


It's the icing on top of your cake (or whipped cream on top of your Android Pie) of despair. You may have not had the easiest time rooting your device, but you feel like you overcame all of the obstacles. Only now to discover that those very apps and mods you were rooting for still won't work — and the signs point to a lack of root access. Don't lose hope, because we have some tricks up our sleeve.
If the problem truly is a lack of root access, you either never really had it, lost it, a setting is off, it's undetected, something is broken for certain apps, or something is blocking your app from using it. There's also the possibility that there's a different problem (other than the absence of root access) in disguise. We will examine and consider all scenarios and offer solutions. After all, root is only as useful as the apps you are using it with — unless, of course, you are modifying files directly, but even then you're probably using a file explorer with root access required.
Check Your Root Status
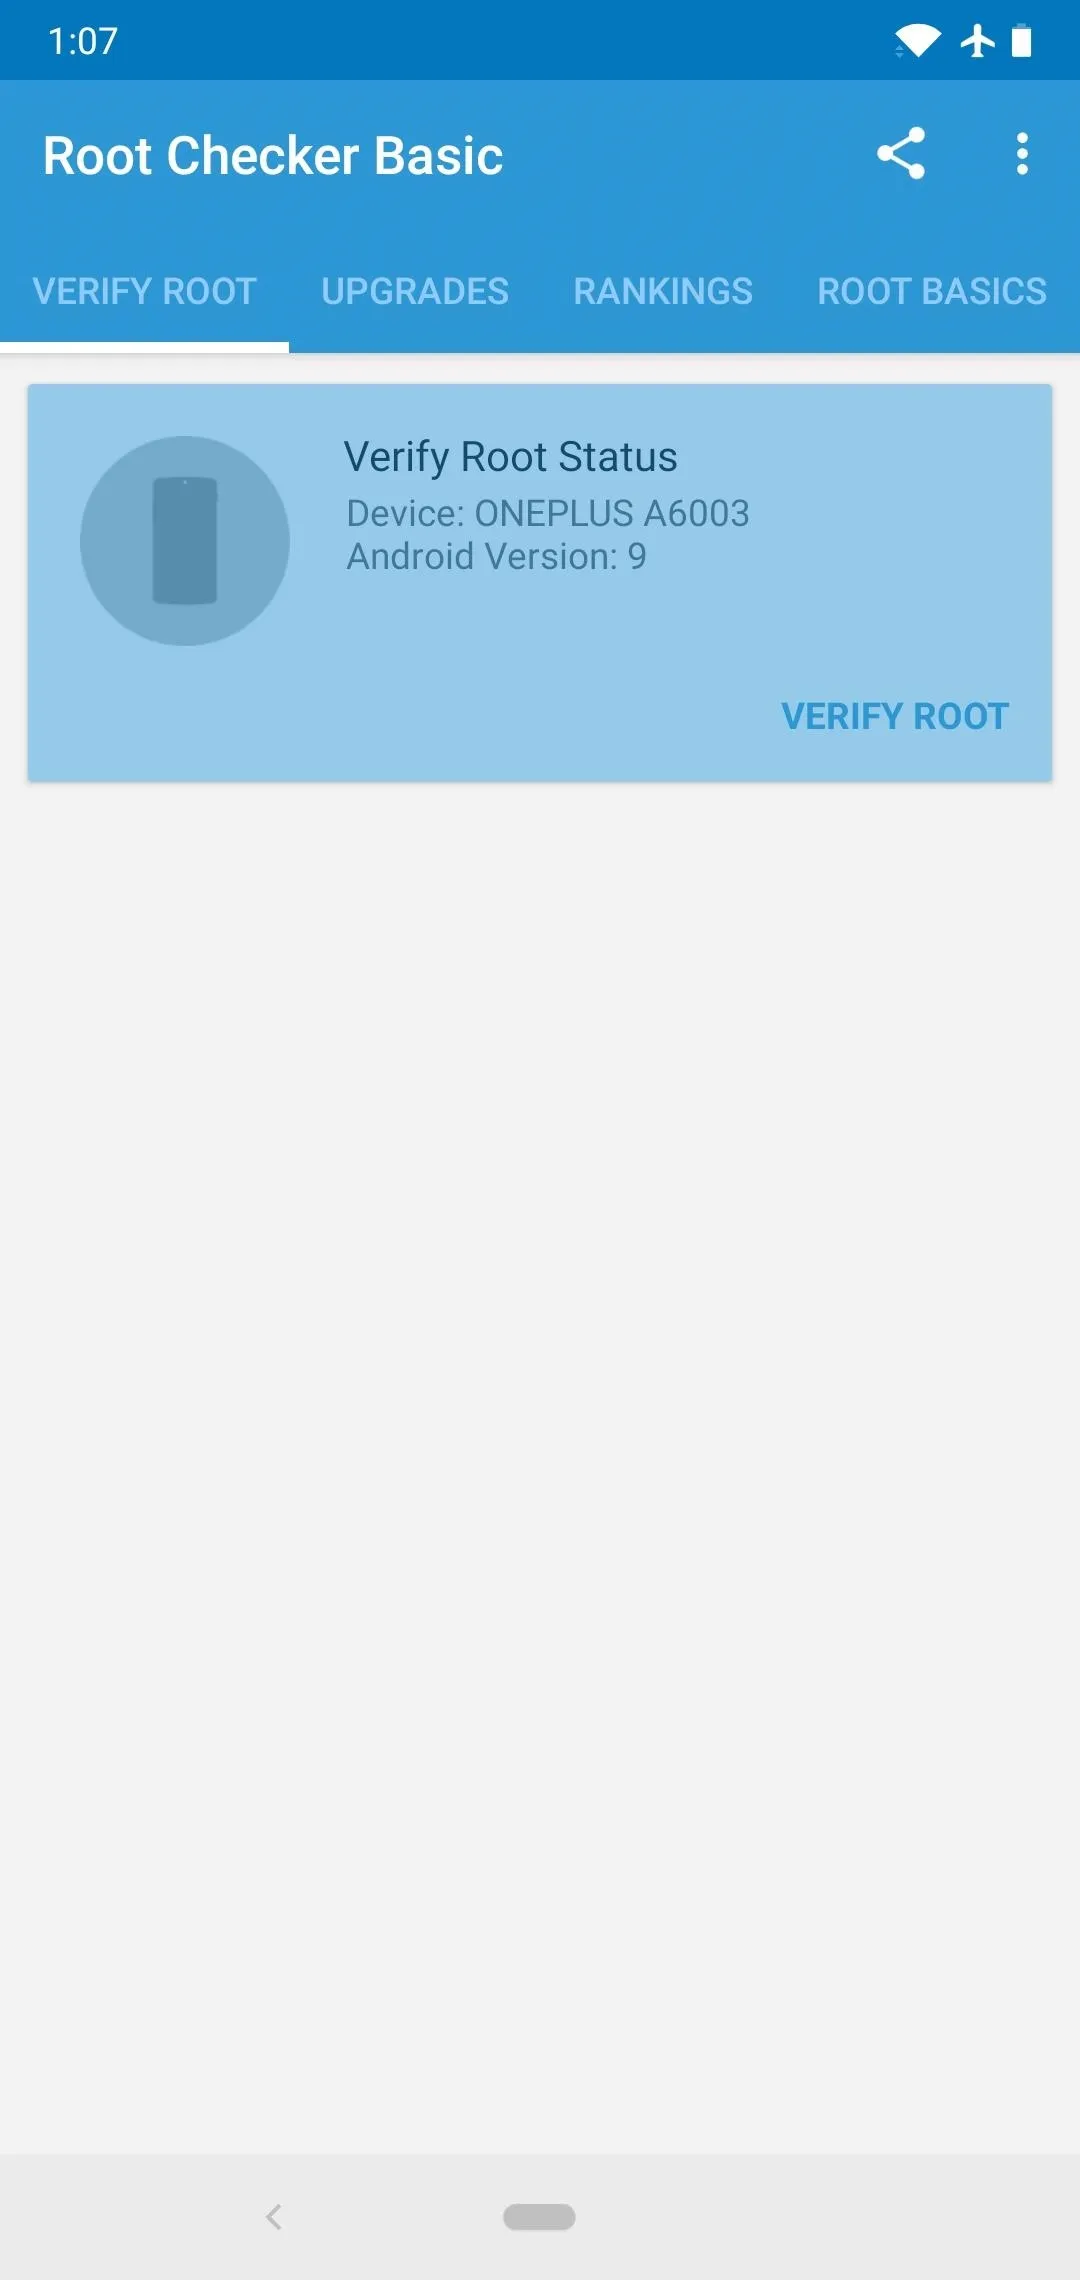
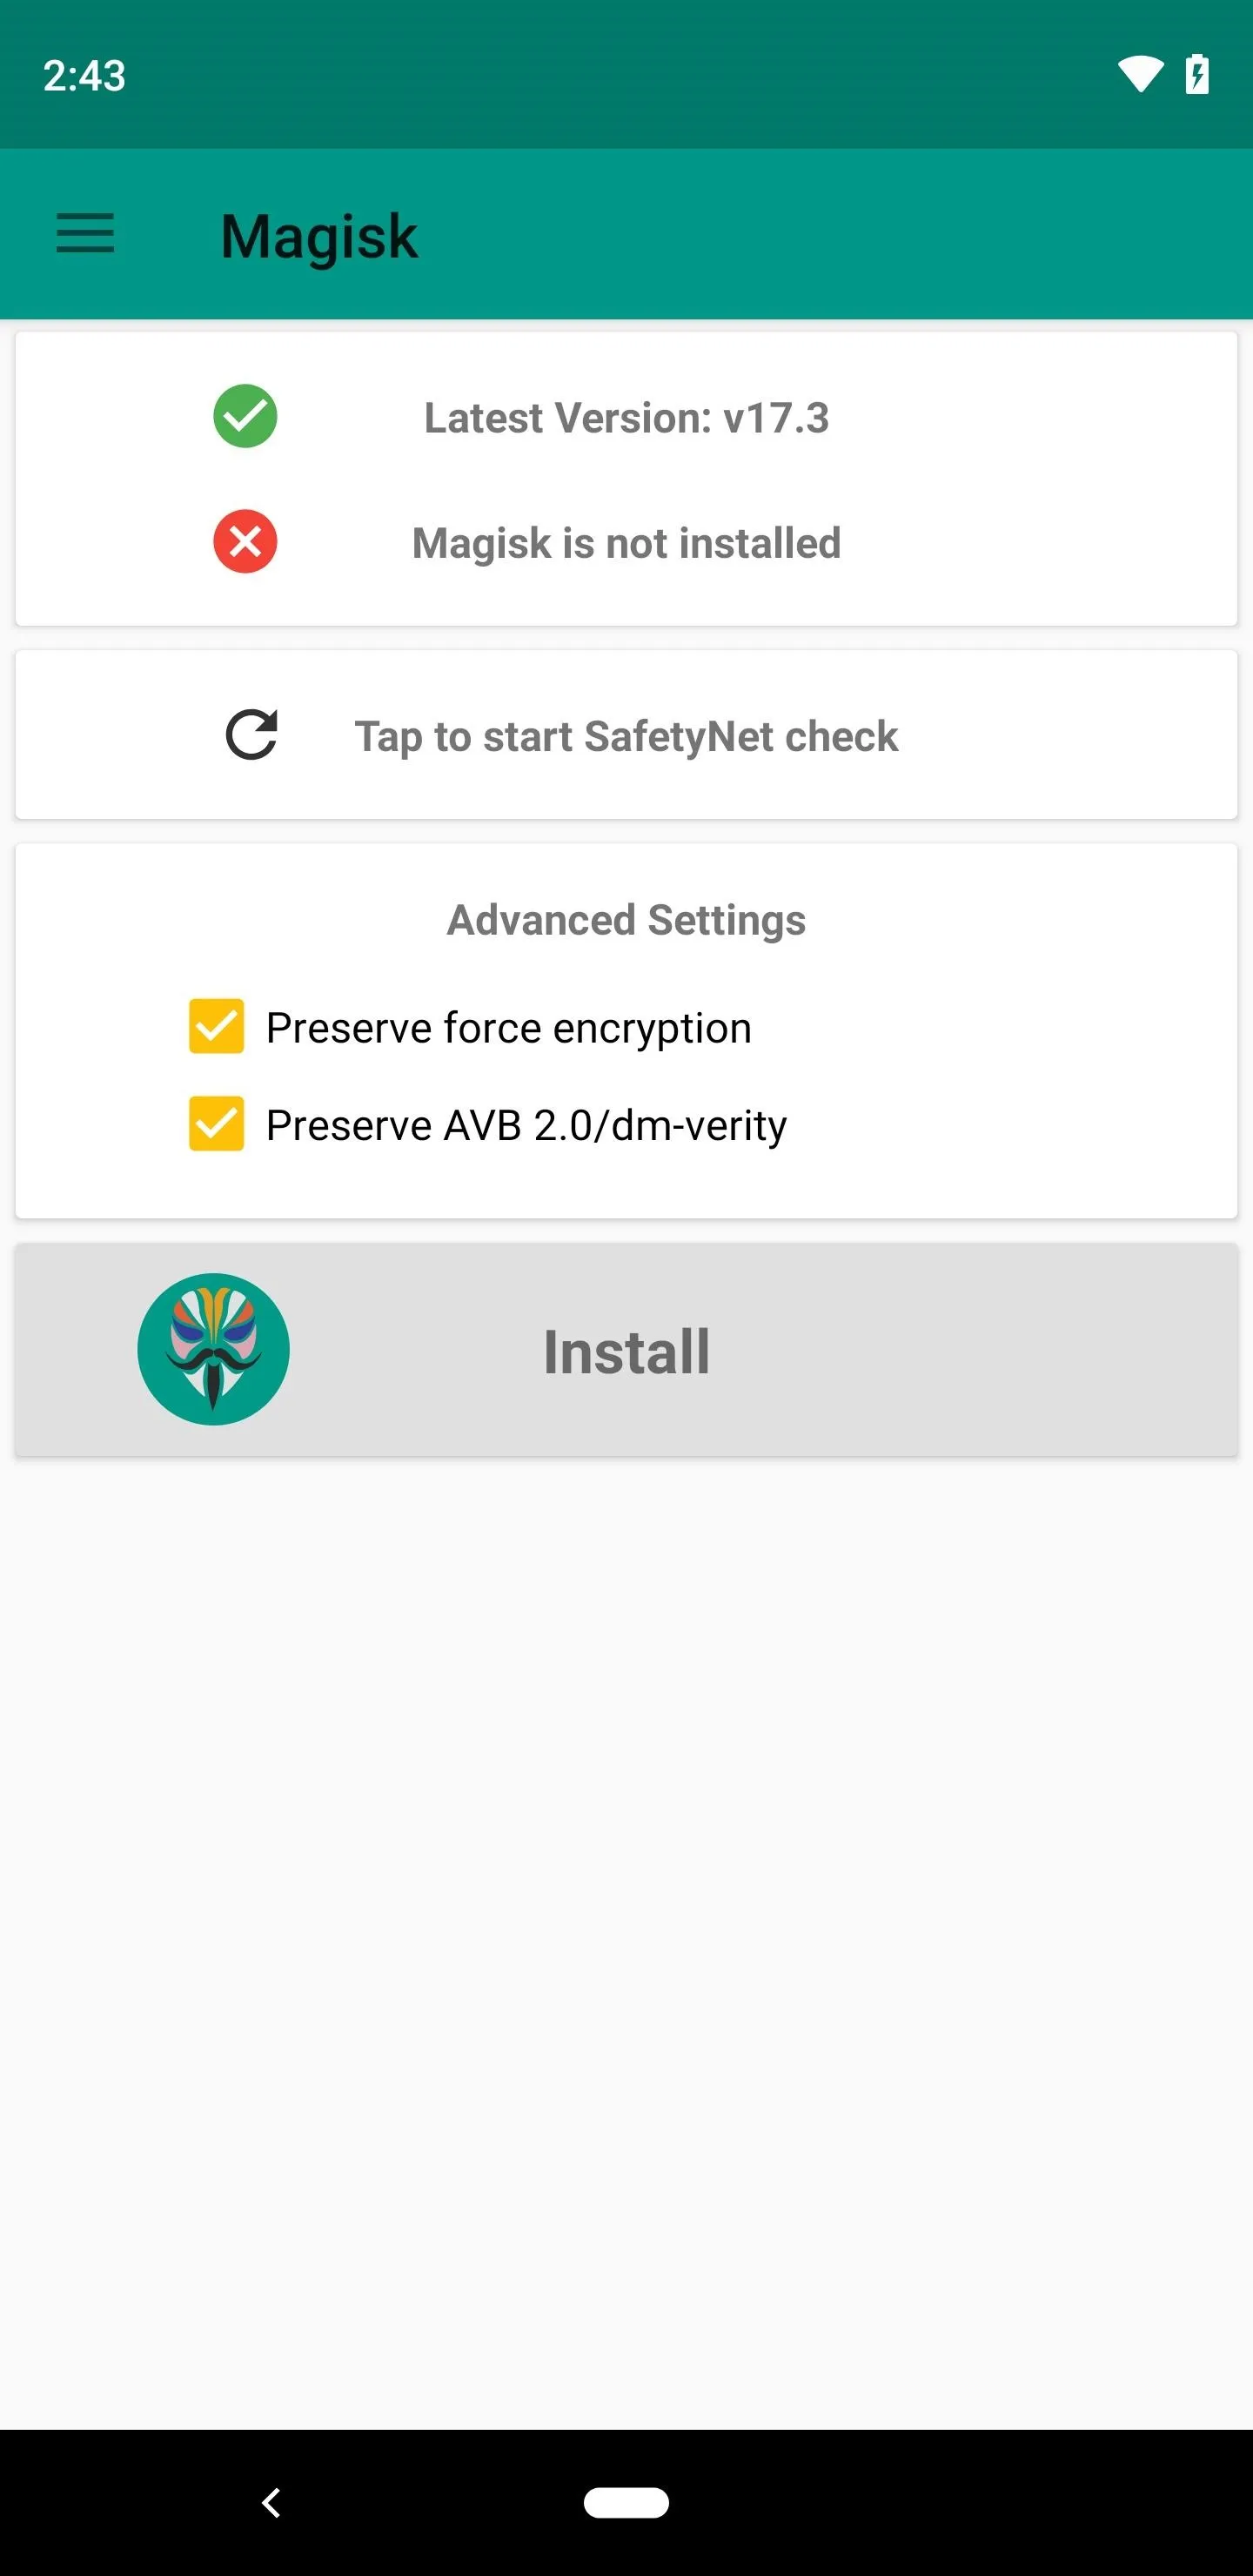
One reason your apps may not be able to access root is because it isn't there. Maybe you followed our Magisk root guide to the letter, but something still went wrong. How do you truly know unless you check?
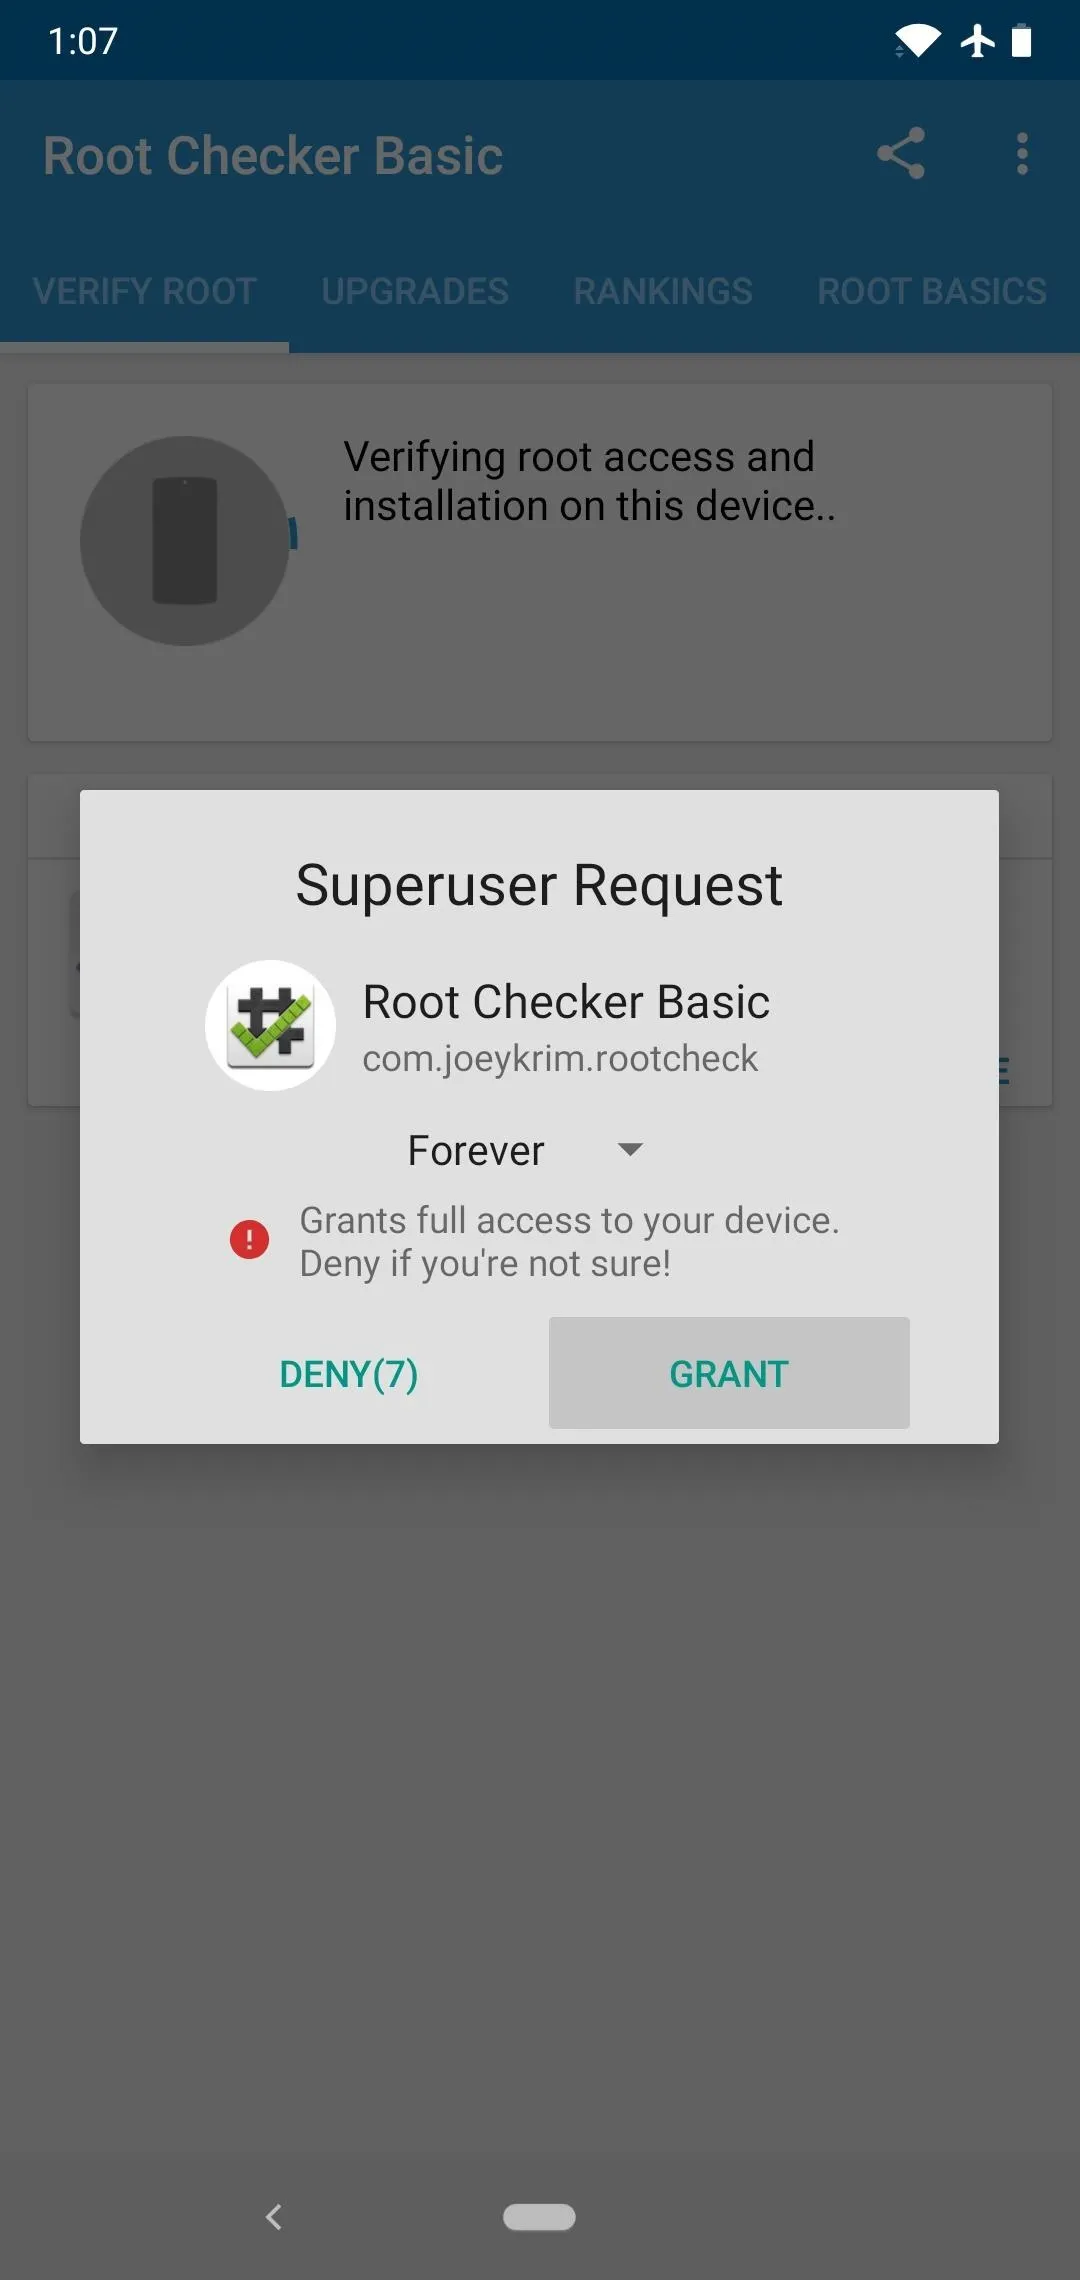
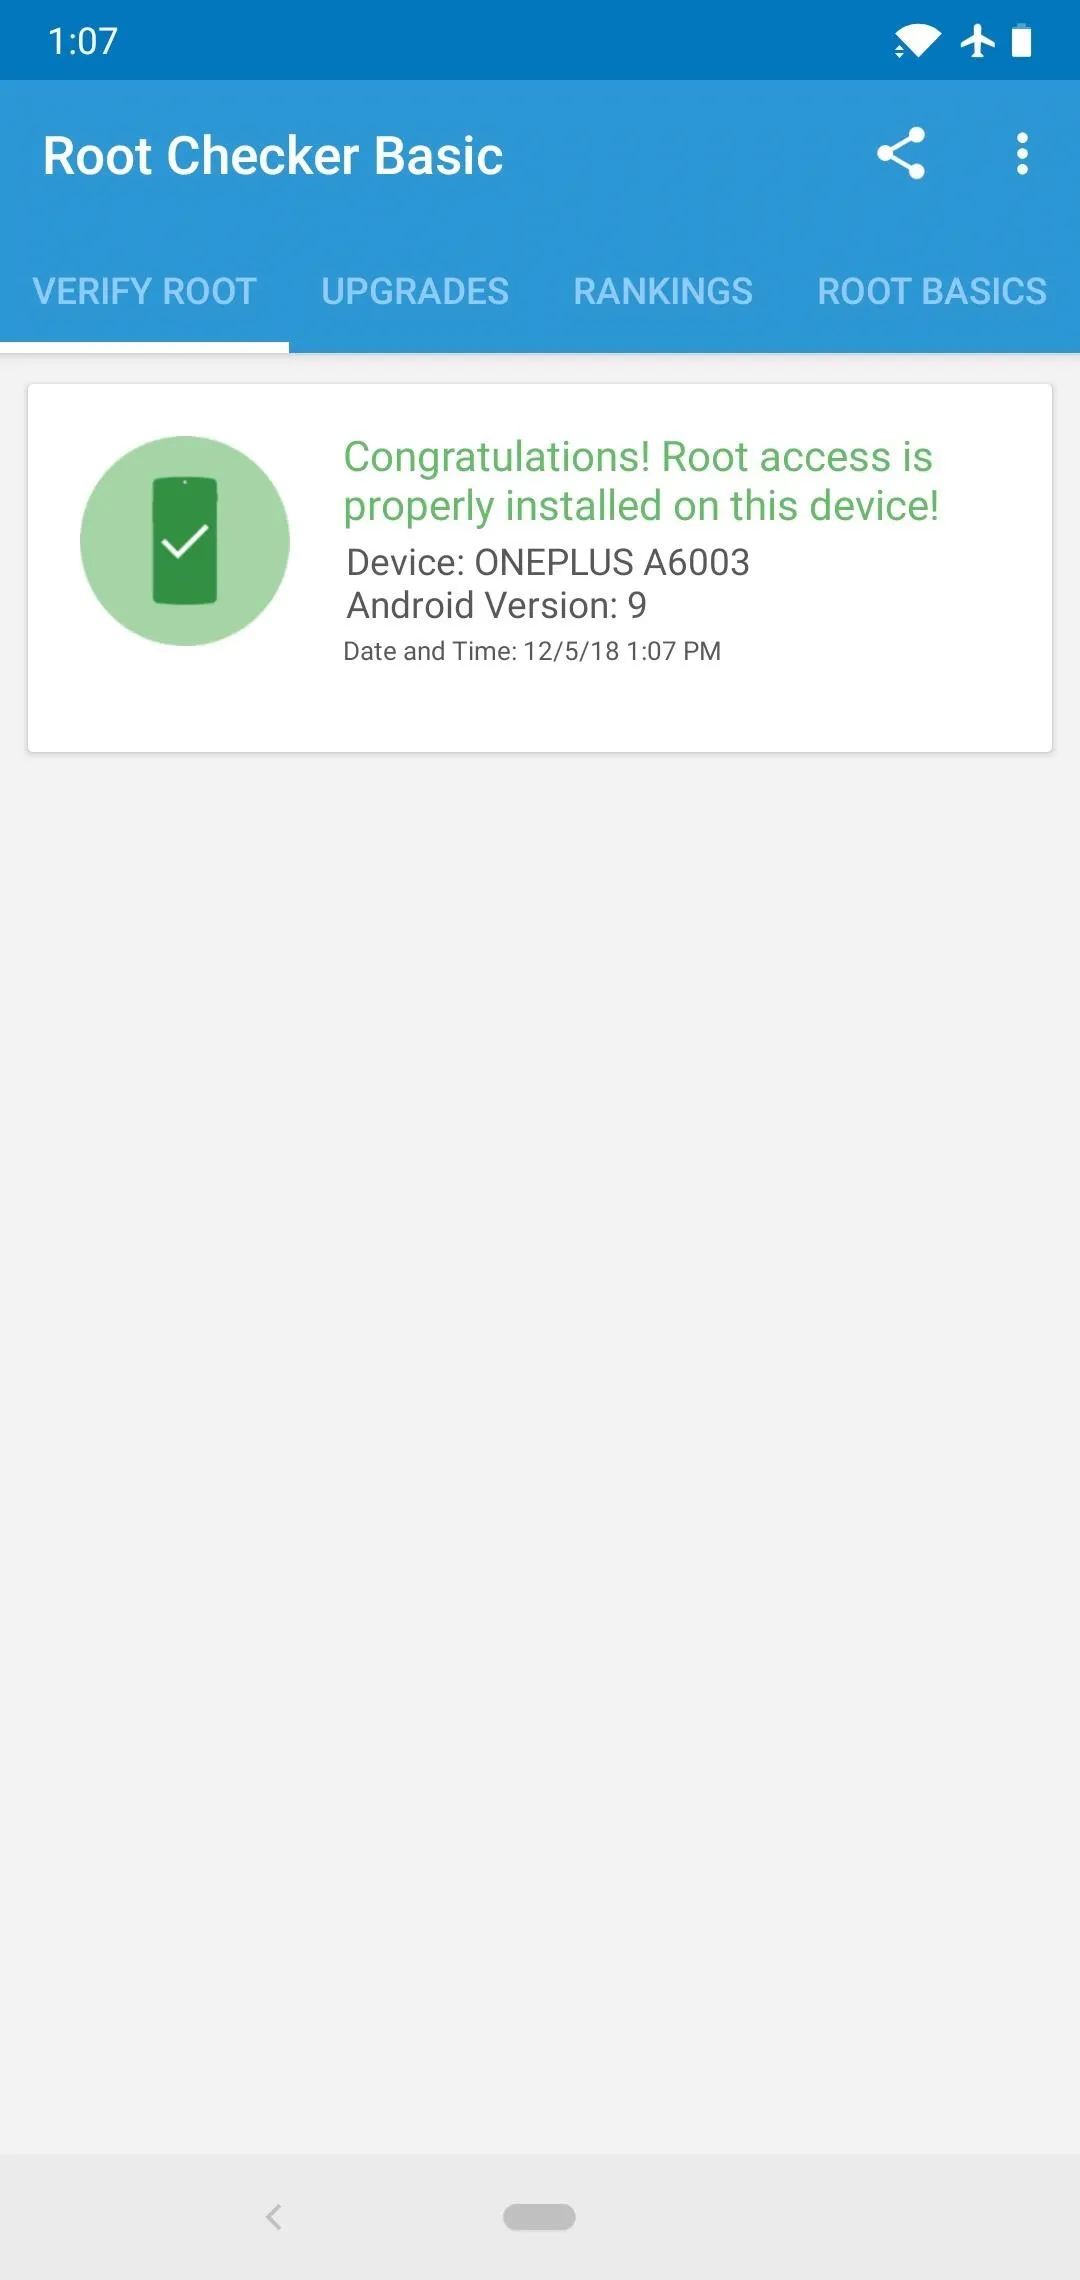
So first, download the Root Checker app by joeykrim from the link below. Open it and tap "Verify Root," then hit "Grant" if prompted to give the app superuser access, then look for a message stating "Congratulations! Root access is properly installed on your device!" If you get this message, root is working on your phone, so it has to be a problem with a specific app — in this case, skip ahead to Step 4. If you didn't get the Congratulations! message, or if Root Checker never prompted you to grant superuser access, move on to Step 2 next.
- Play Store Link: Root Checker (free)
Make Sure Magisk Isn't Hibernated
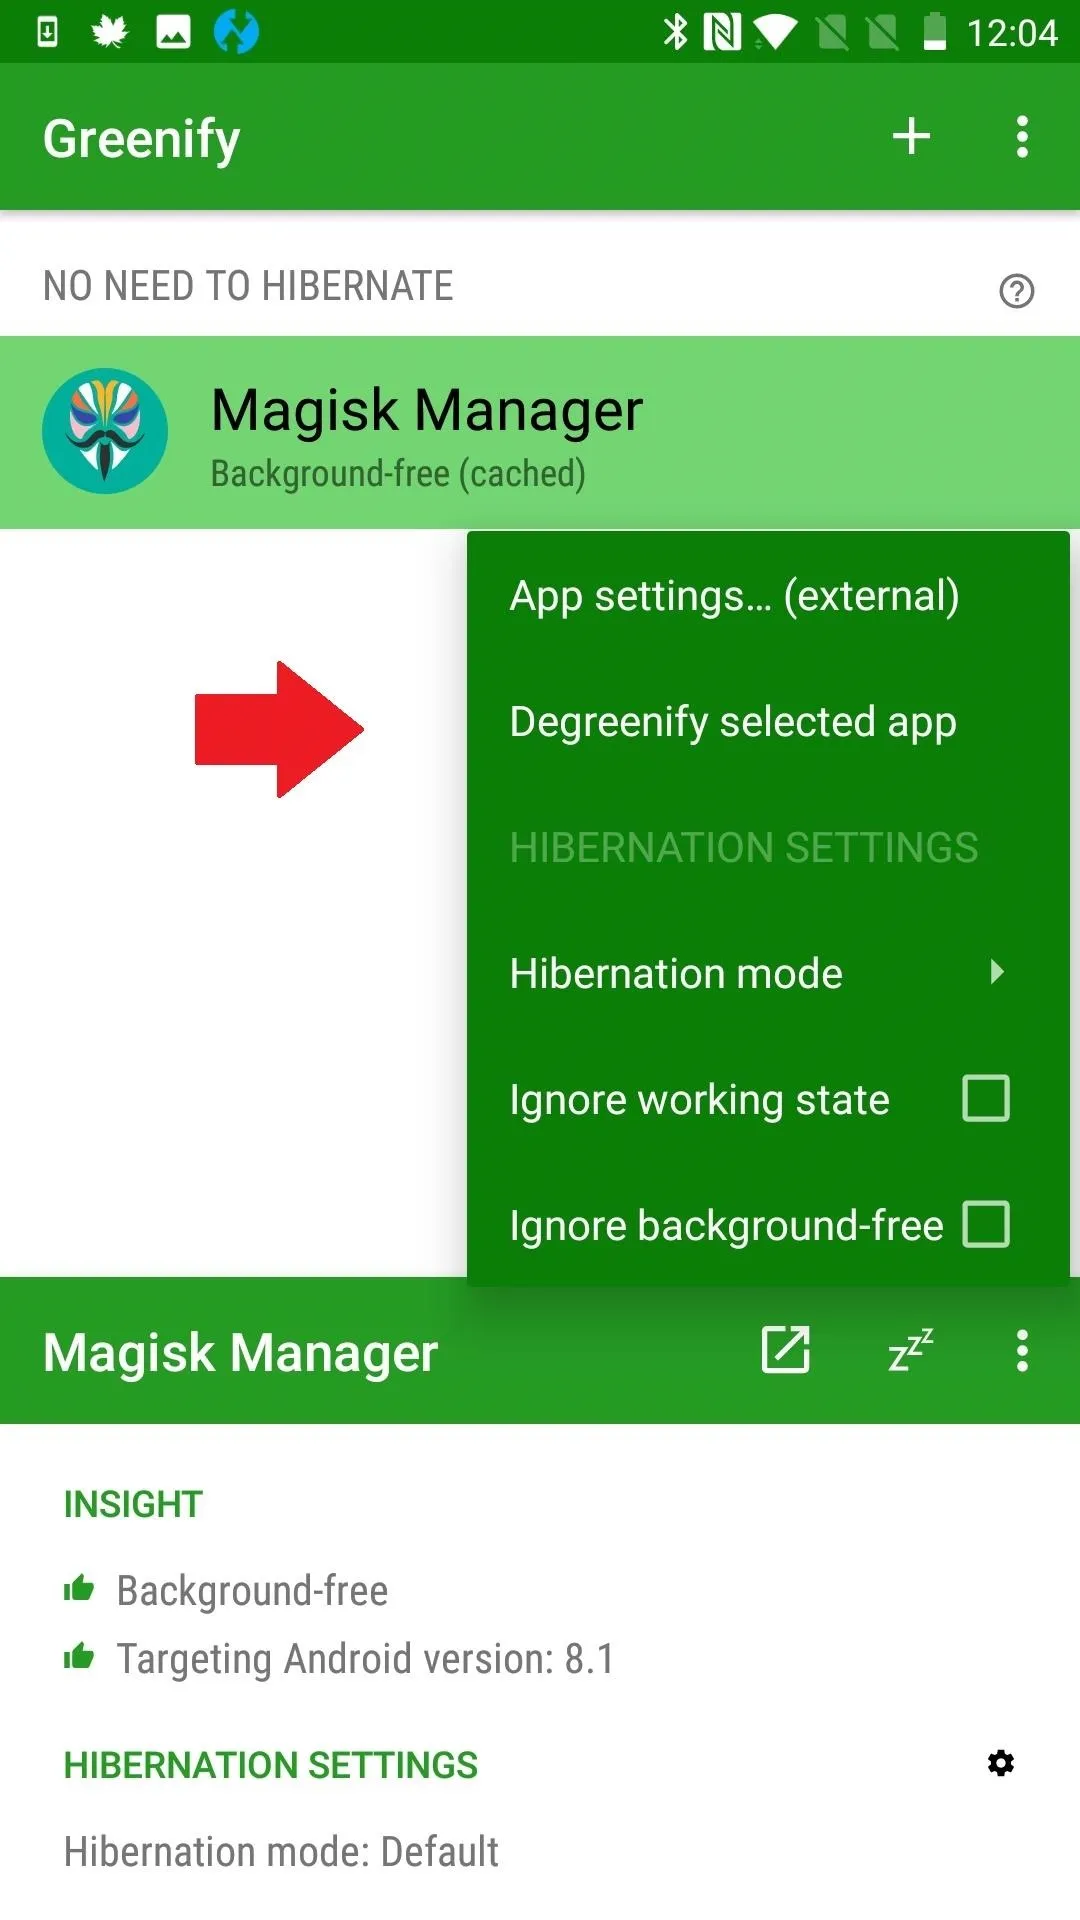
If Root Checker didn't give you that Congratulations! message, you're most likely not properly rooted. But before you get into the process of re-rooting, you should check to make sure an app or mod isn't breaking your root management system.
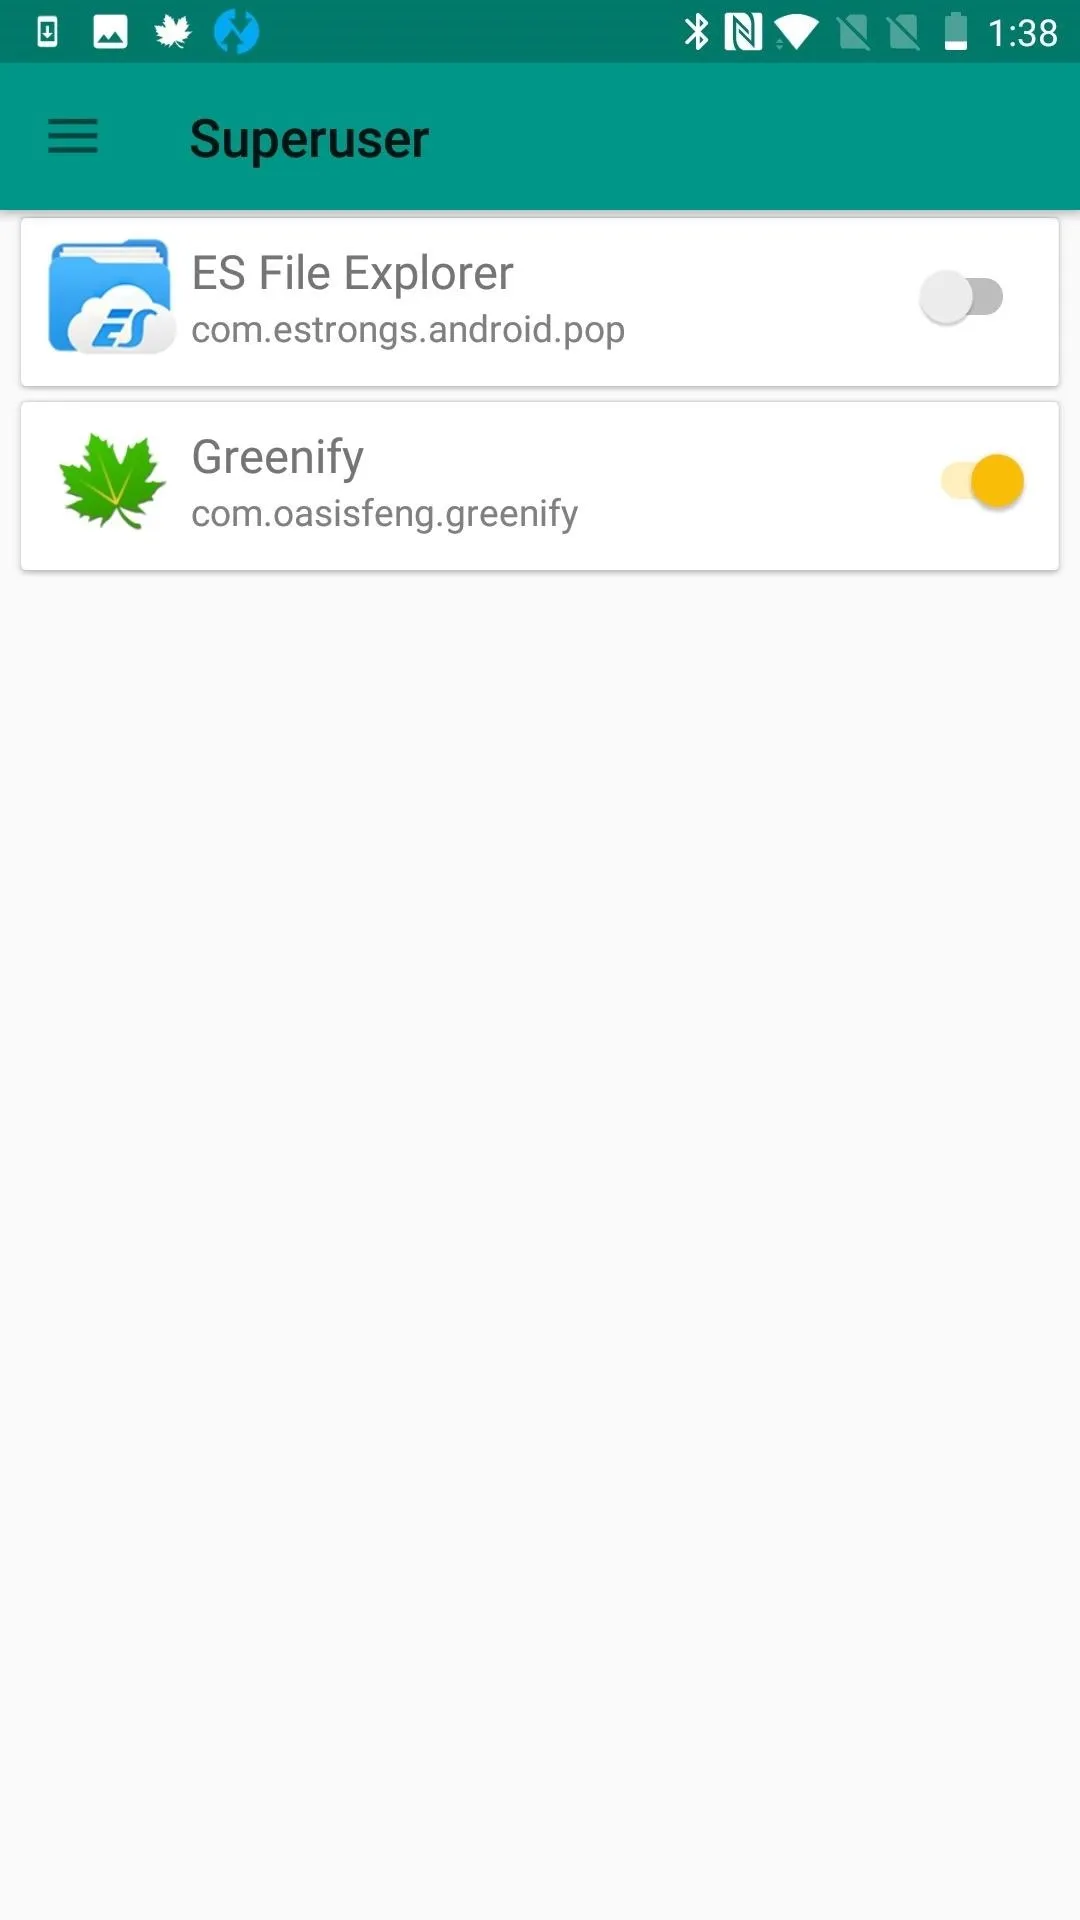
If you use apps like Greenify, make sure that Magisk Manager is not being put into hibernation mode. If you are using apps that you have to hide Magisk from, such as banking apps, un-hide Magisk and close these apps when you are done.
Fix Issues with Root (Or Re-Root)
If that wasn't it, you'll need to re-root. You've probably done this already if you tried to root at all, but just to be safe, make sure you are starting out by unlocking your bootloader. If you need help with this part, we've covered the process for many popular modding phones:
- Bootloader Unlock Guides: Essential PH-1 | OnePlus 5 | OnePlus 5T | OnePlus 6 | OnePlus 6T | Pixel | Pixel 2 | Pixel 3
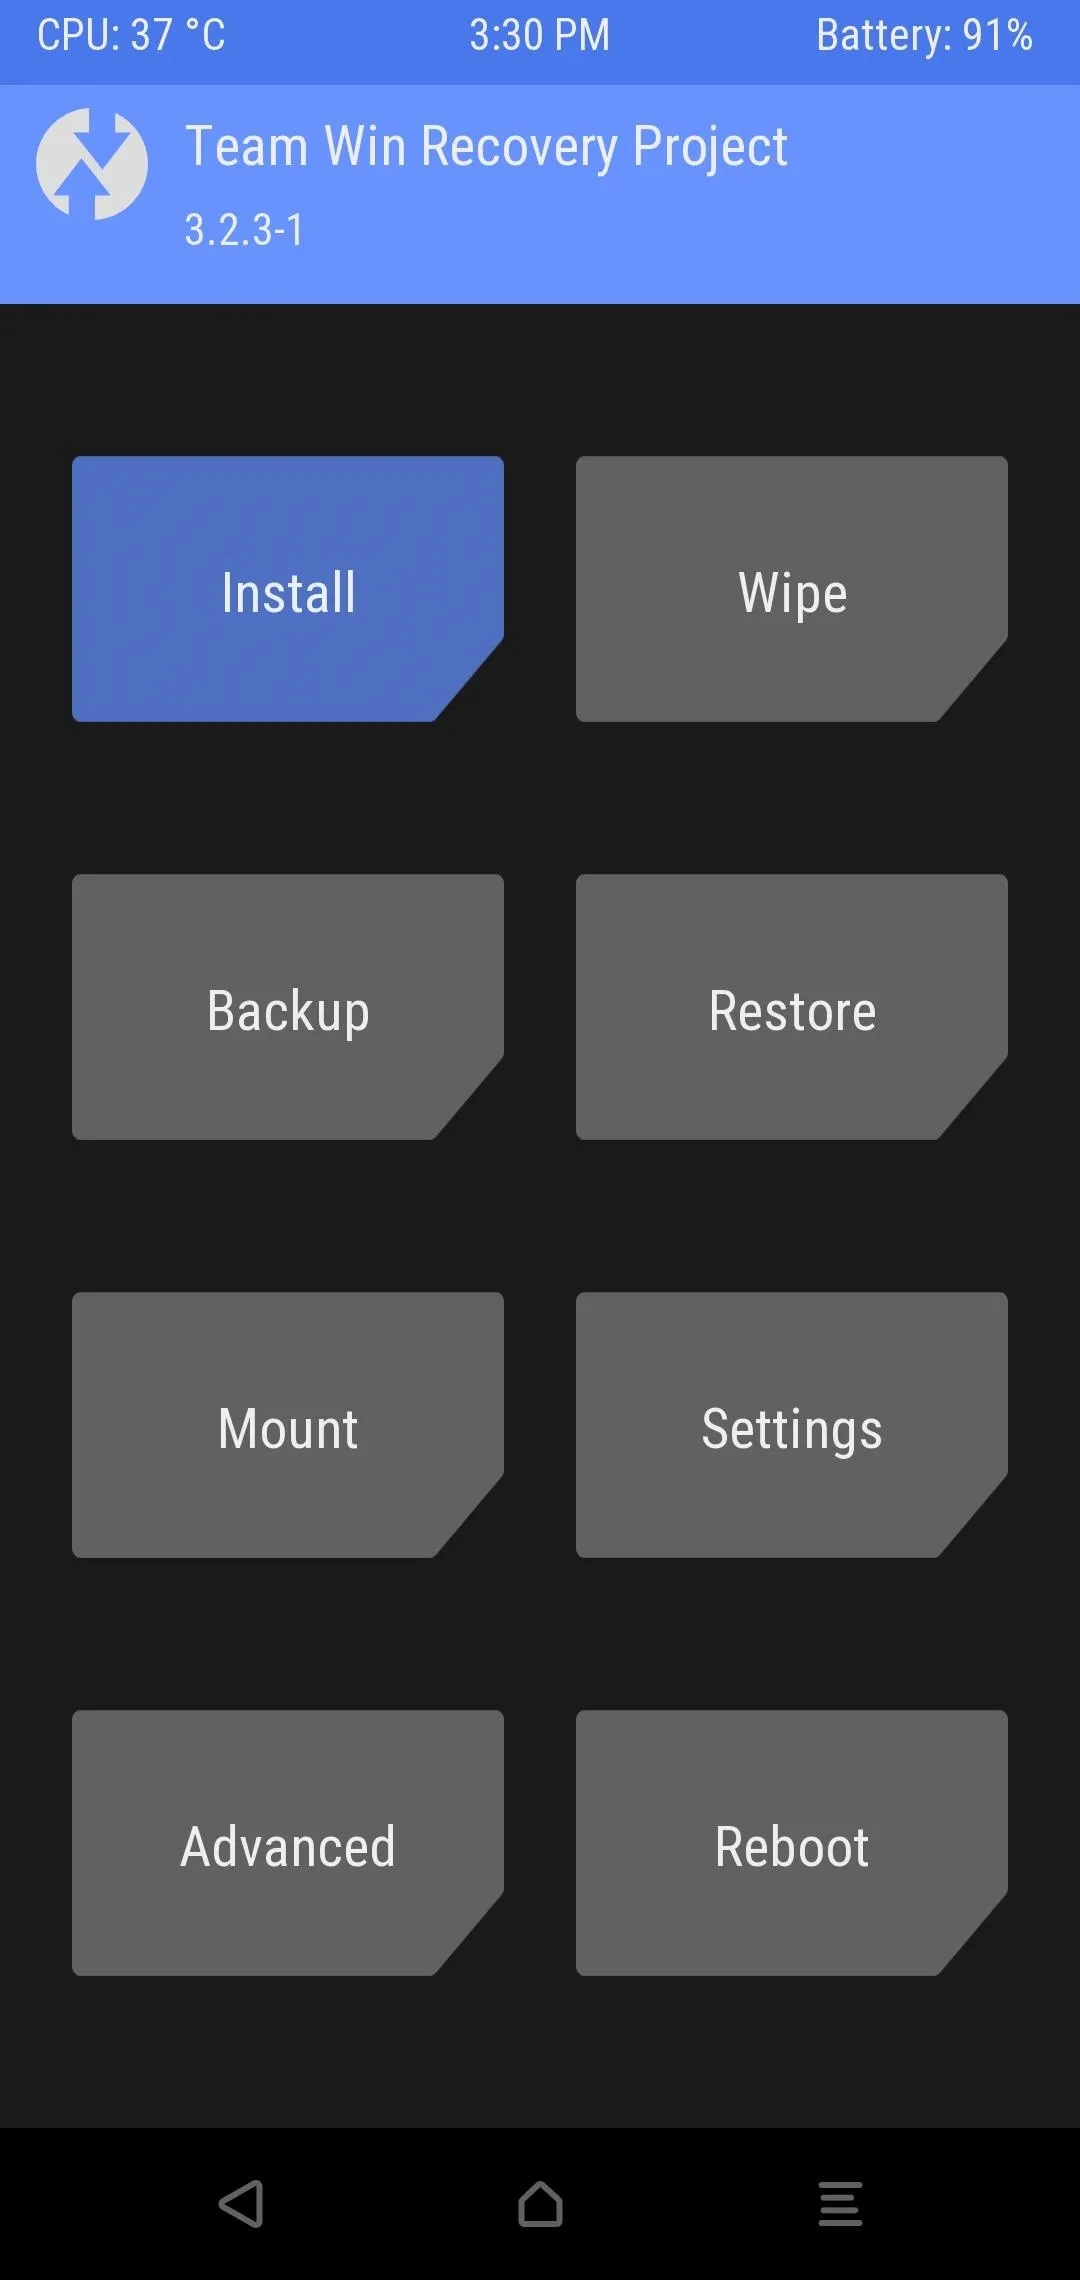
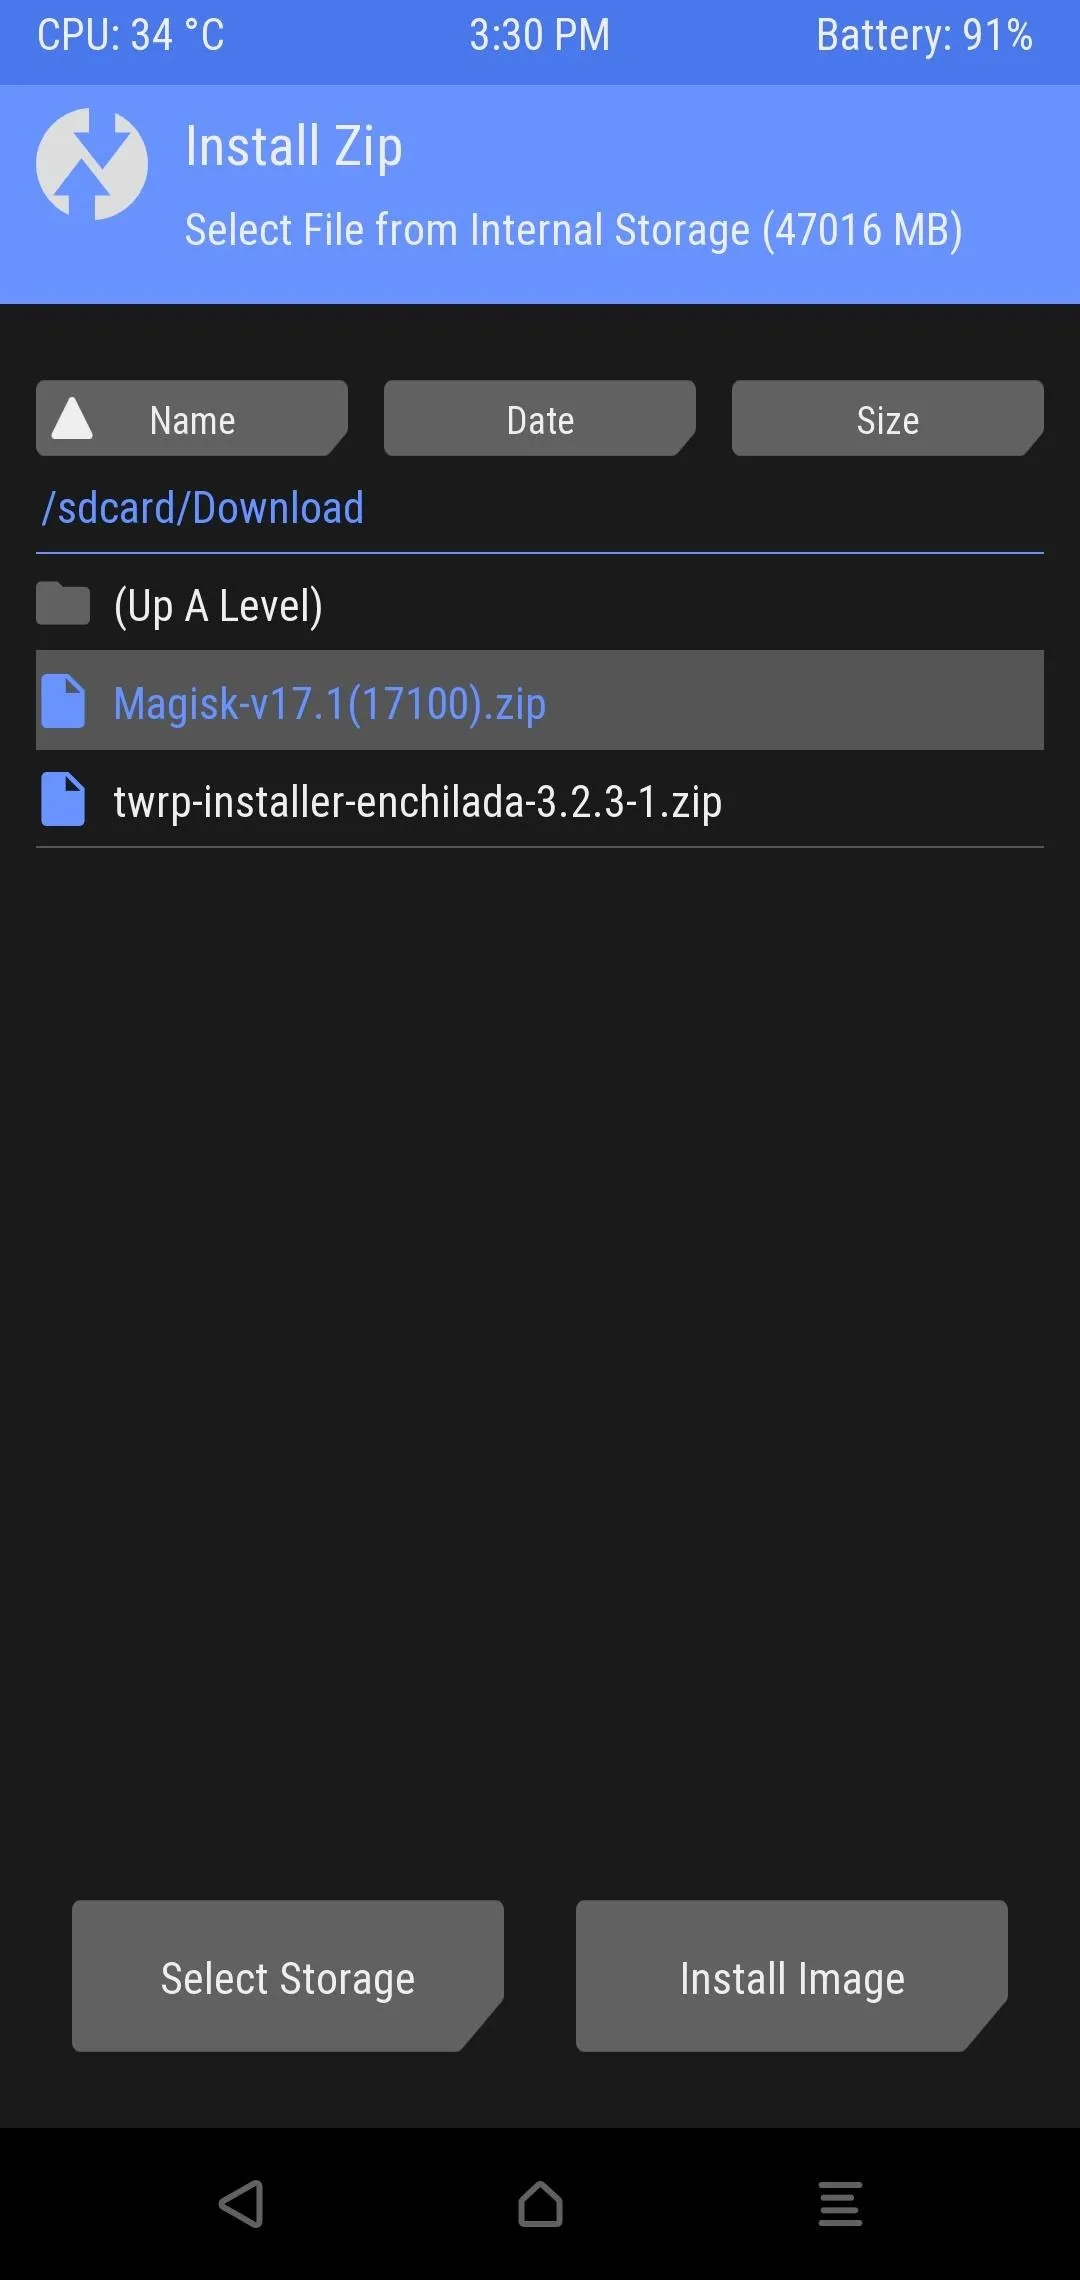
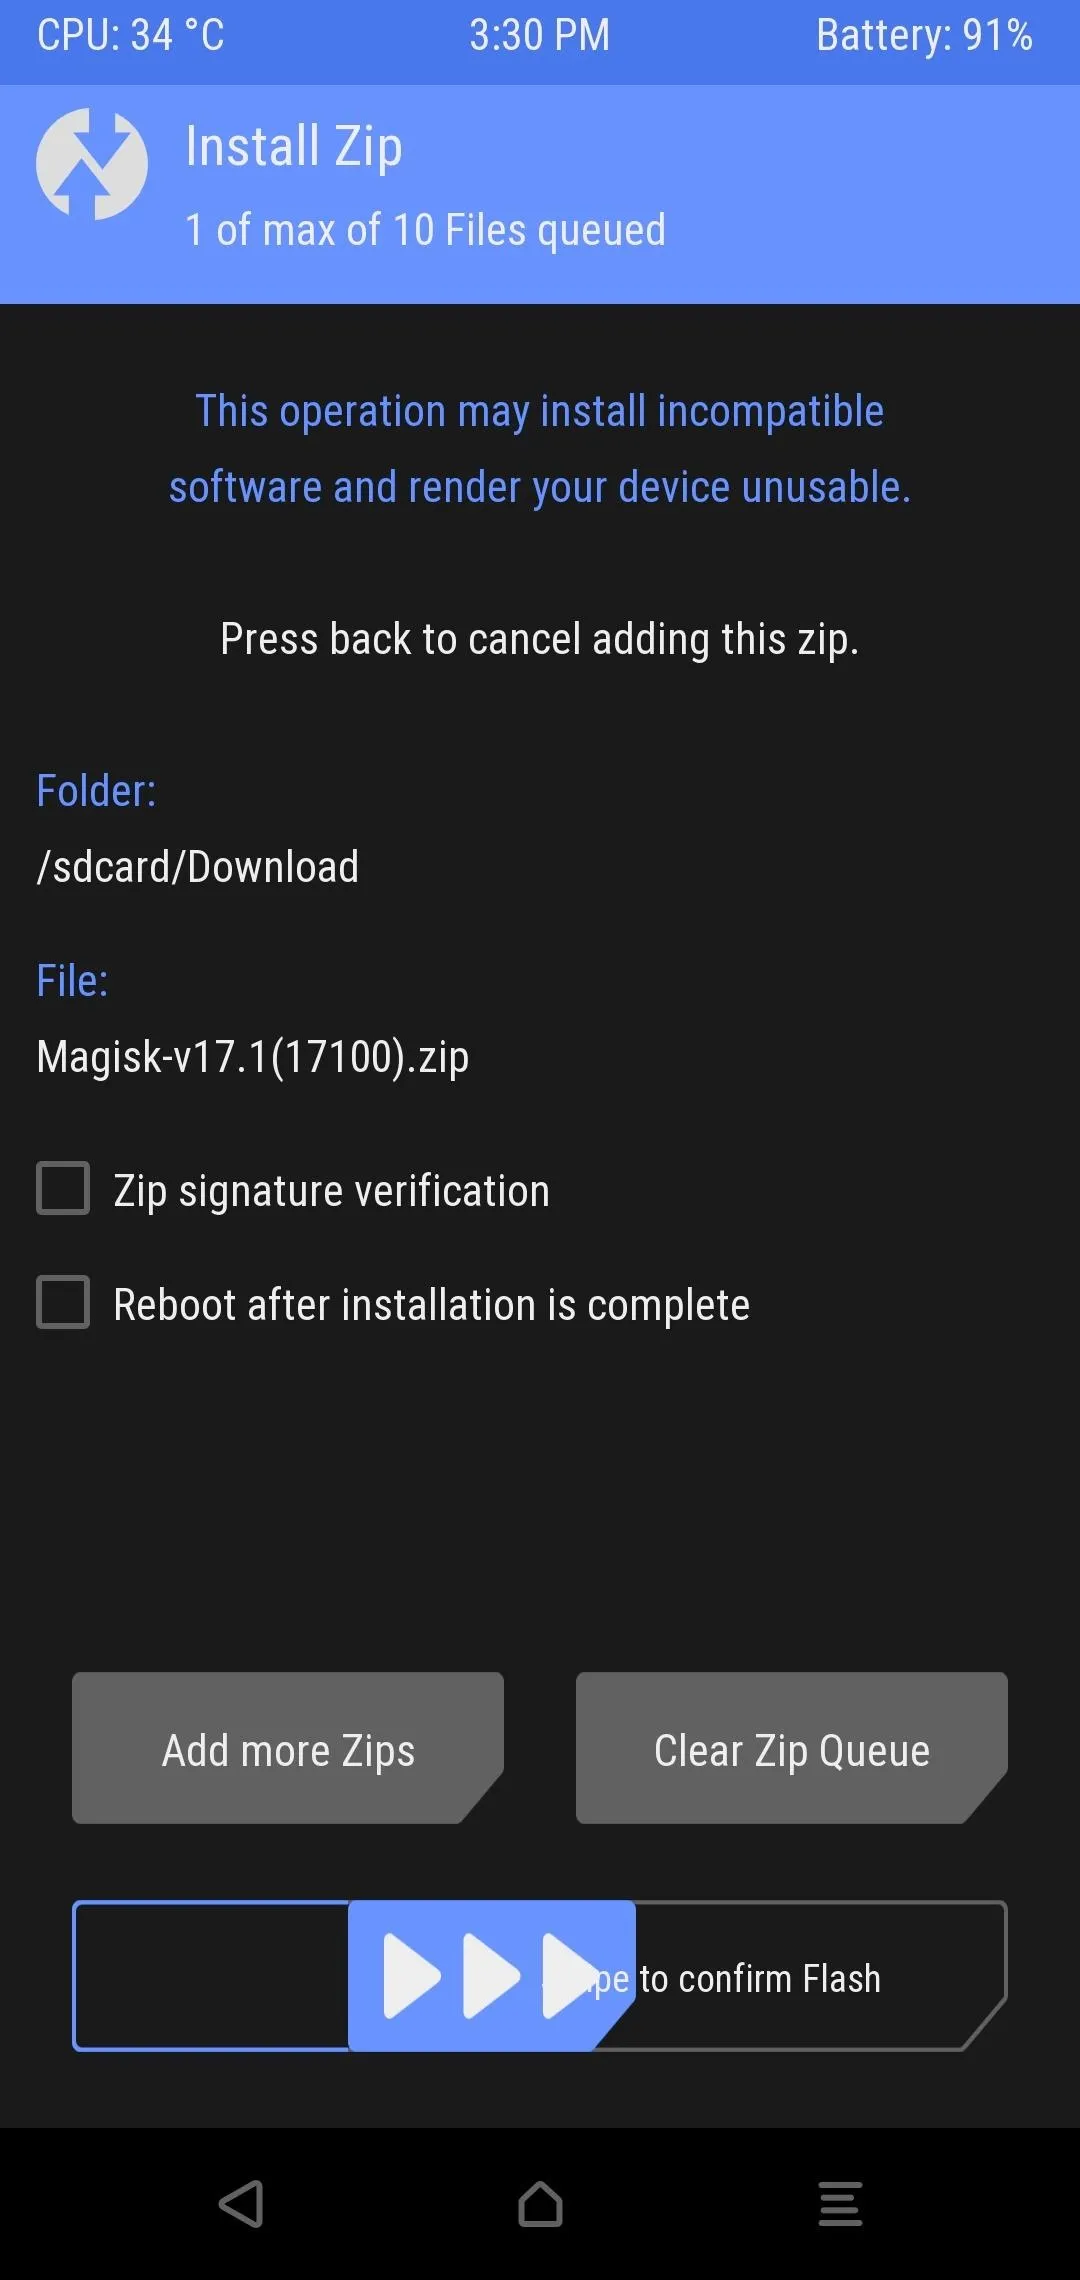
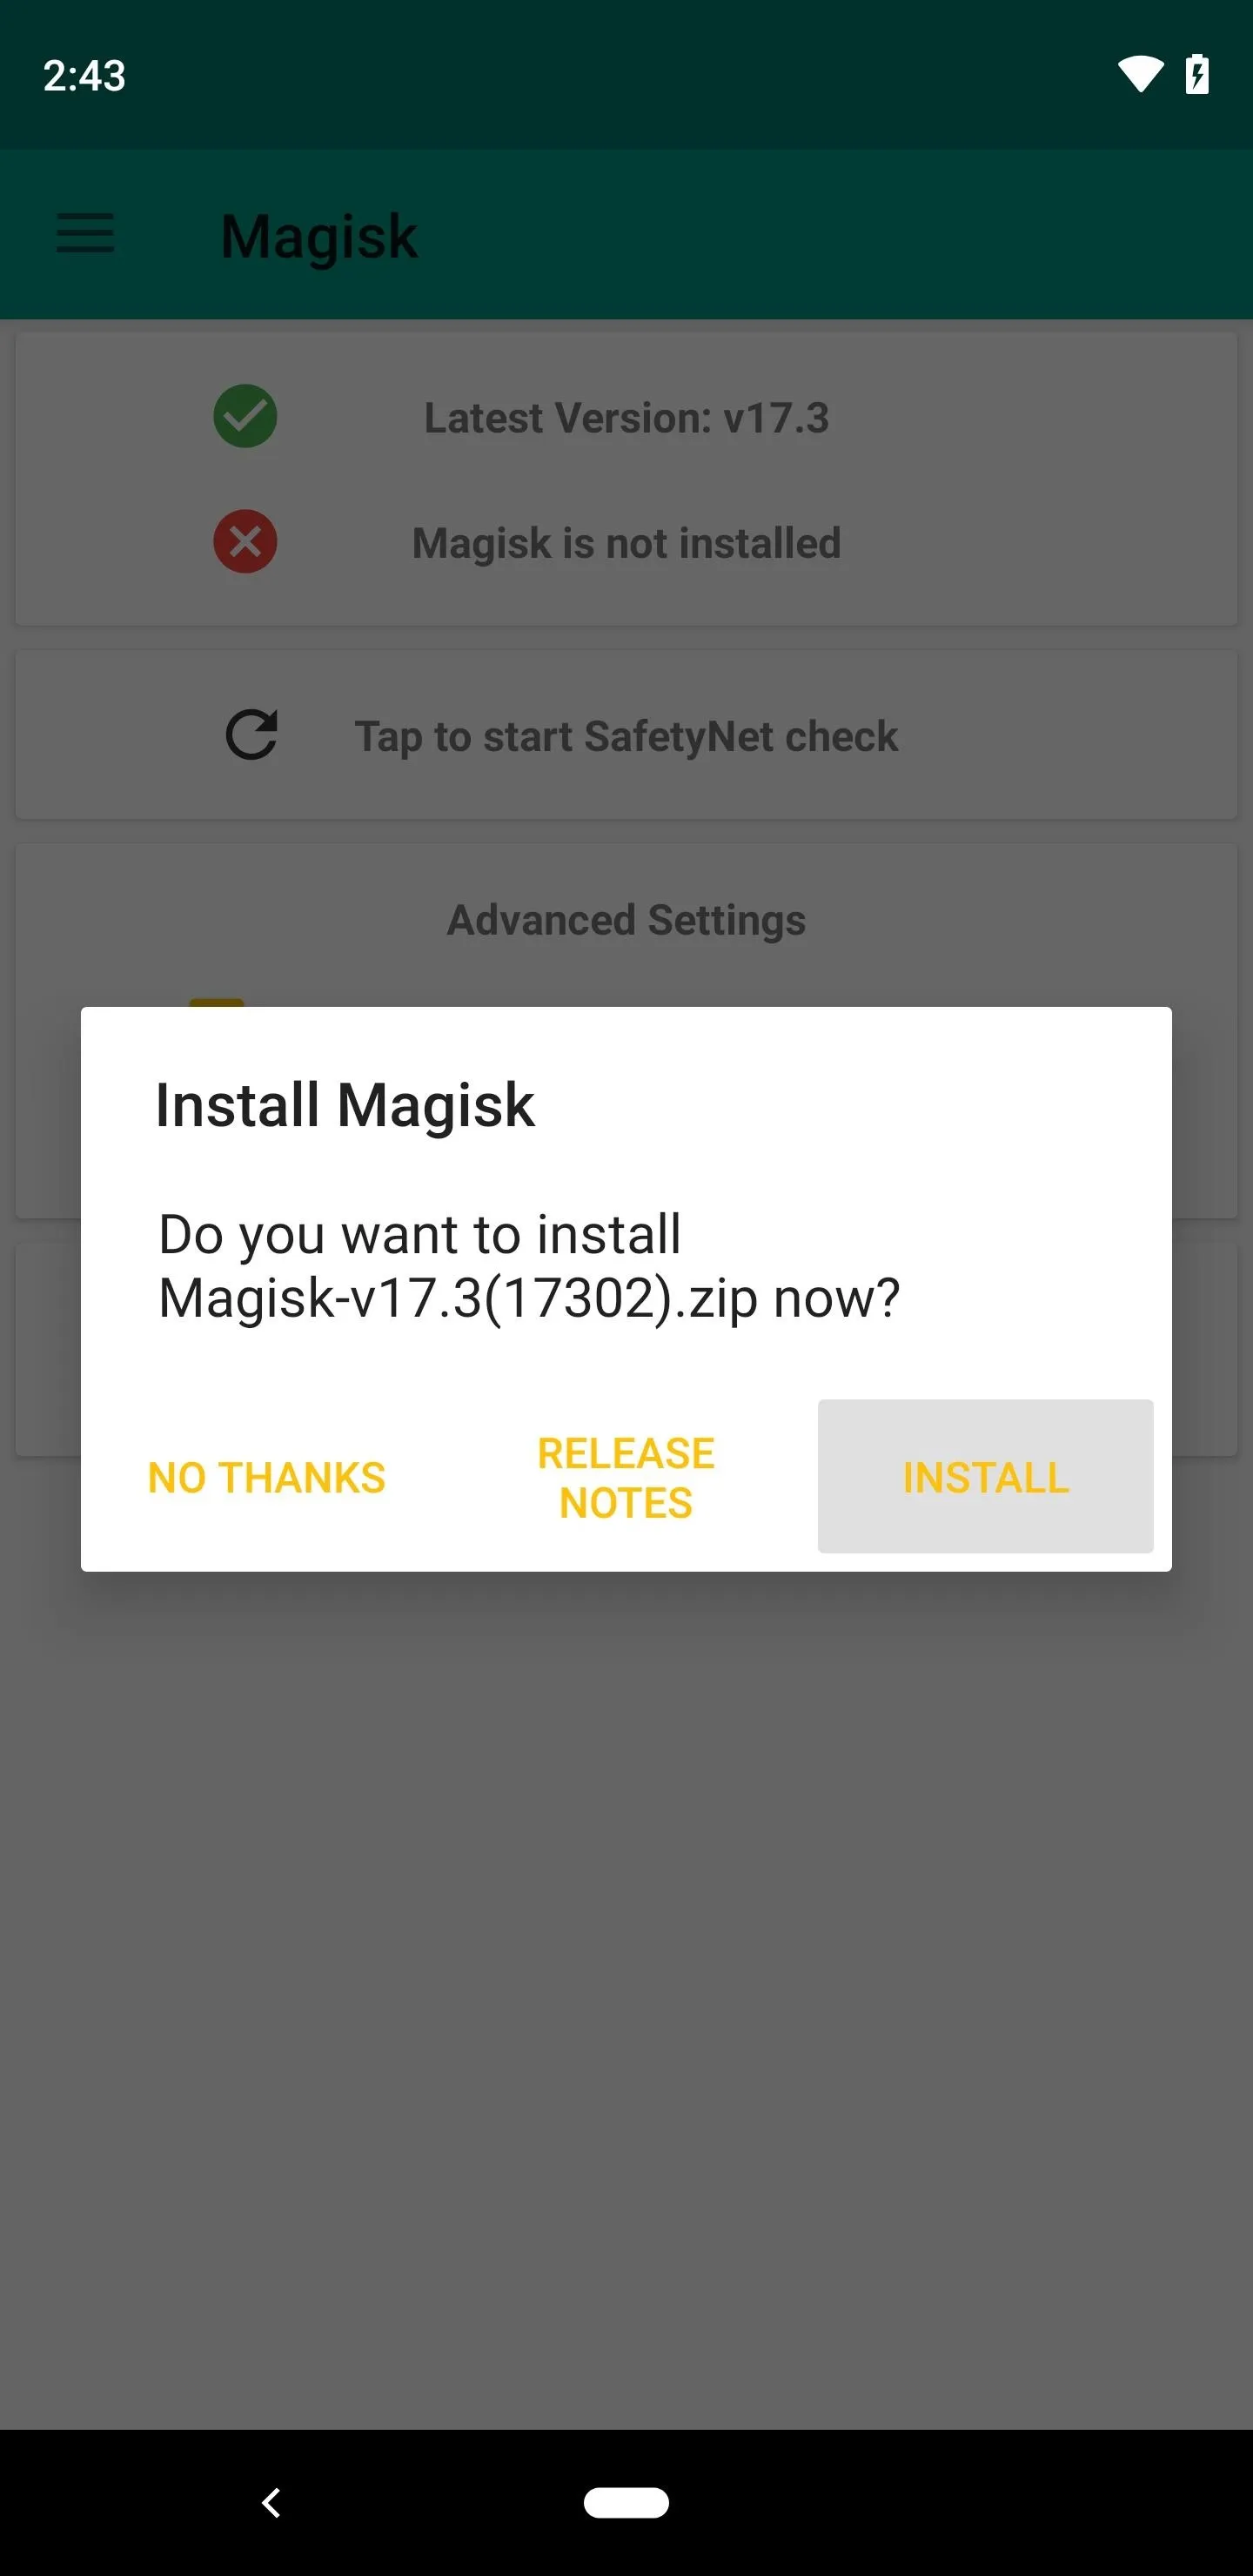
Next, to finish off the rooting process, we recommend installing TWRP for your recovery. You will then be ready to root using Magisk, which is as simple as flashing a ZIP in TWRP.
- More Info: How to Install TWRP on Any Phone with an Unlocked Bootloader
- More Info: How to Root Any Phone with Magisk & TWRP
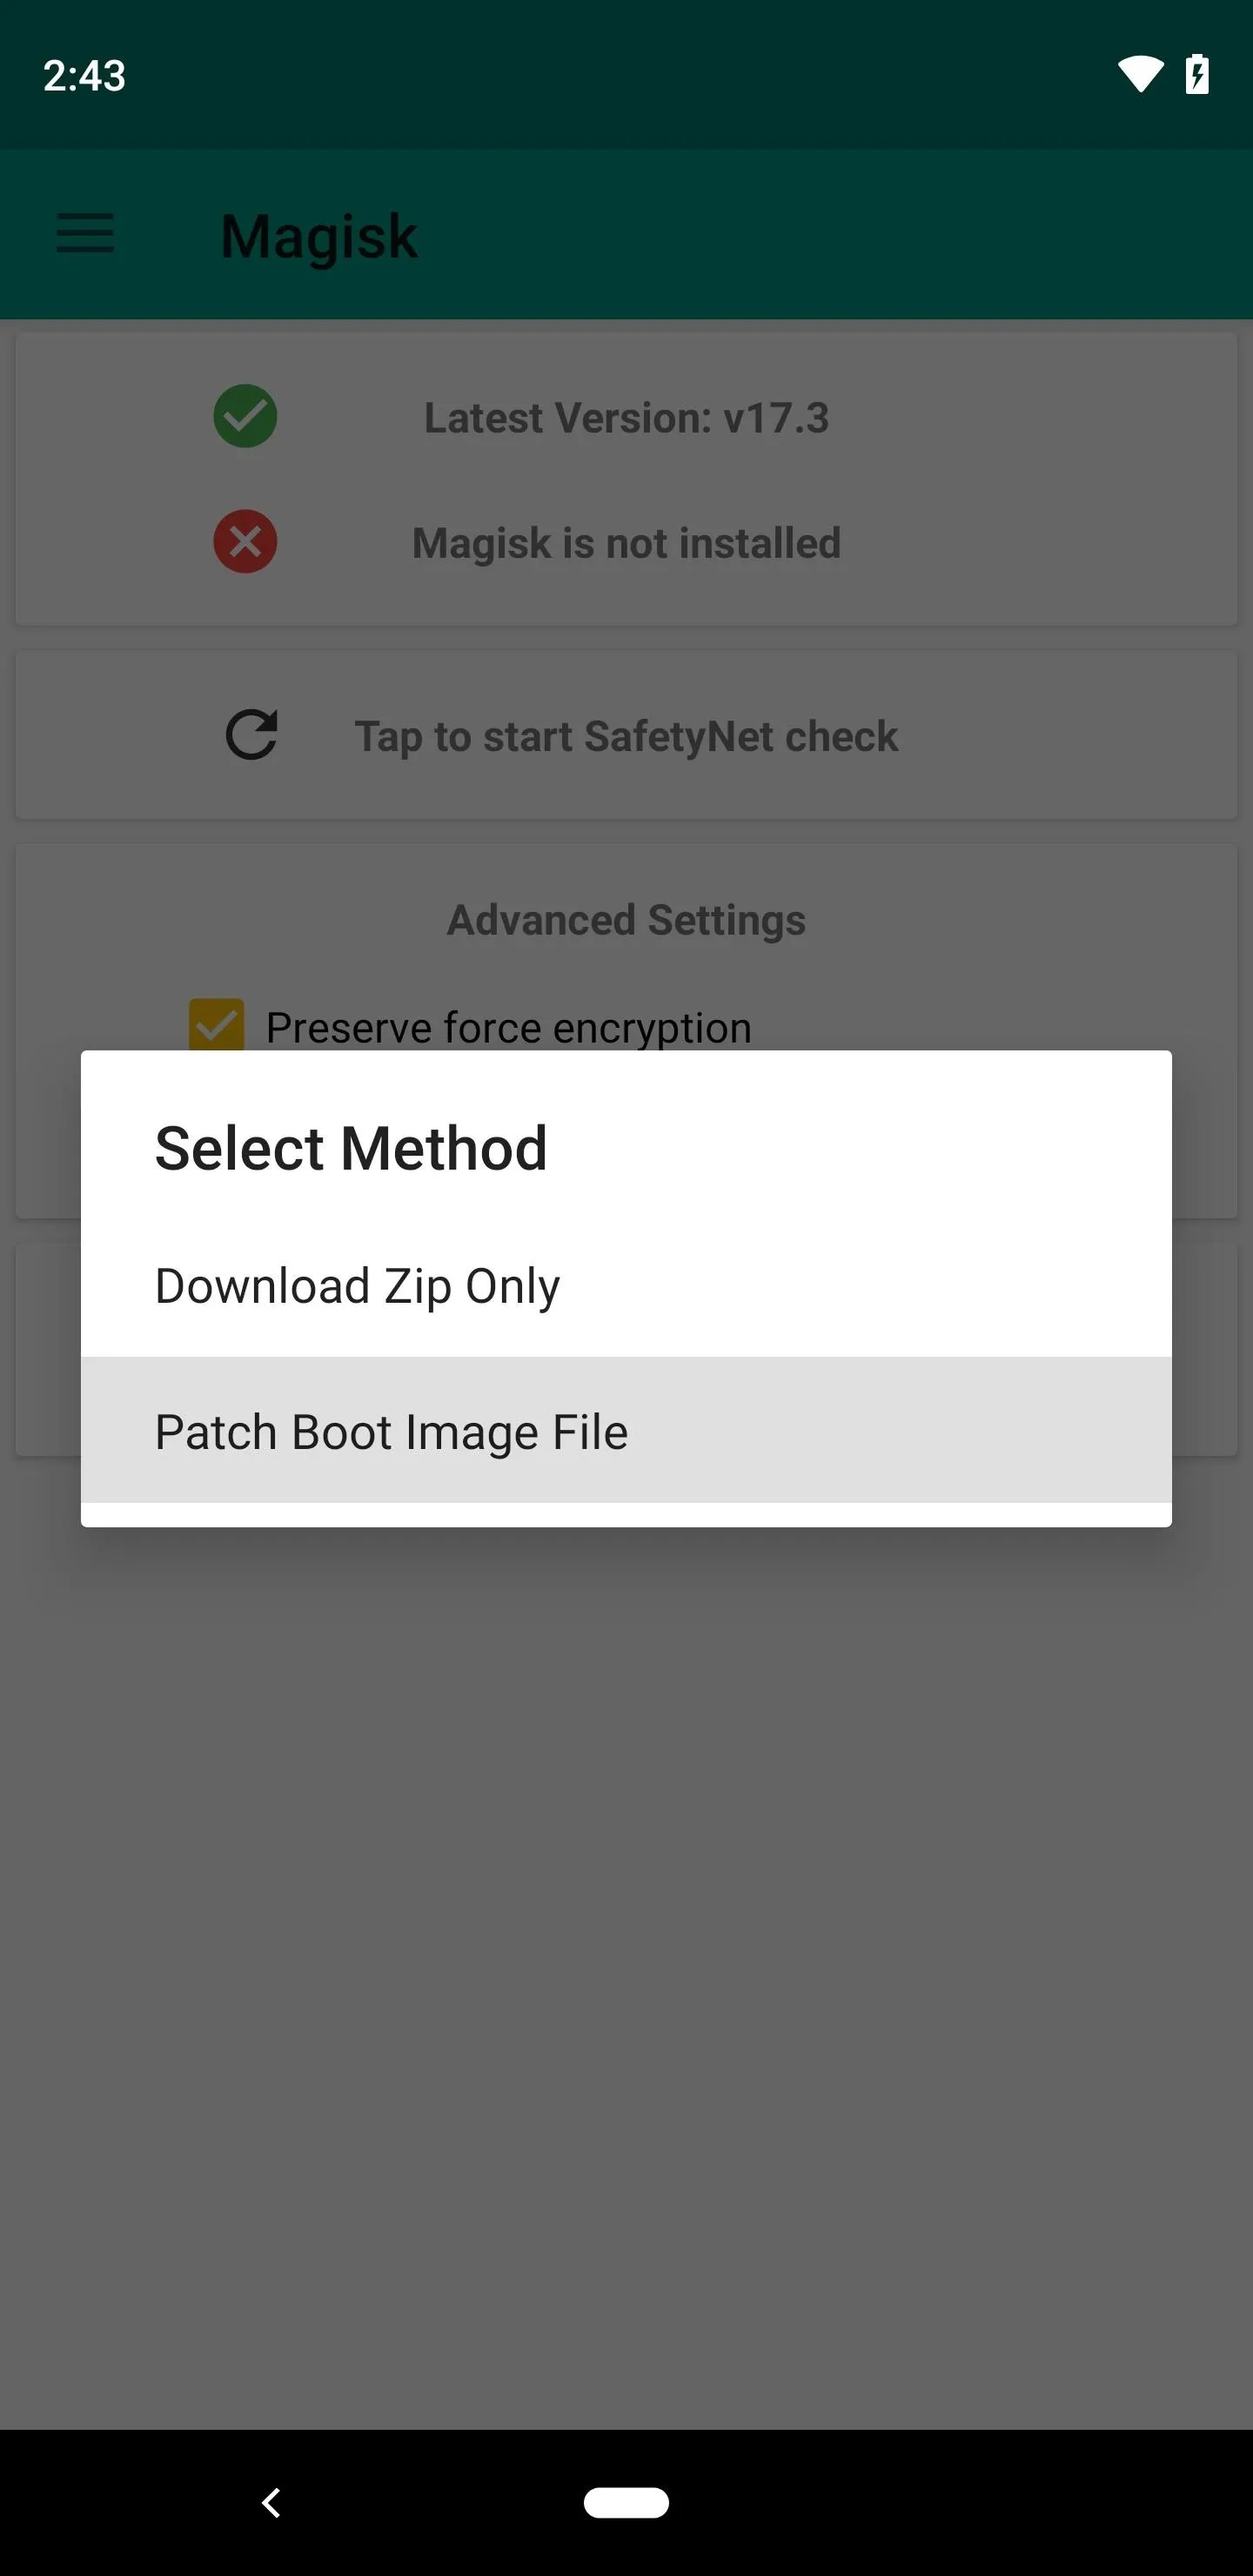
Sometimes the Magisk installation will fail because the custom recovery you are using is outdated. If a recent version of TWRP (3.2.x or higher) isn't available for your device, it is possible to root with Magisk by patching your boot image.
To do that, you'll need to download your phone's current stock firmware (i.e., the firmware version that matches your current build number). For Google devices, do that here. For OnePlus, check here. For Essential, look here. If you use another phone, your best bet is to search the XDA forums for your current firmware.
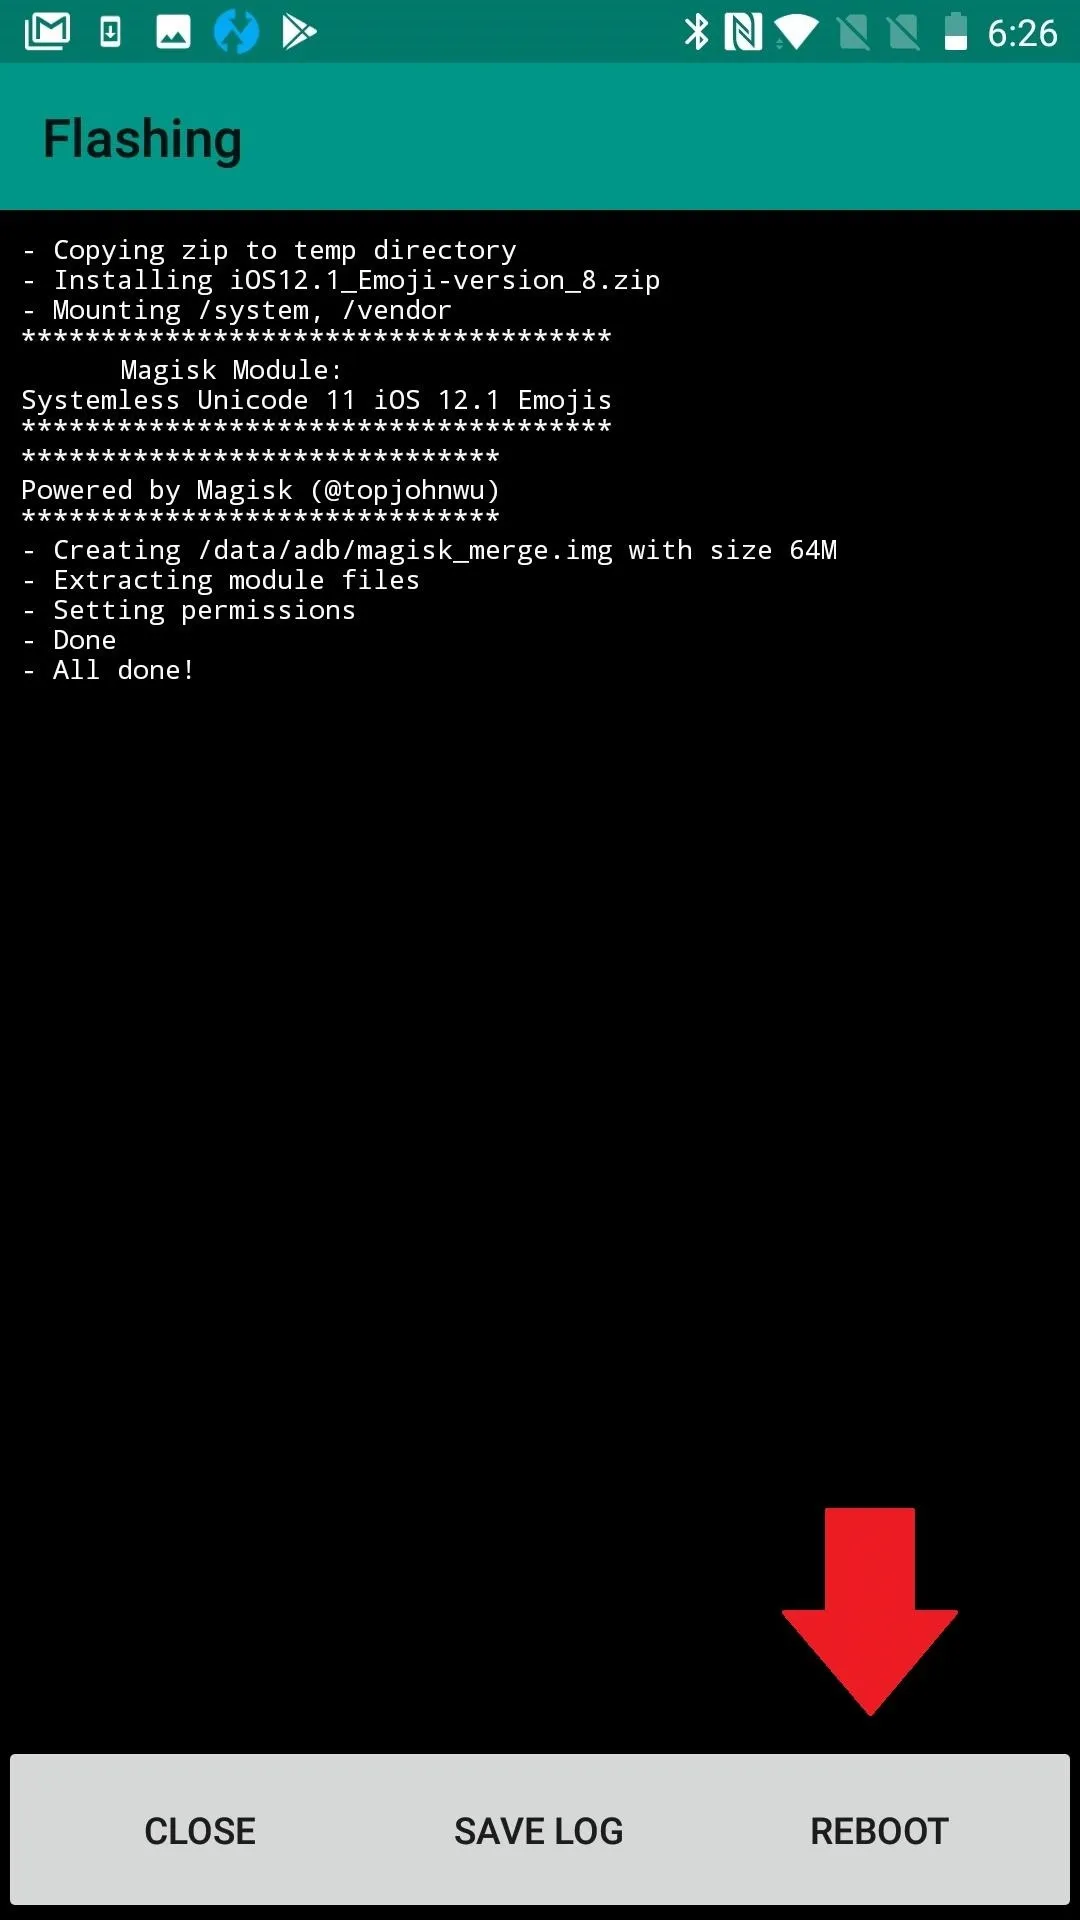
Once you have a copy of your current firmware, extract the ZIP or TAR file and pull out the boot.img file. Save this file to your phone's internal storage so that Magisk Manager can access it. Next, open Magisk Manager and tap "Install" from the main menu, hit "Install" again on the prompt, then choose "Patch Boot Image File" and select the extracted IMG file.
Magisk will patch the boot image to make it a rooted version, then save this file to your phone's storage. Now, to root, you'll just need to transfer the patched boot image over to your computer and flash it using Fastboot — this part's a bit tricky, so head to the link below for a full walkthrough:
Another method that sometimes works is to uninstall, reboot, then reinstall the newest version of Magisk. Depending on your OS, it may also help to actually downgrade to an older version of Magisk. Typically, this isn't ideal, though. Updated versions address bugs and introduce new features.
Reboot (The Ol' Cure-All)
Restarting your device can solve all sorts of ailments, especially if it's your first reboot since flashing Magisk. So do that now, and when you get back up, check to see if root is working. If it's not, we have more troubleshooting steps below.
Reboot from Magisk
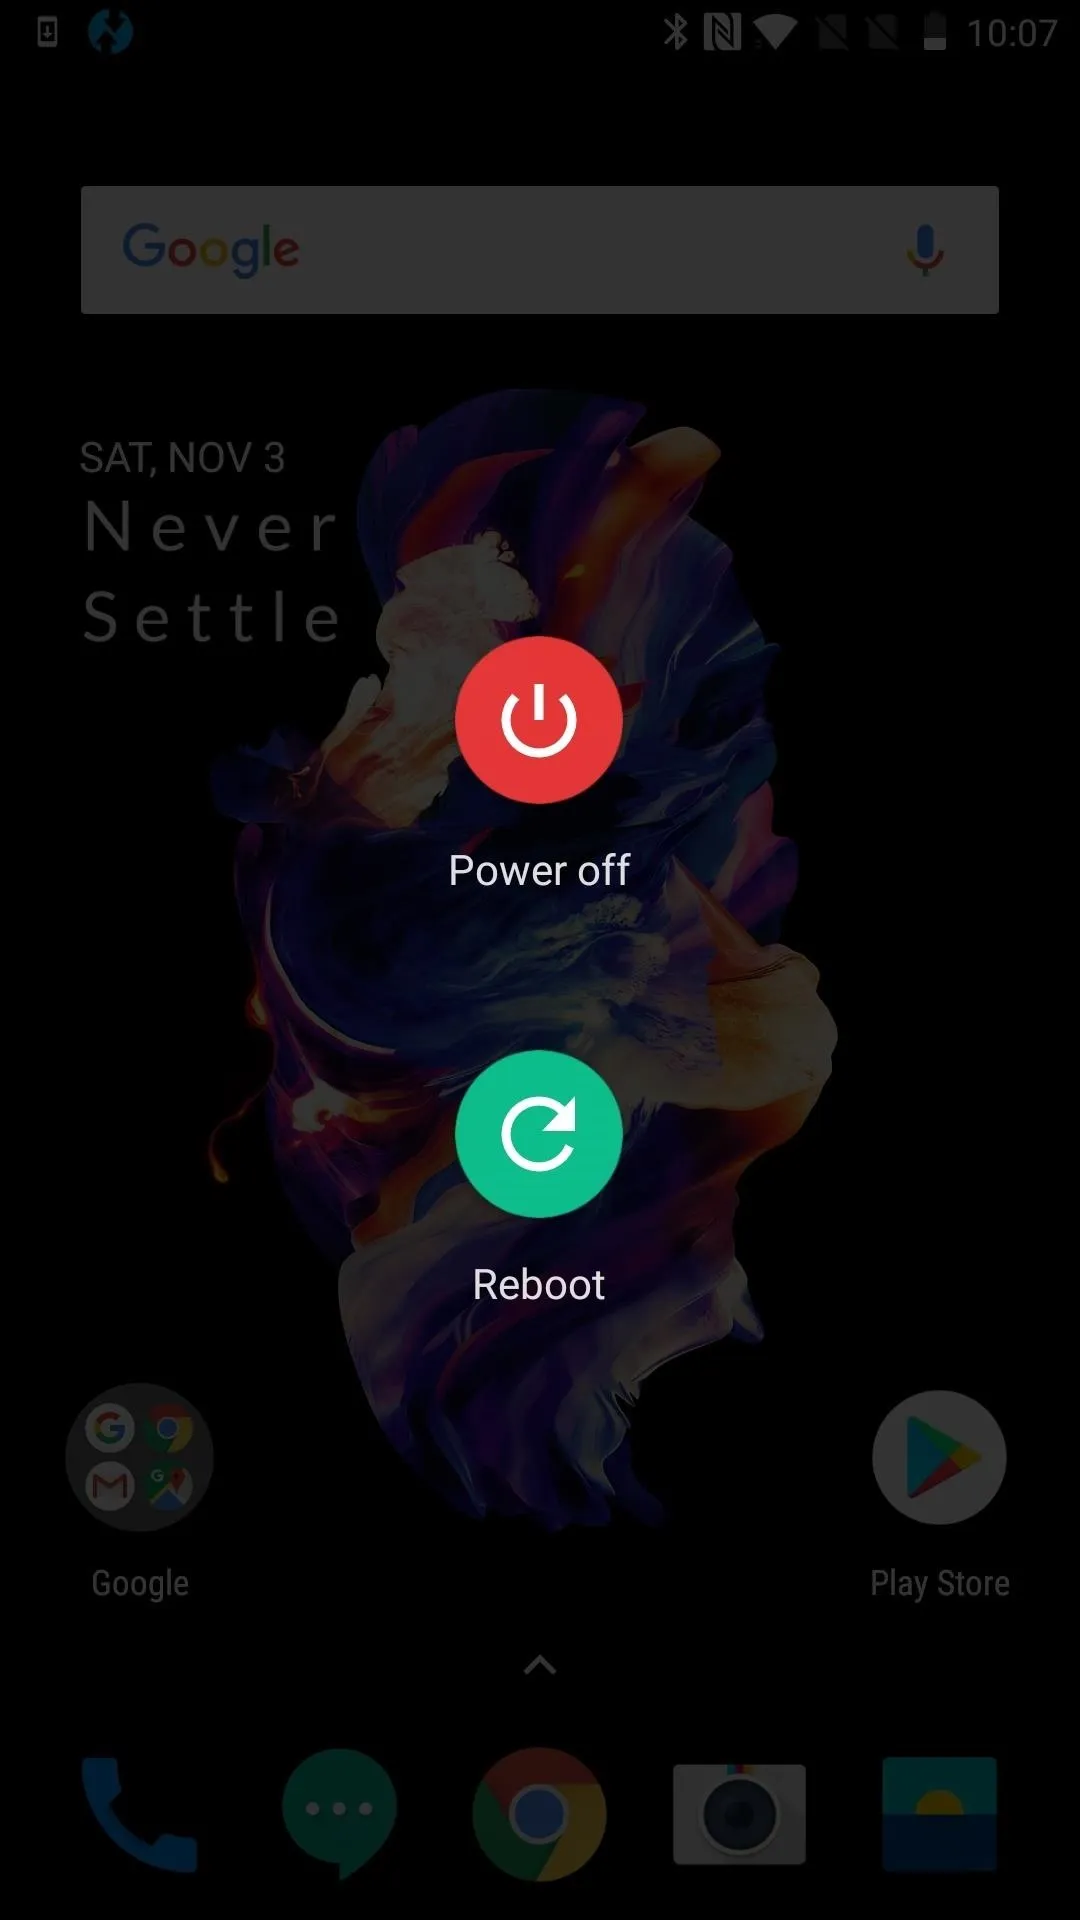
Or reboot via Power button
Reboot from Magisk
Or reboot via Power button
Make Sure You're Aware of App Root Settings
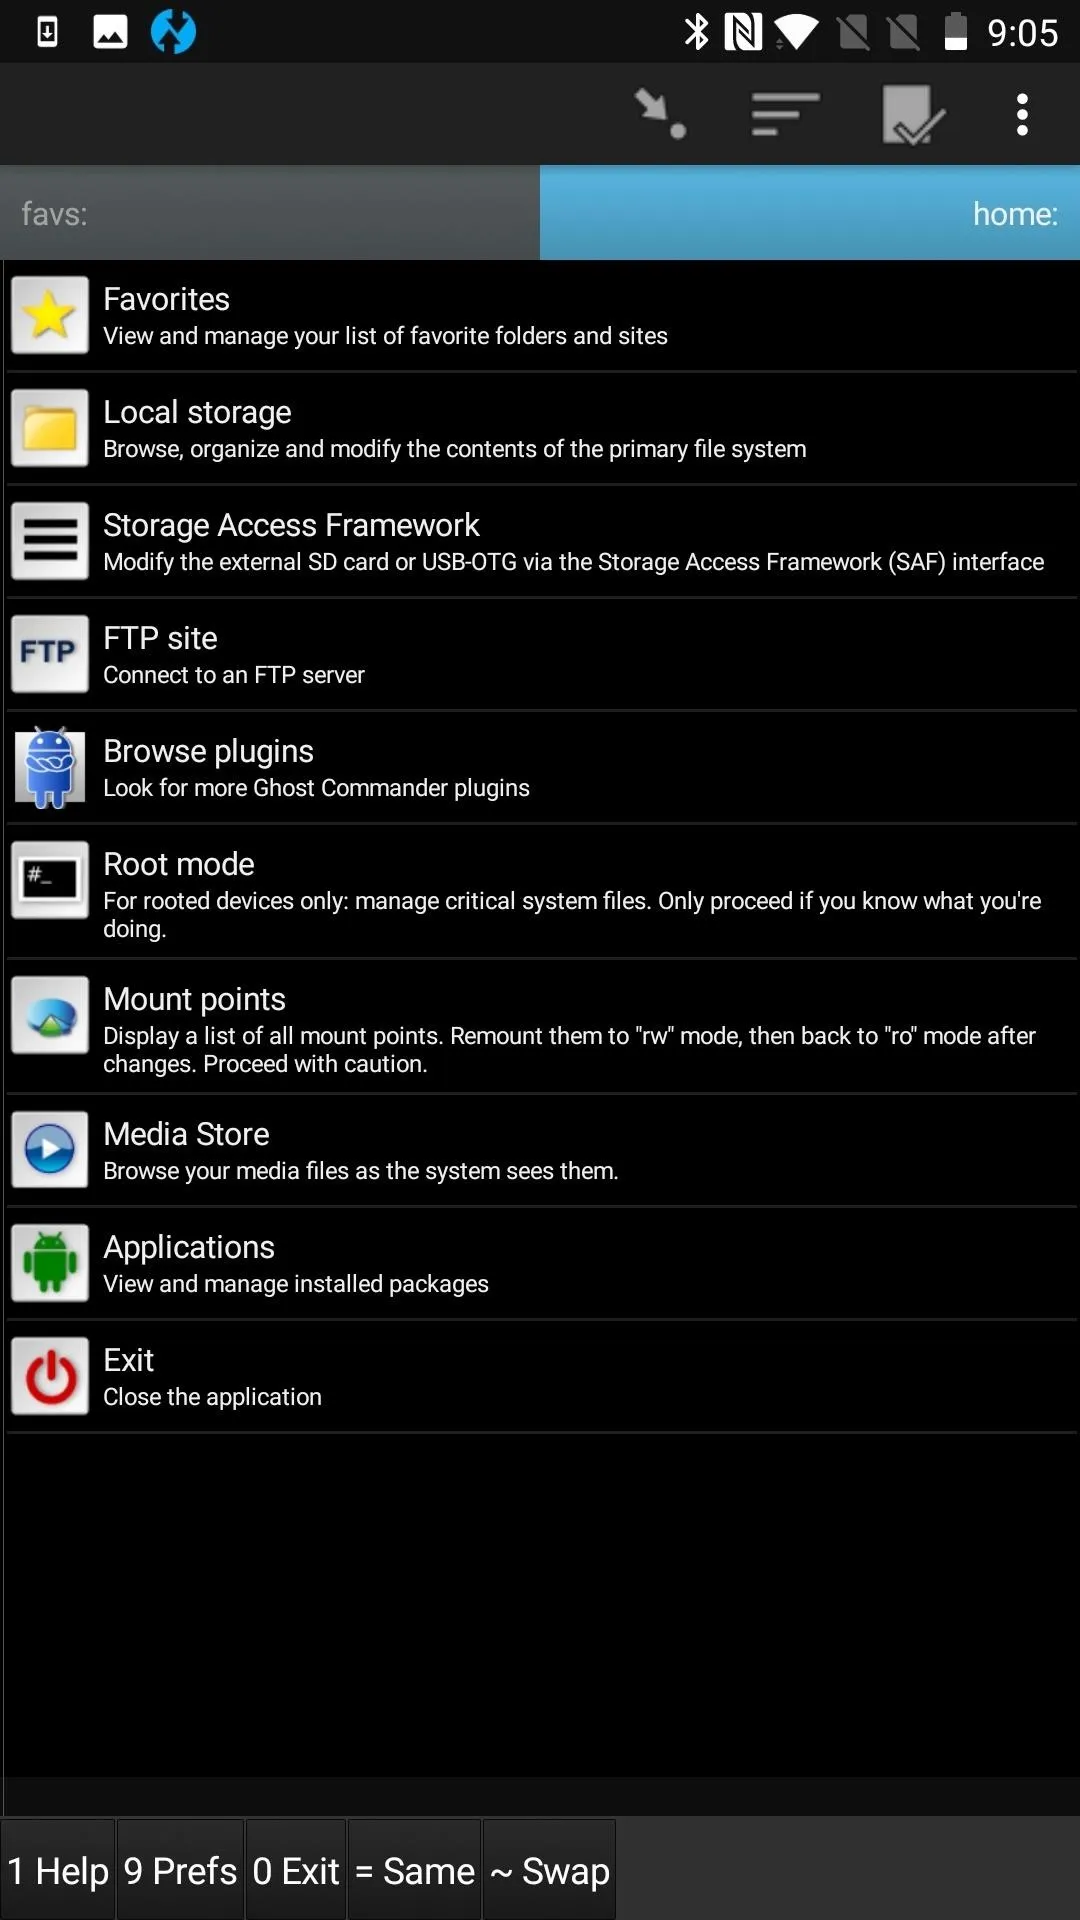
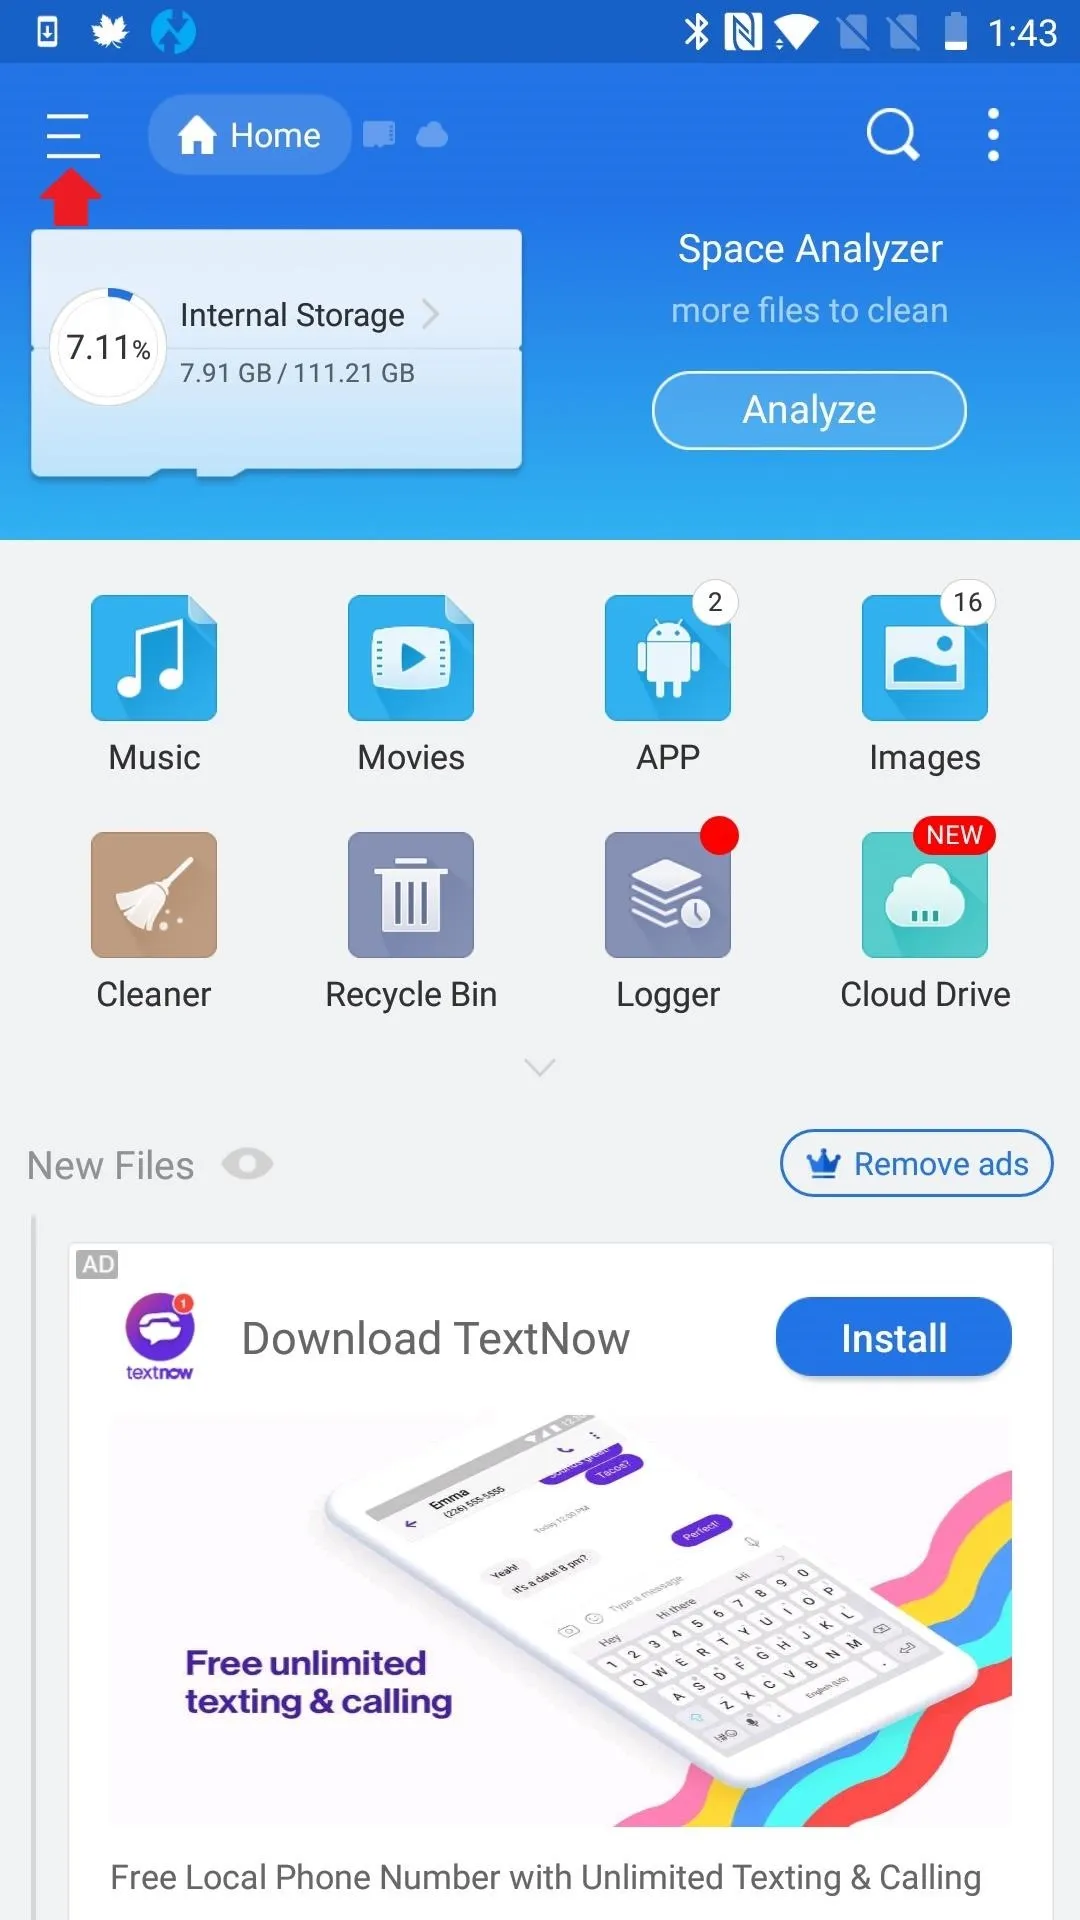
Some apps have internal settings that help you gain root access, or they may also prevent root access. Take Ghost Commander File Manager, for instance. There are two different modes of operation: normal and root. You only need root mode to tweak your system using root, but that's likely why you are here. You can also use Ghost Commander to remount file systems.
With Ghost Commander specifically, there are a few different ways to enter root mode. One is to access the file path using root: as a prefix (i.e. root: /data). You can also enable it from the home screen if you visit Settings –> Advanced –> Show advanced home items. Another way is to use the tool button for access with a single tap.
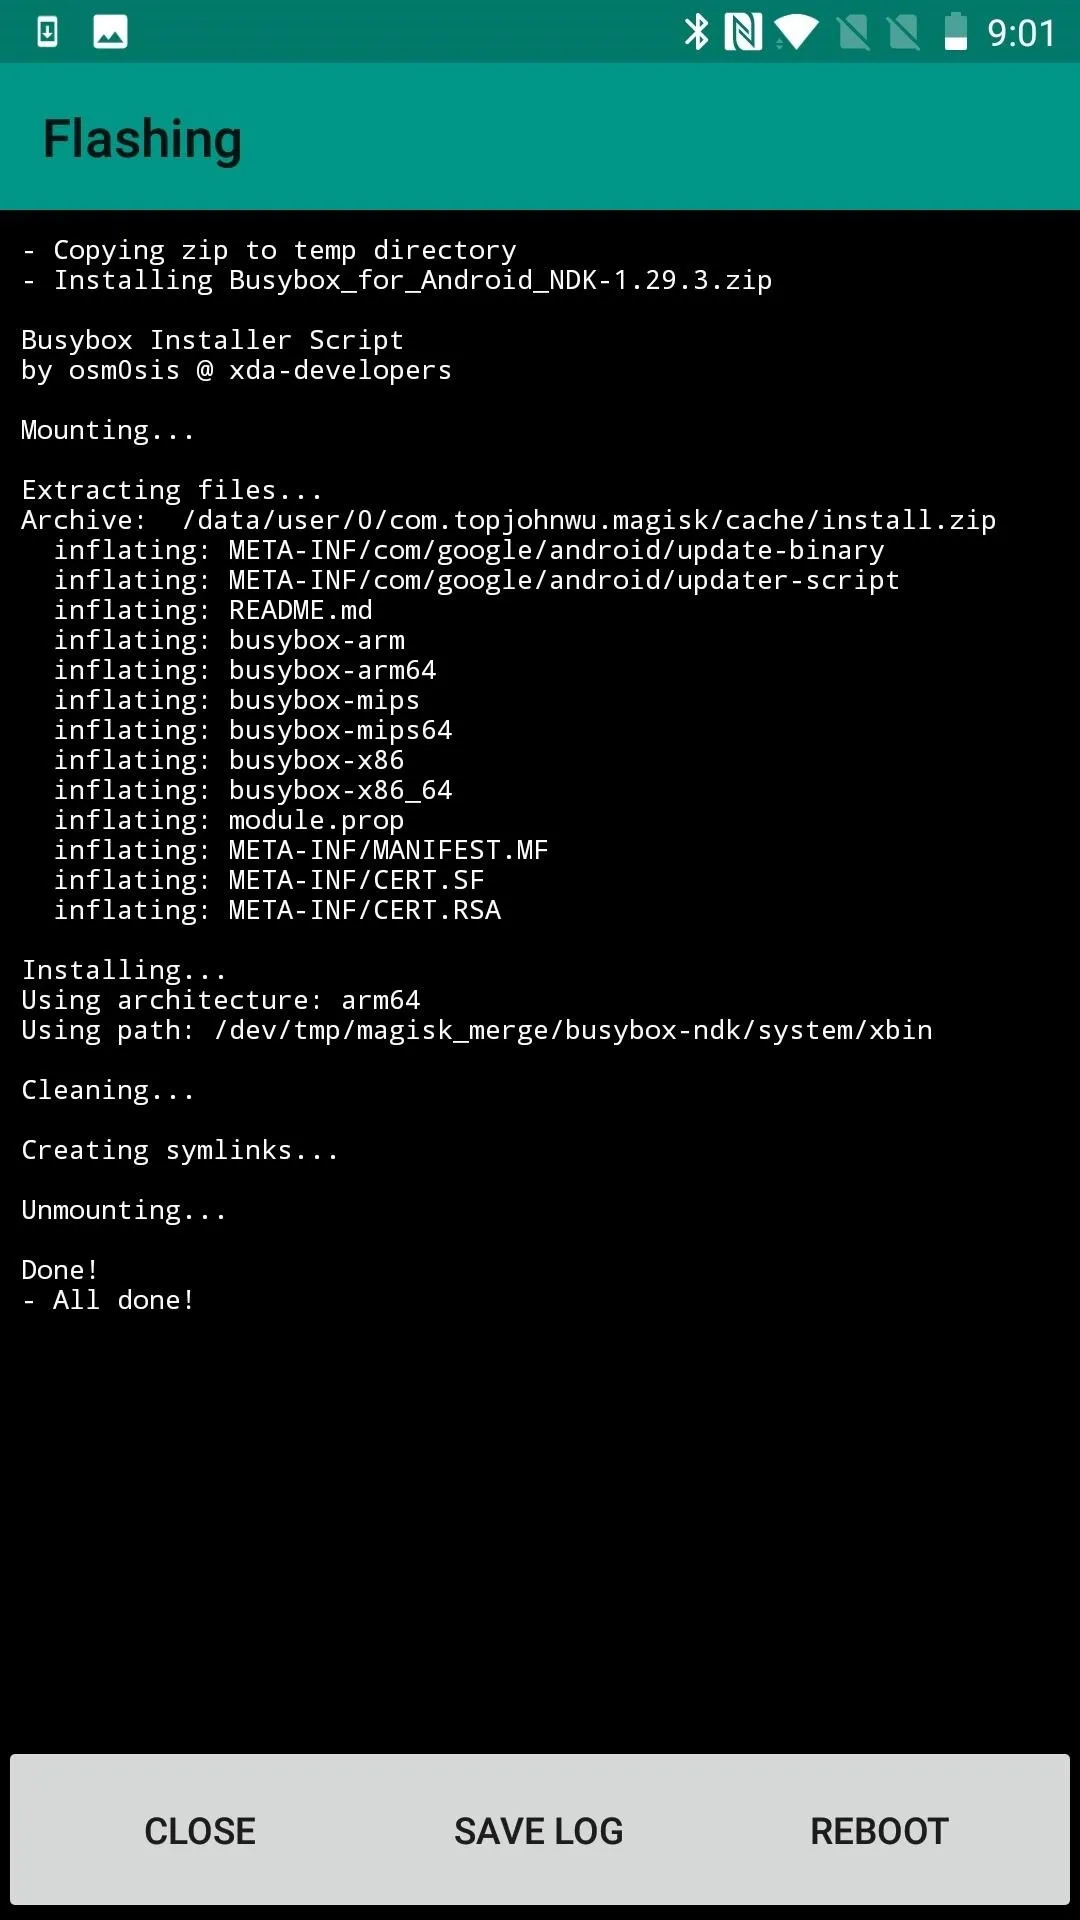
BusyBox available on Magisk

Setting to enable root options
Root Mode Option on Home Screen
BusyBox available on Magisk
Setting to enable root options
Root Mode Option on Home Screen
Terminal emulators apps are another type of app that typically require a special command to enable root. You usually have to run "su"within the shell to use root. If you aren't asked explicitly whether you want to grant an app superuser access, check out the app's settings to make sure it's not something you are meant to request. Most rooted apps aren't shy about asking, but sometimes it's also easy to overlook.
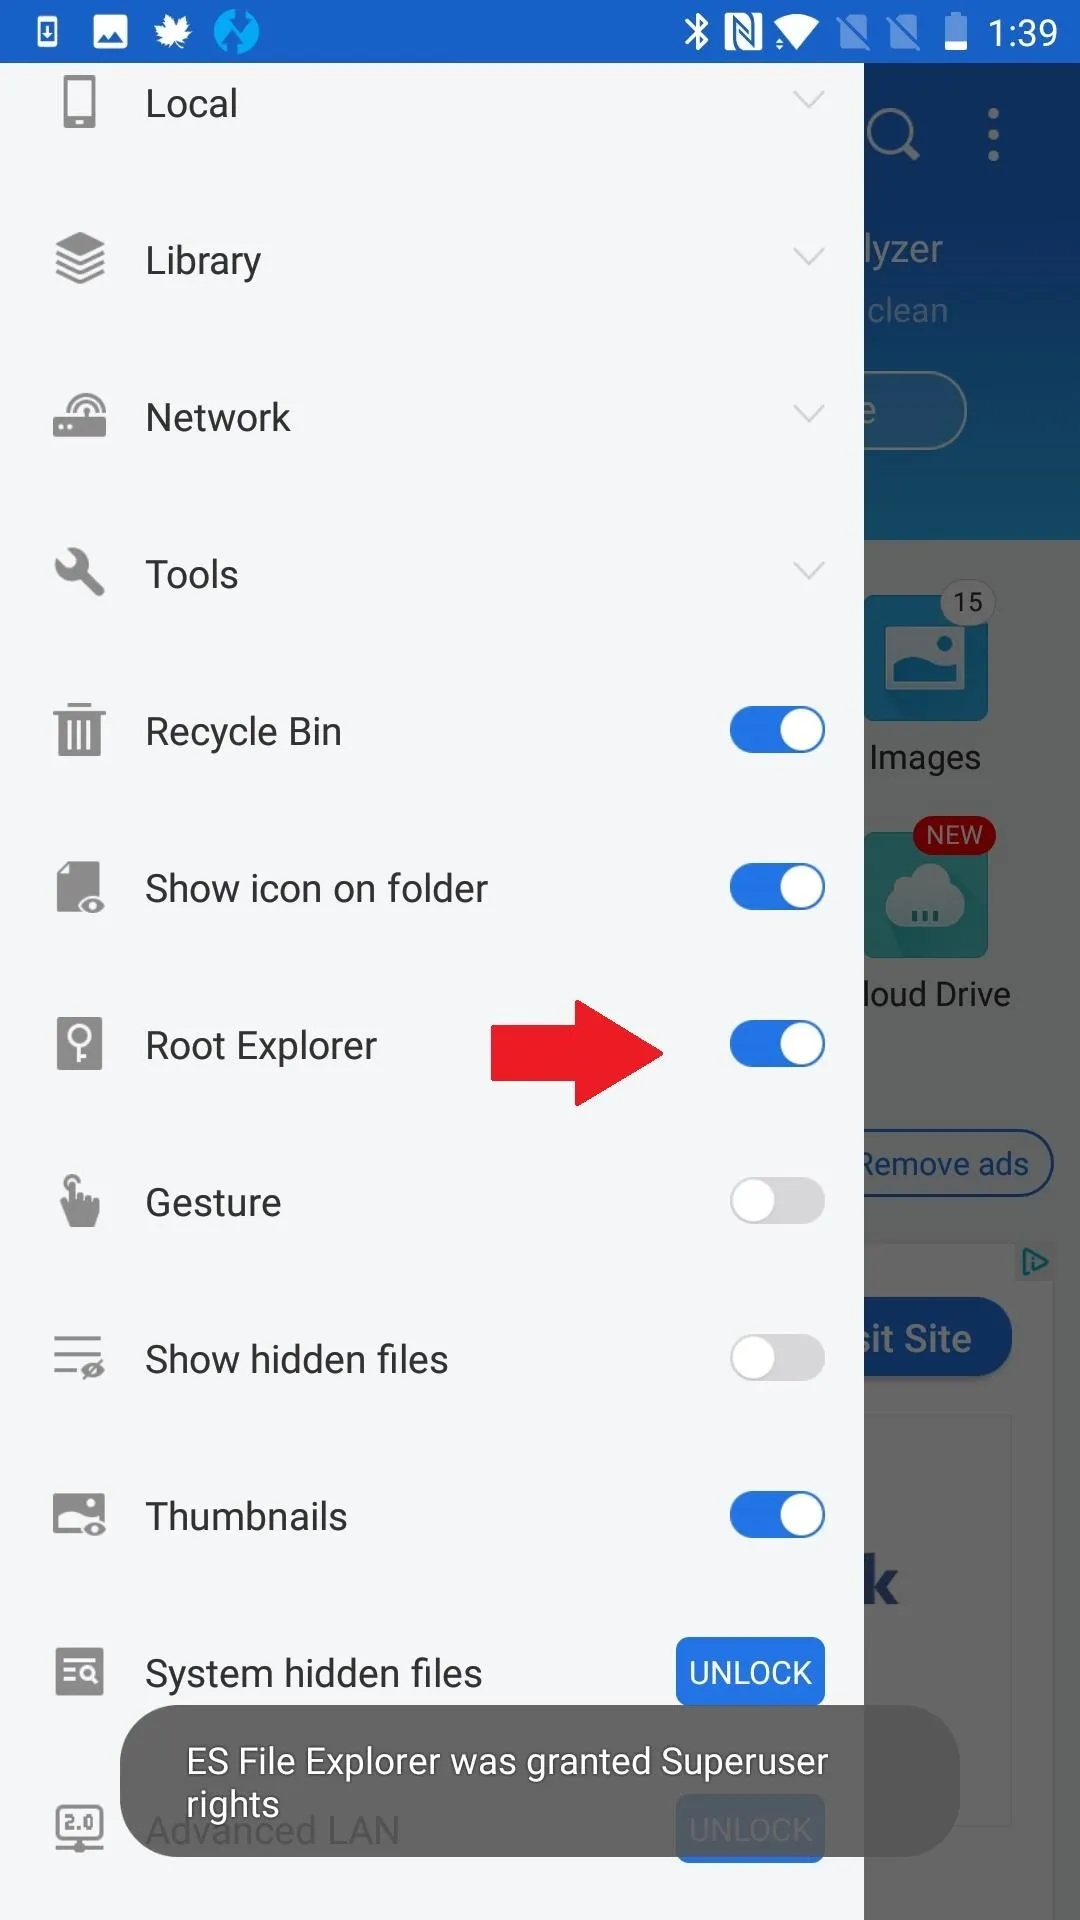
ES File Explorer/Manager PRO is another app in which root must be manually enabled. To do so, press the menu button (upper-left, 3 lines) and tap "Root Explorer."
Outside of our three examples, there are plenty of other apps that don't request root by default. To make sure this isn't your problem, head to the app's settings and thoroughly examine all options.
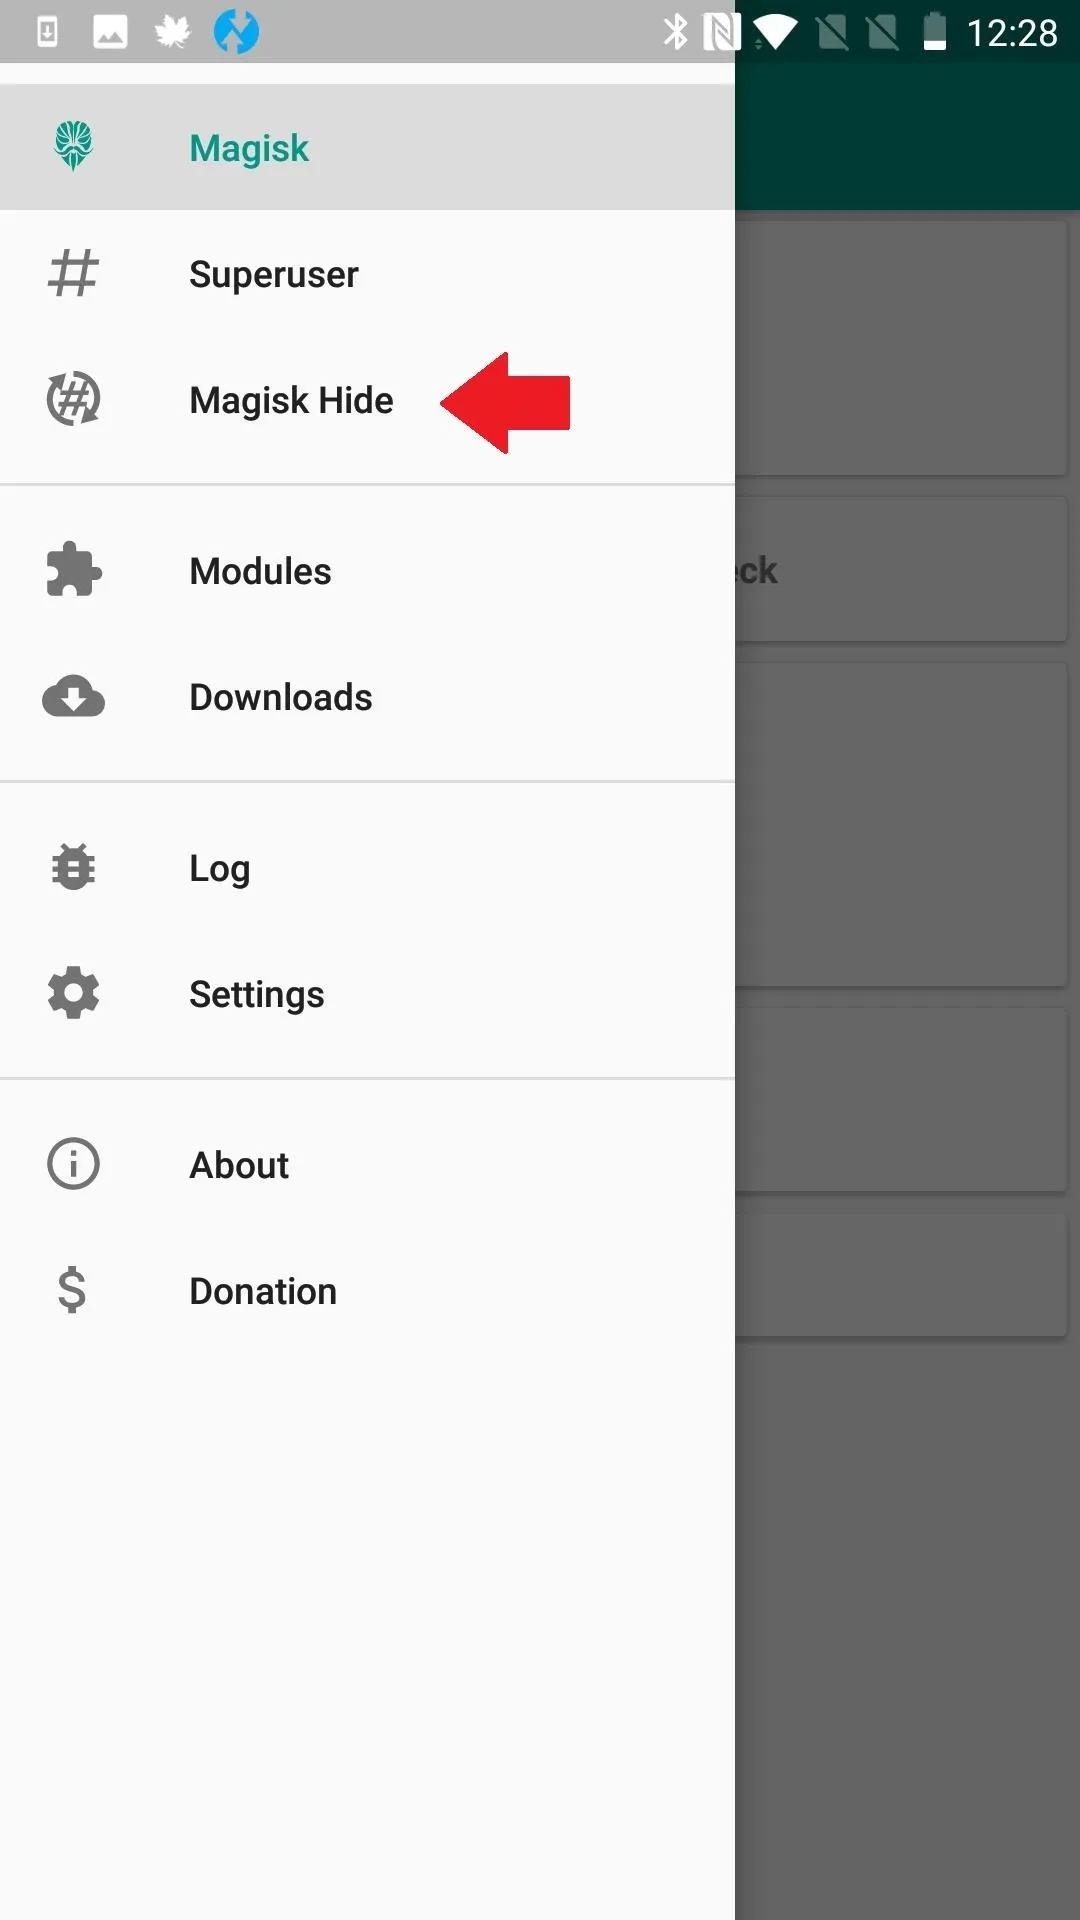
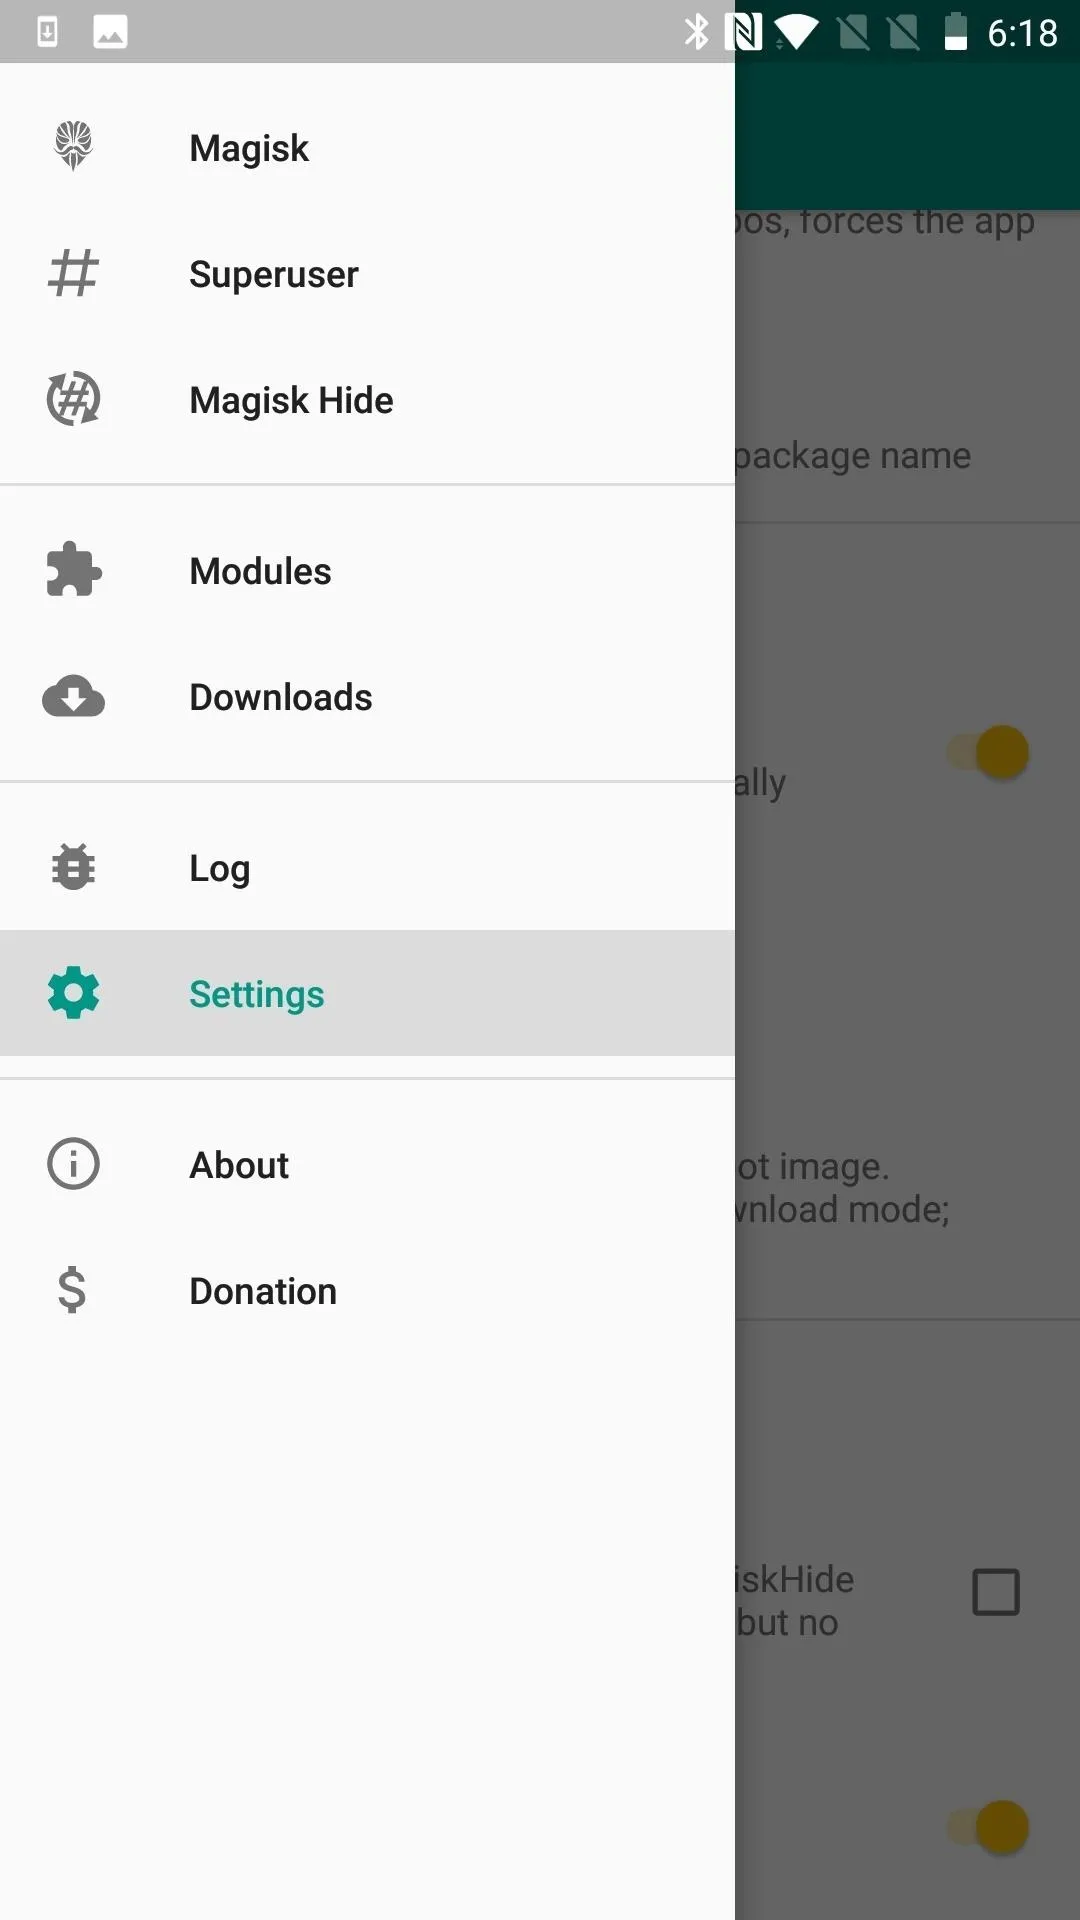
Check Out Magisk Manager's Superuser Permissions
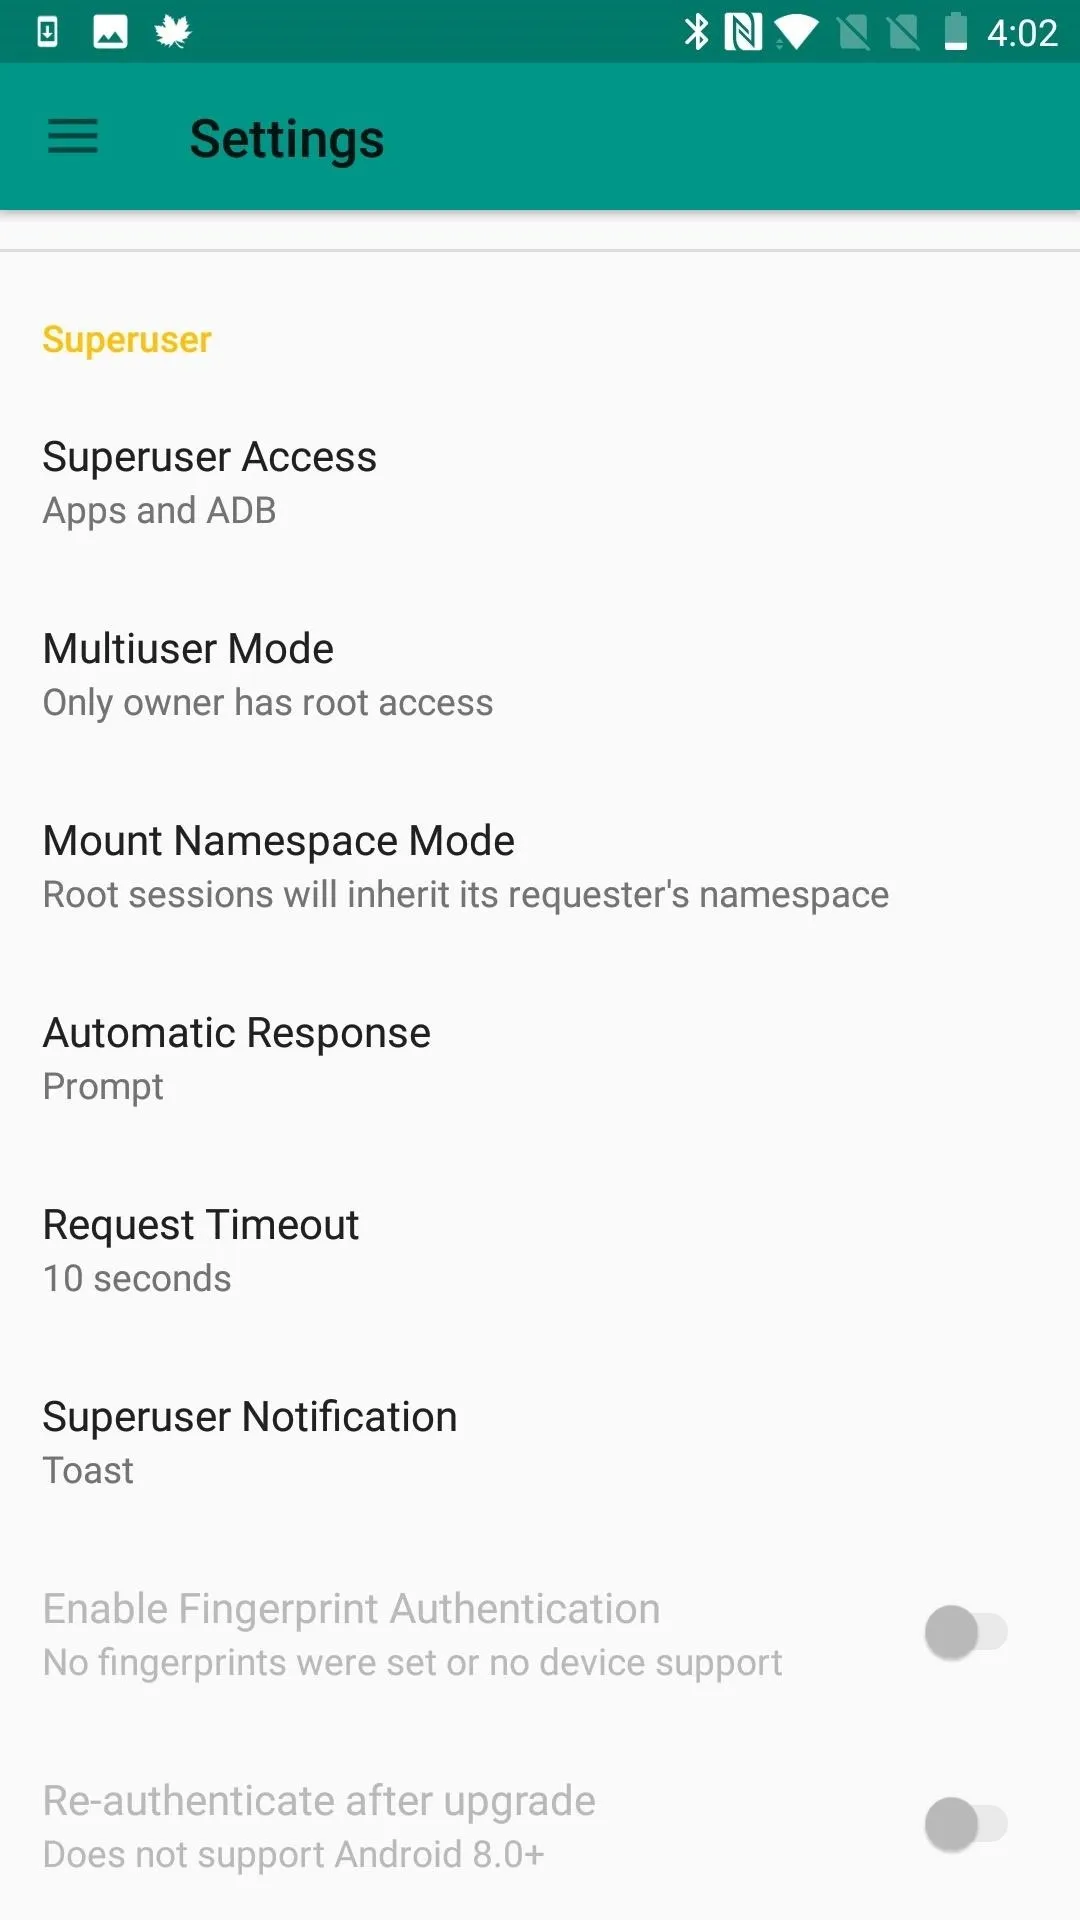
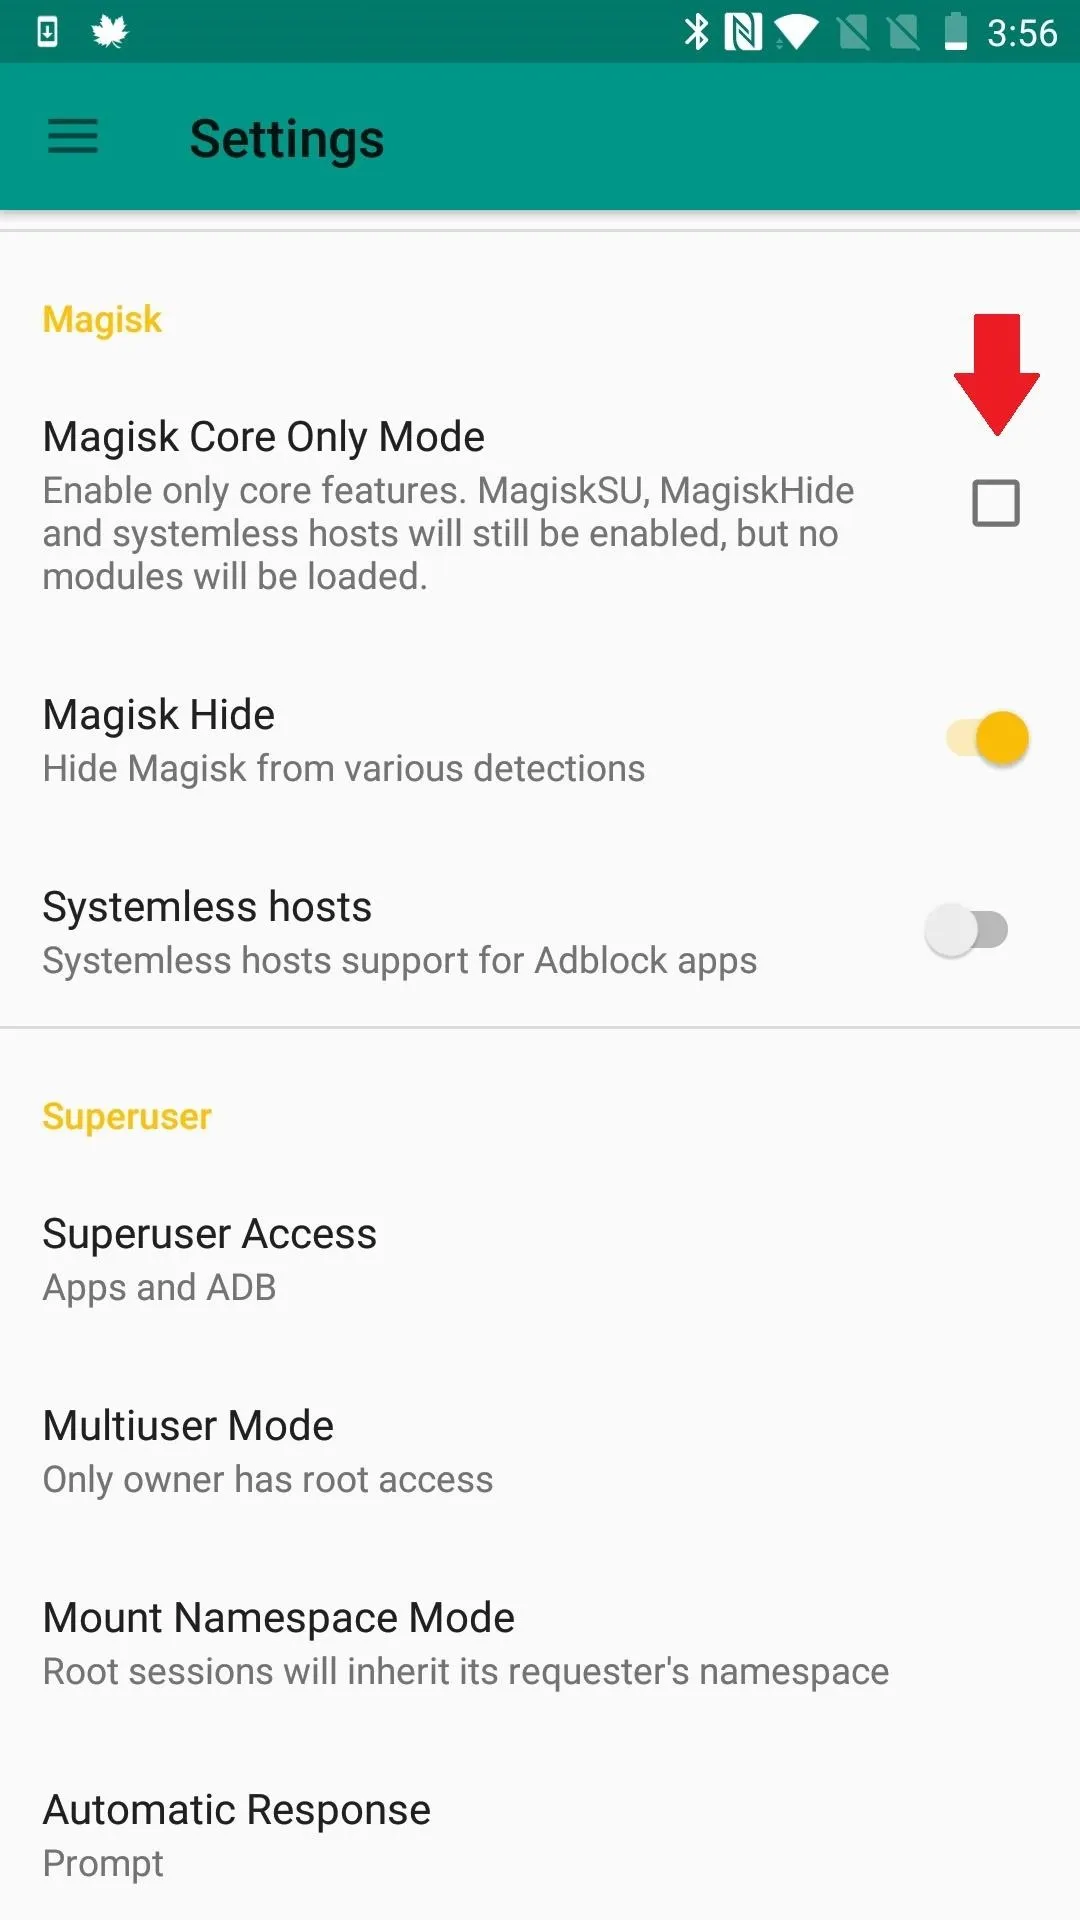
Did you know that Magisk Manager has a section of its settings devoted to making sure specific apps are granted root access? Even if this is old news, try toggling any app you are having problems with in that list of apps with superuser access. Also, in Magisk's settings, scroll to the bottom and make sure that those Superuser settings are set up correctly.
You can configure Magisk's Superuser settings section to your liking, but the default options are as follows: Superuser Access: Apps and ADB; Multiuser Mode: Only owner has root access; Mount Namespace Mode: Root sessions will inherit its requester's namespace; Automatic Response: Prompt; Request Timeout: 10 Seconds; Superuser Notification: Toast.
Update the App
Some apps have a hard time finding root via Magisk because they look for the superuser binaries in a very specific location. The best solution to this problem is to simply update the app. As more and more people use systemless root, more rooted apps adapt to it. If you are already using the most recent version of the app, reach out to the developer to ask for support or look for an alternative app that's been updated more recently.
Disable All Modules
You could think of this next troubleshooting tip as a Magisk safe mode. To make sure a module isn't causing problems with root access, head to the Modules section in Magisk Manager's side menu, then simply disable all modules and reboot. If root works when you get back up, re-enable the modules one by one and reboot after each until you find the culprit.
Alternatively, in Magisk Manager's settings, you'll find "Magisk Core Only Mode," or if you can't boot, you can insert a file named ".disable_magisk " in /cache (/data/cache on some devices). This is a good approach if you already know that a particular module is causing your rooting woes. It helps you get in far enough to uninstall the troublemaker.
Symlink the SU Binary to a Standard Location
If you realized in Step 8 that your problem stems from an app looking in the wrong place for Magisk's systemless root binaries, there's another option besides looking for a different app.
You can place a pointer or path to SU by creating a symbolic link. This may be accomplished by using an Android terminal emulator to insert the symlink, but MagiskHide will likely fail since SU will now be exposed. As an alternative, XDA Senior Member laggardkernel developed a Magisk module that can do this systemlessly. This does break SafetyNet. The module could be flashed either in Magisk Manager or via a custom recovery, and you can grab it from the link below.
I had trouble flashing it, however, and it looks like support has only been provided up to Magisk V12. So you might only be left with the first option of inserting the symlink yourself, which I personally feel breaks too much of the functionality of Magisk.
Handle a Faulty Implementation of F2FS
If your device does not use F2FS (Flash-Friendly File System), there's no need to complete this step. If it does, it's possible that the file system is breaking root by preventing Magisk from mounting at boot.
There are a different ways to solve this problem, but the most efficient is to find a new kernel without the file system. Another, sometimes more problematic, approach is to reformat your /data partition as ext4. If you decide to go this route, it's easy enough to do through TWRP's "Wipe" option. It's just that some devices designed to use F2FS may have problems booting as ext4.
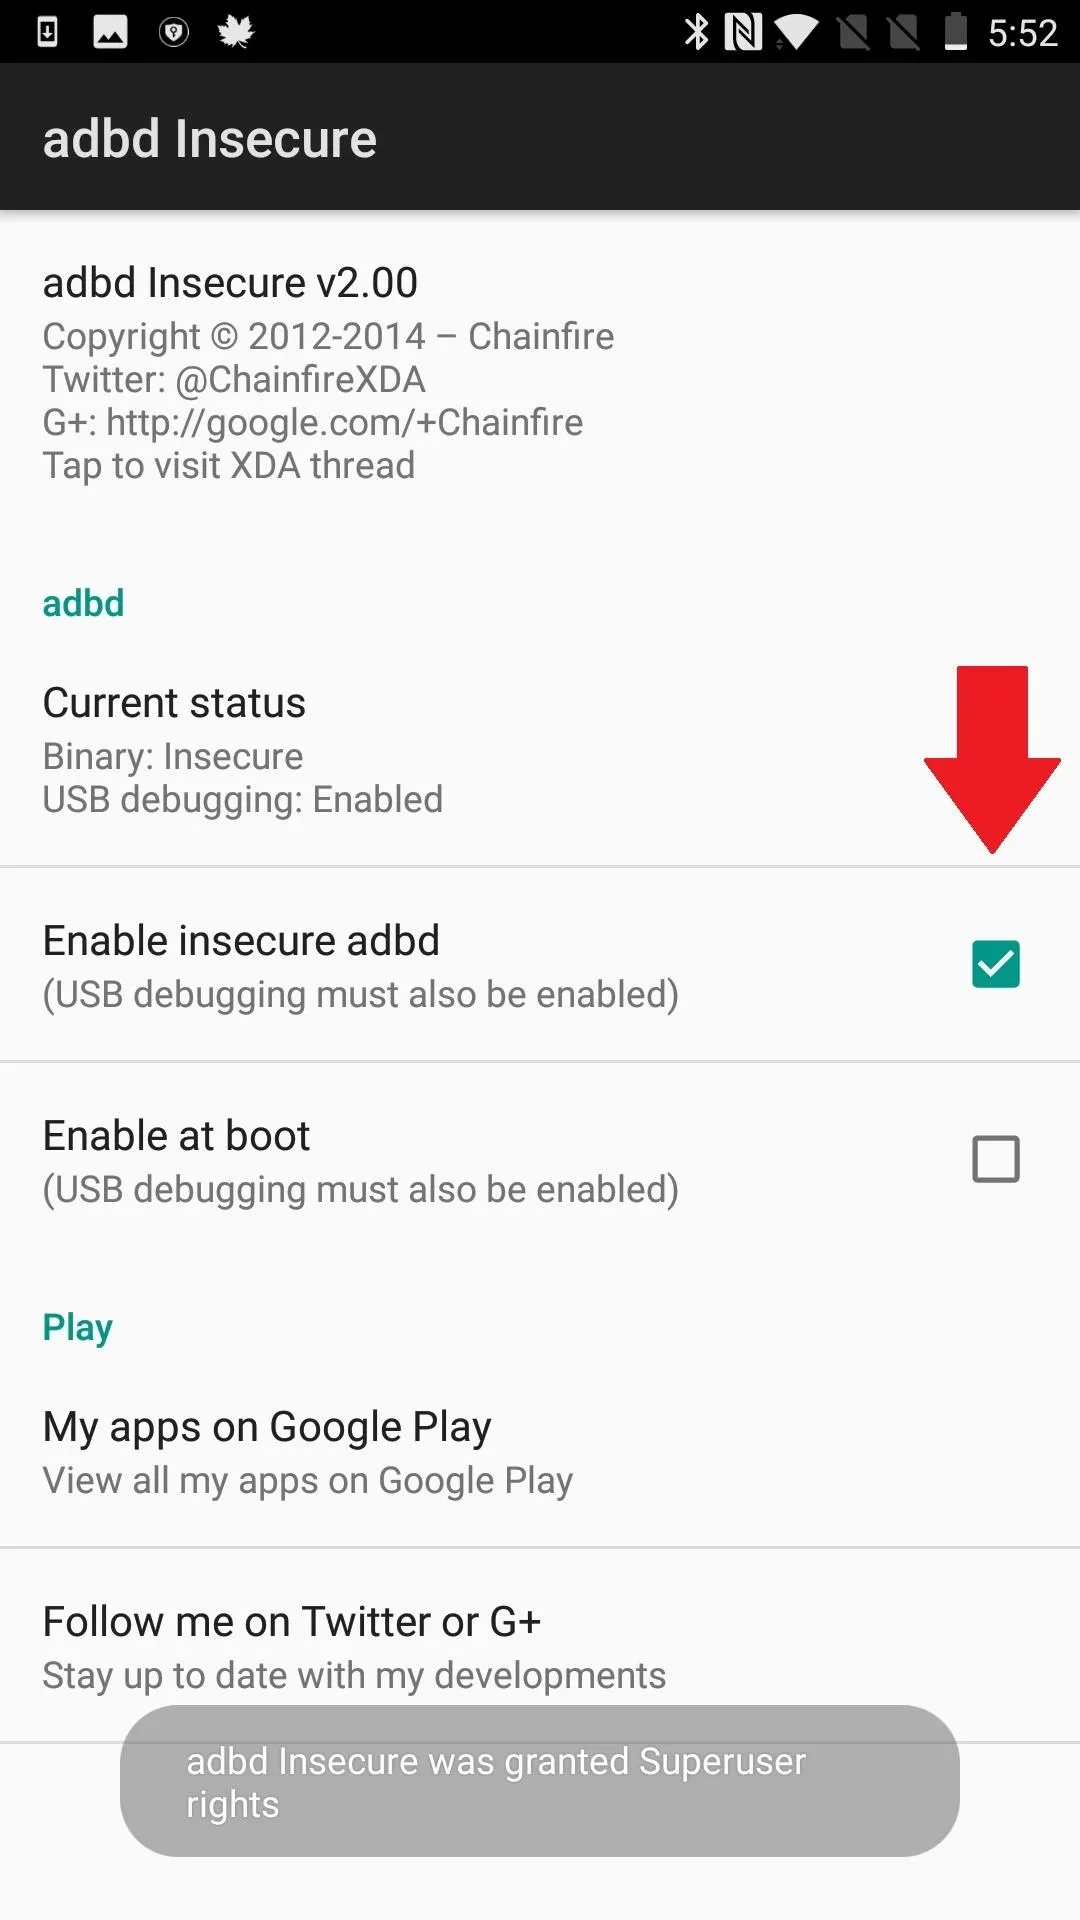
Run ADB in Root Mode with ADBD Insecure
On most stock kernels, ADB (Android Debug Bridge) only runs in secure mode, even if you are rooted. This makes it difficult to access root when you are using ADB to run commands on Android via your desktop. The (root) ADBD Insecure app allows you to run ADBD (Android Debug Bridge Daemon) in "insecure mode," so you can do things like access system files and directories by running the command "adb push/pull" or make your system partition writable using "adb remount." The daemon is what grants access to the shell.
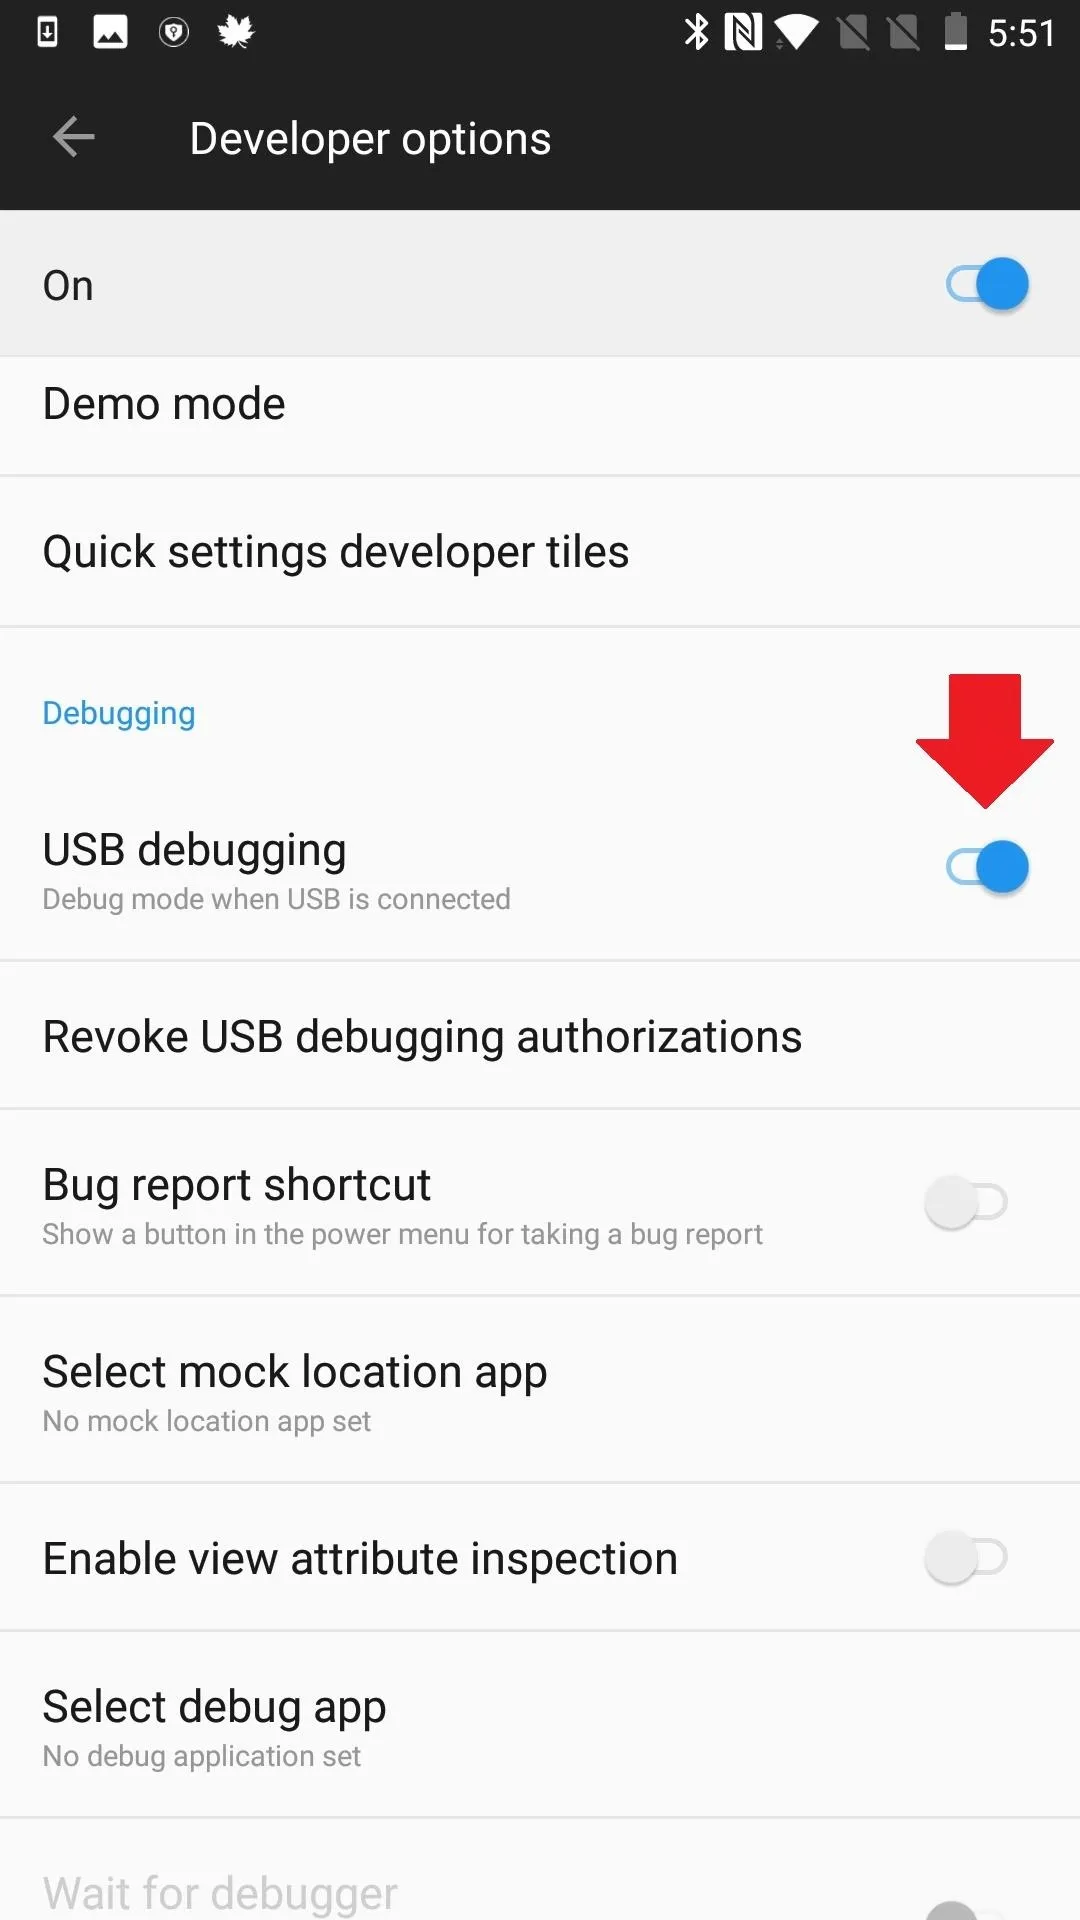
ADBD Insecure can be installed from the Google Play Store, or you can simply search it by name from your Play Store app. You'll be required to enable USB debugging, so make sure your Developer Options are enabled by tapping on Settings –> About Phone, then rapidly tapping "Build number" seven times.
Install Magisk SELinux Manager
This is kind of pulling out the big guns, and it may be just as risky as if you took that saying literally. Android uses a principle called Security-Enhanced Linux (SELinux for short) to help maintain security. By default, any request made of the operating system that is not explicitly allowed is denied. Software only runs with minimal privilege, providing some damage control against attacks or buggy processing. Depending on the root app, SELinux could be preventing it from doing what you want it to do.
SELinux has two modes: "permissive" and "enforcing." In permissive mode, SELinux logs policy violations, but it doesn't block the event. Enforcing mode both logs and blocks every action that violates SELinux policy. XDA Junior Member Jman 420 found and shared a way to enable SELinux permissive mode on boot, which may help with your root crisis, but can also be a risky venture.
For one, it's discontinued, so you are on your own. All cautioning aside, there are simply some tools and apps that are notorious for malfunctioning or not working at all in enforcing mode. And for many people, rooting is way too risky. For others, the best things in life involve at least a little bit of risk.
Magisk root holds a lot of advantages over traditional rooting methods, but when your apps can't access it, it may not feel too advantageous. After all, one supposed advantage of Magisk is that rooting and then using root is easy. But with such a wide variety of devices, systems, and apps, there are a lot of variables at play — and a lot of potential issues. So if you know of other ways to solve problems with apps accessing root via Magisk, let us know in the comments.
- Follow Gadget Hacks on Pinterest, Reddit, Twitter, YouTube, and Flipboard
- Sign up for Gadget Hacks' daily newsletter or weekly Android and iOS updates
- Follow WonderHowTo on Facebook, Twitter, Pinterest, and Flipboard
Cover image and screenshots by Delani Clatfelter/Gadget Hacks


Comments
Be the first, drop a comment!