


Although the Essential PH-1 got off to a rocky start, thanks to steady updates, it has slowly become one of the best Android phones to come out in recent years. For $499, the Essential Phone is a cheaper Pixel, receiving updates almost as soon as the Pixel lineup does. What's more, you get a phone with an easily unlockable bootloader, which is the first step to rooting.
If you are new to rooting, understand that while it might seem intimidating at first, it is relatively simple with the Essential PH-1 compared to other devices. And that's one of the best aspect of the phone, since before you can use Magisk, Xposed, or flash your first custom ROM, you'll need to unlock the bootloader first.
What You Will Need:
- Windows, Mac, or Linux computer
- OEM USB cable
Back Up Your Data
Before you do anything, make sure you back up your data. Unlocking the bootloader will wipe your device, so you want to make sure you can get all your data back afterward. While Android does automatically back up most of your personal data to Google Drive, including your call history, Wi-Fi passwords, apps, contacts, and more, you should still back up your own copies in case Google fails to restore your most recent actions.
We would recommend using third-party apps such as SMS Backup & Restore to back up your call history and text messages for the most up-to-date list. Check out our guide below for how to accomplish this.
Download the Drivers (Windows Only)
If you are using a Windows-based computer, you will need drivers in order for your computer to correctly identify (and interact with) your phone when connected via USB. Head over to this link to download Essential's drivers to your computer. Double-click the file once downloaded, then follow the prompts to install the drivers.

Install ADB & Fastboot on Your Computer
Unlocking the bootloader requires the use of Fastboot. You will need the appropriate software, which varies depending on the operating system of your computer.
To download the software need to perform ADB & Fastboot commands, check out our guide below. We included multiple methods that each have different advantages. For the easiest method, we recommend using Method 2. However, for the best results, we recommend sticking with Method 1.
Enable 'OEM Unlocking' & 'USB Debugging'
To unlock the bootloader, you'll need to send commands from your computer to your phone. This means you'll need to enable two settings on your phone: "USB debugging," which allows for instructions to be received from the computer, and "OEM Unlocking," which allows the bootloader to be unlocked.
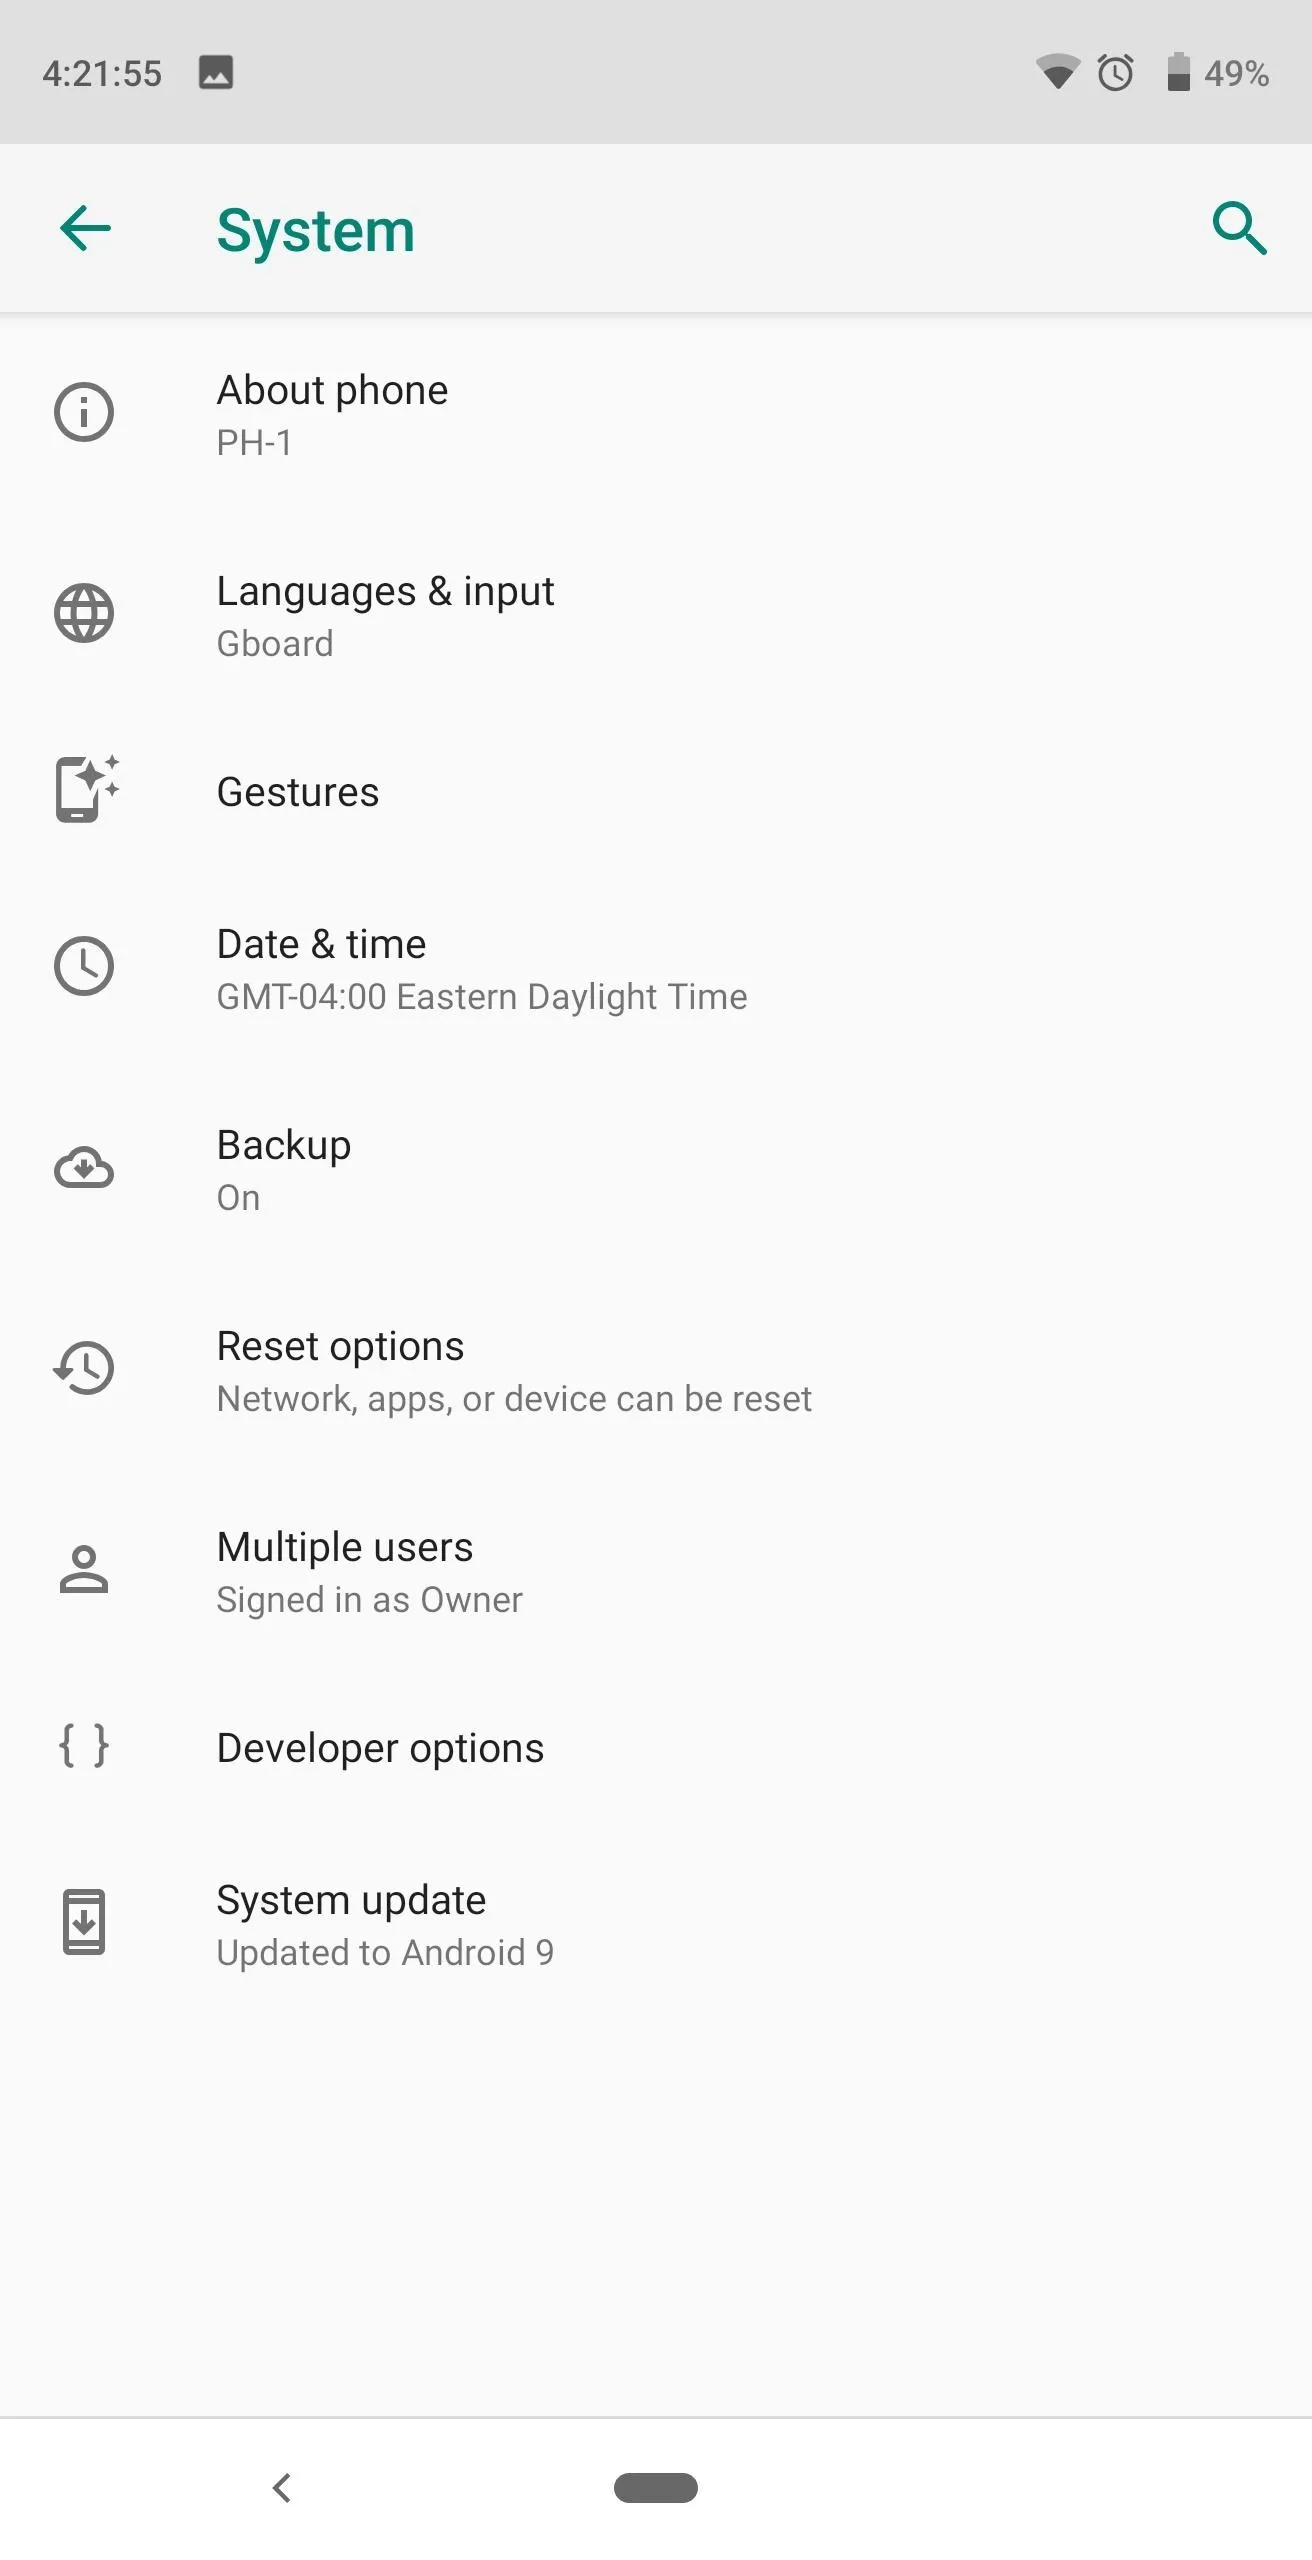
To enabled these settings, you'll need to unlock the hidden Developer Options menu. Use this link for detailed instructions, but the short version is this: Go to Settings –> System –> About Phone, then tap "Build Number" 7 times. Return to the previous page, then select "Advanced" to reveal "Developer options."
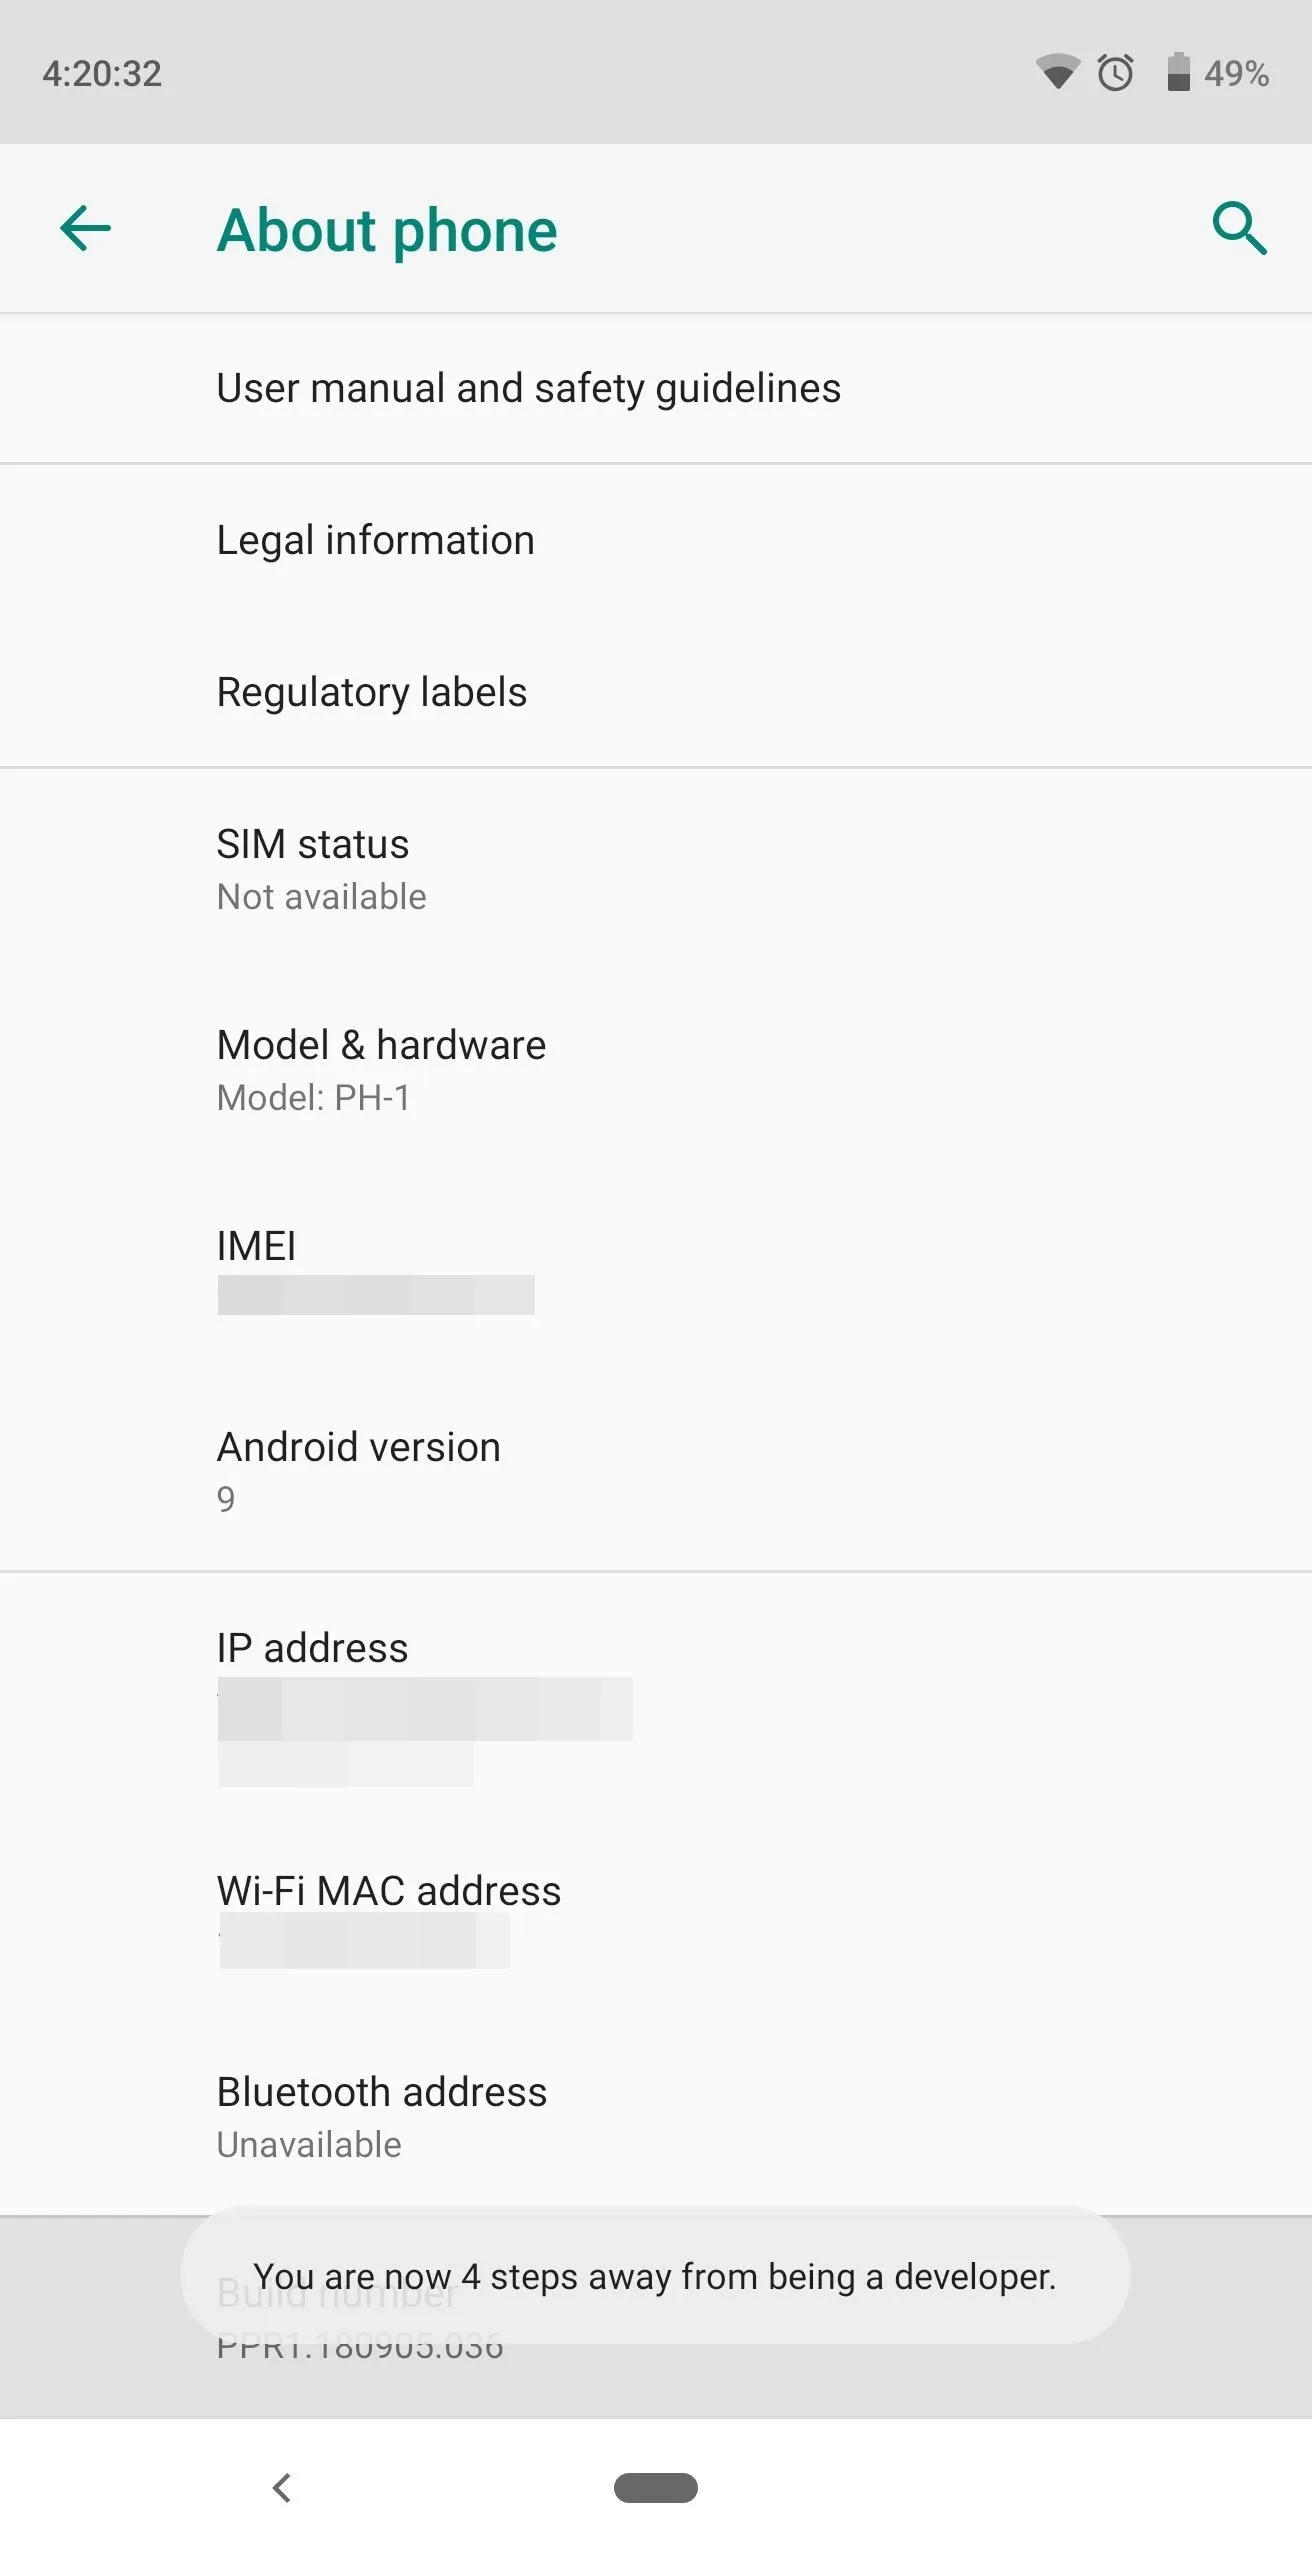
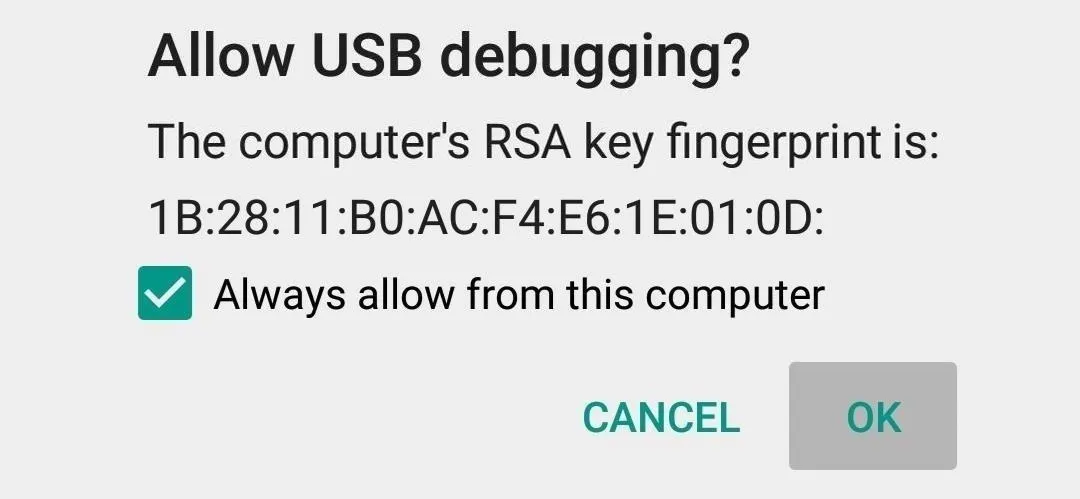
Select "Developer options," and toggle on the "OEM unlocking" setting, which may require you to enter your lock screen PIN. Then, using the OEM cable, connect your Essential PH-1 to your computer. On your phone, scroll down in Developer options to find "USB debugging." Enable its toggle and select "OK" on the popup.
Open Command Prompt or Terminal
On your computer, you'll need to open command window in the right directory. One of the easiest ways to accomplish this is to first open the platforms-tools folder in your computer's file browser. For Windows users, this can usually found at C:\Program Files (x86)\Android\android-sdk\platform-tools. For Linux and Mac users, the folder's location will vary, so use your operating system's search function to locate the folder.
Once found, copy the full location (including the platform-tools part) from the address bar at the top of your file browser. Then, open a command prompt or terminal window. On Windows, press the Windows button on your keyboard, then type in "cmd" and hit enter to do so. On Linux or Mac, open "Terminal" from your Applications folder.
Once you've got the command window open, you'll need to change directories to the platform-tools folder before you can send the Fastboot command to unlock your bootloader. To do that, type "cd" (without the quotes) followed by a space, then paste in the file location for your platform-tools folder:

Dallas Thomas/Gadget Hacks
Use ADB & Fastboot to Unlock Your Bootloader
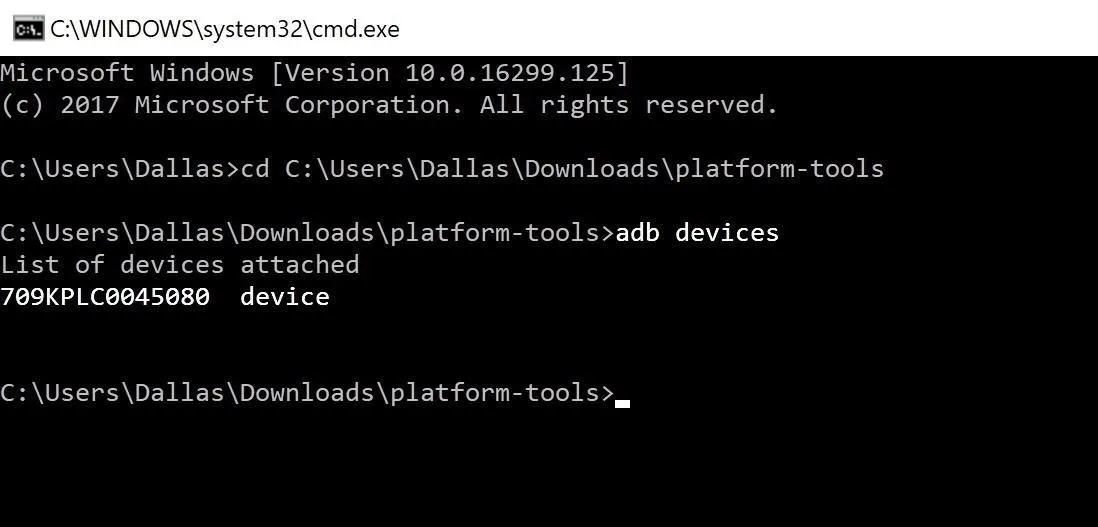
With your phone still connected, type the following into your command prompt:
adb devicesOne thing you should note is that Mac and Linux users will need to put "./" before each line of code so the code will be "./adb devices" for those using computer running either operating system. . This command should present you will screen similar to the screenshot below with the phrase "List of devices attached" followed by a series of numbers and letters and the word "device."
Dallas Thomas/Gadget Hacks
This information means your device is properly connected to your computer and USB debugging was authorize. If you see "Unauthorized" instead of "device," disconnect and reconnect the USB cable, and make sure to select "OK" on the "Allow USB debugging" prompt.
Since we need to use fastboot, we need to boot our device to the bootloader. Type the following command into the command prompt or terminal window, then hit enter:
adb reboot bootloaderNote: Linux, Mac, and Windows PowerShell users will have to add a period and a slash (./) to the front of all commands listed here, e.g., ./fastboot devices)
Unlock the Bootloader
You phone will now restart to a new screen with several lines of text. Next, input the following code to unlock your bootloader:
fastboot flashing unlock_criticalUse the volume rocker on your phone to navigate to "Yes," then confirm using the power button.
After selecting "Yes," your phone will reboot. A new page will appear indicating that your bootloader is no longer locked and you can press the power button to pause the reboot. This is perfectly normal. Do not press the power button as you want your phone to reboot. After the boot animation appears, a layered circle will appear along the bottom of your page with the text "Erasing."
At this time, your phone will factory reset your device. Once this is finished, it will reboot you back to the operating system. Because your data is erased, you will be greeted by the initial startup screen you first encountered when you took your phone out of the box.
Unlock the Bootloader Again (Recommended)
From our experience, we found that we needed to unlock the bootloader twice to ensure it stuck — once with the "unlock_critical" command, then a second time with the regular "unlock" command. It's possible you won't need to do this step, but if you want to be safe and make sure you don't have trouble installing modifications down the road, like TWRP, we recommend it.
After returning to the initial setup screen in Android, quickly go through the process without inputting your information. Typically, you will press the bottom-left option to avoid any input. Once complete, head to Settings and follow Step 4 again to unlock Developer Options and enable "USB Debugging" and "OEM Unlocking."
From there, follow Step 5 and Step 6 again to reboot your device back into the bootloader and get a command window open in the right directory. When you're ready, input the following command:
fastboot flashing unlockYou should see the same page as in Step 6 asking you to erase your device. After erasing, your device will return to the initial setup screen. This time, you can enter your information and set the phone up as you normally would, including restoring your SMS and call log history.
Unlike many other Android phones, unlocking the bootloader doesn't void the warranty on your PH-1. However, the warranty will not cover any defects that occur from non-normal usage, such as rooting and custom ROMs. Note that each time your device reboots, you will see the warning about you having an unlocked bootloader. This is normal and will not affect operation.
- Follow Gadget Hacks on Pinterest, Twitter, YouTube, and Flipboard
- Sign up for Gadget Hacks' daily newsletter or weekly Android and iOS updates
- Follow WonderHowTo on Facebook, Twitter, Pinterest, and Flipboard
Cover image and screenshots by Jon Knight/Gadget Hacks


Comments
Be the first, drop a comment!