


There are three tiers to Android customization: things you can do by default, things you can do with ADB, and things you can do with root. While root is still pretty tricky to get, ADB mods just got a lot easier.
Back in Android 9, Google added a feature that allowed you to wirelessly send ADB commands from a computer to your phone over a Wi-Fi network. Not particularly groundbreaking, but it laid the groundwork.
Enter developer Tyler Nijmeh and his new app, LADB. It creates a local host entirely on-phone, then acts as if it's a computer on your network. From there, it's just a matter of connecting to your phone's own wireless ADB feature, meaning you no longer need a computer to use the feature!
What You'll Need:
- phone with Android 9 or higher
- $2.99 to buy the app on Google Play (or the gumption to build an app from GitHub source)
Confirmed Working On:
- Google Pixel phones (Android 9 or higher)
- OnePlus phones (OxygenOS 9 or higher)
- Samsung Galaxy phones (One UI 2.0, 2.1 & 3.0)
Install LADB
Heads up, this app does cost three bucks. If you're not okay with that, you can go to the app's GitHub page and compile the APK from source for free. Here's a Stack Overflow thread that should be a good starting point if you want to go that route.
But for everyone else, just search for LADB in your Play Store app to get it installed. Or, tap the link below from your phone to jump right to the app's install page.
- Play Store Link: LADB — Local ADB Shell ($2.99)
Enable Developer Options
Now, open your Settings app and scroll down to select "About Phone." Inside, tap the "Build Number" entry seven times in quick succession, then enter your lock screen passcode when prompted. This will unlock the hidden Developer Options menu — but if you'd like more help, we have a full guide dedicated to this part:
Enable Wireless Debugging
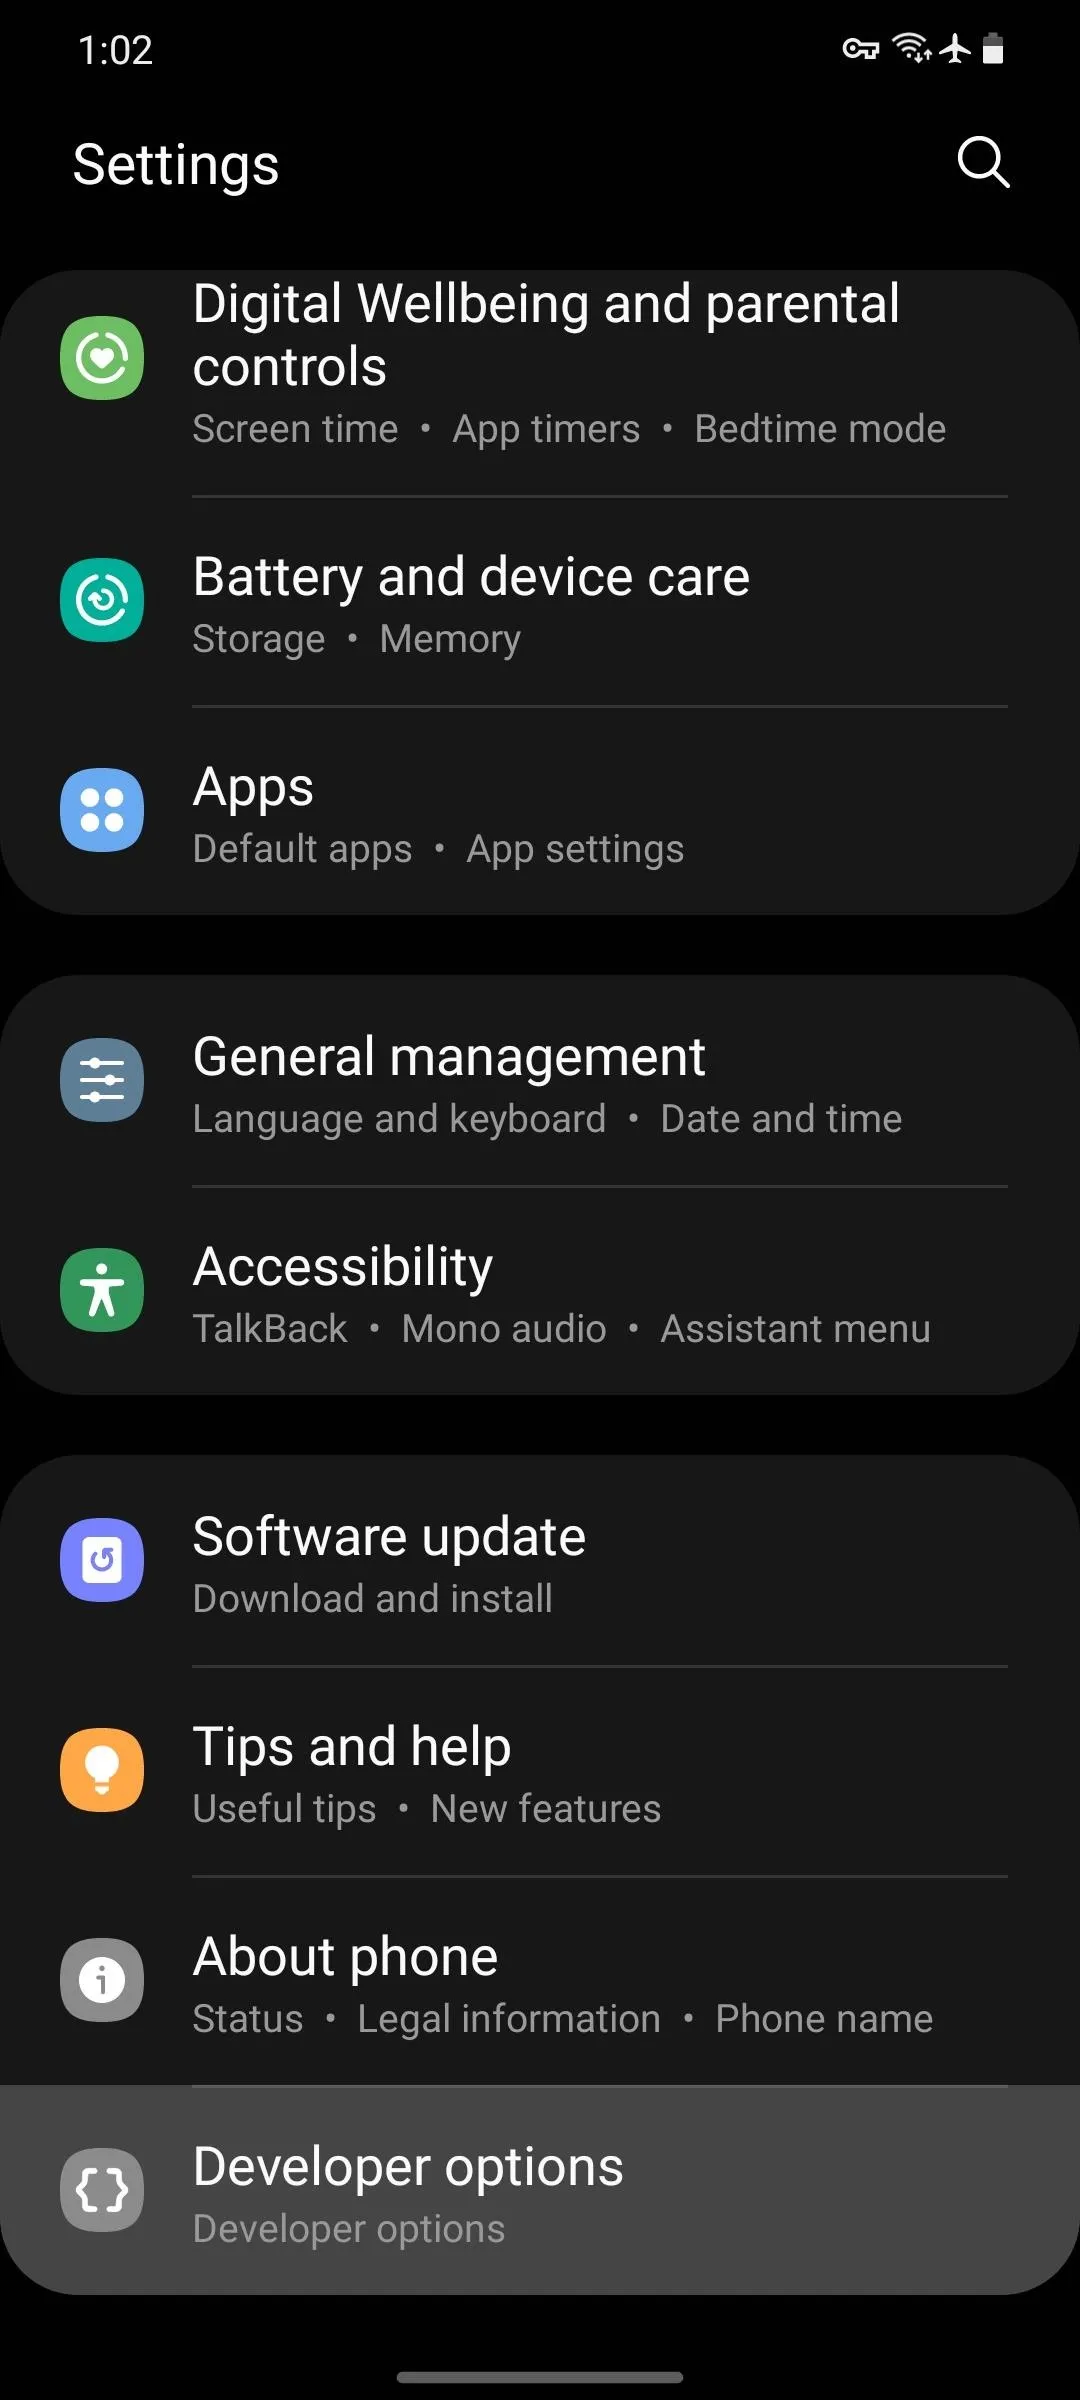
Now, you'll need to enable the underlying Android feature that makes this app work. Head to your Settings, then scroll down and select "System," then tap "Advanced" and choose "Developer Options." On some phones, the Developer Options entry may be listed at the very bottom of the main Settings screen instead.
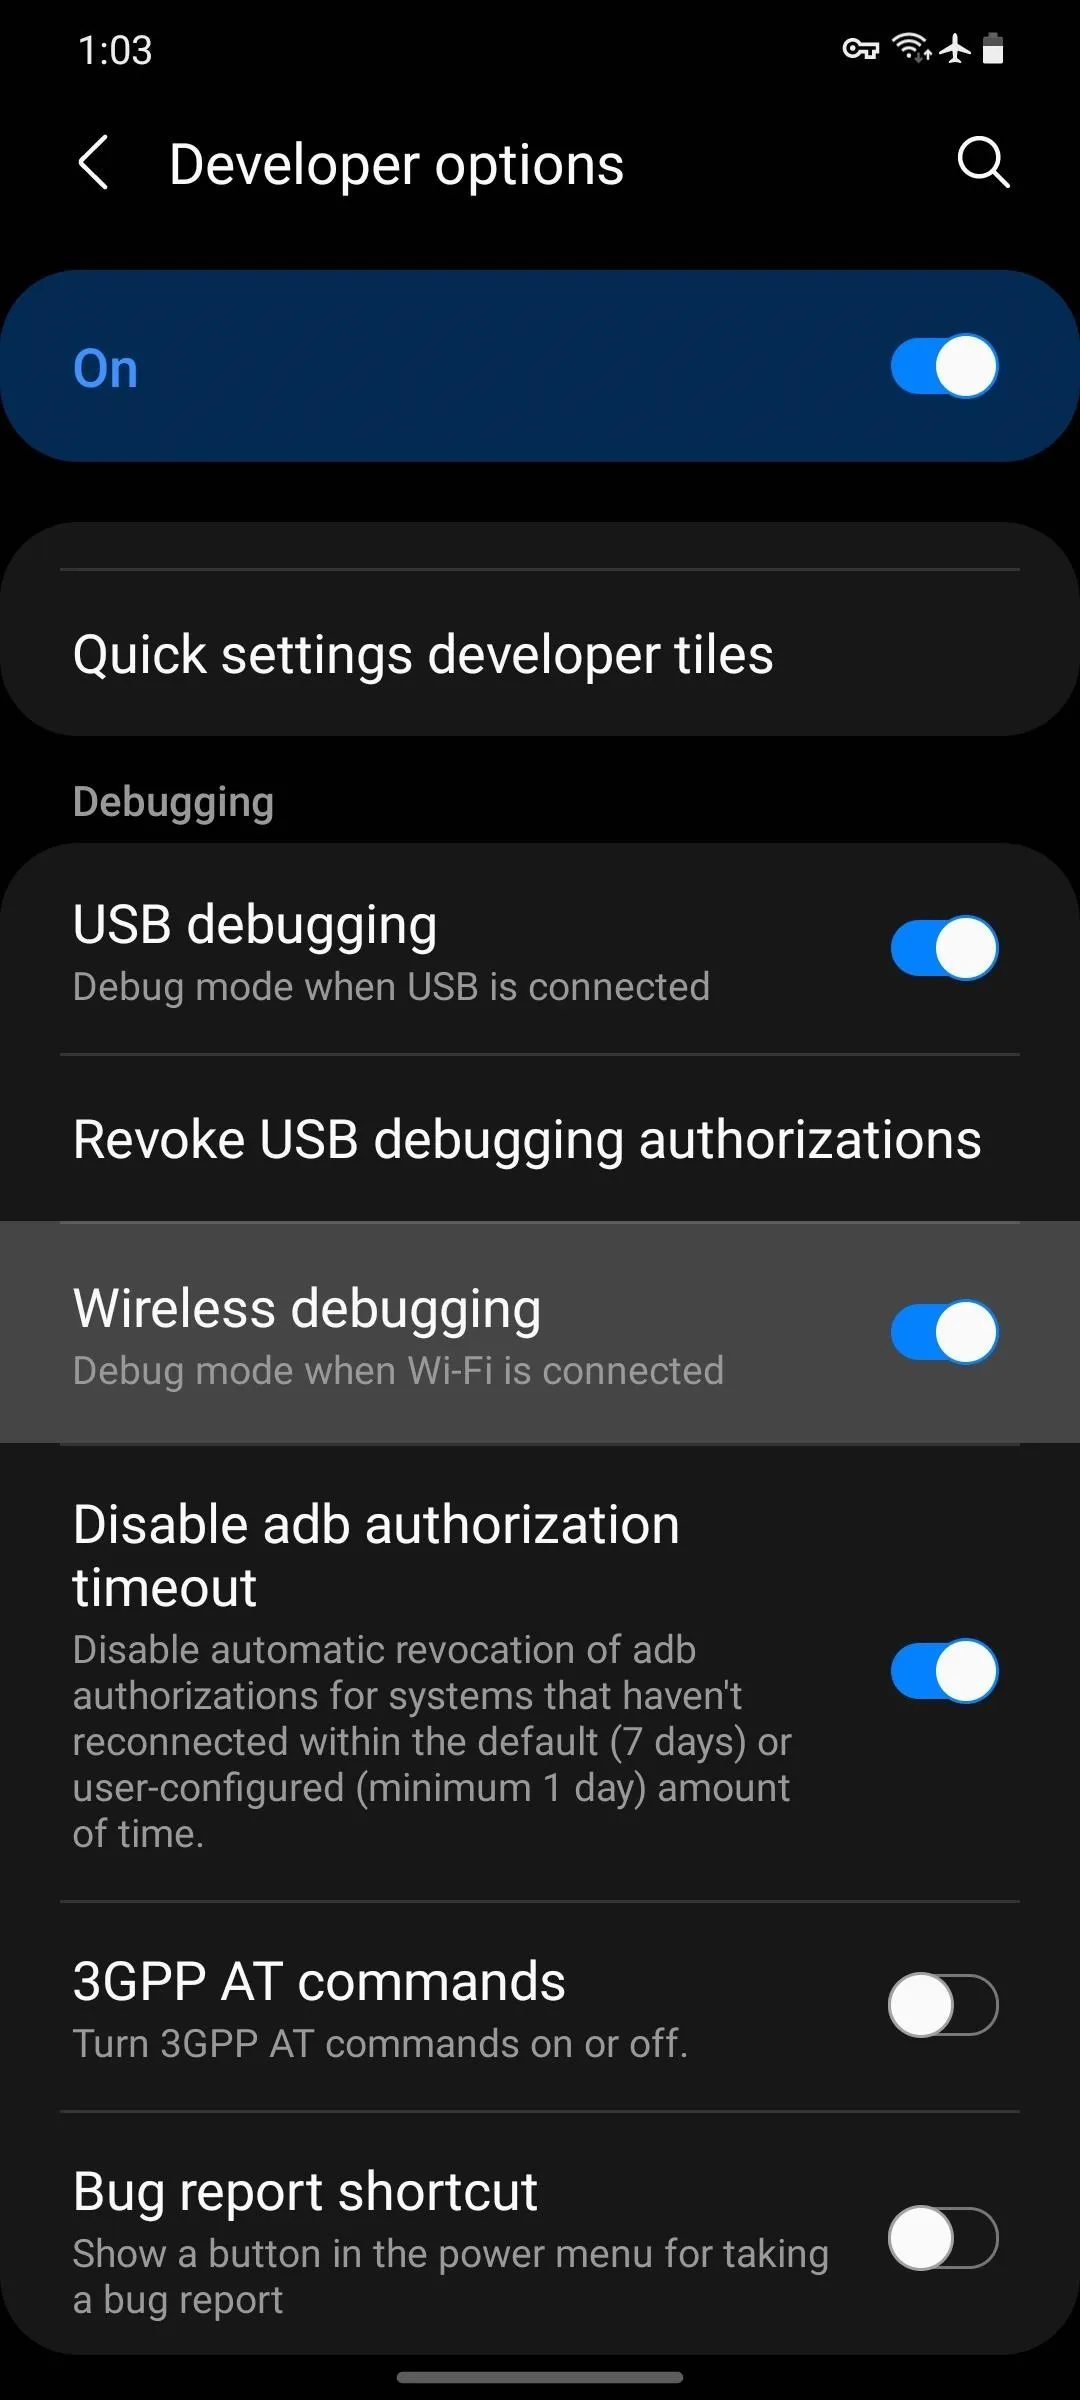
Once inside, scroll down to the Debugging section. Here, enable the switch next to "Wireless debugging," then press "OK" on the prompt to confirm your choice.
While we tested this and found it working on essentially every modern Android phone sold in the US in the last four years, not every device is guaranteed to have the Wireless Debugging feature. It's part of AOSP, Android's open source code base, but OEMs sometimes remove functionality from their skinned versions of Android. If your phone doesn't have this option, sadly, LADB won't work for you.
Establish the Connection
Next, you'll just have to connect LADB's local host to your phone's wireless ADB function. But depending on what Android version you're running, that can be either incredibly easy or a little clunky. We'll start with the clunky one (newer Android versions), so if you're running Android 10 or lower, click here to skip ahead.
Android 11 & Higher
Starting with Android 11, the new Wireless Debugging feature is complete. That means it even has a proper security system where you have to enter credentials to send commands, which complicates things in this instance.
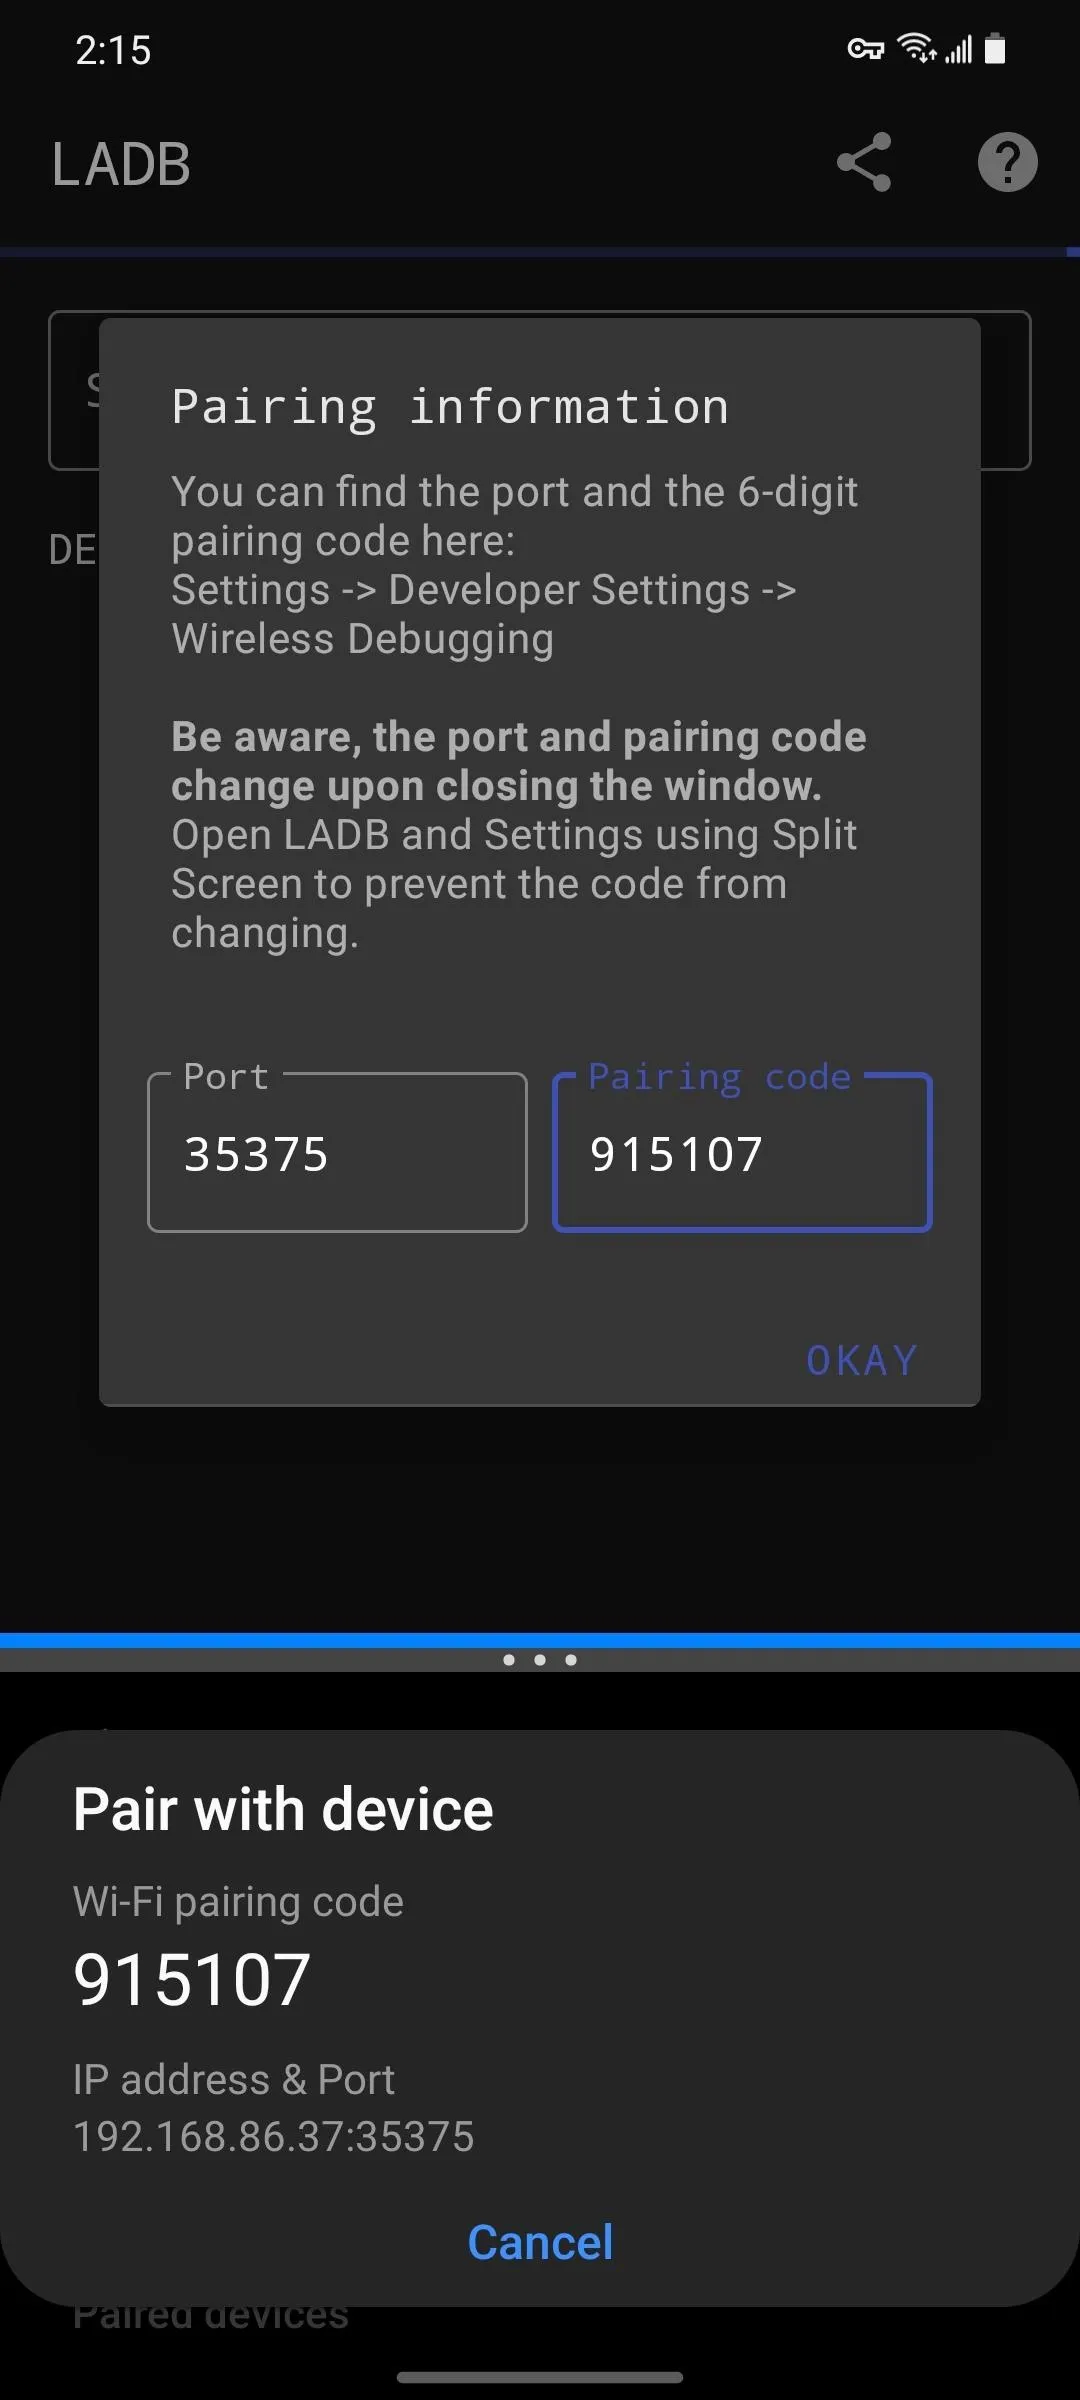
So when you first launch LADB on Android 11, you'll see a popup asking you to input the port number and pairing code. Since the popup in Settings that shows the pairing code was meant to be read on your phone while you're typing it into a computer, the system automatically changes the pairing code as soon as it closes.
So you'll need to open your Settings app in split-screen view to keep the popup from closing. While LADB is prompting you for the numbers, enter multitasking view and tap the app's icon at the top of its card, then select "Split Screen." Next, select the Settings card from the mini multitasking view that appears to make it the second screen. Or if you're on Samsung, select "Settings" from the list.
From there, head back to Settings –> System –> Advanced –> Developer Options or Settings –> Developer Options, then tap the "Wireless Debugging" text (rather than the toggle) to open the feature's submenu. From there, scroll down and tap "Pair device with pairing code."
Now it's just a matter of copying the numbers over. Under IP address & Port in the Settings popup, you'll see a series of numbers, then a colon, then another number. The number after the colon is what you should enter into the Port field in the LADB popup. Then the pairing code goes in the Pairing Code box and you can now tap "Okay" in LADB.
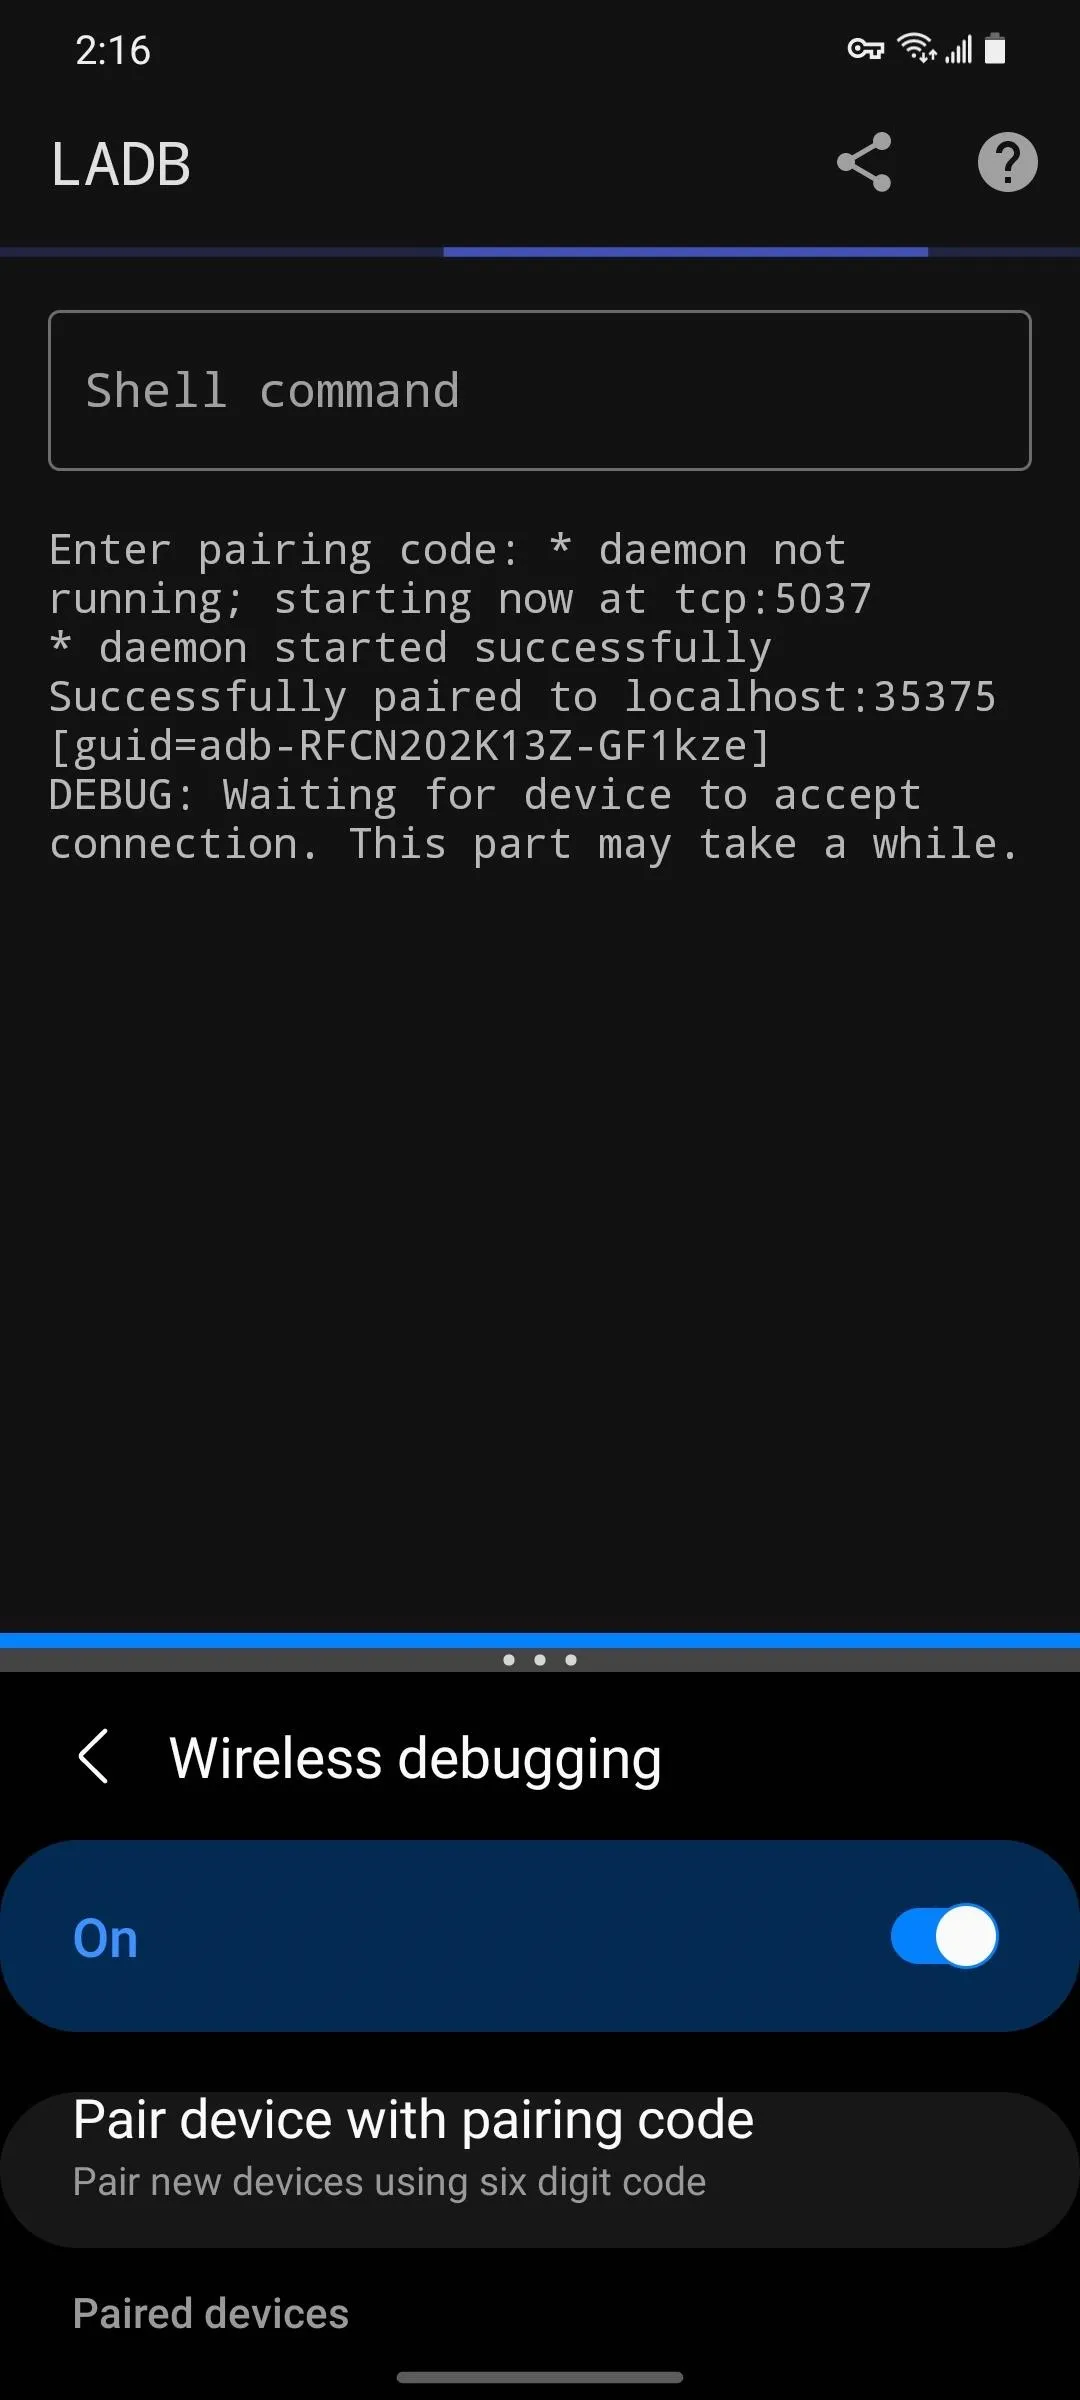
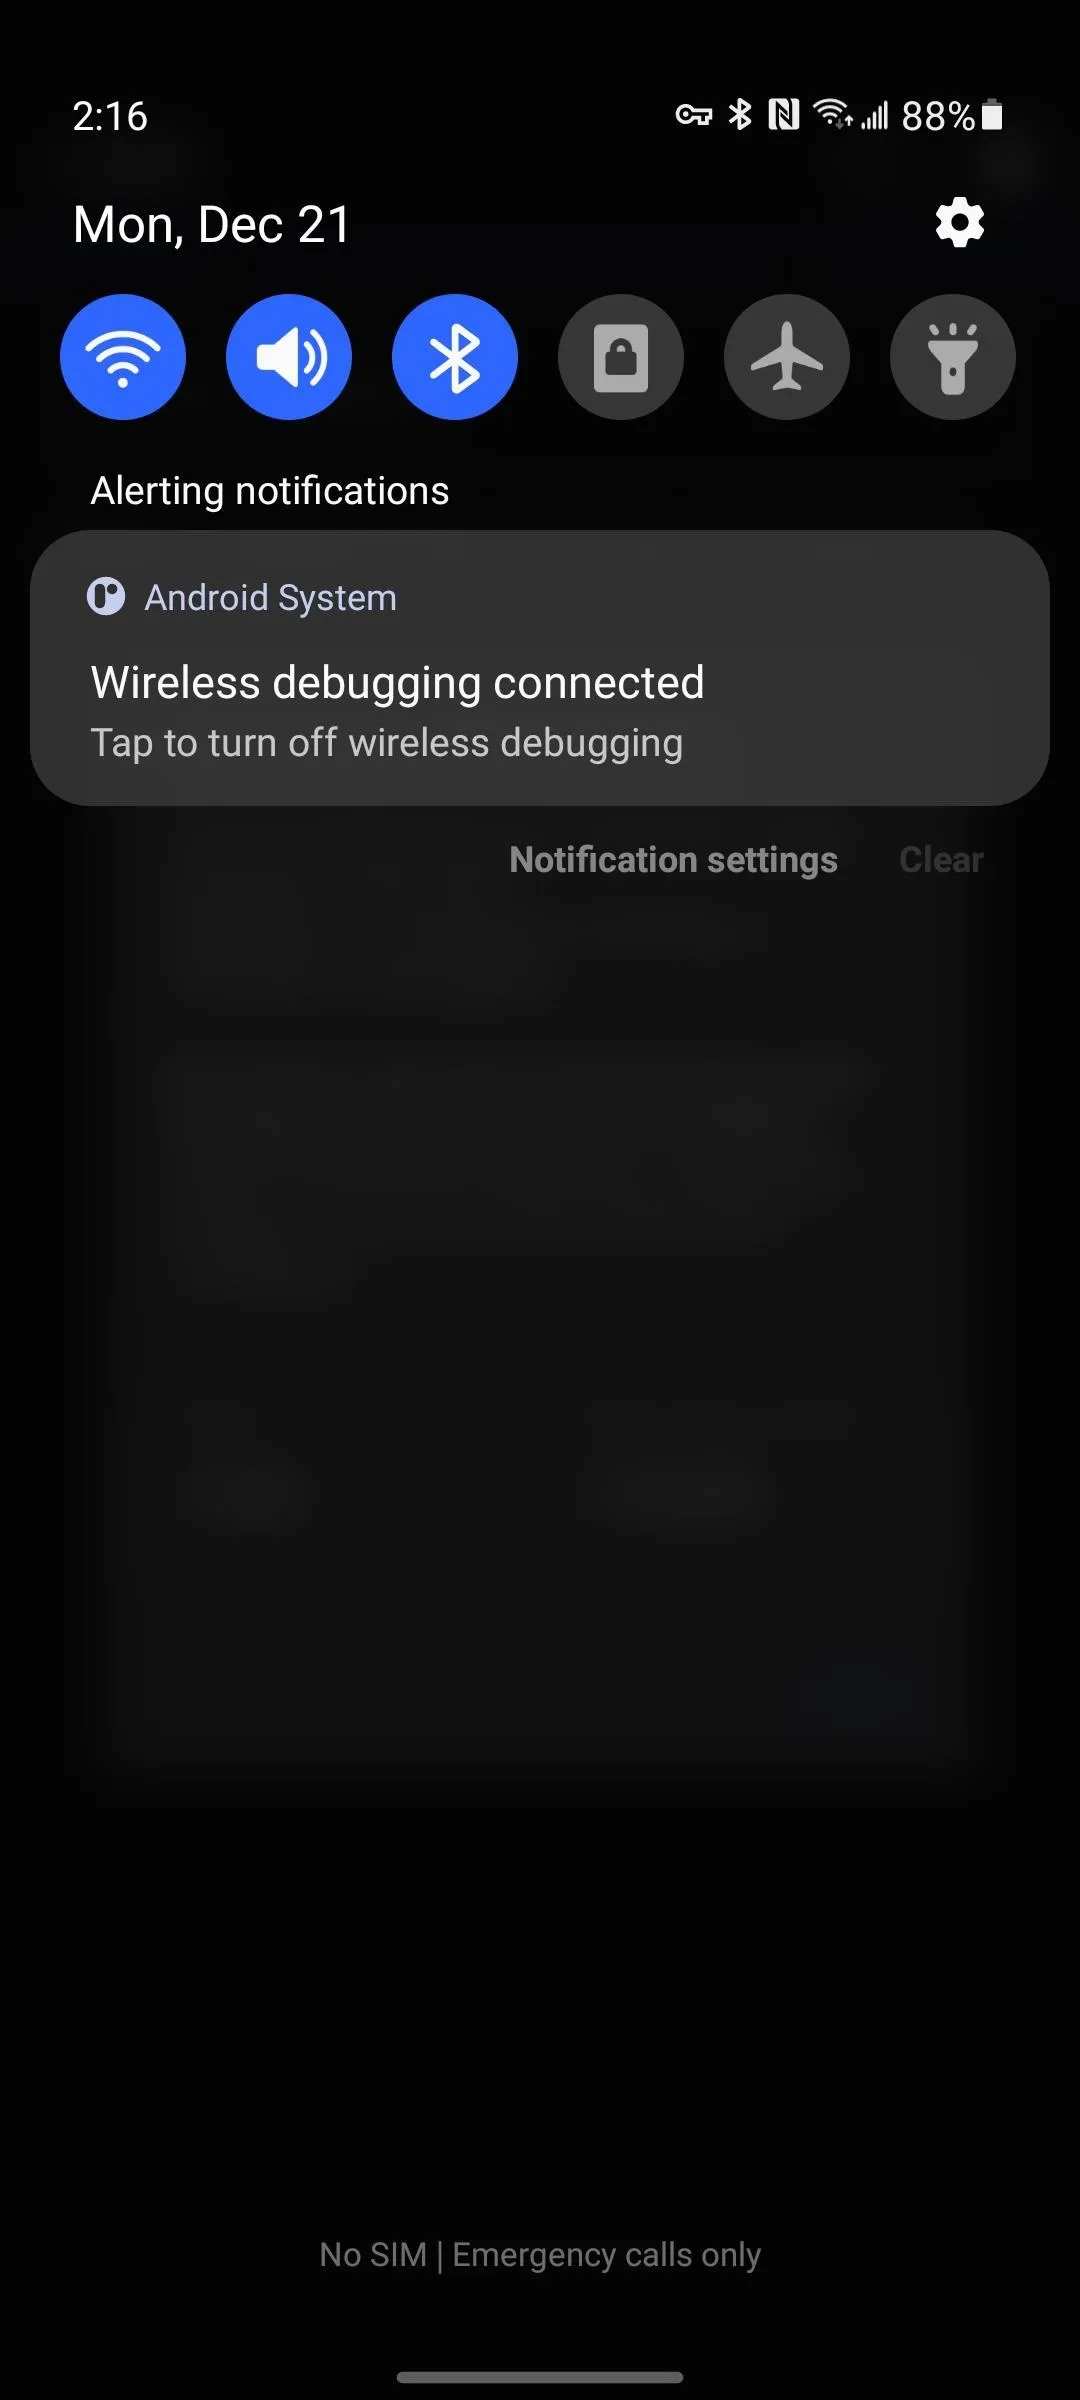
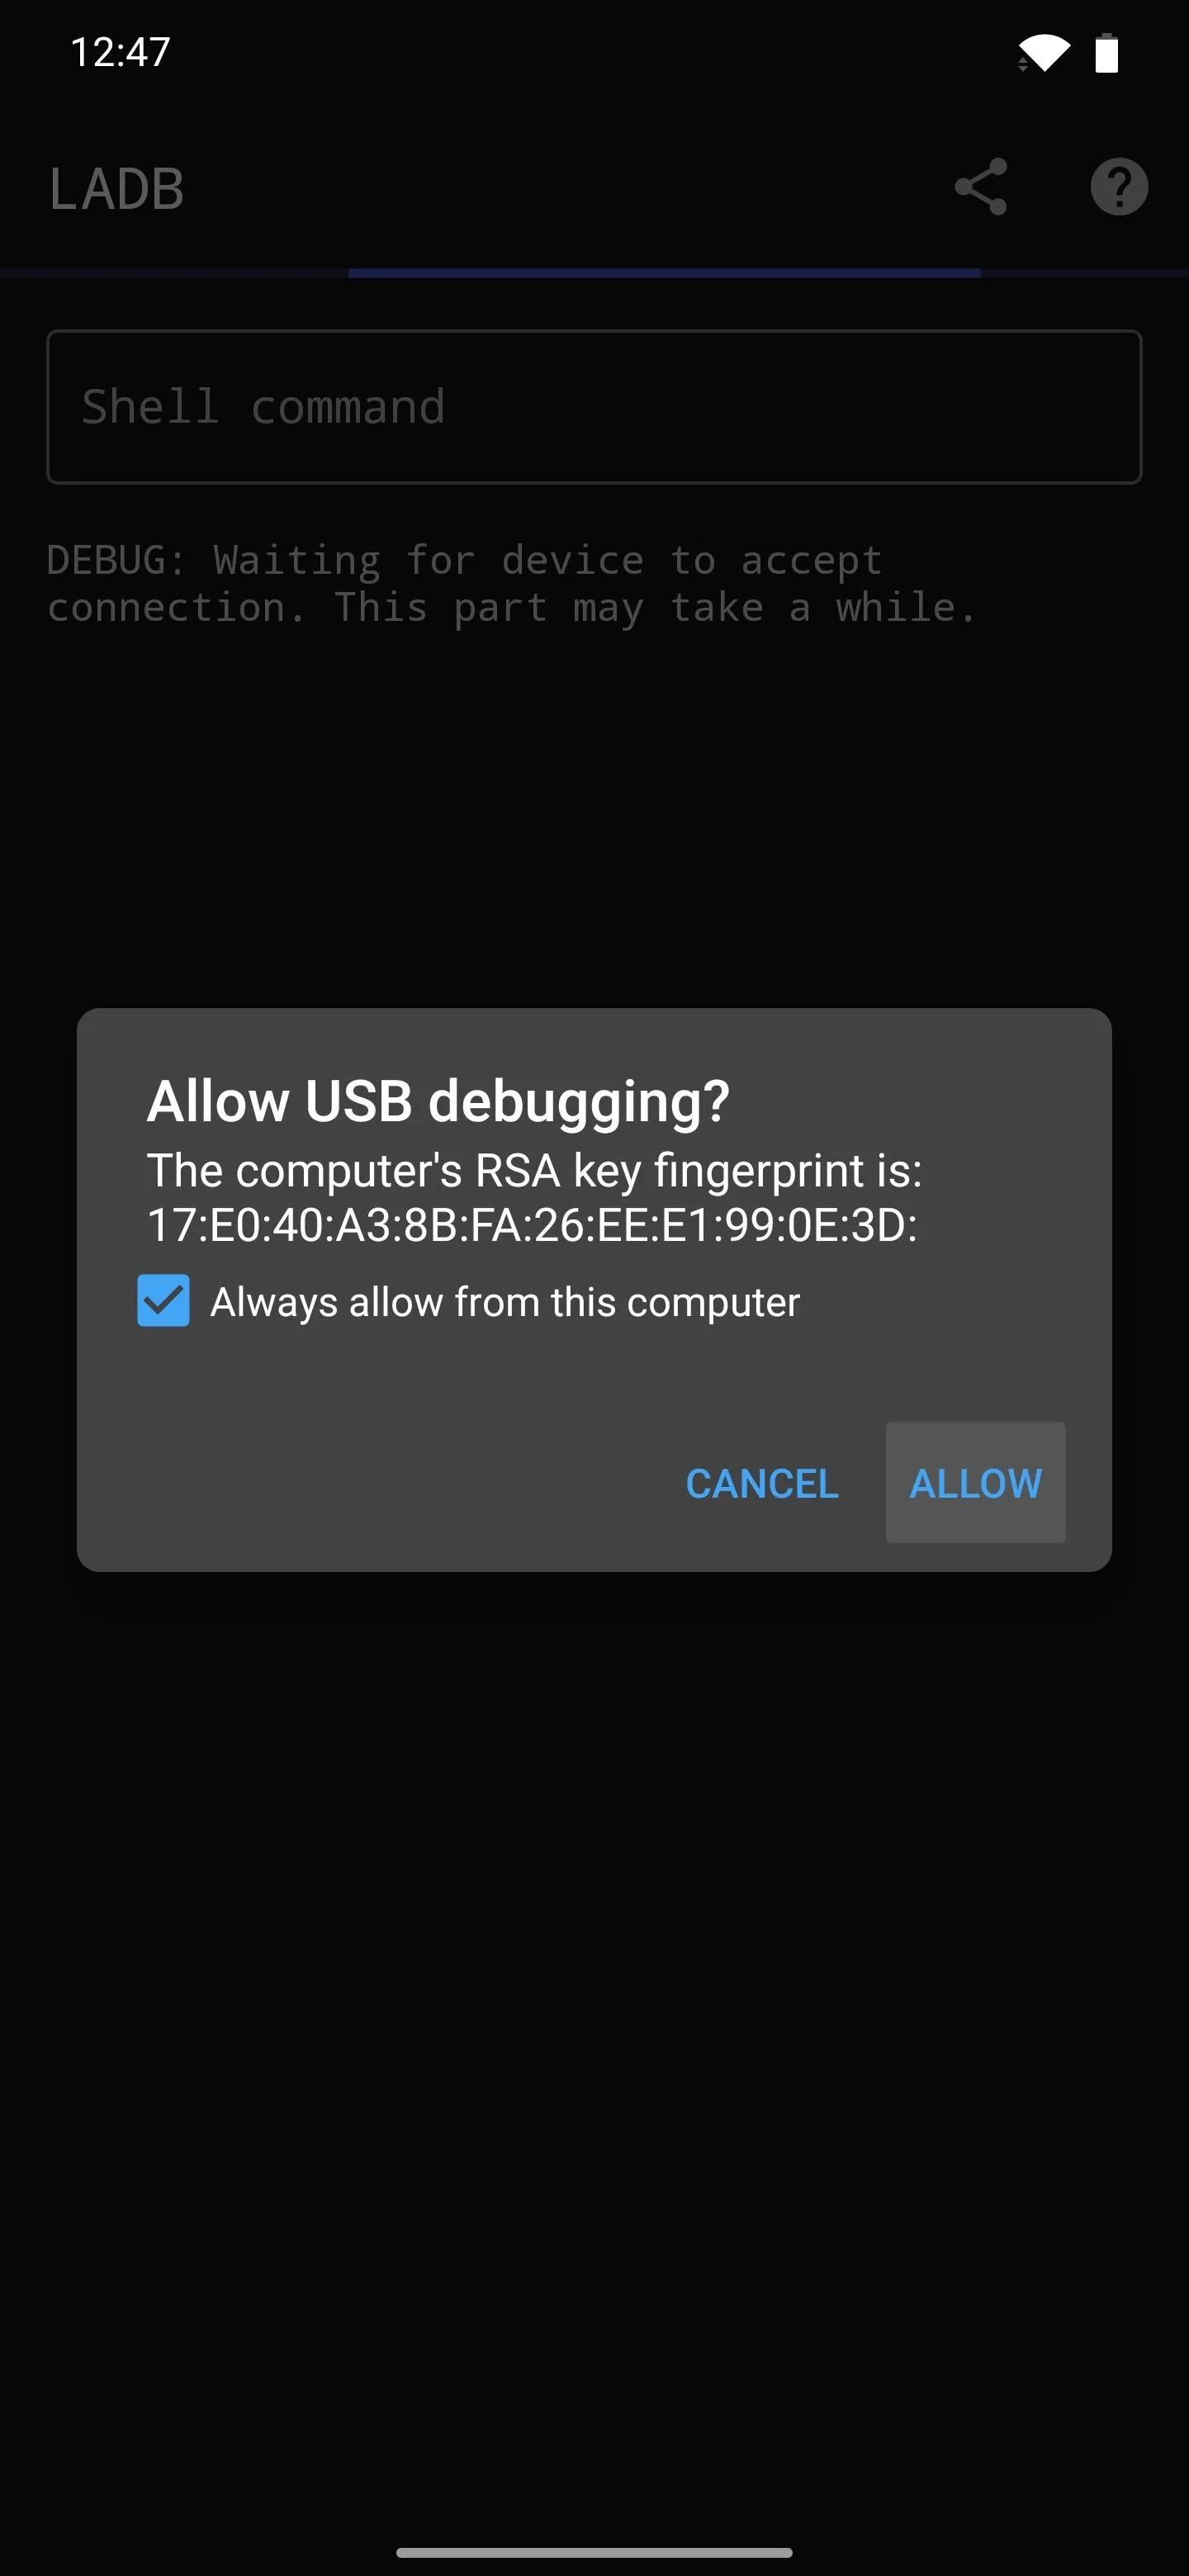
You'll see a message in the LADB terminal saying "Waiting for device to accept connection." This could take up to two minutes, so be patient. When the connection is complete, you should get a notification from Android System telling you "Wireless debugging connected."
In the future, you won't have to do all of this stuff. LADB and Android both save their Wireless ADB pairs, so the next time you need to send an ADB shell command, you'll just have to open the app and type it in!
Android 9 & 10
If you're on Android 9 or 10, this part is so much easier. Just open the app, then tick the box next to "Always allow" and select "Allow" when prompted to "Allow USB Debugging." You'll then be shown the command line, ready to accept a command!
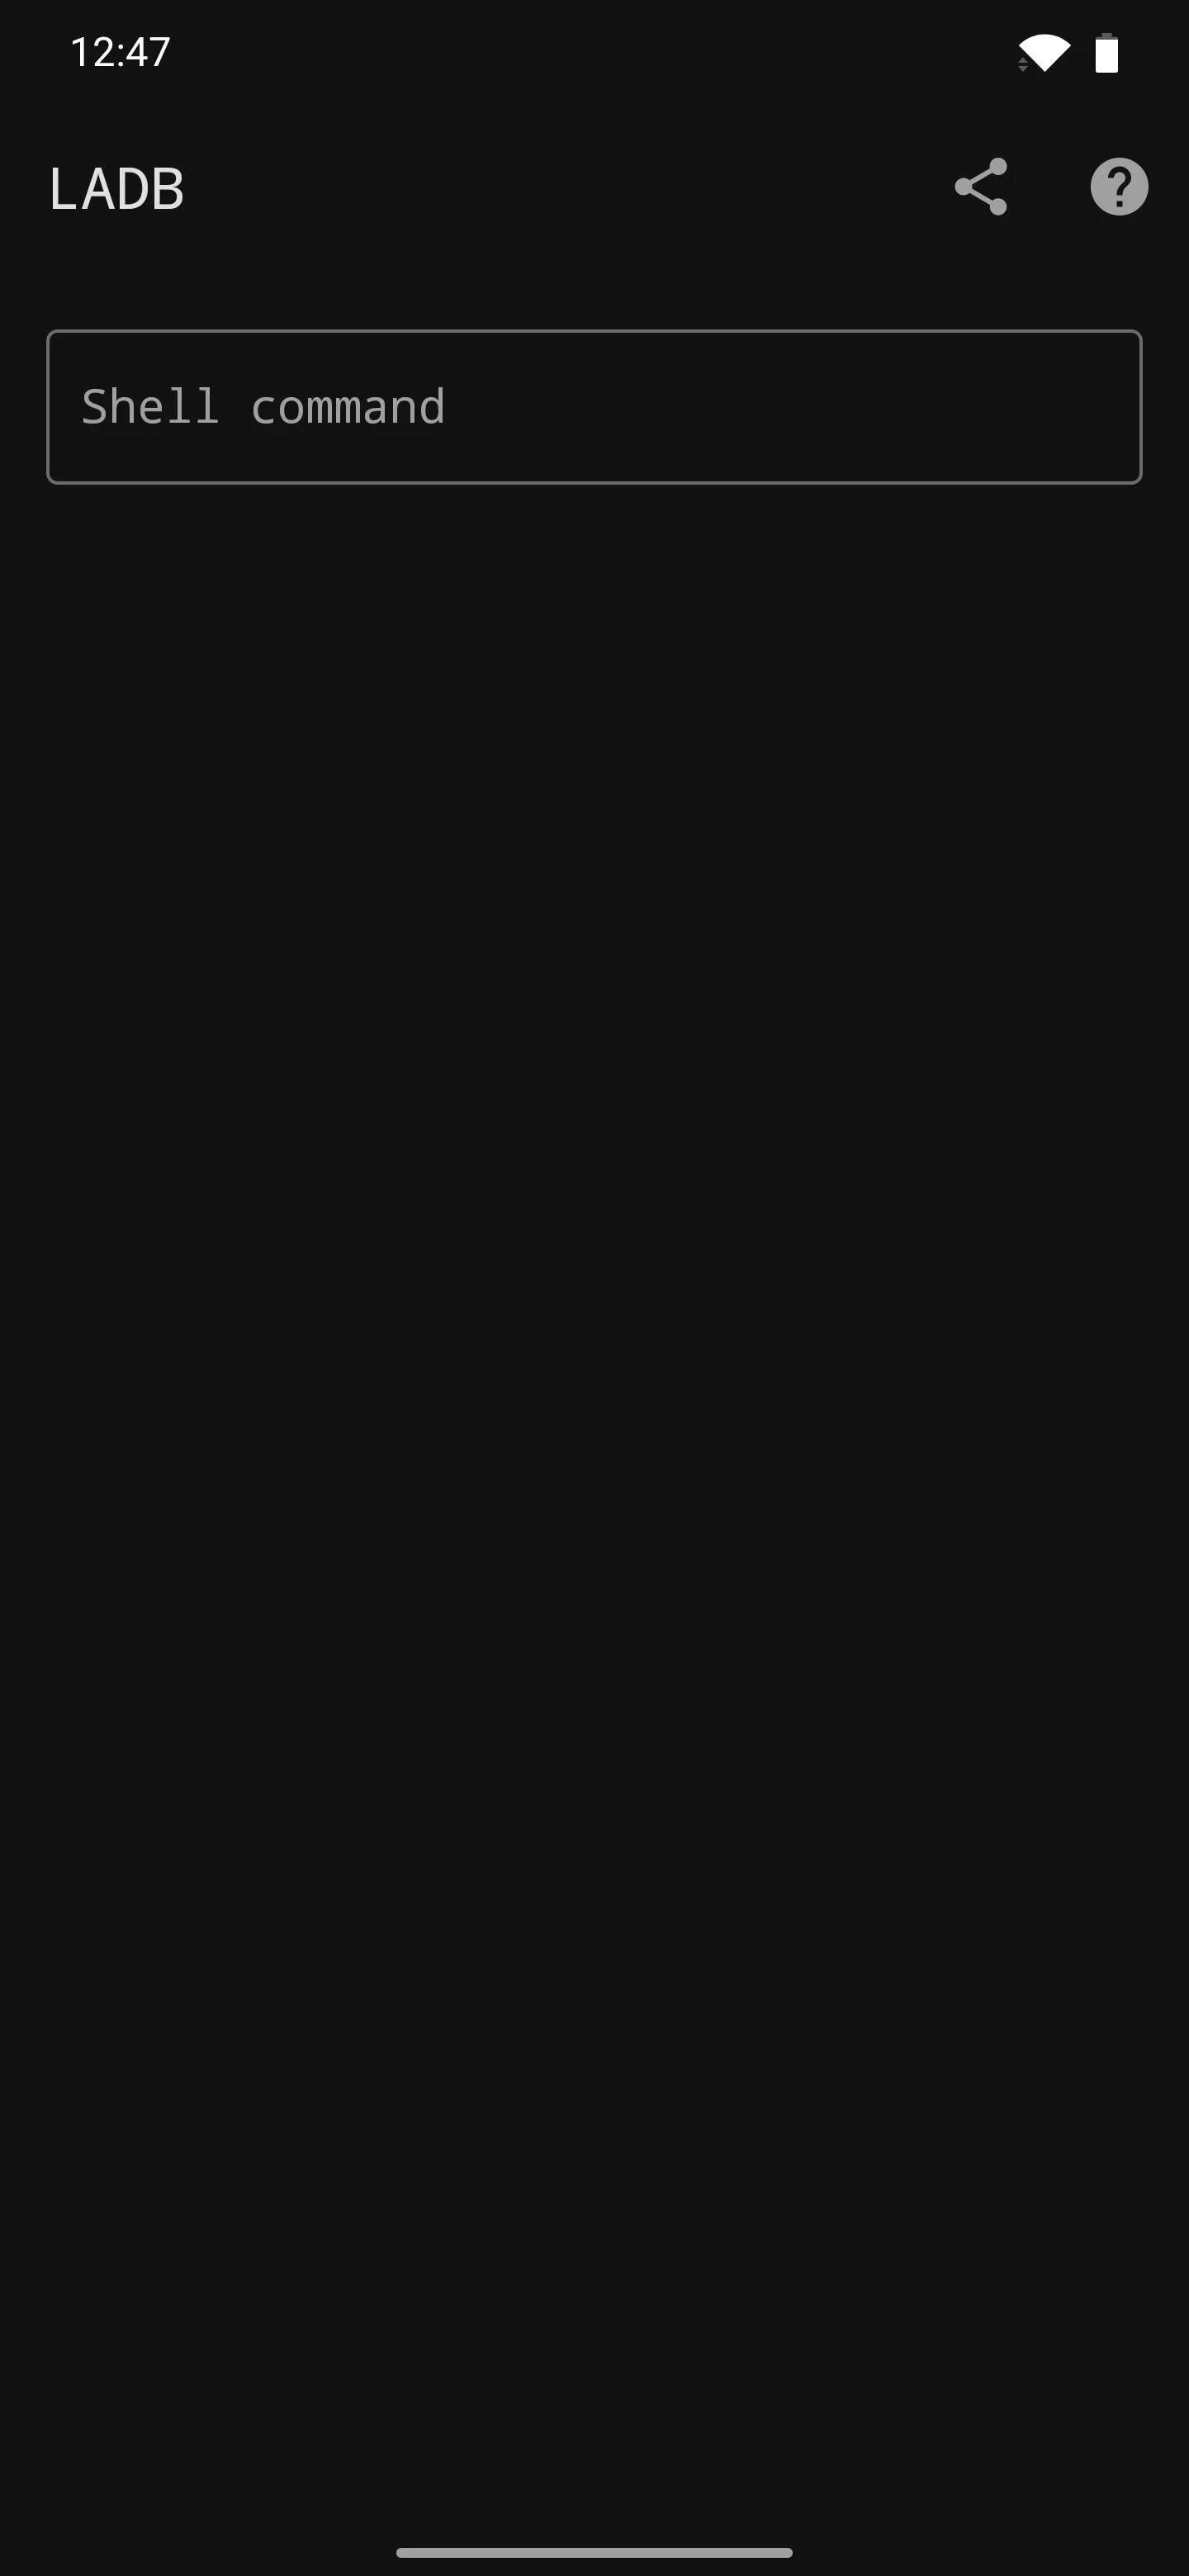
Send ADB Shell Commands to Your Own Phone
Now you're ready to send ADB shell commands to your own phone. Keep in mind this is an ADB shell, meaning you don't get access to commands like "adb reboot-bootloader." Instead, you can only run commands that normally begin with "adb shell."
However, since you're sending commands directly to the ADB shell, you don't need to include the "adb shell" part of commands — just delete that part and send the rest of the command by itself. For instance, when granting the WRITE SECURE SETTINGS permission that advanced customization apps require, instead of this:
adb shell pm grant com.appname.xyz android.permission_WRITE_SECURE_SETTINGS... you would just send this:
pm grant com.appname.xyz android.permission_WRITE_SECURE_SETTINGSTwo great apps to try that command with are SystemUI Tuner and Tasker. Once they've been granted the elevated permission of being able to write certain system settings, they become quite powerful!
Then perhaps the most practical use for this is uninstalling bloatware apps without having to struggle with a PC connection or using root access. It's a fairly simple process once you have LADB set up, so check it out at the link below.
Cover image, screenshots, and GIF by Dallas Thomas/Gadget Hacks


Comments
Be the first, drop a comment!