


While installing the new Android 9.0 Developer Preview is fairly easy if you're using a Windows machine, it's a little trickier if you want to use macOS instead. To help you get the latest Android OS on your Google Pixel phone, we'll break down the whole process so using your Mac can be as simple as Windows.
This isn't a totally foolproof method of installing the Android Pie factory image from Google onto your Pixel, but there are some troubleshooting tips at the end of this article should you run into any common problems. If you experience anything not listed here, let us know in the comments, and we'll try to help you out!
Download the Android 9.0 Pie File
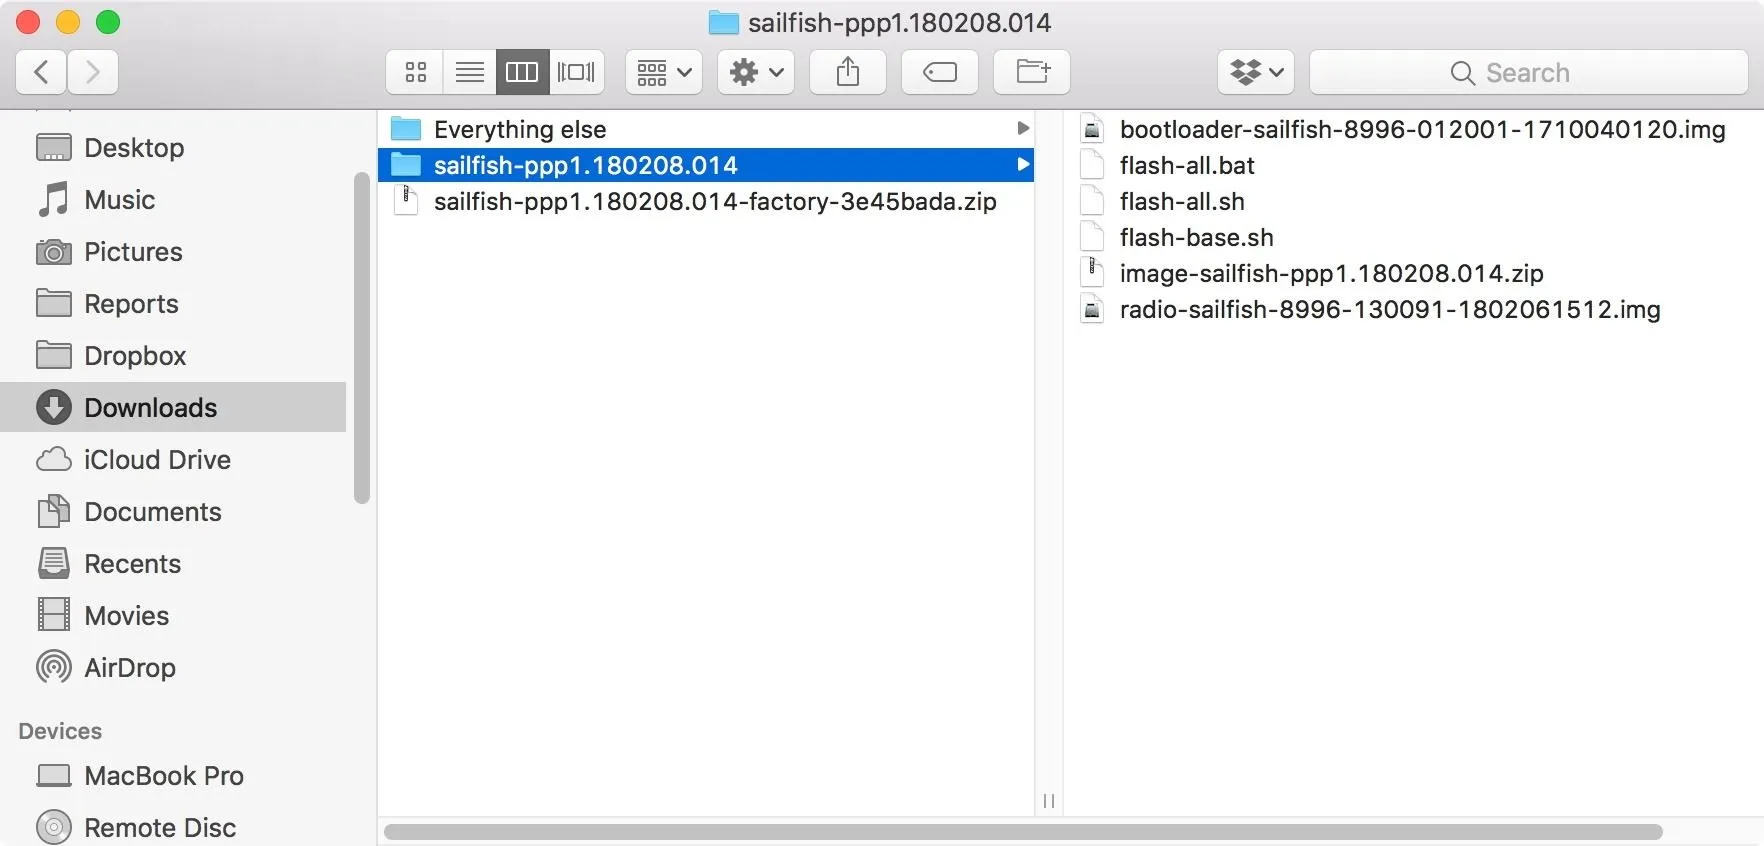
To get the latest Android Pie version on your Pixel, Pixel XL, Pixel 2, or Pixel 2 XL, head to Google's Android P Developer Preview flashing page, then download the appropriate file for your Pixel device. Once downloaded, go to your "Downloads" folder, and unzip it if it didn't do it automatically.
Set Up Fastboot on Your Mac
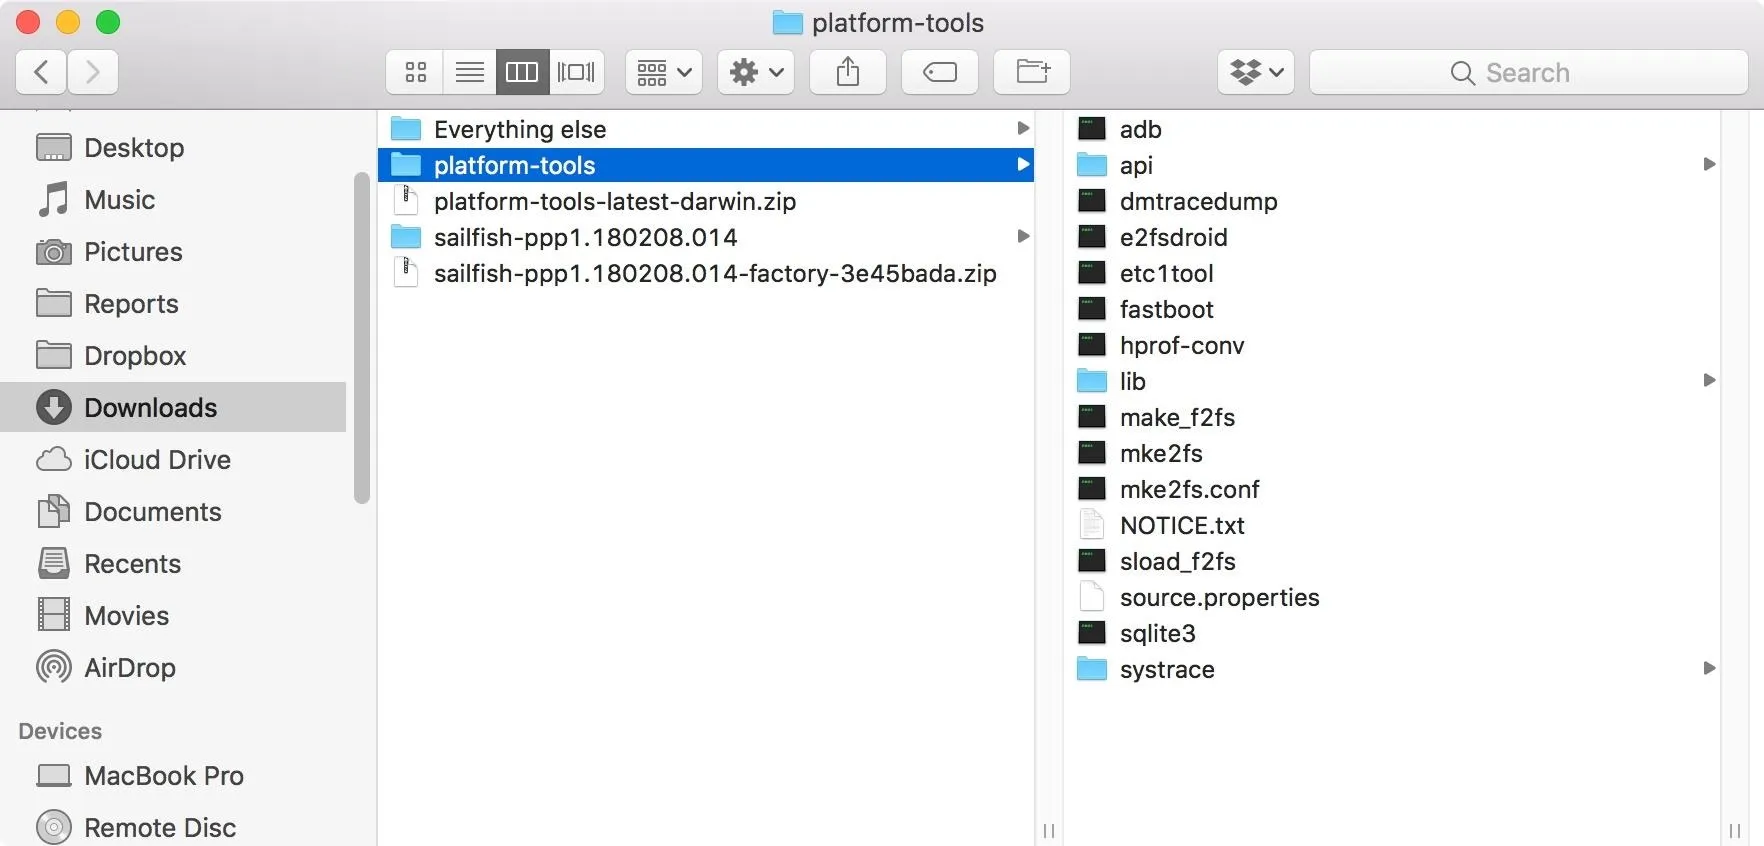
In order to unlock the bootloader later and flash the system image, we'll need Fastboot installed, which can be found in the SDK Platform-Tools from Google. You can download the latest version straight from Google. That link will always be the most up-to-date version, so use it whenever you want to make sure you have the latest one available.
Once downloaded, unzip the platform-tools-latest-darwin.zip in your "Downloads" folder if it didn't unzip already. I like to move the resulting "platform-tools" folder over to my "Applications," but you can leave it in "Downloads" if you want.
Move Android P Files to Platform-Tools
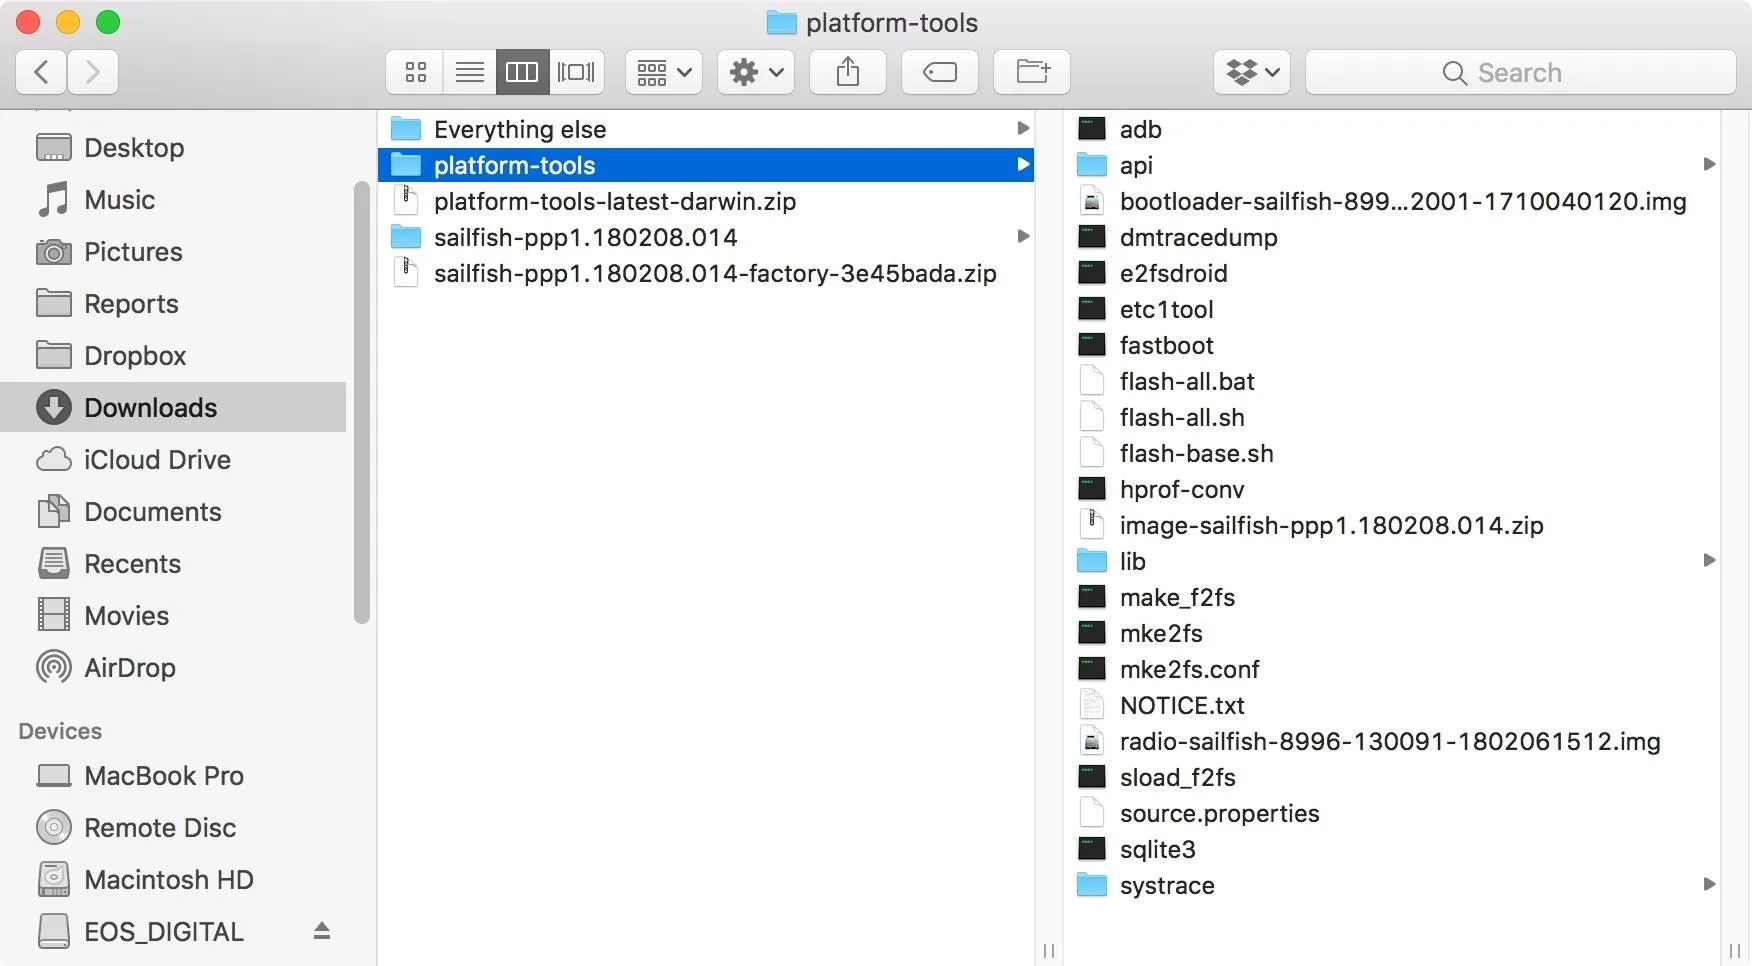
To make this super easy later, drag all of the files found in the Android Pie Developer Preview image folder that you unzipped in Step 1 over to the "platform-tools" folder, wherever you put that. You could also just copy and paste them if you don't want to drag and drop.
Unlock Developer Options (If Not Already Done)
On your Pixel, you'll need to enable "OEM unlocking." This option can only be found in a secret developers-only folder which anyone can unlock.
Open up your Settings as you normally would, then select "System." From there, tap "About phone," then tap the "Build number" at the bottom at least 7 times in rapid succession until you see "You are now a developer" appear (you may need to enter your PIN first before you see the message appear).
Enable OEM Unlocking
Now that the "Developer options" have been unlocked, go back to the "System" menu in Settings, and tap on the now unhidden option. Scroll down and find "OEM unlocking," then make sure it's toggled on. If it's grayed out and already toggled on, there's a good chance your bootloader is already unlocked.
Connect Pixel to Mac in Bootloader Mode
In order to run Fastboot commands, your Pixel will need to be in bootloader mode, so power off your Pixel. When the screen is black, press and hold the power and volume down buttons together for about 10 seconds, until Android's bootloader pops up. There will be a picture of an Android robot with an access panel opened on it, along with "Start" up top, and some device info in the bottom left. When you're there, connect your Pixel to your Mac using an appropriate USB cable.
If your bootloader is already unlocked, you can skip down to Step 8 now.
Unlock Your Bootloader
If you haven't already unlocked your bootloader, you should do so now. How do you know if you are unlocked or not? If you just came from Step 6, it will also say "locked" or "unlocked" at the bottom of the screen. Alternatively, whenever you restart your Pixel, if you see an unlocked lock icon at the bottom of the Google splash page, you're unlocked. If there's nothing there, you're not, and you'll need to do this step before continuing on.
Also note that unlocking your bootloader will wipe your Pixel clean, so if you have photos or music you want to save or sync to the cloud, do so now.
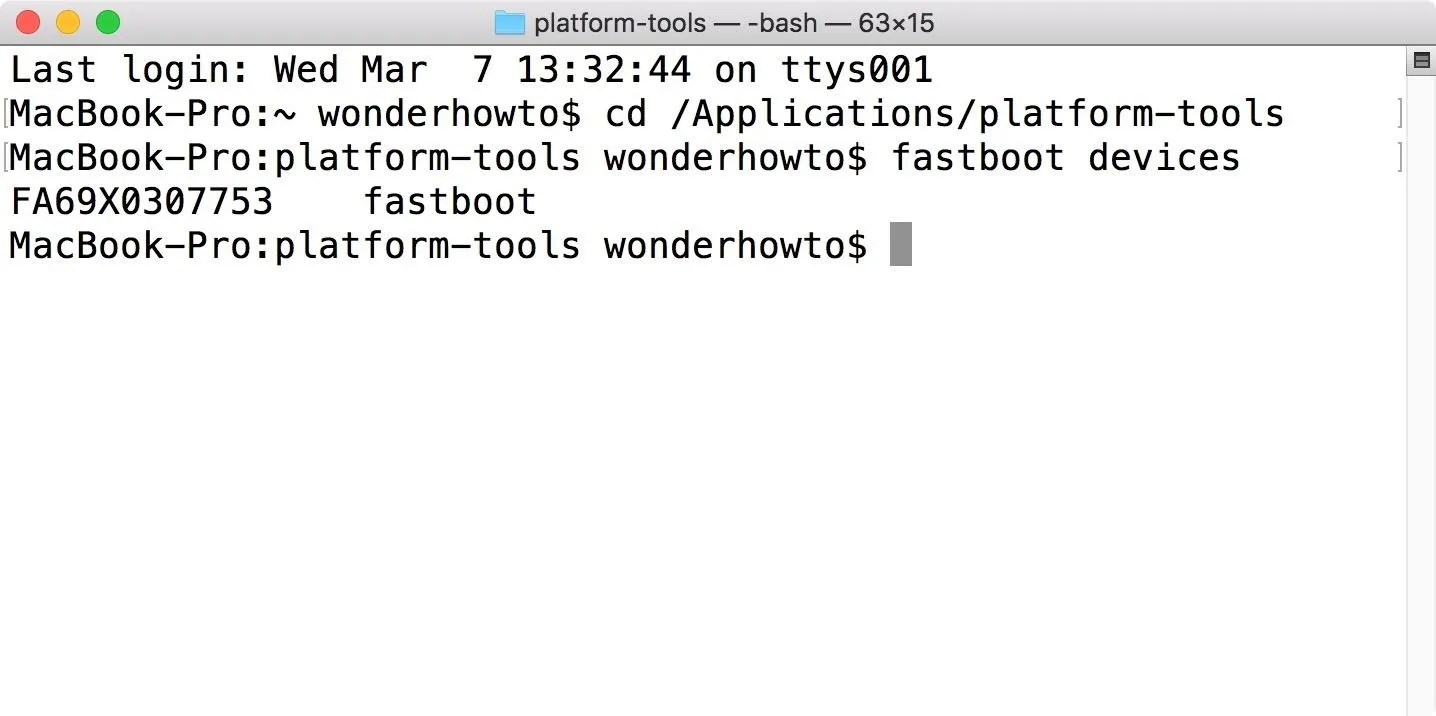
Open up the Terminal application in macOS, then issue the following command to cd (change directories) into the "platform-tools" folder with all the goodies. If you changed the location of this folder from "Downloads," just substitute Downloads in the command with the right location.
cd /Downloads/platform-tools
Now we want to make sure our device is communicating with our Mac, so use the following command. If this returns a series of letters and numbers, then you're good to go. Otherwise, refer back to the guide in Step 2 to check your Fastboot installation.
./fastboot devices
Note: Depending on how you installed the SDK Platform-Tools from Google, you might not need to add a period and a slash (./) to your Fastboot commands. It should work either way, but if the commands throw an error with the period and slash included at the beginning, retry without them.
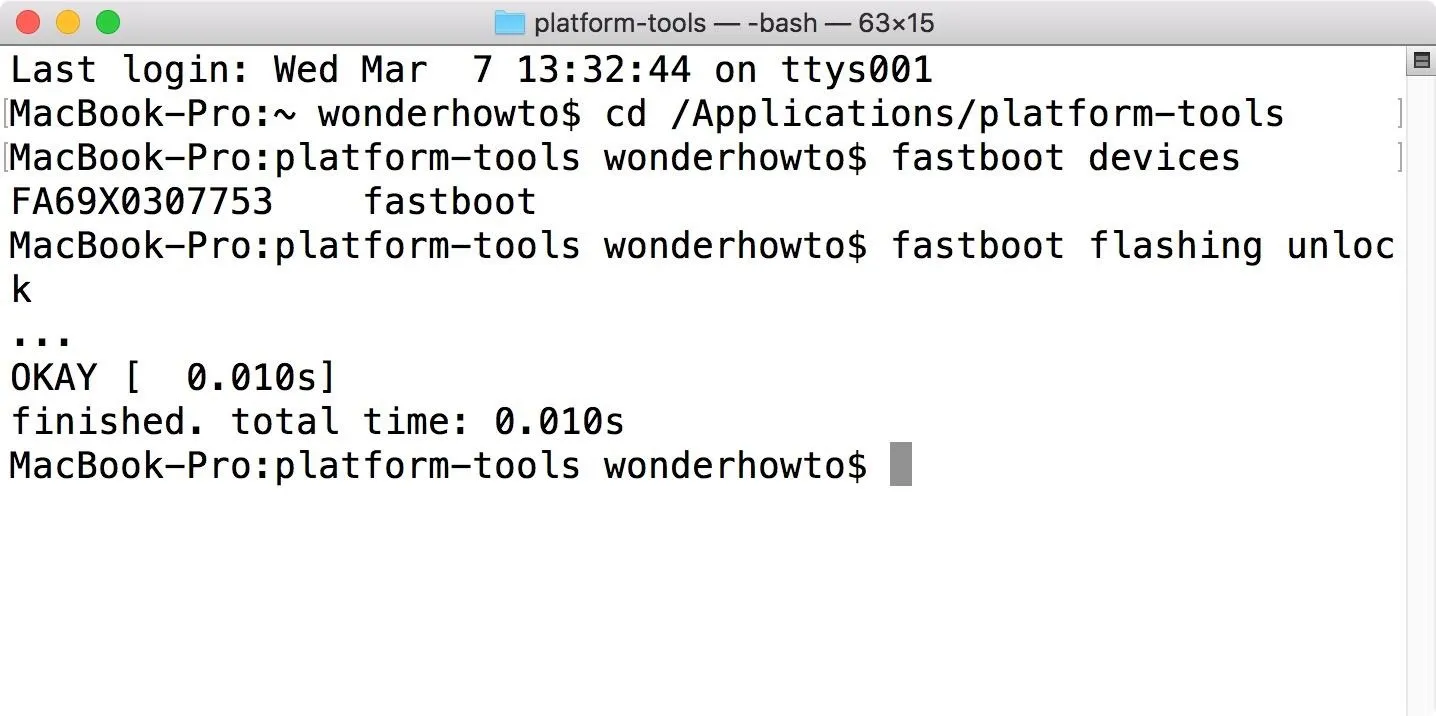
We're ready to unlock the bootloader now. To do so, just use the following command. Note that this will wipe your Pixel, so make sure you back up everything you need to before going any further.
./fastboot flashing unlock
On your Pixel, you should see a prompt asking you to unlock the bootloader. Use the volume up or down button to select "Yes," then hit the power button to continue.
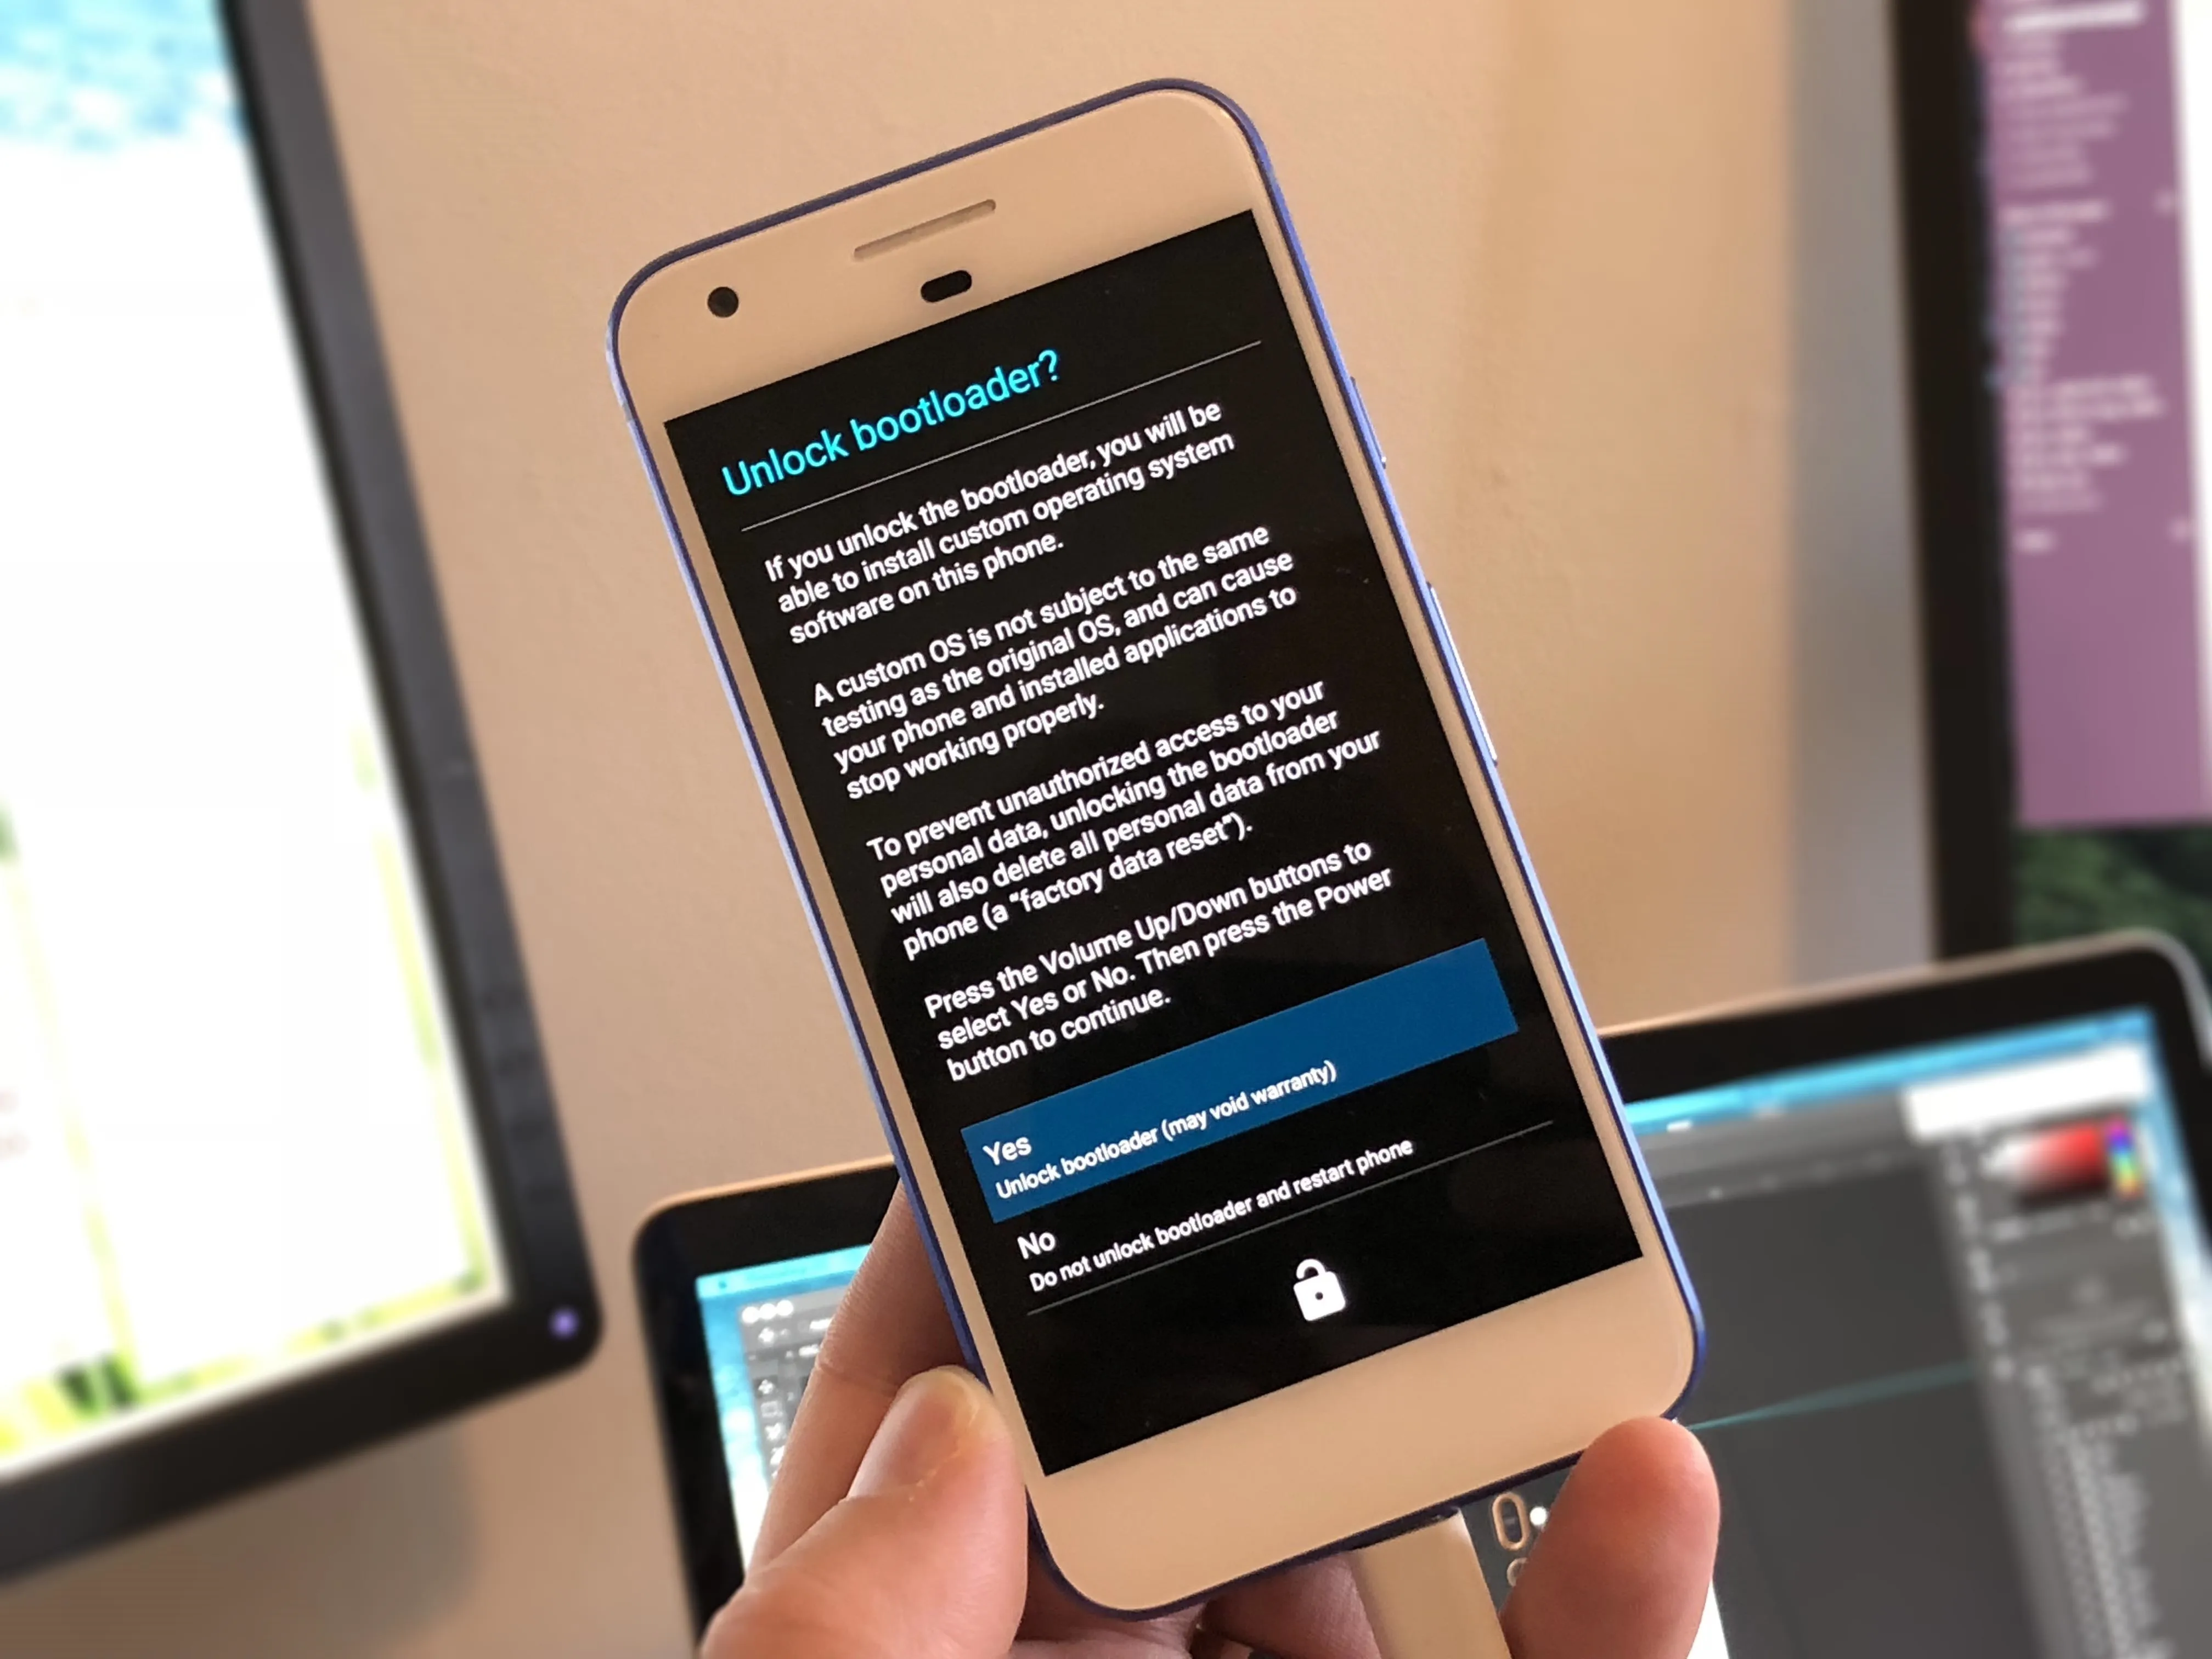
Justin Meyers/Gadget Hacks
Afterward, your Terminal window should say "finished."
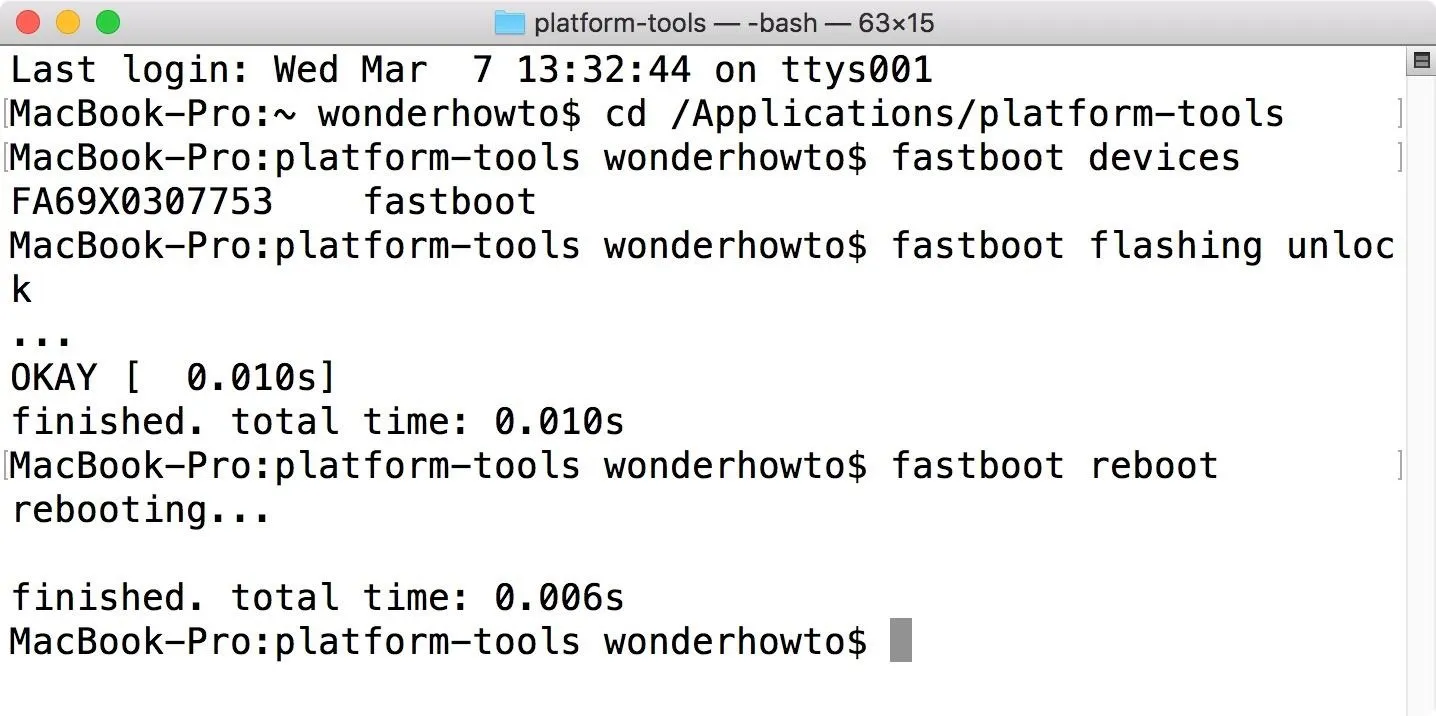
To finish things up, we have to reboot into the bootloader. Use this command:
./fastboot reboot-bootloader
Now, skip down to Step 9 to continue. Step 8 is just for those who already have their bootloaders unlocked.
Change Directories in Terminal to Platform-Tools
If you already have your bootloader unlocked and skipped Step 7, open up the Terminal application in macOS, then issue the following command to cd (change directories) into the "platform-tools" folder with all the goodies. If you changed the location of this folder from "Downloads," just substitute Downloads in the command with the right location.
cd /Downloads/platform-tools
Now we want to make sure our device is communicating with our Mac, so use the following command. If this returns a series of letters and numbers, then you're good to go. Otherwise, refer back to the guide in Step 2 to check your Fastboot installation.
./fastboot devices
Note: If you're just picking back up from Step 6, you should know that you might not need to type the period and slash at the beginning of these Fastboot commands. It won't hurt anything either way, but if you have errors after sending the above-listed command, try it again without the ./ at the beginning.
Flash Android Pie onto Your Pixel
All that left now is to flash the factory images of the Android Pie Developer Preview onto your Pixel. To do so, issue the following command.
./flash-all.sh
You could also use the following command instead, where sudo -s launches a shell authenticating yourself as a superuser without changing the current directory. You will need to enter your root password after issuing this command, so it's better to stick to the first one above for simplicity.
sudo -s ./flash-all.sh
If everything was successful, after 5 or 10 minutes, you should have Android 9.0 on your Pixel. You'll know it's done when you see a new command prompt in Terminal after the last "finished" note. For me, it would be "MacBook-Pro:platform-tools wonderhowto$."
After you confirmed it's done, use the volume buttons on your Pixel to select "Start" from the bootloader, then hit the power button to do so. And that's it. Follow the prompts to set up your new Android Pie operating system.
Troubleshooting: The 'Fastboot Too Old' Error
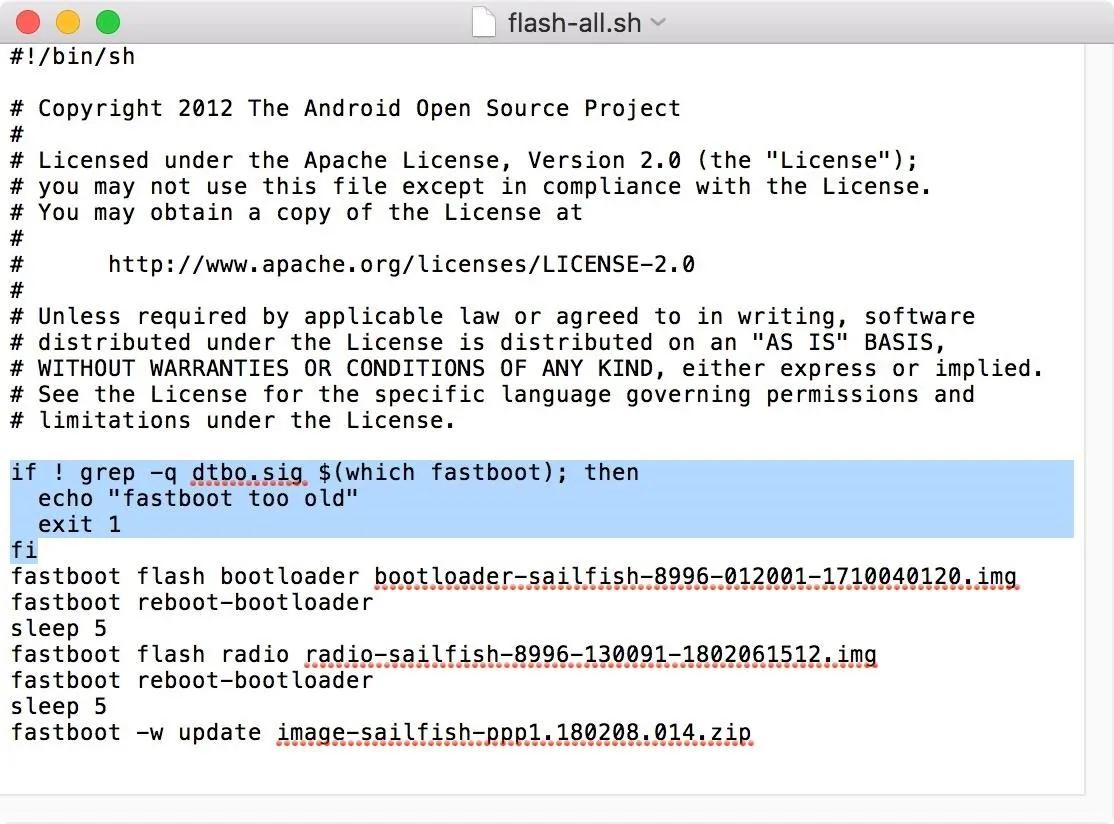
If you get an error in Terminal saying that "fastboot too old," then you'll have to work some quick magic to get rid of that warning. Open up the "flash-all.sh" file in the "platform-tools" folder. If it opens up in TextEdit, that's fine, but you could also use Xcode, TextWrangler, or another code-editing application. With it open, find the following four lines of code, delete them, save the file, then exit. Then, try Step 9 again.
if ! grep -q dtbo.sig $(which fastboot); then
echo "fastboot too old"
exit 1
fi
Troubleshooting: The 'Partition Table Doesn't Exist' Error
If you get the "FAILED (remote: partition table doesn't exist)" error at the end of the flashing in Step 9, it's probably okay, and you can try restarting the Pixel like you would with a totally successful install. It should still work. However, if you'd rather not take the chance, you'll want to do a little work to prevent this from happening.
In the "platform-tools" folder, unzip the .zip file that starts with "image." Once that's done, delete the .zip file, open the new folder, then delete "system_other.img" from the contents. Now, select the folder starting with "image," right-click on it, then select "Compress" to create a new .zip file. Delete the folder you were just in, keeping the new .zip file, which effectively replaces the old .zip file in there. Then, try Step 9 again.
If that still didn't work for you, instead of doing all of that, unzip that file you just created, then copy all the image files into the platform-tools folder to flash them all individually. Instead of Step 9, use the following command to flash the new bootloader onto your Pixel. Of course, substitute the "bootloader" .img file with the one for your specific Pixel that's in the "platform-tools" folder.
./fastboot flash bootloader /Downloads/platform-tools/bootloader-namehere-numbershere.img
After it says "finished," use the following command to reboot into the new bootloader to continue flashing the rest of the .img files.
./fastboot reboot-bootloader
When that's done, do the .img in "platform-tools that starts with "radio" using the following command (swap out your location if it's different, and make sure the radio file name is the one that appears in your folder).
./fastboot flash radio /Downloads/platform-tools/radio-image-namehere-numbershere.img
After it finishes, now you can do all of the other .img files that you unzipped, one by one. For example, I'll show the command for the "boot.img" file below, but the formula is the same for the rest (i.e., ./fastboot flash
). Do all of them just like this, one by one, until you've flashed at least the bootloader, boot, radio, vendor, and system images — but make sure not to do the "system_other.img," which should not even be there anymore.
./fastboot flash boot /Downloads/platform-tools/boot-image-namehere-numbershere.img
Make sure you flash the "system.img" file last.
./fastboot flash system /Downloads/platform-tools/system-image-namehere-numbershere.img
- Follow Gadget Hacks on Facebook, Twitter, YouTube, and Flipboard
- Follow WonderHowTo on Facebook, Twitter, Pinterest, and Flipboard
Cover photo, screenshots, and GIFs by Justin Meyers/Gadget Hacks


Comments
Be the first, drop a comment!