

Smartphones are more like computers than actual telephones. Unfortunately, thieves, hackers, and other bad actors know this and are always looking to make money off your personal data. Thankfully, your Galaxy S20, S20+, or S20 Ultra has tools to combat these threats — as long as you know where to look.
Threats can range from a busybody wanting to find dirt on you to identity thieves trying to steal your info to sell on the dark web. Even local police and federal law enforcement have to be considered since they can arbitrarily subpoena your device. While you may have already enabled a few privacy features on your phone, it's still worth checking out the settings below to make sure all your bases are covered.
Jump to a section: Location | Alerts | App Access | Anti-Theft | Google
1. Location History
When initially setting up your S20, you may have granted it permission to log your location in your haste. The feature continuously monitors your movements and stores a history of your visited pllaces, which you can access via this link using the Google account attached to your phone. Handy for personal reference, but not great for privacy since Google gets access to this data.
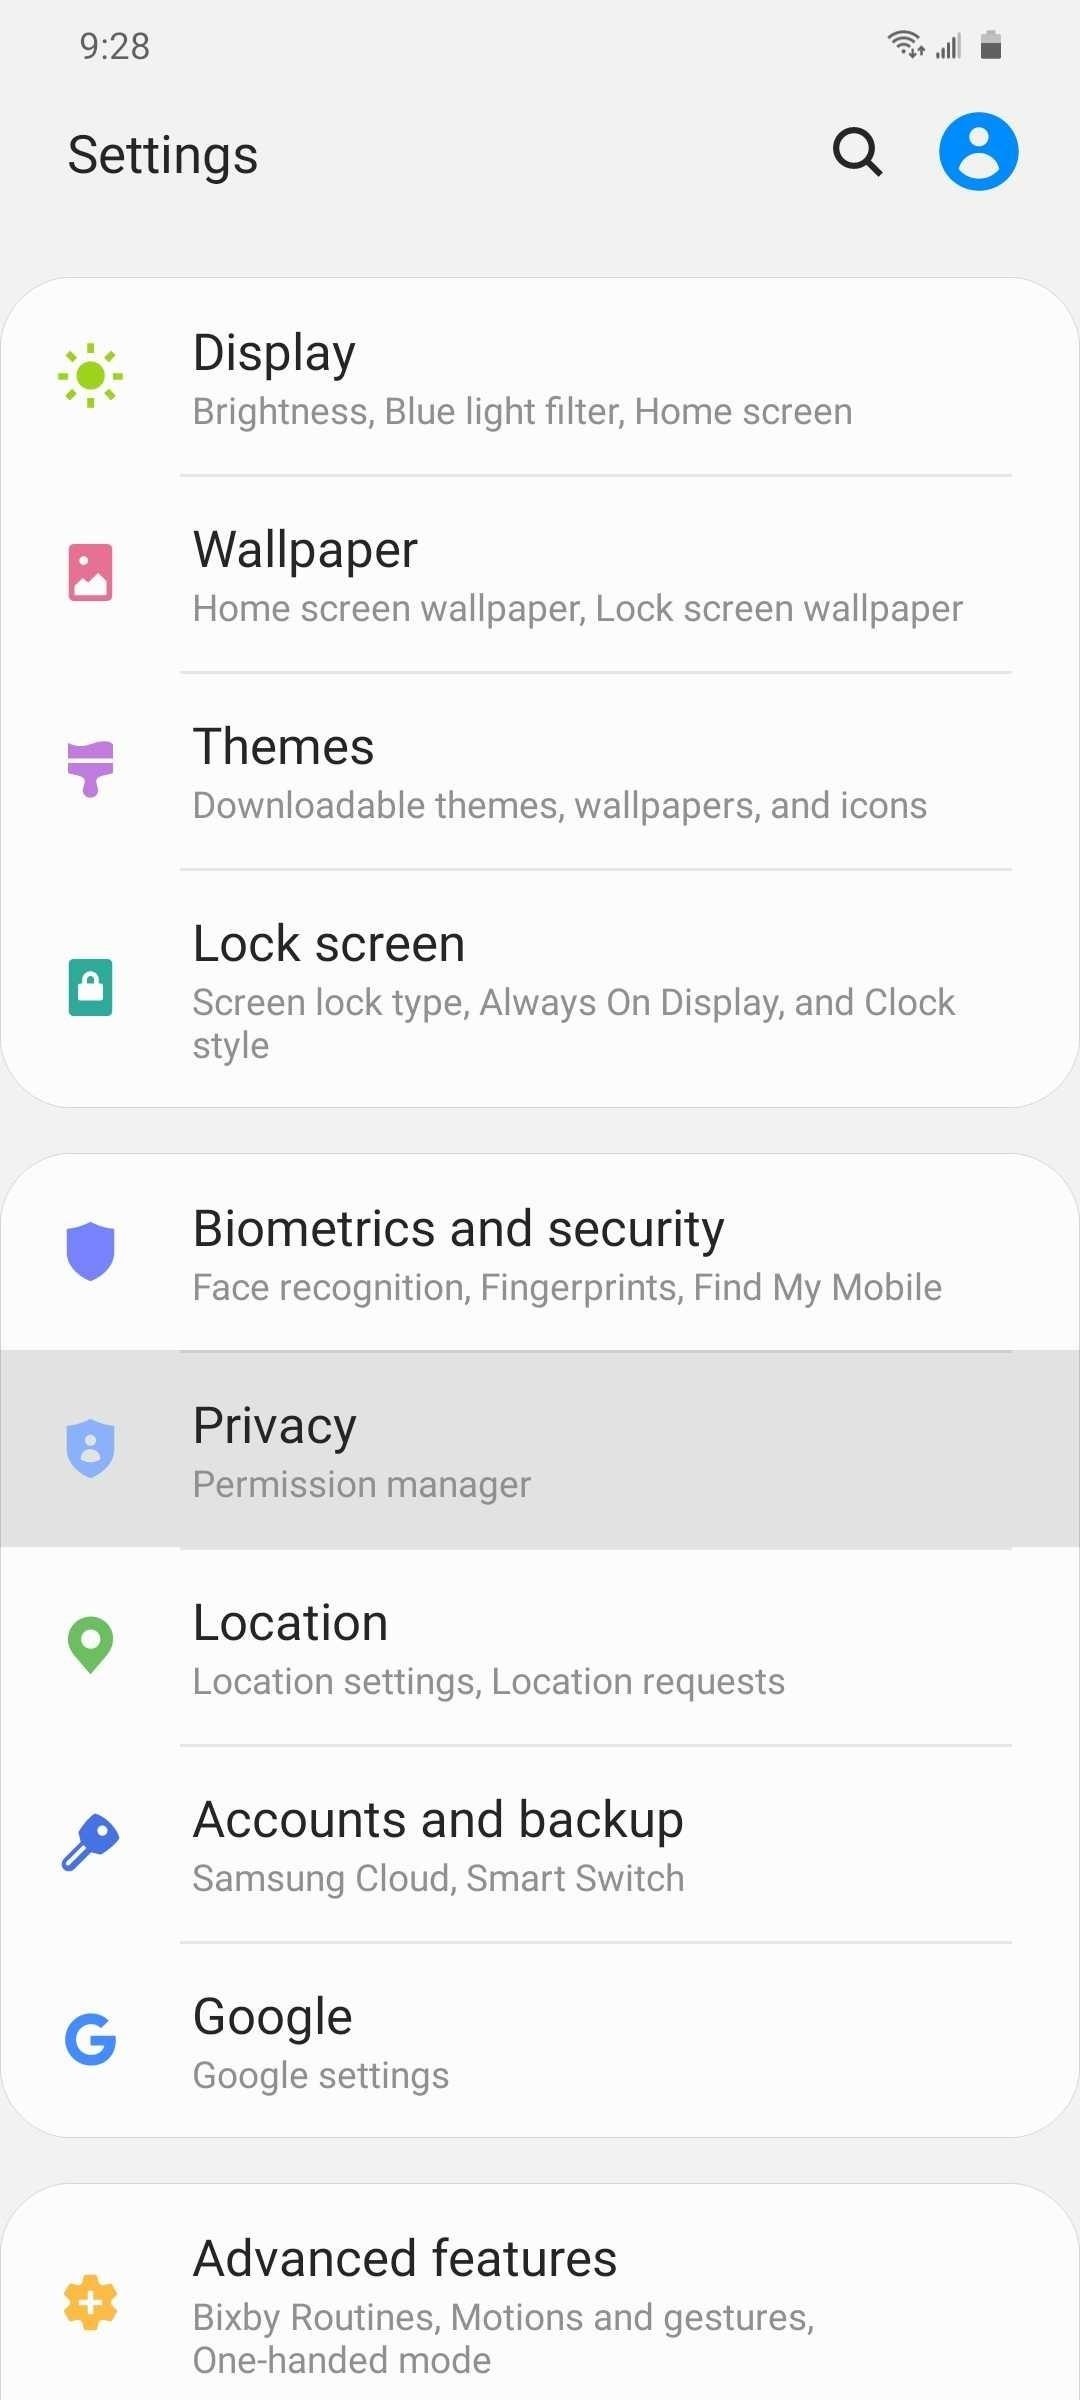
If you want to turn location history off, open the Settings app, then go to "Privacy" and hit "Google location history." Once inside, tap the toggle in the middle and select "Pause" twice on the following prompts to stop your device from saving a log of your whereabouts.
2. App Notifications
Android has a terrific notification system. In a boon for privacy, it gives you thorough control over what types of notifications are visible and where they appear.
Go to Settings –> Notifications and choose an app to start. Some apps may show several different notification categories on this page. If so, pick a category to manage how that specific type of notification is delivered.
If you want alerts to come through in a more discreet manner, you can choose "Silent" on either the app's main notification settings page or the notification category's page. Alternatively, disable the "Show as pop-up" toggle so the full text of notifications doesn't just pop onto your screen (great if you're around looky-loos).
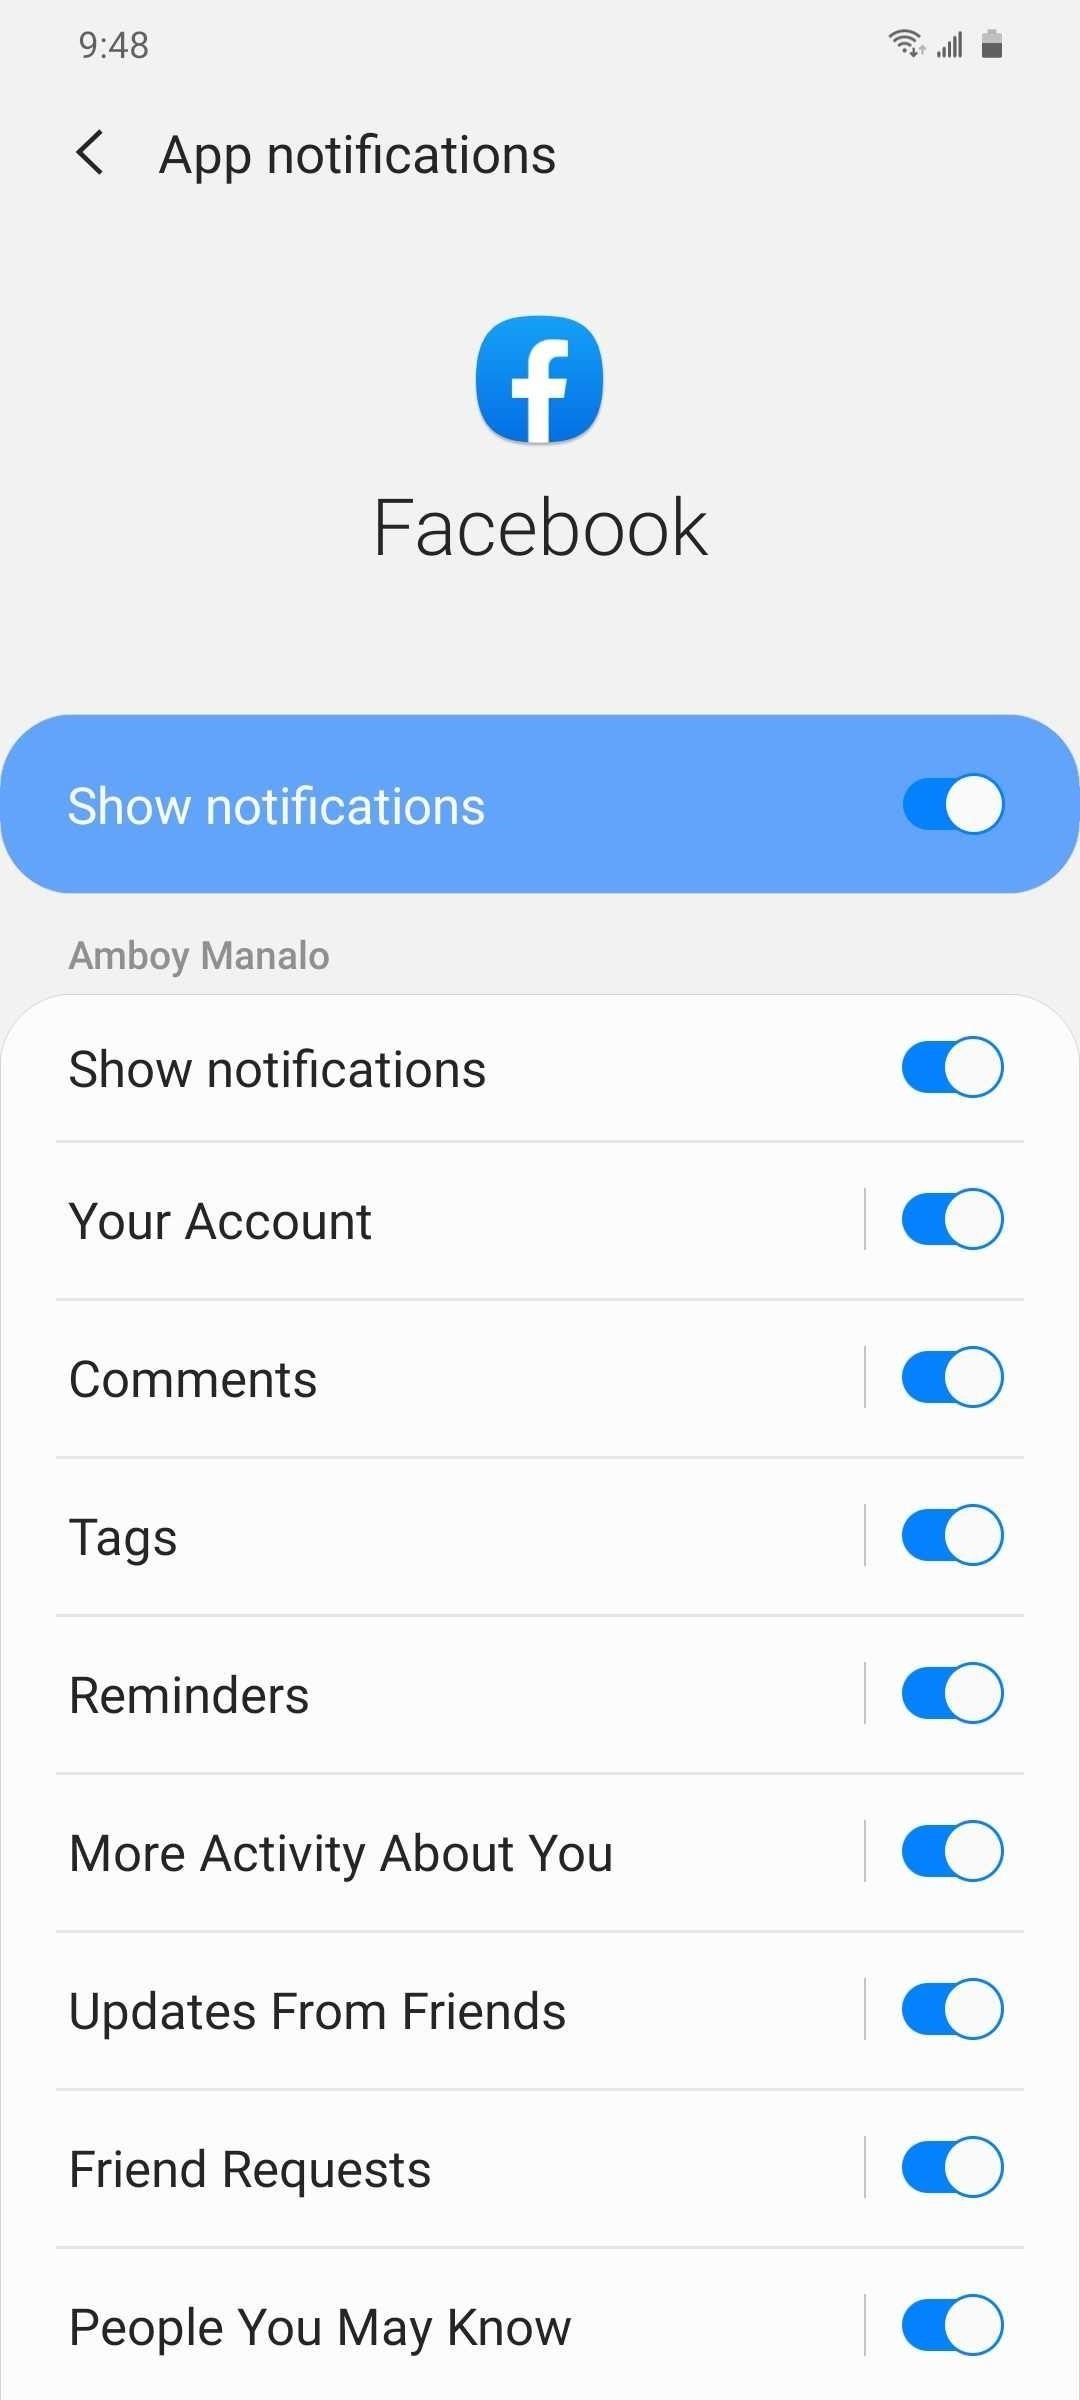
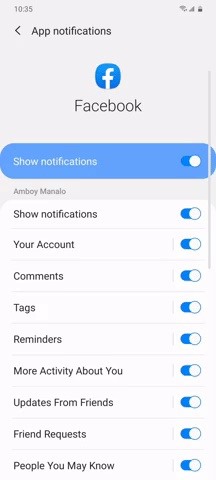
Finally, the nuclear option is to disable notifications altogether. If an app has different notification categories, you can do this selectively by tapping the toggles to the right of the category (i.e., not the text label). Otherwise, disable all notifications for the app with the "Show notifications" toggle at the top of the page.
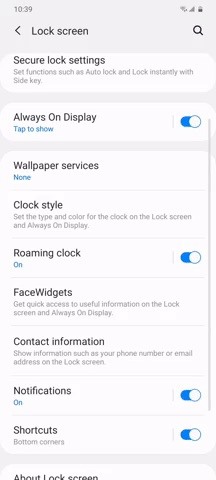
3. Lock Screen Notifications
Depending on how your phone is set up, notifications will light up your phone's screen as they come in. This gives you a chance to see the activity at a glance, but if the full text of notifications are visible on your lock screen, it also gives nosy people a chance to spy on you.
Go to "Lock screen" in Settings. Here, you can disable lock screen notifications altogether by tapping the toggle next to "Notifications." But if you want to still receive notifications, albeit more securely, tap the "Notifications" text itself (instead of the toggle). Here, you can enable the "Hide content" toggle to hide the text of the notification when it appears on the lock screen, or set alerts to appear as "Icons only" from the menu for "View styles."
4. Notification Access
Some apps need access to your S20's notifications in order to work. For example, Android Auto transmits alerts to you car while connected, and WhatsRemoved saves WhatsApp notifications in case the sender deletes them.
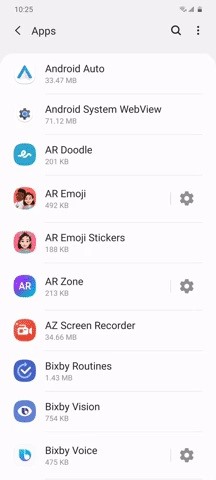
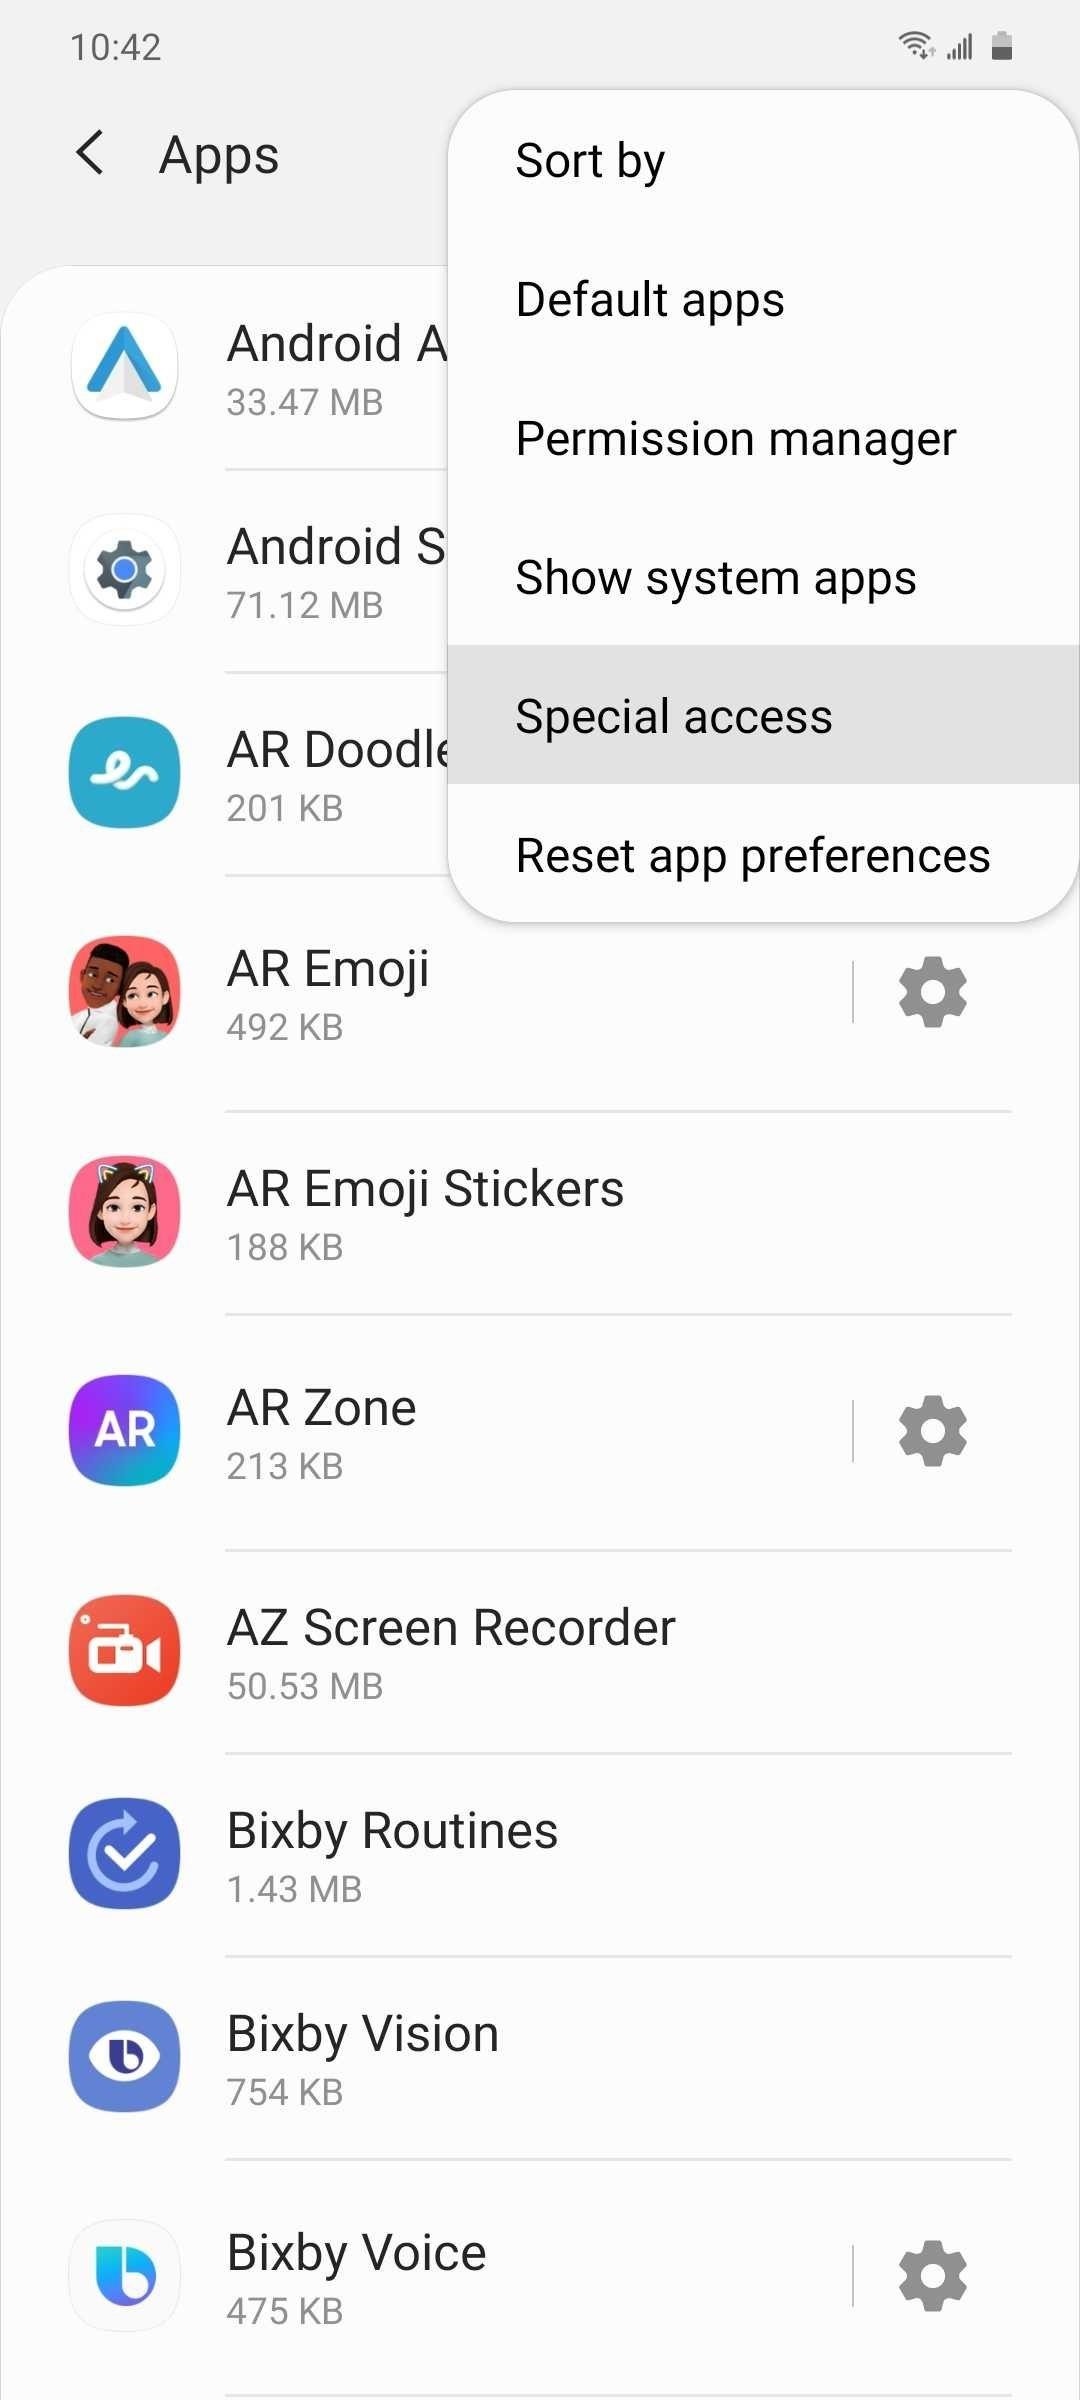
But most apps don't need this level of access. So to check for apps that have permission to access your phone's notifications, go to Settings –> Apps –> Menu button –> Special Access –> Notification access. From there, toggle the feature off for any apps that don't need the permission granted.
5. Camera, Mic & Location
Opening an app for the first time will often yield a flurry of permission prompts requesting access to various features and services like your cameras, microphones, contacts, and so on. If you rushed through the app's setup, you may have granted it access to sensitive data that it simply doesn't need.
Thankfully, you can easily check for any wayward permissions via Settings –> Privacy –> Permission manager. This page lists all the hardware and software that can be accessed by third-party apps, so carefully look over each one, starting with the all-important "Camera," "Location," and "Microphone." Revoke any app by tapping on it.
6. Device Administrators
Some third-party apps need "Device administrator" privileges to do their intended job. Antivirus and ad blocking apps come to mind, but beyond those, a vast majority of apps can do without such high level access to your S20.
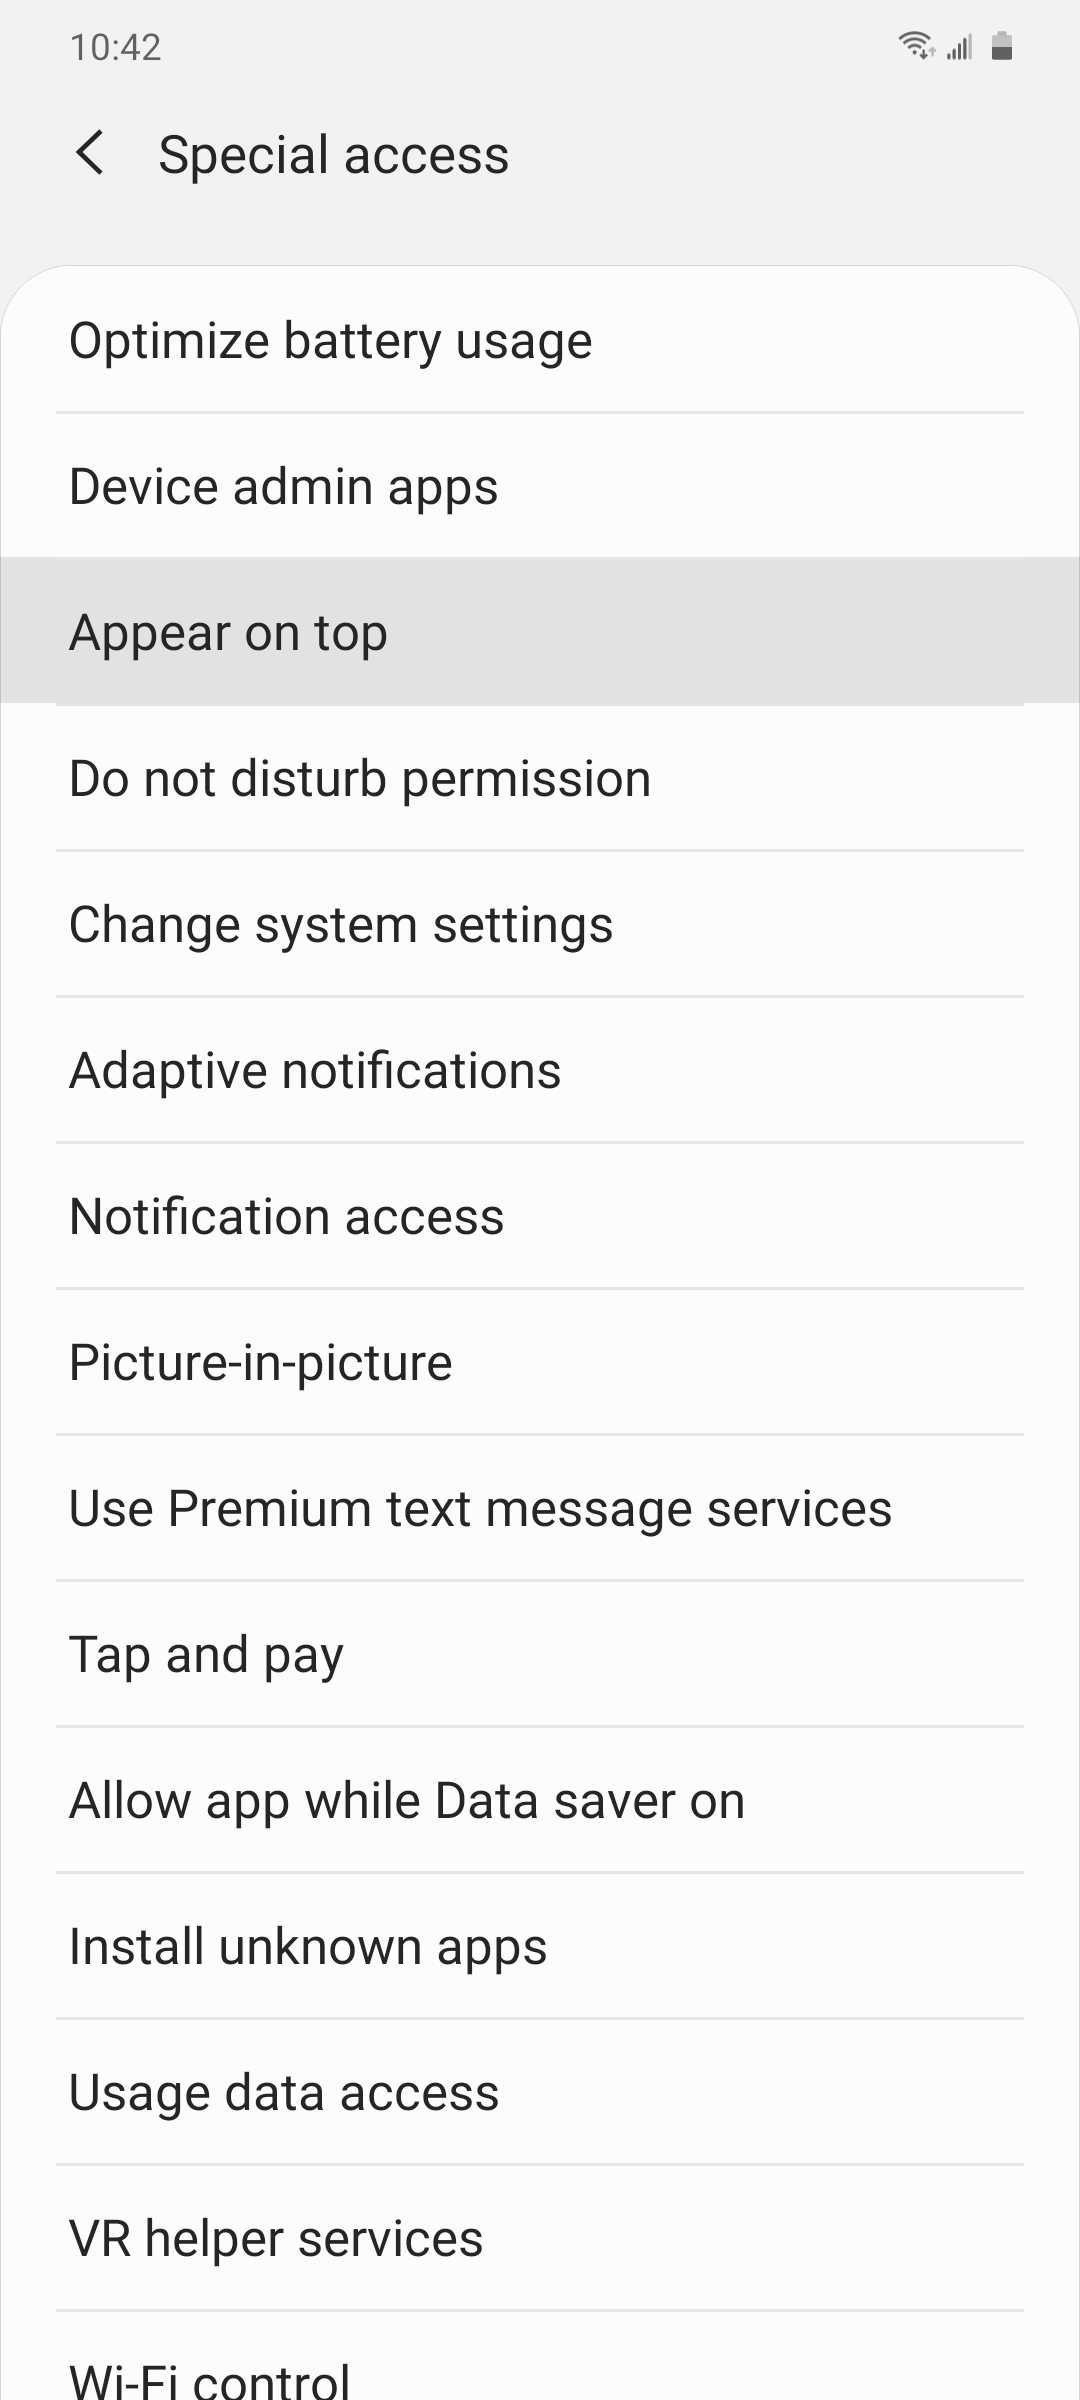
This permission is one of the most abused when it comes to malware apps, because it can be used to prevent the app from being uninstalled. So head to Settings –> Apps –> Menu button –> Special access –> Device admin apps, then give the list of apps a thorough look-over.
If you find a suspect app that has been granted administrator privileges, simply tap on it and hit "Deactivate" to revoke the permission. Just be sure to leave "Find My Device" and "Google Pay" alone if they show up on your S20's list, as they need this elevated access to work properly.
7. Apps That Can Appear on Top
Many apps have an overlay feature that lets it apply controls on top of your S20's screen for added accessibility. For example, Facebook Messenger's chat heads feature lets you instantly access your chats by way of an overlay bubble. On the flip side, sketchy apps can also utilize this feature and trick you into installing malware by overlaying "Cancel" over the "Install" button.
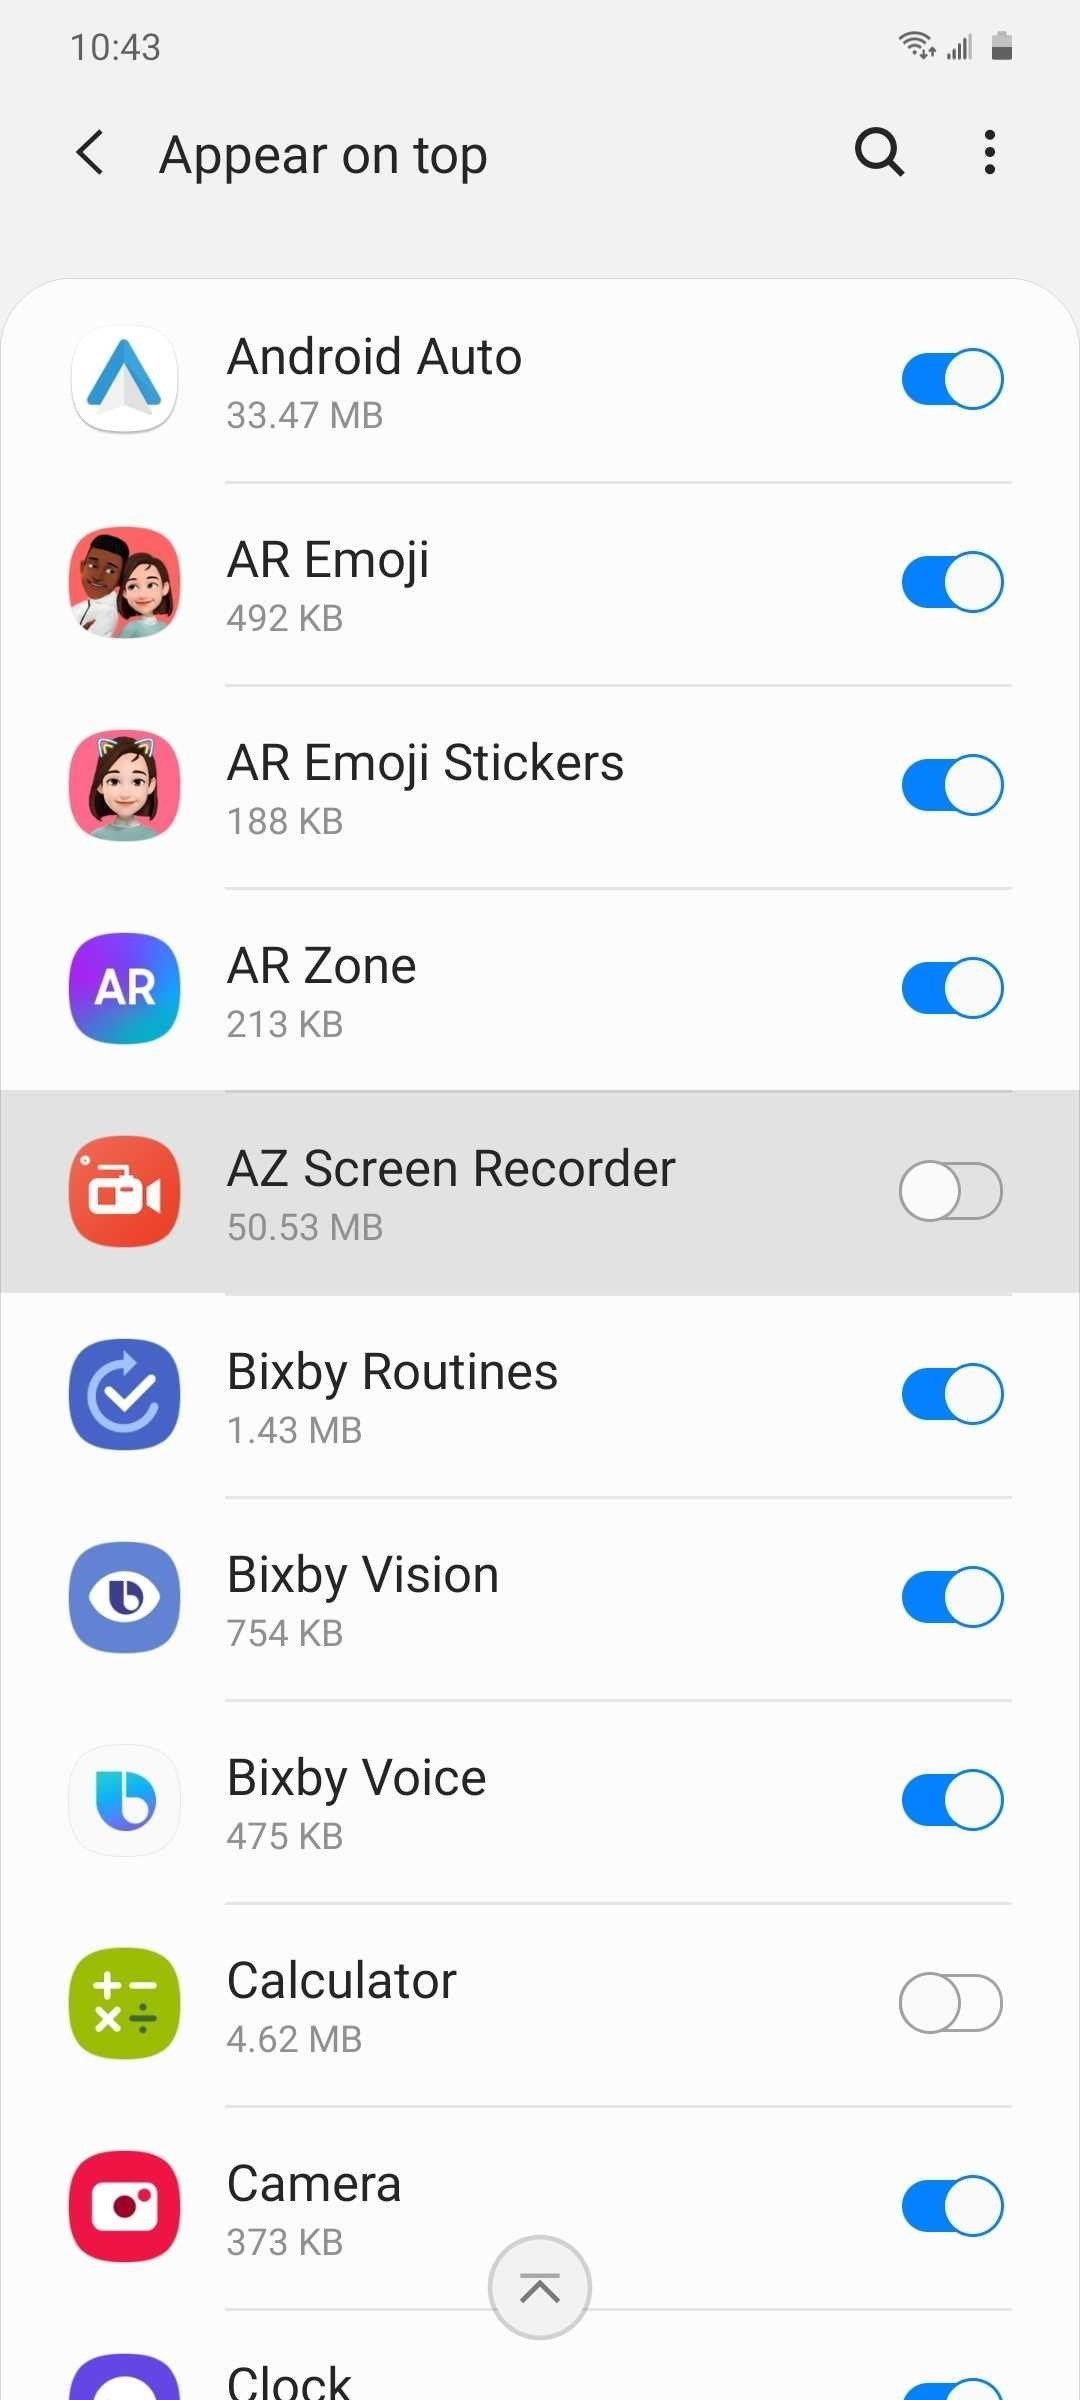
That said, it's also a great idea to check for this setting periodically, and can be done via Settings –> Apps –> Menu button –> Special access –> Appear on top. Once inside "Appear on top," carefully look through the list and check for any third-party apps that have the feature enabled, tap on the toggle next to any suspect to remove access to the function.

8. Apps That Can Change System Settings
Voice assistant apps like Bixby are a great example of the ability of some apps to access and make changes to system settings, as they use enhanced permissions to enable or disable settings like GPS at your command.
Some apps like Google Assistant have the ability to get into your S20's system settings and make changes, which they need for toggling settings like GPS on or off, drafting and sending messages, and more, using verbal commands. Of course, these enhanced permissions can be outright dangerous if granted to a questionable app.
To check for this setting, head to Settings –> Apps –> Menu button –> Special access –> Change system settings, and carefully sort through the list of apps. Be on the lookout for any third-party app that shouldn't have this permission granted, and disable the feature by hitting its toggle.
9. Usage Data Access
To ensure you get the best experience possible, many apps will request access to your usage data to monitor your smartphone habits, and use the information to better cater to your personal needs. Data collecting can range from finding out which apps you use the most, how often you exercise, to determining your location, preferred language, and which carrier you're on.
If this makes you uncomfortable, you can disable the feature by going to Settings –> Apps –> Menu button –> Special access –> Usage data access. From there, look through the list and select a third-party app you want to deny access to, and toggle the feature off on the following page. Just be sure to leave native apps and services like One UI Home and Google Play Store alone as they need this permission to work properly.
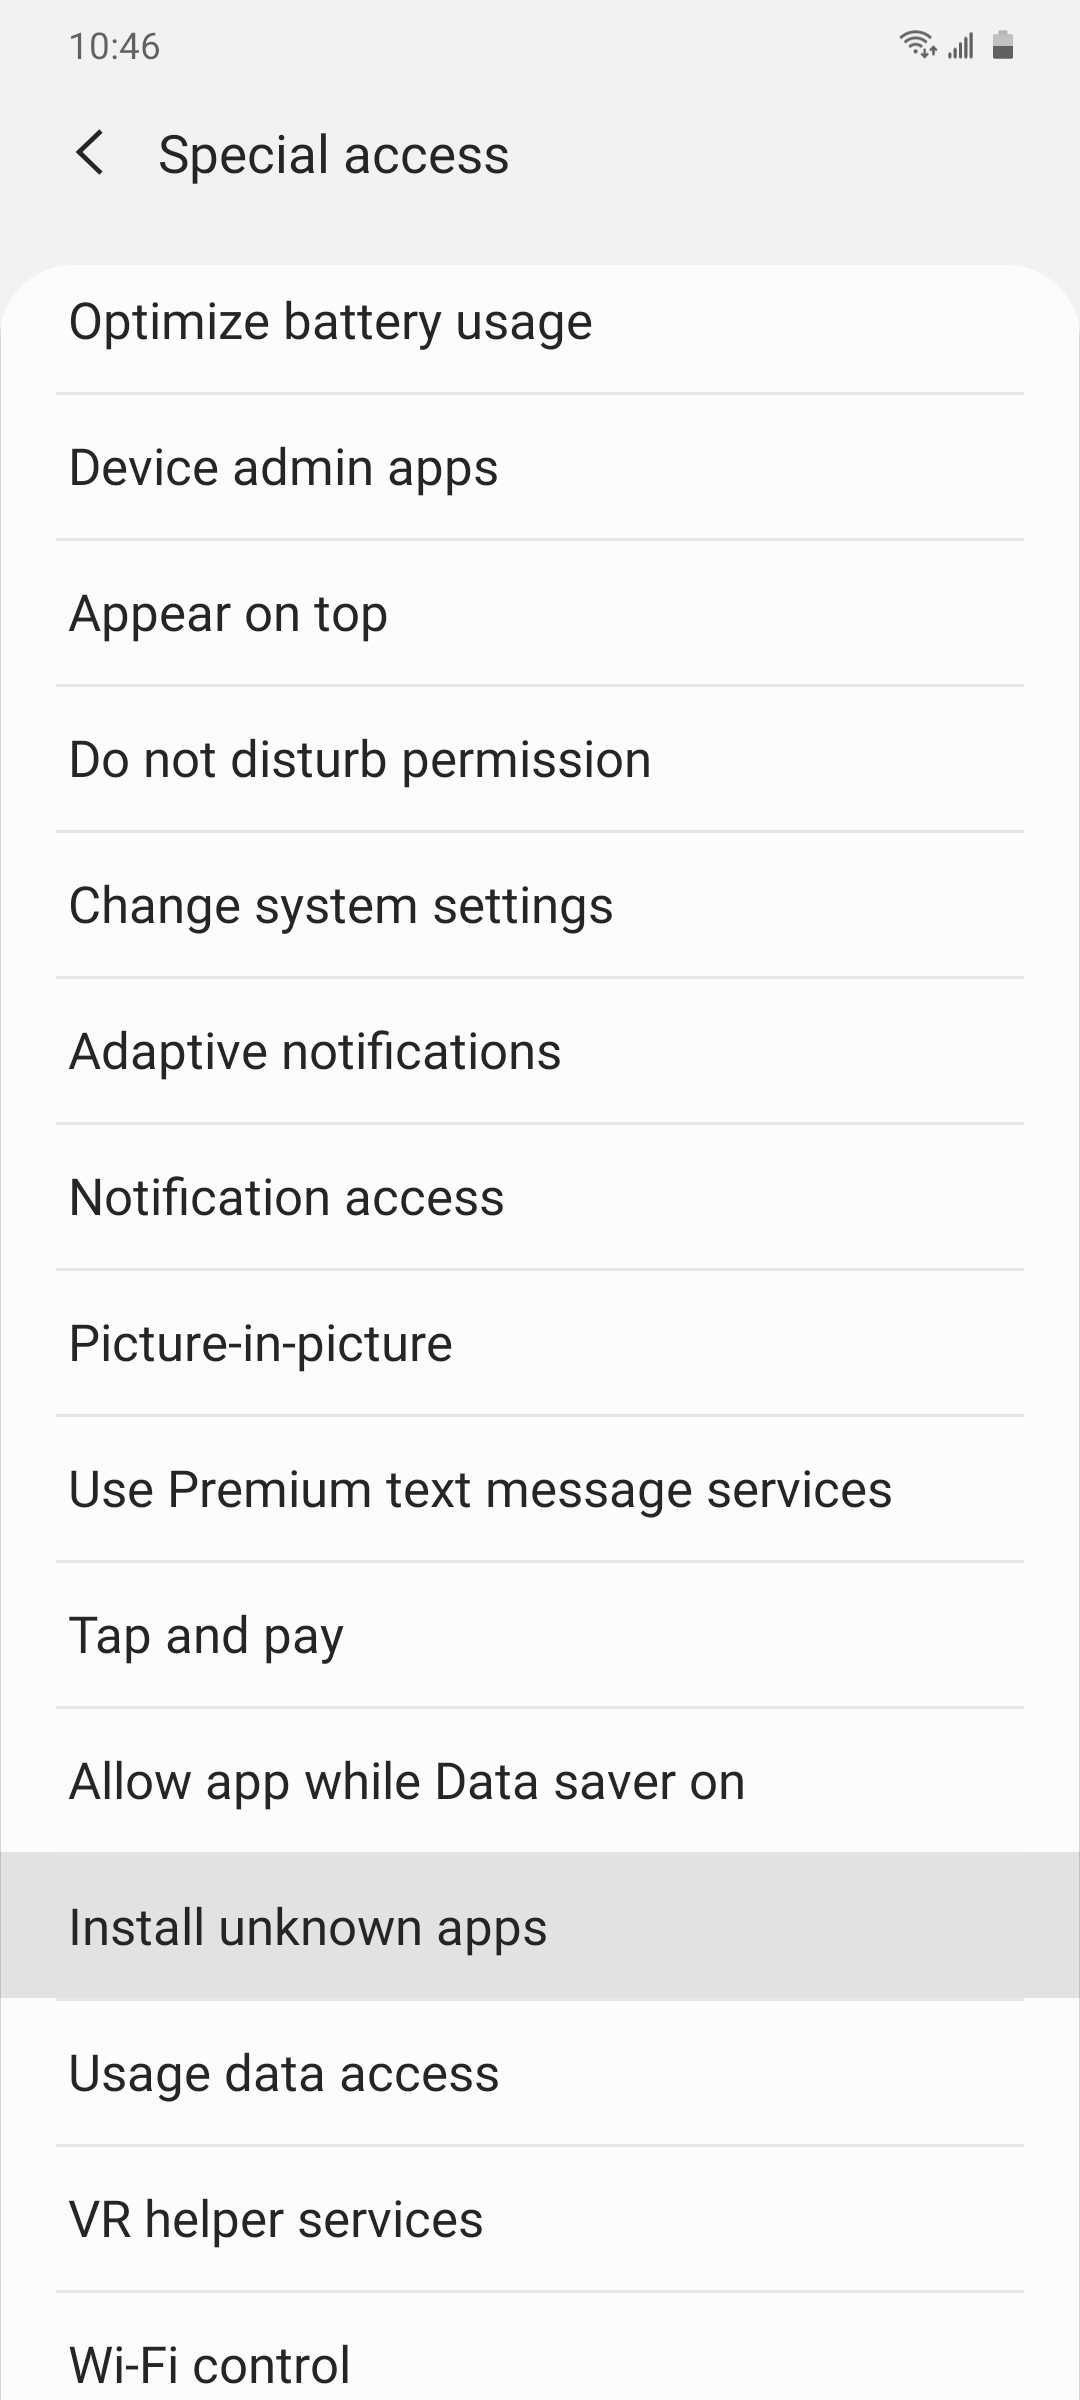
10. Install Unknown Apps
Sideloading apps may be a handy way of getting apps outside both Google Play and Galaxy Store, but doing so can leave your S20 open to Android malware. Fortunately, you need to explicitly grant an app permission before it can download apps from an outside source.
Other than internet browsing apps like Samsung Internet or Chrome, it doesn't make sense for other apps such as gaming and social media to have permission to install apps from unknown sources, since they provide different services altogether. So it's always a good idea to check which apps may have been granted such a high level permission from time to time, just to play it safe.
To do so, head to Settings –> Apps –> Menu button –> Special access –> Install unknown apps, then go through the list and check which apps have this permission. Turn off the toggle next to "Allow from this source" for any apps that don't need this feature enabled.

11. Face Recognition
While the Iris scanner can no longer be found on the S20, you still have the option to use Face Recognition in alongside other security measures like the passcode and fingerprint sensor. Since the function solely relies on the front-facing camera and no other supporting sensors like Apple's Face ID, this feature is nowhere near as secure, and may make it easier to spoof with images of your face.
So if you want to disable the feature, simply go to Settings –> Biometrics and security –> Face recognition –> Face unlock. But if you find the feature too convenient to give up, there are settings inside "Face recognition" that you can tweak to make it more secure. For example, you can turn "Require open eyes" on to prevent unwanted access to your device whenever you're asleep.
12. Smart Lock
Smart Lock is a great feature to use if you want easier access to your S20, and can be set to stay unlocked whenever you're in a trusted location like your home or workplace, or using a specified paired device. As convenient as this feature is, however, it does leave your device completely open to unwanted access if left unattended, especially in a "trusted" office or classroom environment.
That said, we recommend disabling Smart Lock altogether to maximize your privacy, and can be done so via Settings–> Lock Screen –> Smart Lock. From there, be sure to turn off the setting for "Trusted devices" by removing any devices that appear. It's also a great idea to disable "Trusted places," "On-body detection," and "Voice Match" to further bolster your security.
13. Google Data Collection
Your S20 is a Google product at its core, and the Android 10-based On UI 2 software running it comes with a slew of Google apps and services like Google Maps, Google Photos, Gmail, and more, that collects data from your phone to give you a personalized experience. If you find this too intrusive, you can disable Google's data collection for account-based services via Settings –> Privacy –> Activity controls.
Inside "Activity controls," there are numerous options you can set to minimize data collection. Disabling the toggle for "Web & App Activity" stops Google from collecting data from apps that you use, along with sites you visit using its search engine, and your voice and audio recordings.

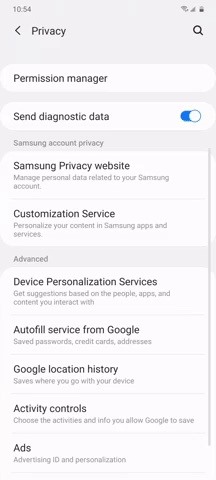
You can also choose to disable the feature for "YouTube History" to further bolster your privacy. Just keep in mind that Google services that need this access to work will no longer function properly.
14. Ads Personalization (Google)
A massive chunk of Google's total income comes from advertising, and uses information collected from your S20 to deliver personalized ads that matches your interests to maximize profits. Granted, Google never shares your data to outside intities, but "Ads Personalization" should still be a cause of concern if you value your privacy, since third-party apps can use your Advertising ID to create a profile centered on you.
Unfortunately, there's no way to totally stop Google from creating an ad profile based on your personal information short of short of installing a custom ROM, but you can choose to opt out of the service by going to Settings –> Google –> Ads –> Opt out of Ads Personalization to prevent external apps from tracking you to a certain degree. You should also hit "Reset advertising ID" on a regular basis to remove your ad profile from Google's servers.
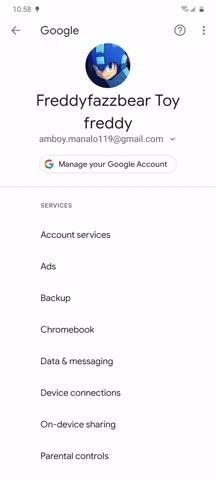
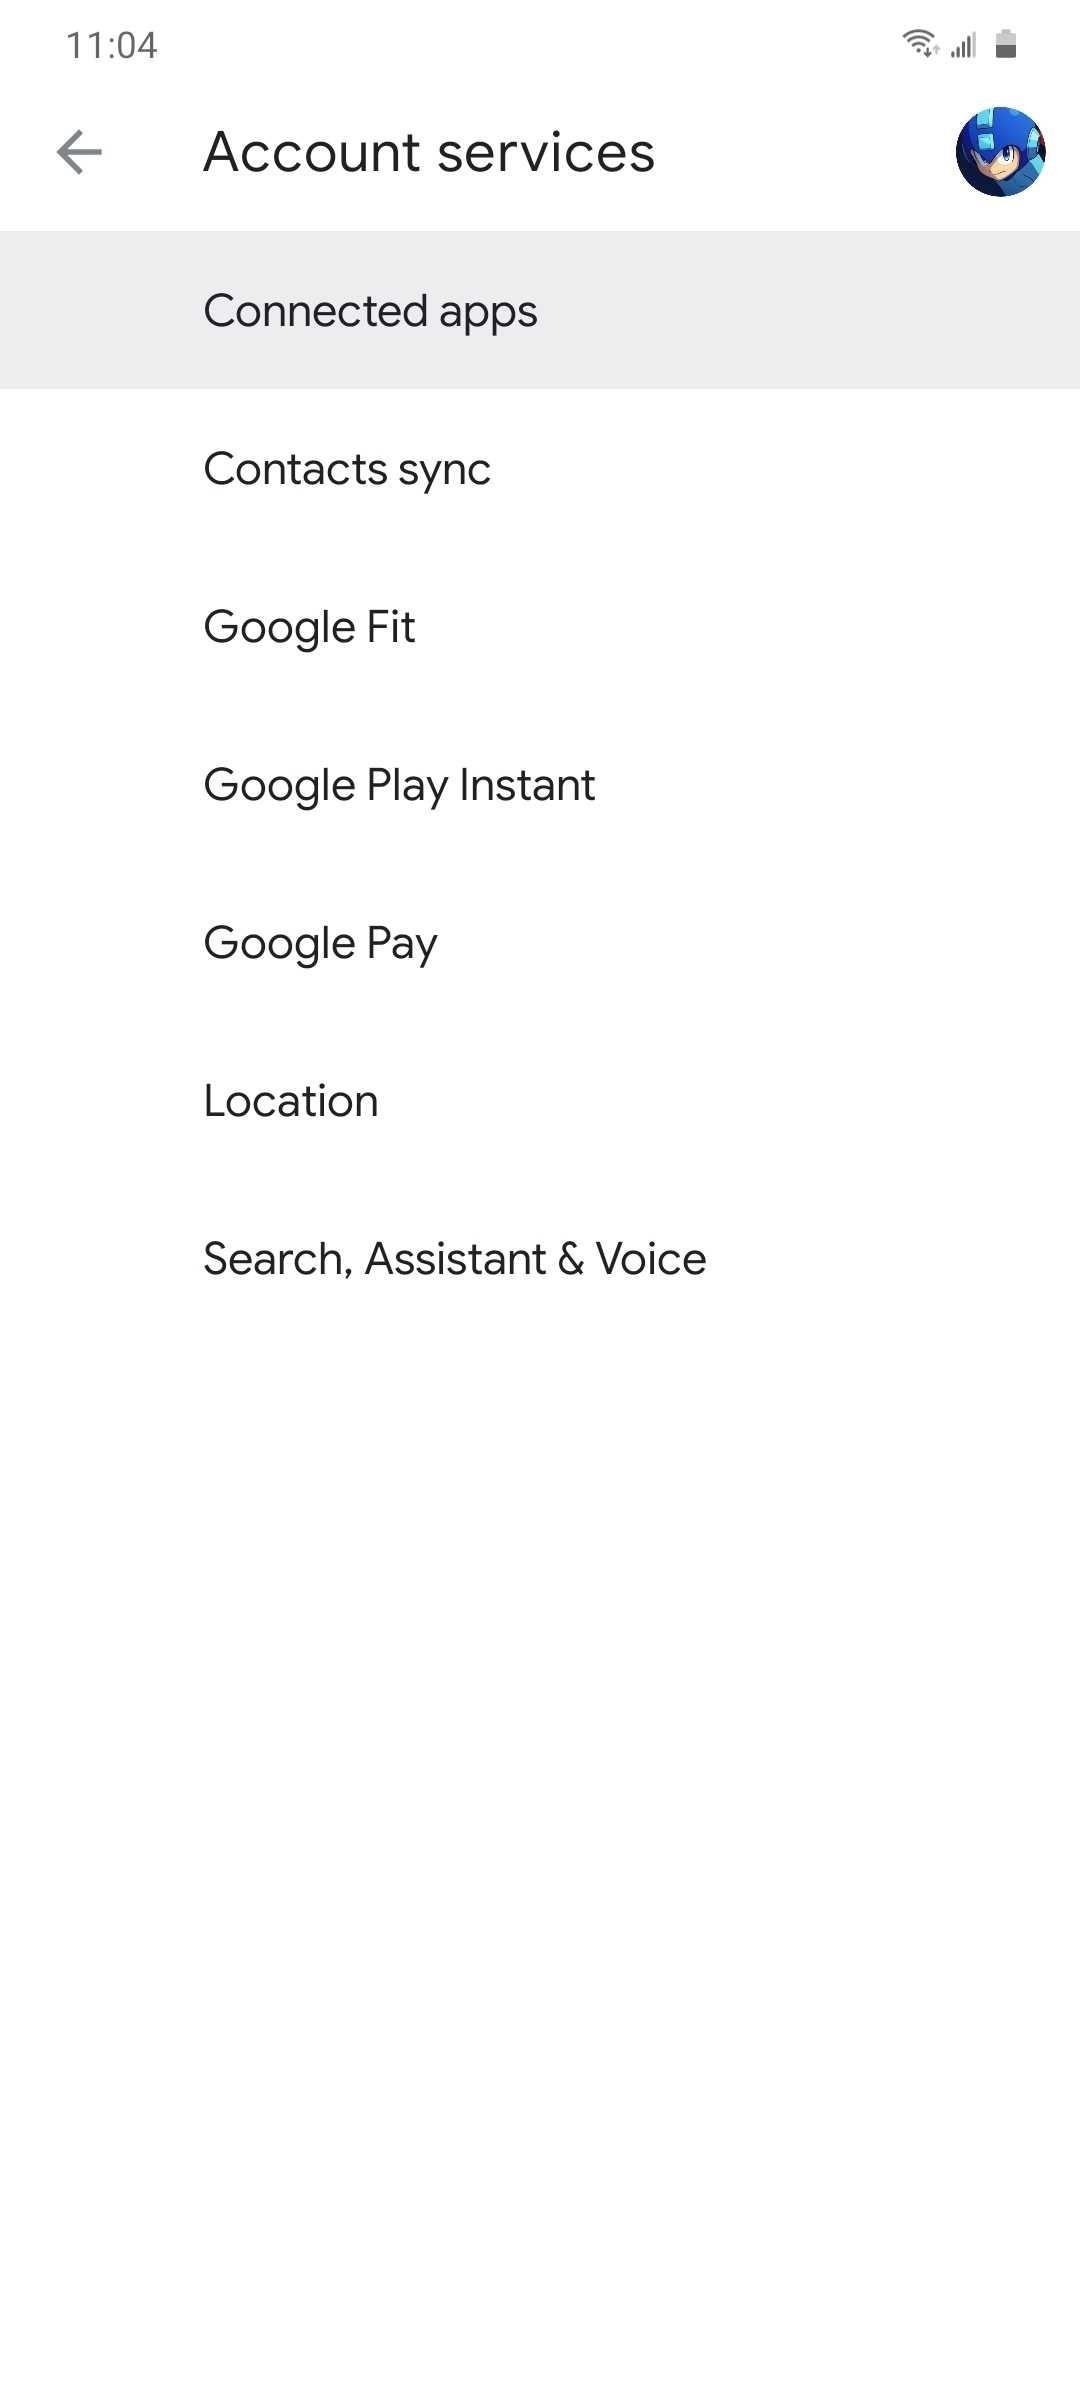
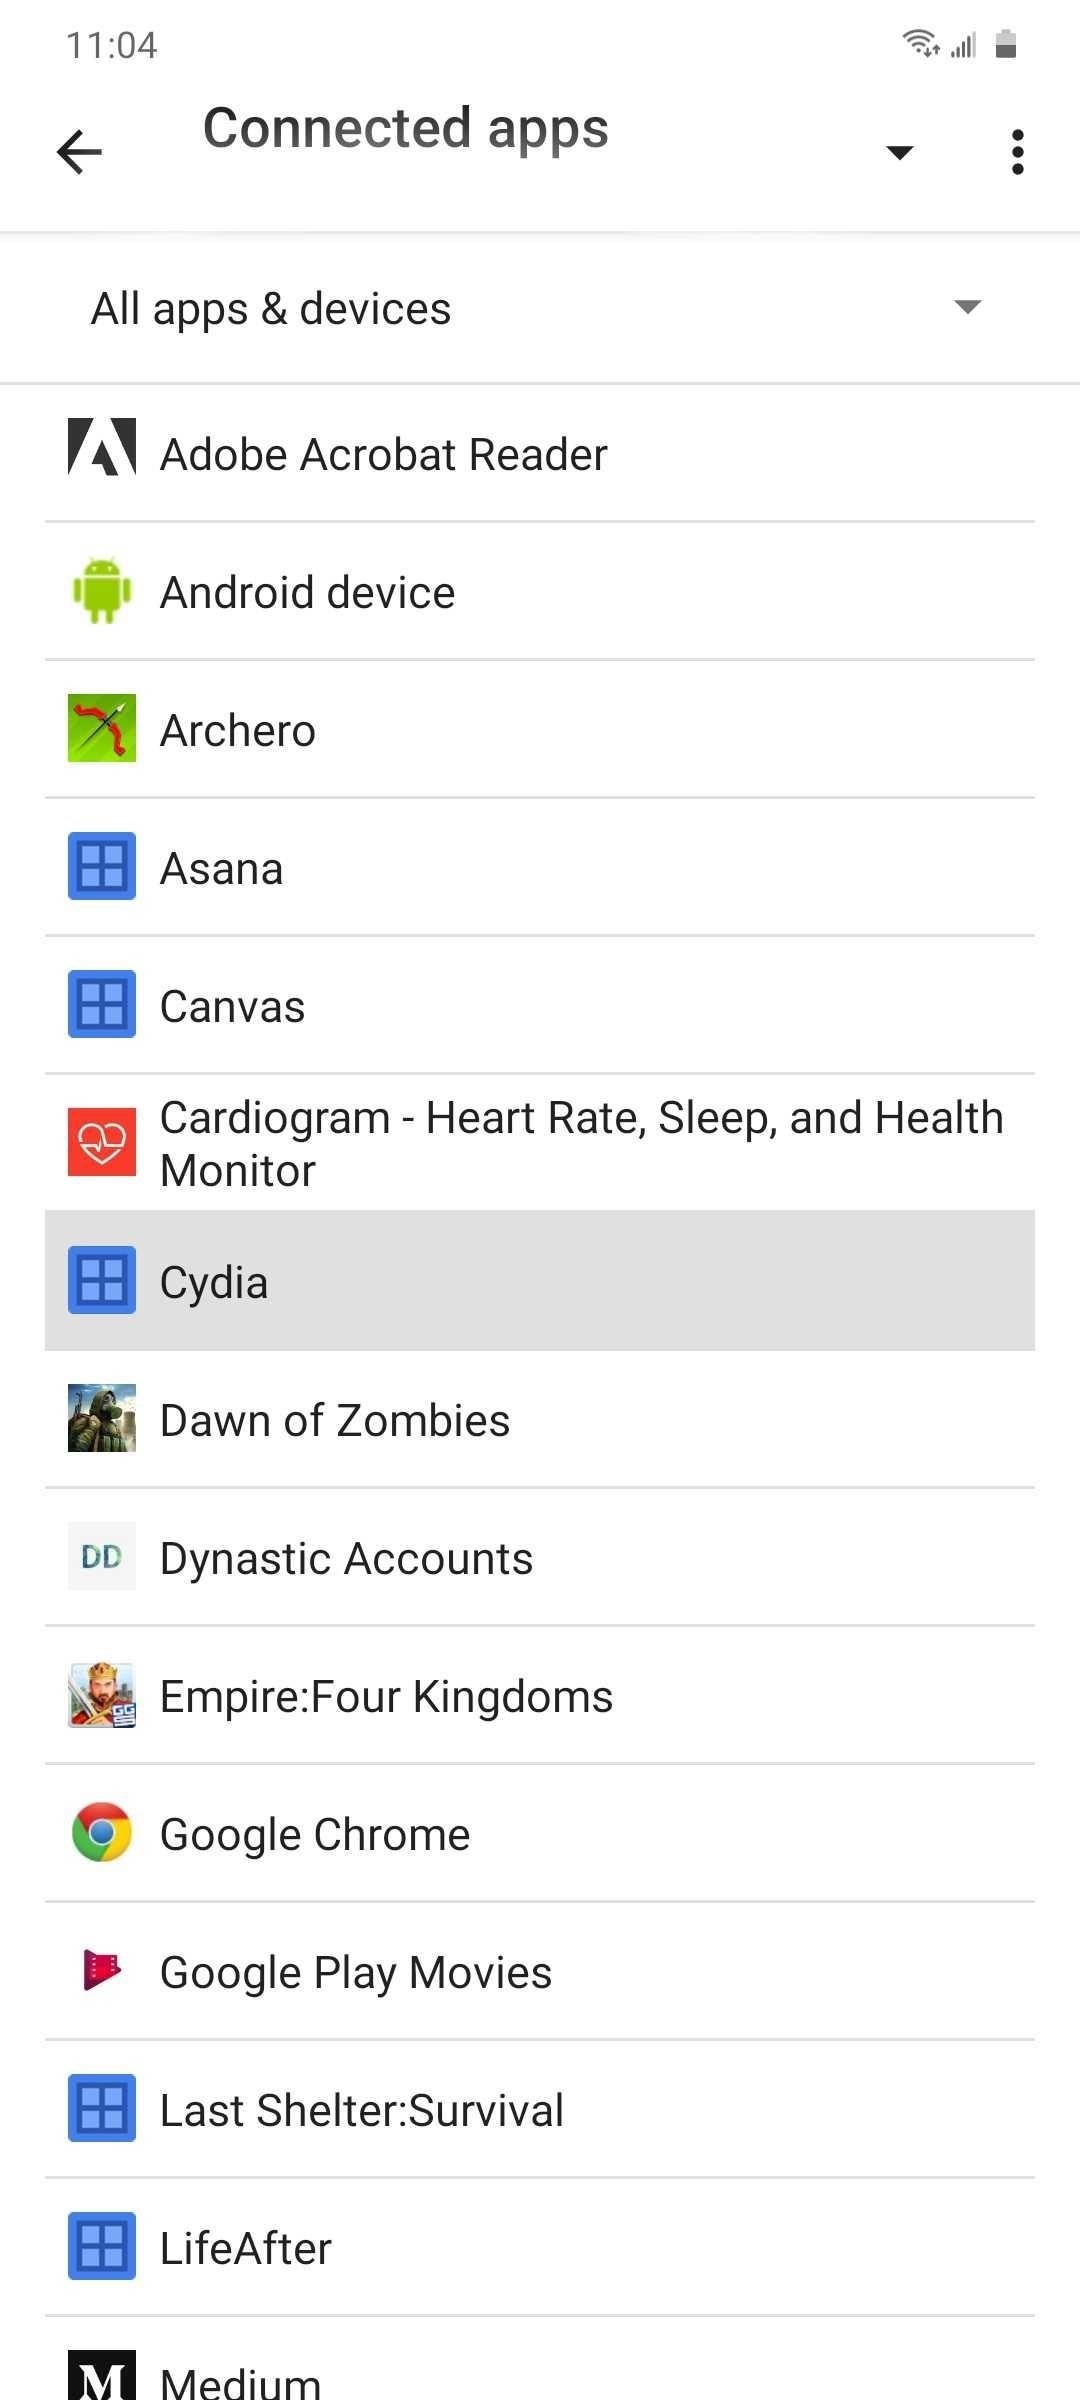
15. Connected Apps
Many apps, sites, and other platforms give you the option of using your Google account in place of a brand new login to access and use their services. While undoubtedly convenient, the "Sign in with Google" option can allow third-parties access to sensitive personal information connected to your Google account and compromise your privacy.
If you find this concerning, go to Settings –> Google –> Account services –> Connected apps. From there, carefully sort through the list and tap on any suspect app that you're no longer using, hit "Disconnect" on the following screen, and confirm on the popup. We recommend repeating the process for any app or service you're unsure about just to play it safe.

This article was produced during Gadget Hacks' special coverage on smartphone privacy and security. Check out the whole Privacy and Security series.
Who needs a wand? Unlock your magical powers and transform yourself from a Muggle into a Wizard or Witch just by using your Android phone. See how:


Be the First to Comment
Share Your Thoughts