


Google's Pixel phones claimed the top spot in our ranking of the best phones for rooting, but they do have one drawback from a modder's perspective: Because of their A/B partition layout for seamless updates, the devices don't have official support for Magisk. Thankfully, though, developer goodwin has stepped in with a fix, so we can now get Magisk working on the Pixel and Pixel XL.
Not all Magisk modules will work on the Pixel or Pixel XL, so if you're only interested in getting the ability to install modules, you should probably wait until there's official support for Magisk on Pixel devices. However, all of Magisk's other systemless abilities are functional, so by following this guide, you'll have root without tripping SafetyNet, you'll get systemless Busybox, and you'll even be able to apply hosts file ad blockers like AdAway without modifying your system partition.
Requirements
A Note About SuperSU
Chainfire's SuperSU is probably the most popular root management app for Android, so there's a good chance you may have it installed right now. The only problem is, Magisk can't work its systemless magic quite as reliably if you have SuperSU installed.
So as a heads up, the method outlined in this guide will remove SuperSU's binaries from your phone. But don't worry, because Magisk has its own built-in root management system, so you can still enjoy most of the same benefits of root without SuperSU.
Even better, when Magisk is using its own root management system, it can completely hide root from all of your apps while keeping SafetyNet, Android's built-in secure boot system, intact. This is thanks to the "systemless" aspect of Magisk, as it doesn't modify any files on your system partition, so apps like Android Pay and other mobile banking apps will actually work if you use Magisk's built-in root management system.
However, Magisk's built-in root management system will not allow you to modify files on the Pixel or Pixel XL's system partition. This means that certain apps, like Titanium Backup, will not work properly with this root method. But the whole point of Magisk is to give you root features without modifying the system partition, as doing so would trip SafetyNet.
If you're dead set on using SuperSU and maintaining the ability to modify files on your system partition with root, know that it's possible, just not recommended. If you wanted to do that, you could just download the latest SuperSU ZIP, then flash it right before flashing the Boot Signer ZIP in Step 5 below — just note that doing so may cause conflicts with Magisk and/or TWRP, and you'll lose some of the benefits of Magisk.
Download Files to Your Phone
First up, you'll need to download a set of four flashable ZIPs on your phone. Some of these files will be different, depending on whether you're using a Pixel or a Pixel XL, so we've categorized them into two sections below.
If you're using a regular Pixel (Sailfish), tap each of the following links to grab the four necessary ZIPs:
Pixel Downloads:
Otherwise, if you're using a Pixel XL (Marlin), hit up these next four links one-by-one to download all of the requisite files to your phone.
Pixel XL Downloads:
Install Magisk Manager
Much like Xposed, Magisk is a two-part system. The first element is what you would call "Magisk," in that it serves as the framework upon which Magisk modules are installed. The second half of the equation is an app called Magisk Manager, which lets you download and install modules and tweak settings related to Magisk.
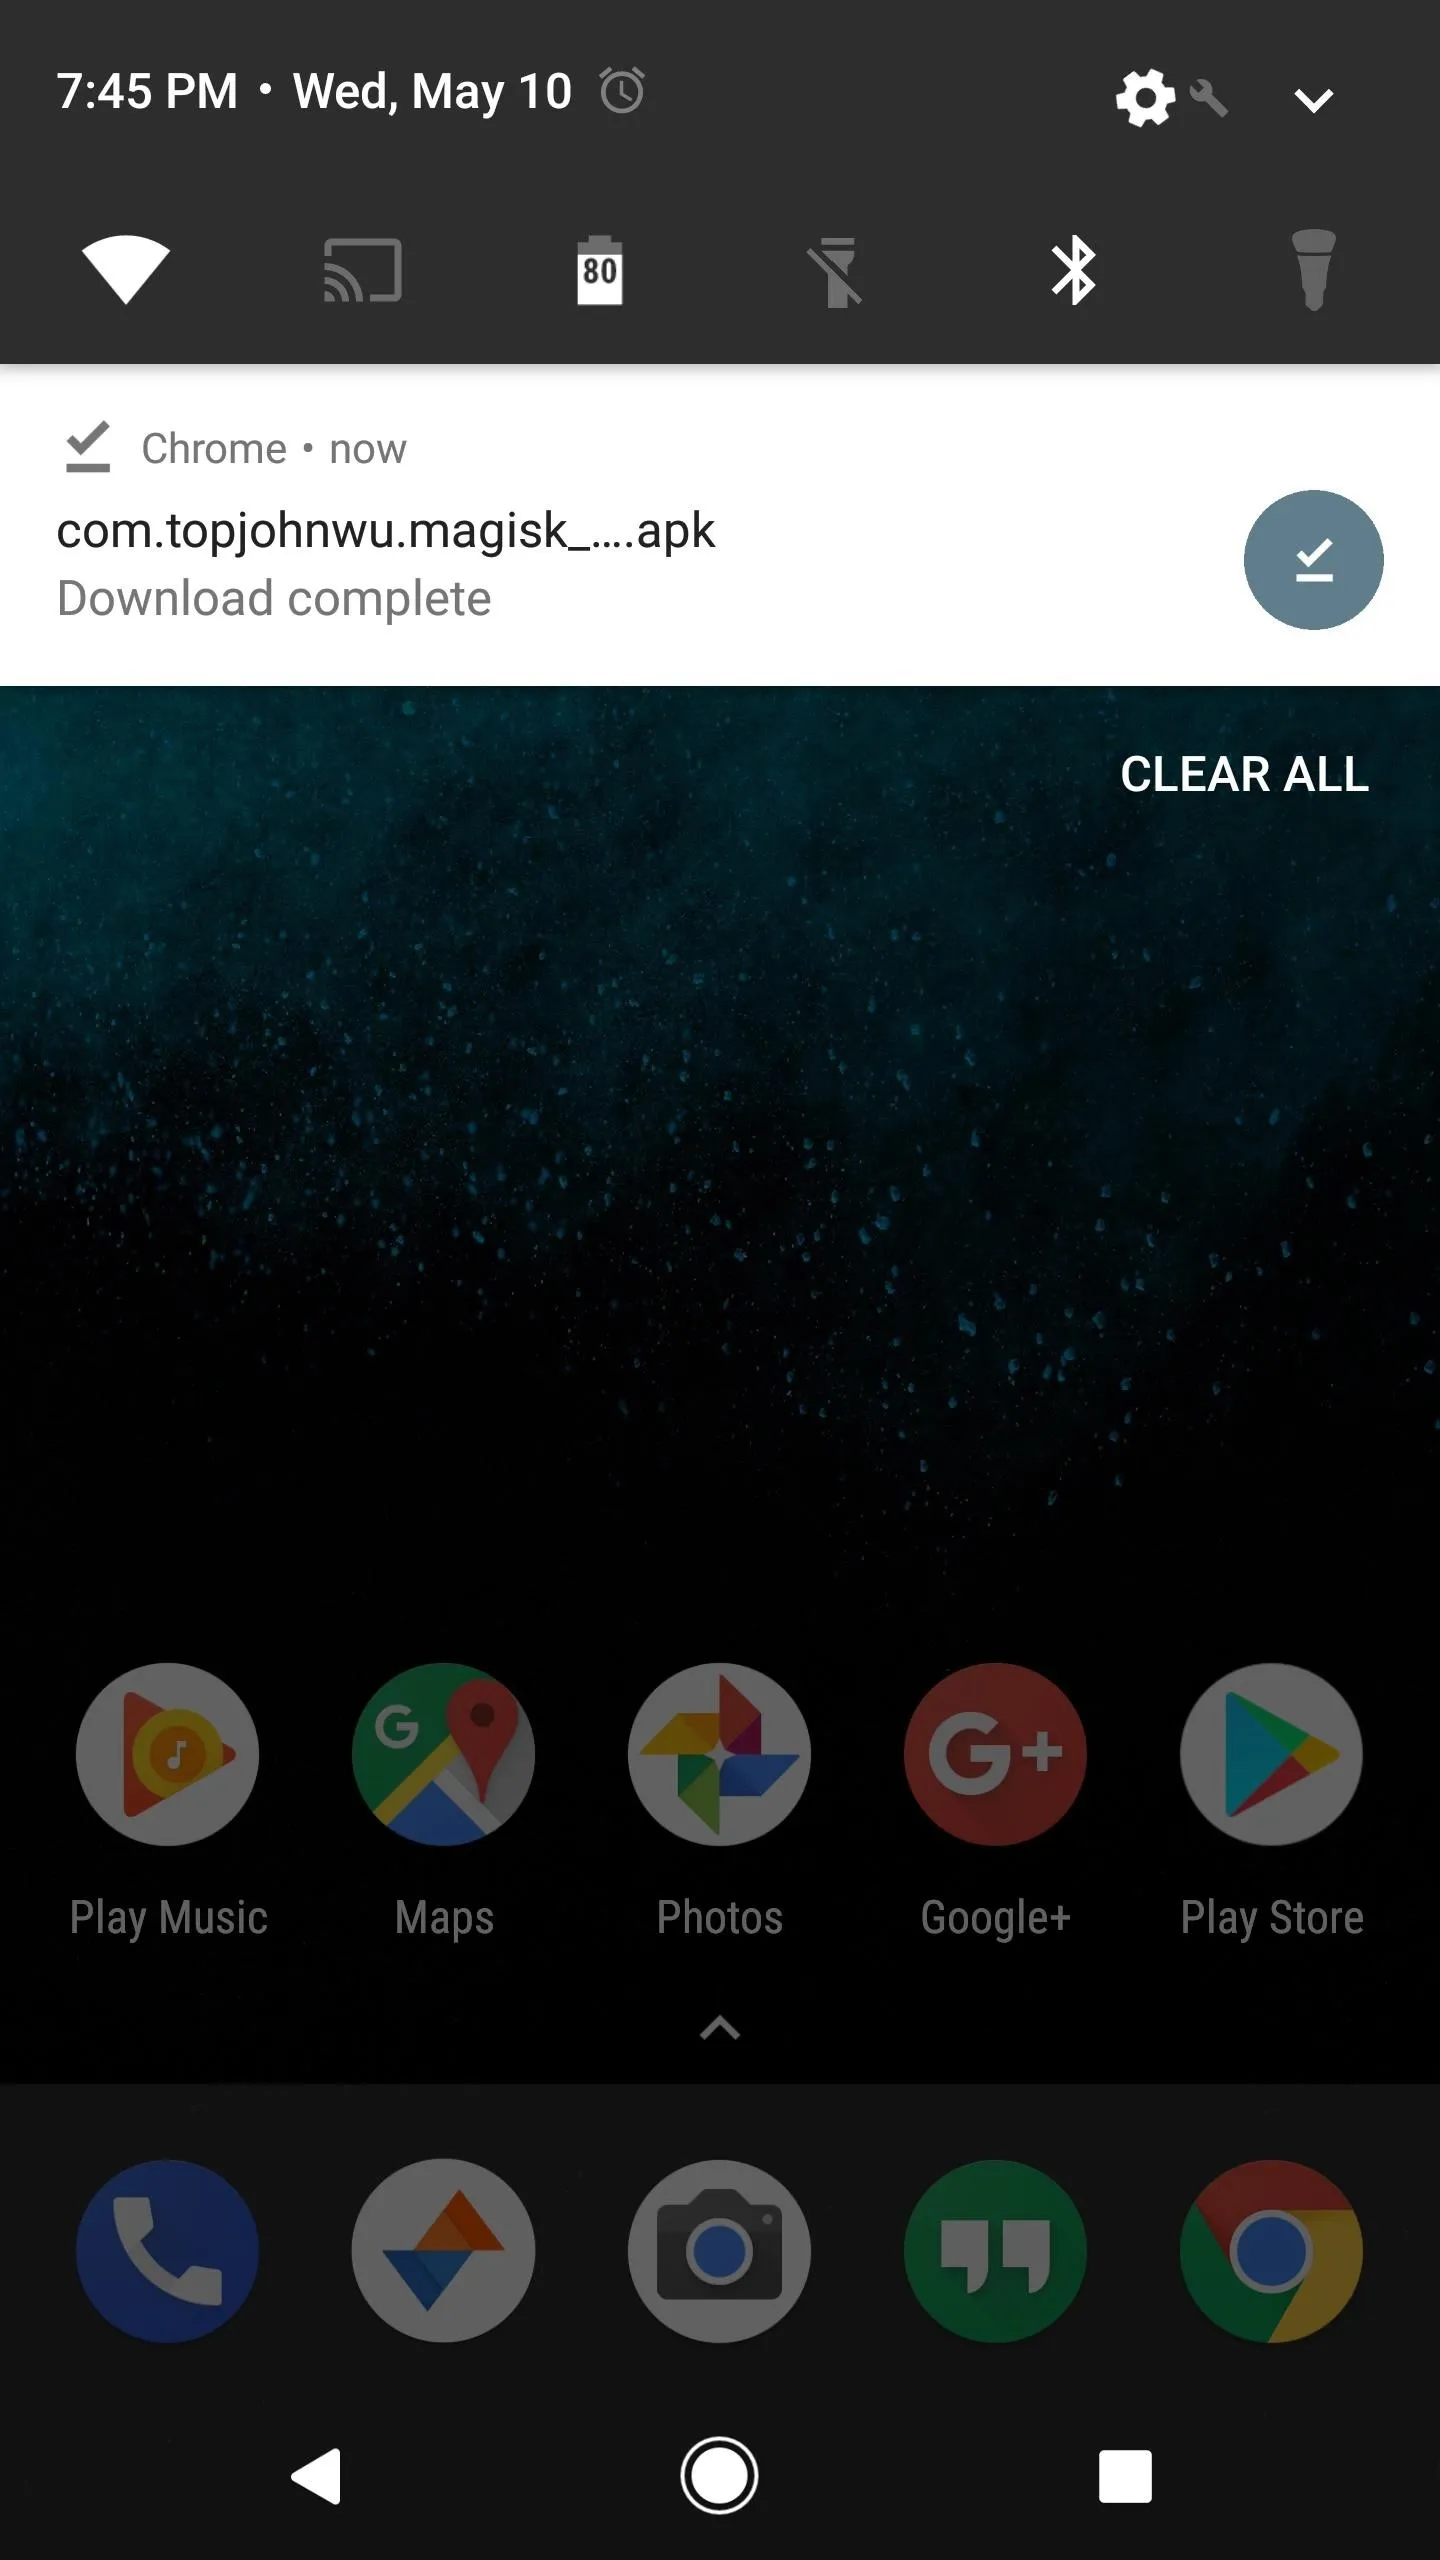
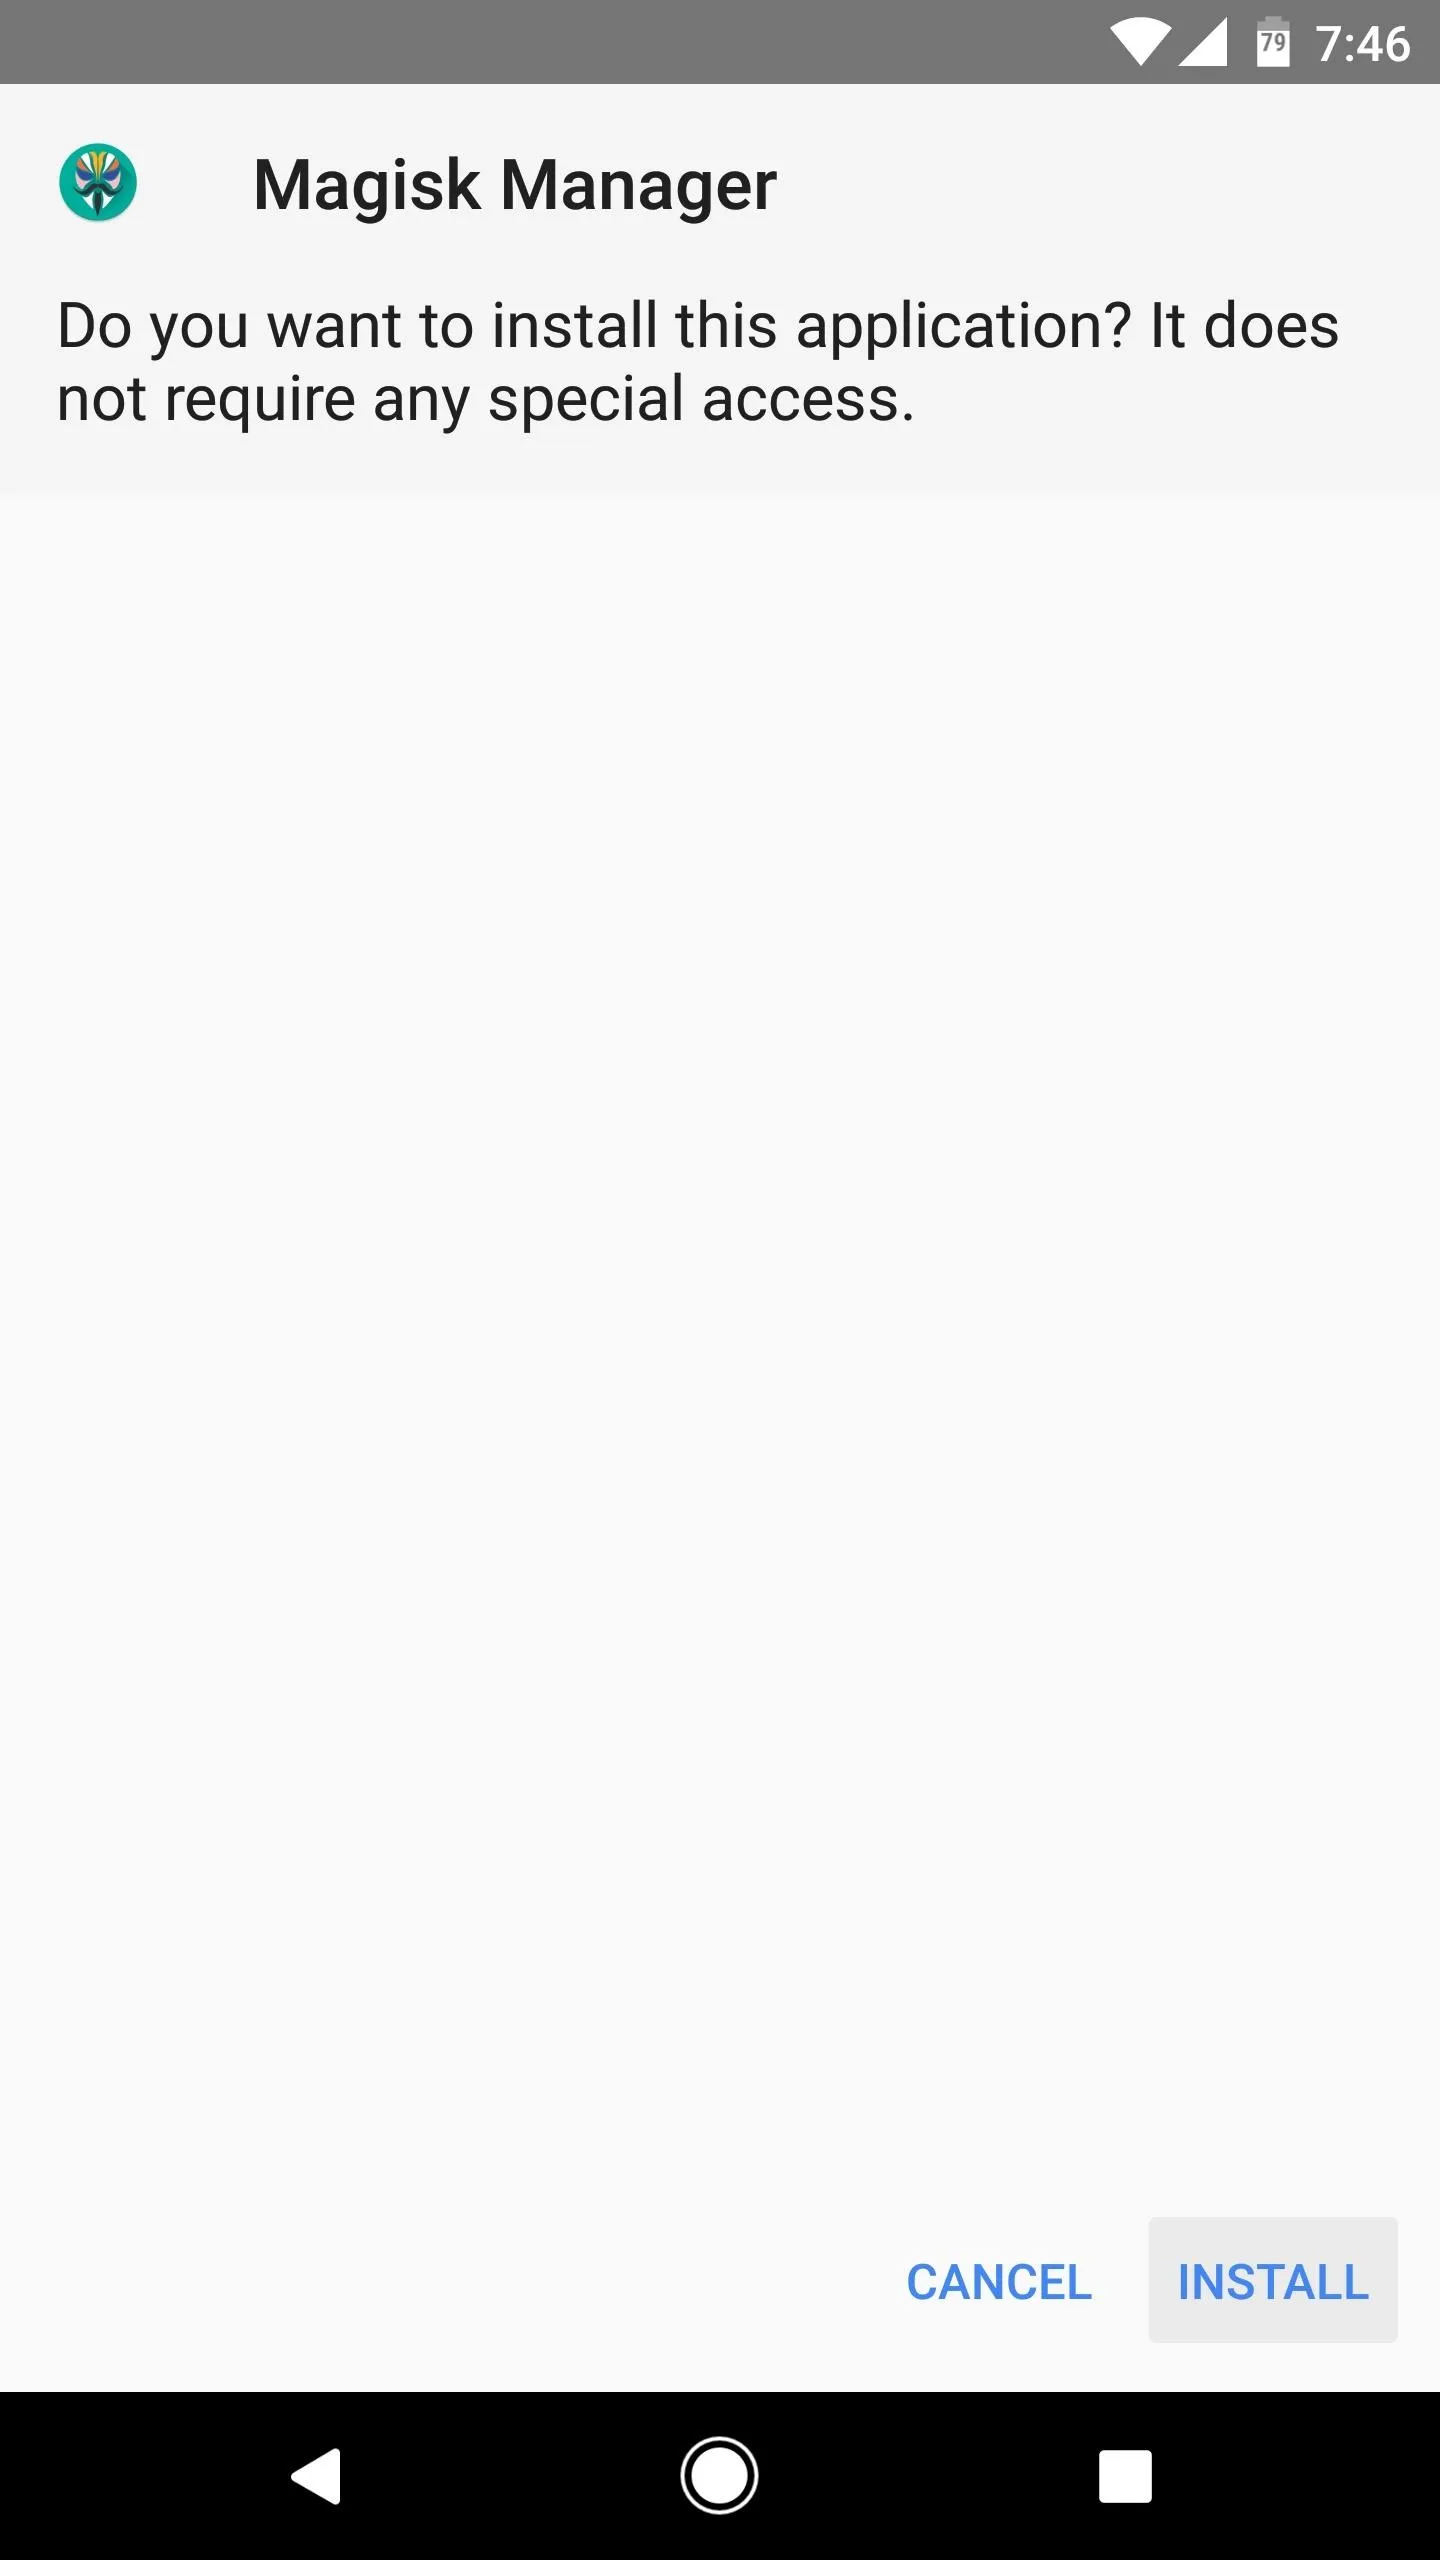
So, while we won't actually be installing Magisk until later in this guide, now would be a good time to install the Magisk Manager app. It isn't available on the Play Store for Pixel devices, so you'll have to sideload the app. That's simple, though — just grab the APK from the following link, then launch the file and press "Install" when prompted.
Re-Flash the Stock Boot Image (Most Users)
If you currently have TWRP, SuperSU, or a custom kernel installed, these mods alter your boot image, which creates conflicts when you install Magisk, so you'll have to clean things up first. The most reliable way to prevent such conflicts is to start fresh by reinstalling the stock boot image using Fastboot.
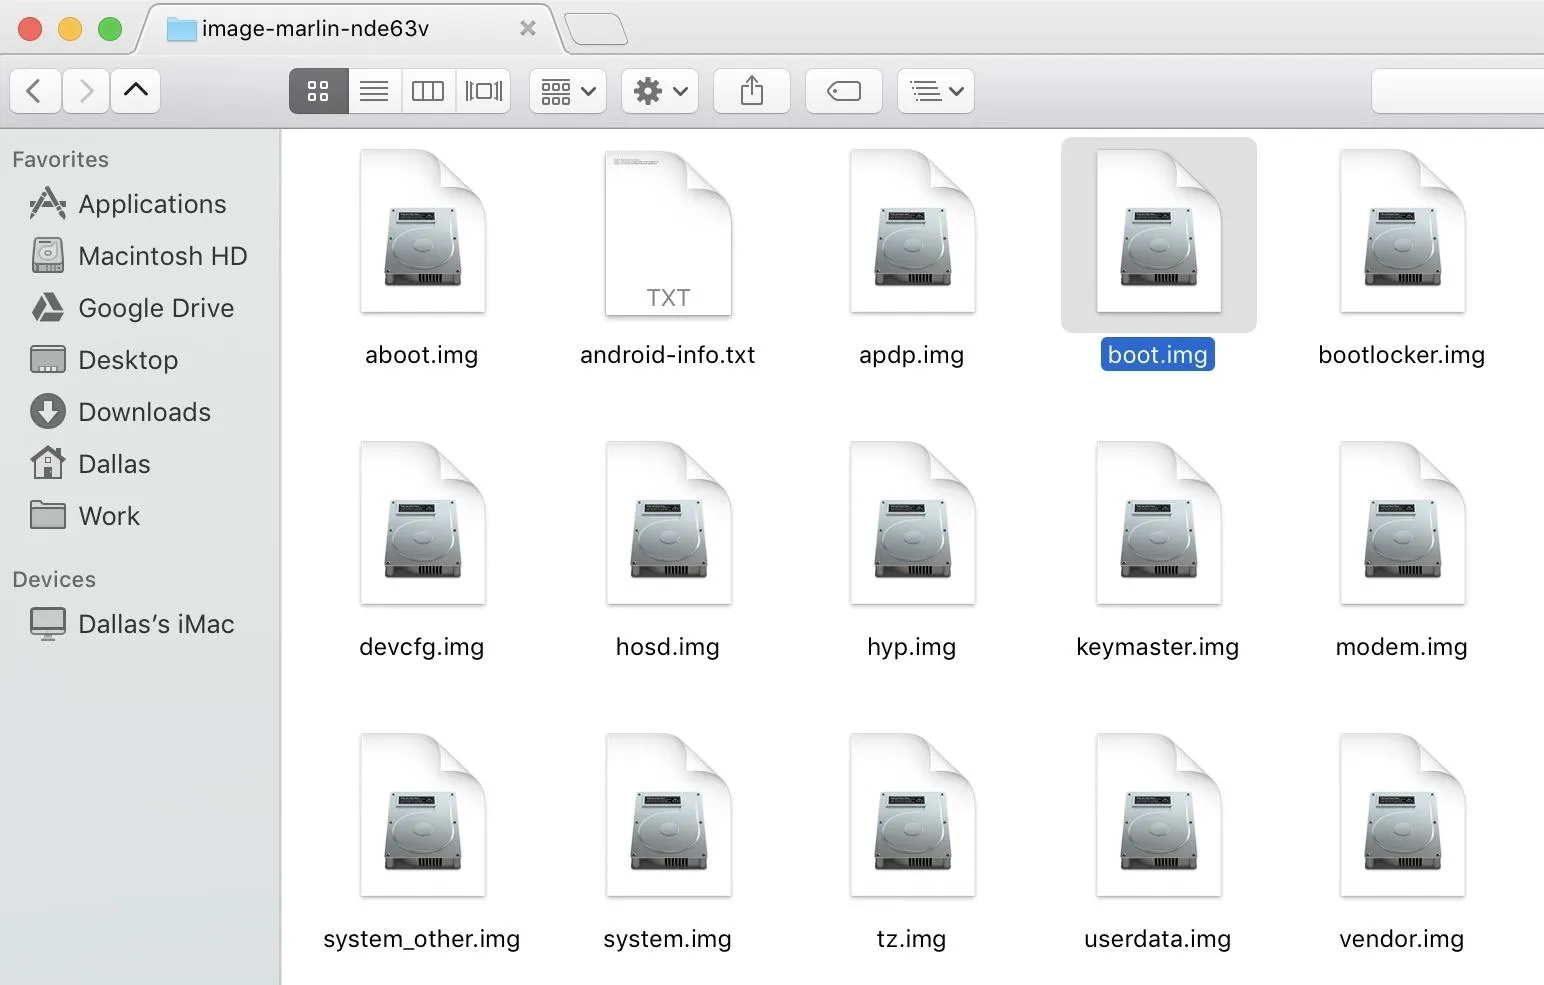
So first up, if you have any of the above-listed mods installed, download the factory images package for your Pixel or Pixel XL directly from Google. Then, extract the contents of the ZIP and open the folder this creates. From there, extract the second archive you'll find in this folder, then open that folder and copy the boot.img file.
Next, paste the boot.img file into the platform-tools folder inside of your ADB and Fastboot installation directory. For Windows users, this can be found at C:\Program Files (x86)\Android\android-sdk. For Linux and Mac users, it depends on where you installed ADB and Fastboot in the first place, so if you're not sure about the folder's location, search your computer for "platform-tools."
After that, Windows users can hold down the shift button on their keyboard, then right-click any empty space in the platform-tools folder and choose "Open command window here." Mac and Linux users will have to open a Terminal window and change directories to the platform-tools folder.
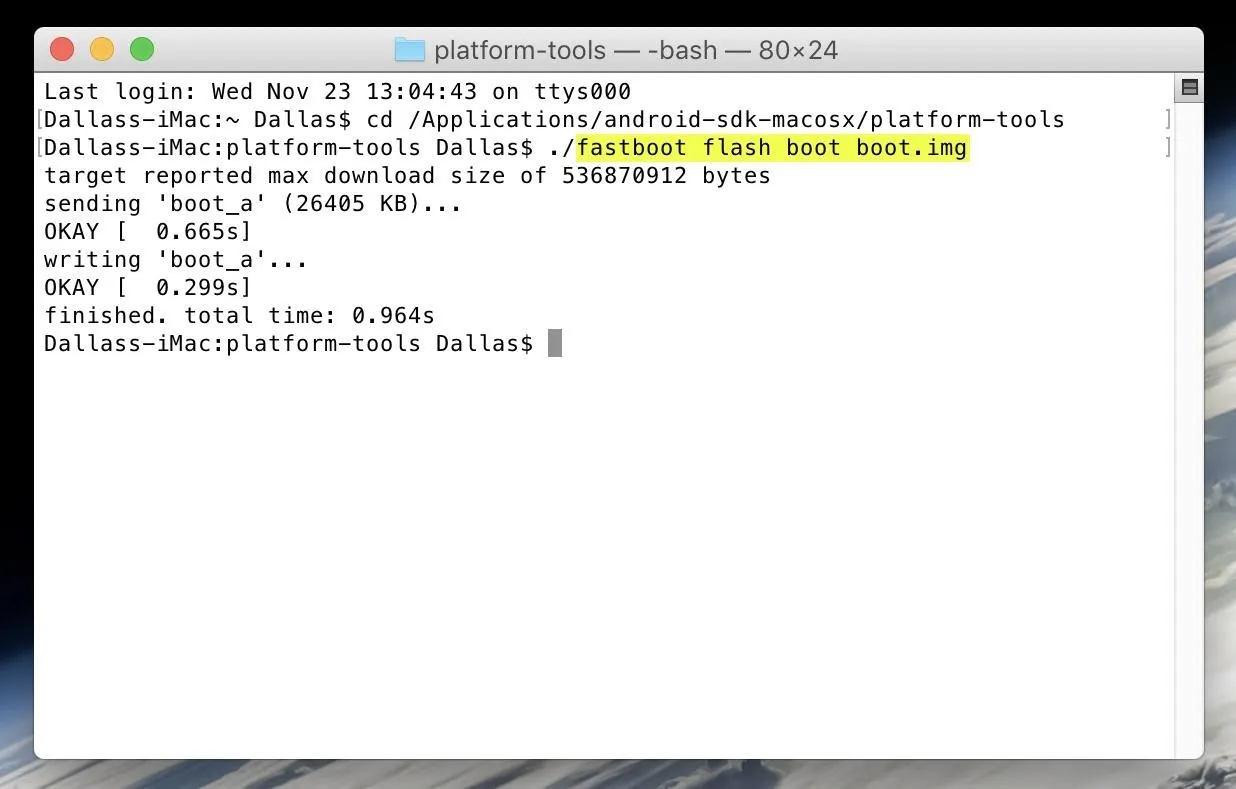
When you're done there, turn your Pixel or Pixel XL off. When the screen goes black, press and hold the volume down and power buttons simultaneously, and your phone will enter Bootloader Mode. From here, connect the phone to your computer with a USB data cable, then type the following command into the Terminal window:
fastboot flash boot boot.img
Note that Mac users will have to add a period and a slash (./) to the beginning of the above command, and Linux users will have to add a slash (/).
When you're done there, leave the command prompt or Terminal window open, and leave your phone on the main bootloader menu, because you'll need to re-install TWRP next, and that requires Fastboot as well.
Install TWRP
Re-flashing the stock boot image will have removed TWRP recovery if you already had it installed. But you'll need TWRP in order to flash Magisk, which means you'll need to reinstall the custom recovery.
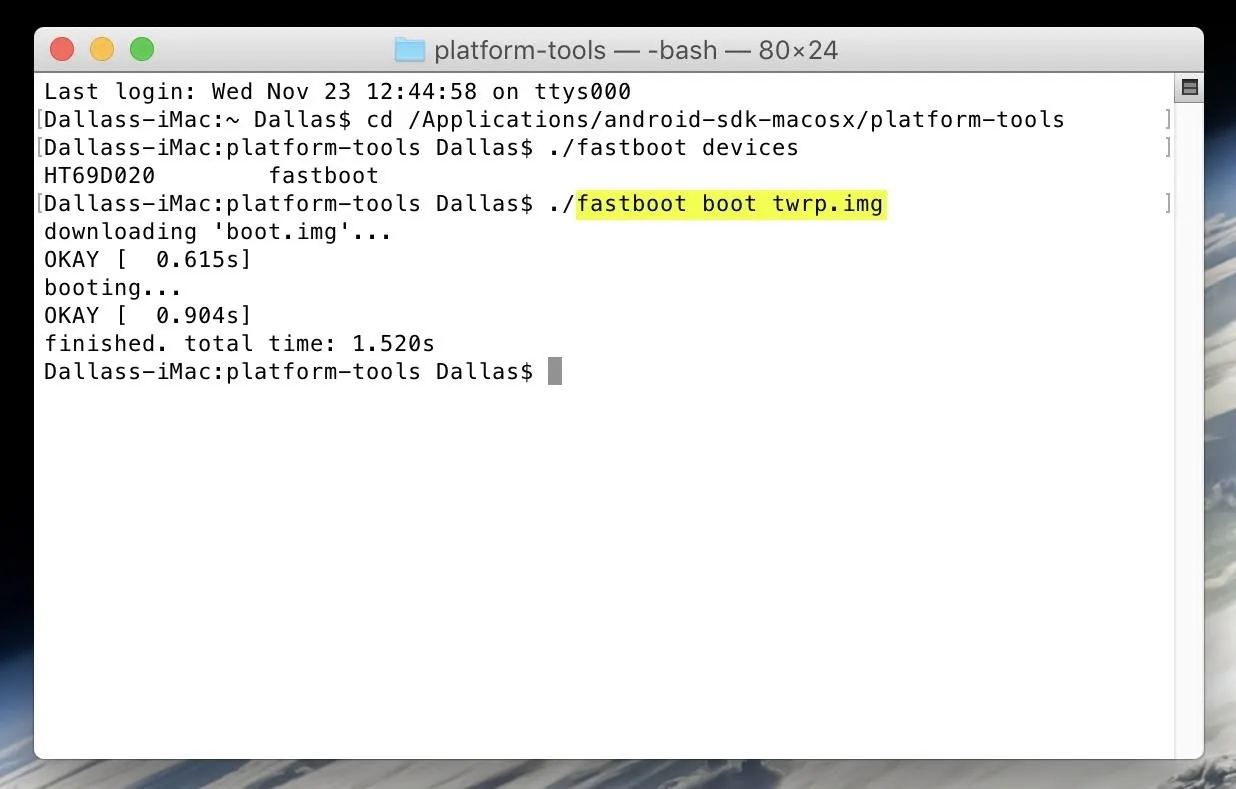
So download this file, then place it in your platform-tools folder. From there, type "fastboot boot twrp.img" into the command prompt (without the quotation marks), then hit enter. When TWRP boots on your phone, tap the "Install" button, then select the TWRP ZIP you downloaded in Step 1. After that, tap "Add more ZIPs," then select the VerifiedBootSigner.zip file and swipe the slider at the bottom of the screen. When that's finished, head to TWRP's main menu and select "Reboot," then "Recovery."
If you'd like a more detailed guide for installing TWRP on your Pixel or Pixel XL, we've outlined the entire process with a full tutorial that you can find at the following link:
Installing TWRP.
Flash the ZIPs
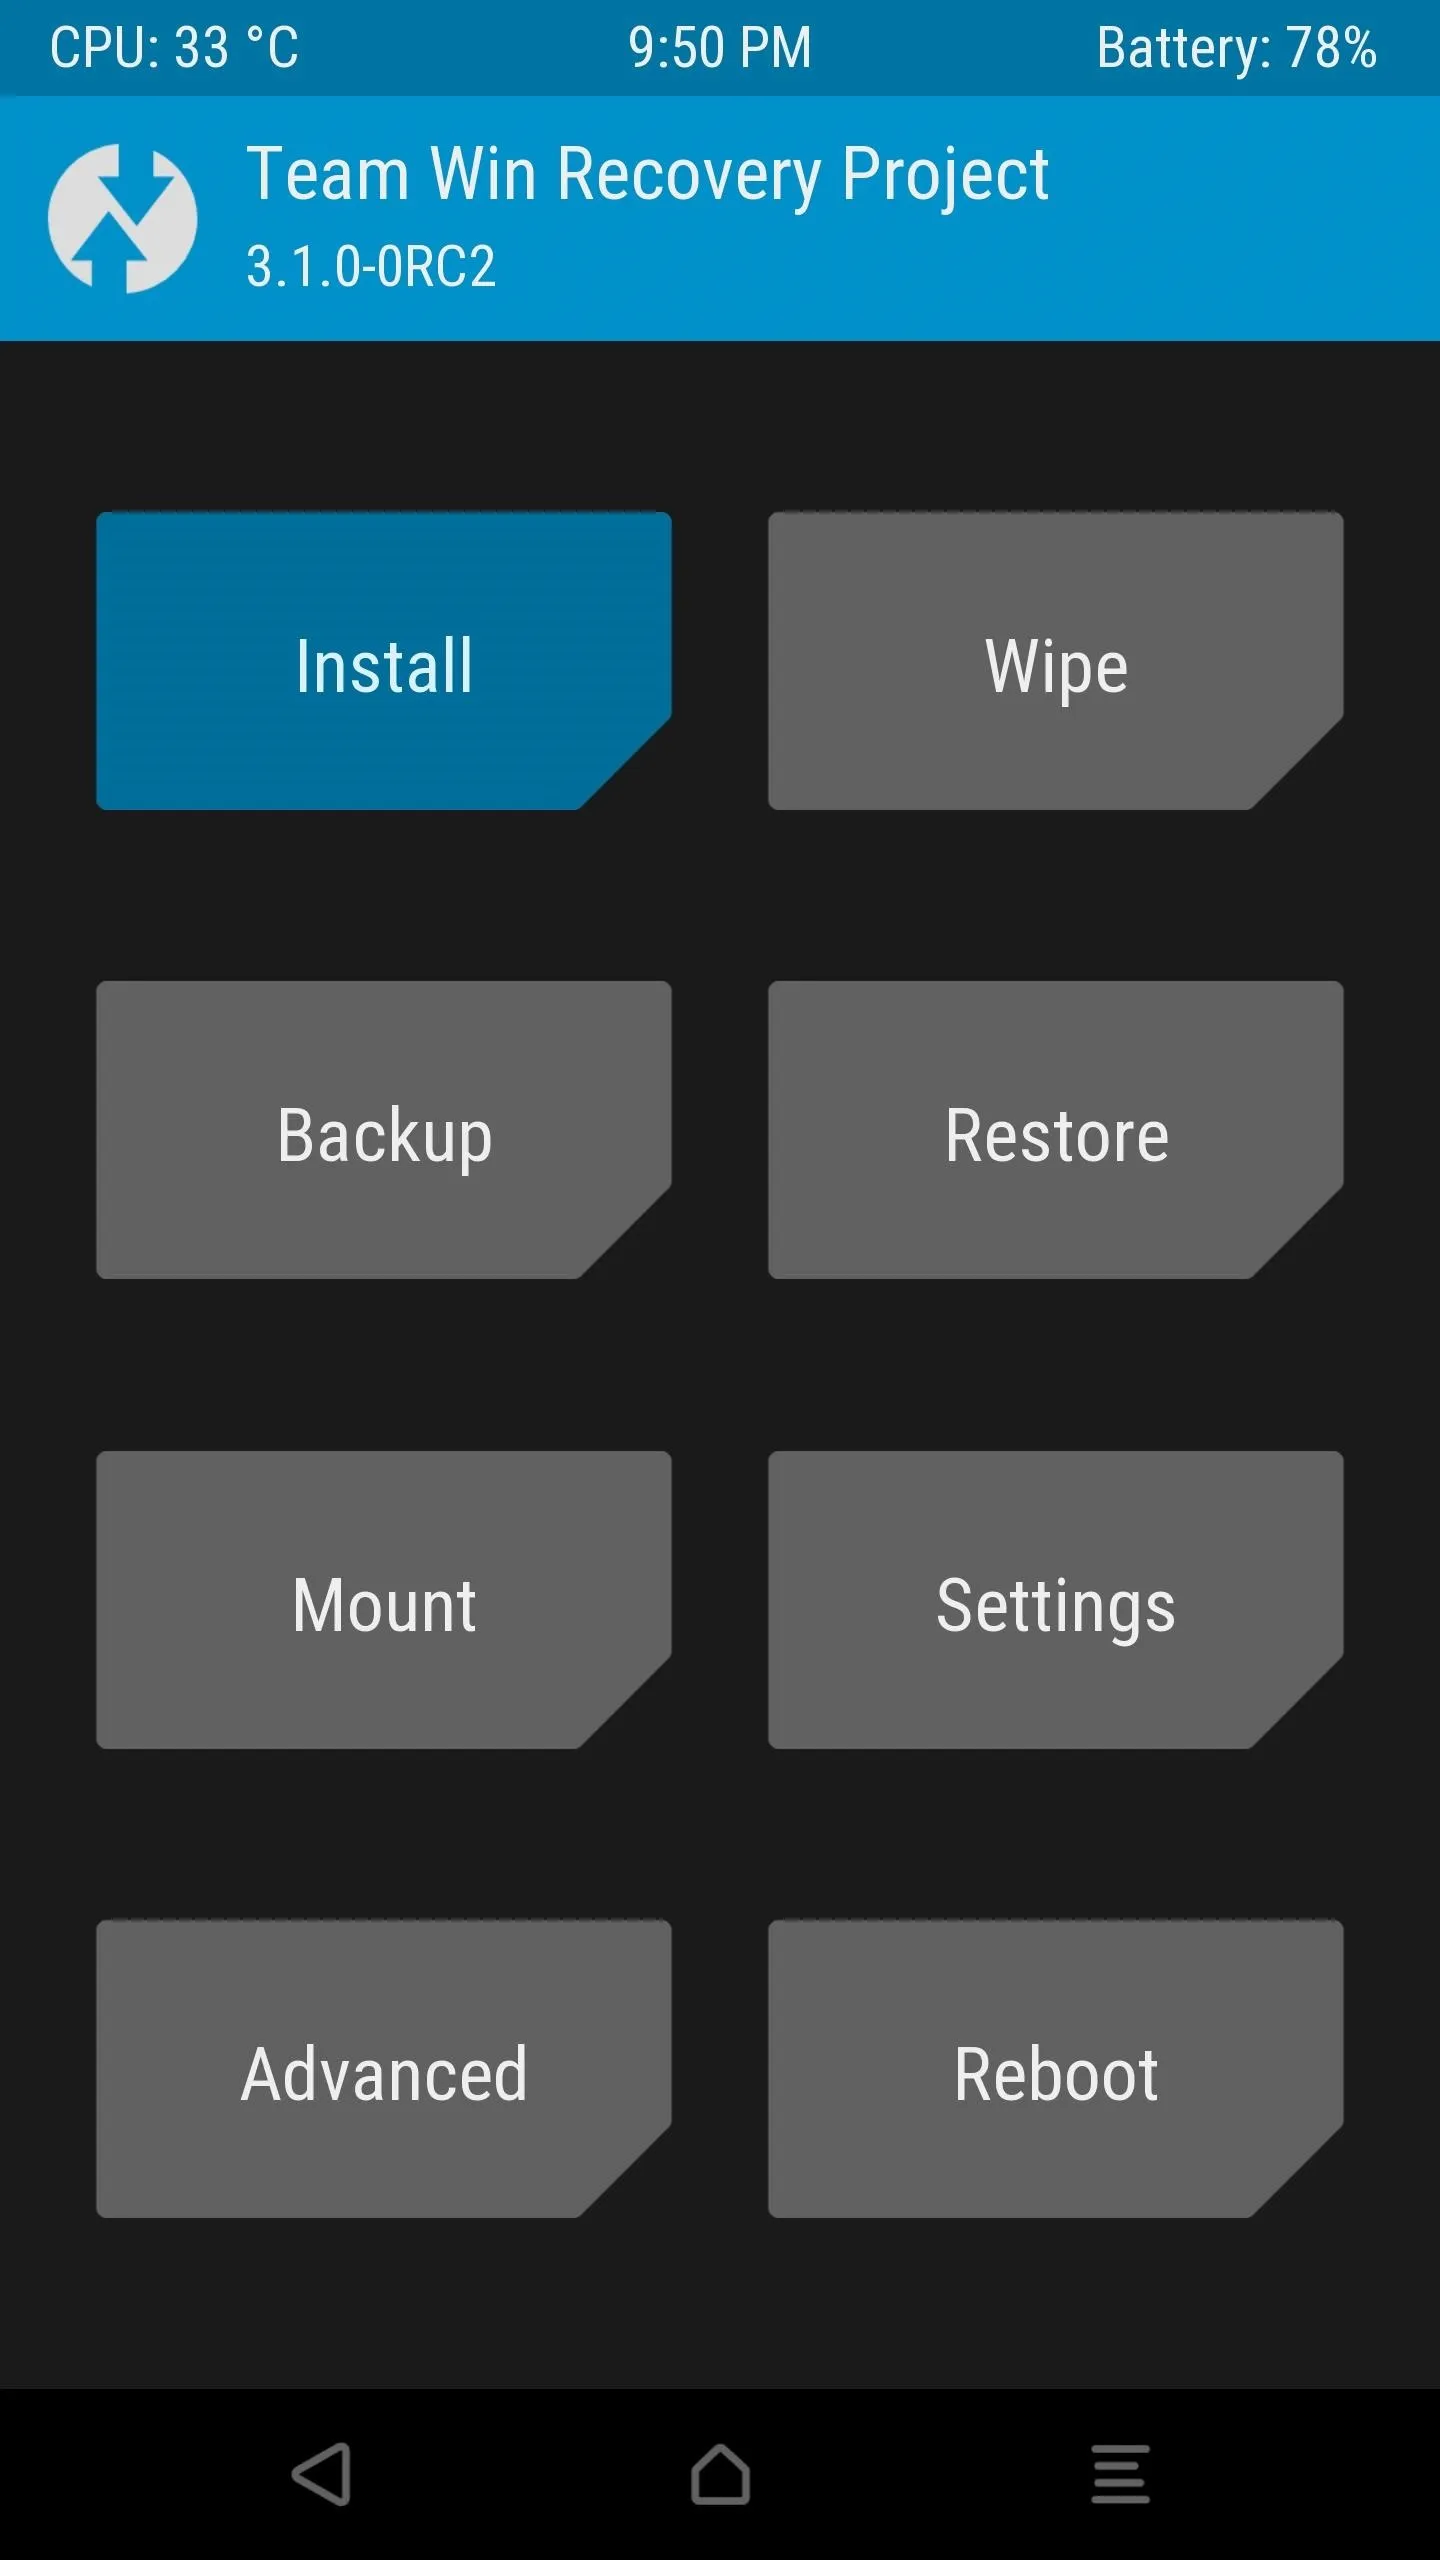
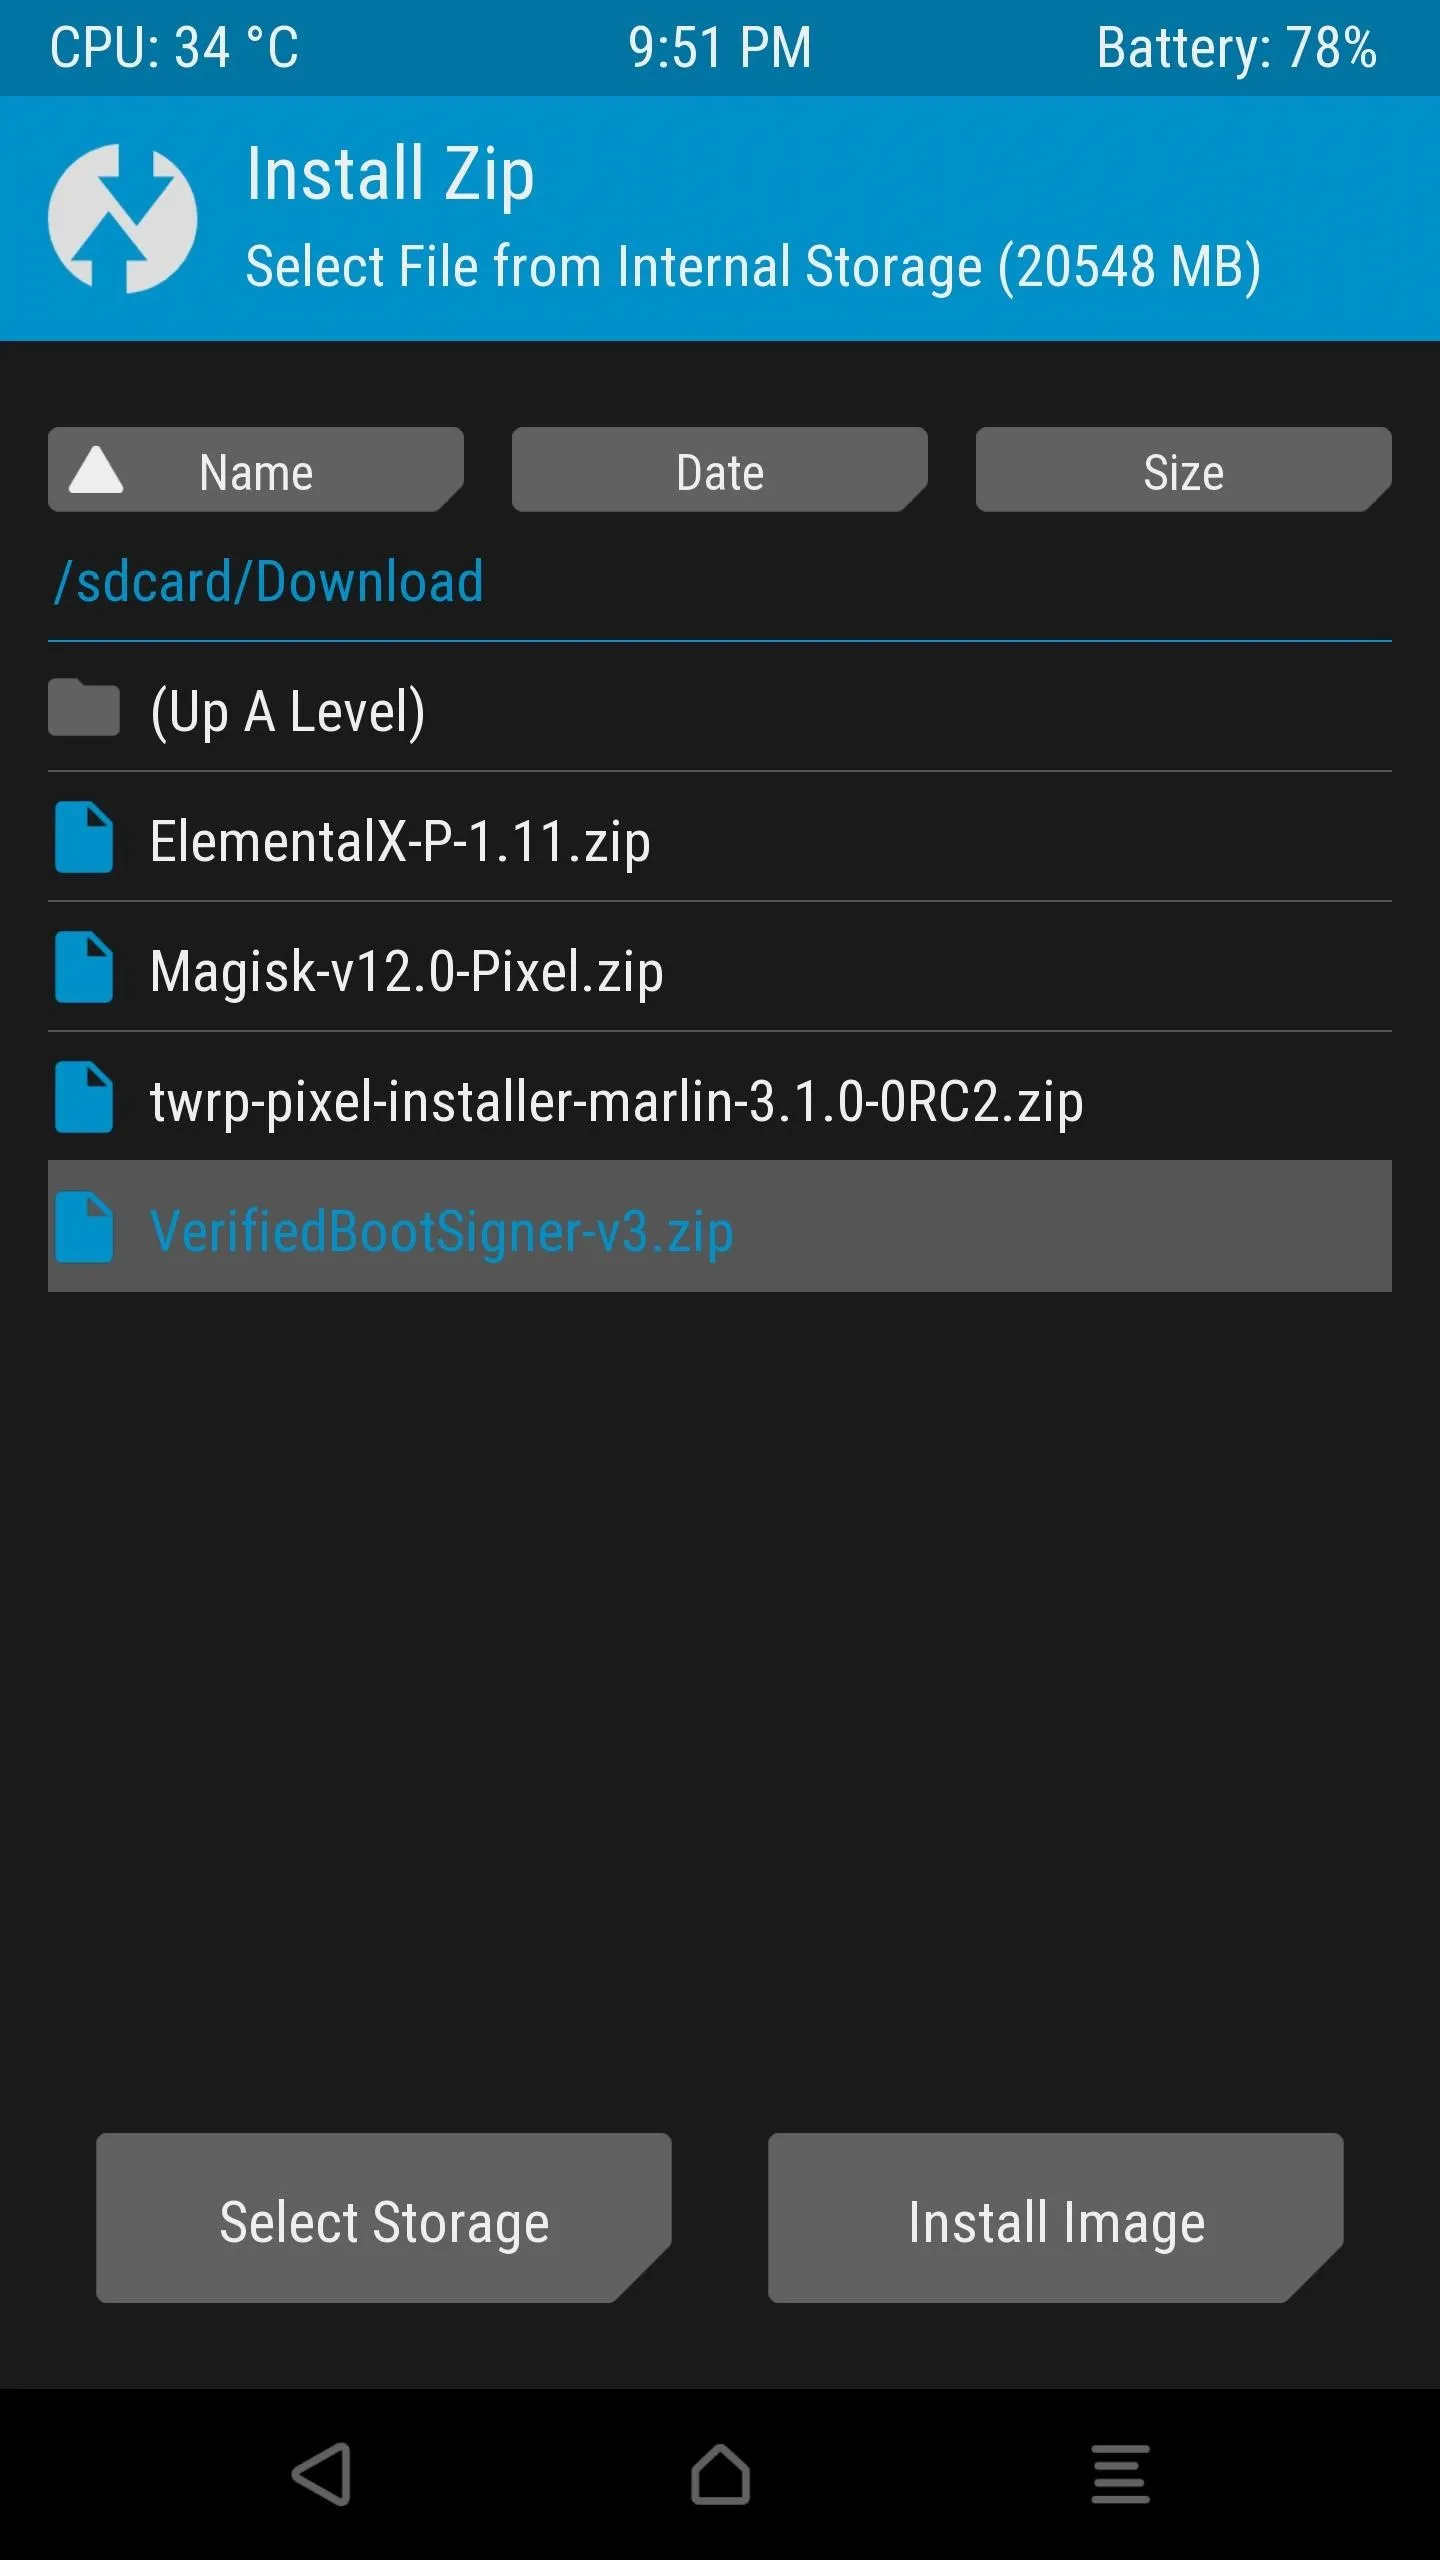
At this point, go ahead and disconnect your phone from your computer. Next, make sure your phone is booted into TWRP recovery mode. From there, tap the "Install" button, then navigate to your device's Download folder. But before you get to flashing, note that the order in which you flash the ZIPs is important.
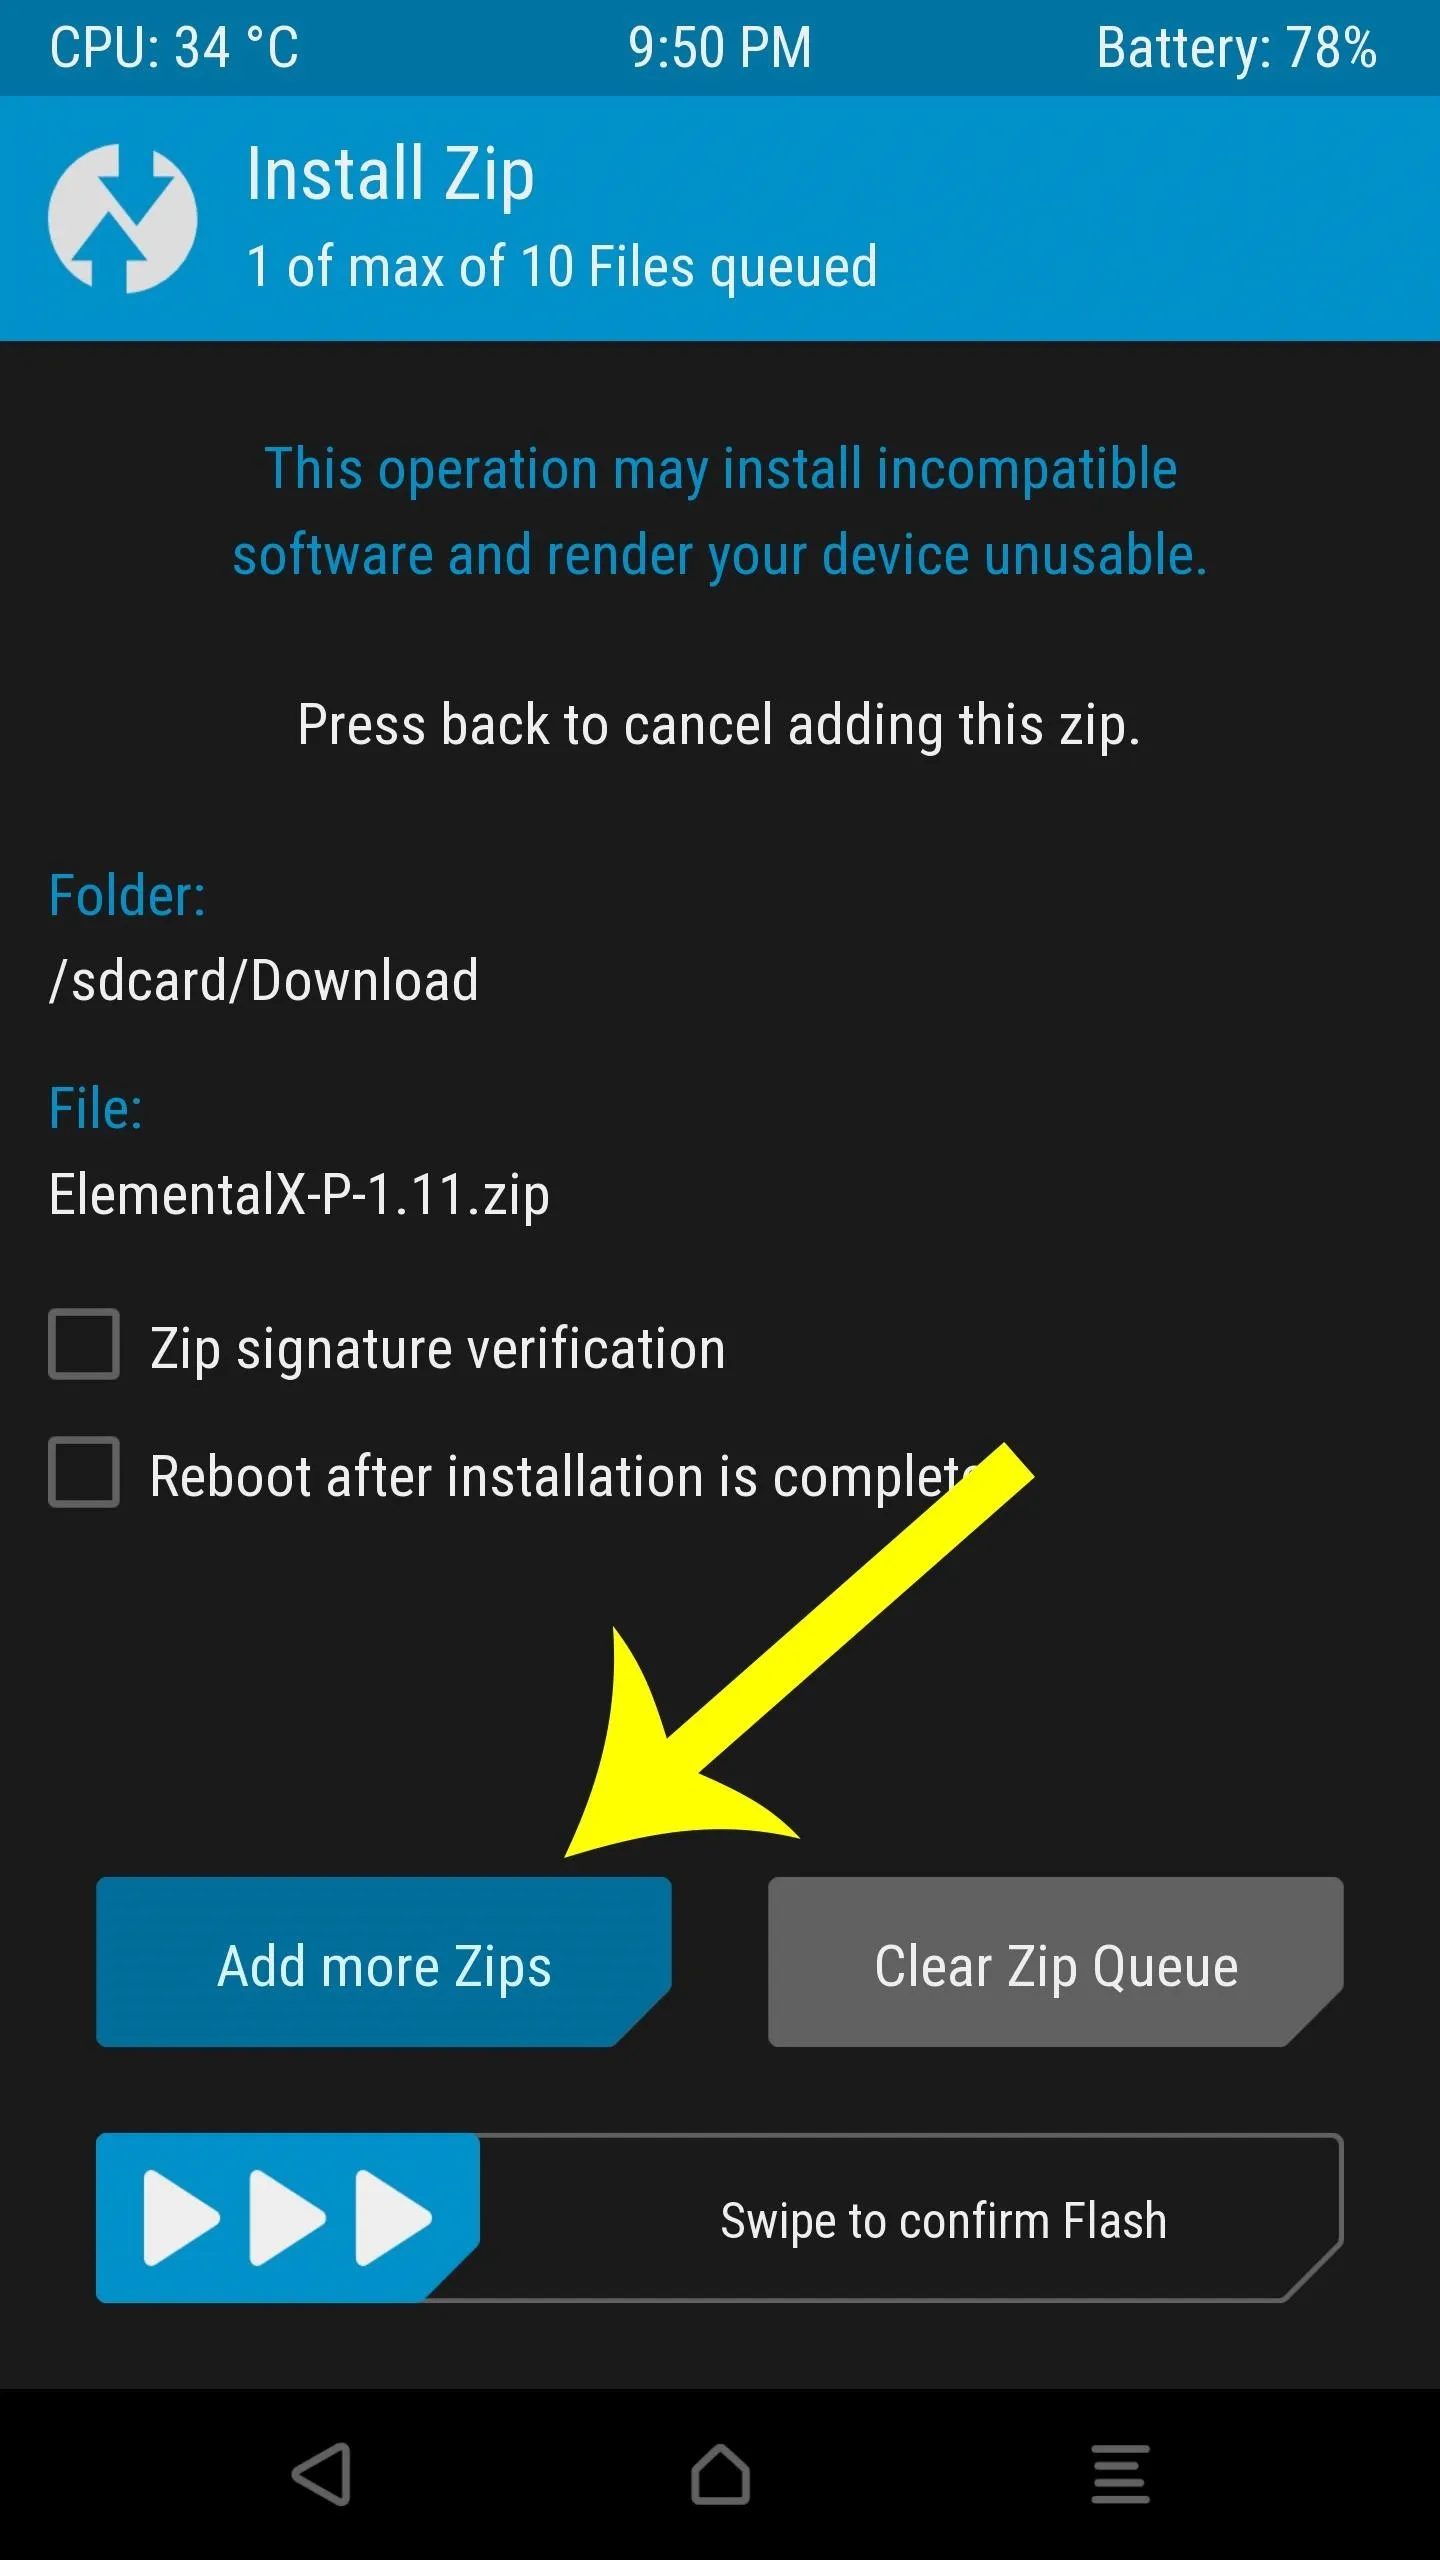
So first, select the ElementalX.zip file, but don't flash it just yet. Instead, tap the "Add more ZIPs" button towards the bottom of the screen.
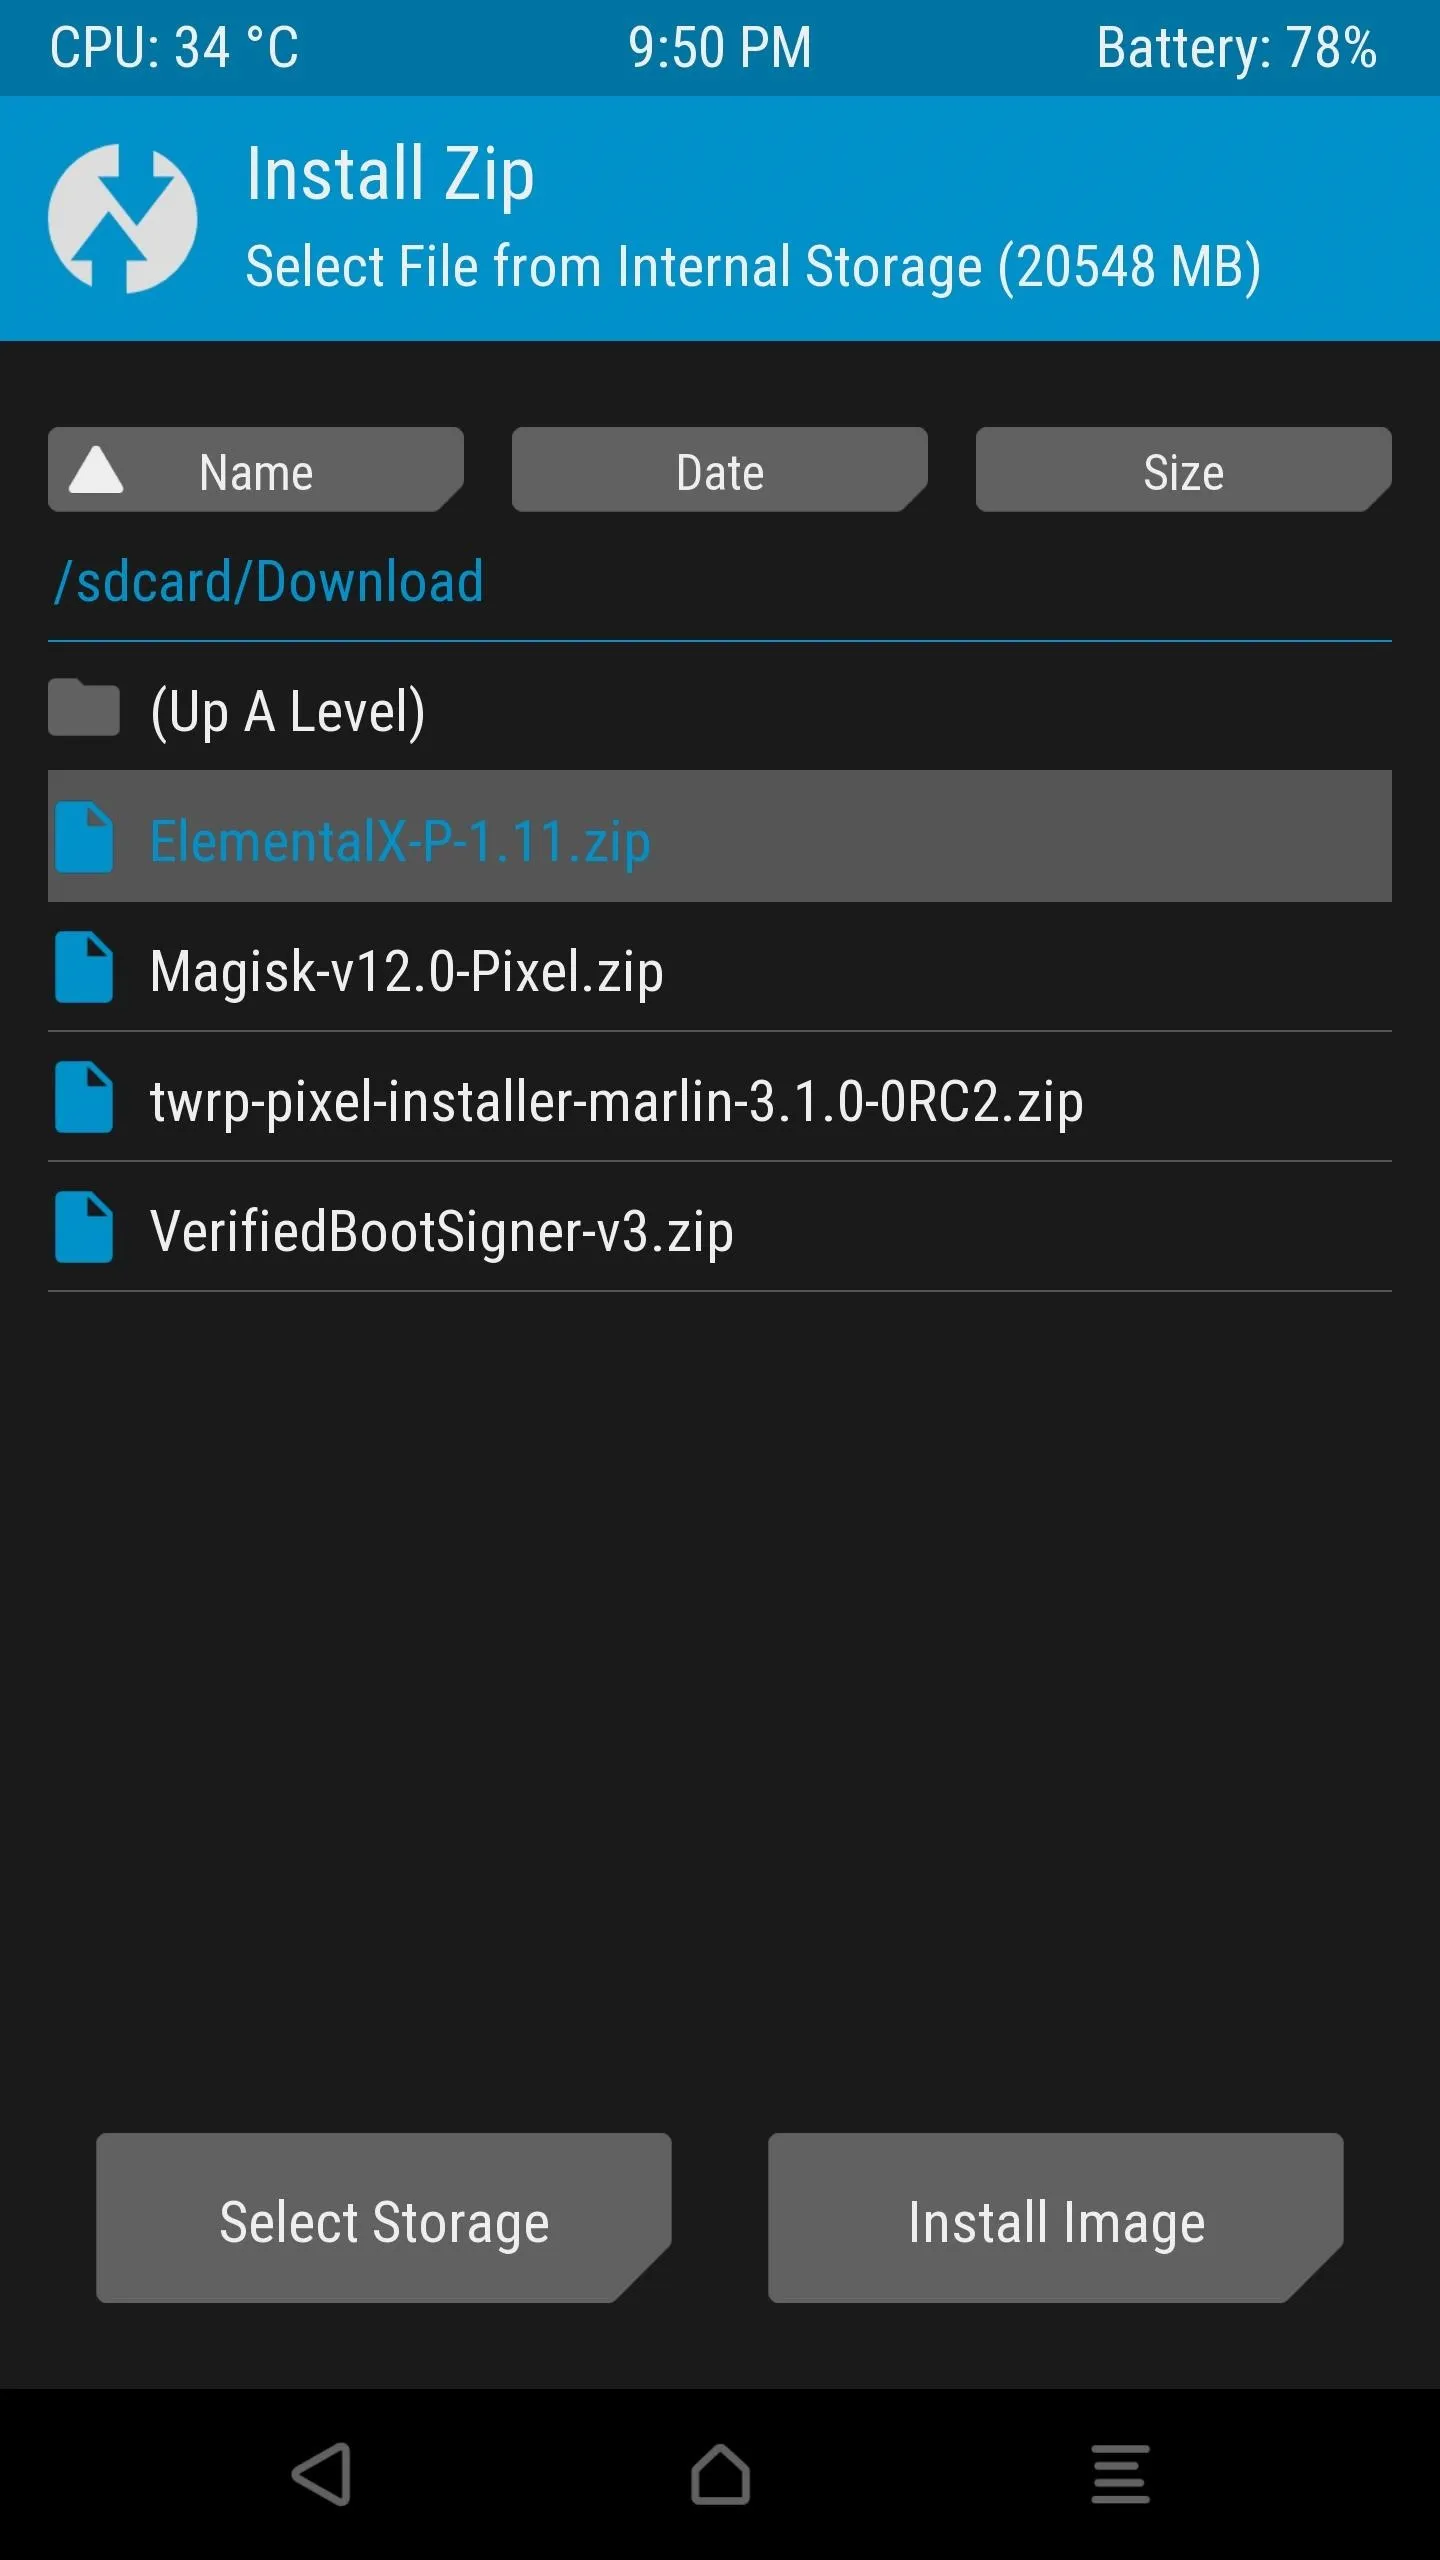
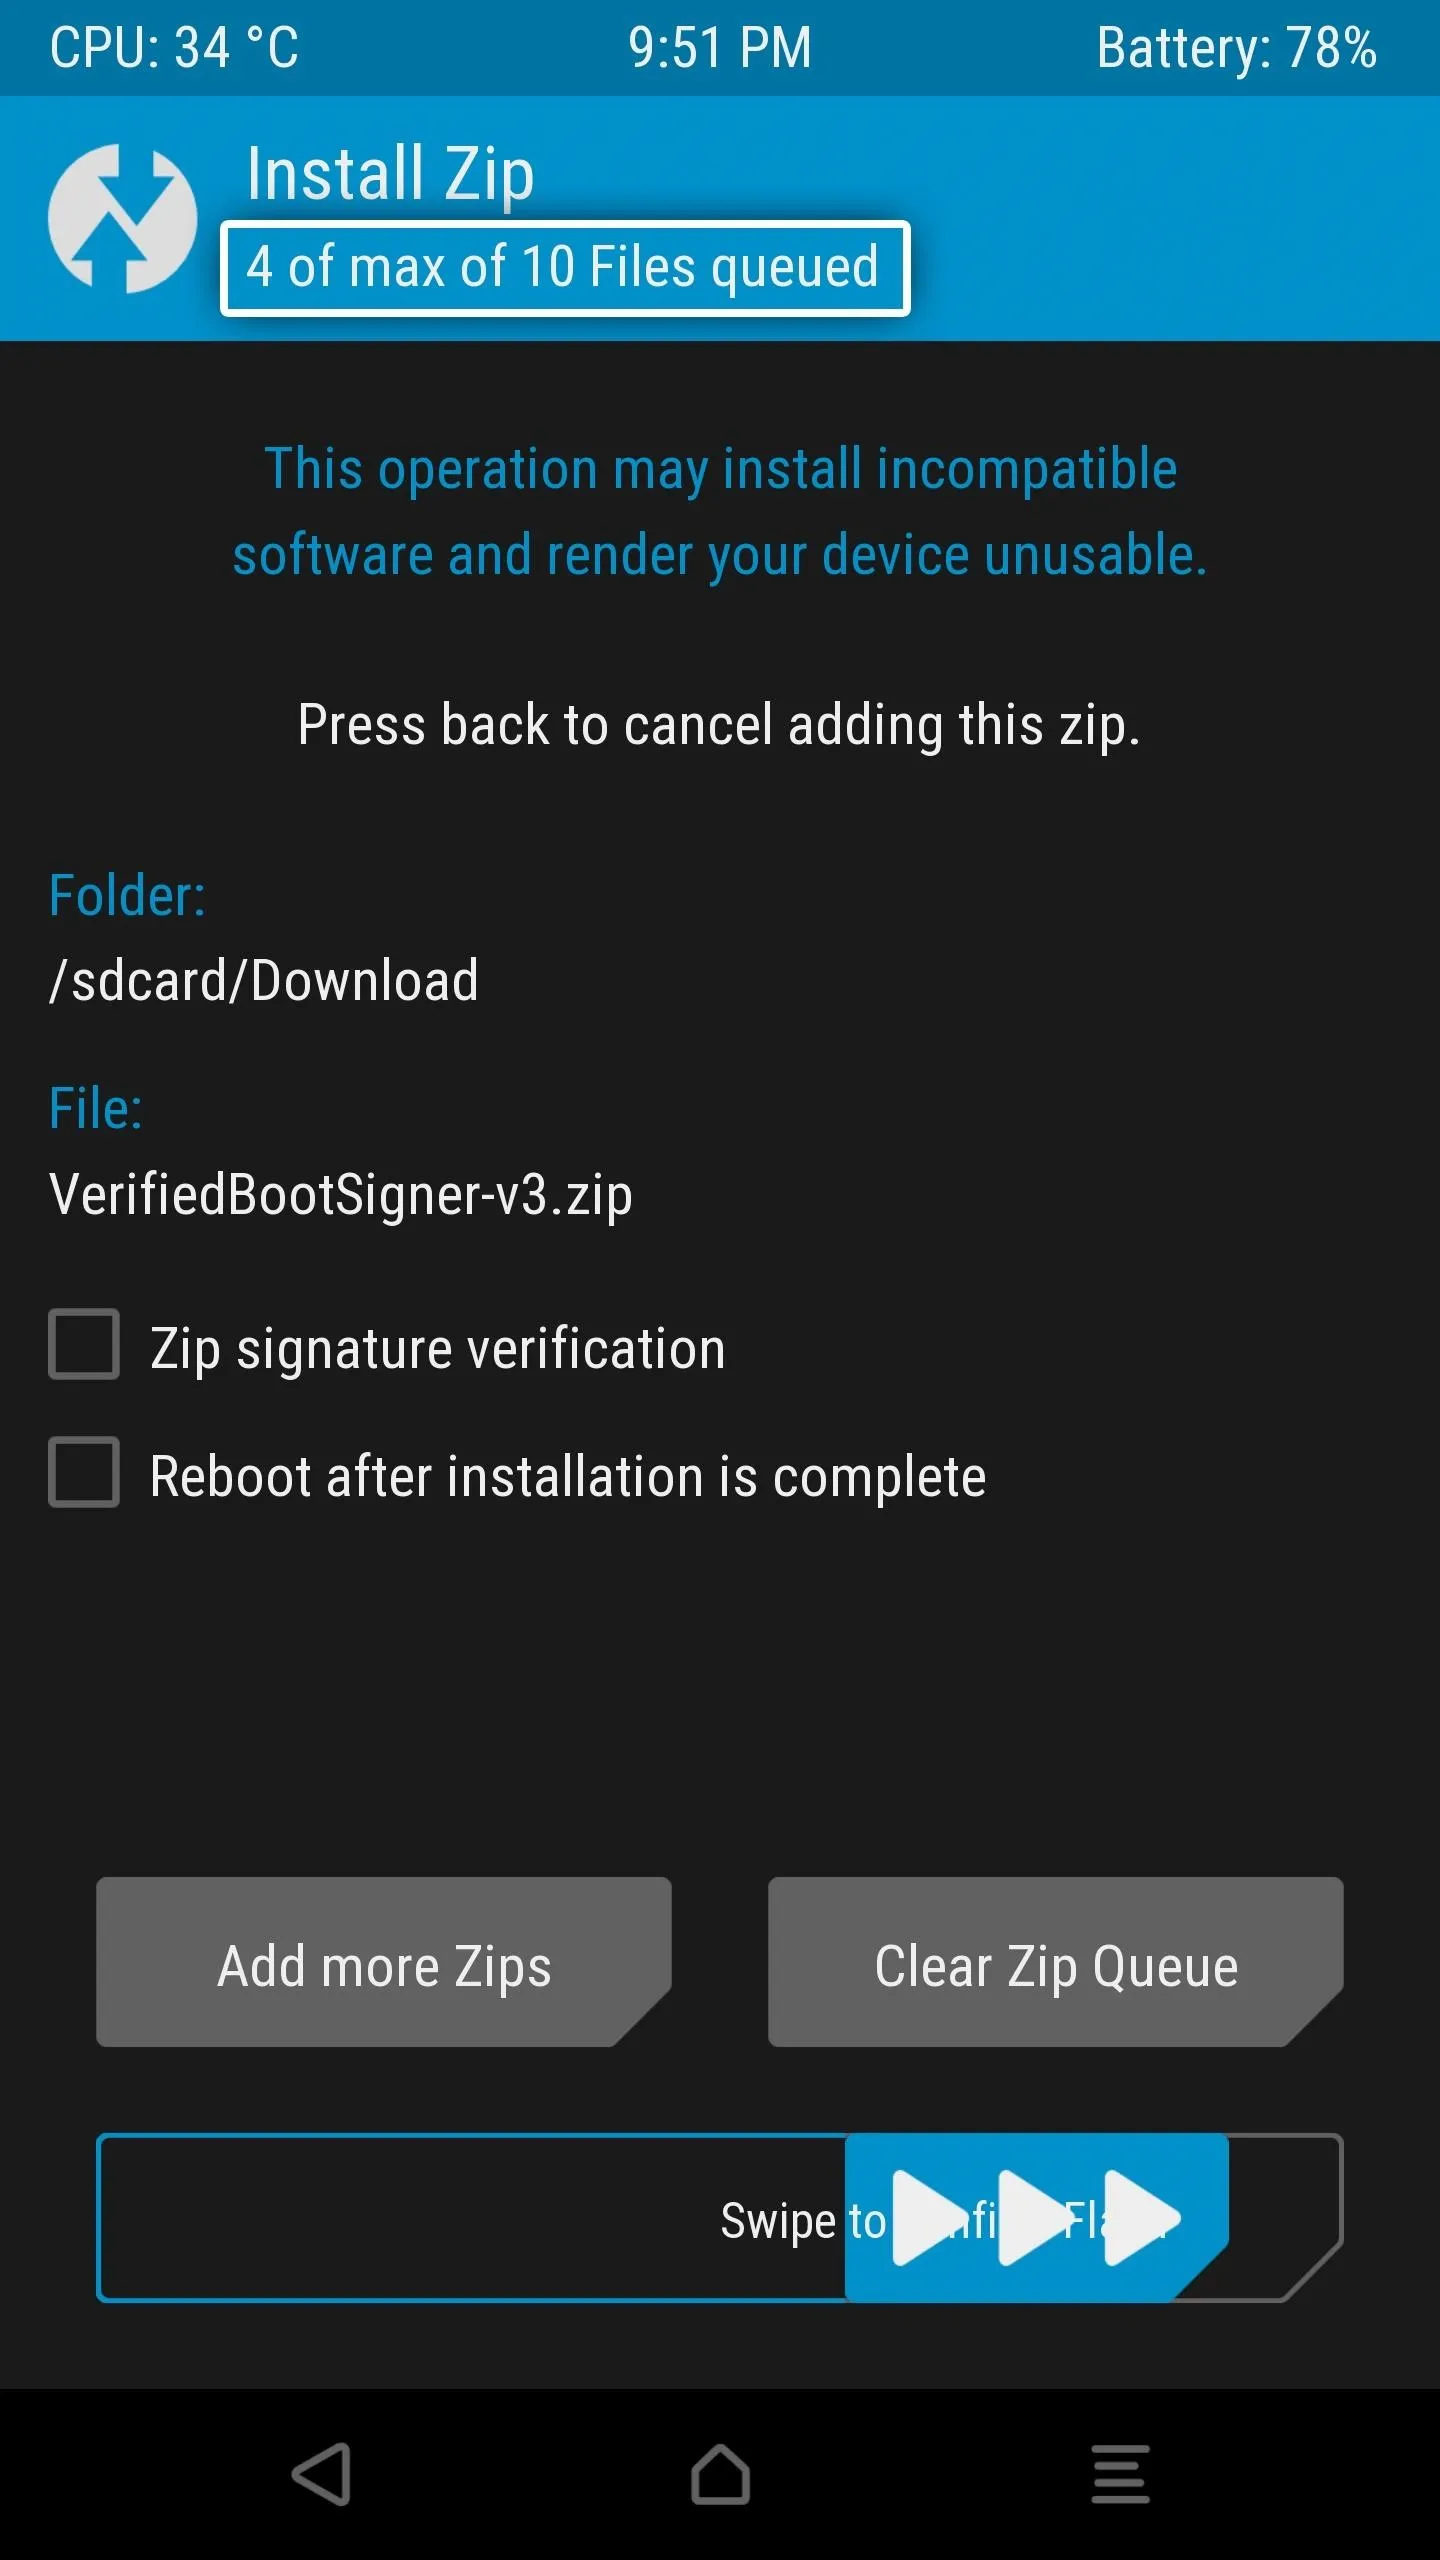
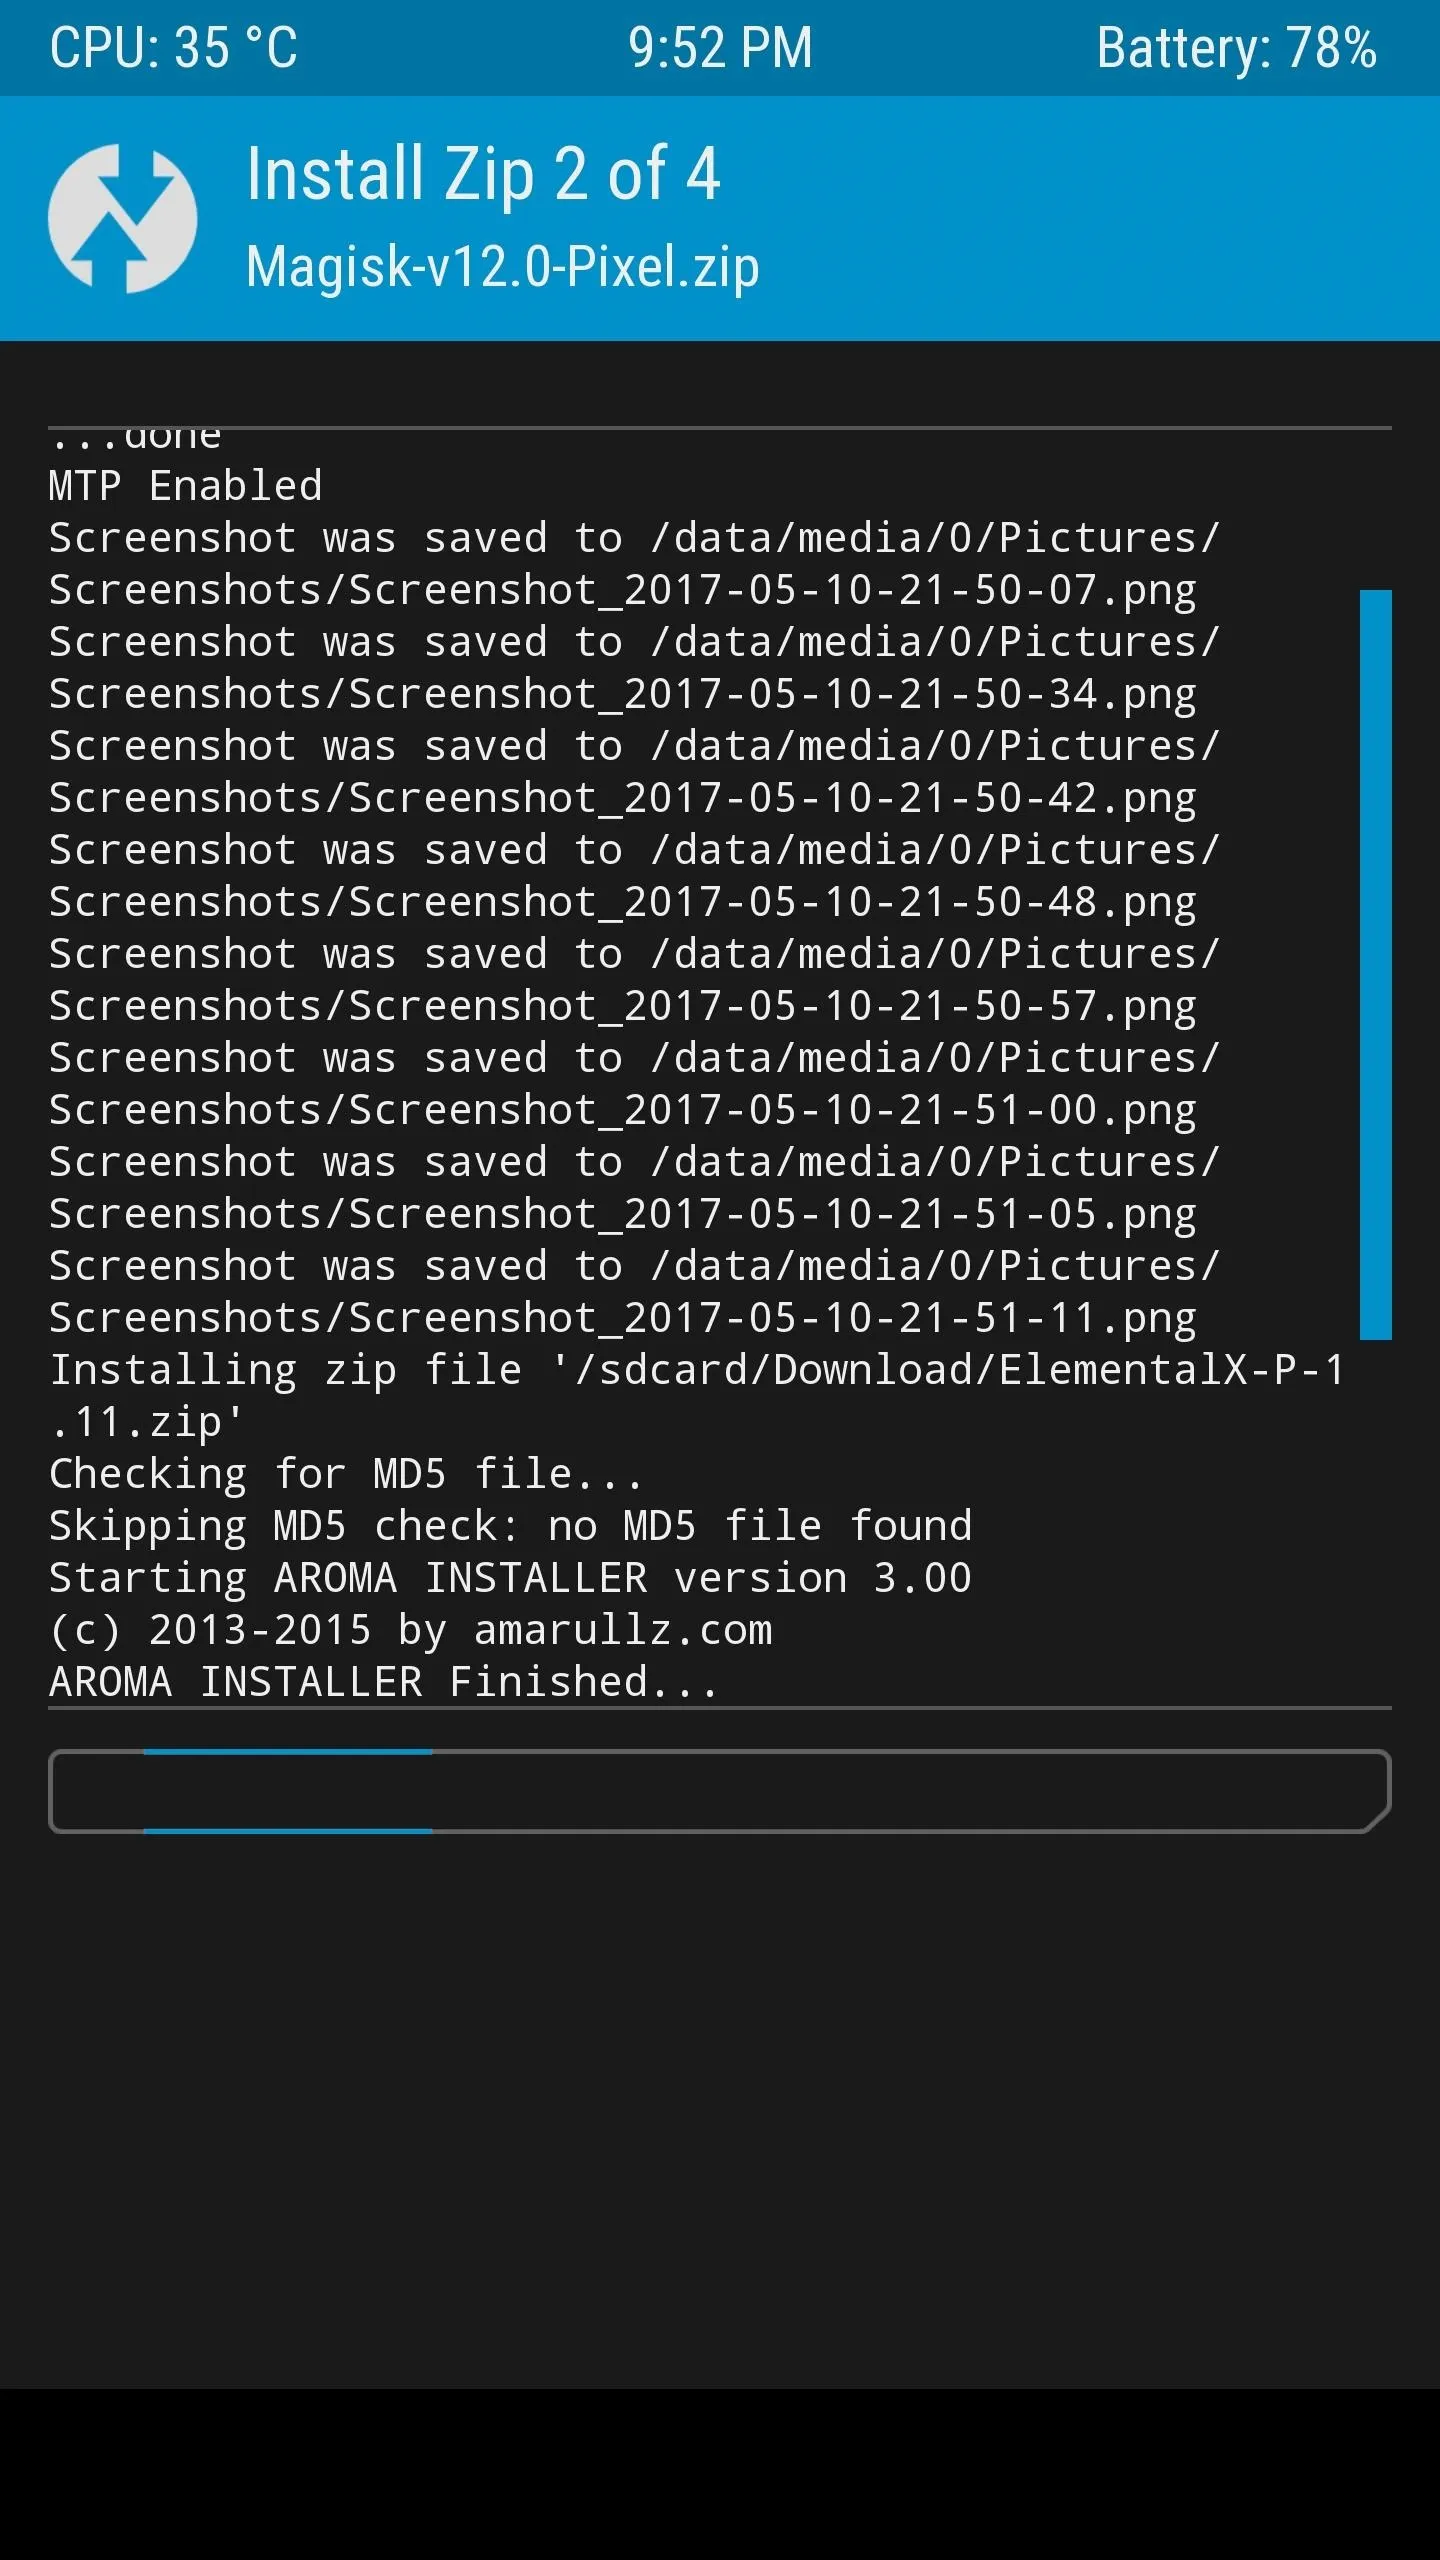
After that, select the Magisk ZIP file, then tap "Add more ZIPs" again. Next, select the TWRP ZIP file, then hit "Add More ZIPs," and finally, select the VerifiedBootSigner ZIP. When the message at the top of the screen says "4 out of max 10 Files queued," you're all set, so swipe the slider at the bottom of the screen to start the process.
Note: If you opted to flash SuperSU, add the SuperSU ZIP after TWRP, but before the VerifiedBootSigner.
Flash ZIPs in this order: 1. ElementalX, 2. Magisk, 3. TWRP, 4. Boot Signer.
Flash ZIPs in this order: 1. ElementalX, 2. Magisk, 3. TWRP, 4. Boot Signer.
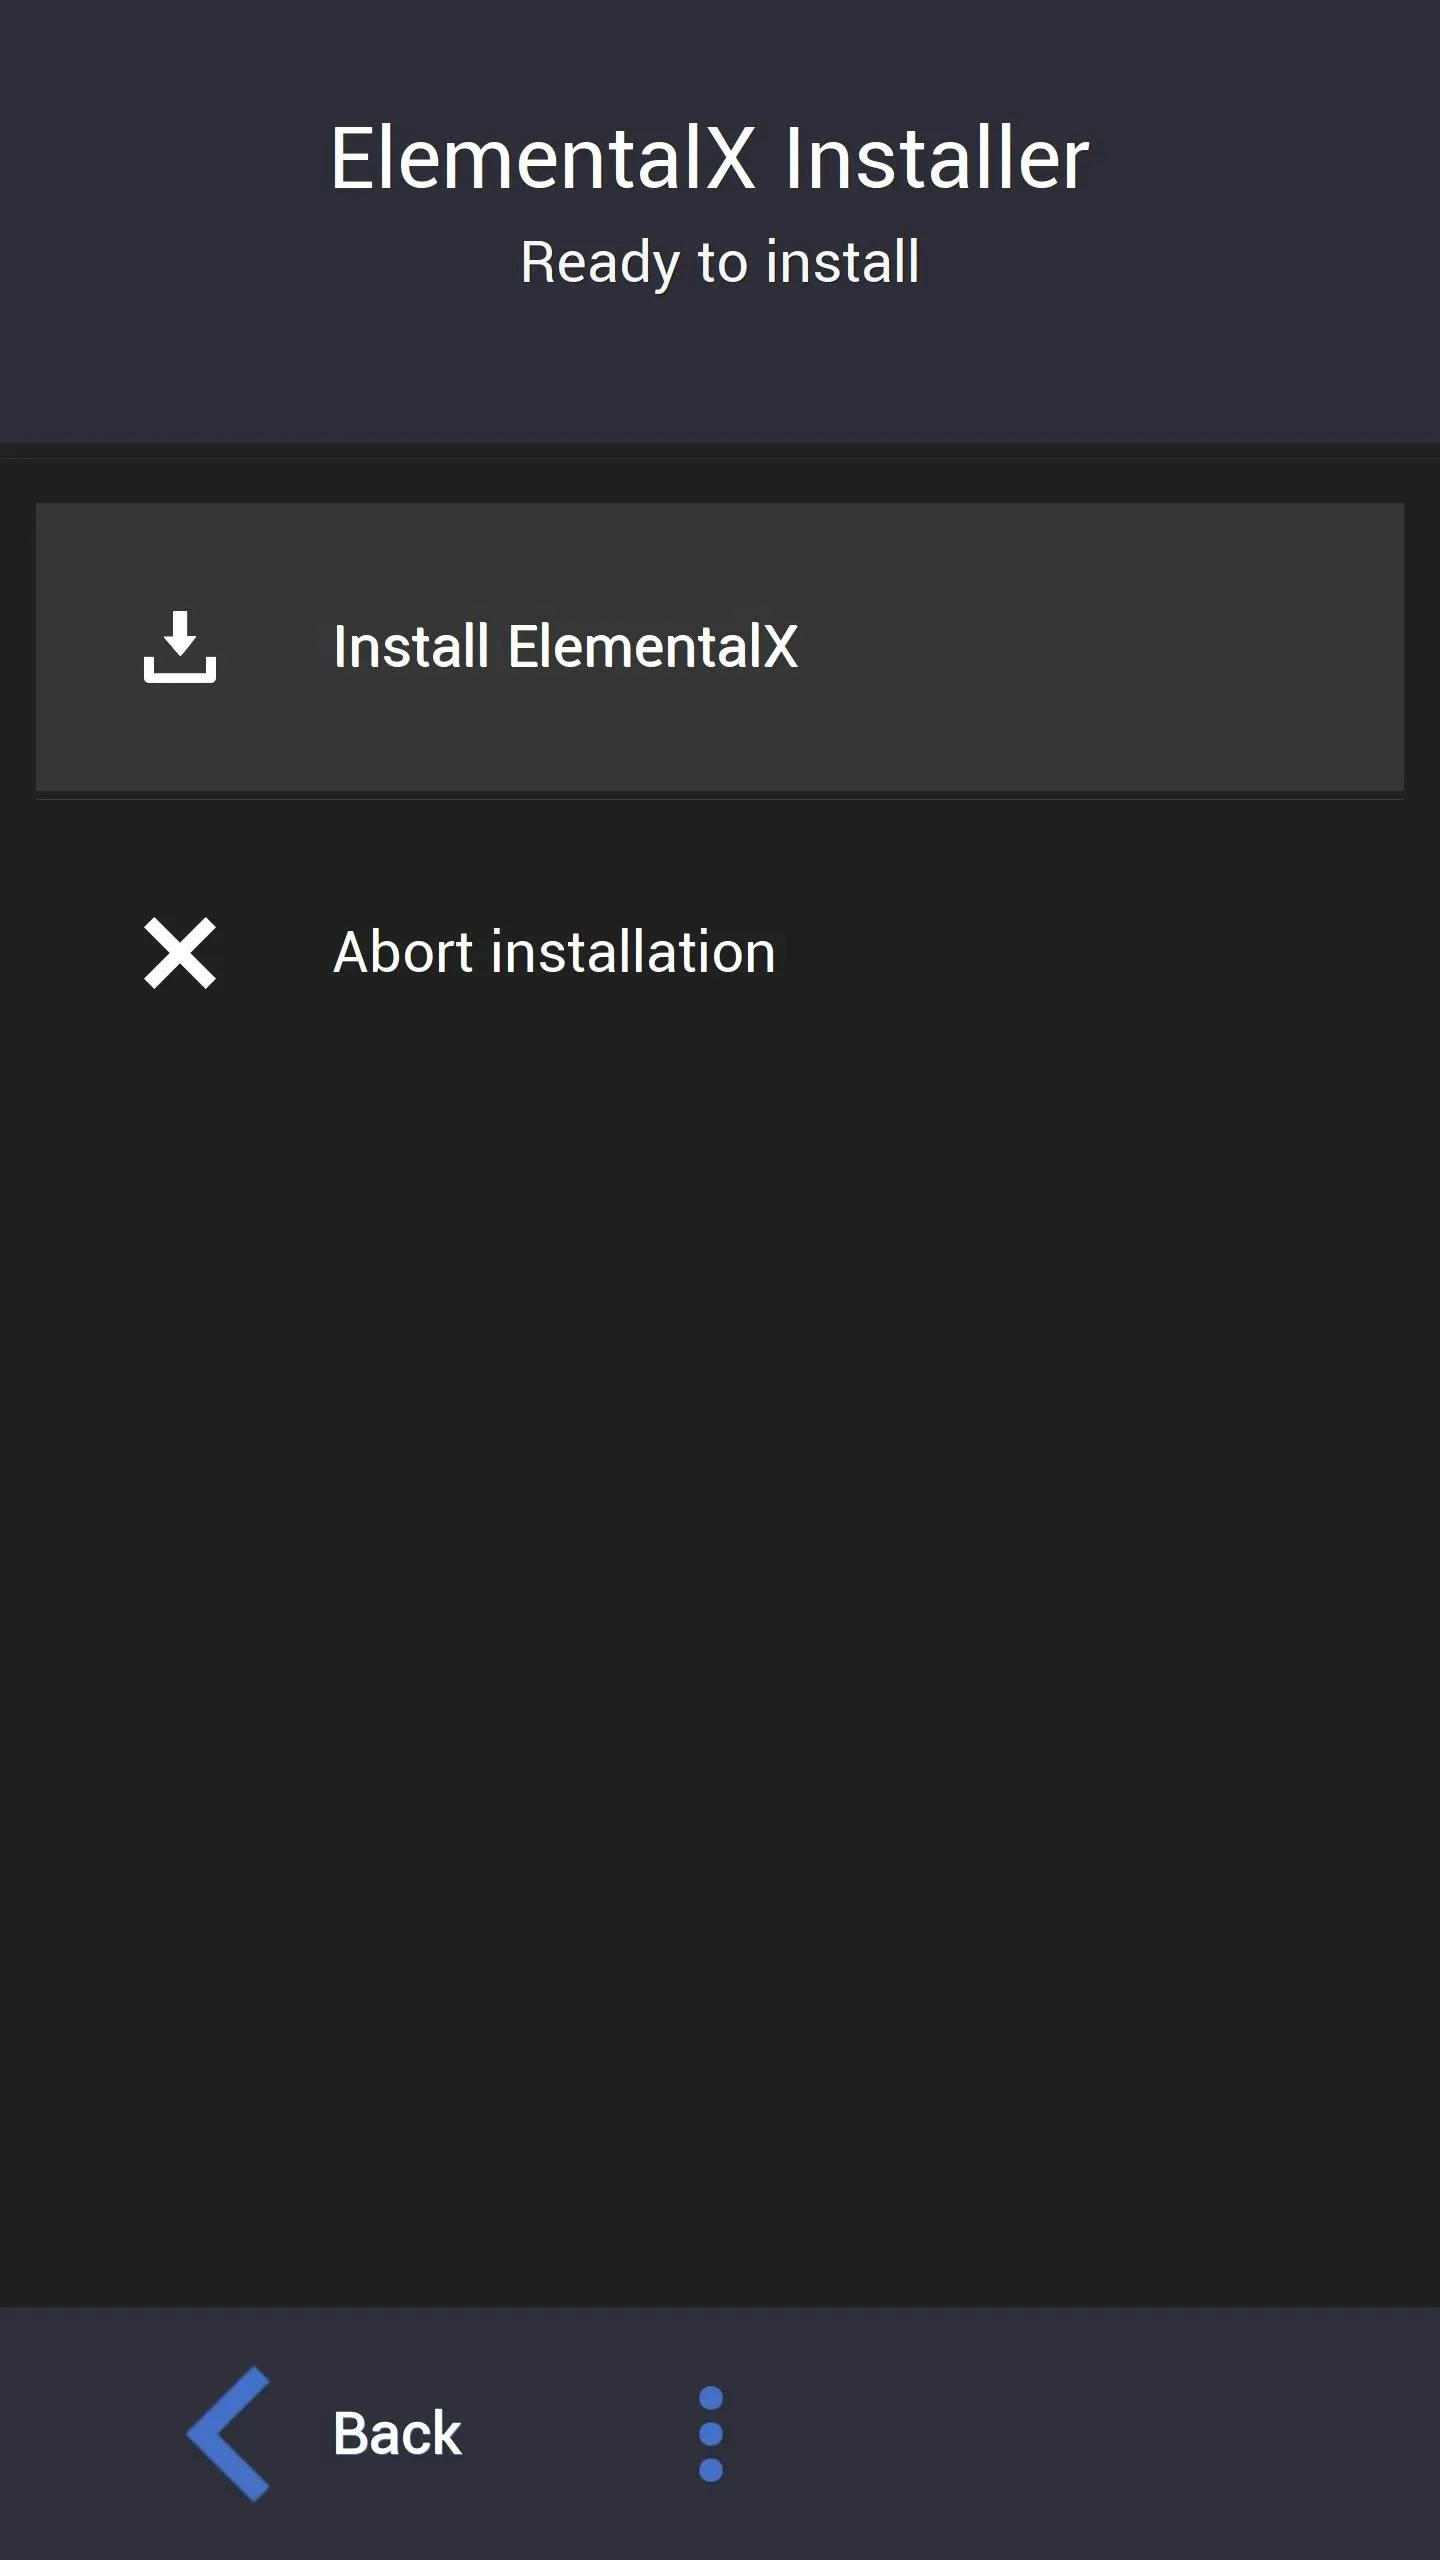
Since ElementalX has an AROMA installer interface, you'll have to make a few selections at the beginning of the flashing process. We recommend leaving these options set to their default values, so tick "I agree," then tap "Next" a few times and press "Install ElementalX" when prompted. When that's done, tap "Next," and then "Finish," and you'll be taken back to TWRP.

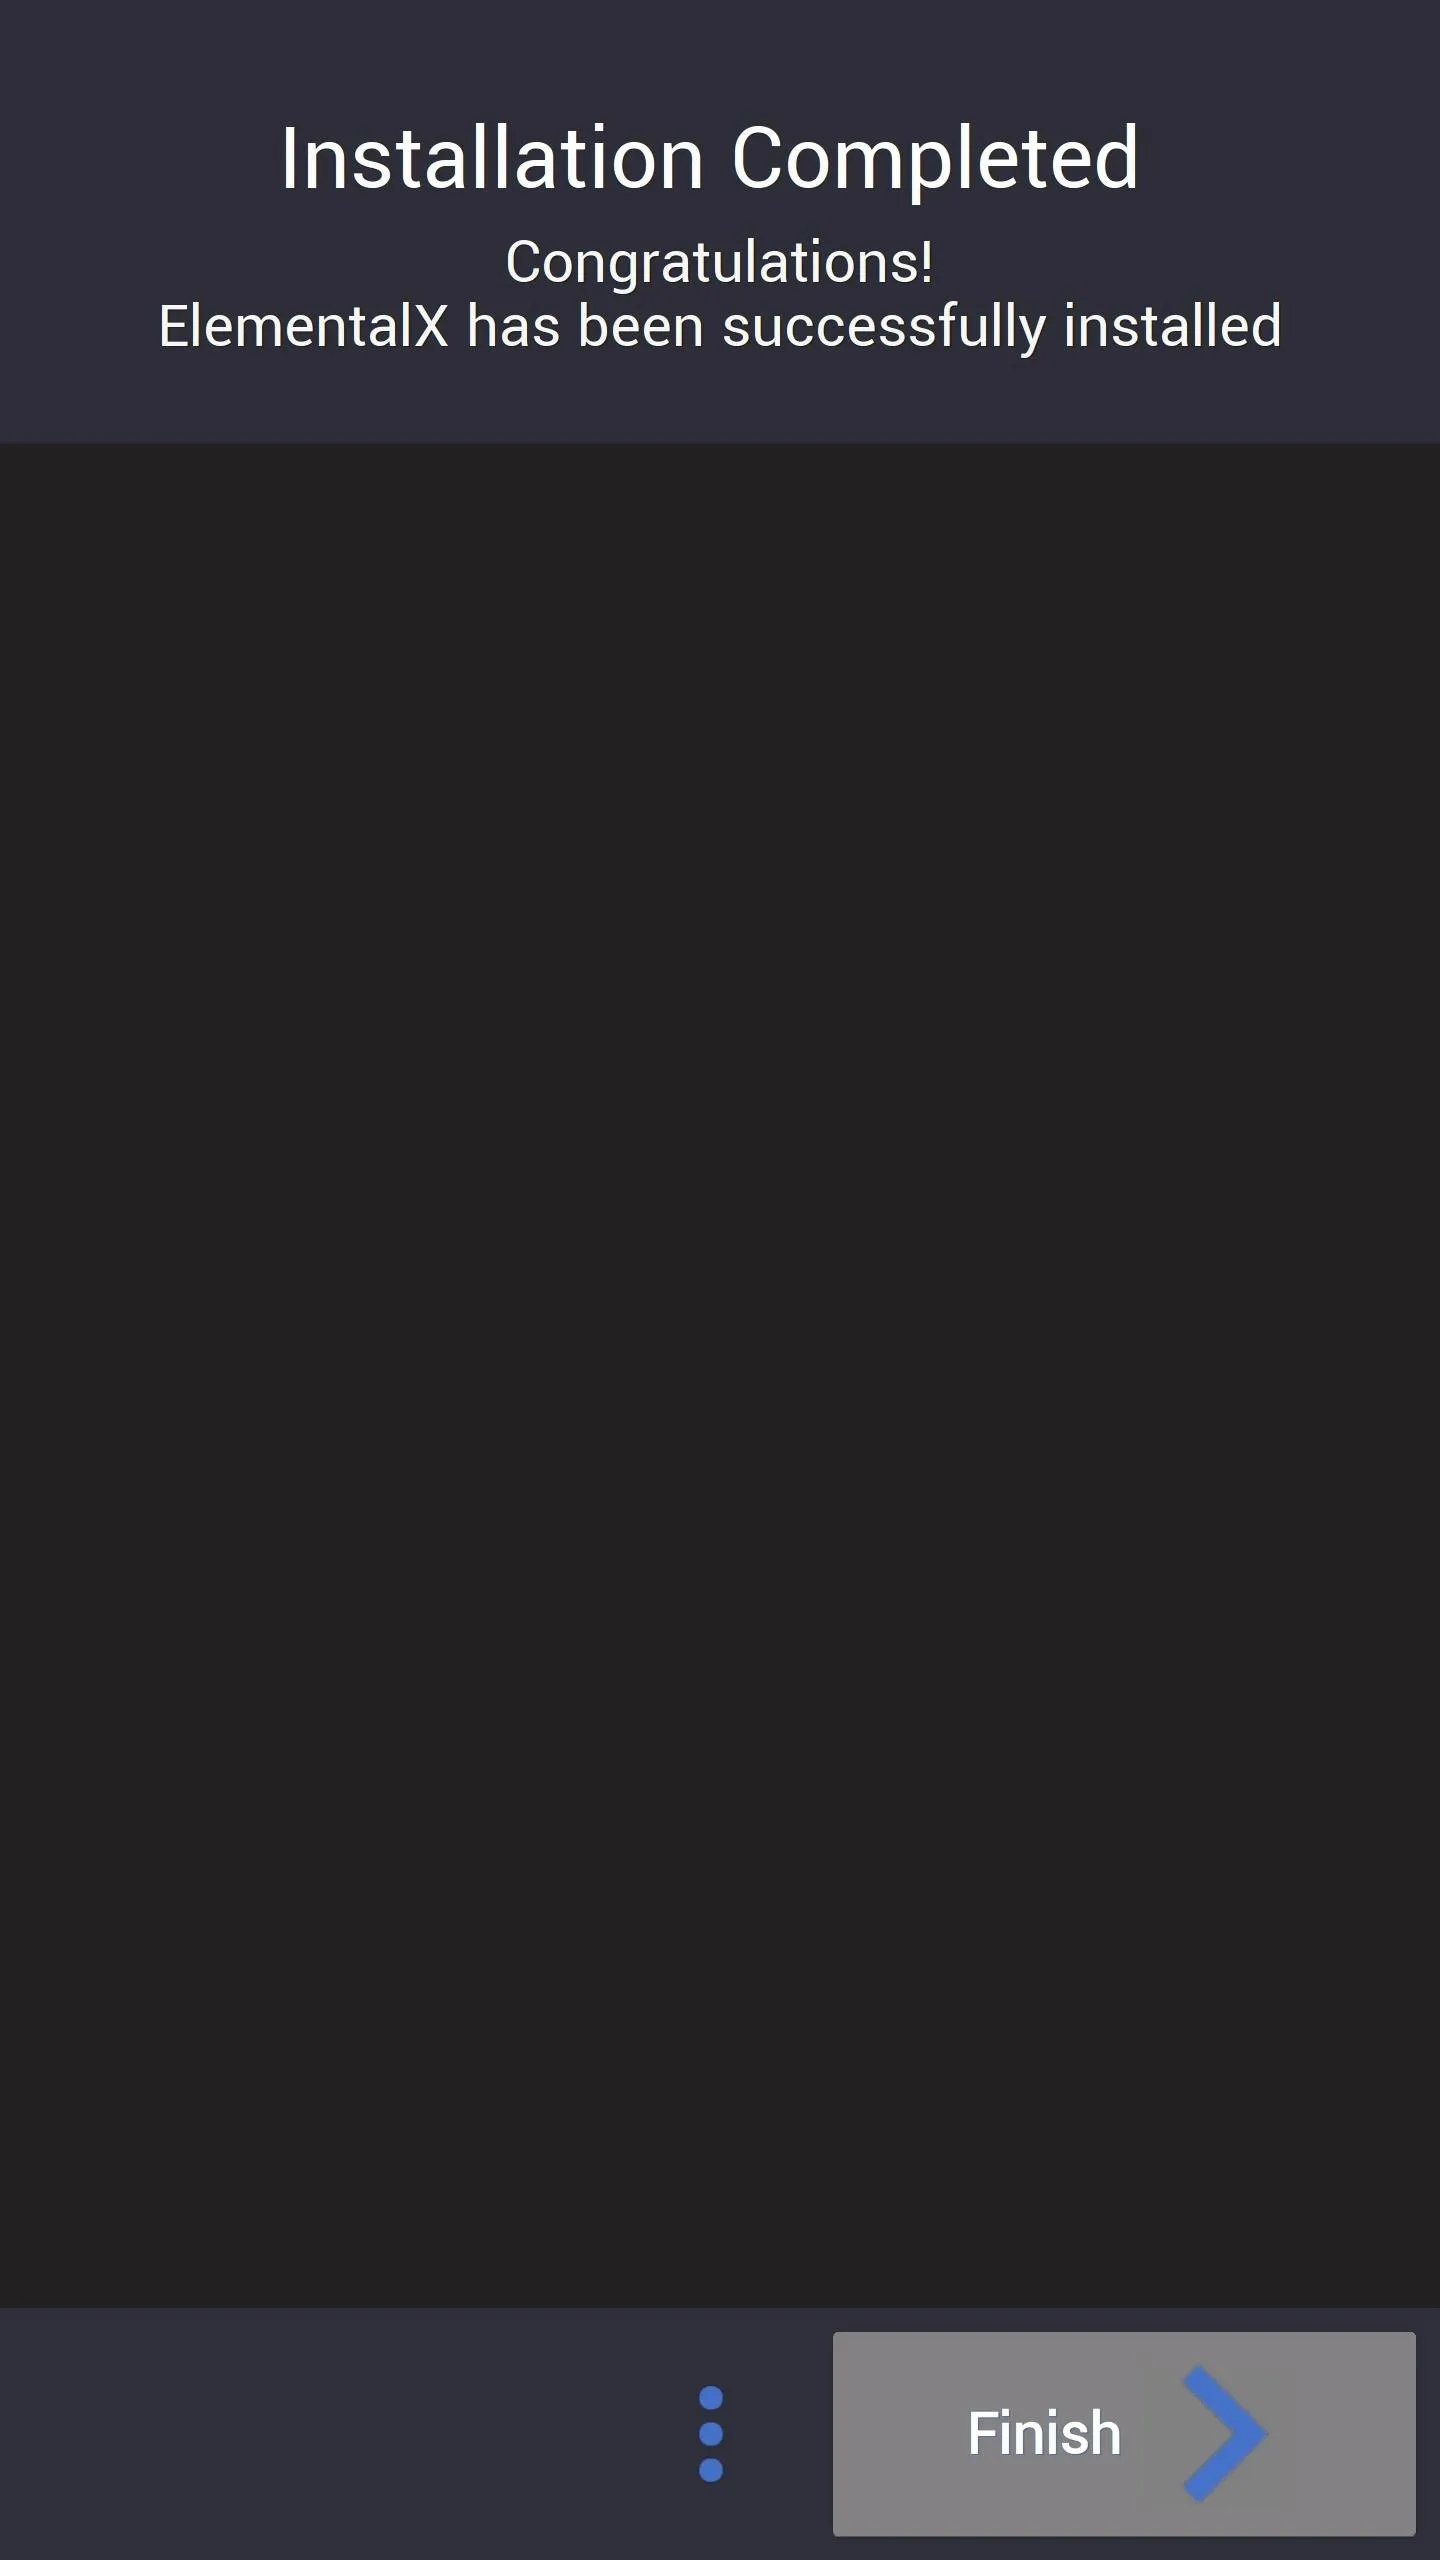
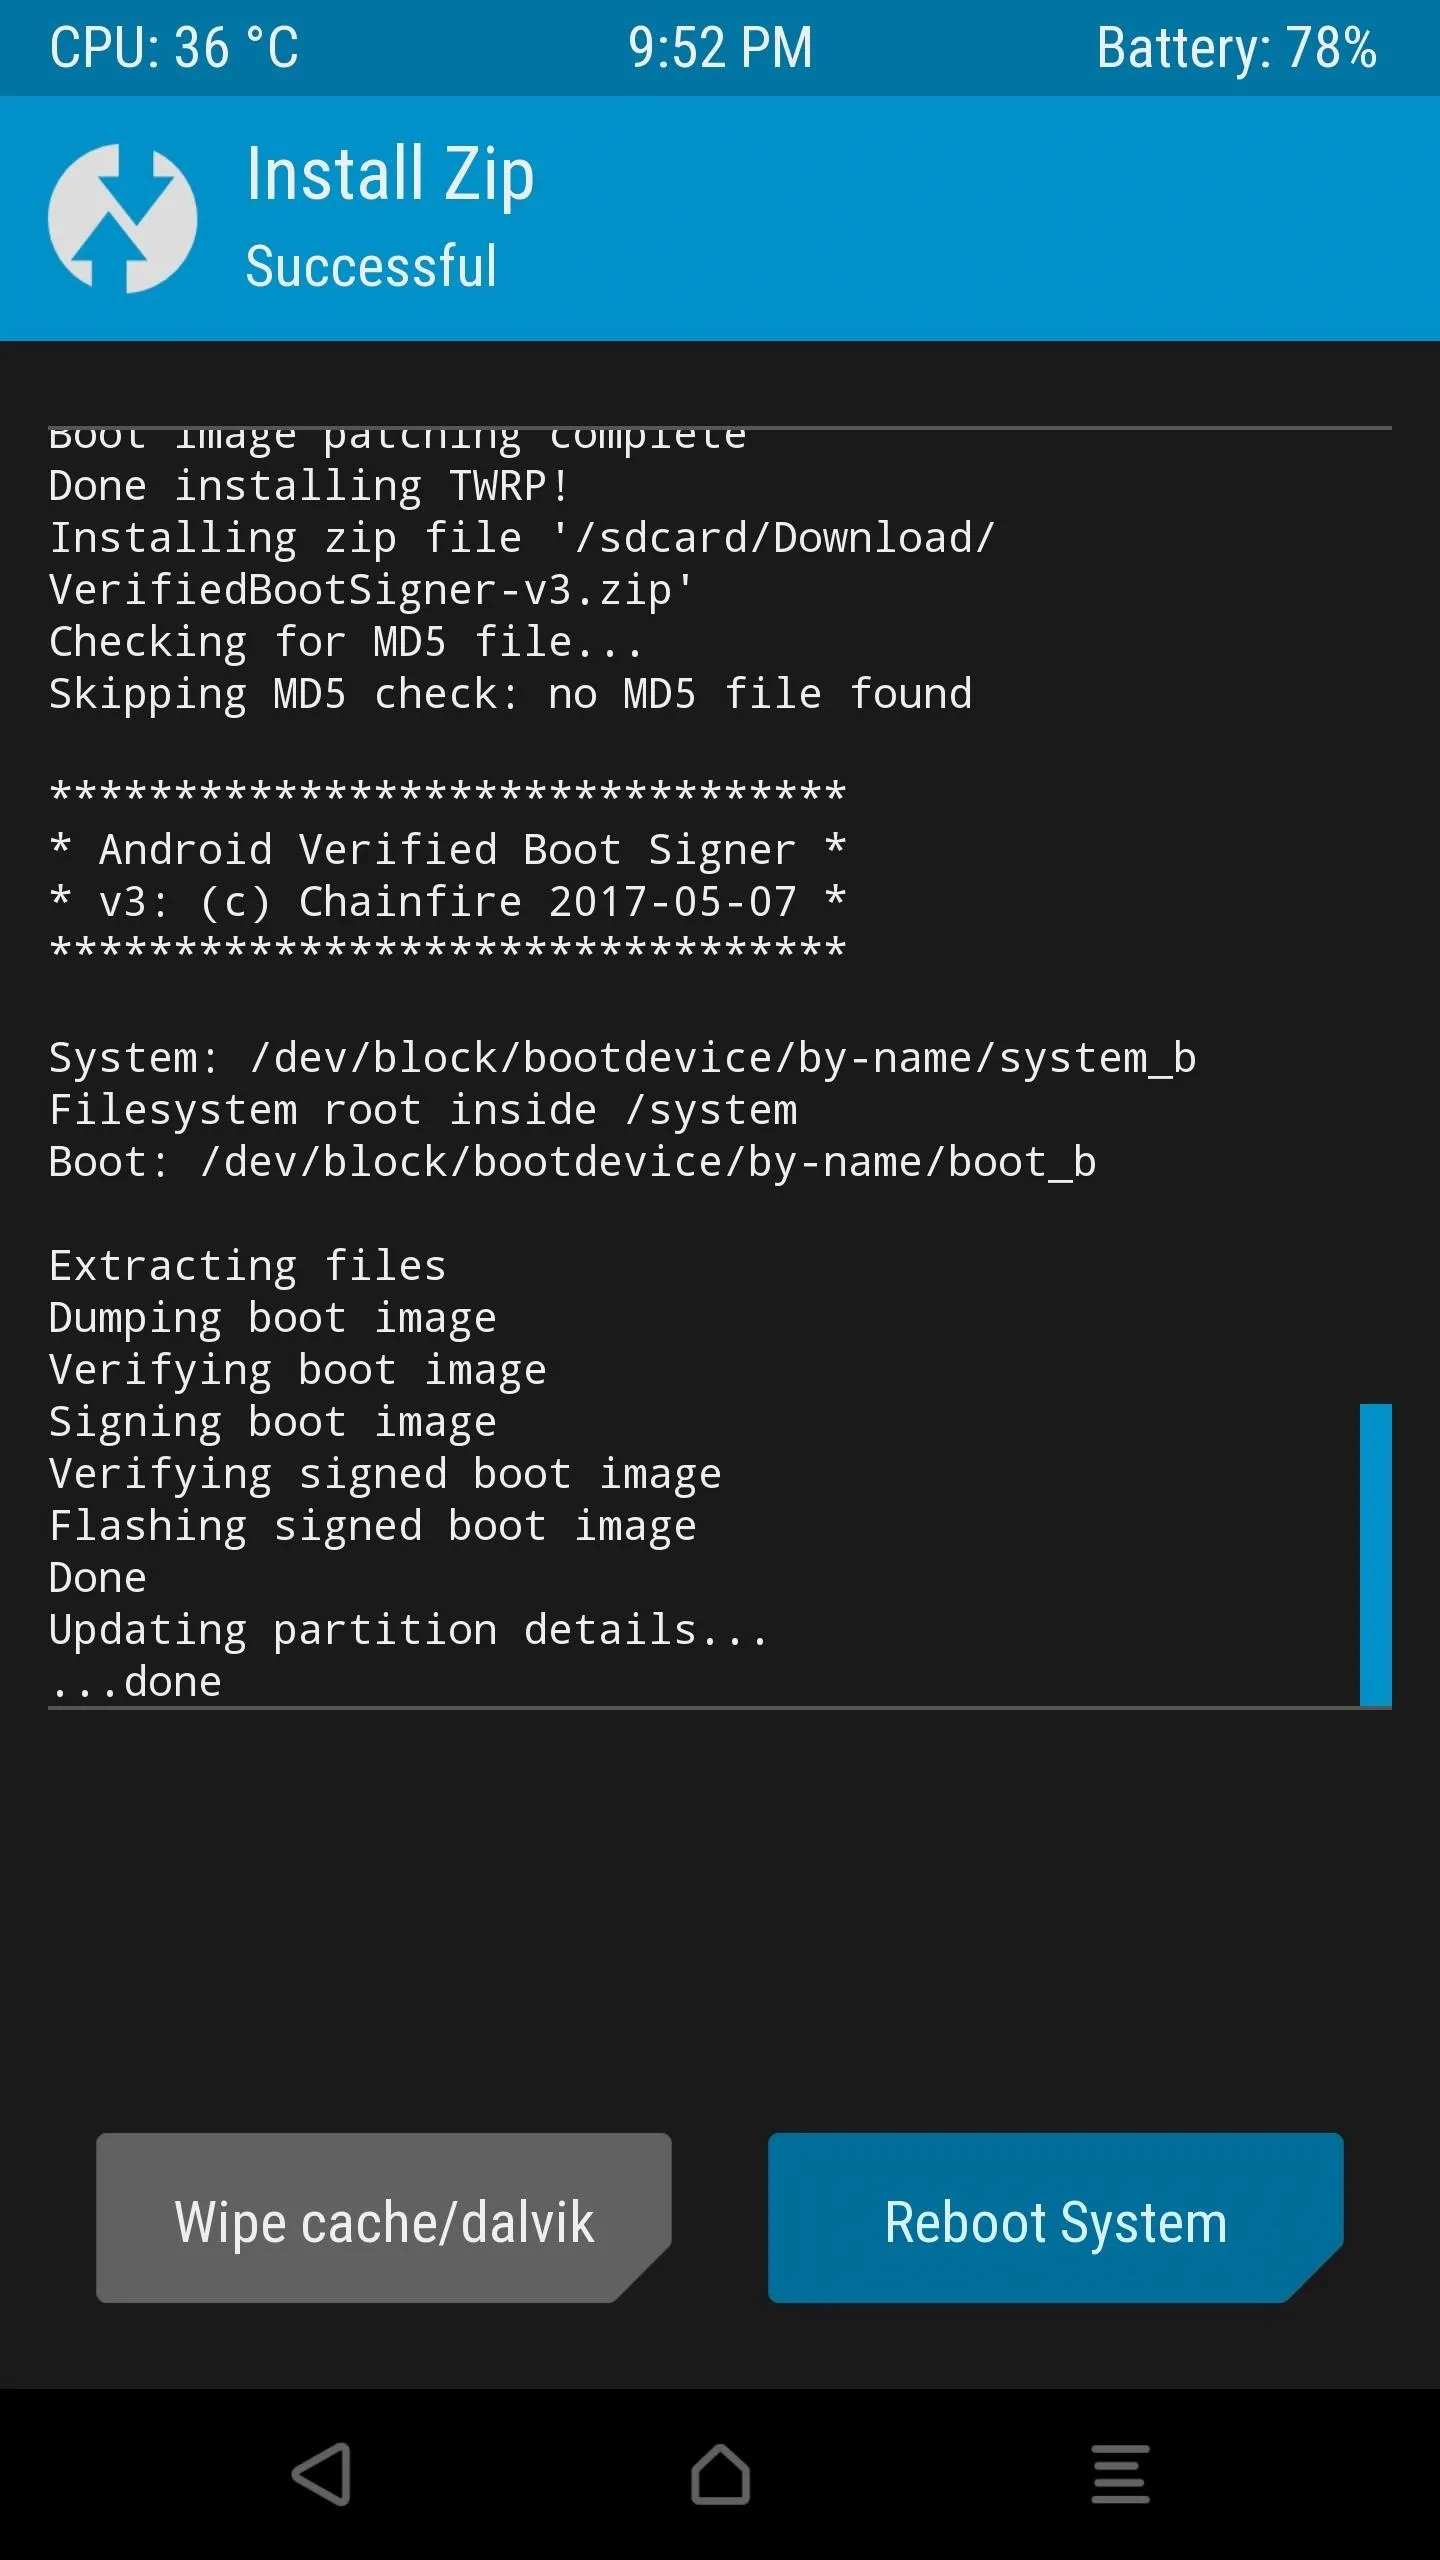
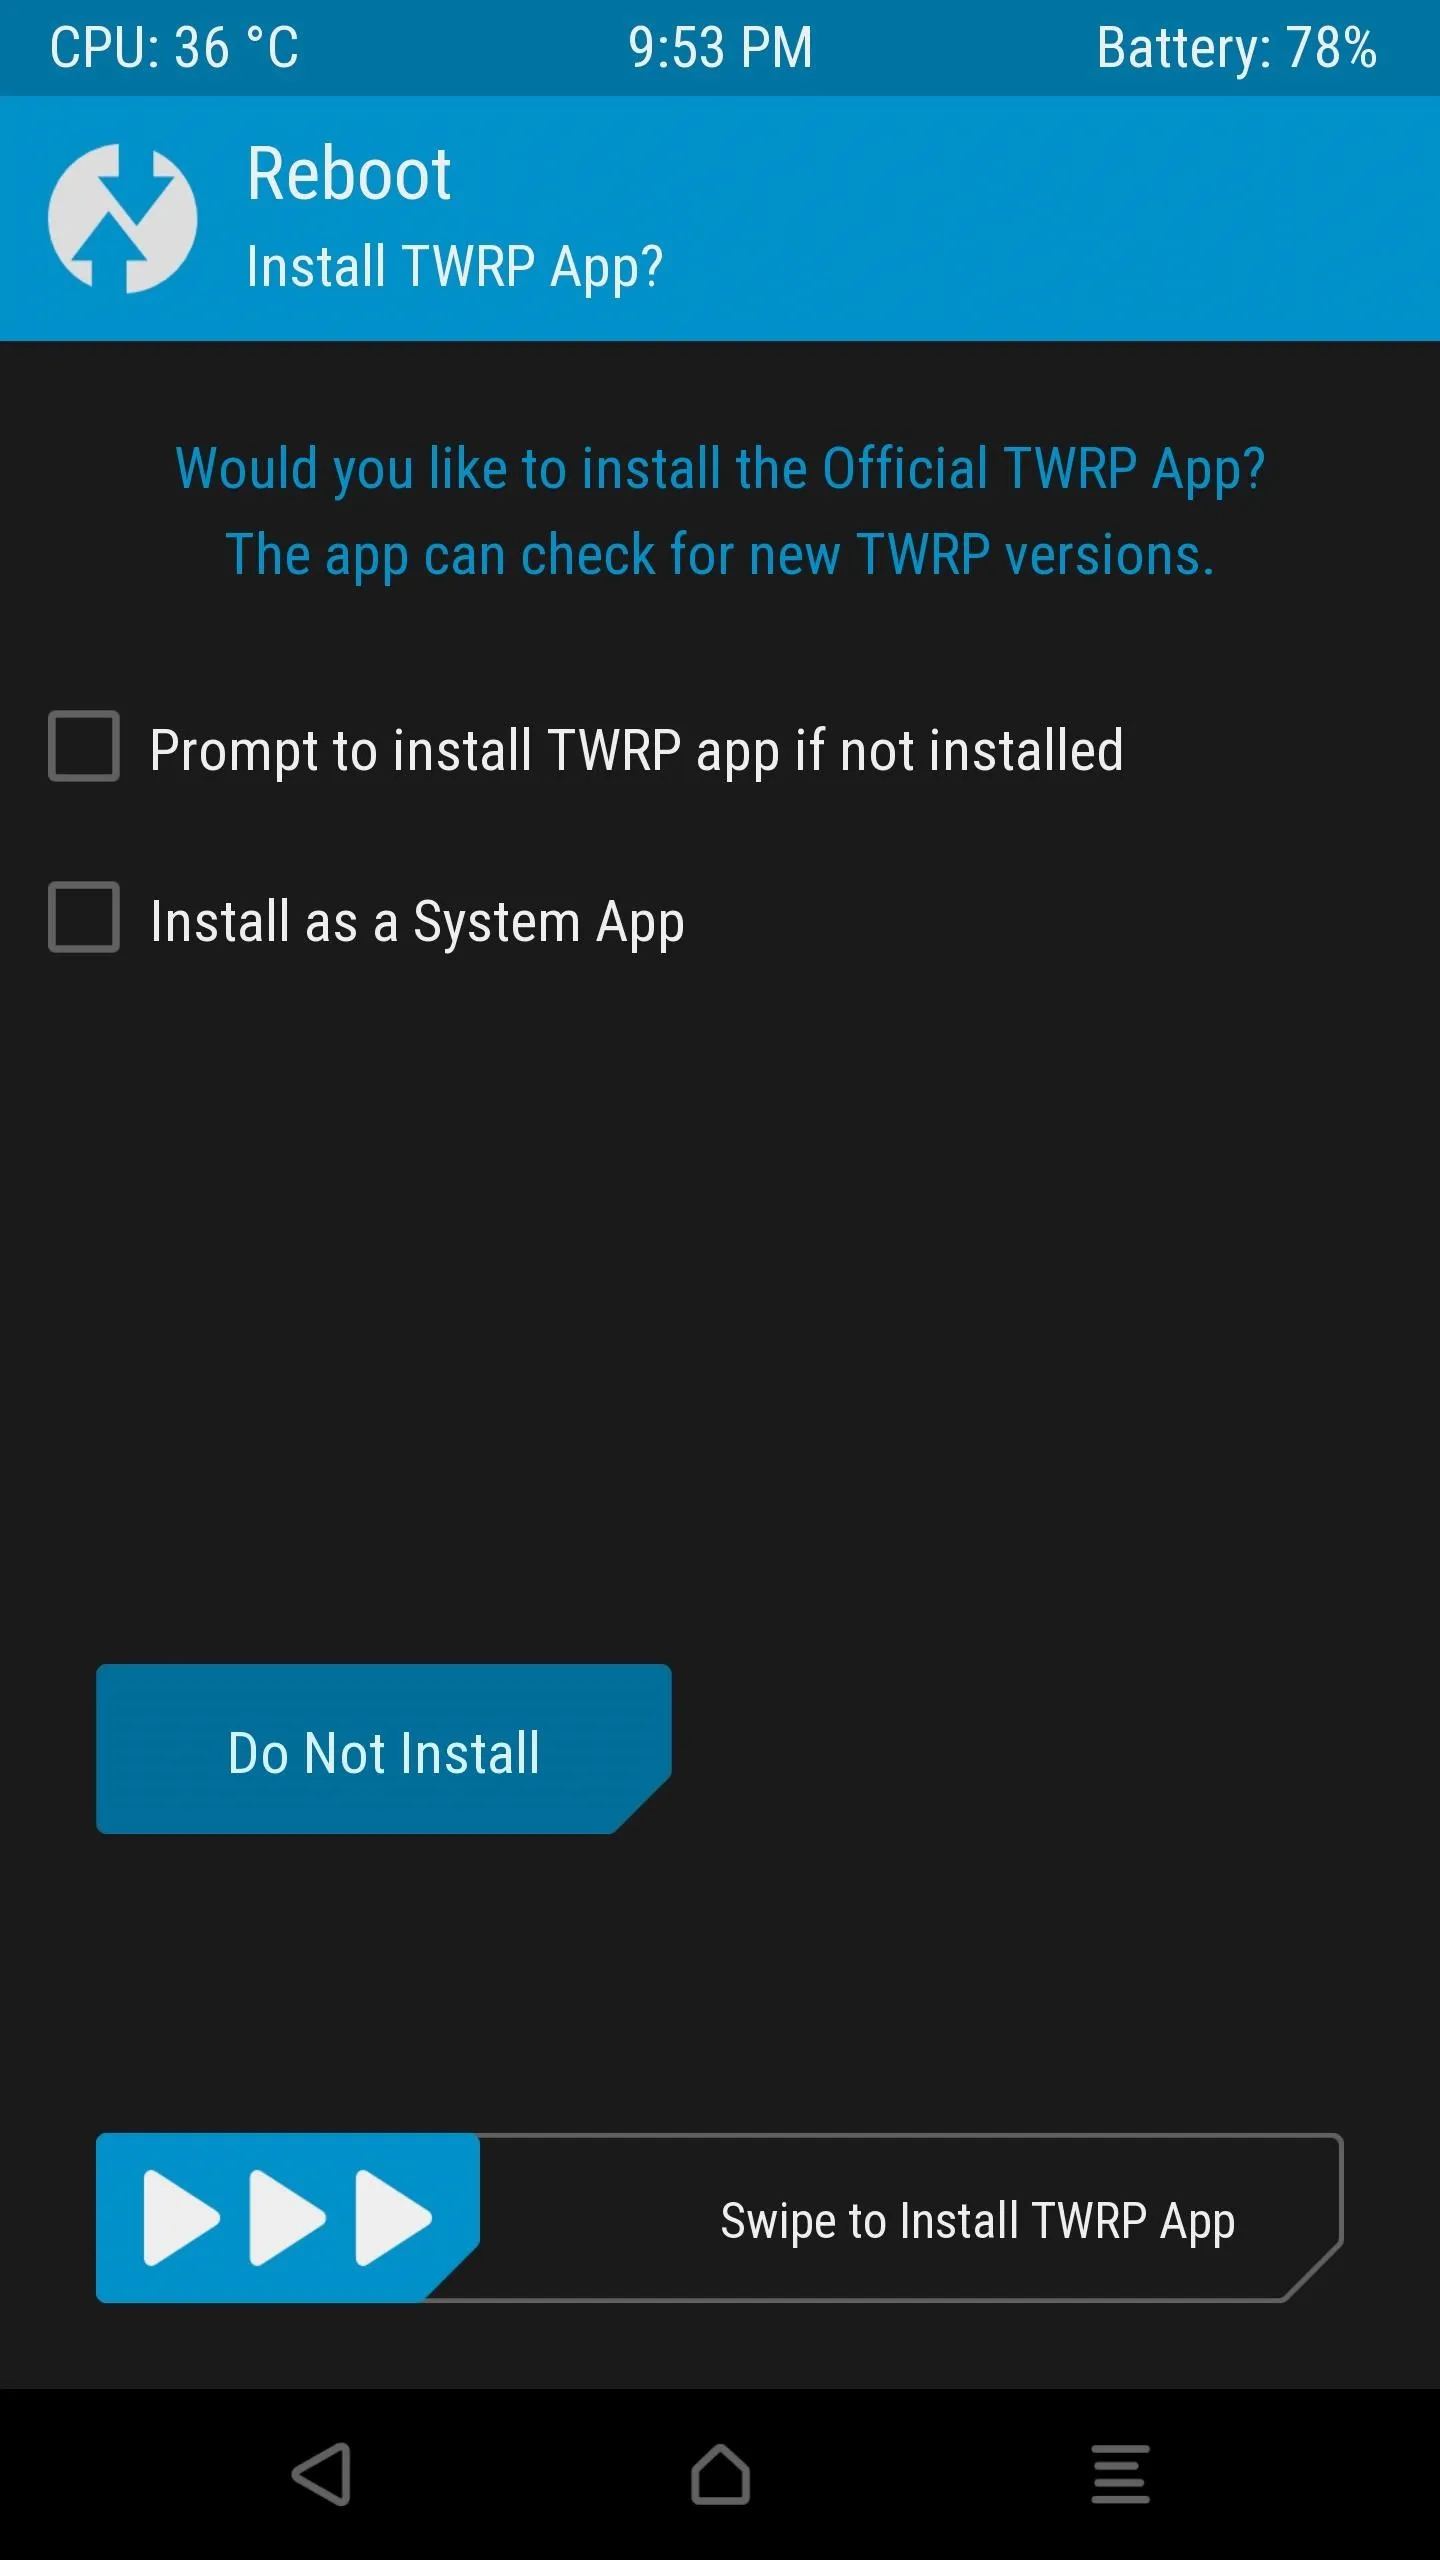
After ElementalX installs, you'll see a readout in TWRP that shows the other three ZIPs being installed. When that's finished, just tap "Reboot System" to wrap things up. If you're prompted to install the TWRP app at this point, select "Do Not Install."
Enable Magisk Features
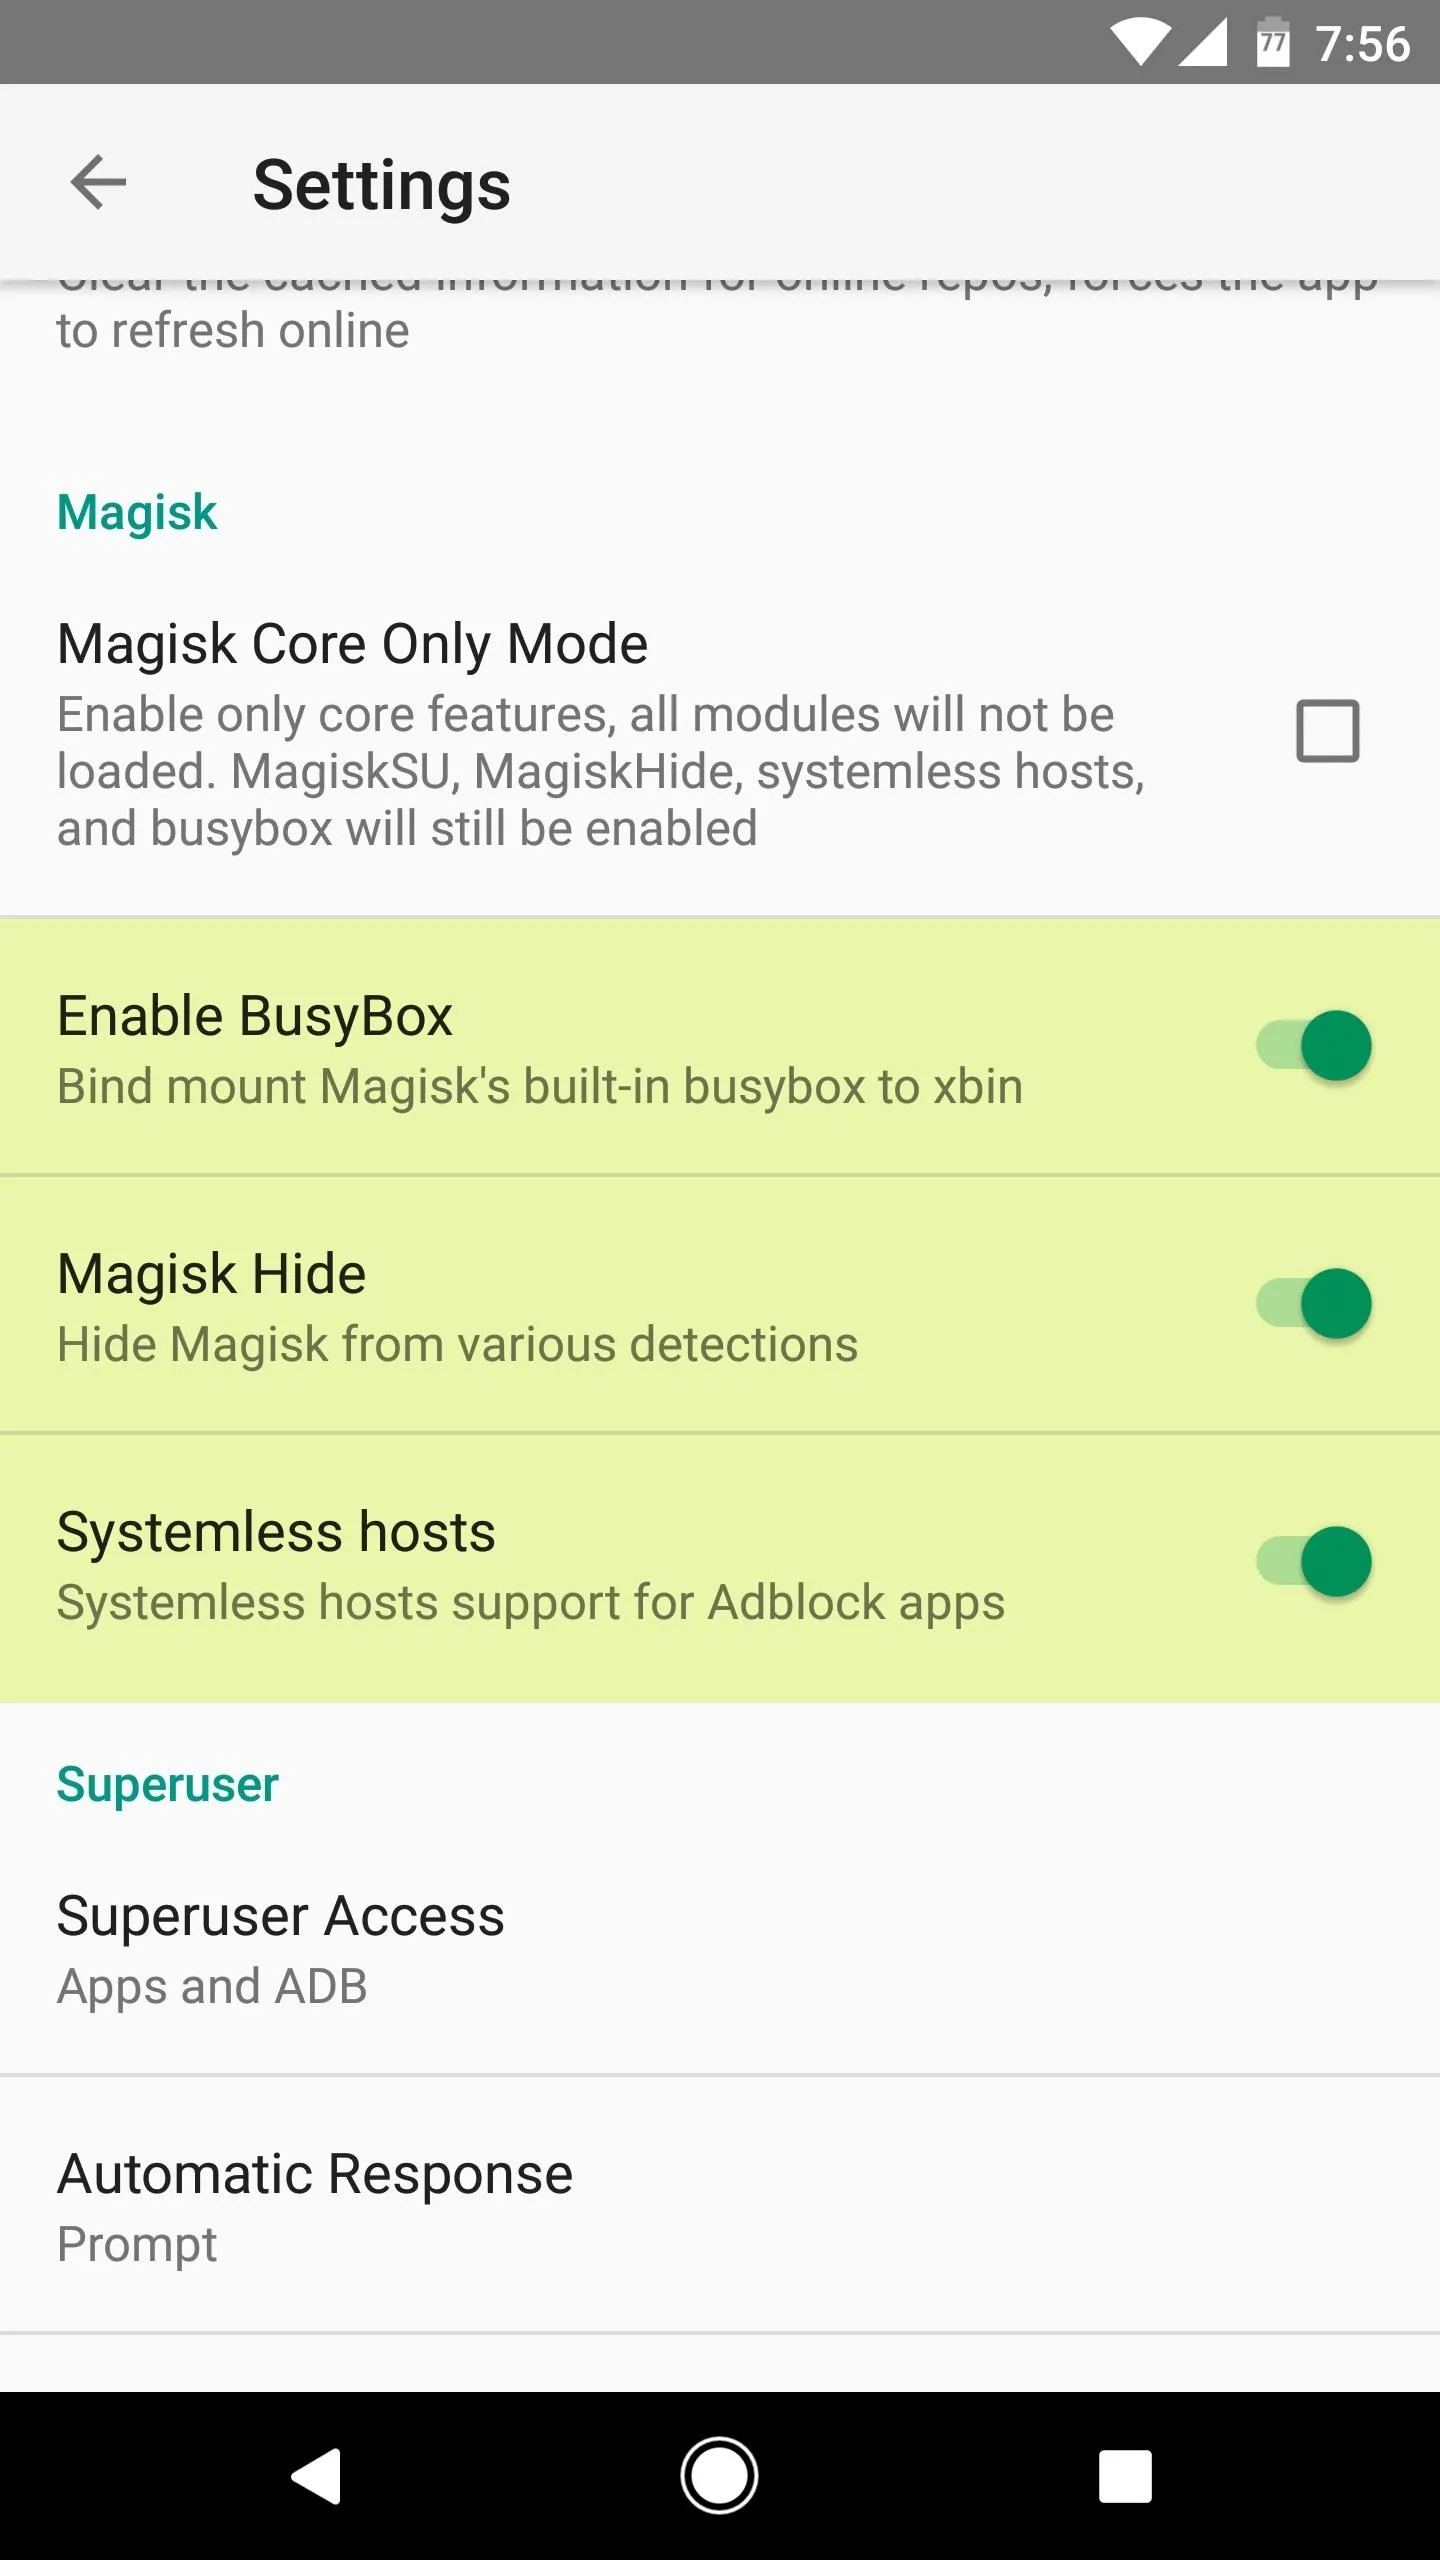
When your phone finishes rebooting, open the Magisk Manager app and grant the permissions it requests. From there, head to the side navigation menu and select "Settings." Next, enable the BusyBox, Magisk Hide, and Systemless hosts options, then head back to the main menu. Now, if you tap the "SafetyNet check" button, you should see a message that says "SafetyNet Passed."
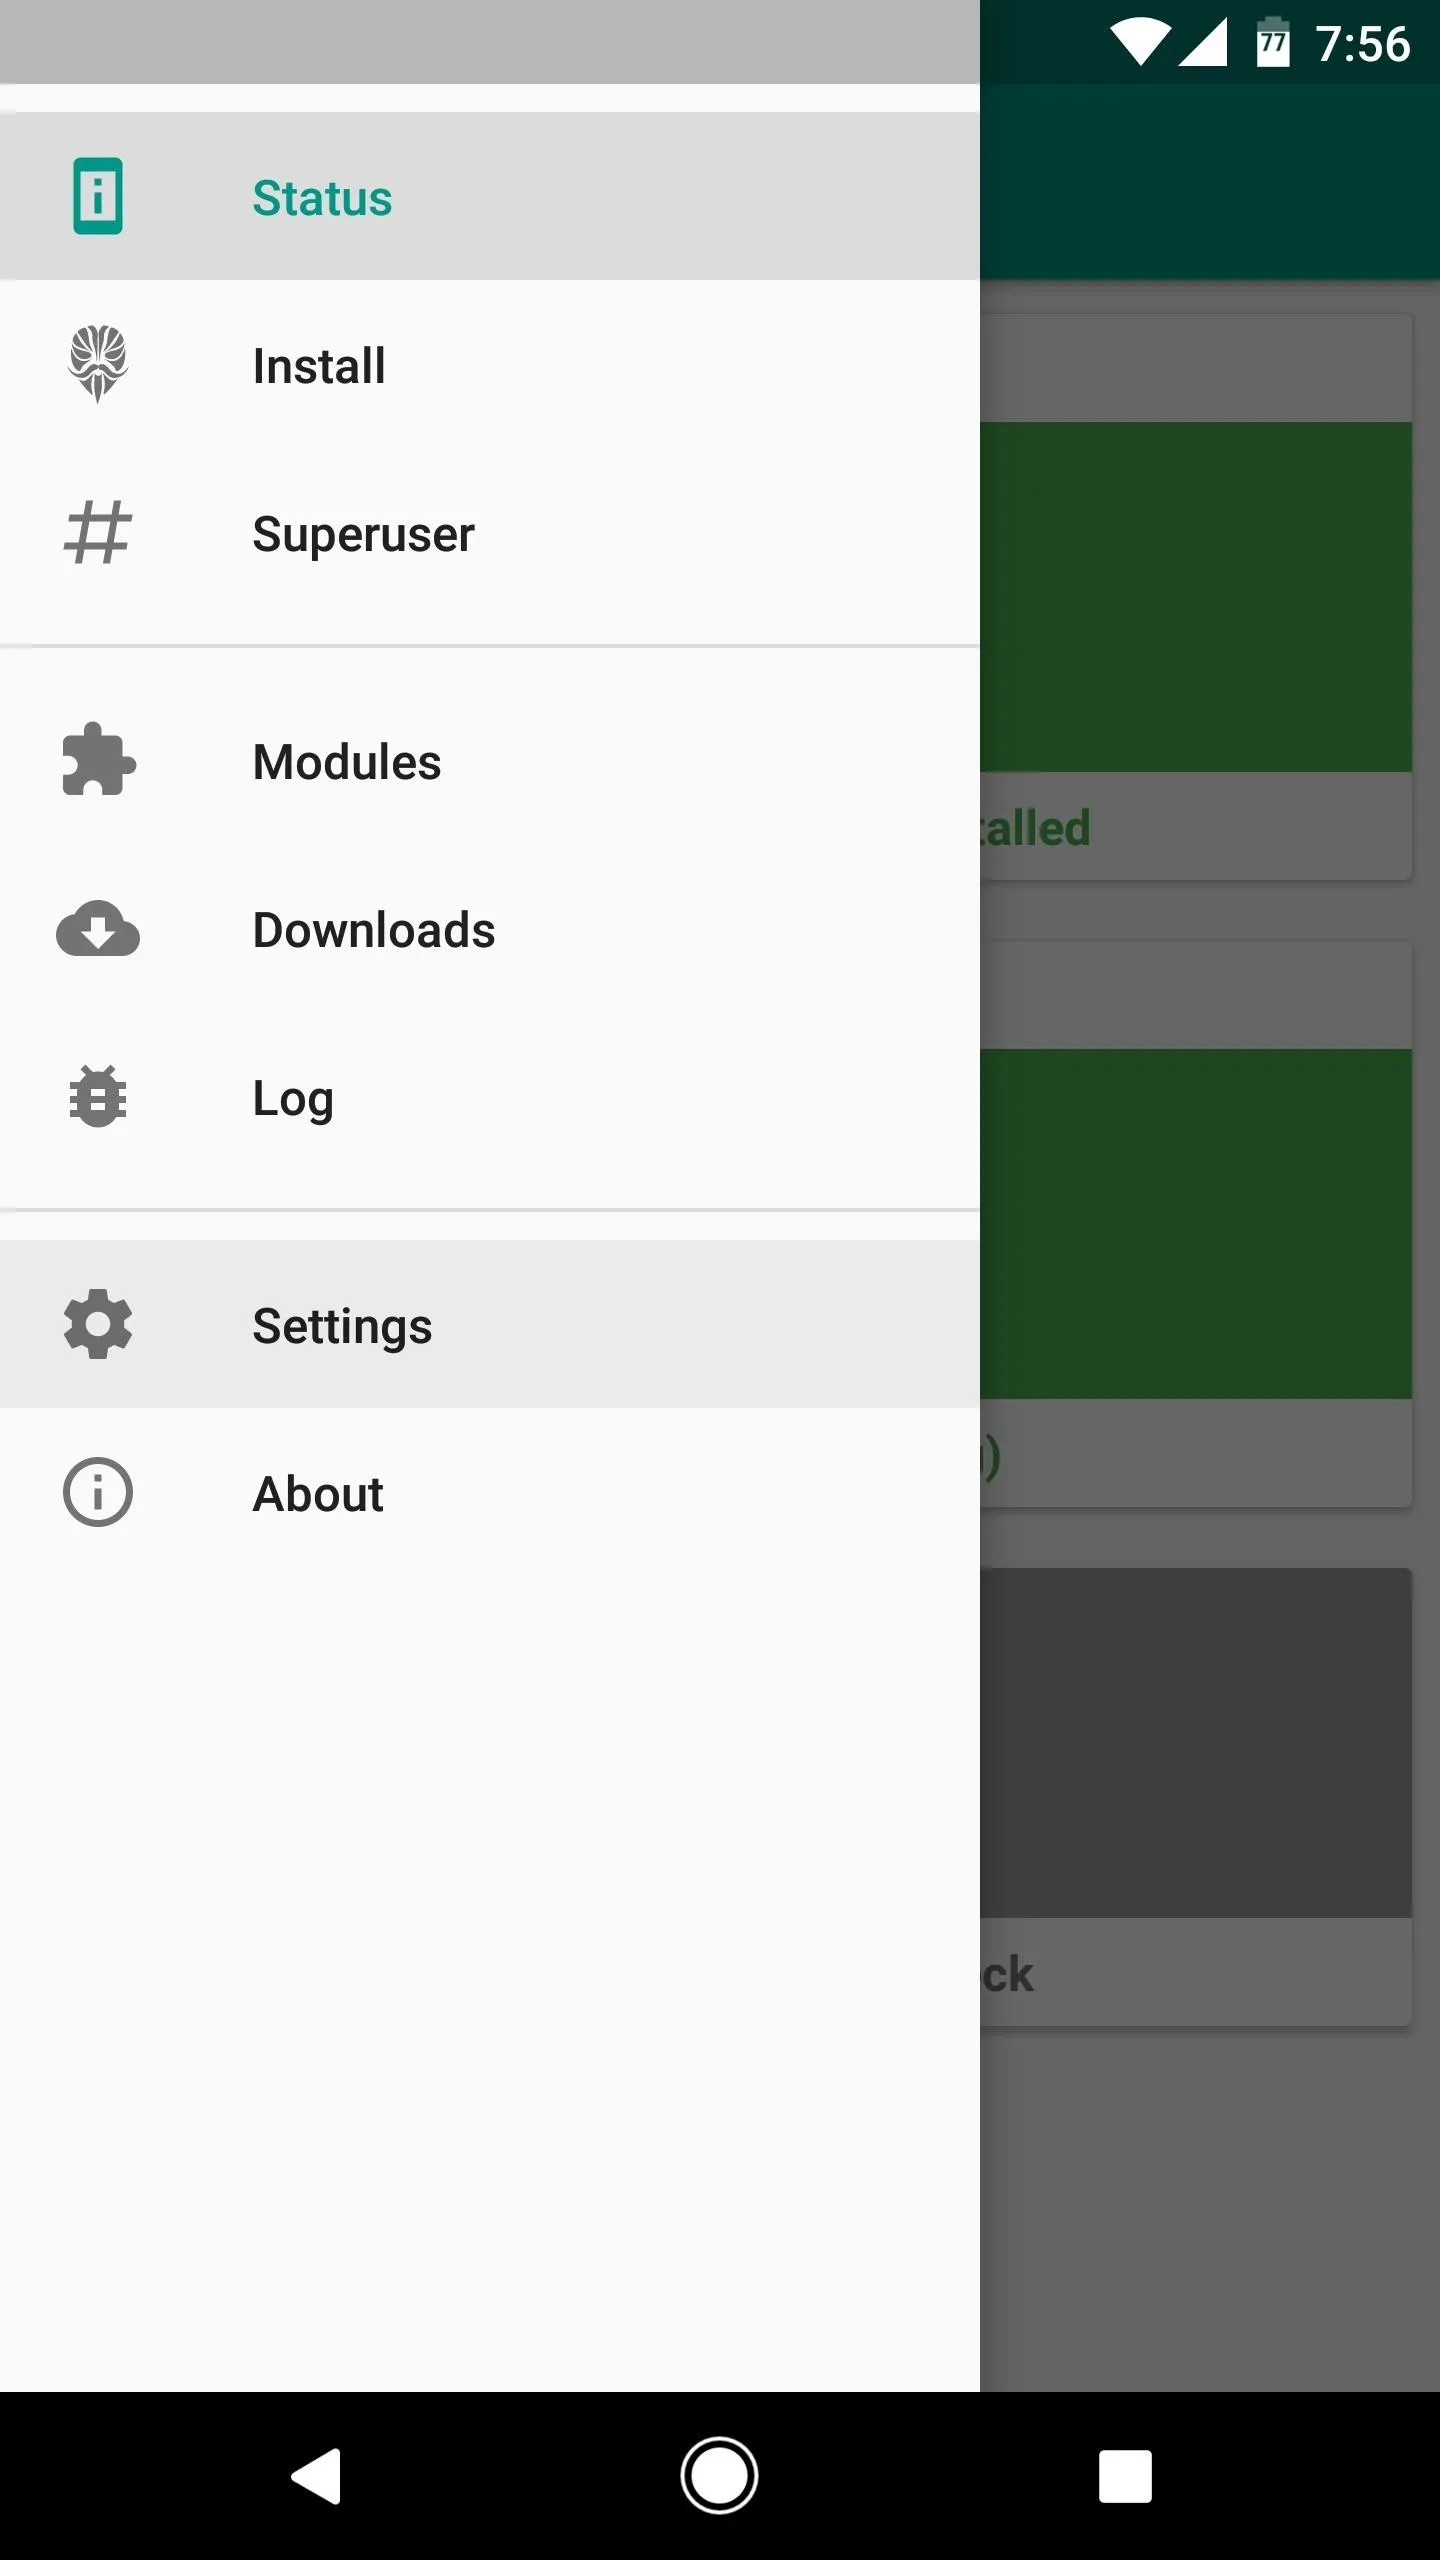
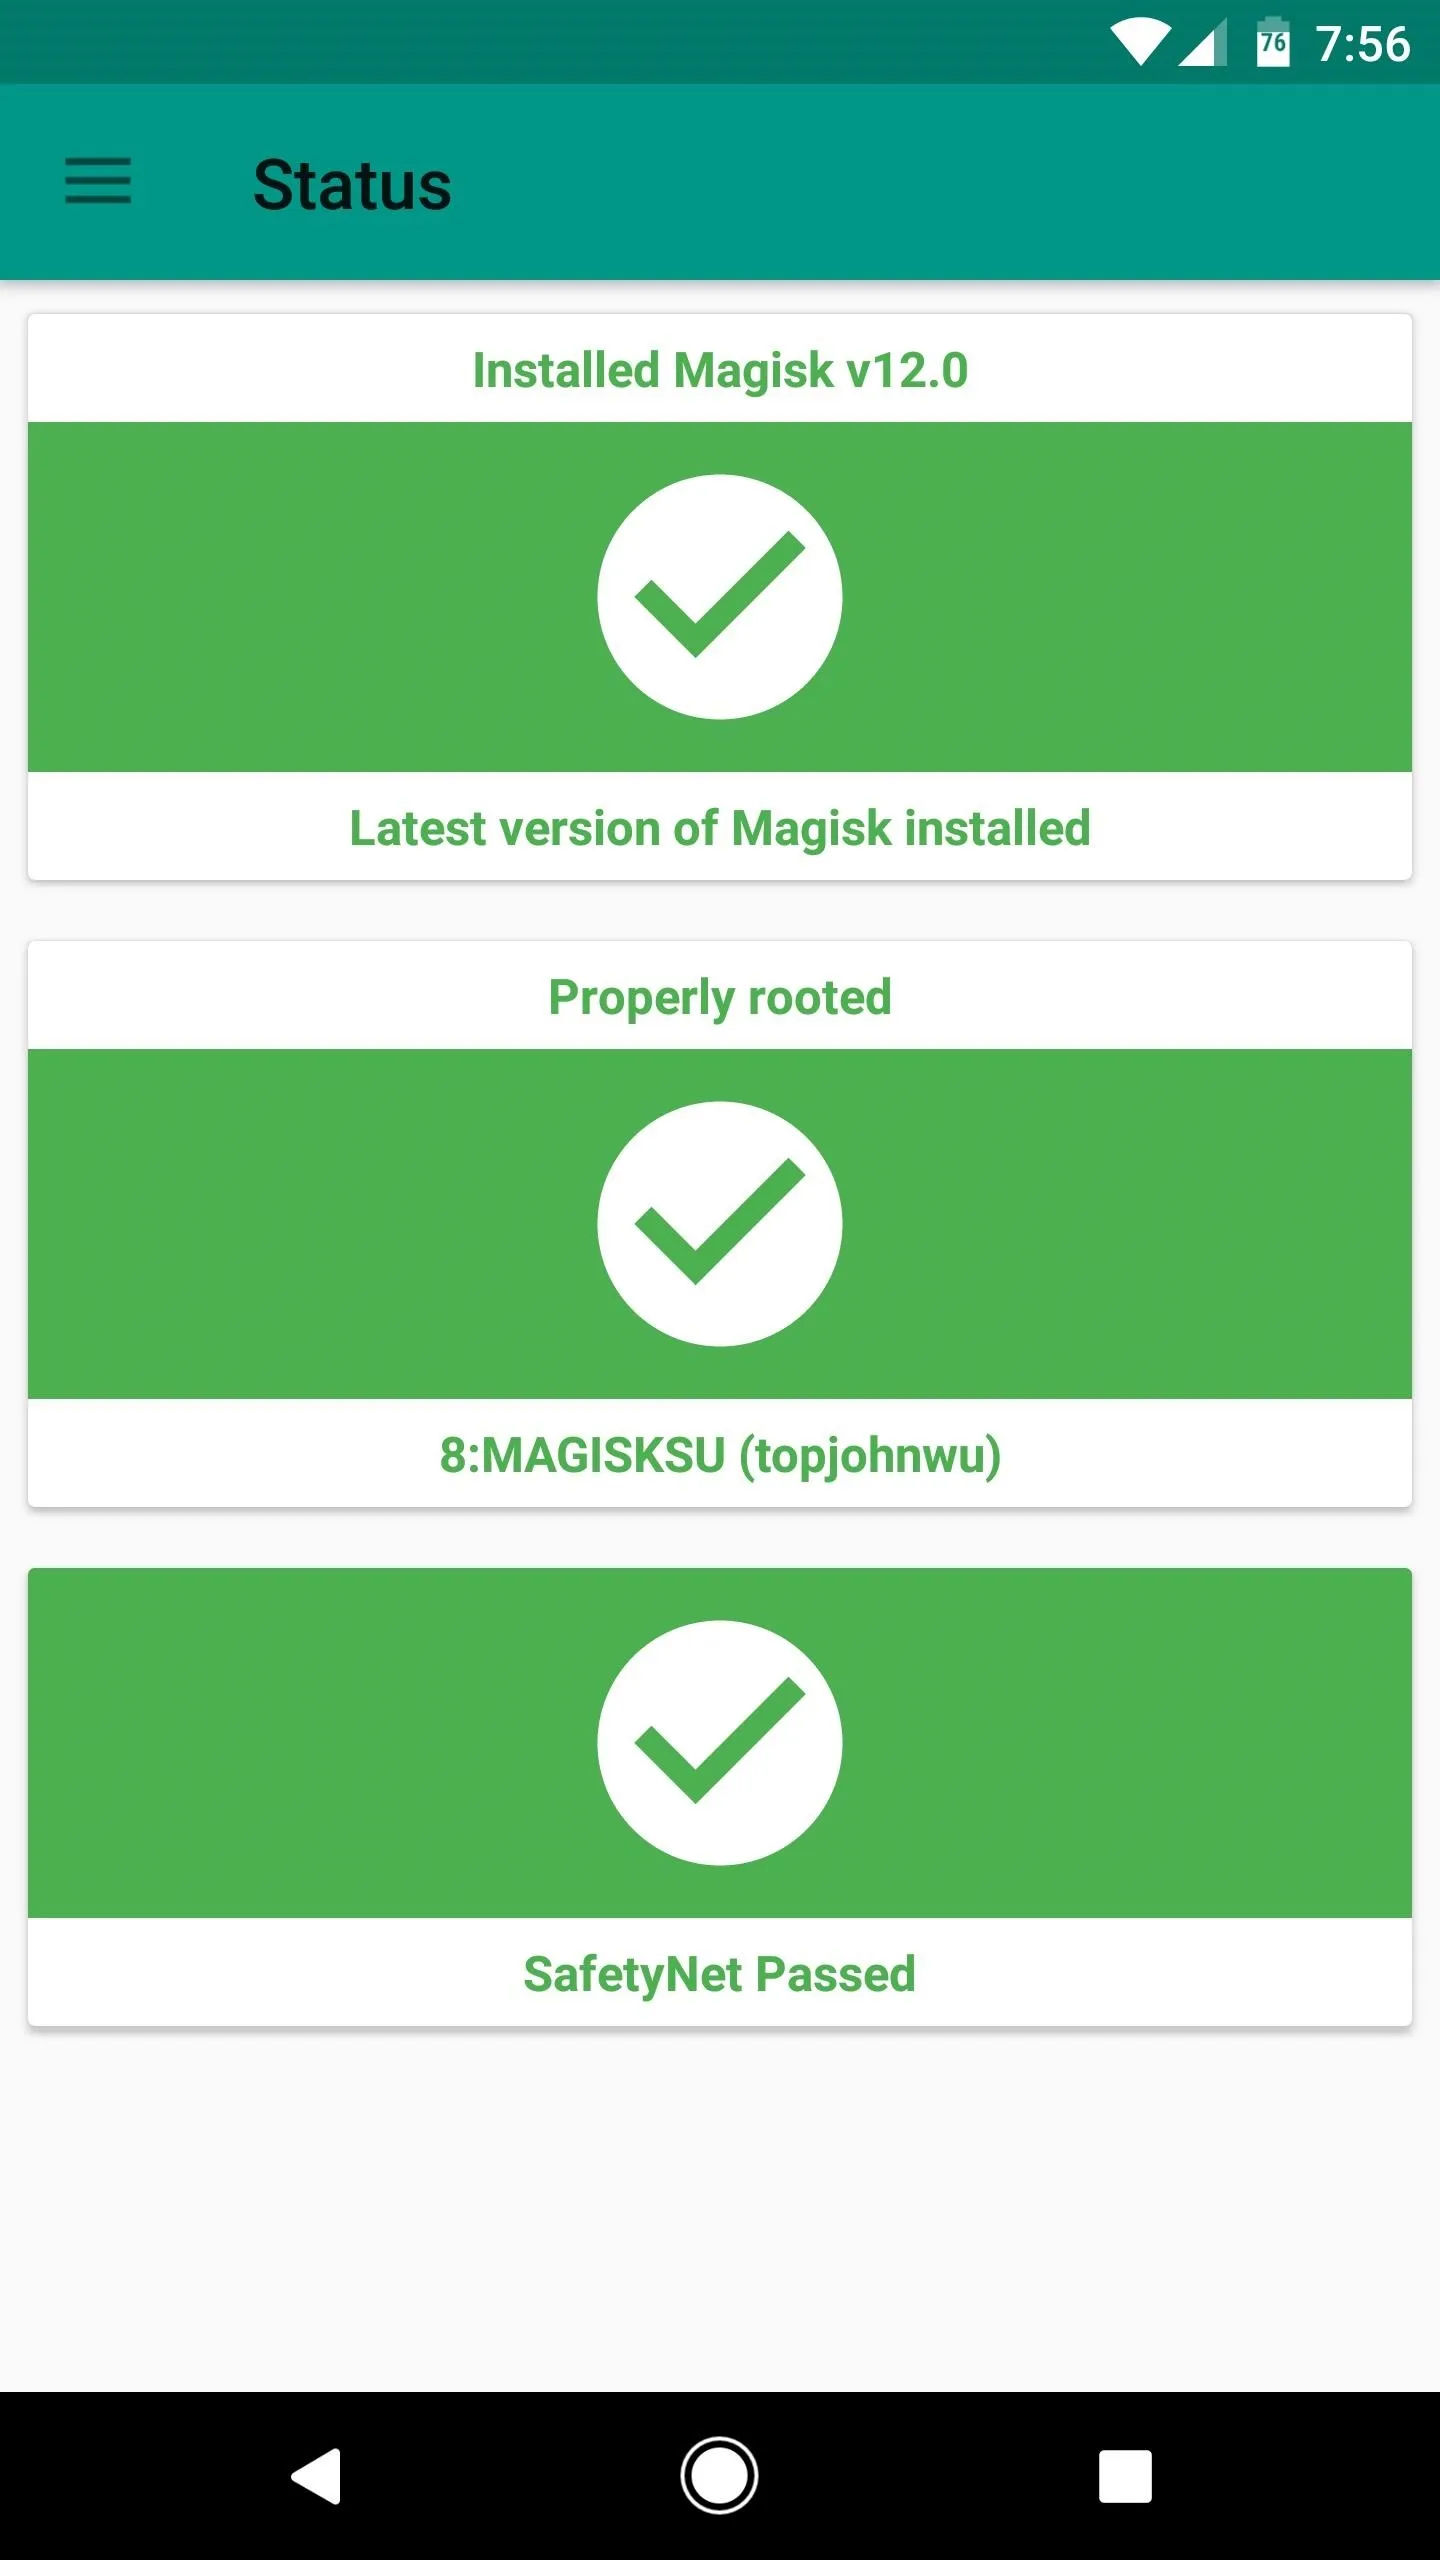
With all three messages in Magisk's main menu showing green check marks, this means your phone is now rooted, but you'll still be able to use apps like Android Pay and Pokémon GO. Essentially, none of the current root detection methods used by security-minded apps will have any idea that your device is rooted, so you shouldn't be inhibited in any way.
As I mentioned earlier, some Magisk modules are not compatible with the Pixel or Pixel XL. An incompatible module can result in a bootloop, so be careful when installing modules in general, and visit the provided support thread to ensure the module will work on your phone.
Aside from that, you'll probably want to install the systemless version of AdAway, since it'll now work flawlessly on your phone. So if you'd like to block all ads system-wide while keeping SafetyNet intact, grab this APK install it, and tap "Apply Ad Blocking."
- Follow Gadget Hacks on Facebook, Twitter, Google+, and YouTube
- Follow Android Hacks on Facebook, Twitter, and Pinterest
- Follow WonderHowTo on Facebook, Twitter, Pinterest, and Google+
Cover image and screenshots by Dallas Thomas/Gadget Hacks


Comments
Be the first, drop a comment!