


When you unlock the bootloader on your Essential PH-1, you open your device to a host of new possible tweaks. One popular modification is a custom kernel, which can not only speed up your phone, but give you new features that wouldn't be possible otherwise.
The kernel controls the communication between the software and the hardware. With a custom kernel, you get unprecedented access to the hardware. Back in the day, this was limited to the ability to overclock (or underclock) the CPU and apply custom performance profiles. However, new custom kernels now offer even more features, including the ability to support new software, adjust vibration, and boost the GPU for better performance.
Unlock the Bootloader
As with virtually all modifications you apply to your Essential PH-1, you will first need to unlock the bootloader. Only when the bootloader is unlocked can you flash unofficial firmware files such as custom kernels. Since this process can be difficult for new users, we've created a full guide which you'll find using the link below.
Install TWRP Custom Recovery
If you're going to mod your Essential Phone, you practically need TWRP custom recovery. With this custom recovery, you can flash other modifications and save your device state in case you happen to mess up or soft-brick the phone. Installing TWRP is a bit different with Essential since it supports seamless updates, so we created a guide to help you along. Check it out using the link below.
Download the Kernel onto Your Device
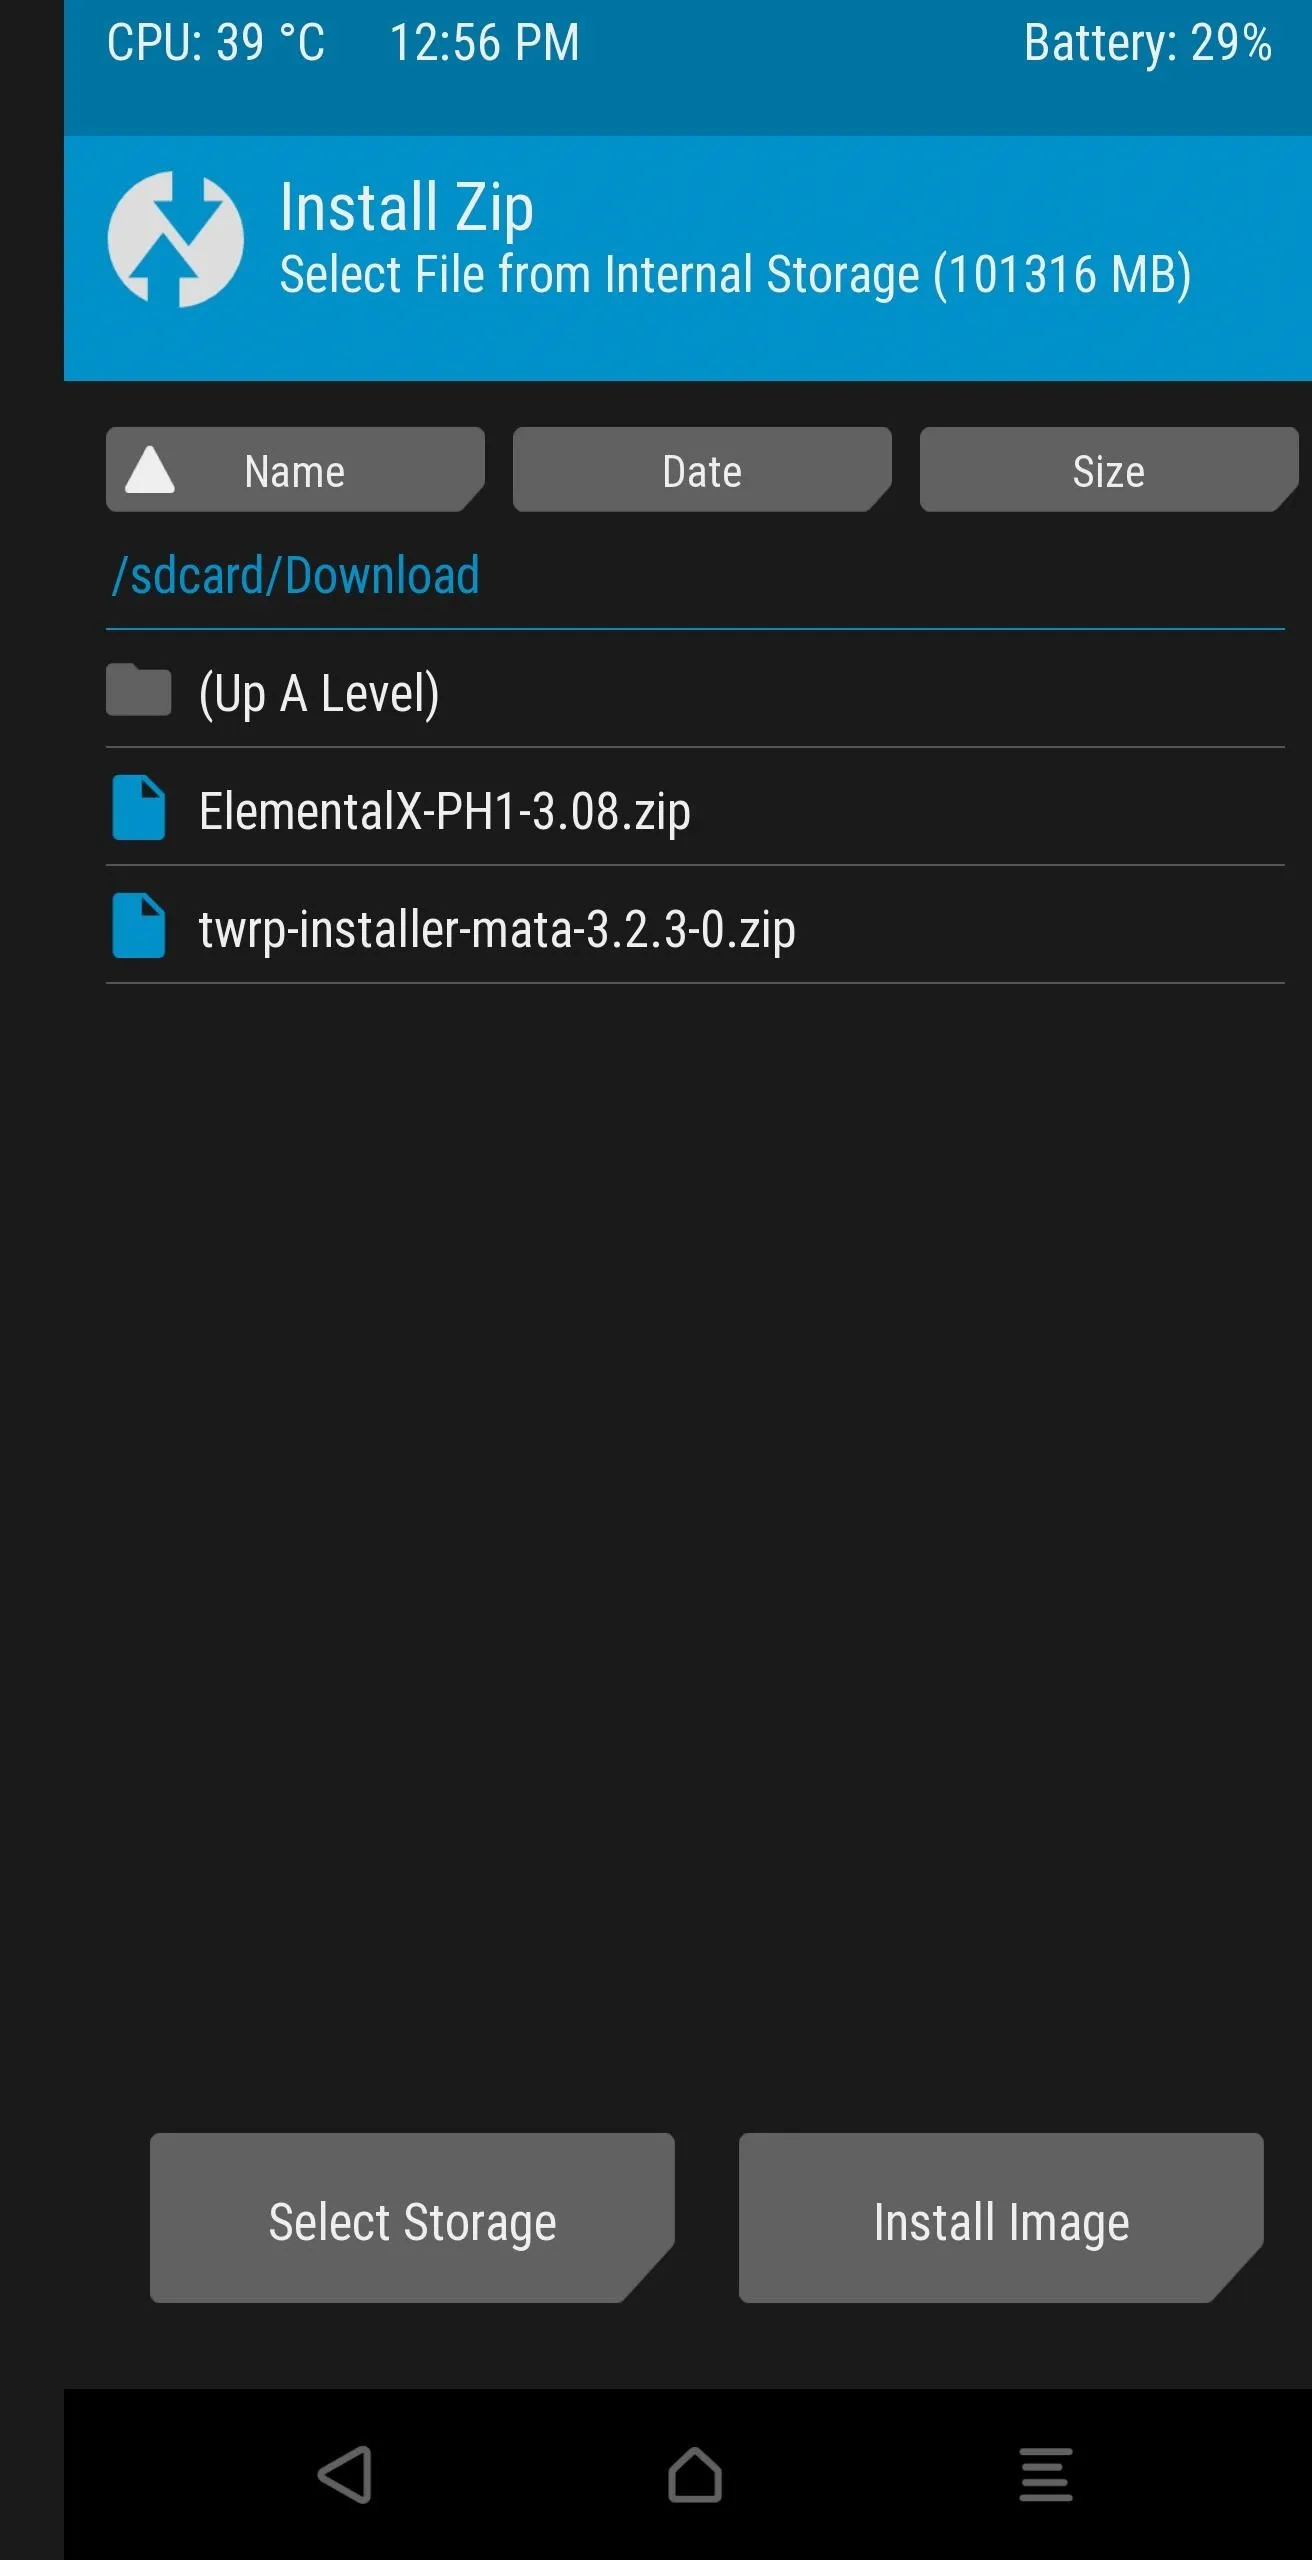
With your bootloader unlocked and TWRP custom recovery installed, you can now proceed to installing your first custom kernel. The first thing you'll need to do is to download a kernel to your Essential PH-1's internal storage.
For our example, we will be using ElementalX. ElementalX is made by flar2, AKA Aaron Segaert. We are familiar with several other works from this developer, including the app Button Mapper, and have had no issues. His kernel is highly rated for the Essential and comes with a lot of features besides CPU frequency speed.
This kernel has only been tested for the stock ROM. Therefore, those using custom ROMs should proceed at their own discretion. Use the link below to download the correct kernel based on the version of Android you are currently running.
Install the Kernel
Power off your device using the power menu. When your device is turned off, press and hold the power button and volume down button simultaneously (like you're taking a screenshot). Keep holding these buttons until you see a menu with the word "Start" in green letters. Using the volume rocker, navigate through the menu until you see "Recovery Mode" in red letters. Press the power button to confirm, which will take you into TWRP custom recovery.
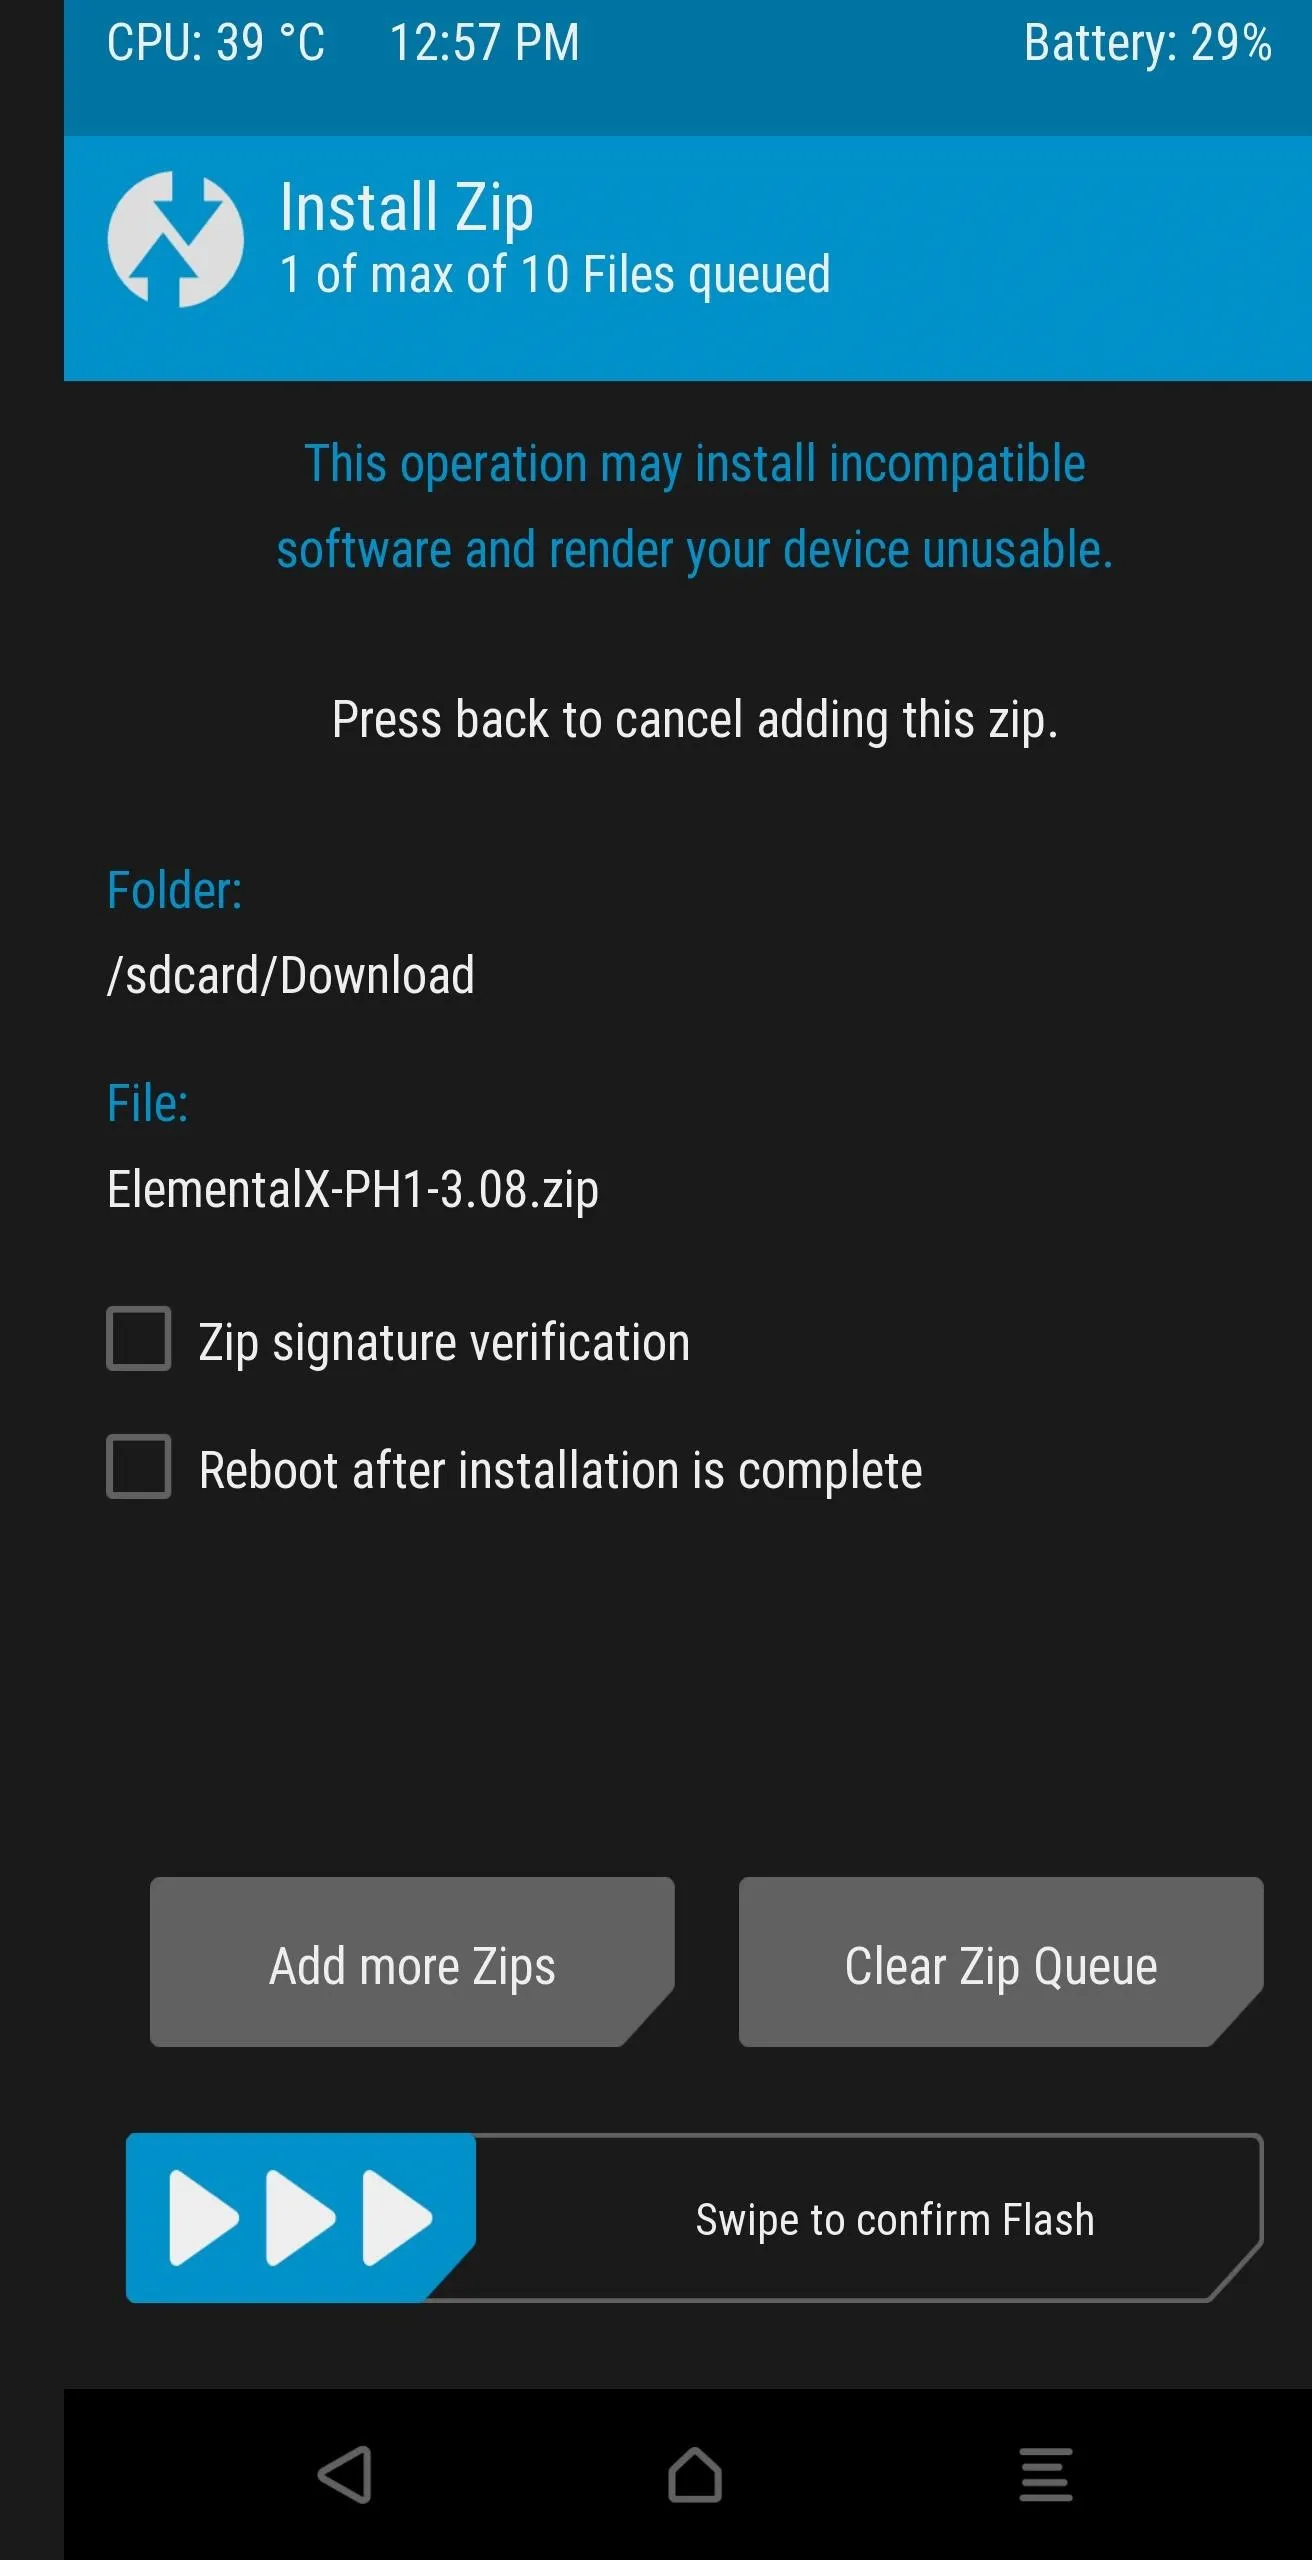
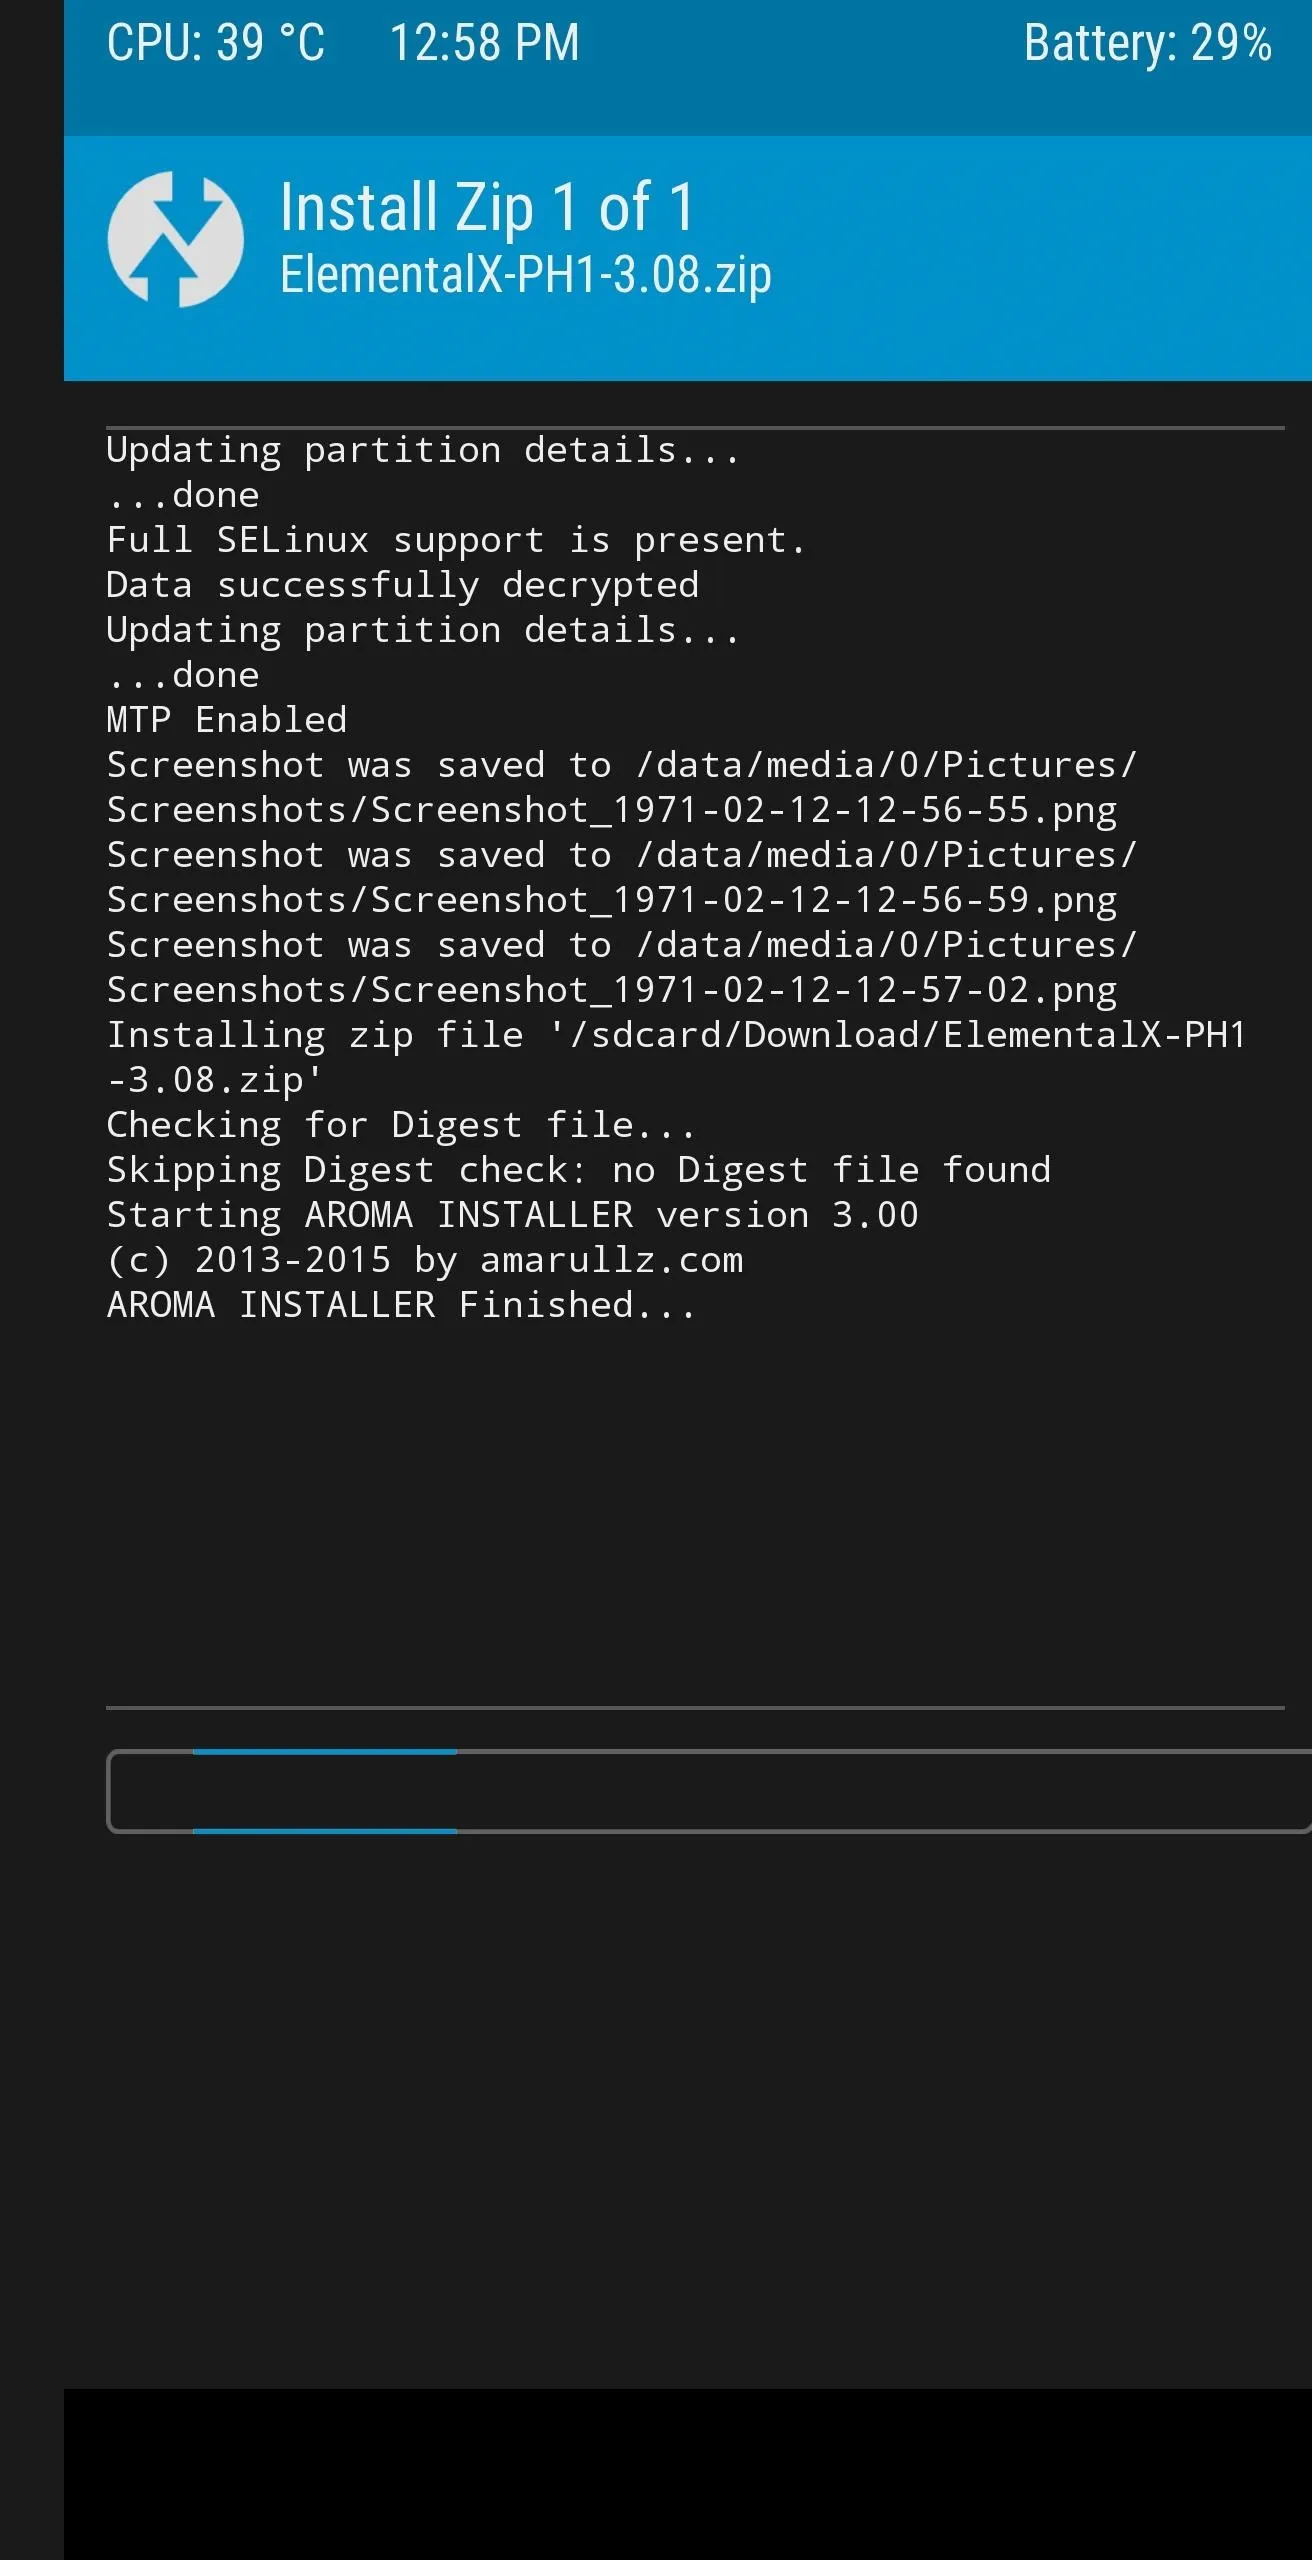
Input your lock screen PIN or password to decrypt your hard drive and to access the main menu of TWRP. From there, select "Install," then choose "Download" from the list of folders. Select the ElementalX ZIP file, then swipe the slider to confirm your choice.
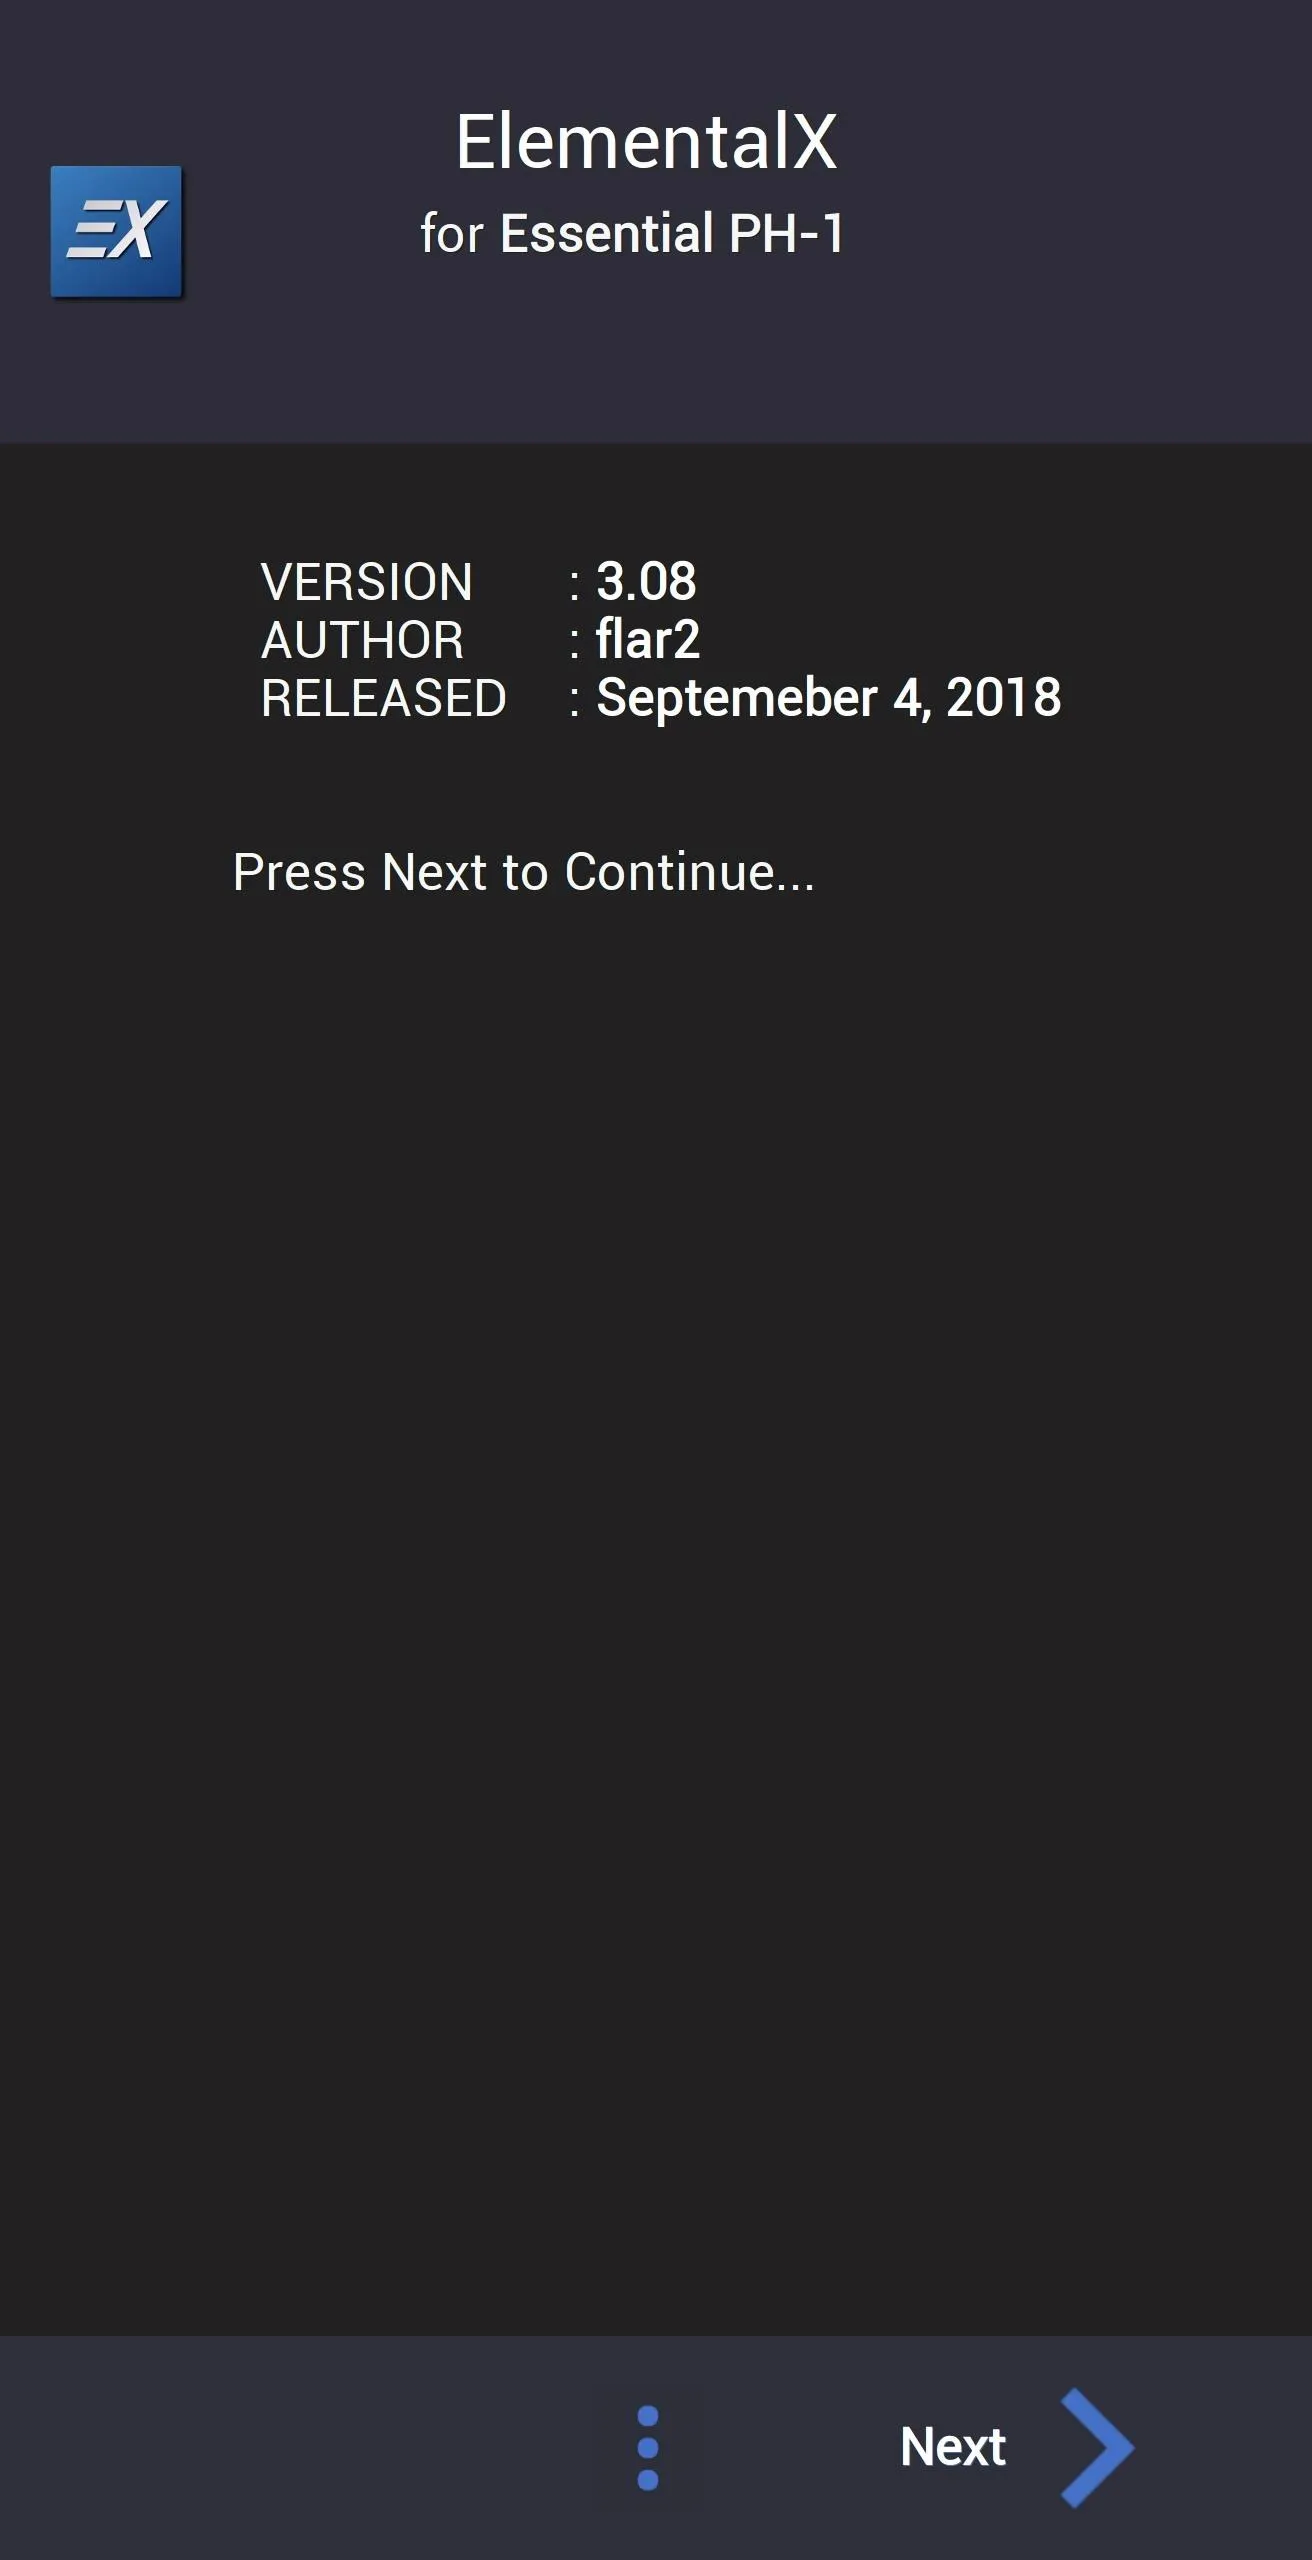
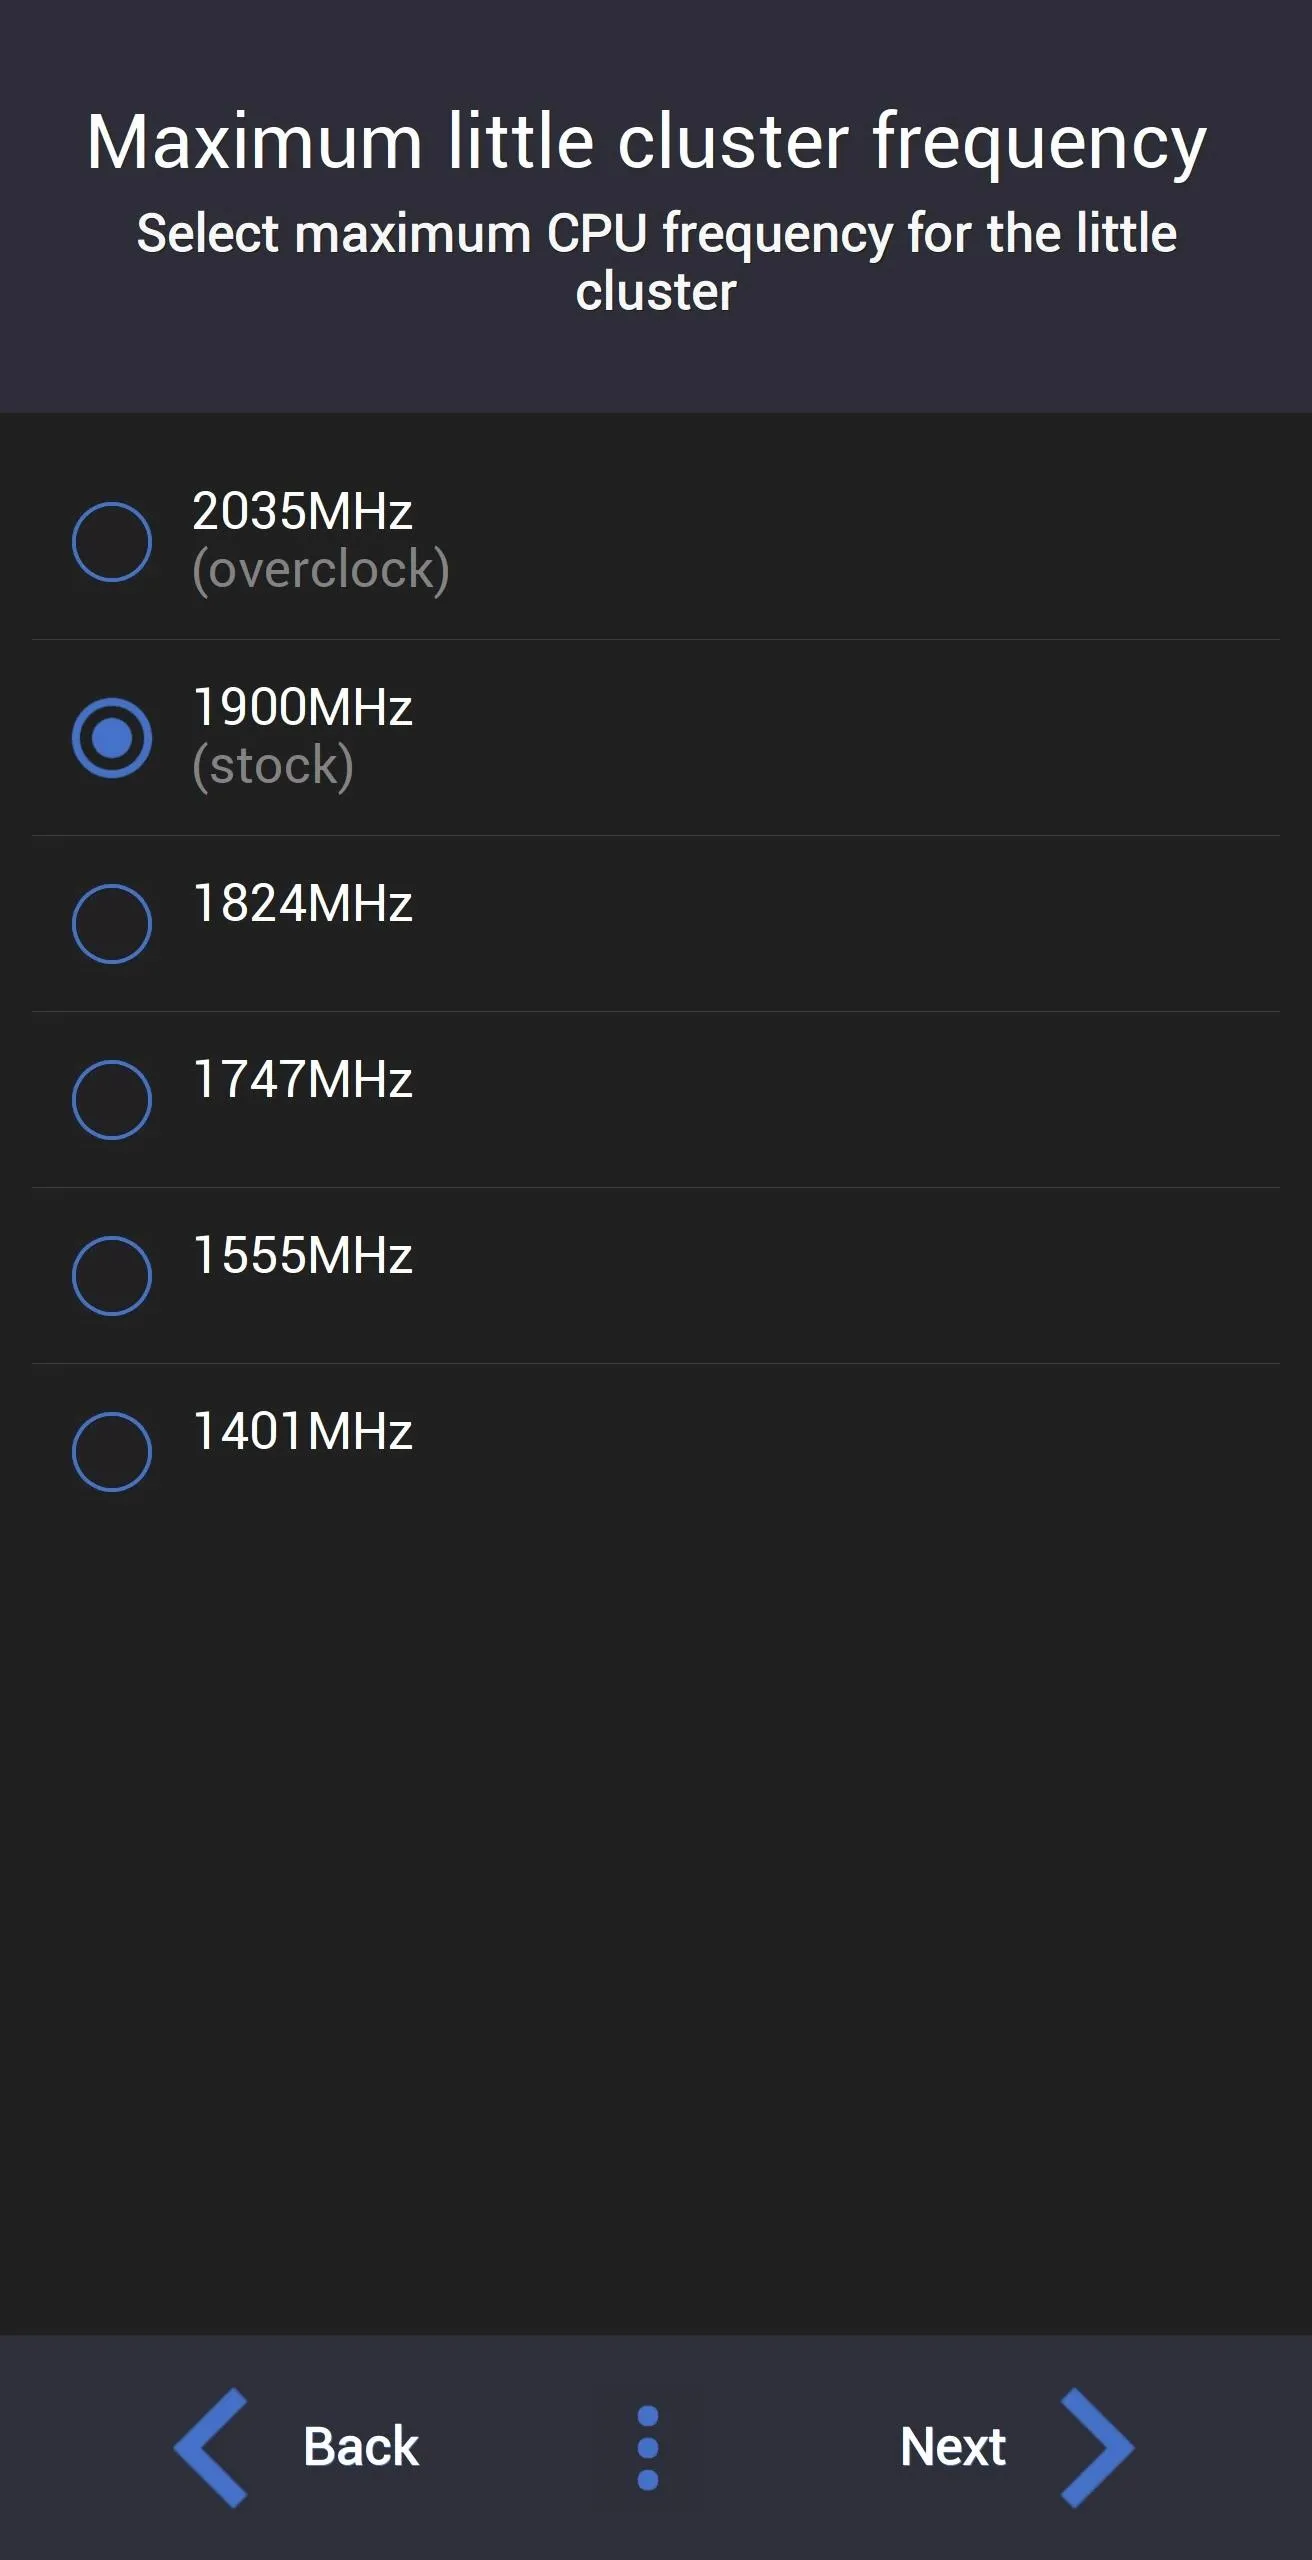
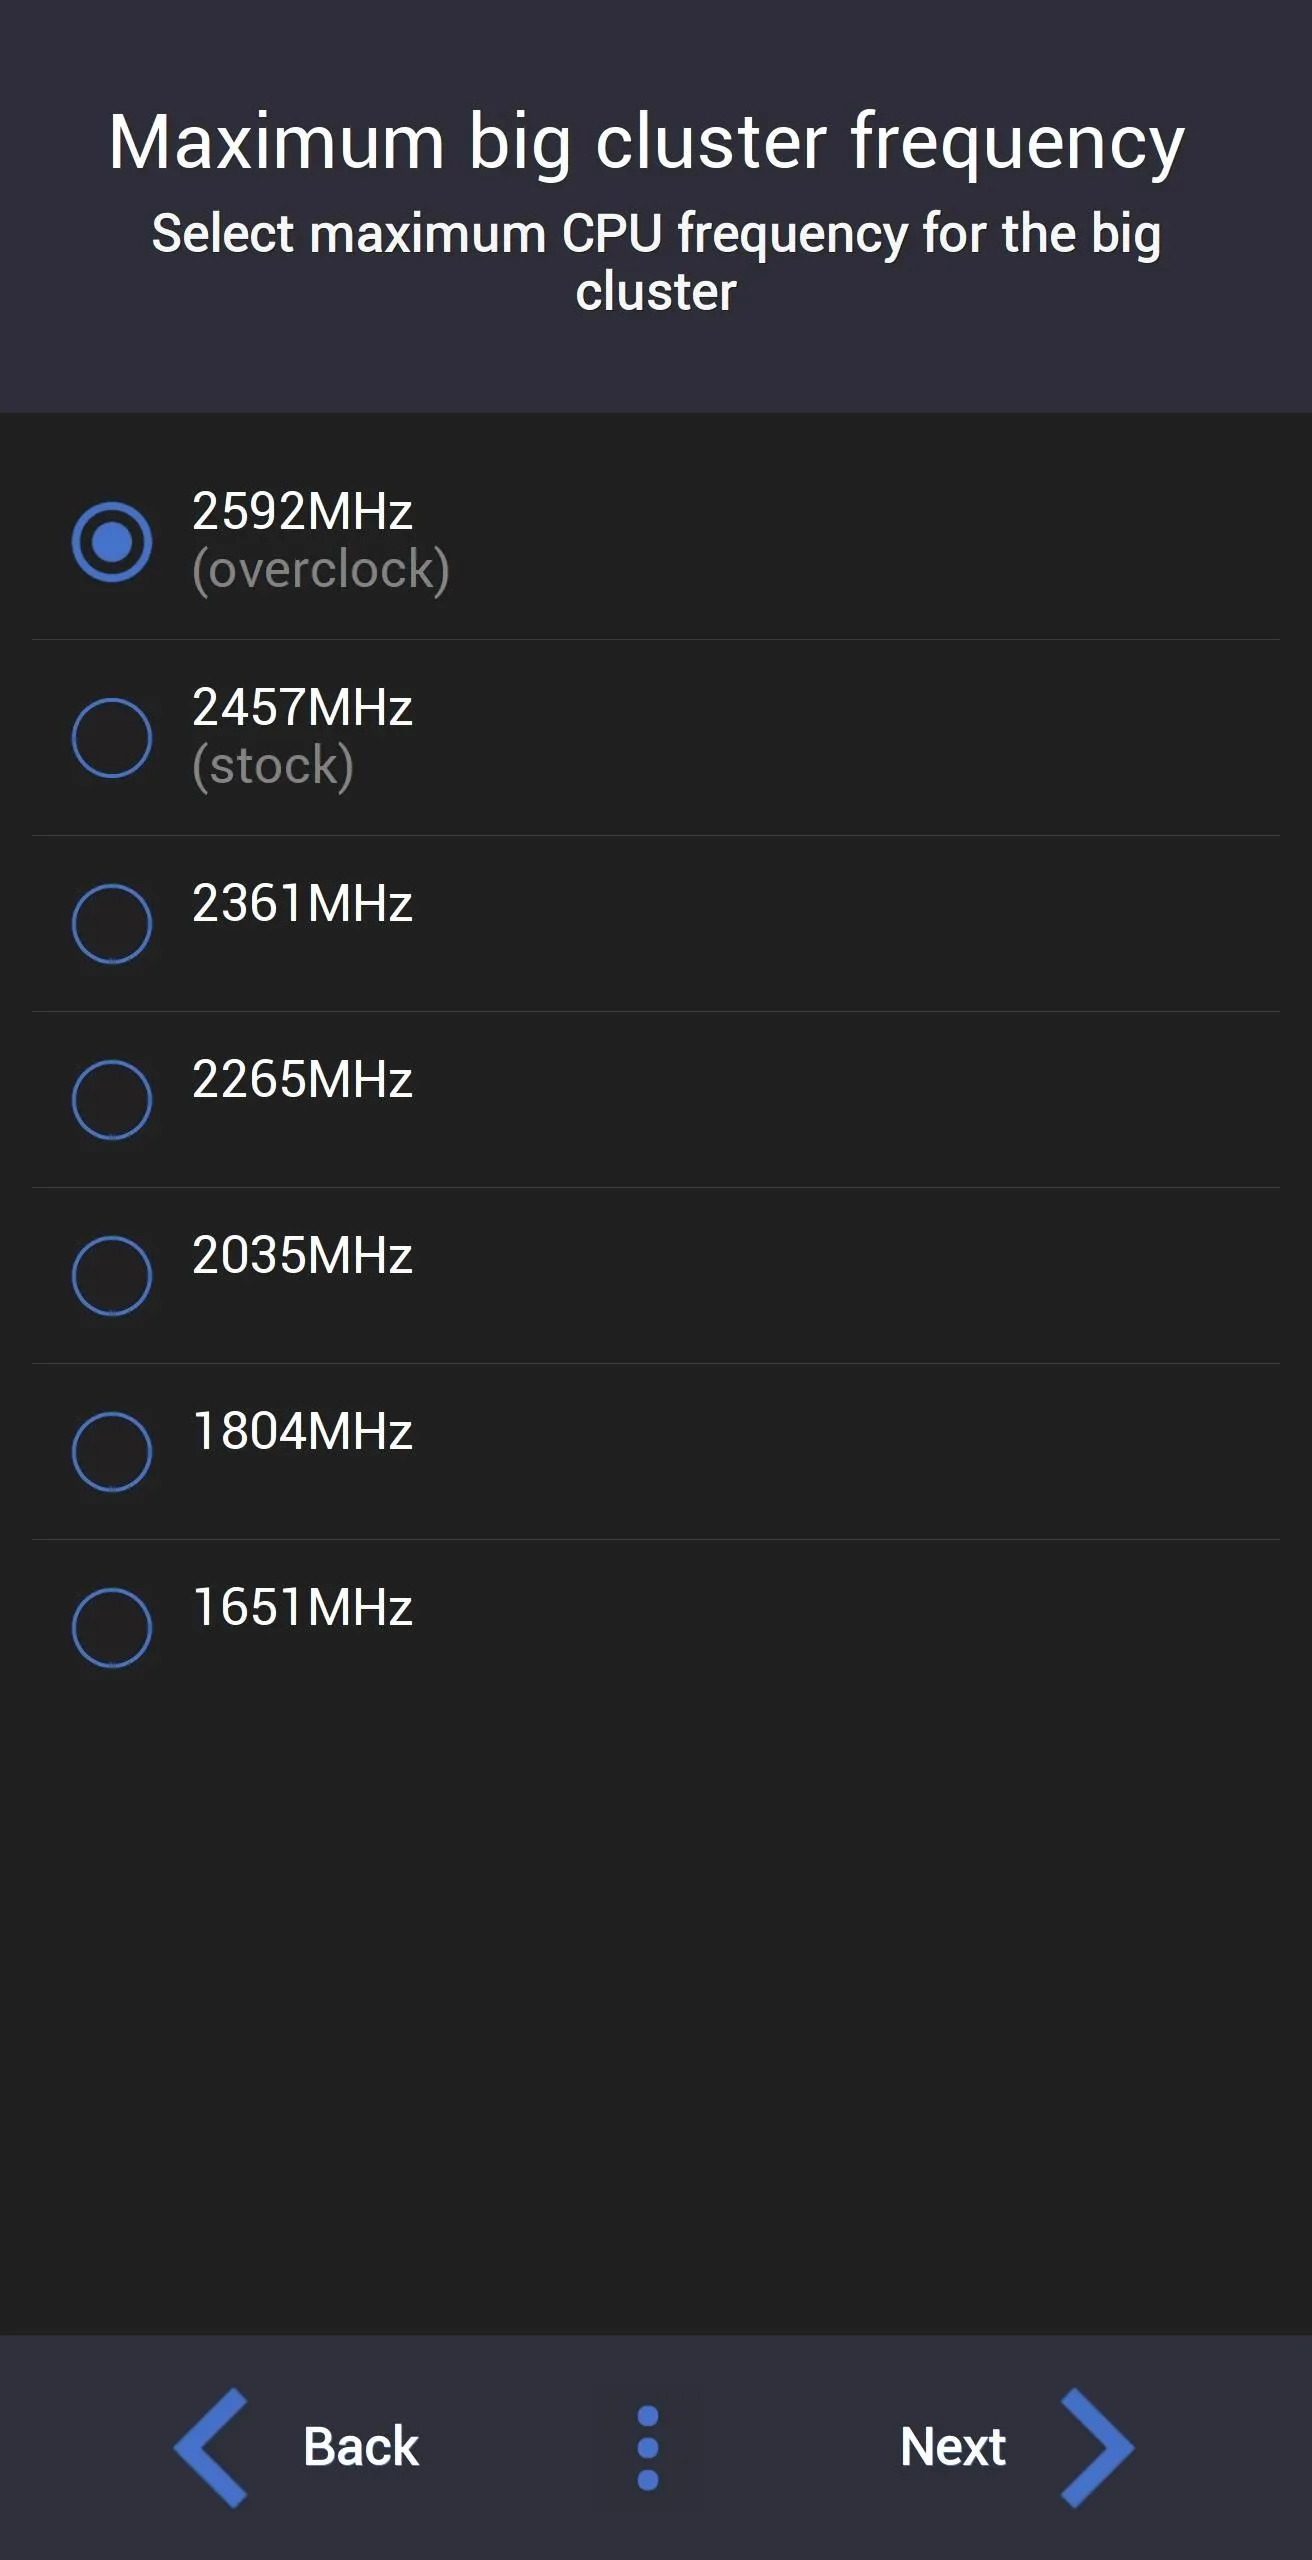
A new page will appear with some options you can configure with the new kernel. After selecting "Next" a few times, you'll see your first configurable options, the frequency of the LITTLE cores on your device.
The Qualcomm Snapdragon 835, the PH-1's SoC, is arranged in two clusters: big (or Gold) cores and LITTLE (or Silver) cores. Each cluster is comprised of four cores, and both clusters operate at different frequencies.
The Silver cores are used for less demanding tasks such as browsing the web and checking emails. Since these activities cover most usage, overclocking this frequency can really improve the overall performance of your device. However, you can also underclock this to save on battery life.
The Gold cores are used for more demanding activities such as gaming. If you want the best performance during gaming, overclock this frequency at the cost of battery life. However, if you hardly game, you can underclock this to conserve battery life.
After selecting the frequency of these two clusters, select "Install ElementalX." Once it's finished with the installation, choose "Reboot system" to return to the lock screen.
Verify It Worked
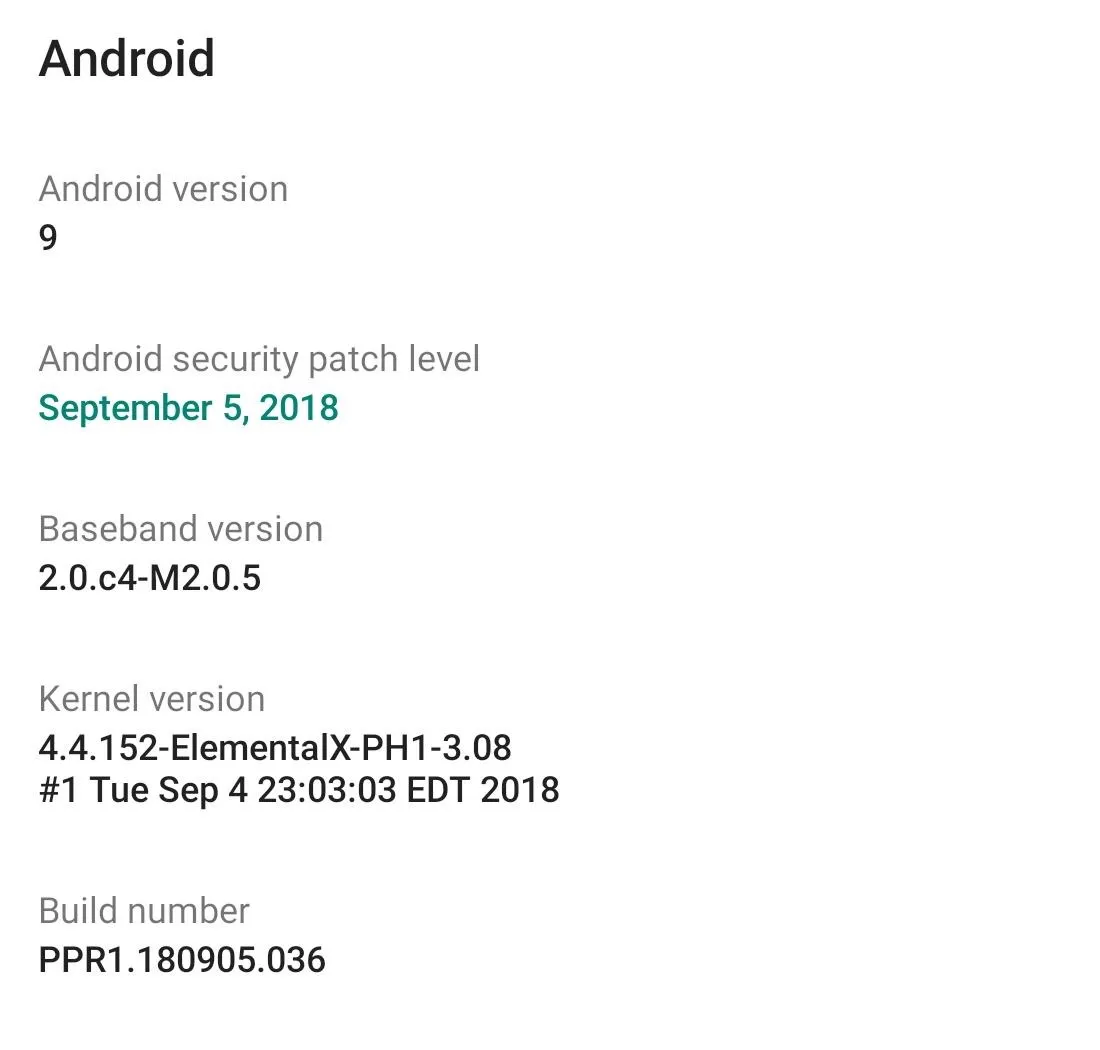
Once you return to the lock screen, you can now confirm the installation worked. Open Settings and choose "System." Select "About Phone" and choose "Android version." In the popup, you'll see a list of information including "Kernel version." Under "Kernel version" should be the text "ElementalX-PH-1" or whichever kernel you chose. If you see this, that indicates your device is now using the custom kernel.
Download EX Kernel Manager (Optional)
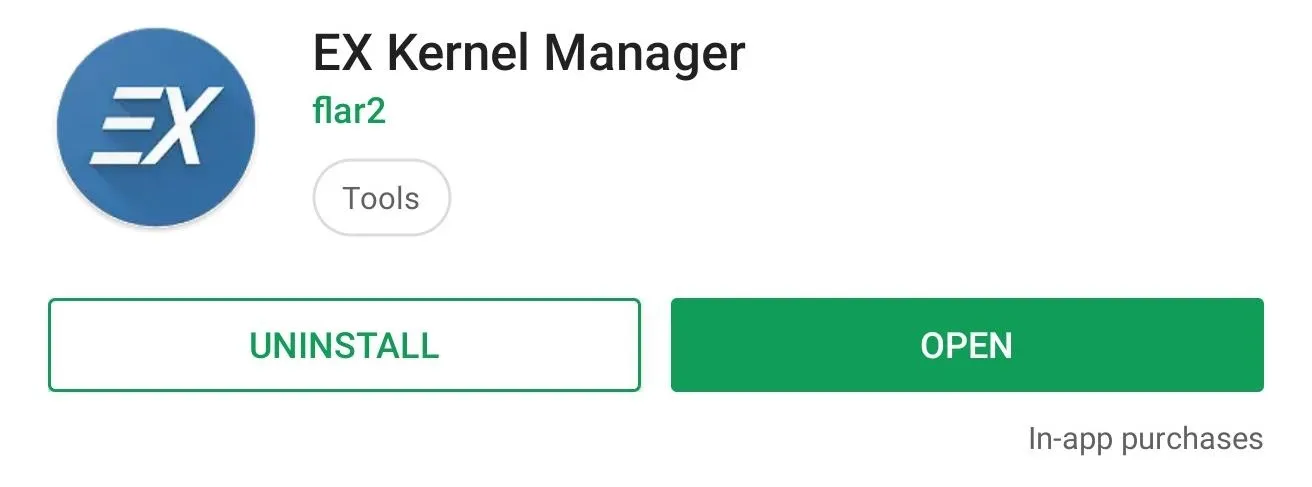
To get the most out of your kernel, you'll generally need a corresponding app that lets you tweak kernel-specific settings. With ElementalX, flar2 has created an app called EX Kernel Manager, which can be found on the Play Store and gives you access to the full list of features included in ElementalX kernel besides frequency adjustment.
The app does cost $4.49, but it's well worth it for the amount of control it provides. Additionally, Mr. Segaert has kernels for a host of different phones besides the Essential, so you are purchasing this app for more than just one device.
- Play Store Link: EX Kernel Manager ($4.49)
Check out the list below for a little taste of the extra features you can control with EX Kernel Manager on the Essential Phone.
- Advanced color control
- Adjust vibration
- Adrenoboost
- Sweep2sleep
- Wakelock blocking options
- Backlight dimmer option
- I/O schedulers: CFQ, FIOPS, deadline, maple, zen, noop, SIO
- NTFS r/w support
- WireGuard support
- Option to disable fsync
The app does require root access for most features. For an in-depth guide on how to root the Essential PH-1, check out the link below.
- Follow Gadget Hacks on Pinterest, Twitter, YouTube, and Flipboard
- Sign up for Gadget Hacks' daily newsletter or weekly Android and iOS updates
- Follow WonderHowTo on Facebook, Twitter, Pinterest, and Flipboard
Cover image and screenshots by Jon Knight/Gadget Hacks


Comments
Be the first, drop a comment!