

Earlier this year, we got our first taste of Android Pie in the form of Developer Preview 1. As with all past Android previews, DP1 was limited to Google devices — but at Google I/O 2018, Google announced that Developer Preview 2 would be accessible to other devices, including the Essential PH-1.
Essential owners can try the latest firmware from Google right now and get an exclusive look at what's to come once Android 9.0 becomes a stable release. Android Pie Beta includes some changes, both under the hood and visually, so we encourage you to try it out. However, this is a beta, so this shouldn't be installed on your Essential if it's your daily driver unless you like living on the edge.
While Essential does include instructions on their website for installing Android Pie Beta, I found no luck with them, and they left me frustrated for two days as I tried to figure it out. If you run into issues with Essential's instructions like I did, here's a surefire way to get Android P installed on your phone:
Step 1: Download ADB & Fastboot on Your PC
In order to install Android Pie on the Essential Phone, your best bet is to use ADB commands. This requires installing the appropriate software on your computer. You'll also need Fastboot.
There are multiple ways to get these programs on your computer, and we've previously outlined them for Windows, macOS, and Linux. For best results, follow Method 1 at the link below to get ADB and Fastboot installed on your computer.
- Instructions: How to Install ADB & Fastboot on Mac, Linux & Windows
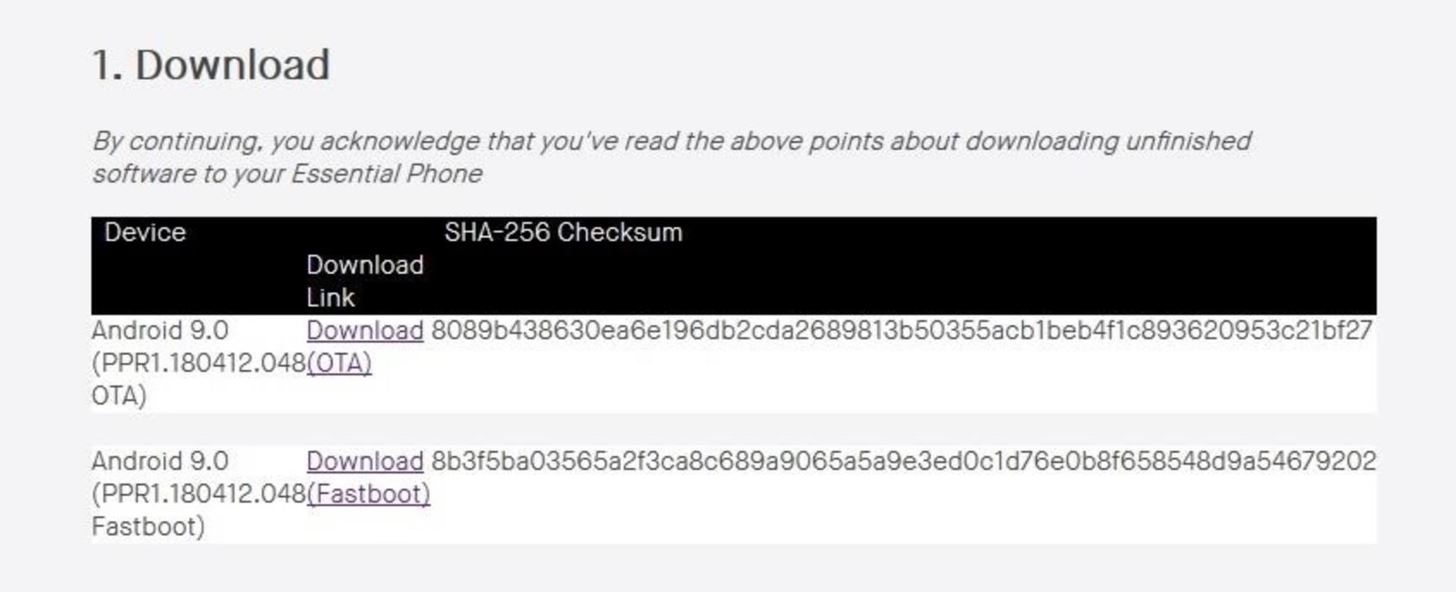
Step 2: Download the OTA File
On your computer, visit Essential's Android Pie Developer Preview webpage using the link listed below. Once there, choose the "Download and Flash the Android P Developer Preview," then fill in the requested information.

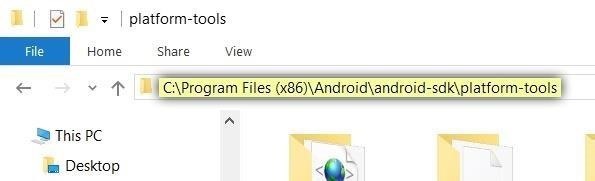
After hitting the "Submit" button, you will be taken to a new page with two downloads available. You'll want to download the first one labeled "Download (OTA)." Once downloaded, move the ZIP file to the platform-tools folder inside of your ADB installation directory.
For Windows users, this can usually be found at C:\Program Files (x86)\Android\android-sdk\platform-tools, though it will vary if you used a minimal ADB installer instead of the full Android SDK. If you're unsure of the folder's location, or if you're on a Mac or Linux machine, use your computer's search function to find the platform-tools folder.
After you've copied the ZIP file into the platform-tools folder, keep the explorer window open, as this will help with the next step.
Step 3: Open a Command Prompt or Terminal Window
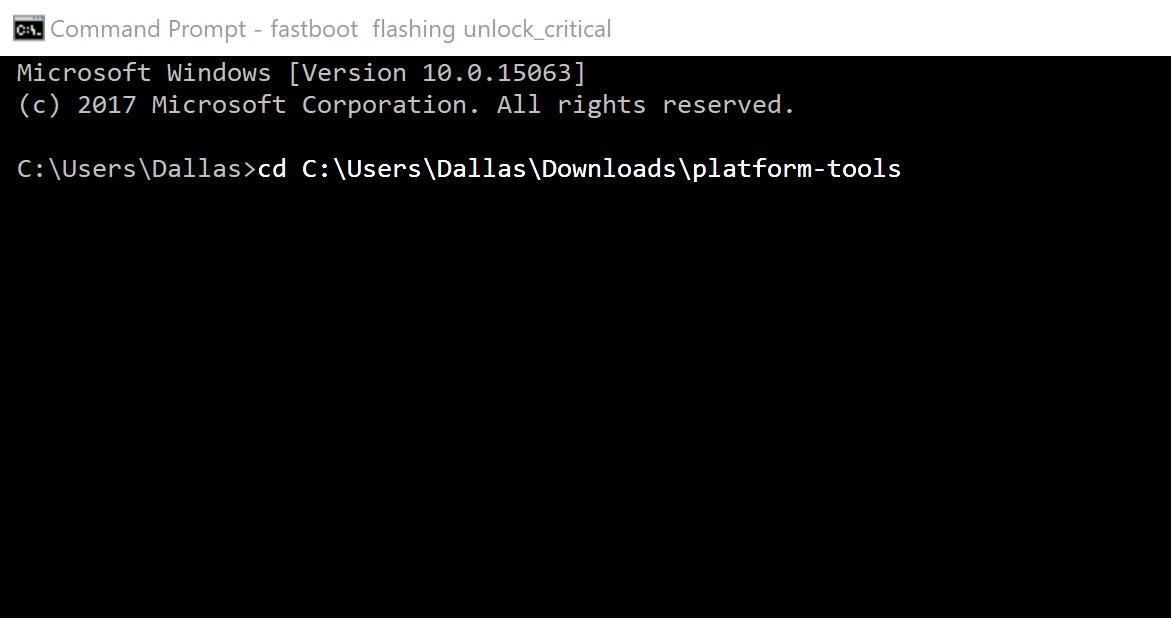
With the platform-tools folder still open in your computer's file browser, copy the folder's full location from the address bar at the top of the window.
Next, open a command prompt or terminal window. On Windows, press the Windows button on your keyboard, then type in "cmd" and hit enter to do so. On Linux or Mac, open "Terminal" from your Applications folder.
Once you've got the command window open, you'll need to change directories to the platform-tools folder before you can send ADB or Fastboot commands to flash Android Pie. To do that, type "cd" (without the quotes) followed by a space, then paste in the file location for your platform-tools folder and hit enter:
No matter which operating system you are using, leave the command prompt or Terminal open, as you will need it for most of the steps below.
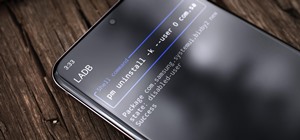
Step 4: Enable 'OEM Unlocking' & 'USB Debugging'
To apply the new update, you need to unlock the bootloader on your device. To do so, you'll need to make sure your computer can communicate with your phone, so USB debugging will need to be enabled in Developer options, and "OEM unlocking" will need to be checked. If you already have "Developer options" unlocked, you can get it to it from "System" in your settings.
If you don't see "Developer options" in "System," navigate to "About phone" in "System," find the "Build number" entry, and tap it seven times until a toast message says "You are now a developer." The "Developer options" should appear in "System" now.
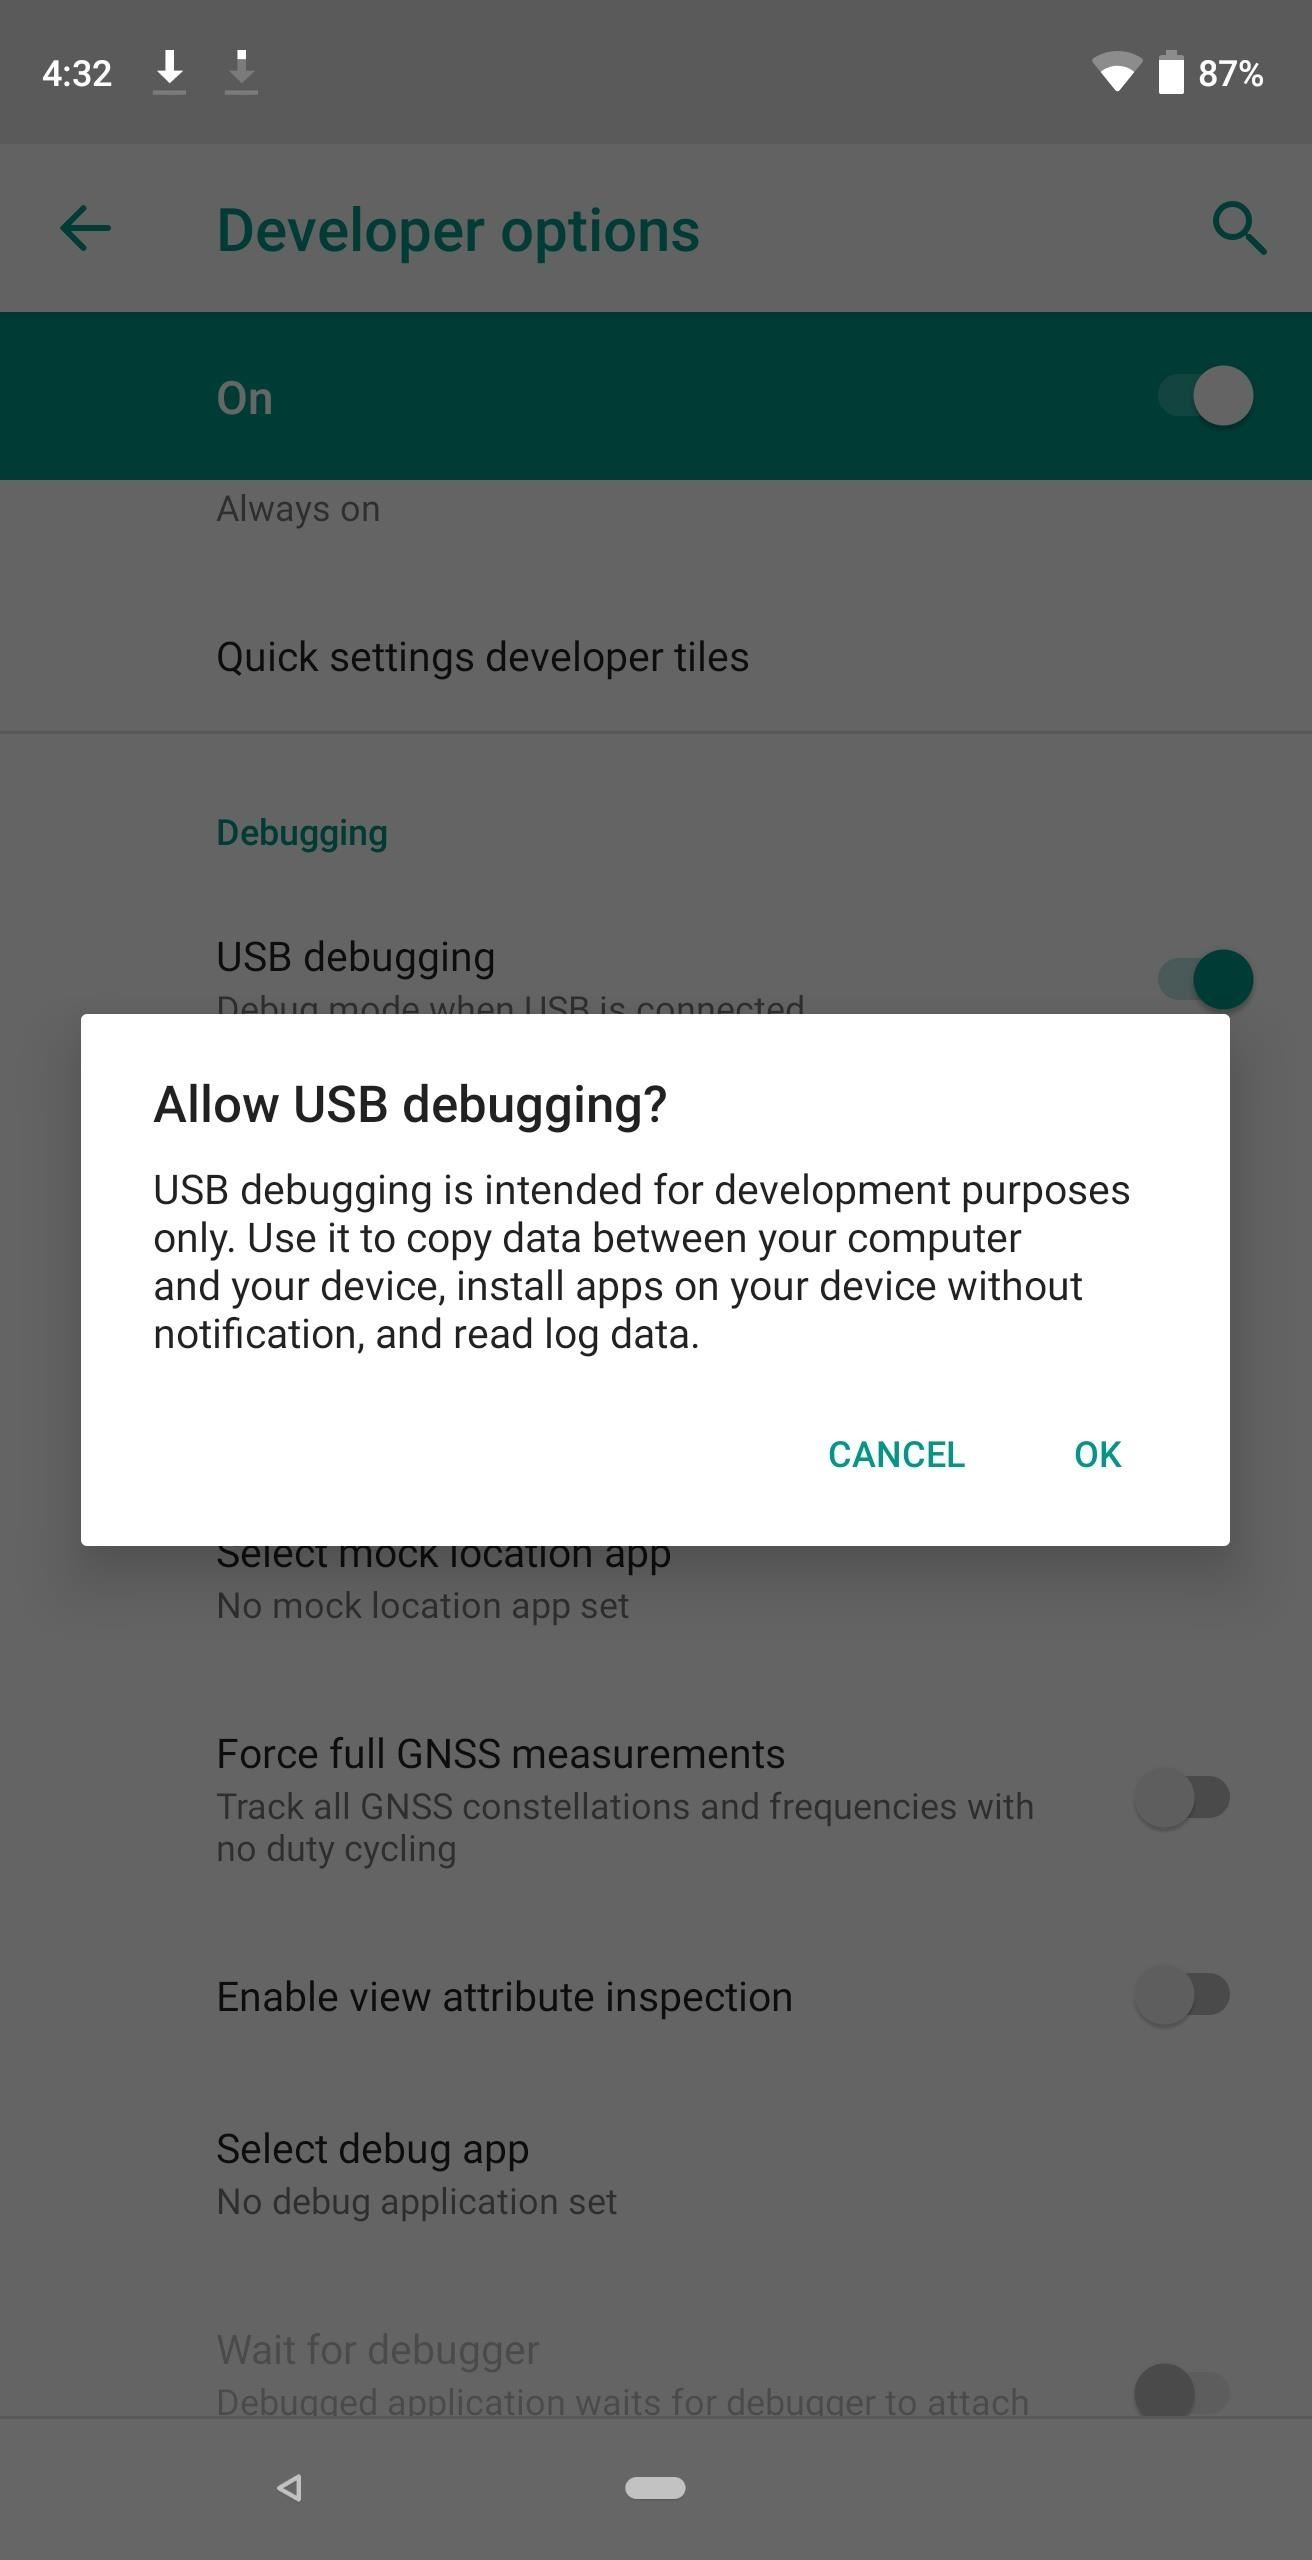
Once in the "Developer options," scroll down to "OEM Unlocking," and make sure it's toggled on. Next, enable "USB debugging," and when a popup emerges, tap "OK."

Step 5: Get ADB Up & Running
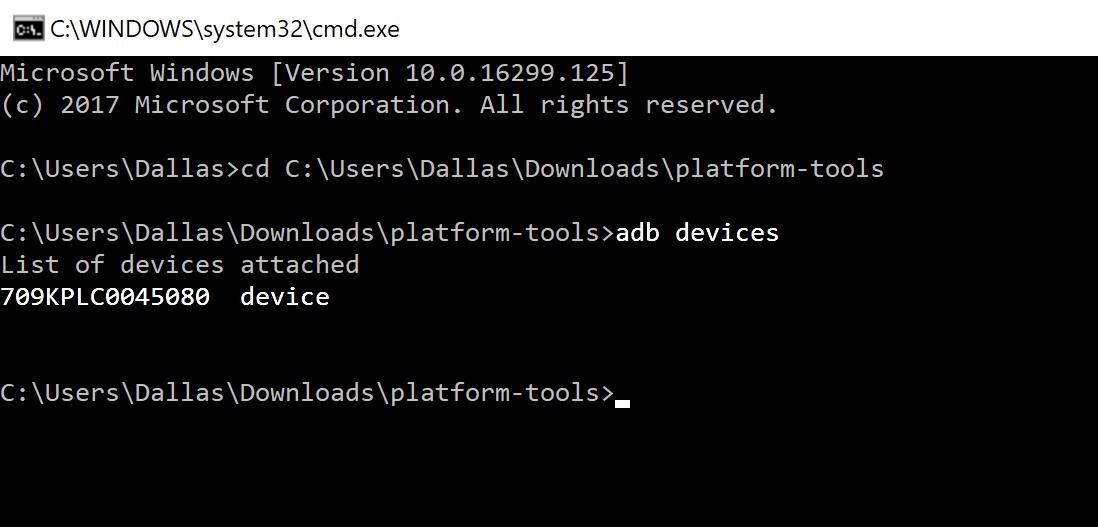
Connect your Essential PH-1 to your computer using the included USB cable. Next, head back to your command prompt or terminal window and input the following command:
adb devices
At this point, you should see a popup on your Essential phone asking if you'd like to allow this computer to connect. Tick the box next to "Always allow from this computer" on this message, then press "OK."
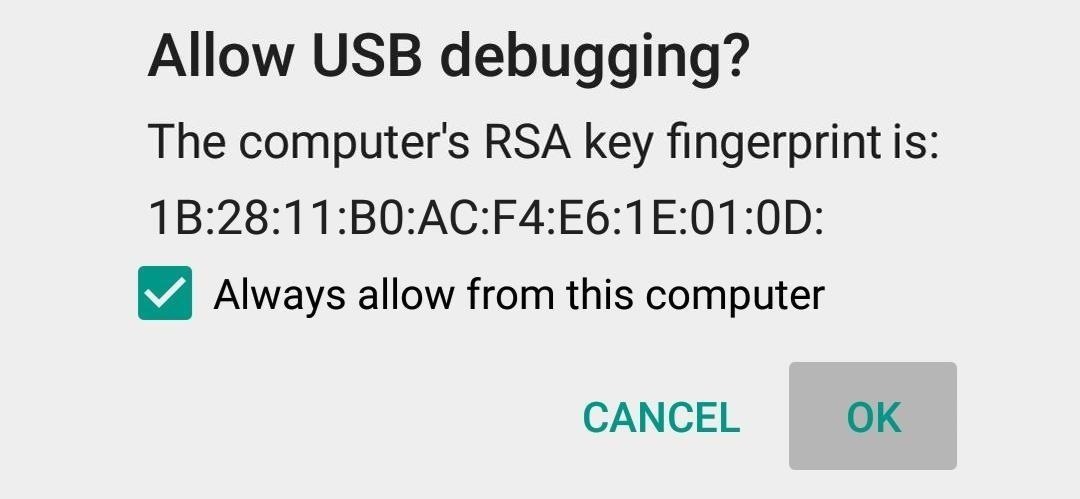
If you performed all the steps up to this point correctly, you should see an assortment of numbers and letters followed by the word "device." If you see "Unauthorized," that means you didn't "Allow USB debugging." If that's the case, disconnect and reconnect the USB cable, then repeat this step.
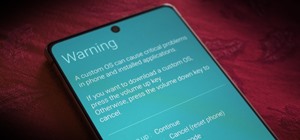
Step 6: Unlock Your Bootloader
Now it's time to actually unlock your PH-1's bootloader. This will allow you to manually flash firmware (such as this Android Pie update) on the device, but be aware that it will automatically wipe all existing data on your phone. If you're okay with that and you have the important data backed up, type the following command into the command prompt or terminal window, then hit enter:
adb reboot bootloader
Your phone will restart, revealing a new screen with several lines of text. Next, input:
fastboot flashing unlock
Using the volume rocker on your phone, navigate to "Yes," then confirm using the power button.
Step 7: Install Android 9.0 Pie
Once your phone completes the task, restart it (if it didn't automatically). Check to make sure ADB commands can be sent using the "adb devices" command again, then input:
adb reboot recovery
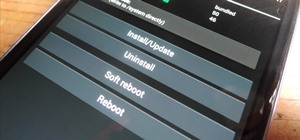
You will see a new screen with an Android mascot laying down. Hold the power button and tap volume up to see the recovery menu options. Use the volume buttons to navigate to "Apply update from ADB" and press the power button to confirm.
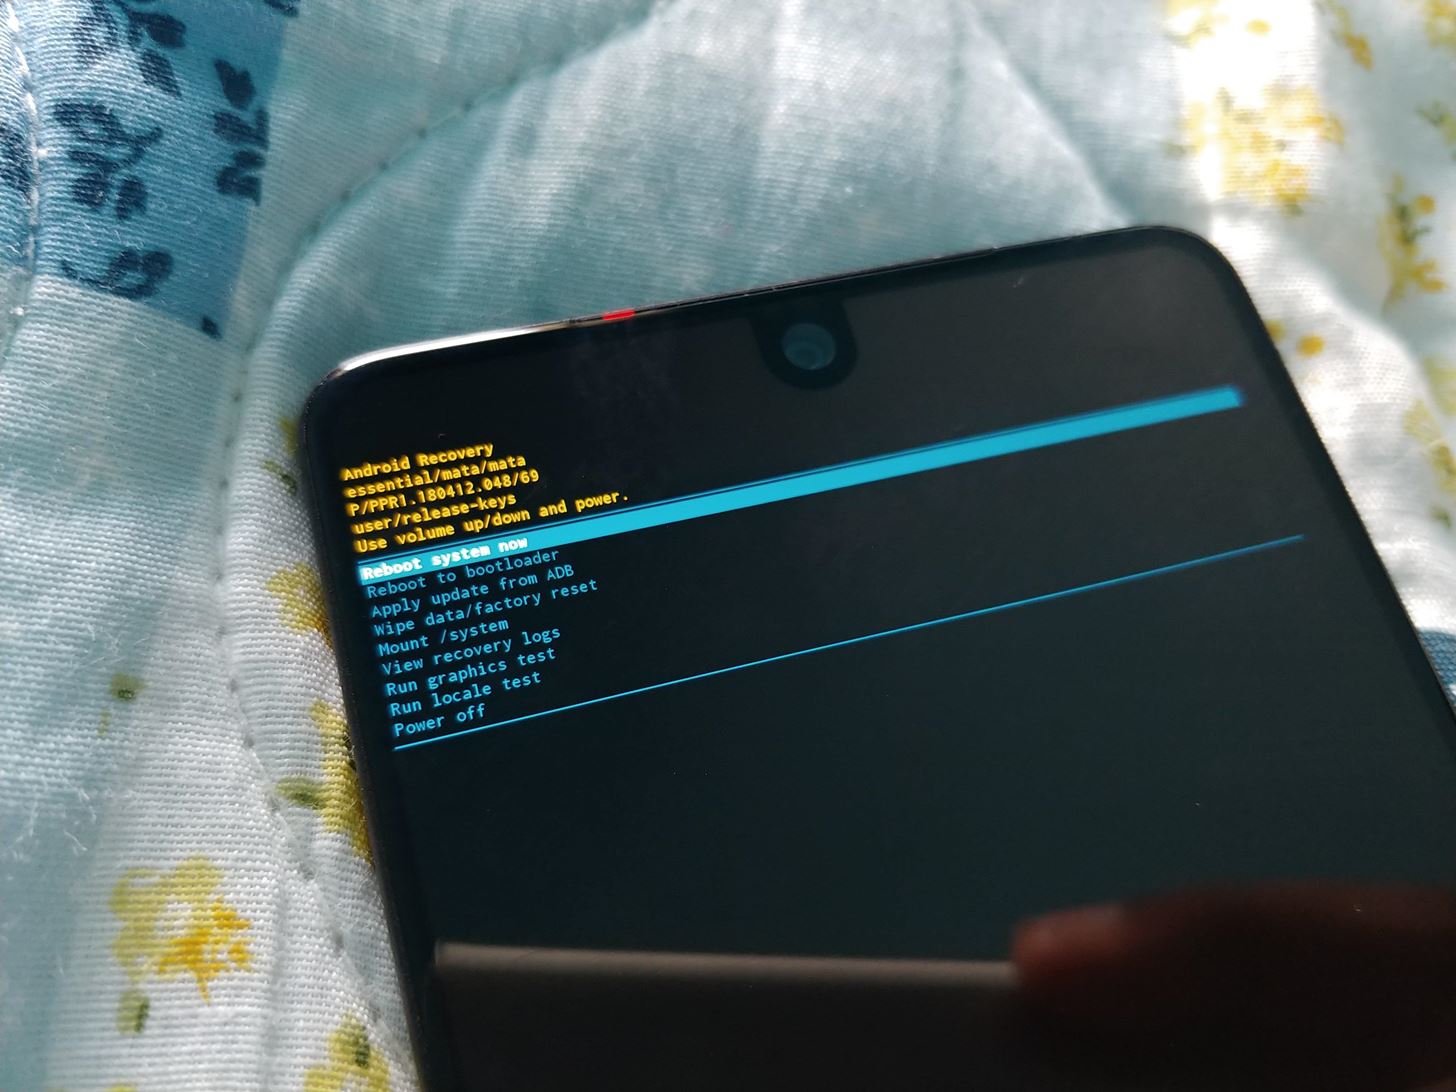
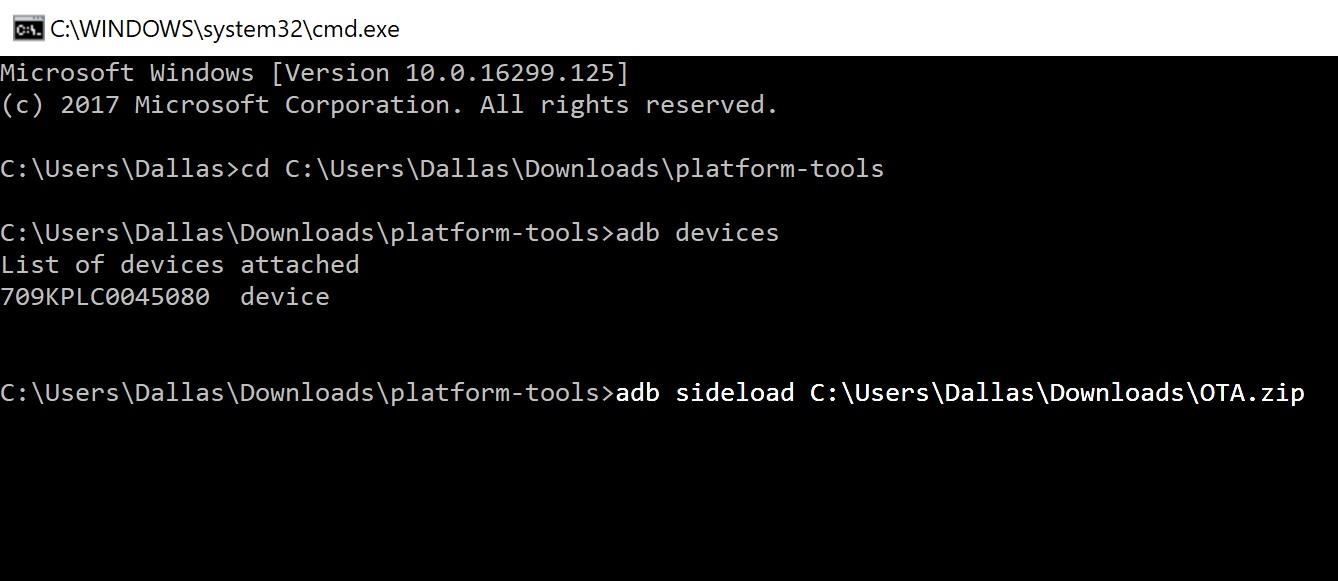
Two lines of text will appear confirming your device is ready to accept sideloaded firmware. Back on your computer, type "adb sideload" (without the quotes) into the command prompt, then add a single space, but don't hit enter just yet.
Instead, drag and drop the OTA ZIP you downloaded in Step 2 into the command prompt window. This will populate the full file name and location directly after the "adb sideload" command you just typed.
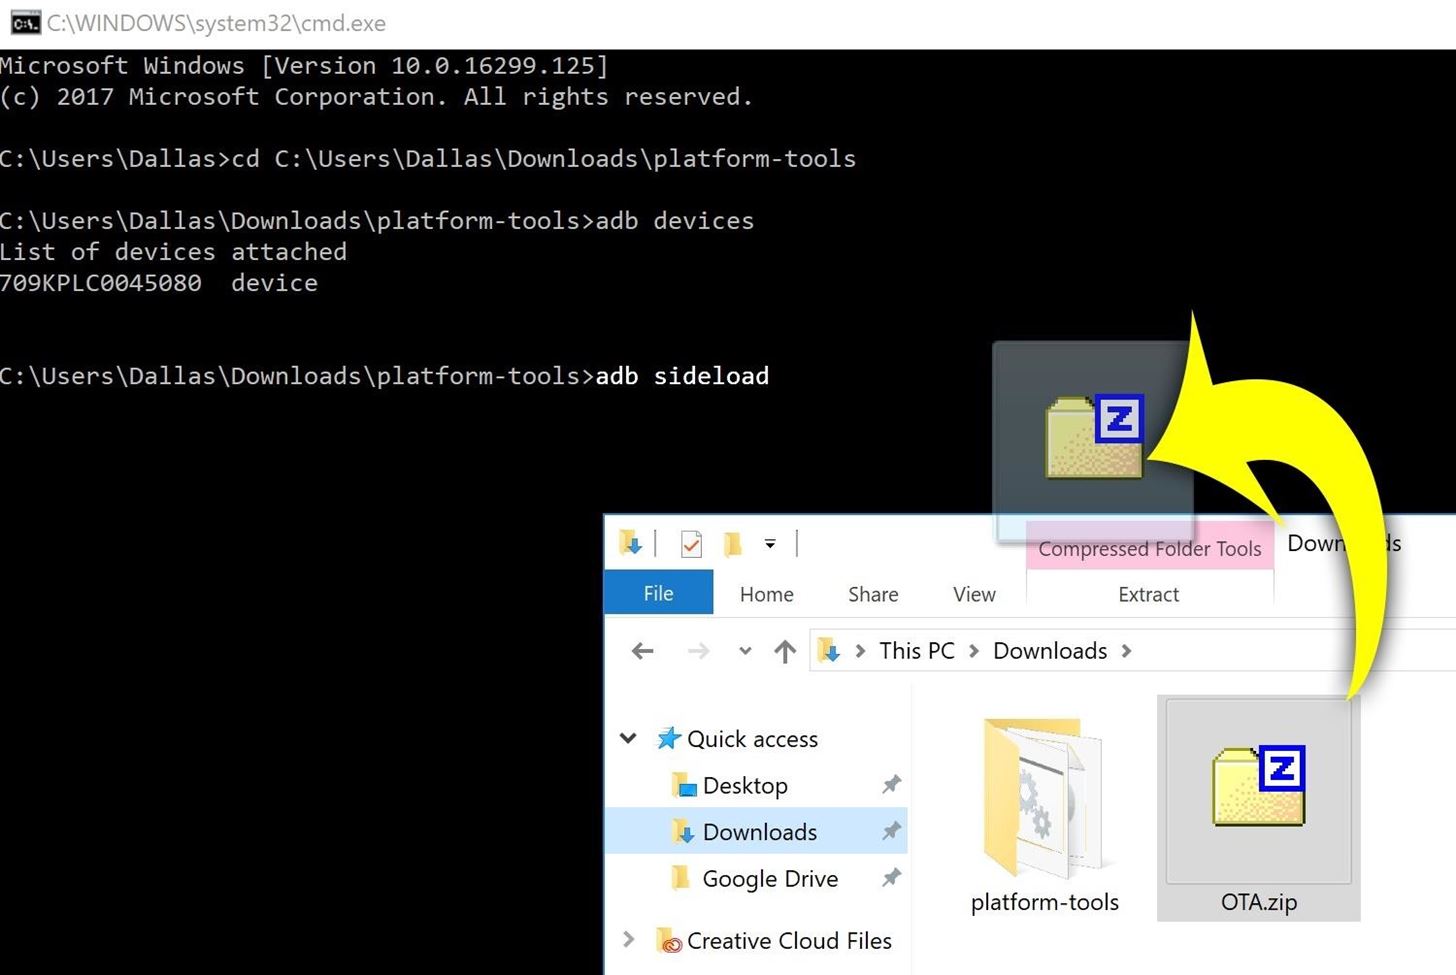
Once the command looks similar to what's depicted below, go ahead and press enter to start installing Android Pie.
adb sideload <file location> <file name.zip>
A percentage number will show up in the command prompt window. Once it reaches 100%, just restart your phone and Android P will installed on your device!
Android Pie is shaping to be a significant update. There are some visual changes, security improvements, and new gestures that alter how you interact with your device. With Android 9.0 Beta, you can enjoy these features early as the rest of the Android community waits for the final build. Aren't you glad you are one of the 100,000 owners of an Essential PH-1?
Who needs a wand? Unlock your magical powers and transform yourself from a Muggle into a Wizard or Witch just by using your Android phone. See how:


2 Comments
I dont understand what i'm doing wrong.
I enter the bootloader menu, and i dont have a "YES" option... it toggles between
START, RESTART BOOTLOADER, RECOVERY MODE, POWER OFF
When i select START and press the power button, the phone simple restarts into my regular lock page, where I can unlock the device with my password...
I've tried this multiple times, without any success..
ideas?
Under "Developer Options," is OEM unlock enabled?
Share Your Thoughts