


From booting into Fastboot mode with a single command to installing mods without root access, there's no shortage of reasons to use ADB. The catch, though, you had to be tied to a computer with a USB connection. However, a new feature in Android 11 finally allows you to run ADB commands over Wi-Fi instead of being tethered.
Download or Update SDK Platform-Tools
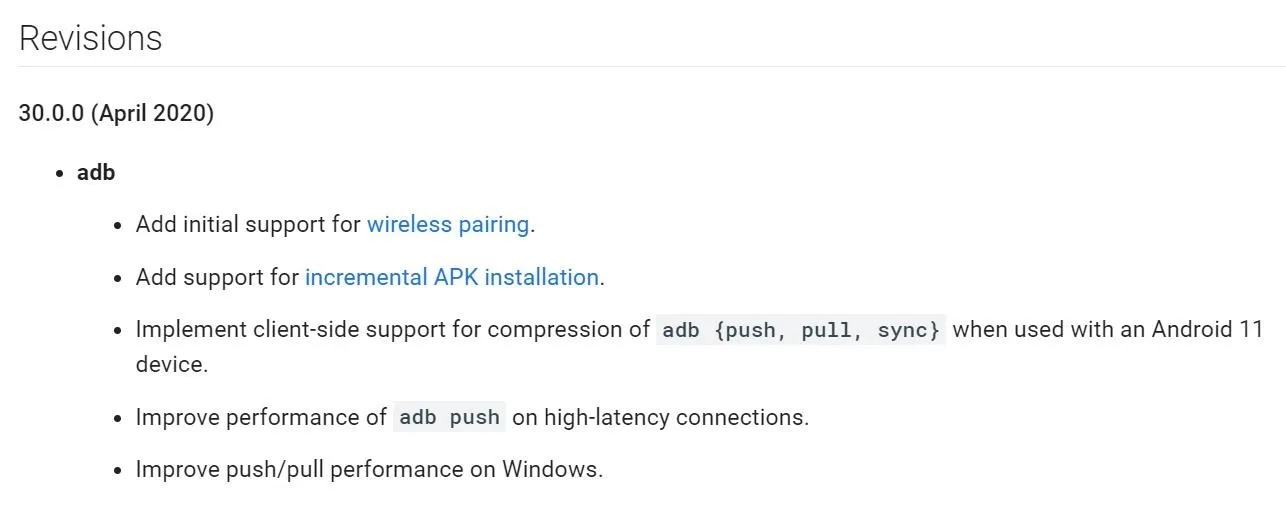
Since wireless debugging is new to Android 11, you need to make sure your Platform-Tools package is at least version 30.0.0, which brought initial support for the feature. Click the link below that corresponds with your operating system to download the latest version. You can save and extract the platform-tools folder to your desktop for easy access.
Enable Wireless Debugging
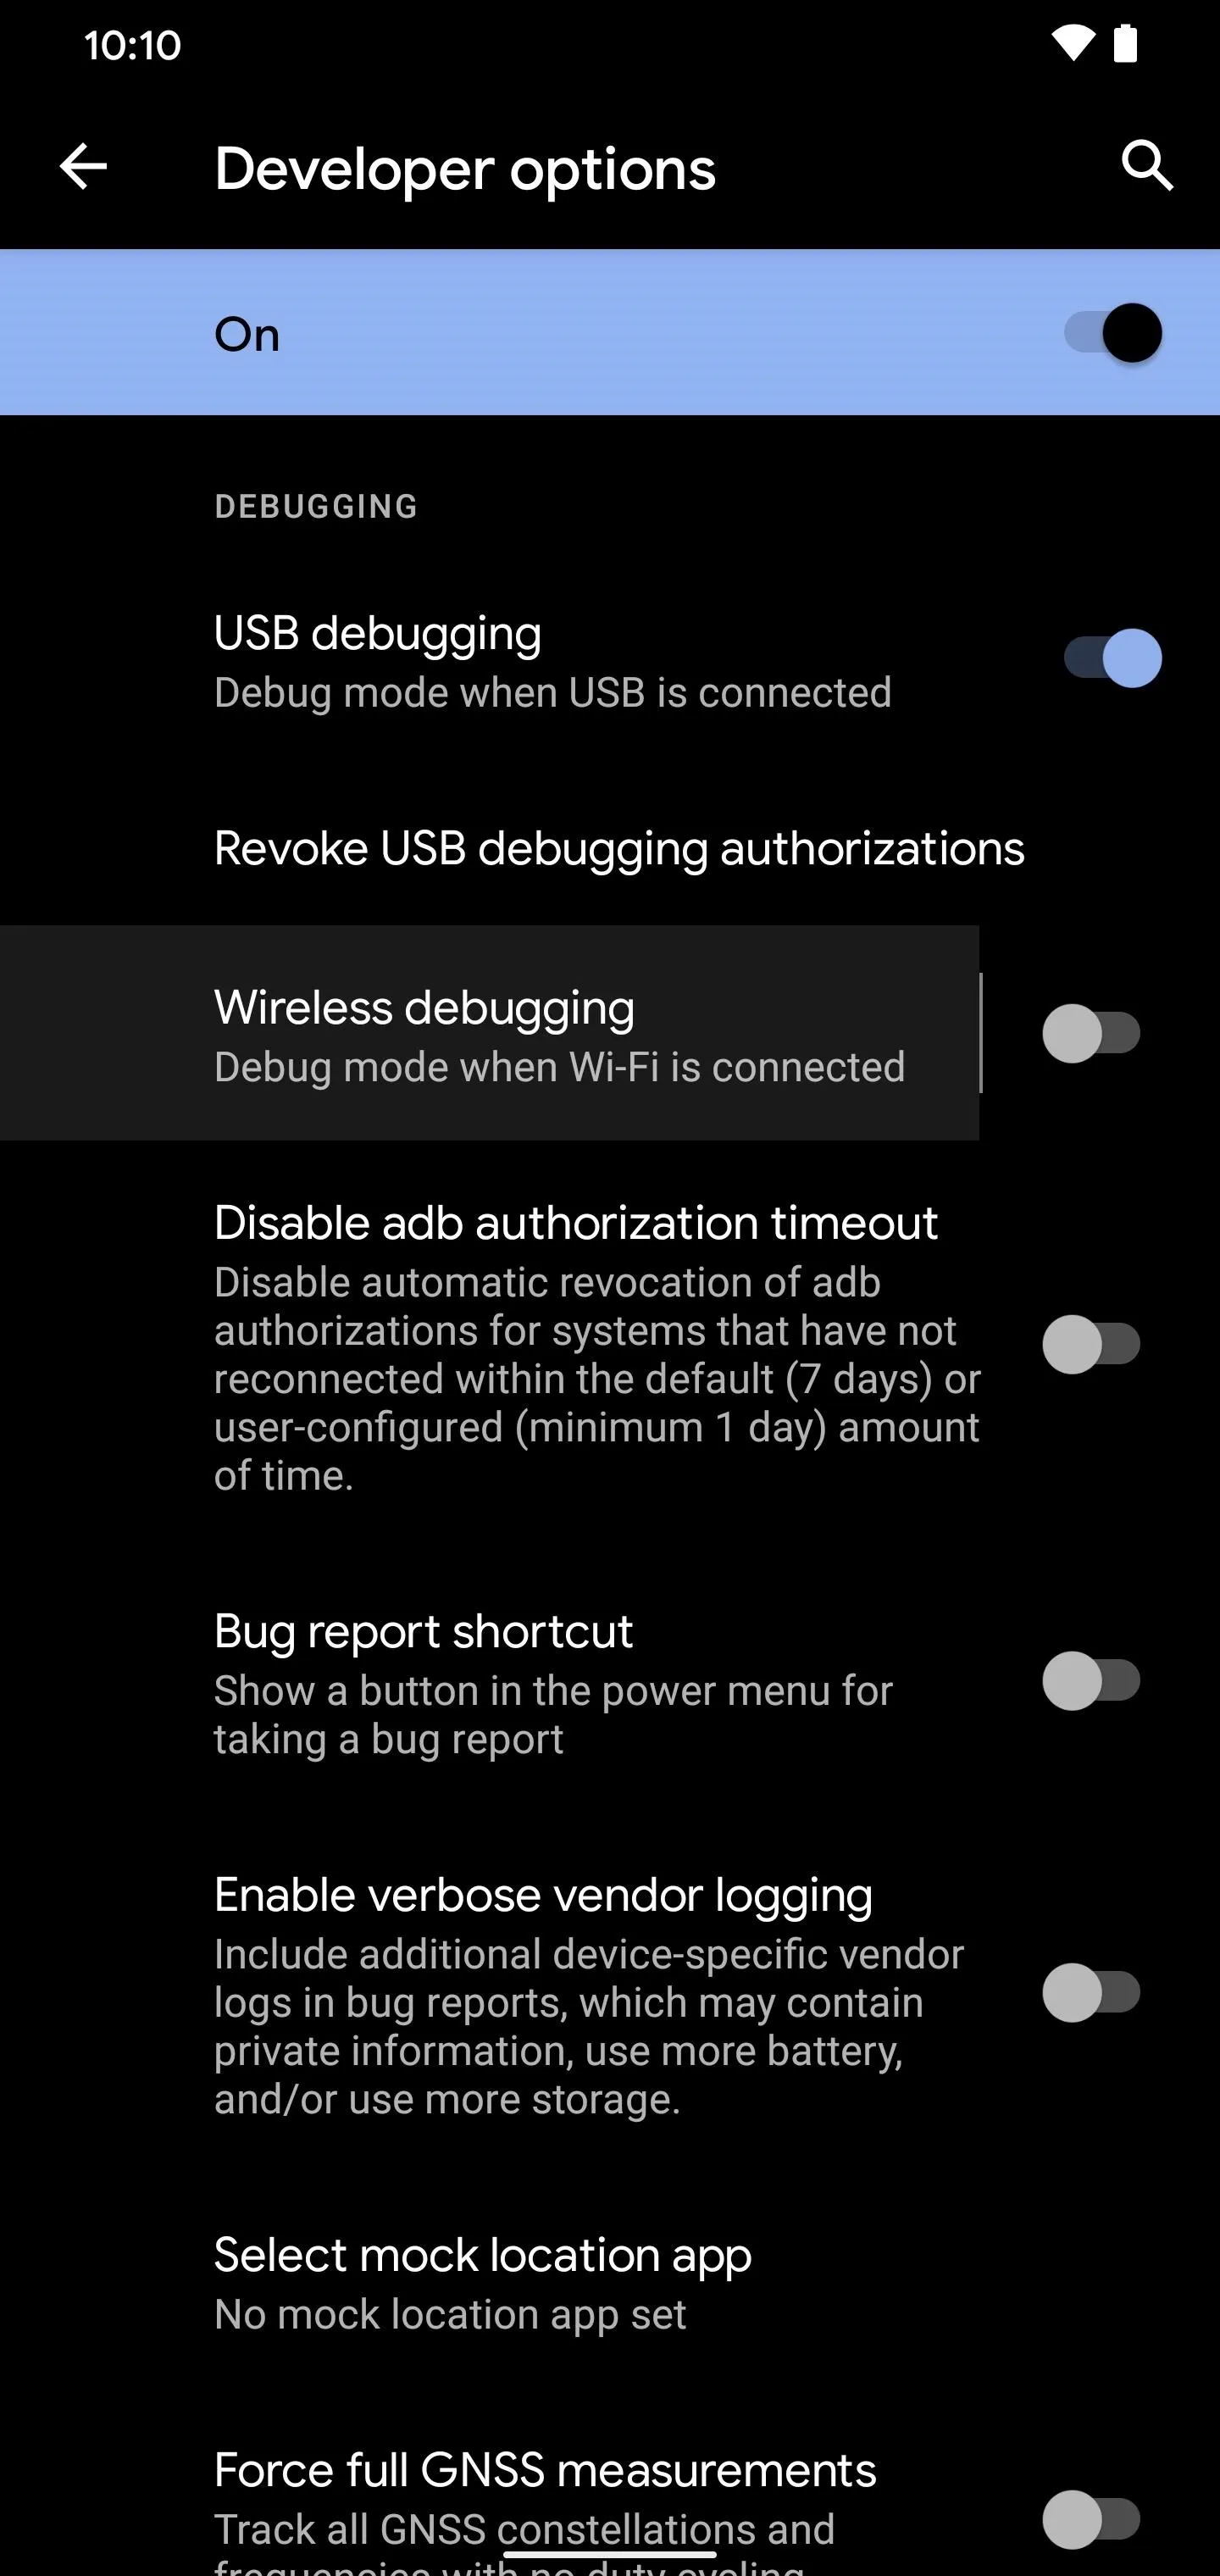
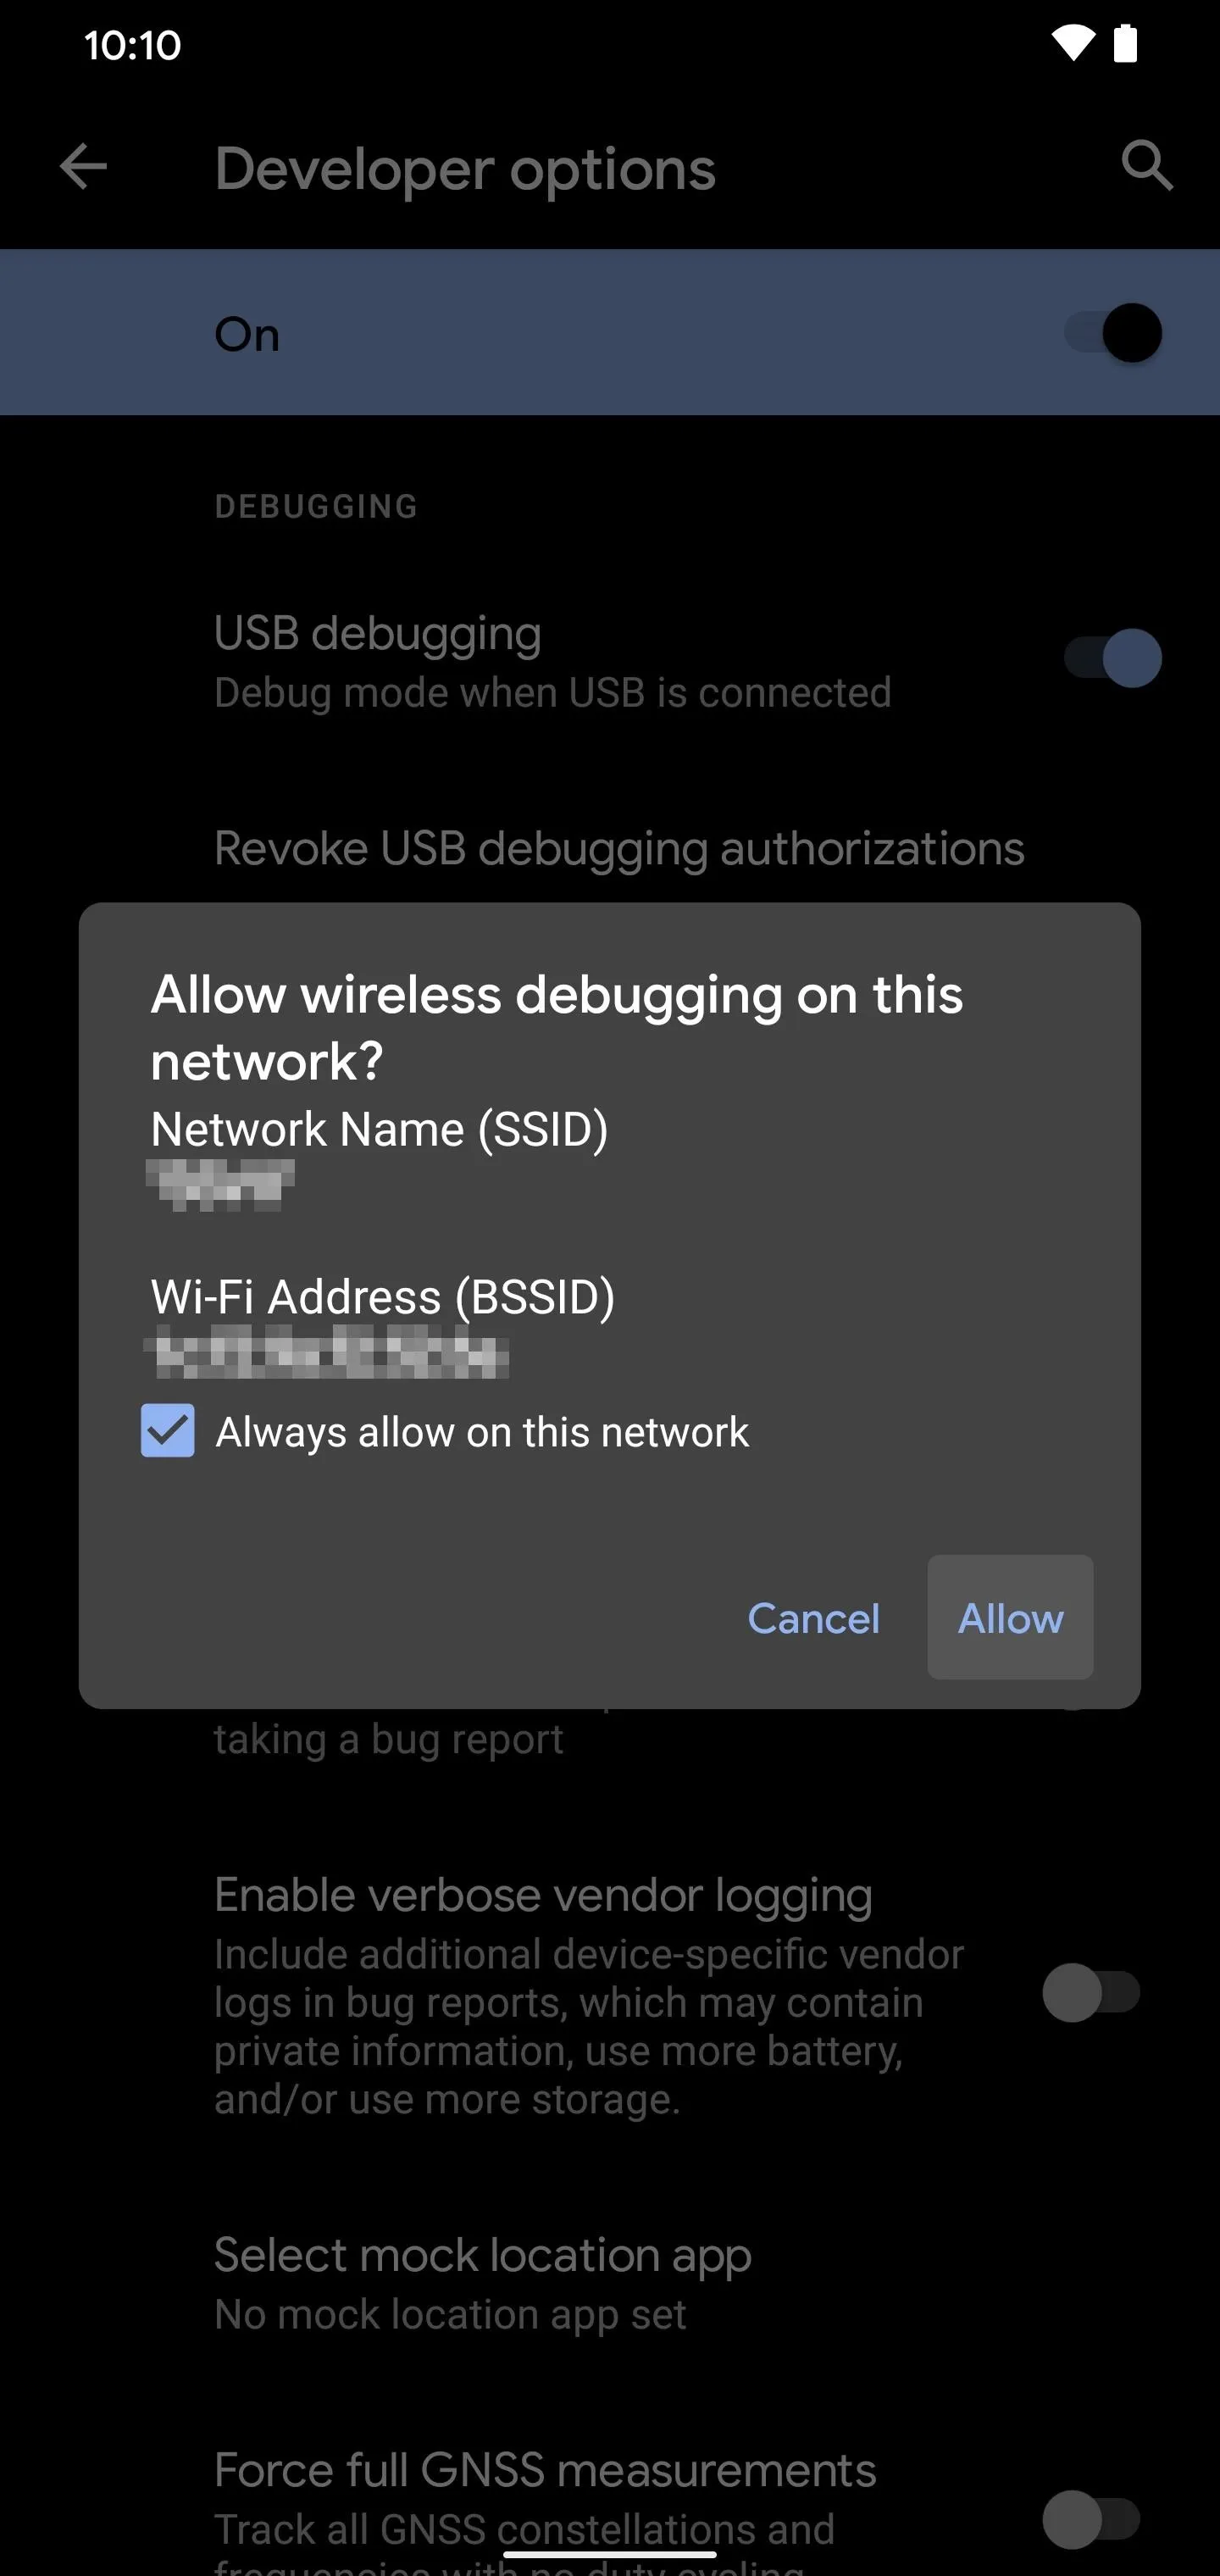
The procedure here will generally be the same for most devices. Pixel users need to go to "About Phone" in Settings and tap "Build Number" seven times to activate Developer Options. From there, head to Developer Options from Settings –> System –> Advanced or at the bottom of the Settings app. Tap the "Wireless debugging" option, check "Always allow on this network," then press "Allow."
Get Wi-Fi Device Pairing Code
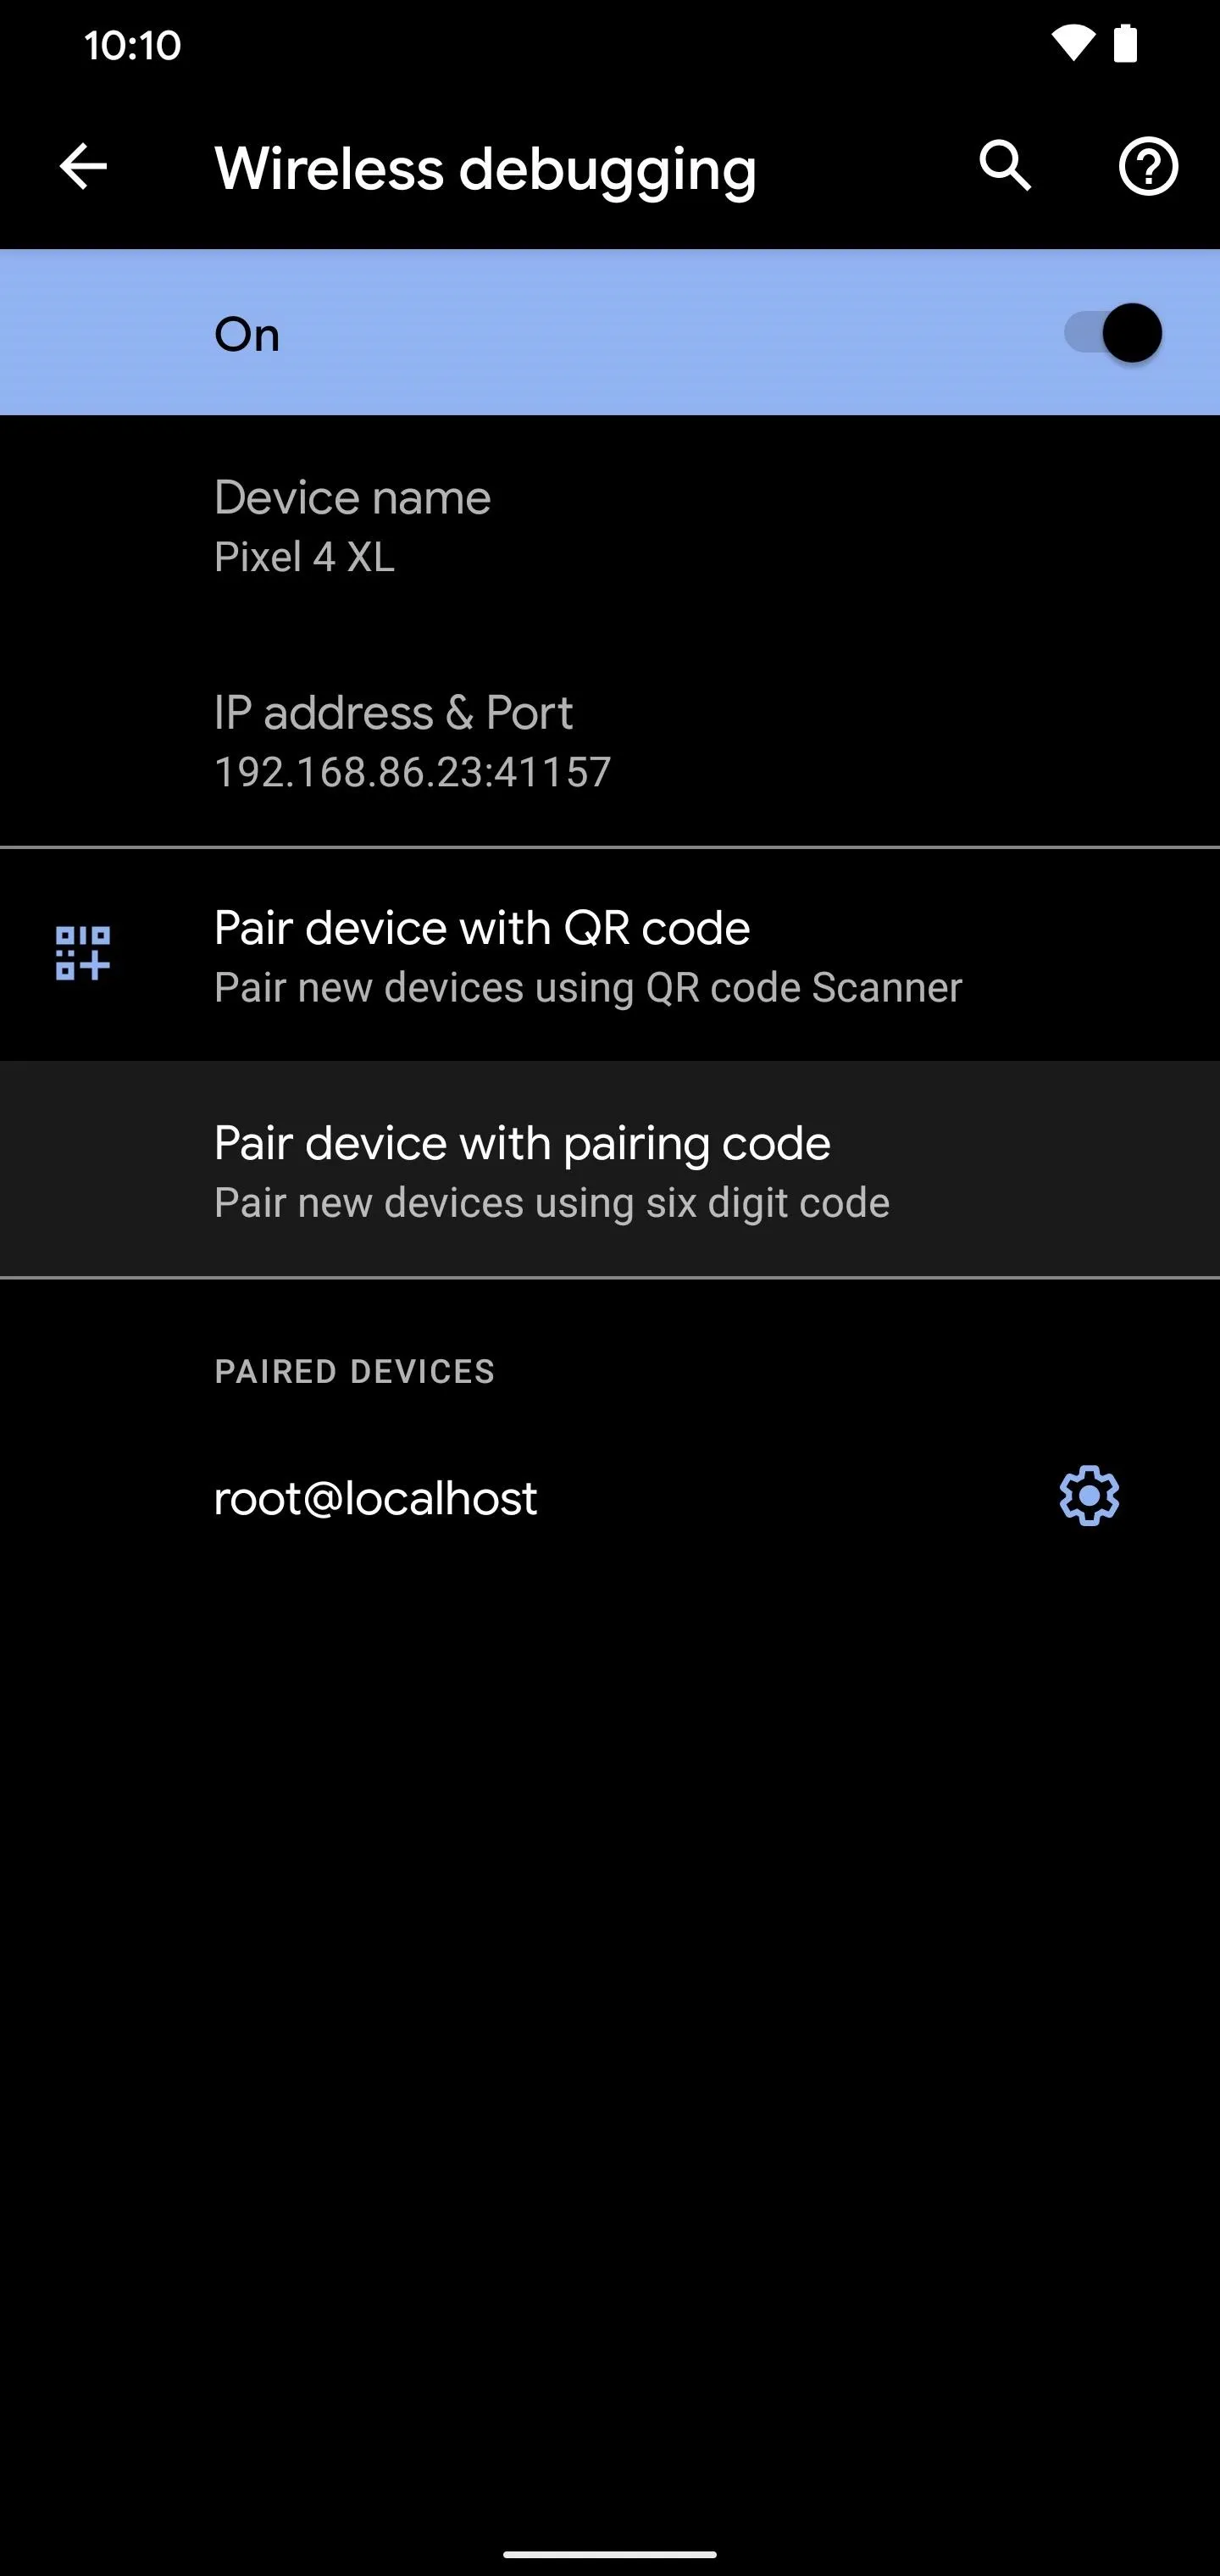
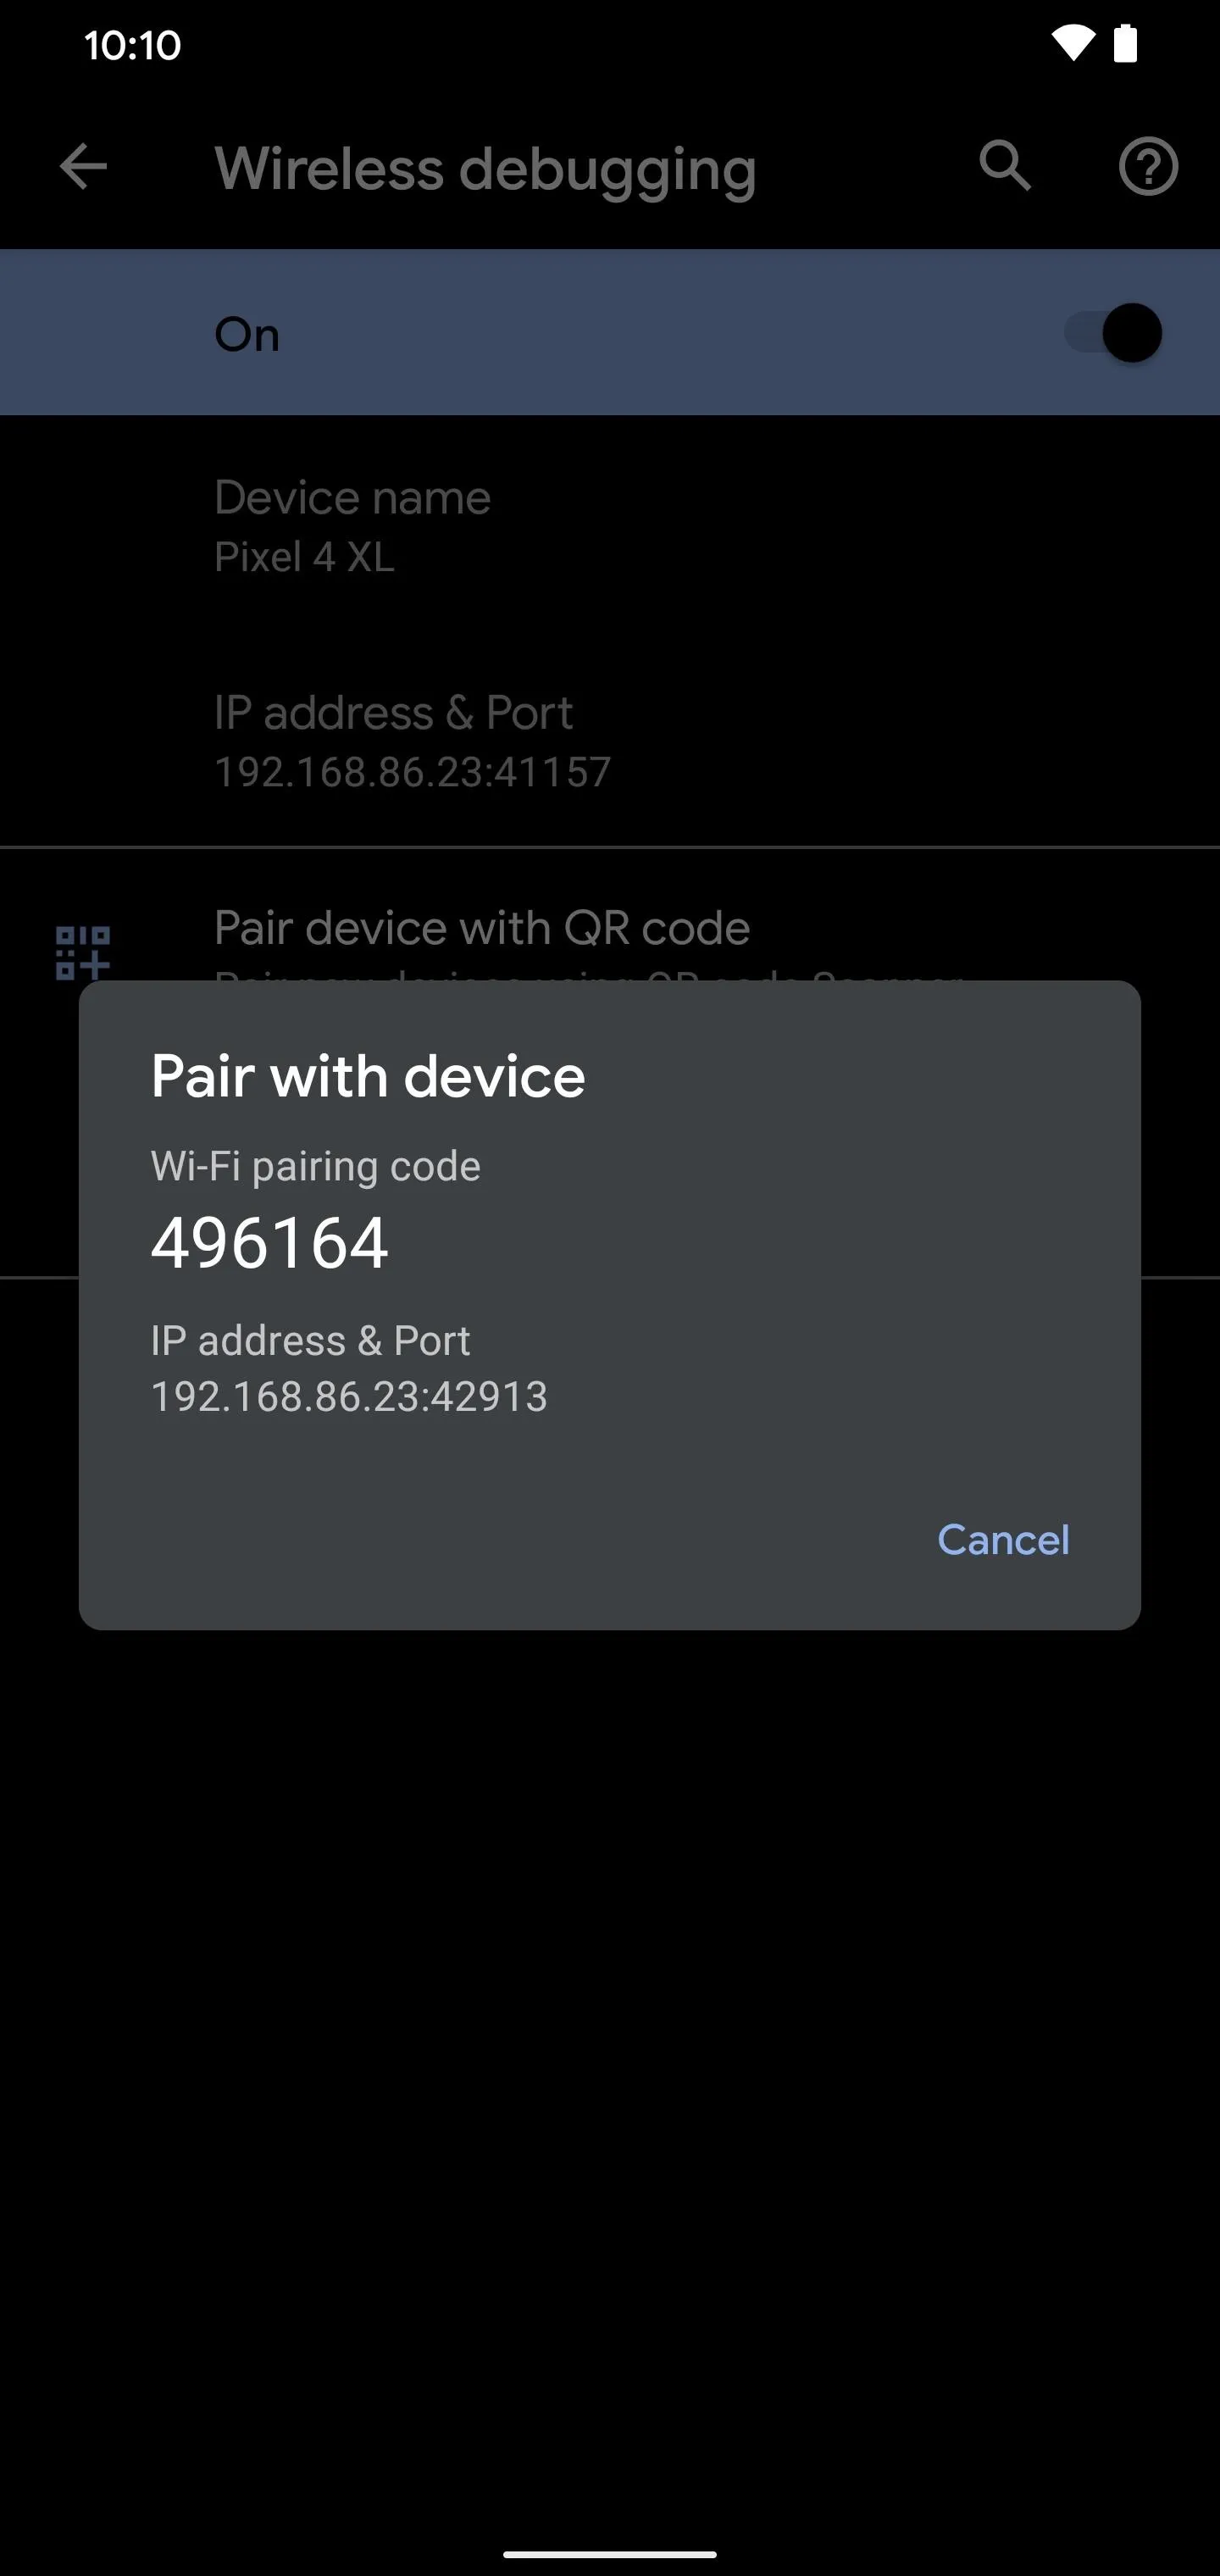
From the main wireless debugging screen, tap "Pair device with pairing code," which will reveal what you'll need for connecting to your computer over Wi-Fi. The pairing code, IP address, and port number are all things required for use in the next steps, so leave the screen just like this and continue with the next part below.
Open a Command Window in Platform-Tools Folder
Back over to your computer, you need to open a command window from the platform-tools folder you downloaded from Step 1. This will allow you to run the few commands required to finish the setup via Wi-Fi so you can use ADB commands without a USB cable.
If you're a Windows user, you can open the platform-tools folder, then click the address bar at the top of the window. Type "cmd" without the quotes, then press enter to open the command window right away in your platform-tools folder.
Dallas Thomas/Gadget Hacks
If you're running Mac or Linux, you'll want to open the Terminal app, type in "cd" followed by a space, however, don't press enter just yet. From there, drag and drop the platform-tools folder onto the command window itself to get its location instantly entered for you. You could do this on Windows if you wanted to as well — there's more than one way to do the same thing.
Dallas Thomas/Gadget Hacks
Run the Wireless ADB Pairing Command
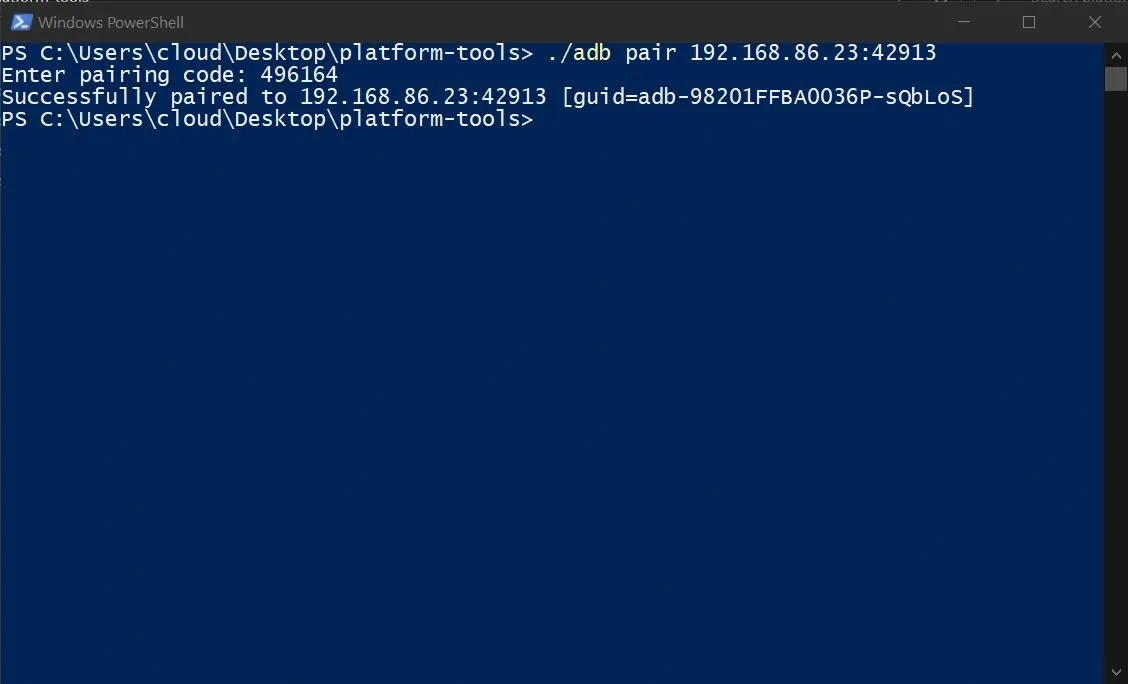
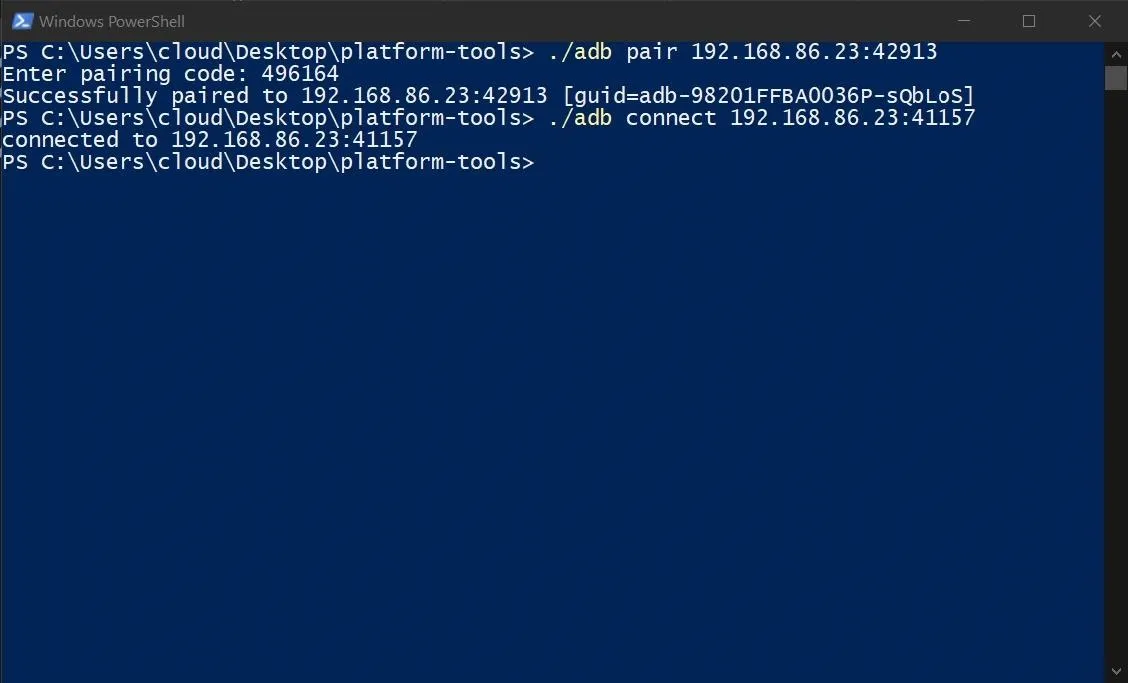
Take a look at your phone to find your device's IP address and what port it's currently using as well. Based on that information from Step 3, type the following command in the platform-tools command window, then press enter.
adb pair ipaddr:portNote: Mac, Linux, and Windows PowerShell users might have to add a period and a slash ( ./ ) before entering certain commands. For example:
./adb pair 192.168.1.9:37179Once you enter the above command that corresponds to your device's information, you'll be asked to enter the pairing code. Type in the device pairing code from Step 3 then press enter to confirm your action. If everything checks out, it should show "Successfully paired to" followed by the device's IP address and port number.
Run the Wireless ADB Debugging Command
From here, head to the main wireless debugging screen on your phone and check the numbers under the "IP address & Port" section. The port number will likely differ from the previous step, so you need to make sure you use the right one for this to work. Once you have the device info, type the following command in the platform-tools command window, then press enter.
adb connect ipaddr:portNote: Mac, Linux, and Windows PowerShell users might have to add a period and a slash ( ./ ) before entering certain commands. For example:
./adb connect 192.168.1.9:40105After you enter the above command, you should see "Connected to" followed by your device's IP address and port number. At this point, you're successfully connected via the Android 11 wireless debugging feature! You can now send any number of ADB commands over to your device without having to be connected by a USB cable. Happy modding!
Final Note
The IP address and port number for your device are local to your network, which means an outside source can't start sending you ADB commands. Unless they have access to the device and are on the same Wi-Fi network, the chances of someone else trying to hijack your session are slim to none. The port number changes every time you request a new pairing code, too, so that makes things even safer.
Cover image and screenshots by Stephen Perkins/Gadget Hacks


Comments
Be the first, drop a comment!