The Galaxy S8 has finally touched down, and it's an absolutely gorgeous device. Samsung's brand new flagship comes jam-packed with new features — some refined, and some that aren't. Luckily, we've compiled some major features to help you get started as quickly as possible so you can go about the rest of your day and show off your shiny new S8 to friends and coworkers.
We'll skip the obvious features that you'll surely find by casually poking around. Instead, this guide will focus on some lesser-known and fairly hidden options that offer interesting and unique functionality. So if you're a fan of customization, check out the following tips, and you'll soon be using your new flagship like a professional tech buff.
#1. Customize the Navigation Bar
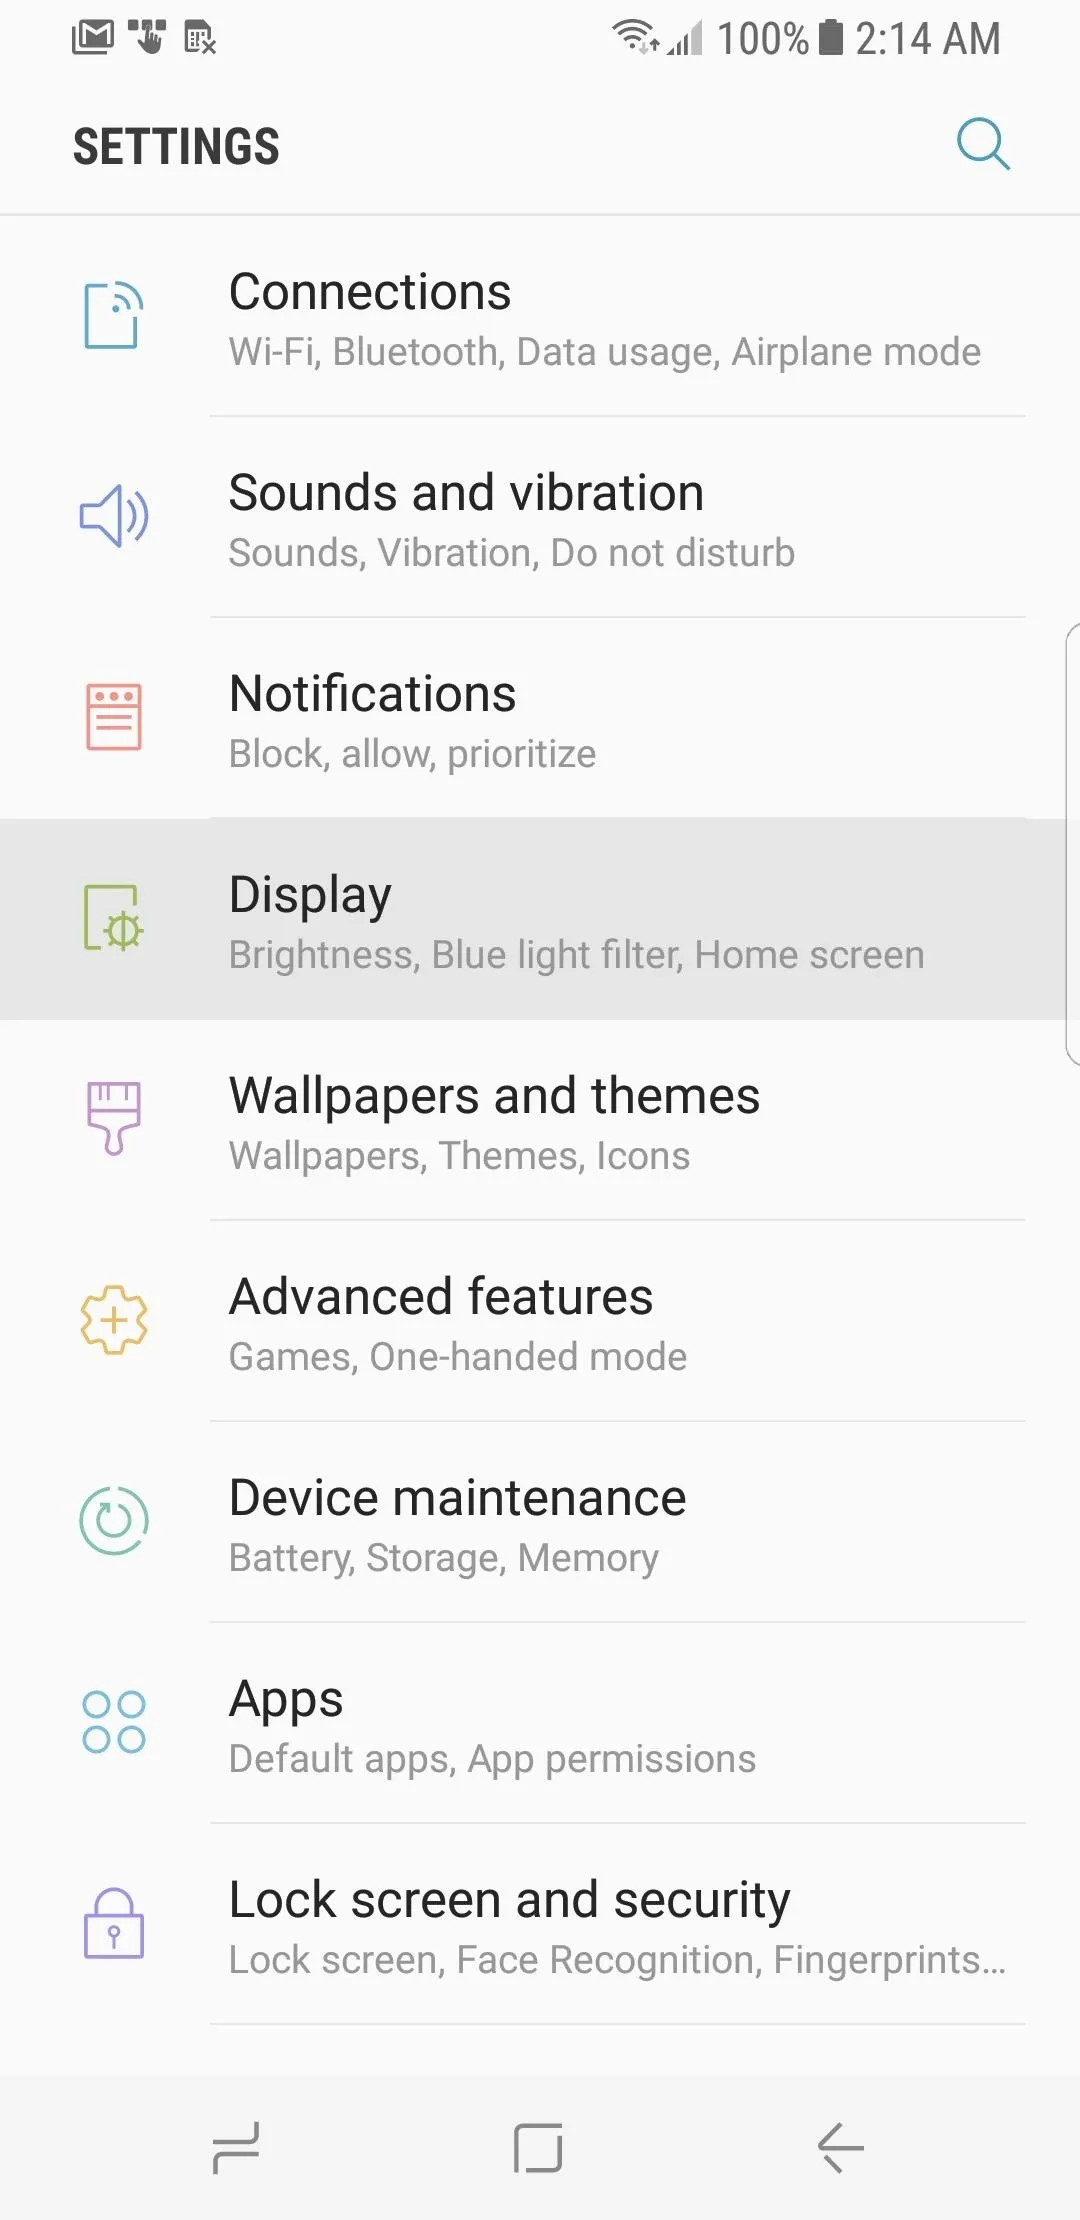
The great advantage of the S8's Infinity Display is the fact that it has an on-screen navigation bar that can now be fully customized to better suit your tastes. This has the added benefit of helping newcomers to the Samsung ecosystem better adapt to their phones when switching to an S8 from another Android device, which probably had different navigation layouts.
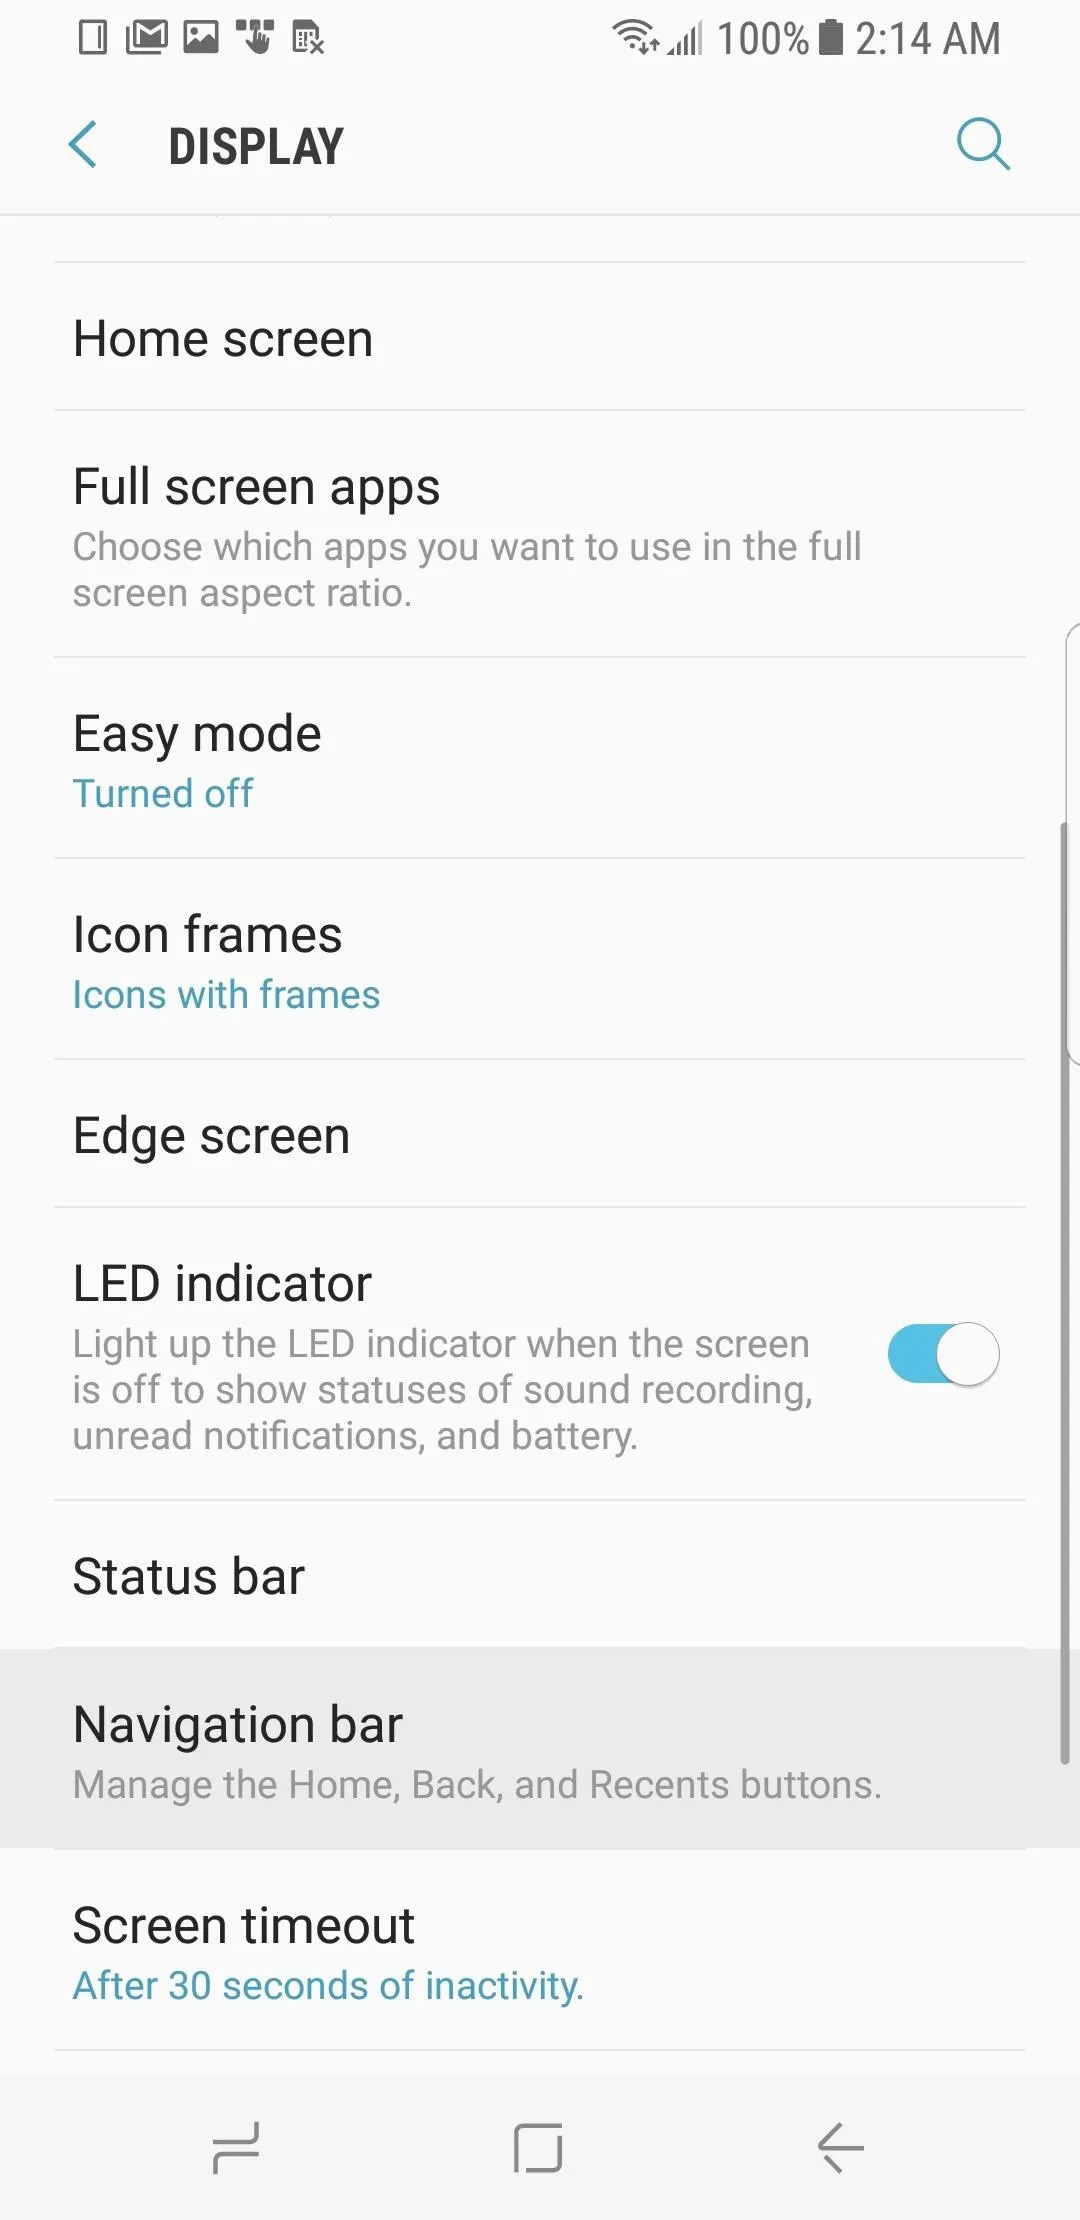
In other words, you can change the button layout if you want to. To try it out, head to your phone's main Settings menu, then select "Display," and choose "Navigation bar" on the following screen.


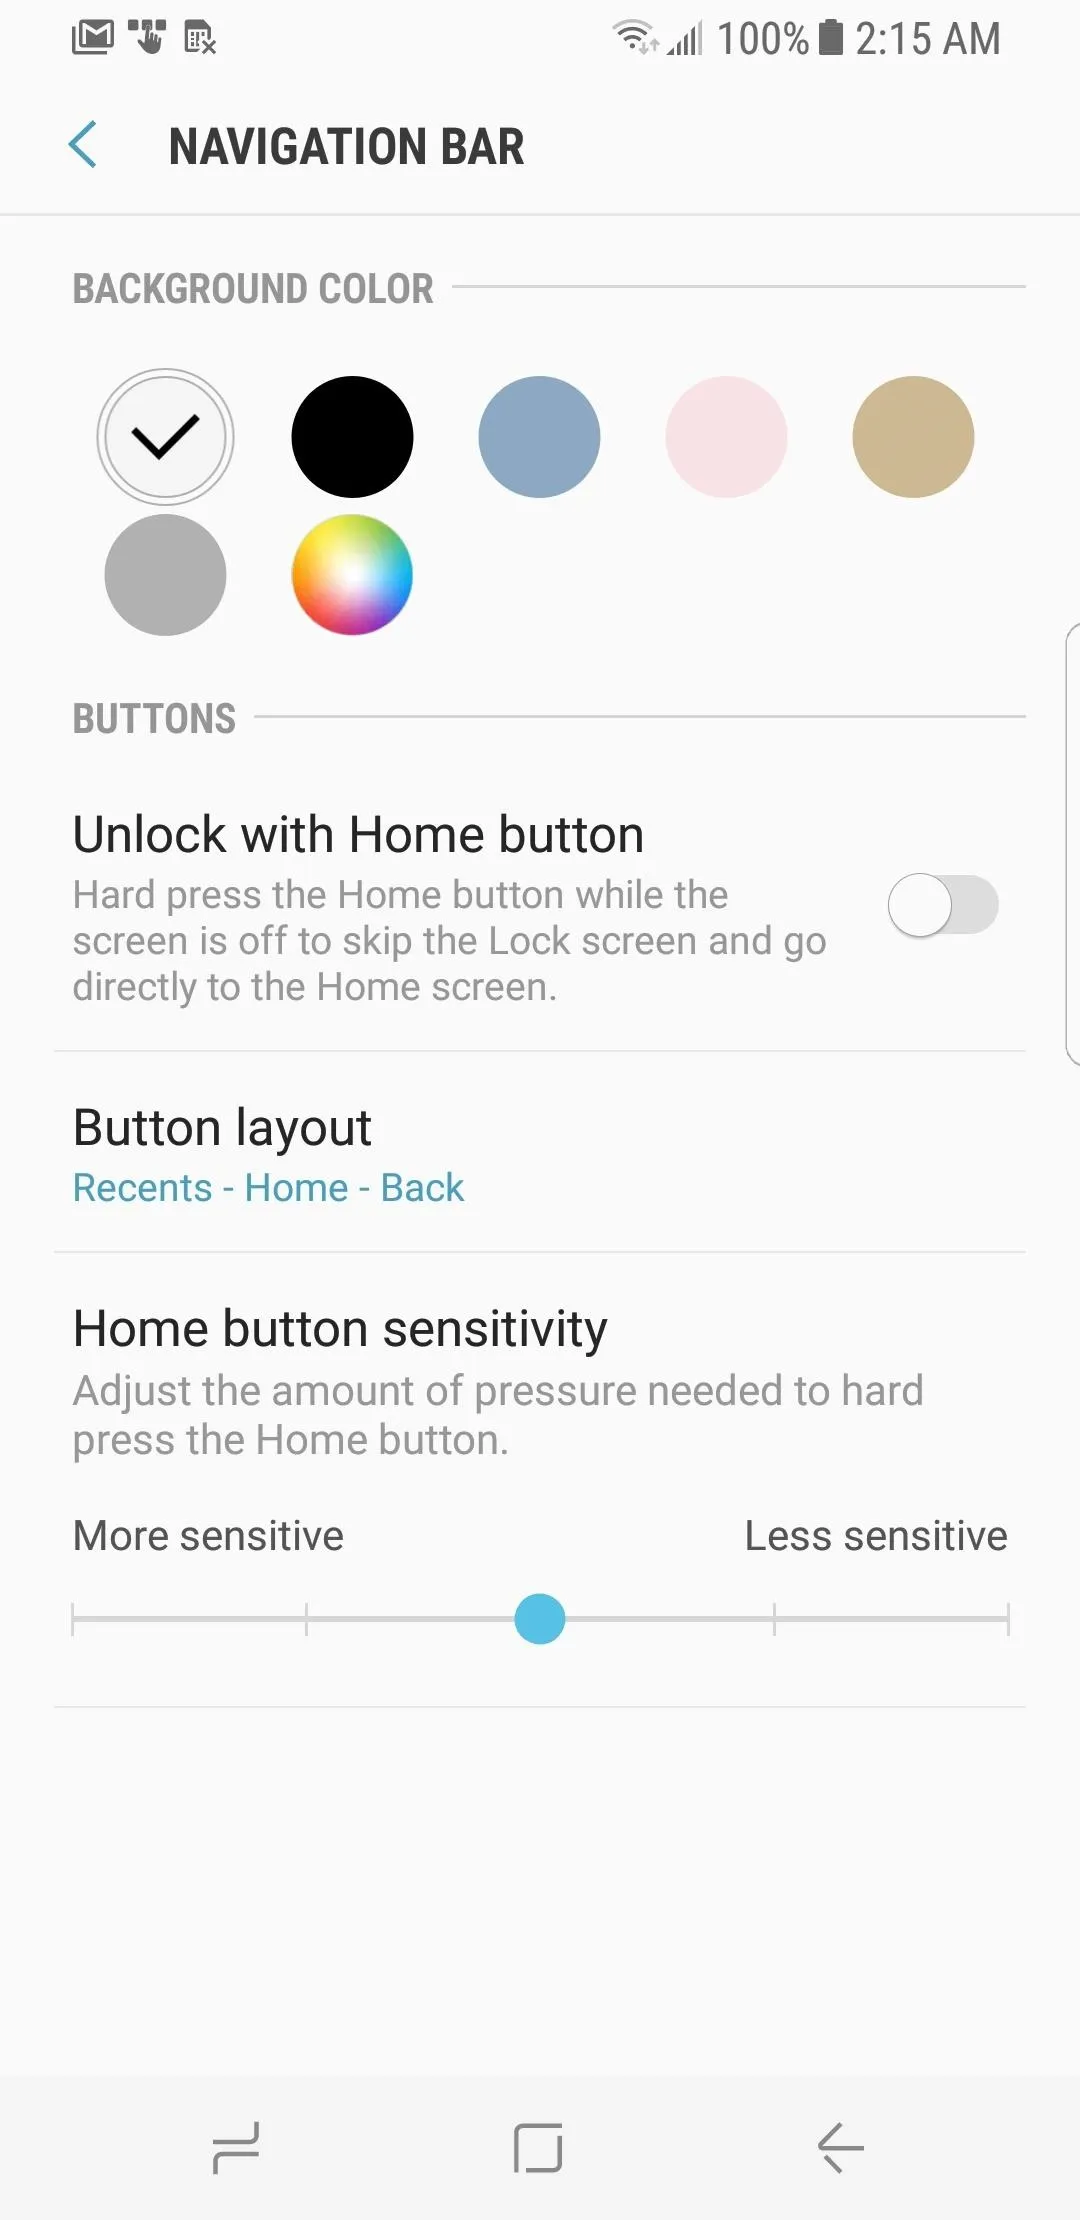
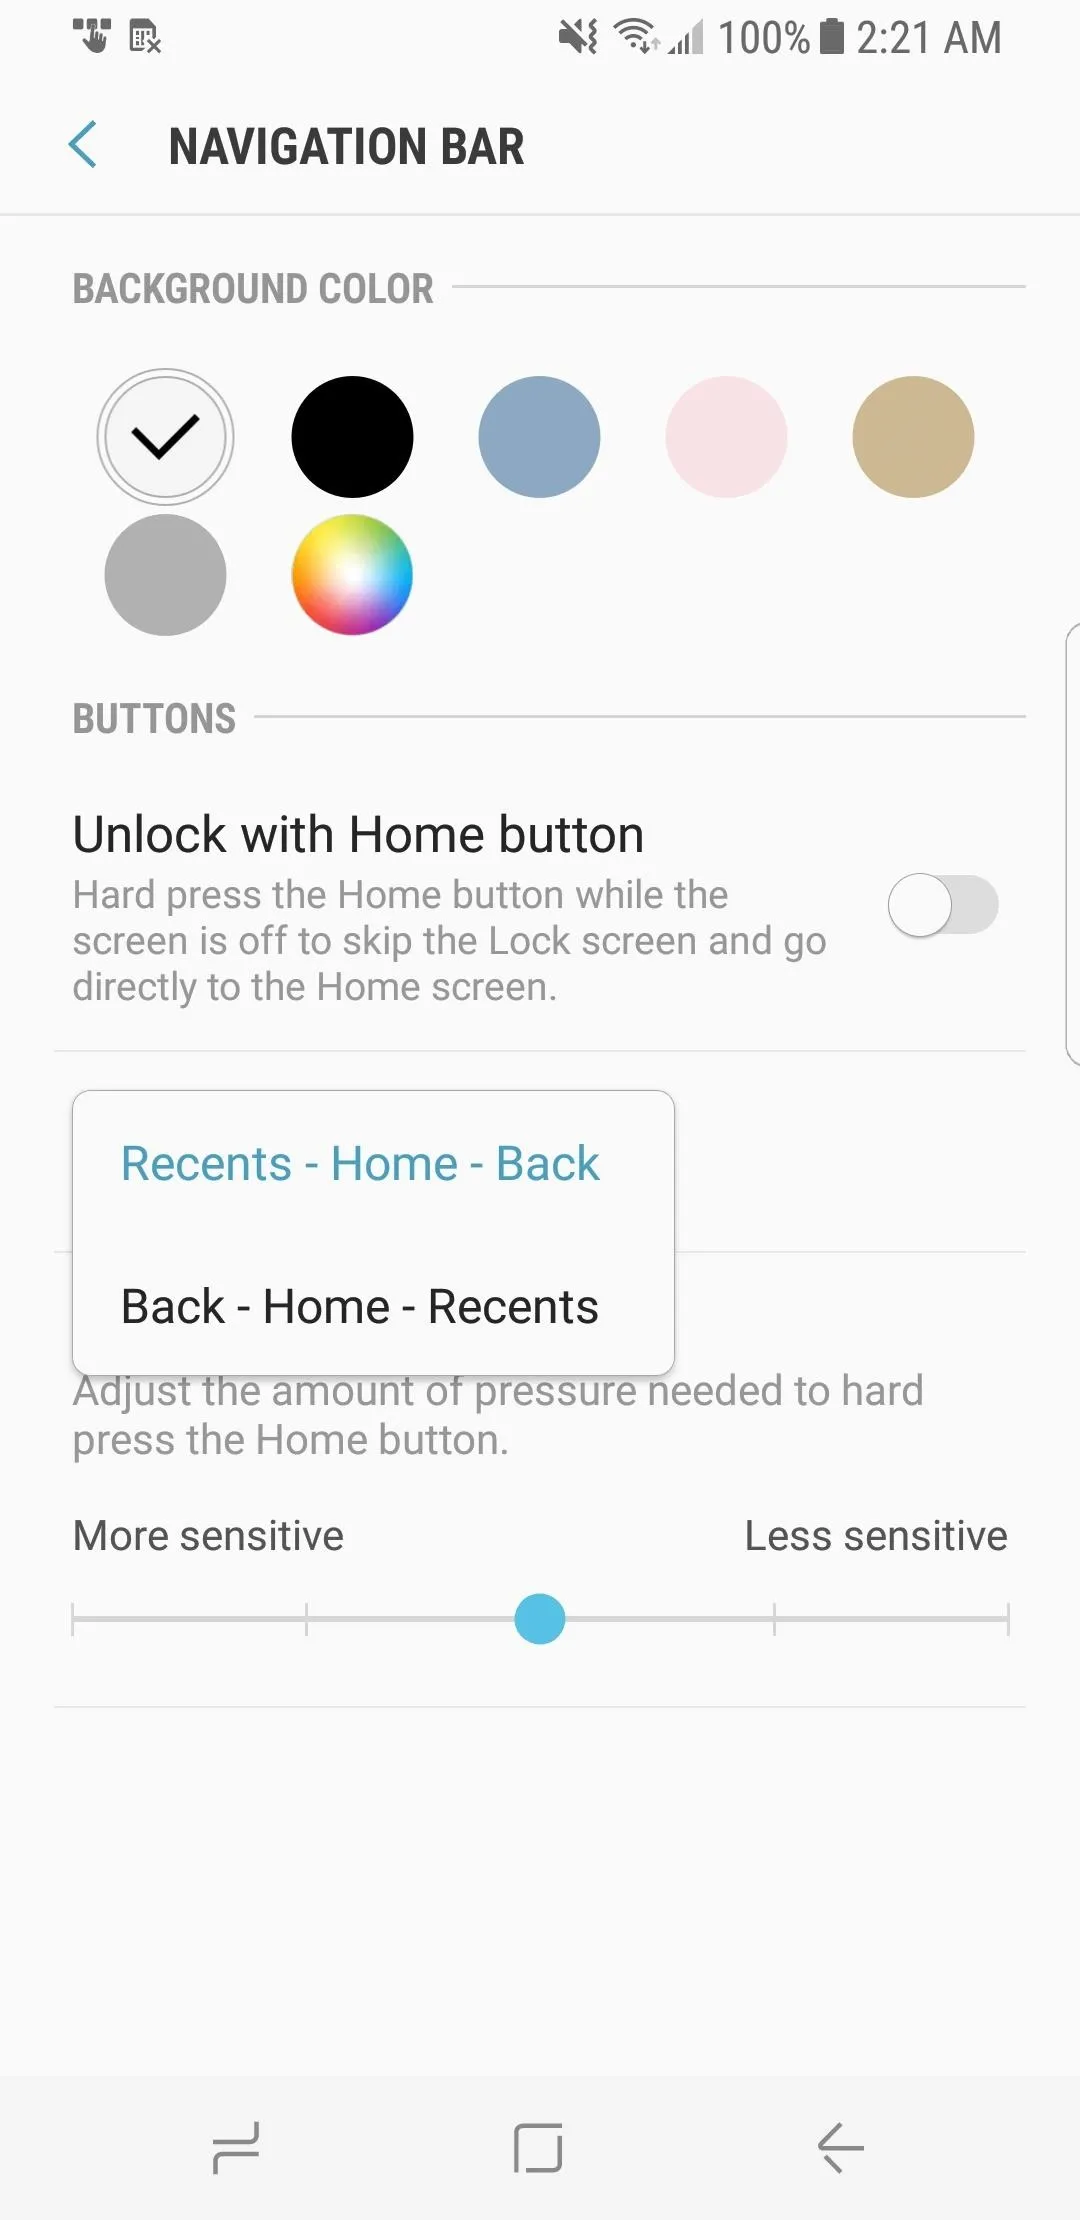
Next, tap on "Button layout," and from here, you can select either Back-Home-Recents or Recents-Home-Back, depending on which you're accustomed to. You can even toggle the home button's wake feature on or off to better suit your preference.


#2. Adjust Screen Resolution
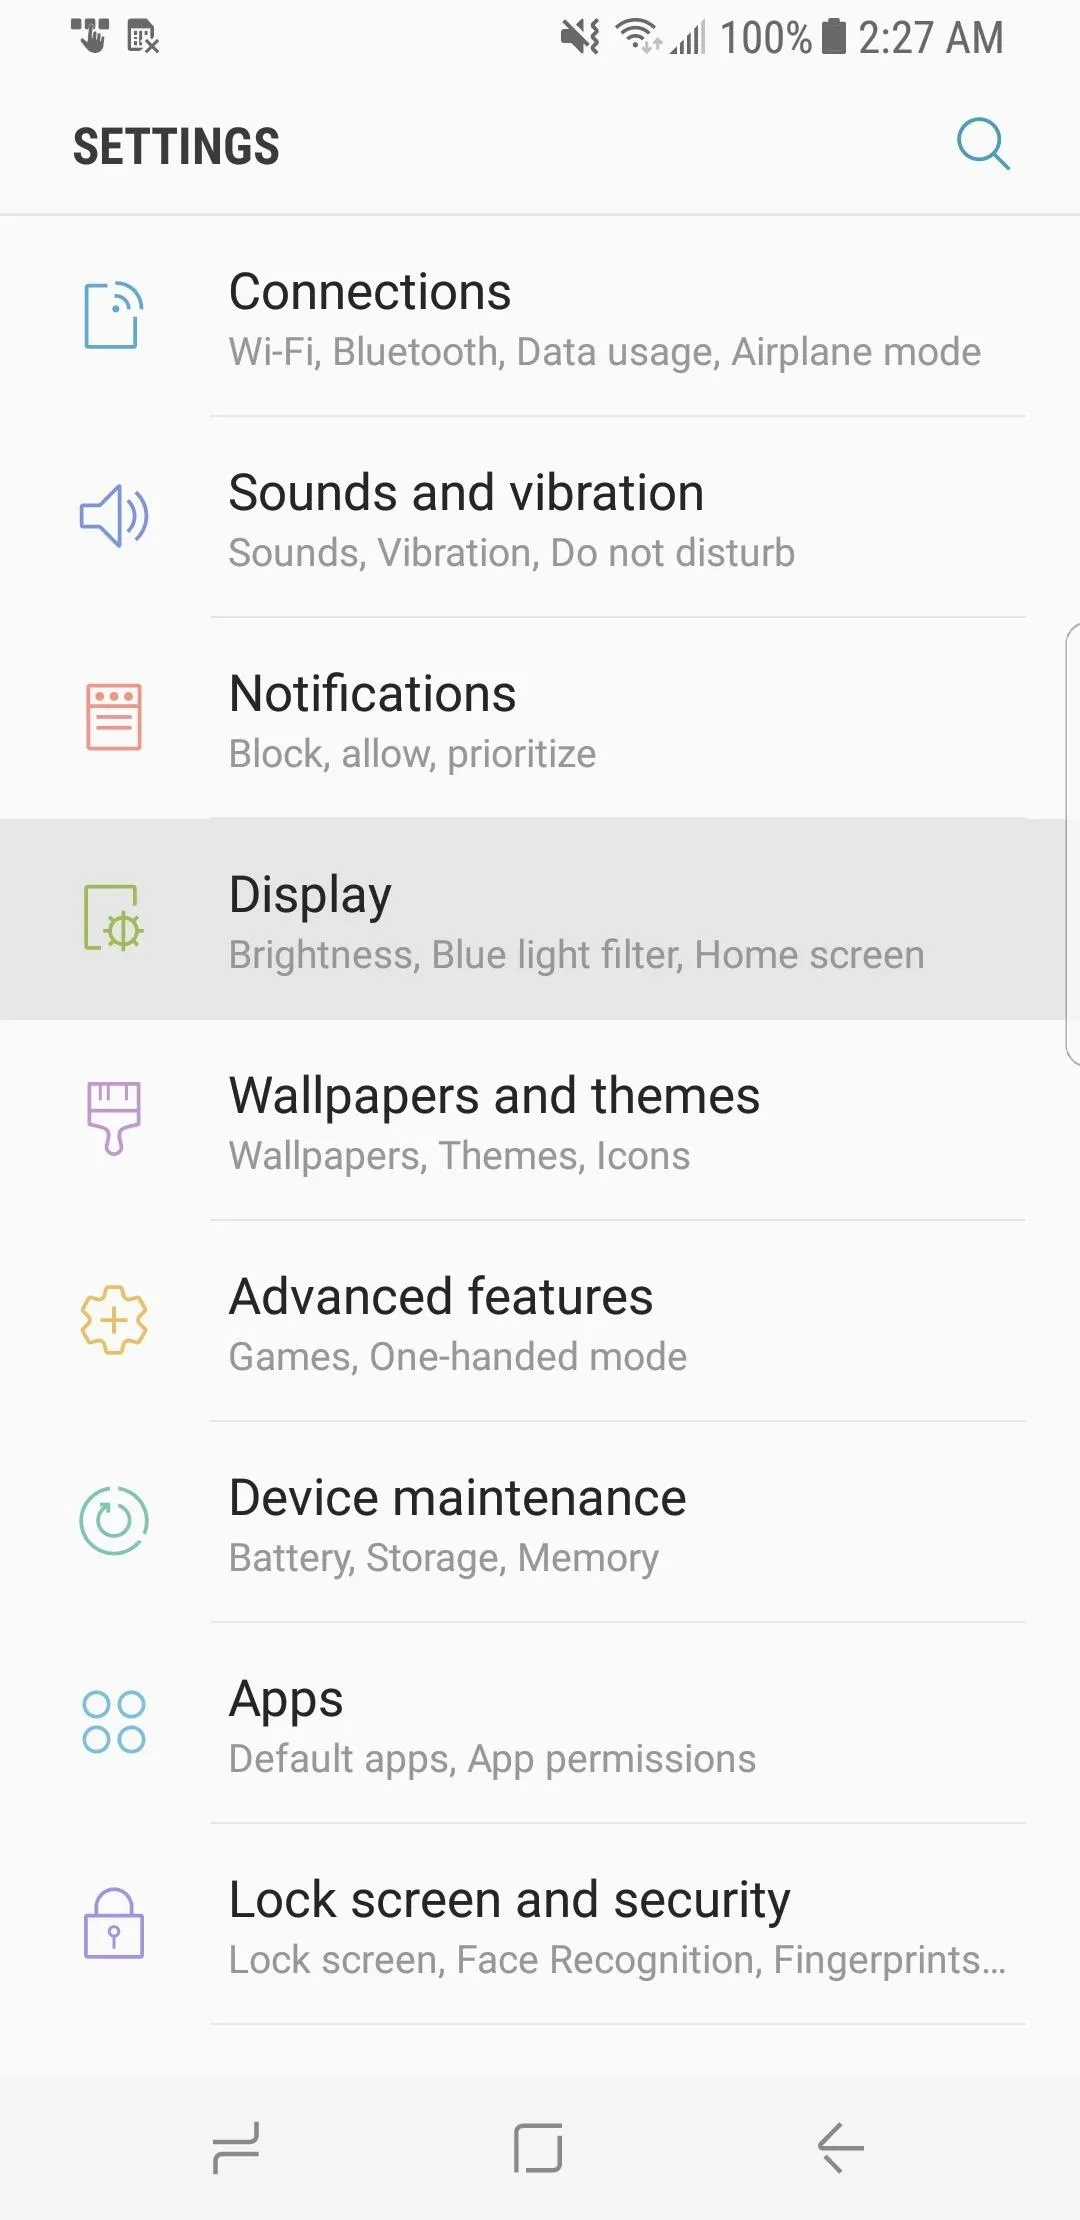
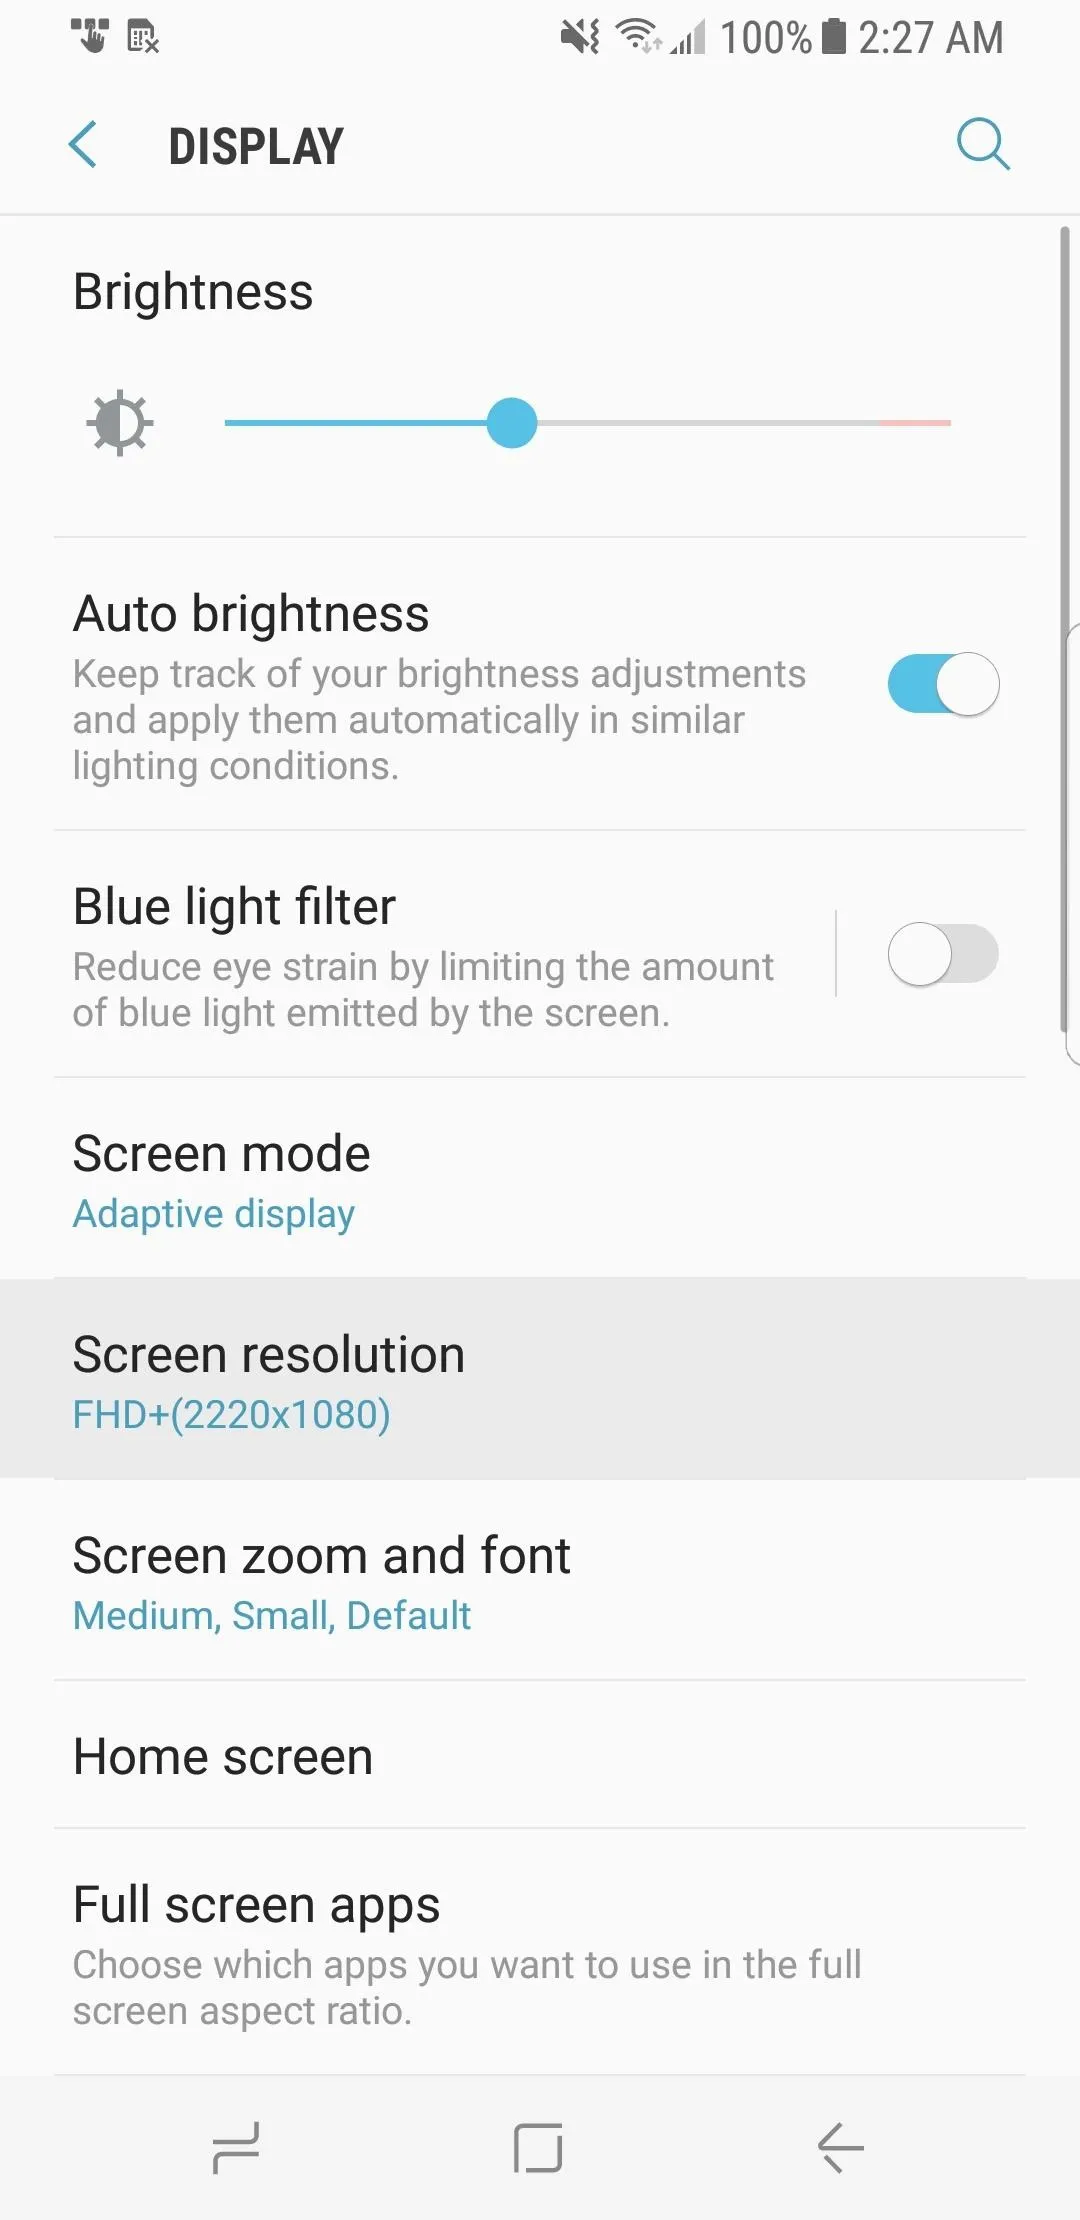
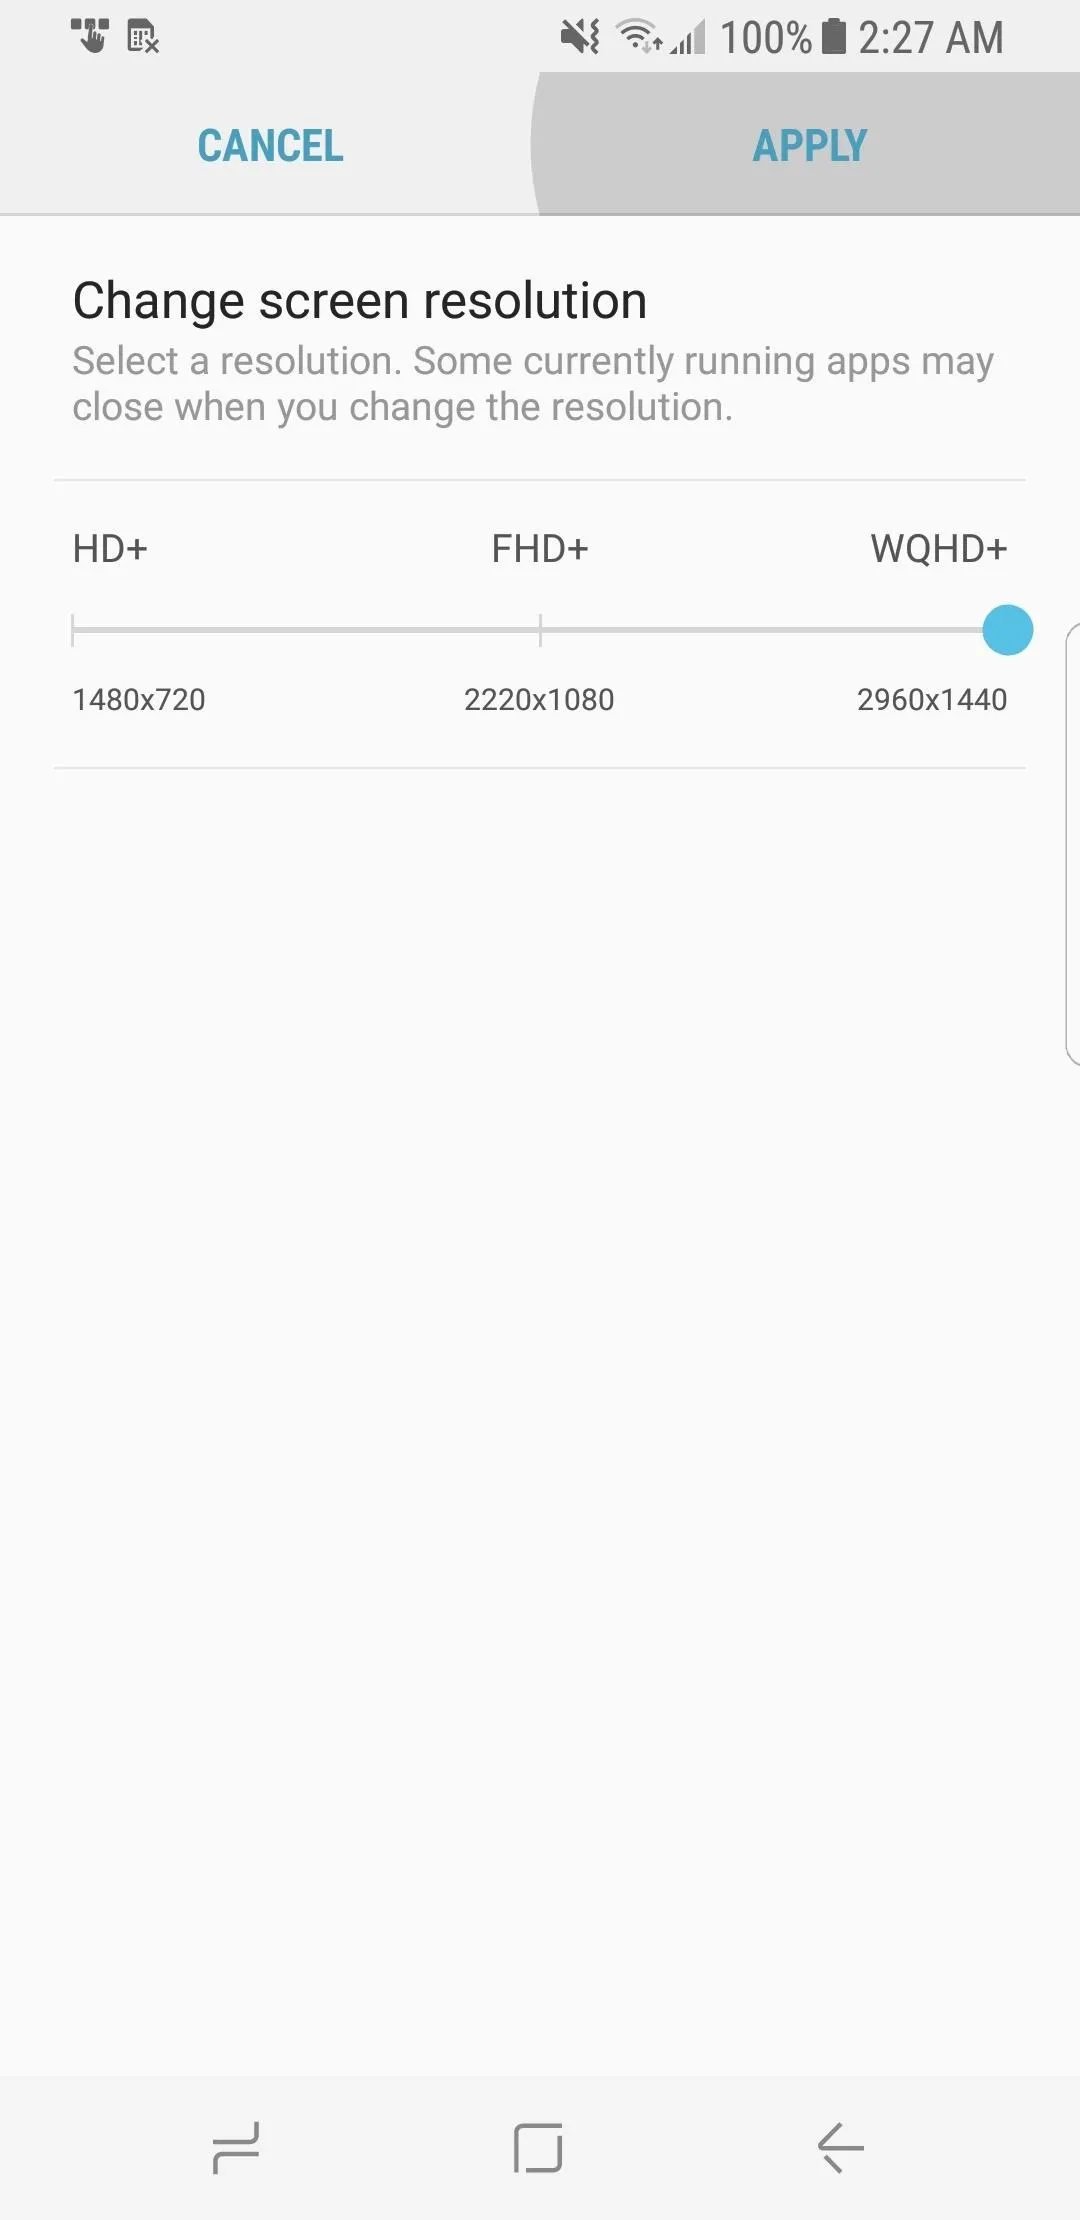
The Galaxy S8's QHD+ AMOLED panel is arguably the most advanced screen put on a smartphone to date, and it's nothing short of stunning. By default, the screen is set to a what seems like outdated 1080p, probably to help reduce power consumption.
The resolution is adjustable, though, so you can head over to the Display menu in Settings, then choose "Screen resolution" to tweak it and reveal the true potential of the S8's epic display. If you want the sharpest possible setting, go with the "WQHD+" option.


#3. Make the Fingerprint Sensor Easier to Use
The S8 now comes equipped with extra security features, most notably its iris scanner and facial recognition. Unfortunately, the most reliable sensor is still the tried and true fingerprint scanner, as the newer sensors aren't fully reliable as of yet. The iris scanner has been found to have trouble reading eyes in bright light, while the facial recognition feature has been shown to be fooled by photos. As of now, we highly recommend using the fingerprint sensor as a primary way to unlock your phone until Samsung irons the kinks out with the other options.
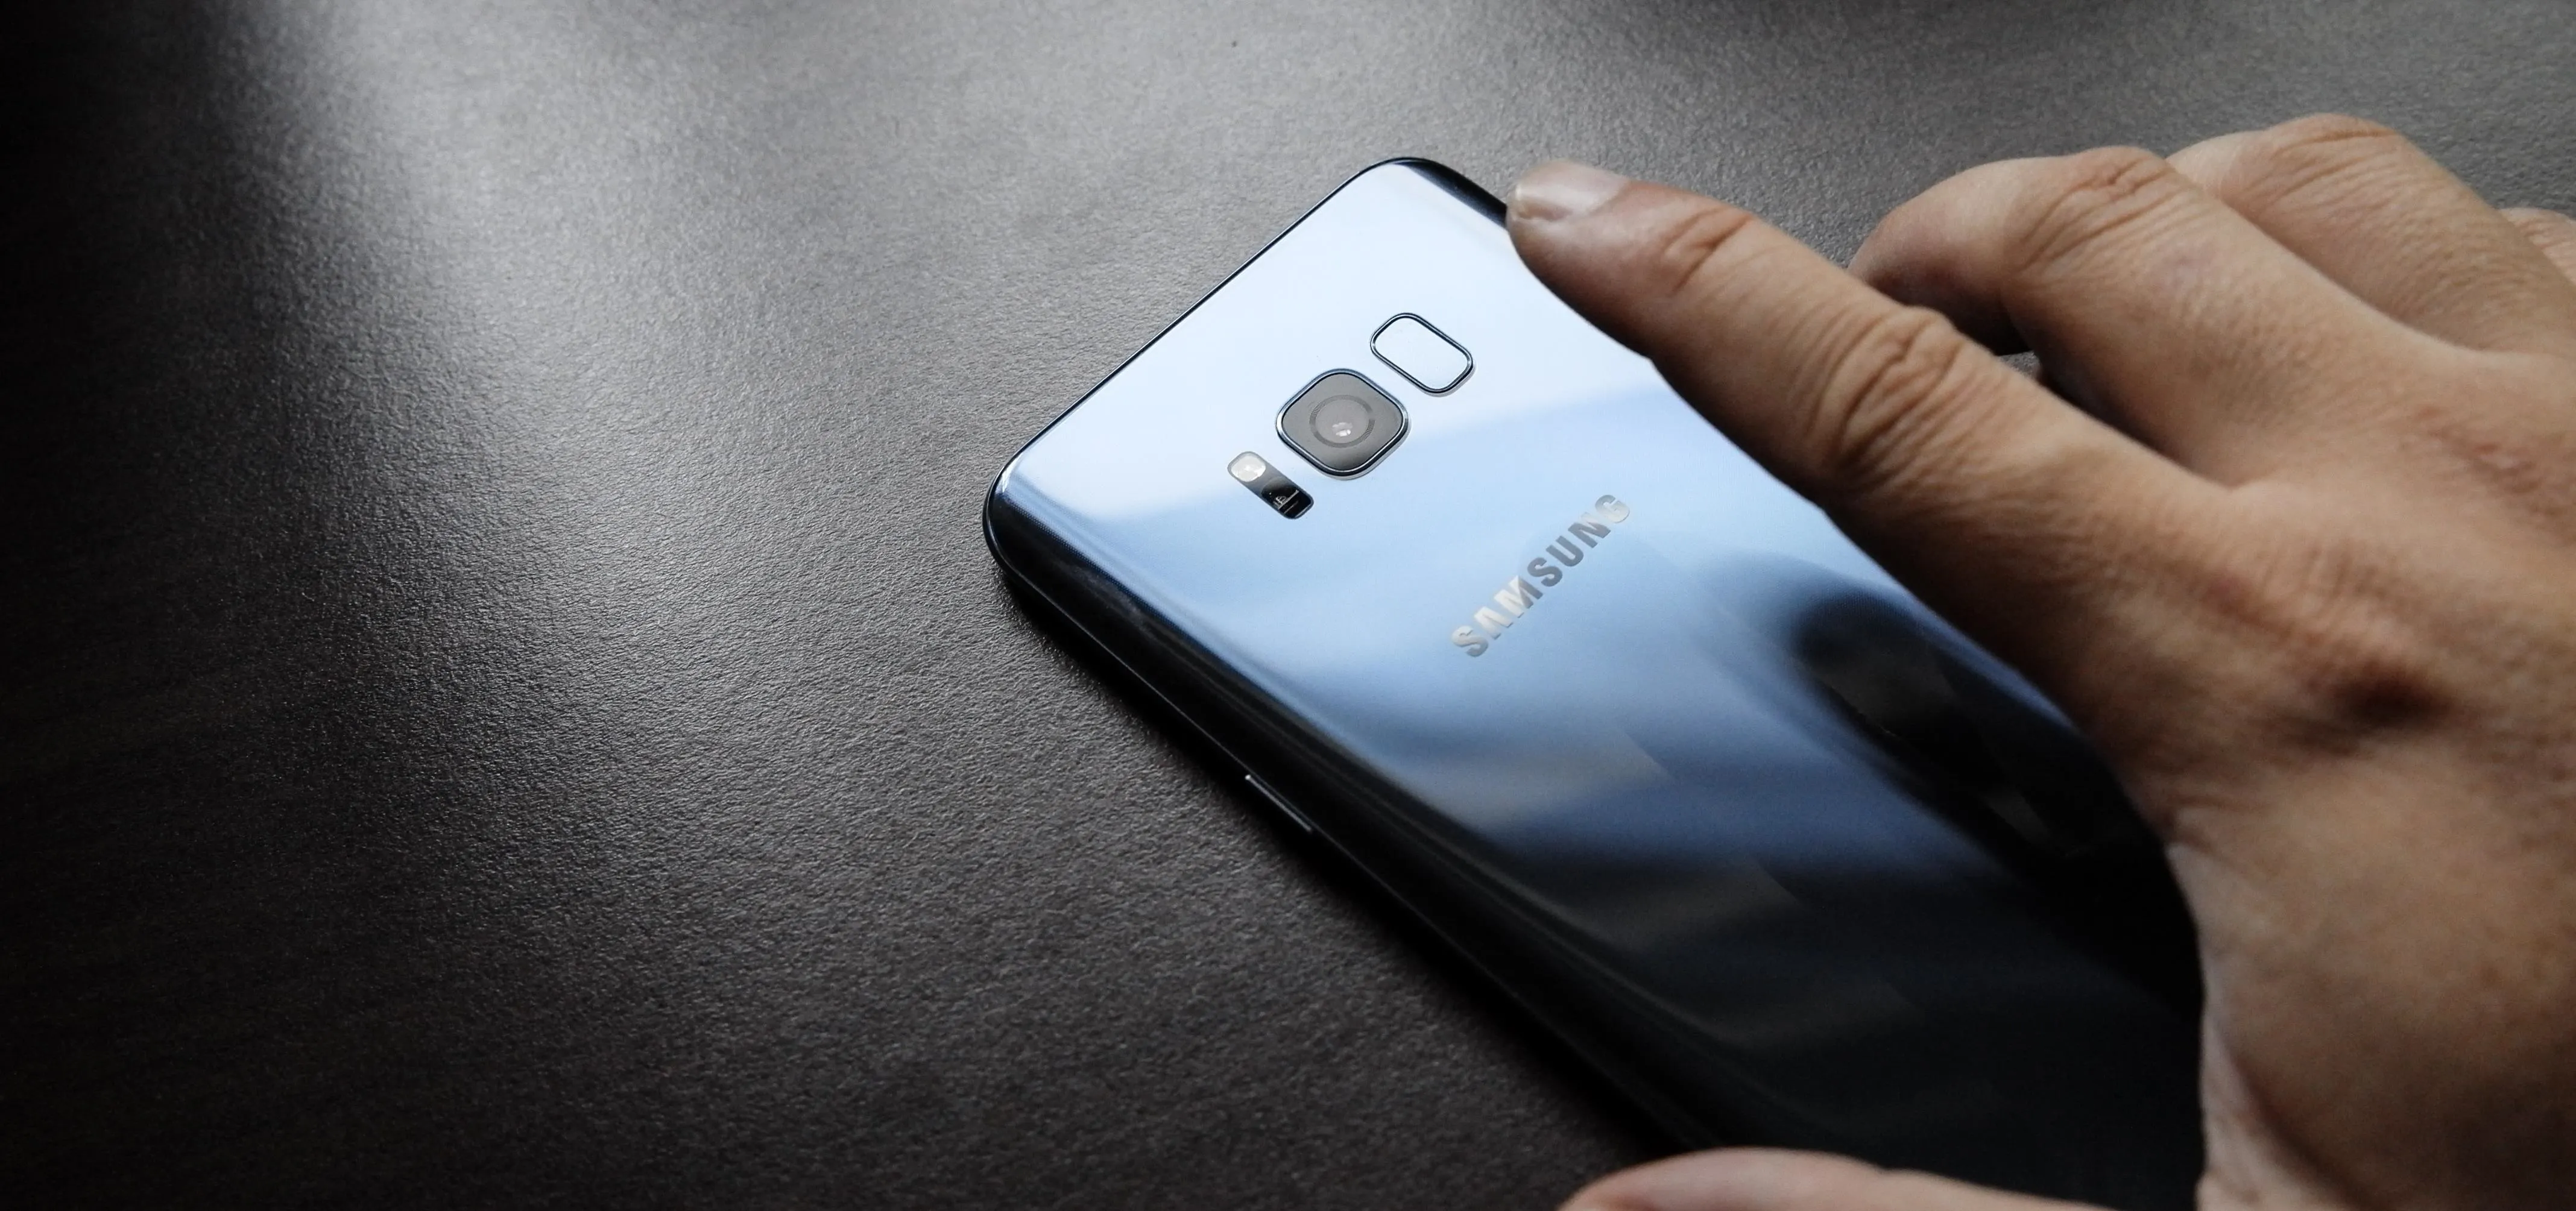
However, the fingerprint scanner's location has been a point of contention for many, as its placement off-center beside the rear camera lens has many people feeling like it's hard to use. What you might not realize, though, is that it isn't so bad if you take a couple of tips into consideration.
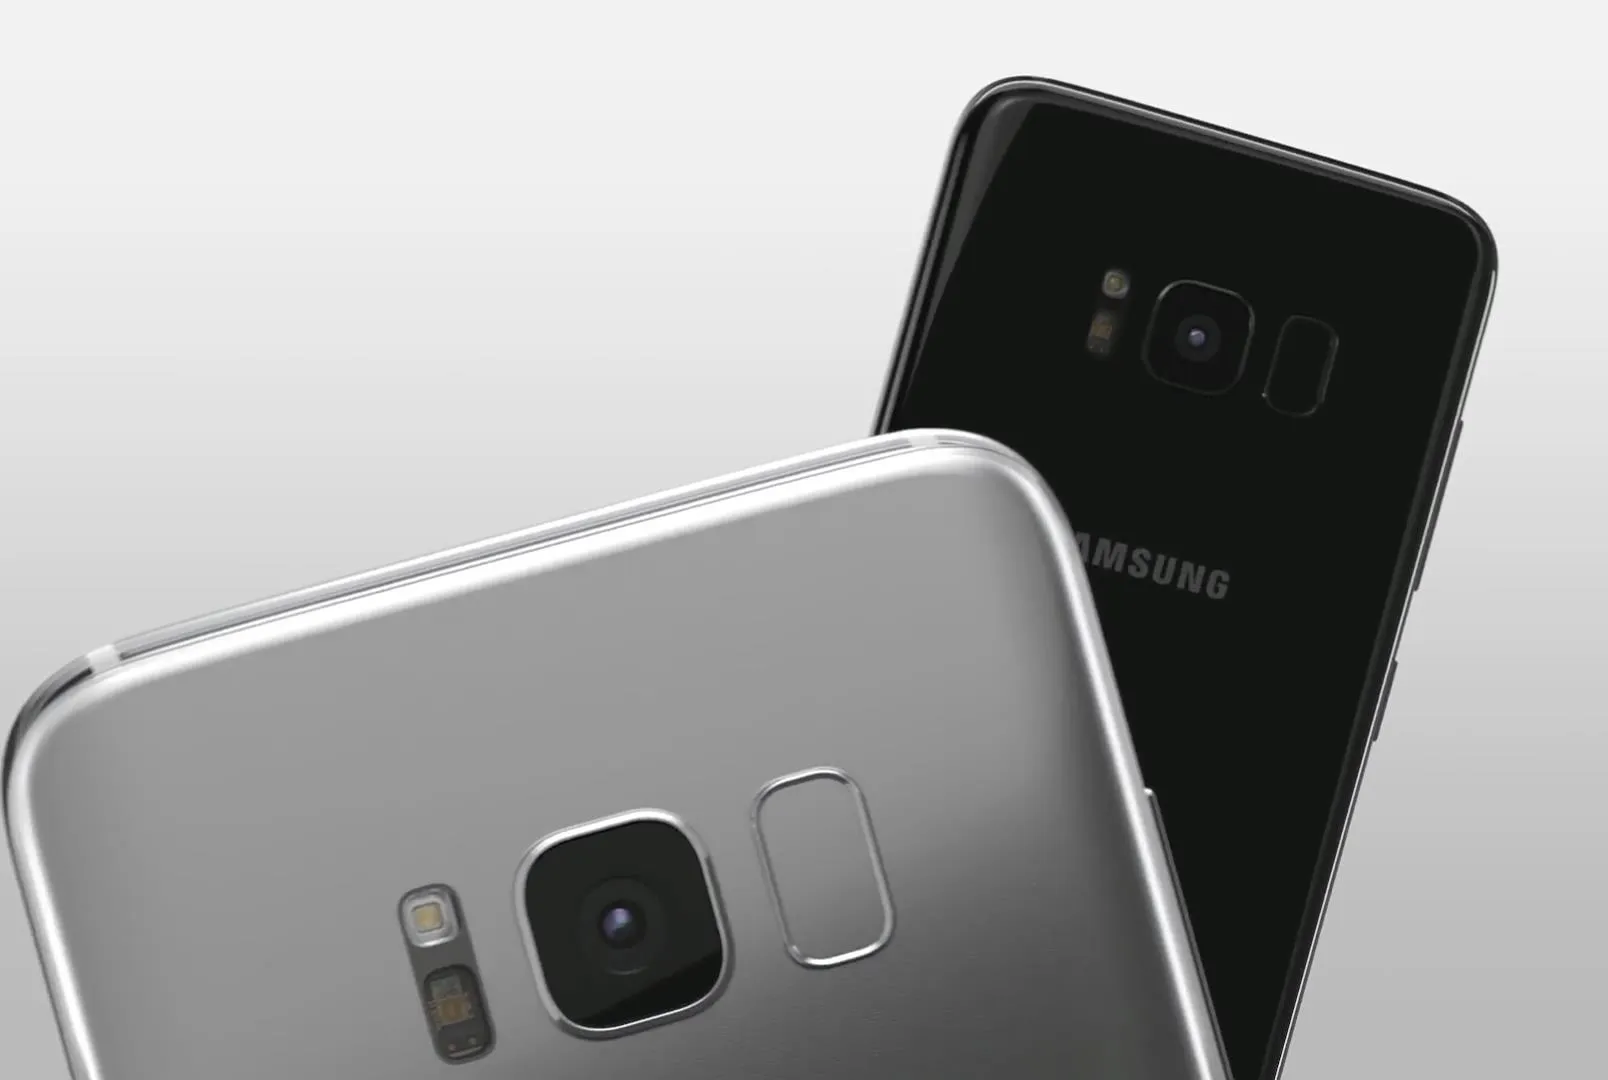
First off, be sure to save your index fingerprints at least twice to have it read more reliably, whether you're right- or left-handed. Lefties will have an easier time locating the sensor, as their index fingers will more naturally place on the sensor. For right-handed people, though, it can be a little more of a challenge.
If you're right-handed, we recommend saving the fingerprint on your middle finger in addition to the index, as we found that it aligns with the sensor better. Using your middle finger also carries less risk of smearing or blocking the camera. A simple but effective tip is to use your index to feel for the rear camera's perimeter and use your middle to jump over the camera to access the sensor. It takes a little getting used to but is a great way to access the fingerprint scanner once it becomes second nature.
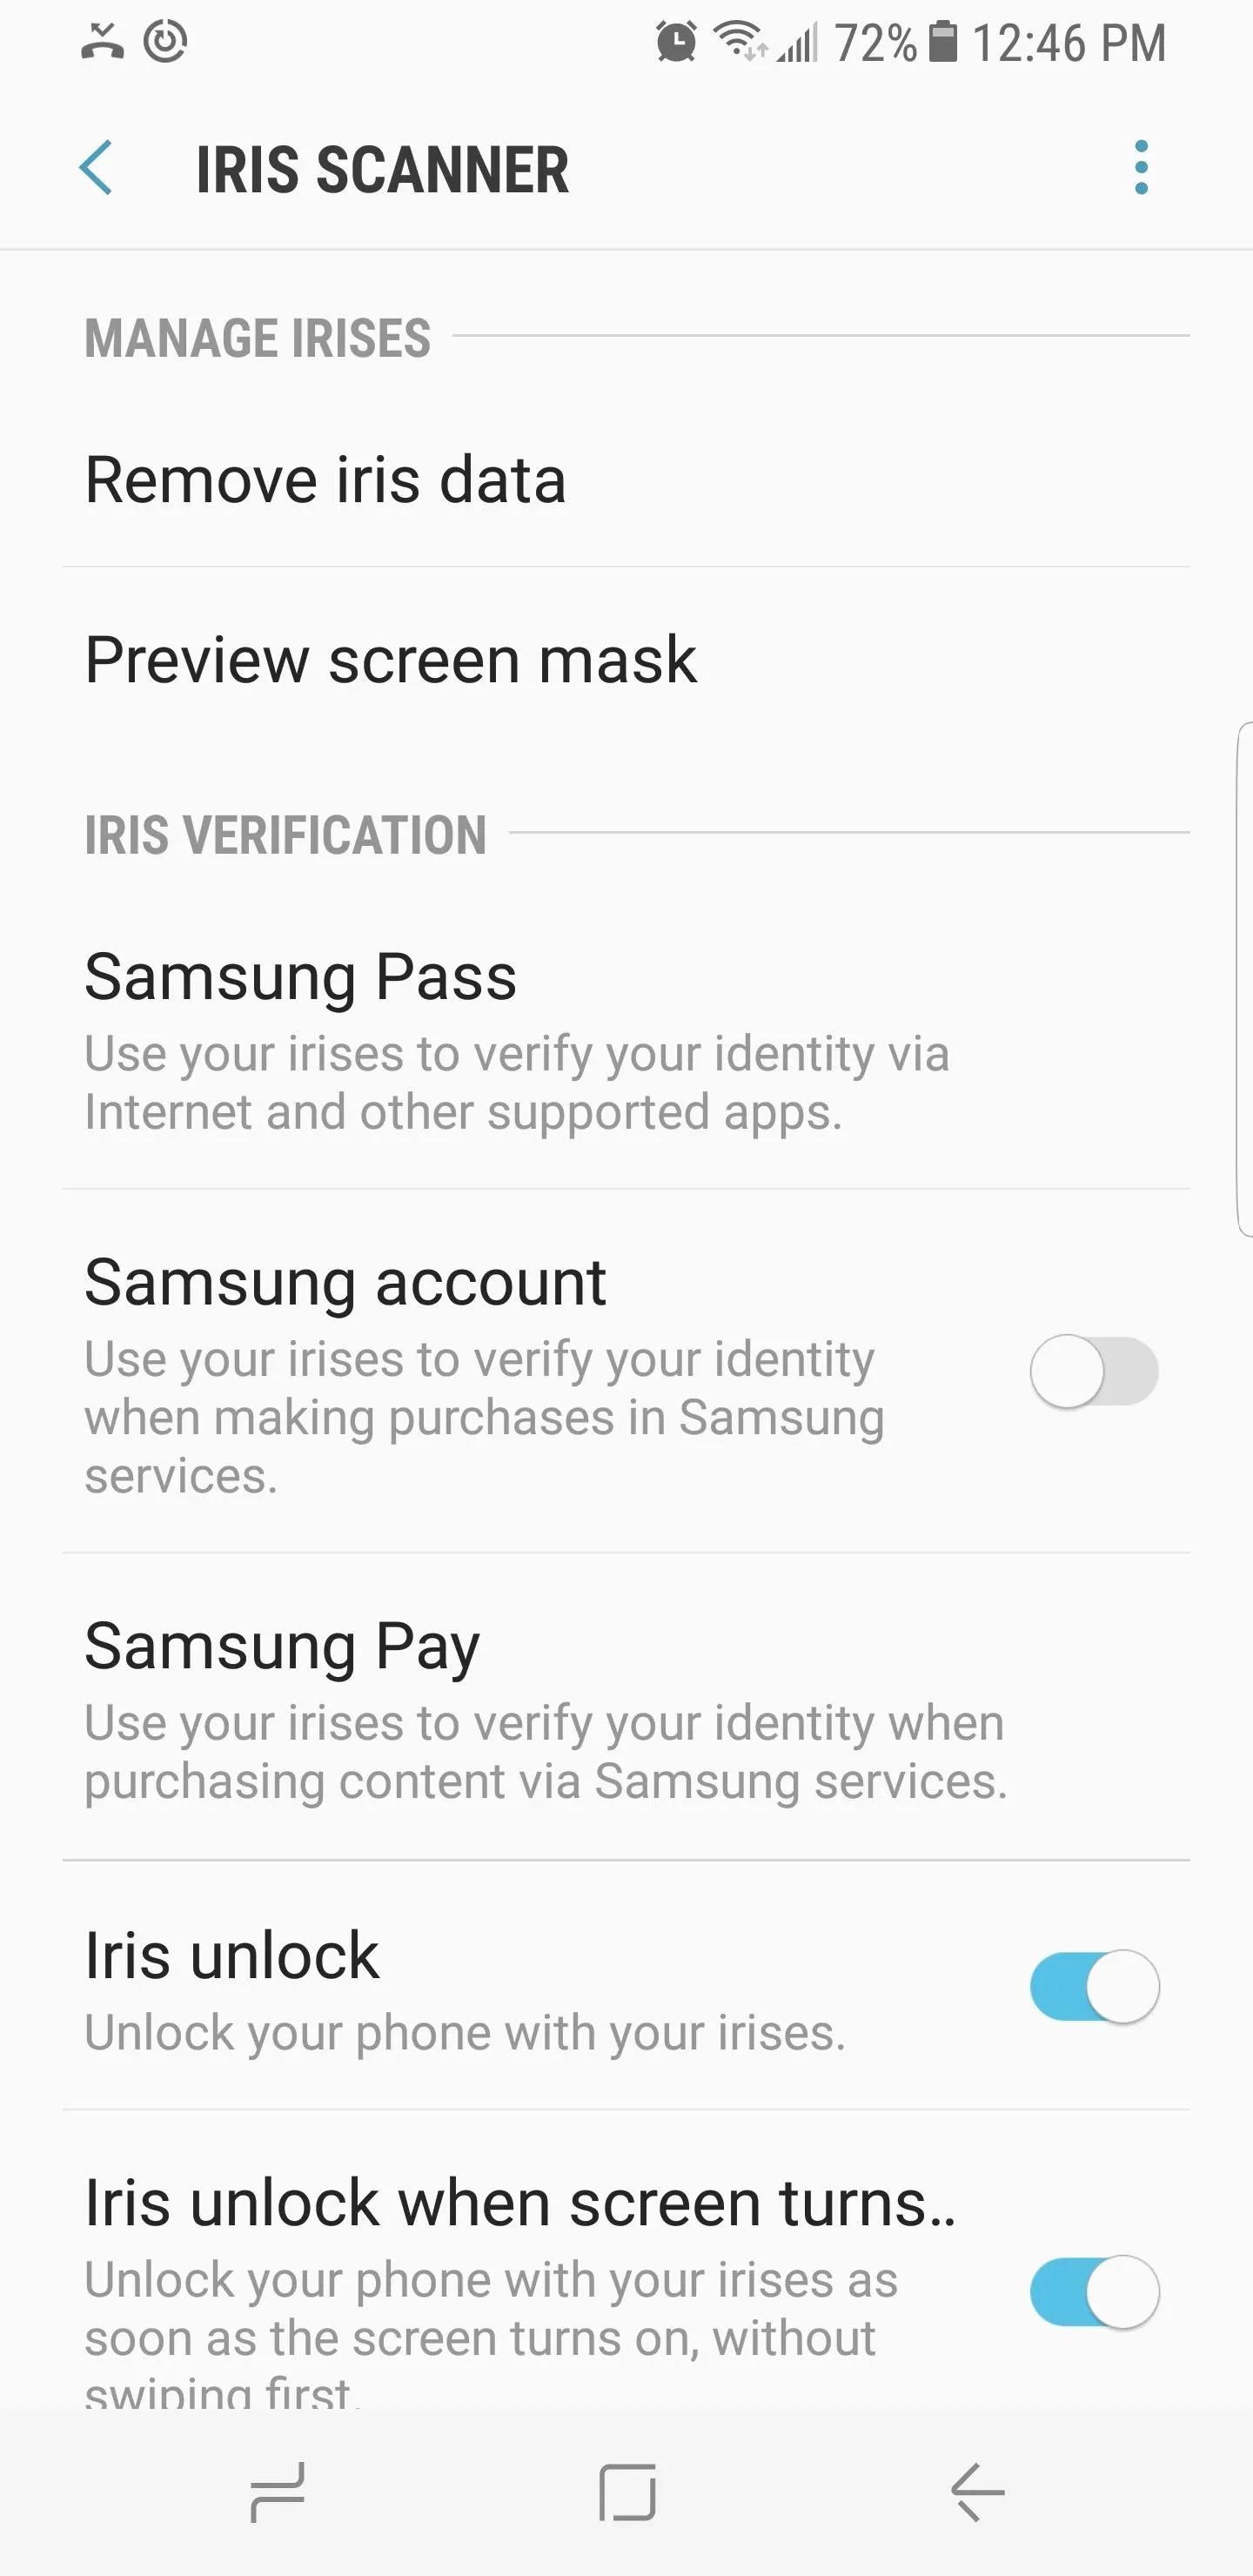
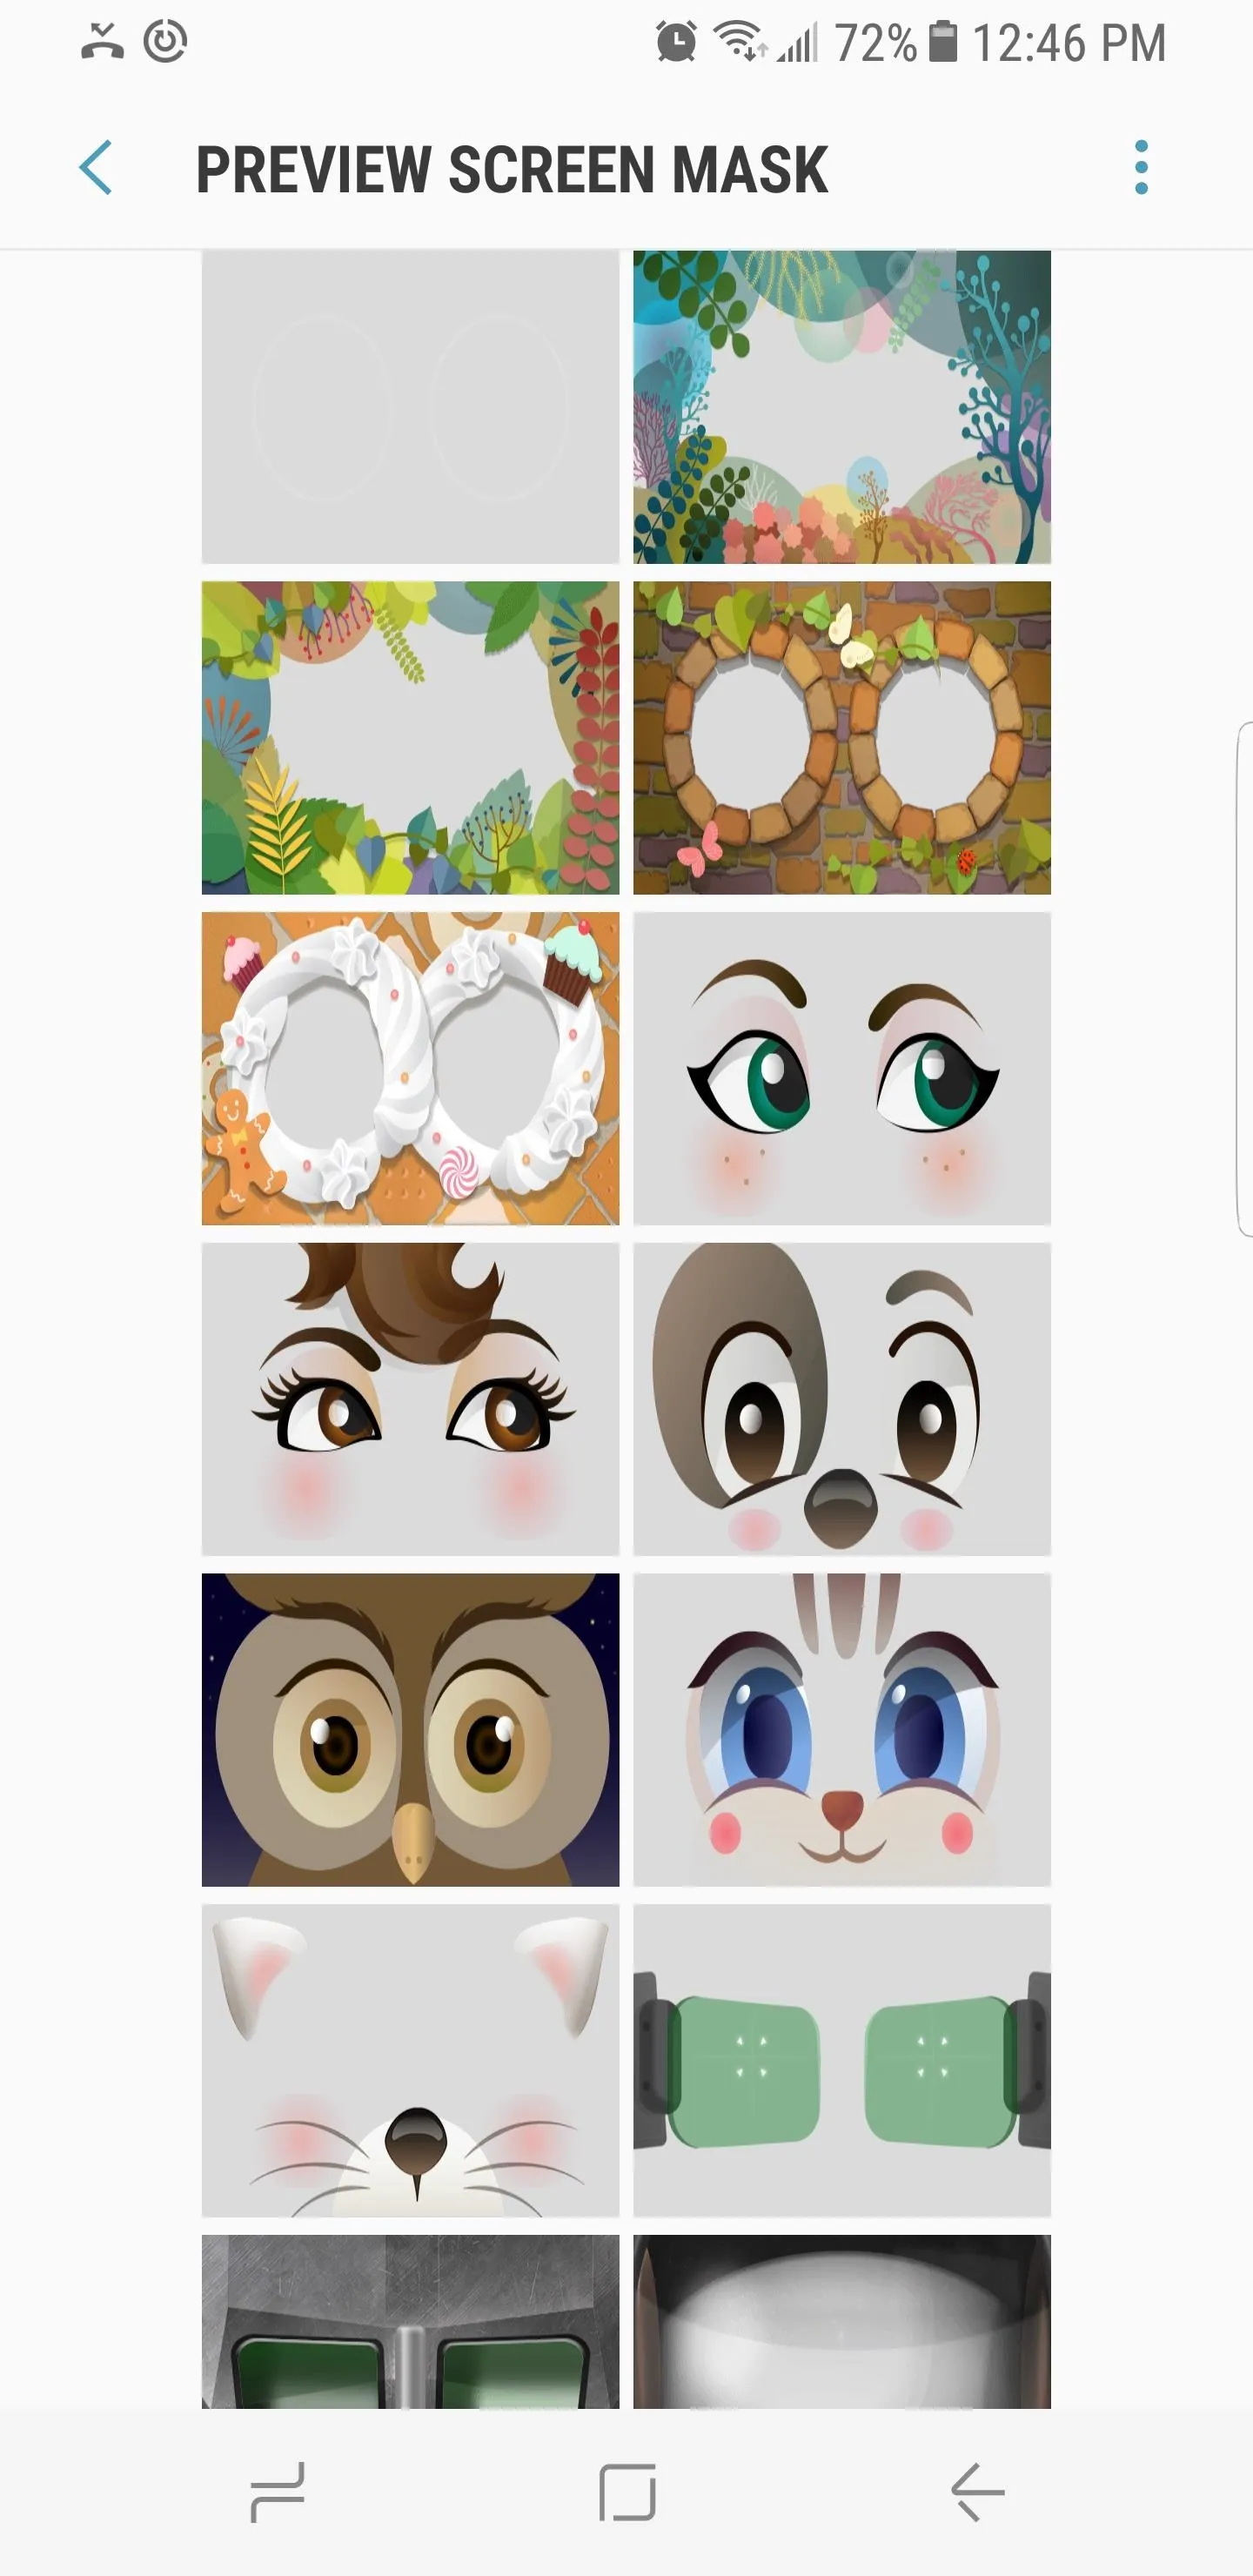
#4. Use the Screen Mask Feature for Faster Iris Scanning
The one big drawback of having a rear-mounted fingerprint scanner is it takes away the ability of merely placing a finger on the phone while it's rested. The extra step of having to physically pick up the device in order to unlock it using a fingerprint can get annoying very fast.
A solution for this is to use the S8's built-in iris scanner as a secondary way to unlock your S8 when its stationary. We recommend taking advantage of the S8's screen mask that can be found Within Iris Scanner under the Lock Screen And Security page in your phone's Settings. The goofy masks actually serve to help align your eyes to the phone, which takes out the guessing game in aligning your eyes to the scanner.


#5. Tweak the Built-in Equalizer
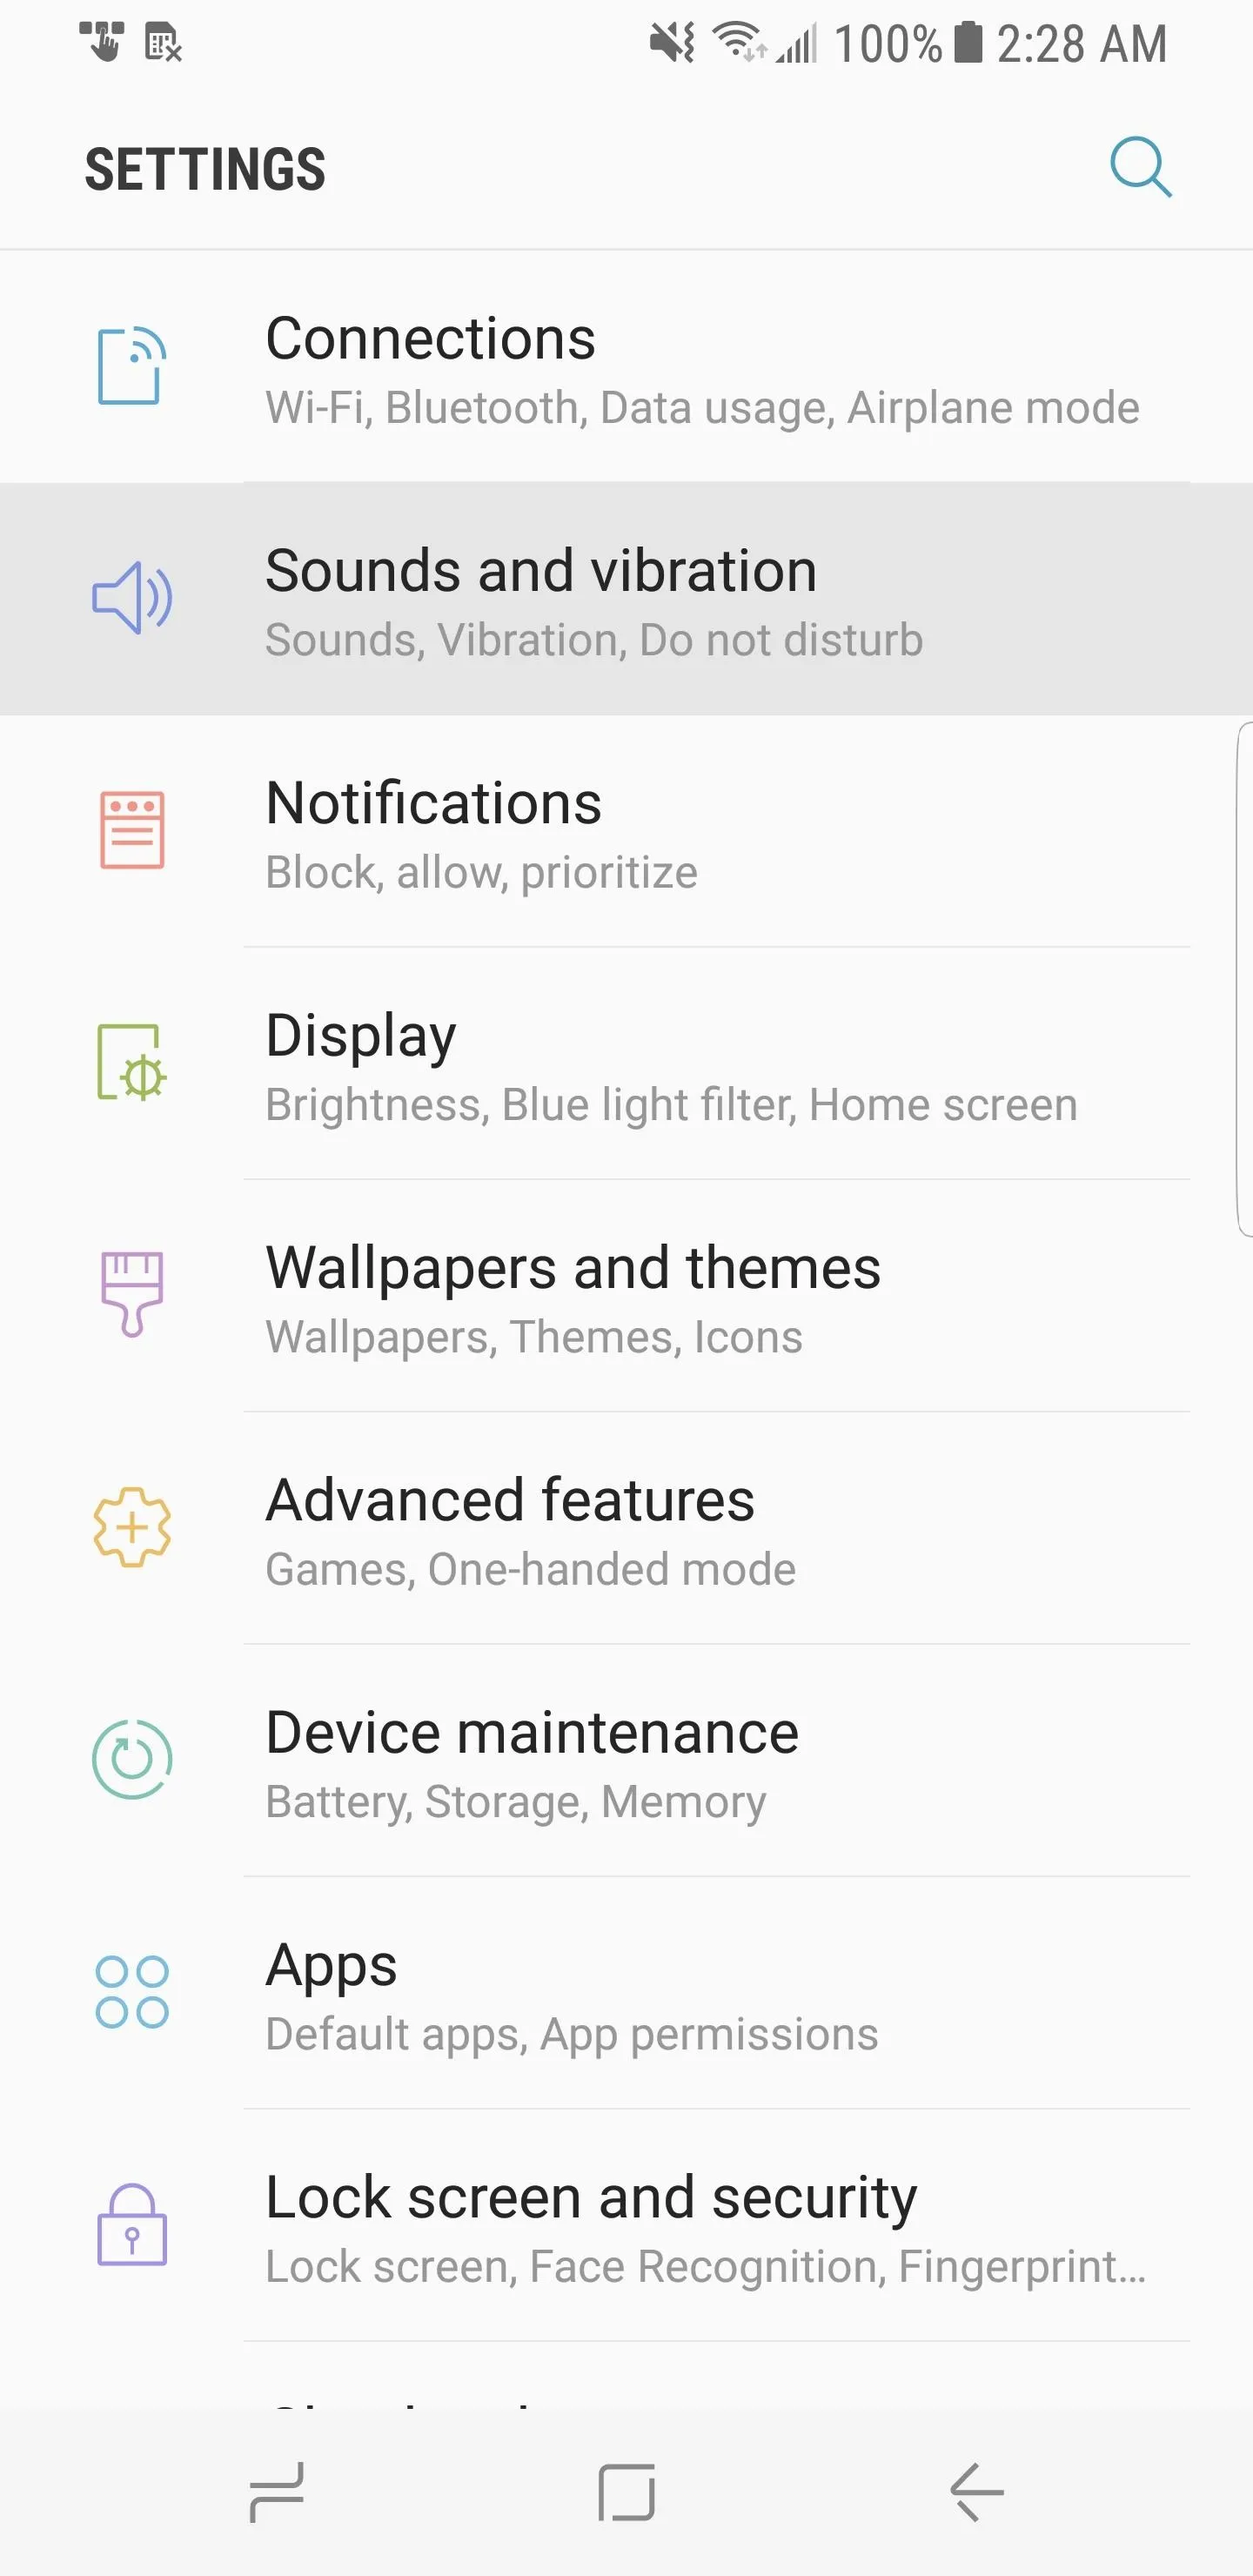
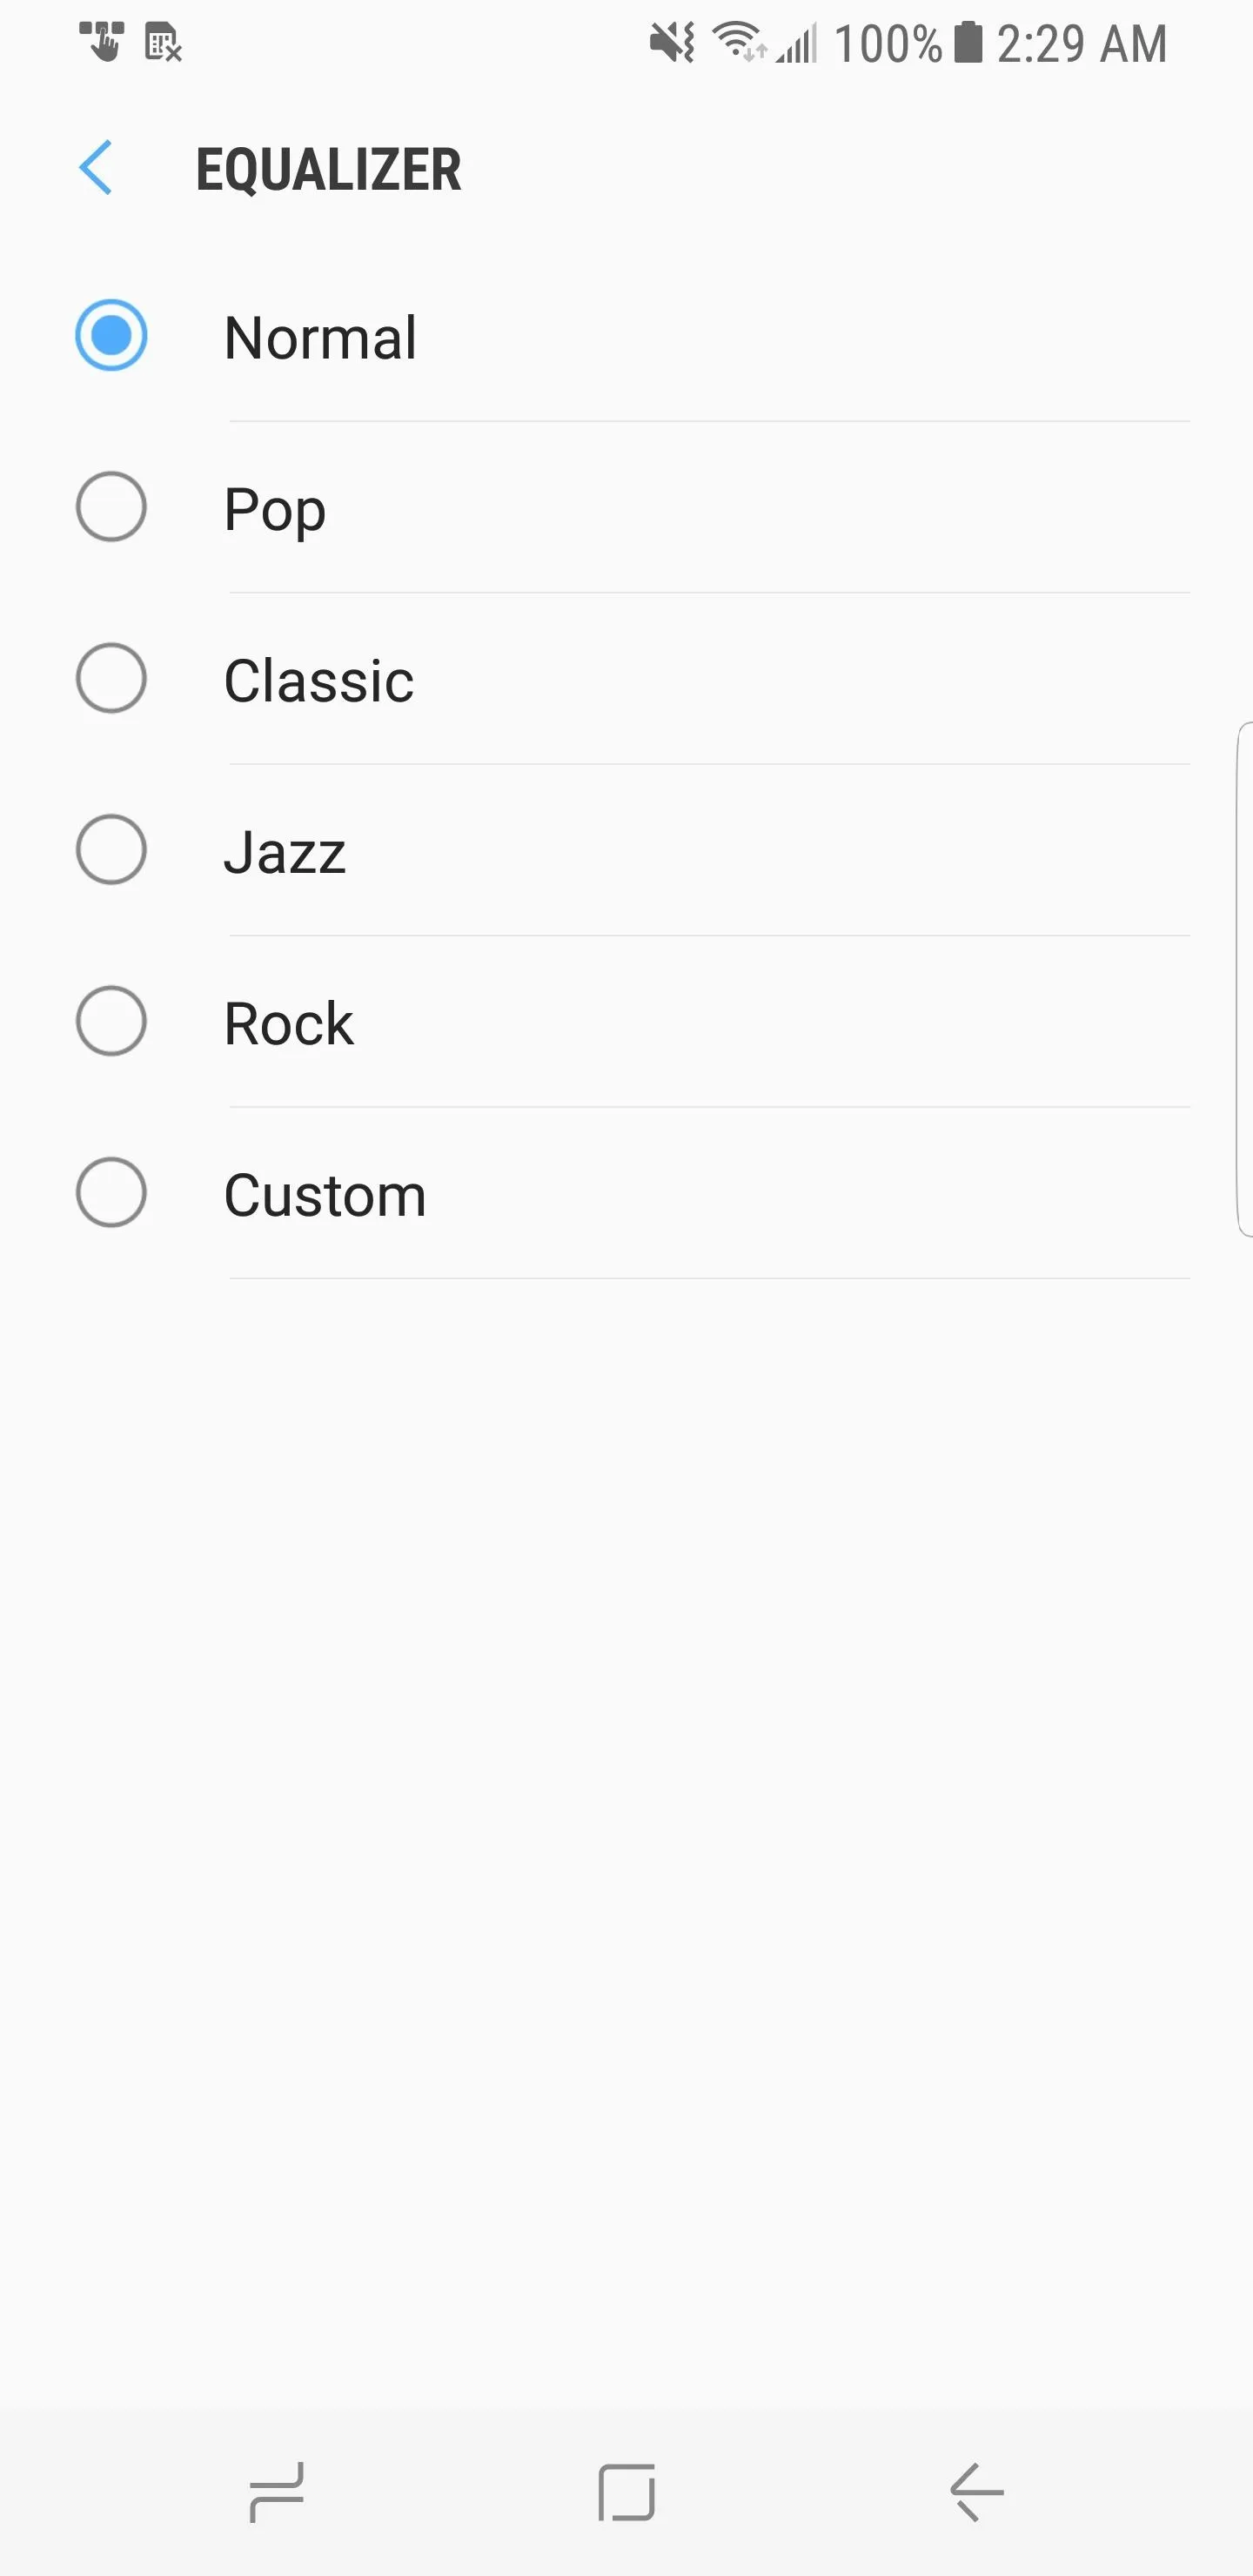
The Galaxy S8 now has built-in equalizers that you can adjust to fine tune your audio experience. To access this nifty feature, head over to the "Sounds and vibration" menu from Settings. There are advanced and basic modes for adjusting the S8's equalizers, so pick the layout that best suits your experience level.
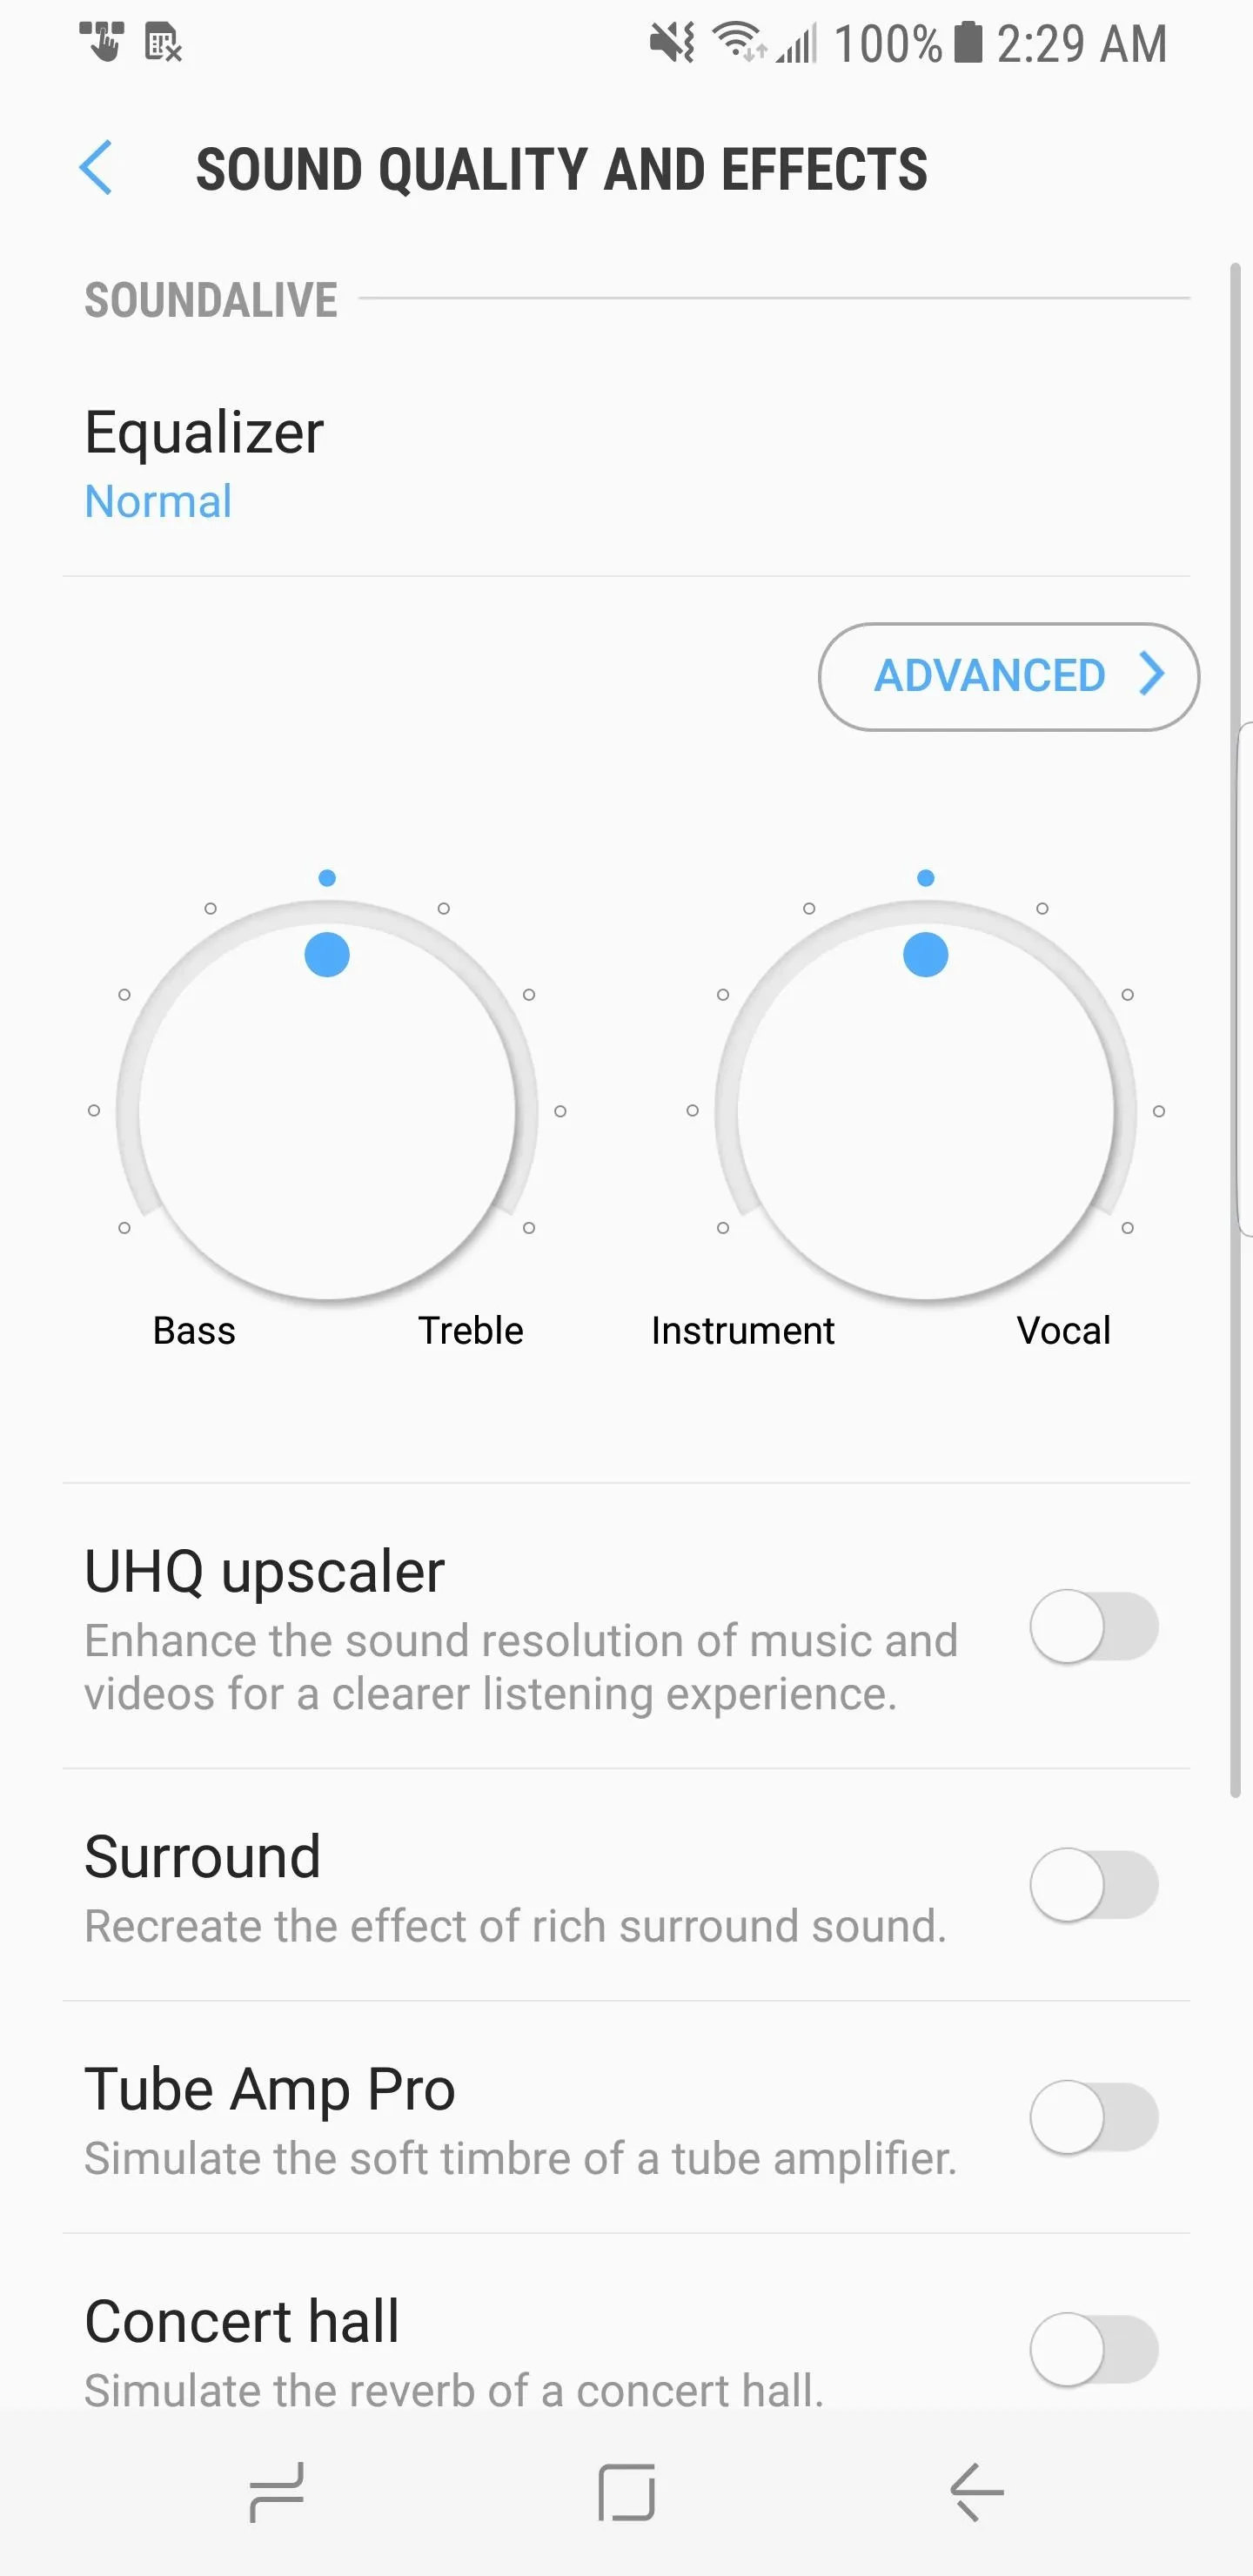
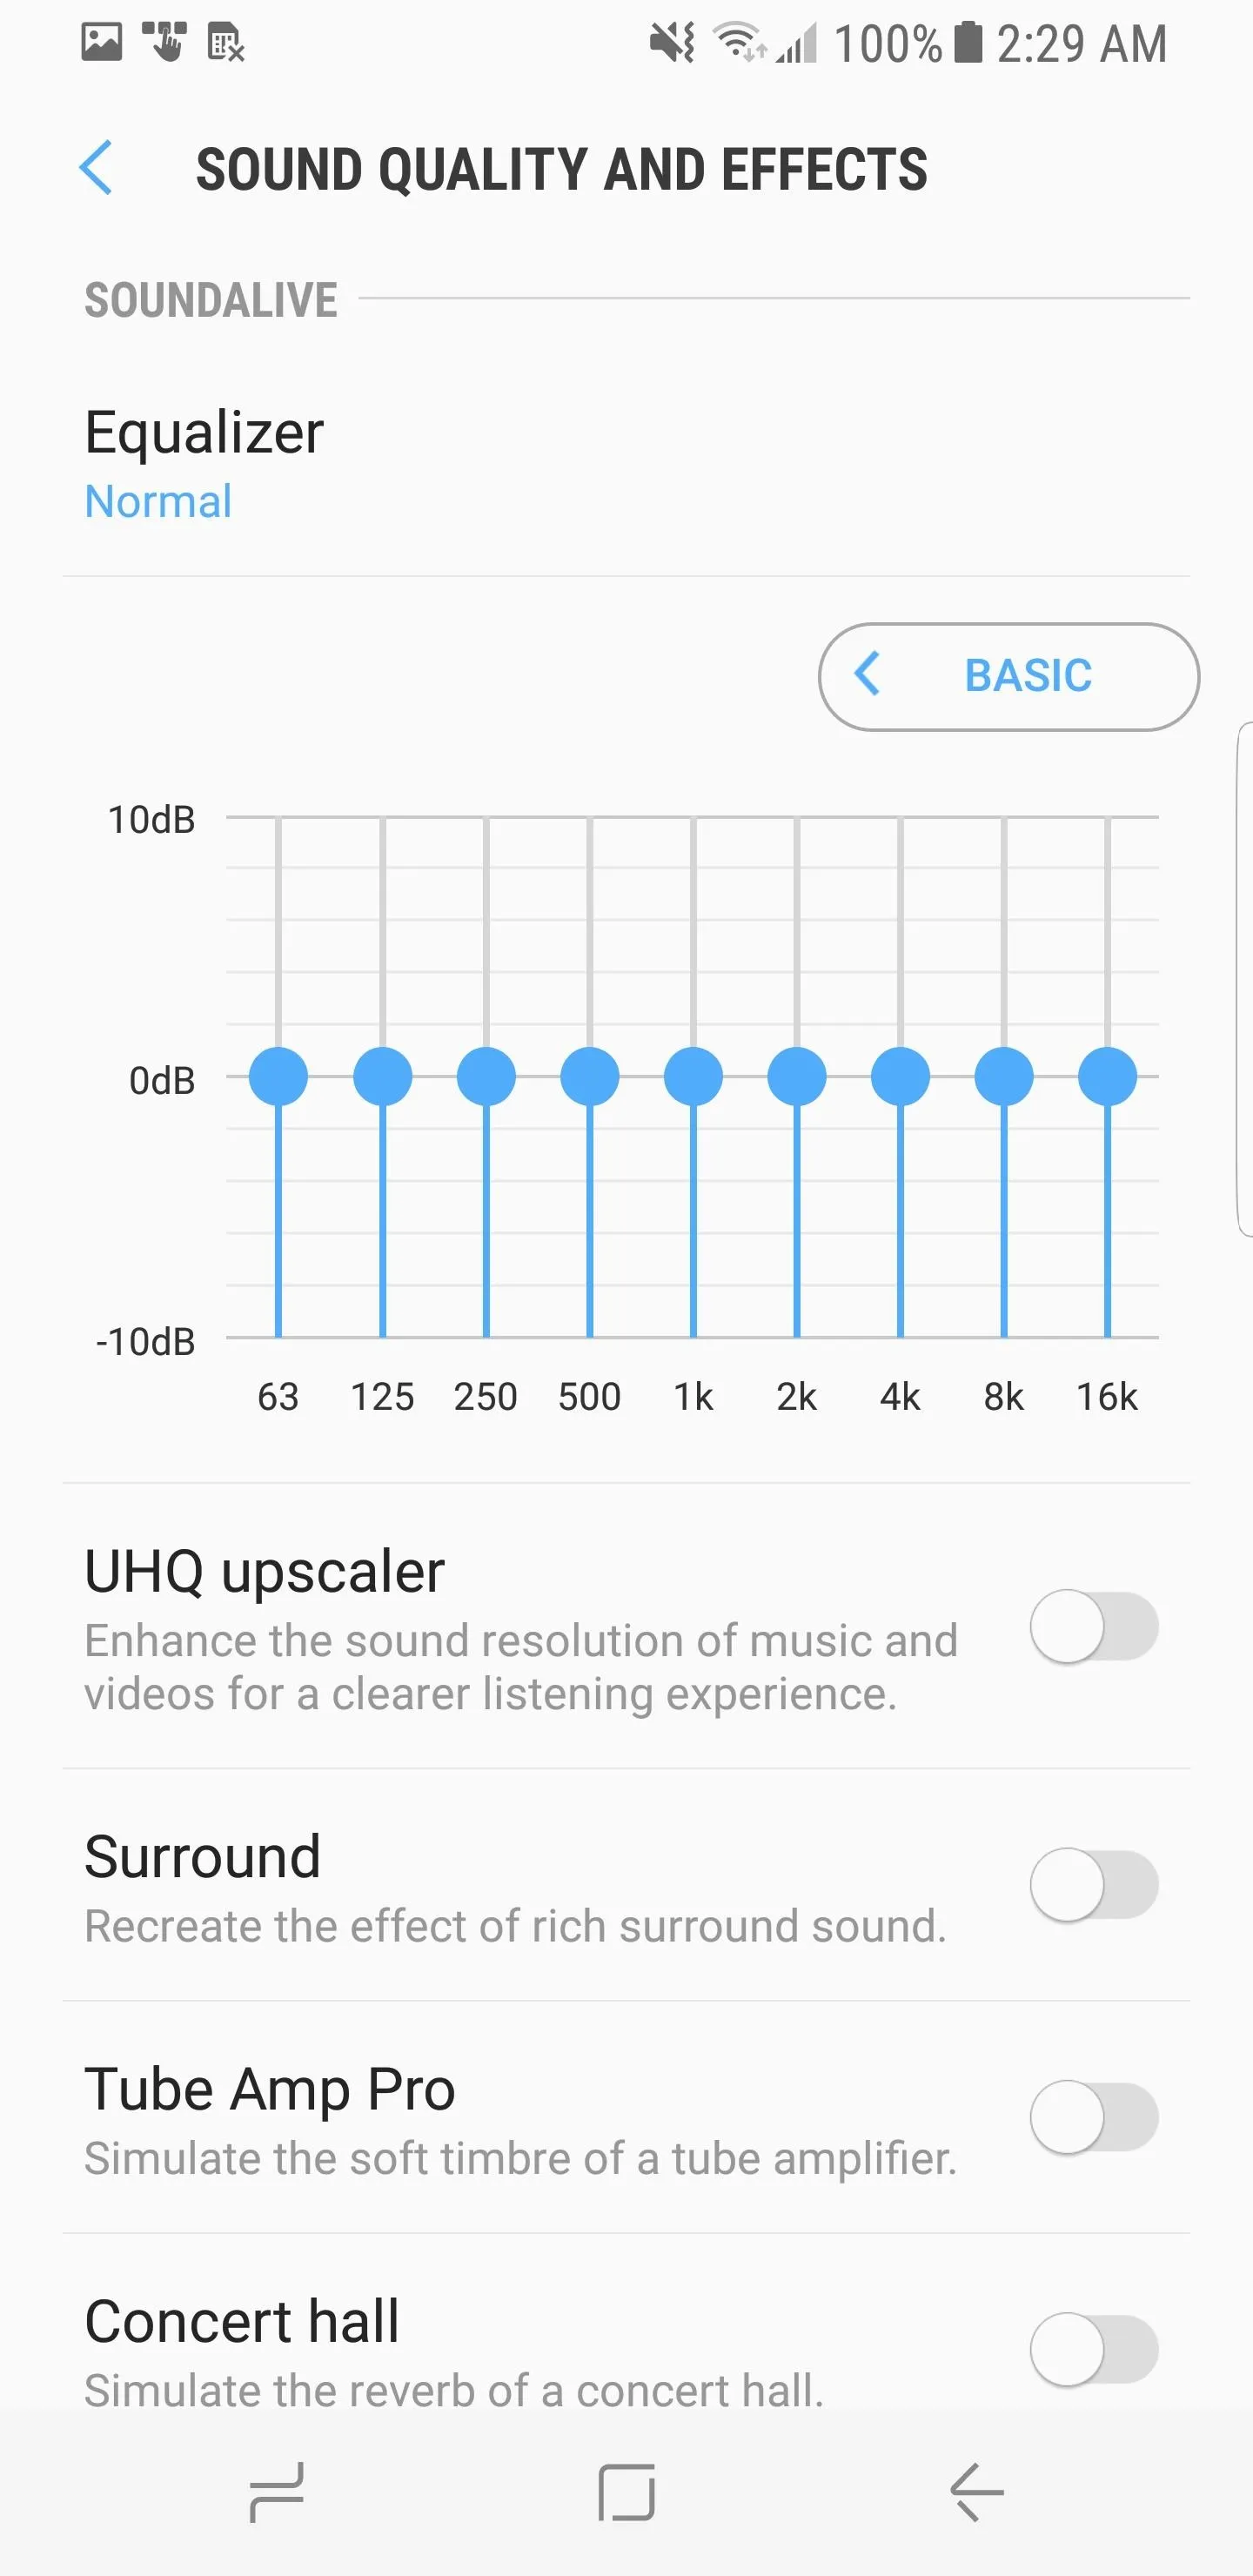


Once you've found this menu, it would be a good idea to start playing some music so you can hear the difference. When you've got that going, experiment with as many settings as possible to tailor the phone's audio output to your tastes. There are even presets that you can choose from to optimize audio quality, depending on what genre of music you're listening to.


#6. Quickly Switch Between Front & Rear Cameras
Samsung has built in some nifty features that let you switch from the main shooter to the selfie cam without having to look at the screen or tap on the camera switch icon. There are two ways to quickly rotate between the S8's primary and secondary cameras that you can choose from, depending on whatever suits you better.
The first method is by far the simplest — simply swiping up and down on the camera screen to switch between the front and rear cameras. Please note that the same gesture applies in landscape mode, but you'll need to swipe horizontally instead of vertically.
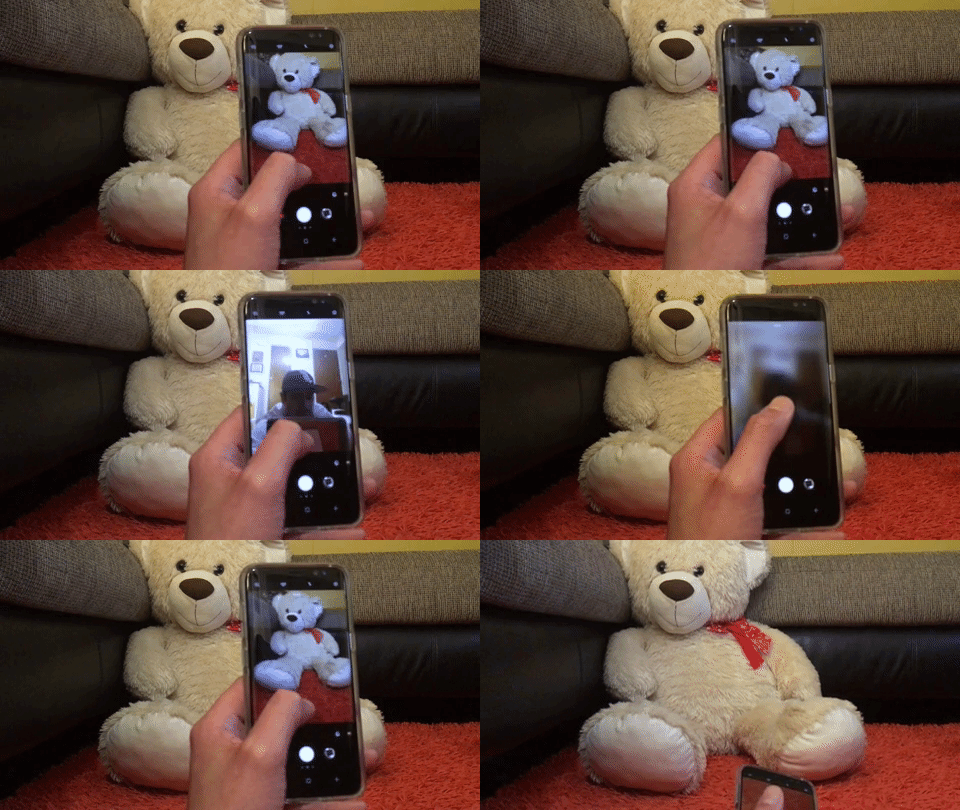
Alternatively, you can use the power button to transition from rear to front camera and vise versa, by performing a quick double-press while the camera app is open. You have to be pretty quick about it, though, as even the slightest lag between clicks will inadvertently put the S8 to sleep.

#7. Access the Brightness Slider with a Single Swipe
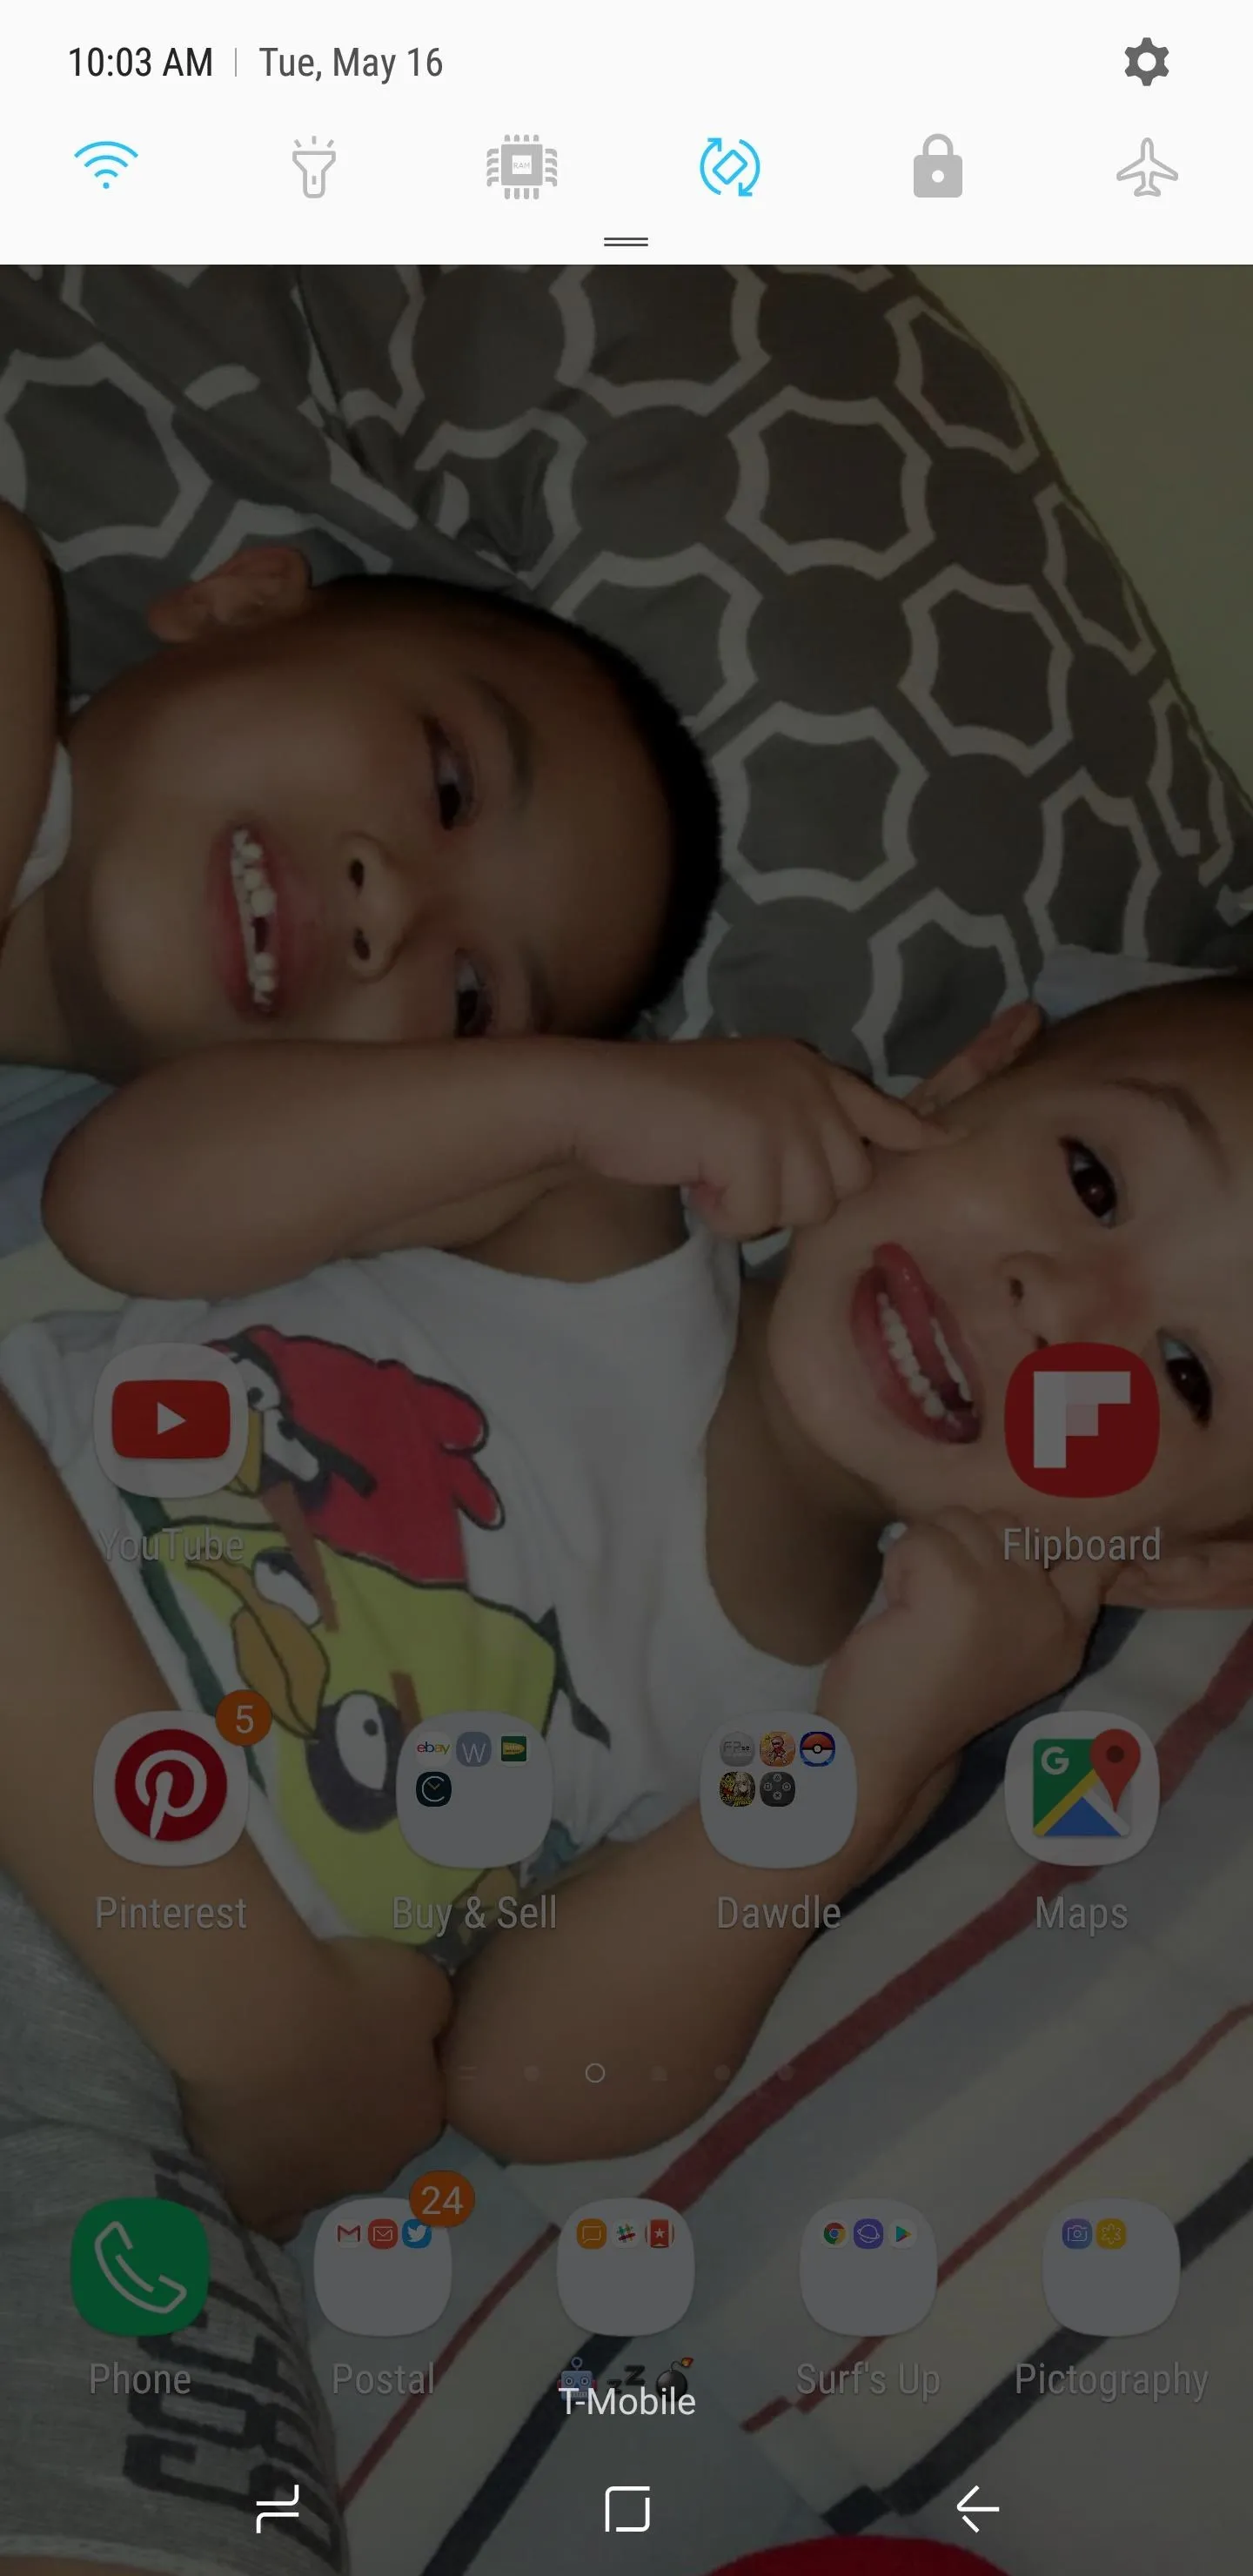
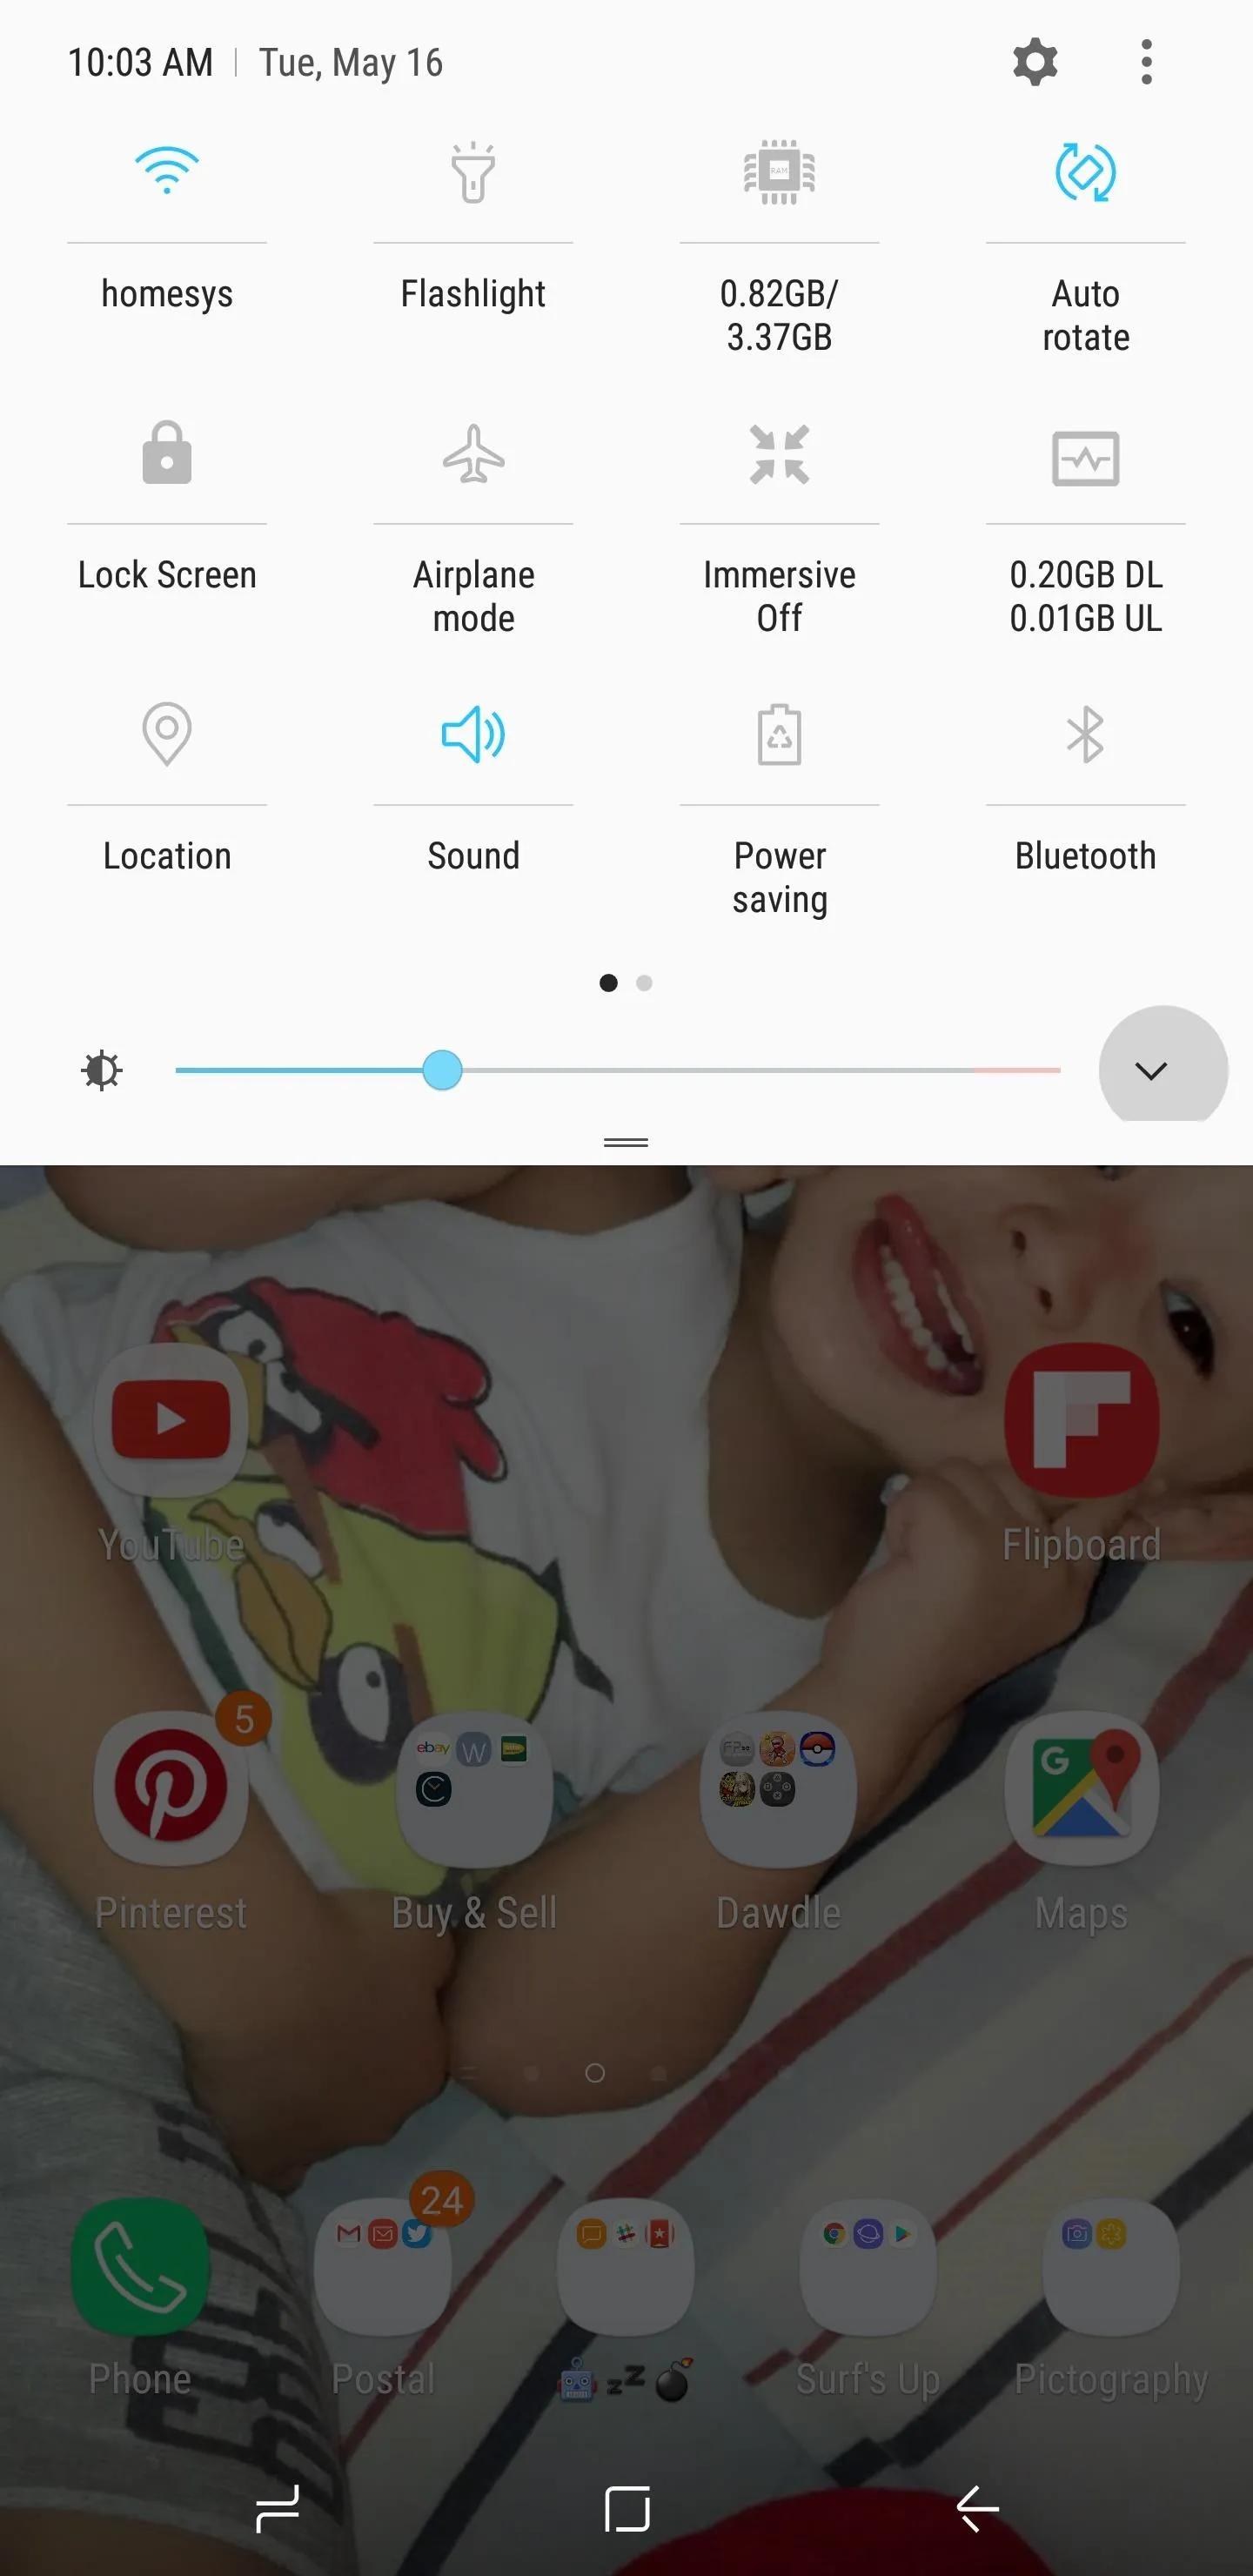
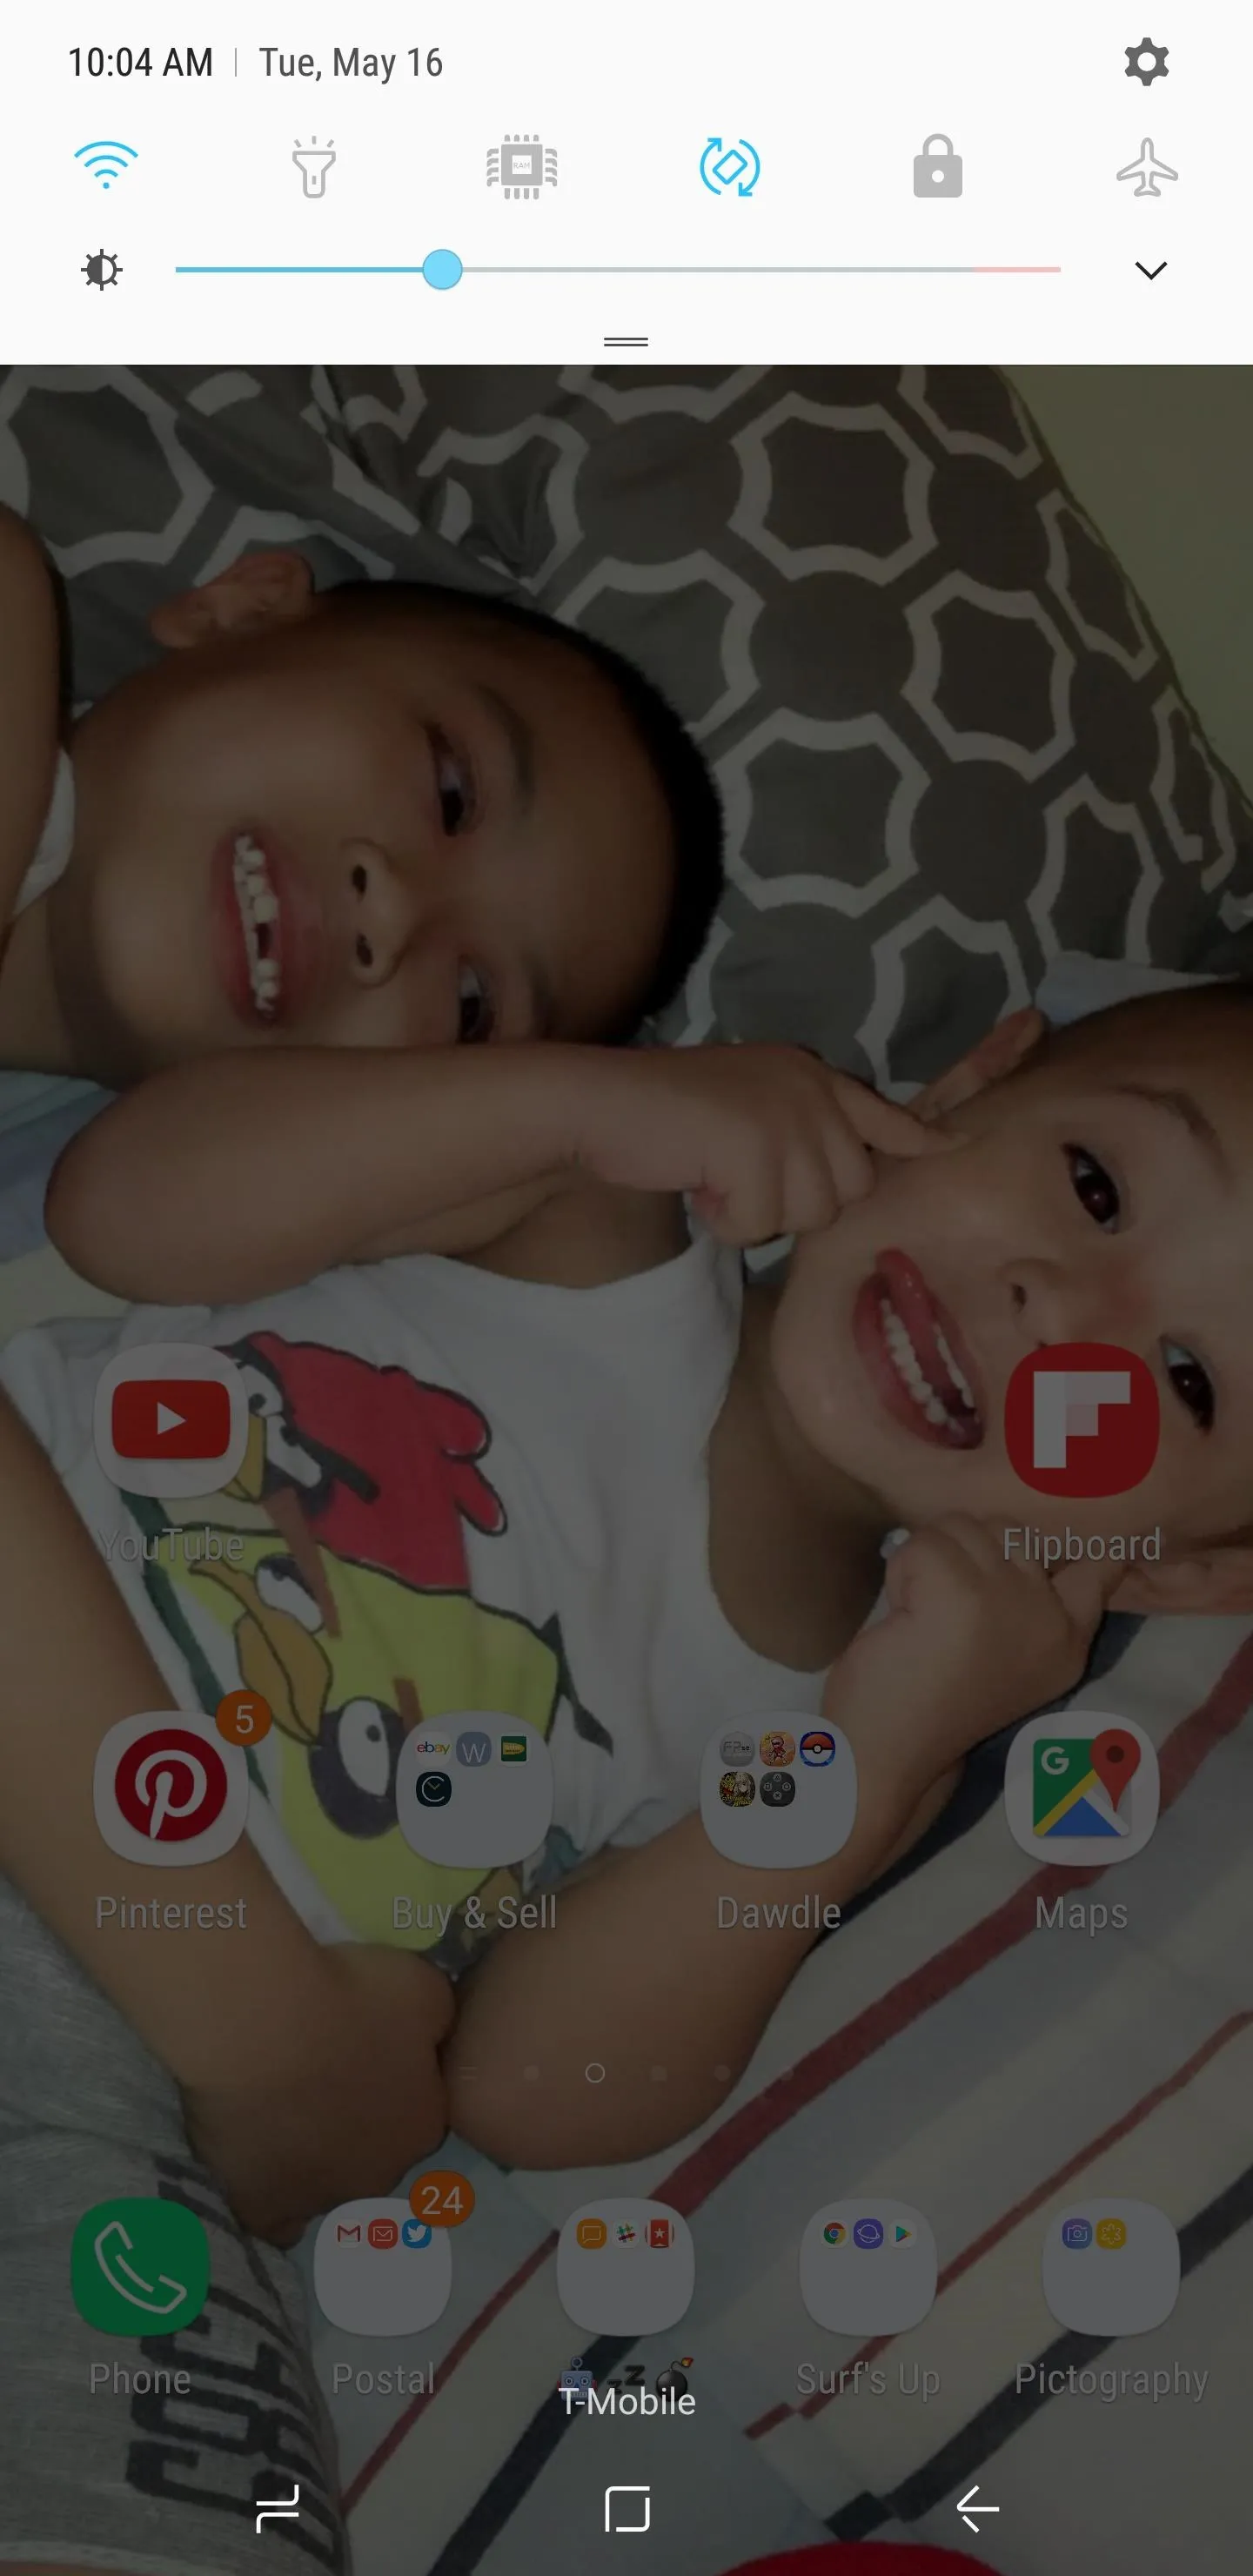
S8's brightness bar sits below the Quick Settings tiles by default, meaning you have to swipe down twice to access it. Fortunately, this minor inconvenience can be easily remedied by moving the brightness bar further up top to allow for instant access with a single swipe.
To get started, you'll need to access your brightness bar, so swipe down twice from the top of any screen to expose the brightness adjustment bar right under the Quick Settings tiles. Next, tap one the drop-down menu icon to the right of the brightness bar.


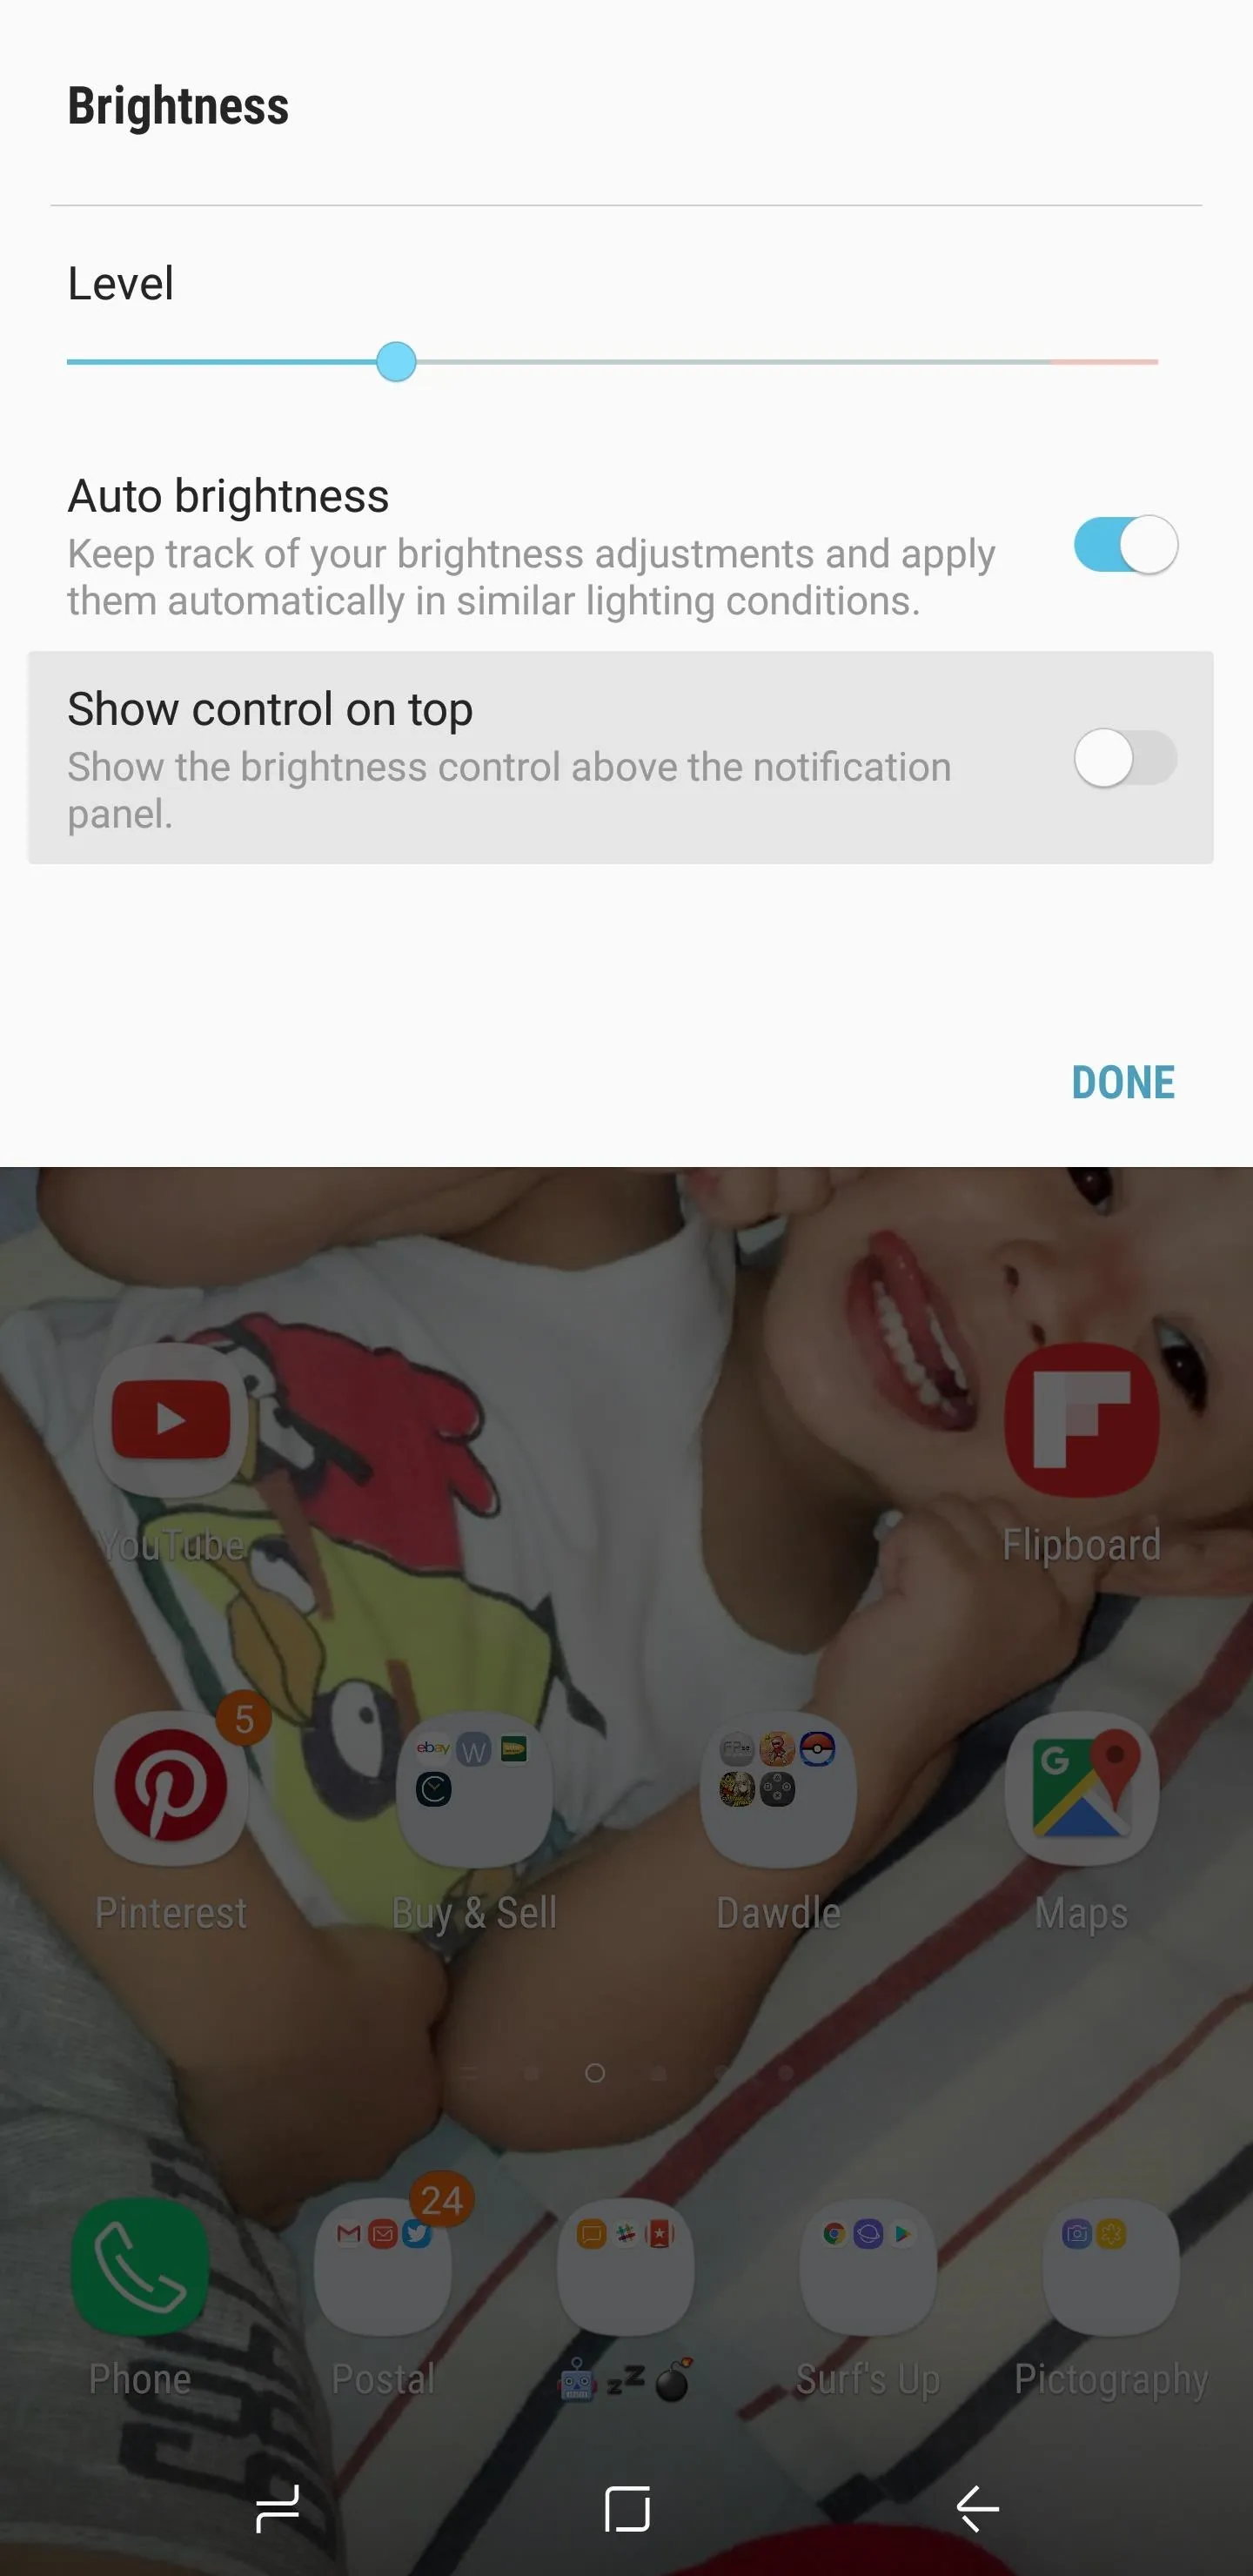
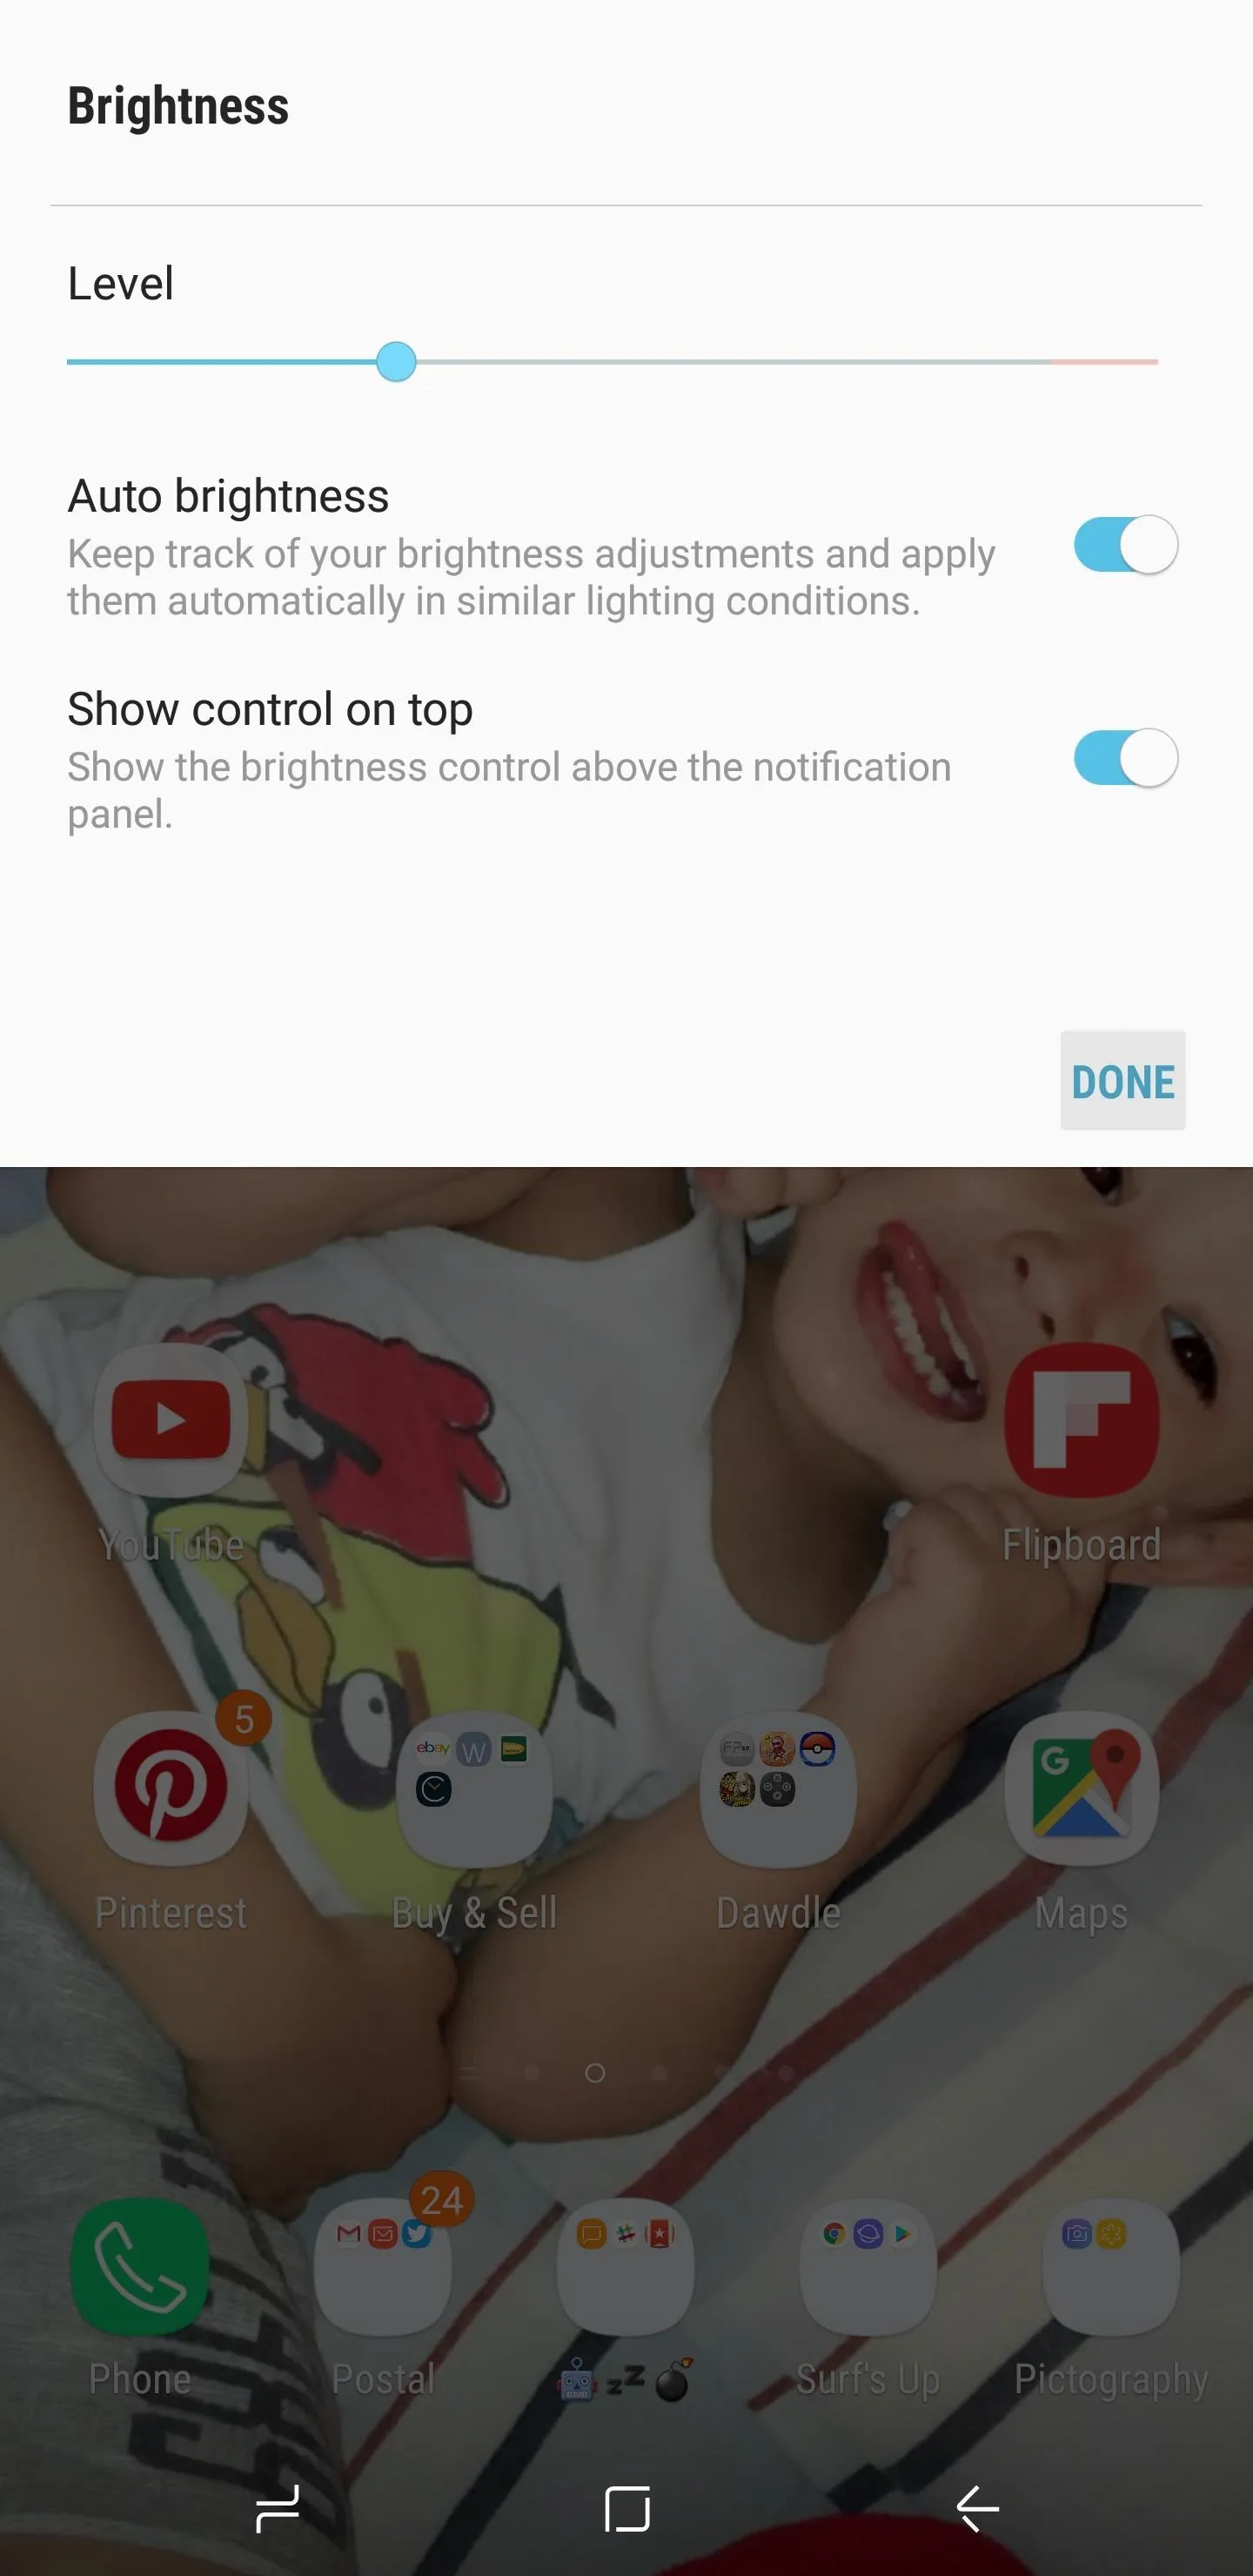
From here, you'll be presented with a menu, so enable the switch next to "Show control on top." Finally, tap "Done" to wrap things up. You now only need to swipe down once to pull up the brightness bar adjustment on the fly whenever your S8's screen is either too dark or too bright.


#8. Adjust the Flashlight's Brightness
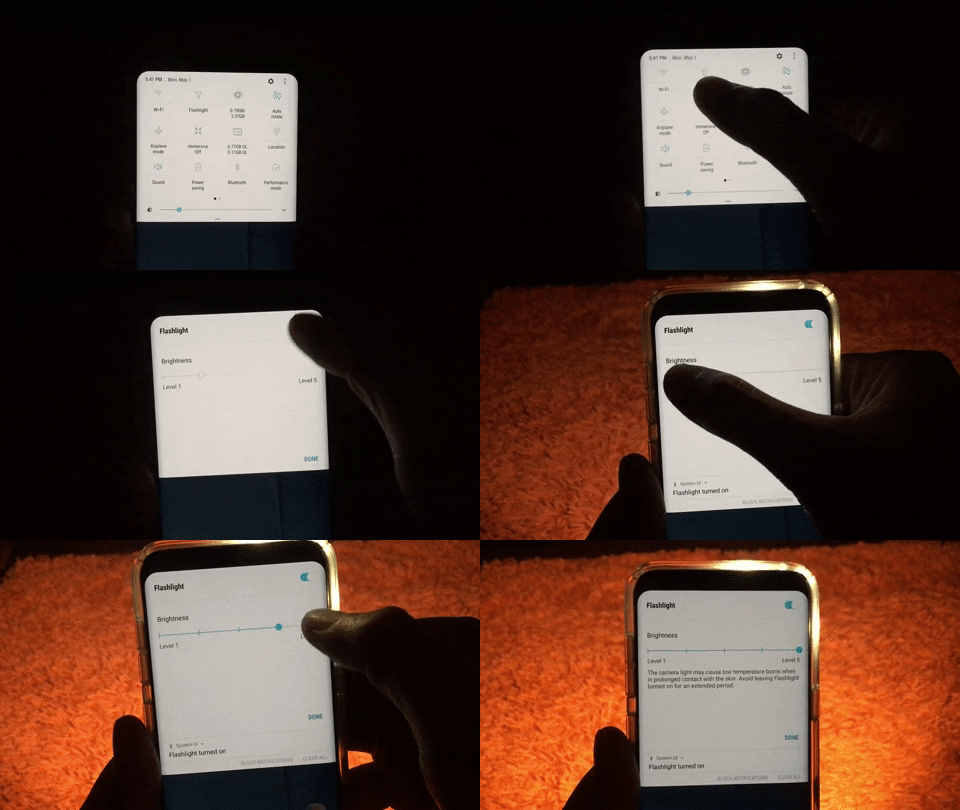
The built-in LED flashlight on the S8 can actually be tweaked to suit your lighting needs. Simply swipe down from the top of any screen to access the Quick Settings panel, then tap on the "Flashlight" text beneath the flashlight icon to go to its settings page. From there, you can adjust the light's brightness, in addition to having the ability to turn it on and off using the toggle in the upper-right corner.
#9. Adjust DPI Scaling
Tweaking a smartphone's DPI has always either required root, ADB, or third-party applications. But the Galaxy S8 and S8+ have made this a built-in setting, and though hidden, can be accessed to let you easily change the size of icons and other elements on your screen.
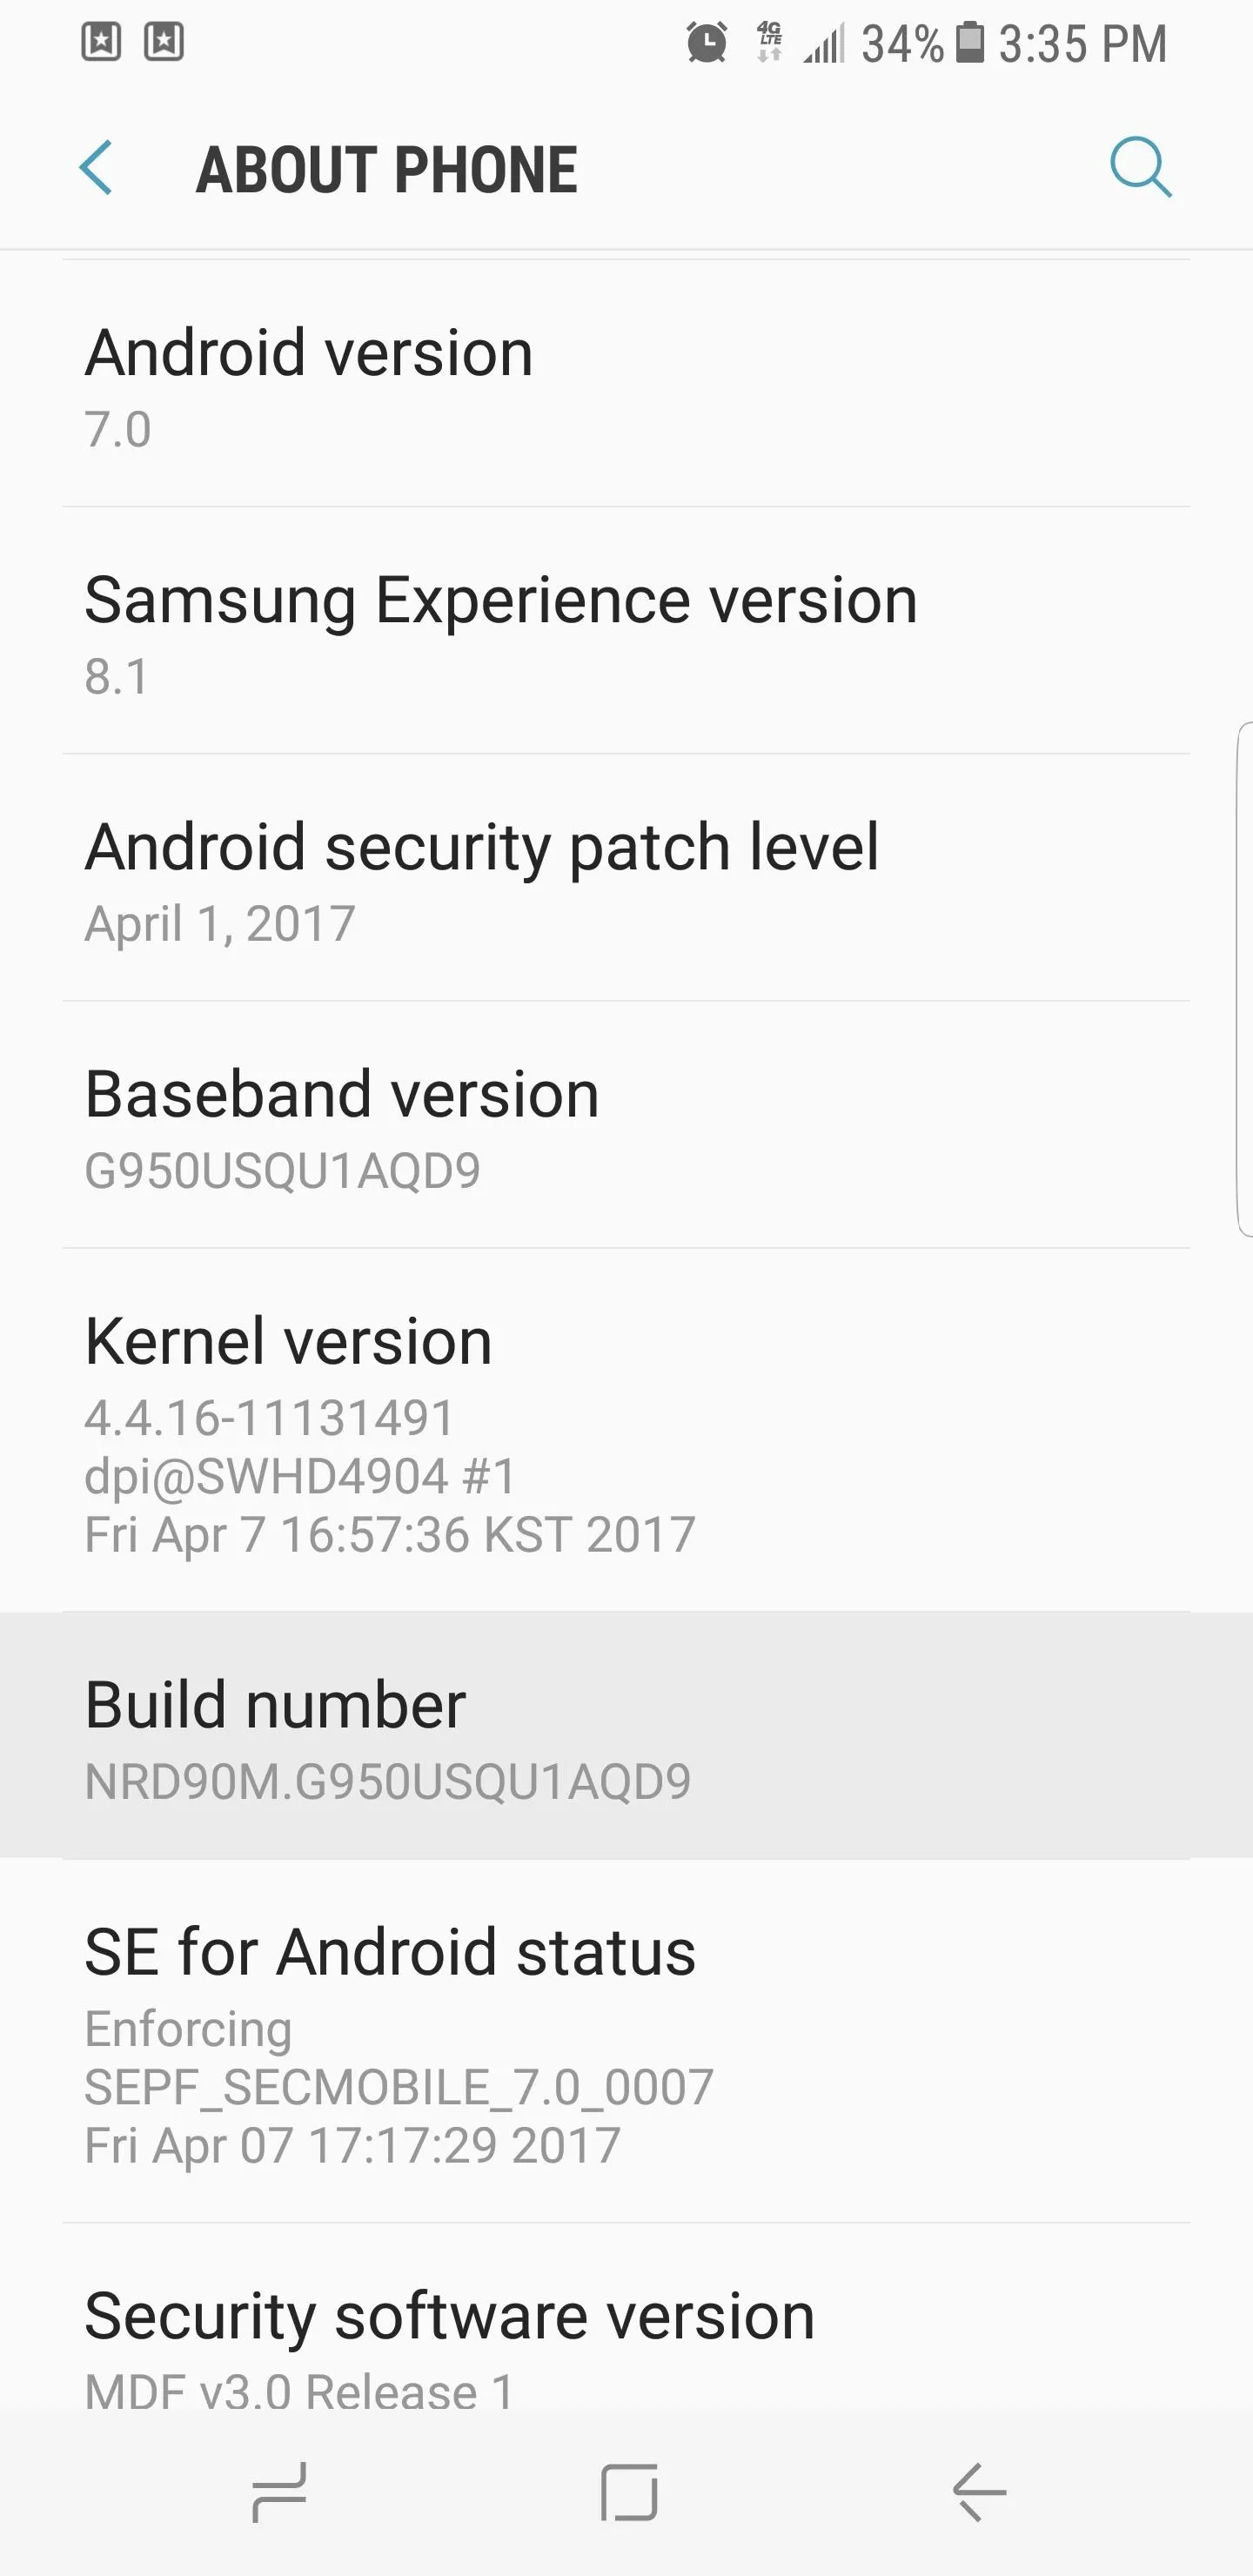
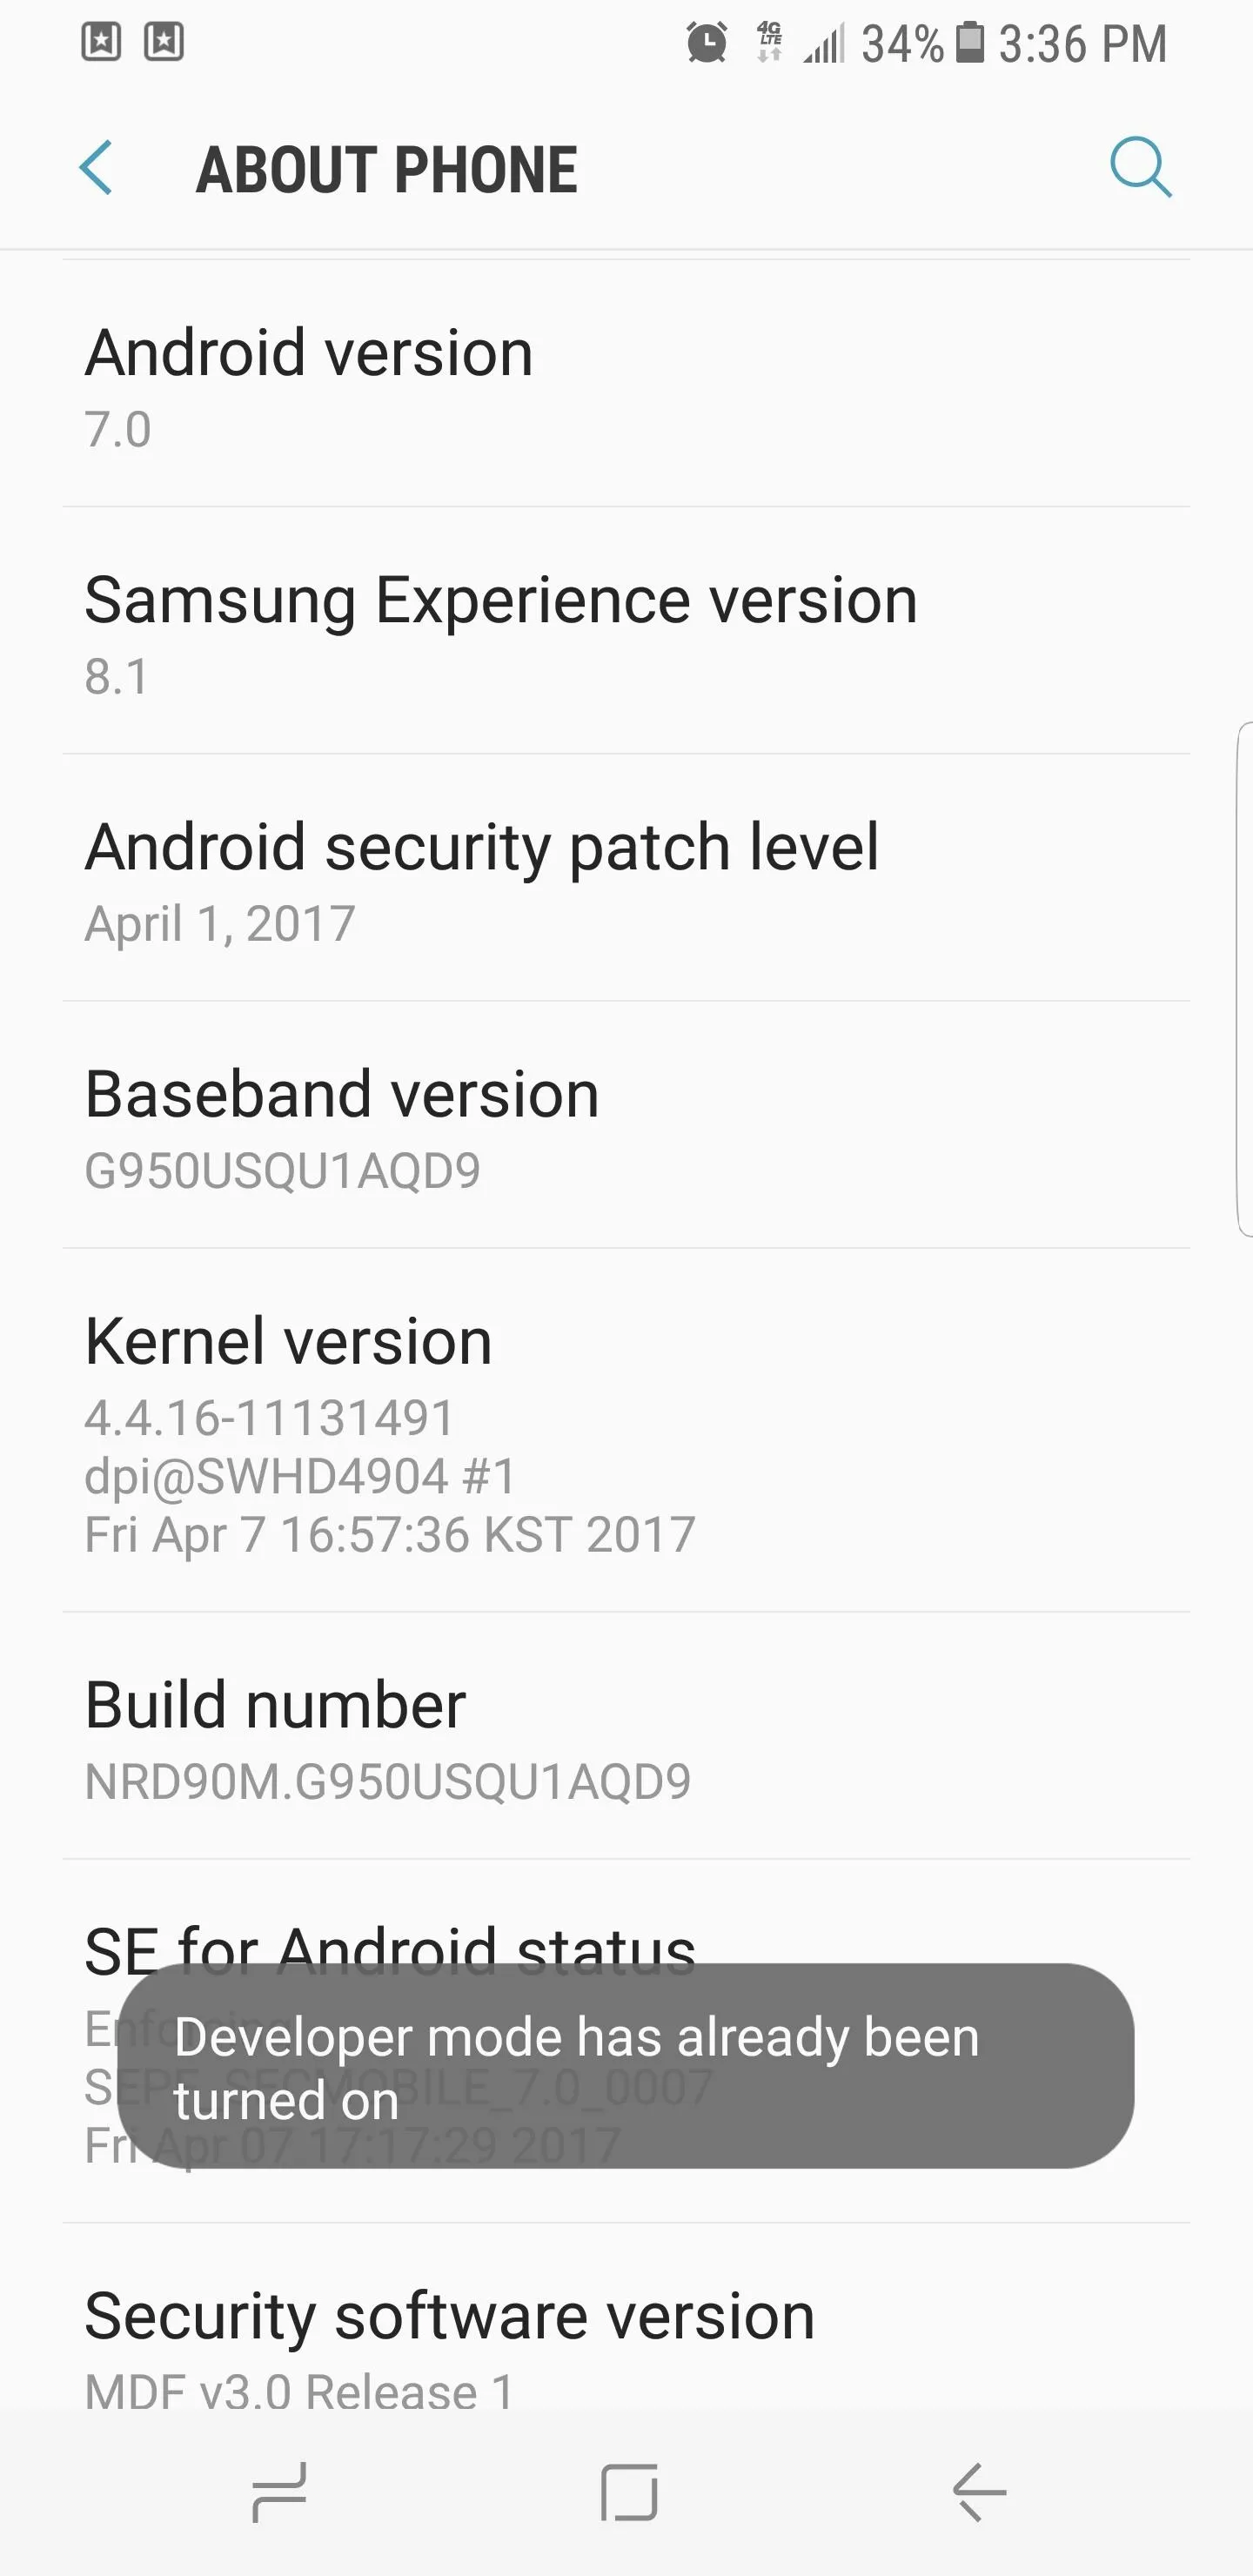
To get started, you'll first need to enable the hidden "Developer options" menu on your Galaxy S8 by heading to the About Phone menu in Settings and tapping the "Build Number" entry seven times. A toast message stating "Developer mode has been turned on" will pop up once you've finished tapping.
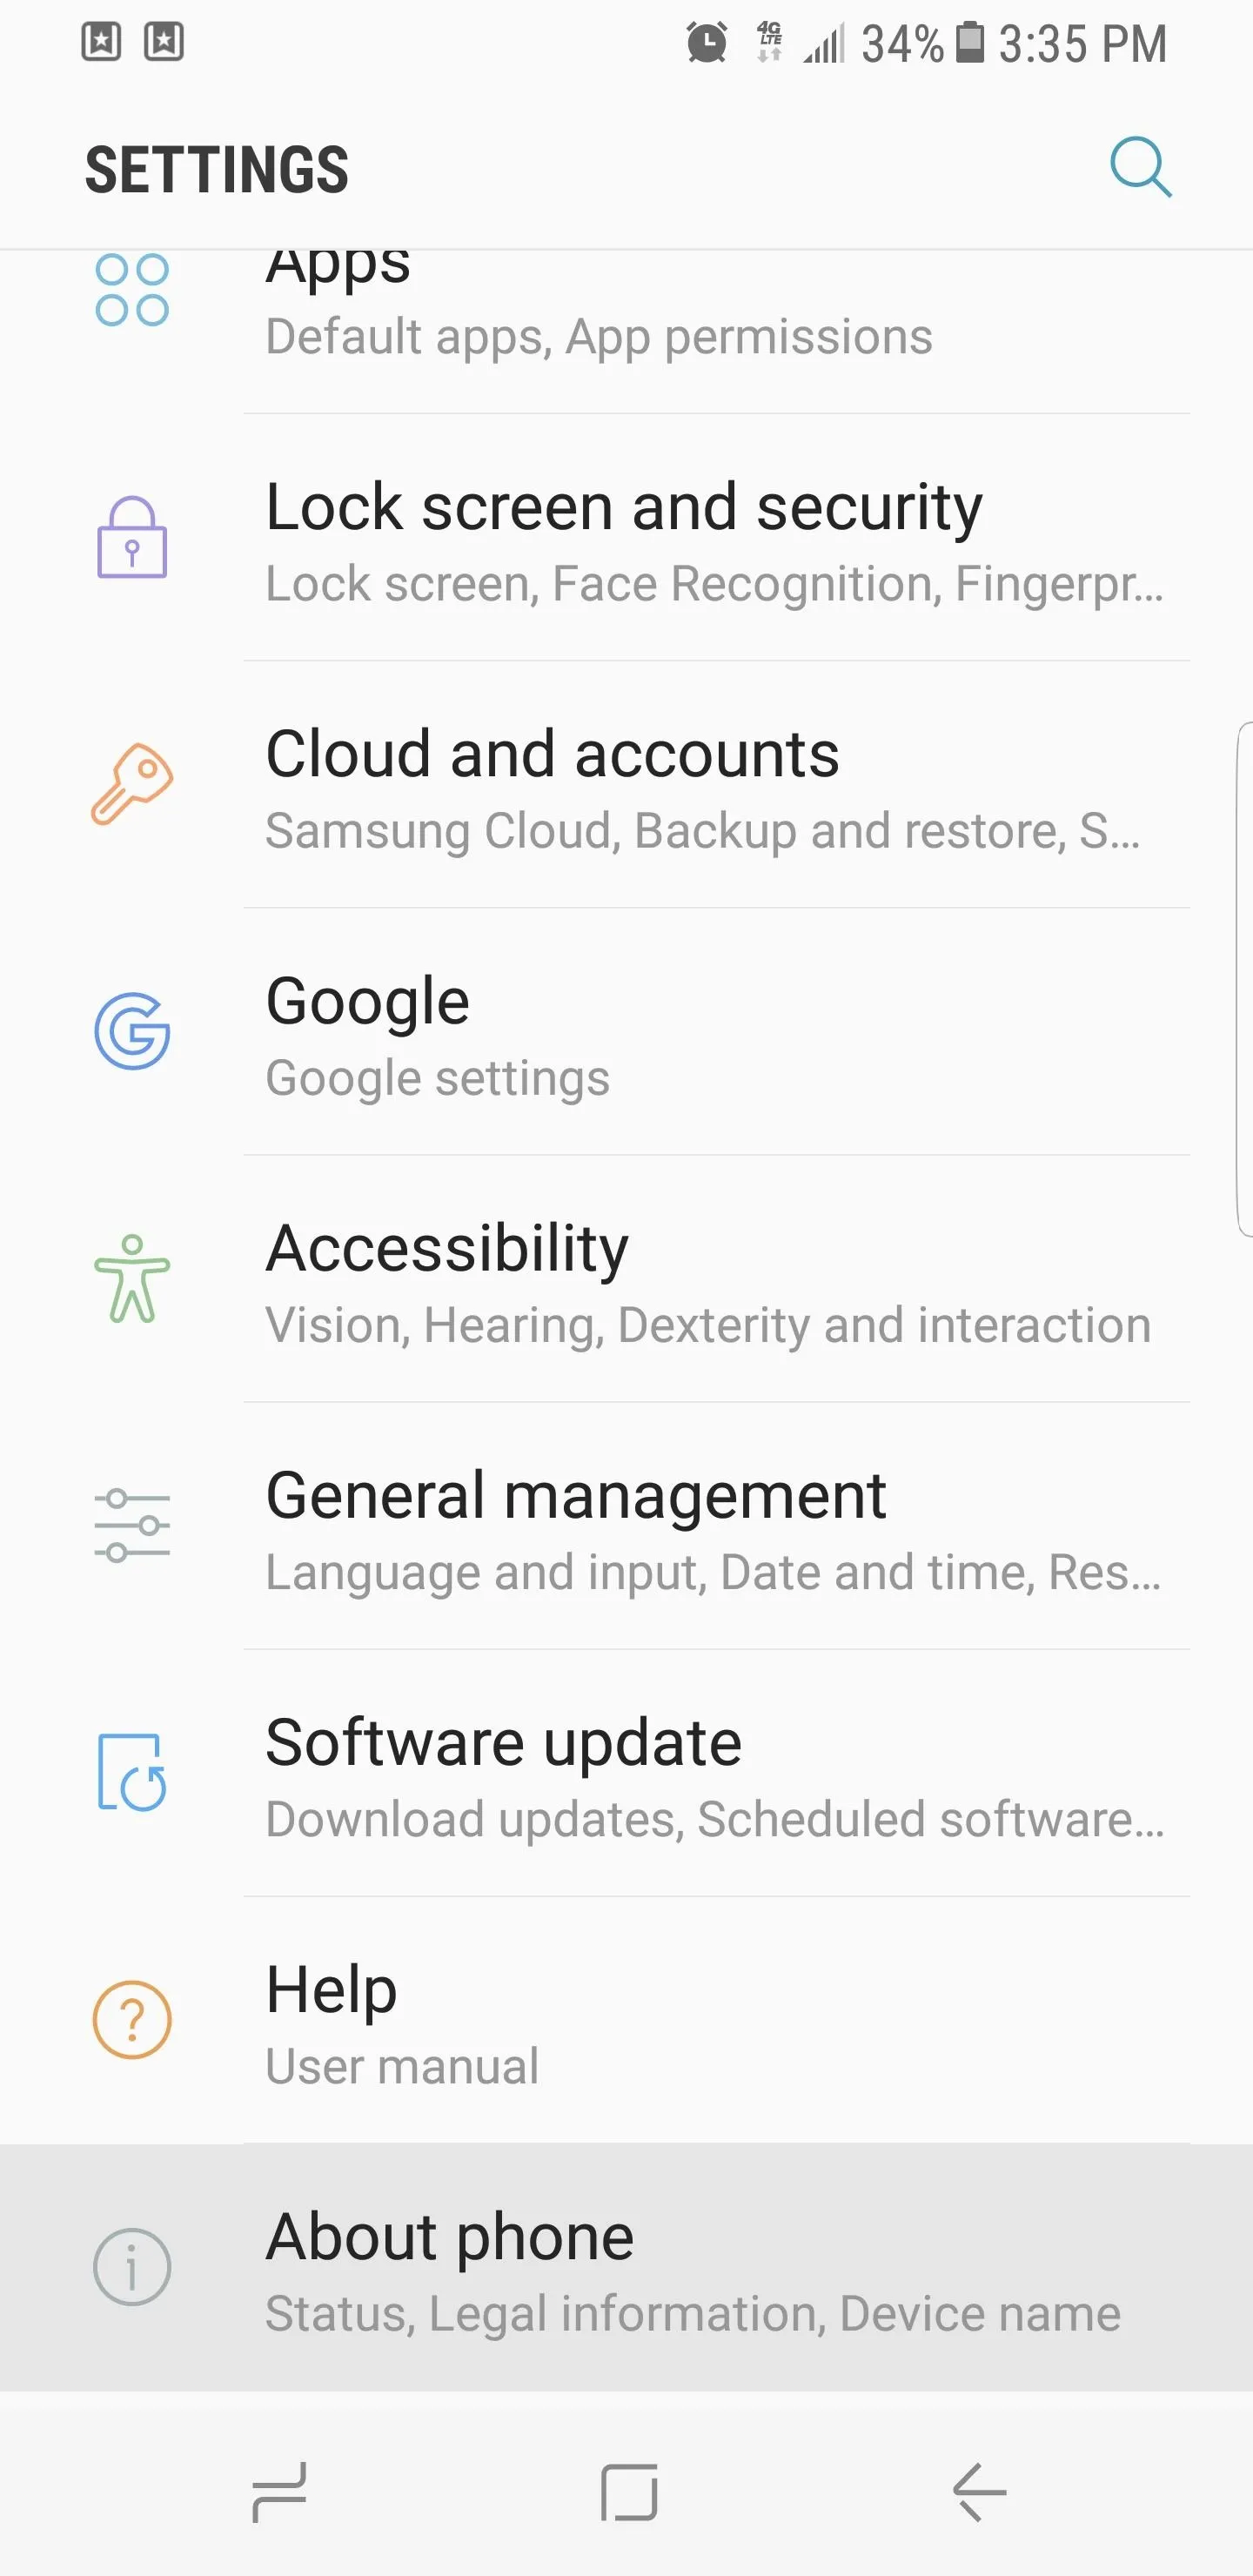


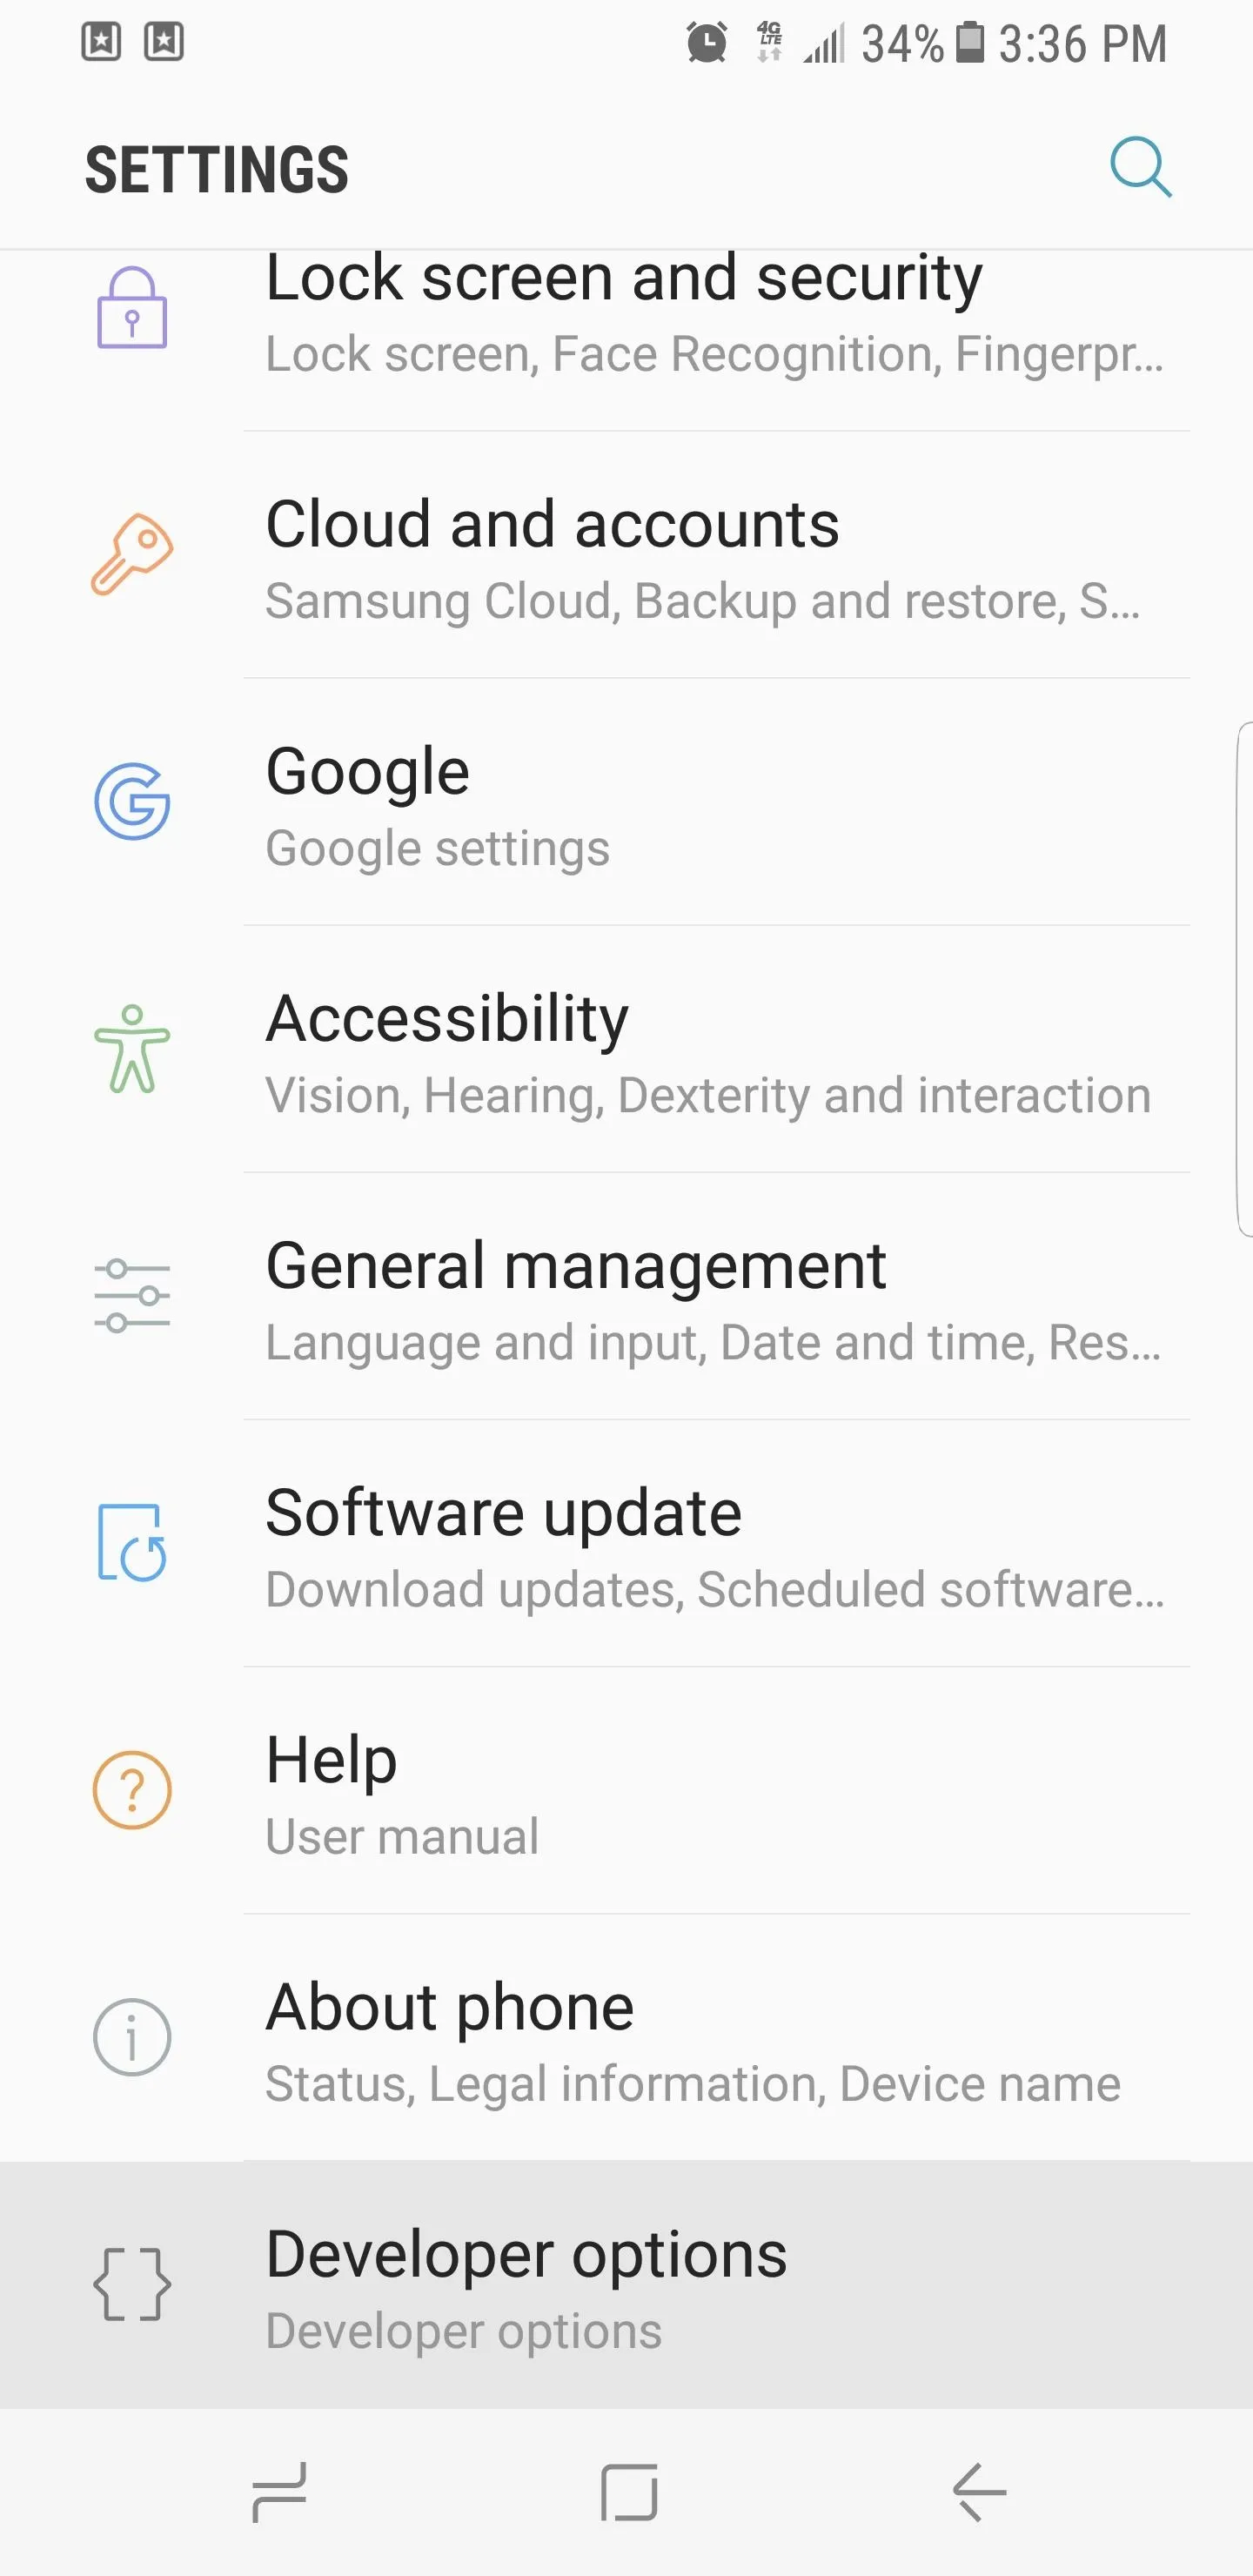
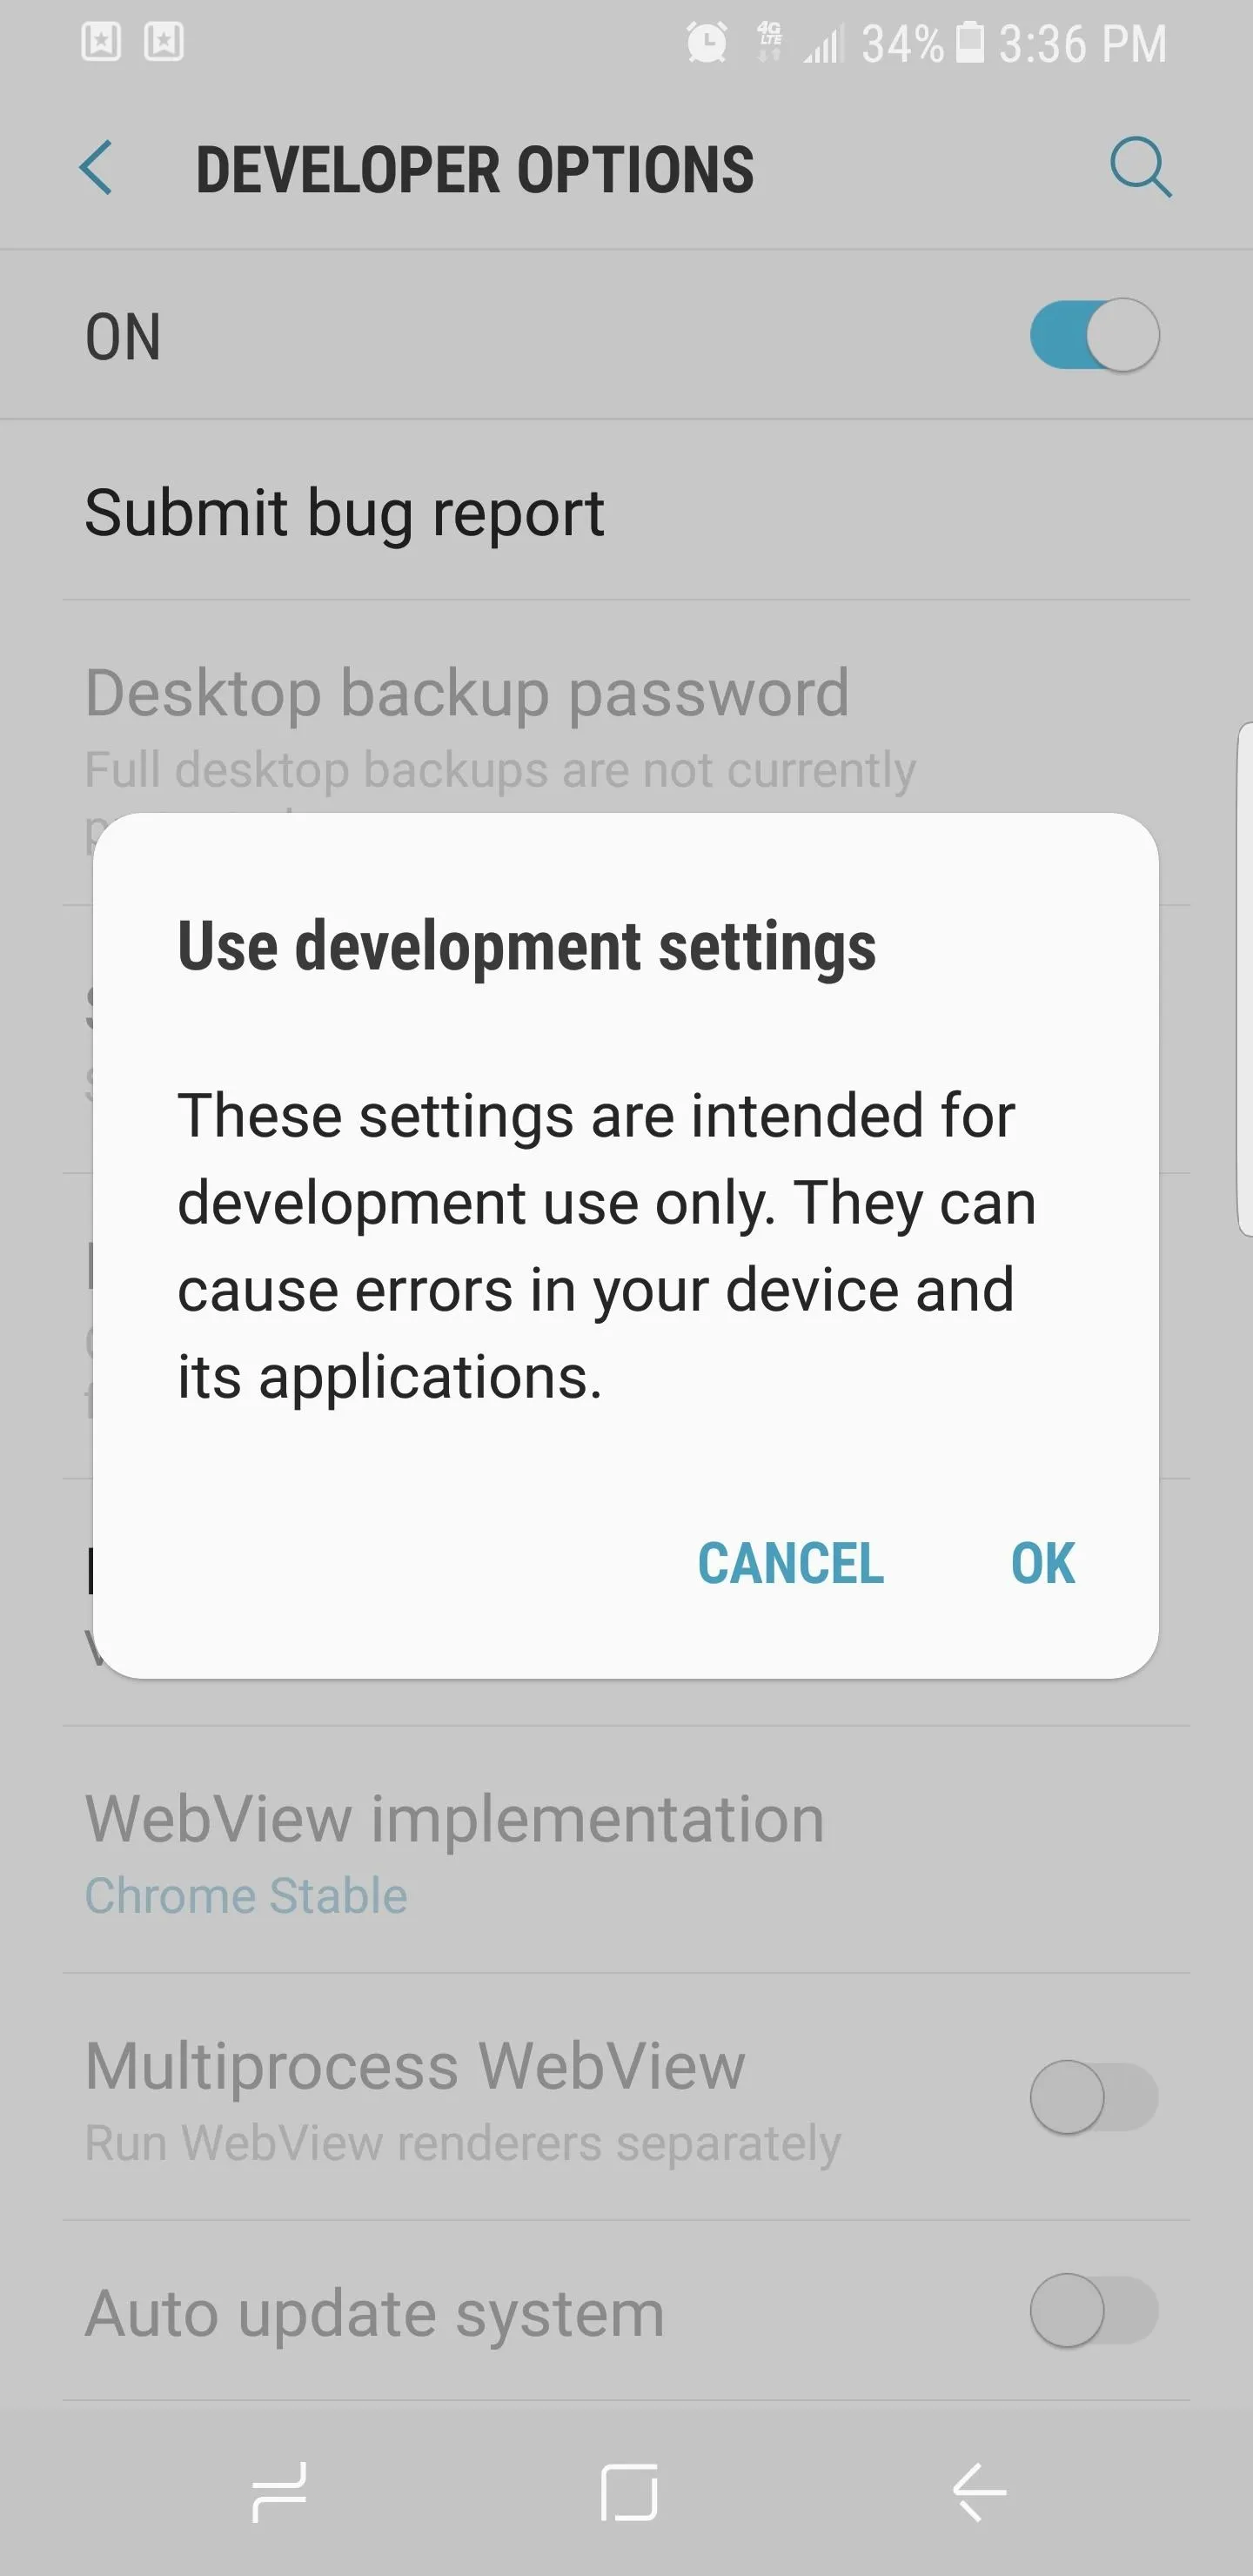
Next, go back to the main Settings page and select "Developer options" at the bottom of the list. Tap on the switch up top to toggle it on, and choose "OK" on the warning prompt to proceed. From there, scroll down and find the "Minimum width" option.
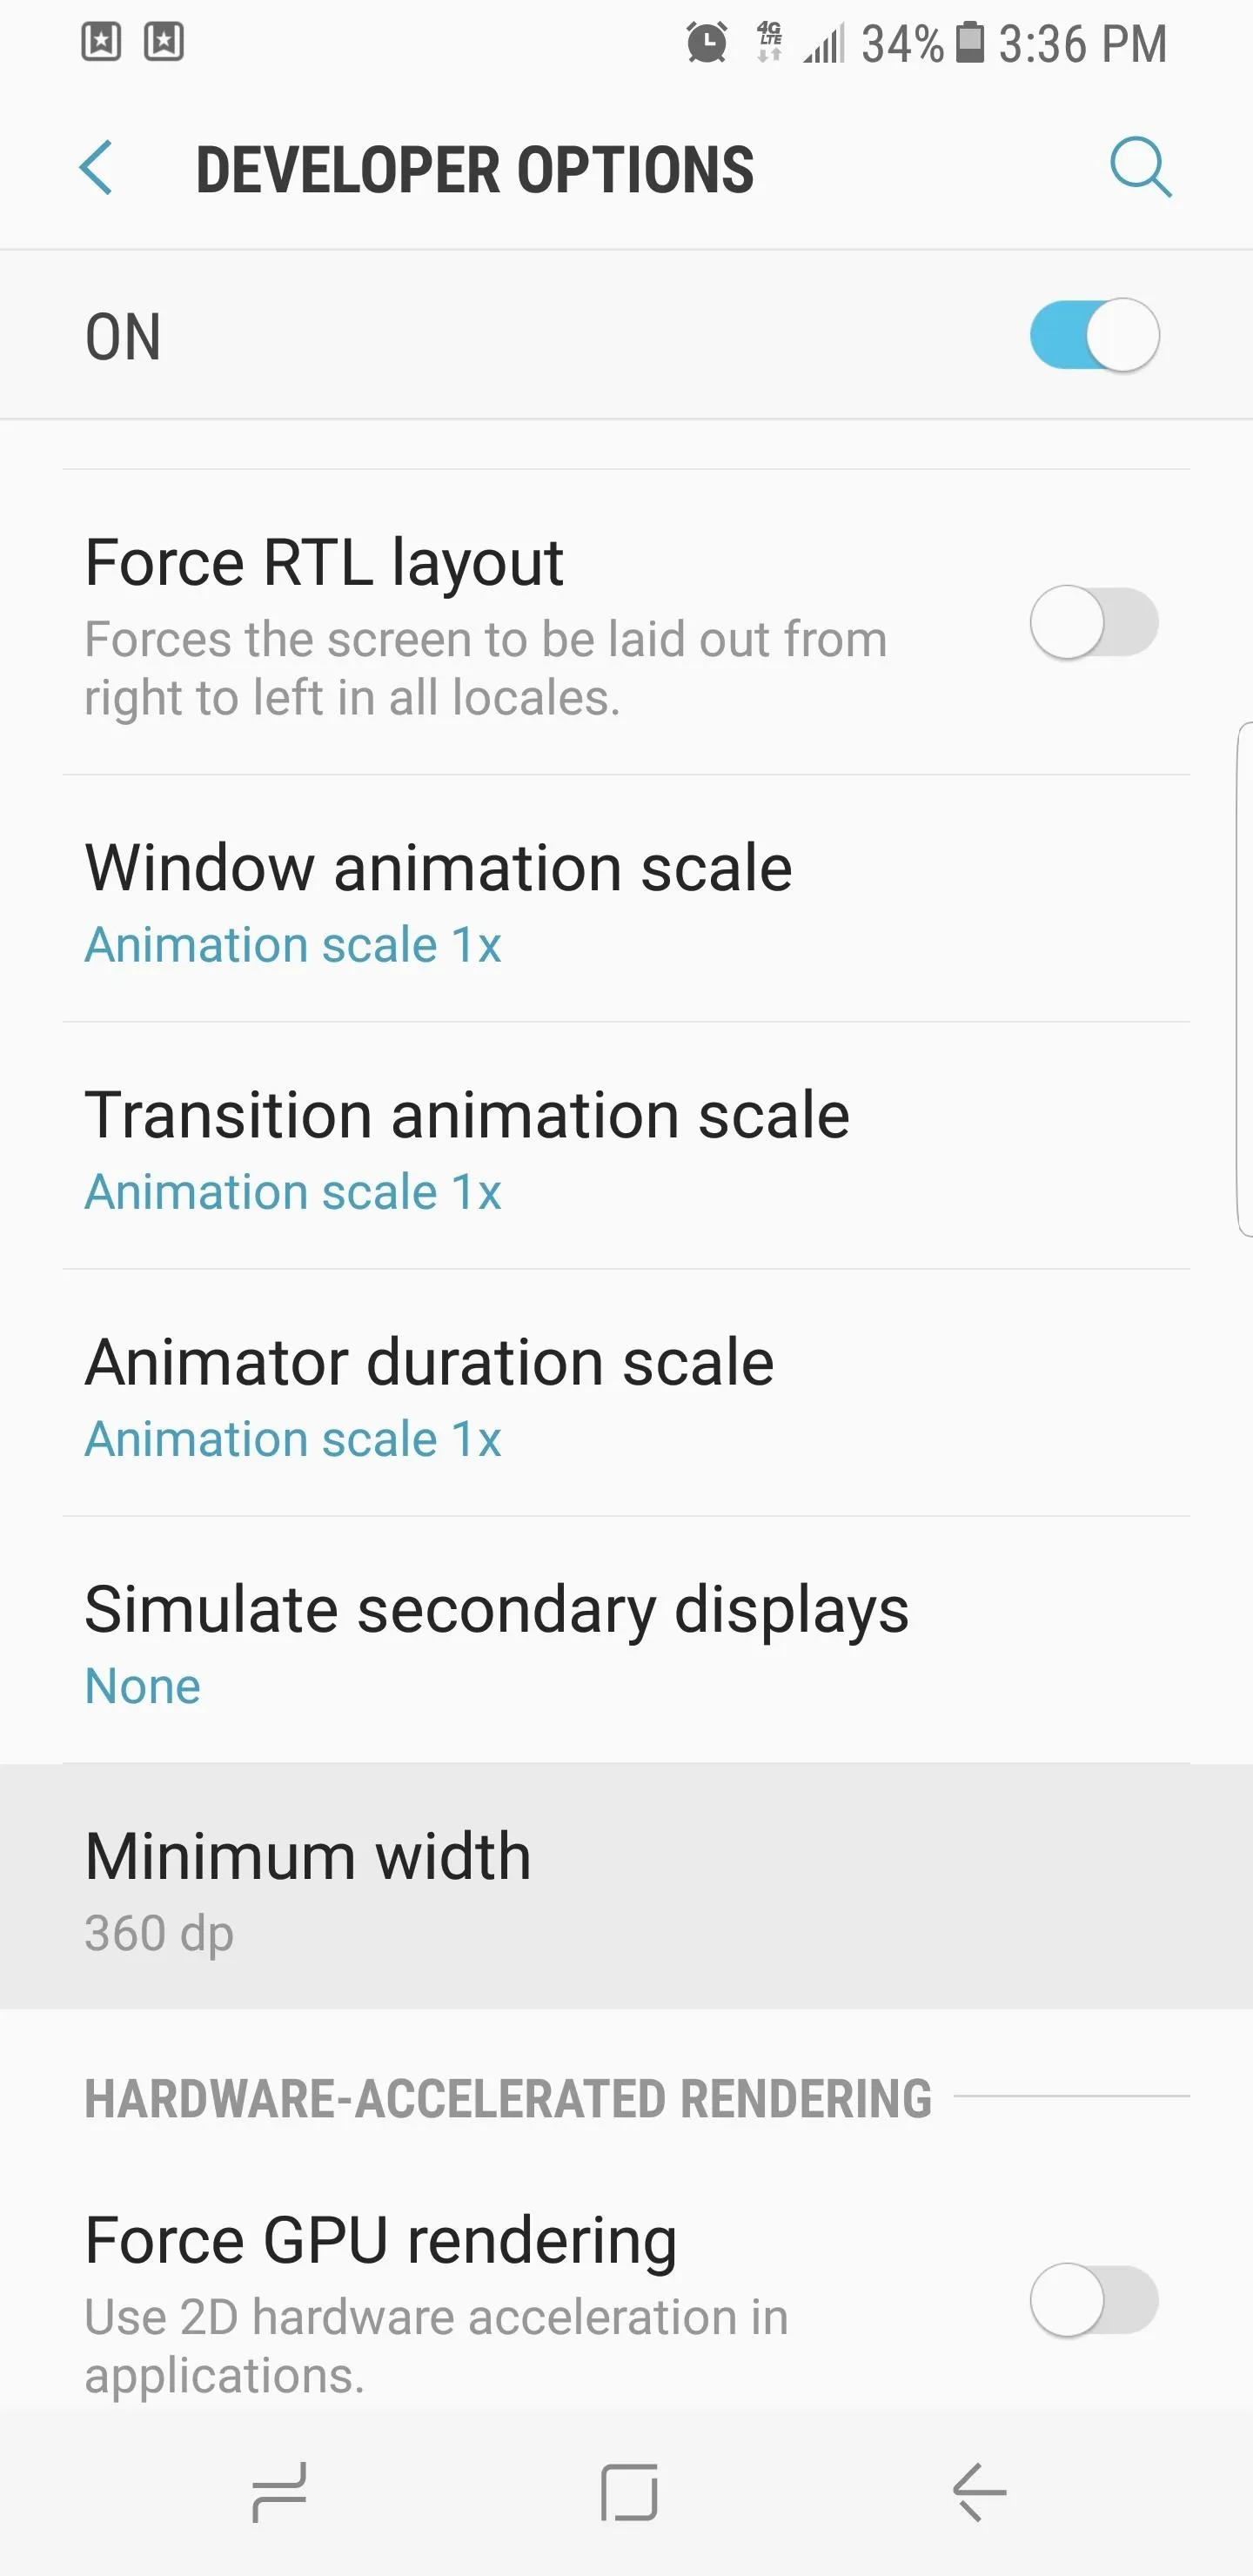


You're now free to tap on the "Minimum width" option and enter a number to adjust the size of the content shown on your display. The Galaxy S8 and S8+ have stock values of 360 and 411, respectively. Decreasing the value will give you larger icons and make text easier to read, while increasing it will make on-screen elements smaller and fit more content on the screen. Changes quickly take effect, making it relatively easy to experiment.

Minimum width set to 320 (left), 360 (middle), and 399 (right).


Minimum width set to 320 (left), 360 (middle), and 399 (right).


#10. Enhance Audio Quality with Adapt Sound
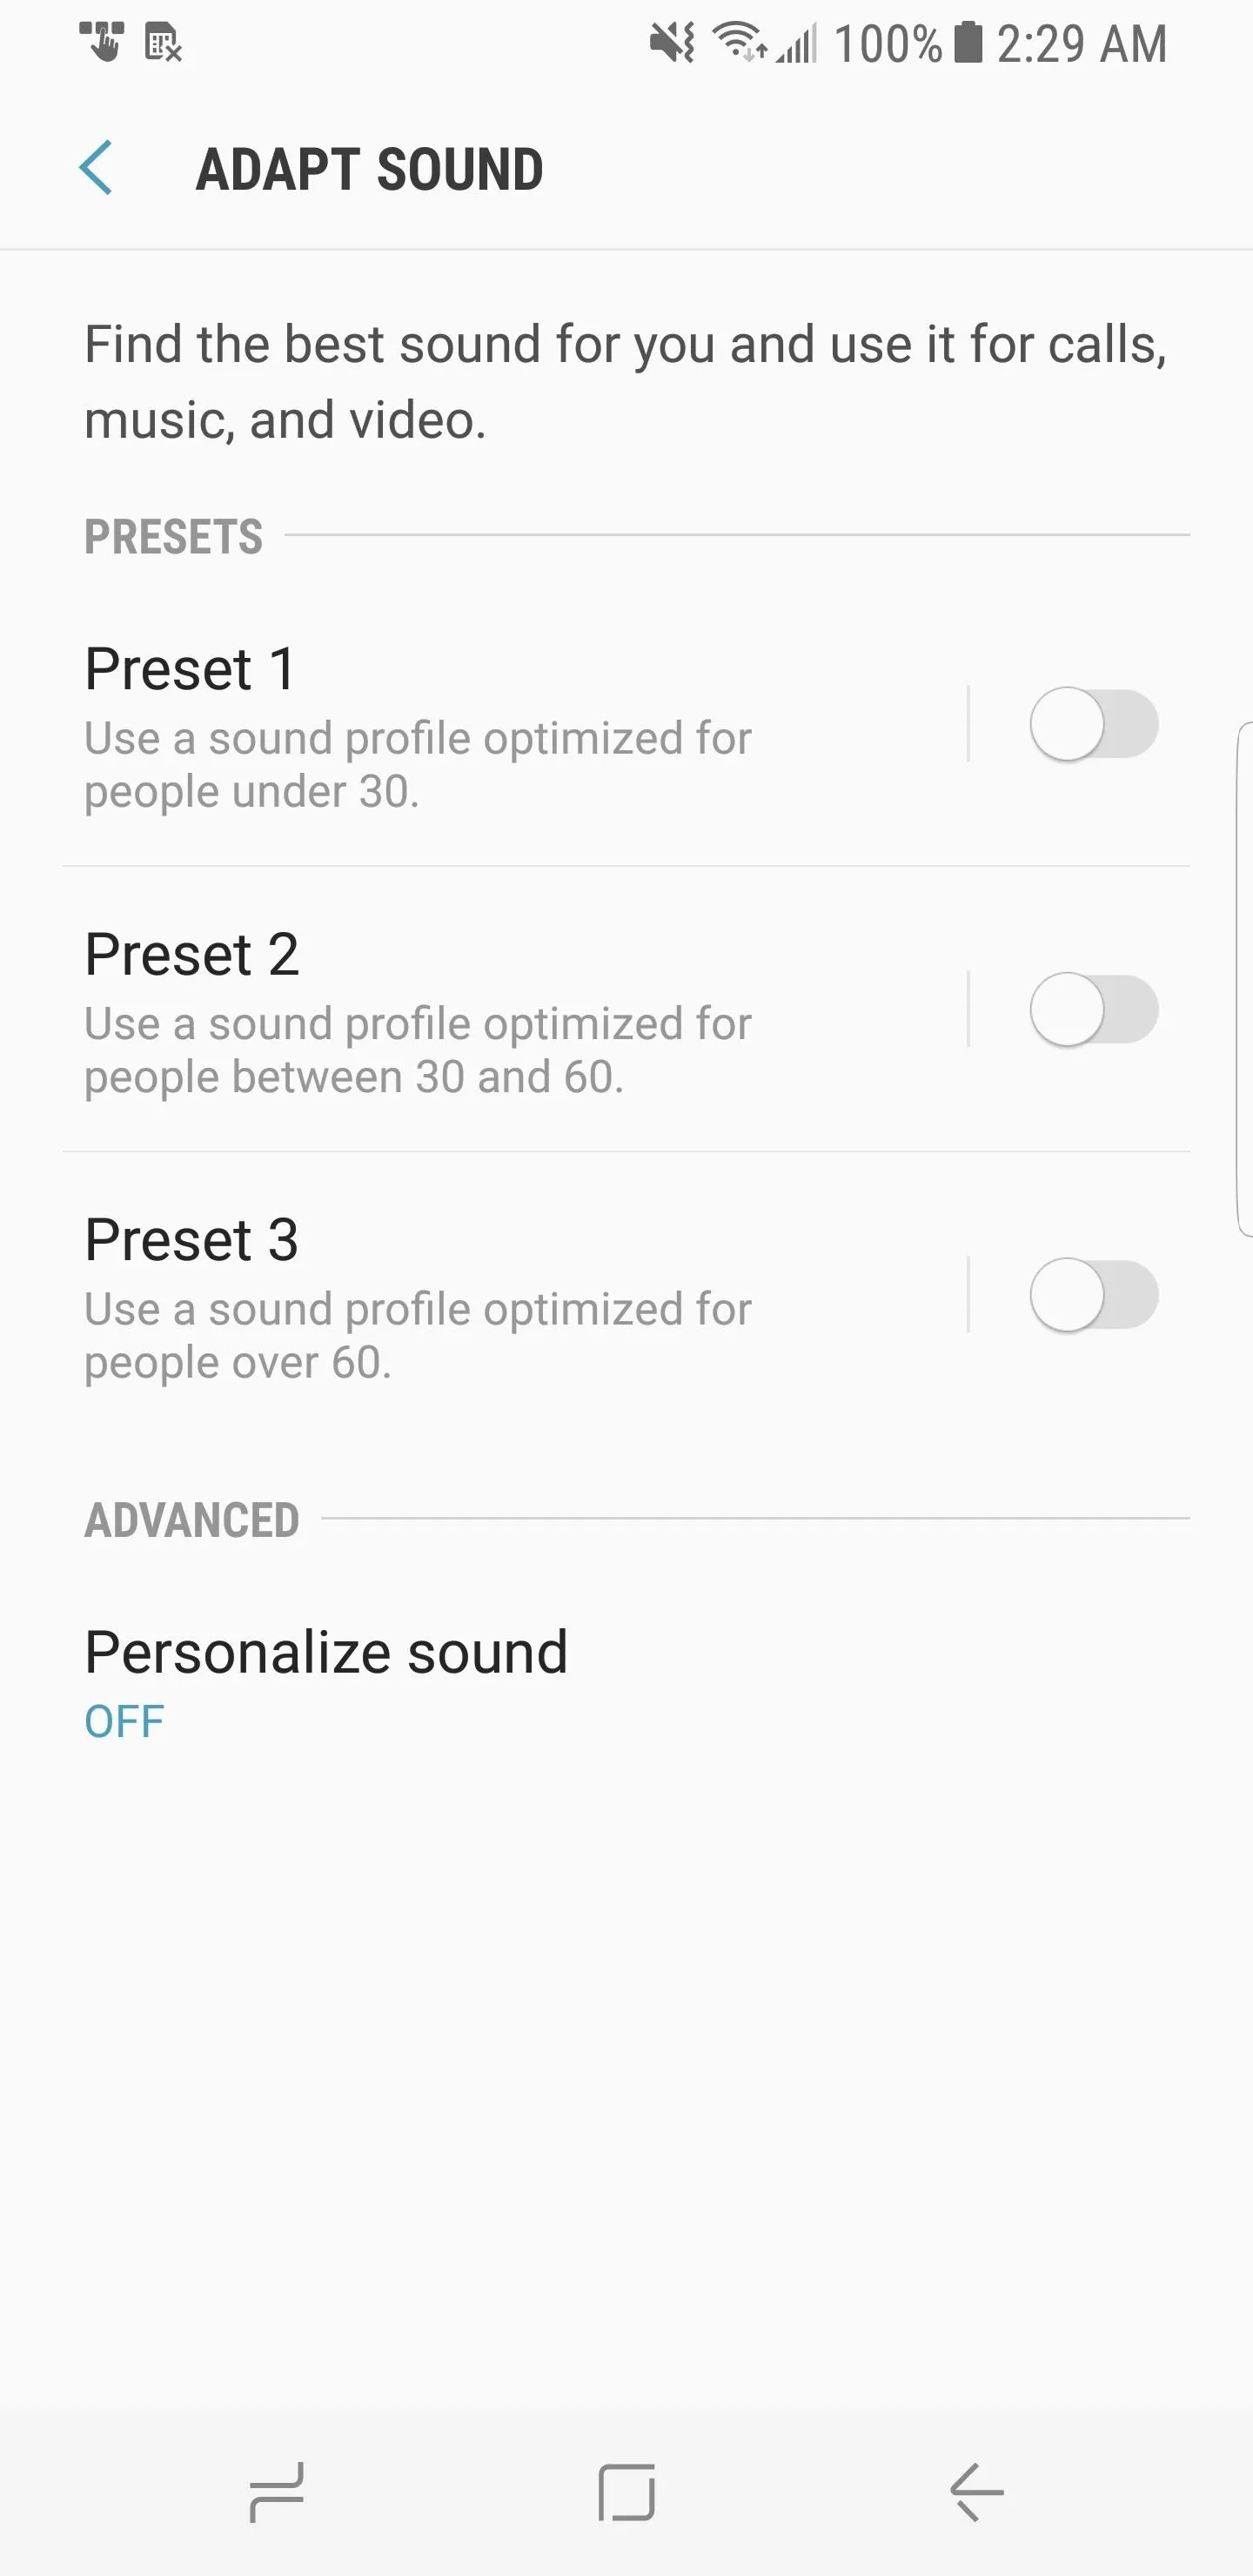
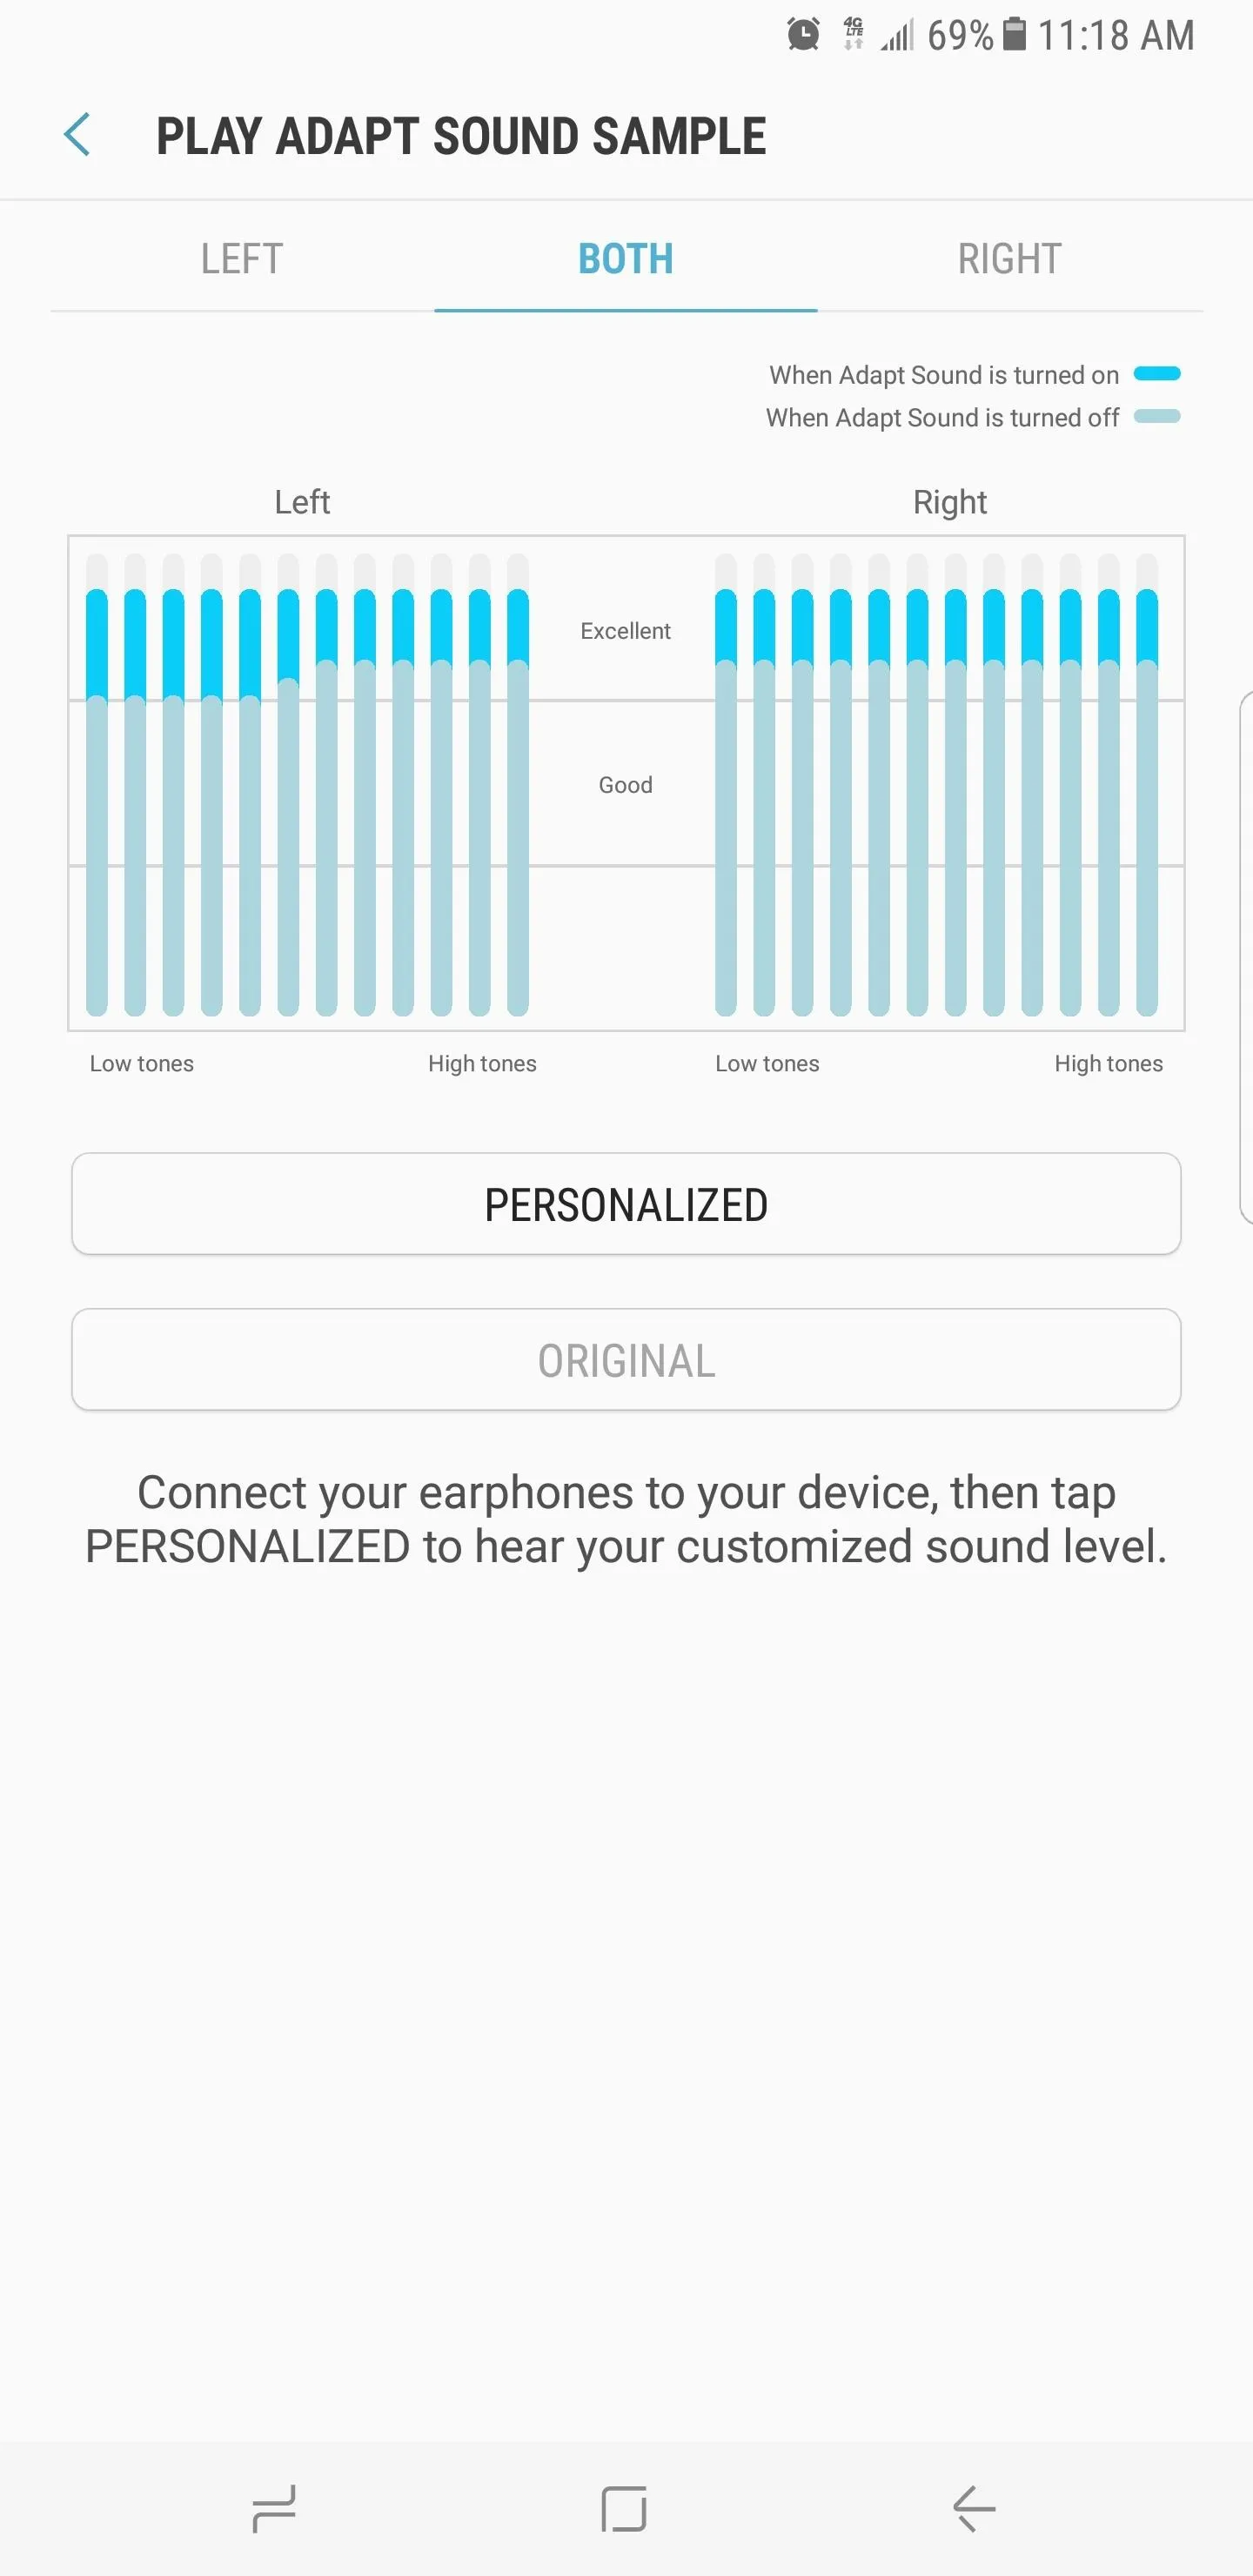
Adapt Sound is a hidden feature that basically runs a hearing test to provide a personalized sound profile that matches your hearing perfectly. Once you've run the test, the sound output from any set of headphones will be adjusted to fit you. With this feature enabled, you're guaranteed a tailor-made audio experience that'll help you get the most out of your Galaxy S8's premium AKG earbuds.
To access this hidden gem, you'll first need to head to your phone's main Settings menu. Tap on "Sounds and vibration," then scroll down and select "Sound quality and effects" near the bottom of the menu. From there, select "Adapt Sound," then follow the prompts to test your hearing and create a personalized sound profile.
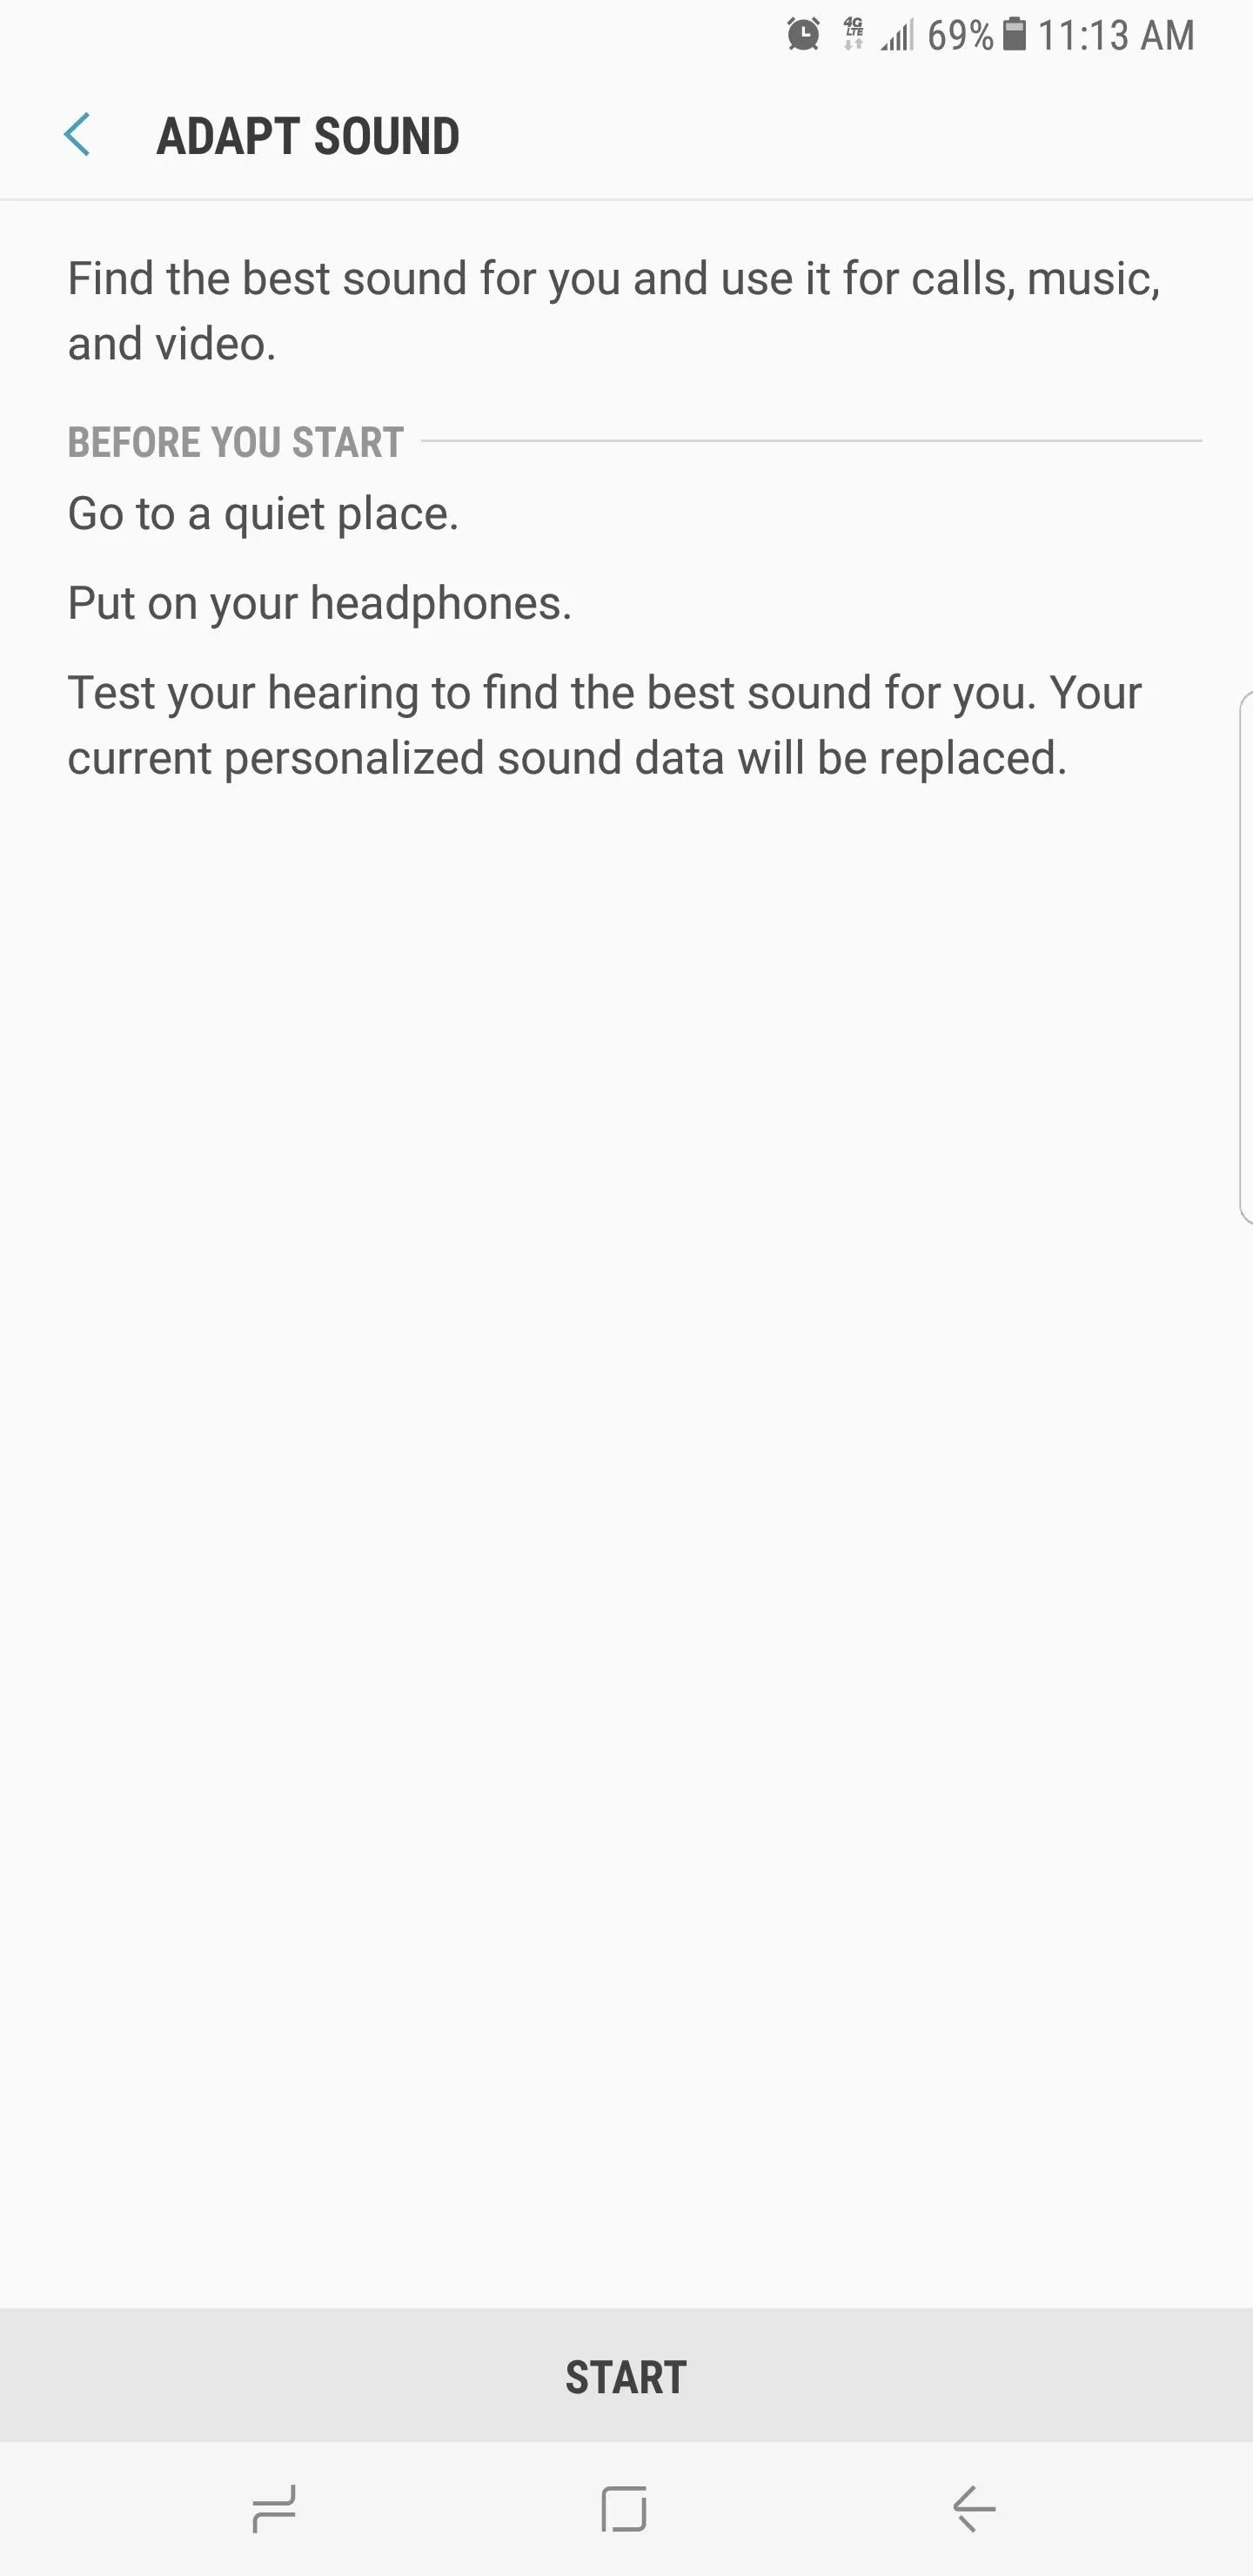
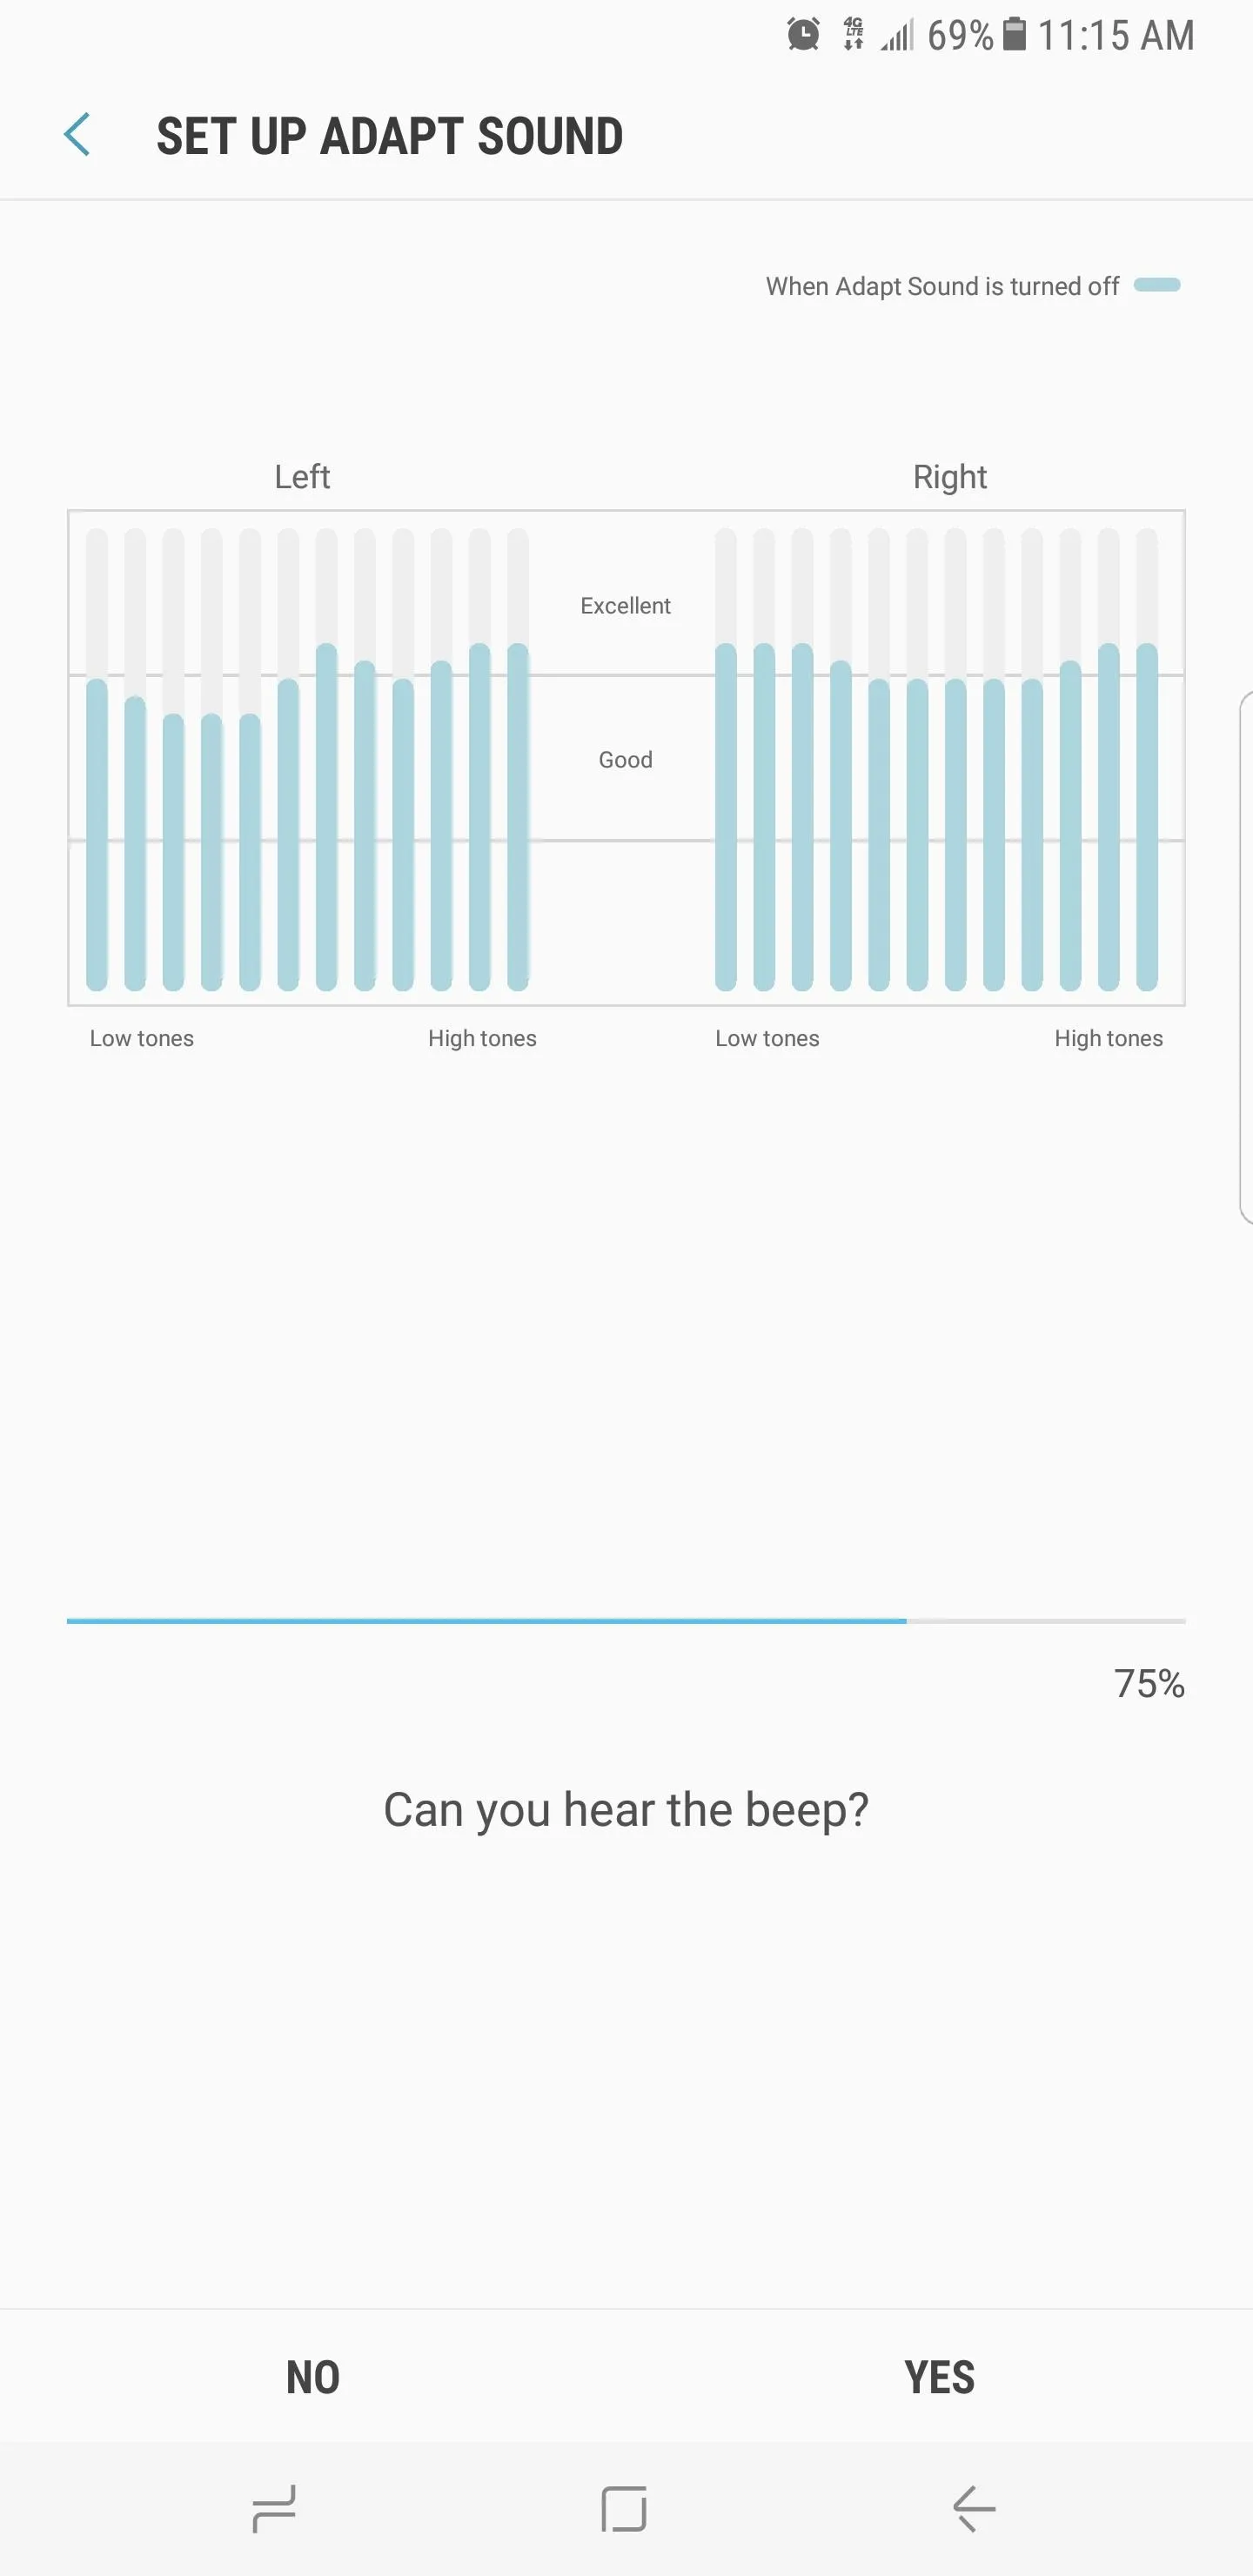


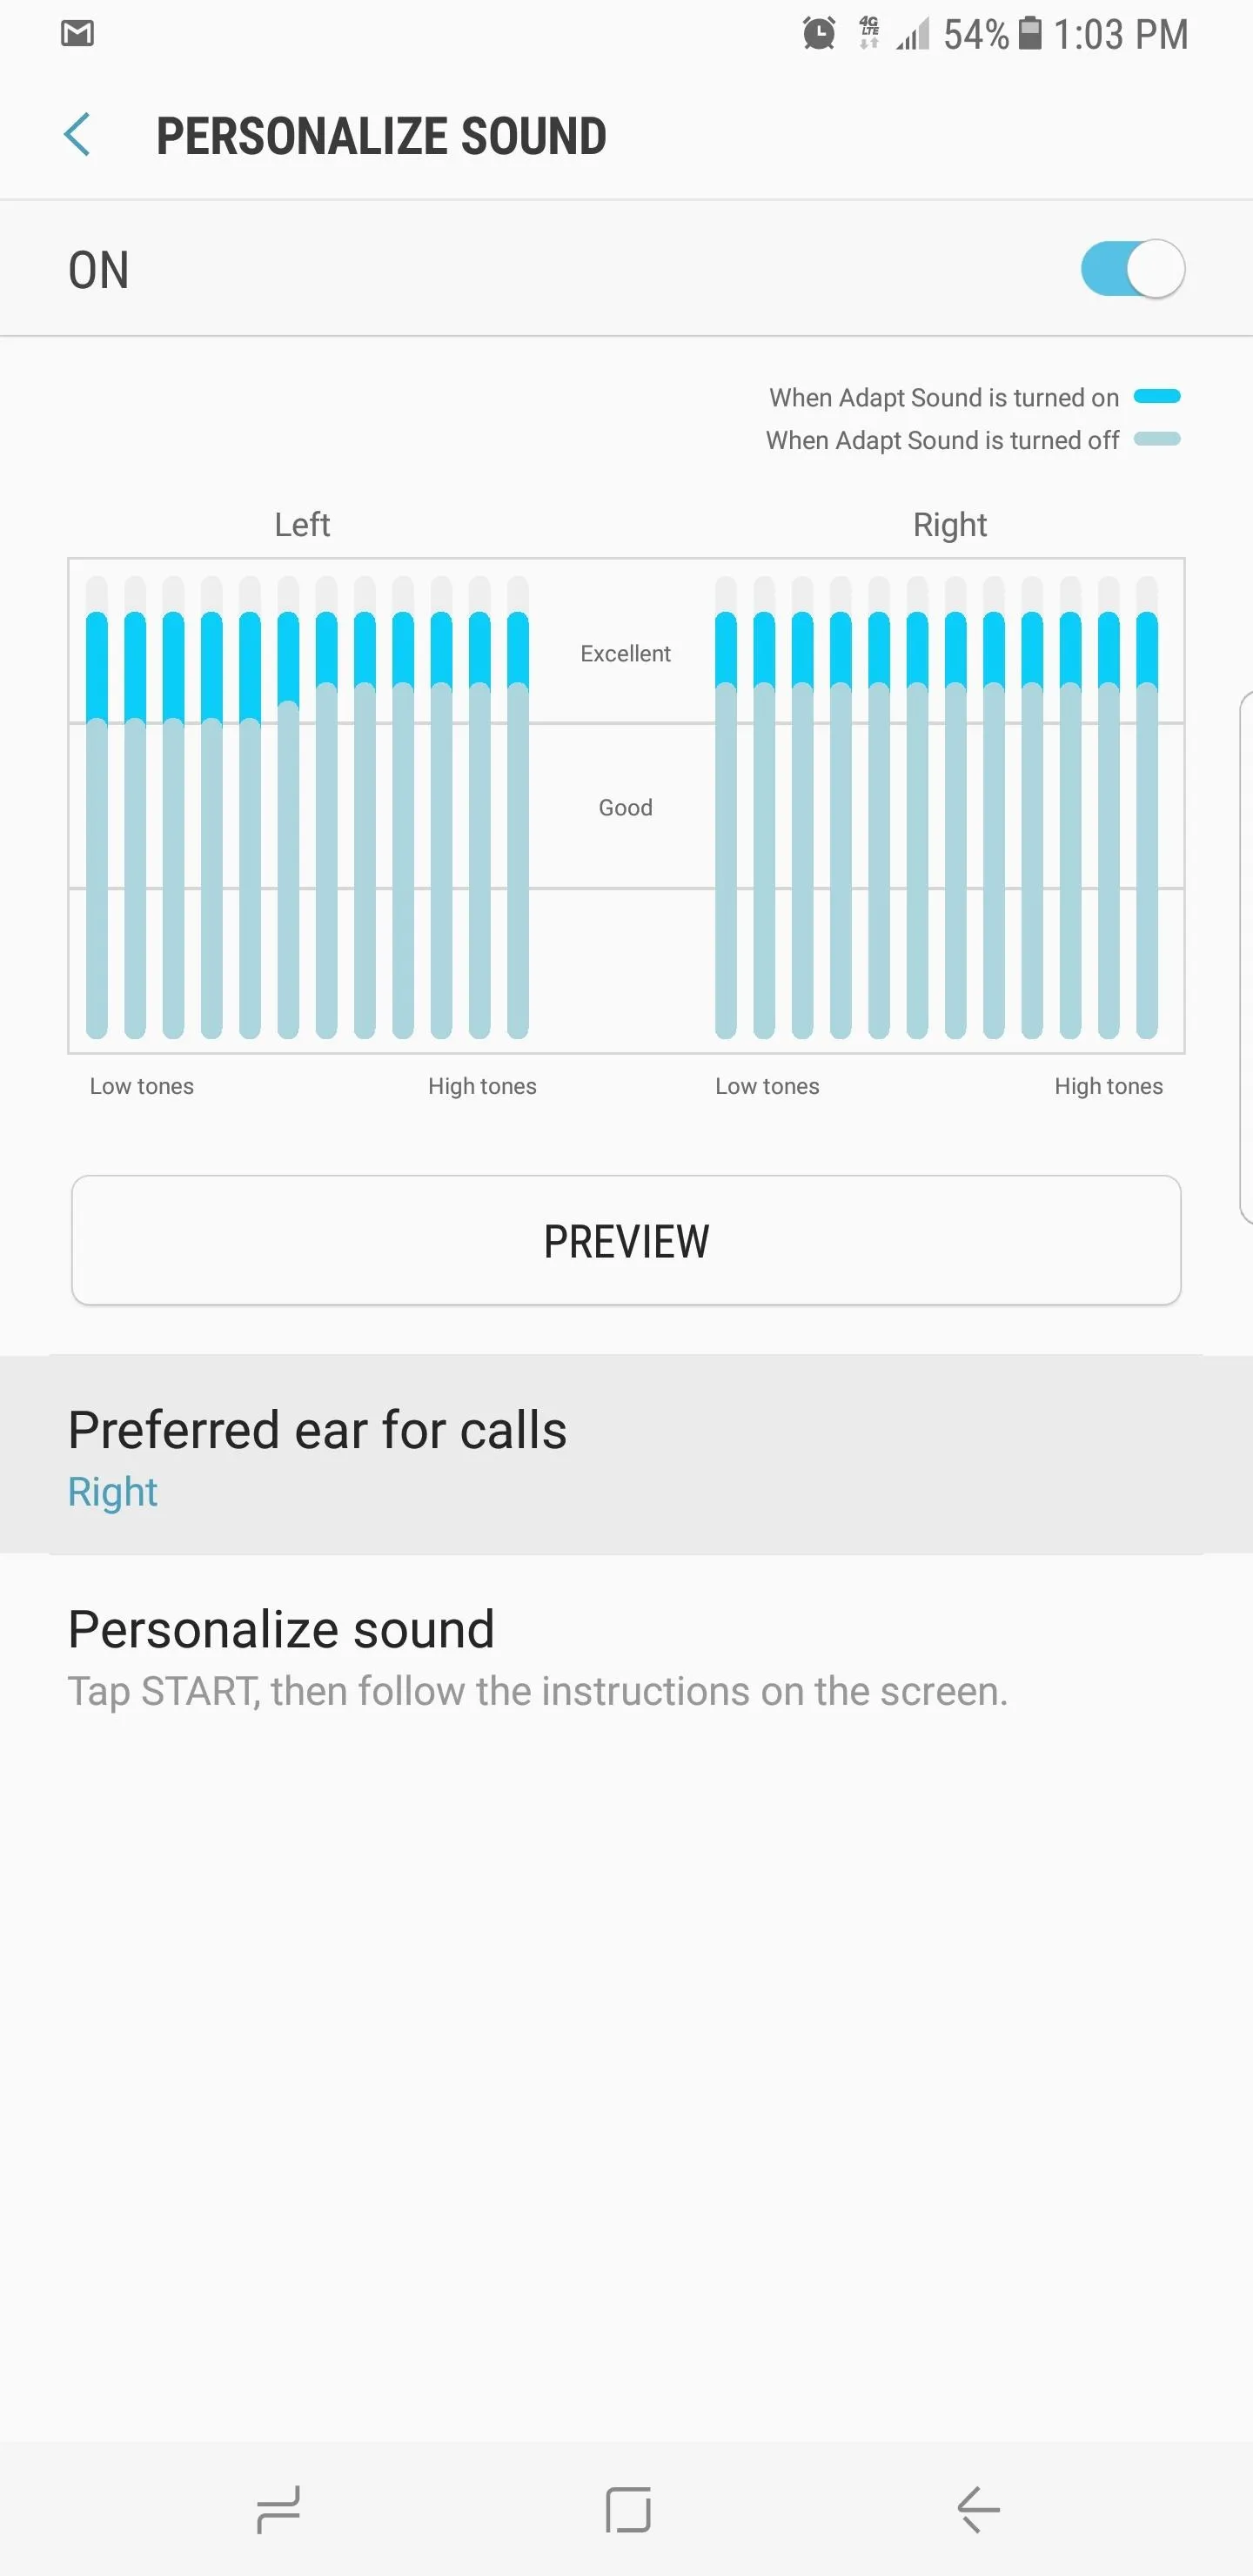
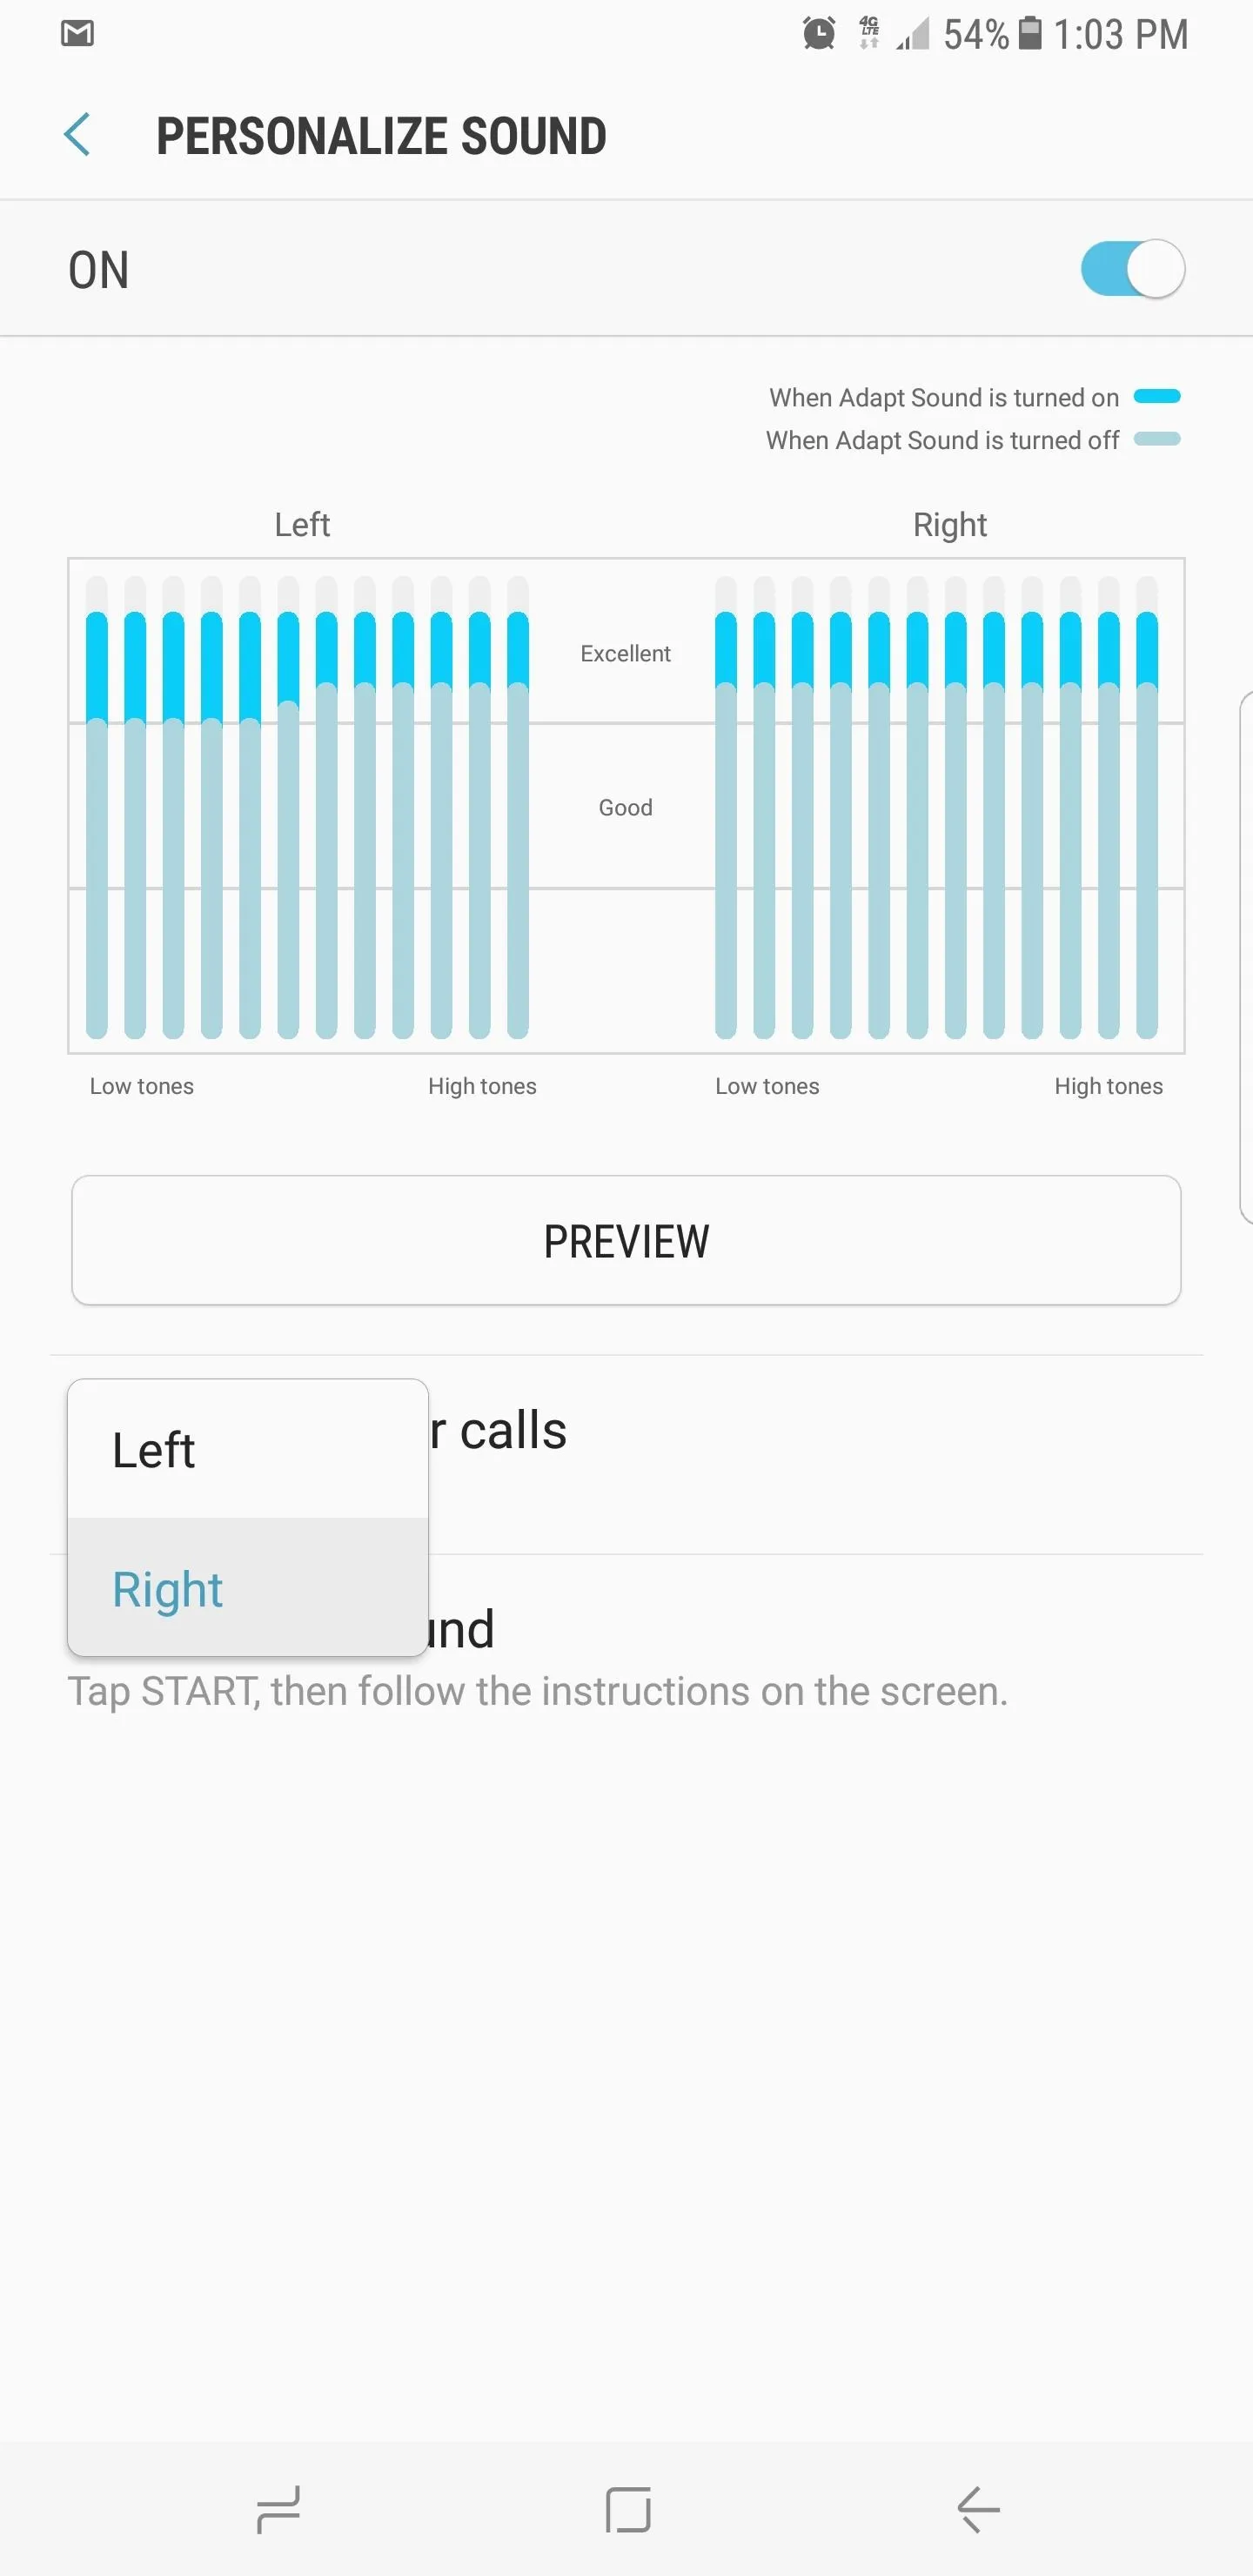
Upon completing the test, Adapt Sound will ask you to choose which ear you'd like to hear your phone calls in. Once you've decided, your newly created custom audio profile will be activated and made available for preview. So tap on "Preview" and check out the difference Adapt Sound makes by toggling between "Personalized" and "Original." For more information, don't miss our full guide on the topic.


How are you liking the Samsung Galaxy S8 so far? As always, feel free join in the conversation and share your opinions, along with any other helpful tips concerning this epic flagship, by posting your thoughts and ideas in the comment section below!
- Follow Gadget Hacks on Facebook, Twitter, Google+, and YouTube
- Follow Android Hacks on Facebook, Twitter, and Pinterest
- Follow WonderHowTo on Facebook, Twitter, Pinterest, and Google+
Cover image by Aaron Yoo/Flickr, screenshots by Amboy Manalo/Gadget Hacks









Comments
Be the first, drop a comment!