


TWRP is the premiere custom recovery for Android because of how many devices it supports and how simple it is to use. But installing it in the first place hasn't always been the easiest thing to do — until now. With the help of a Magisk module, you can finally use one Android device to flash TWRP on another.
Google removed Android's native ability to send ADB and Fastboot commands to other devices in an earlier version, but this mod brings that functionality back. Developers osm0sis and Surge1223 are the ones who made the magic happen, so big props to them for their work. The initial setup is the longest part of this whole thing, but once that's done, it's easy to maintain in the future.
What You'll Need
- One Android device that was rooted with Magisk (host phone)
- Another Android device with an unlockable bootloader (target phone)
- USB data cable or OTG adapter for connecting the devices
- The main rooted device should have USB OTG support
You will need two Android devices for this to work, and one should already be rooted. The already-rooted device takes the place of the computer in this instance.
Install ADB & Fastboot for Android
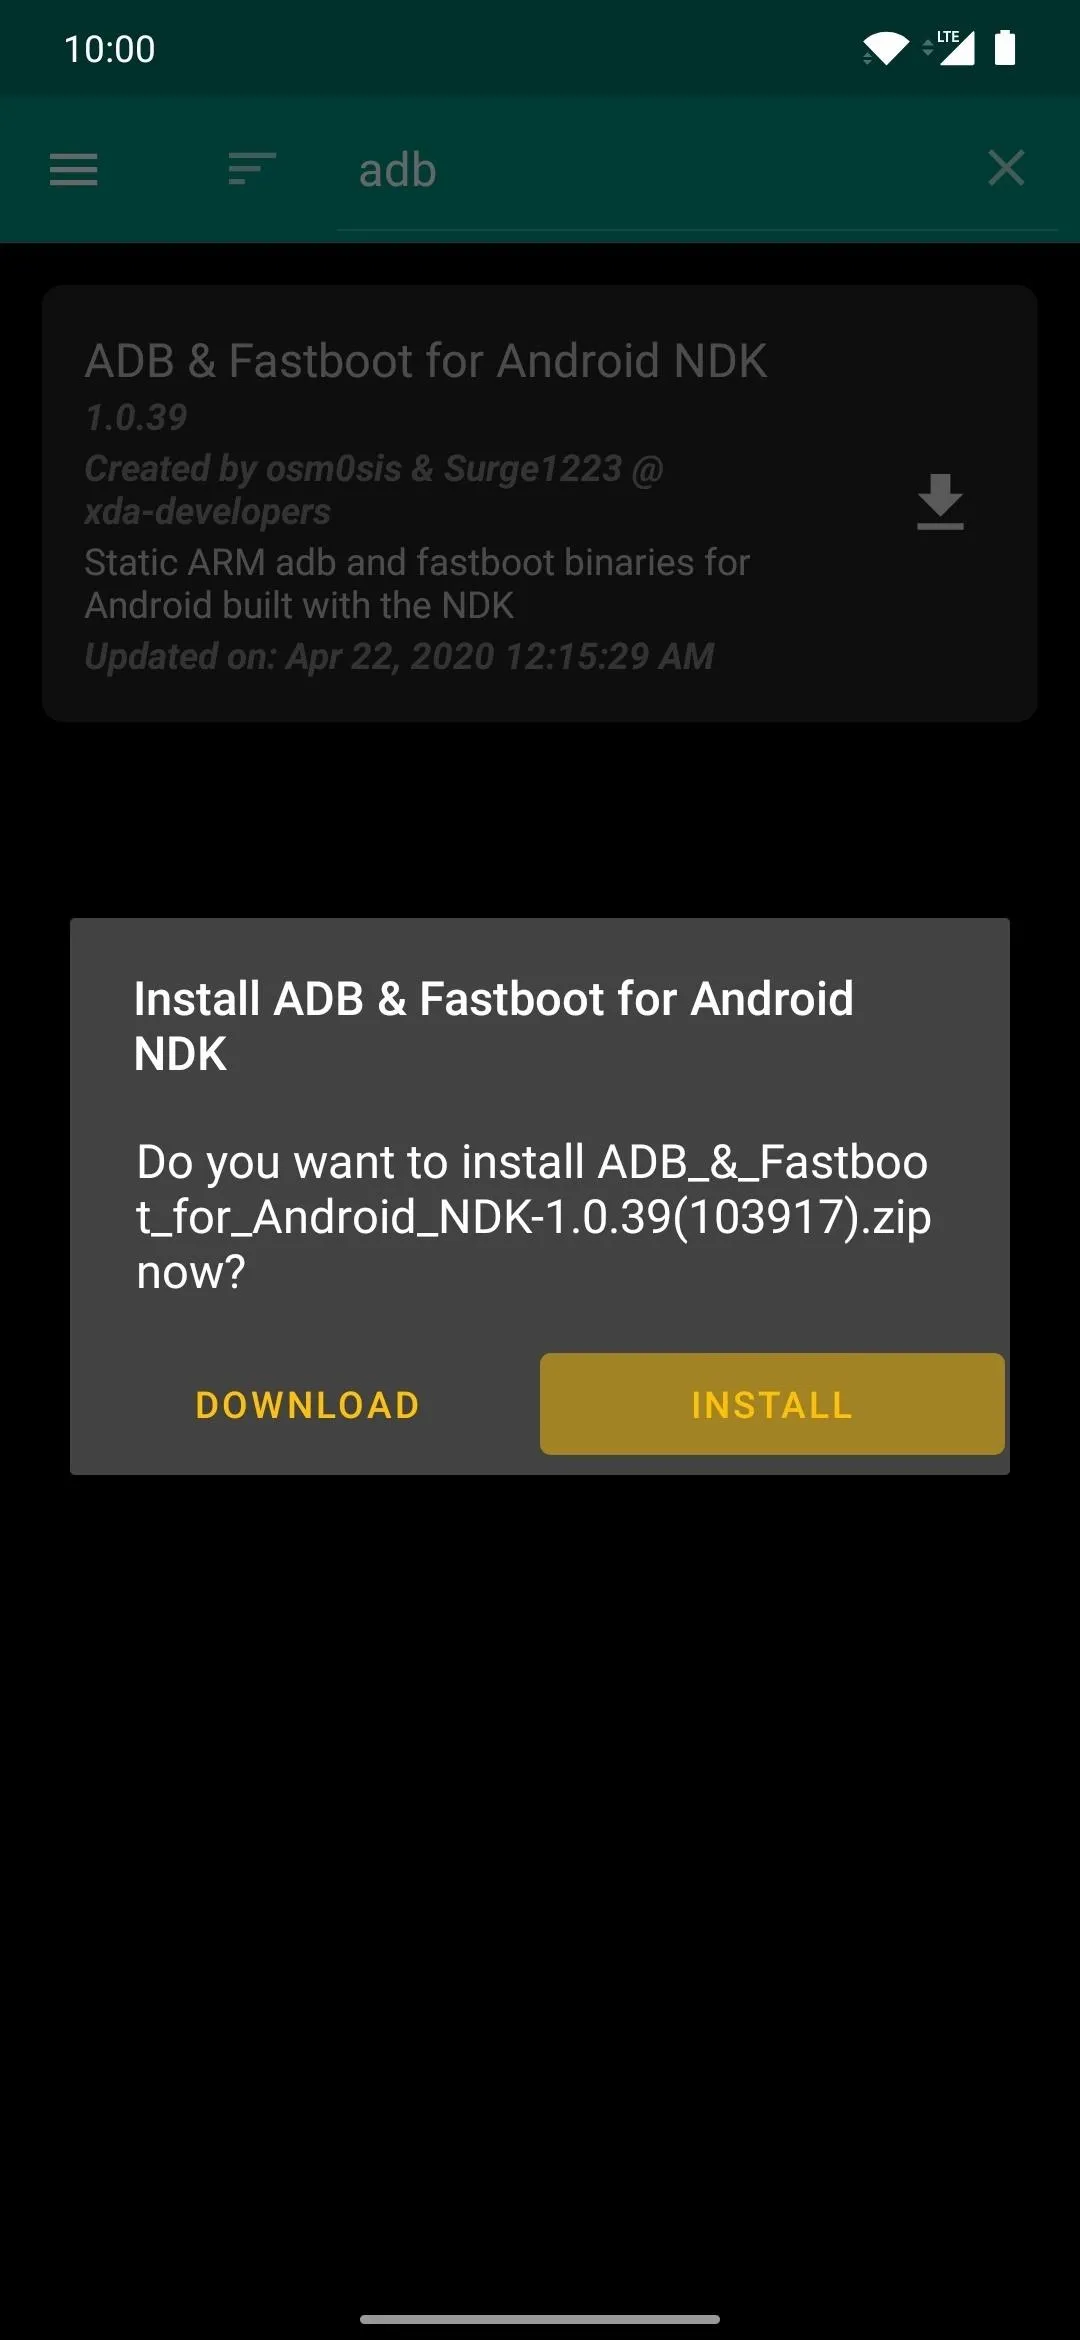
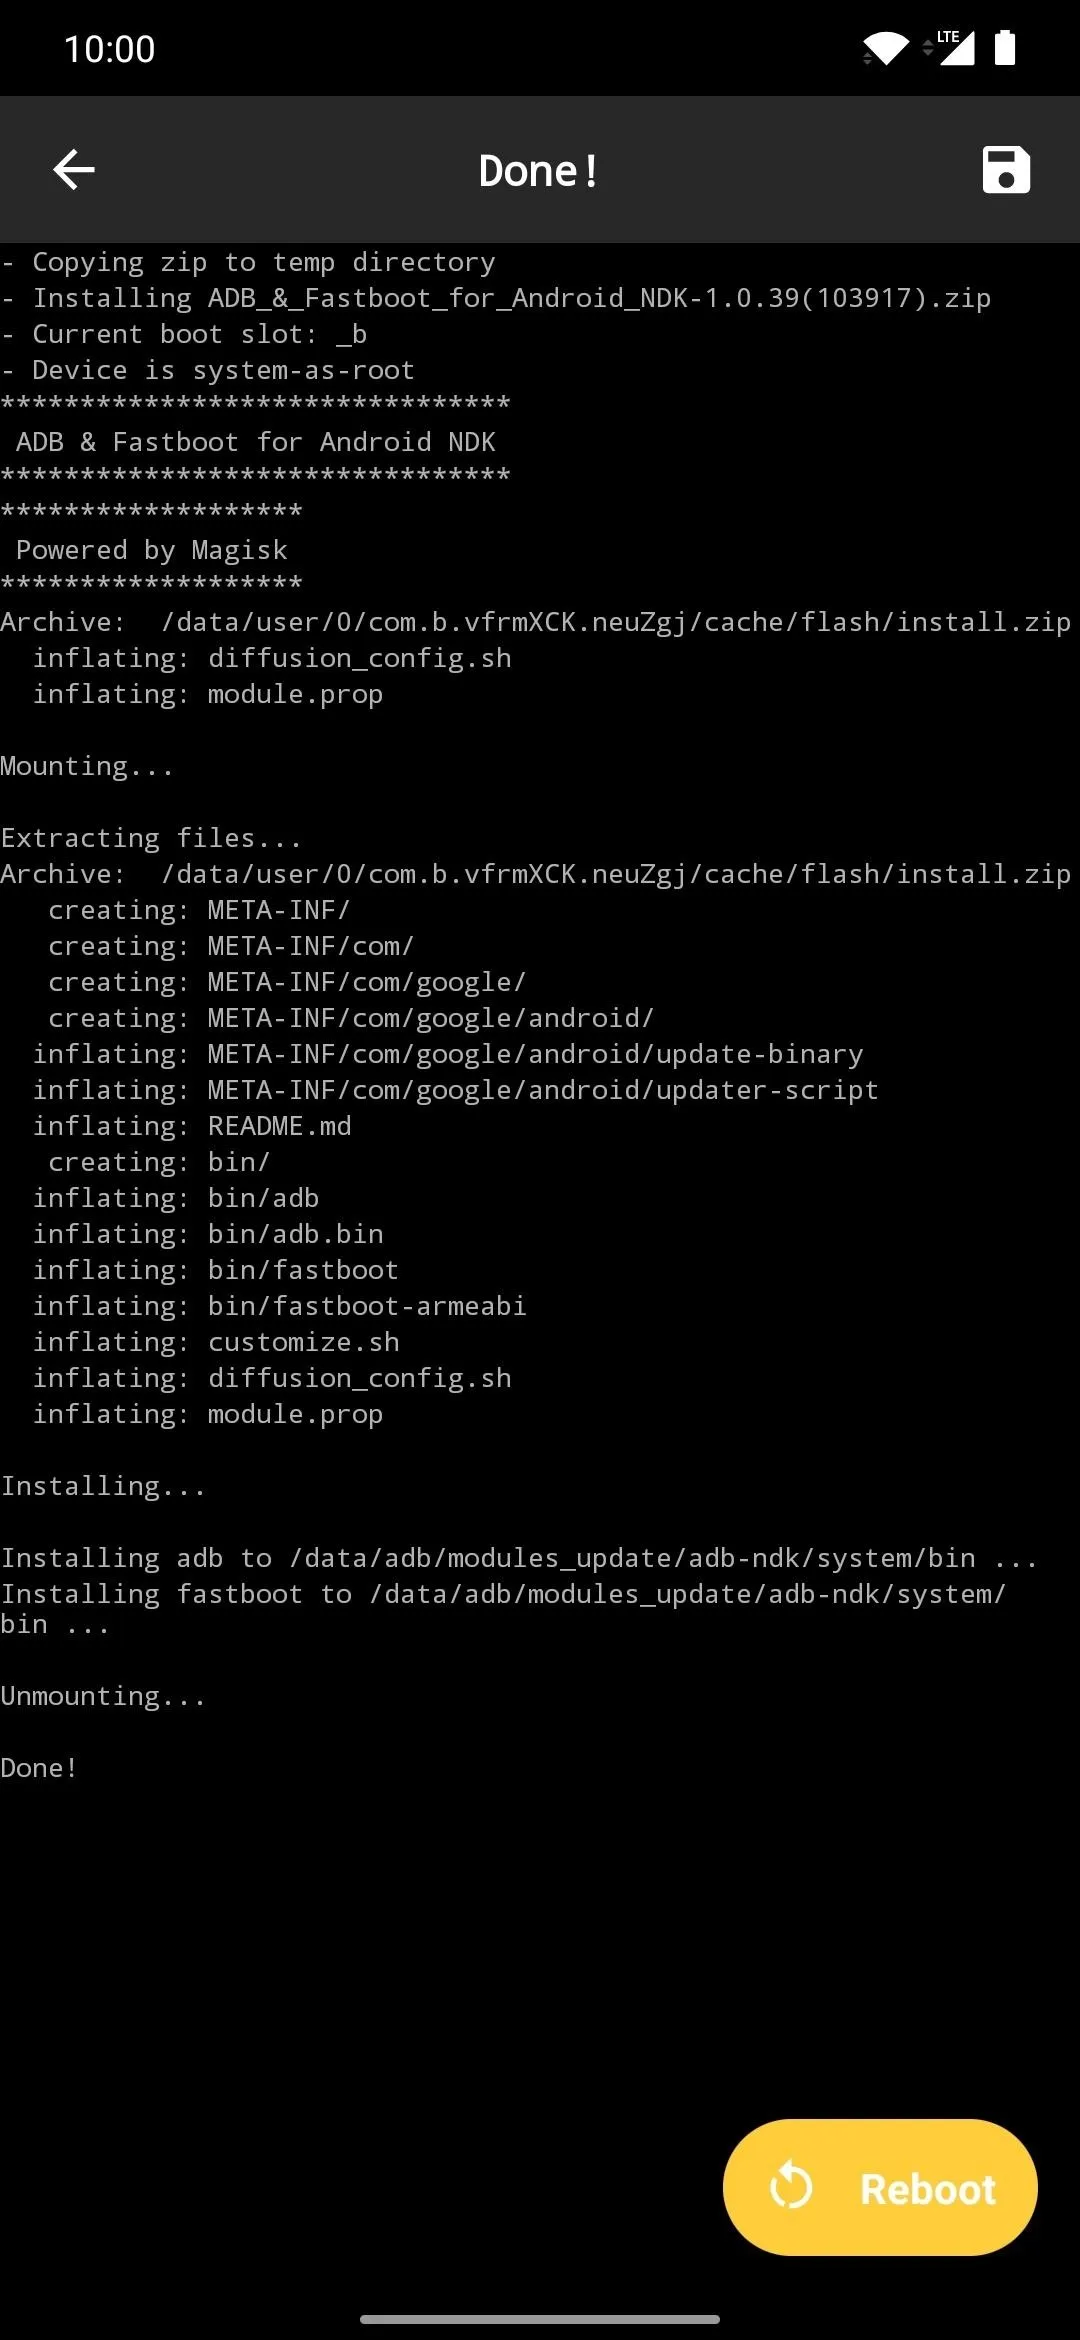
On the Android device with root access, open Magisk Manager, tap the menu on the left, then go to "Downloads." Tap the search icon, then type in "adb" to locate the ADB & Fastboot for Android NDK module. Tap the download arrow, hit "Install," then tap the "Reboot" button to activate the module.

Download TWRP for Your Device
Now you need to grab the TWRP image file for the device you want to install the custom recovery onto. Grab your TWRP image from the link below and save it to the "Download" folder on both devices. Also, rename the file to "twrp" to make things easier for later on in the guide.
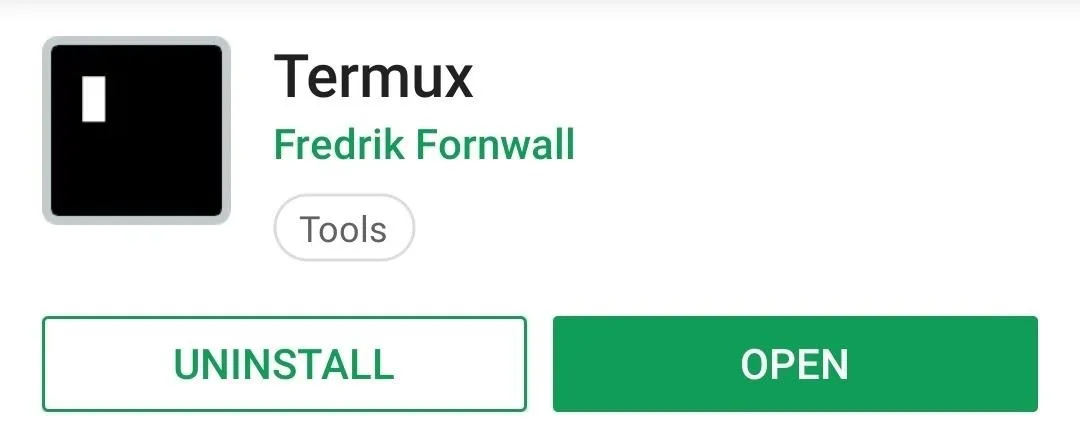
Install the Termux App
To make use of the Magisk module you installed from Step 1, you'll need to have a terminal app. Termux is one of the best such apps, so hit up the link below to get it installed on your already-rooted device.
- Play Store Link: Termux (free)
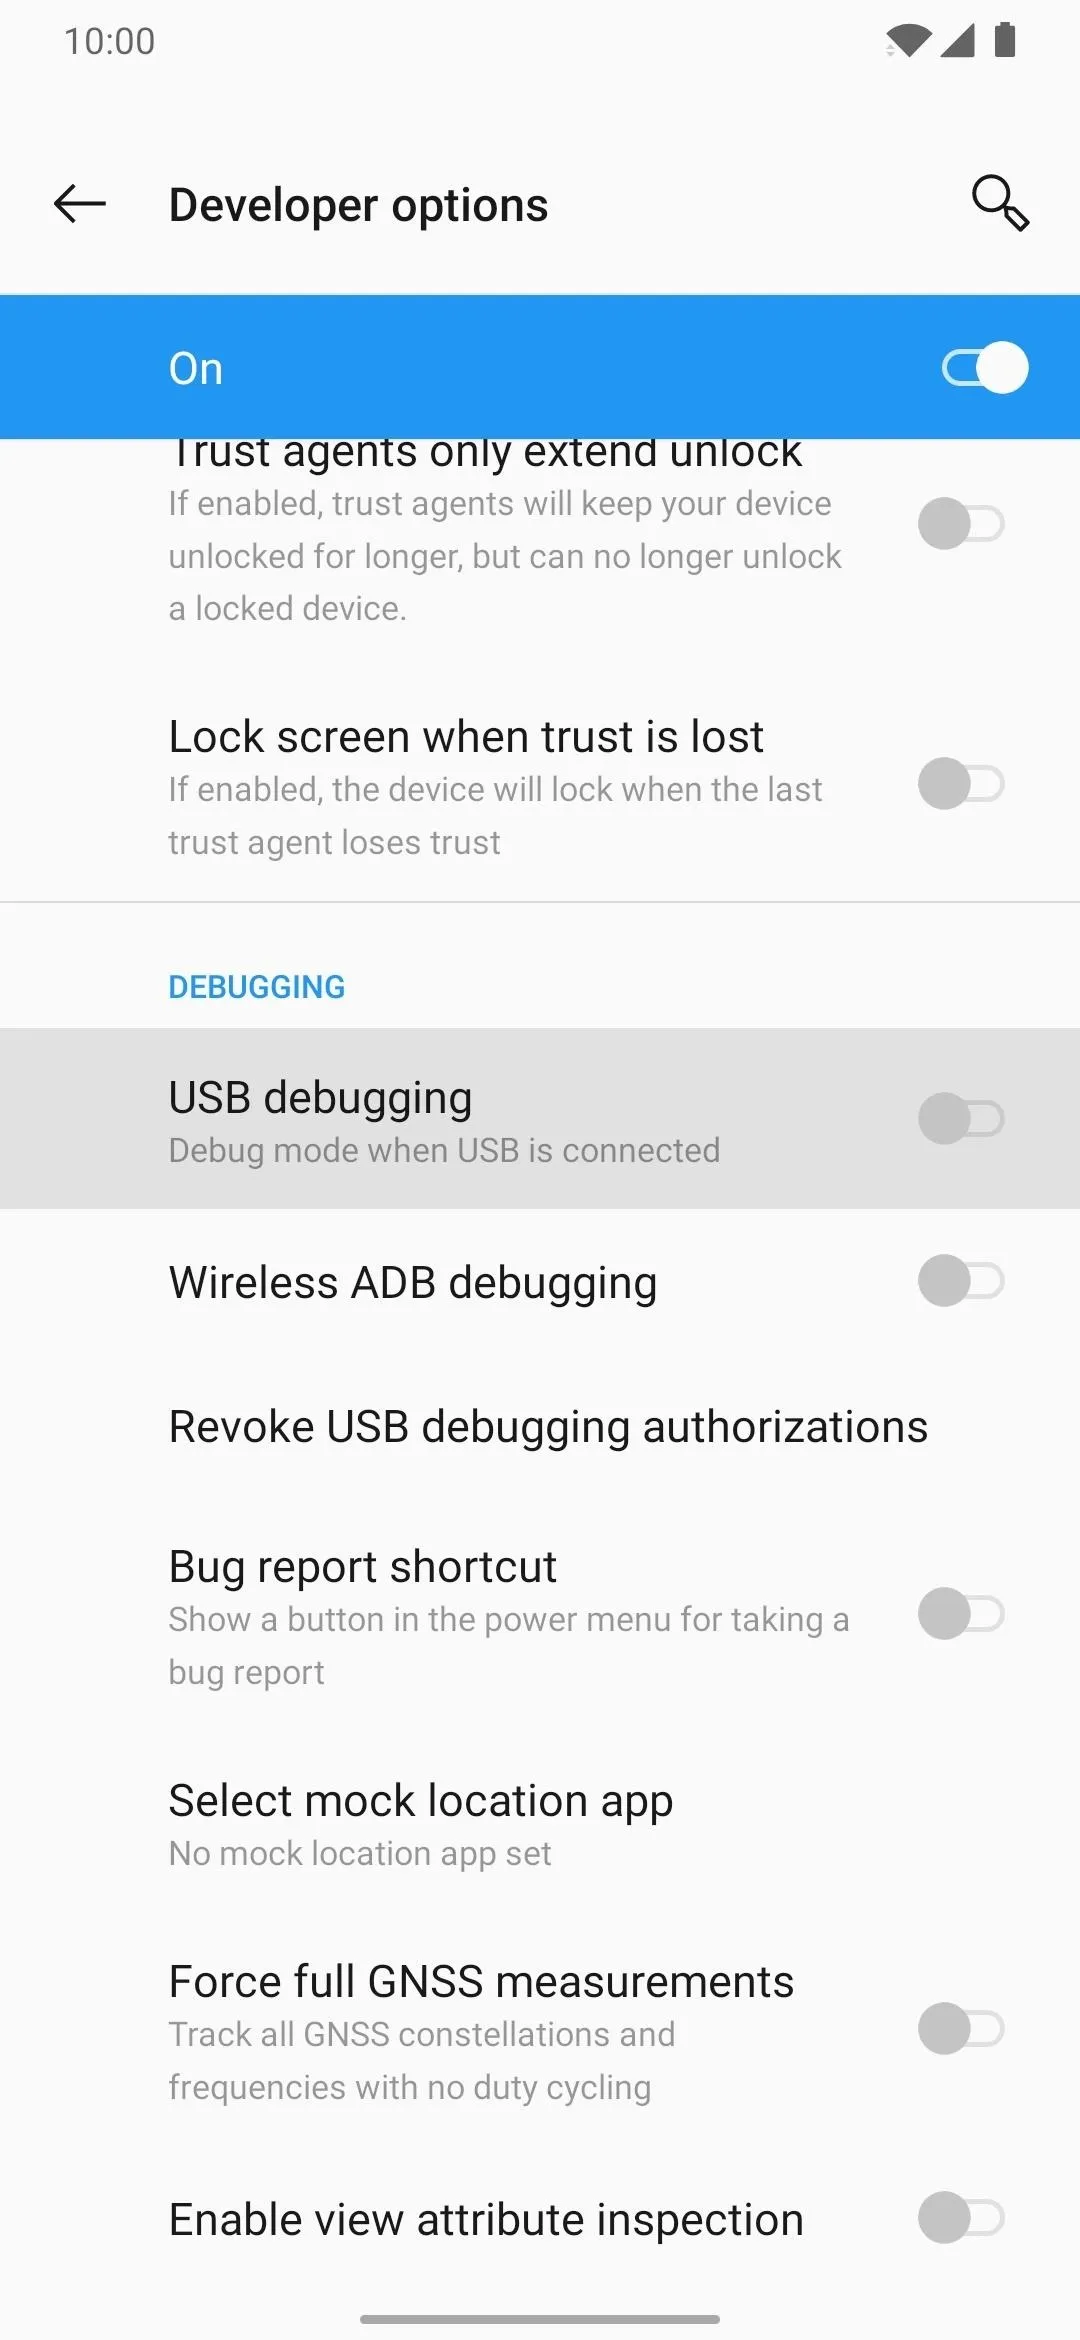
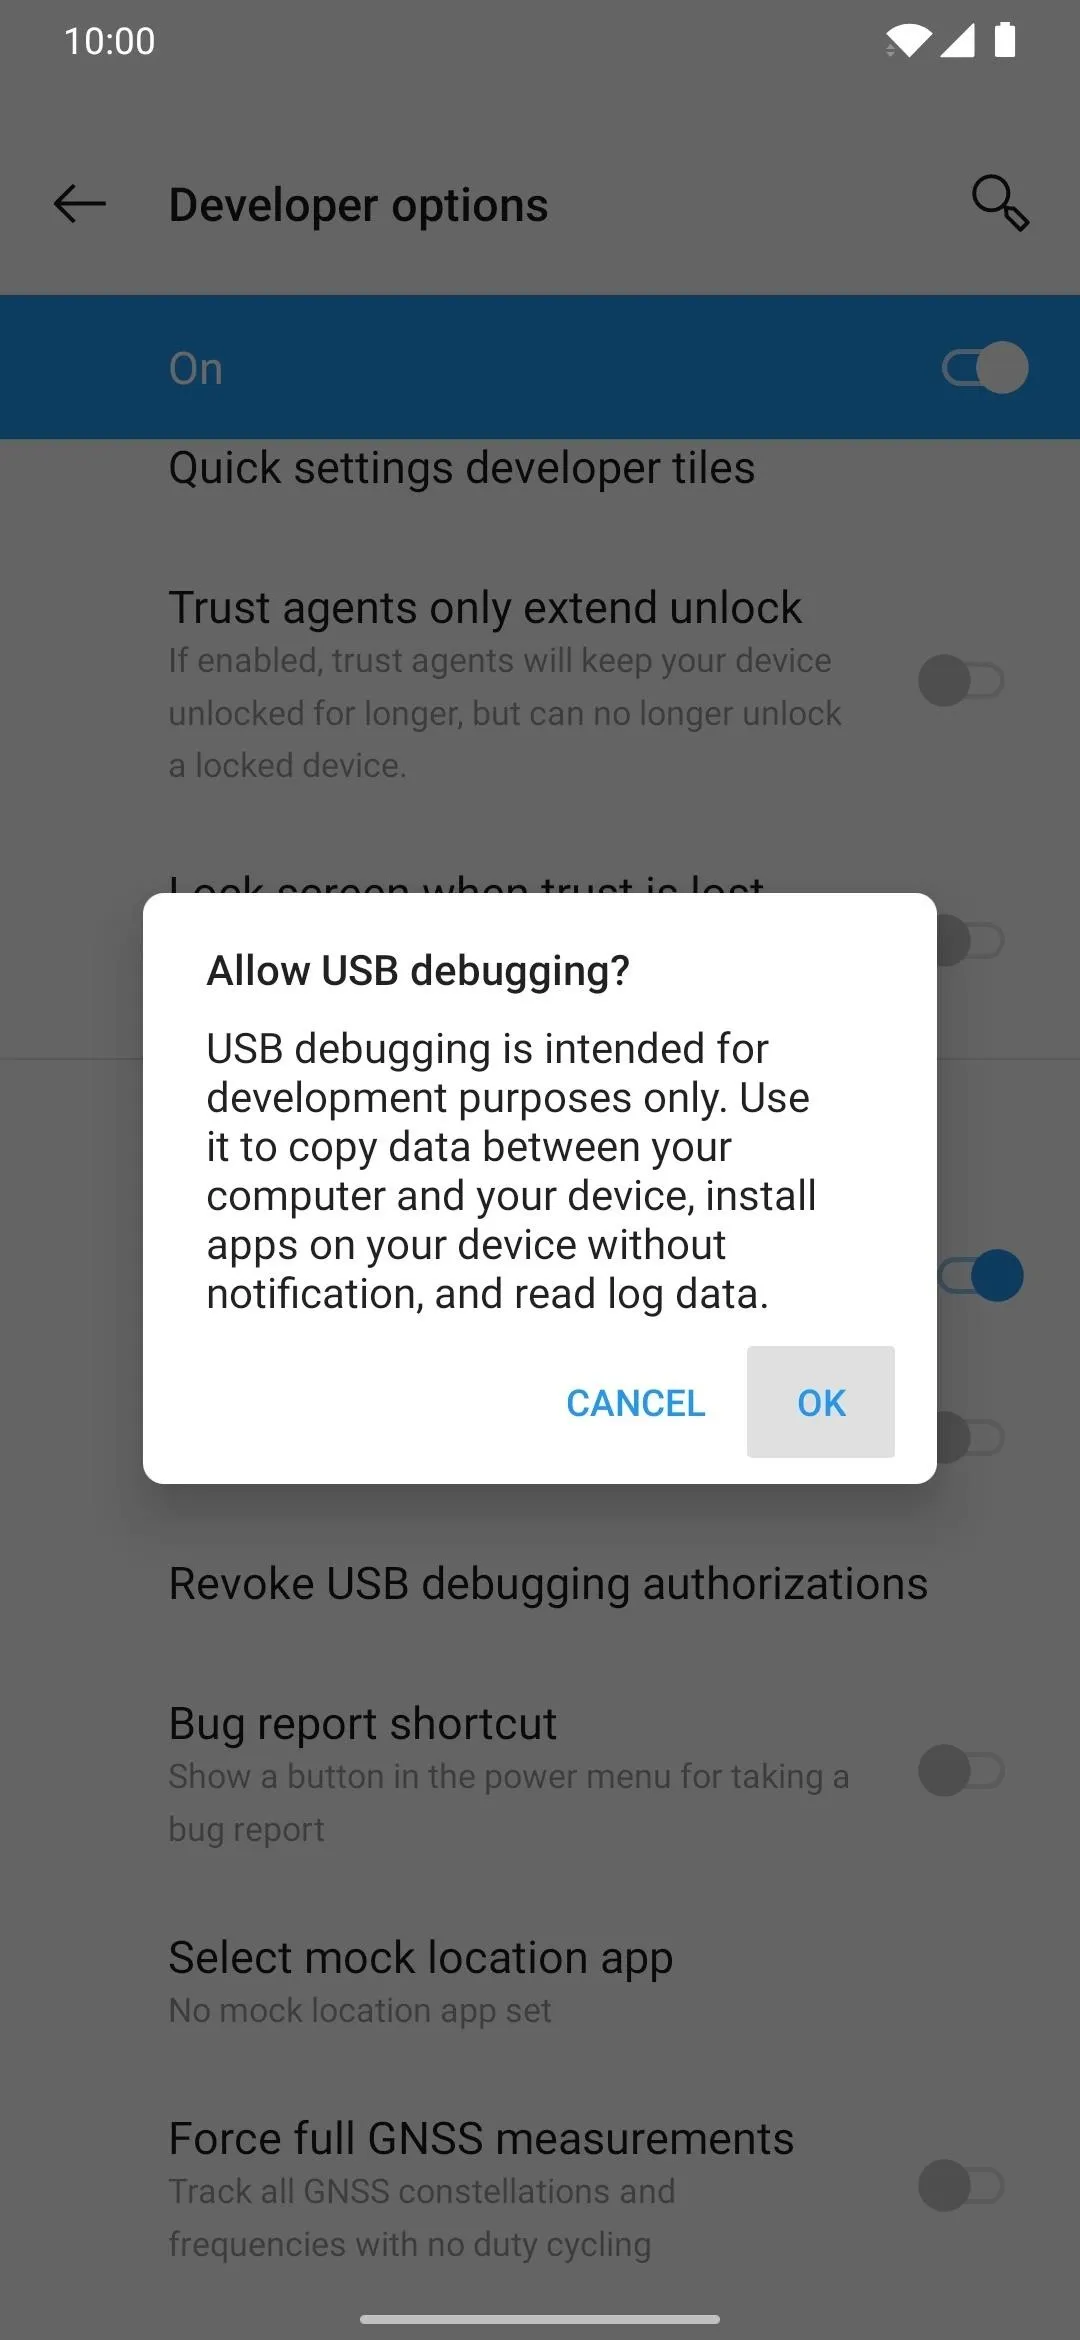
Enable USB Debugging
On the target phone, go to Settings –> About Phone and tap "Build Number" 7 times quickly to activate Developer Options. Once done, head to Developer Options either from Settings –> System –> Advanced or from the very bottom of your Settings app. Finally, enable the "USB Debugging" option.
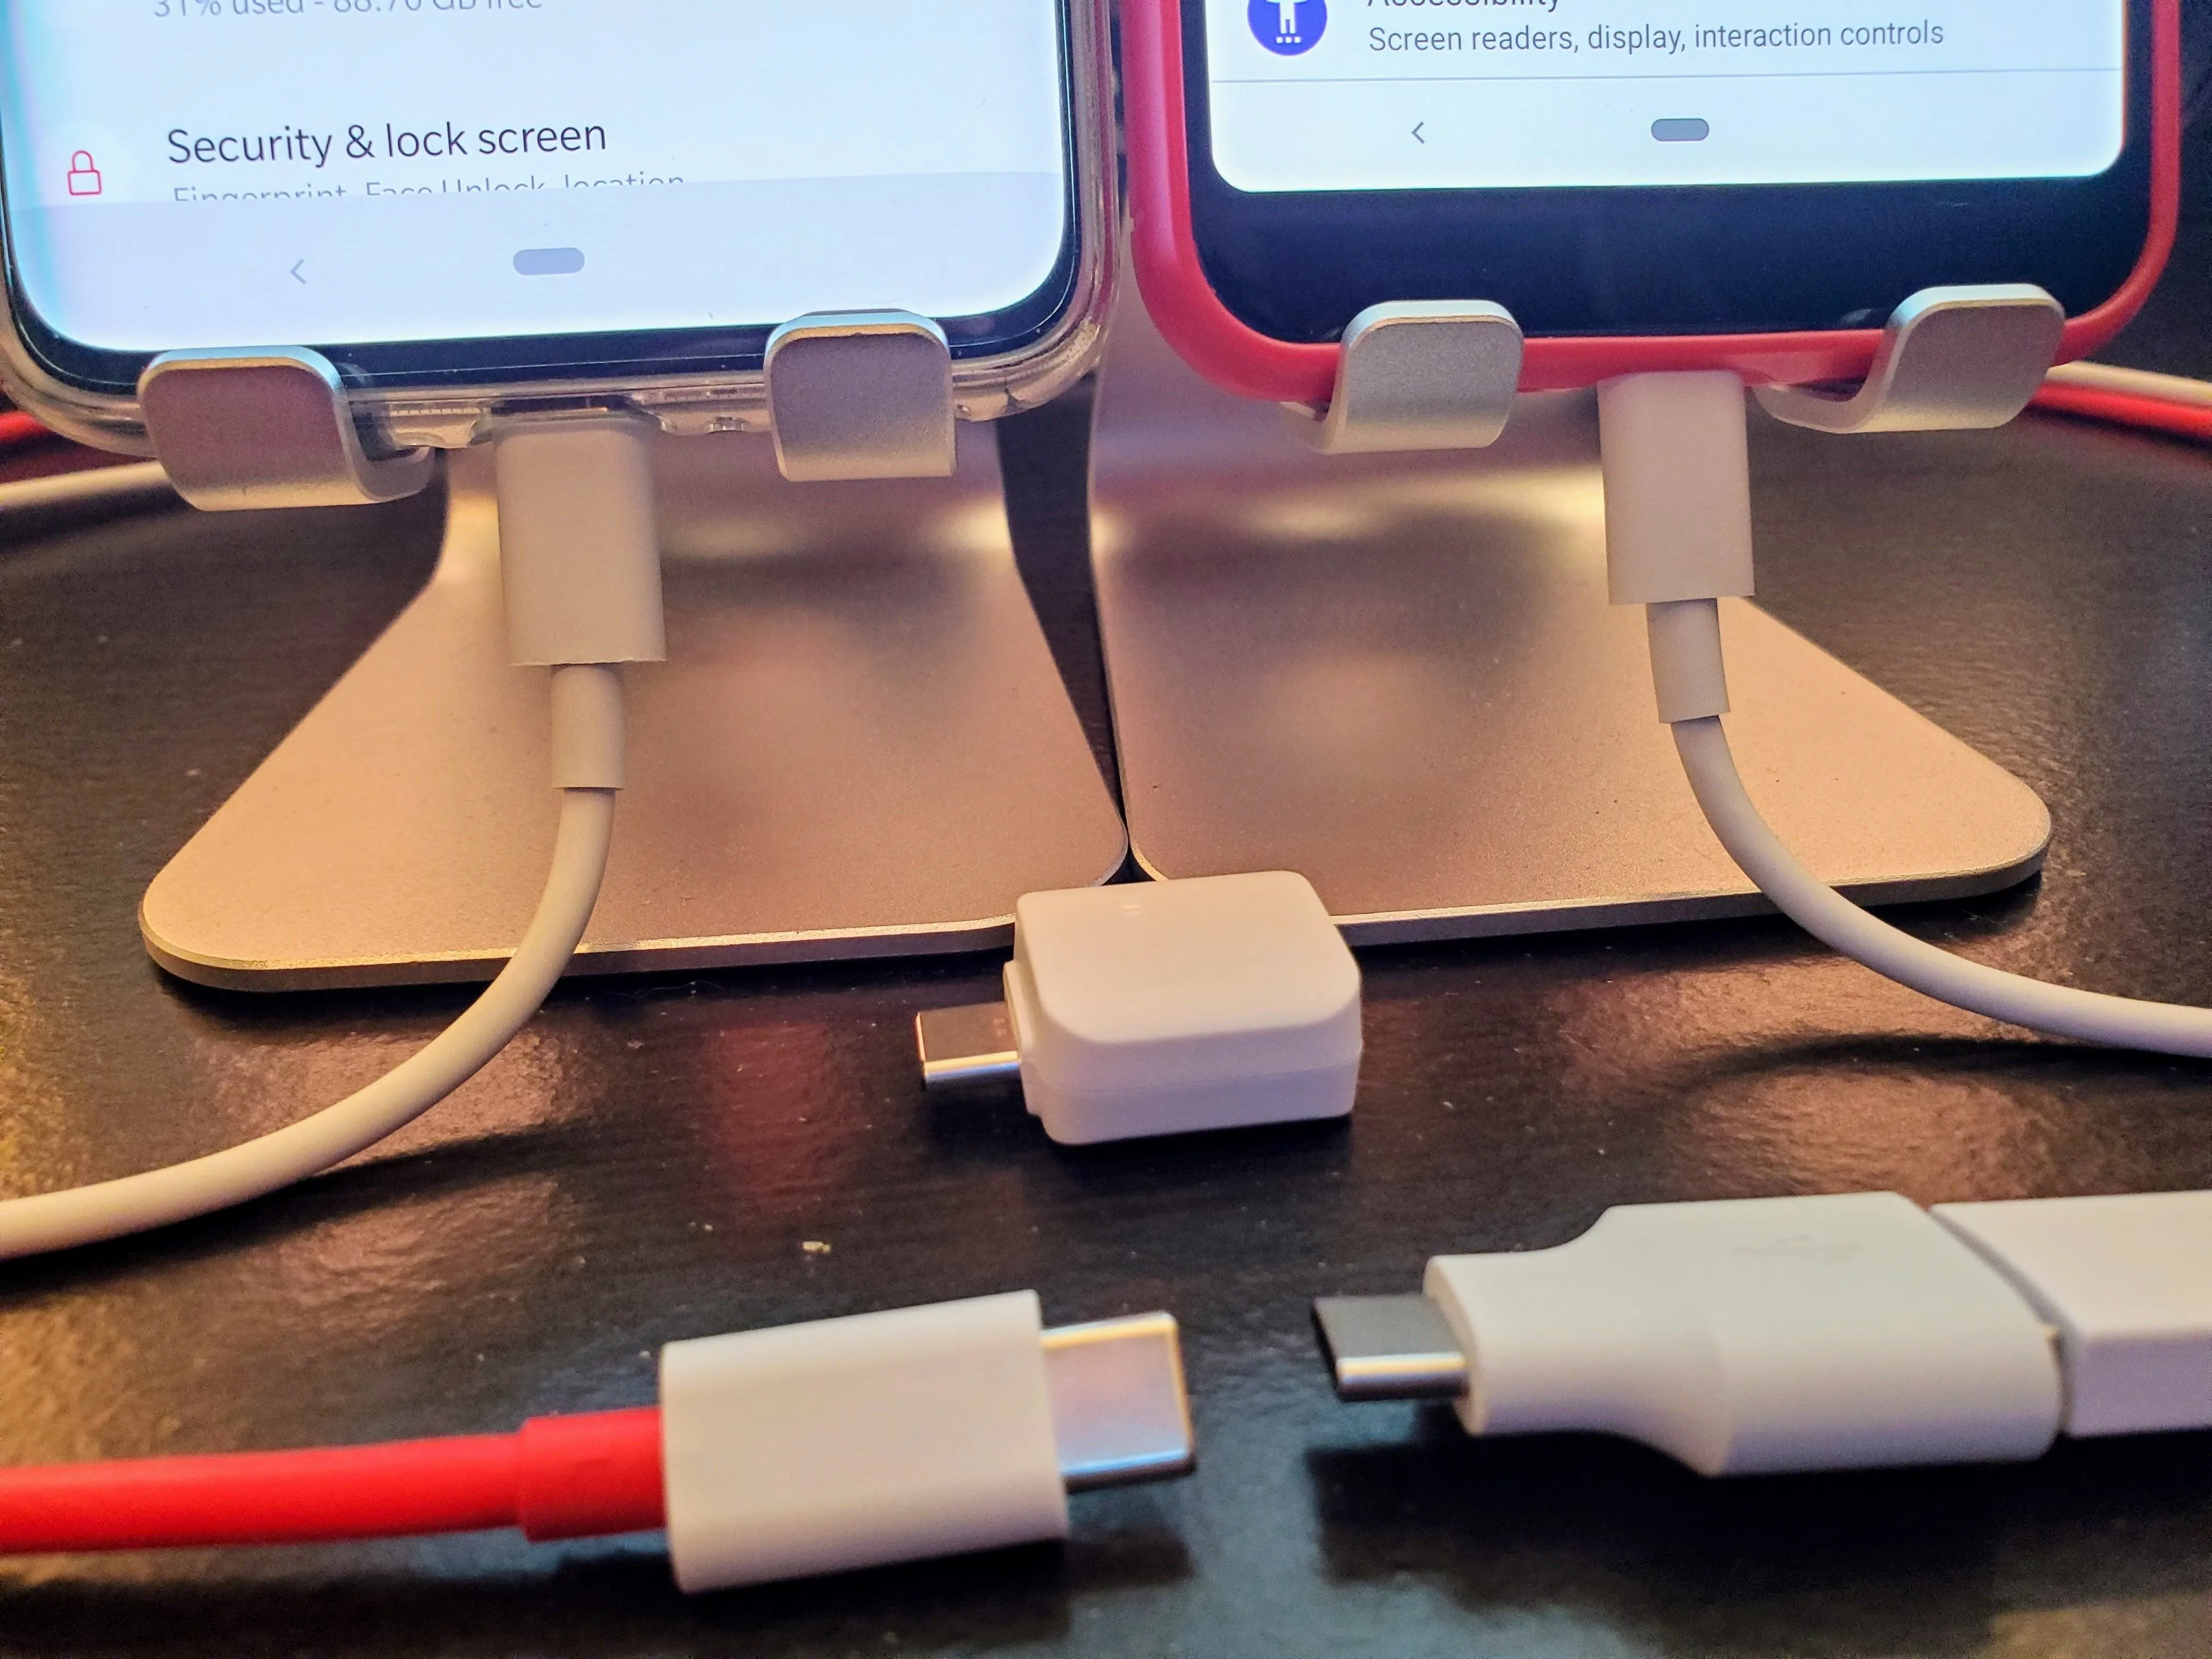
Connect the 2 Android Devices
If both phones were made in the last few years, you'll just need a standard USB C cable to connect them. One with the modern, reversible connector on both sides. But if one or both of the phones has a micro USB port, you can find adapters on Amazon using the links below.
- Buy a USB Type-C OTG adapter from Amazon (from $3.50)
- Buy a Micro USB OTG adapter from Amazon (from $4.20)
- Buy a USB A to USB C cable from Amazon (from $5.99)
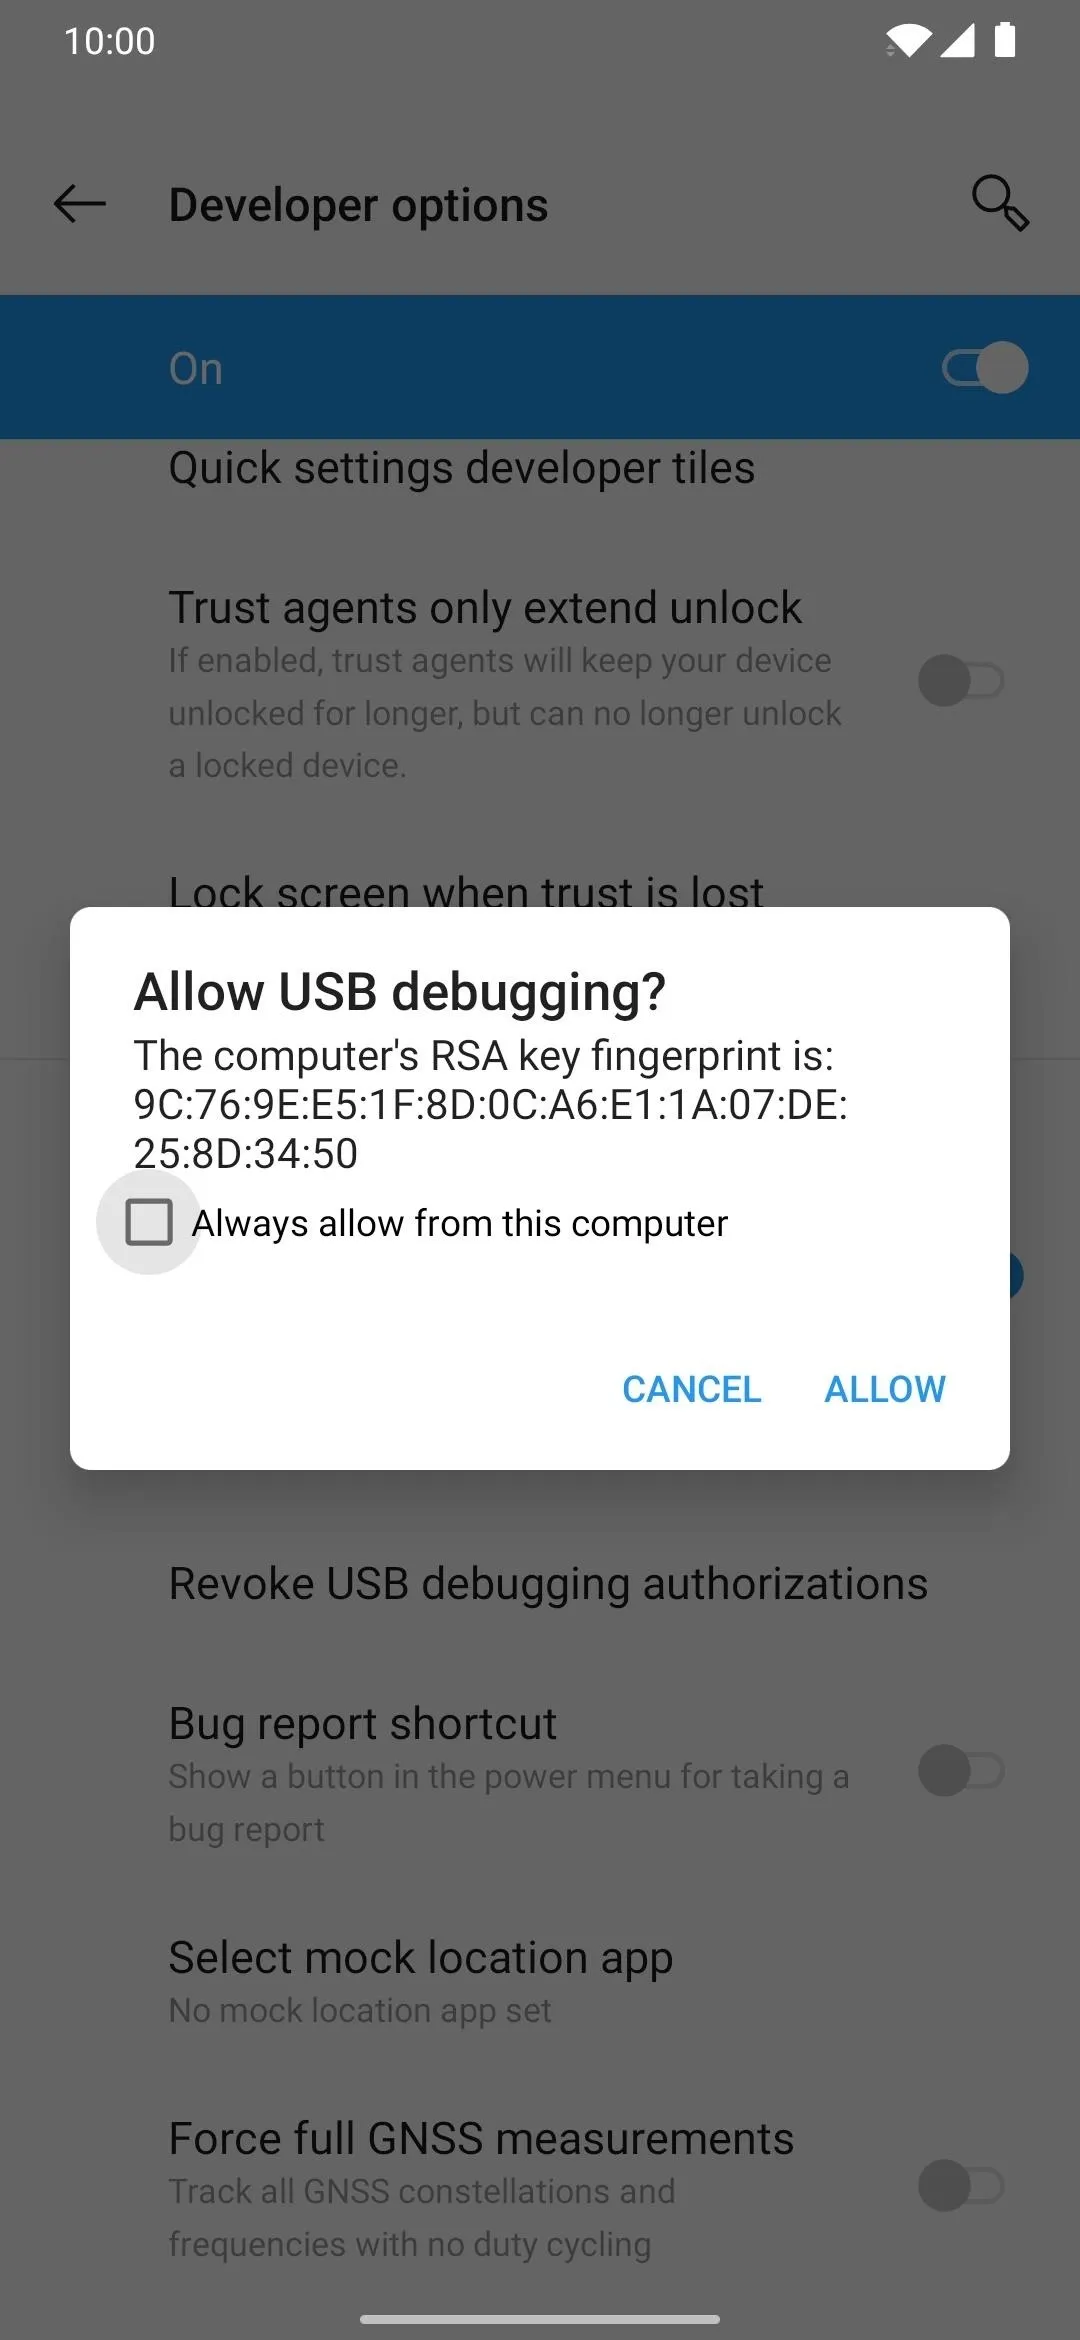
Allow USB Debugging Permission
Once the two Android devices are connected, the target phone should show a new popup right away. Remove and reconnect the USB cable for the secondary device if this doesn't happen to try again. Now, tap "Always allow from this computer," followed by "OK" to confirm the choice.

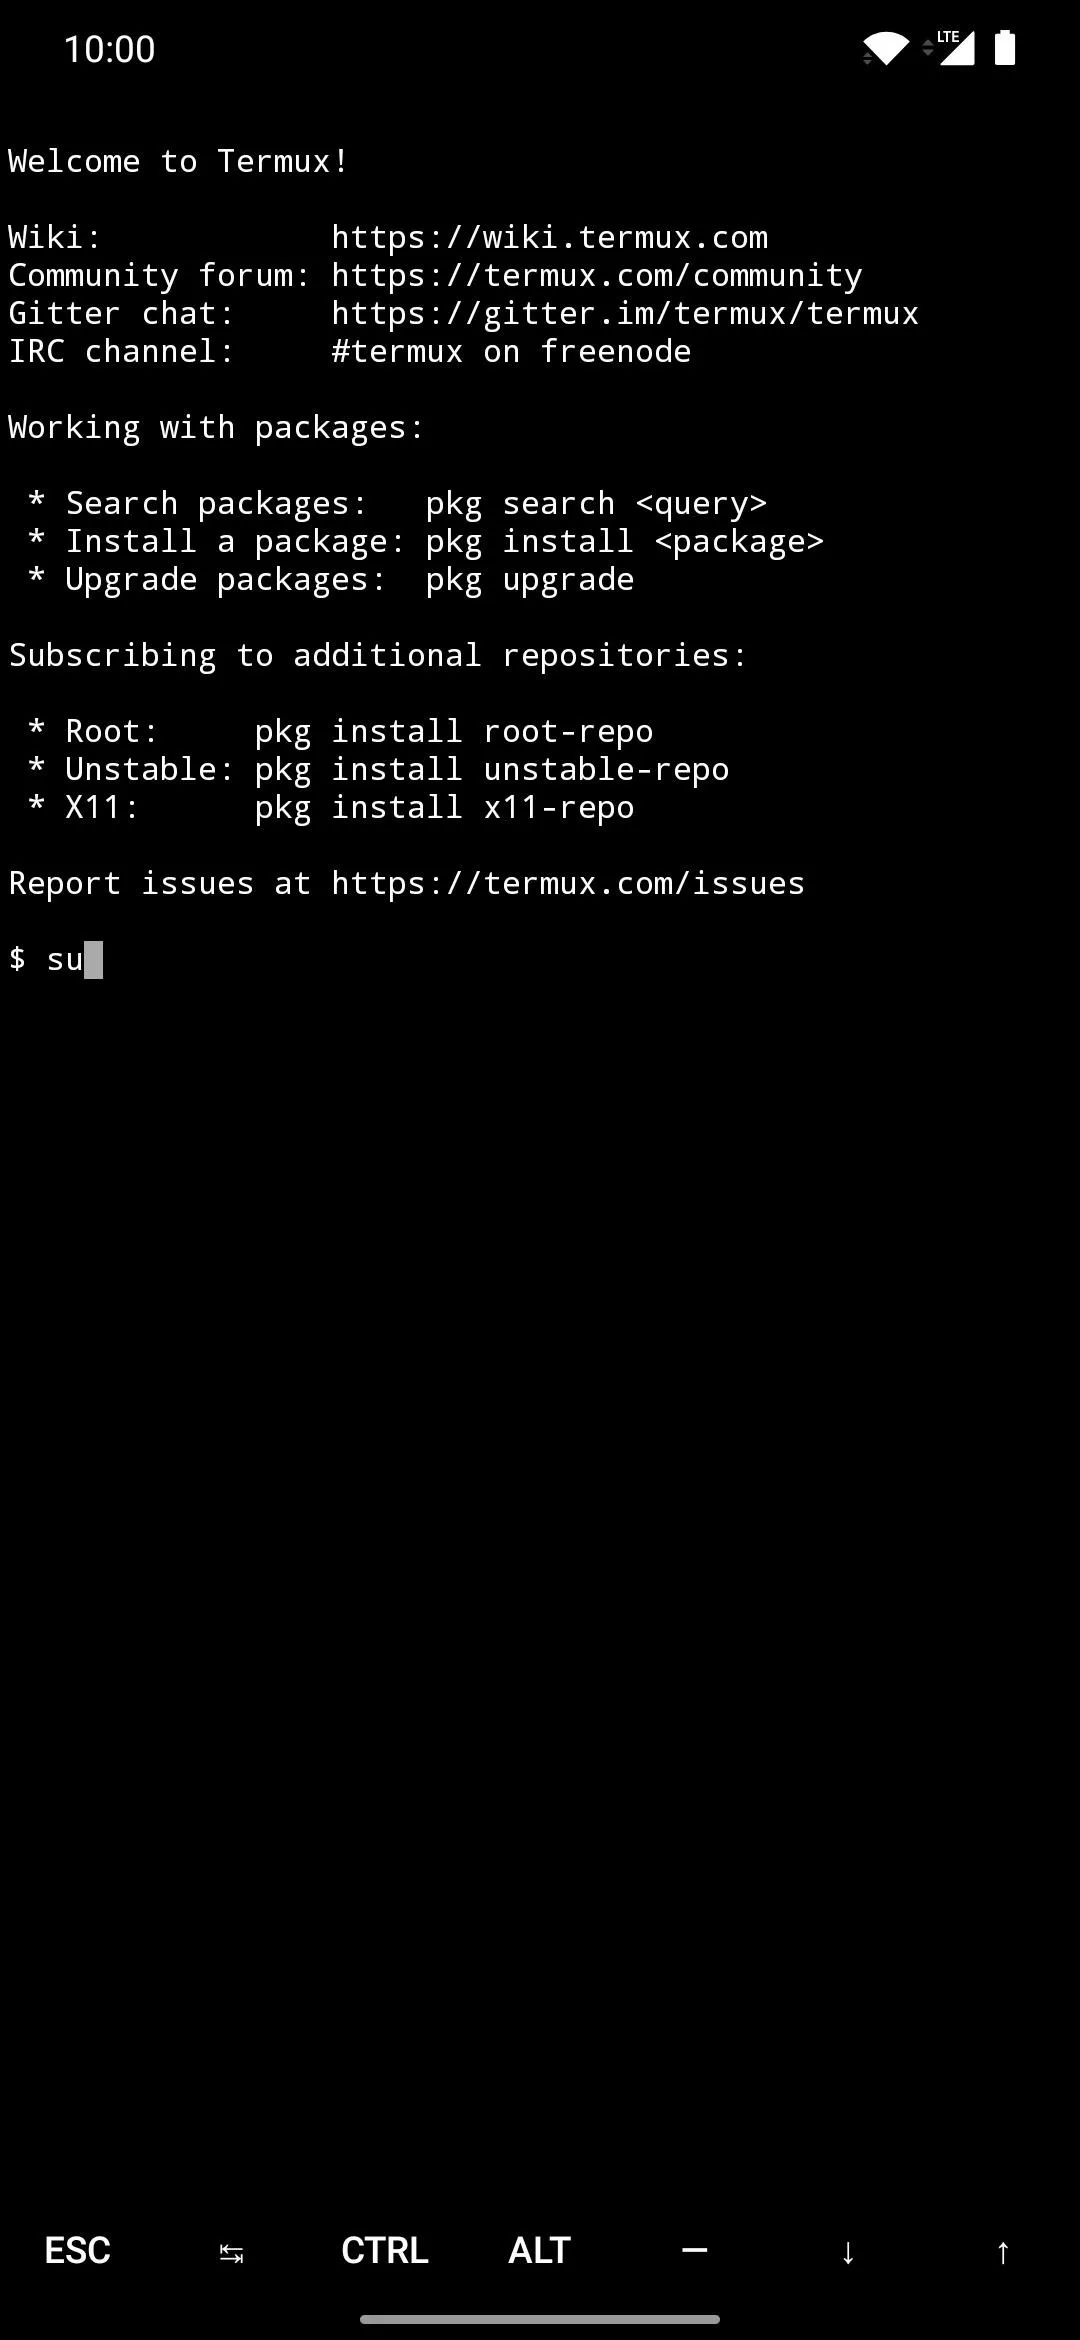
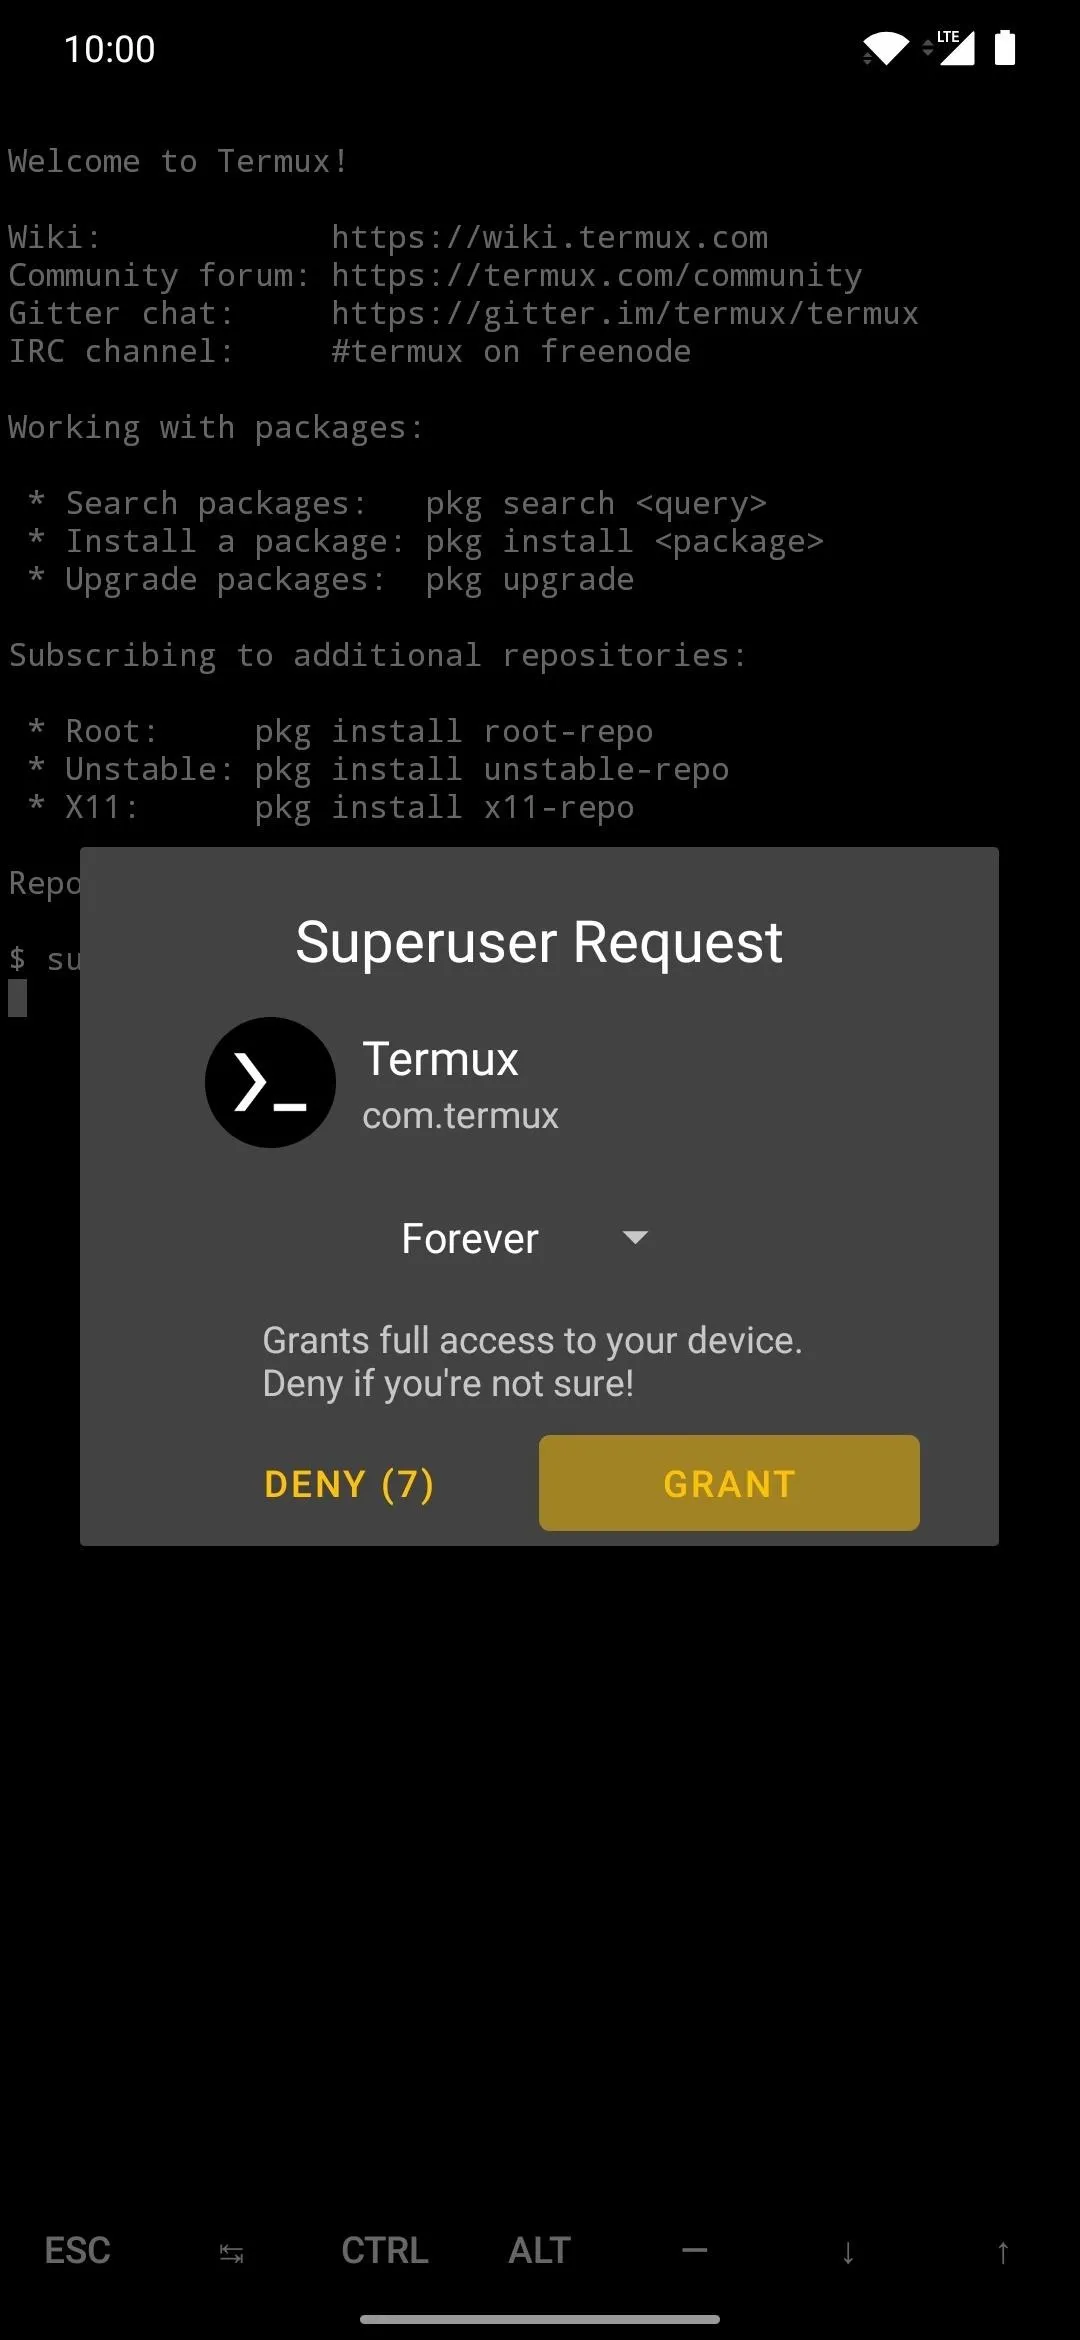
Grant Root Access
On the rooted device, open the Termux app, type the following command, then press enter.
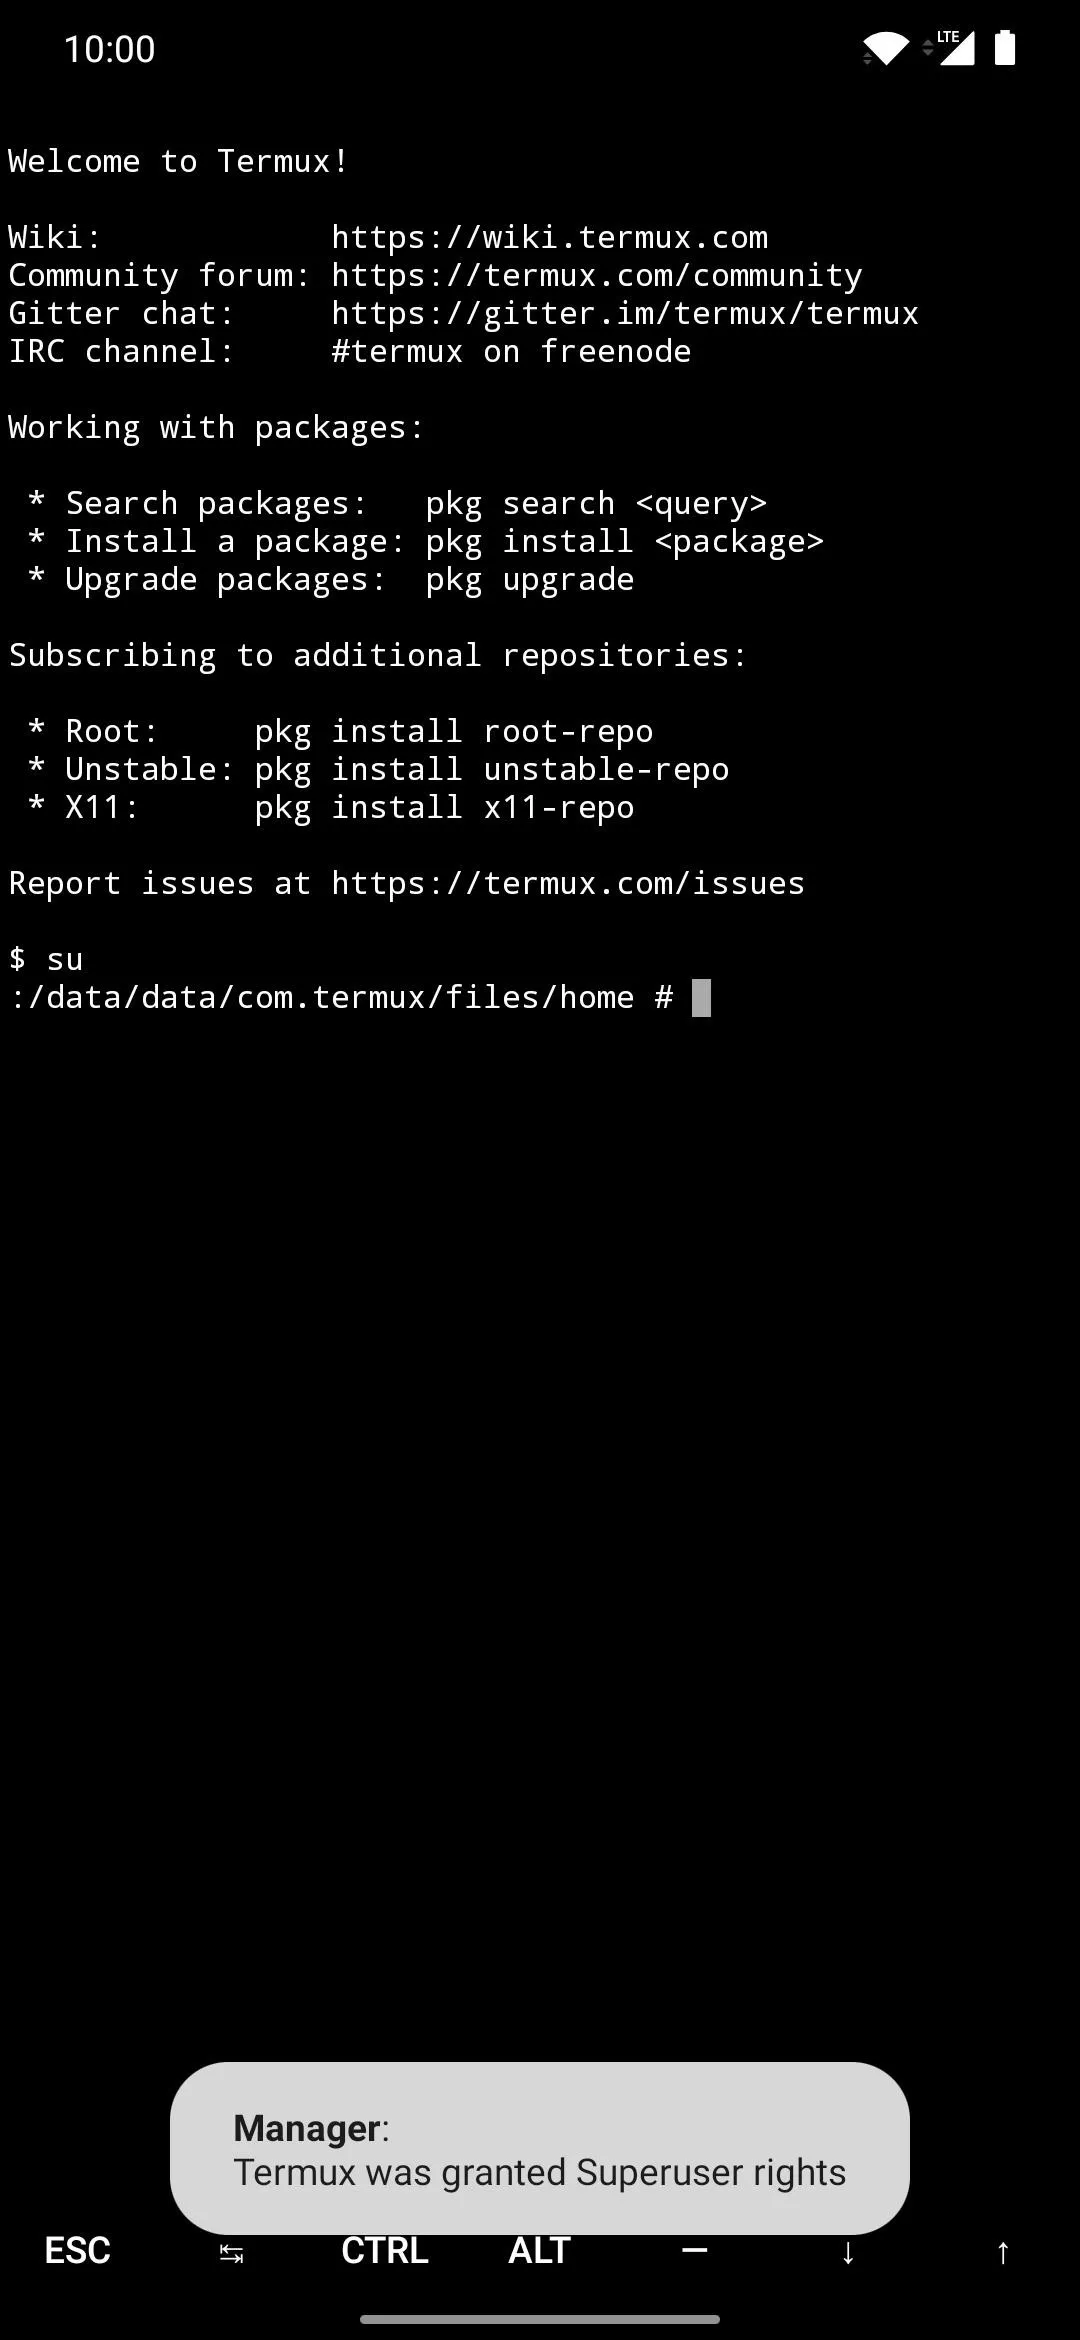
suThis will trigger a superuser request from Magisk, which is required when executing higher-level system commands. Tap "Grant" when prompted, then you're all set here. You'll need to run the "su" command before sending ADB or Fastboot commands each time, but you won't be required to grant the superuser request again.
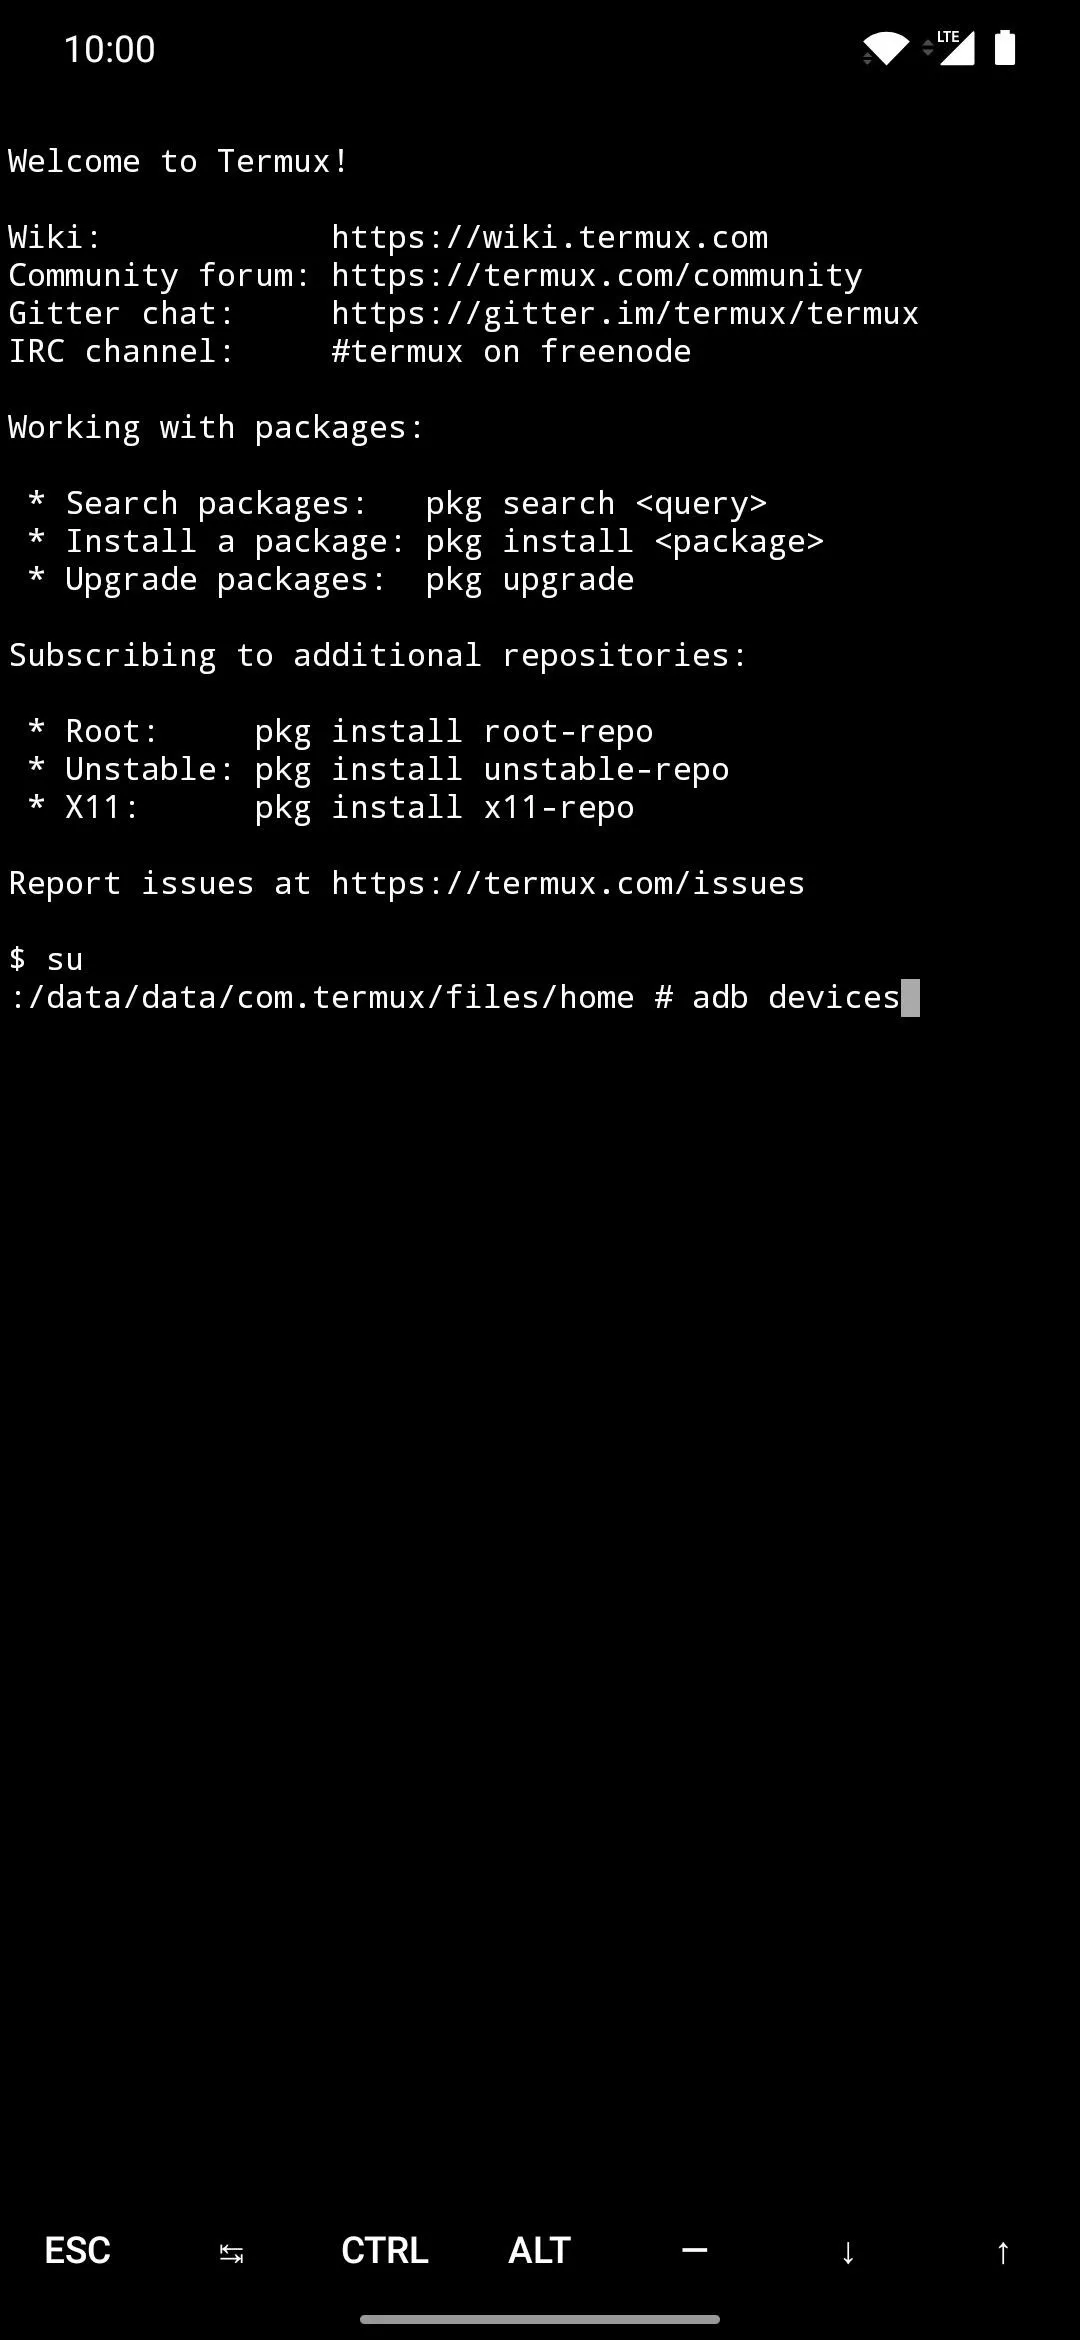
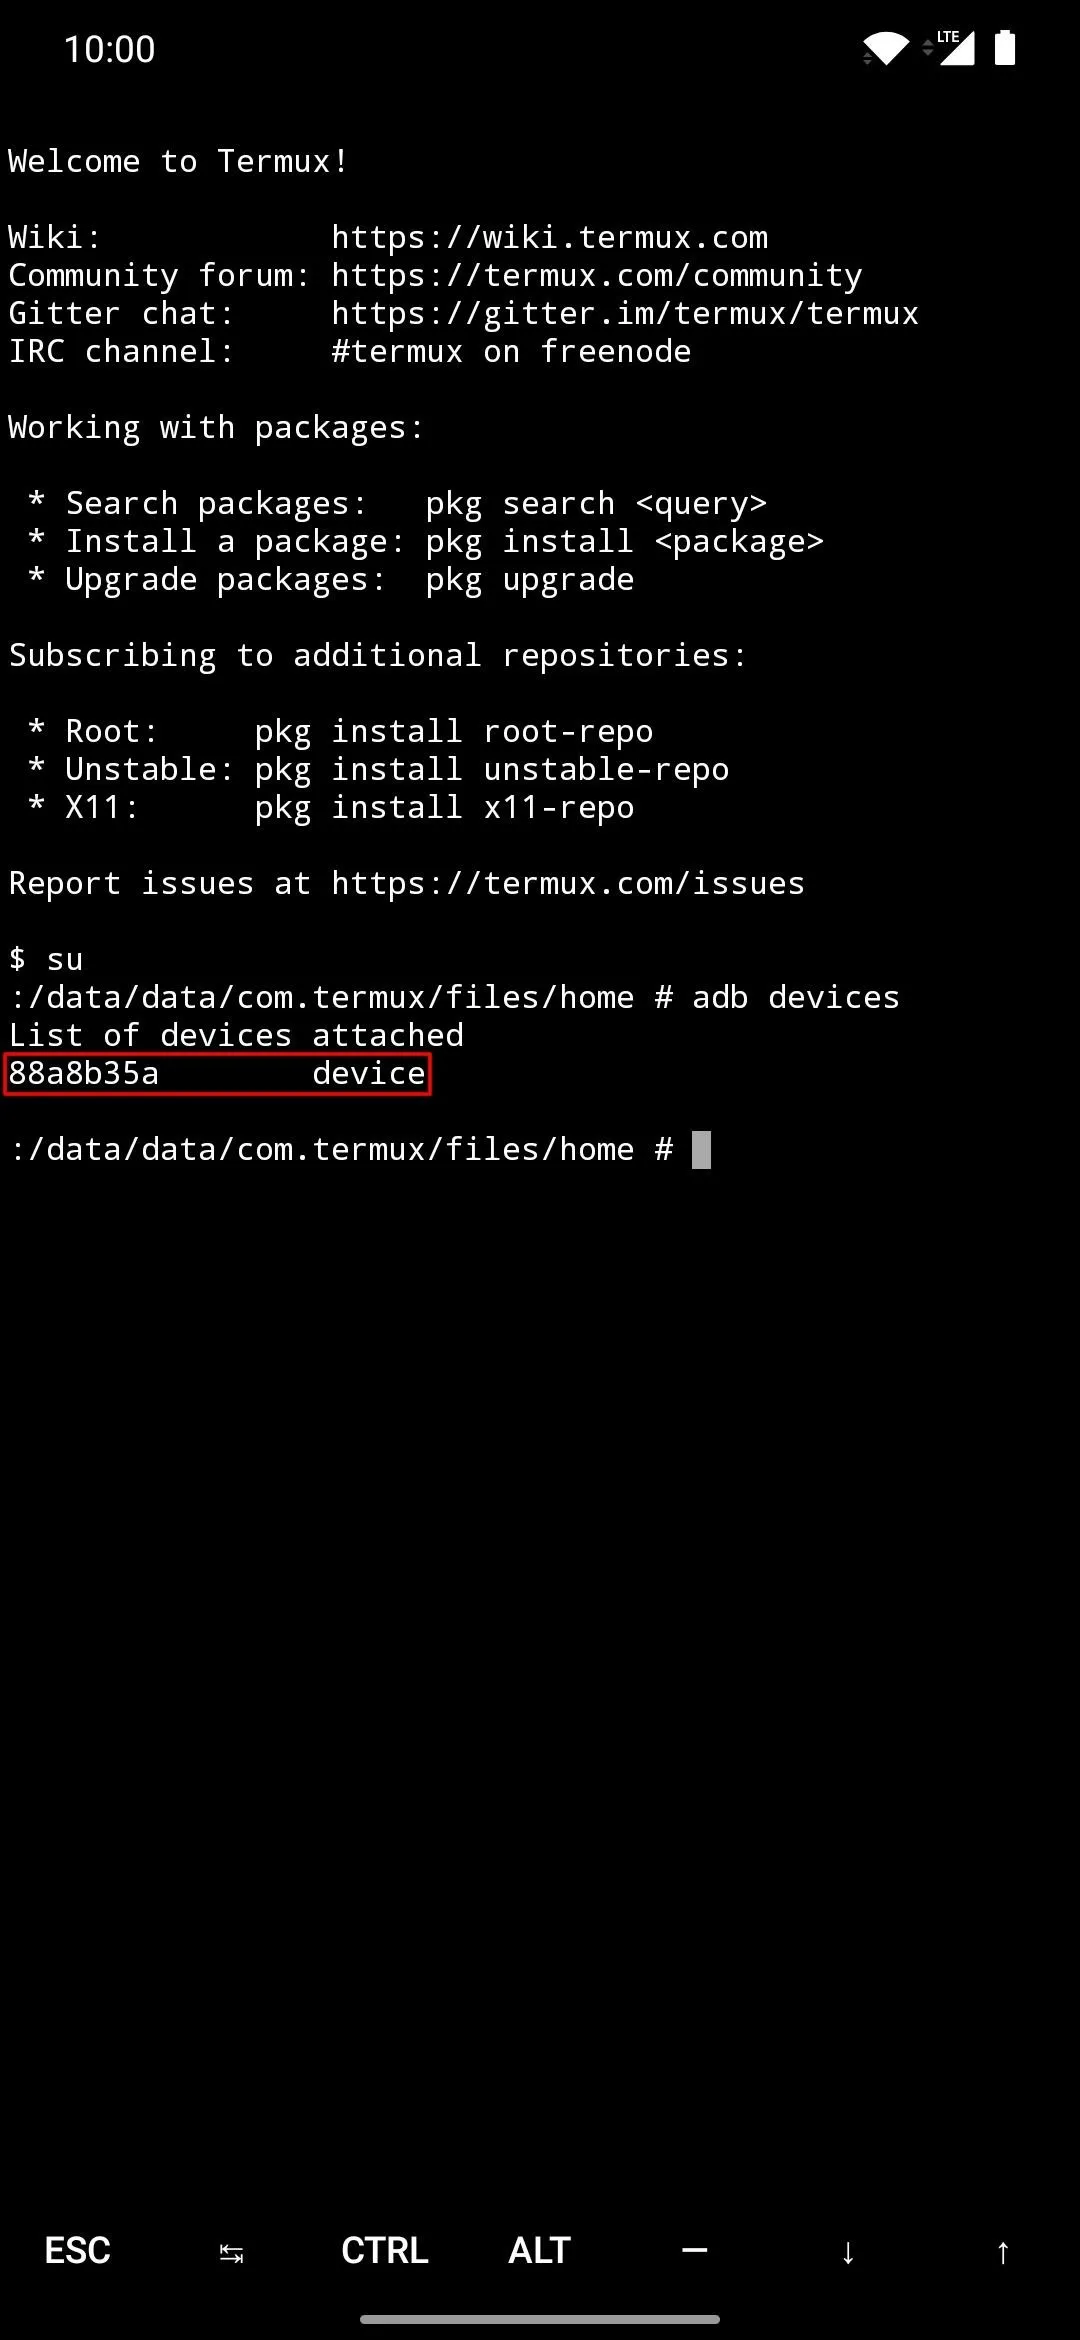
Verify Your Device Connection
Just because the two devices are connected to one another doesn't mean they are actually communicating correctly. To check this, type the following command on the rooted device through Termux, then press enter.
adb devicesThe above command will check any connected devices that can communicate via the ADB interface. If everything worked as intended, you should see a device ID under the "List of devices attached" line.
Boot into Fastboot Mode
Before you can run any Fastboot commands, you'll need to boot your secondary device into a special mode for this very thing. On the rooted device with Termux, type the following command, then press enter.
adb reboot bootloaderThis will send the secondary device into its native bootloader menu, which is also known as "Fastboot Mode."
Locate the TWRP File
At this point, you'll need to redirect Termux so that it can locate the twrp.img file you downloaded from Step 2. Using the same rooted device terminal, type the following command, then press enter.
cd /sdcard/DownloadAs mentioned, this will redirect the location of the terminal window to the "Download" folder on your rooted device. This is the specific location where the twrp.img file is, so you need to make sure you enter the command exactly as it appears.
Check Your Partition Layout
Now it's time to send over the twrp.img file to the secondary device so you can get TWRP installed onto it. But the instructions are different depending on whether or not the target phone supports Android 7.0's A/B partition layout.
So first, if you're not sure whether the phone you want to install TWRP on has A/B partitions, install Treble Check from the Play Store. Open the app and it will say either "Unsupported" or "Supported" in the Seamless System Updates section. If your phone is supported, you have A/B partitions and should follow the corresponding instructions in the next step.
- More Info: How to See if Your Phone Has A/B Partitions
Install TWRP
If you have an A/B partition target device, open the Termux app on the host device and type the following command, then press enter.
fastboot boot twrp.img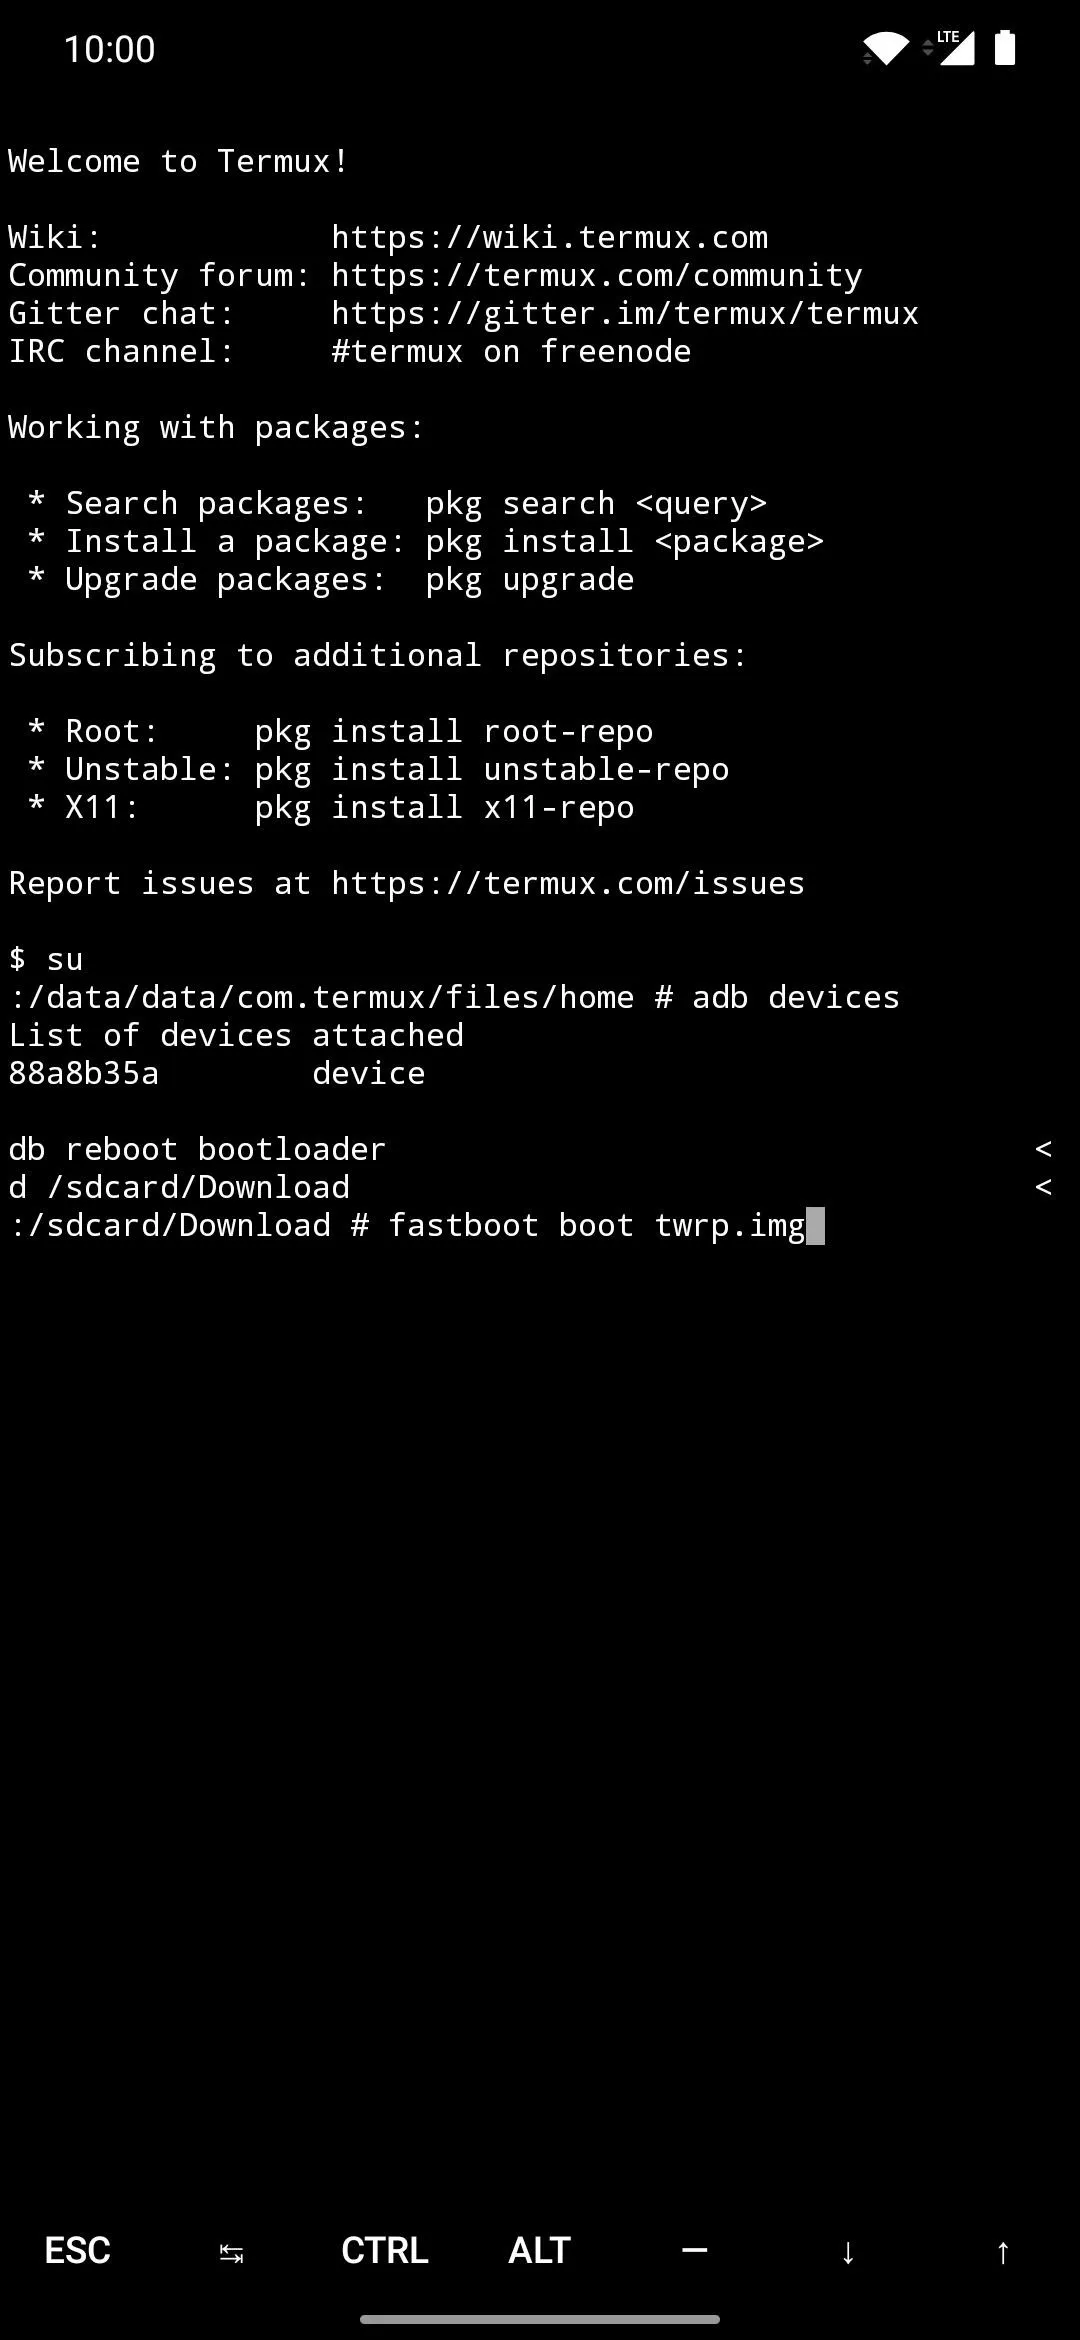

This will temporarily boot TWRP onto the secondary device; however, you'll still need to run the permanent installer after that. If you don't do this, TWRP will disappear after you reboot your device.
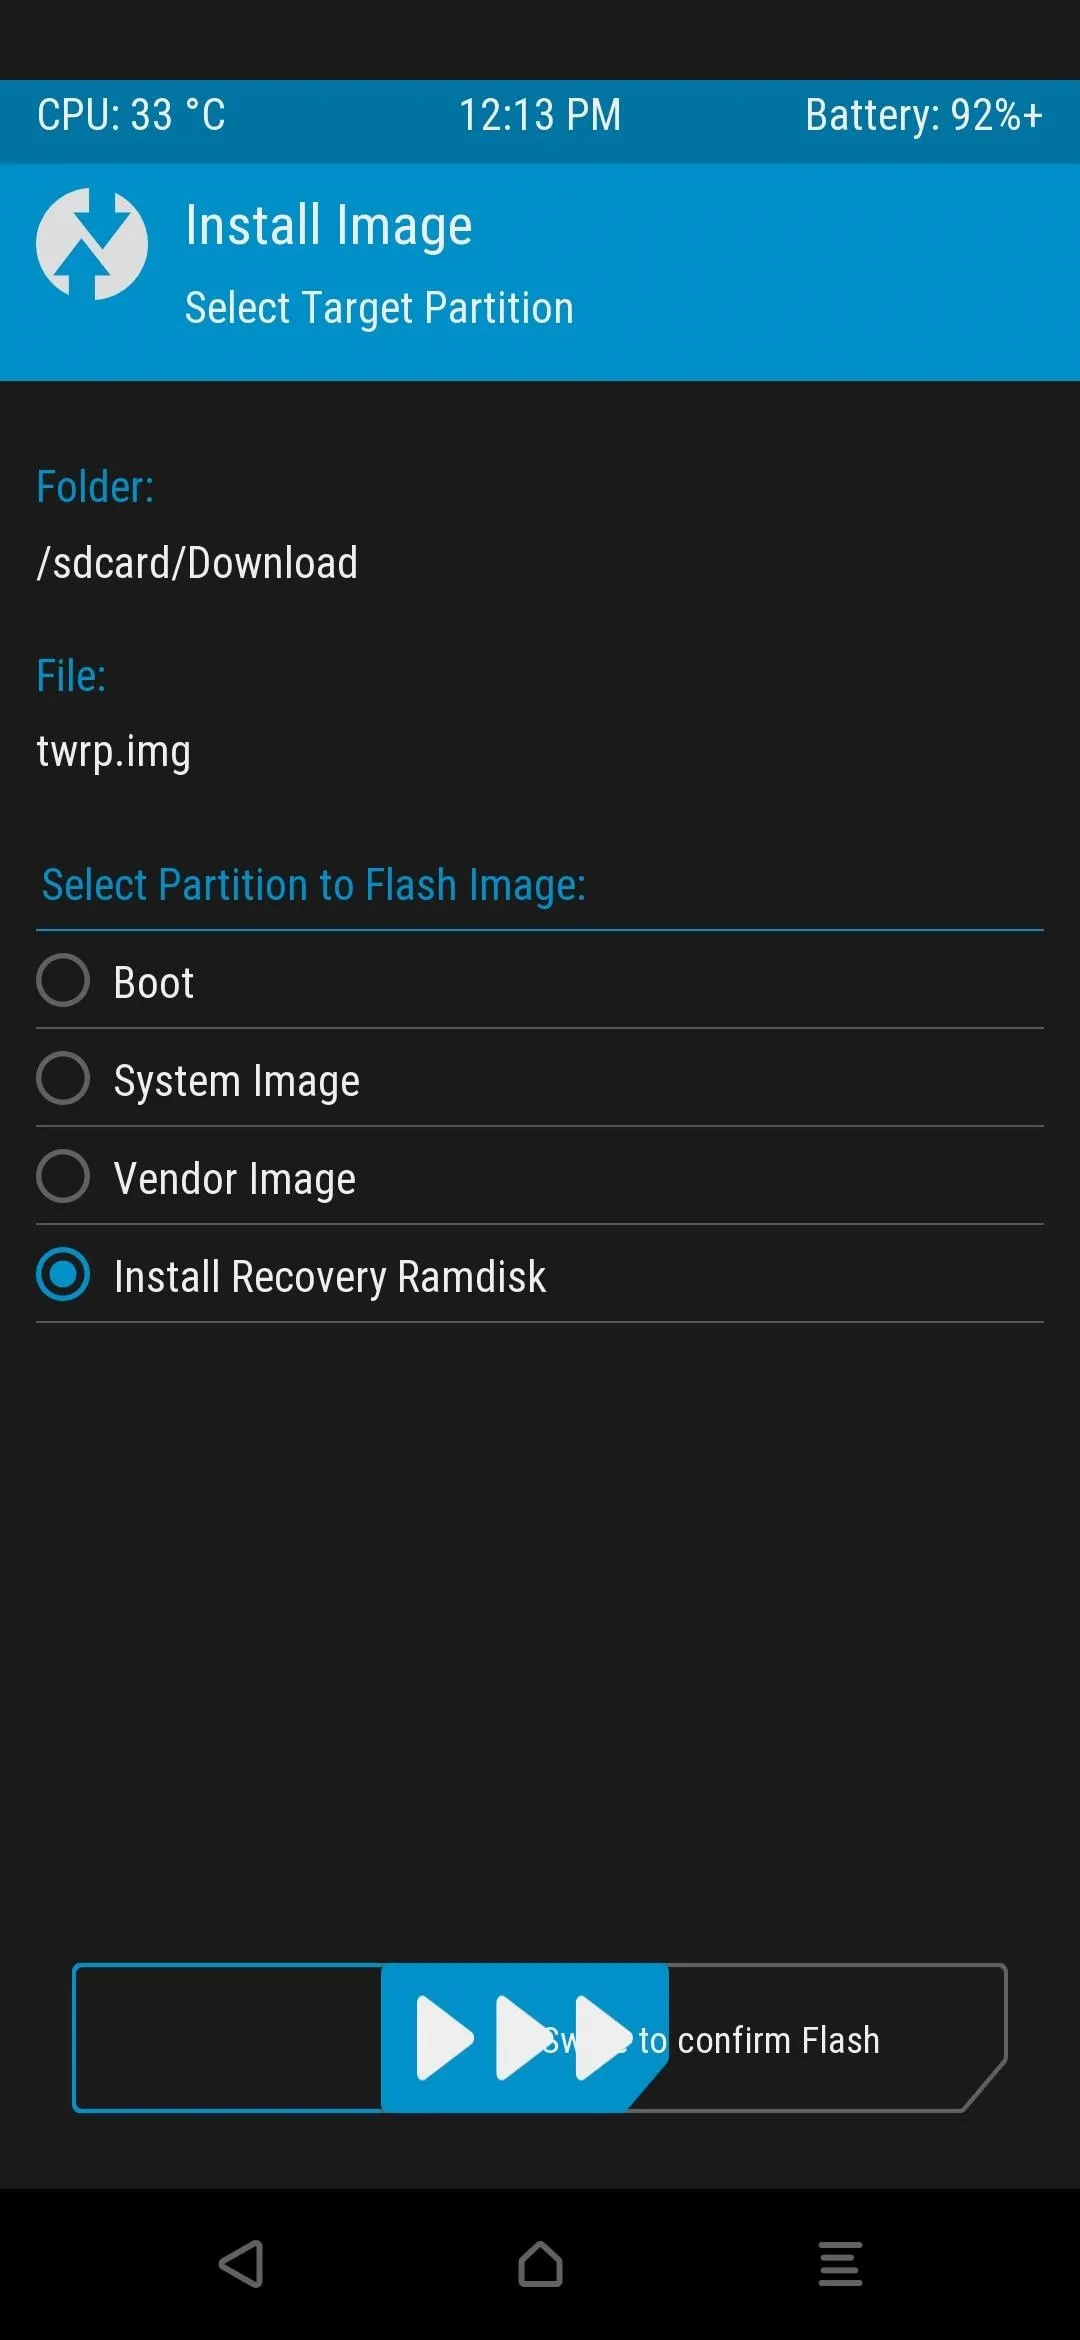
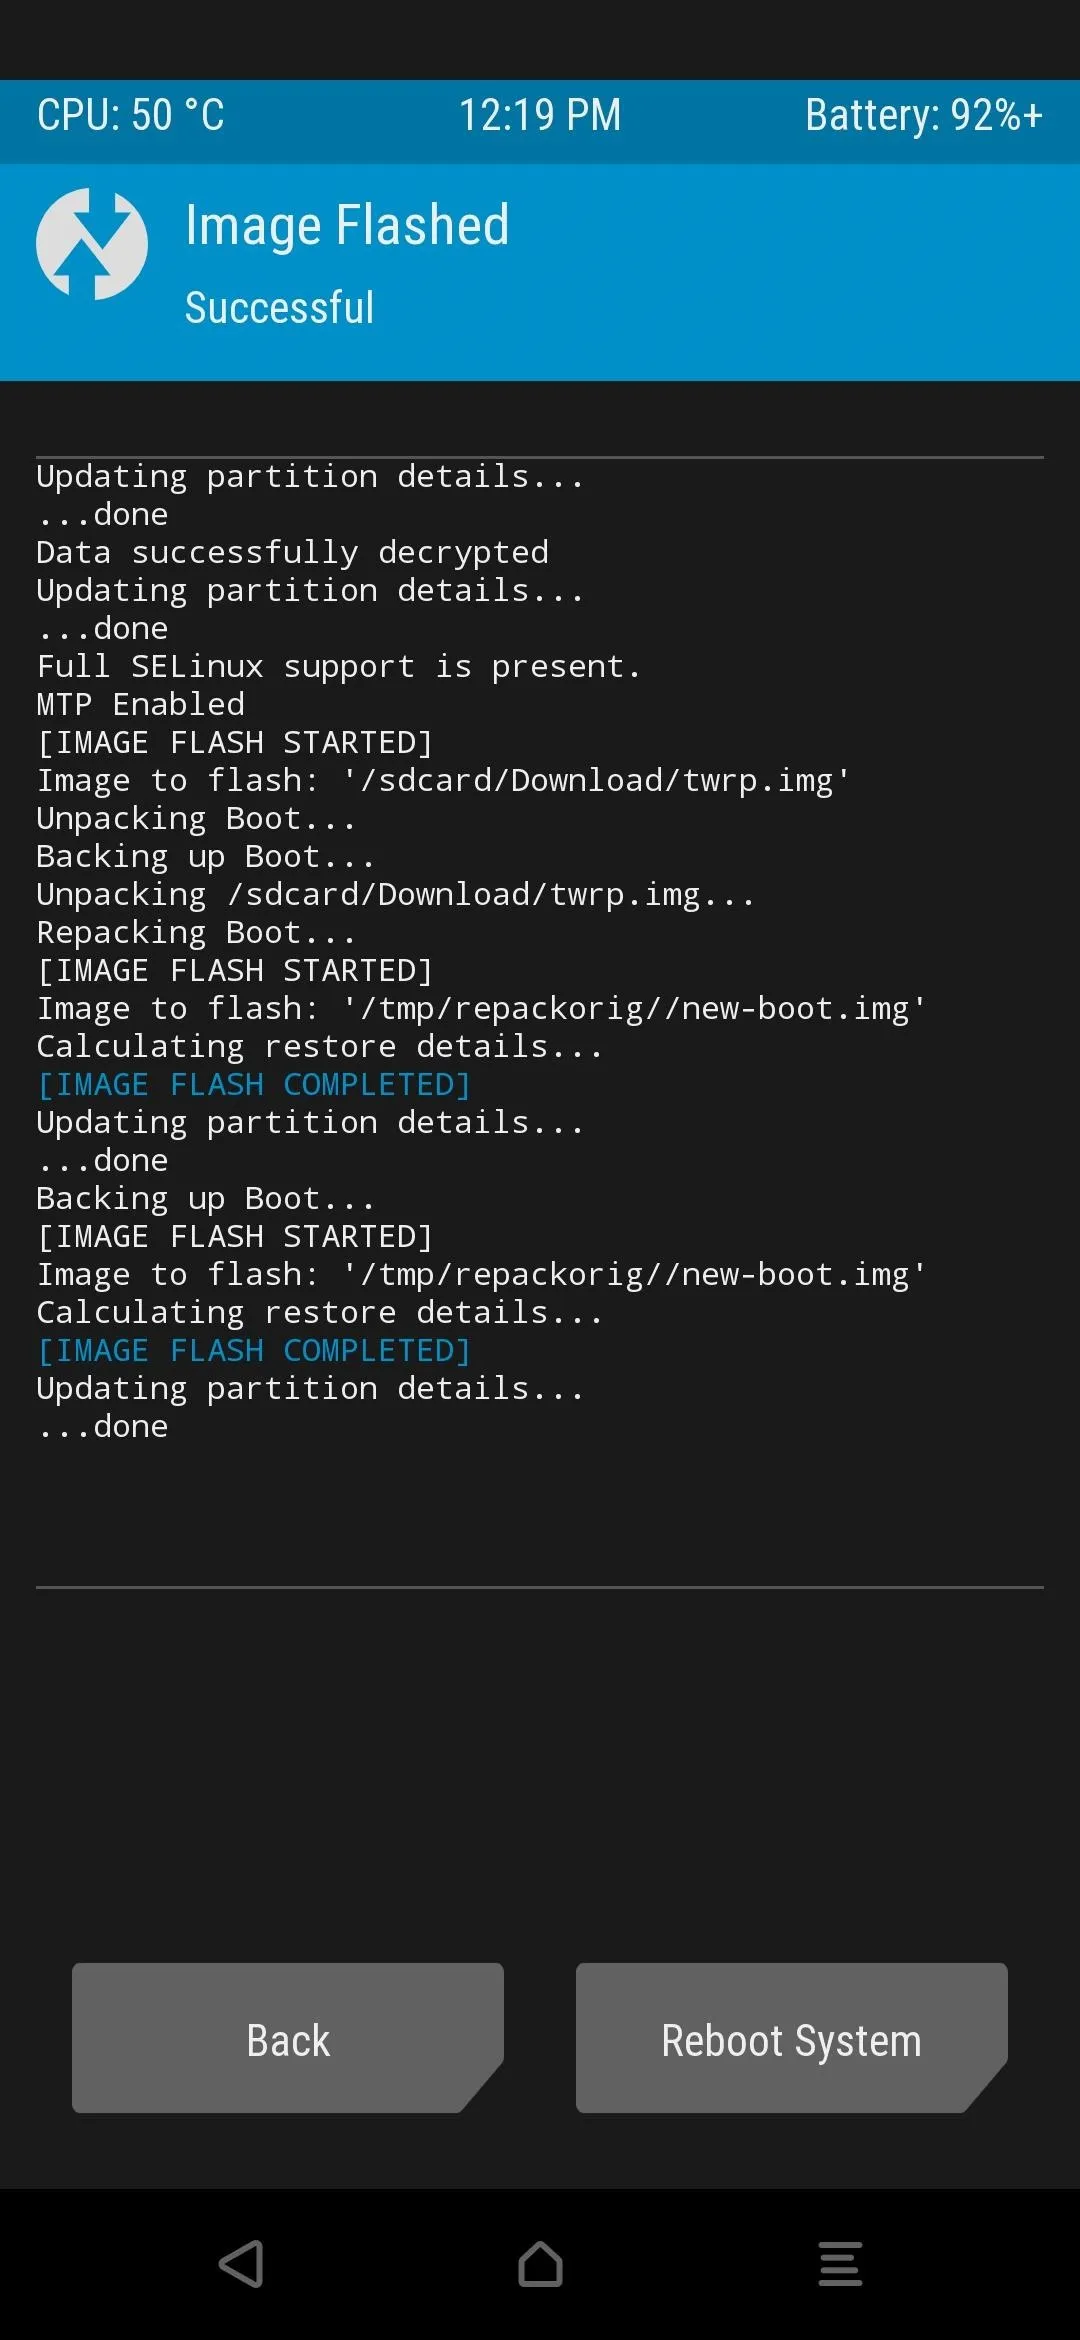
So tap "Install," browse to the Download folder, then press the "Install Image" button. Tap the twrp.img file, select "Install Recovery Ramdisk," then swipe the slider to begin. Once the process is finished, press the home button, go to "Reboot," then "Recovery," where you'll be greeted by the permanent version of TWRP!
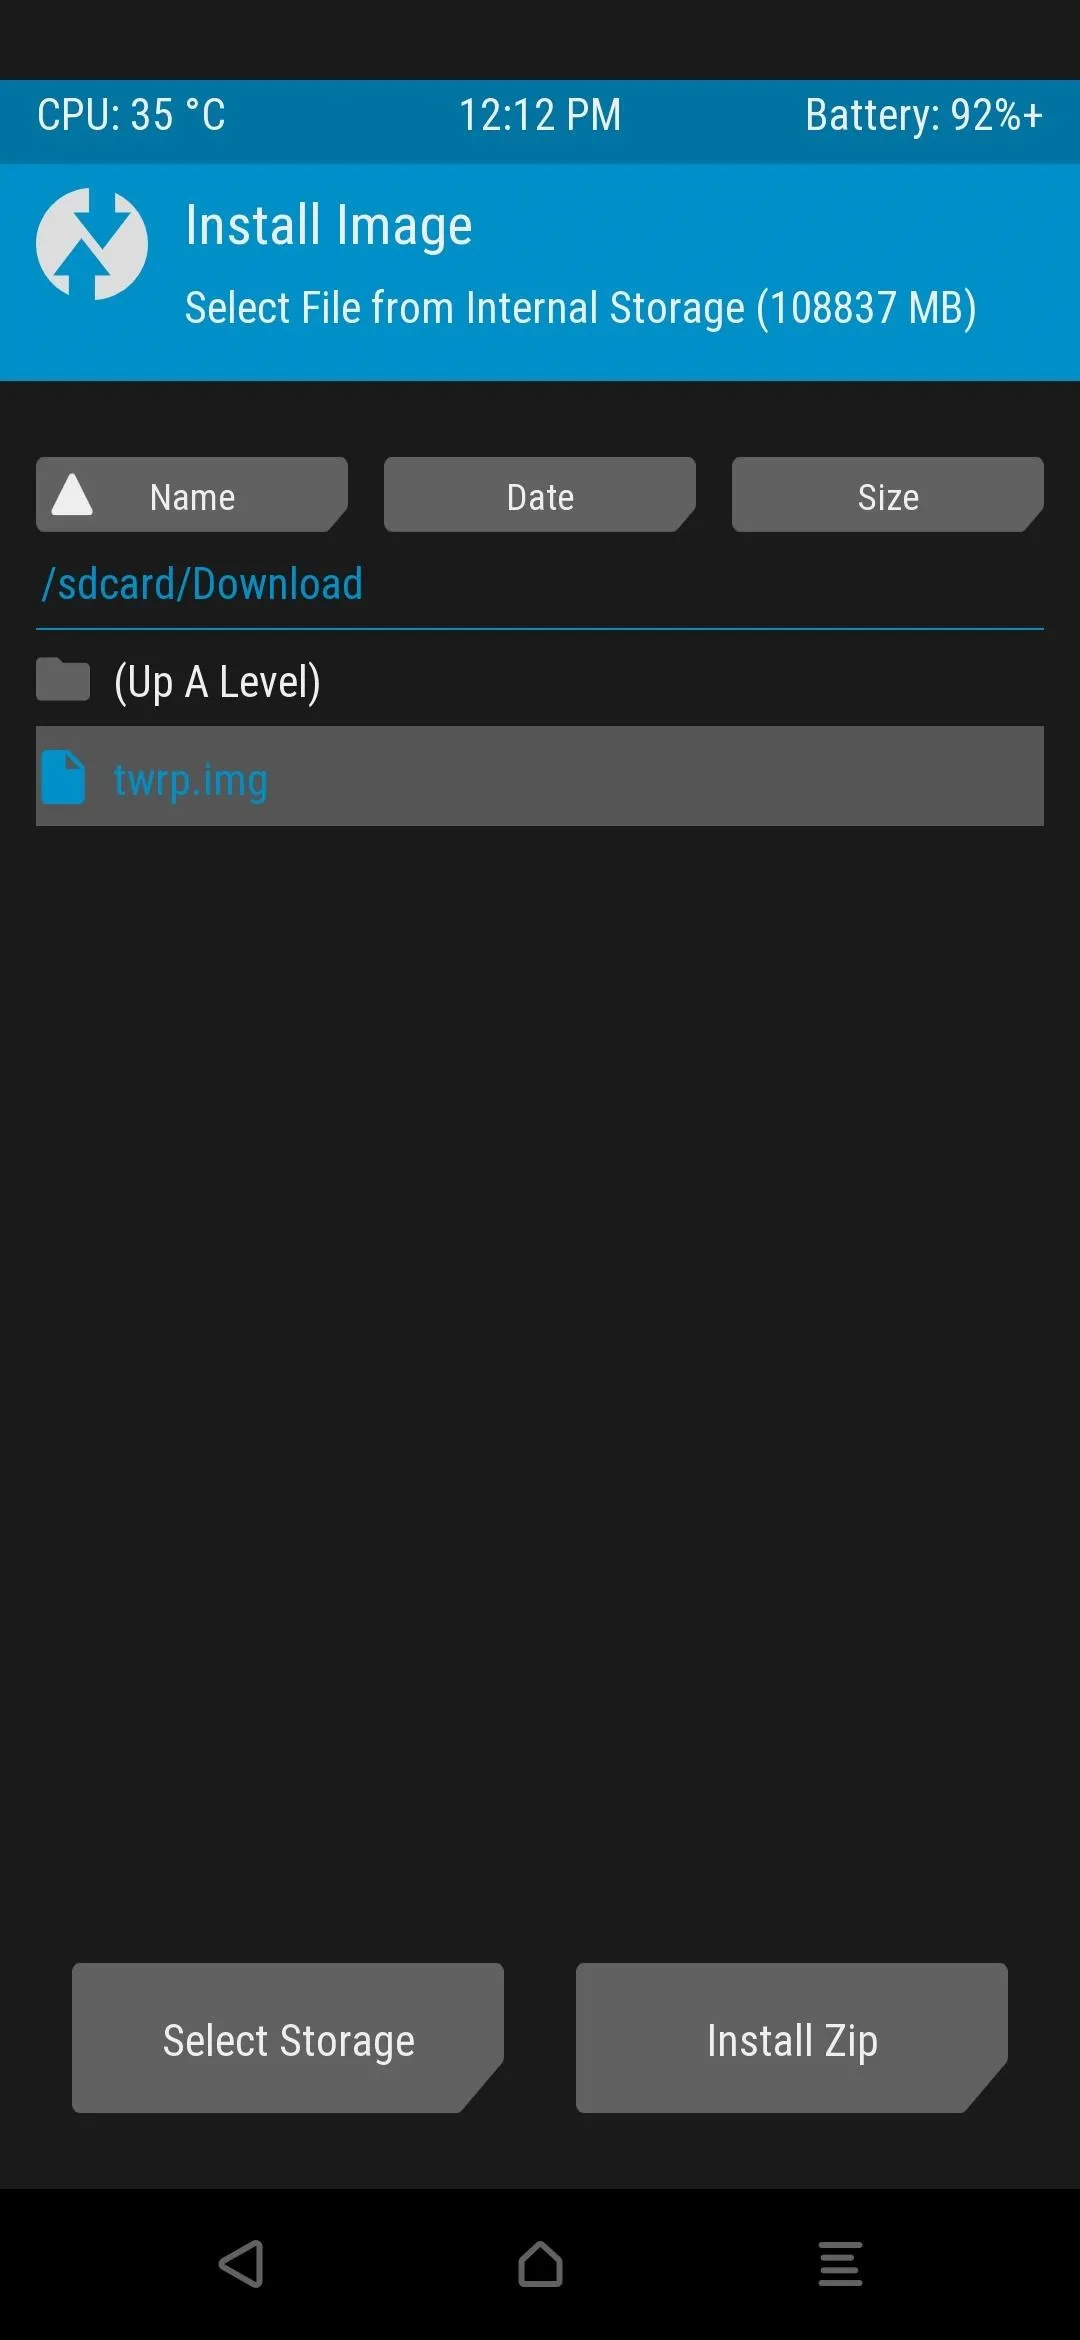
Depending on your version of TWRP, your options might differ slightly when installing an image file. Just look for something related to "Install Image" or "Recovery Ramdisk" and install it using that option.
Depending on your version of TWRP, your options might differ slightly when installing an image file. Just look for something related to "Install Image" or "Recovery Ramdisk" and install it using that option.
If the target phone does not have A/B partitions, open Termux on the rooted device and type the following command, then press enter.
fastboot flash recovery twrp.imgThis command will permanently install TWRP onto your device without any extra work on your part due to how devices with an "A-only" partition layout work. The final thing you need to do is type the following command, then press enter.
fastboot reboot recoveryAt this point, your secondary device should now reboot to the TWRP main menu automatically. You can safely remove the USB cable or OTG adapter now. You've successfully installed TWRP and can do anything you want using the popular custom recovery without being tied to a computer.
Note: If your device doesn't respond to the Fastboot recovery command, you'll have to manually boot into recovery mode. It involves holding a button combination when powering on the device to access the bootloader menu. You then navigate the menu to locate the "Recovery" option. Accessing the recovery option will boot you right into the TWRP main menu. Visit the link below for more on that:
Cover image and screenshots by Stephen Perkins/Gadget Hacks


Comments
Be the first, drop a comment!