


If you buy an Android phone from any of the big US carriers, it will come with several extra apps in addition to any apps the manufacturer preinstalled. It's all in the name of profit, of course. Some of these apps are from companies that paid the carriers to distribute their software, and some are from the carriers themselves, usually aimed at upselling you or perhaps collecting a little data.
The whole thing is pretty disgusting, honestly. Take the T-Mobile app as an example. On most phones that come with it preinstalled, you can't even delete the app using conventional methods. The "Disable" button is grayed out in your system settings and there's no option to uninstall the app. You have to use ADB, which typically involves your computer and a command prompt, to remove it.
But a new feature added in Android 9 and finalized in Android 11 now allows you to use ADB without a PC. That means you can just tap a few buttons, copy and paste some text from this article, and the T-Mobile app will be gone for good!
What You'll Need
- Android 9/One UI 1.0 or higher (some models may need Android 11)
- Access to any Wi-Fi network
- $3 to buy an awesome app from an independent developer
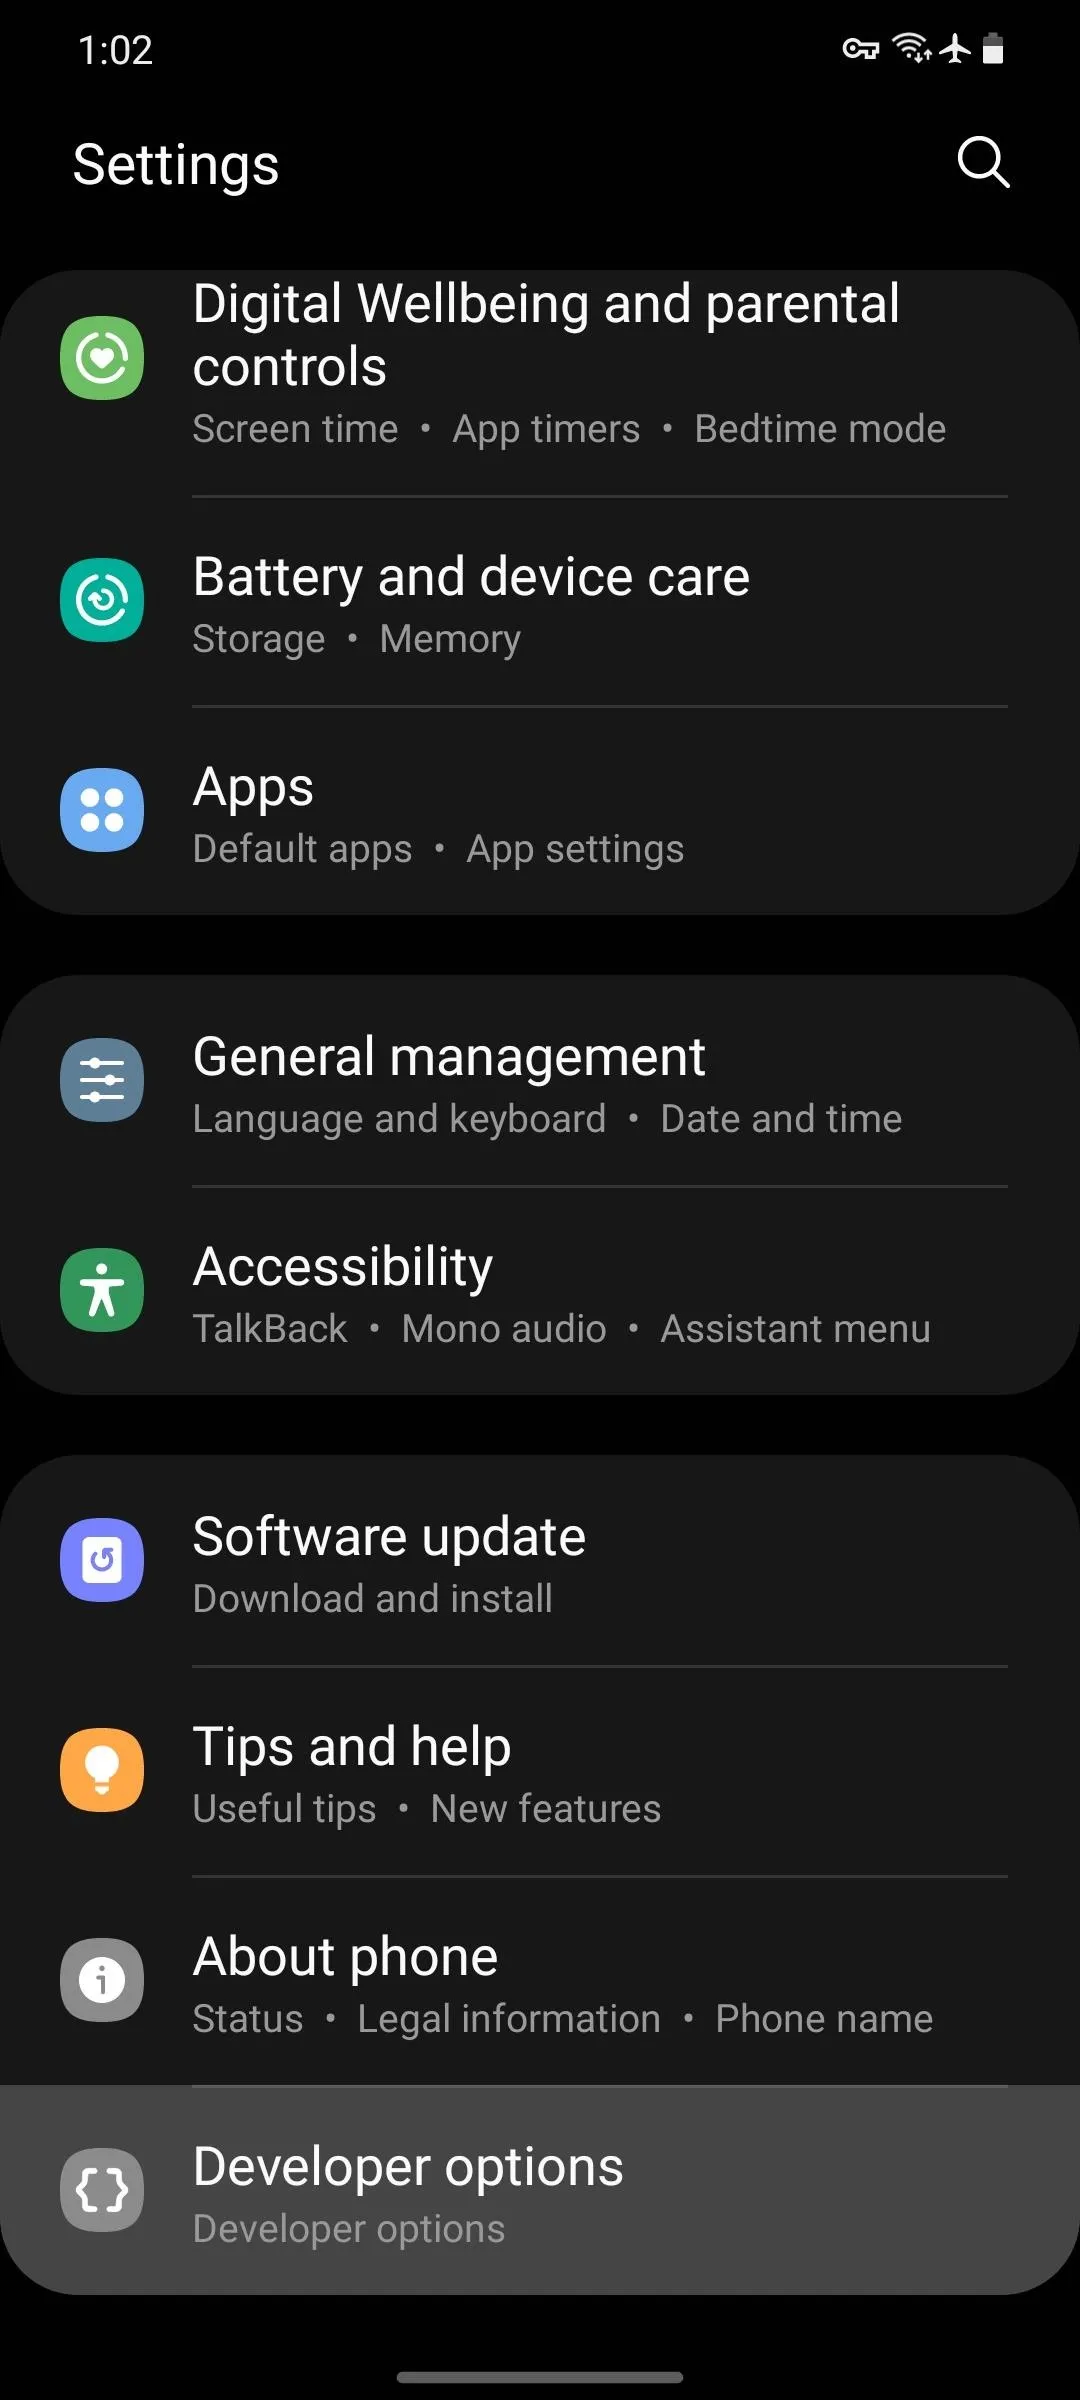
Enable Developer Options
First, open the Settings app from your app drawer (the "All Apps" list) and scroll down towards the bottom. Here, select "About Phone," and if you're on a Samsung, tap "Software Information" after that. Next, tap the "Build Number" entry seven times in quick succession to unlock Android's hidden Developer Options menu. If you'd like more help, we have a full guide dedicated to this part:
Enable Wireless Debugging
Next, back out to the main Settings menu and scroll down to the bottom to select the newly-unlocked "Developer Options." If you don't see it on the main menu, select "System," then "Advanced" to find the Dev Options menu.
Once inside, scroll down just a little bit (maybe one page length) and enable the toggle switch next to "Wireless Debugging." If you don't see this option, it's because some phone manufacturers hid it away on their builds of Android 9 and 10. It's not hidden anymore on any devices with Android 11. But your only option if it's not there is to set up a traditional ADB connection, then skip ahead to Step 5.
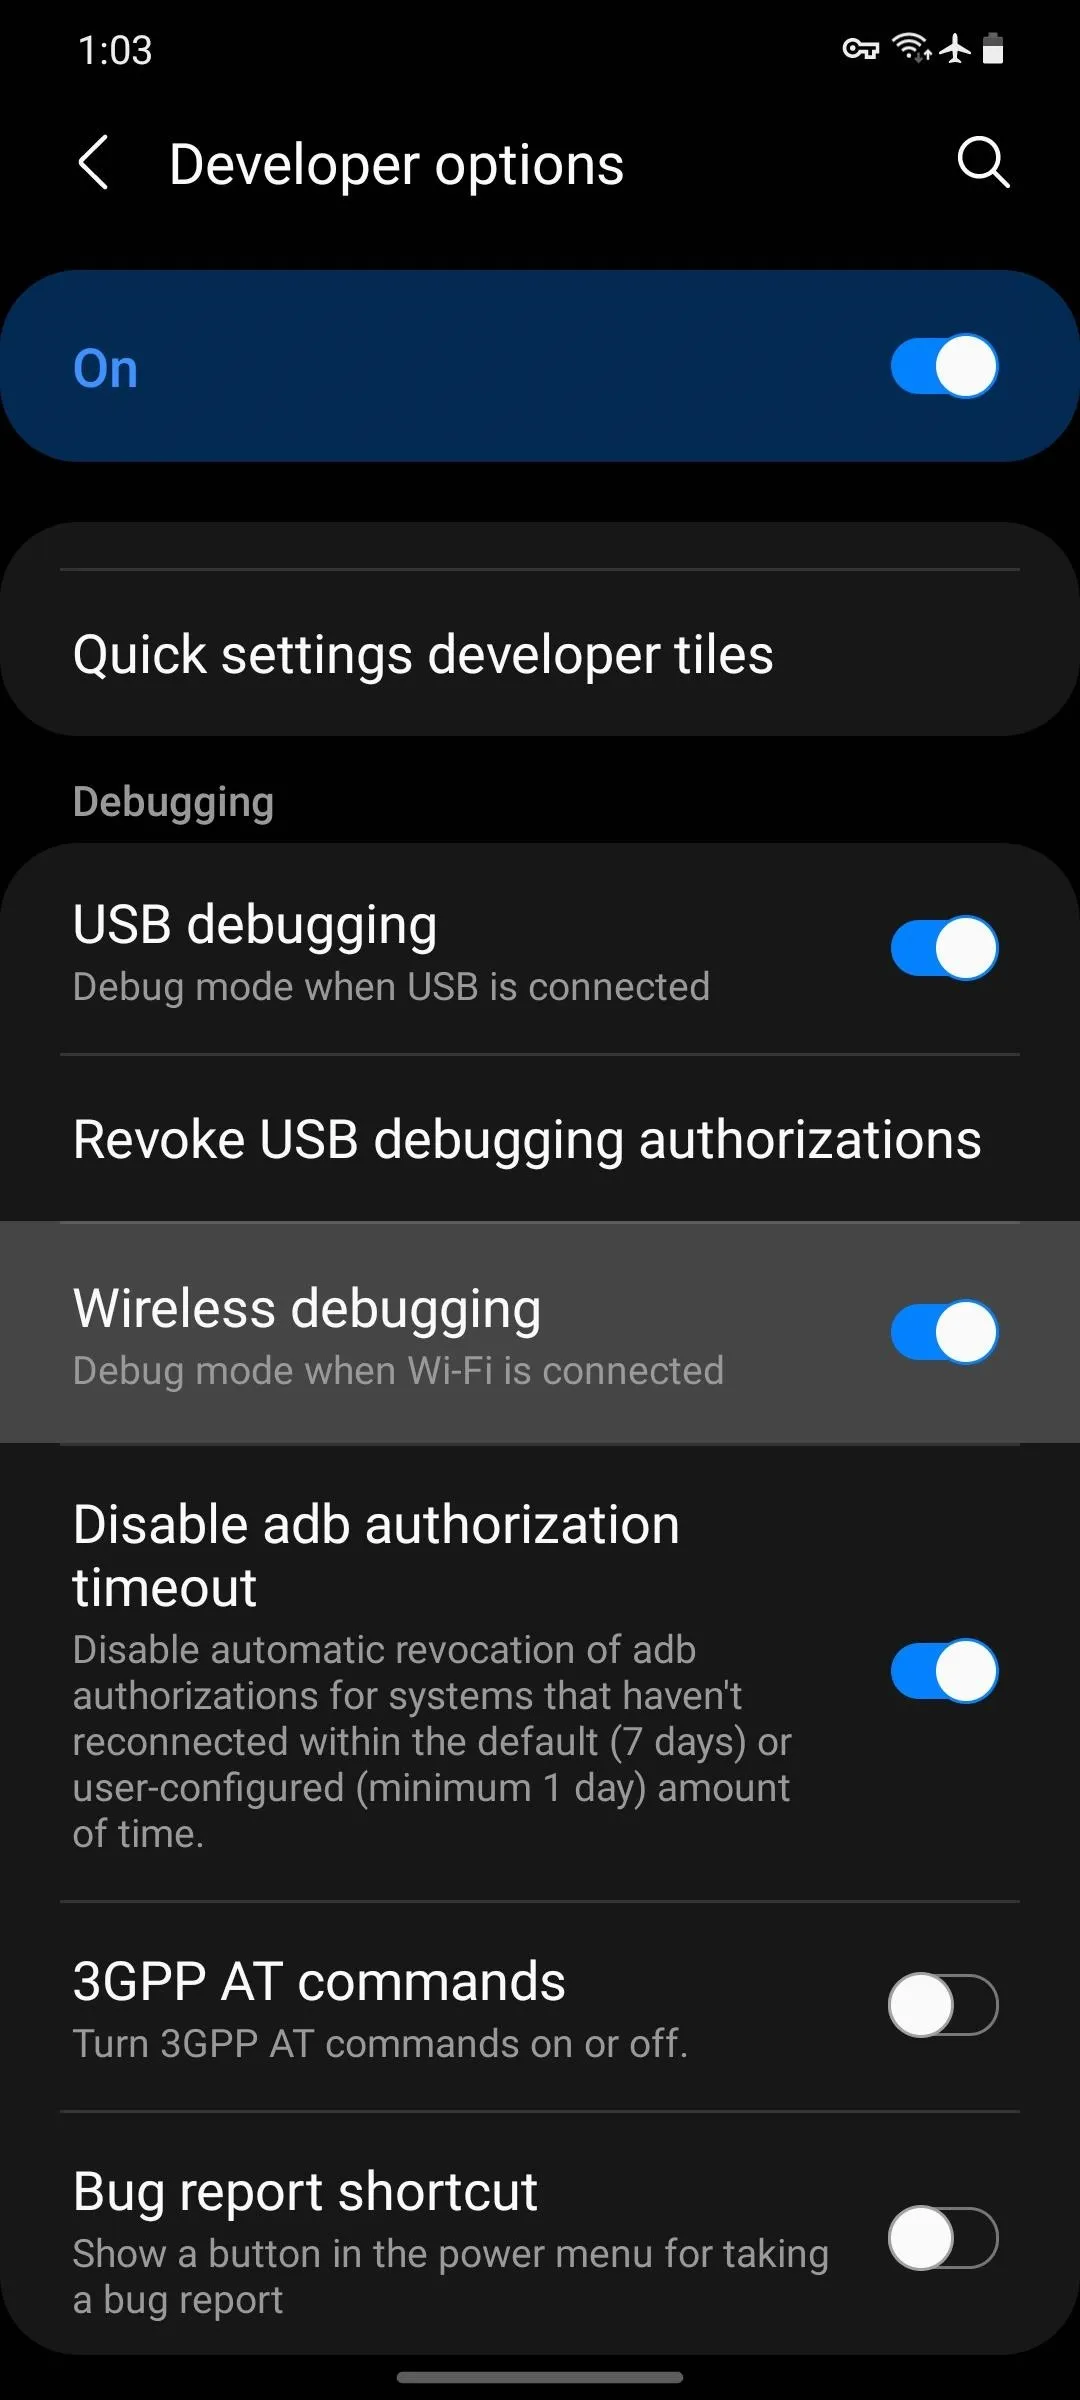
Also of note, this is the part where you'll need access to any Wi-Fi network. The Wireless Debugging setting won't allow you to turn it on unless you're connected to Wi-Fi. The network won't be used (instead you'll create a virtual network shell on your phone), so it can be literally any Wi-Fi access point, even one without internet.
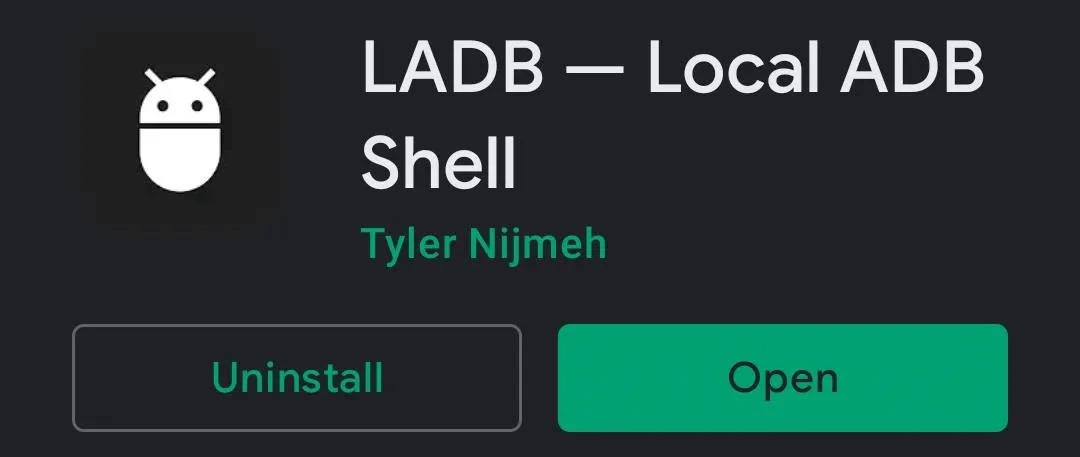
Install LADB
Here's the part that actually costs a little money. Instead of using the Wireless Debugging feature through a computer over Wi-Fi, you can use an app called LADB, or Local ADB, to create an ADB server on your phone and connect directly to it without a PC.
If you're unable to use the Play Store's billing system or you can't spare the money, you can visit the project's GitHub page and compile the app from source, but be warned that's a complicated process. For everyone else, just grab the app from the Play Store at the link below!
- Play Store Link: LADB — Local ADB Shell ($2.99)
Connect to the Virtual Shell
Next, you'll just have to connect LADB's local host to your phone's wireless ADB function. But depending on what Android version you're running, that can be either incredibly easy or a little clunky. We'll start with the clunky one (newer Android versions), so if you're running Android 10 or lower, you can skip ahead.
Android 11 & Higher
Starting with Android 11, the new Wireless Debugging feature is complete. That means it even has a proper security system where you have to enter credentials to send commands, which complicates things in this instance.
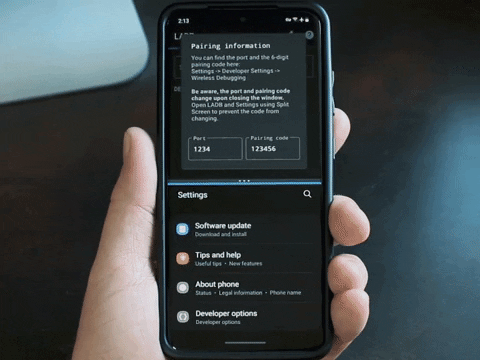
So when you first launch LADB on Android 11, you'll see a popup asking you to input the port number and pairing code. Since the popup in Settings that shows the pairing code was meant to be read on your phone while you're typing it into a computer, the system automatically changes the pairing code as soon as it closes.
So you'll need to open your Settings app in split-screen view to keep the popup from closing. While LADB is prompting you for the numbers, enter multitasking view and tap the app's icon at the top of its card, then select "Split Screen." Next, select the Settings card from the mini multitasking view that appears to make it the second screen. Or if you're on Samsung, select "Settings" from the list.
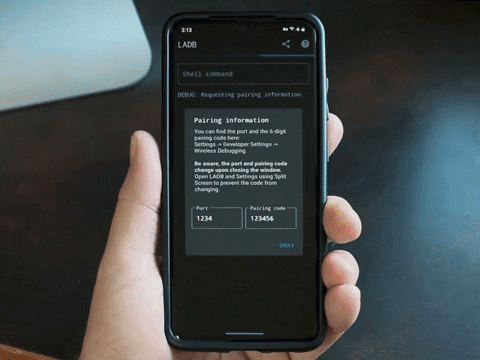
From there, head back to Settings –> System –> Advanced –> Developer Options or Settings –> Developer Options, then tap the "Wireless Debugging" text (rather than the toggle) to open the feature's submenu. From there, scroll down and tap "Pair device with pairing code."
Now it's just a matter of copying the numbers over. Under IP address & Port in the Settings popup, you'll see a series of numbers, then a colon, then another number. The number after the colon is what you should enter into the Port field in LADB. Then the pairing code goes in the Pairing Code box and you can tap "Okay" in LADB.
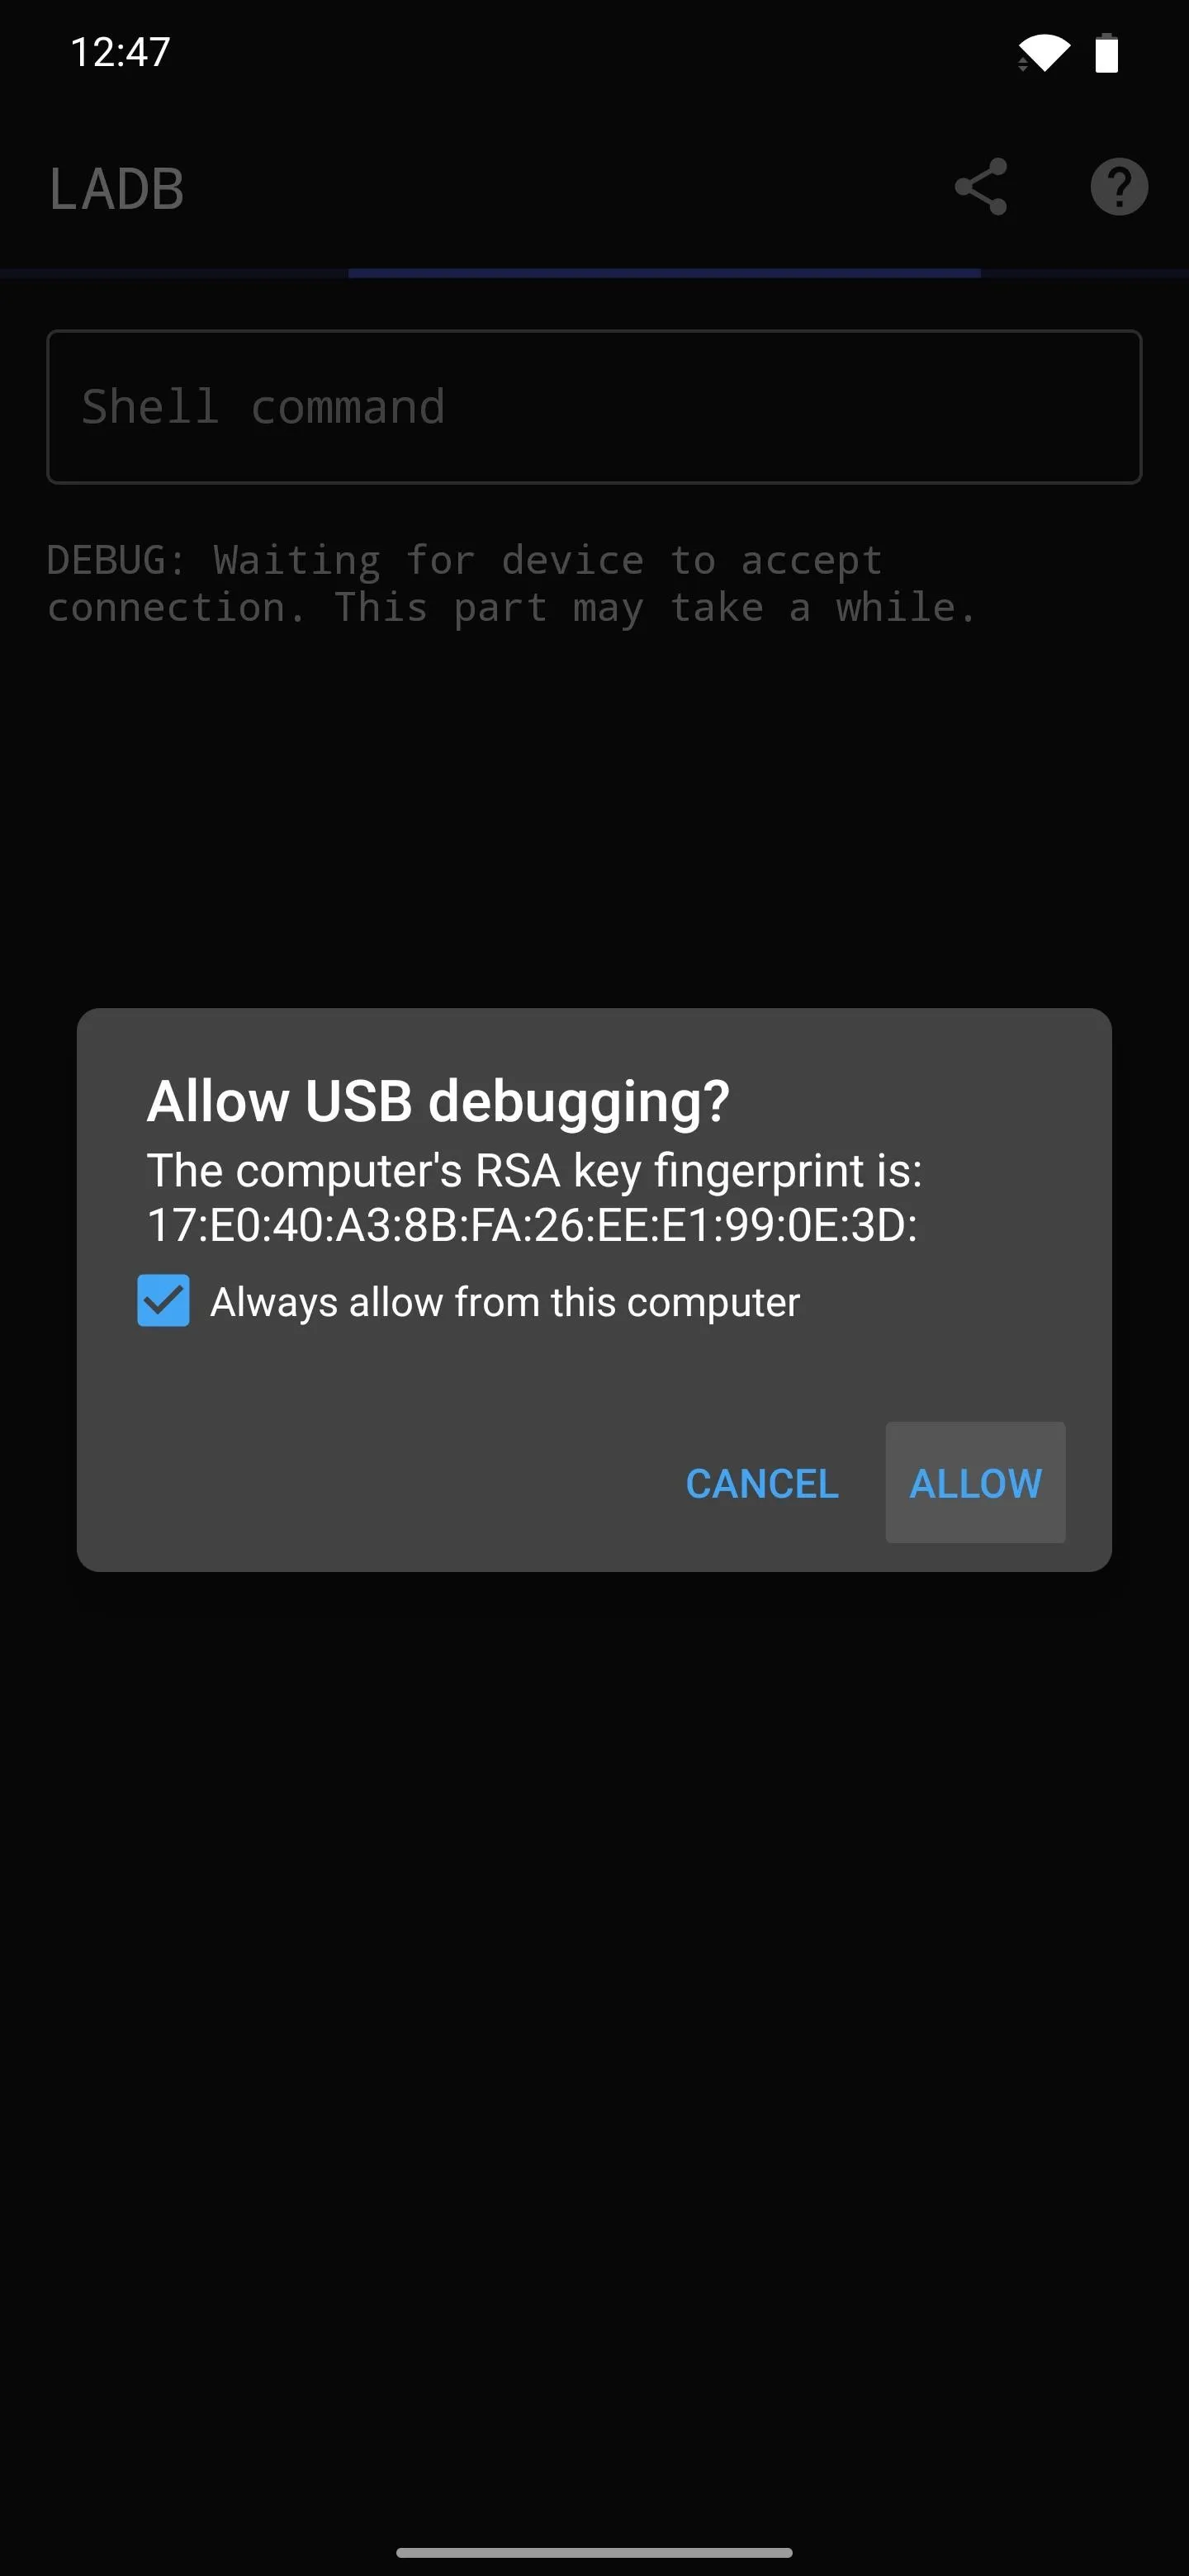
You'll see a message in the LADB terminal saying "Waiting for device to accept connection." This could take up to two minutes, so be patient. When the connection is complete, you should get a notification from Android System telling you "Wireless debugging connected."
Android 9 & 10
If you're on Android 9 or 10, this part is so much easier. Just open the app, then tick the box next to "Always allow" and select "Allow" when prompted to "Allow USB Debugging." You'll then be shown the command line, ready to accept a command!
Delete the T-Mobile App
Now you're ready to do some deleting. Long-press the text in the code box below, choose "Select All" from the context menu, then hit "Copy."
pm uninstall user --0 com.tmobile.pr.mytmobileHead back to LADB and paste the above command into the input field at the bottom of the screen, then hit enter on your keyboard. You'll see a "Success!" message and you'll instantly find that the T-Mobile app is gone from your system.
This method is permanent with two exceptions. One, you can reinstall the app by sending the command in the code box below. Two, if you ever factory reset your phone, it will be restored. Other than that, have fun with your less-bloated phone!
pm install-existing com.tmobile.pr.mytmobileCover image, screenshots, and GIFs by Dallas Thomas/Gadget Hacks


Comments
Be the first, drop a comment!