


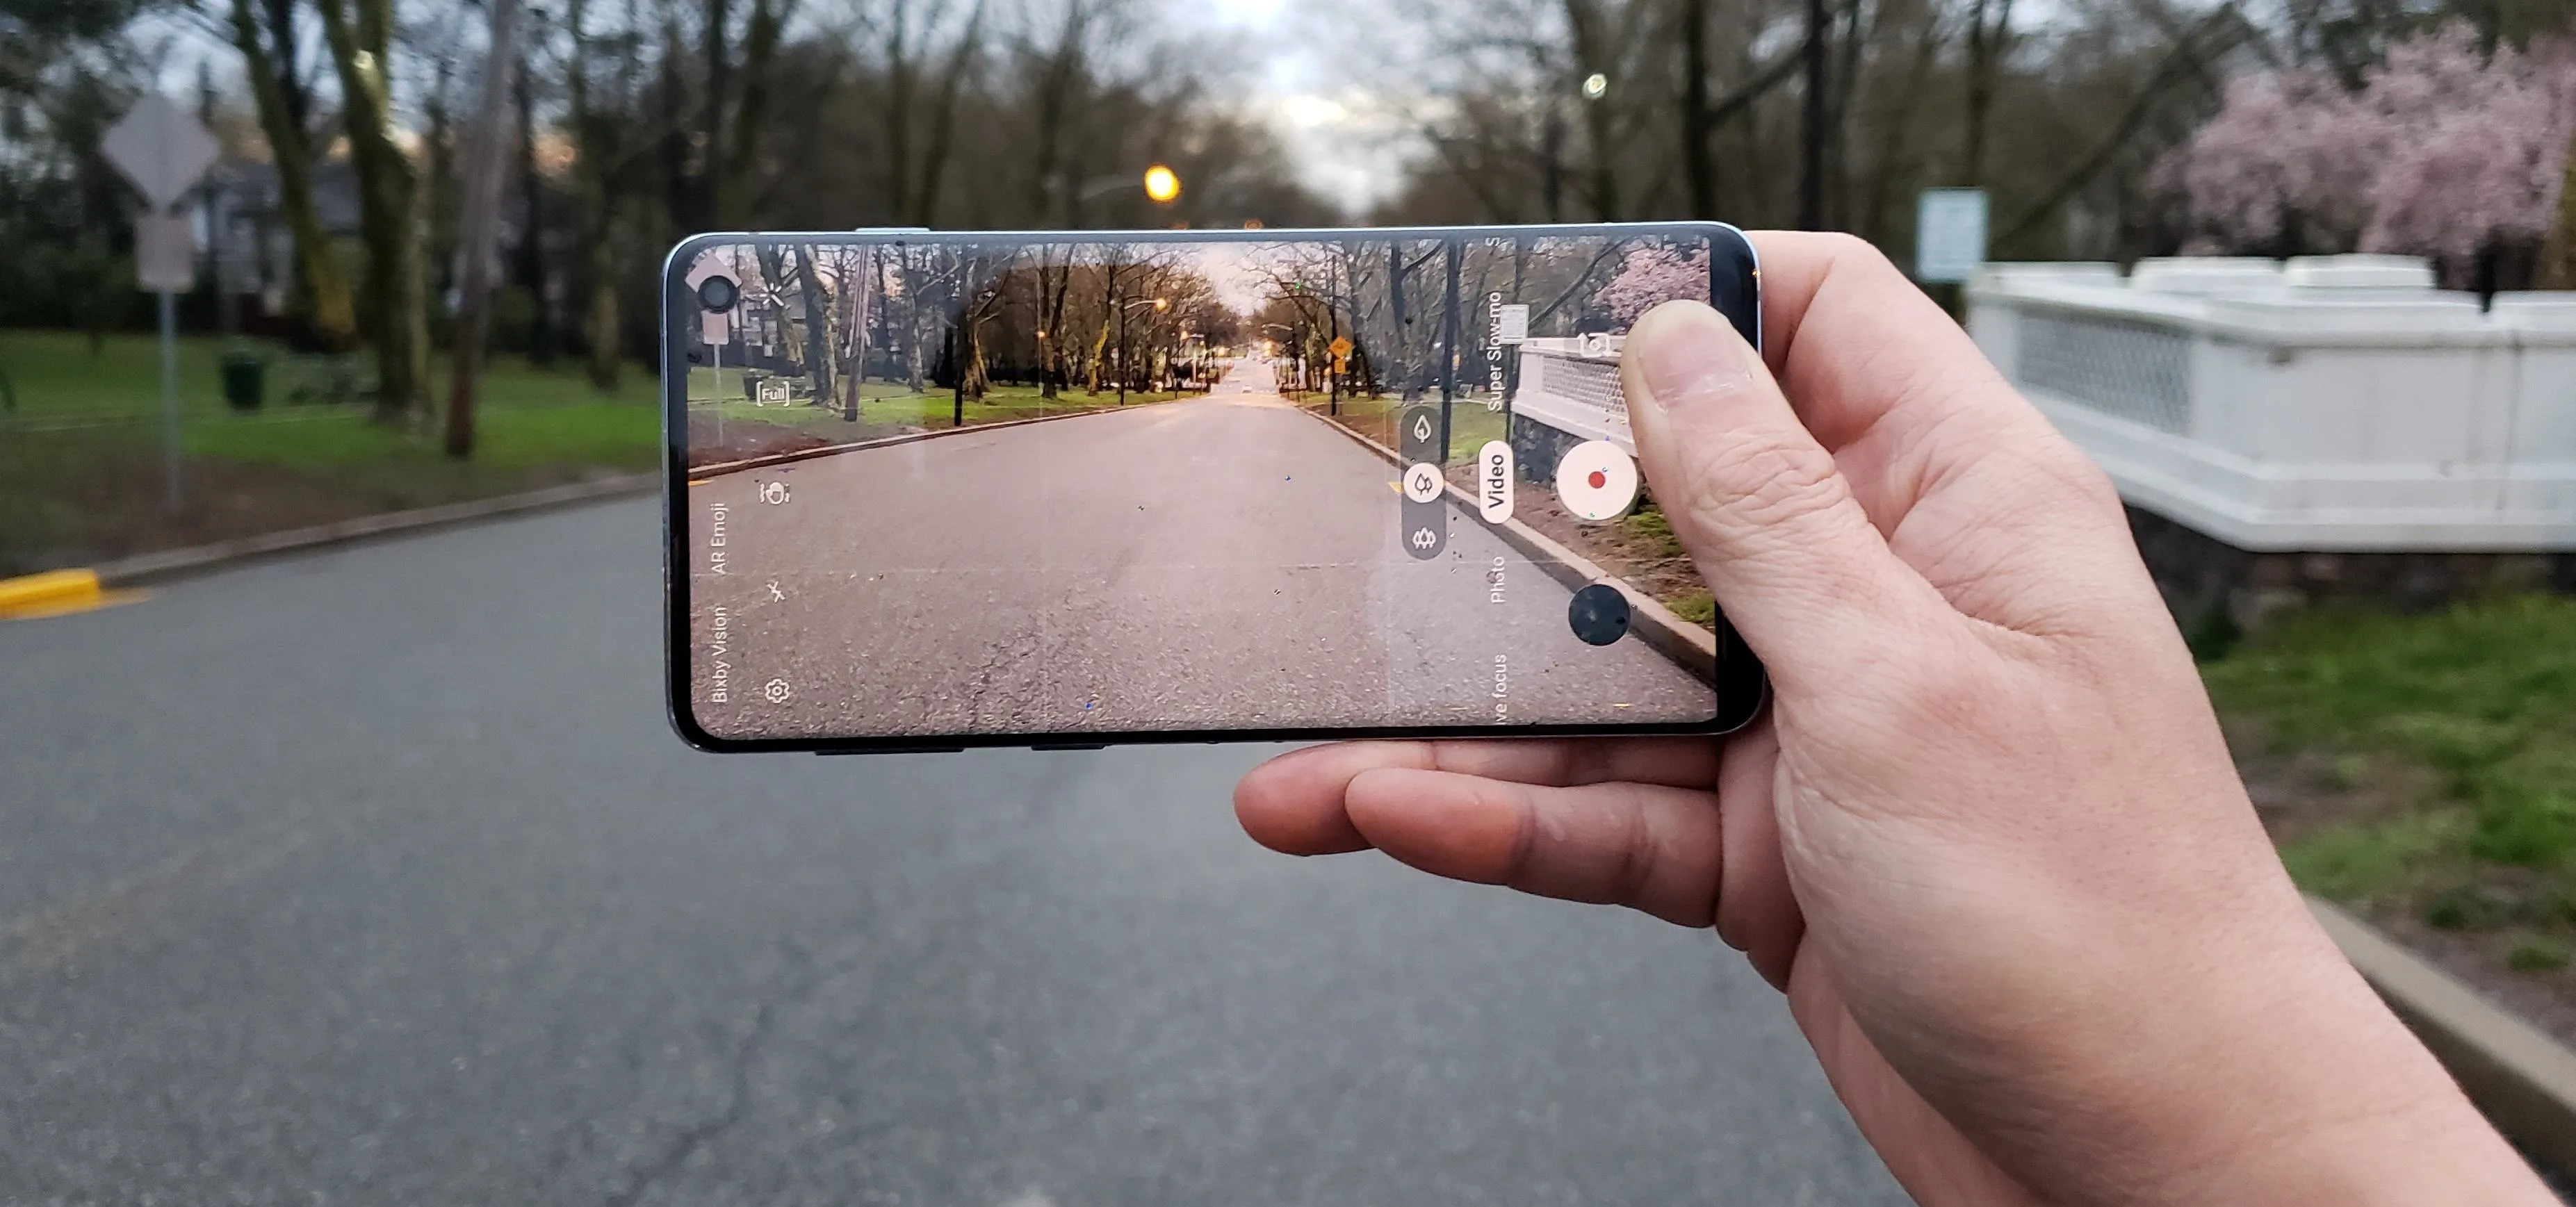
Smartphones have put an end to camcorders. If you want to capture memorable moments in high quality, look no further than that technological marvel in your pocket. Recent Galaxy phones are shining examples of how far we've come — but the more capable a camera gets, the more complicated things can be.
Below, we'll highlight many lesser-known video features in Samsung's Camera app, and since it's remained largely unchanged from Android Oreo to Android Pie (One UI), the majority of these tips will apply to all recent Galaxy flagships. So whether you're using an S8, S9, S10, Note 8, or Note 9, try these tricks to ensure consistently great videos when filming using Samsung Camera.
Tip 1. Quickly Set the Aspect Ratio (One UI)
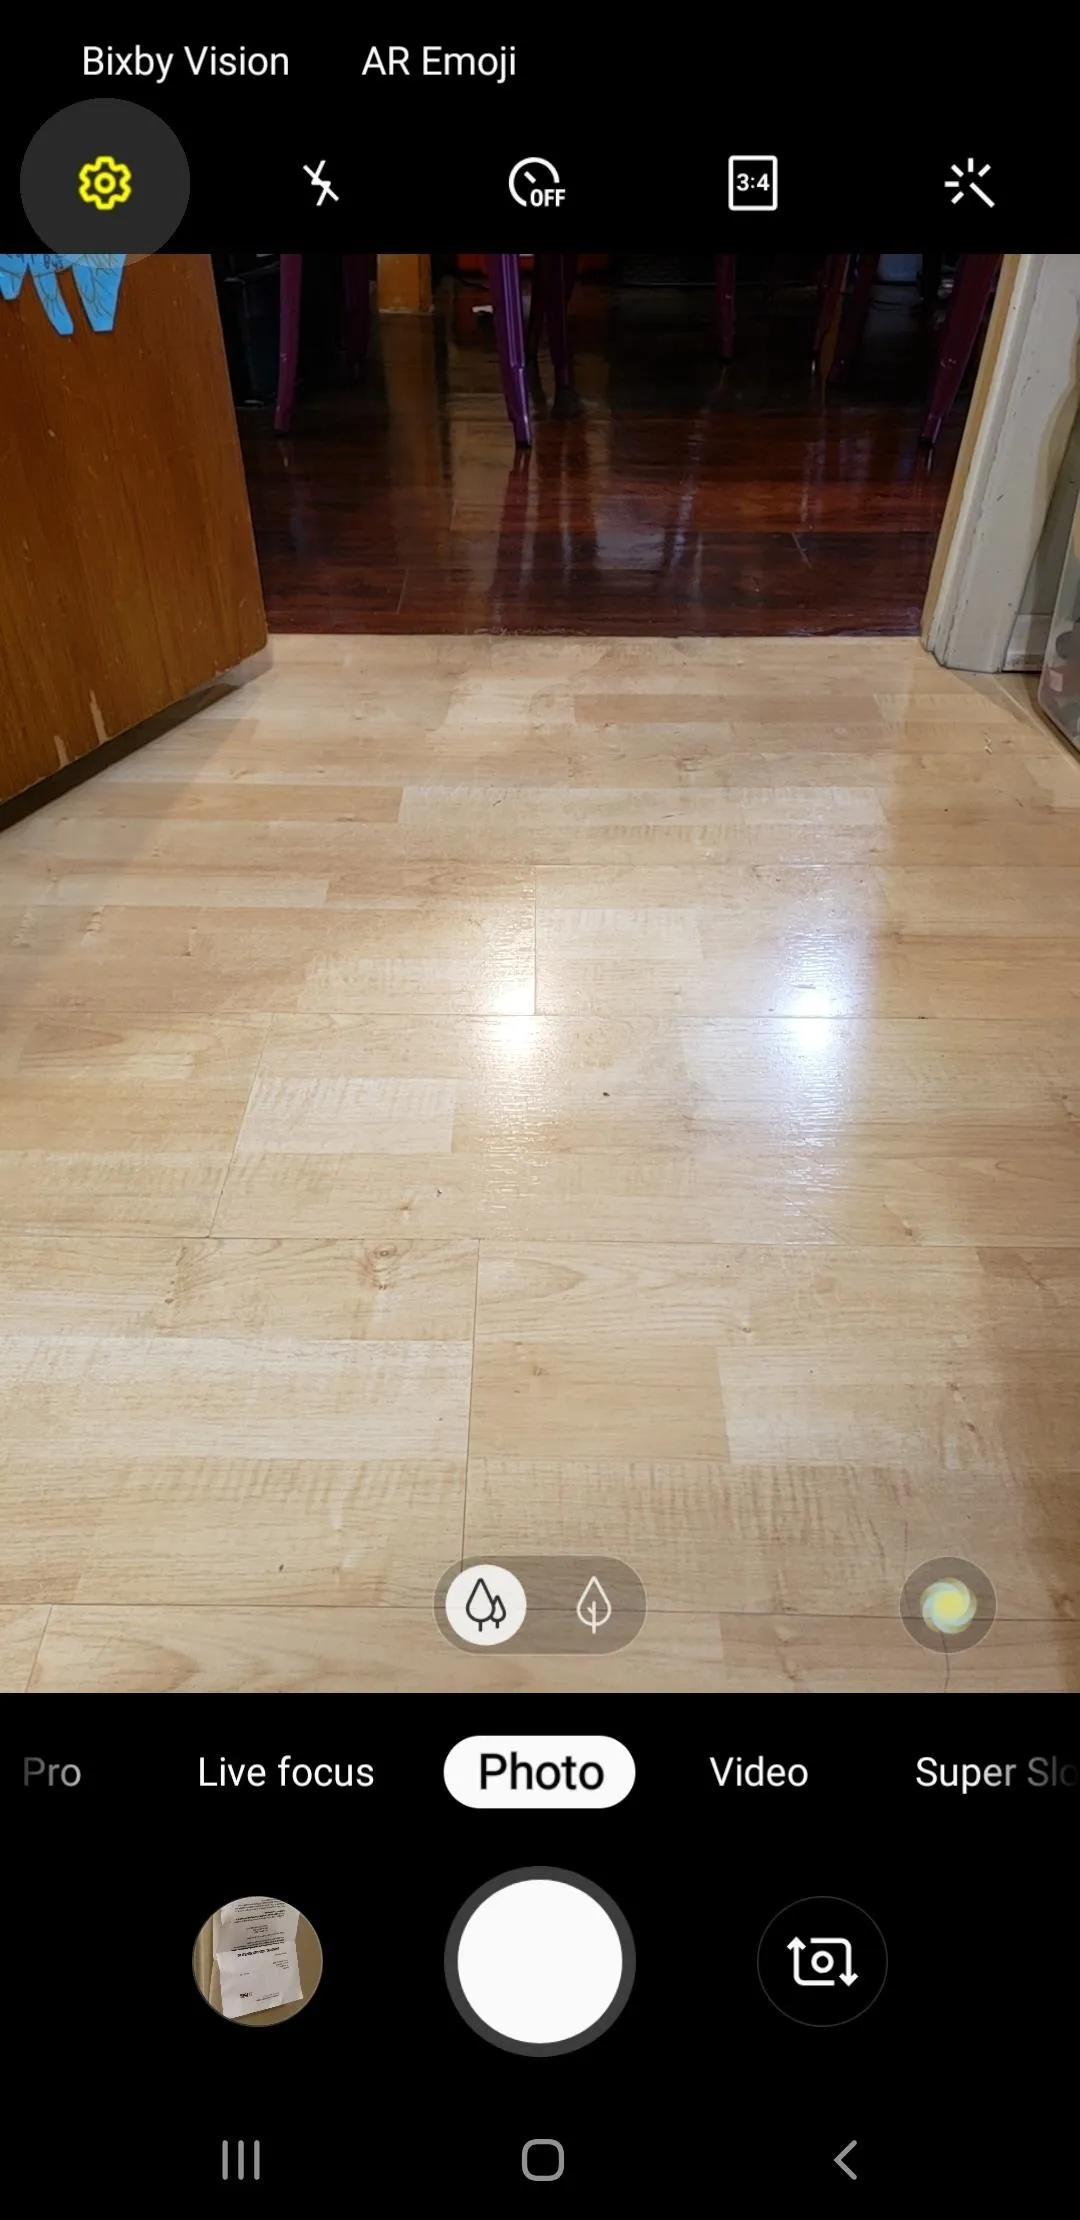
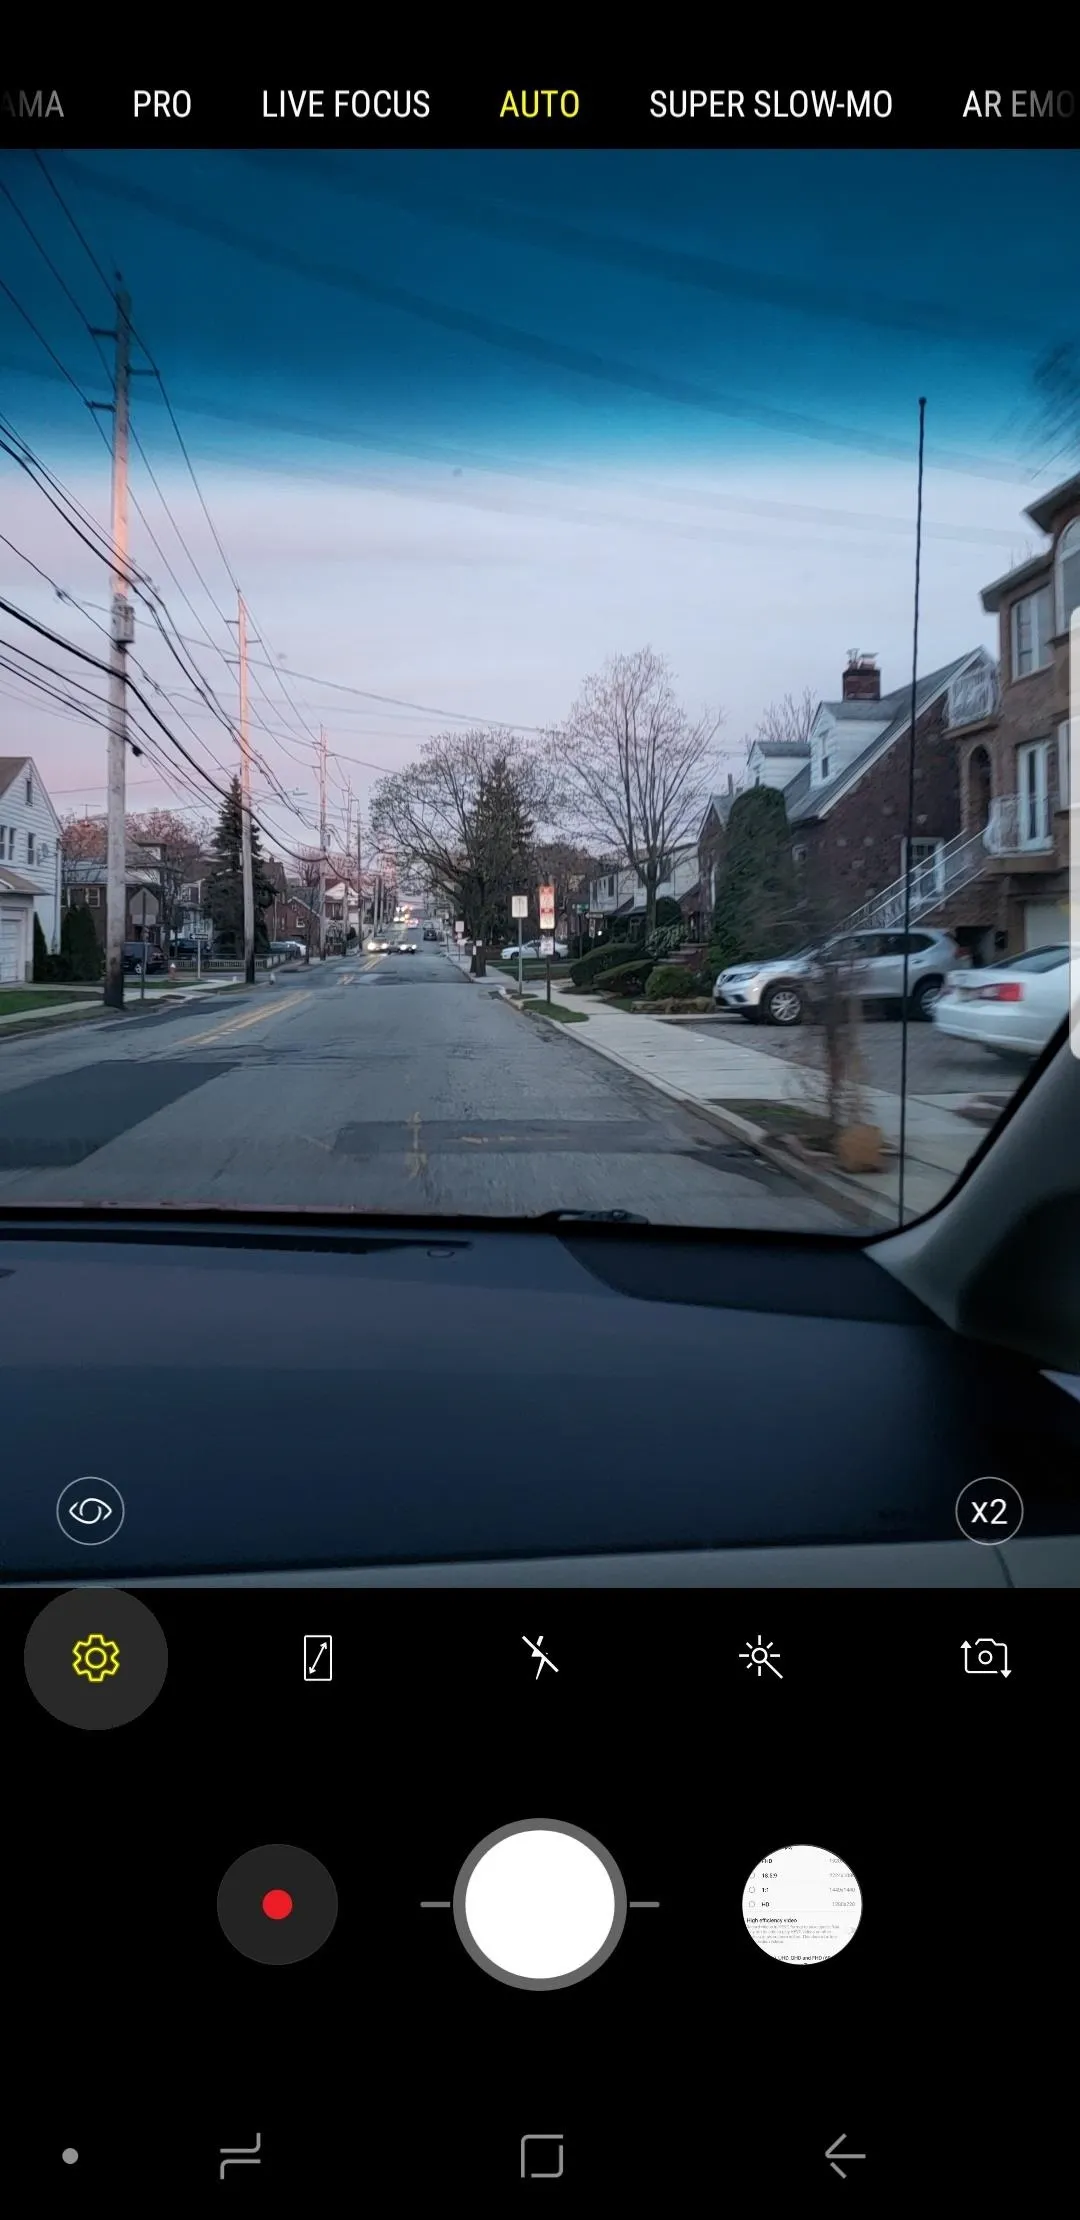
If your Galaxy is running the new One UI update, you can quickly set your video's aspect ratio in just a few taps, regardless of whether you're using the selfie or main camera. Tap on the ratio icon located along the top of the viewfinder and choose between "16:9," "Full," and "1:1" for both front and rear cameras.

Keep in mind that changing the aspect ratio will also change the resolution, which varies between Galaxy devices. On the S10, for instance, this option varies between 1920 x 1080 on "16:9" by default, 2288 x 1080 on "Full," and 1440 x 1440 when set to "1:1."
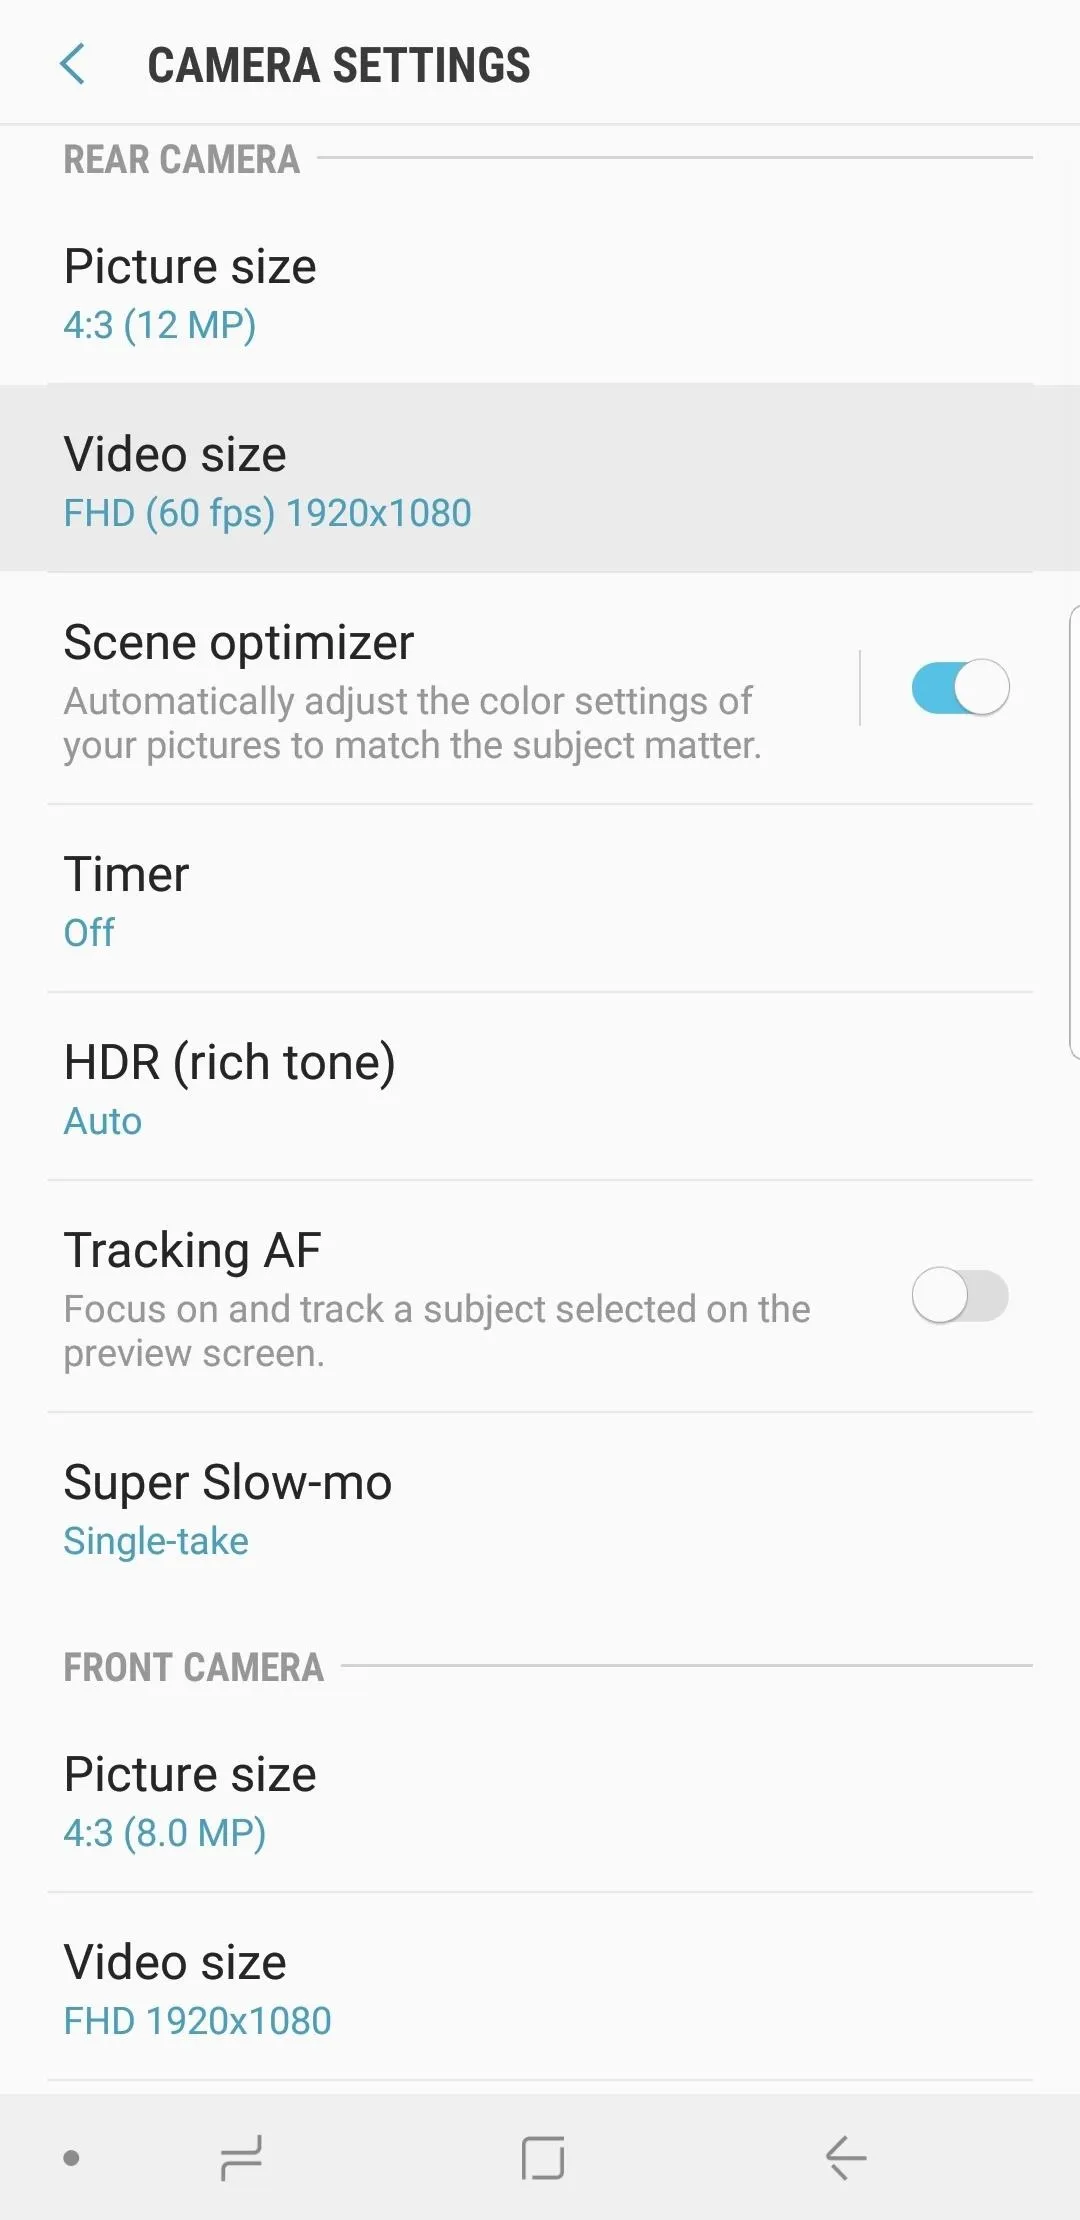
Tip 2. Change Your Video's Resolution (Oreo & One UI)
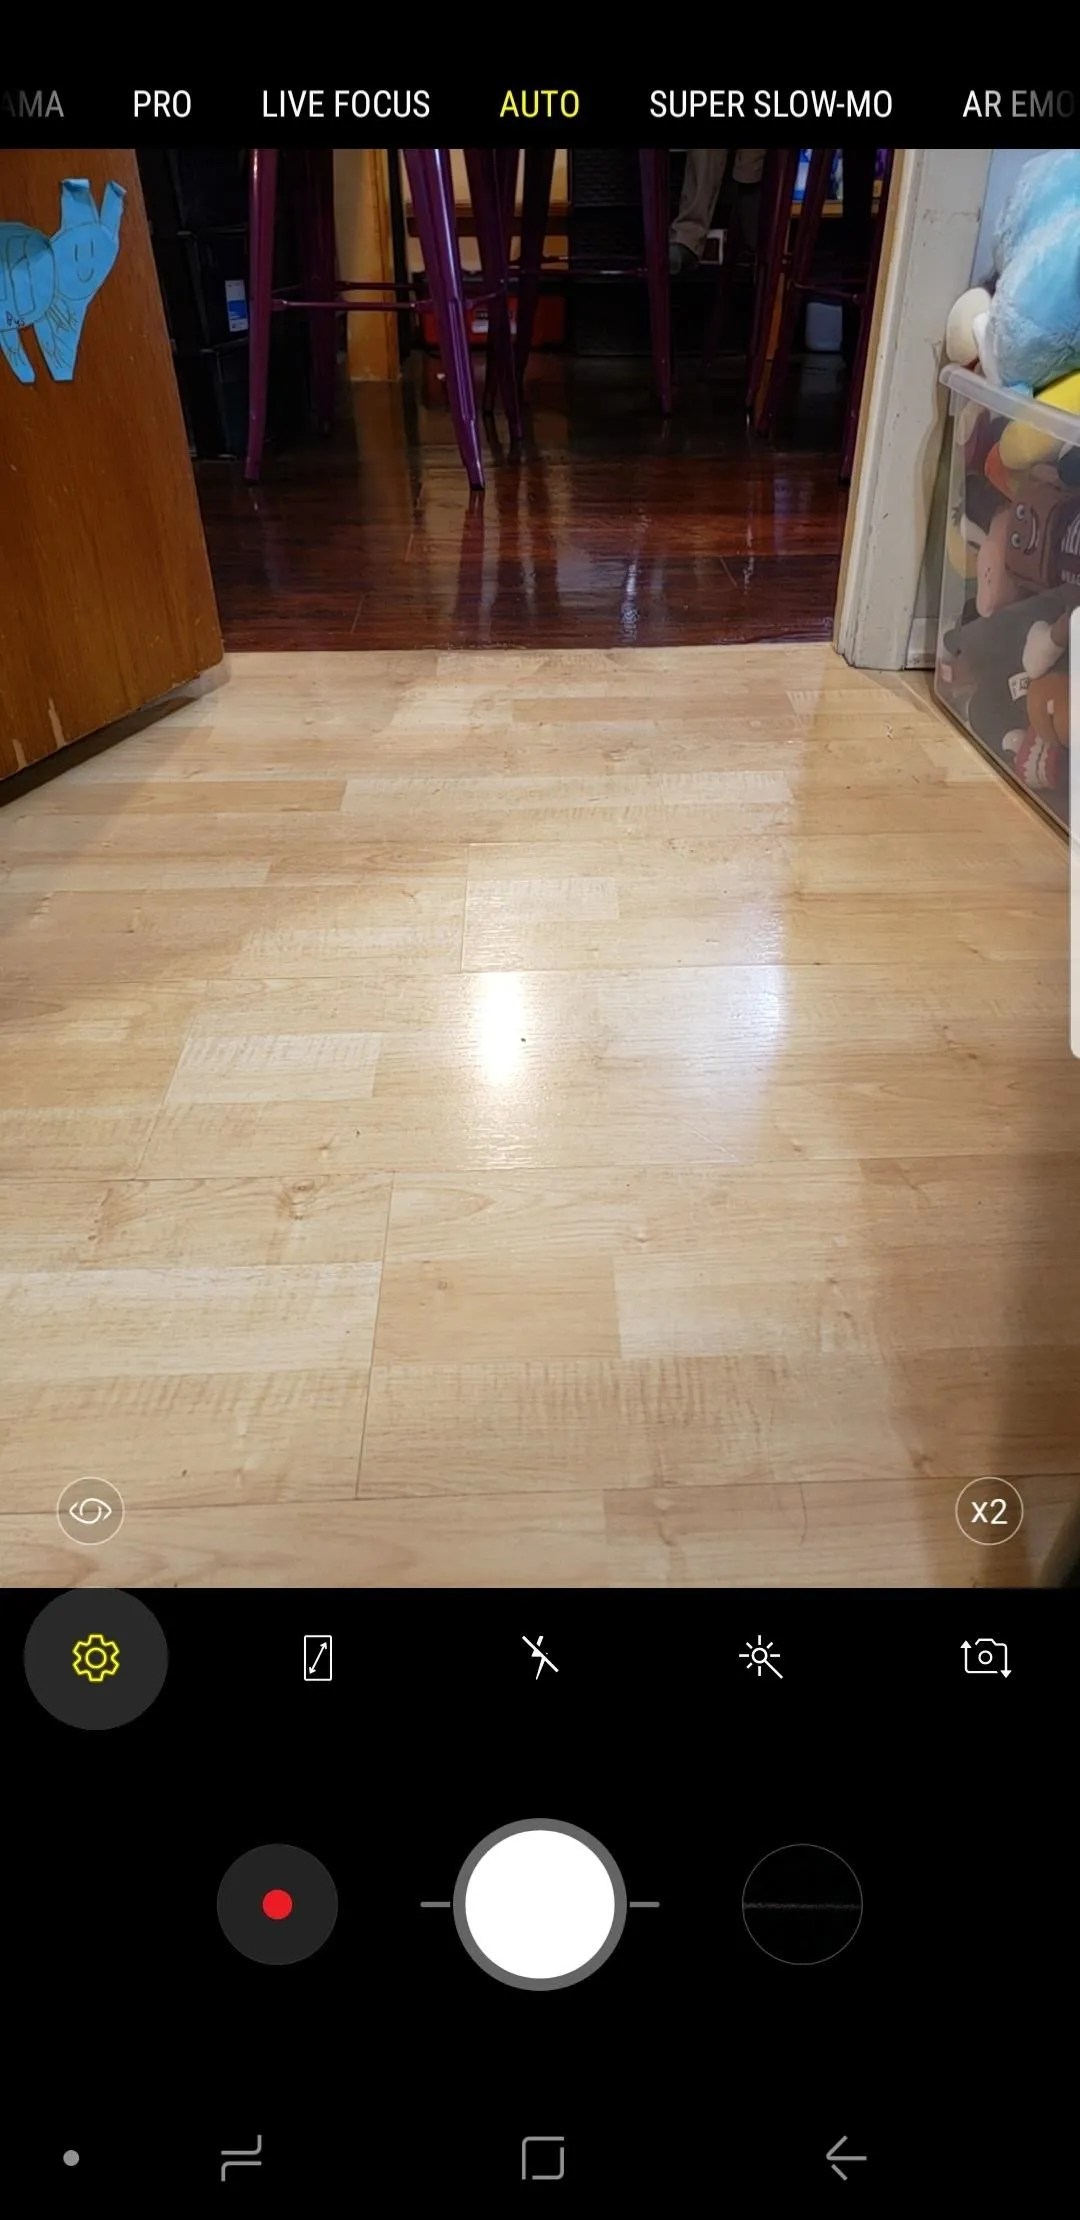
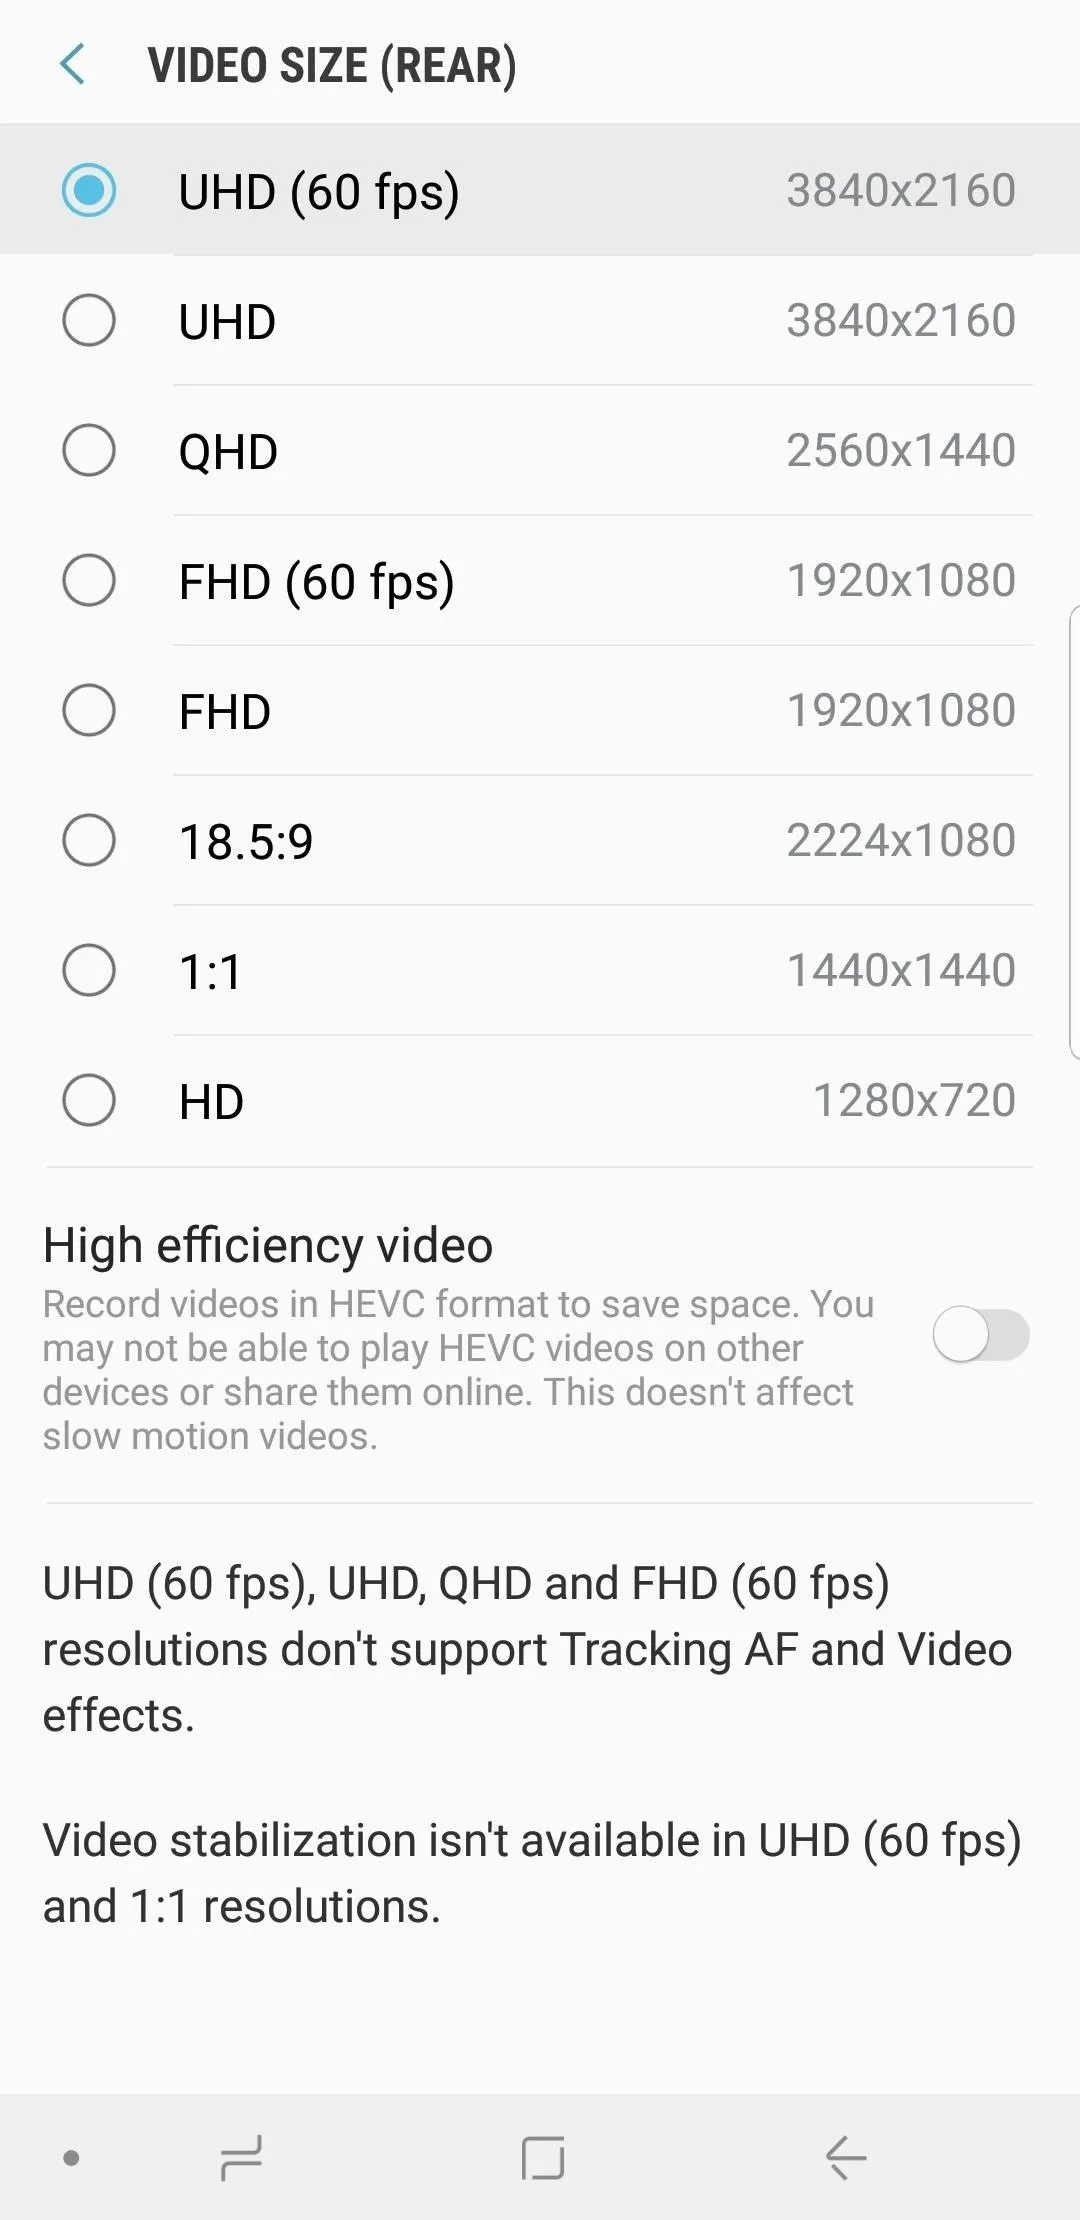
When you're filming videos using the standard 16:9 aspect ratio, Samsung Camera lets you customize the video resolution. For this, you'll need to go into the app's settings page by tapping on the cog-shaped icon located either along the top-left of the viewfinder (One UI), or on the left-hand side right above the shutter button (Oreo).
From there, tap on either "Rear video size" or "Front video size," depending on which one you want to adjust. Choose "Resolution" within the "16:9" option, then select the video resolution from the overflow menu that appears. For maximum quality and frame rate, you may want to set the resolution to UHD (60 fps)for the main camera, though doing so will cause videos to take up more storage space.
Tip 3. Keep Your Videos Smooth & Steady (Oreo & One UI)
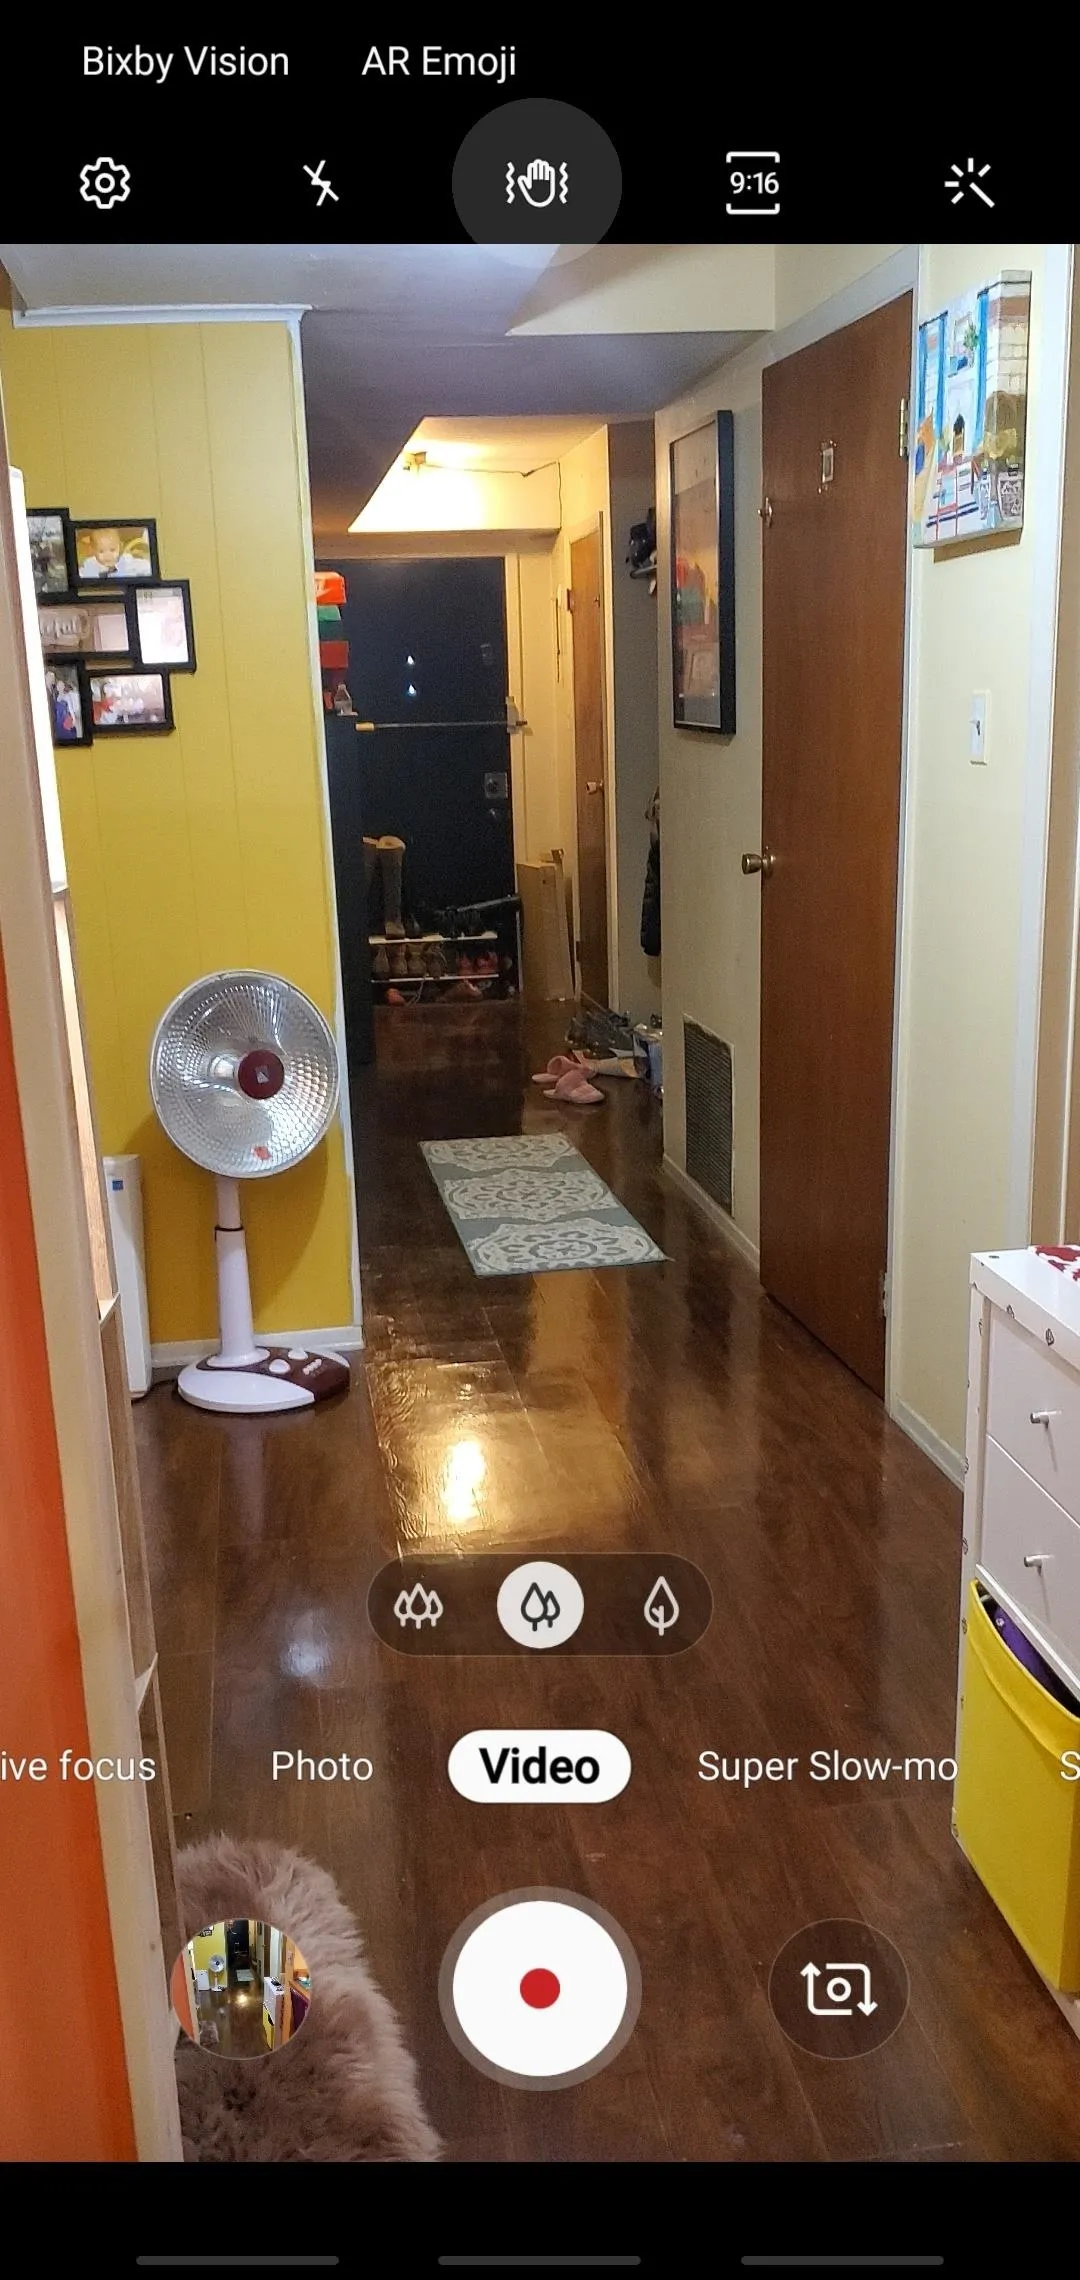
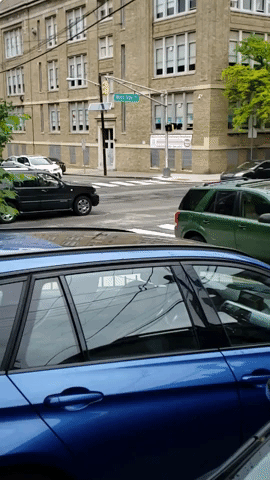
If you're filming a video on your Galaxy S10 while on the move, there's a nifty setting you can enable to ensure your recording stays as steady and stable as possible. Aptly named Super Steady, the feature can be enabled by tapping on the hand icon along the top of your S10's viewfinder.
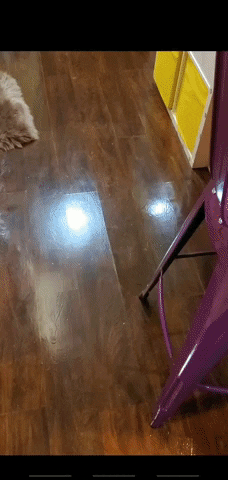
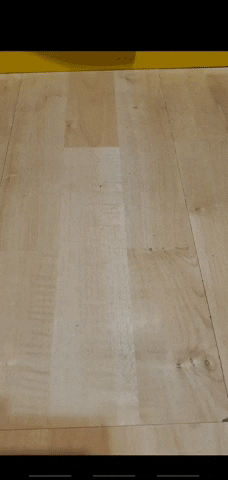
Enabling the feature on your S10 significantly reduces wobbling for a nearly steady video. And while Super Steady isn't available on older devices, you can still enable "Video stabilization" from within Samsung Camera's settings for noticeably smoother videos. Granted, the feature is not as effective as Super Steady, but still does the job quite well, as you can see from the comparison GIFs below.
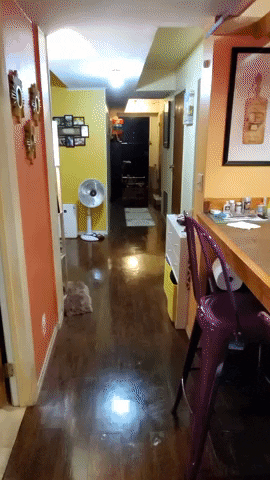
Super Steady enabled.
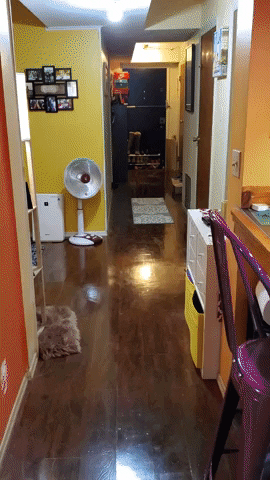
Video stabilization enabled.
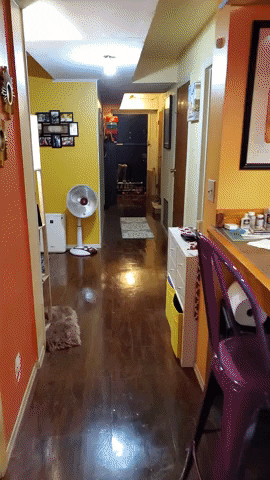
Video stabilization disabled.
Super Steady enabled.
Video stabilization enabled.
Video stabilization disabled.
Tip 4. Record Videos Hands-Free (Oreo & One UI)
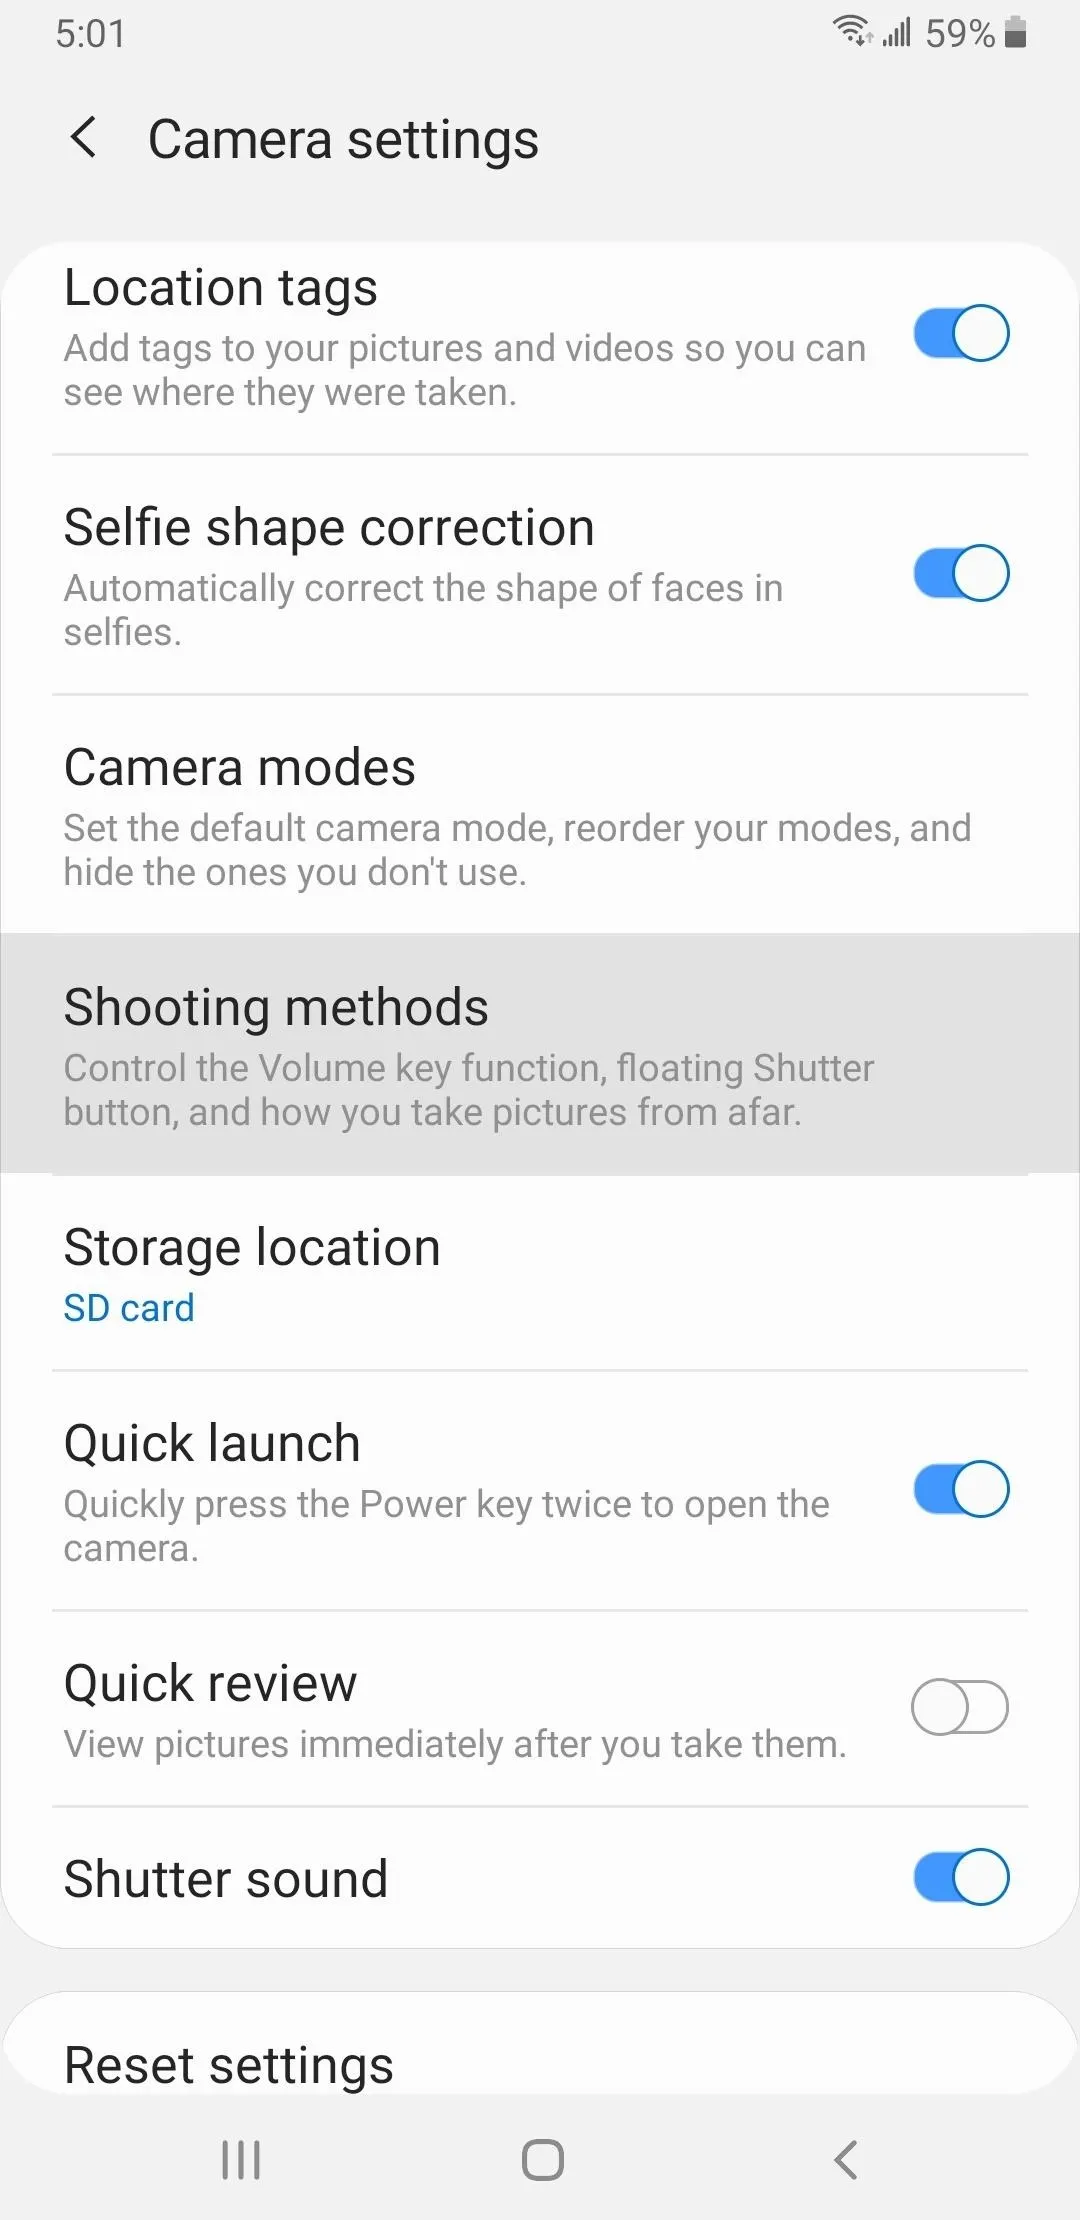
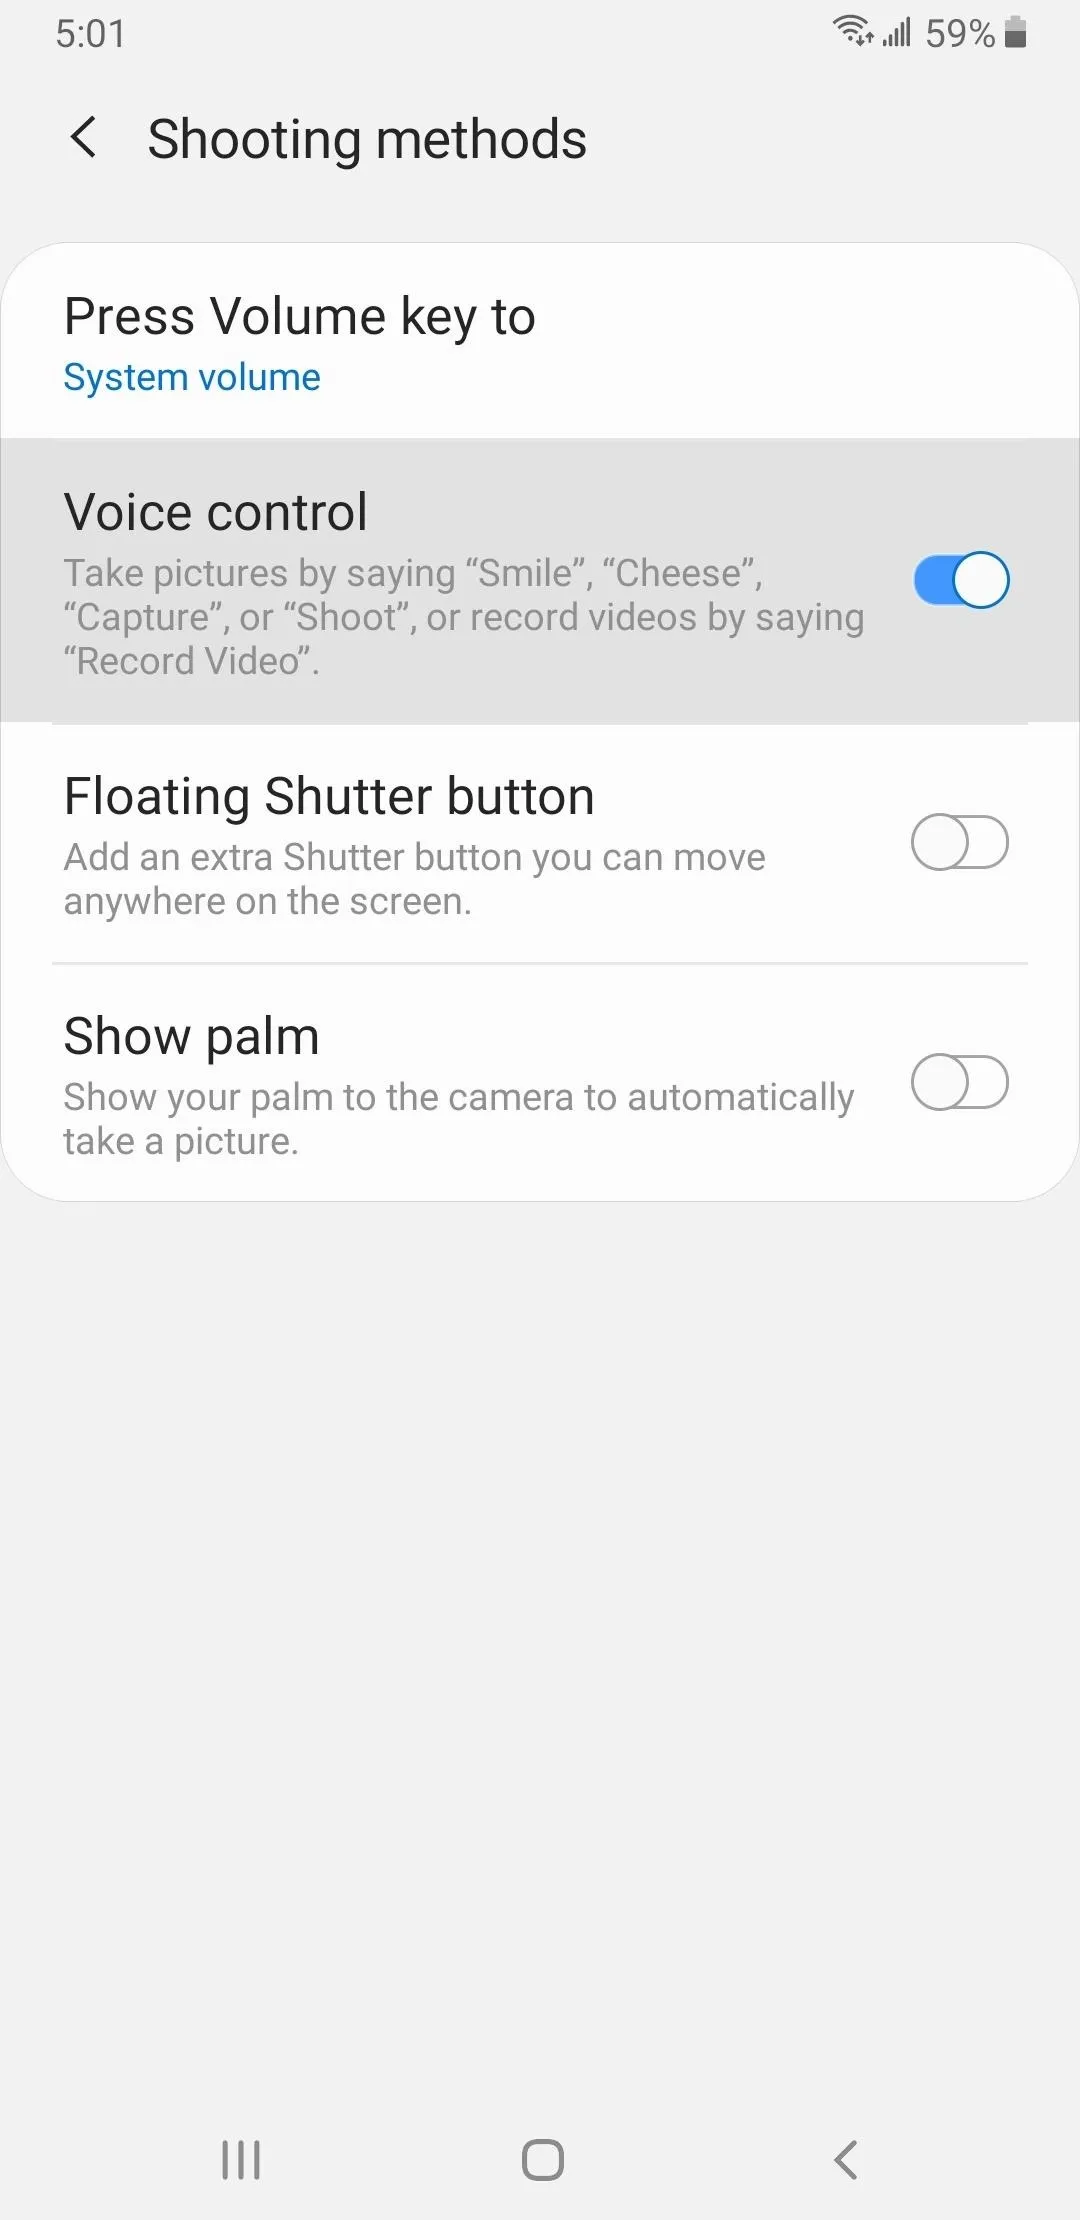
Galaxy devices have a relatively hidden setting within Samsung Camera that lets you verbally command the app to record videos without the need to summon Bixby or other AI assistants. To enable this option on One UI, select "Shooting methods" within the app's settings, then enable the "Voice control" toggle. For Oreo, the toggle for "Voice control" is located within the "Common" section of the app's settings.
Tip 5. Zoom in & Out Like a Pro (Oreo & One UI)
The zoom function on your Galaxy's video camera is a handy feature for getting closeup shots of subjects at a distance, and flagships like the S10 and Note 9 let you digitally zoom in up to 10x. On One UI, you can zoom in instantly simply by tapping on on the tree icons right above the shutter button to zoom in up to 2x. Beyond that, you can swipe on the icons if you need to fine tune the zoom and get in even closer.


Oreo-based Galaxy devices also give you two primary ways of zooming in and out of videos. First, you can swipe on the shutter button to zoom in and out before you initiate recording. Once you've started recording, you can swipe on the stop button to zoom in and out while filming.
Tip 6. Use Volume Keys as a Shutter Button (Oreo & One UI)
For added convenience, you can use the volume buttons to start and stop recording videos. If you're on One UI, head to the Camera app's settings and select "Shooting methods" if you're on One UI or scroll to the "Common" section if you're on Oreo. From there, tap "Press Volume key to" and choose "Take picture or record video."
Alternatively, you can also set the volume key to zoom in and out if you frequently use the zoom feature but find the default on-screen method a little too cumbersome.
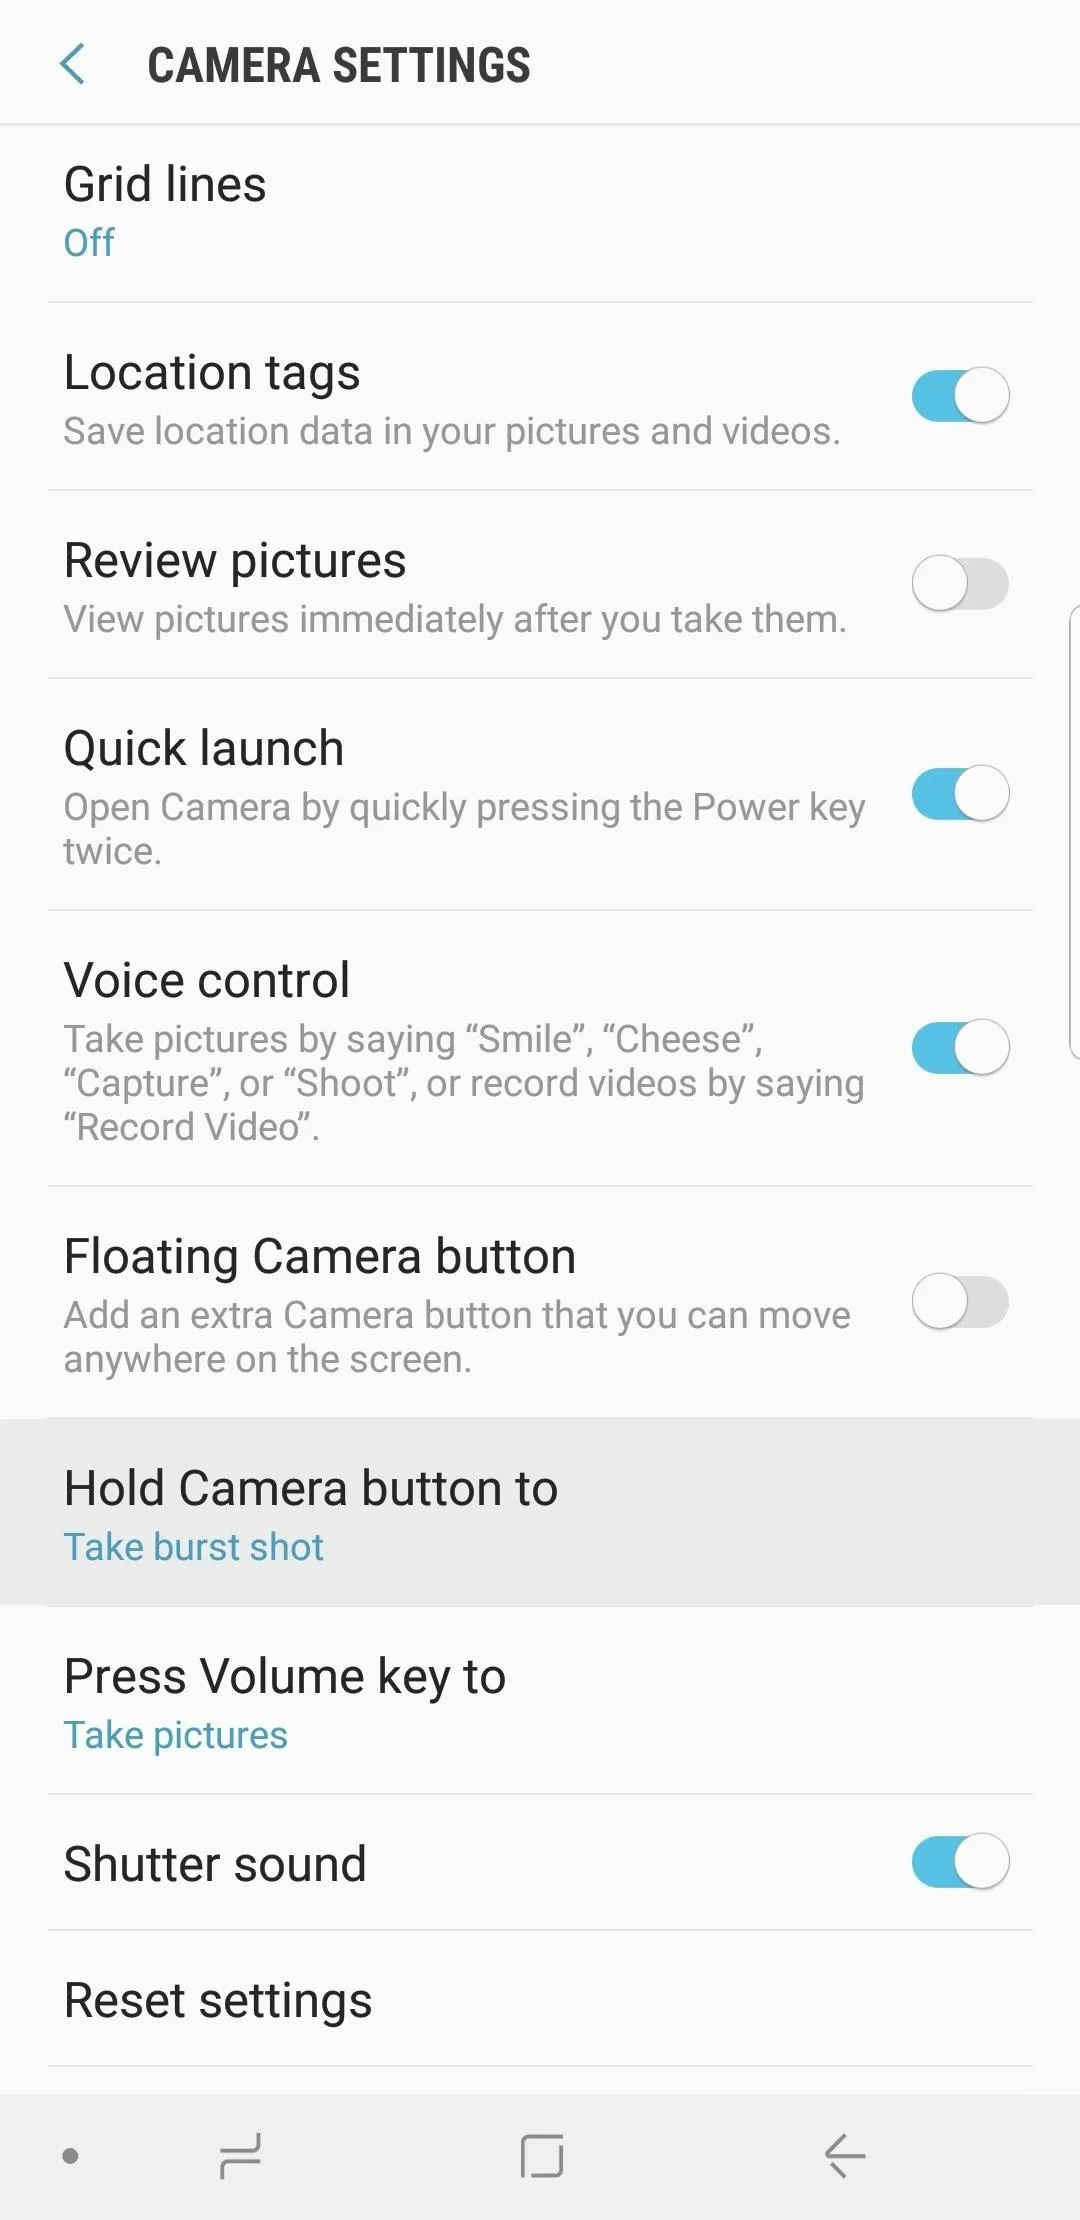
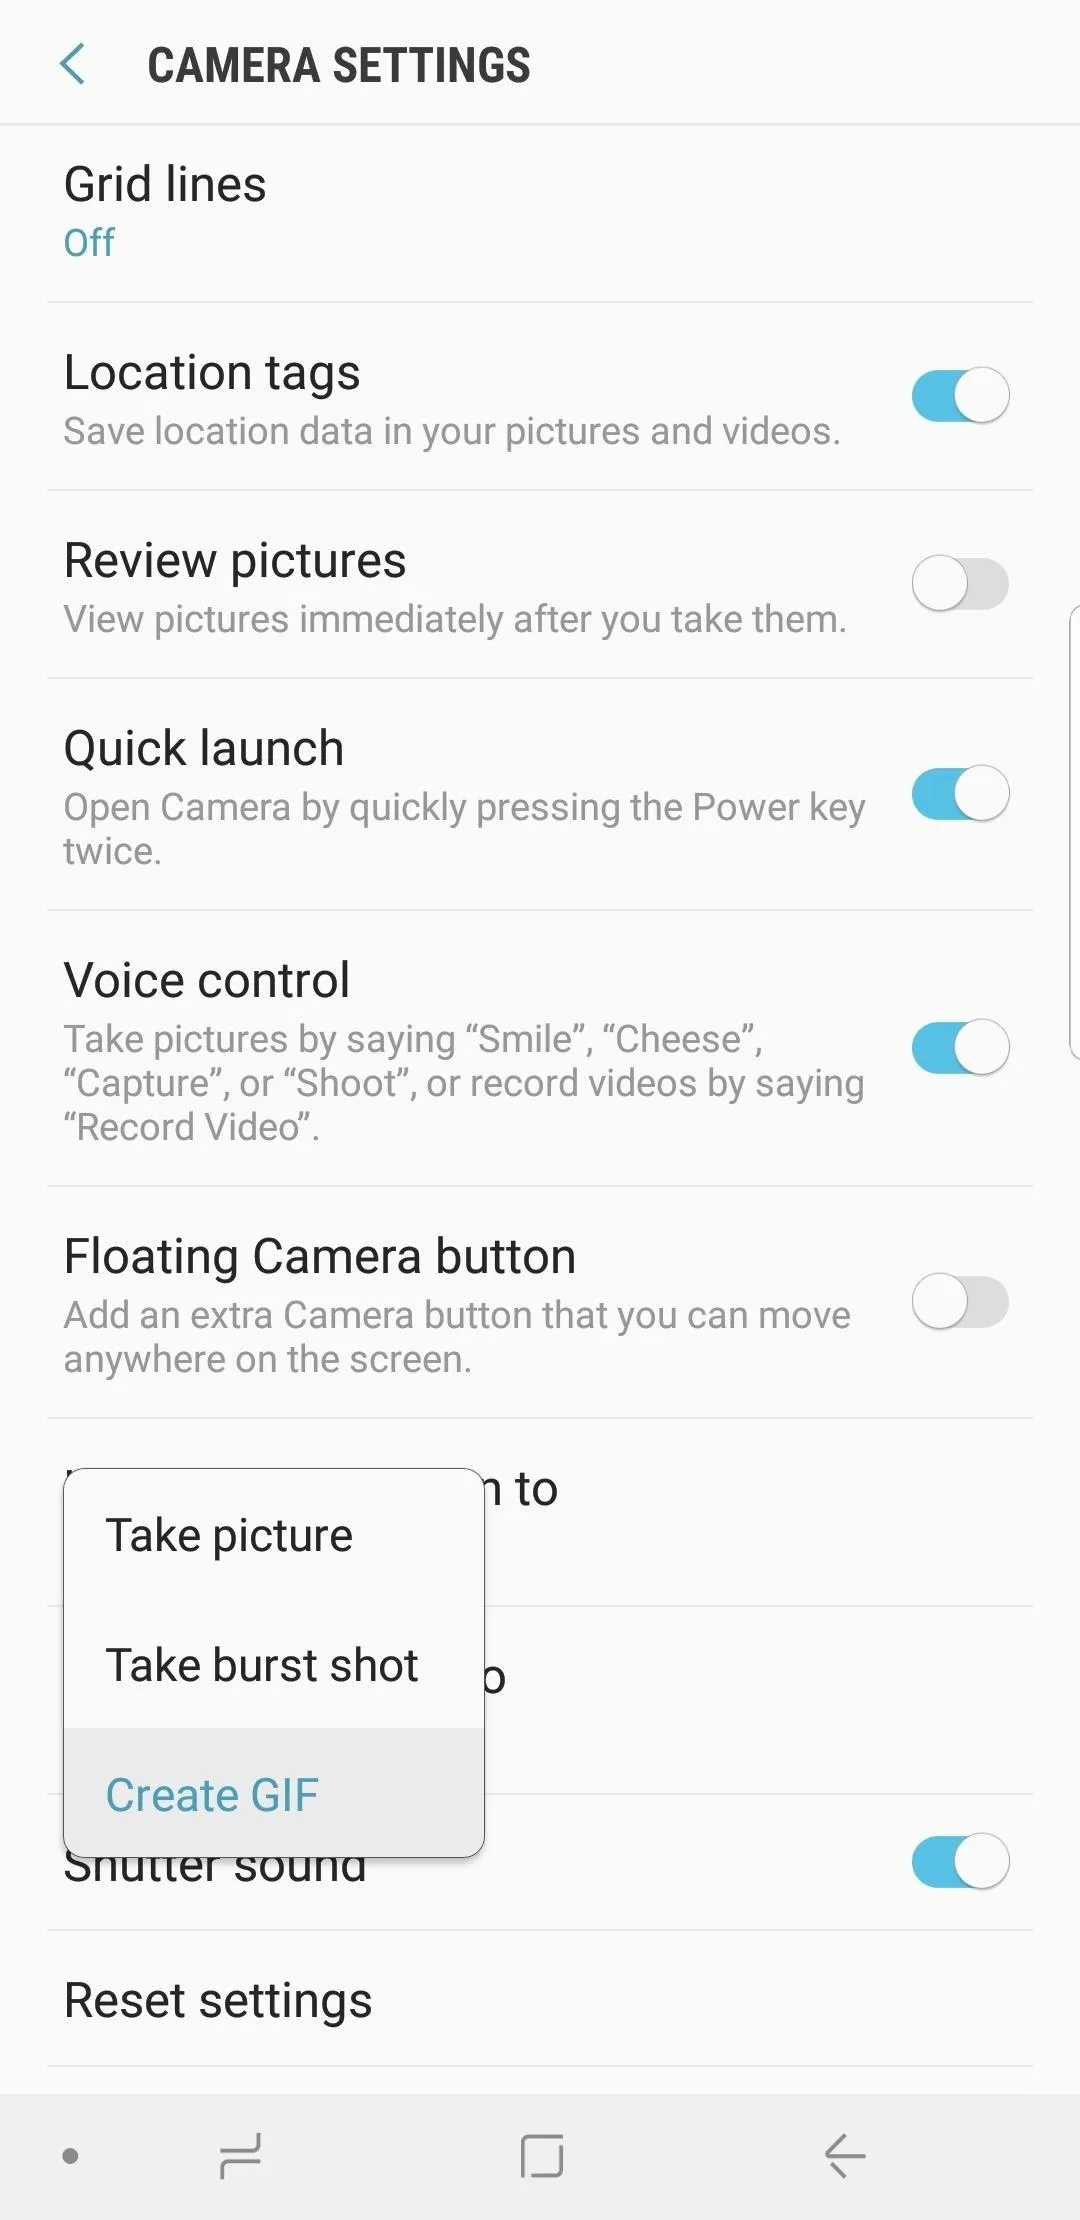
Tip 7. Instantly Create GIFs (Oreo & One UI)
GIFs are the medium of social media, but it's not always easy to make them. Instead of recording a video, then converting it to a GIF, you should know that your Galaxy can make GIFs on the fly.
If your Galaxy is on Oreo, you can enable this option straight from the Camera app's settings by tapping "Hold Camera button to" and selecting "Create GIF" from the menu. On One UI, the "Hold Shutter button to" option can be found under the "Pictures" section within the main camera settings page. So tap on the setting and choose "Create GIF" from the selection that pops up.
Tip 8. Preview Video Before Recording (Oreo)
Because you can shoot both still photos and videos in the Samsung Camera app on Oreo, it has a tendency to zoom in whenever you tap record. This frequently leads to recordings that start off shakily, as you often had to quickly reorient the video to focus on your subject. Fortunately, One UI has since solved this problem by separating video recording into its very own camera mode.
If your Galaxy is still on Oreo, however, you still have the ability to preview your prospective video before you record it to ensure you're properly focused on what you want to capture. To do so, simply tap and hold on the record button. Once you're ready to start, release the button to initiate recording.
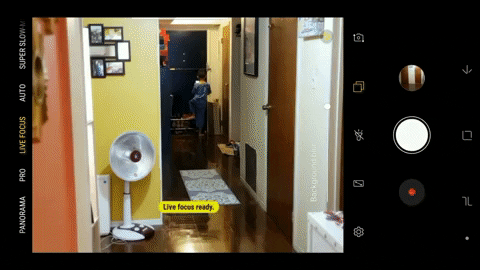
Tip 9. Master 'Super Slow-Mo' (Galaxy S9 & Up)
With its introduction alongside the Galaxy S9, Samsung Camera's Super Slow-mo feature gave Galaxy users the ability to capture videos at an impressive 960 fps (frames per second). The feature comes laden with goodies to make recording, editing, and sharing very user-friendly. For a more detailed guide on the topic, be sure to check out our full rundown on Super Slow-Mo below.

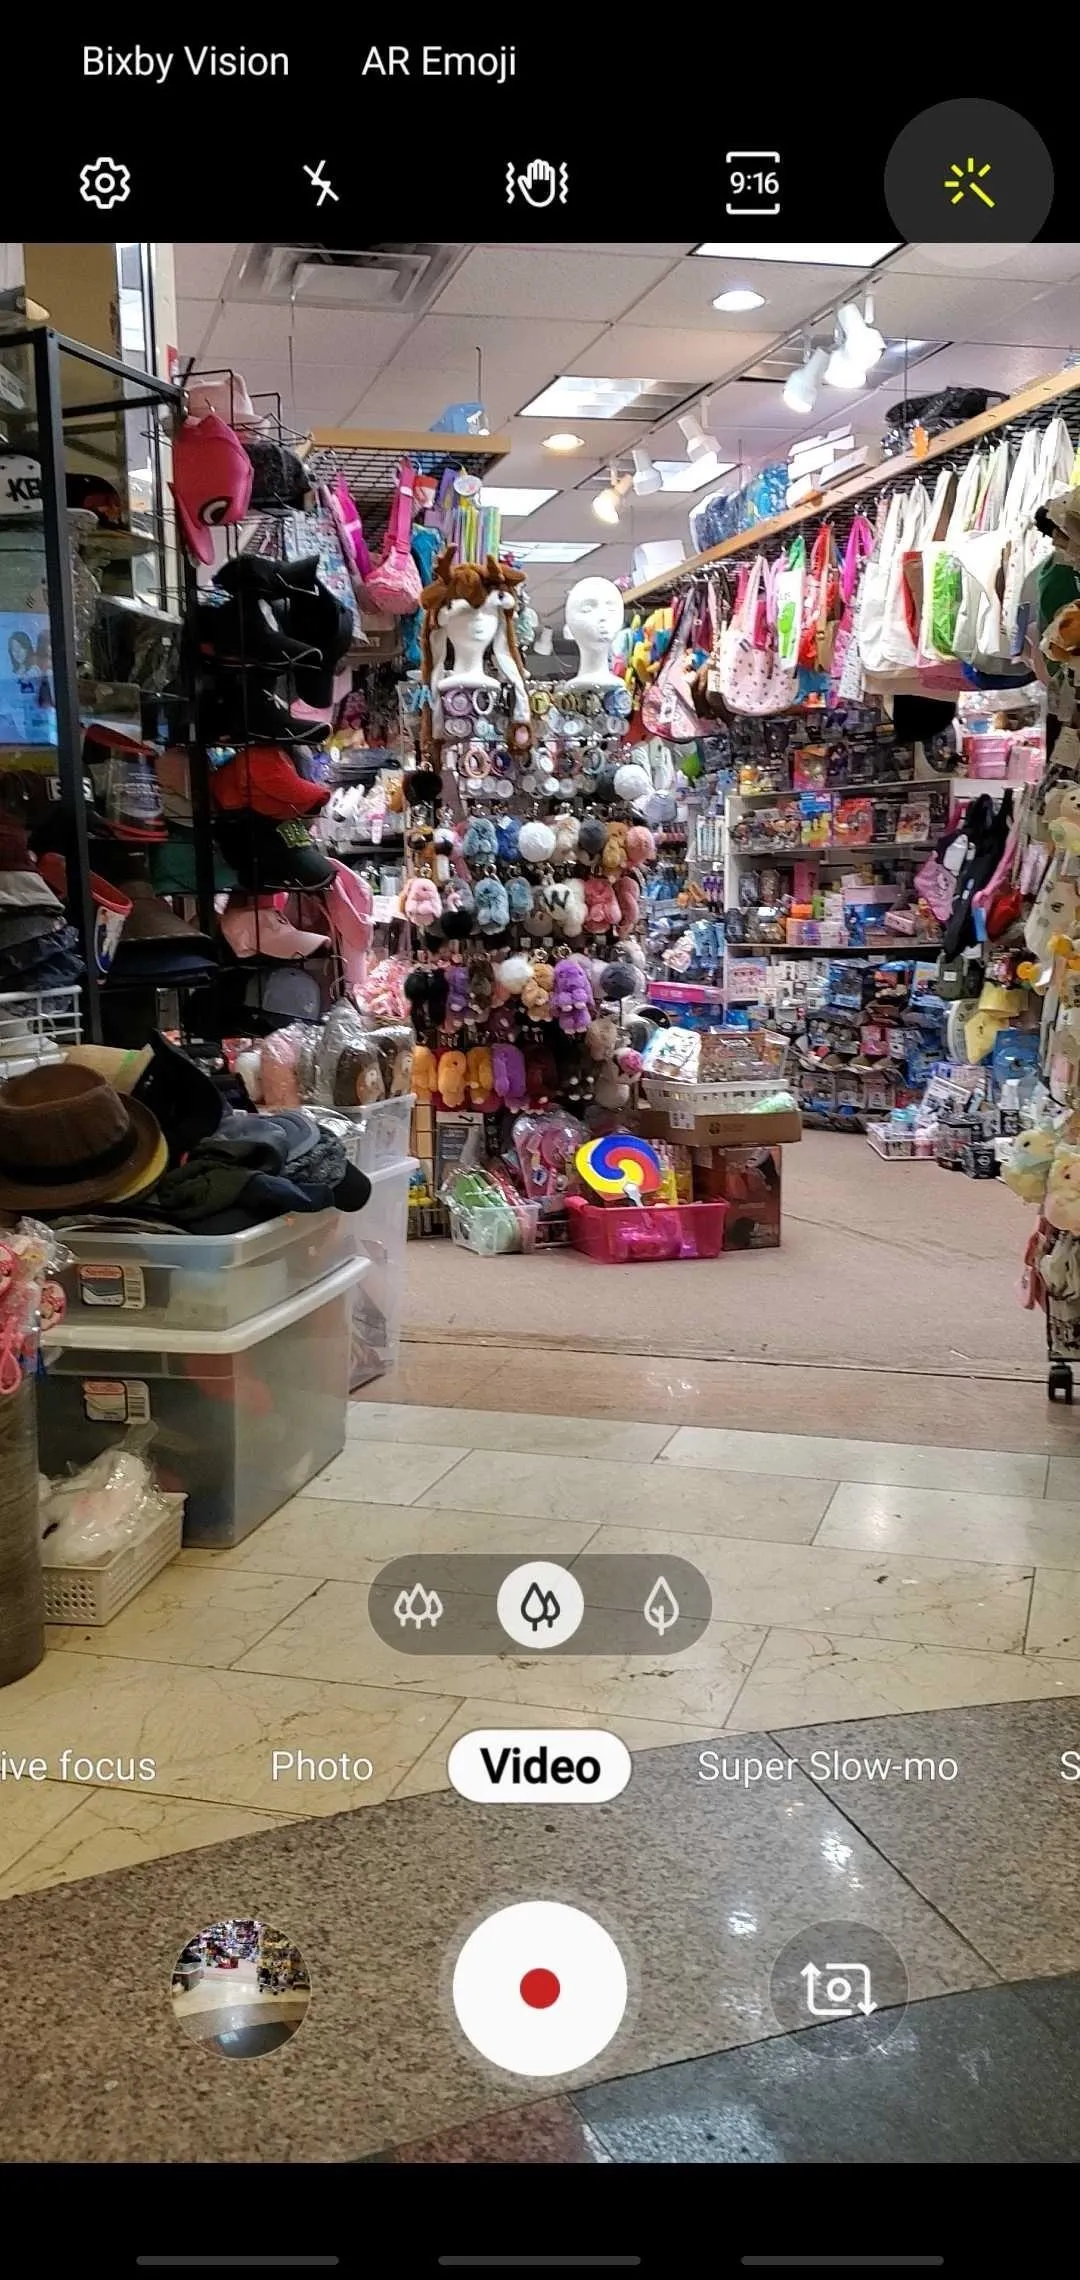
Tip 10. Apply Filters (Oreo & One UI)
Video filters are not only great for accentuating your video's colors to better reflect the mood or atmosphere you're trying to convey, they're also a handy tool to adjust your video's appearance when filming under various lighting conditions.
Filters are incredibly simple to access. Simply tap on the magic wand icon along the top or above the shutter button within the view finder for One UI and Oreo devices, respectively. From there, choose from the selection of filters available until you find one that suits your needs, and they'll be applied on the fly. For more filters, tap on the download icon and install directly from the Galaxy Store.

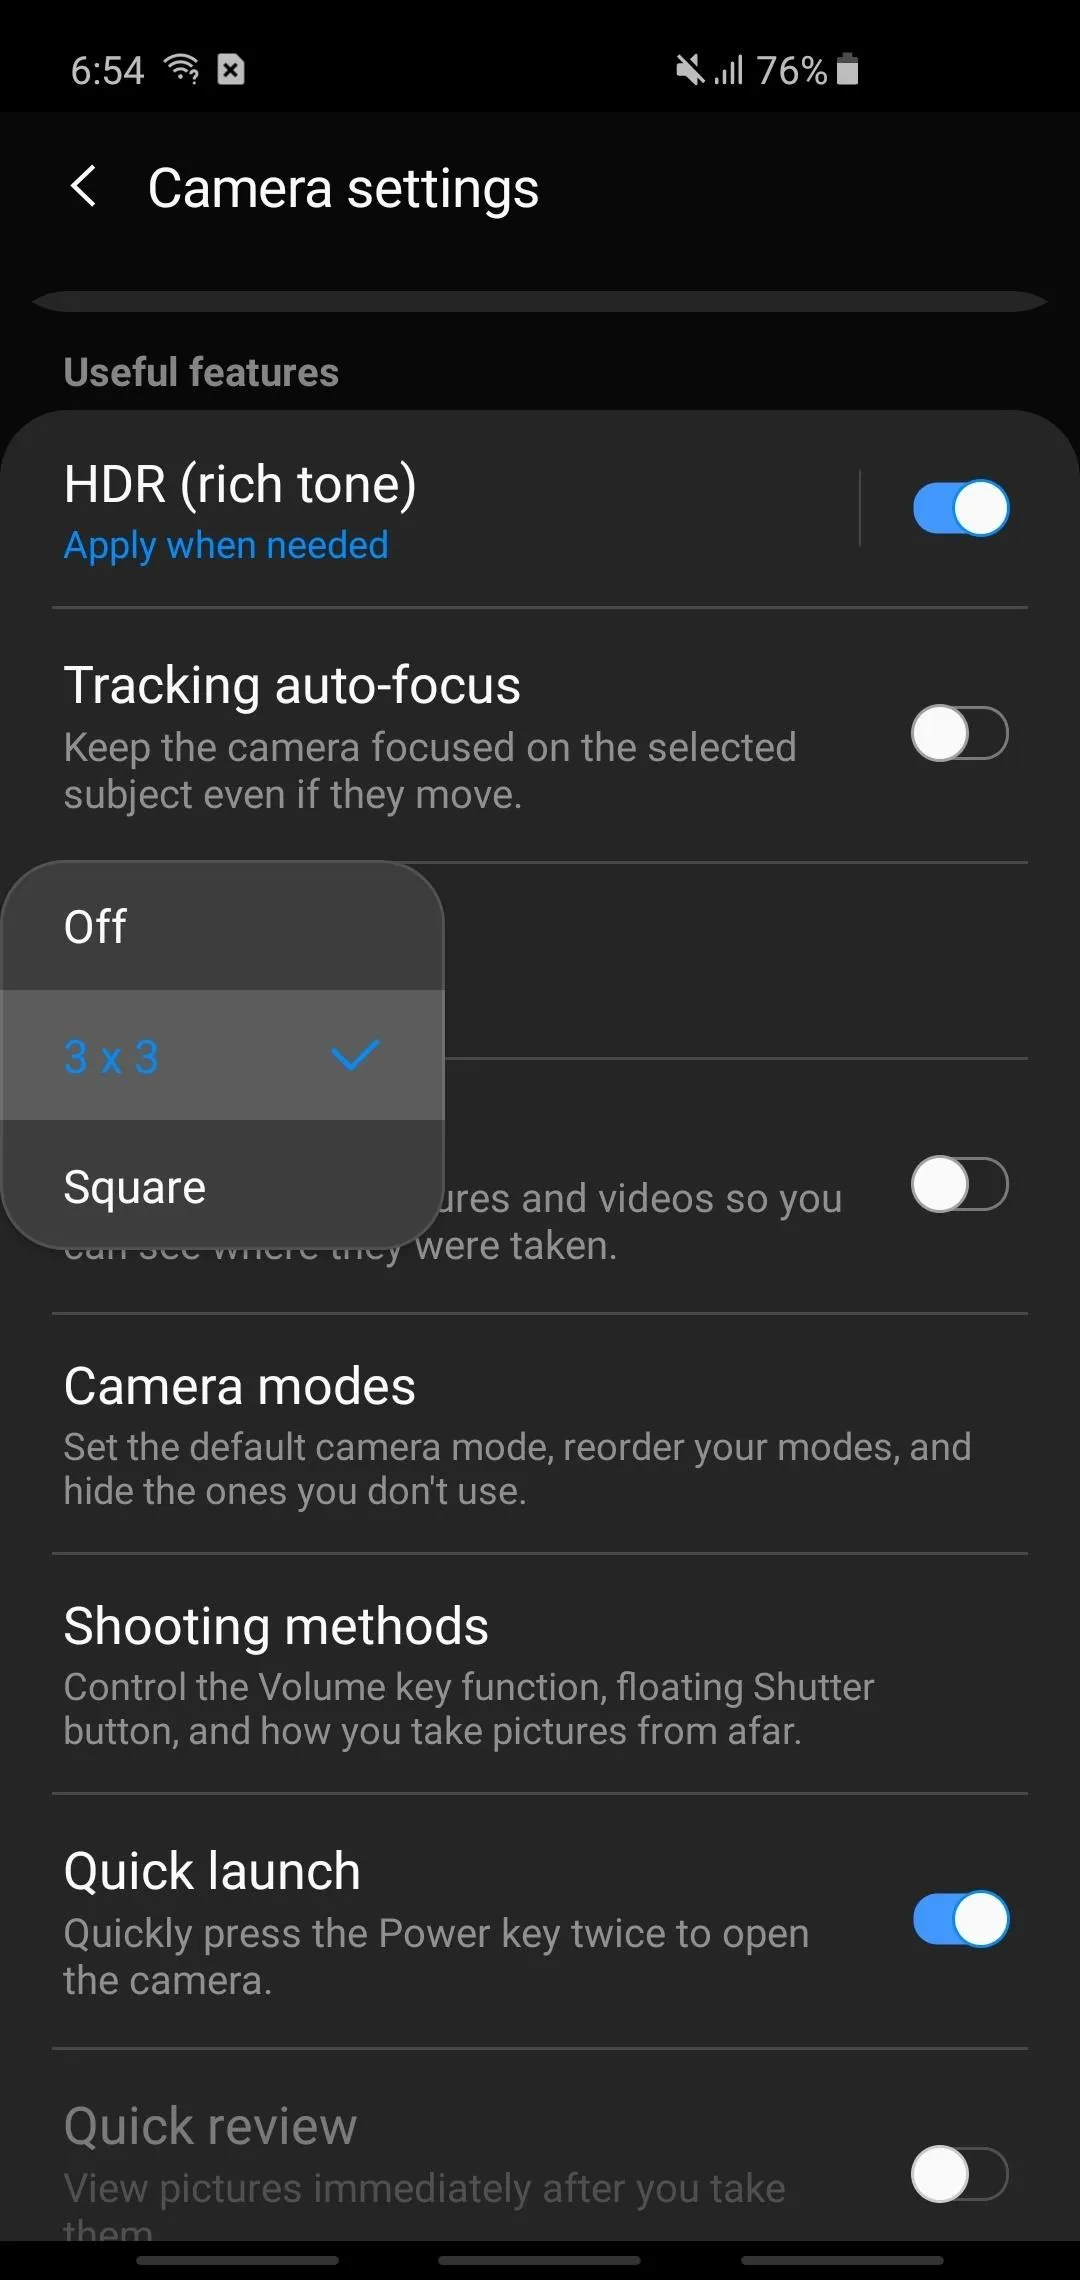
Tip 11. Enable Grid Lines (Oreo & One UI)
Having grid lines enabled while taking photos on your Galaxy is a great way to help yourself practice with framing techniques like the rule of thirds. It's also very handy in helping you properly orient your videos and keeping them centered to ensure you record moments in the best quality possible.
This option can easily enabled from within Samsung Camera's settings, and can be found under the "Useful features" or "Common" sections on One UI and Oreo, respectively. From there, you can choose between "3 x 3" and "Square," which will overlay faint grid lines in your viewfinder.

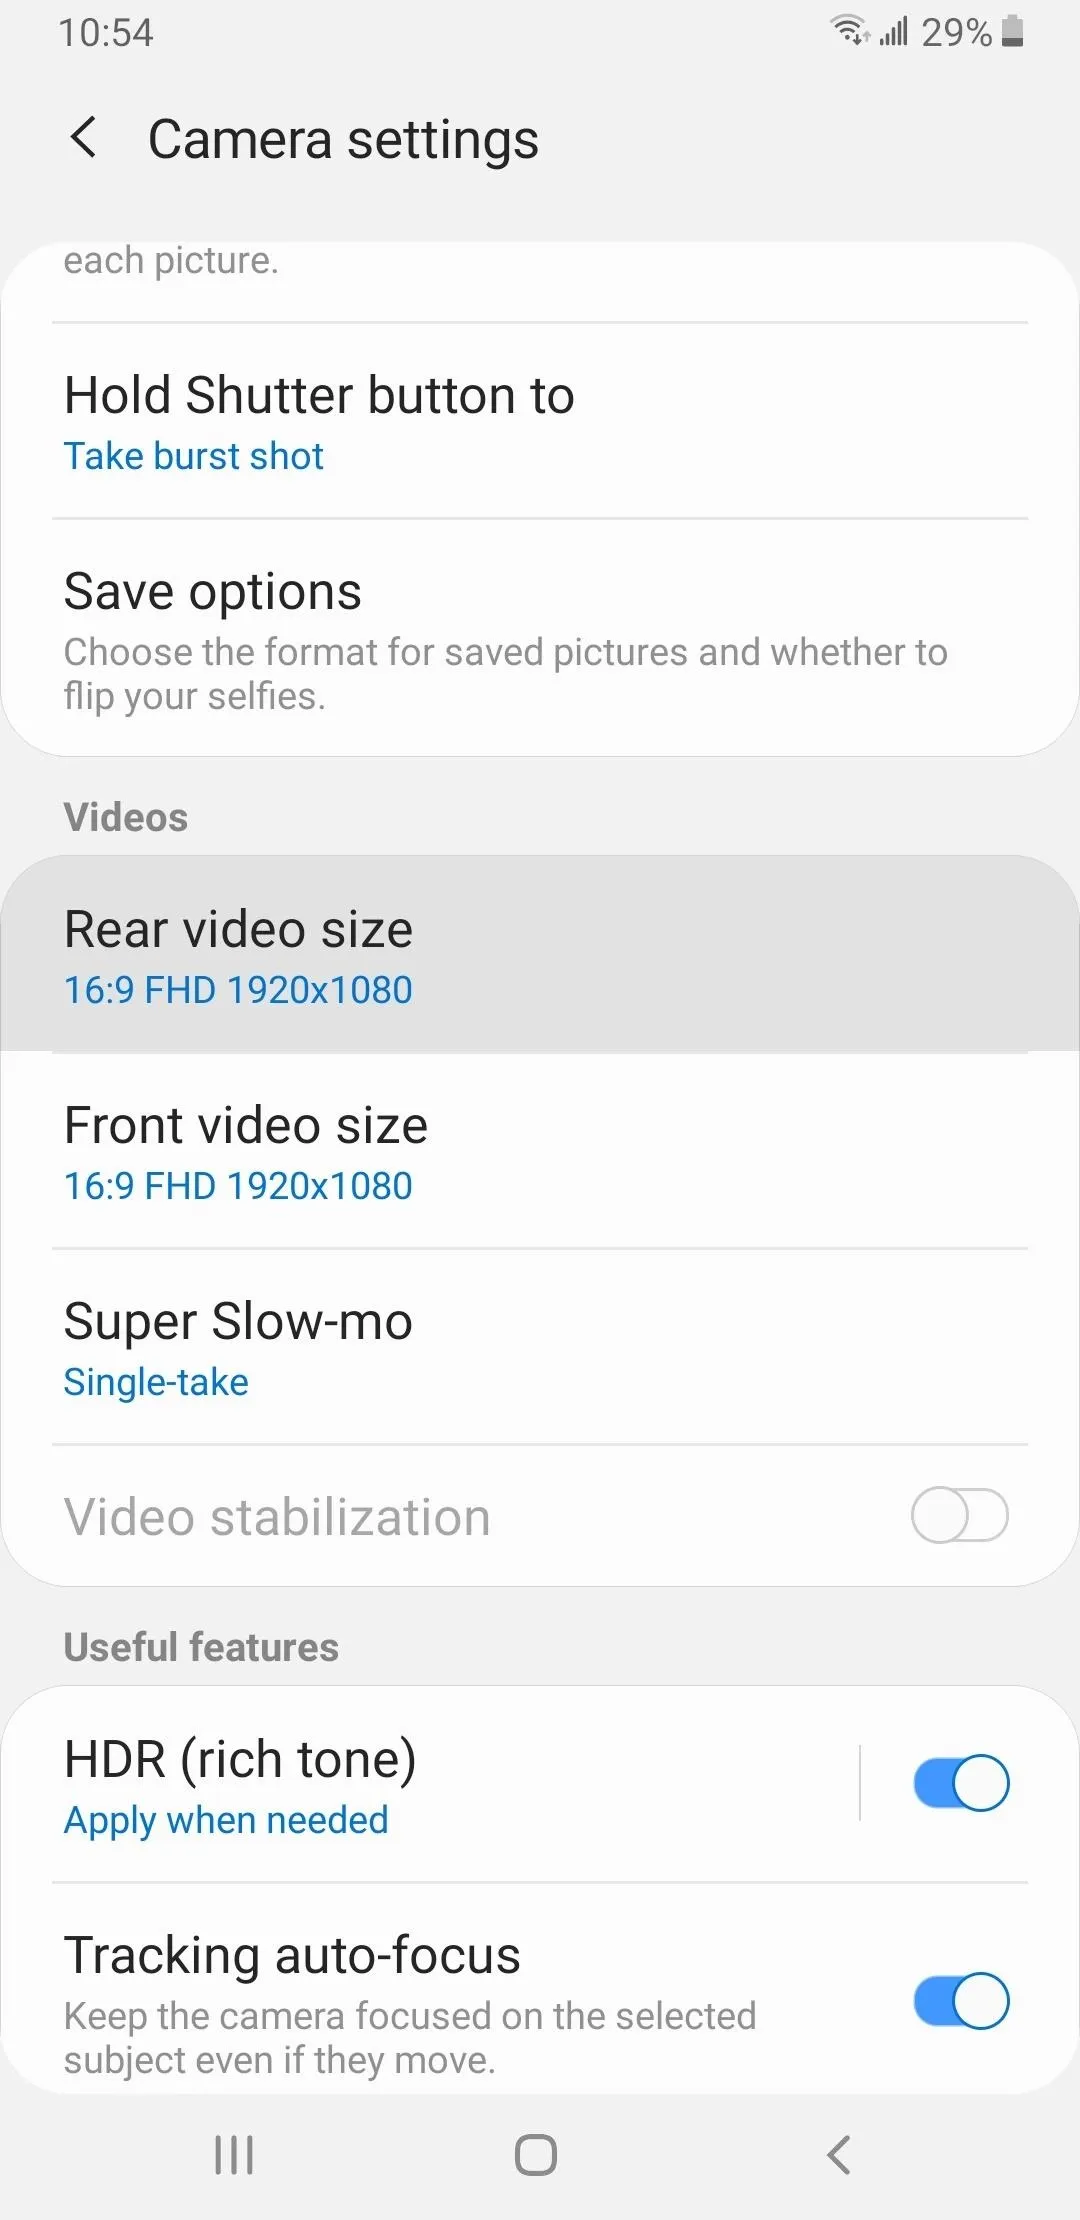
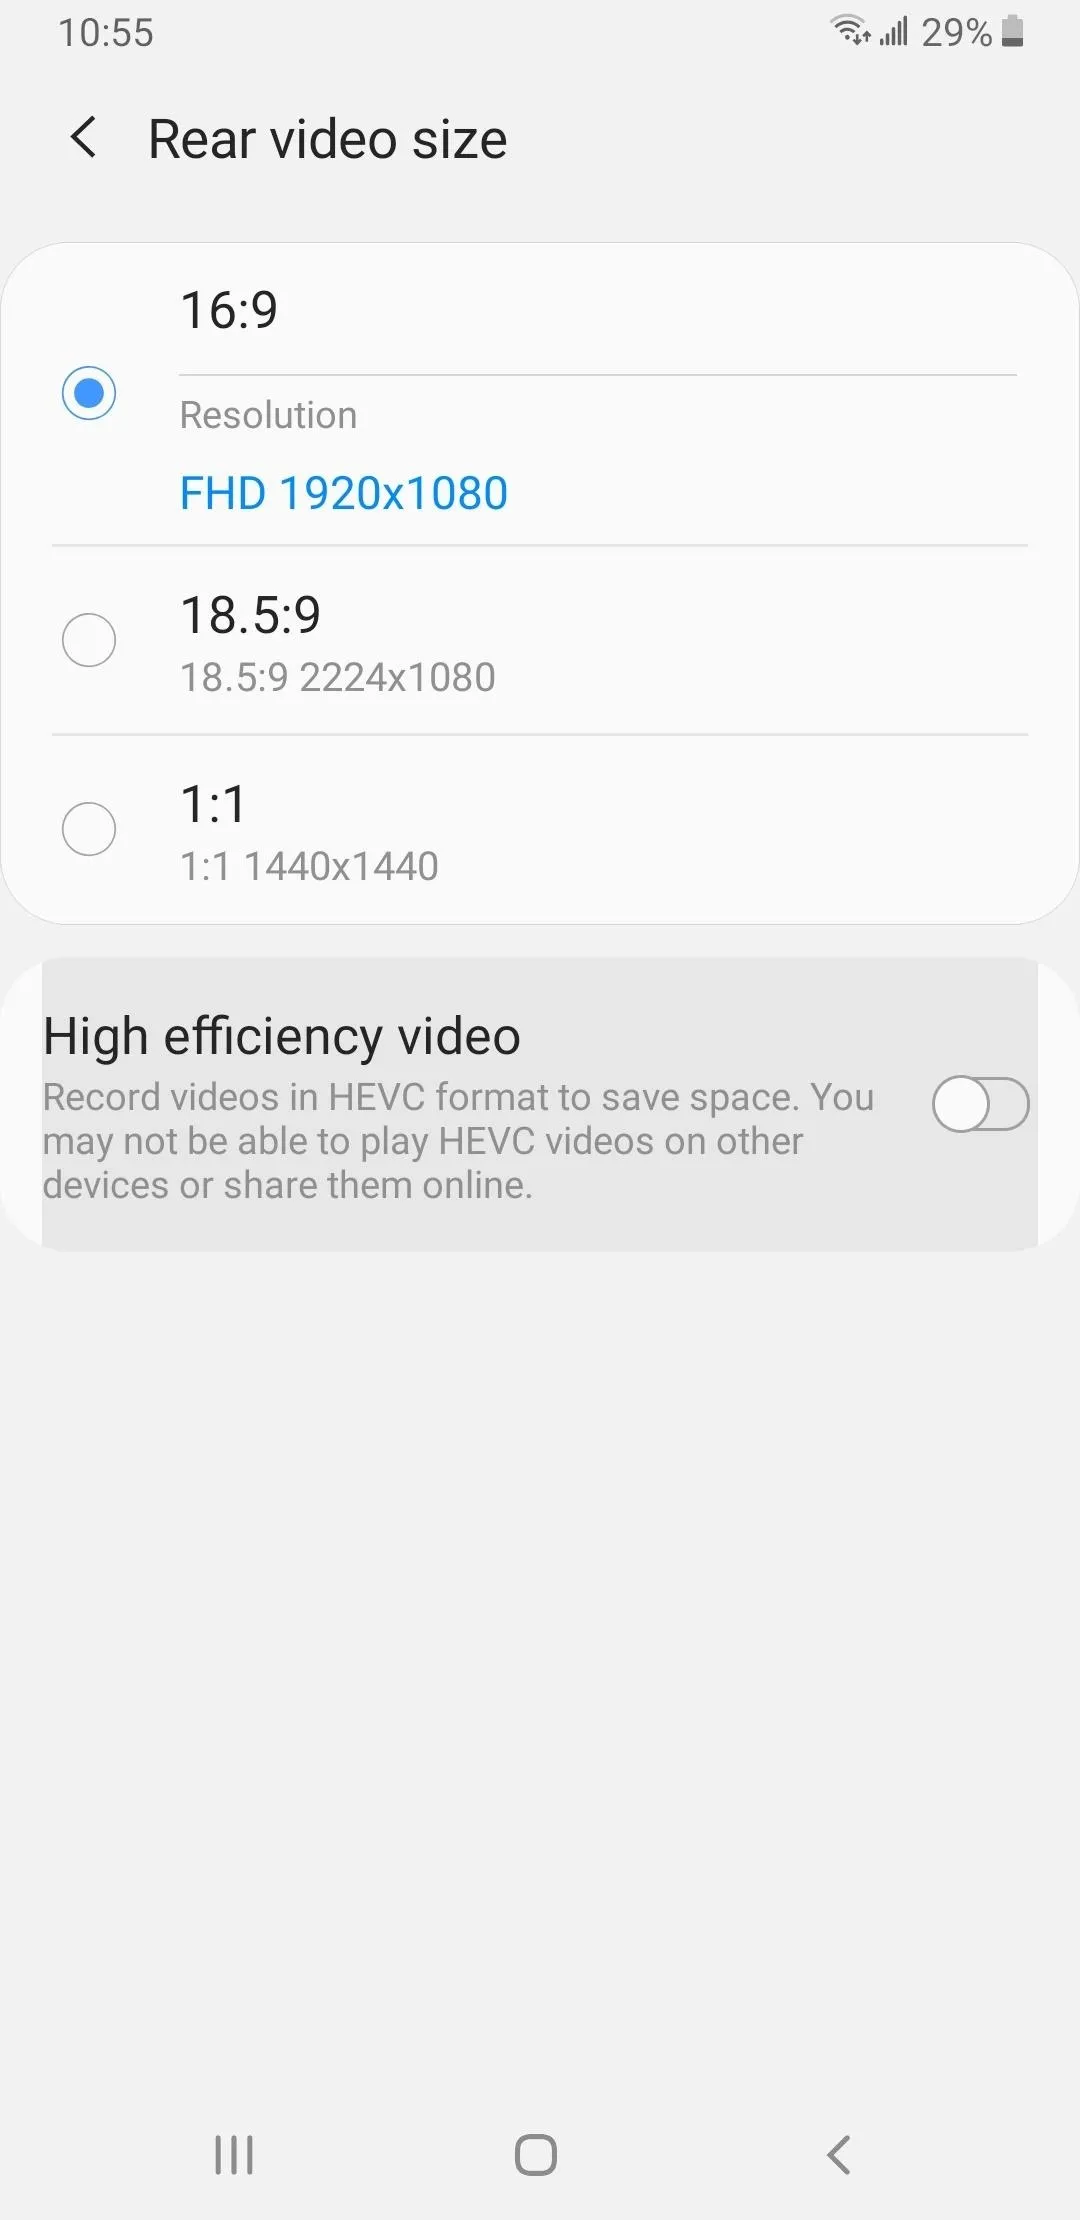
Tip 12. Maximize Compatibility (Oreo & One UI)
Videos are made for sharing, so you want to ensure they'll be able to play on as many phones, tablets, and computers as possible. To do this, go inside Samsung Camera's settings, and select "Video size" for the rear camera. From there, make sure that "High efficiency video" is toggled off for better compatibility. Note that this will cause videos to take up more space.
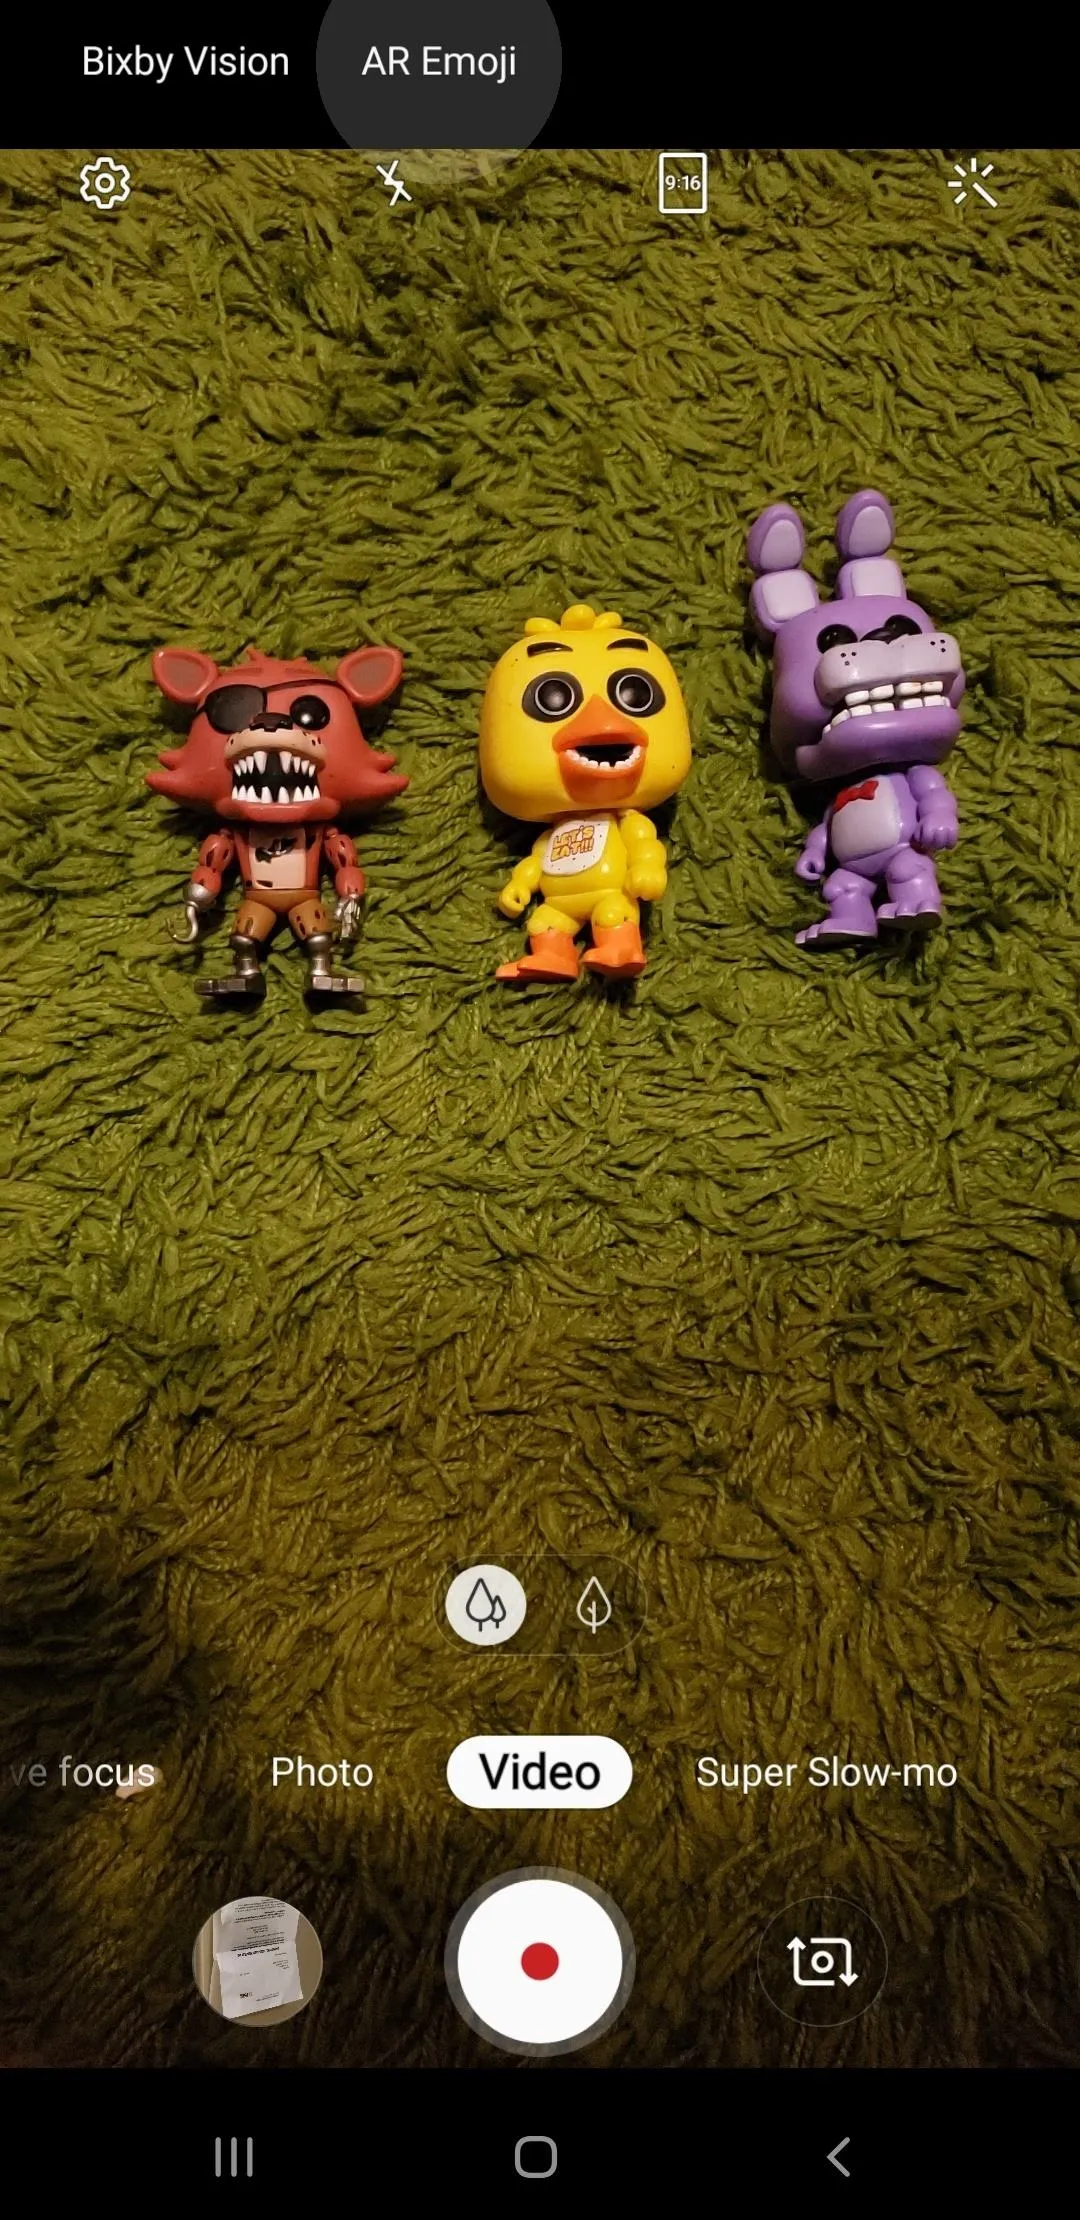
Tip 13. Add AR Stickers (Oreo & One UI)
If you want to add some pizzazz to your videos, Samsung Camera lets you apply fun and whimsical AR stickers and animojis, similar to the Playground feature found on Pixel devices. To do so, either tap on "AR Emoji" along the top if you're on One UI, or swipe along the top until you get to the "AR Emoji" camera mode on Oreo.
From there, you're free to choose between various AR emojis and stickers to accentuate your videos, though you'll need to detect a face for the former to kick in. If you find the selection a little too bare for you liking, you can tap on the Galaxy Store icon to install more AR Emojis and stickers directly from Samsung's native app store.
Admittedly, Samsung Camera's AR Emojis pale in comparison to Google Camera's Playground. Fortunately, you can get the Pixel's AR sticker functionality on your Galaxy with no root required. To learn more, head to the link below!
This article was produced during Gadget Hacks' special coverage on smartphone-based video creator tips for filming and editing. Check out the whole Videography series.
- Follow Gadget Hacks on Pinterest, Reddit, Twitter, YouTube, and Flipboard
- Sign up for Gadget Hacks' daily newsletter or weekly Android and iOS updates
- Follow WonderHowTo on Facebook, Twitter, Pinterest, and Flipboard
Cover image, screenshots, and GIFs by Amboy Manalo/Gadget Hacks


Comments
Be the first, drop a comment!