


If you recently received your new Galaxy S9 or S9+, you're probably excited to try out all of the features the flagship offers. While many of the features are self-explanatory and easy to access, there are a handful of very useful items that Samsung has buried in the settings menu. Enabling these hidden features will help you unlock the true power of your new device.
Samsung packs a ton of features into their flagship devices. This can be a compelling reason to buy their phones, but also a bit intimidating for new users trying to locate all of the available settings. On the Galaxy S9, many of the new features like AR Emoji, Dolby Atmos Surround Sound, and Always on Display customization are a bit tricky to find. Let's dive in to the most important hidden features on your Galaxy S9.
1. Dolby Atmos Surround Sound
Aside from the camera, the biggest hardware improvement on the Galaxy S9 is undoubtedly the inclusion of stereo speakers. Increasing the quality of sound output, Samsung also partnered with Dolby to deliver truly incredible Atmos Surround Sound.
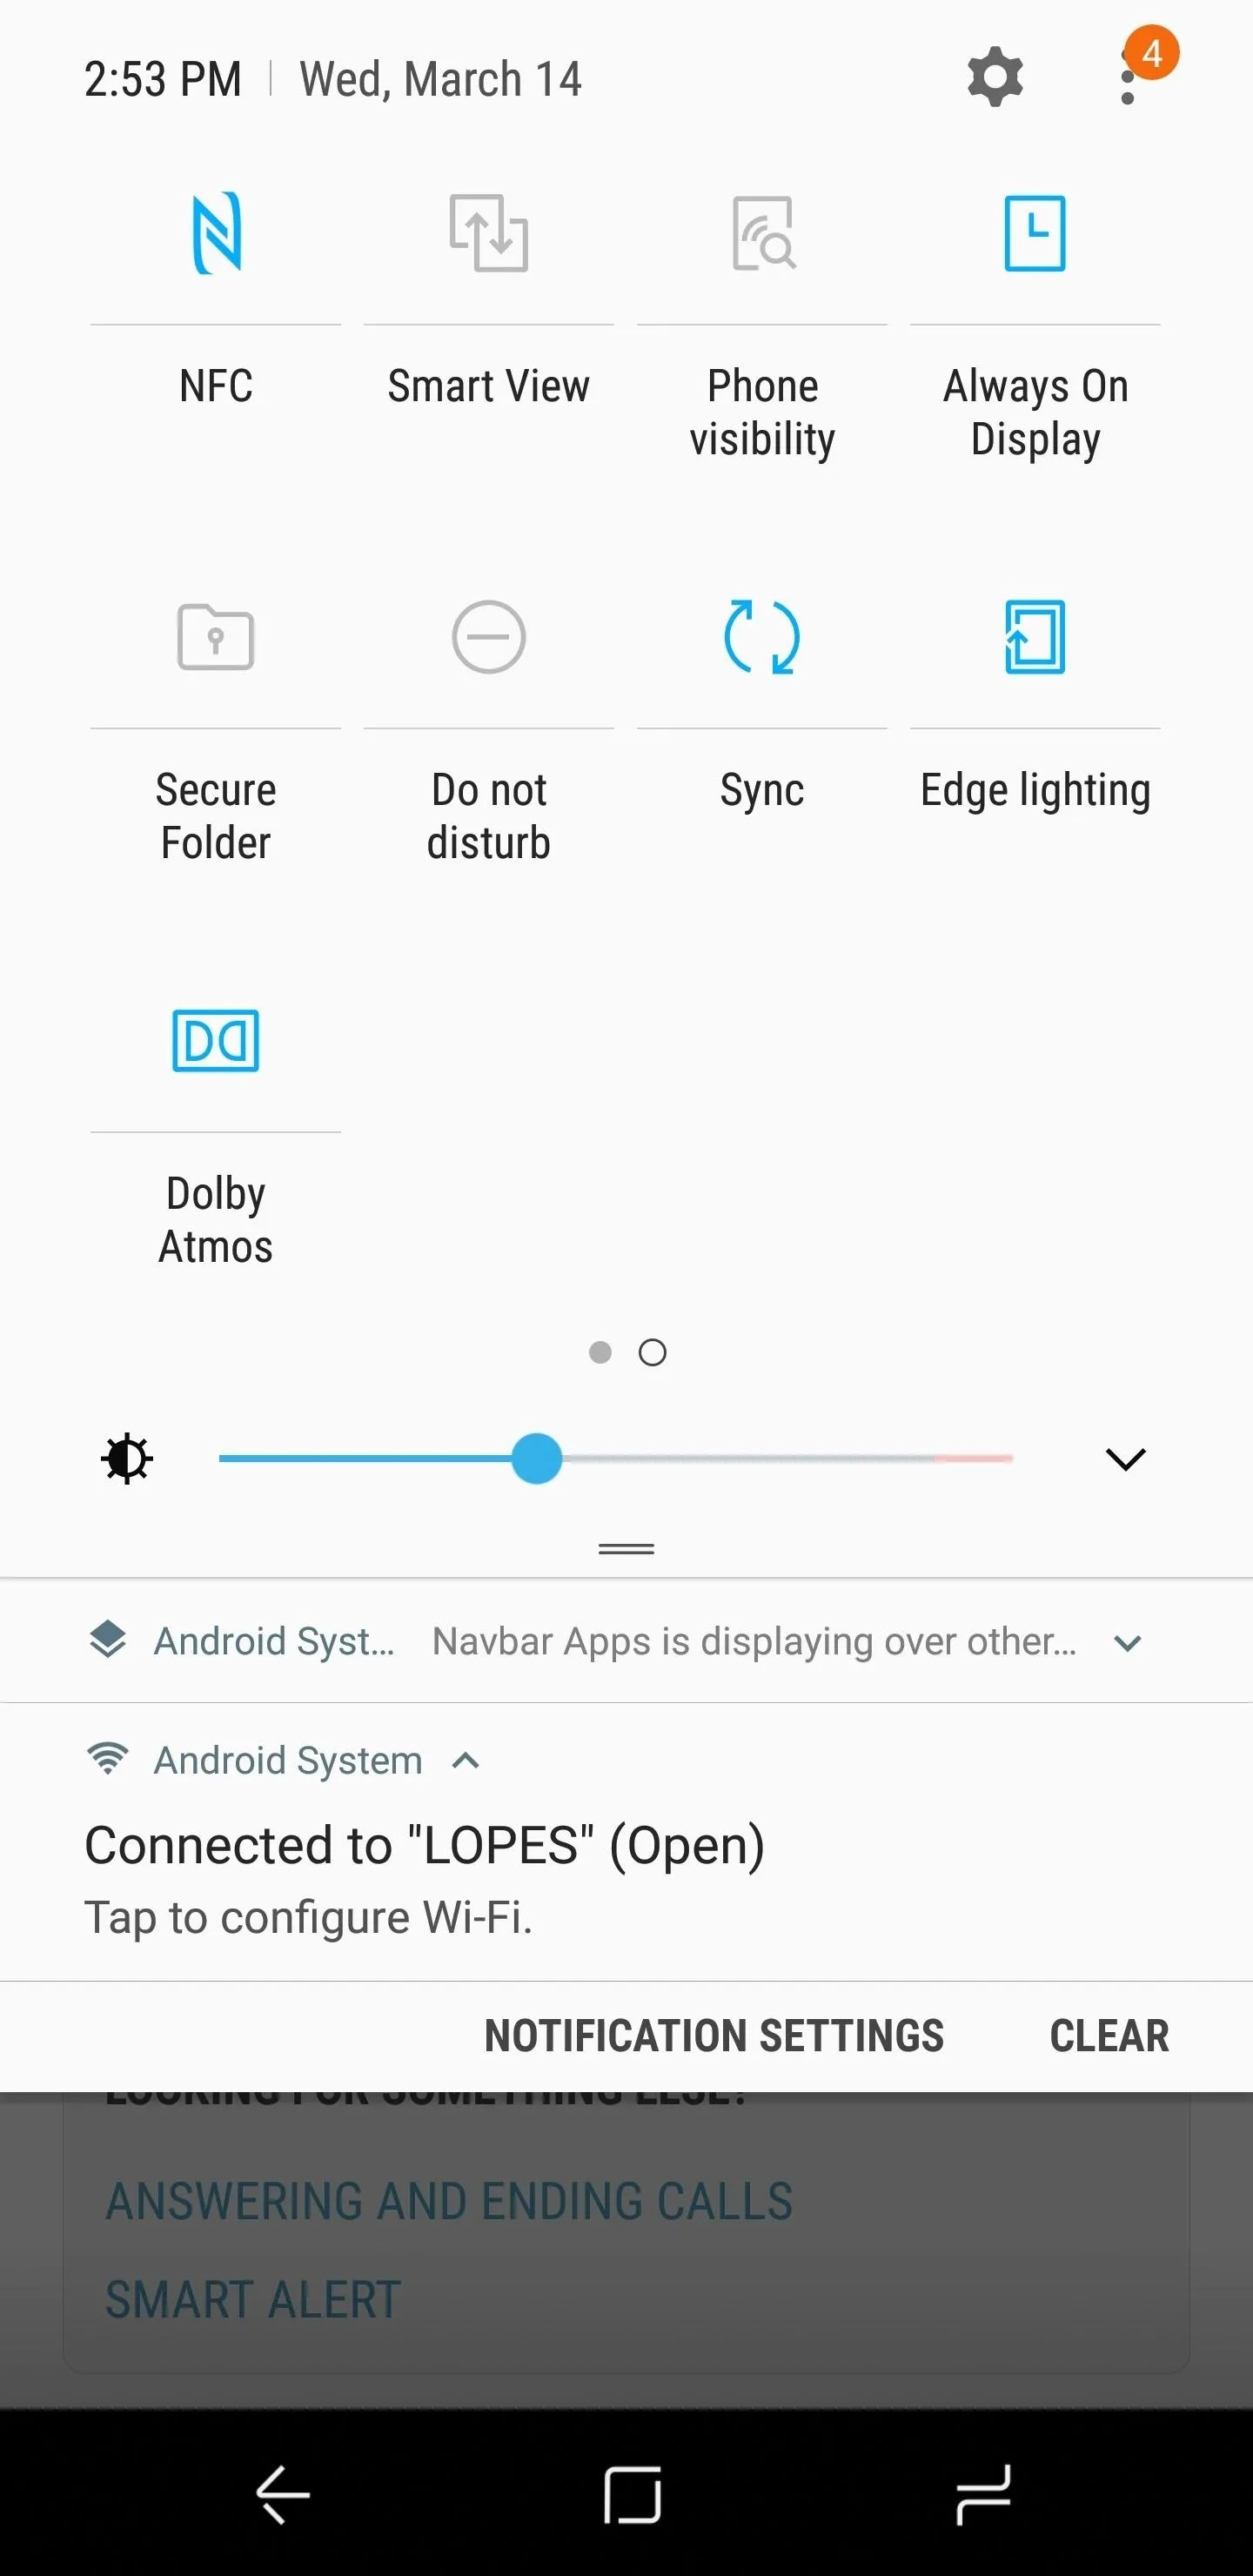
There are a few ways you can enable Dolby Atmos. The easiest way to do so is from the quick settings. To do this, swipe down your notification shade fully, swipe to the left, and Dolby Atmos will be listed as the last quick setting tile. The Atmos feature is turned off out of the box, so tapping on the tile will enable it.
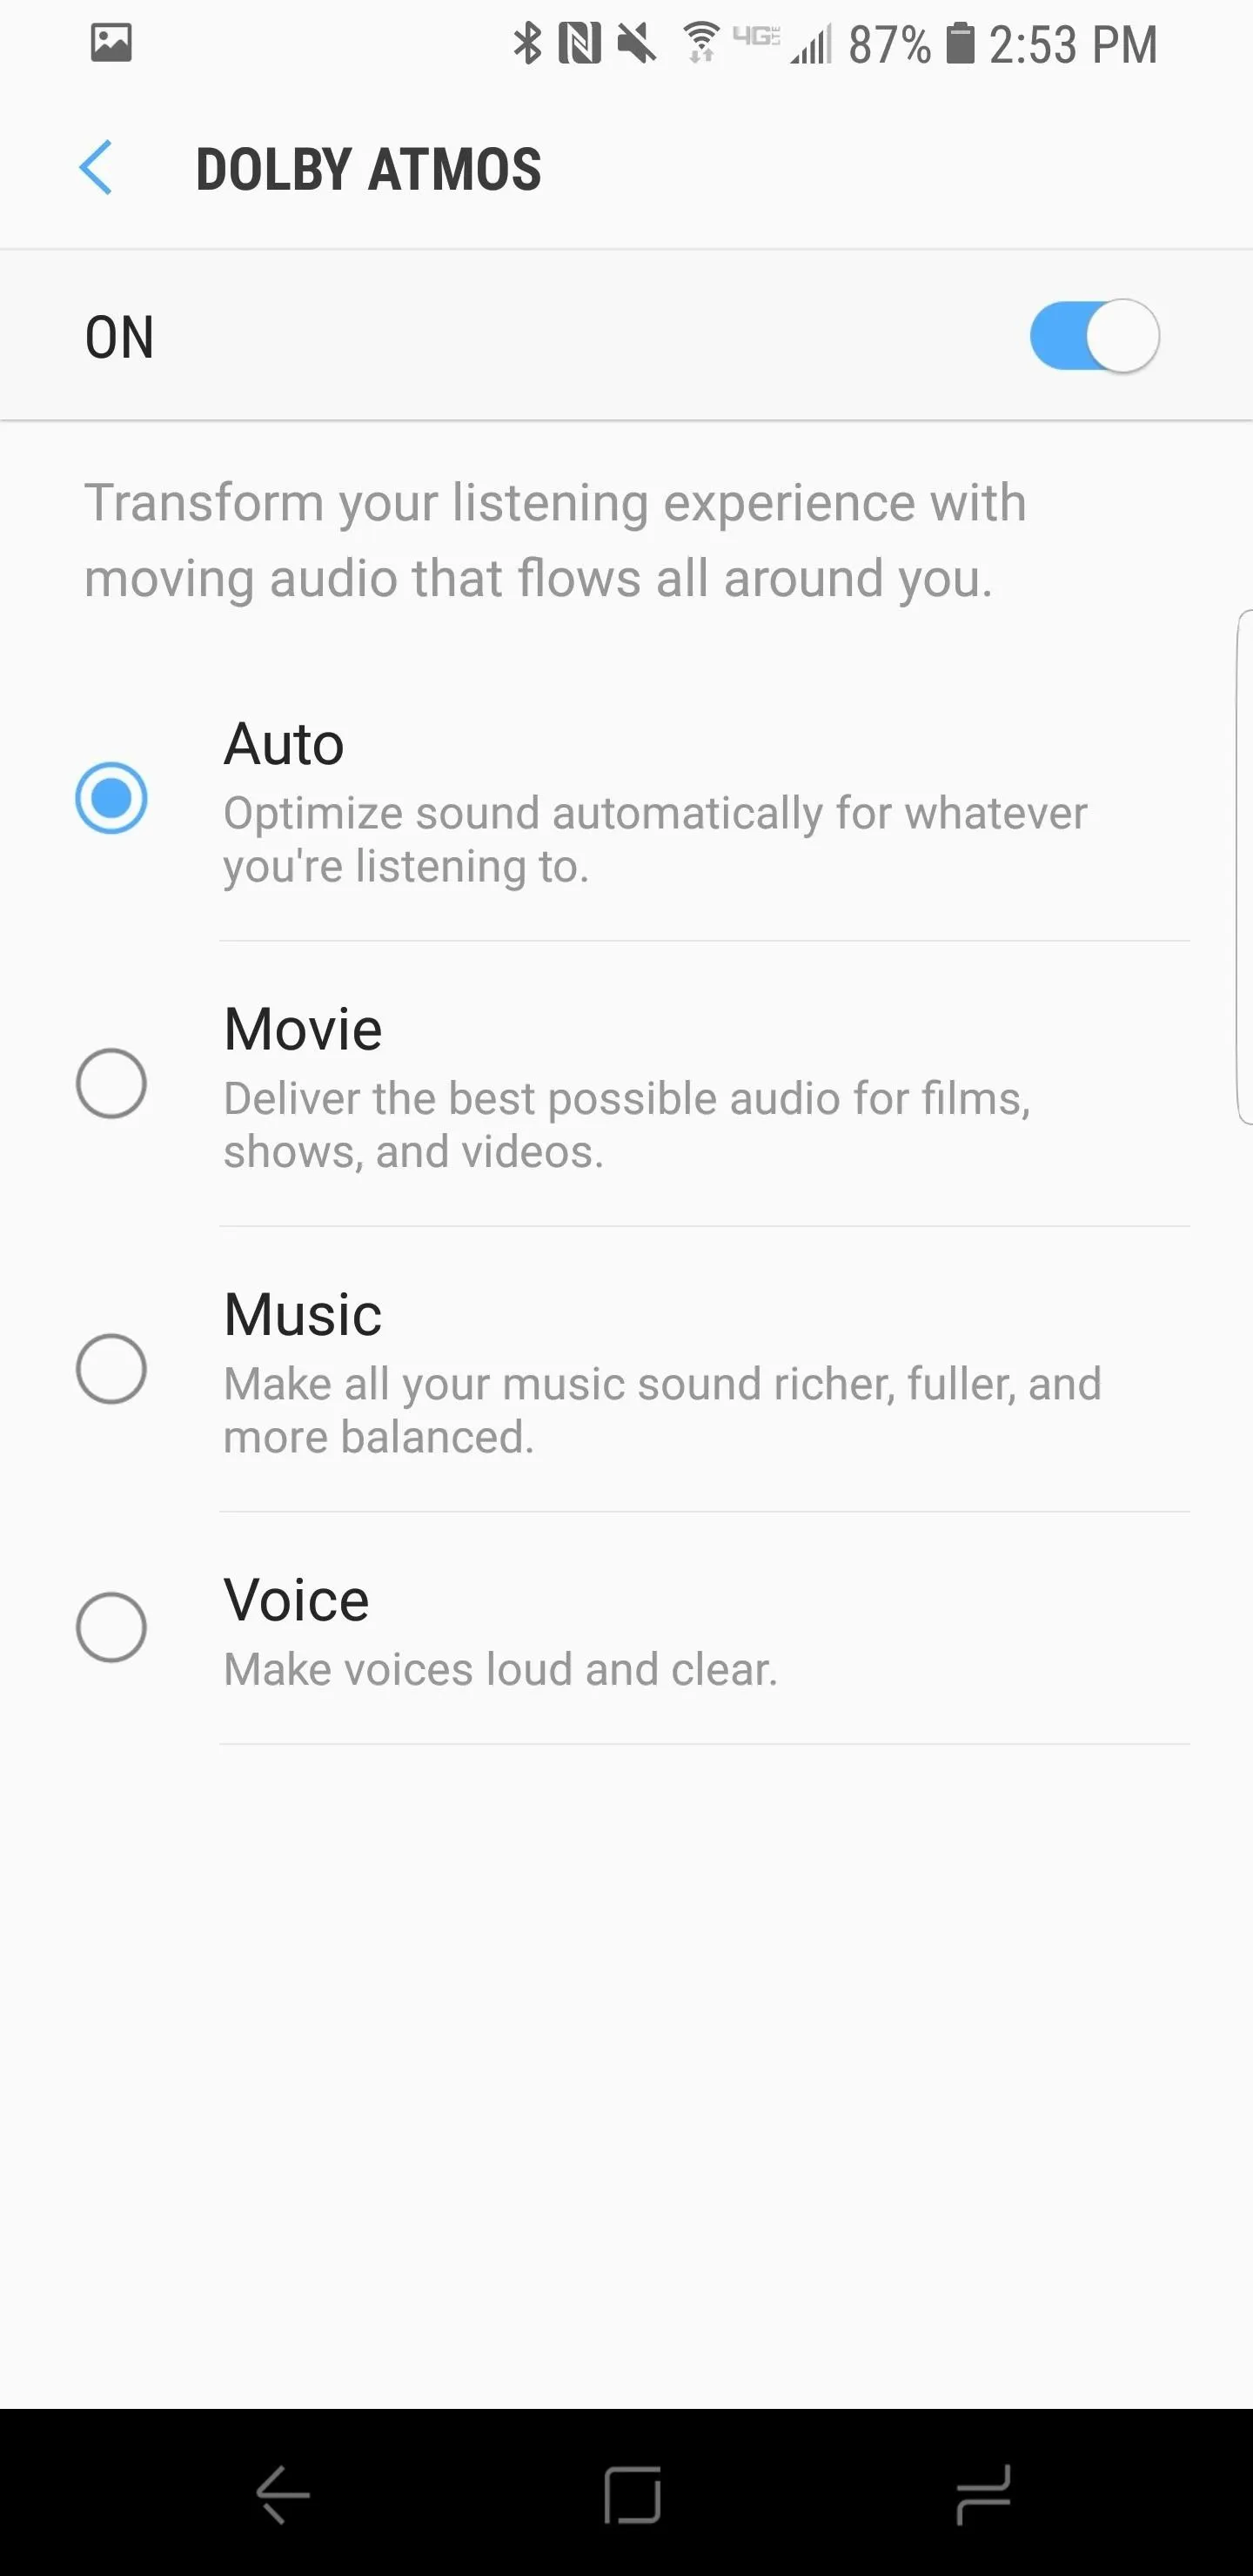
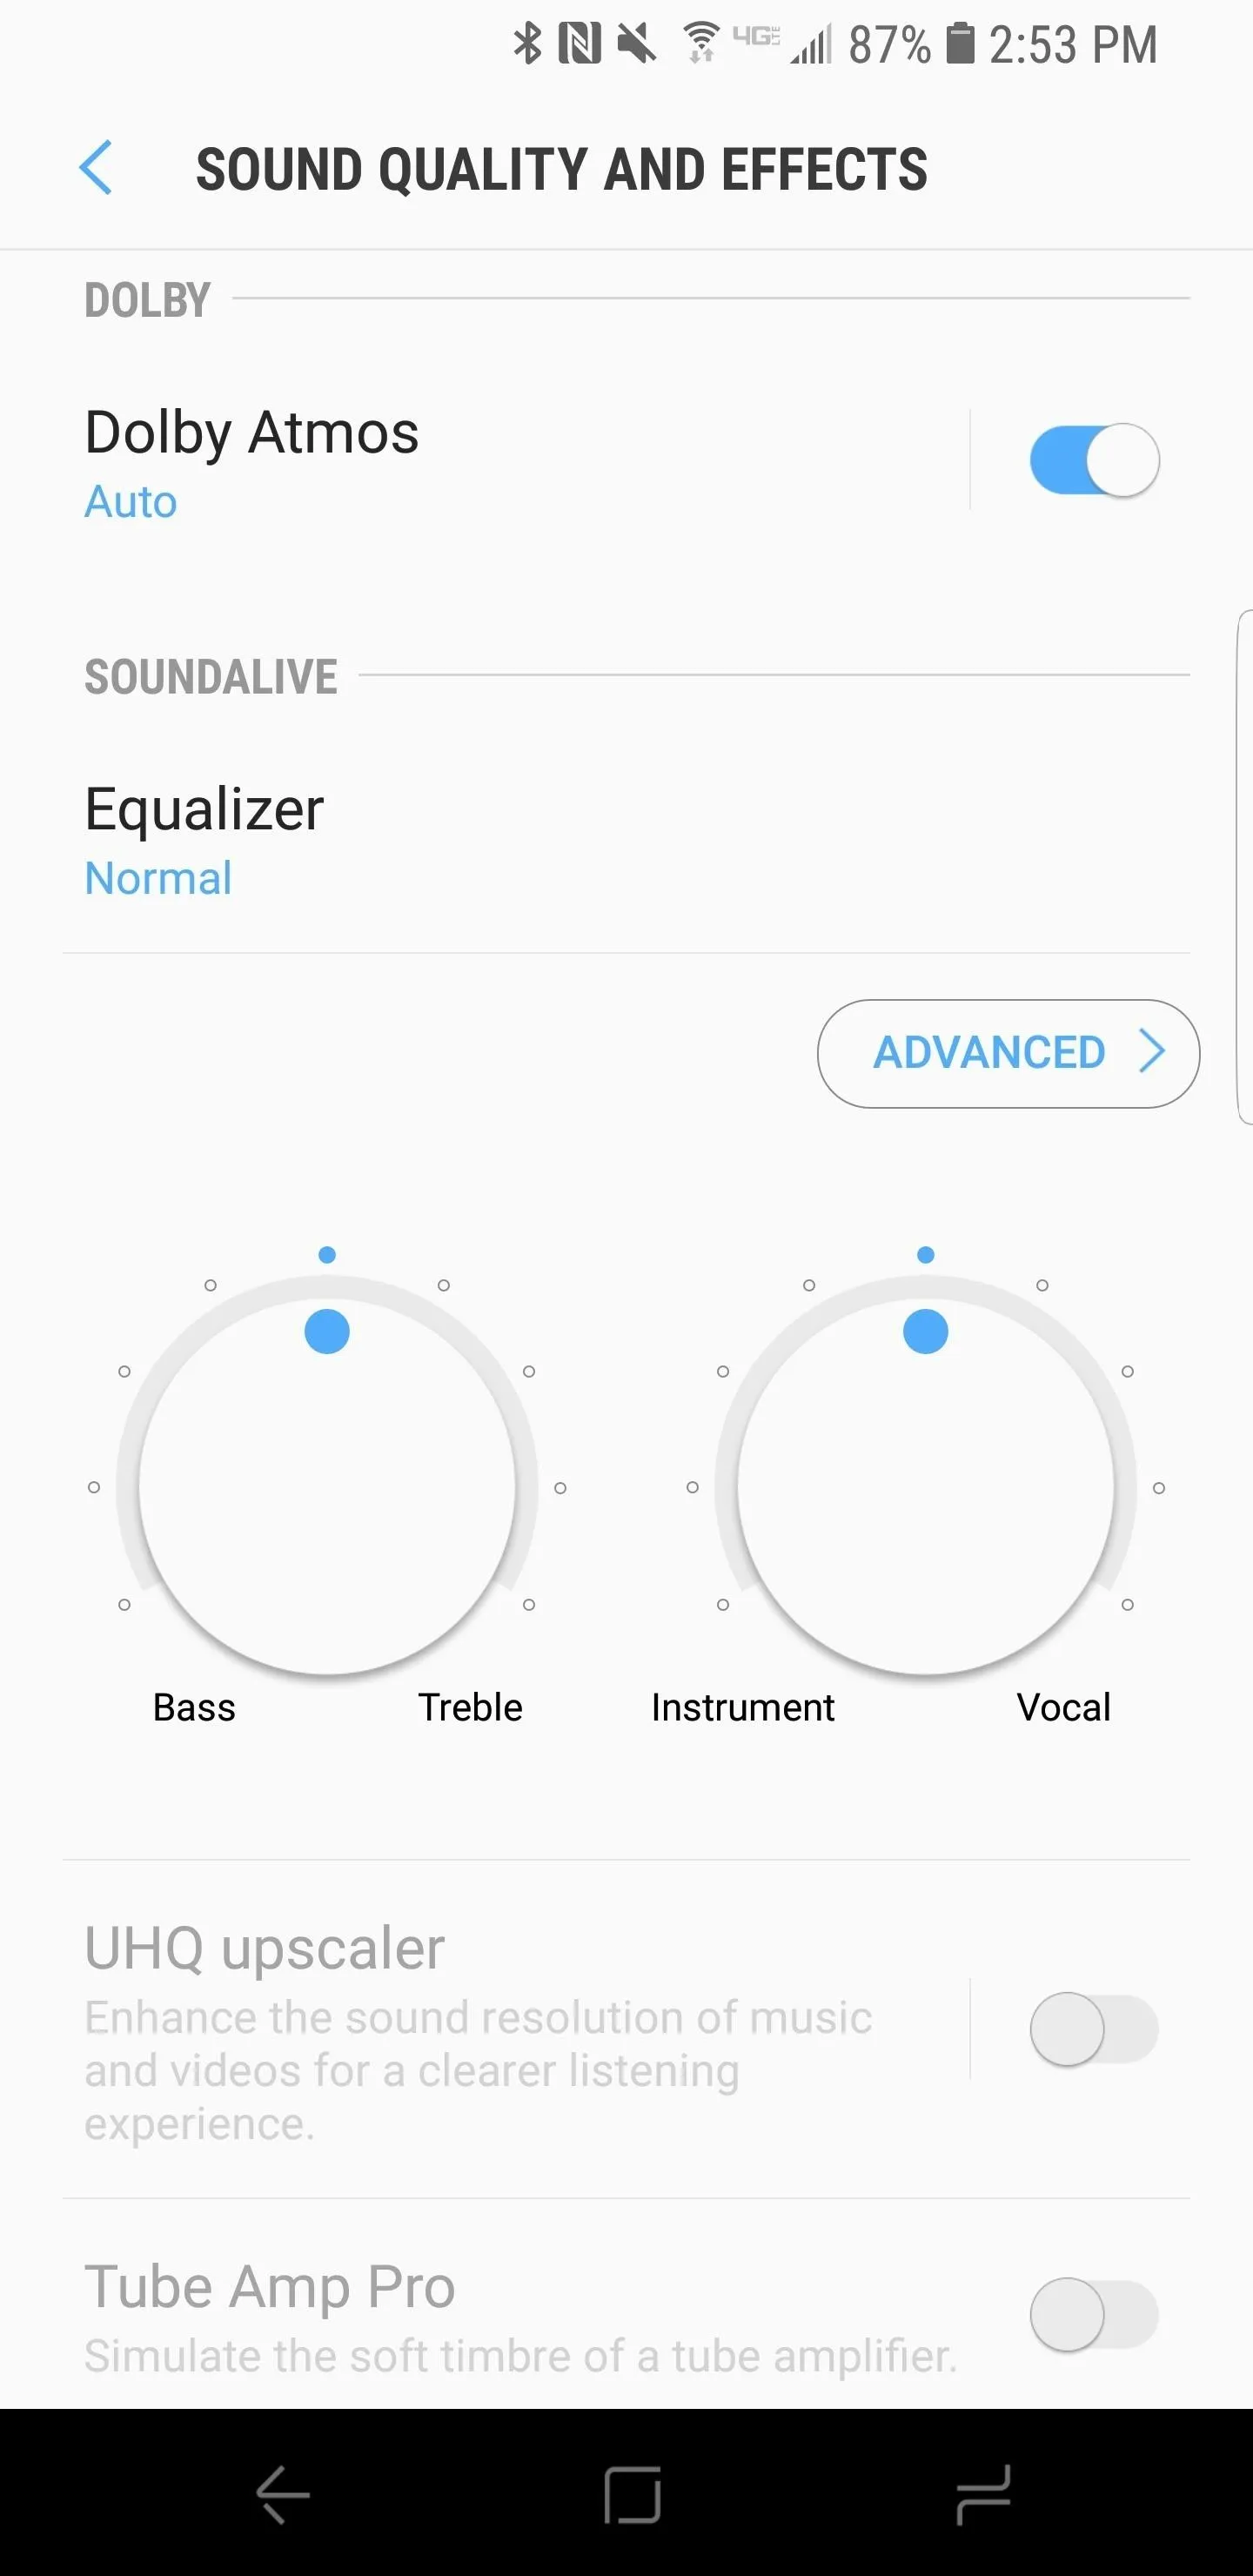
After you have enabled the Dolby Atmos feature, you can toggle a few useful settings. To enter the detailed settings menu, long-press on the Dolby Atmos tile. The four options available are Auto, Movie, Music, and Voice. If you often switch between media and calls all day, it is probably best to leave the Auto option untouched for daily use. For a rich Netflix experience the Movie mode is a great choice, just remember to toggle back to Auto after viewing.
2. AR Emoji
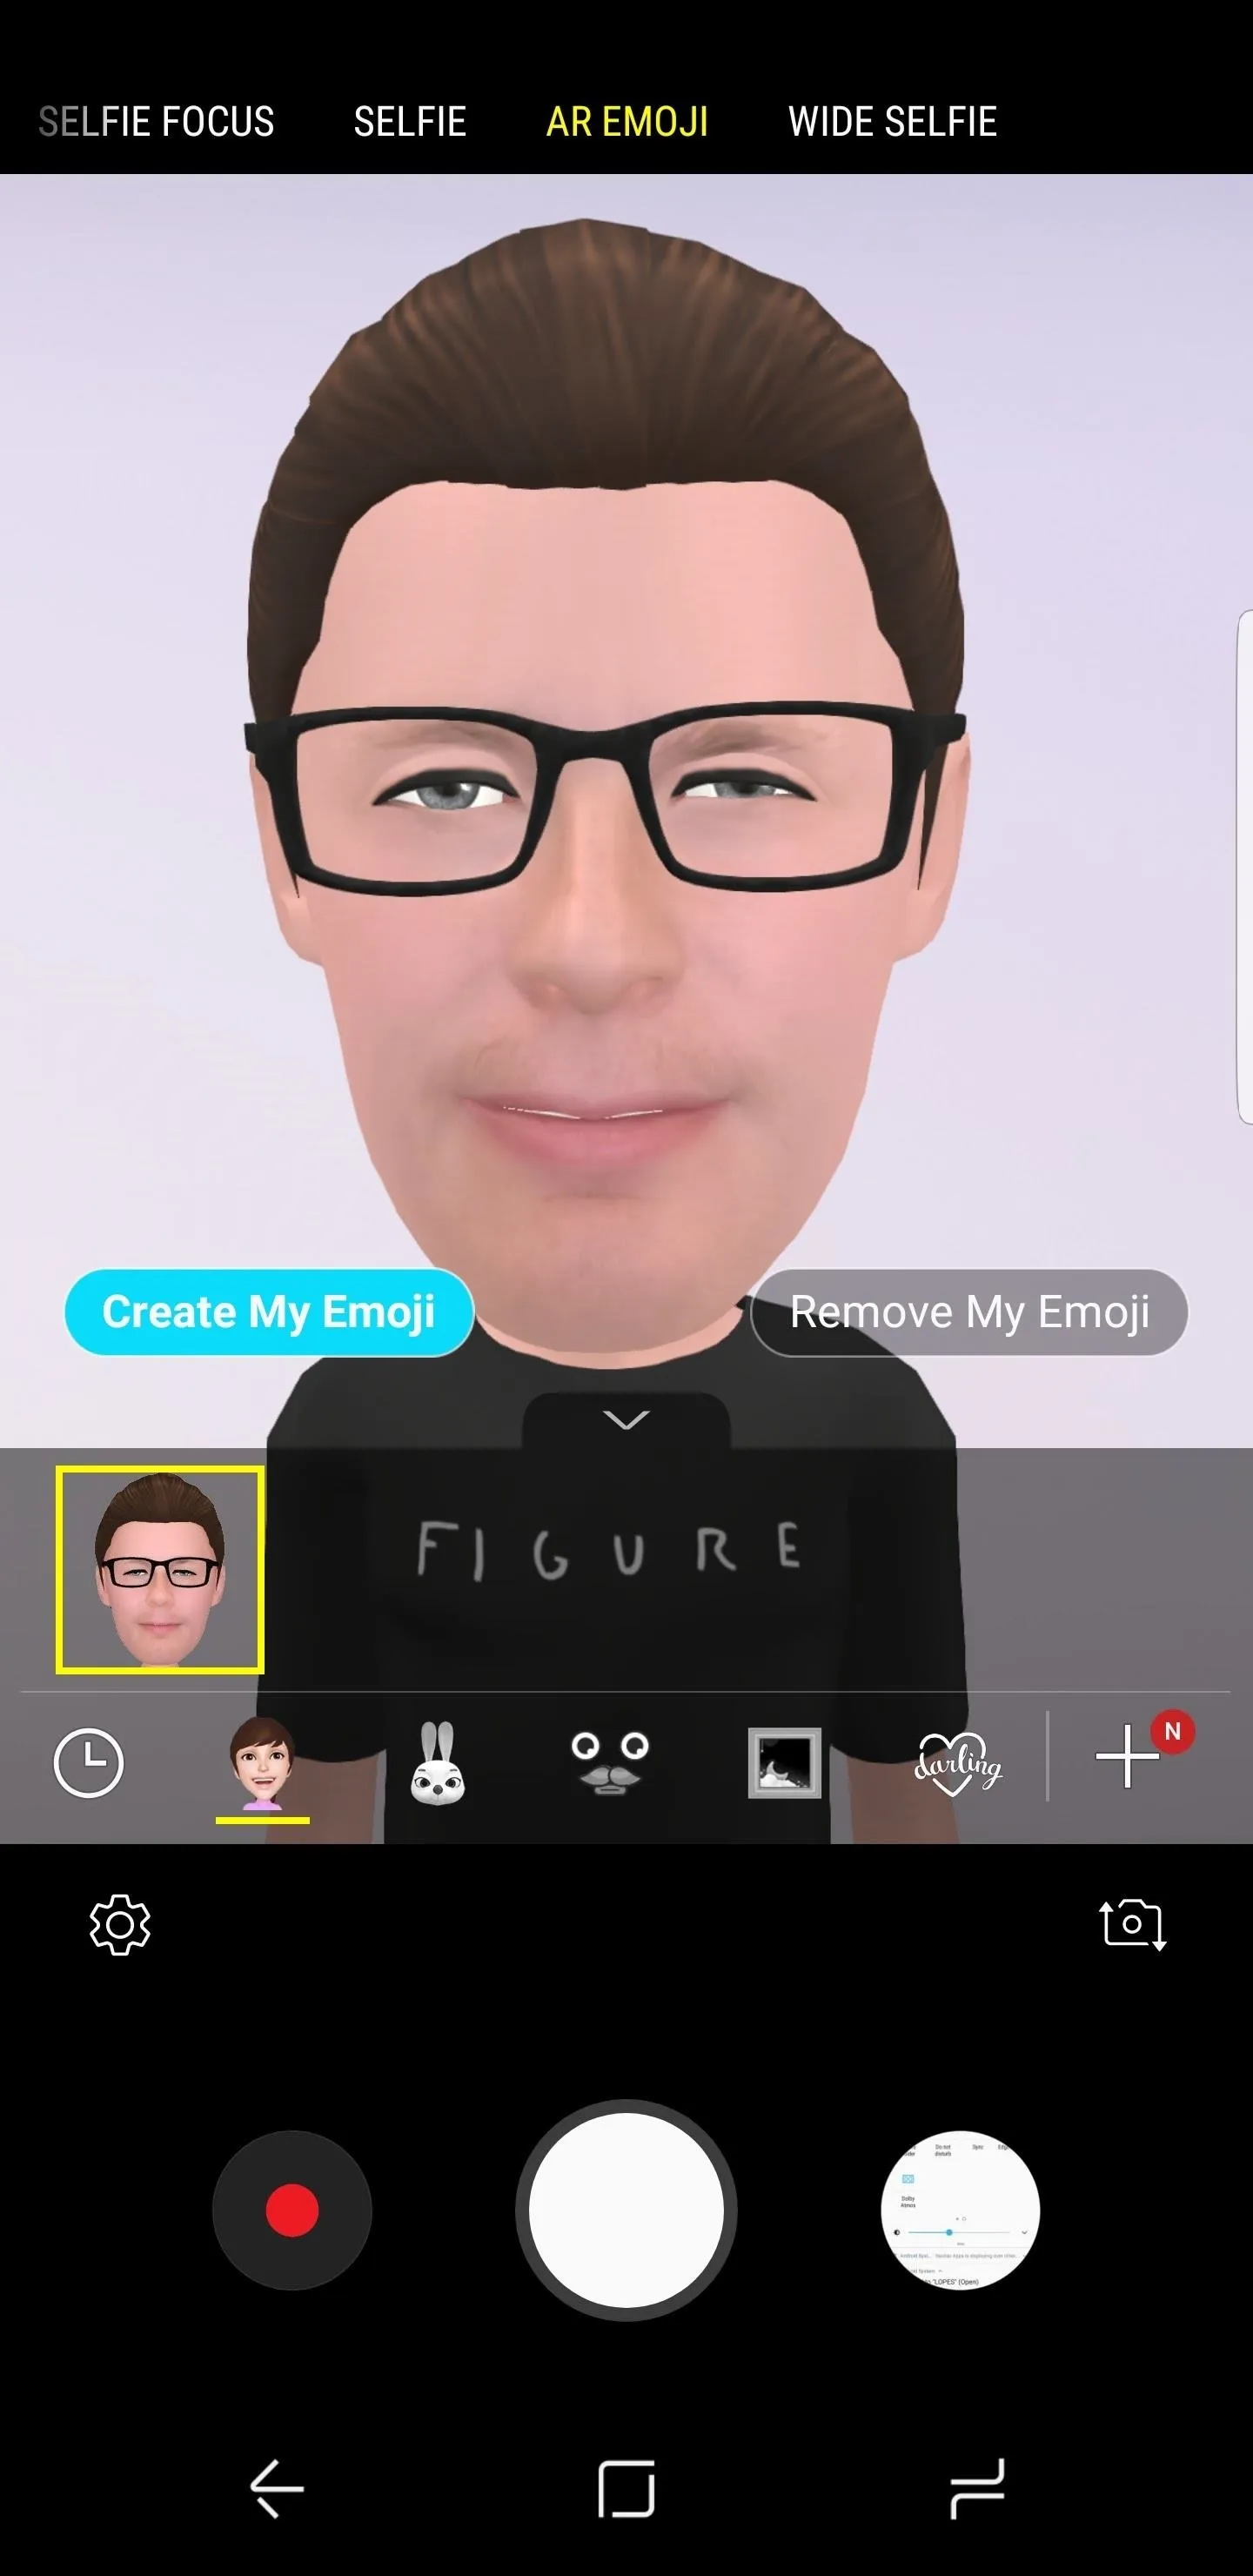
In the Galaxy S9 keynote, Samsung spent significant time touting their new AR Emoji feature. The idea is simple enough, create a Bitmoji-like character in your likeness, then share animated GIFs featuring your character. This feature is clearly targeted as competition with Apple's Animoji on the iPhone X. While AR Emoji is not buried in settings like Dolby Atmos, it can be a bit tricky to locate for Android newcomers.
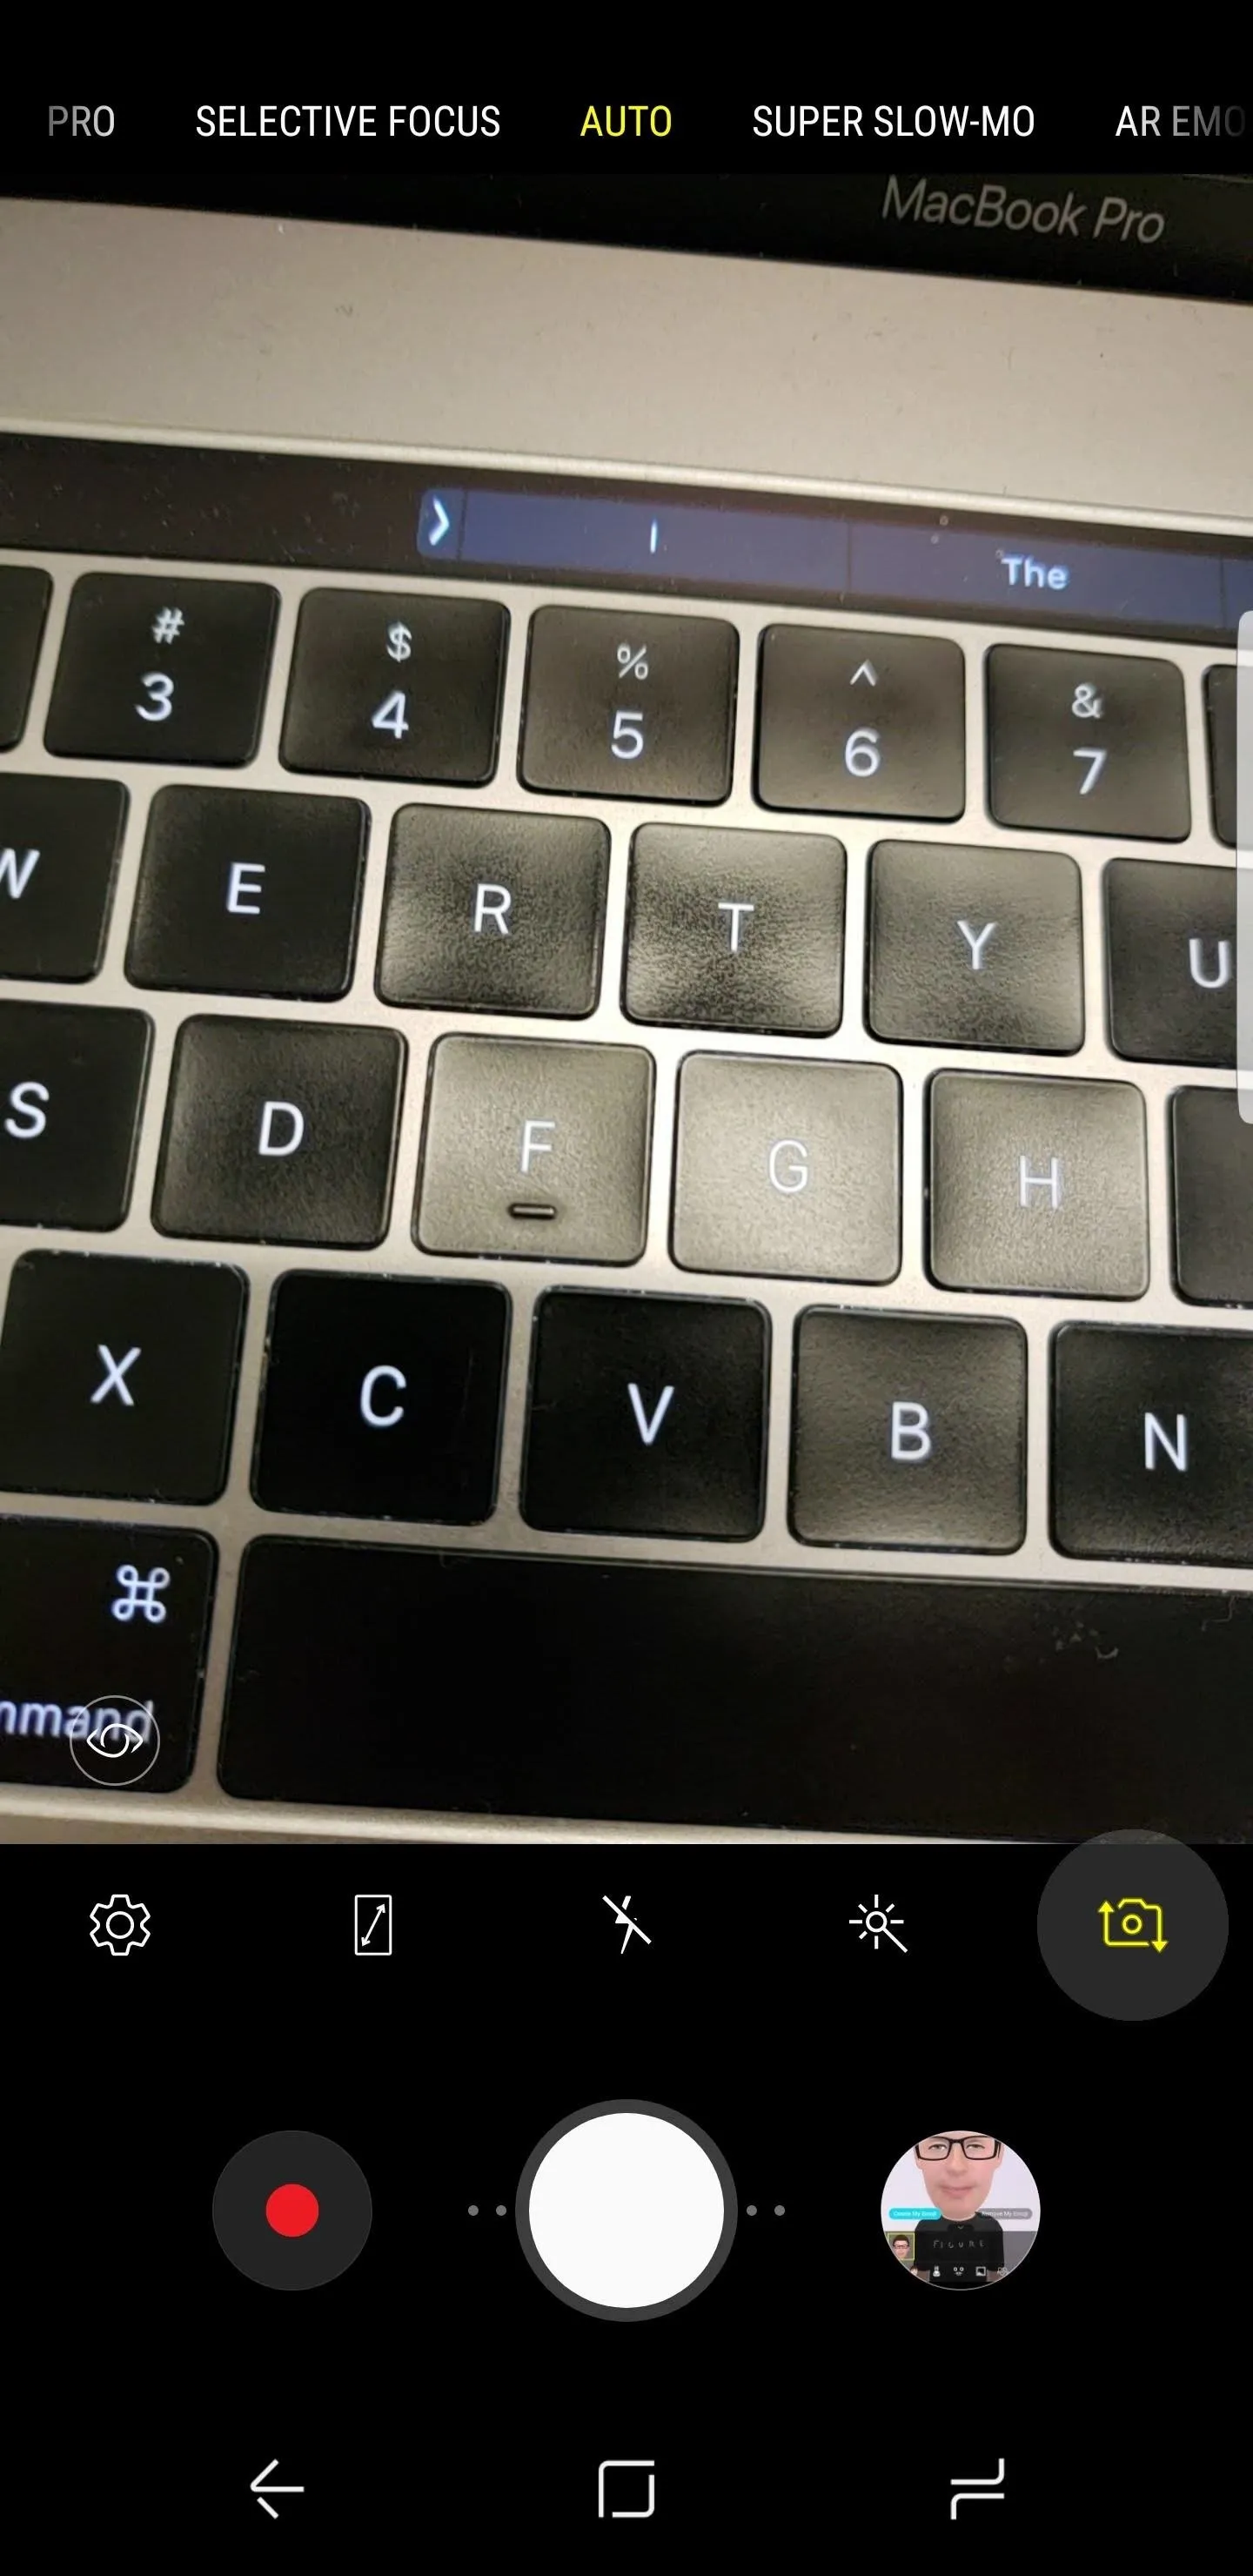
AR Emoji does not have a dedicated app — instead, you create your character from within the Camera software. To access this, open the Camera, tap the selfie camera toggle, then swipe left once to reveal the AR Emoji screen. From here, you can scan in your face and create your custom AR Emoji. The following screens provide options for customizing clothing, skin tone, and hair style as well. If making a Bitmoji of yourself is too creepy, there are also several cartoonish characters you can choose from in the app.
3. Always on Display & Lock Screen Customization
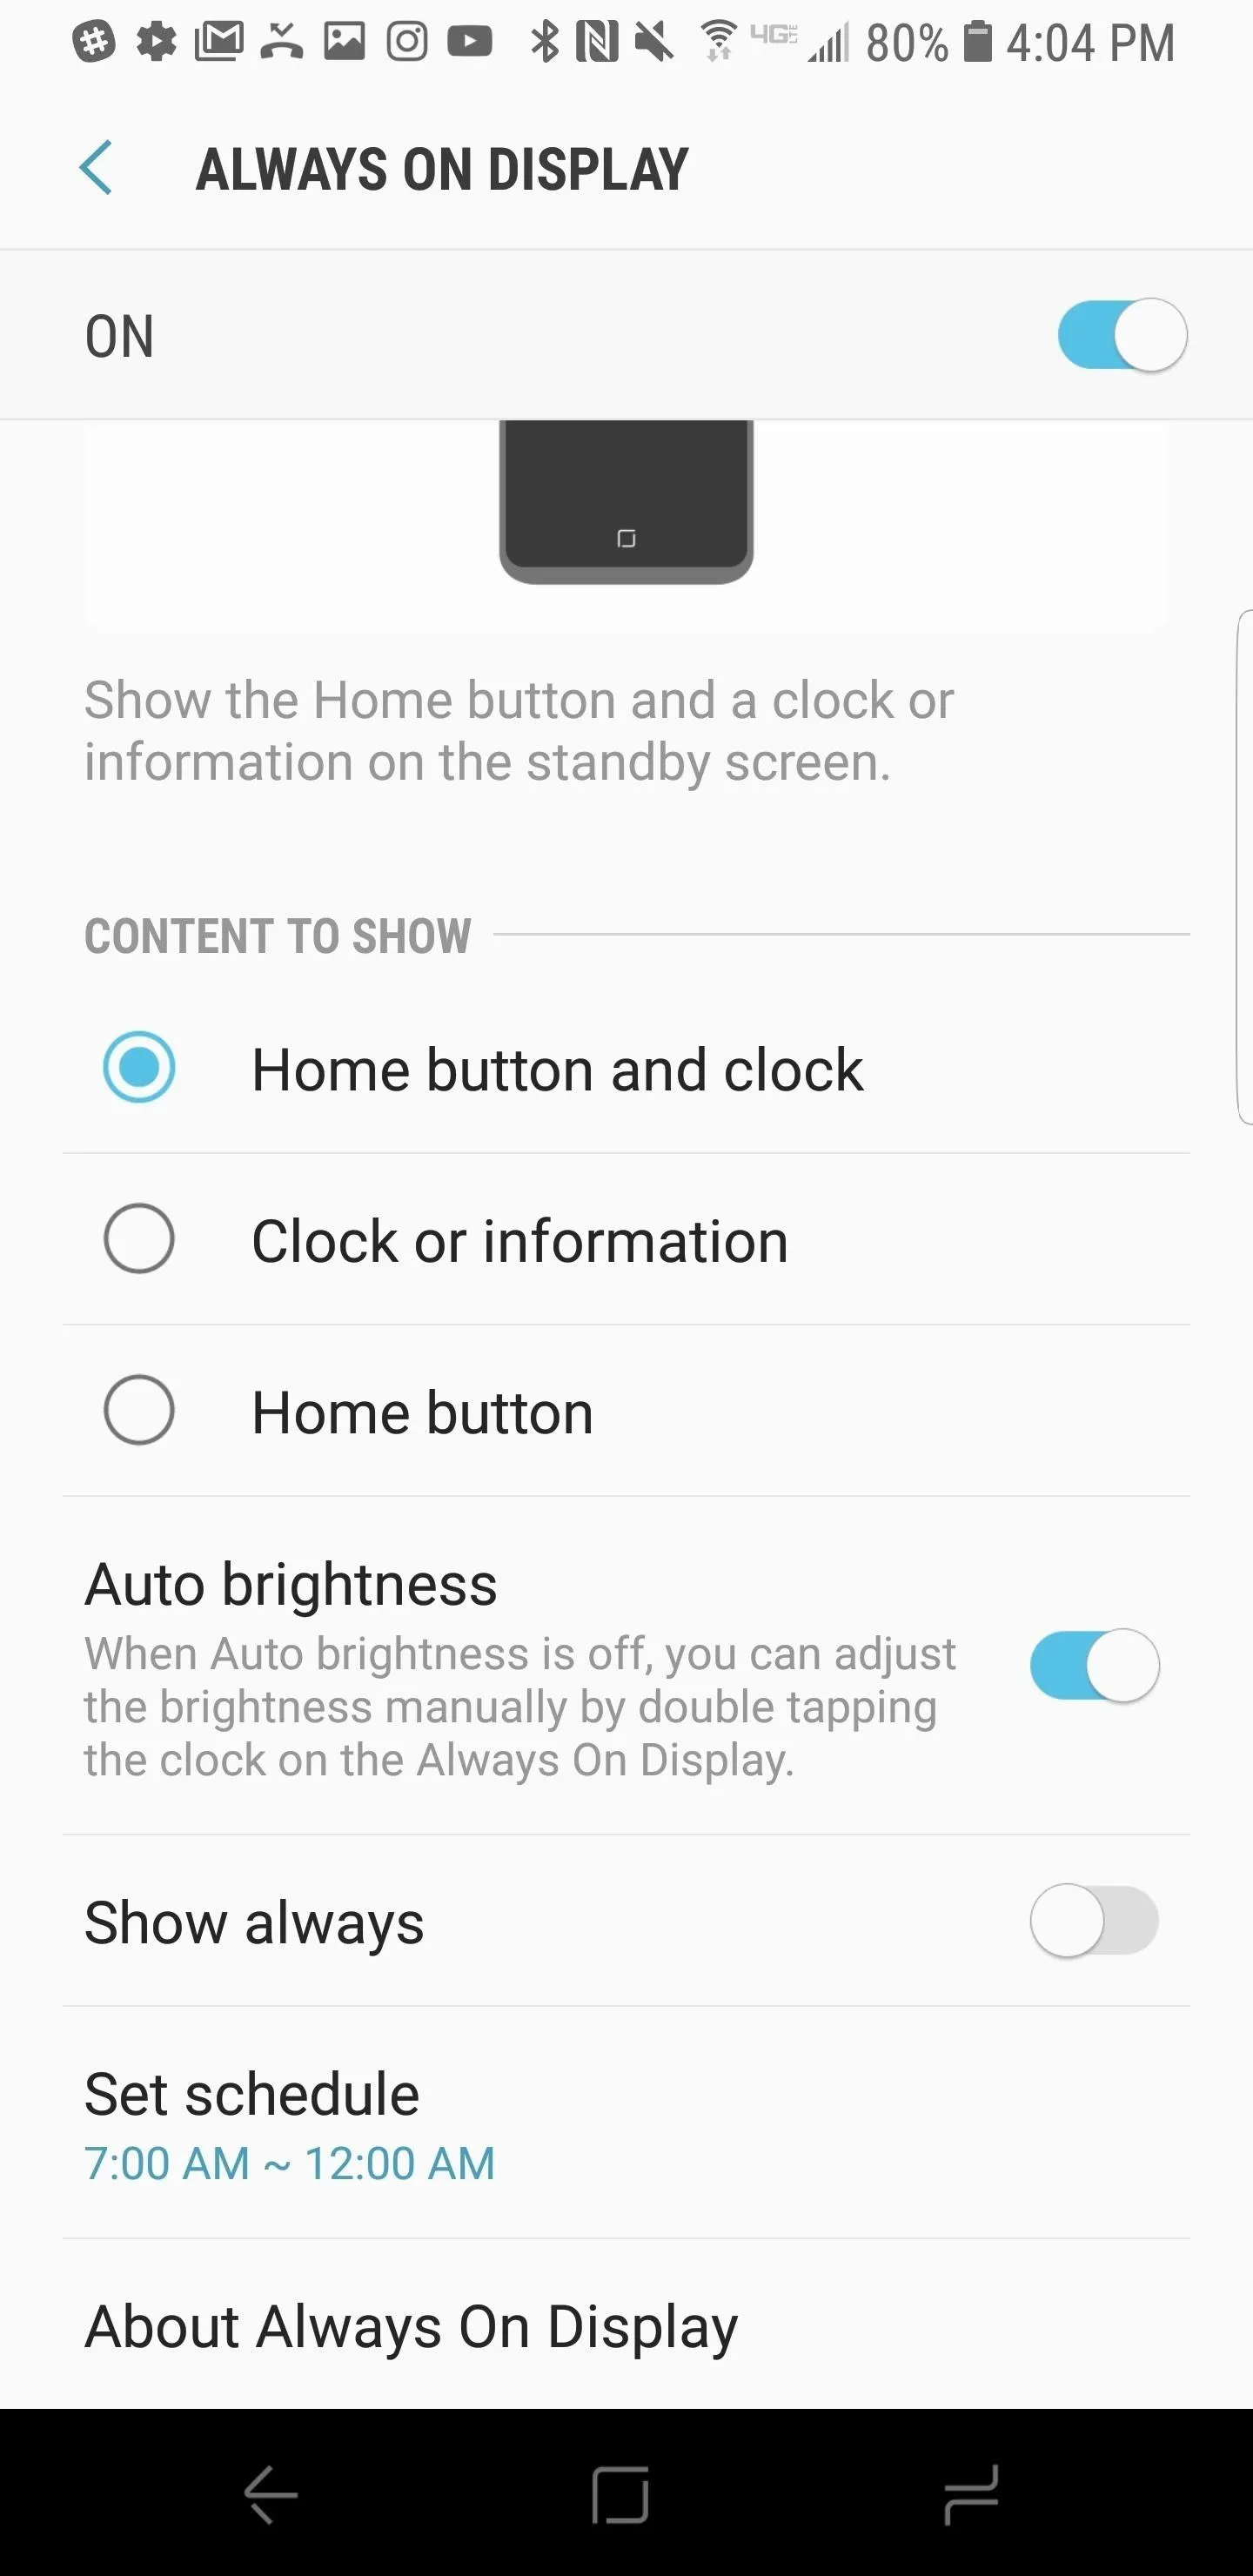
The first time you utilize the Always On Display, Samsung walks you through a quick tutorial of the various components. One of the most important components is the ability to customize your Always on Display and set a schedule. Unfortunately, most users gloss over this useful information in the first tutorial. Luckily, you can navigate back to these settings at any time you choose.
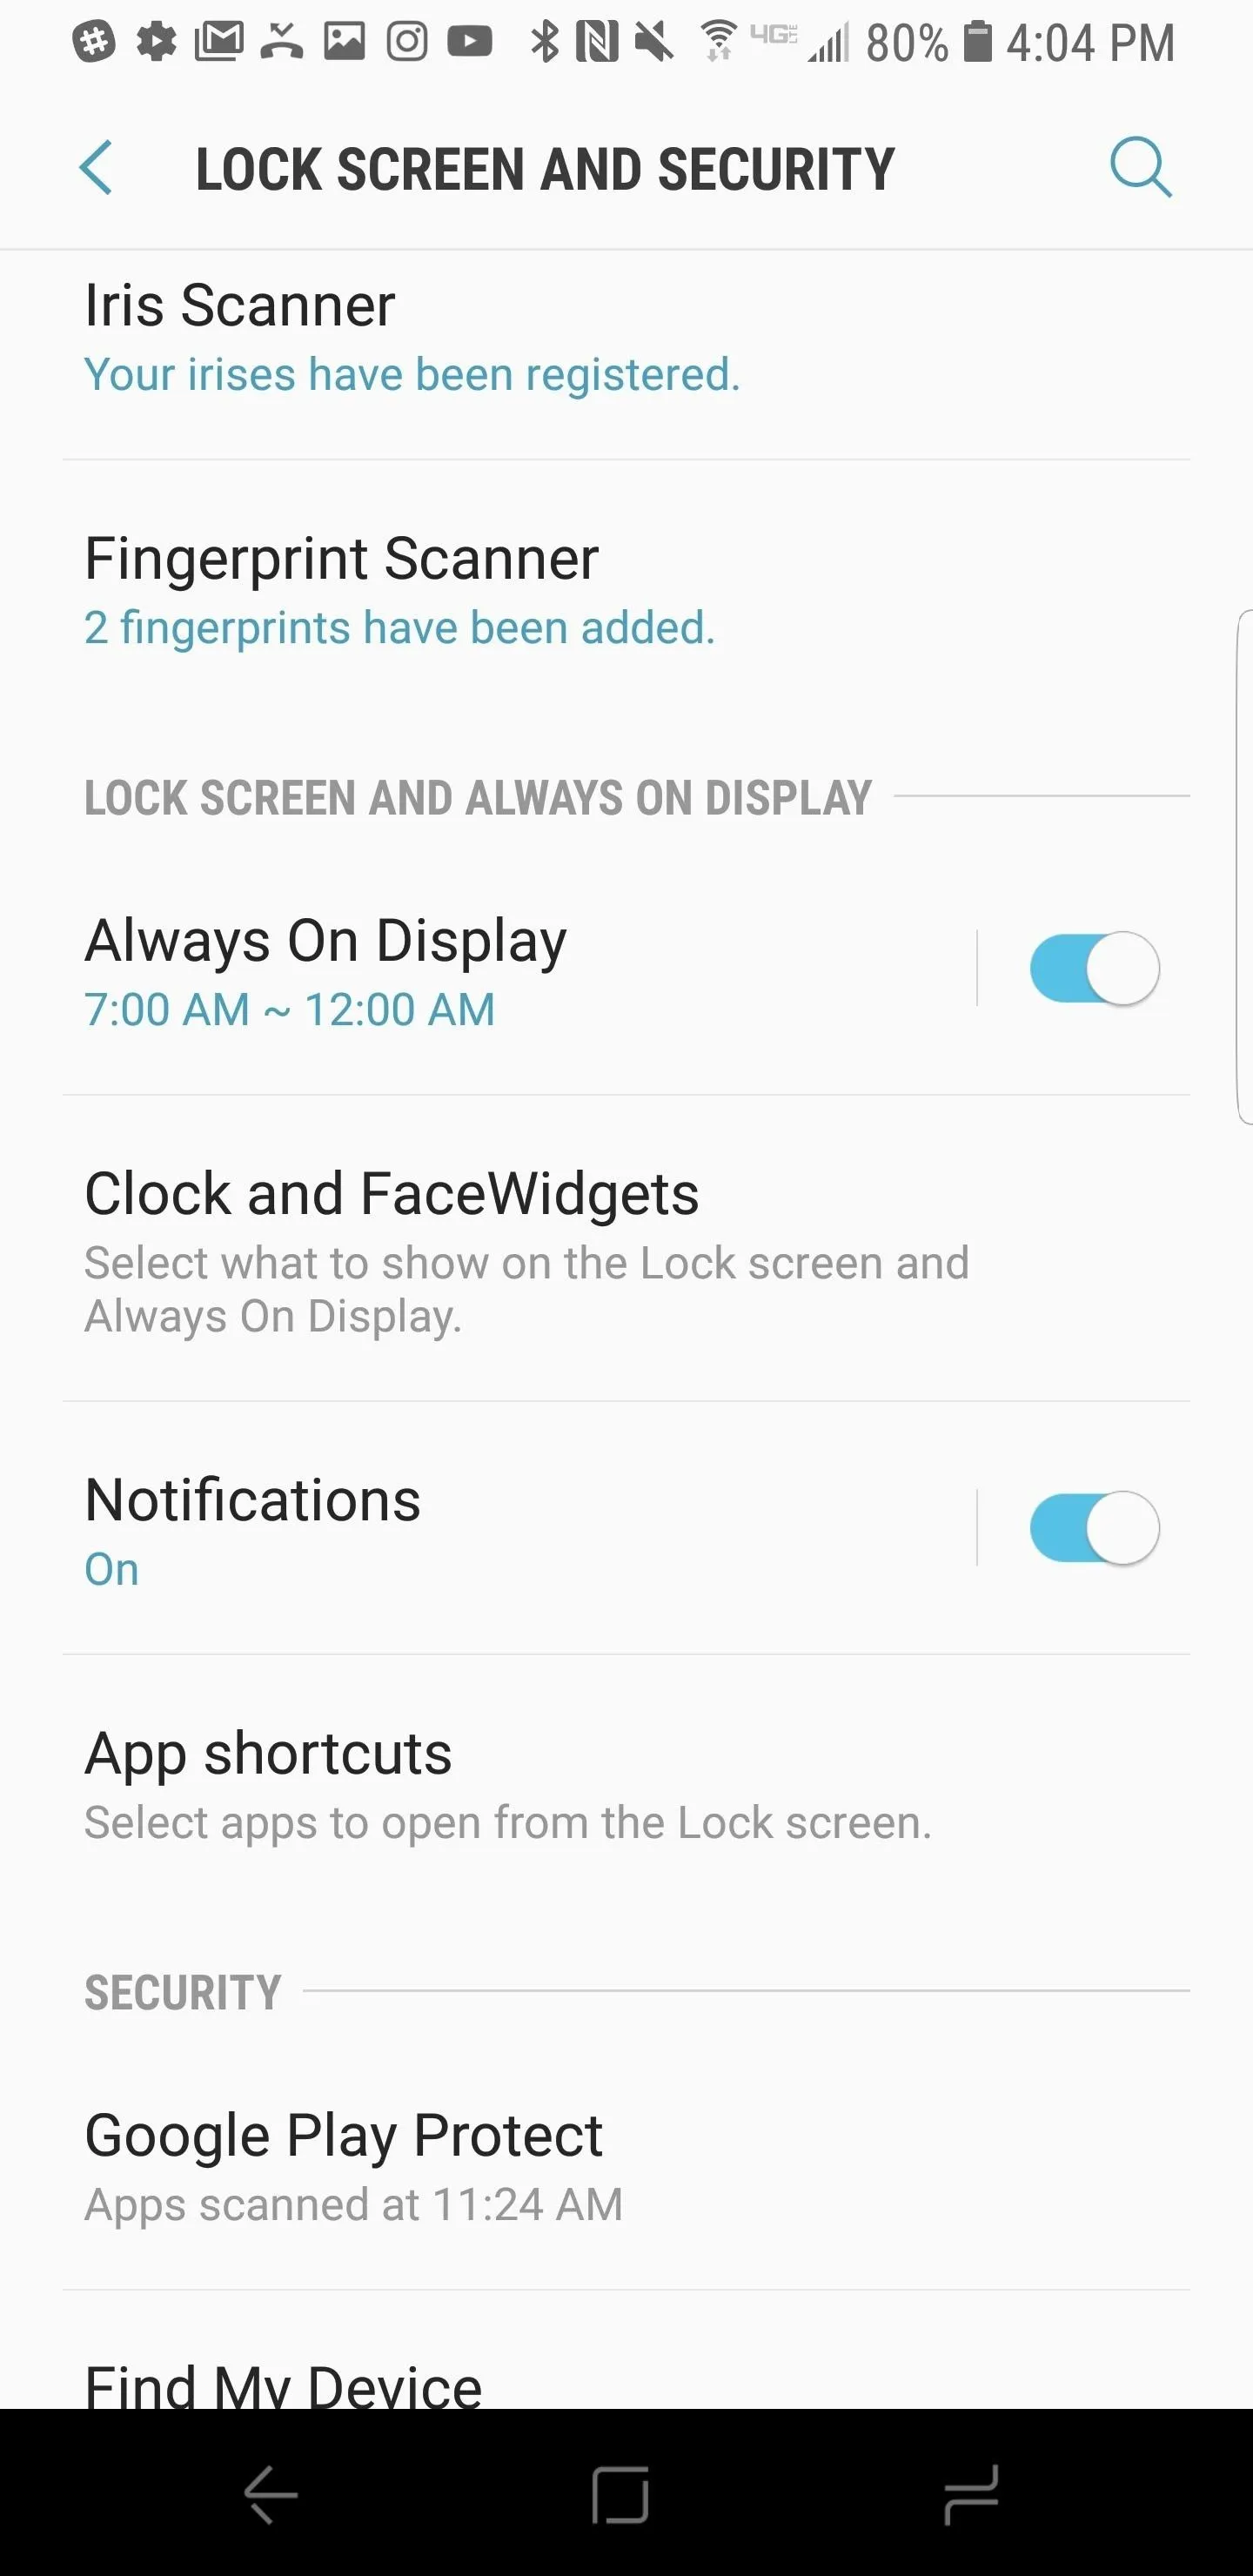
To access these settings, head to Settings and tap "Lock Screen and Security." From here, there are a number of custom settings worth tweaking. Under the Lock Screen and Always on Display heading, you can start by setting your Always on Display to a custom schedule. This allows you to enable Always on Display during the hours you're awake, and automatically turn it off when you go to sleep. In addition, you can choose which pieces of information to show on your standby screen, or enable the Always on Display at all times.

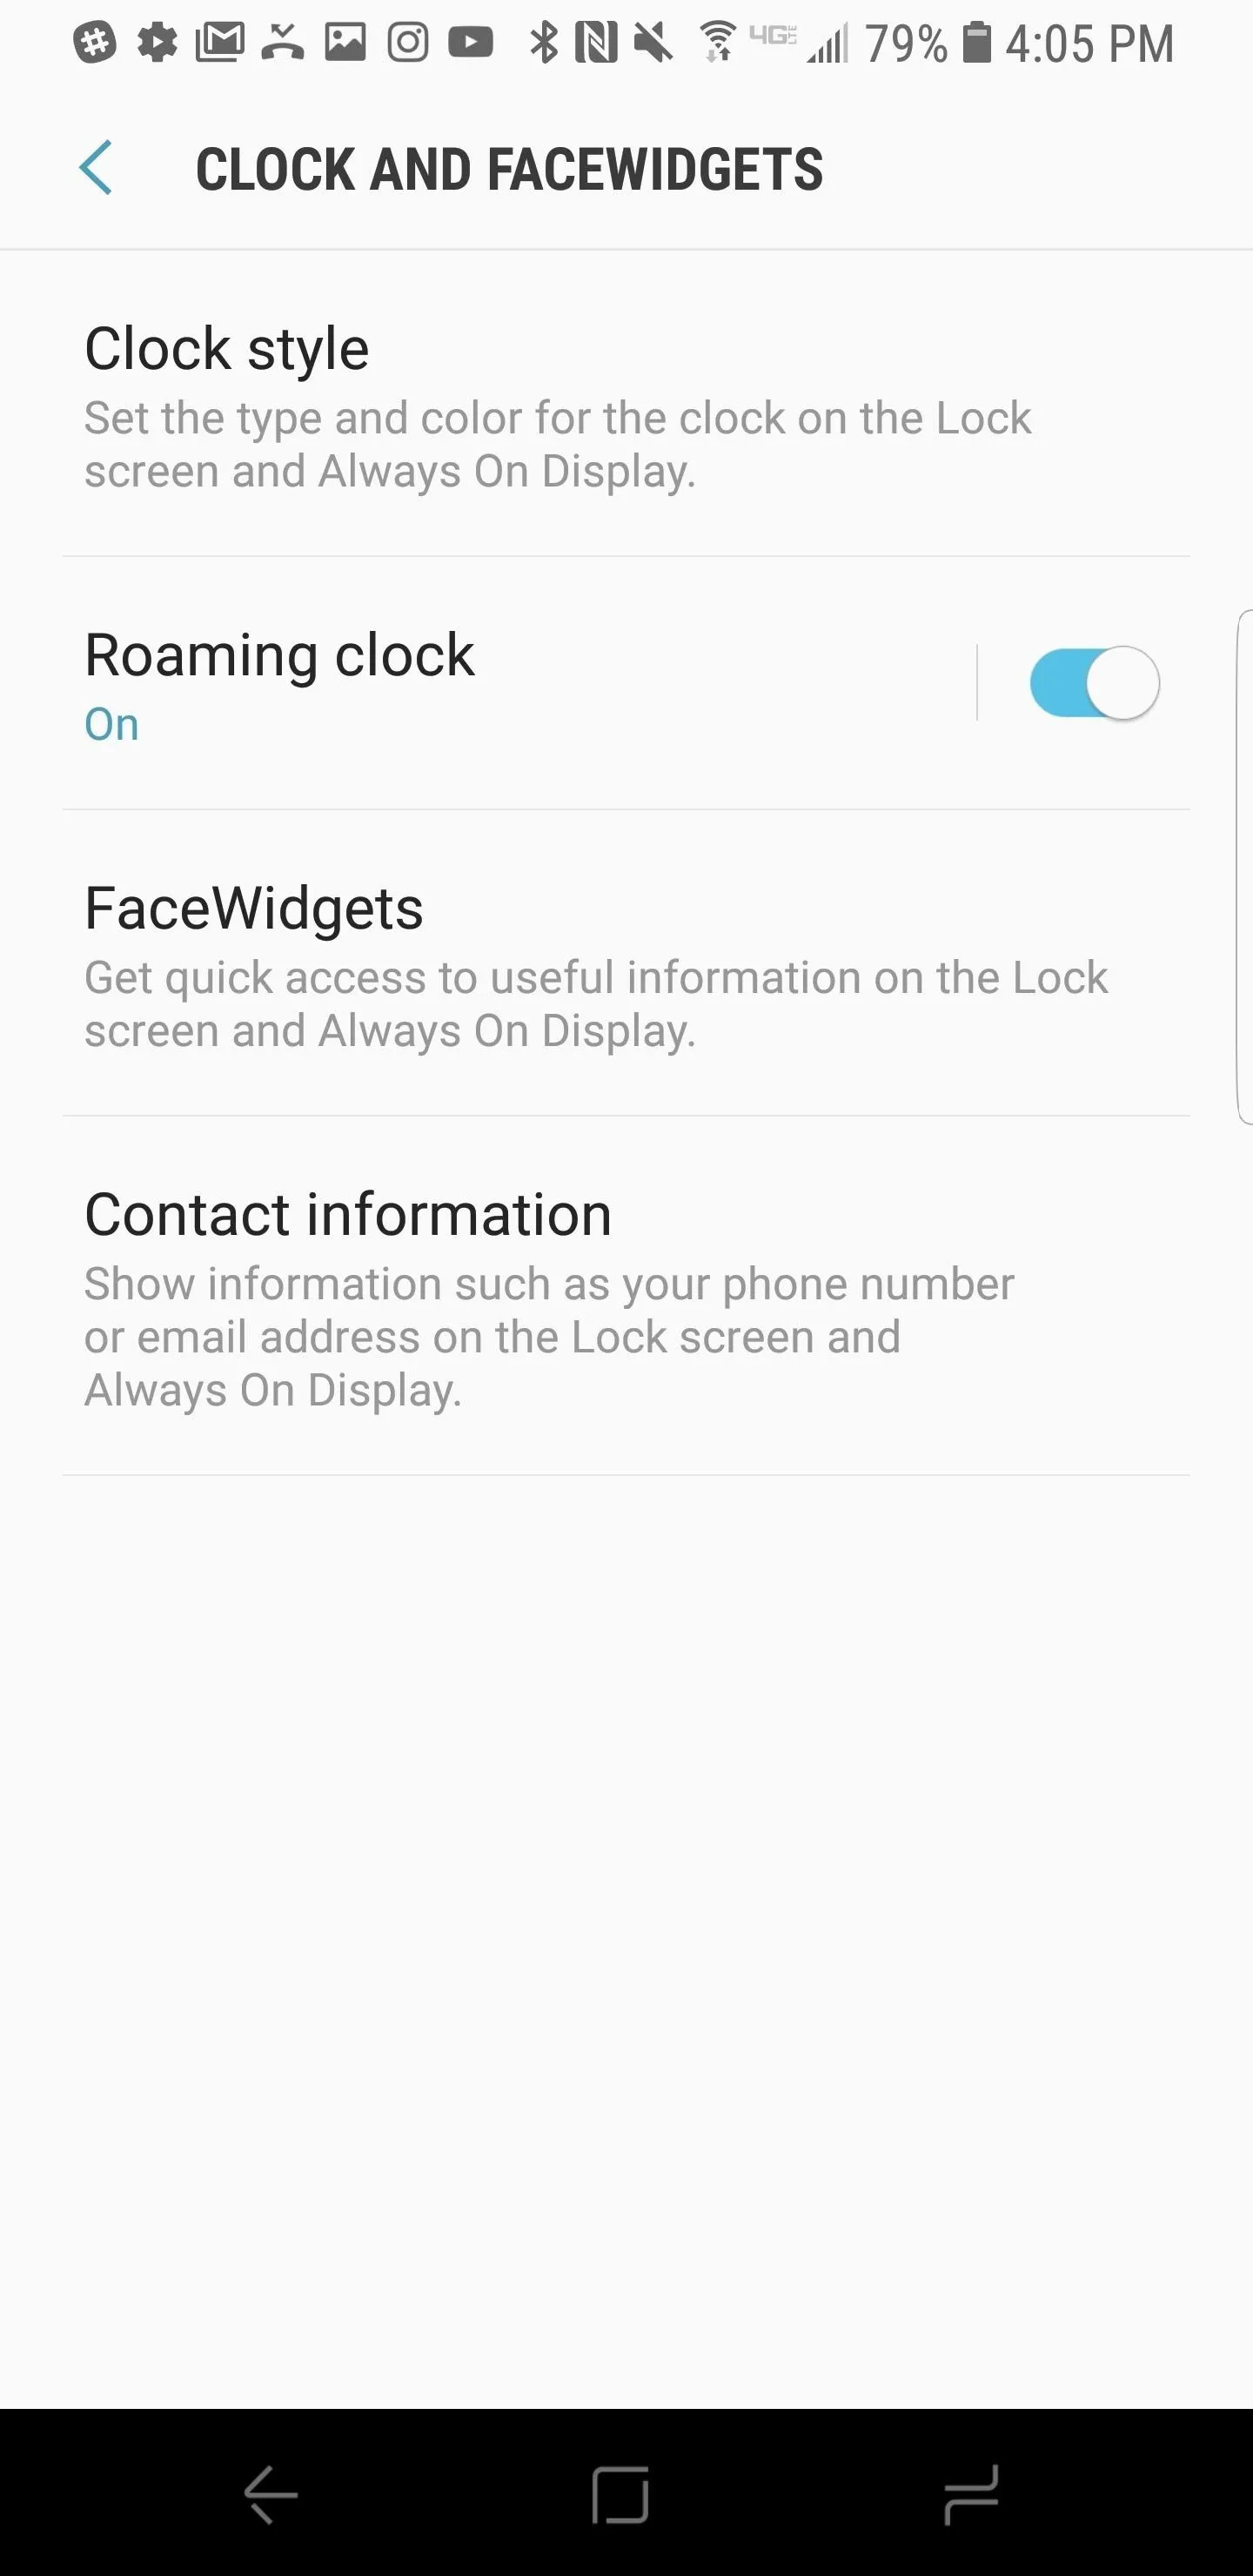
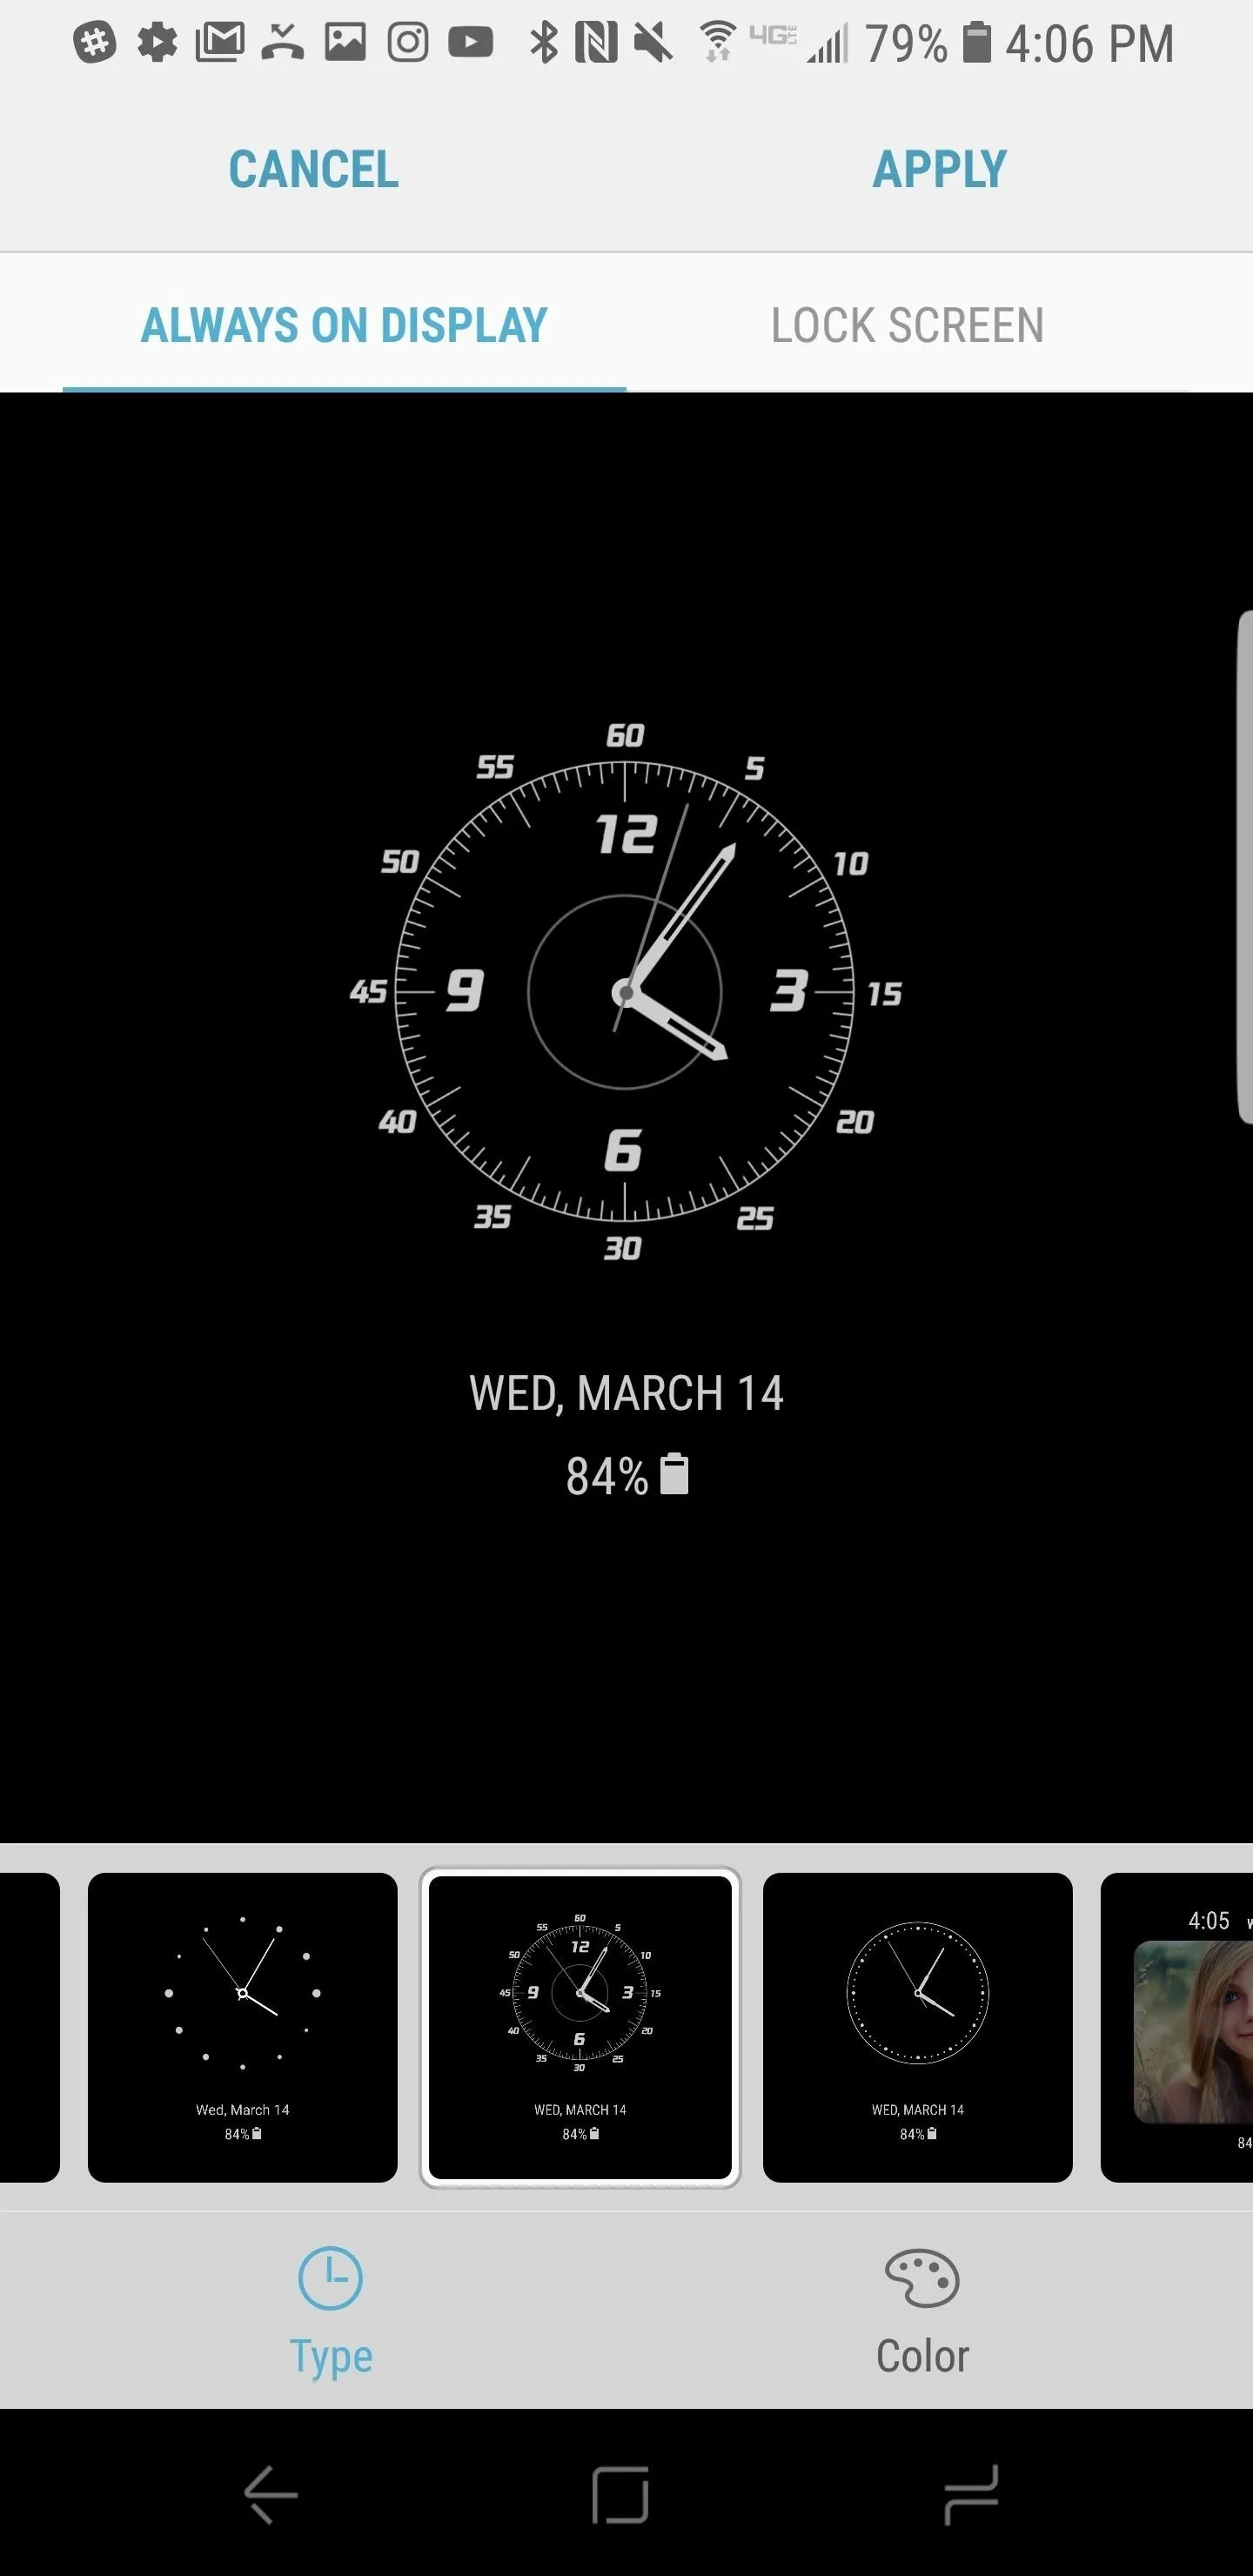
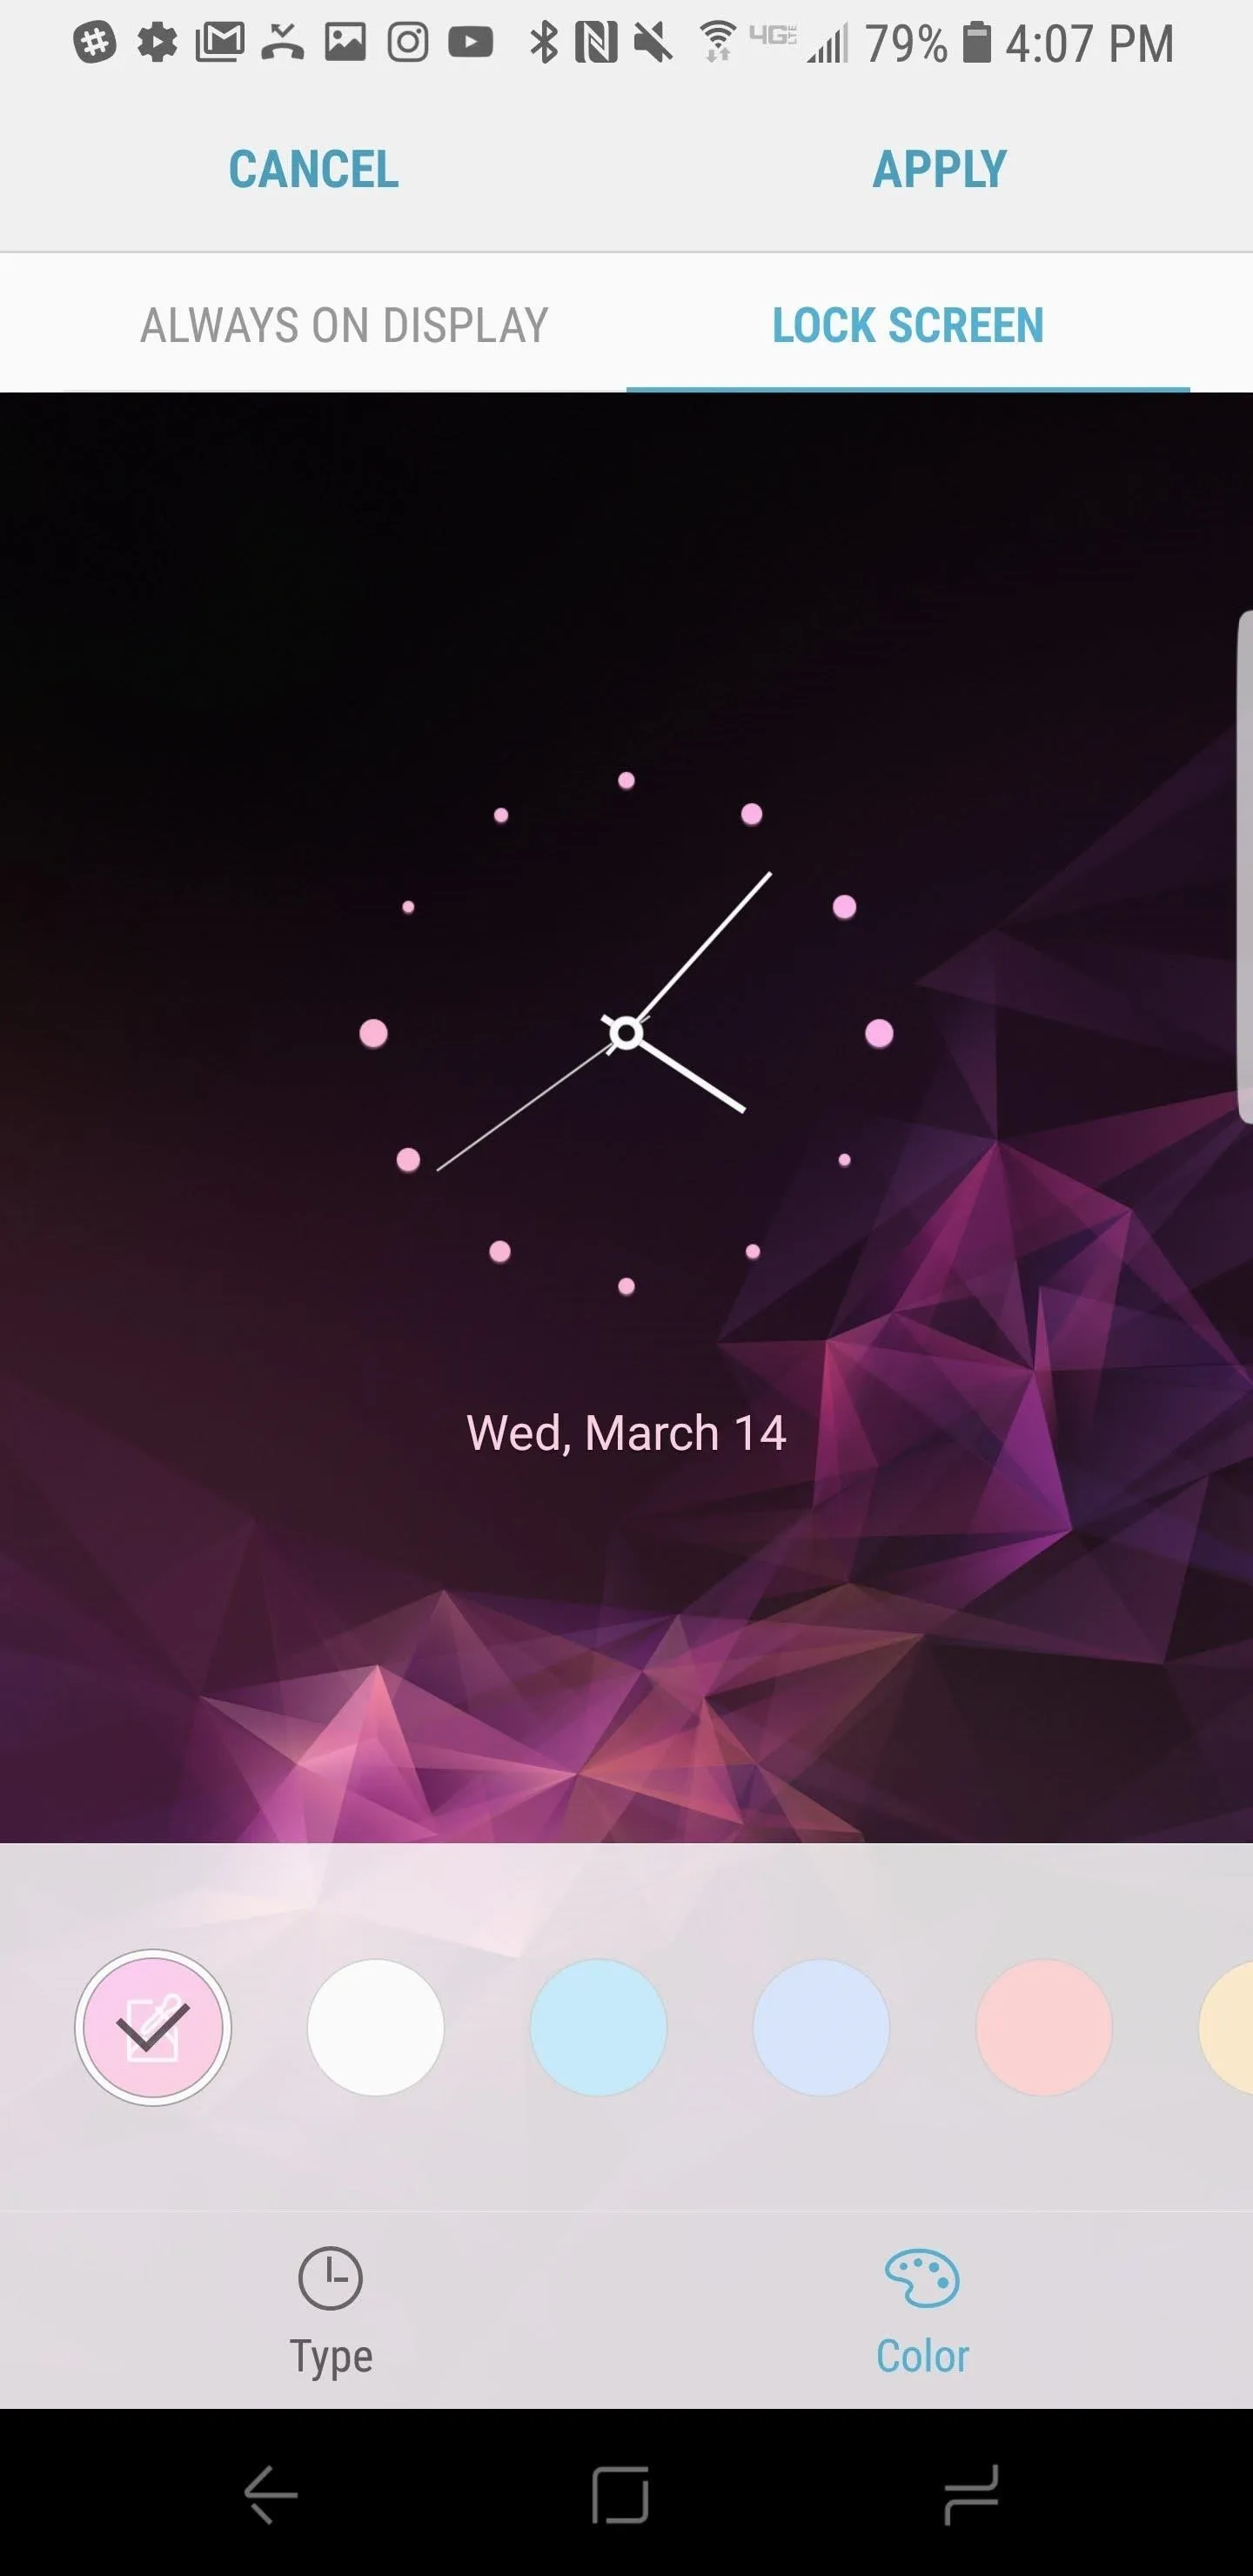
Below the schedule option, you will find "Clock and Facewidgets." In this menu, you can choose from a number of clock styles, and choose which widgets are displayed on your lock screen and Always on Display. With Android Oreo, Samsung added a nice selection of new clock styles and added the ability to color-match your wallpaper color on the lock screen clock.
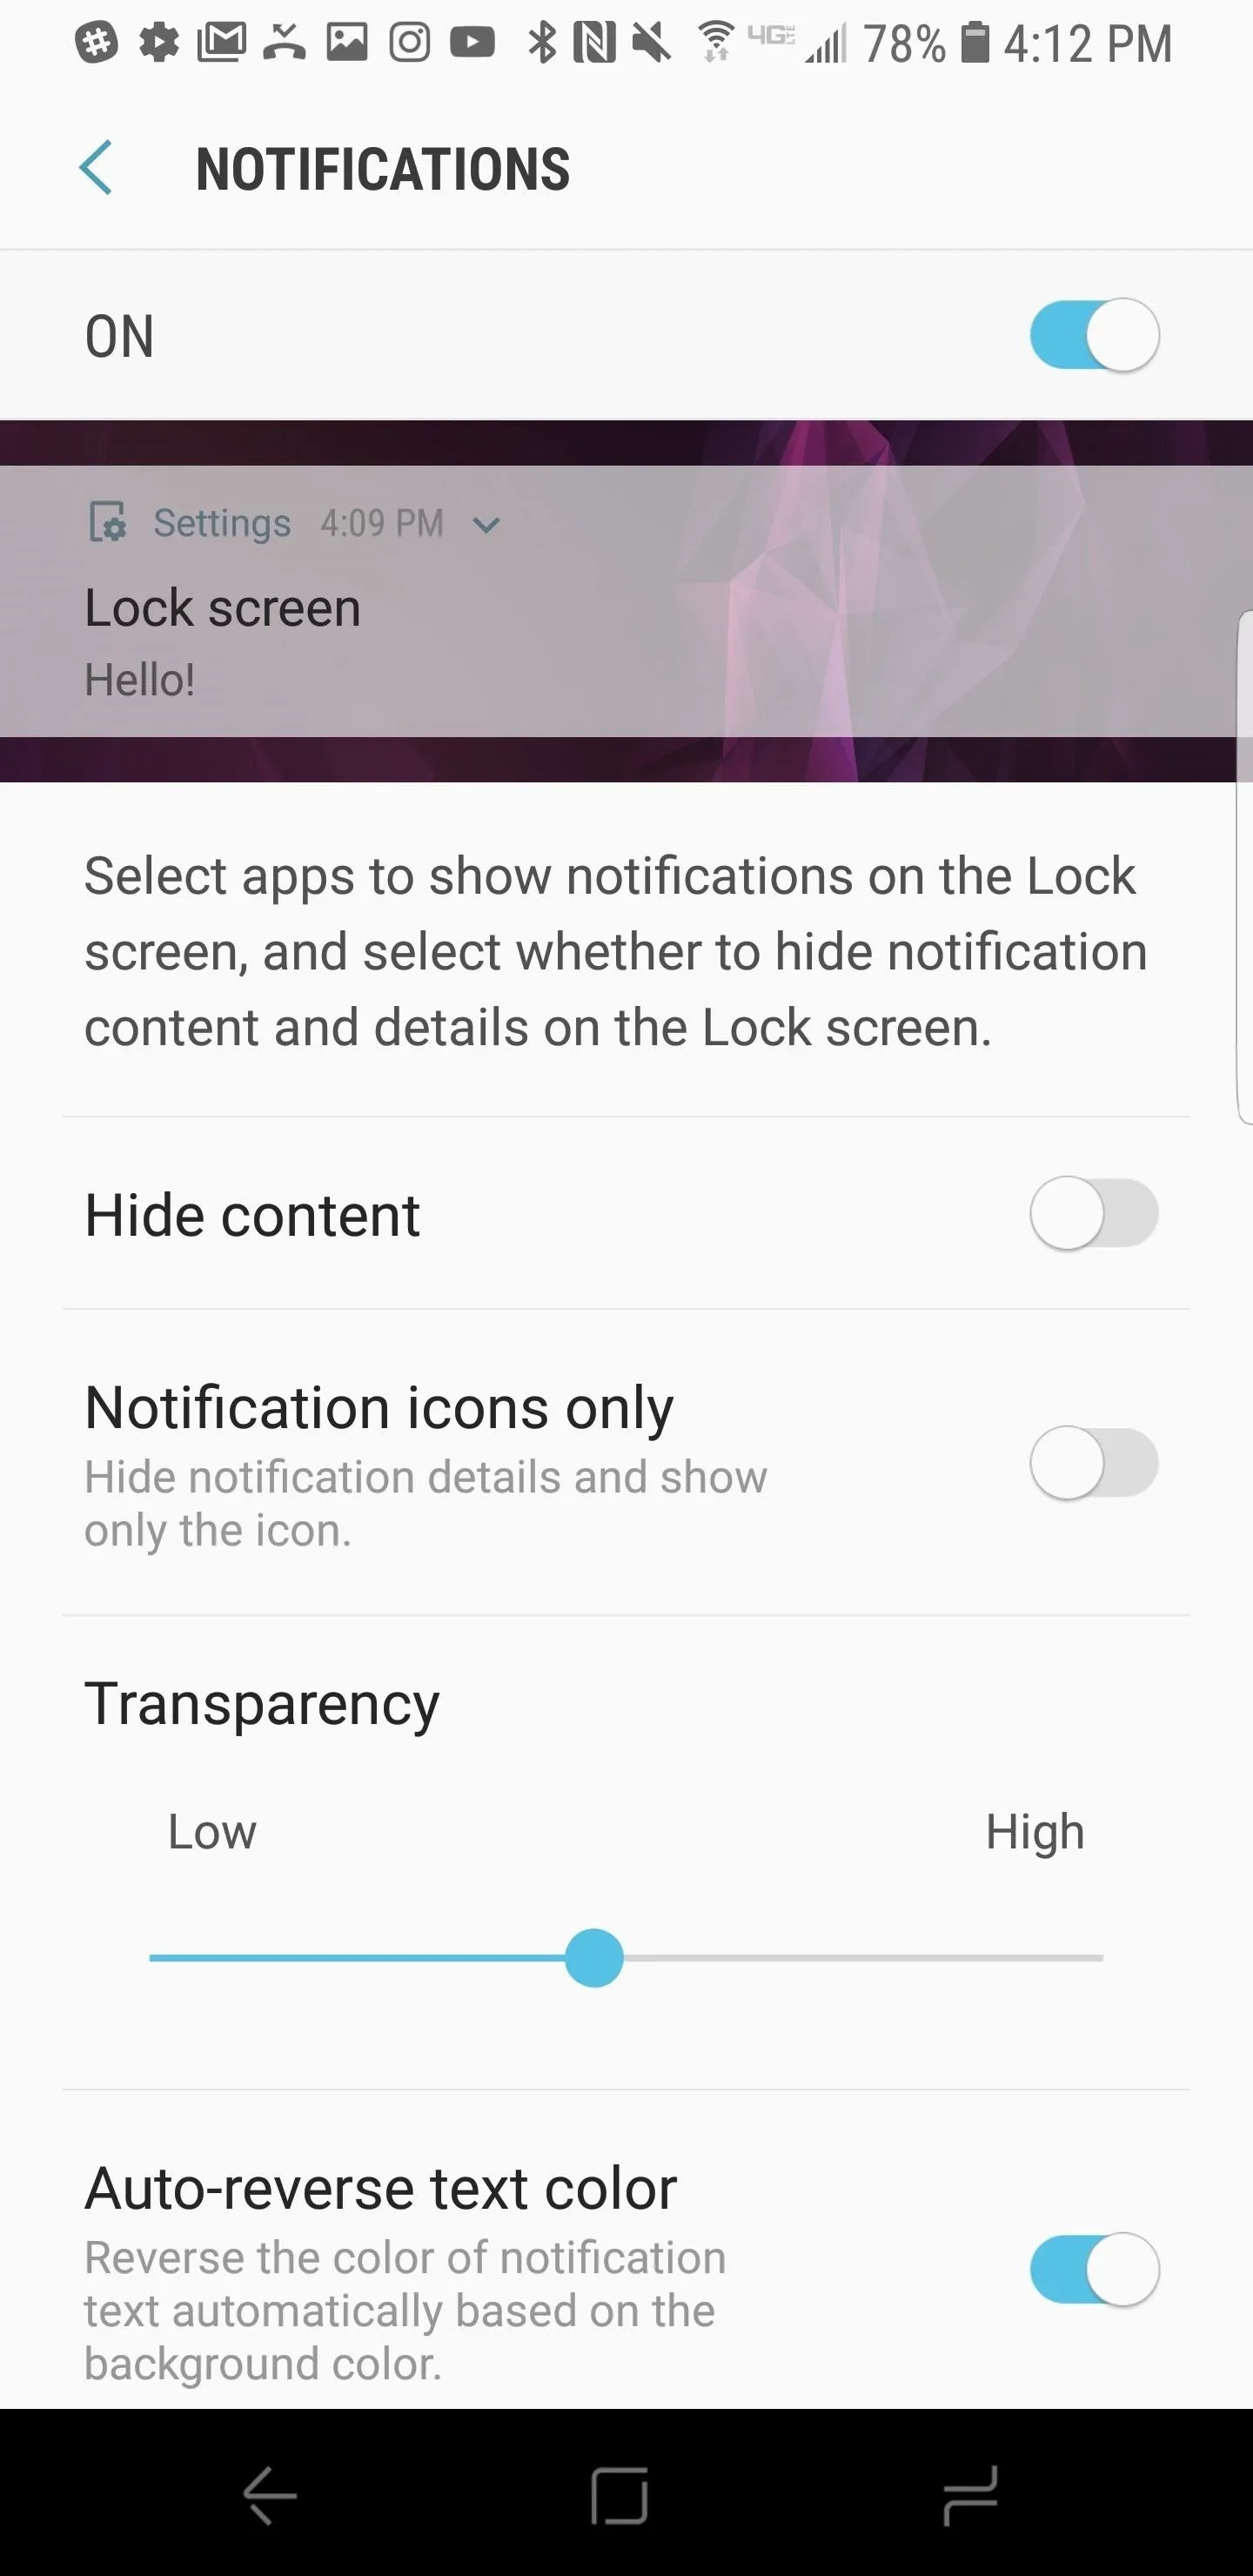
Next, the "Notifications" setting allows you to change the type of notifications displayed on your lock screen and customize their appearance. There is an option to hide content, only show notification icons, and even finely tune which apps display notifications. New to Android Oreo, Samsung also built in the option to change the transparency of your notifications. When you use the transparency slider, you will notice a nice preview of the lock screen at the top of the menu.
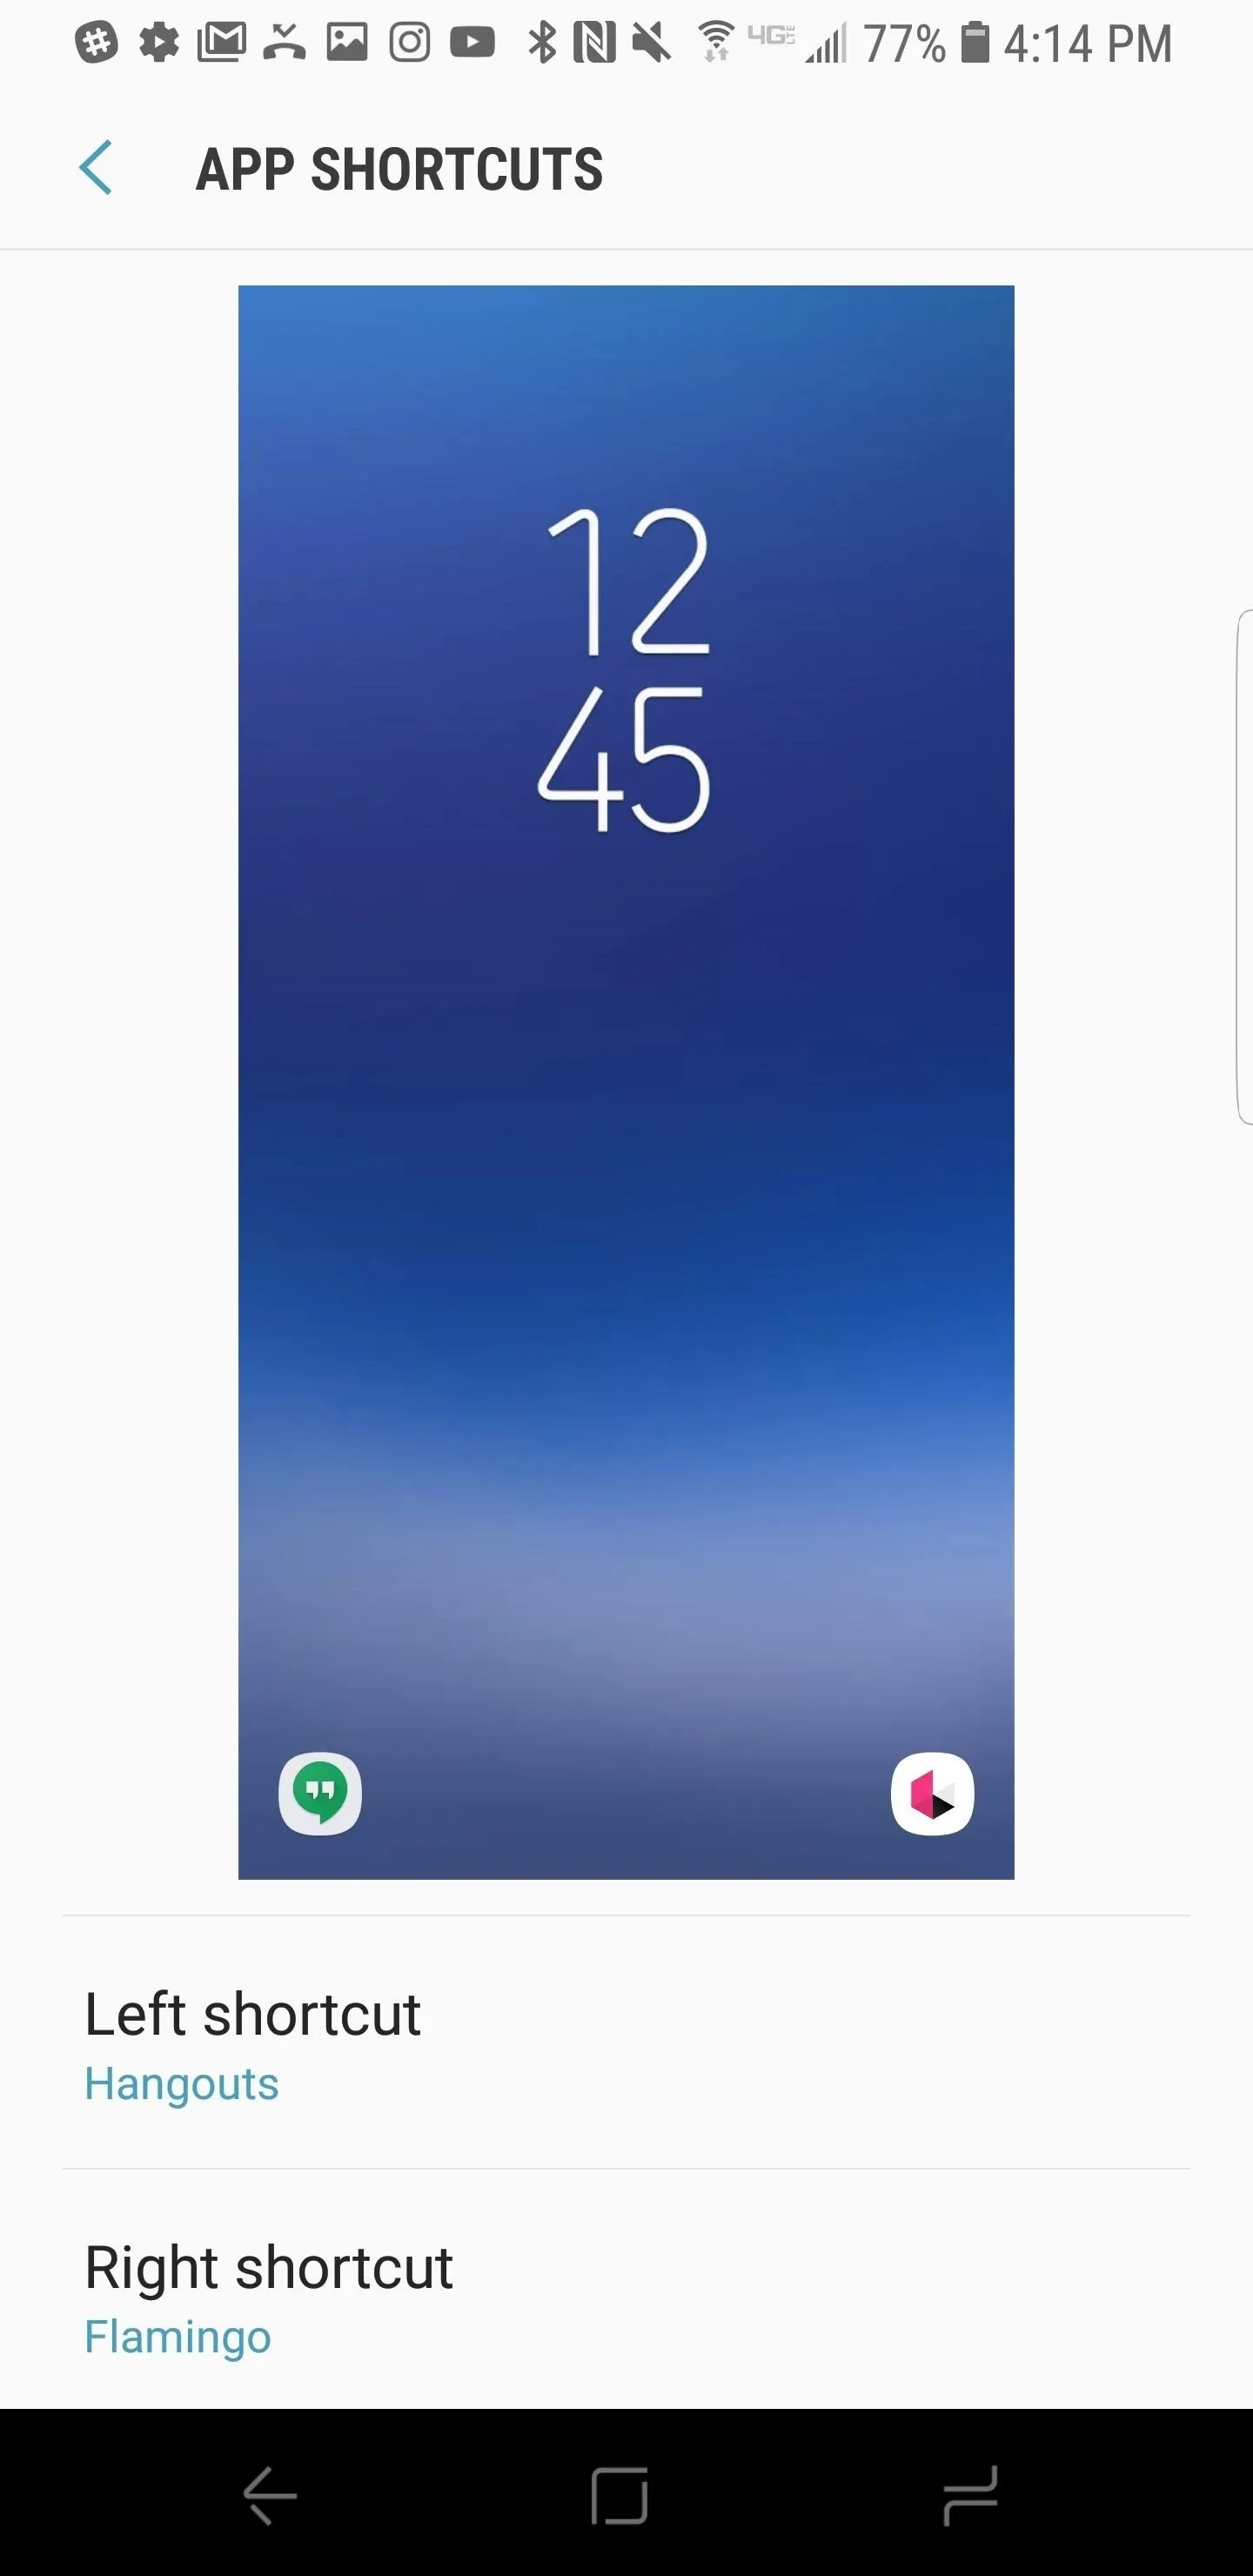
Finally, "App Shortcuts" allows you to change the two app icons that appear on your lock screen. These icons allow you to quickly launch either app from the lock screen. You can choose from any app installed on your device.
4. Smart Stay, Camera Quick Launch, & Fingerprint Gestures
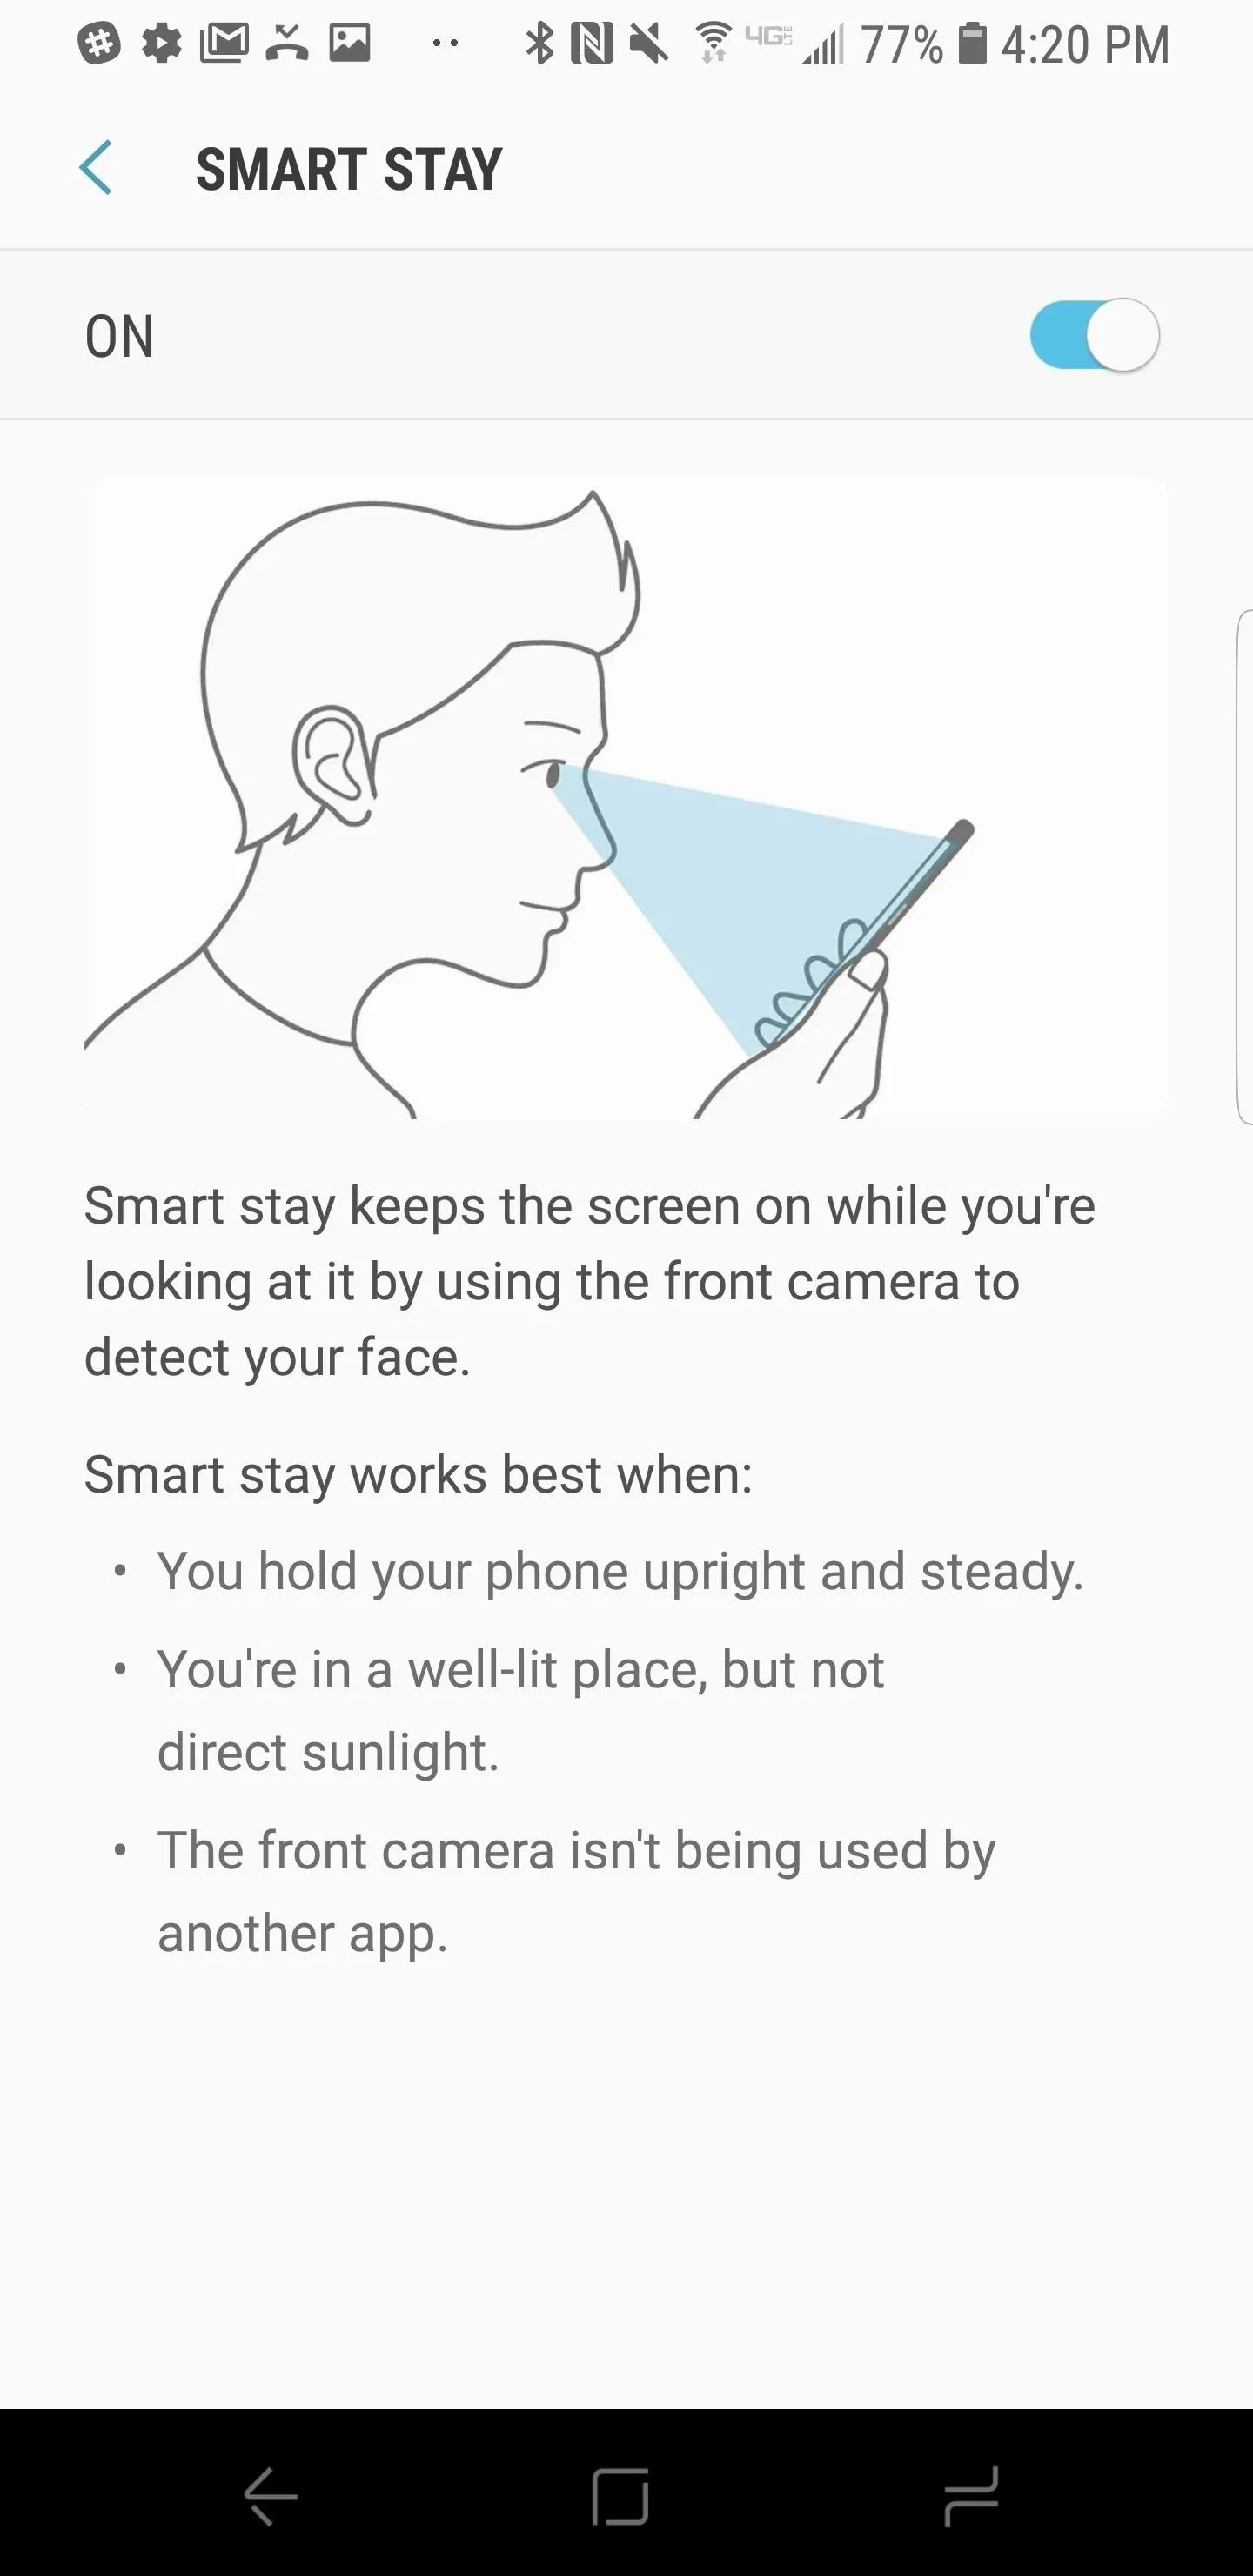
Samsung has a habit of piling useful features under the "Advanced Features" menu in Settings. In particular, this menu lets you enable two features that are very popular on Android. The first feature we recommend is Samsung's "Smart Stay" function, this keeps the display on while you're actively looking at the device. This feature uses the front camera to detect your face and does a surprisingly good job.
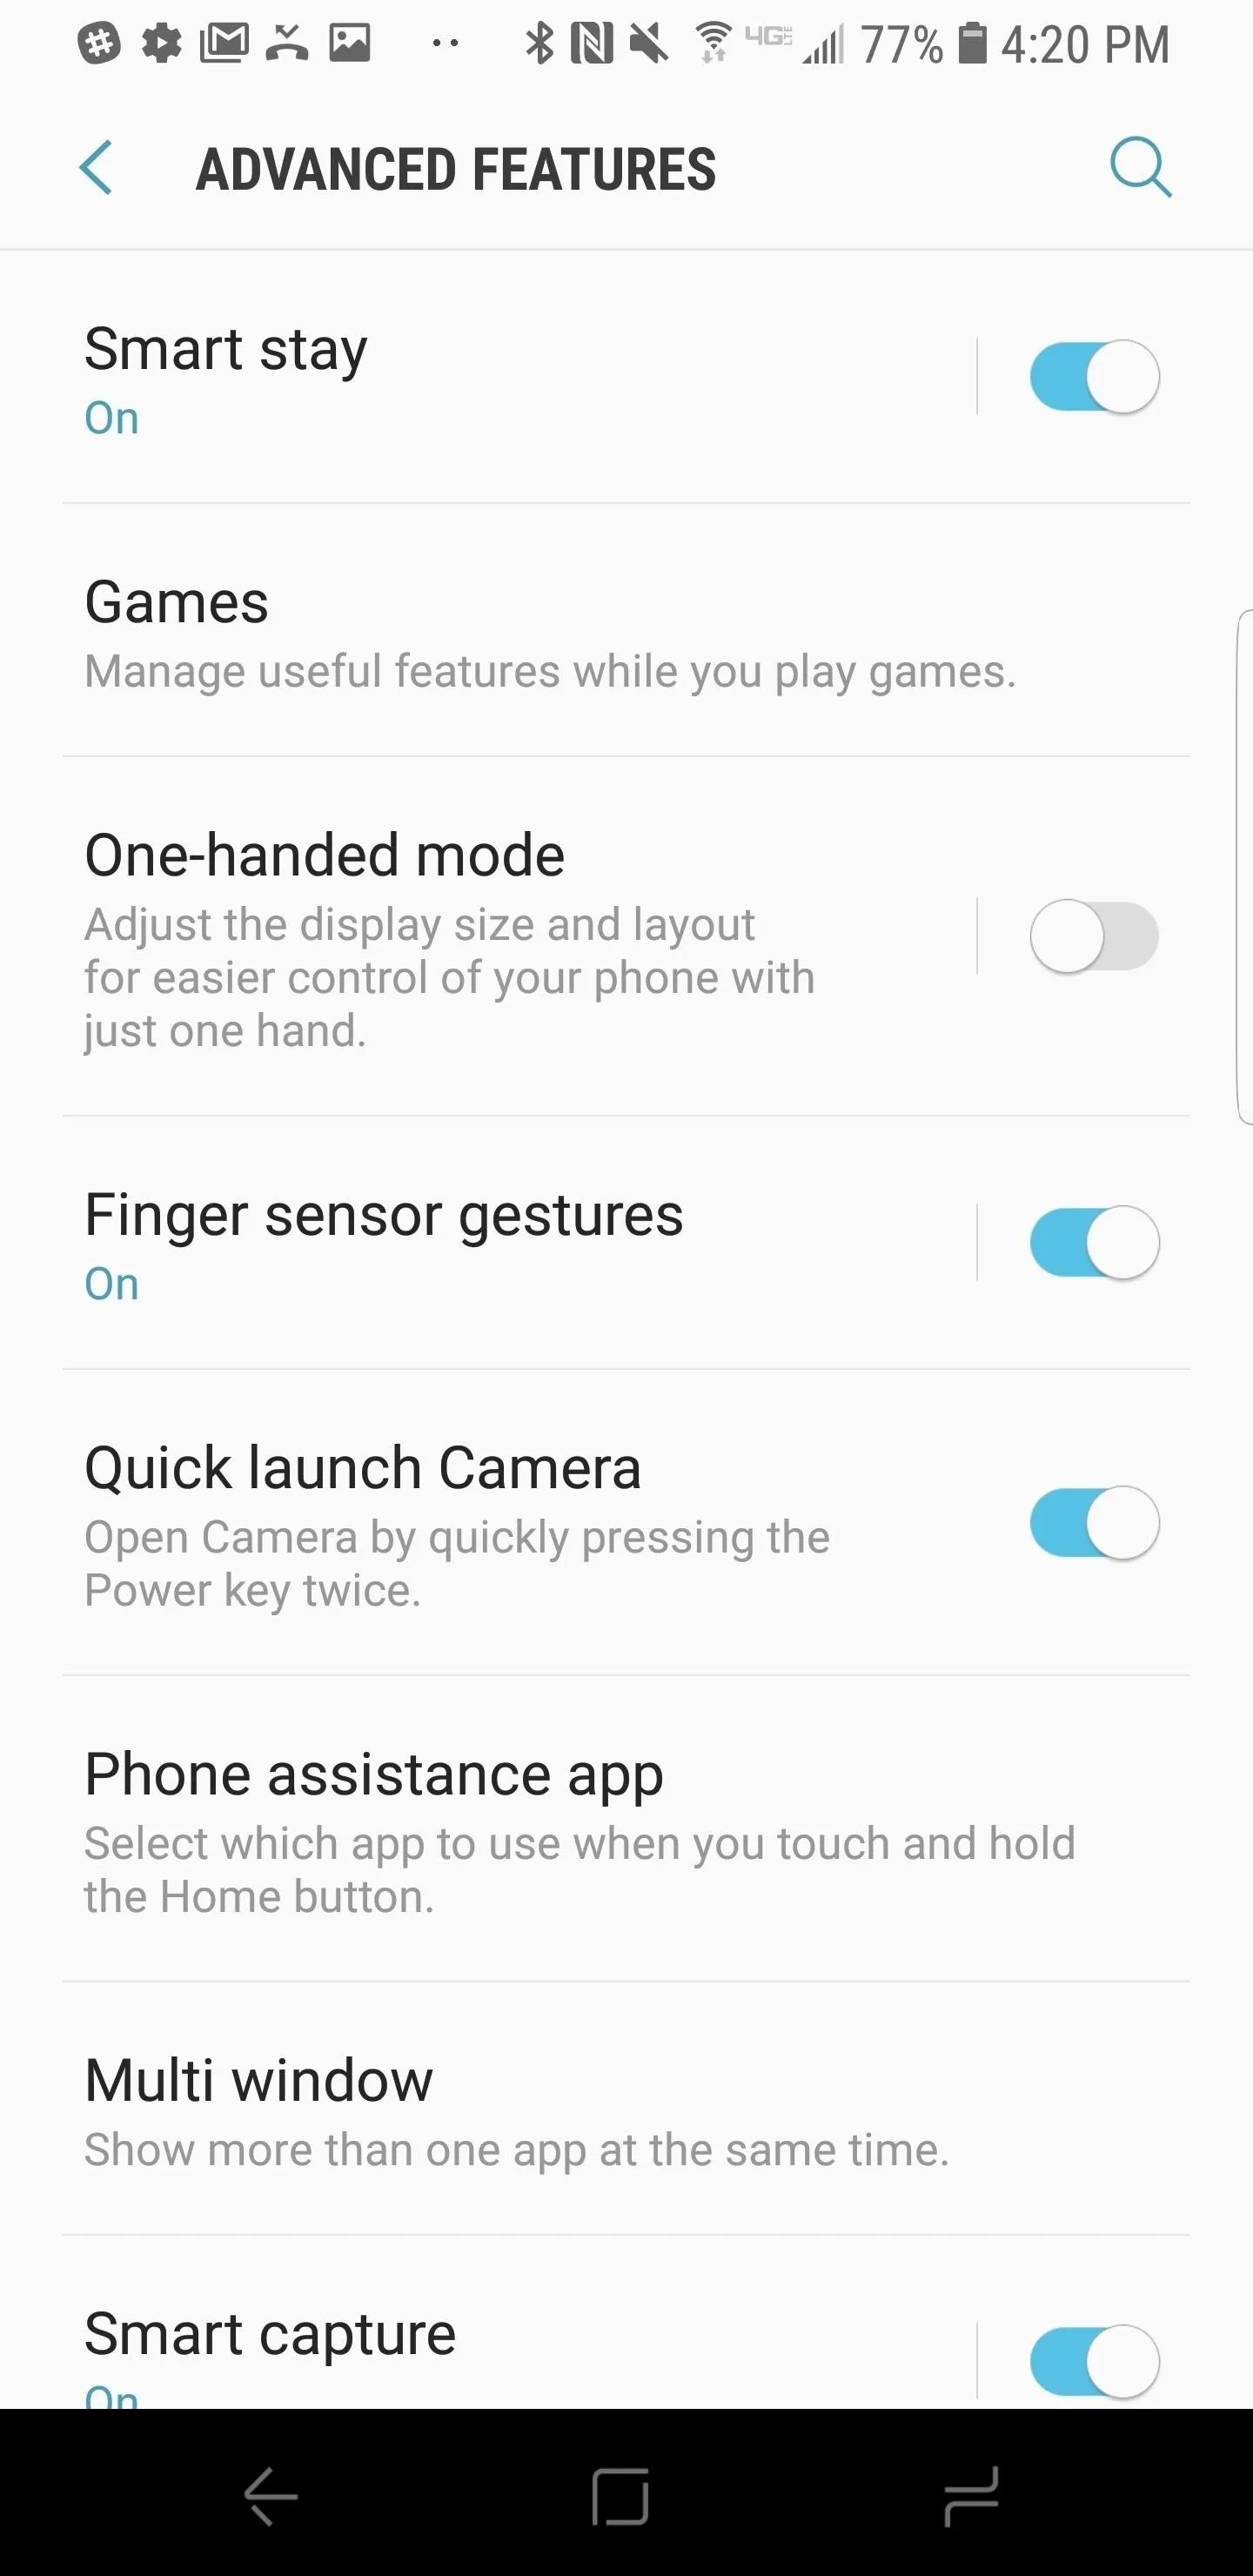
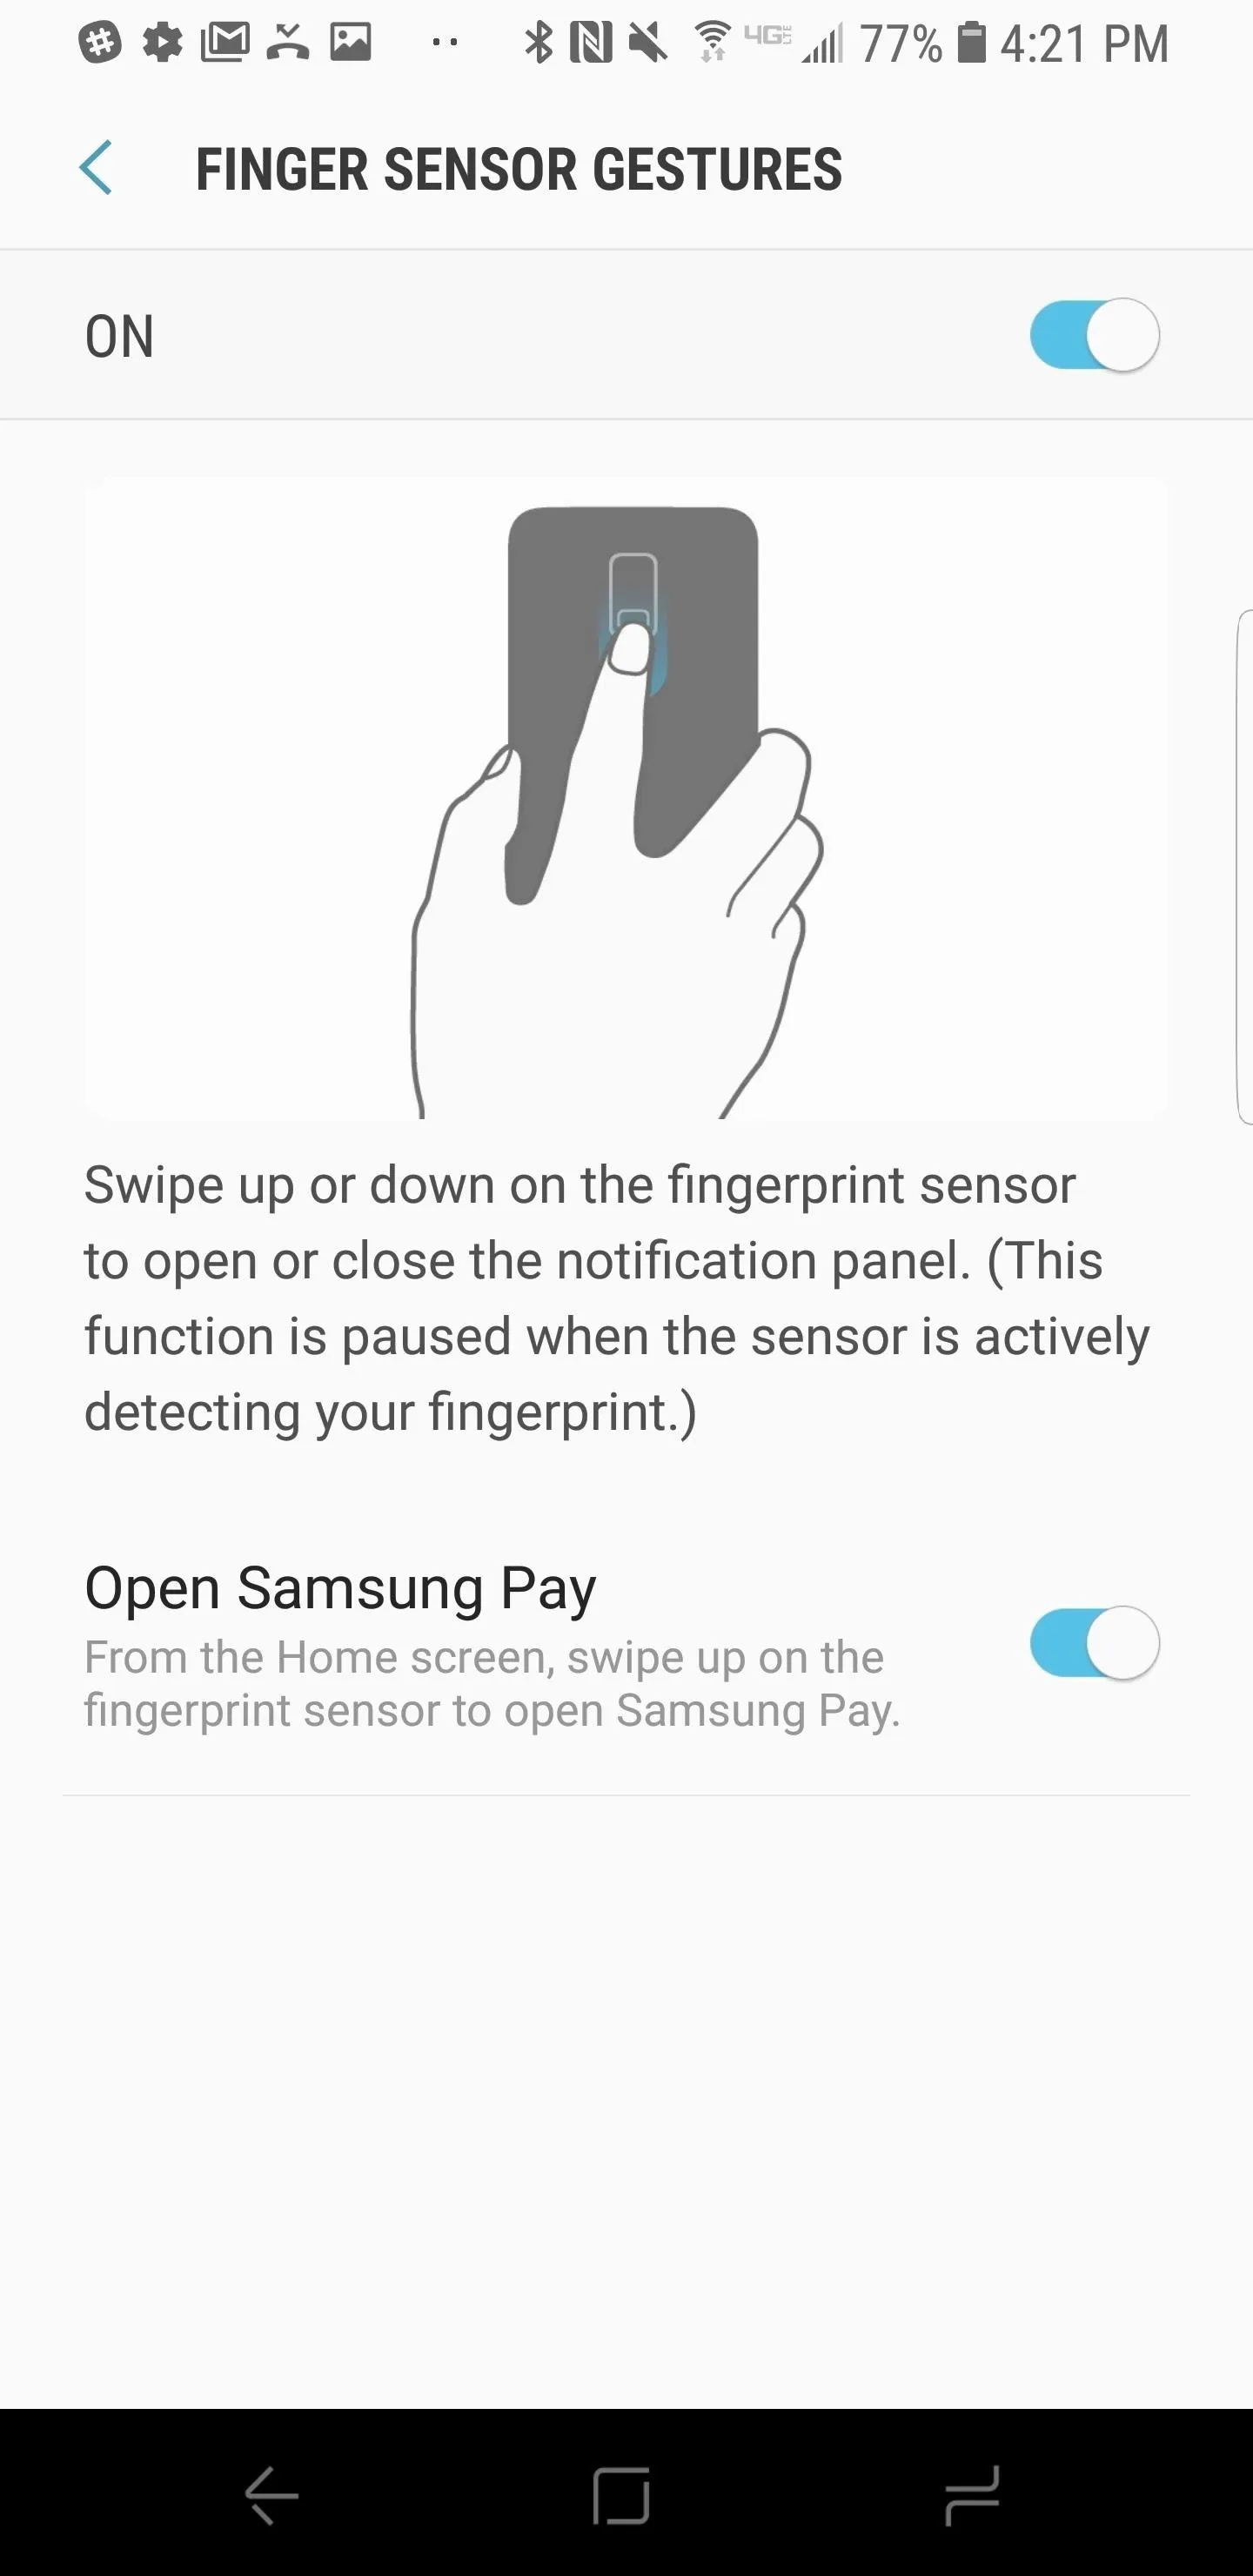
Up next, "Finger Sensor Gestures" enables you to swipe down on your fingerprint sensor to slide down to the notification shade. This is a very useful feature with rear-mounted fingerprint scanners. In addition to the traditional notification gesture, Samsung also added a slide up gesture to launch Samsung Pay from the home screen.
Perhaps the most popular hardware shortcut on Android, "Quick launch Camera," allows the user to enter the Camera app quickly by double-tapping on the power key. With this feature enabled, you always have access to your Camera to catch an action shot.
5. Custom Navigation Bar & Display Resolution
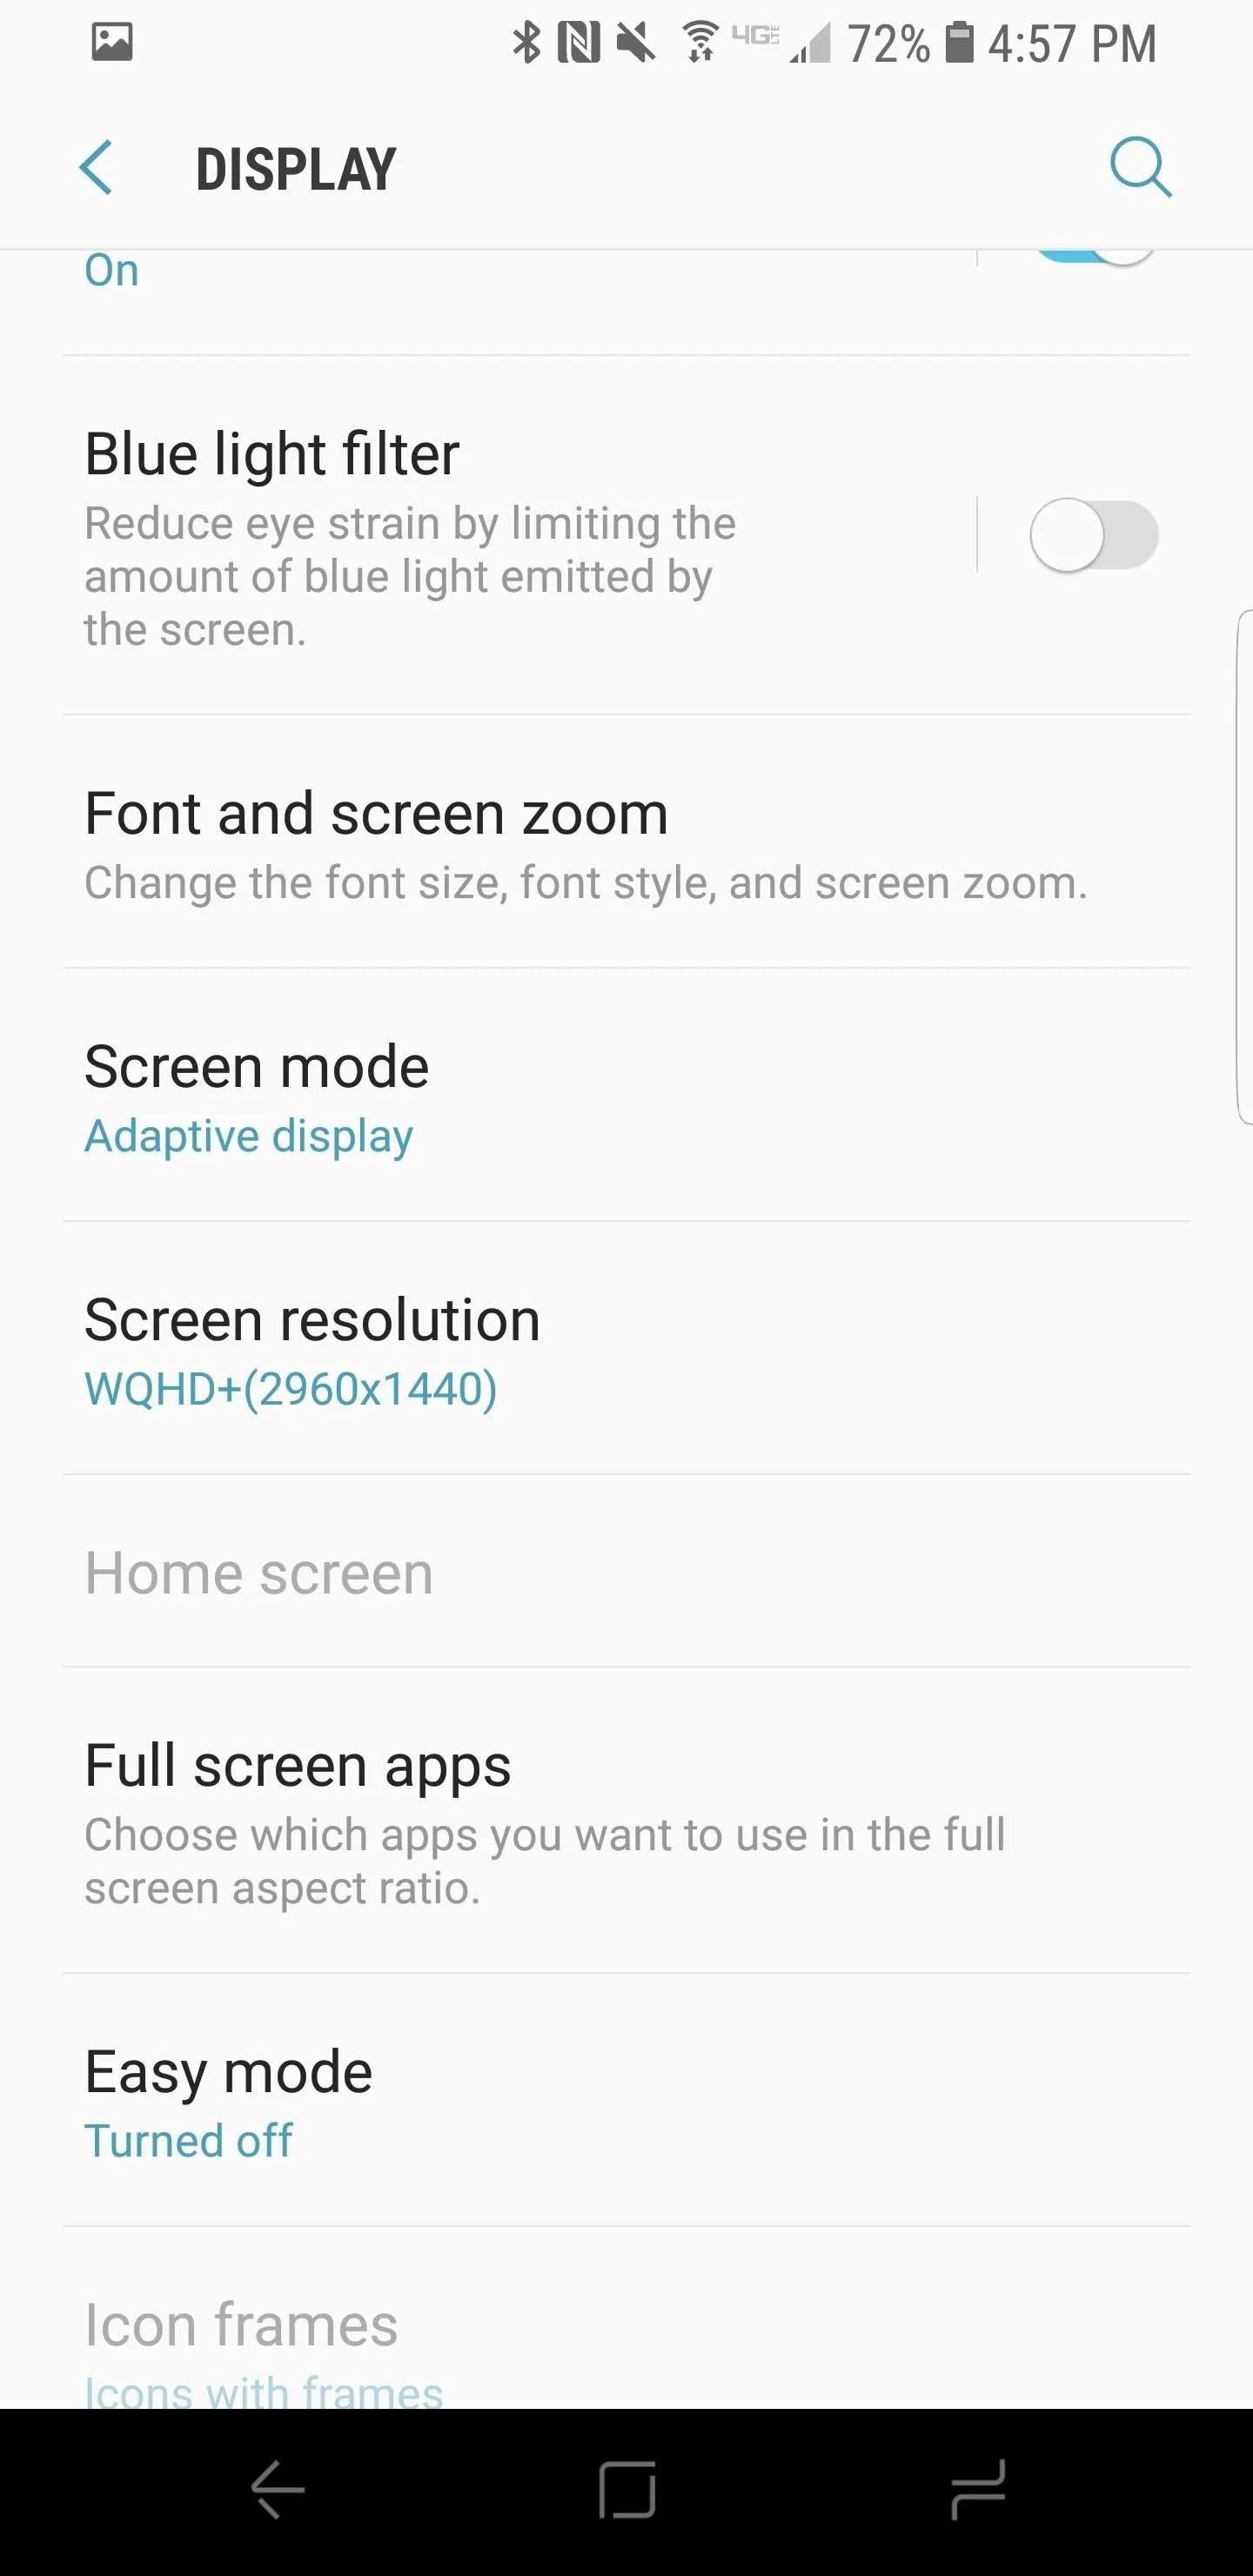
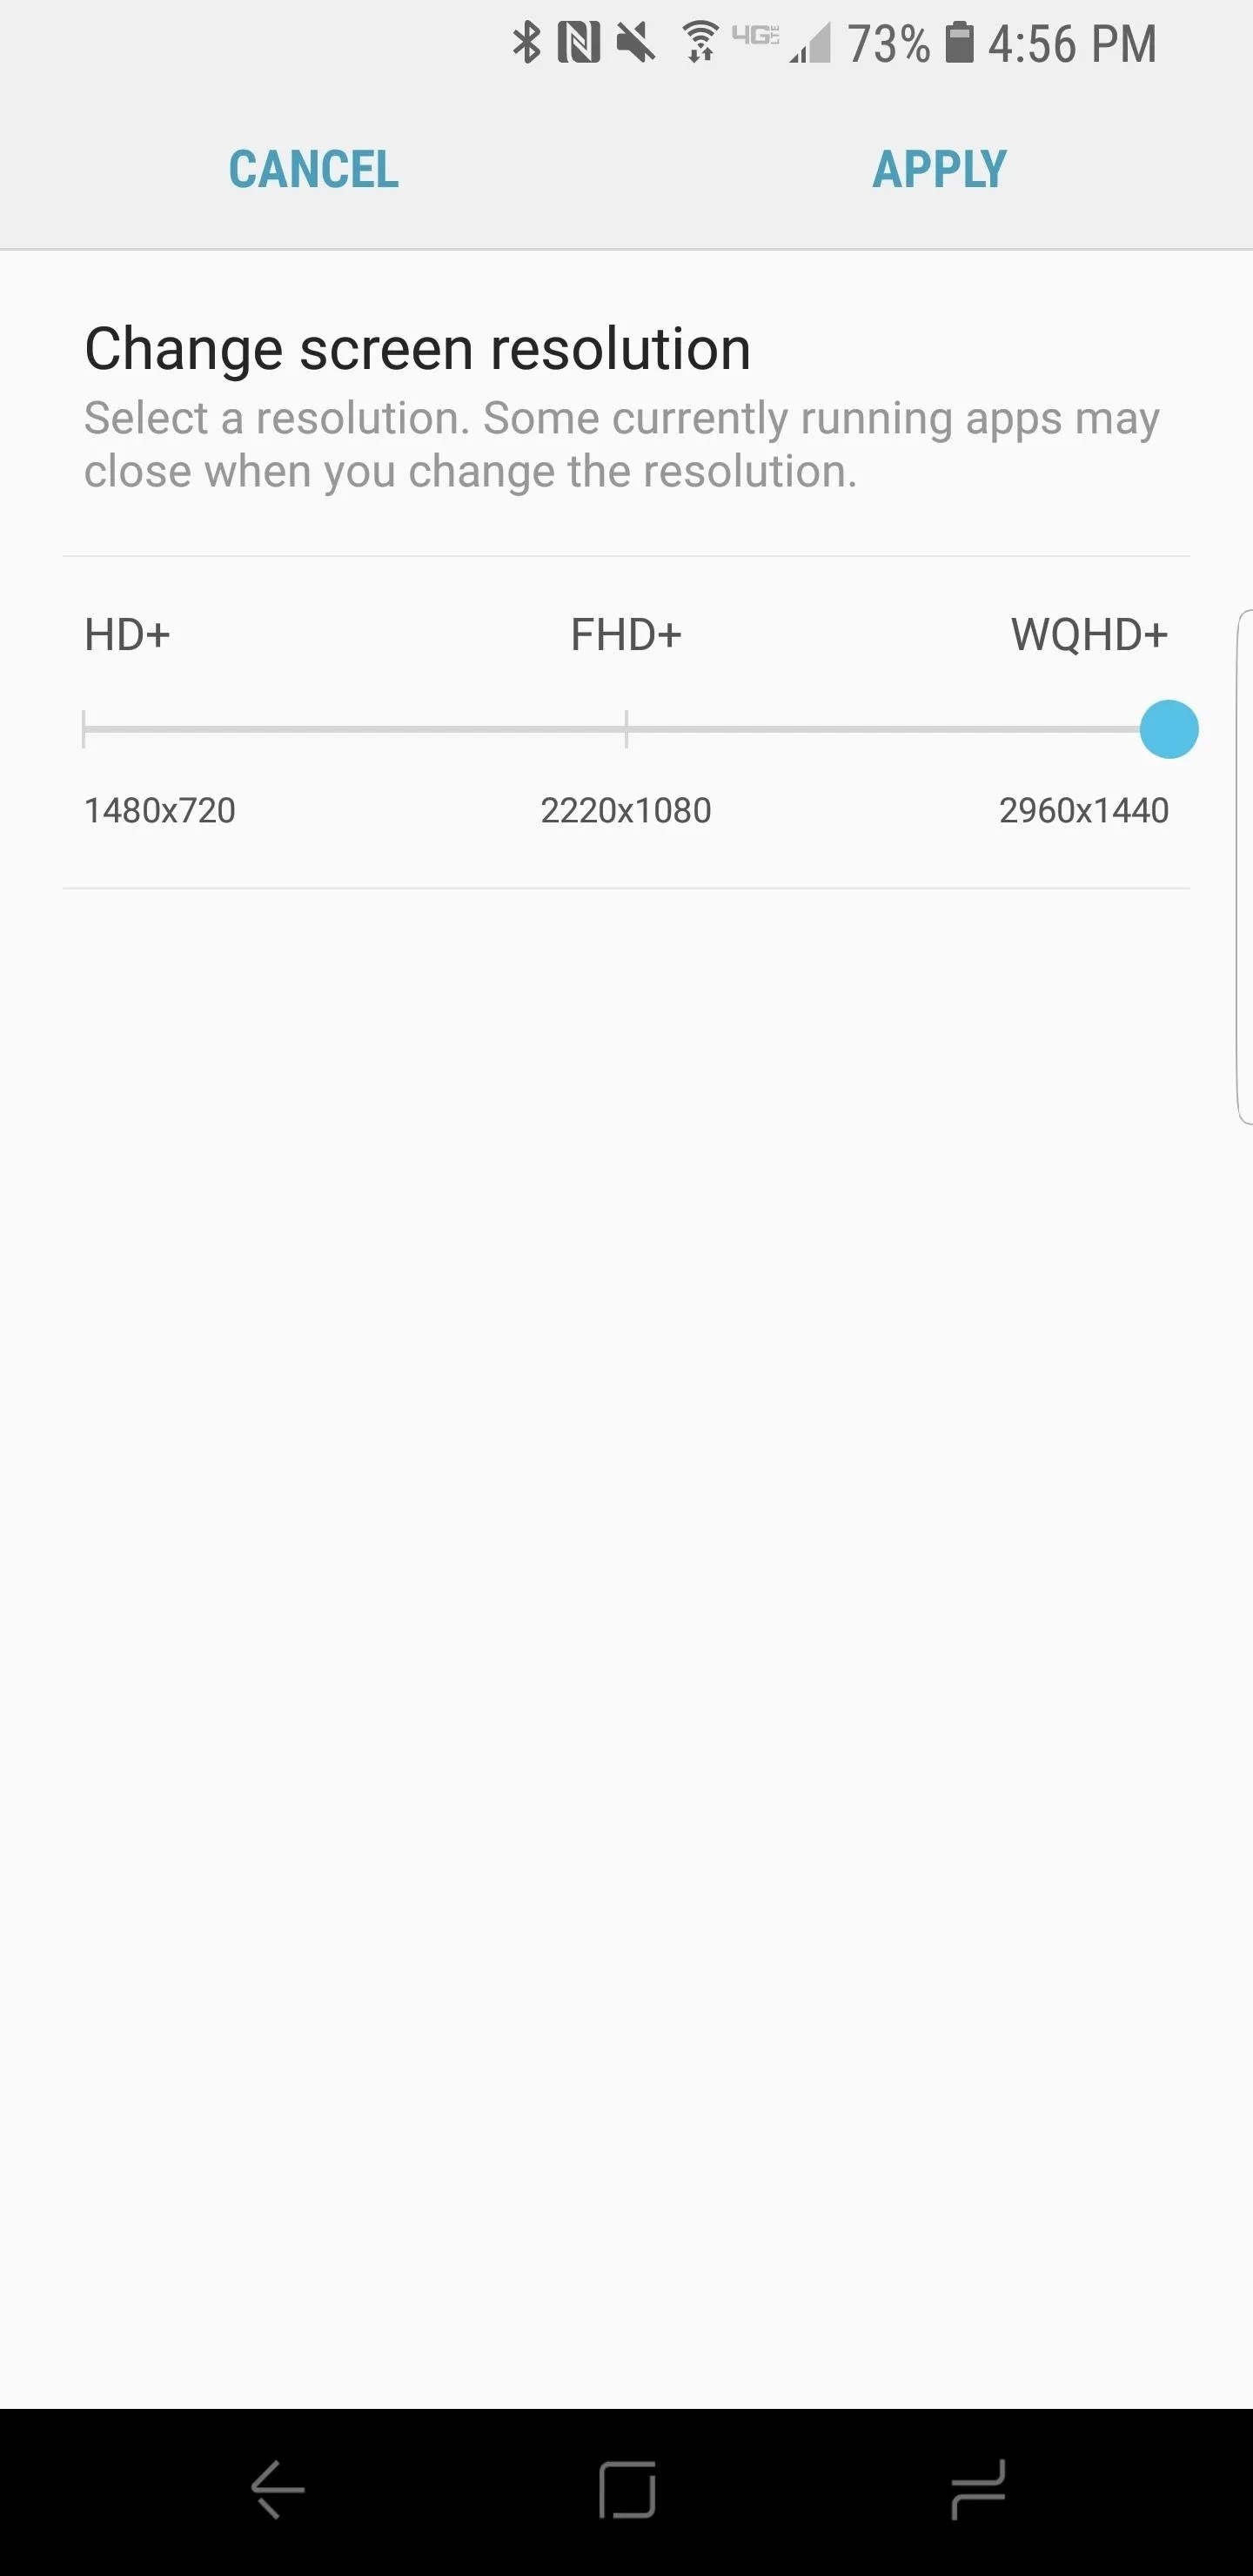
This final pair of hidden settings will help you squeeze the most out of your Galaxy S9's infinity display. Out of the box, the Galaxy S9 is set to FHD+ resolution, which does not take full advantage of its capabilities.
To change the display resolution, head to Settings –> Display –> Screen Resolution. For maximum pixel goodness, select the WQHD+ option. It is worth noting that you will see some degradation in battery life with the higher resolution. There is also the option to downgrade the resolution to HD, which will improve your battery life a nominal amount.
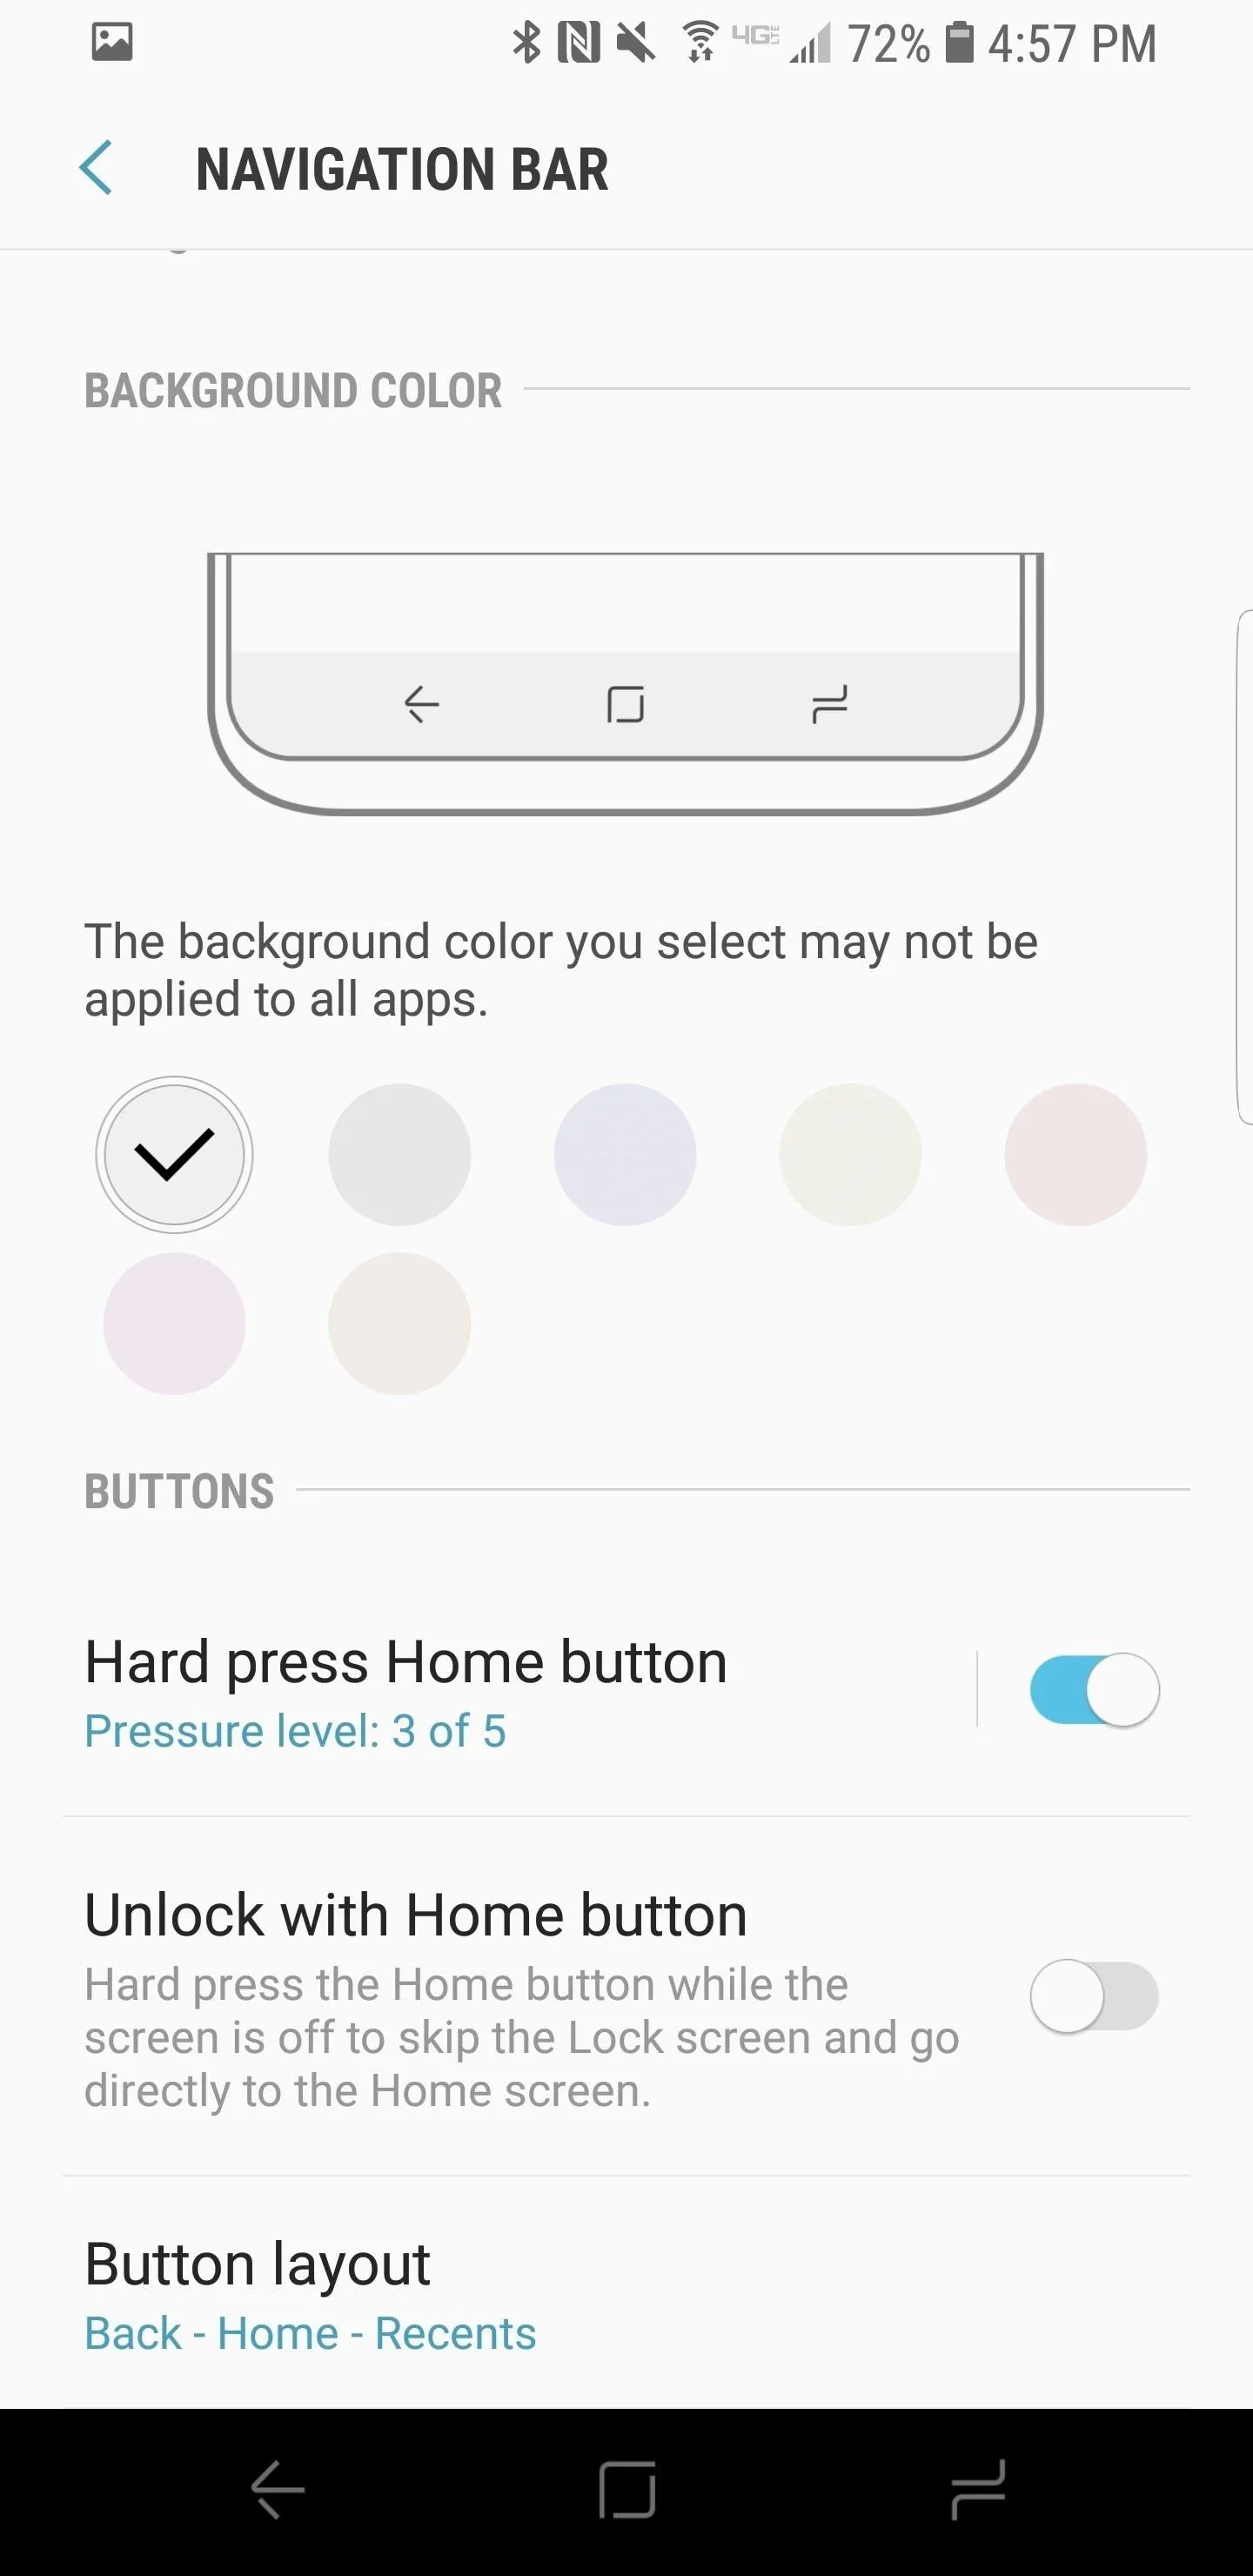
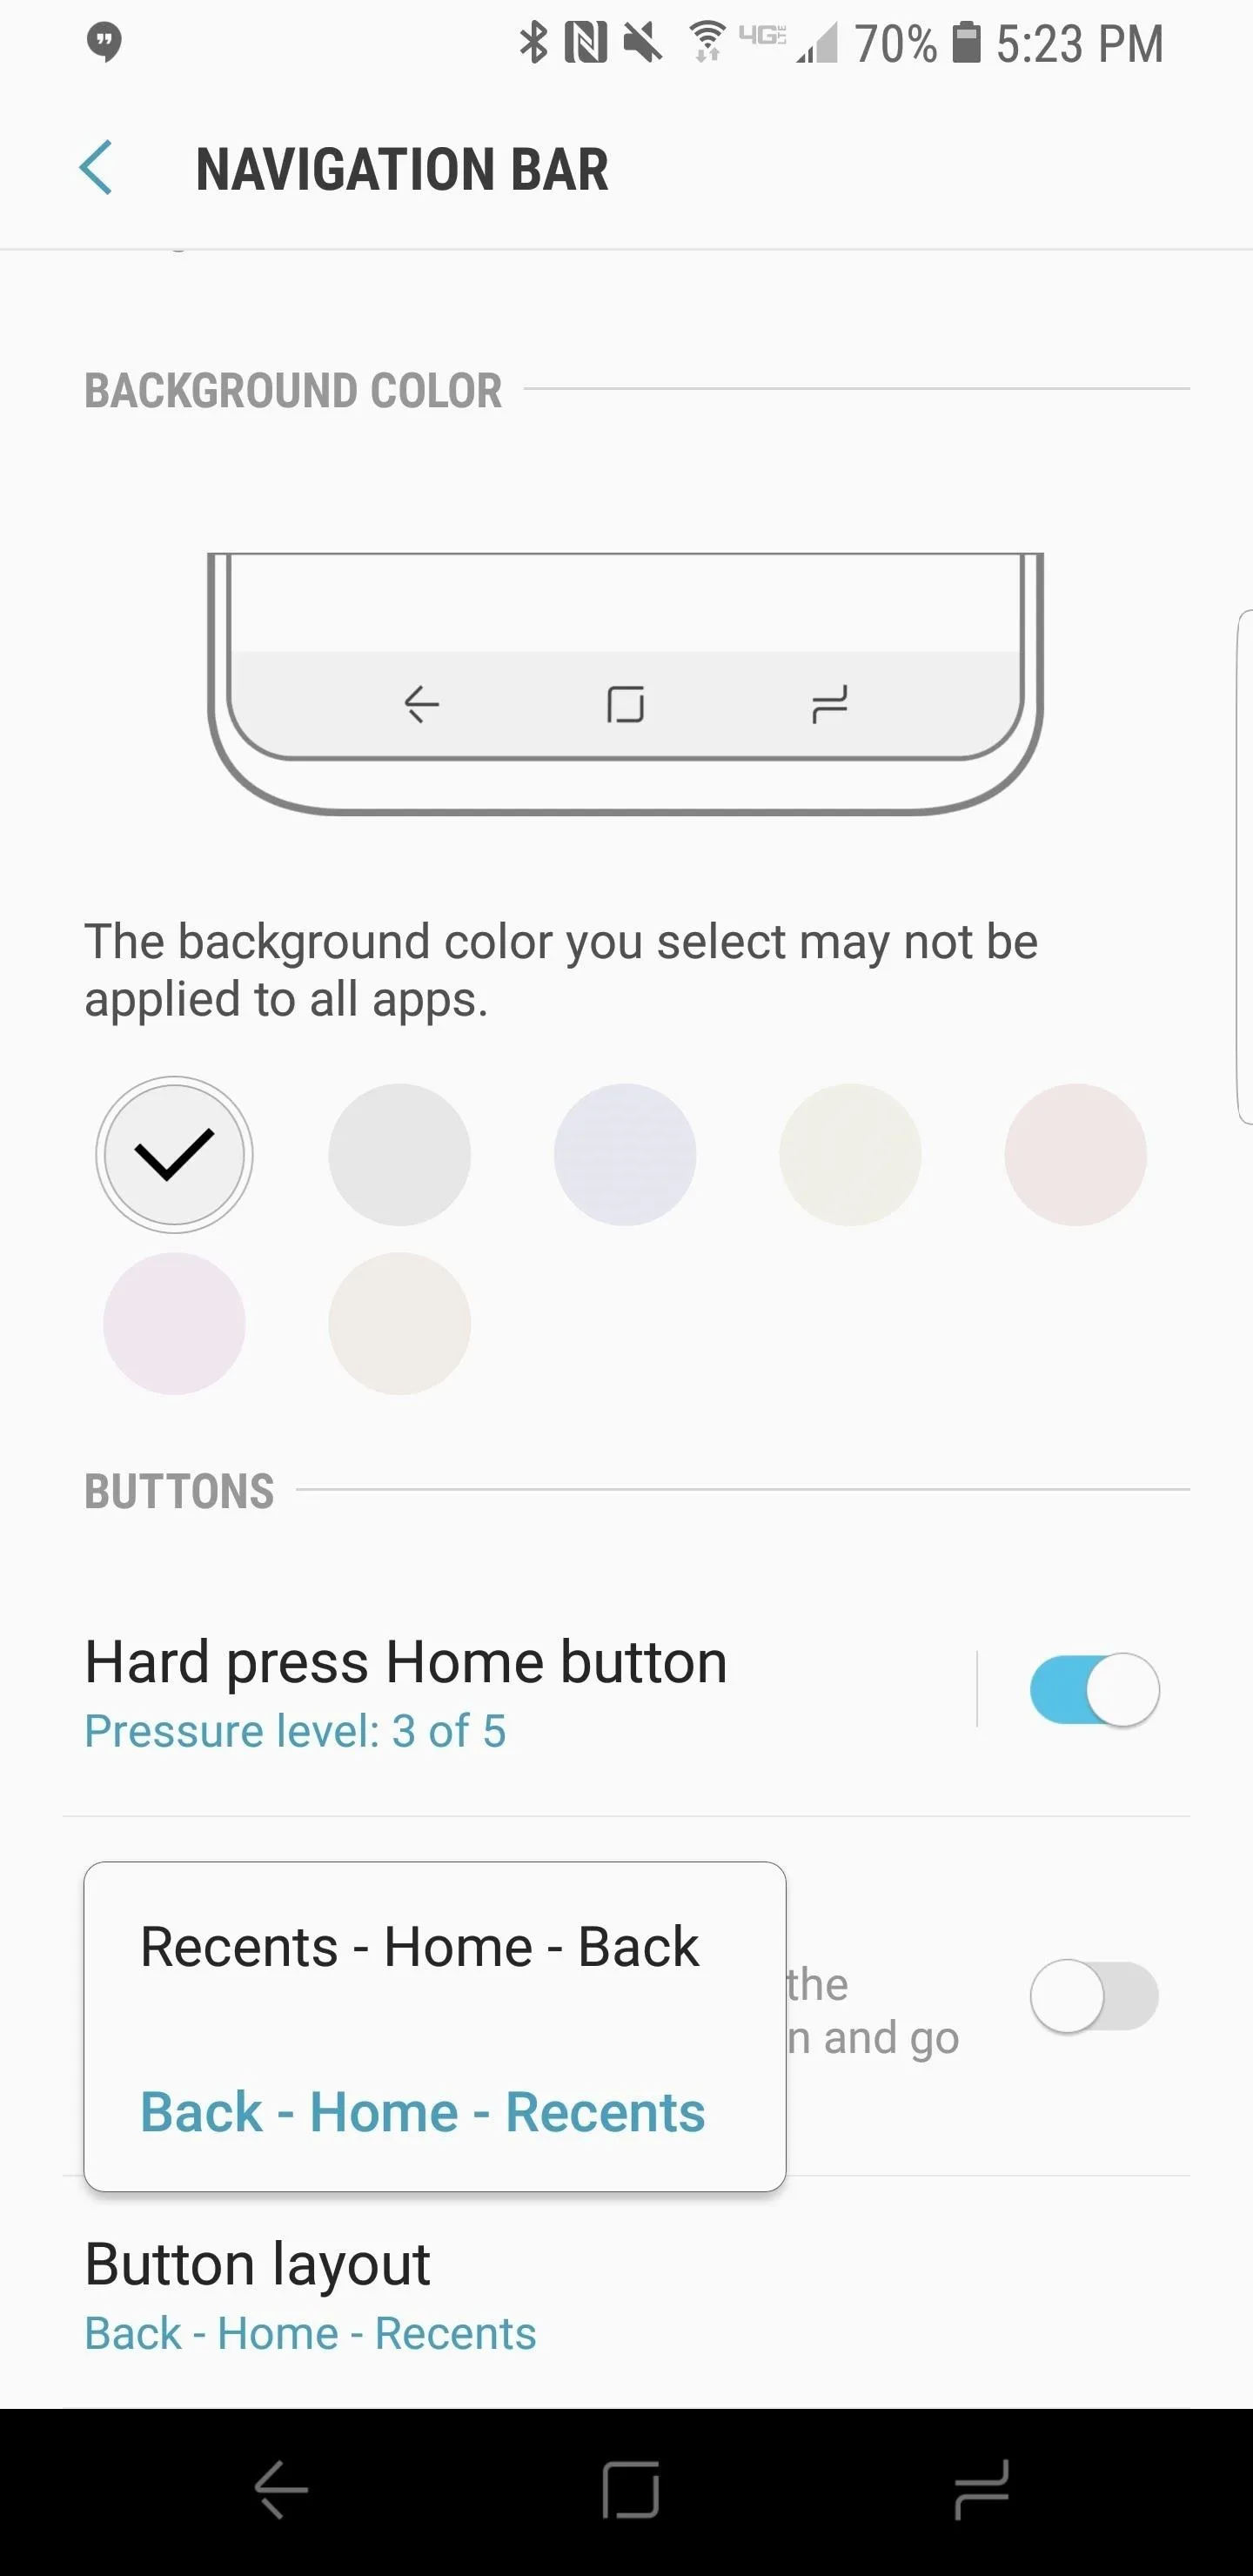
The navigation bar is the main tool for interacting with the Galaxy S9. Under Settings –> Display –> Navigation bar, you can change the appearance and functionality of this important software feature. We recommend you edit the button layout and pressure level of the home button to find your preferred setting in each category.
If you would like to add some color to your navigation bar, Samsung has several pastel shades to choose from. It is worth noting the lack of dark colors available for the navigation bar — Samsung claims this is to help with screen burn-in issues. There is a simple way to regain a dark navigation bar, using the third-party solution called NavBar Apps.
With these hidden features enabled, you should be all set to begin using your new Galaxy S9 to its maximum potential. Keep in mind that there are many other useful advanced customization options to explore on your Galaxy S9. In fact, the S9 already has several of the new features coming to Android P. Let us know in the comments how you're liking the S9, and what other tips you'd like to see us explore!
- Follow Gadget Hacks on Facebook, Twitter, YouTube, and Flipboard
- Follow WonderHowTo on Facebook, Twitter, Pinterest, and Flipboard
Cover image and screenshots by Jeff Springer/Gadget Hacks


Comments
Be the first, drop a comment!