


Android 11 won't be available as a beta update for Pixel devices until May 2020. Until then, the only way to try the latest Android version is by manually installing it. Usually, this means carrier models are left out since their bootloaders are locked, but there's still a way to get it done.
You see, flashing the developer preview images requires an unlocked bootloader, but sideloading the ota.zip file through ADB does not. This means that if you're on a T-Mobile Pixel, a Verizon Pixel, or any Pixel 2 or newer on any carrier, you can update to Android 11 while keeping your data intact.
- Don't Miss: How to Flash the Android 11 Developer Preview Images on Your Pixel (If Your Bootloader Is Unlocked)
Download the OTA File for Your Pixel Model
First, you'll need the Android 11 OTA update file. It's a ZIP, and you can download it directly from Google using the links below.
Download Your OTA.zip File Directly from Google:
Rename the OTA File
Once the file is downloaded, rename it to ota.zip. If your computer is not set to show file extensions, rename it to ota without the ".zip" part.
Dallas Thomas/Gadget Hacks
Download the Platform-Tools Package
Now you'll need a piece of software that will bridge the connection between your phone and your computer. Hit up the download link below to save Google's Platform-Tools package to your computer.
Organize the Files
Next, extract the Platform-Tools ZIP you just downloaded. From there, drag and drop the ota.zip file from Step 2 into the extracted platform-tools folder.
Dallas Thomas/Gadget Hacks
Open a Command Window in Platform-Tools
From here, you'll need to open a command window in the platform-tools folder on your computer. Both the ota.zip file and the software that allows your computer and phone to communicate are in this folder, so you'll just need to make sure your command prompt is operating in this folder.
If you're a Windows user, open the platform-tools folder from Step 4, then click the address bar at the top of the window and type "cmd" without the quotes, then hit enter to open a command window right there.
Dallas Thomas/Gadget Hacks
For Mac and Linux users, the easiest way is to open the Terminal app and type "cd" followed by a space, but don't hit enter. Instead, drag and drop the platform-tools folder onto the command window itself to populate the location of the platform-tools folder, then hit enter. This also works just the same for Windows users.
Once you have the command prompt in the platform-tools directory, that fact should be reflected in the text just in front of the blinking cursor. If so, simply leave this window open for now.
Enable USB Debugging on Your Pixel
Next, you'll need to enable a setting in Android that allows your computer and your phone to communicate. The setting is hidden by default, so first, activate Developer Options by tapping "Build Number" in Settings –> About Phone seven times.
Now, go to Settings –> System –> Advanced and choose "Developer Options." Scroll down the list a little bit and enable the switch next to "USB Debugging," then confirm your choice on the prompt.
- More Info: How to Enable USB Debugging
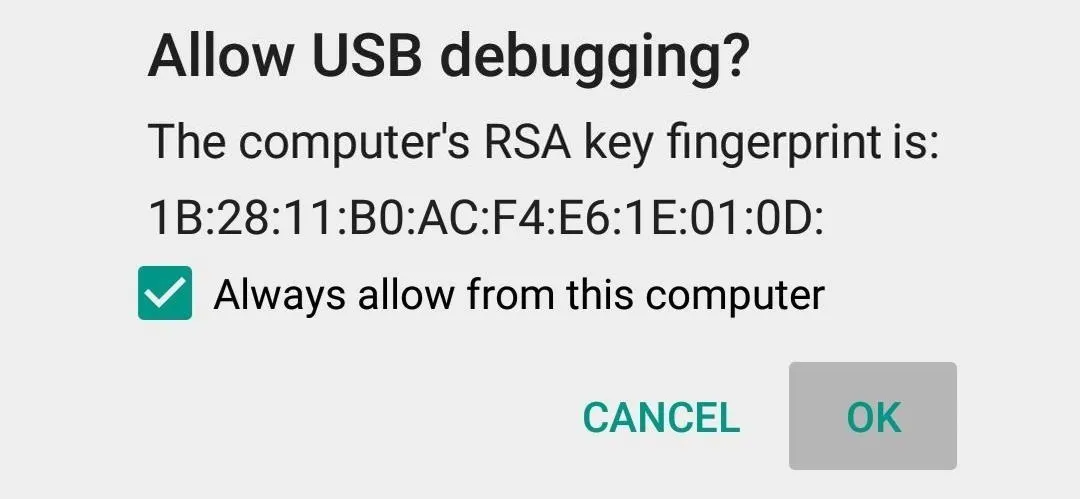
Now, connect your phone to your computer with a USB data cable. You should get a popup on the phone asking if you'd like to allow the computer to connect. Check the box next to "Always allow," then tap "OK" to confirm your choice.
Boot into Recovery Mode
Next, you'll need to boot your Pixel into recovery mode. Since your phone is connected to your computer and the USB debugging permissions have been granted, this part is super simple. Copy and paste the following line into the command prompt from Step 5, then hit enter to continue:
adb reboot recoveryNote: Mac, Linux, and Windows PowerShell users might have to add a period and a slash ( ./ ) before entering certain commands. For example:
./adb reboot recoveryEnter OTA Sideload Mode
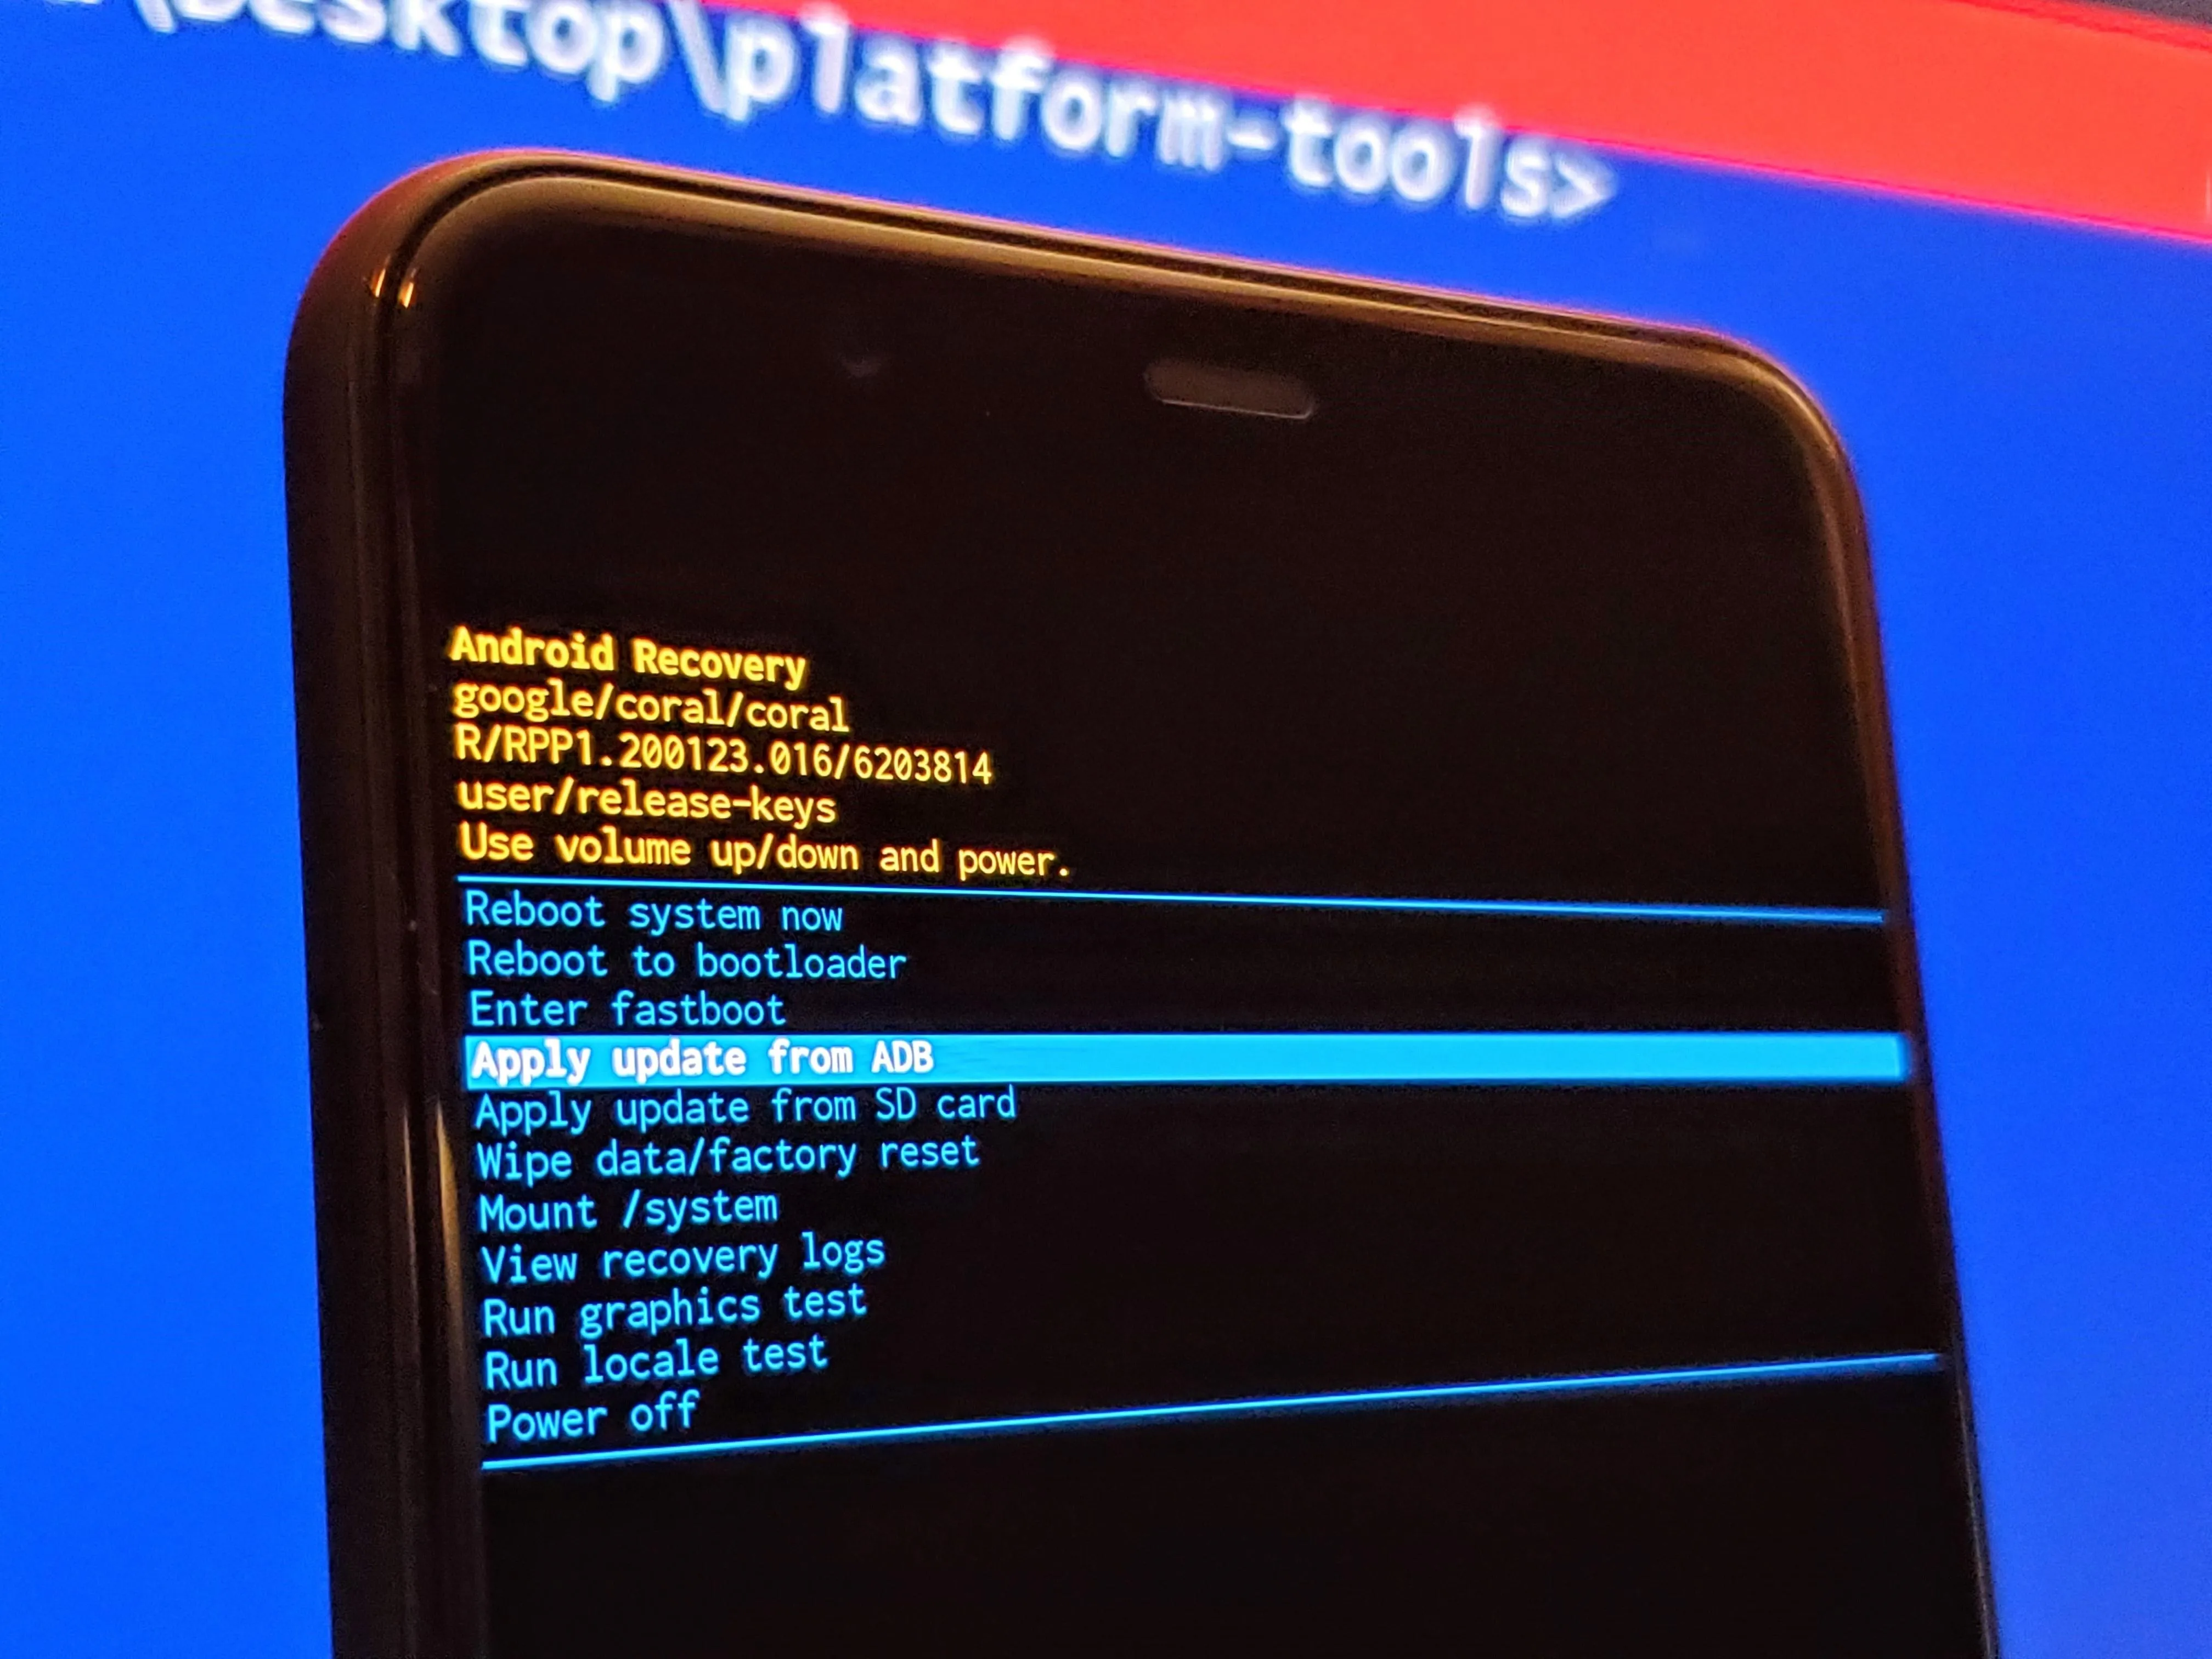
The above command will make your Pixel reboot into recovery mode. Once it gets to the "No command" screen with the red Android icon, hold the power button, then quickly press the volume up button to enter the main recovery menu.
Next, using the volume keys to move through the list, highlight the "Apply update from ADB" option, then press the power button to confirm your choice.
Install the Android 11 OTA Update
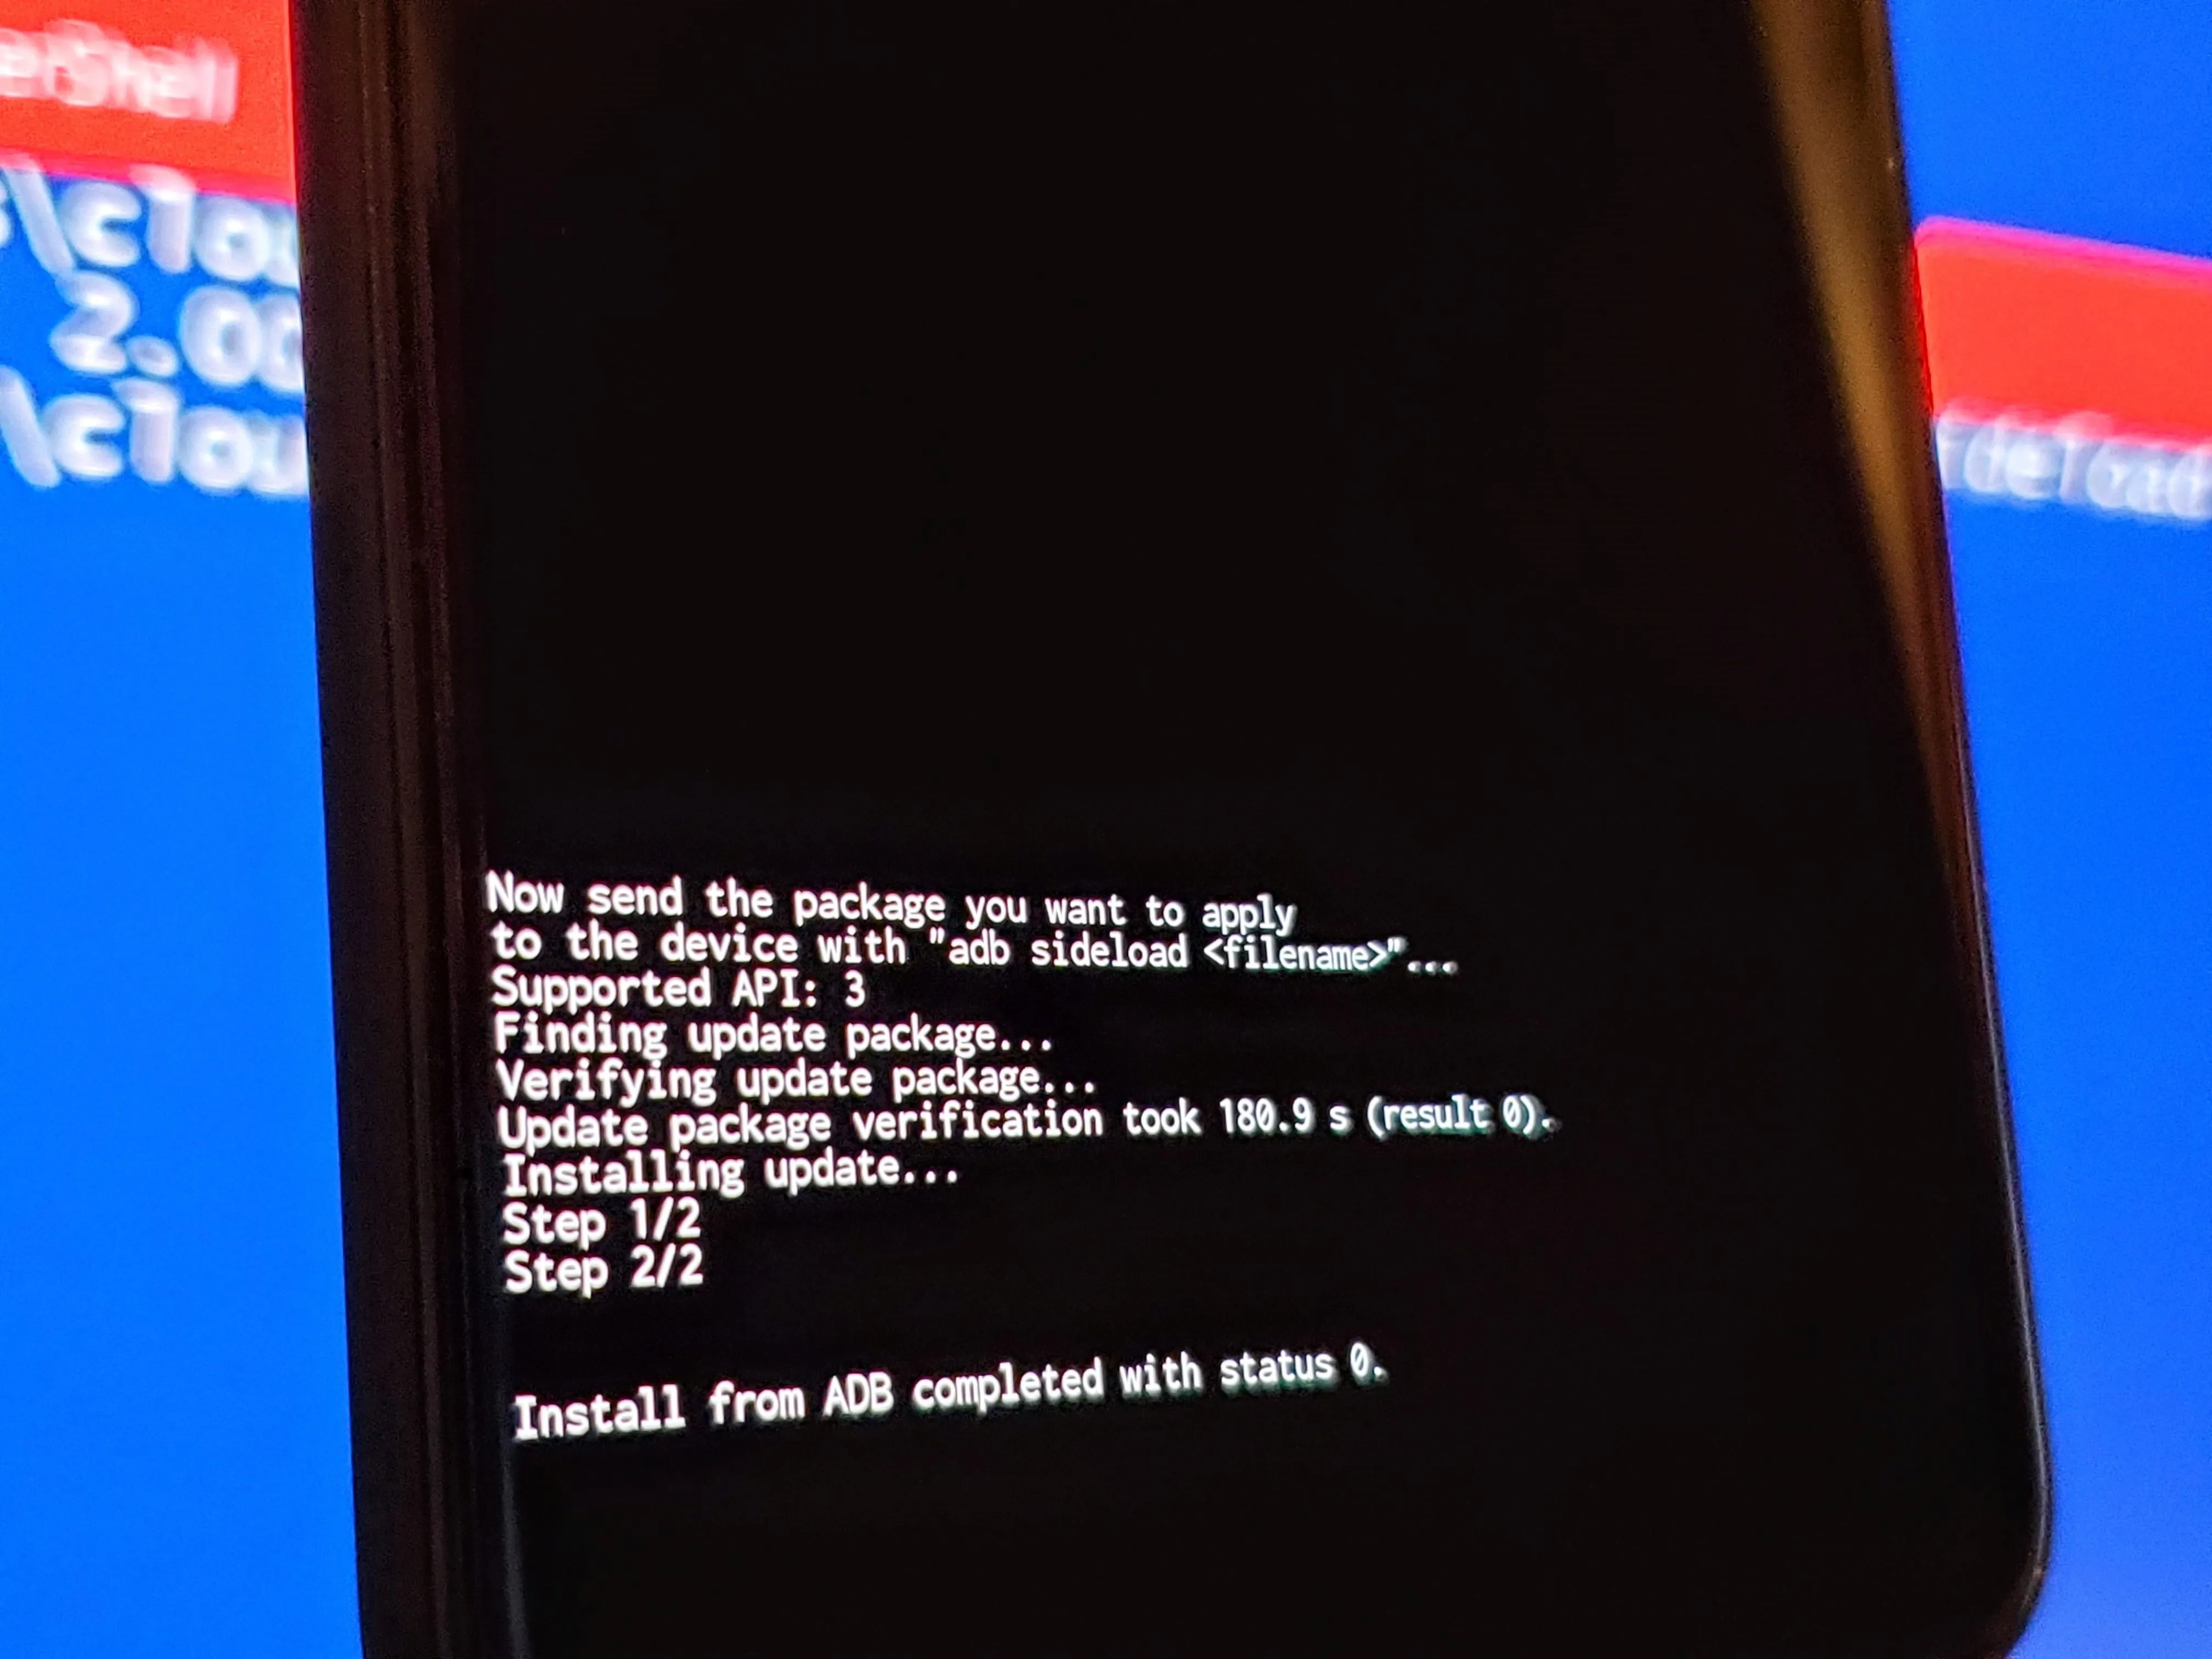
Now comes the final step of the whole process: installing the Android 11 OTA update. From the platform-tools command window, copy and paste the following command into the command prompt, then hit enter.
adb sideload ota.zipIf this returns an error, try again with a period and a slash at the beginning:
./adb sideload ota.zipThe above command will begin installing the Android 11 system update onto your Pixel. Since this is an OTA file and not a full-on system image, it's no different than getting the update notification for a non-beta. This is just the manual method of installing a system update, but the end goal is the same: your data stays safe and you get the new version!
The update process might take some time to finish since the file is rather large, so be patient while it works on installing Android 11 onto your system. Once the update finishes, copy and paste the following command, then hit enter to continue.
adb rebootThe above command will reboot your Pixel back into Android so you can start exploring the new update. Alternatively, your phone should be sitting on the "Reboot system now" option in the recovery menu, so you could just press the power button reboot all the same. Now it should boot into Android 11, and you'll be able to enjoy new features like the ones in our full Android 11 changelog below:
Cover image and screenshots by Stephen Perkins/Gadget Hacks


Comments
Be the first, drop a comment!