


Up until Android 5.0 Lollipop, the actual text of incoming notifications would scroll by in your status bar. These ticker style alerts didn't pop on screen or interfere with what you were currently working on, but you could still read the message. They were replaced by the new "heads up" alerts, but you can still bring them back.
Tom Bayley, the same developer behind one of my all-time favorite apps, Bottom Quick Settings, has created a way to bring back the notification ticker without root, complicated steps, or spending a single dime. Here is how it works.
Requirements
- Computer running Windows, macOS, or Linux
- USB Data cable
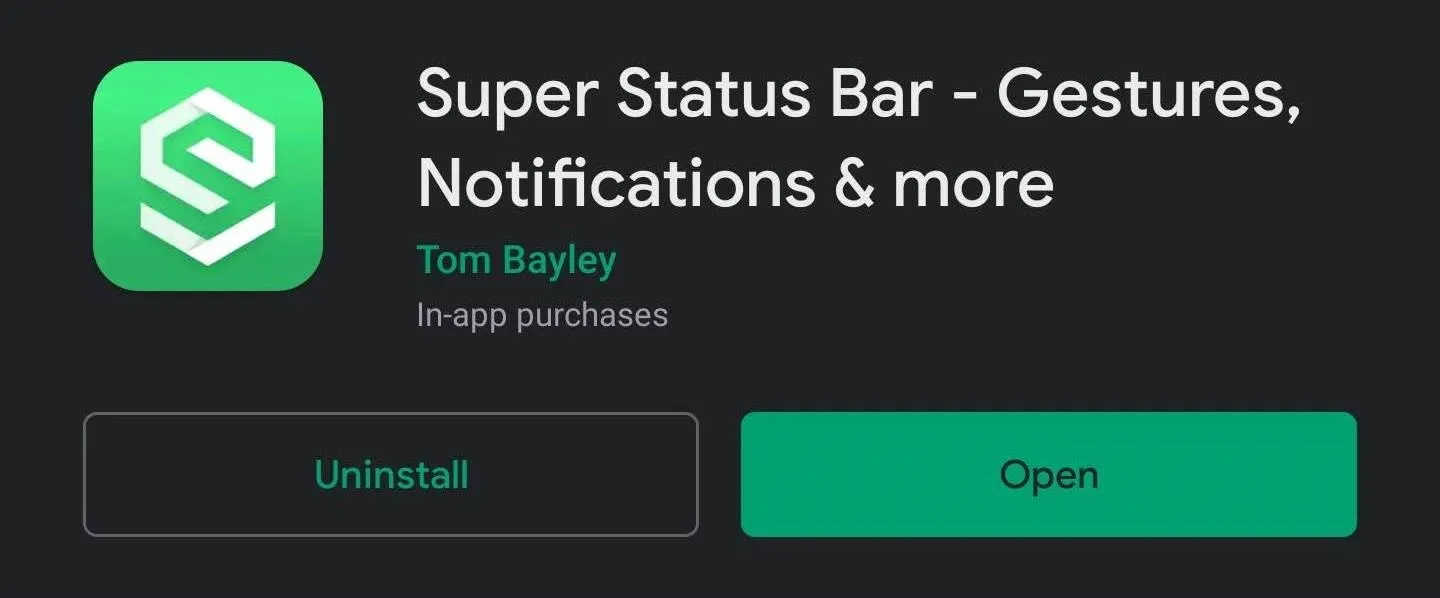
Download Super Status Bar
The app which makes this all possible is Super Status Bar from developer Tom Bayley. It's free and can be found on the Play Store. Use the link below to download and install the app on your phone.
- Play Store Link: Super Status Bar (free)
Enable Permissions
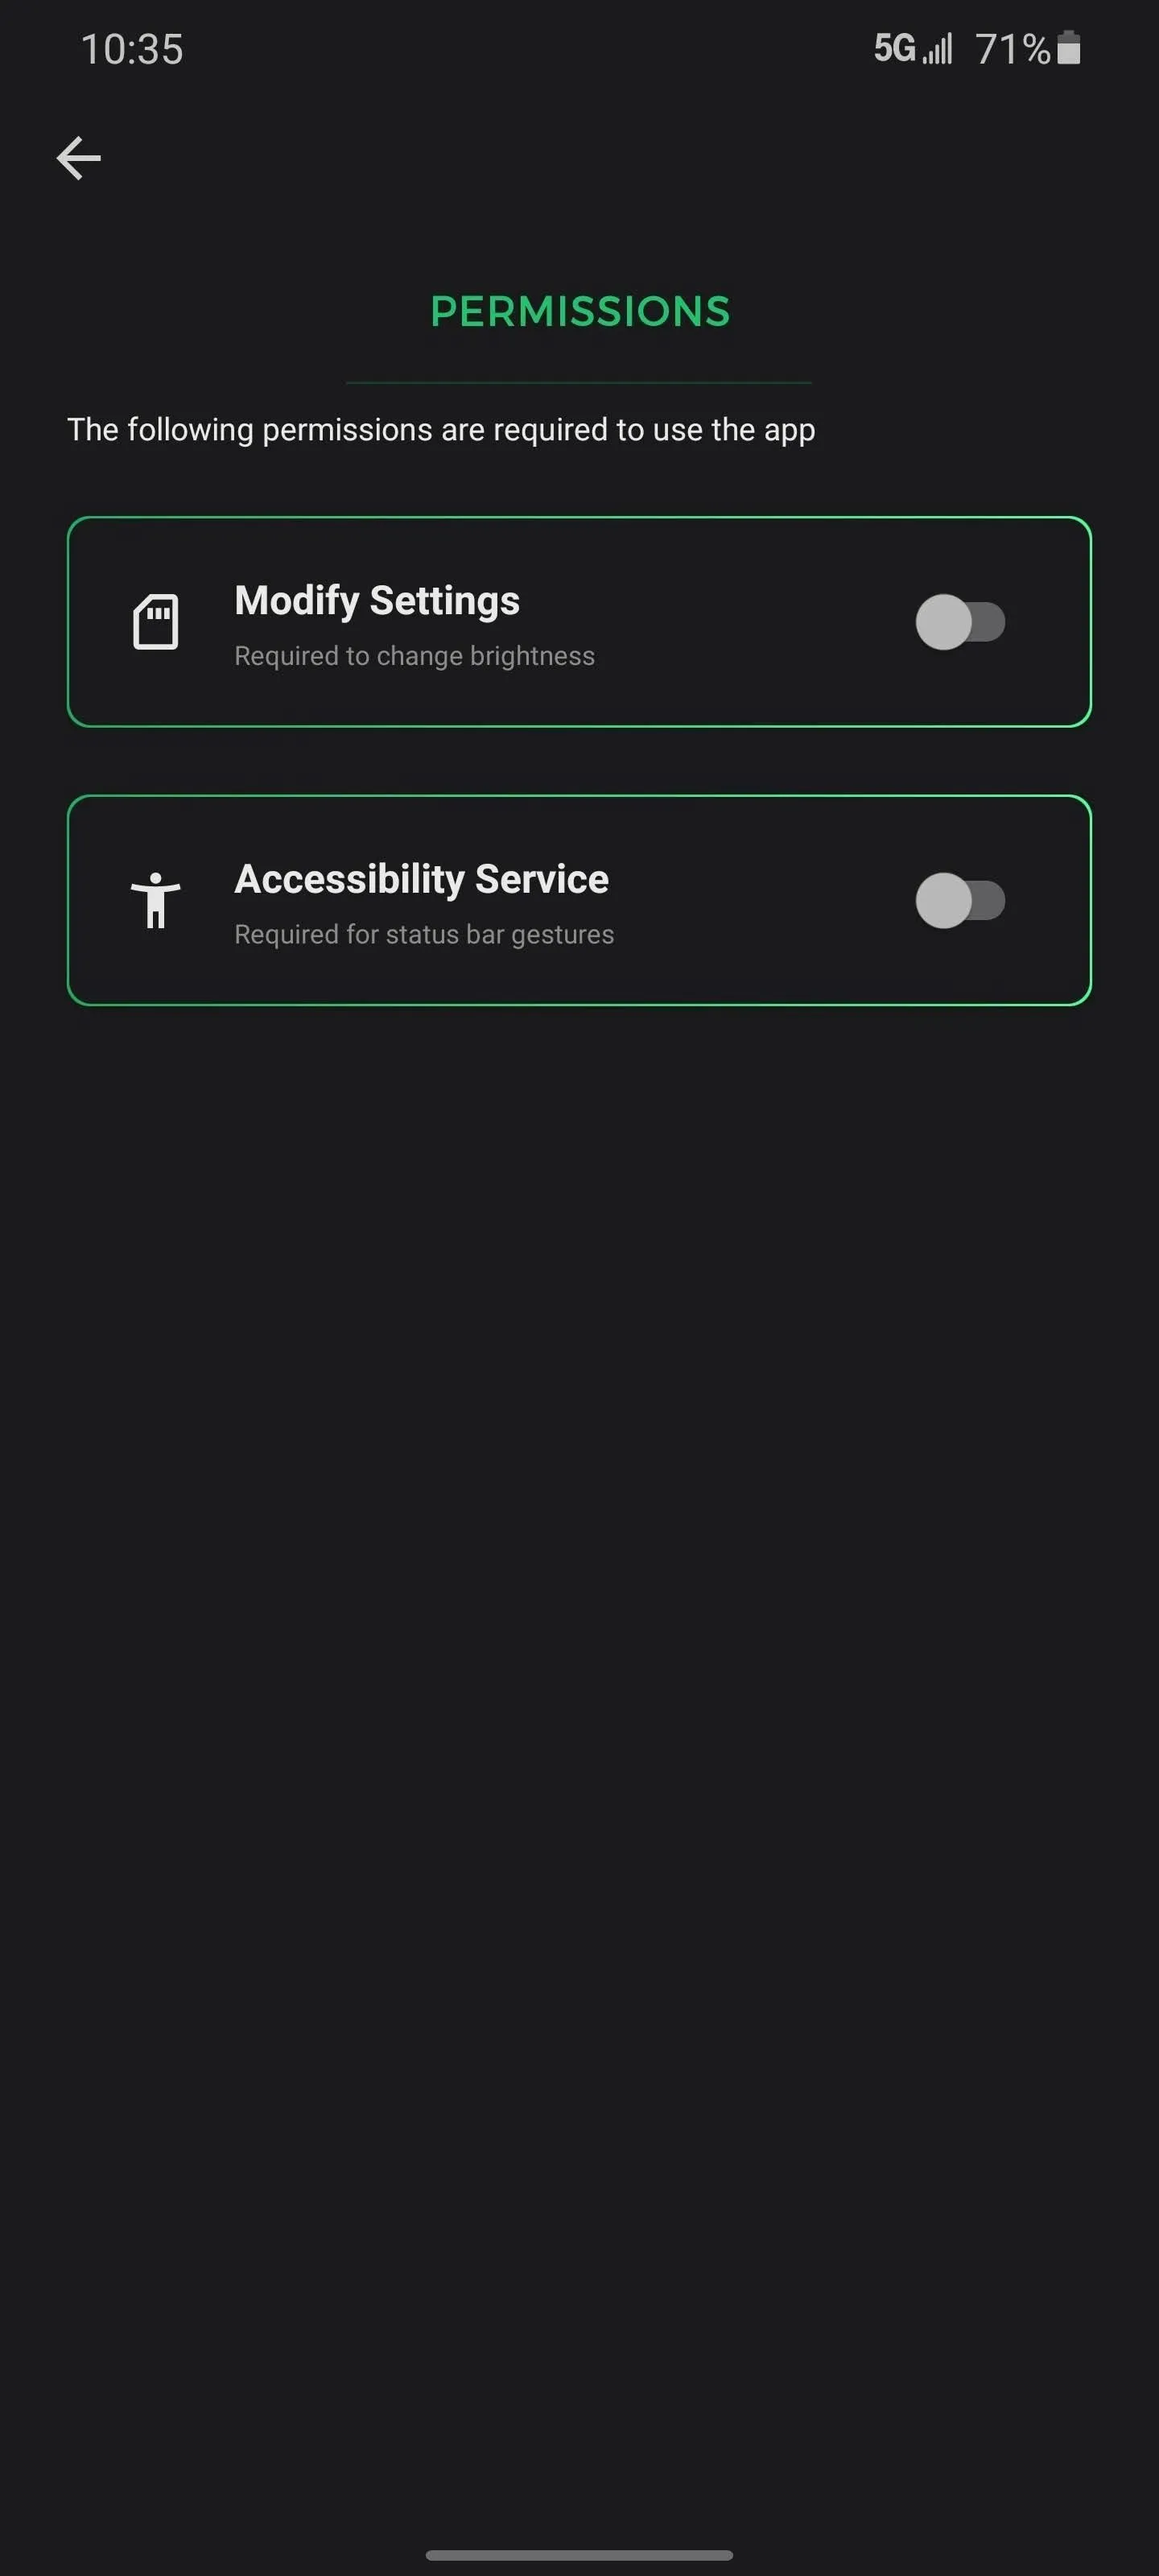
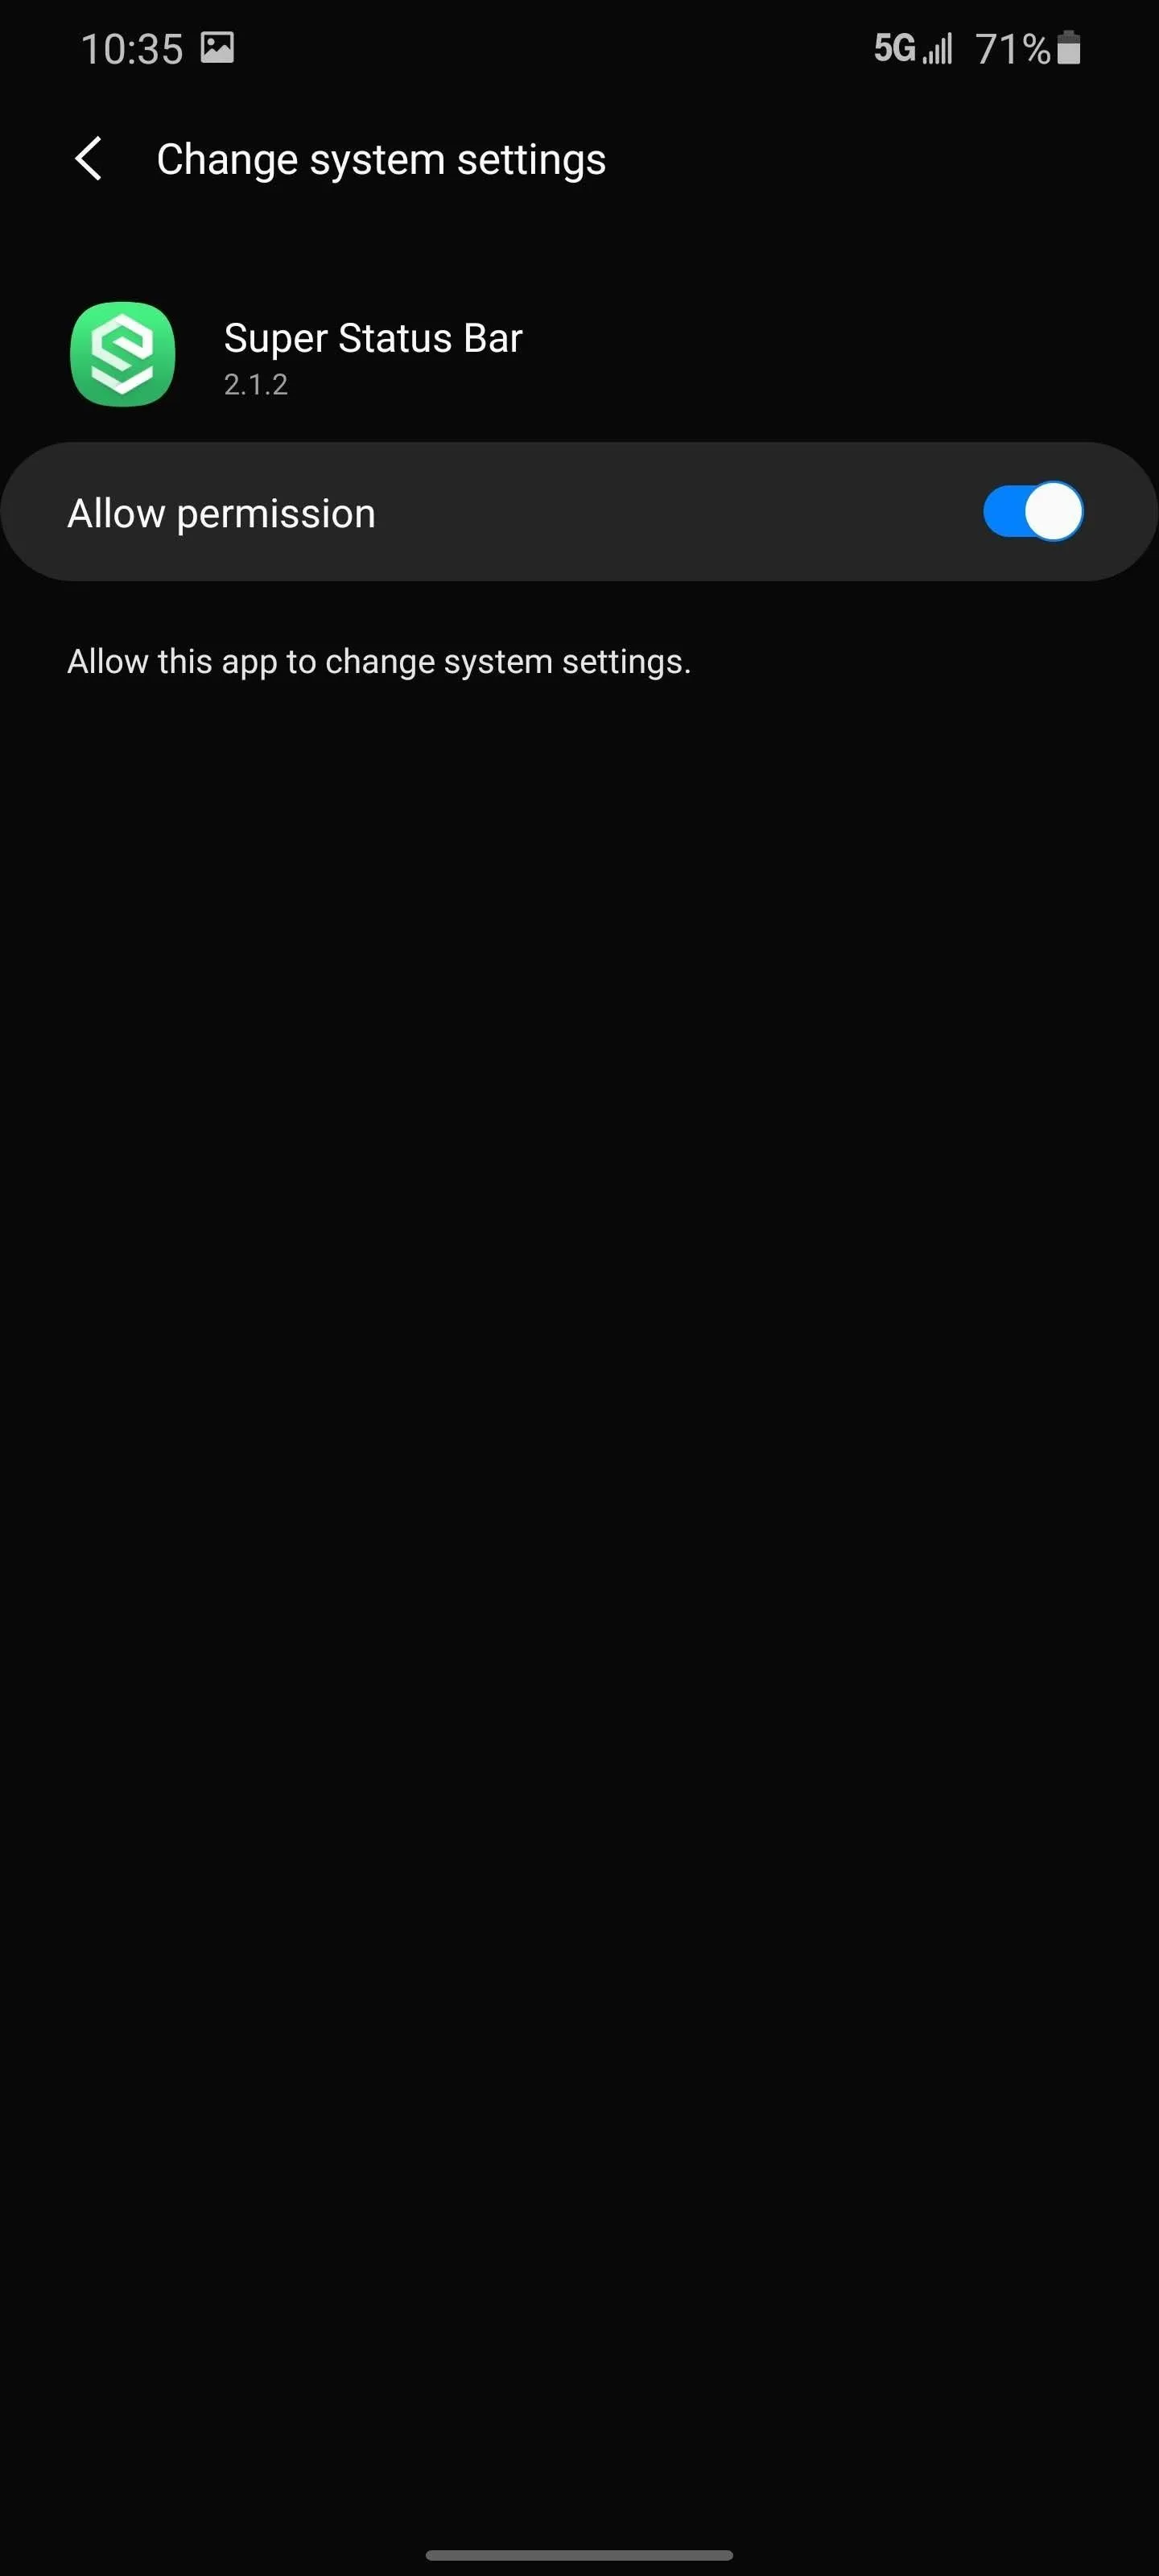
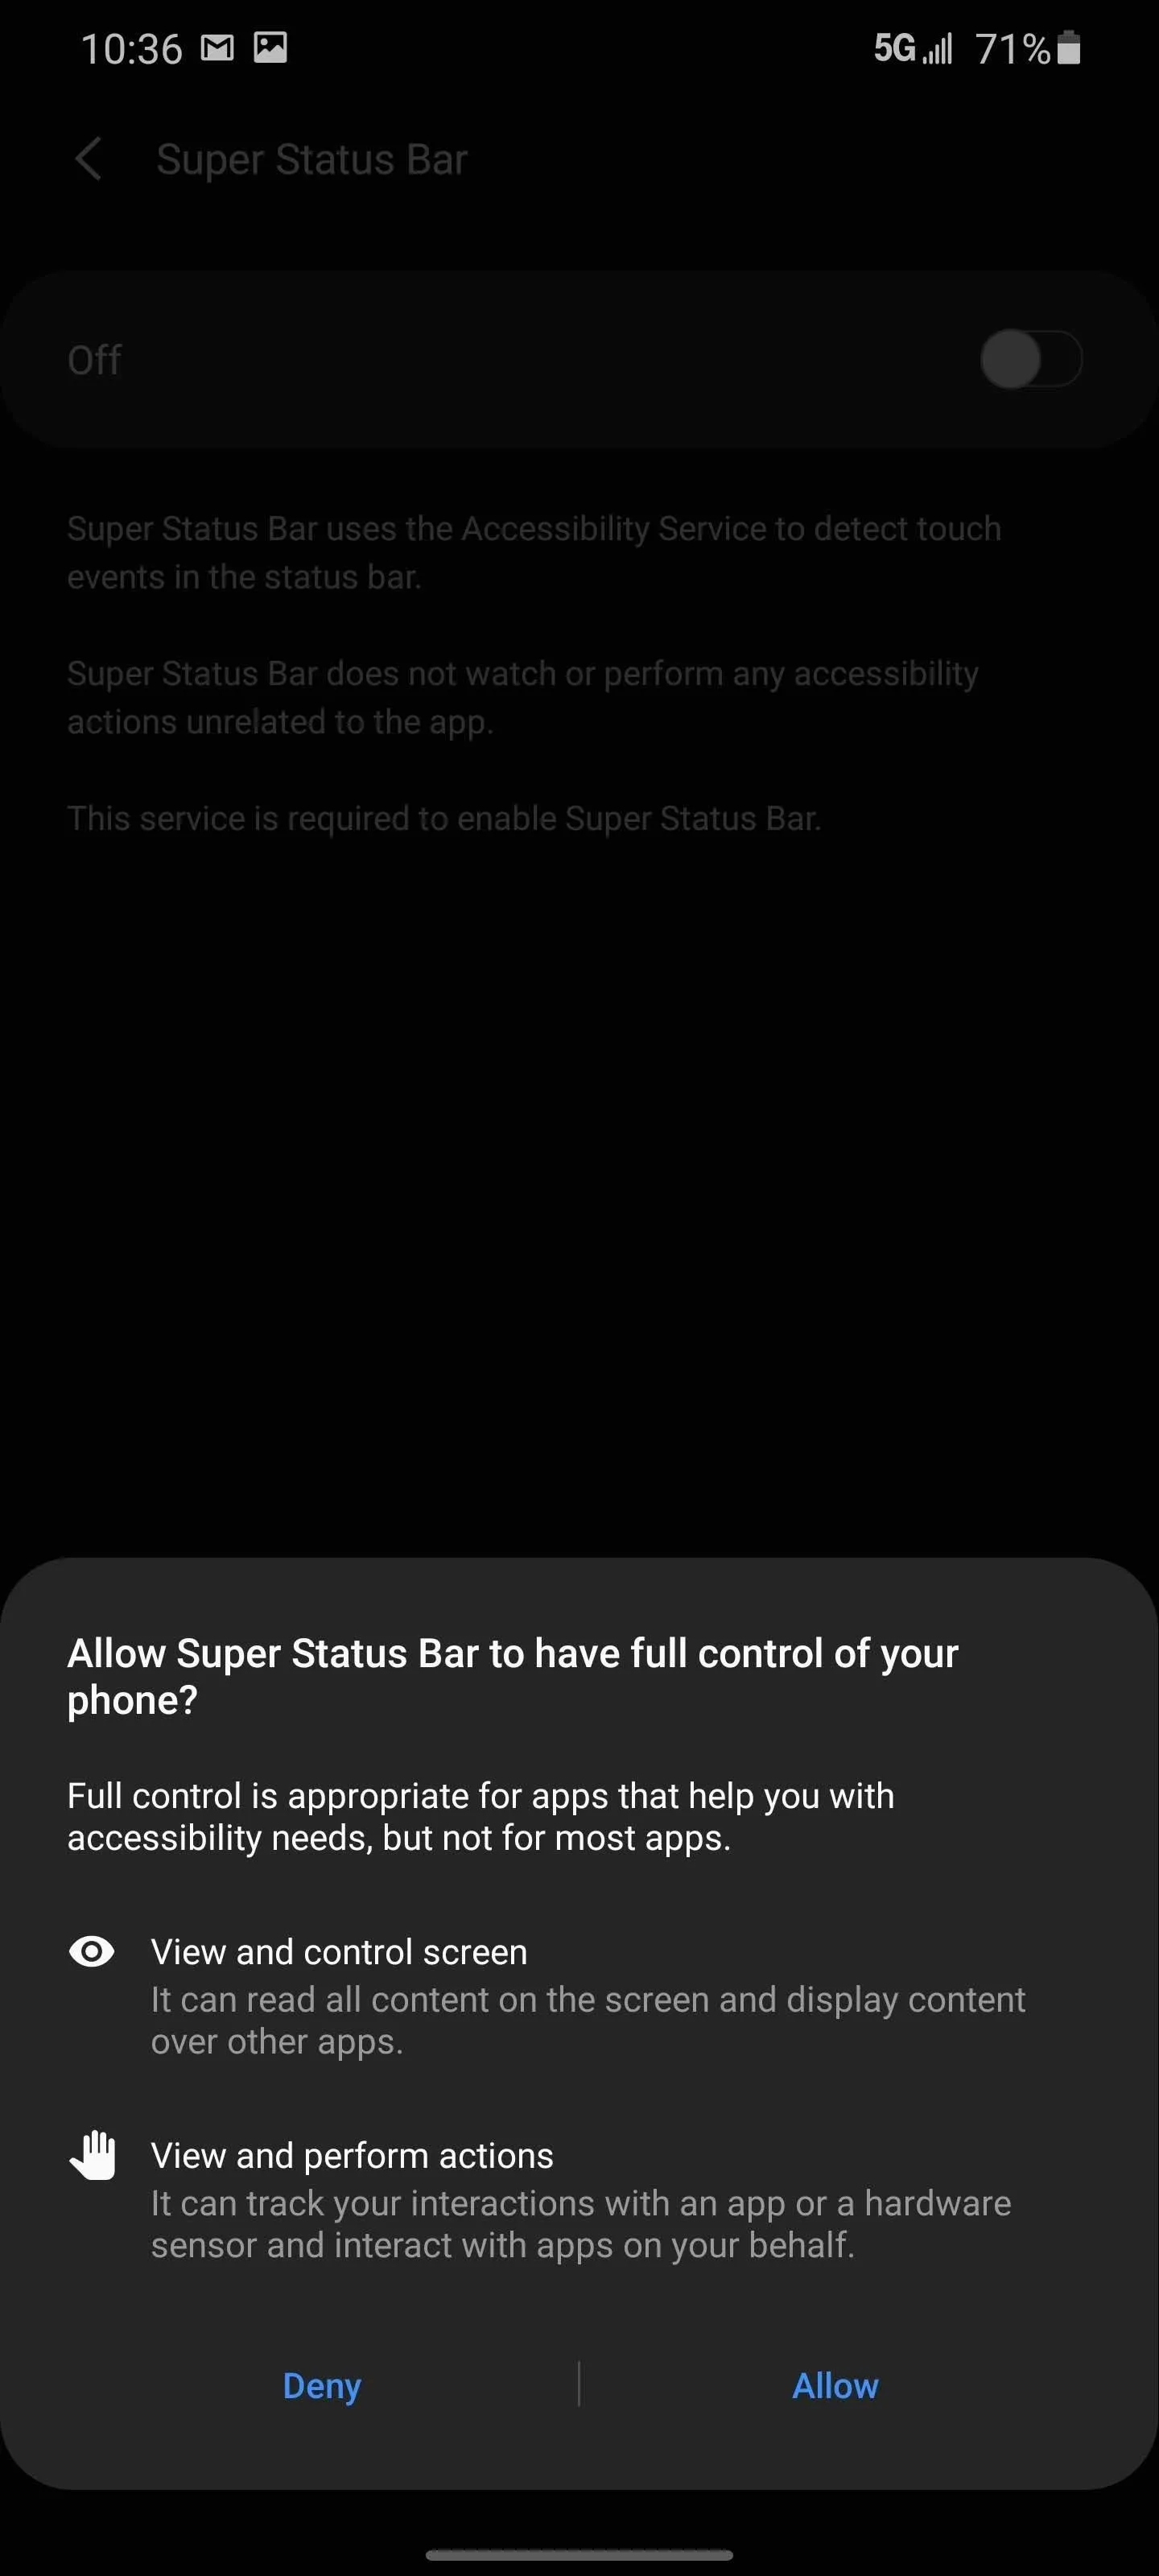
Open the app, and after going through the initial setup pages, hit "Start" on the main menu. On the new page, you will see two toggles representing permissions that need to be granted for the app to be able to work. Selecting a toggle will redirect you to the corresponding page in your phone's Settings where you actually provide Super Status Bar with the necessary permission.
After providing the app with both permissions, return to the app's main page and you will see the "Start" button has changed to "Stop." The app's main service is running!
Bring Back the Notification Ticker
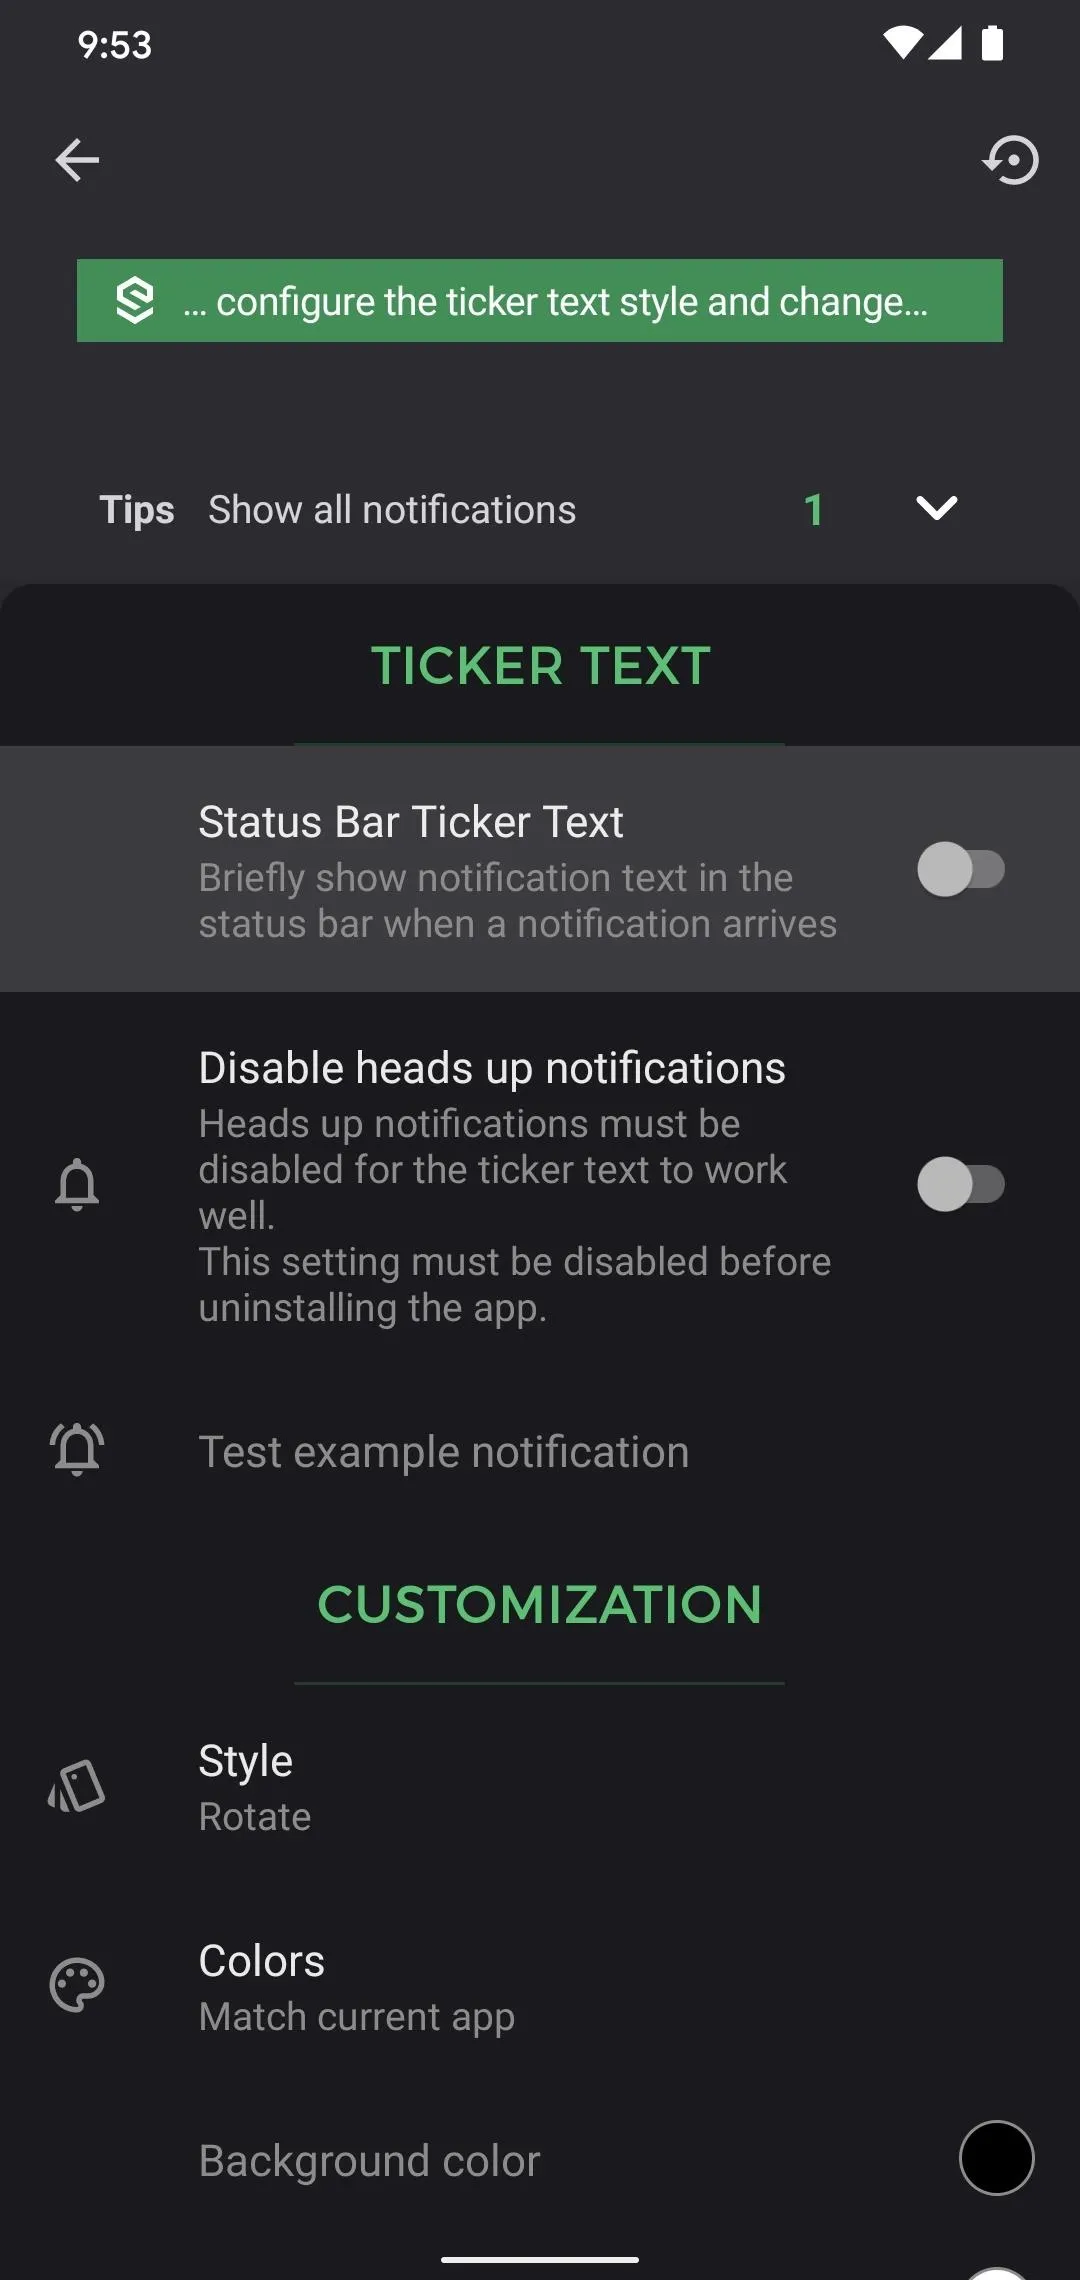
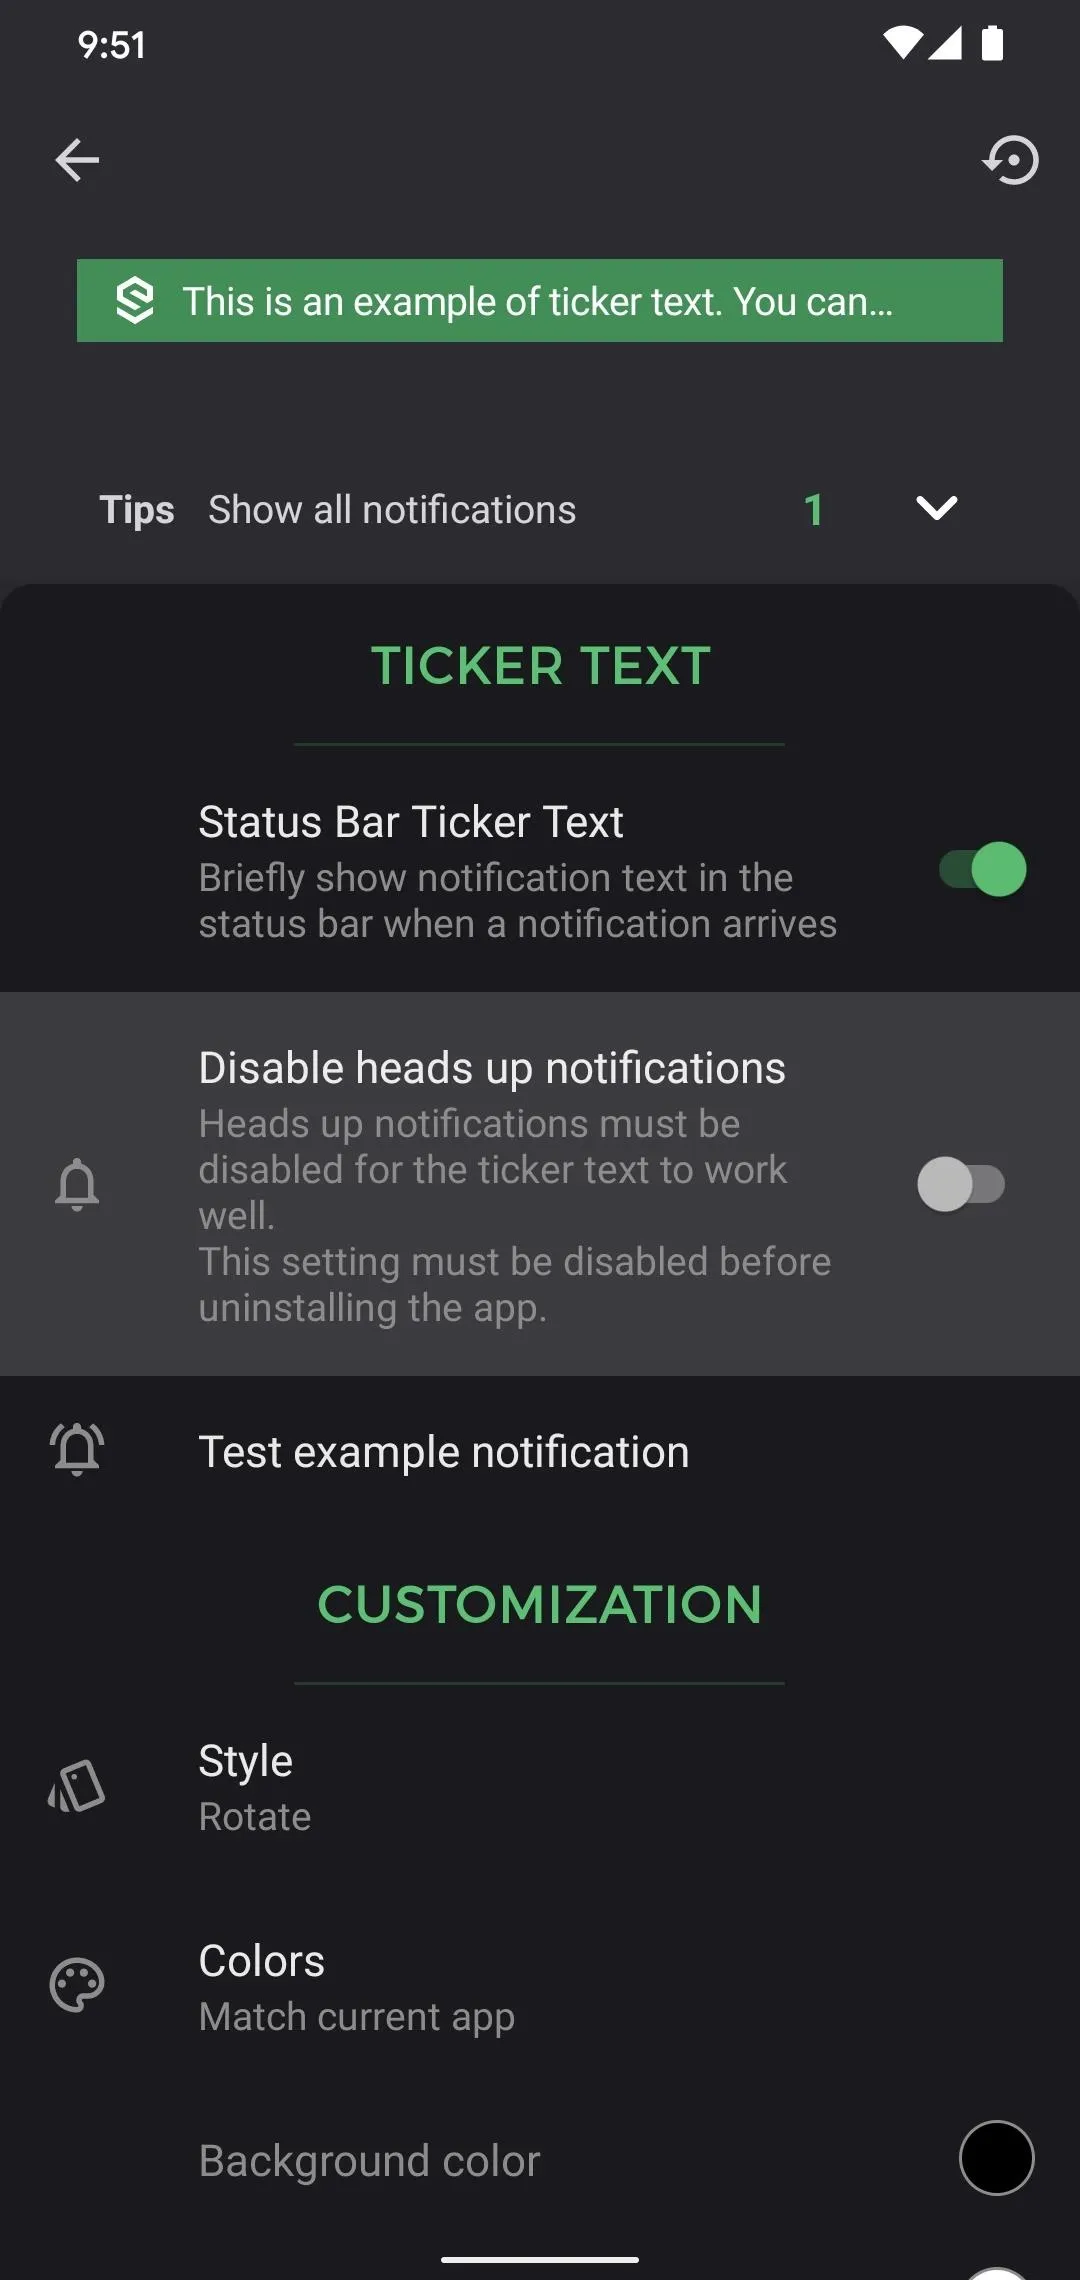
From the app's main screen, choose "Ticker Text" and enable "Status Bar Ticker Text." On the new page, enable the toggle next to "Super Status Bar." Hit "Allow" on the prompt, then return to the app.
Get Ready to Disable Heads Up Notifications
At this point, ticker notifications are enabled. But we're not done yet. We need to disable the new-style popup notifications since they're redundant now, plus they may obscure the ticker on some phones.
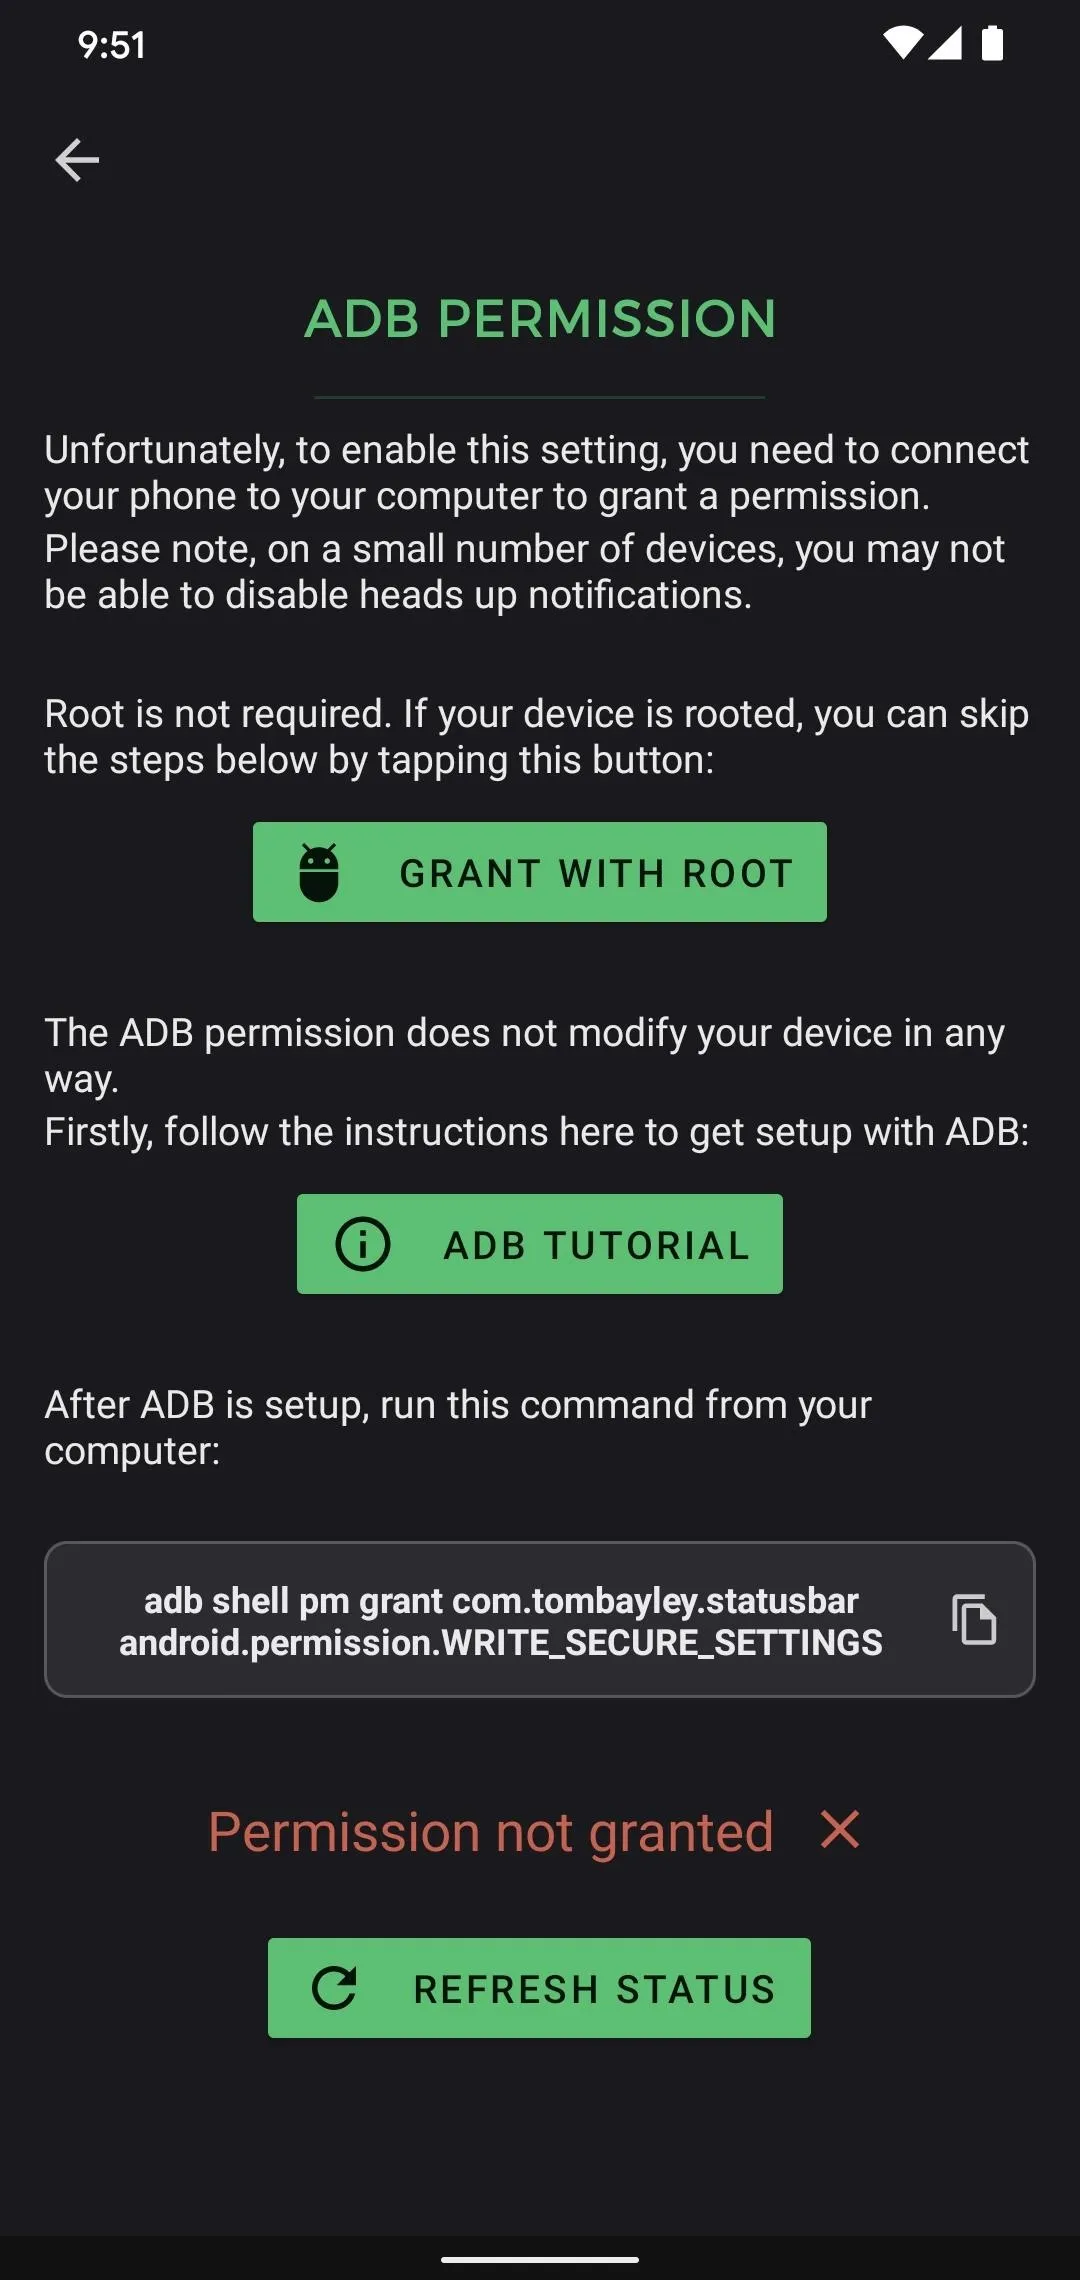
So from the app's main screen, head to the "Ticker Text" section again and tap "Disable heads up notifications." A new page titled "ADB Permission" will appear. Unlike the other permissions we granted in Step 2, we need to use ADB commands for this one. If you're ready, grab a computer and USB data cable and move on to the next step.

Download Platform-Tools
On your computer, download the platform-tools files from Google. These files allow your computer and phone to communicate. They are free to download and support all three major desktop operating systems. Select the corresponding link below to download the files onto your computer.
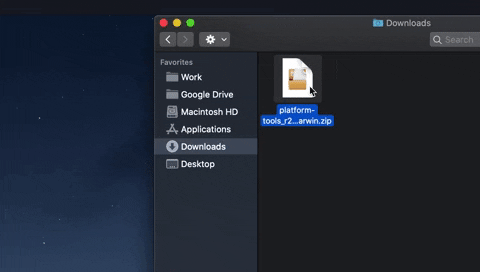
Extract the ZIP
Locate the download ZIP file on your computer (usually found in the Downloads folder) and extract the file to your computer. You can extract ZIP files using either the built-in options or third-party options, such as 7-Zip.
Once extracted, to make things easier, drag the folder to the desktop. This makes finding the folder easier as we will need it in the next steps.
Dallas Thomas/Gadget Hacks
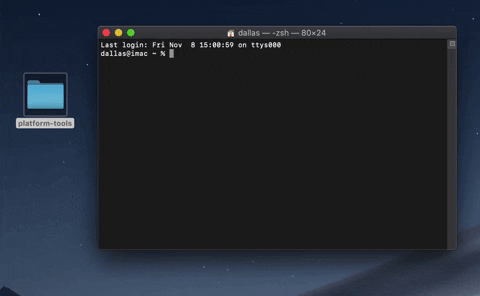
Open a Prompt in the Platform-Tools Folder
Open Command Prompt (Windows) or Terminal (macOS or Linux) and input the following:
cdHit the space bar, then drag the platform-tools folder from your desktop to the command window. This will auto-populate its location, so hit enter to complete the command. You've now redirected the Command Prompt or Terminal to inside the platform-tools folders, allowing you to access its tools (such as ADB commands).
Dallas Thomas/Gadget Hacks
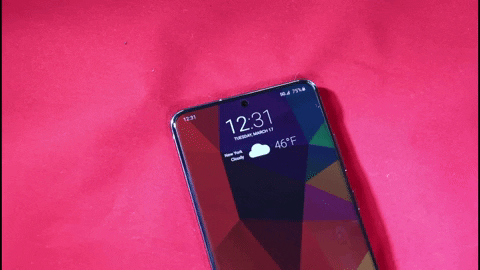
Allow USB Debugging
On your phone, enable Developer Options by opening Settings, selecting "About Phone," then tapping "Build number" seven times. Enter your lock screen passcode when prompted and Developer Options will be enabled.
So go to the main page of your Settings app and you should see "Developer Options" at the very bottom. If not, go to "System," then "Advanced," and you should see "Developer Options" there. Tap it.
In Developer Options, enable "USB Debugging." Connect your phone to your computer using a USB data cable. A prompt, similar to the screenshot below, will appear on your phone. Select "Always allow from this computer," then hit "Allow." If this prompt doesn't appear, input the following code in Command Prompt or Terminal:
adb devicesNote: If you're using macOS or Linux, you'll probably need to put a "./" before every ADB command shown in this guide (e.g., "./adb devices").
You are now ready to send ADB commands. If you had any trouble at all, check out our in-depth guide linked below.
- Full Guide: How to Set Up ADB on Your Phone & Computer
Hide Heads Up Notifications
Input the following command in Command Prompt or Terminal:
adb shell pm grant com.tombayley.statusbar android.permission.WRITE_SECURE_SETTINGSBack on the "ADB Permission" page in Super Status Bar, you should see "Permission granted" with a green checkmark along the bottom of the page. If not, tap "Refresh Status" to refresh the page. If you don't see it, check that you entered the command correctly (remember to add ./ on Mac!).
Test It Out
You can test to see how notifications will appear by tapping "Test example notification." If you successfully brought back the Notification Ticker on all apps, cool, you are done. However, during my testing, I found this wasn't always the case.
I needed to manually disable popup notifications on some apps for ticker text to appear. If you are running into the same problem, open Settings and choose "Notifications." Select the app which isn't displaying correctly and choose one of its notification categories. Disable the "Show as pop-up" toggle to deactivate head-up notifications. The next time an alert appears, it should appear only in the status bar as intended.
Cover image, screenshots, and GIFs by Jon Knight/Gadget Hacks


Comments
Be the first, drop a comment!