


There are few things more annoying in life than getting interrupted—especially when you're in a groove, jamming out to your favorite song. If we can all agree on that sentiment, then why is it that our phones mute the music we're listening to for a few seconds whenever a notification comes in?
Luckily, you have an Android device. This means that minor quibbles like this one can easily be remedied in most cases—especially when you involve the powerful automation app Tasker. Below, I'll go over a simple Tasker profile that will automate the process of disabling notifications while you're listening to music or streaming video.
Install Tasker
If you don't have Tasker already installed on your device, you can use the links below to get that taken care of. It's available for $2.99 on the Google Play Store, but if you'd rather give it a try before you buy, there's a free 7-day trial version that can be sideloaded.

Enable Tasker's Accessibility Plugin
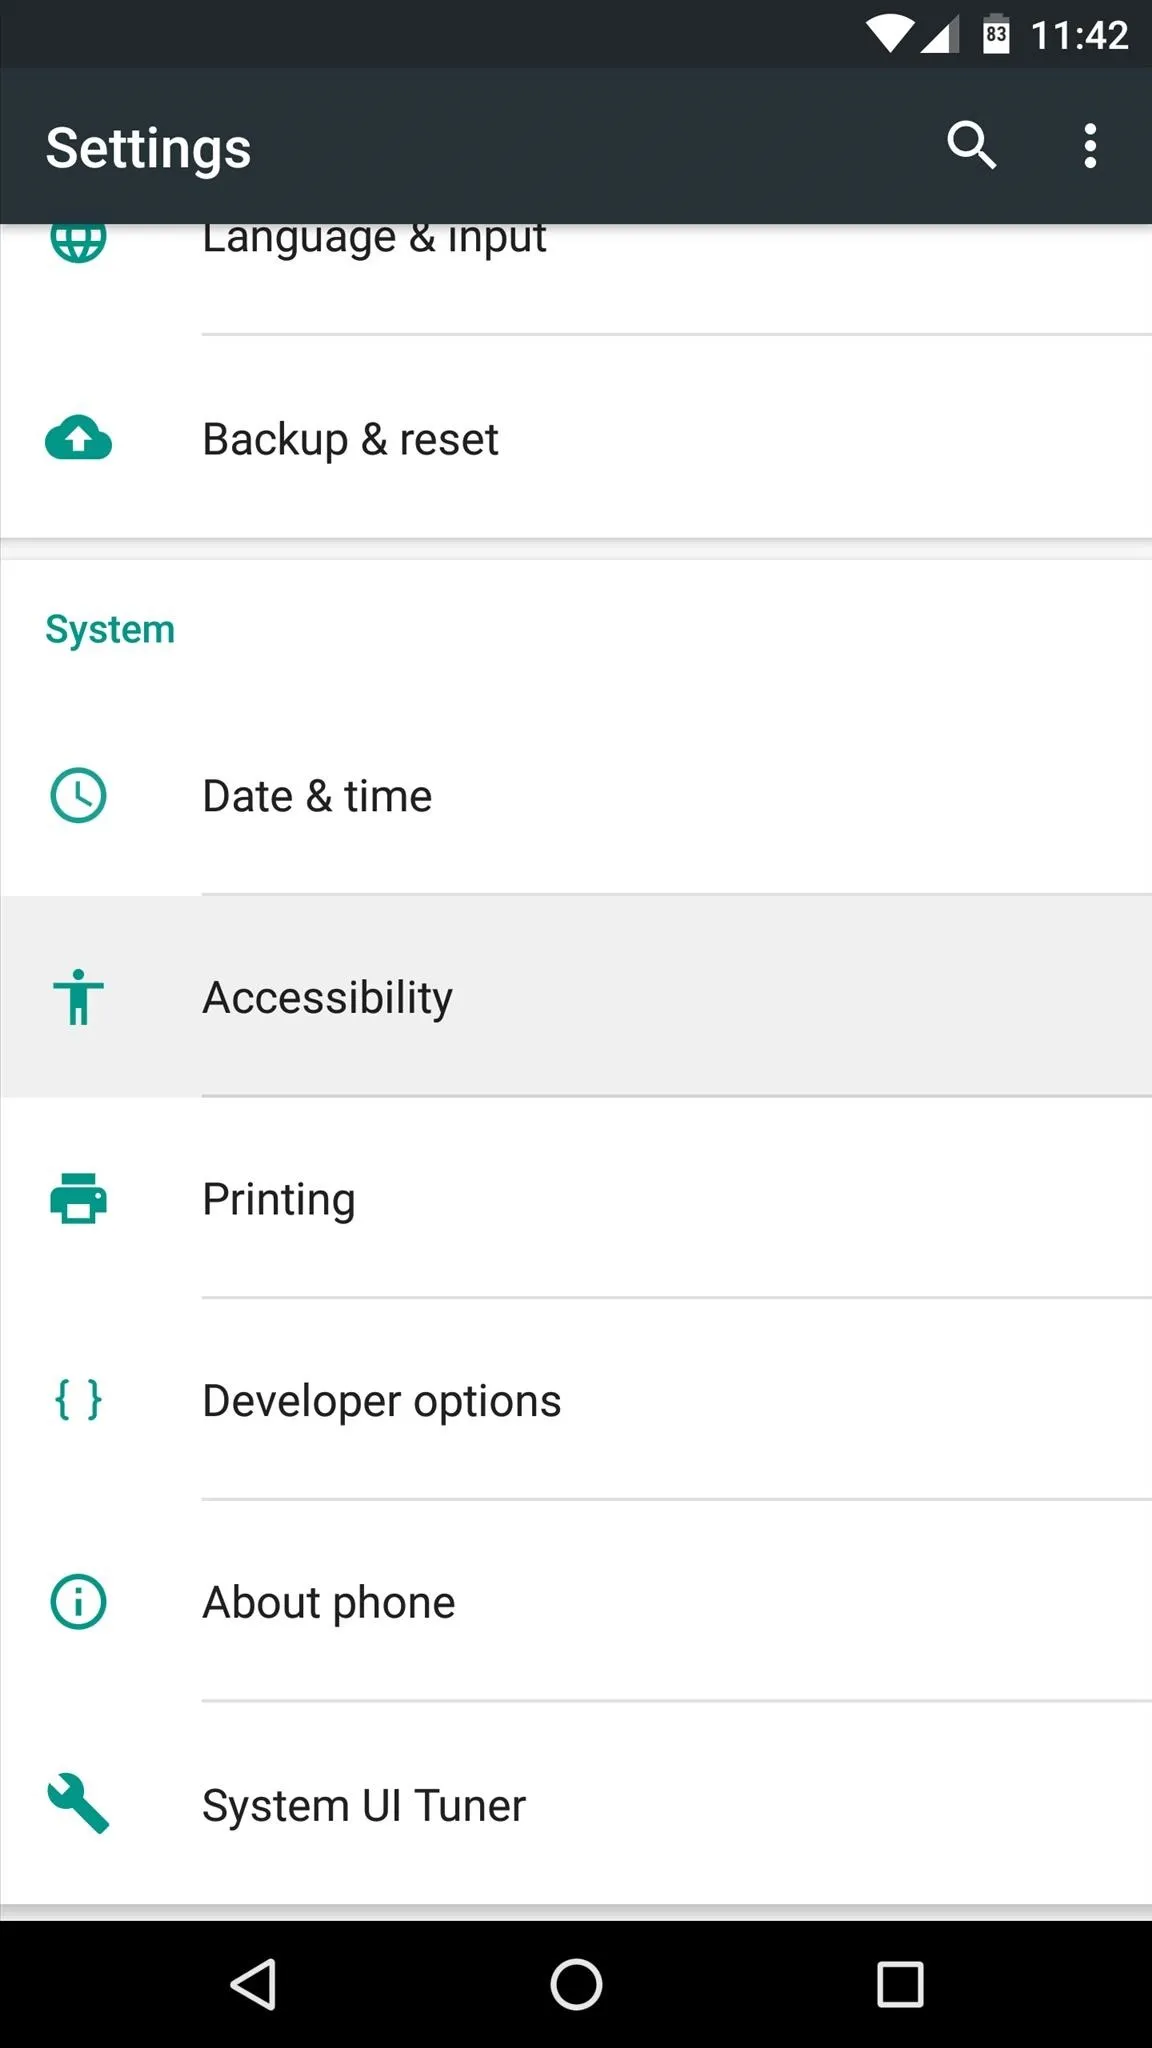
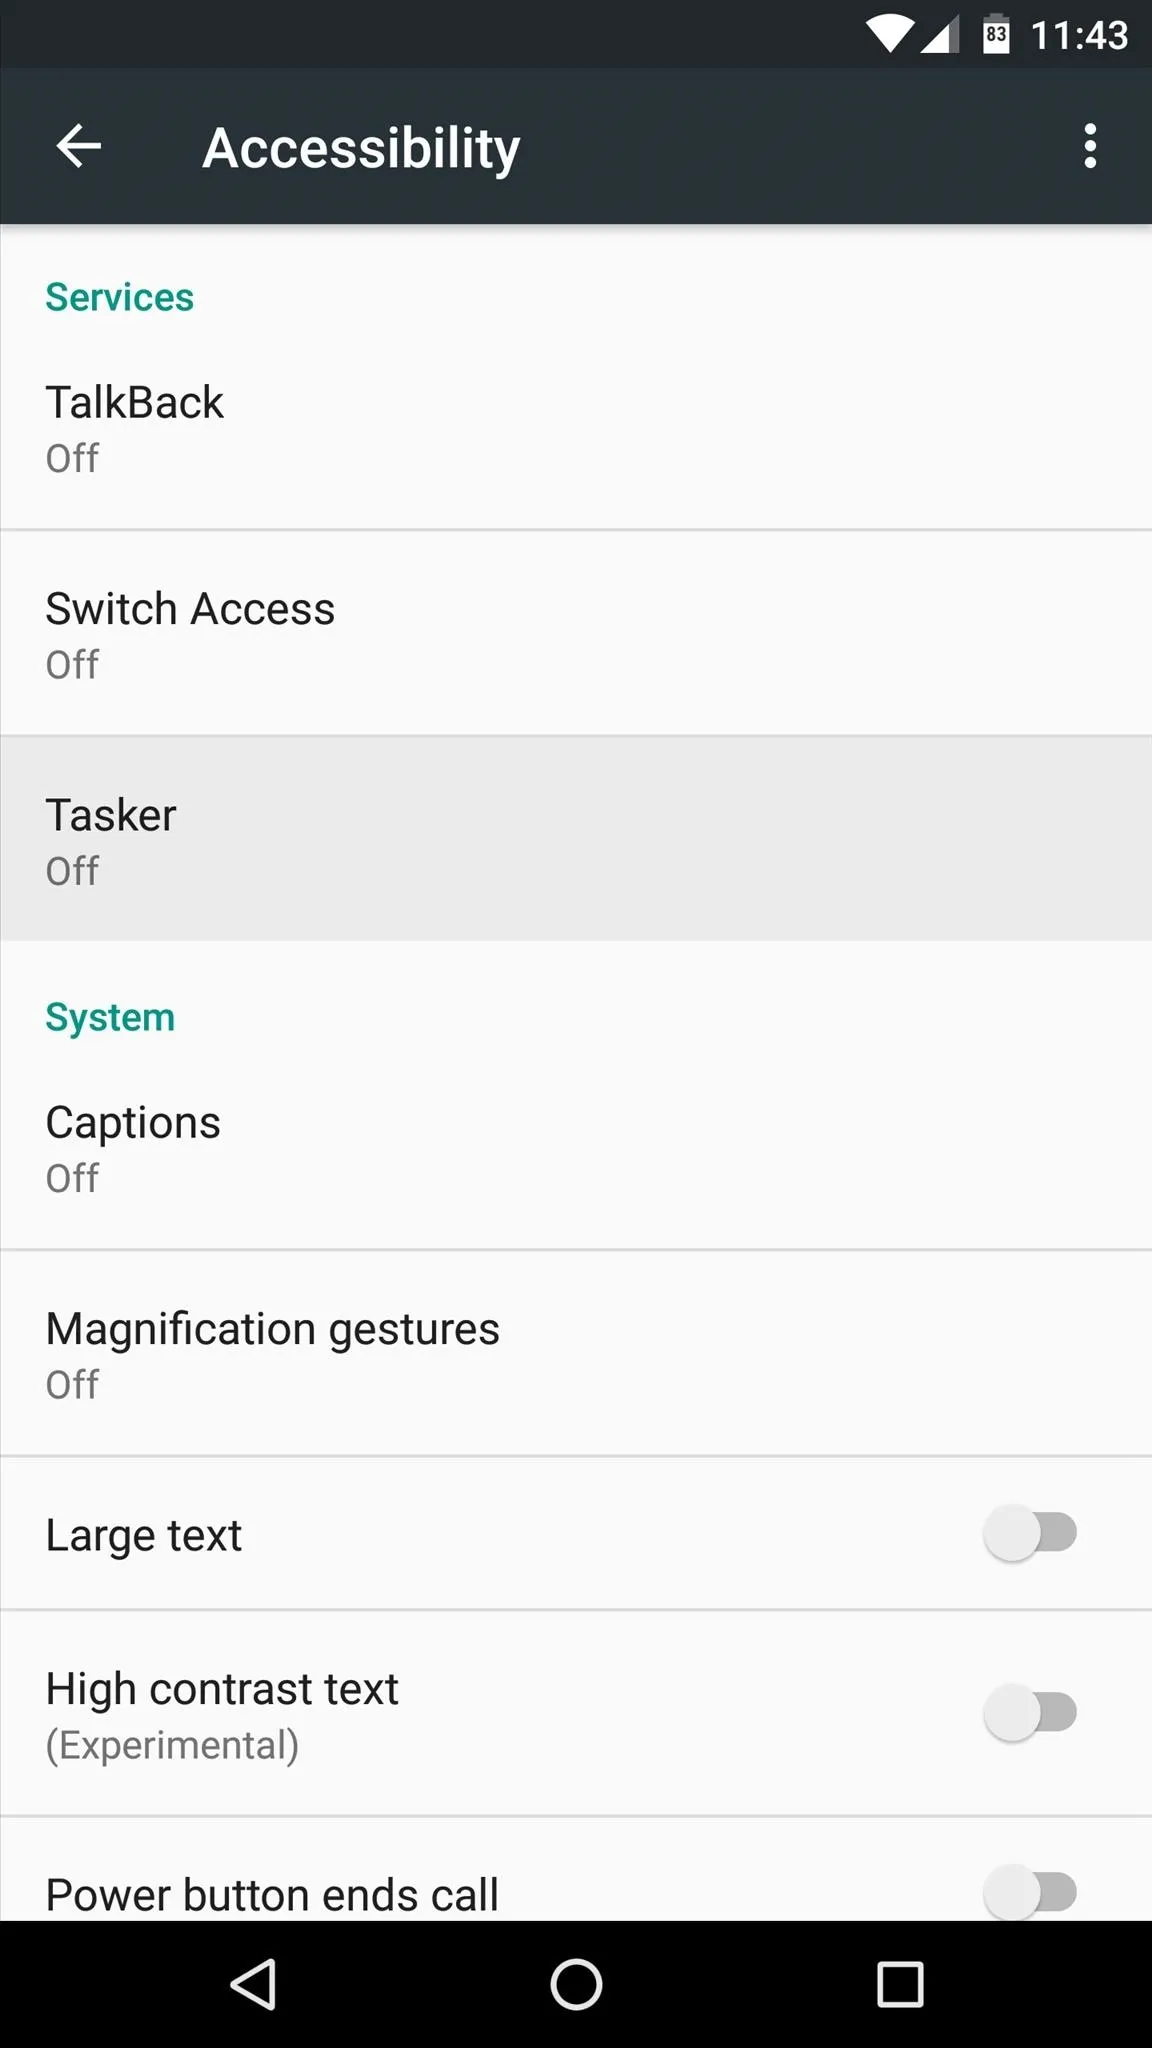
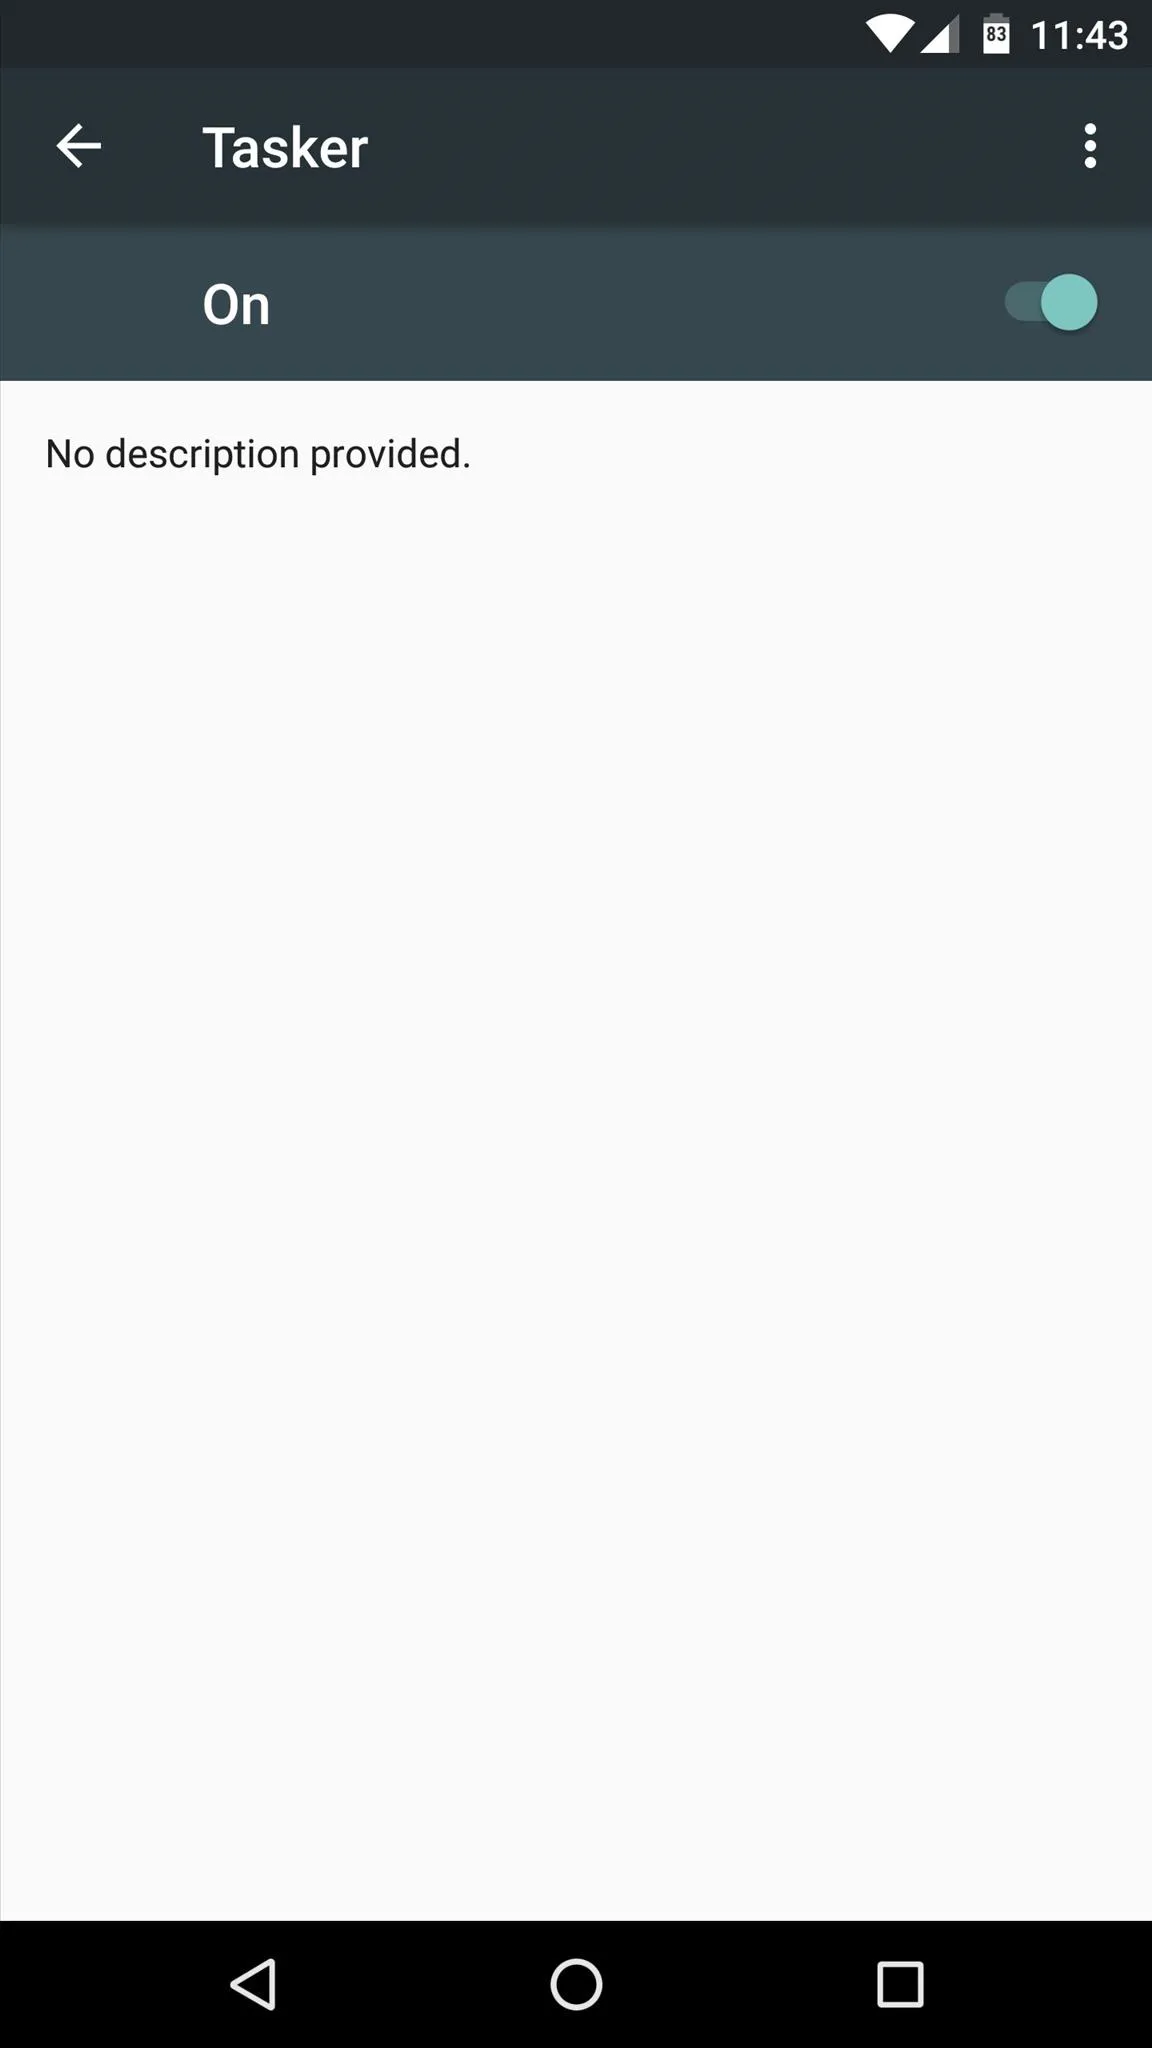
With Tasker installed, the first thing you'll need to do is enable its accessibility plugin. So from your phone or tablet's main Settings menu, head to the "Accessibility" entry, then select "Tasker" from the list. Finally, toggle the switch at the top of the screen to enable the service. If you already had Tasker installed, there's a good chance this was already done.
Create a New Profile in Tasker
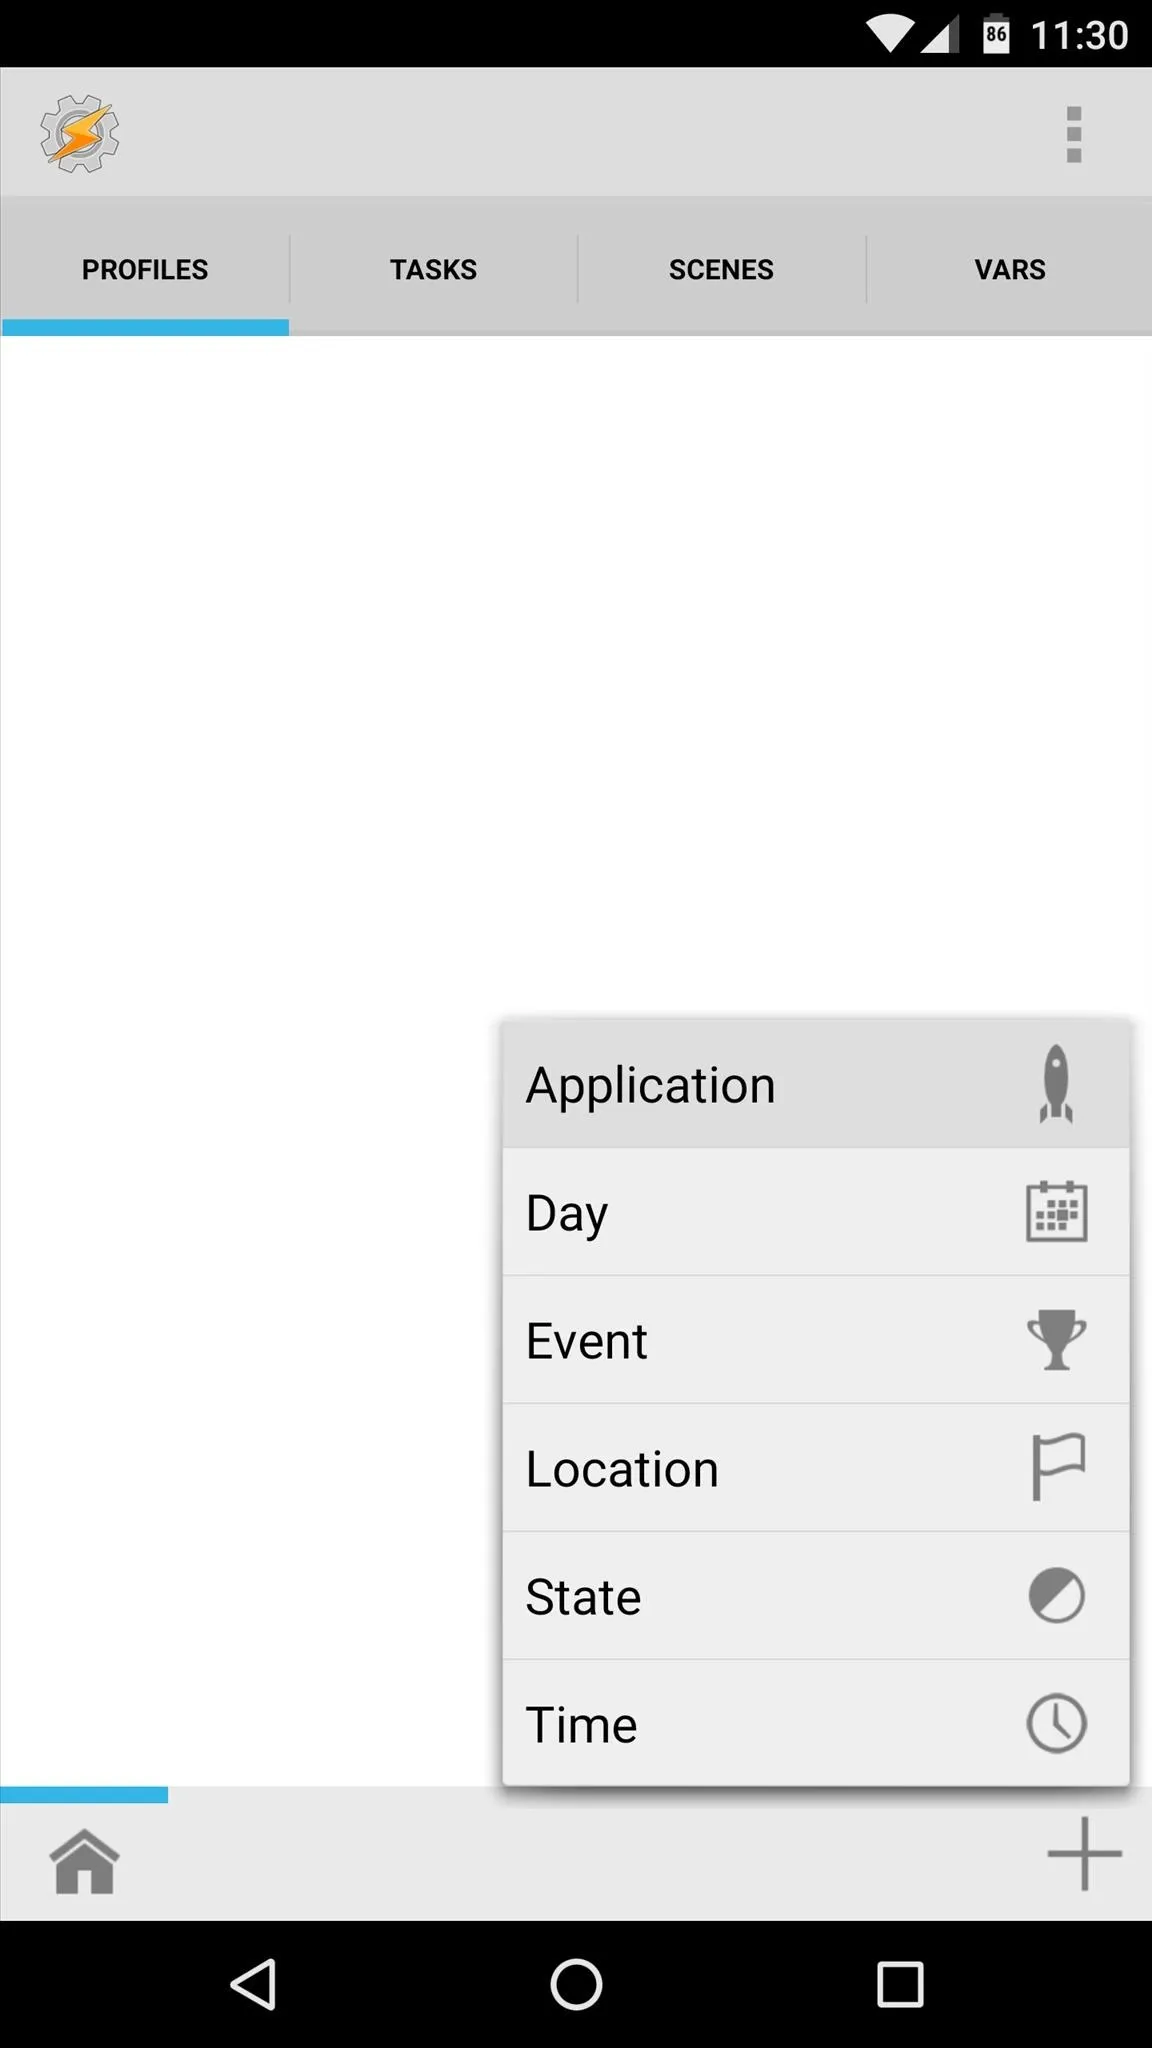
Just in case you need a refresher on how Tasker works, I'll cover the basics briefly. First, you set up a "Profile," which is a condition or set of conditions that, when met, will trigger a "Task." The task, on the other hand, is a set of actions that will be performed automatically when your profile's conditions are met.
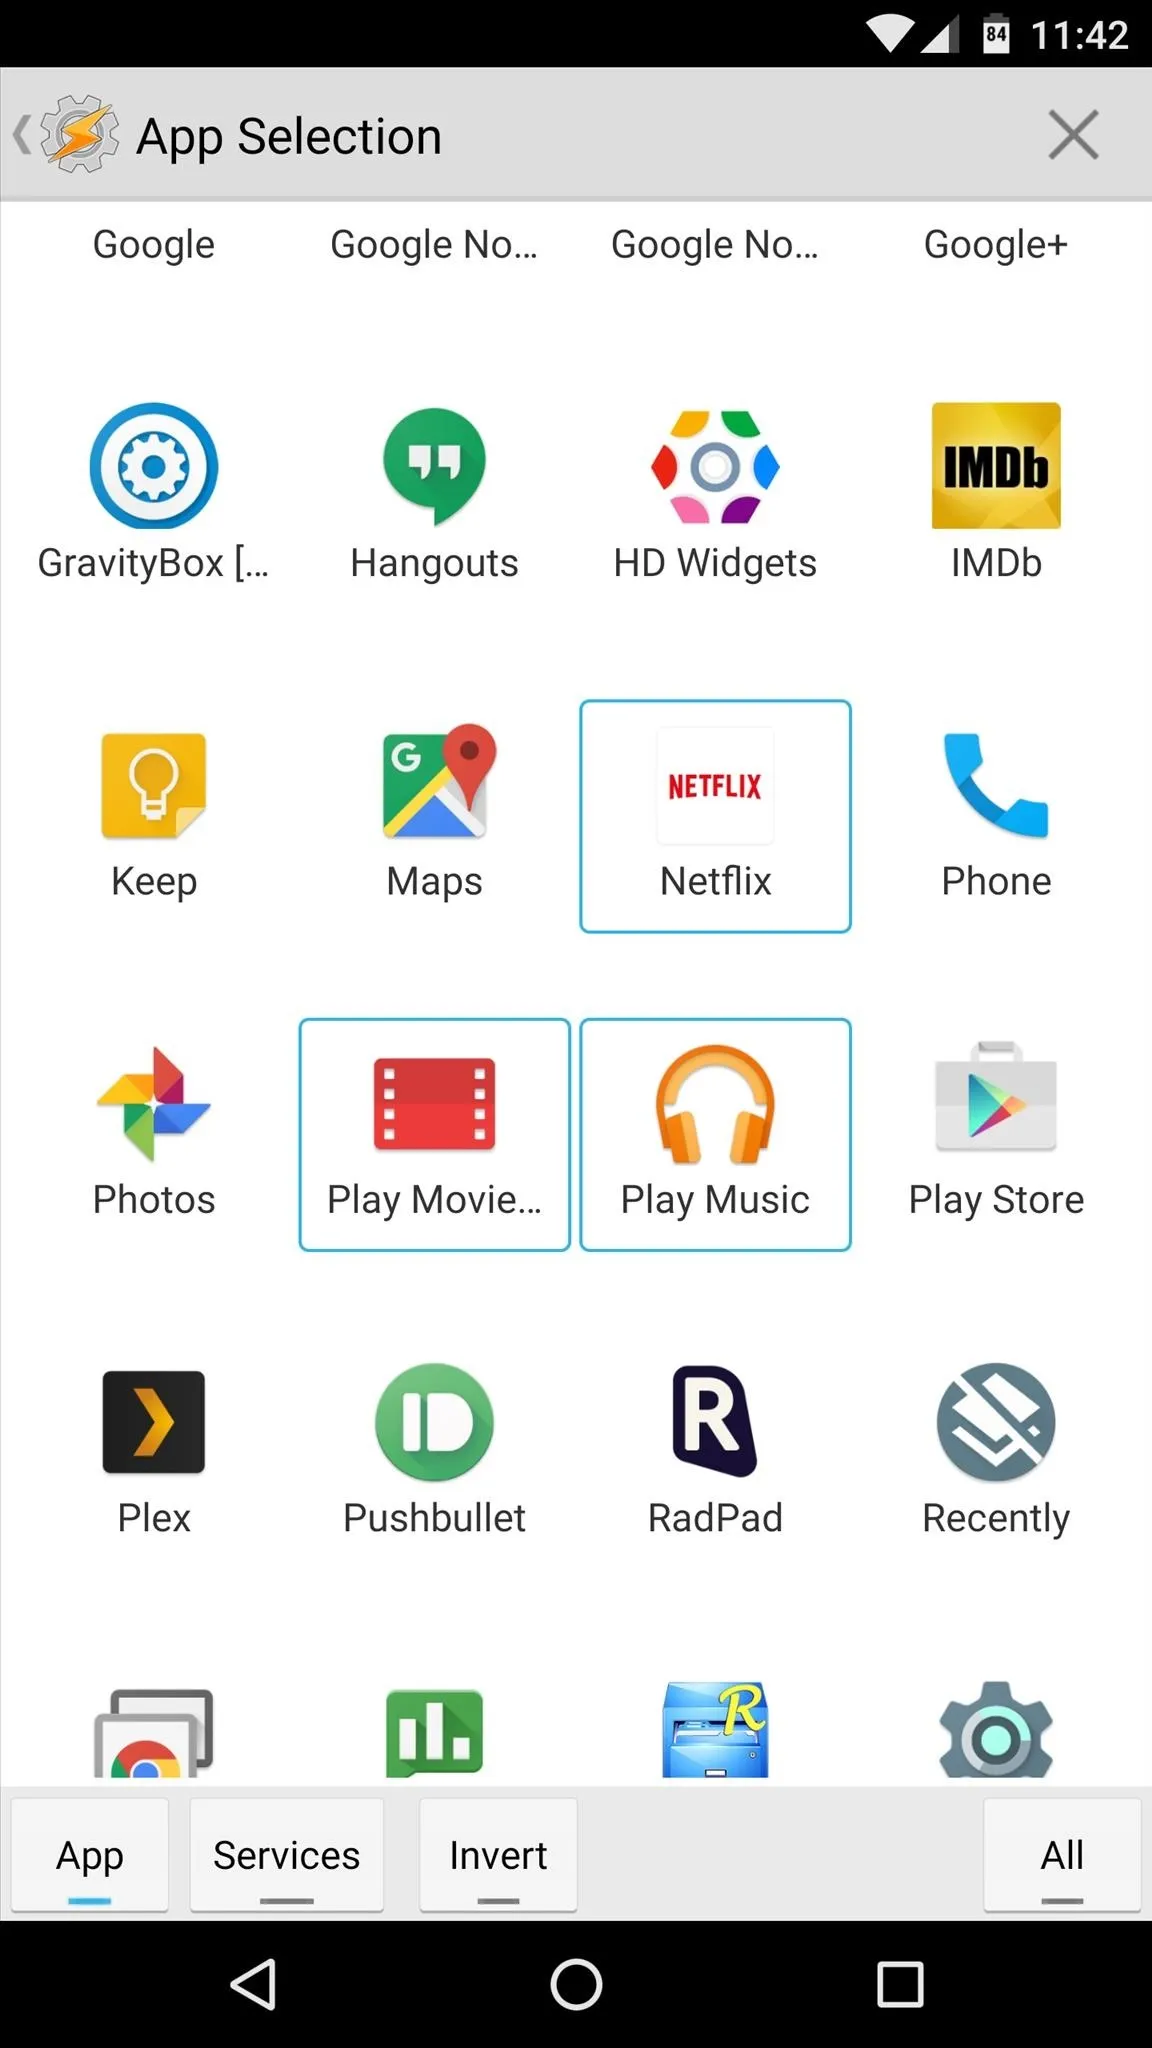
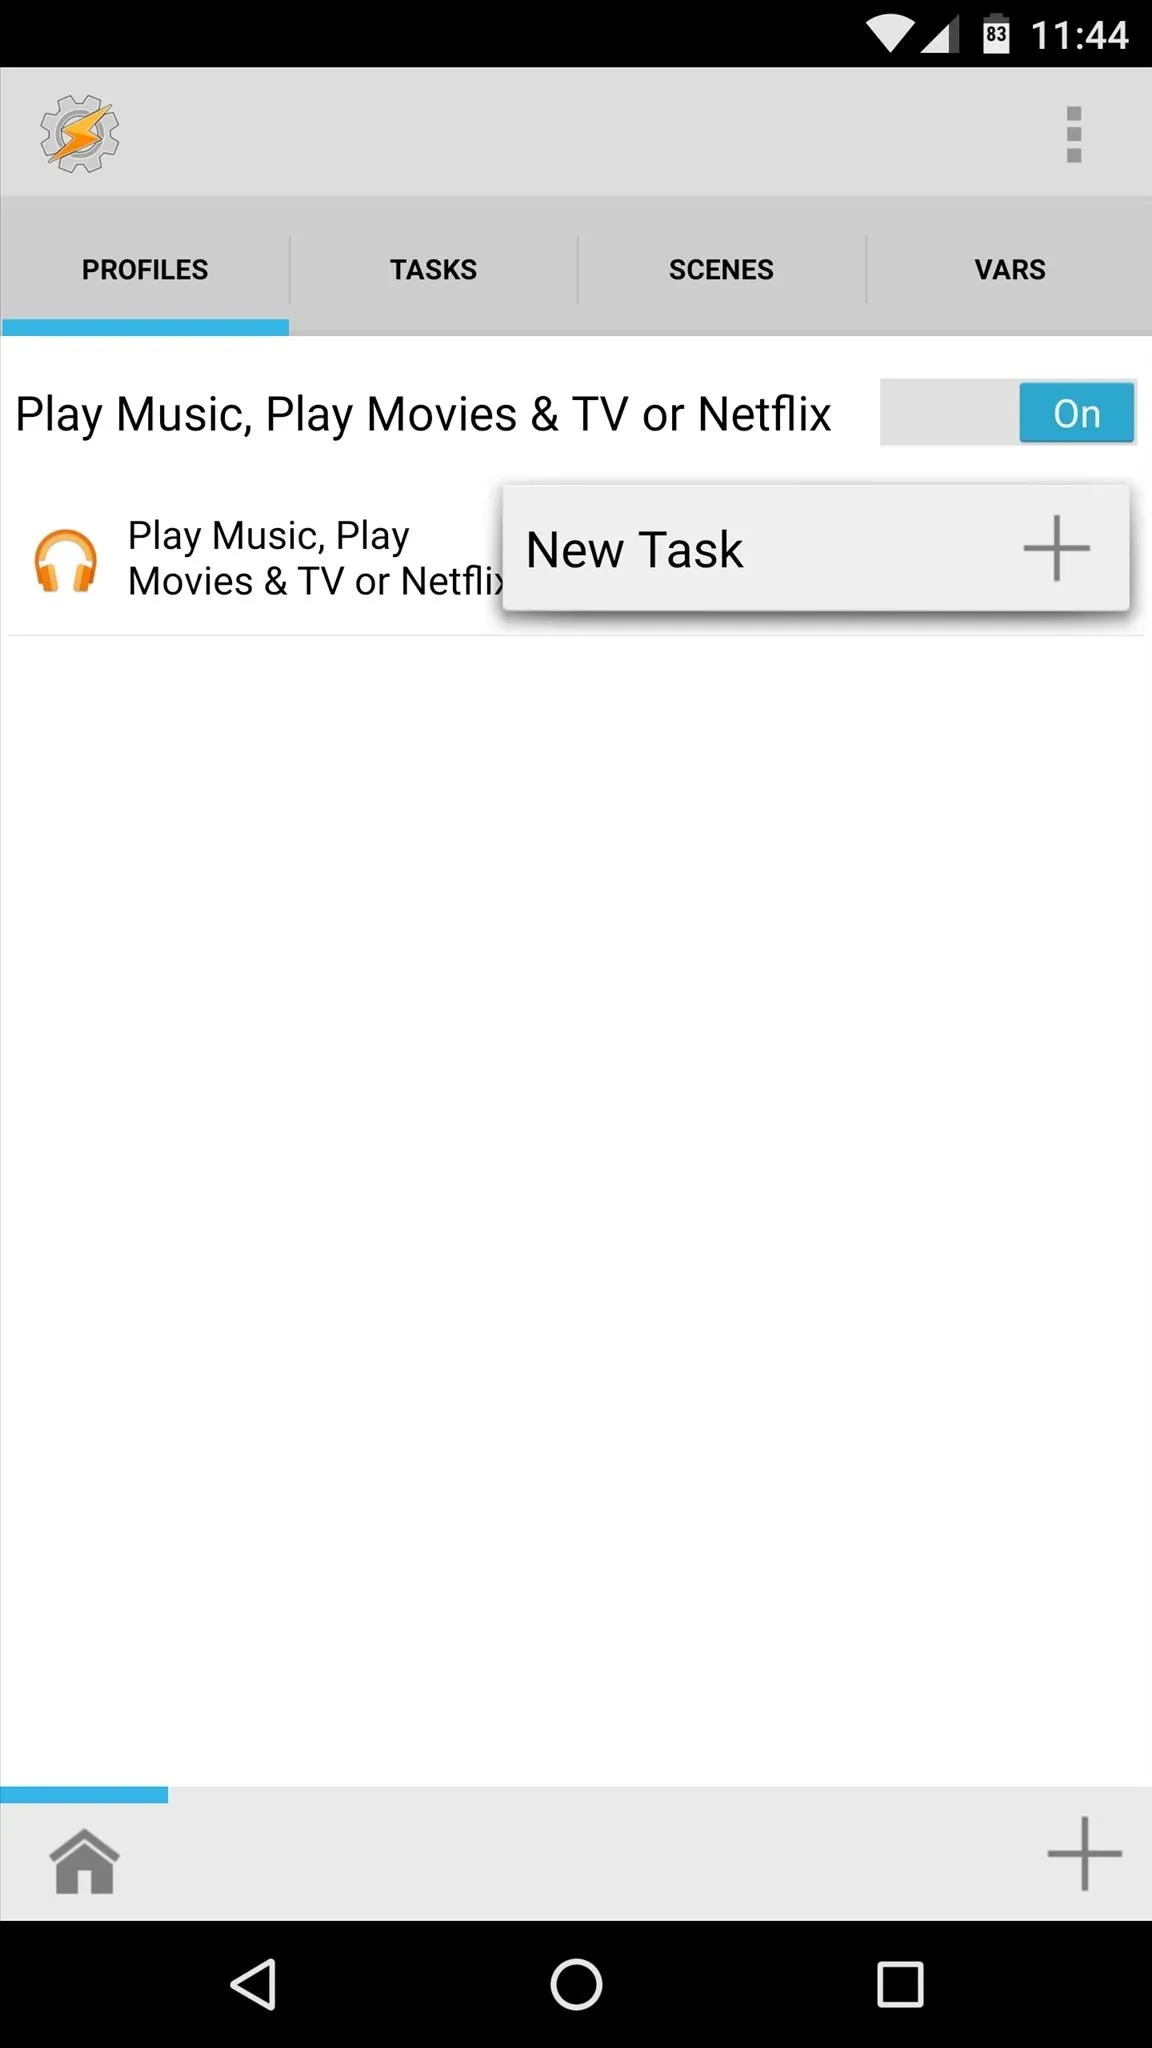
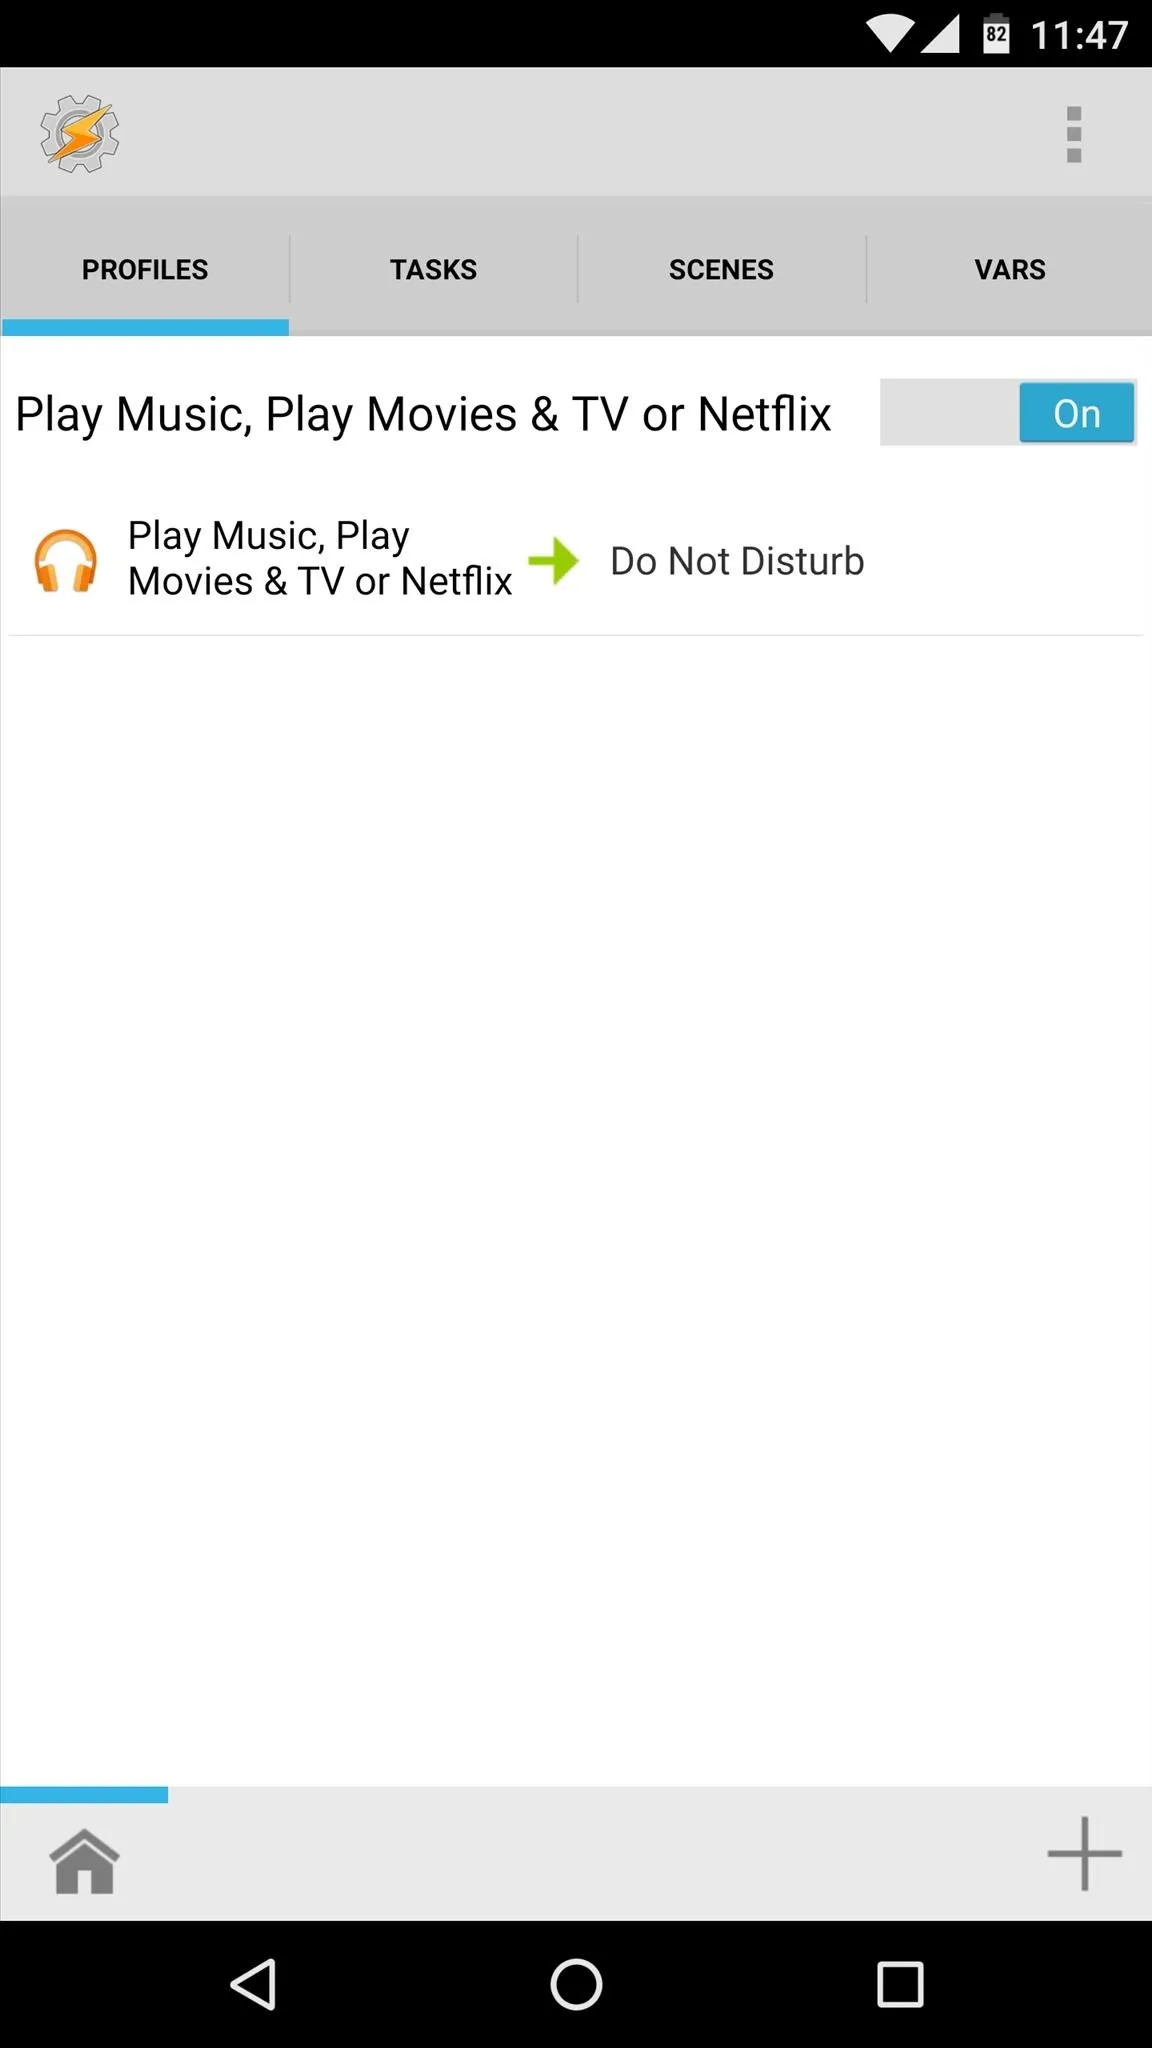
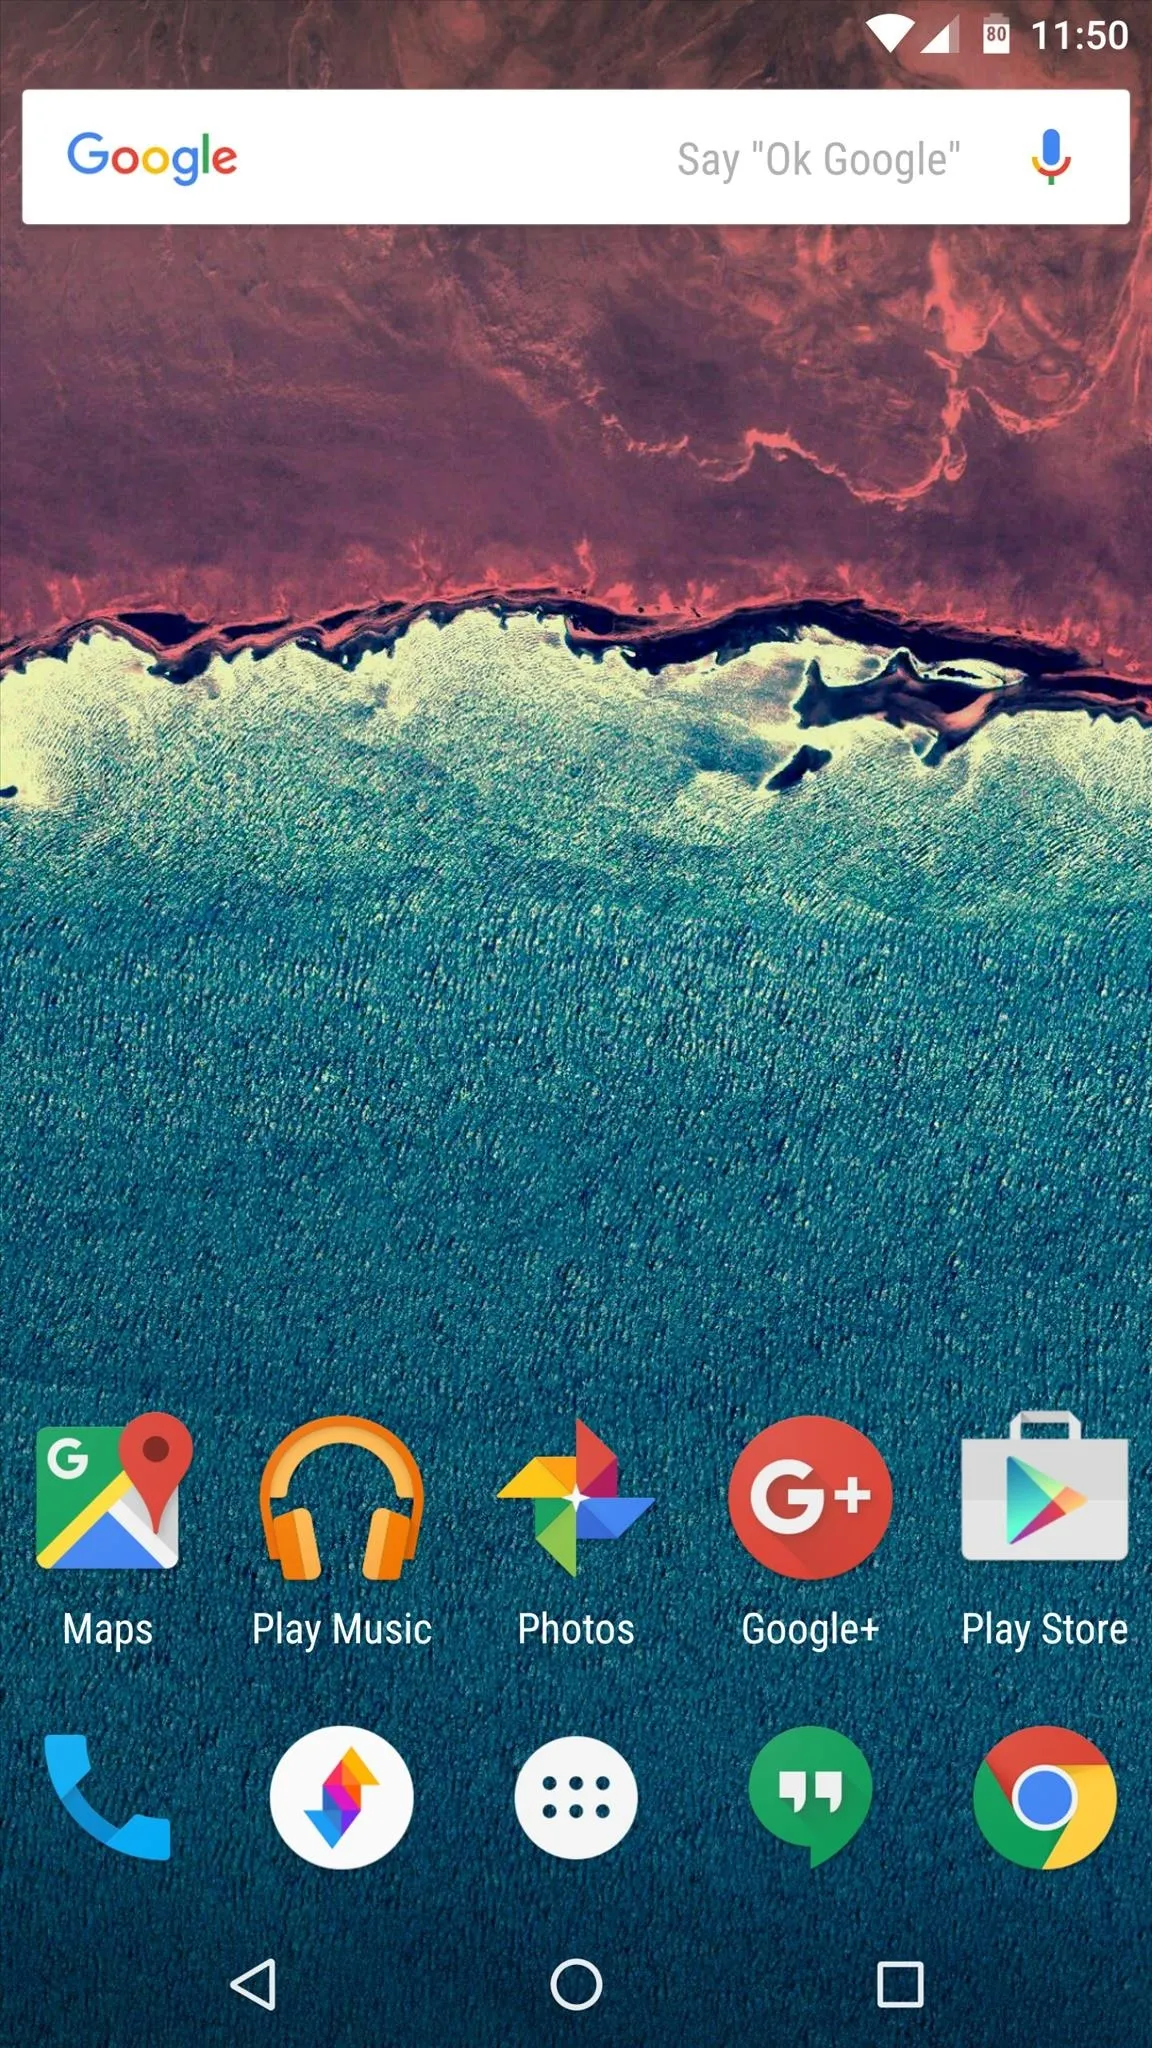
So to get started, head to the Profiles tab in Tasker's main menu, then tap the + button at the bottom of the screen, and select "Application." From here, select any apps that you use to listen to music or stream video, because the way this profile will work is by triggering a task that enables "Do Not Disturb" mode when these apps are open in the foreground.
Associate a Task with This Profile
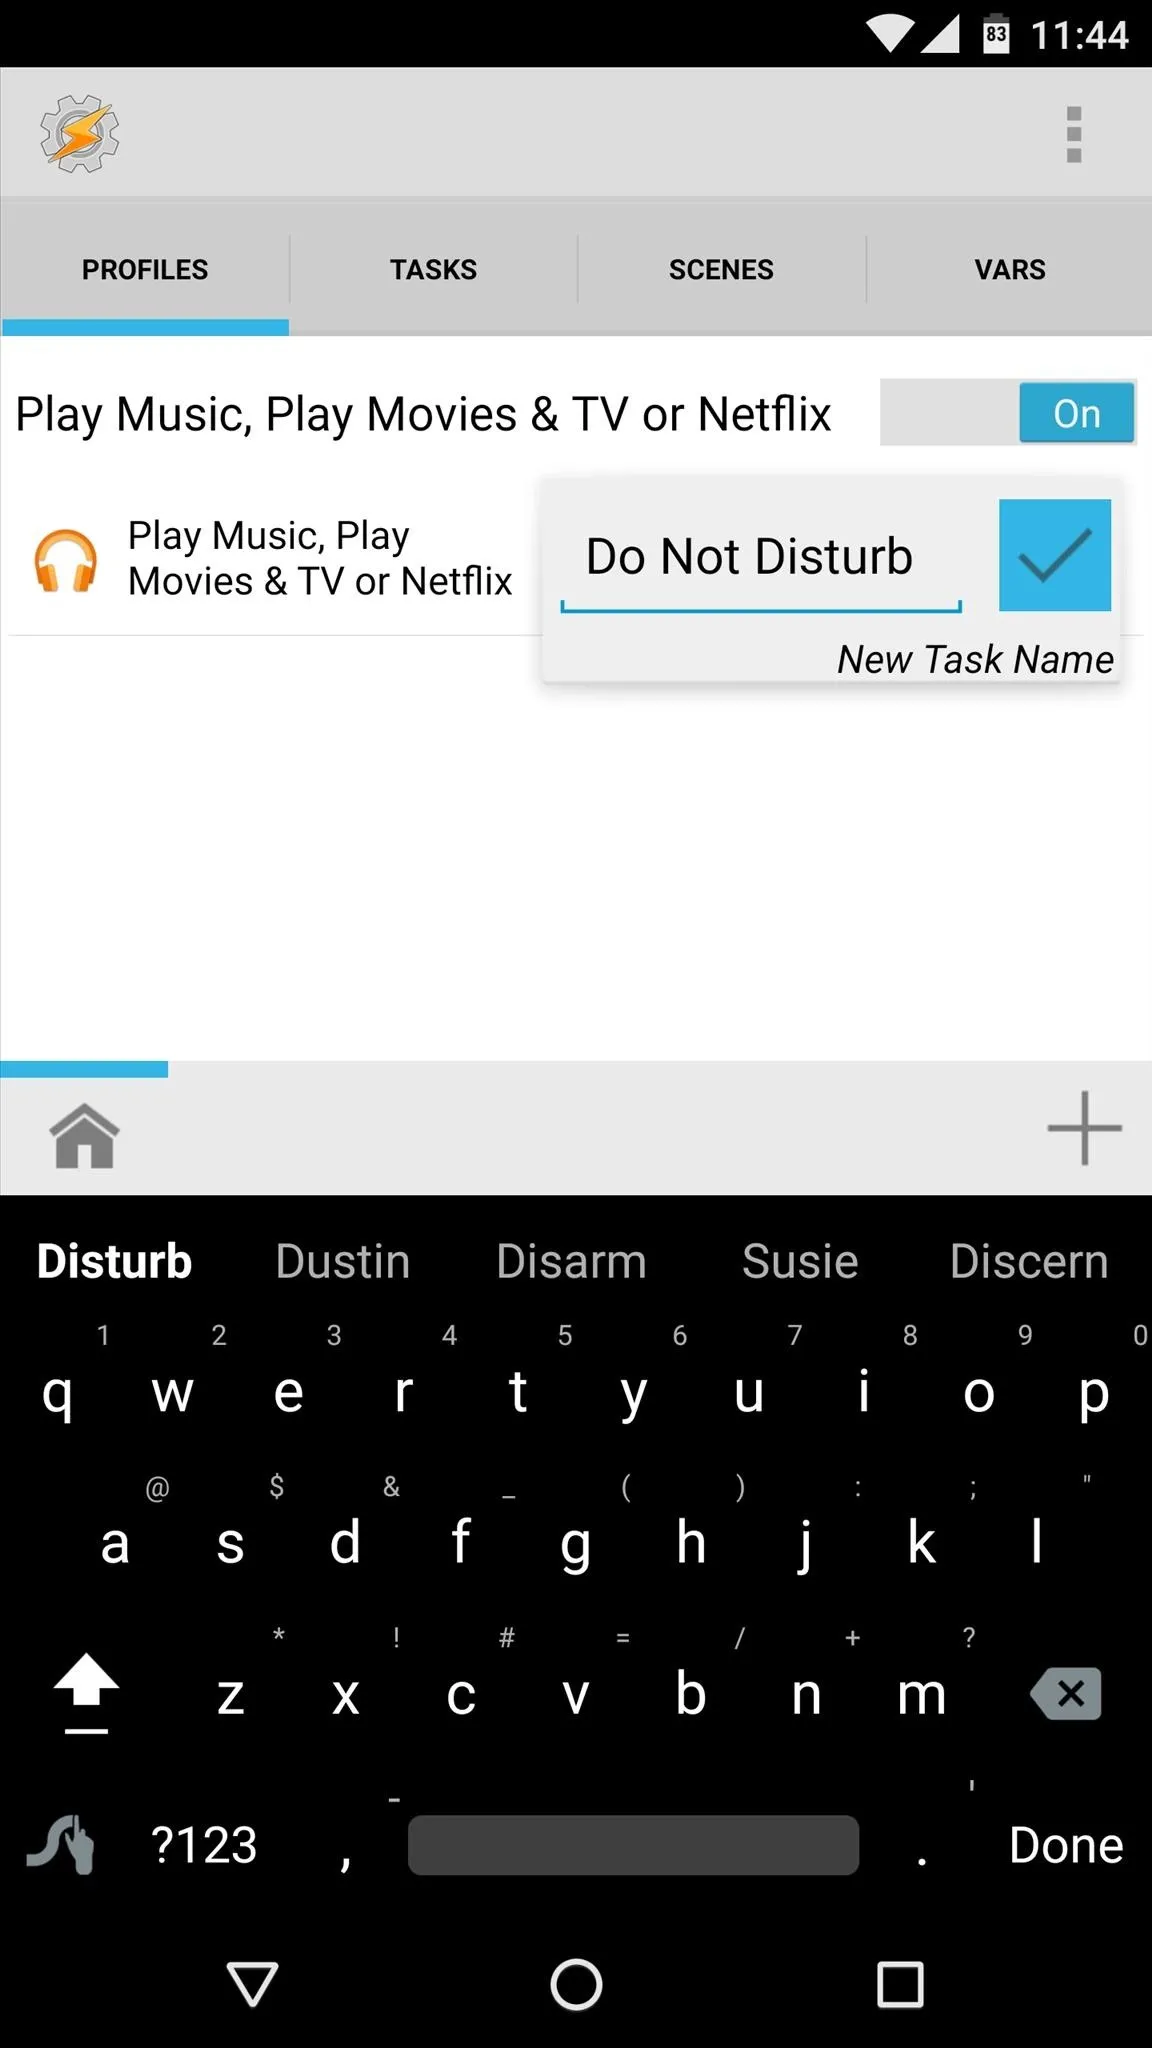
Once you're done selecting apps for your profile, tap your device's back button once. From here, Tasker will prompt you to associate a task with this profile, so choose "New Task," then name it something like "Do Not Disturb" or "DND."
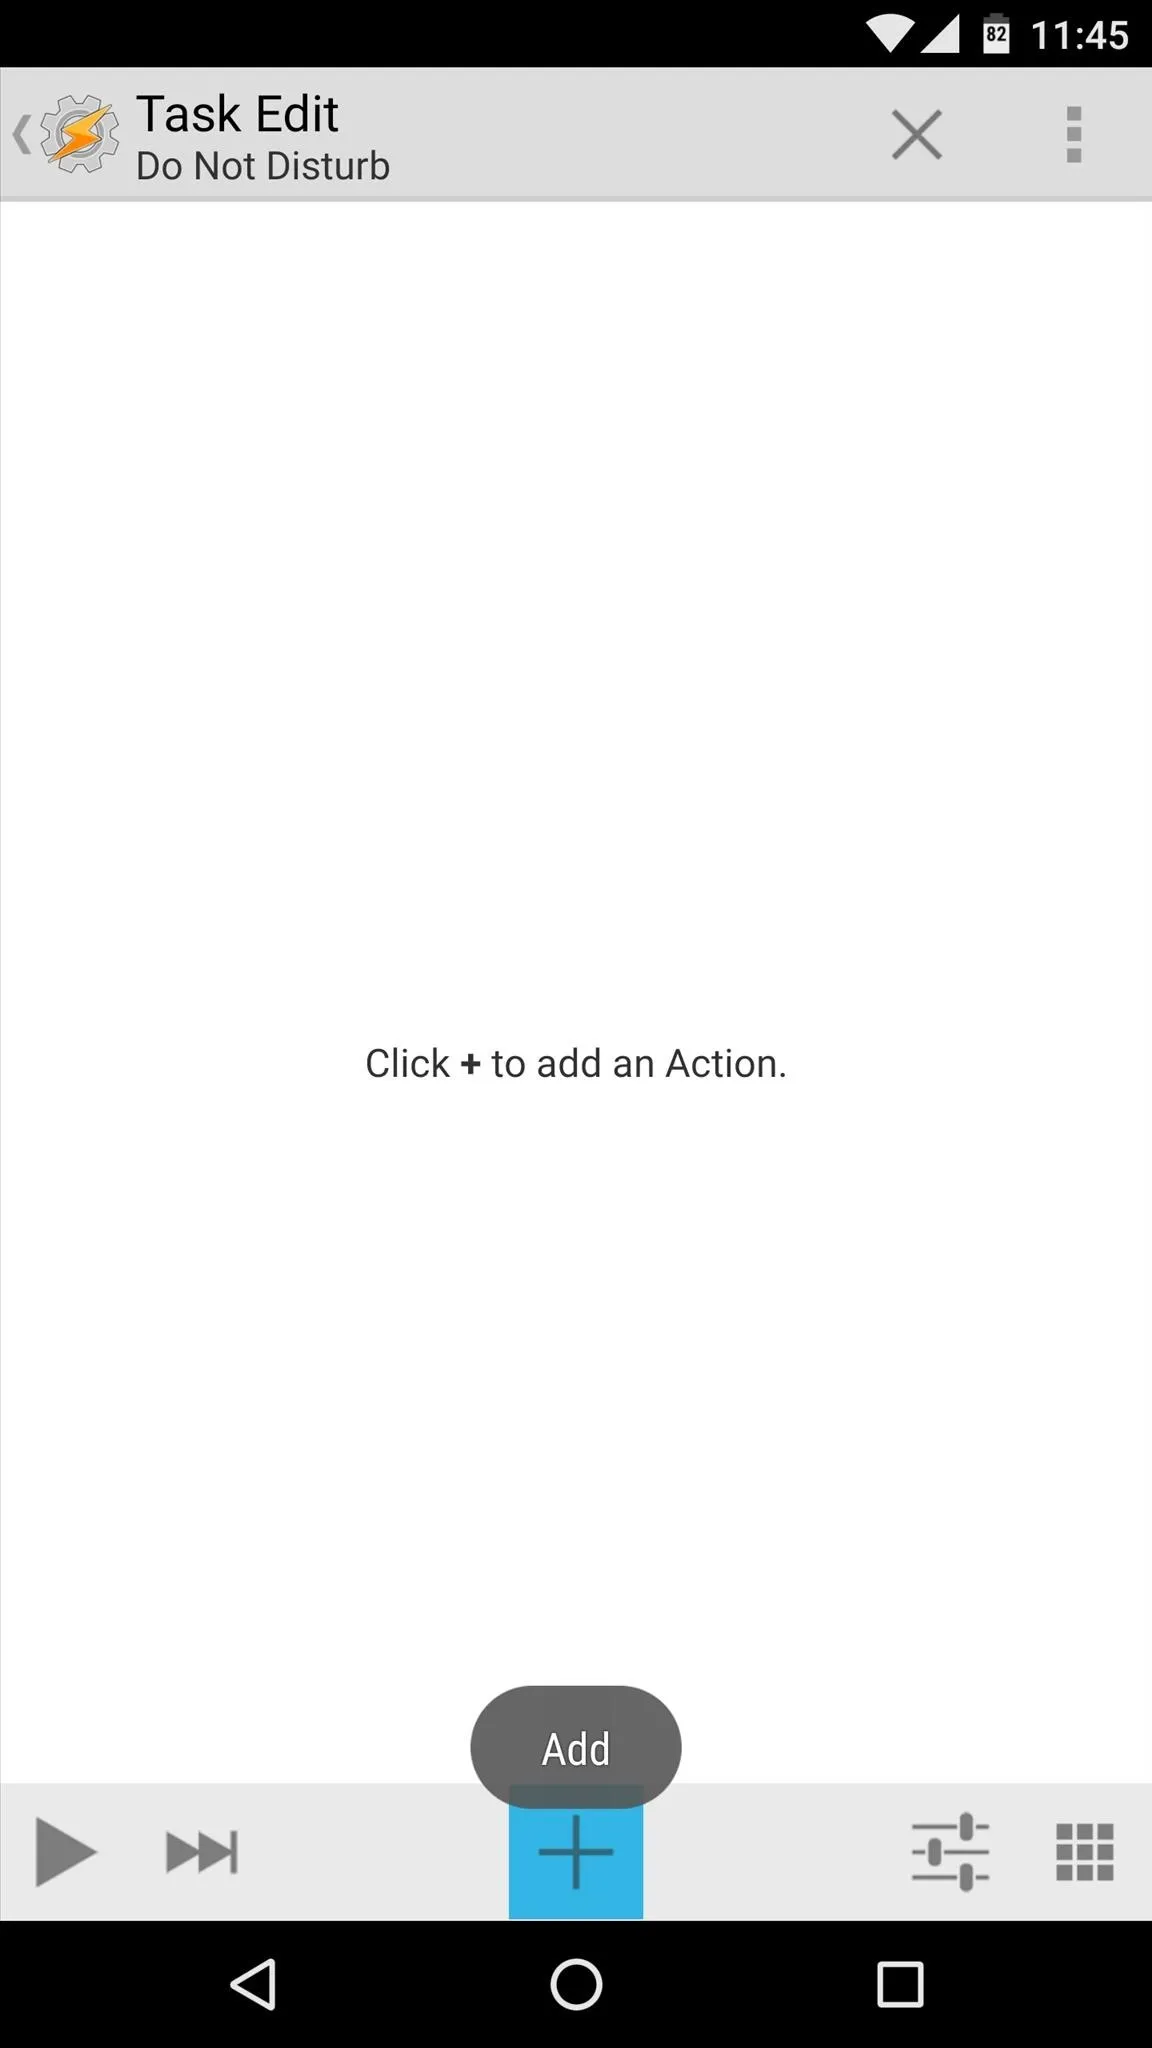
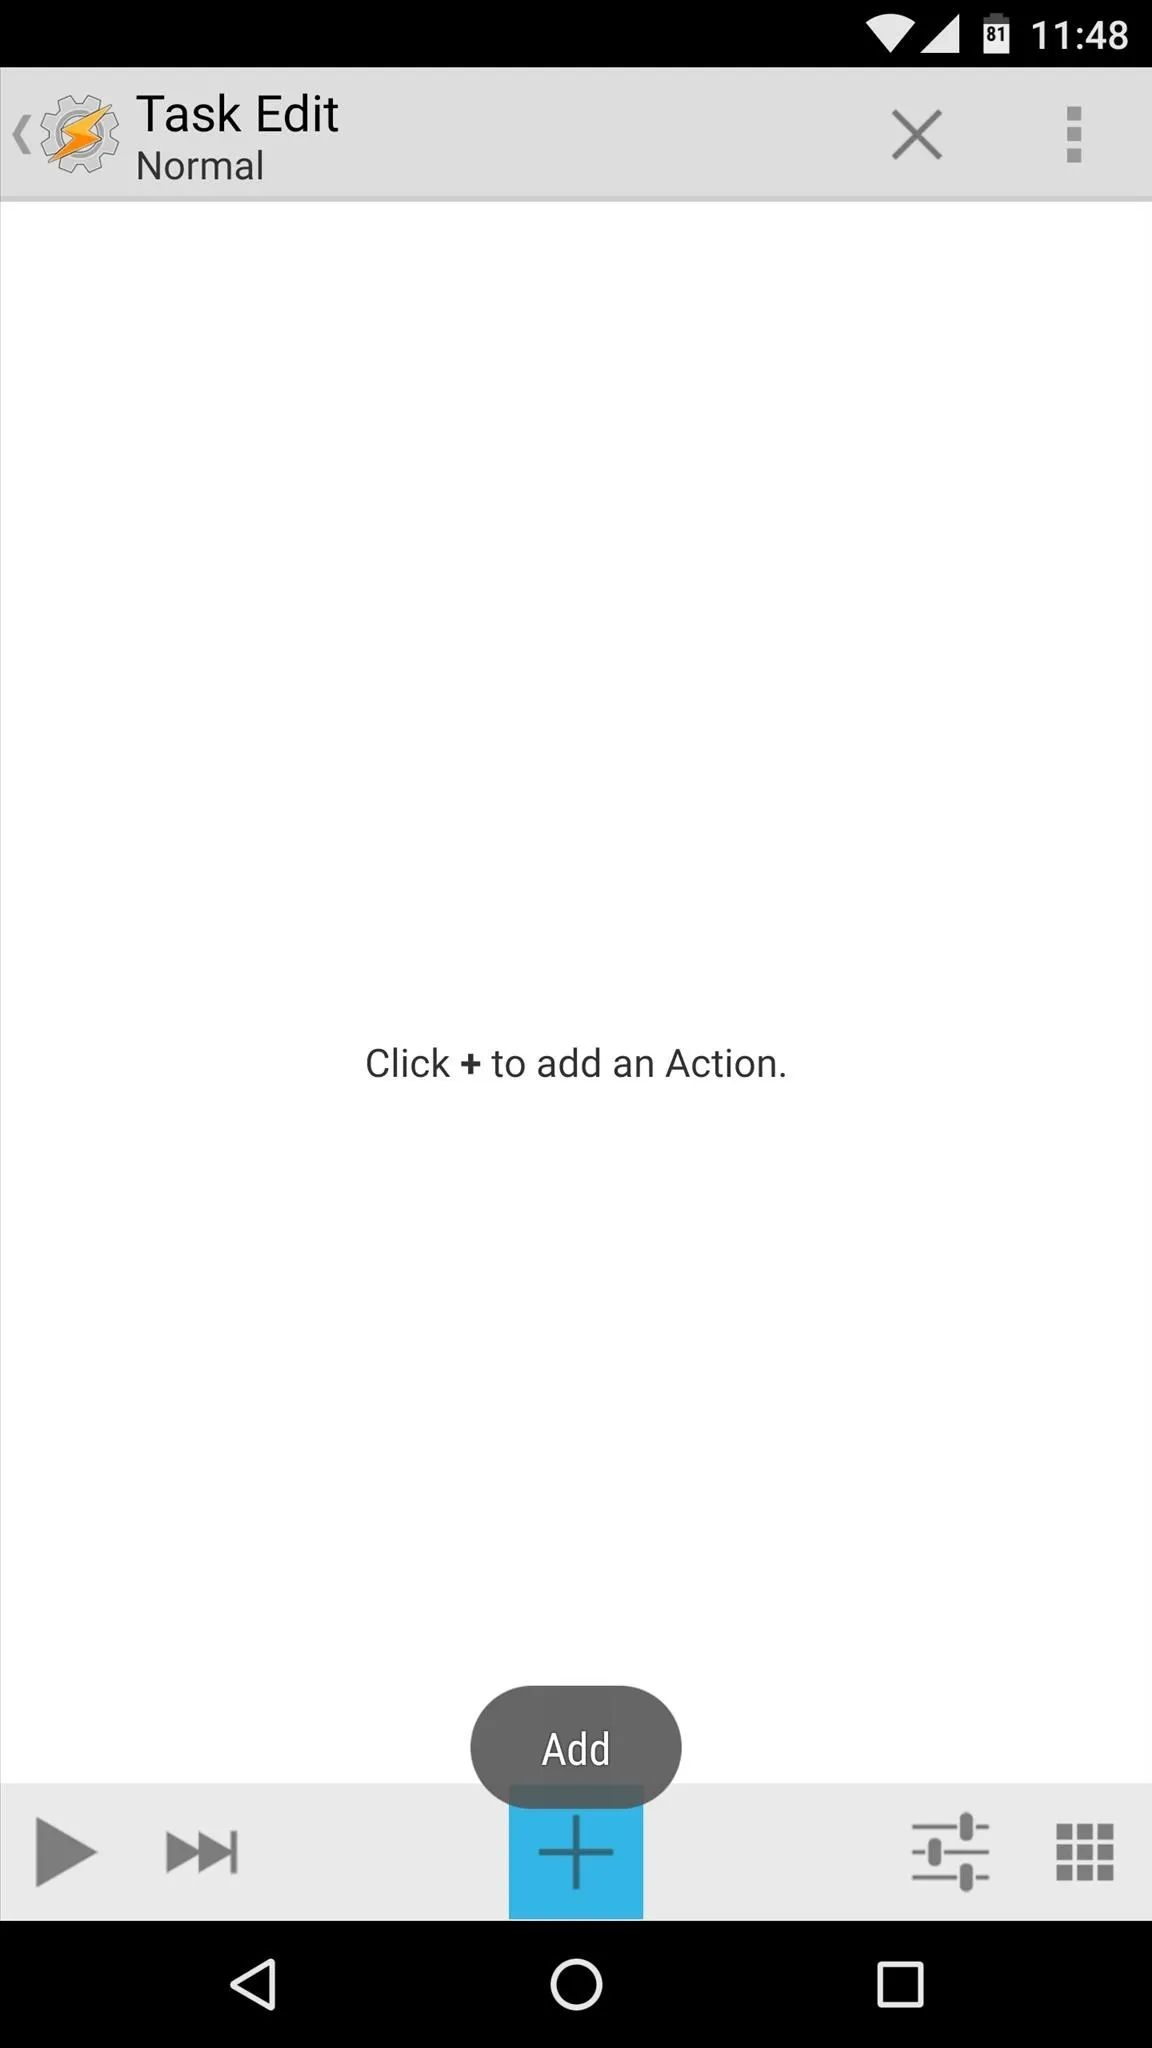
From here, you'll be taken to the Task Edit menu. Tap the + button at the bottom of your screen to add a new action to this task, then on the following menu, select the "Audio" category.
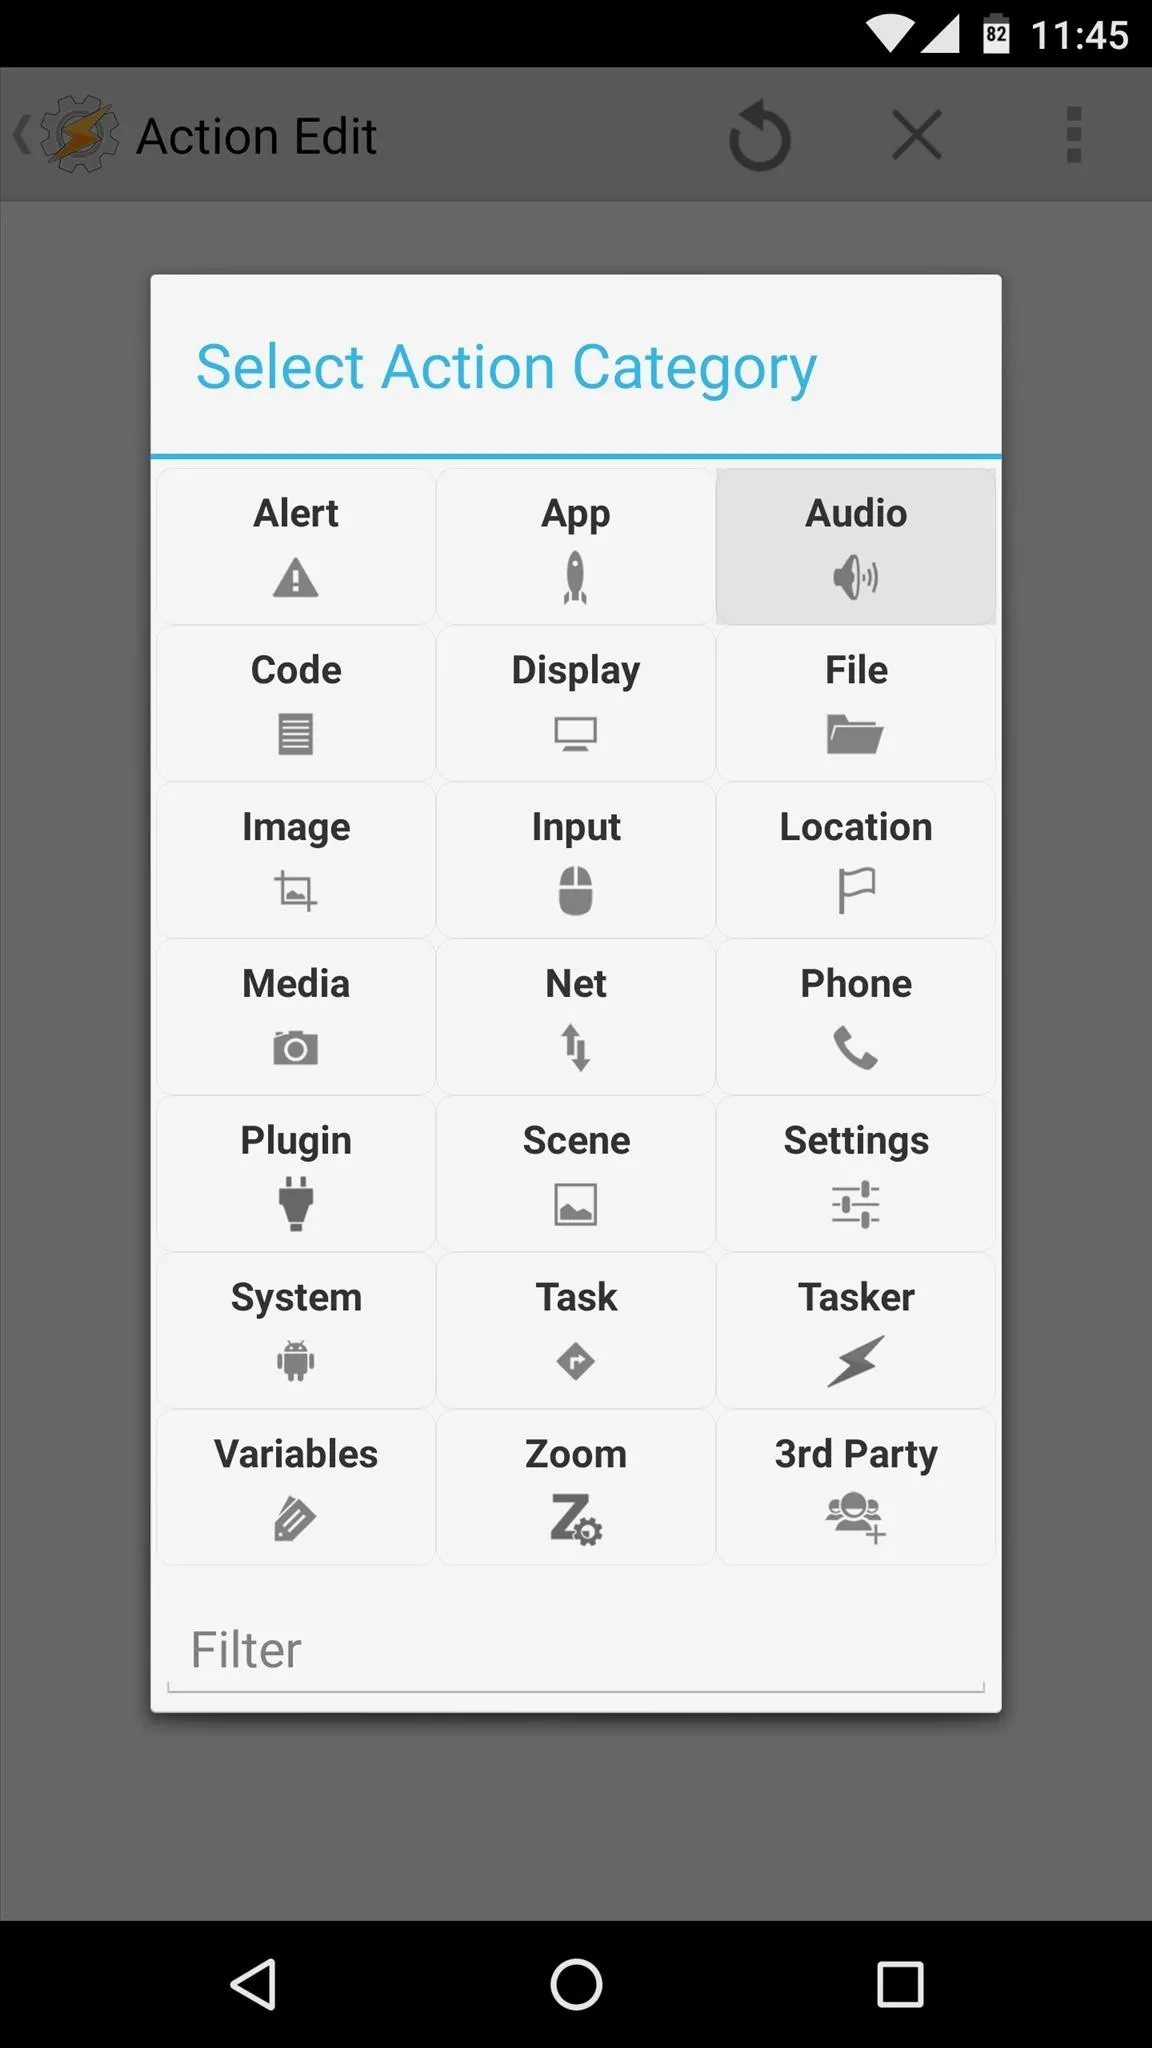
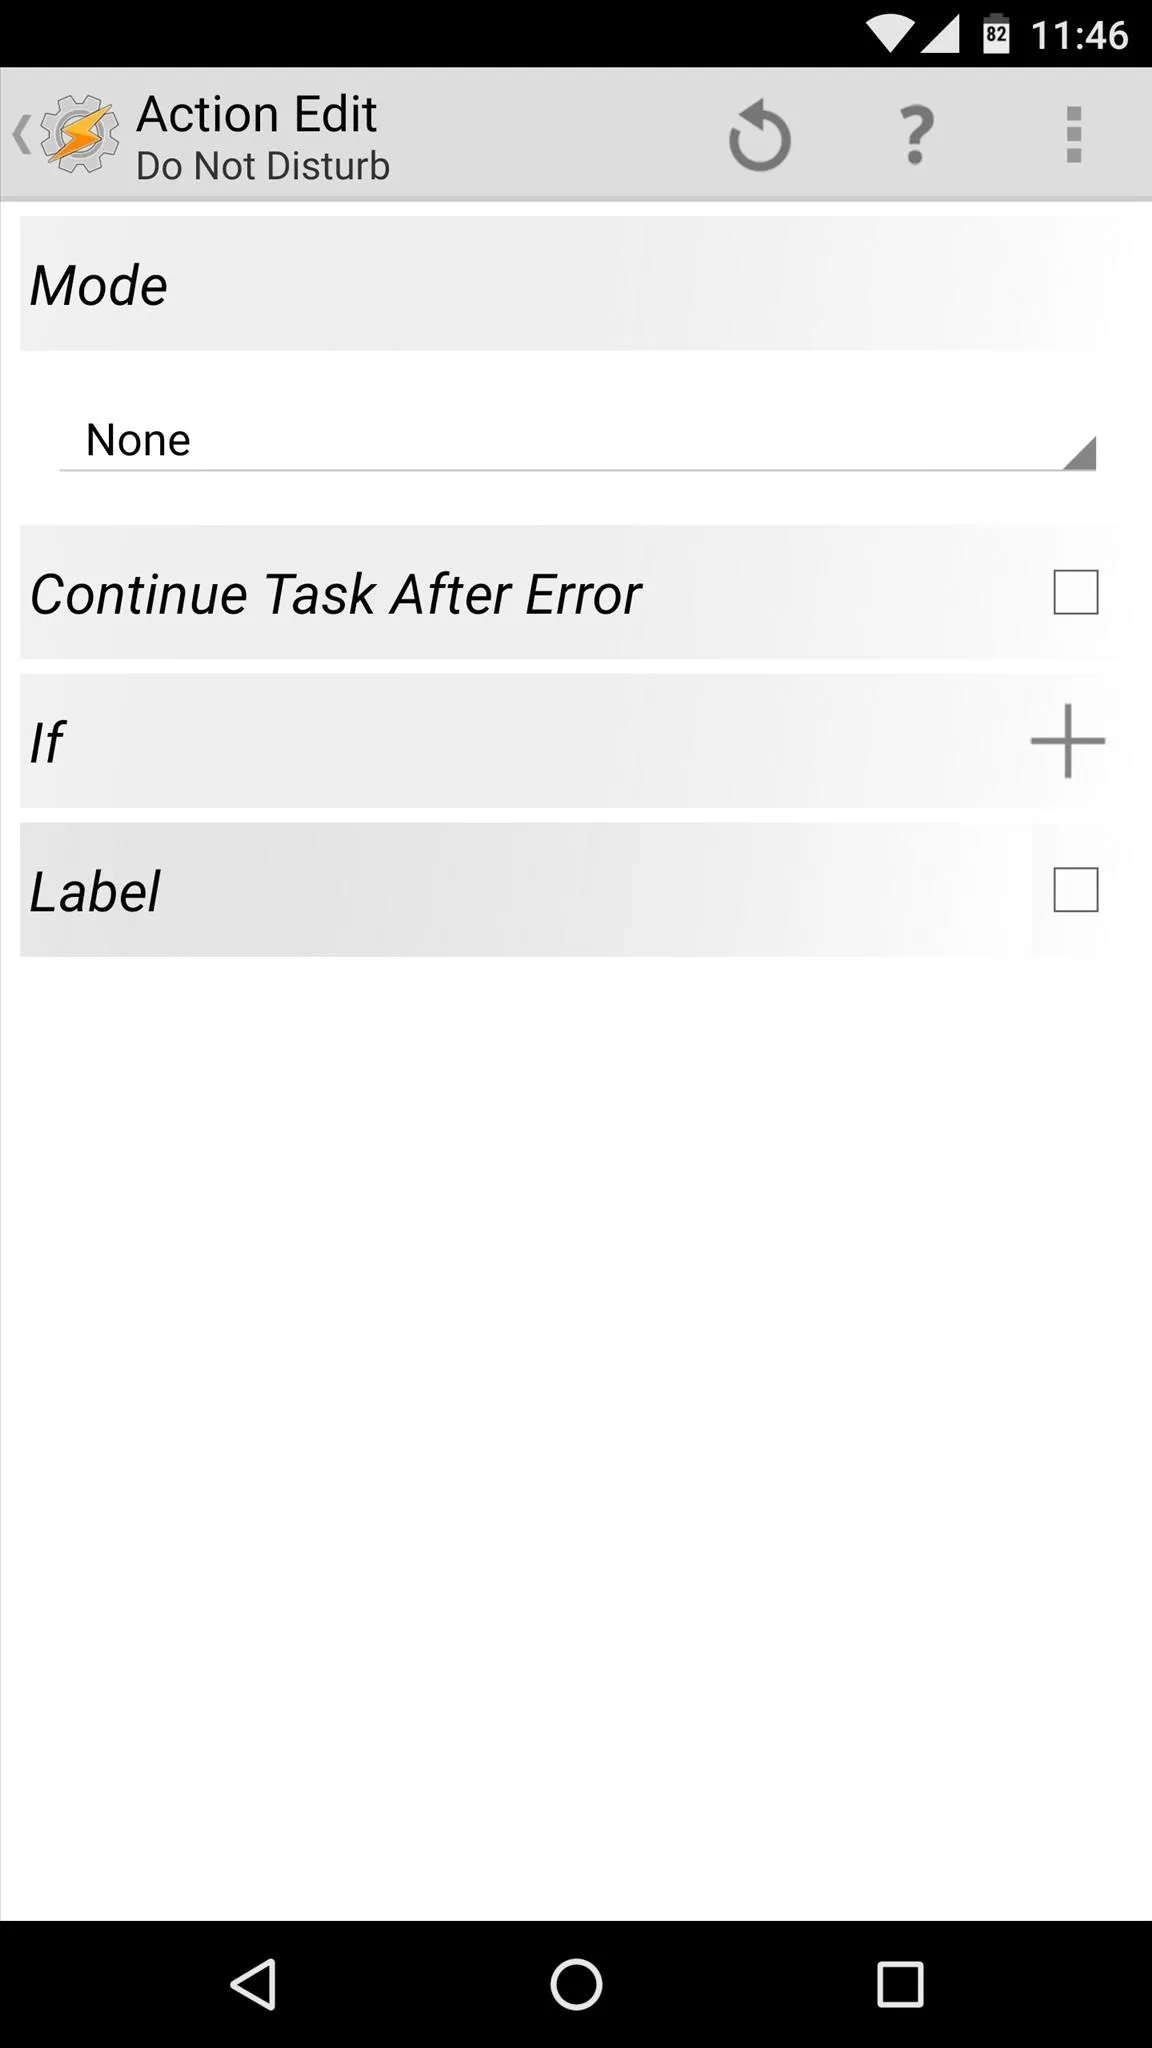
Next, choose "Do Not Disturb" on the subsequent popup, then leave everything selected exactly as it is on the following screen. Note that "Do Not Disturb" might not be available on older Android versions, so if this is the case, you'll have to experiment with the "Notification Volume" action instead.

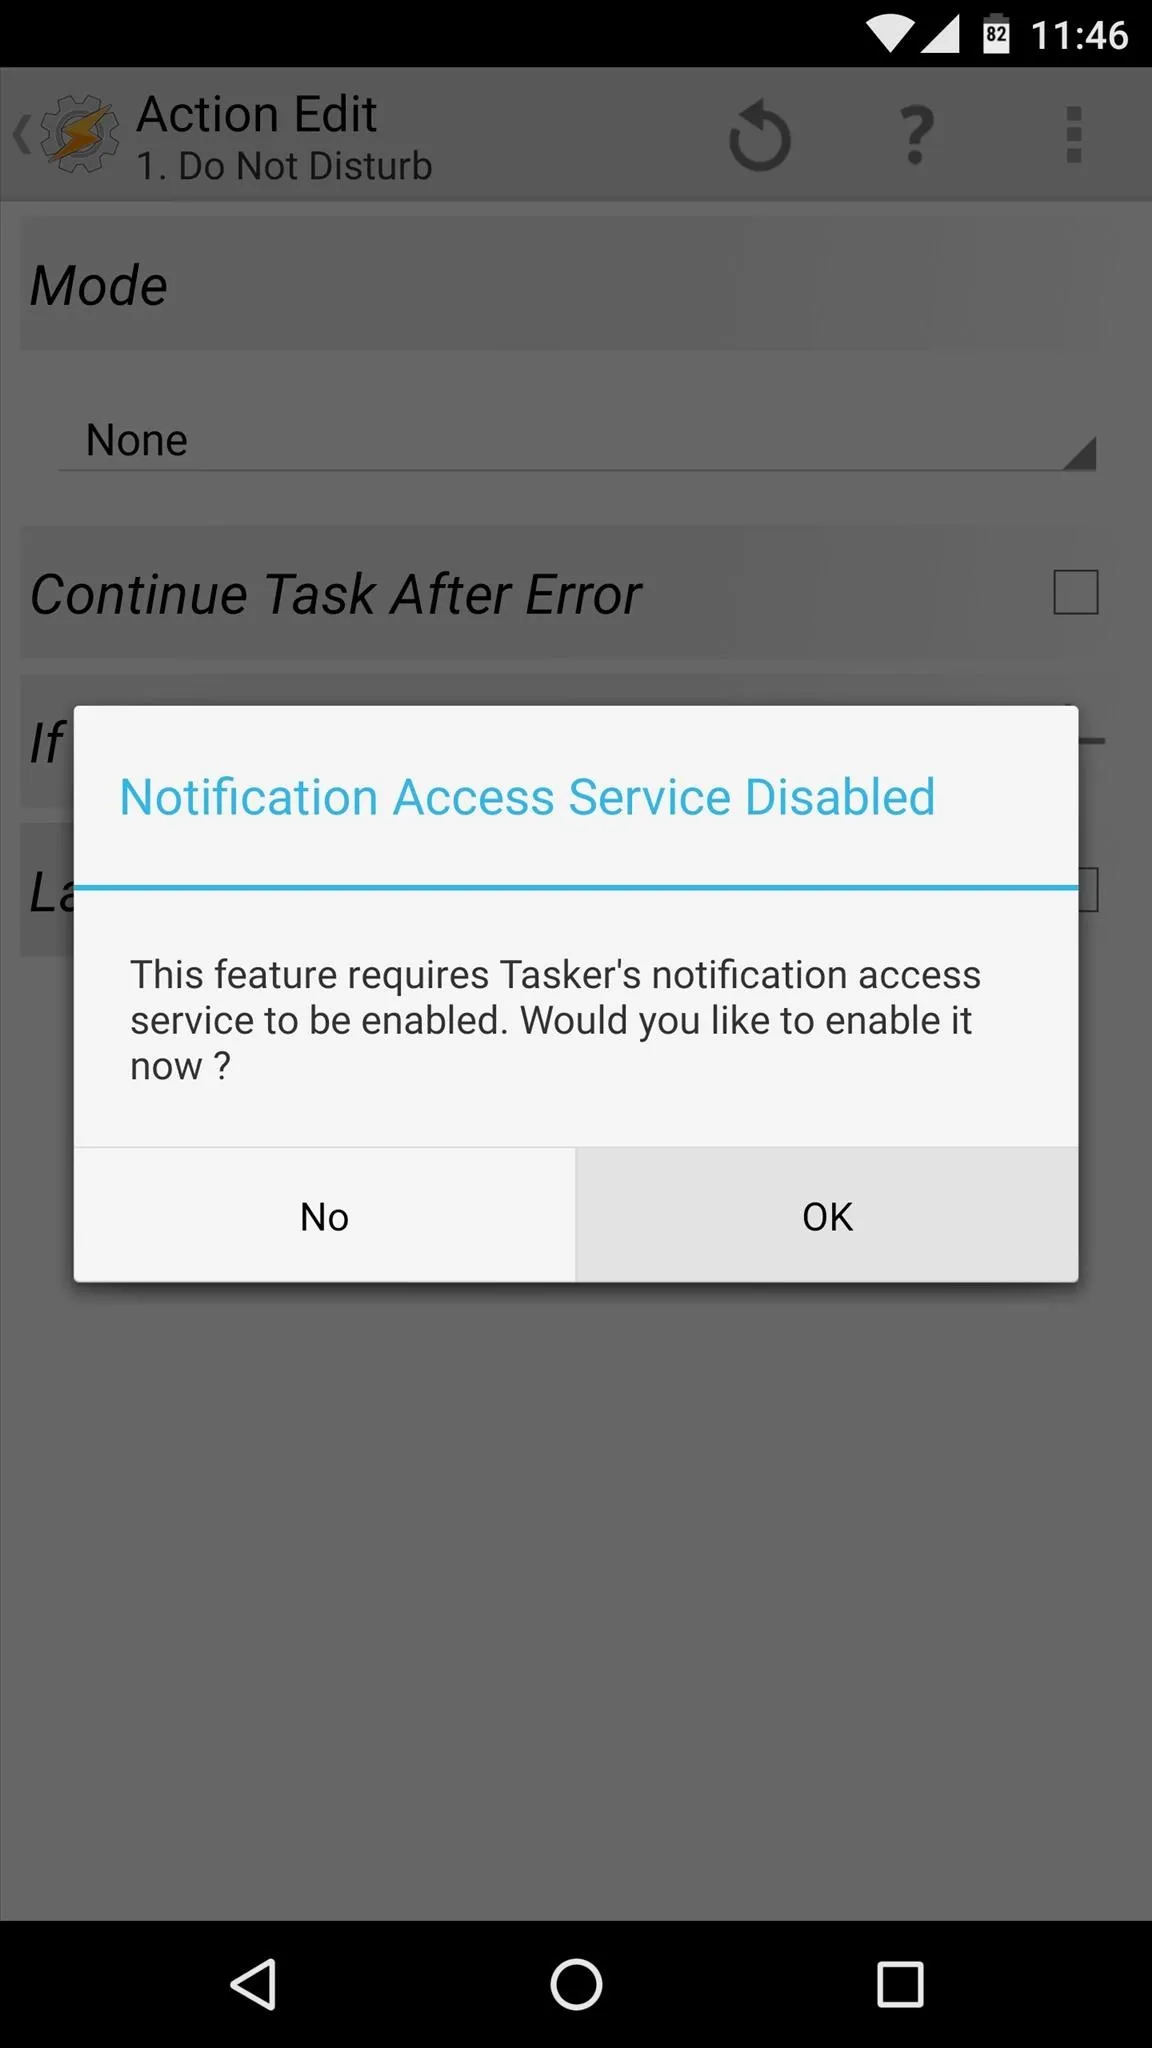
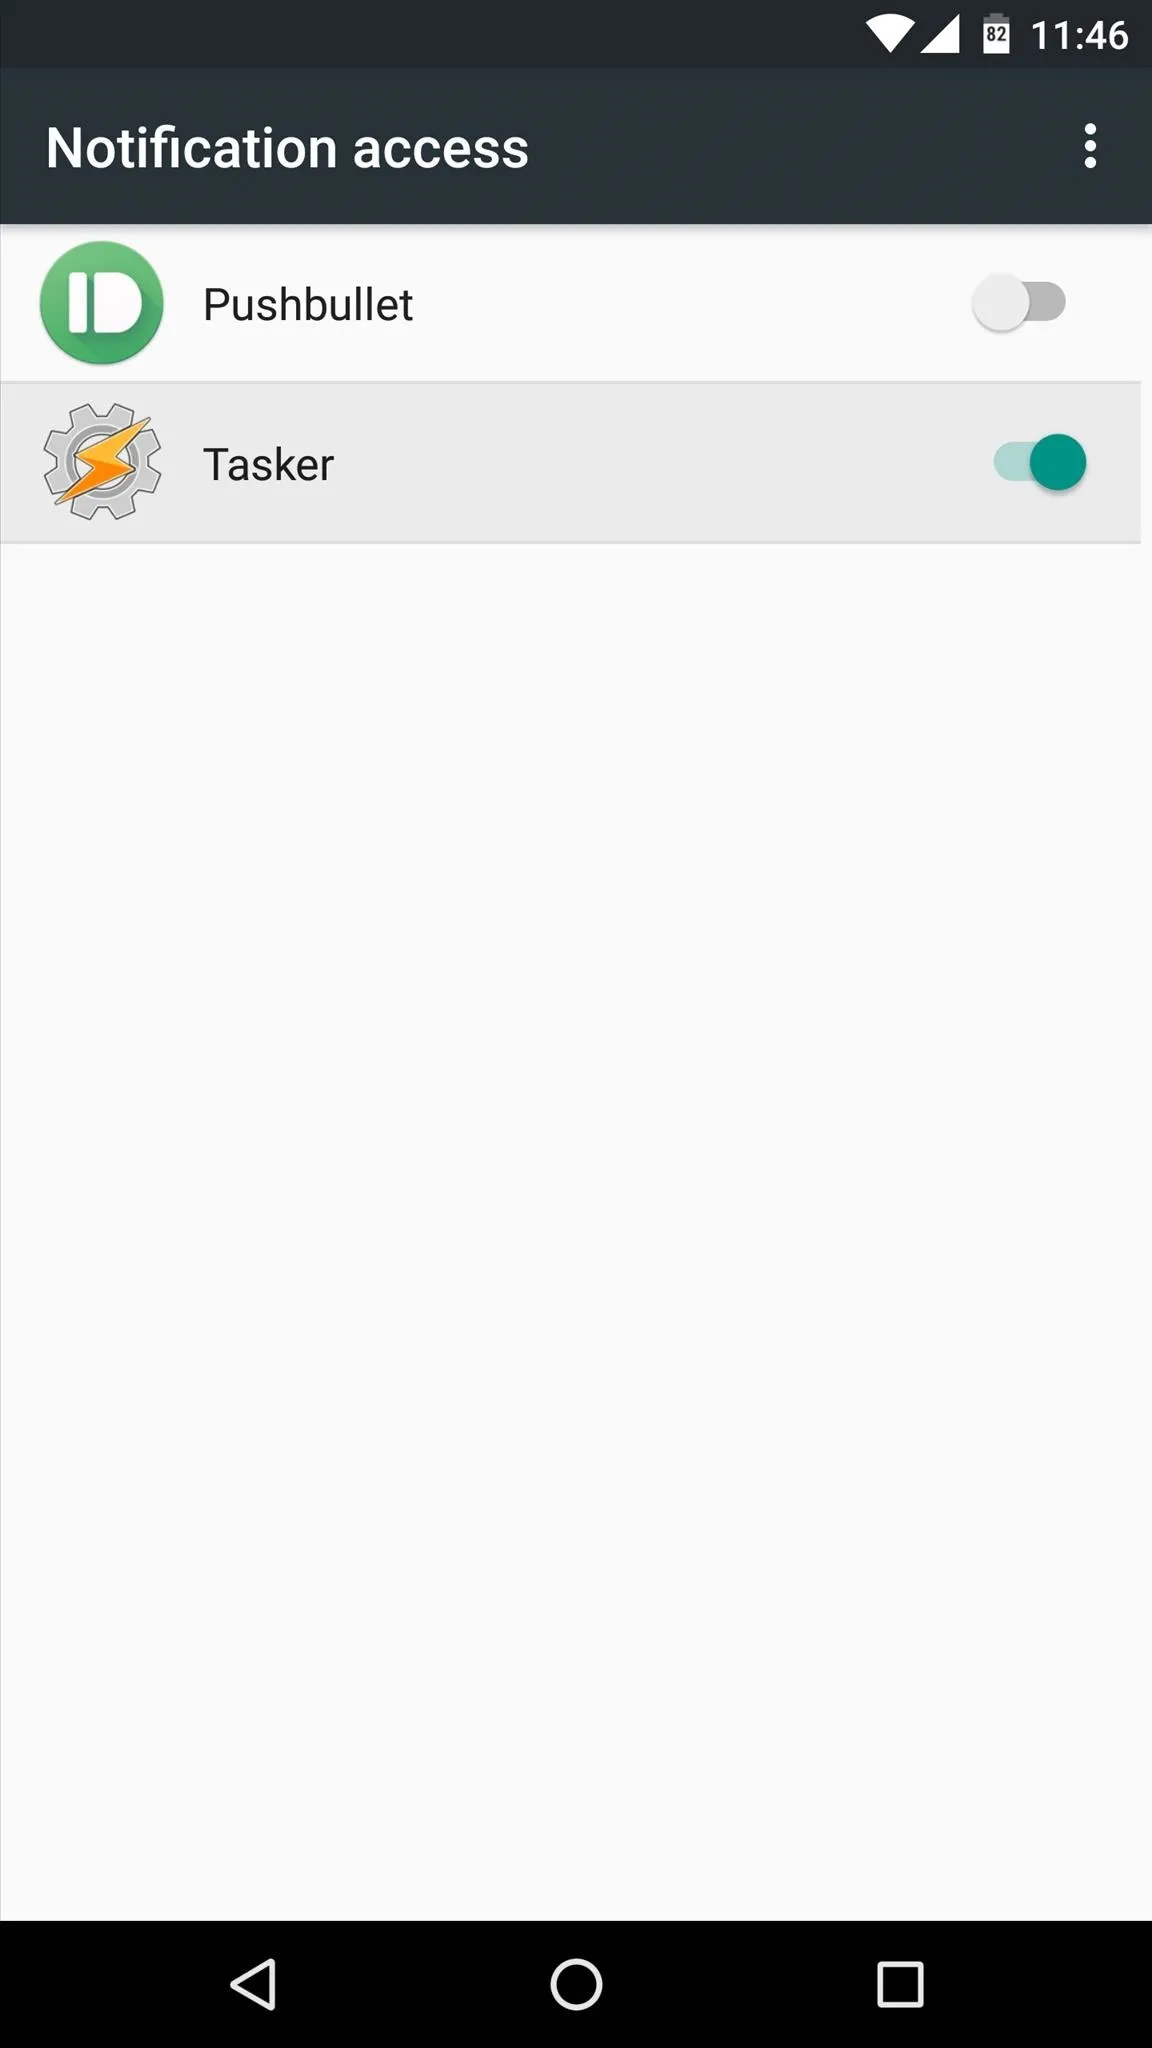
From here, tap your device's back button once, then Tasker will prompt you to enable its notification listener service. So press "OK" on this message, then enable the "Tasker" option on the following screen, and press your device's back button one more time to head out to Tasker's main menu again.
Add an Exit Task to Your Profile
At this point, the basics of your automated Do Not Disturb mode profile are already taken care of. If you examine the profile from Tasker's main menu, you'll see that it becomes active when you're using the music or video apps you chose, at which point your task will kick in and cause Do Not Disturb mode to be enabled. But the only problem is that, as things stand, your device will stay in Do Not Disturb mode after you exit these apps.
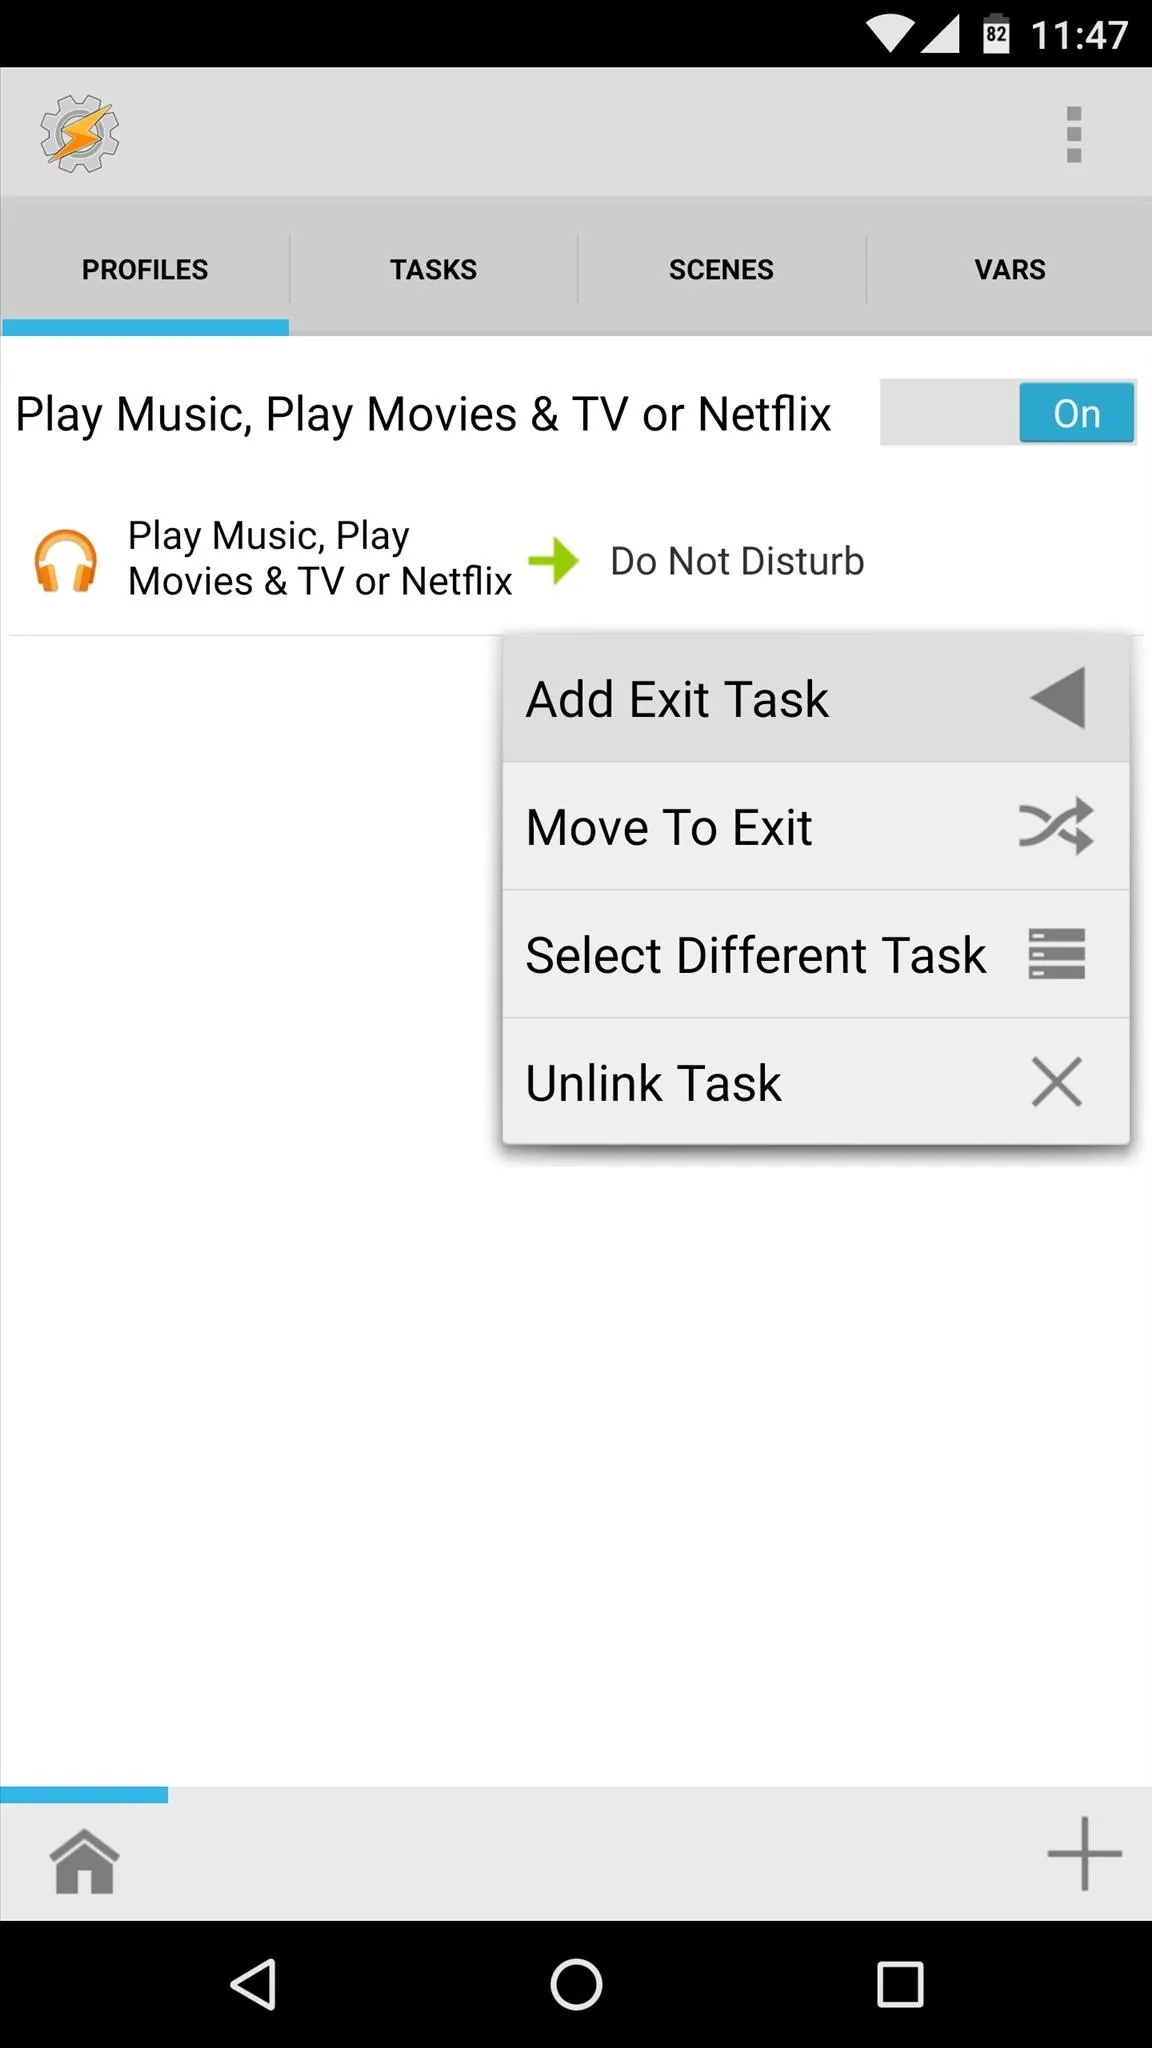
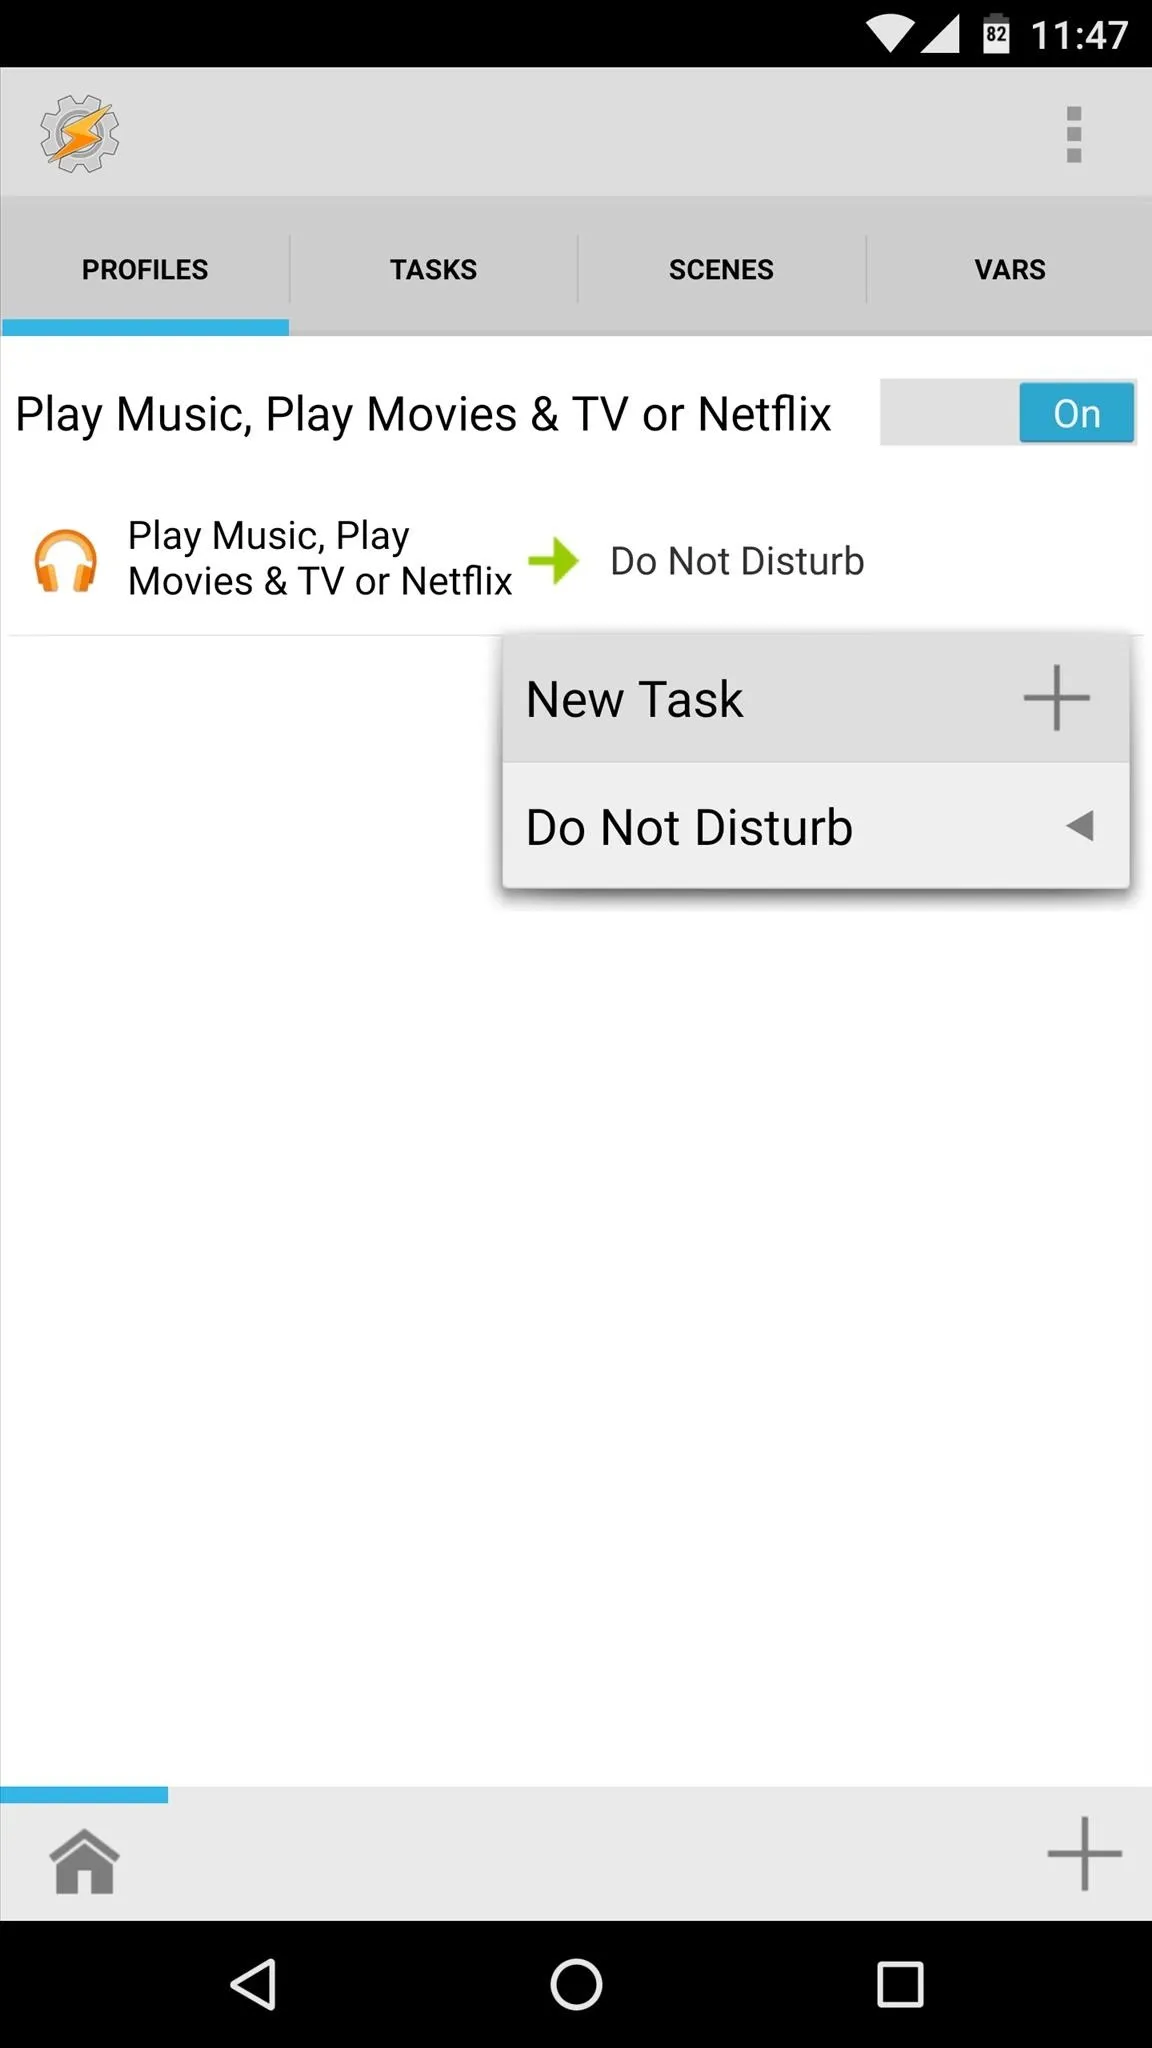
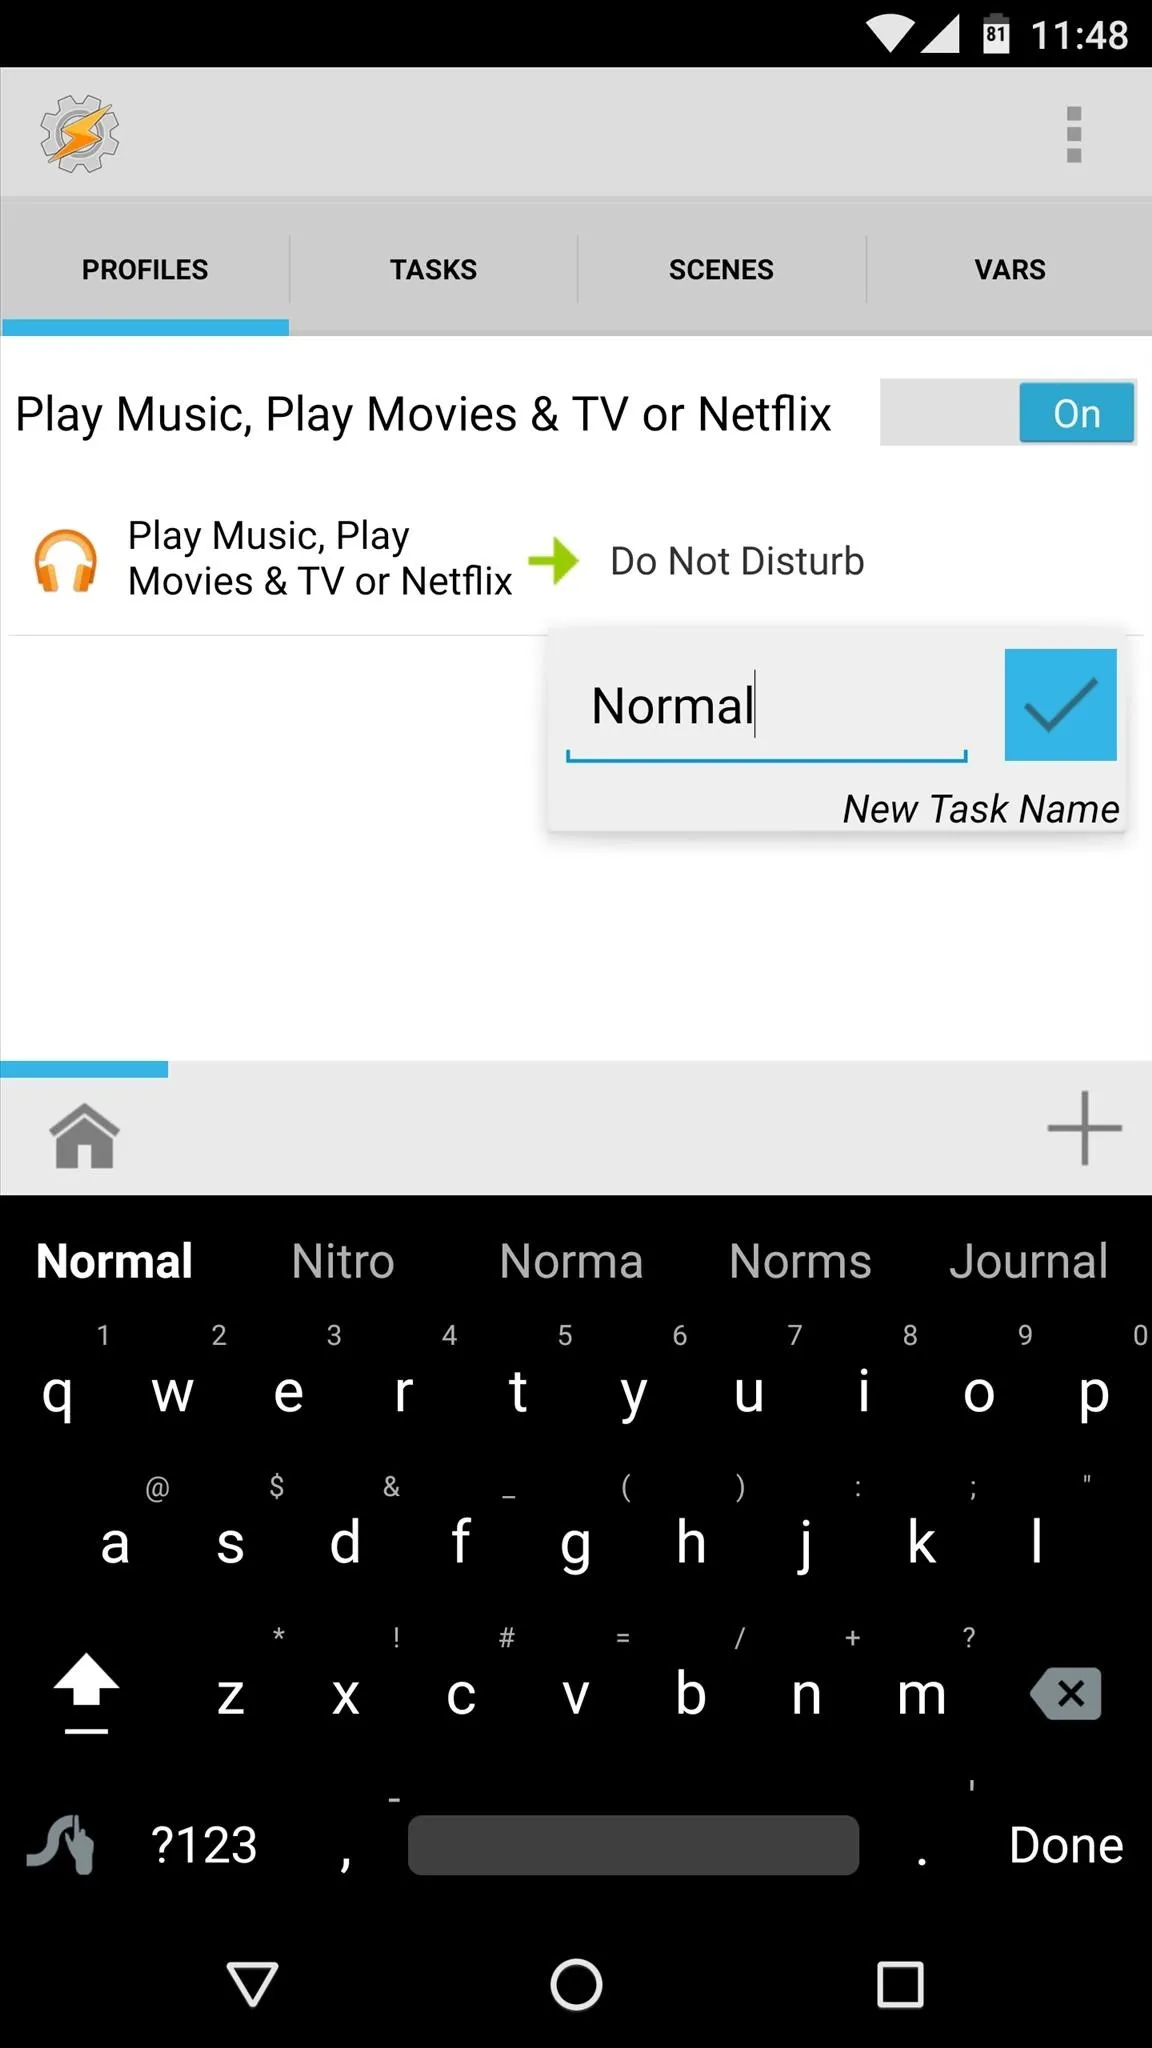
So to make sure you still receive notifications when you're not listening to music or streaming video, you'll have to add an exit task to this profile. To do that, long-press the task portion of your profile and choose "Add Exit Task." From here, choose "New Task" again, then name it something like "Normal" or "DND Off."
Next, you'll be taken to the Task Edit menu again. From here, tap the + button at the bottom of your screen to add an action to this task, then select the "Audio" category on the popup.

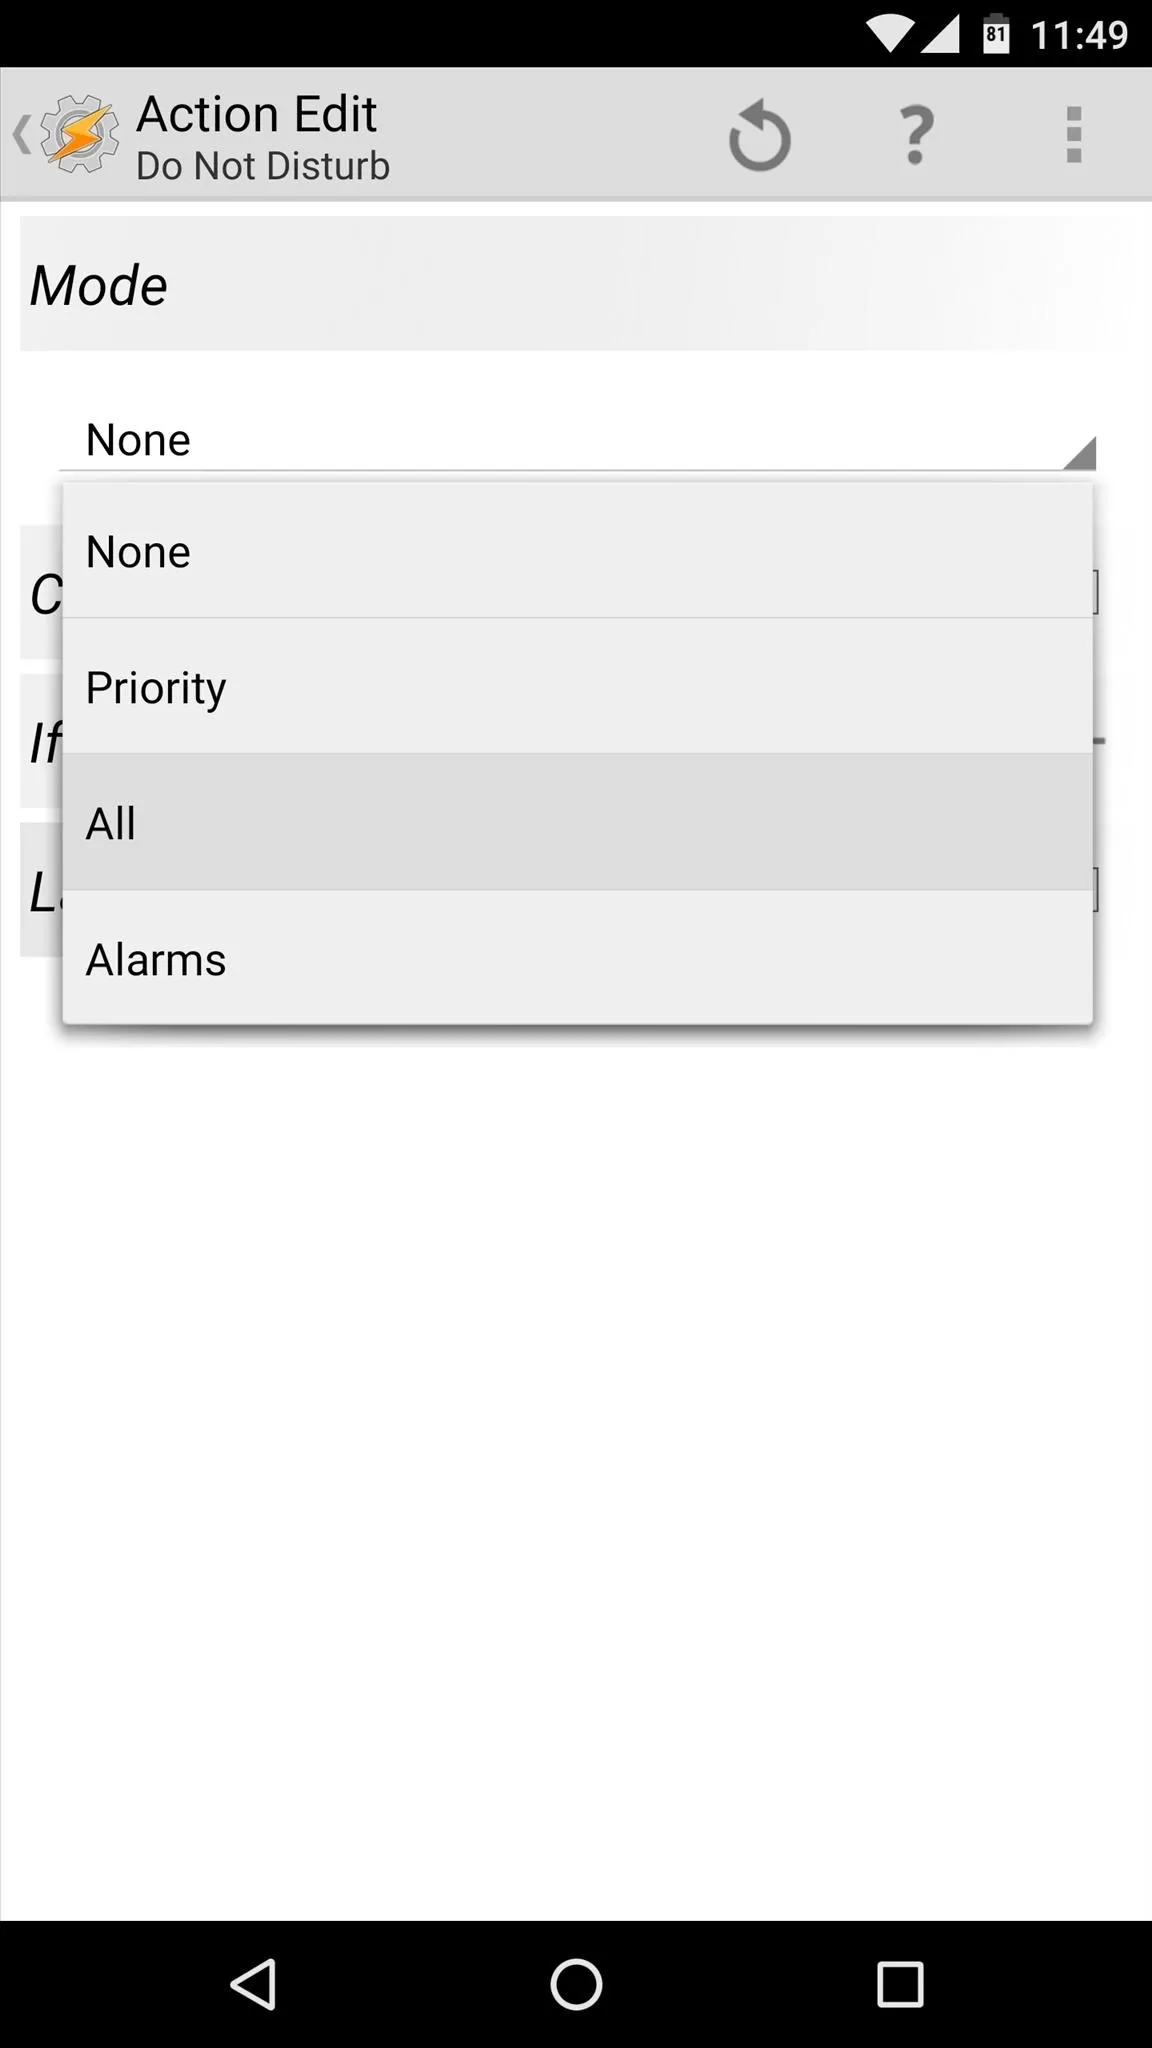
From the next menu, choose "Do Not Disturb" again, but this time you'll have to make a minor change on the Action Edit screen. So tap the drop-down menu, then select "All," which will return your device to regular notification mode.

Next, tap your device's back button twice to head out to Tasker's main menu and make your profile become active. From here, if you take a closer look, you'll see how things will work going forward.
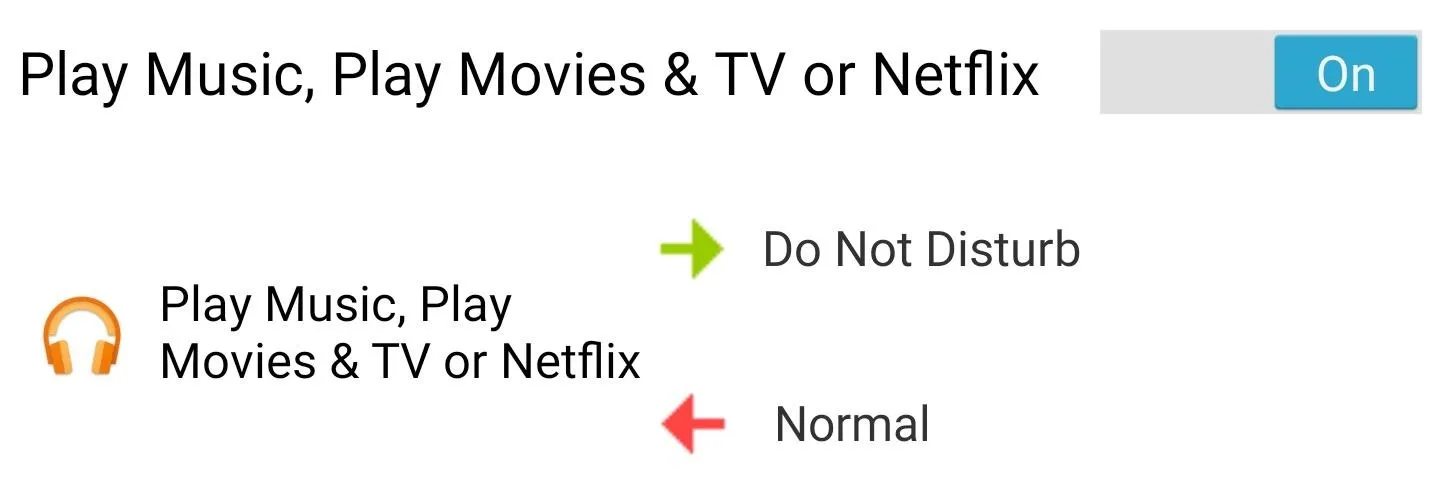
The profile you created will only become active when the music or video apps you selected are active in the foreground. When that happens (when you're listening to music or streaming video, basically), your task will kick in and cause your device to enter Do Not Disturb mode. When you leave one of these apps, however, your exit task will kick in and restore your ringer to its normal state.
Enjoy Music & Videos Without Interruptions
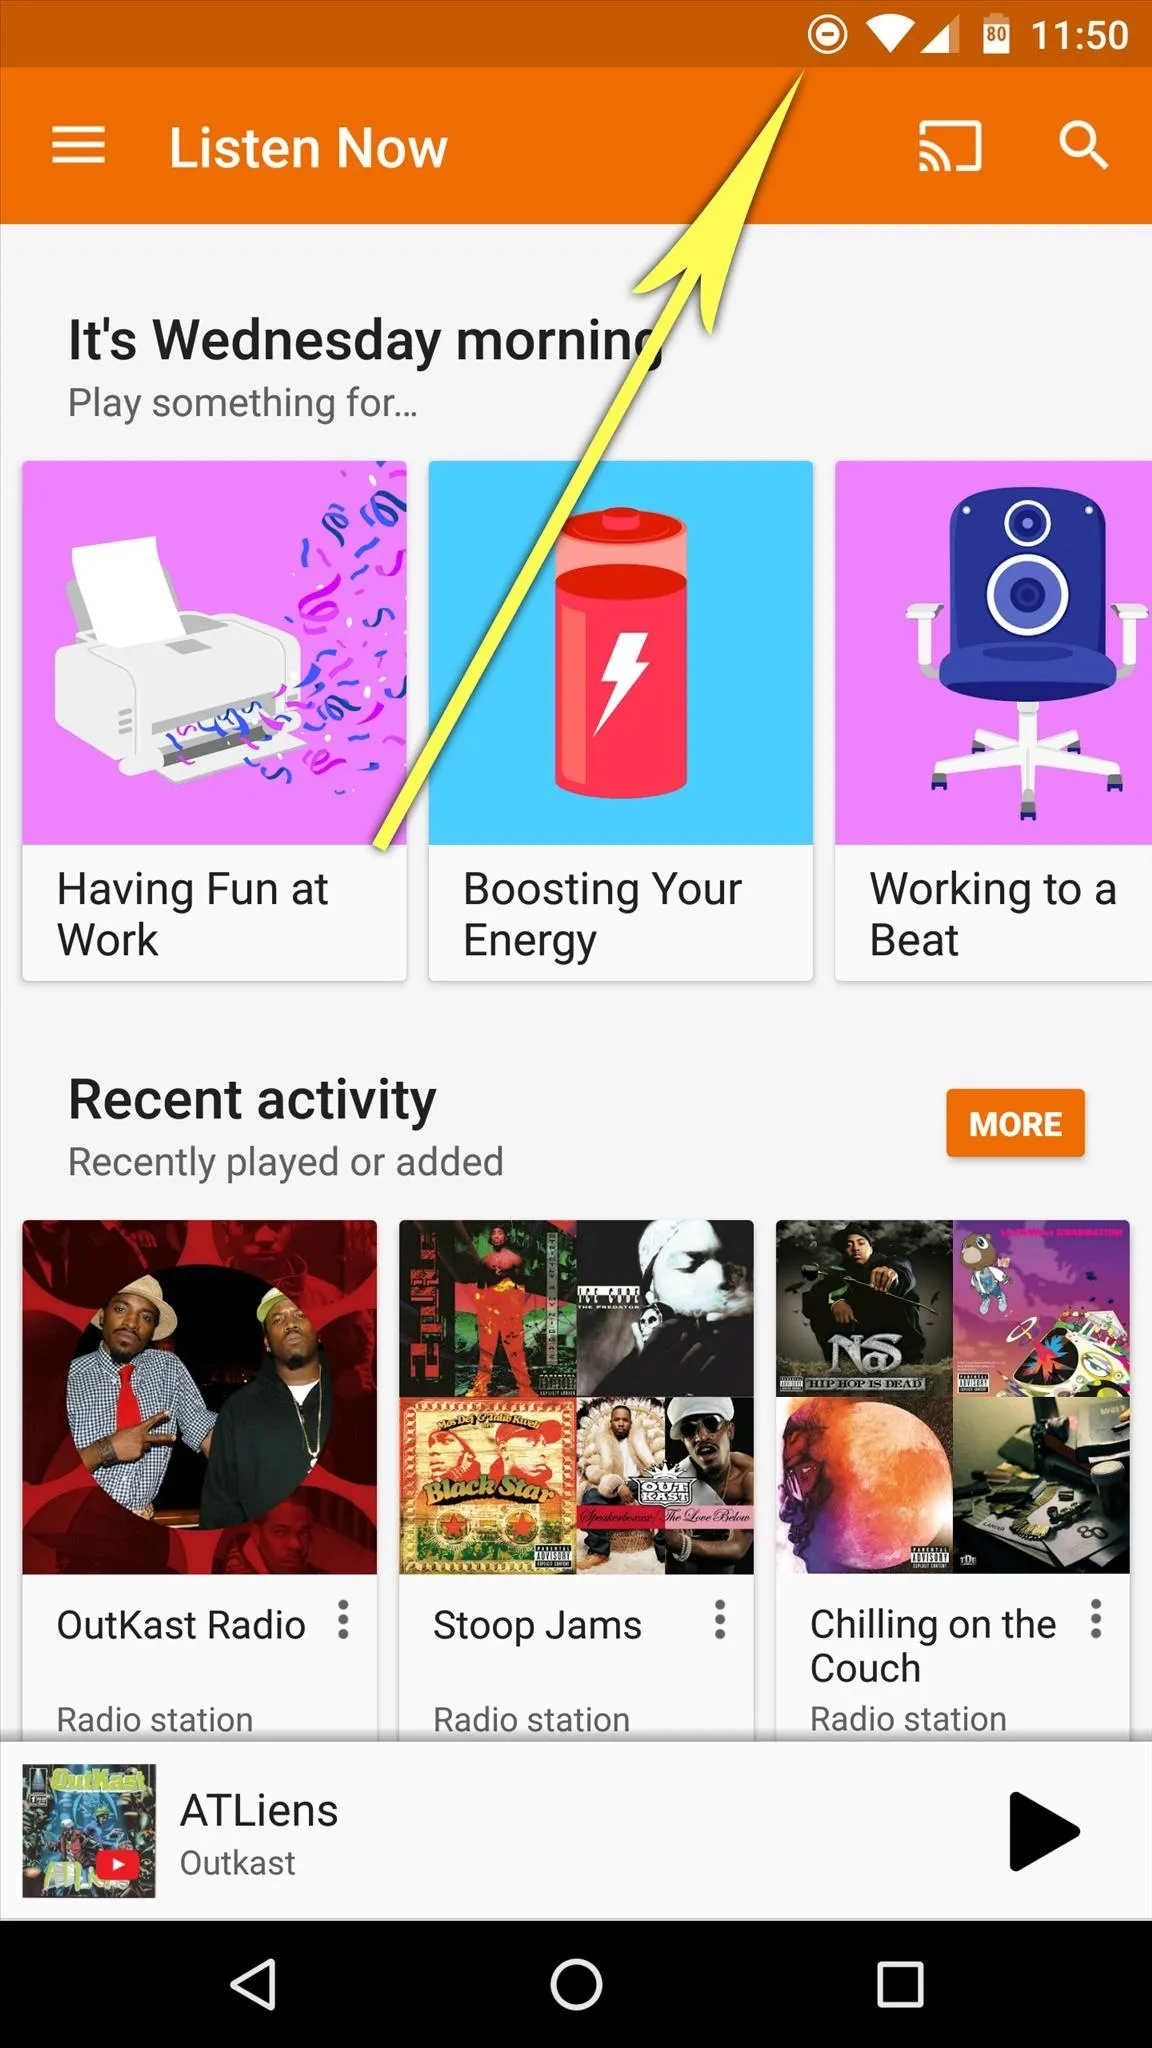
So with everything set up, you'll be able to enjoy music or videos without interruptions from now on. When you open one of the apps you selected in Step 3, you'll see the Do Not Disturb icon in your status bar, which means notifications won't interrupt your jam session. When you leave the app, however, that Do Not Disturb icon will disappear automatically, and you'll continue to receive notifications like normal.


Comments
Be the first, drop a comment!