


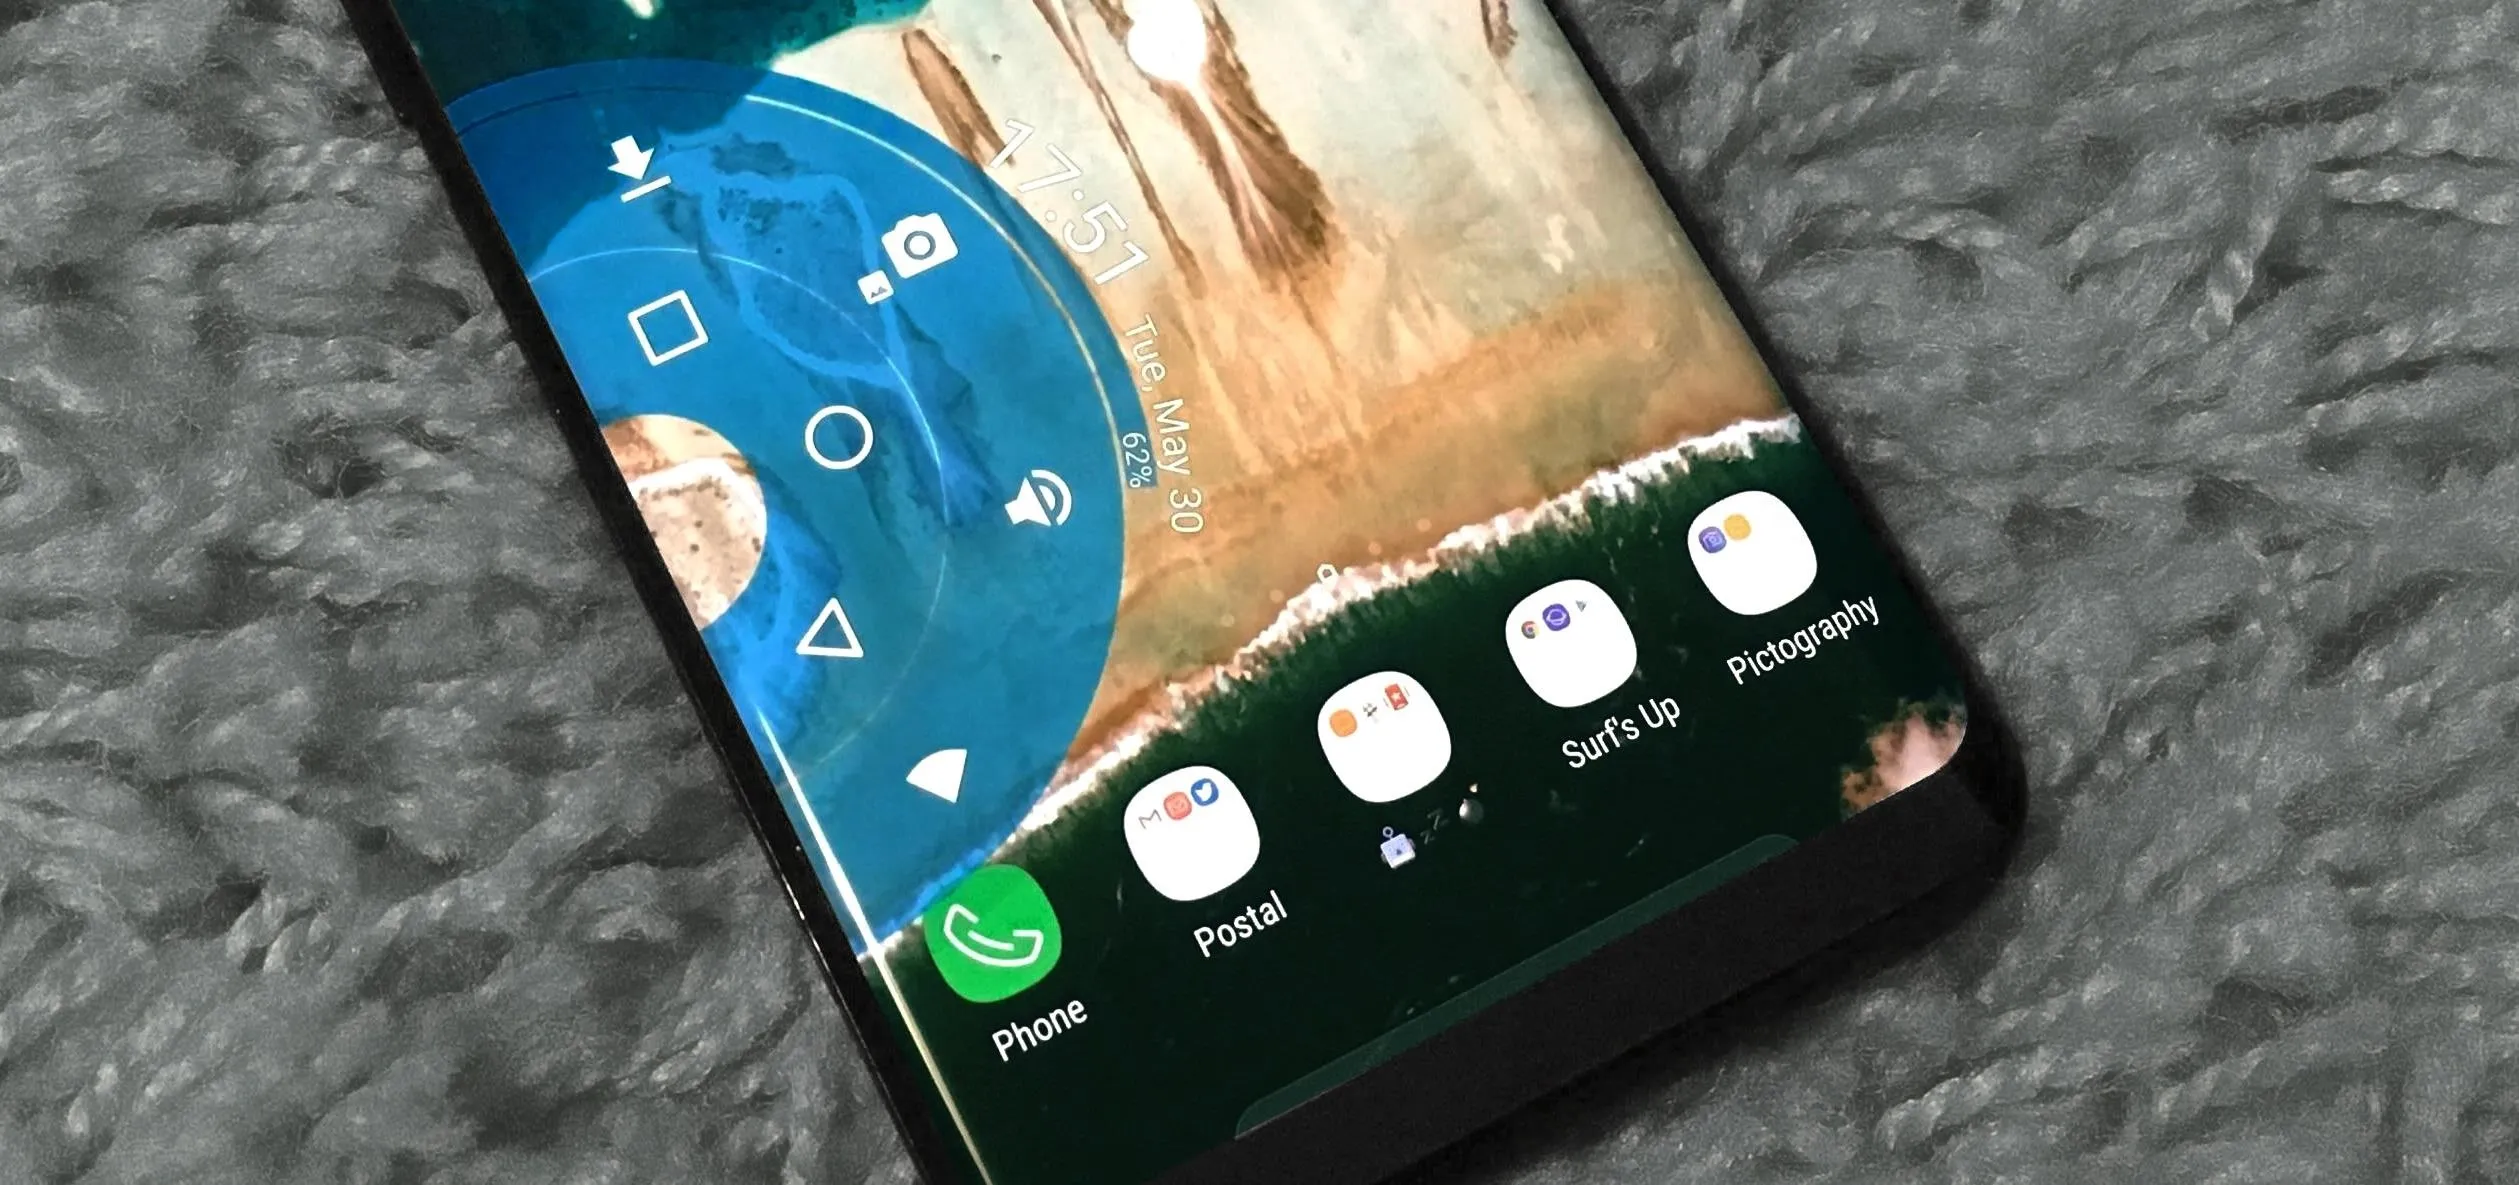
The Galaxy S8's AMOLED display is prone to screen burn-in, particularly with the navigation and status bars. But hiding these bars would make it hard to navigate your phone — that's where Pie Controls come into play.
By enabling full-time Immersive Mode, you can hide the on-screen buttons and reduce the risk of screen burn. But this would mean you'd have to swipe in from the edge of your screen to access the back, home, and recent apps buttons before you could press them.
XDA user Kenishi99 has the perfect solution for this issue. By installing an app that gives you Paranoid Android's Pie Controls feature, you'll be able to hide your on-screen buttons and simply navigate your phone using swipe gestures instead. Best of all, this mod does not require root, so it's completely safe and anyone can try it out.
Requirements
- Developer options and USB debugging enabled
- Windows, Mac, or Linux computer
- ADB and Fastboot installed
- USB data cable
Enable Full-Time Immersive Mode
To get started, you'll first need to hide your S8's navigation bar since it'll be replaced with Pie Controls. To do that, you'll need to be run a single ADB command from your computer, which will enable full-time Immersive Mode to hide your on-screen navigation keys.
For this part, you have two options: You can hide both the navigation and status bars, or you can hide the navigation bar only. We've outlined both of these options in more detail with a separate tutorial, so head to the following link to get started, then pick back up at Step 2 here:
Install Pie Control
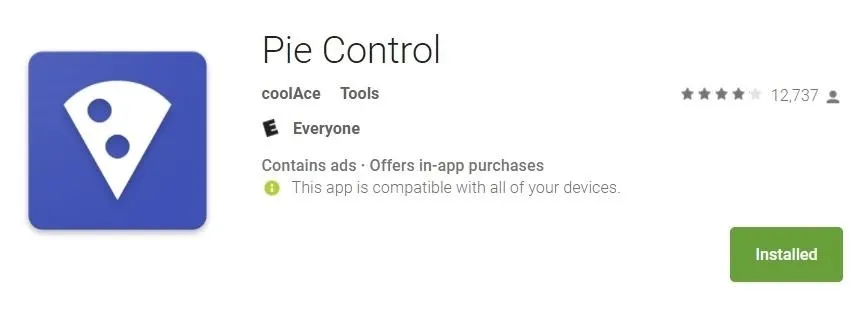
With Immersive Mode set up and out of the way, head to the Play Store and grab an app called Pie Control by coolAce. You can either do a quick search or head to the following link to download the app.
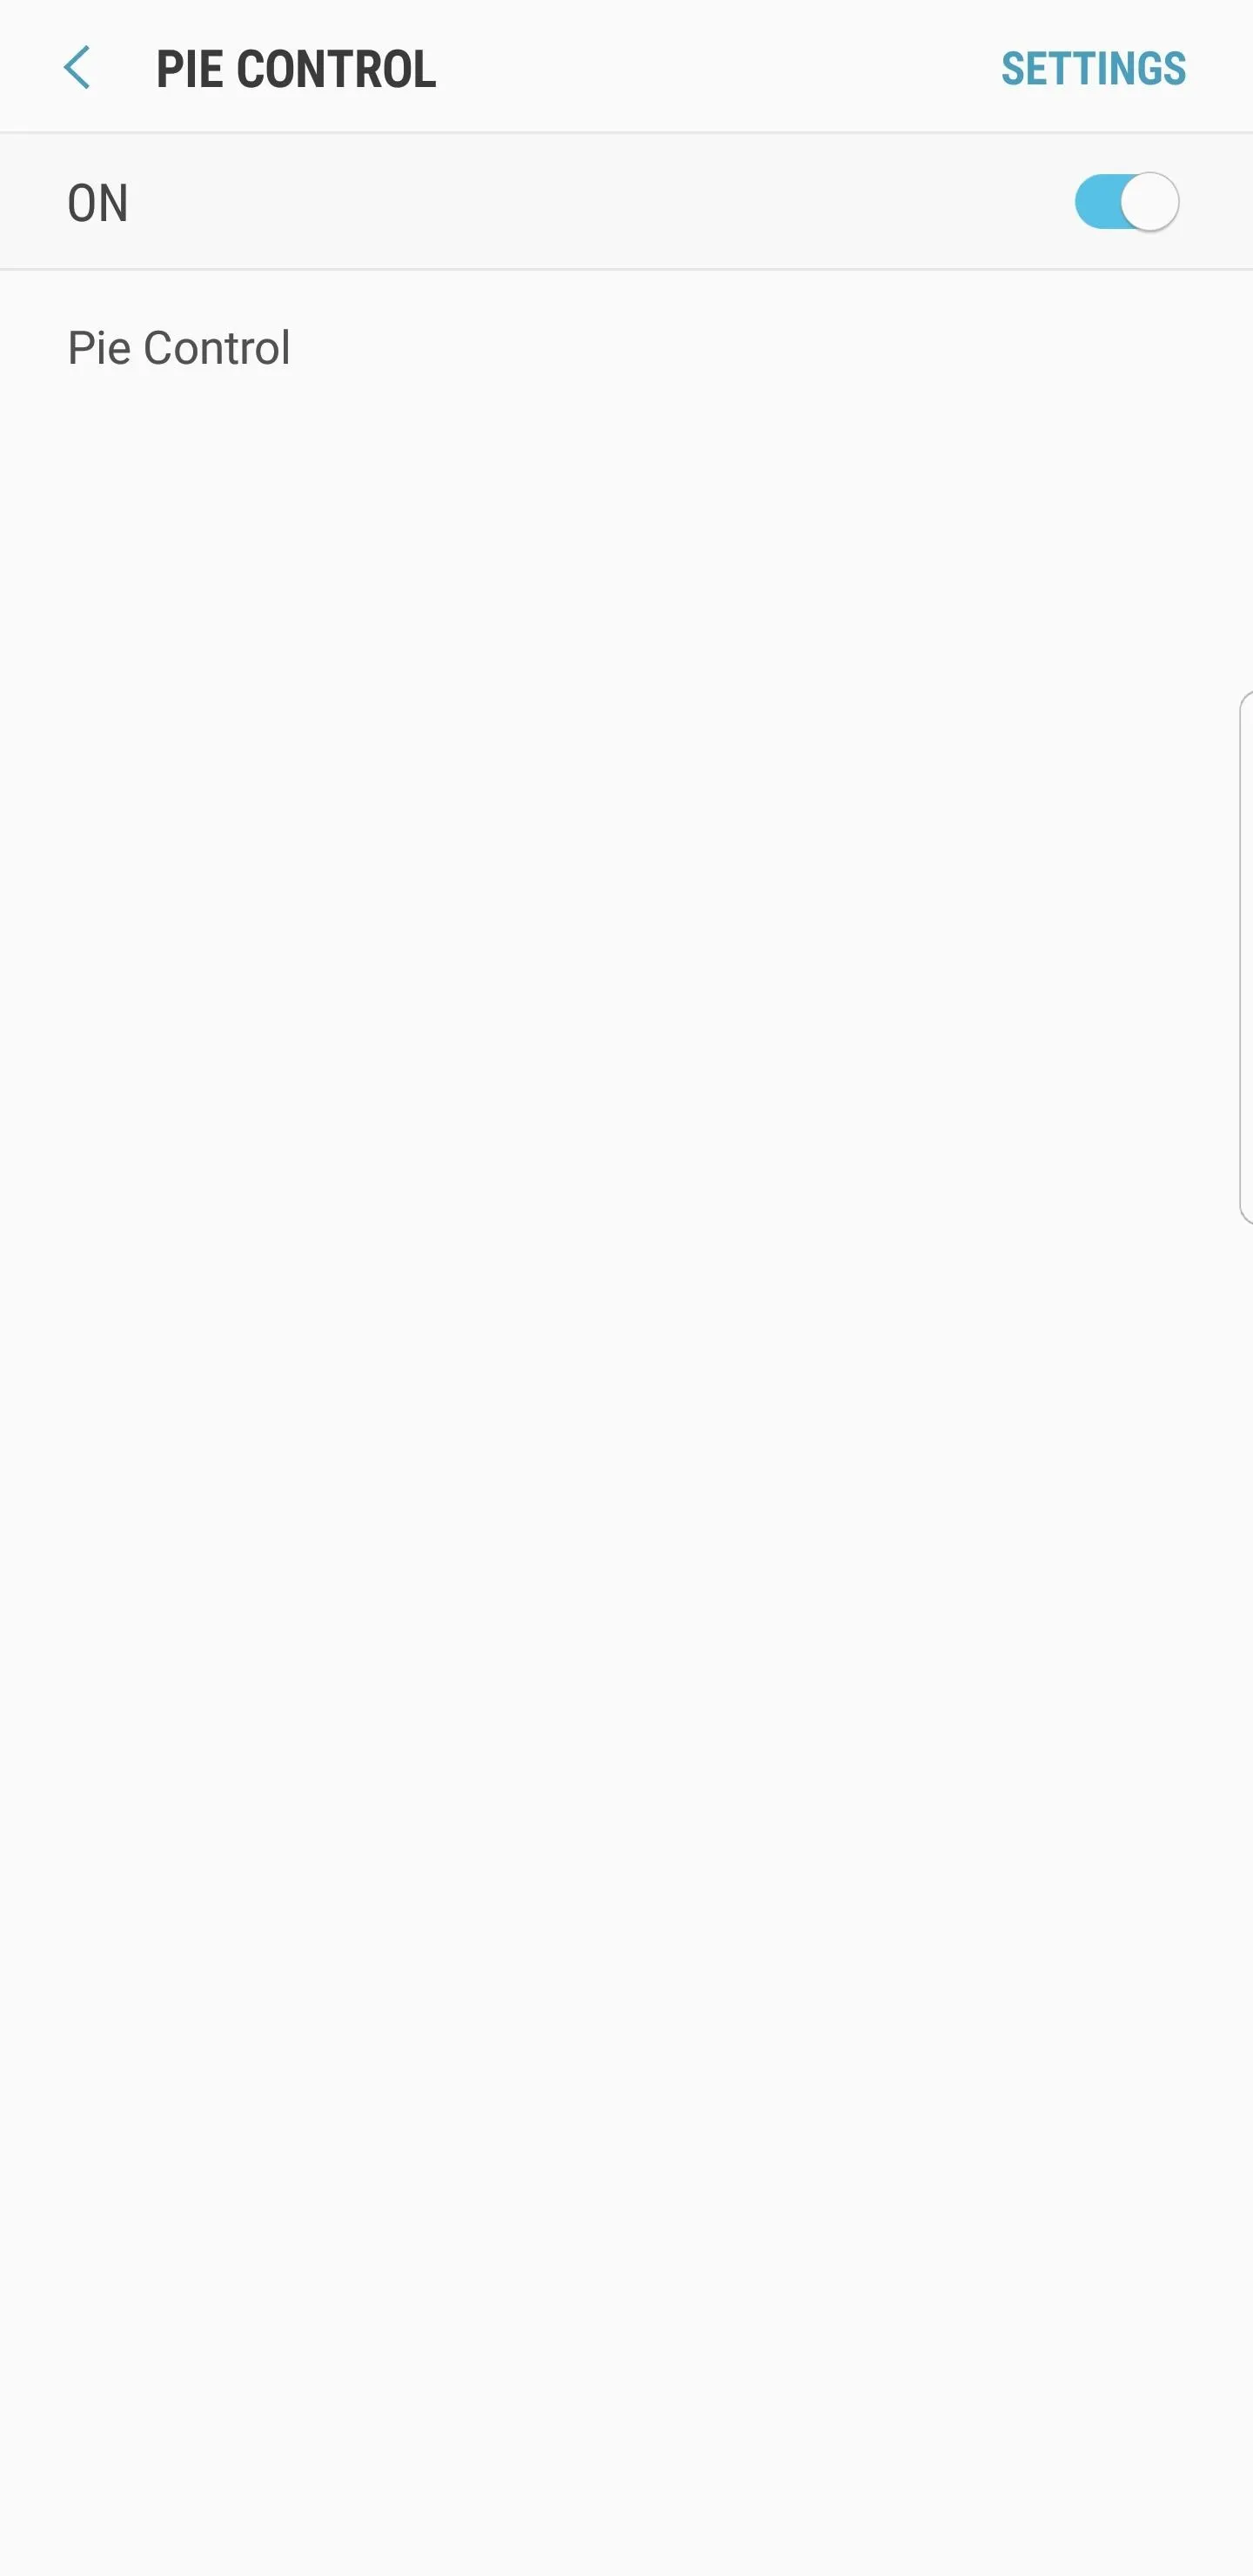
Set Up Pie Control
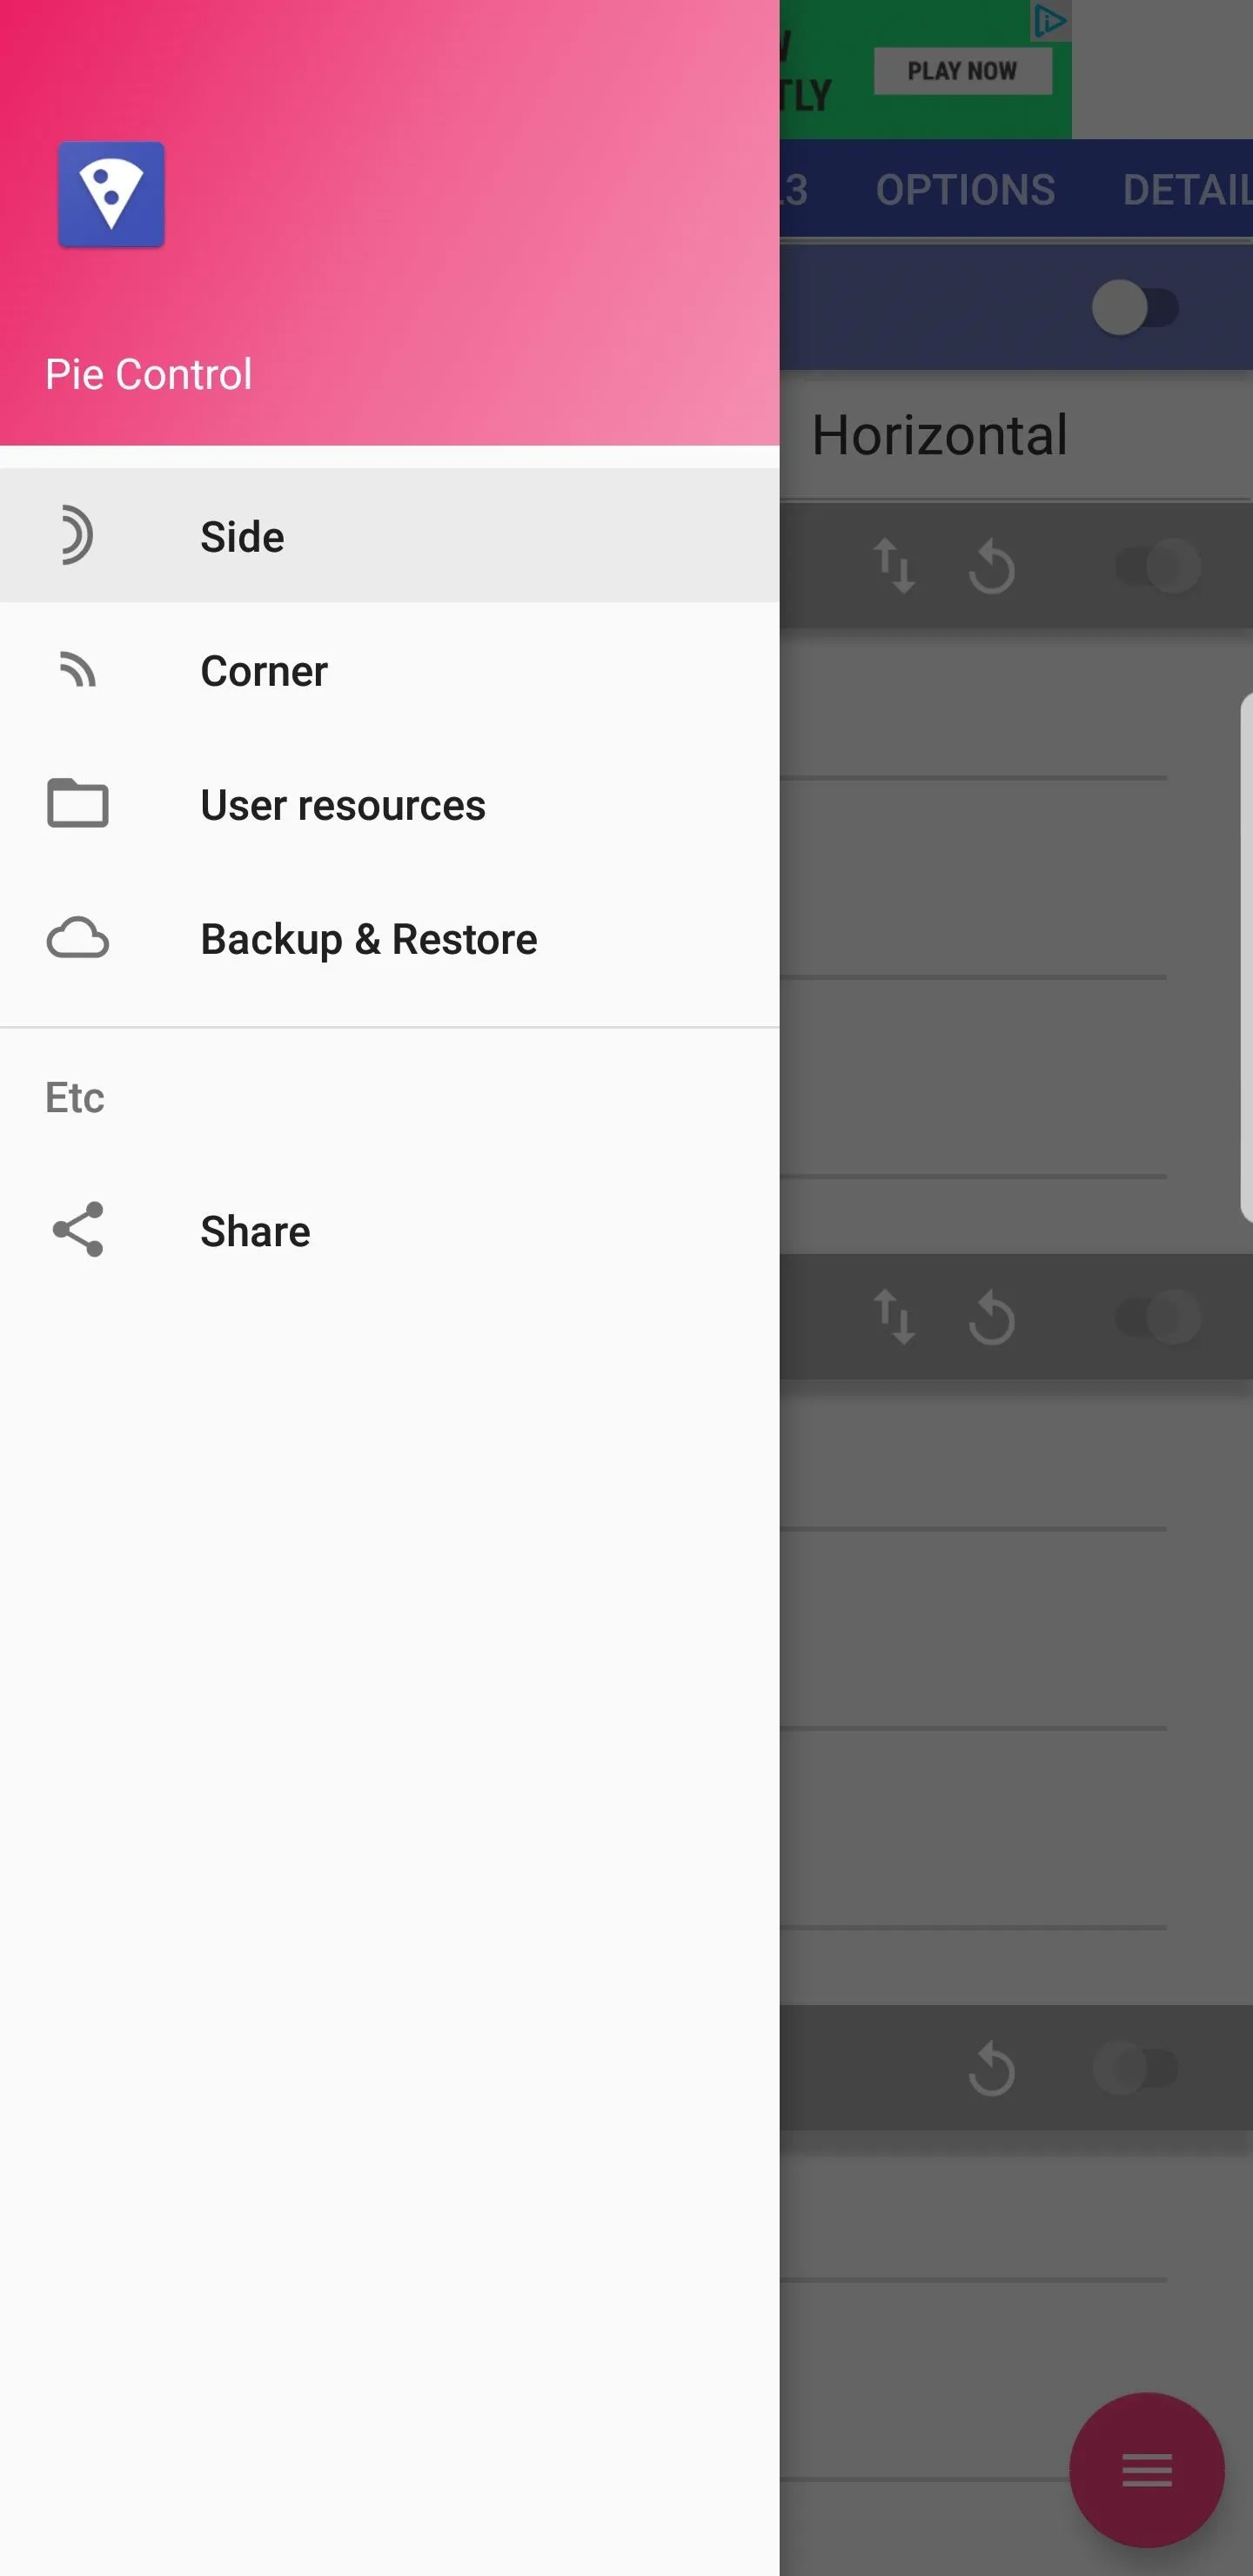
Next, open the Pie Control app and select "Side" from the menu, then turn on the switch next to "Enable Side Area." After that, head to the Level 1 tab and clear out all of the pre-selected shortcuts by tapping on the trash icon located to the right of each one.

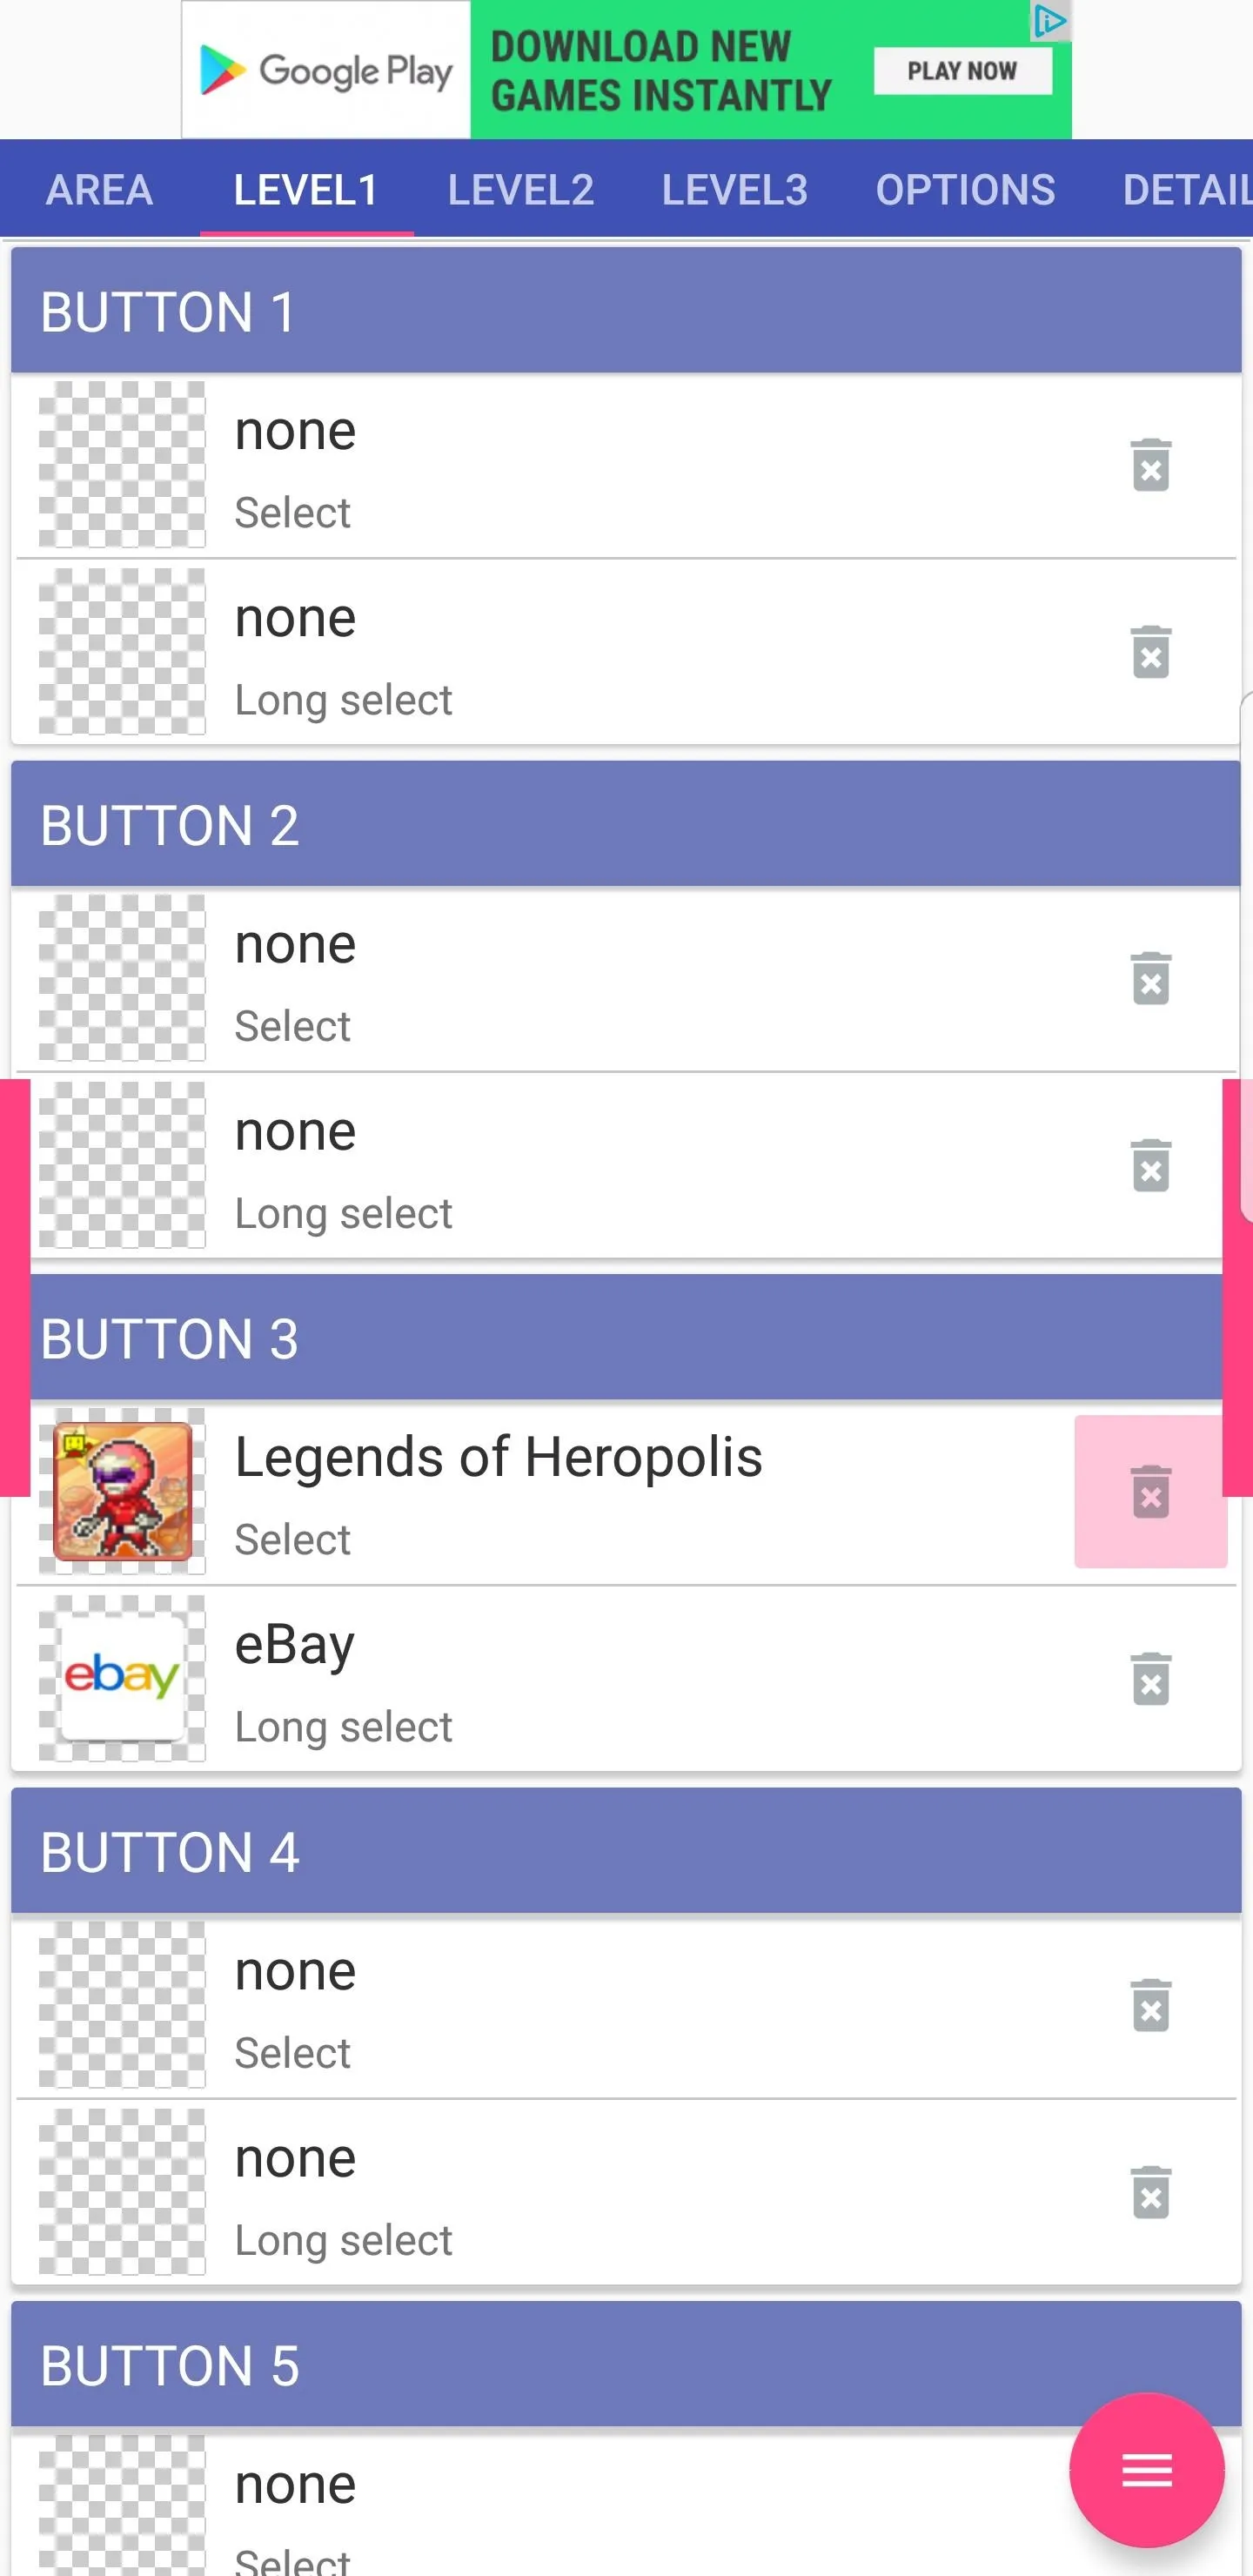
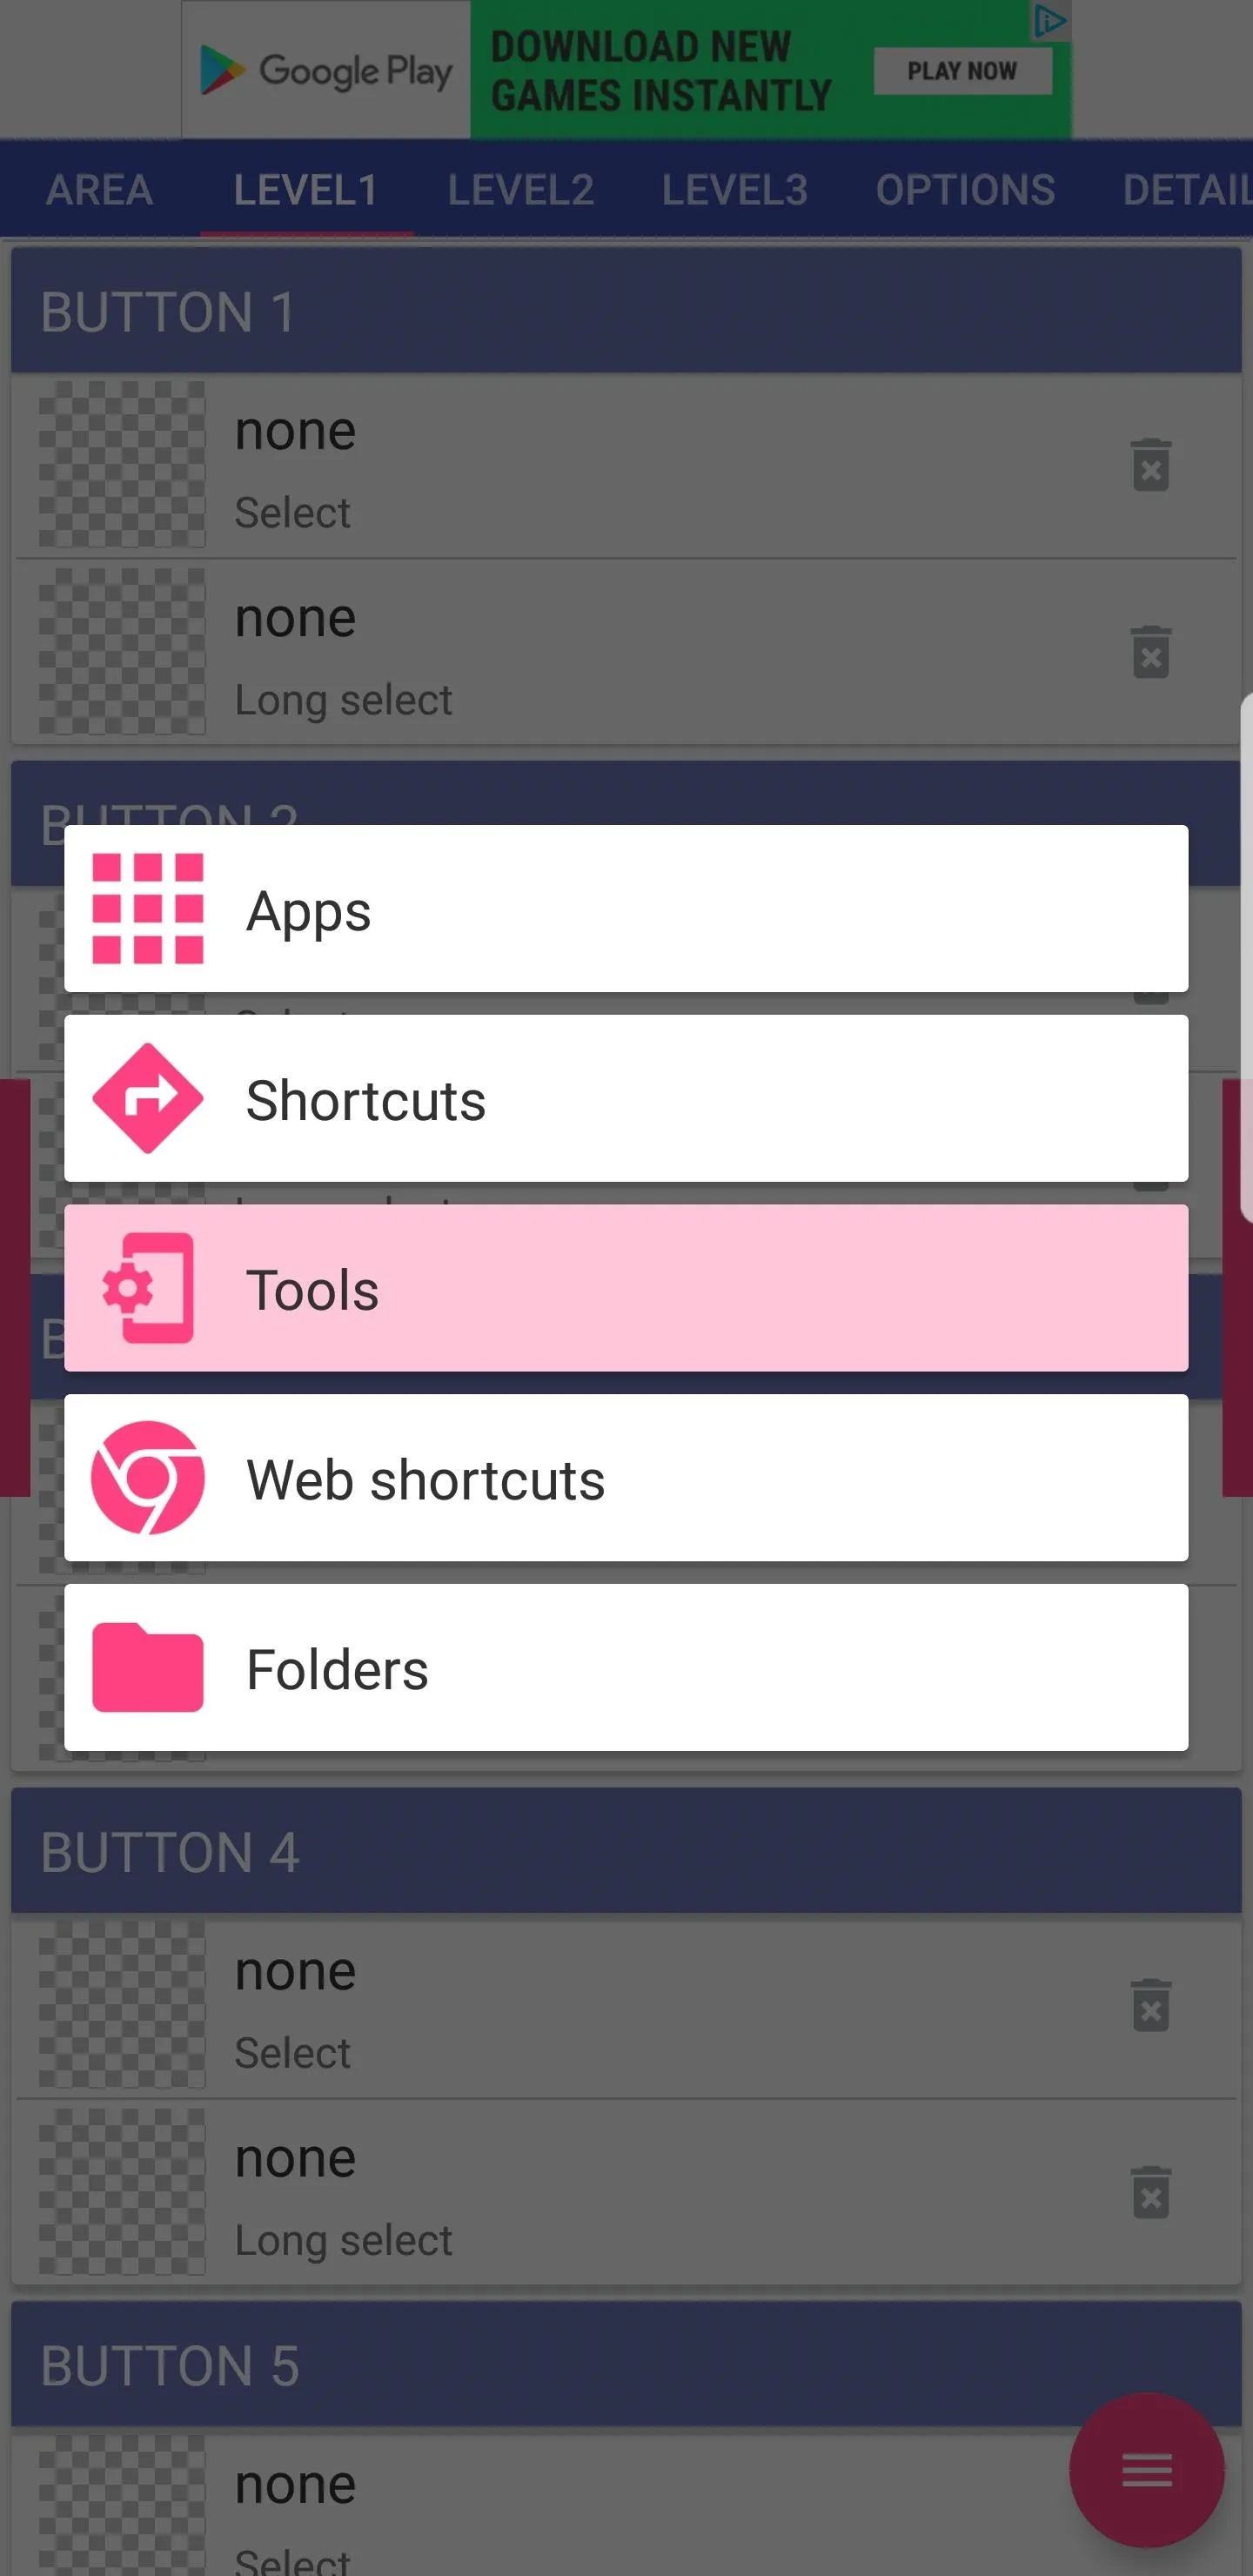
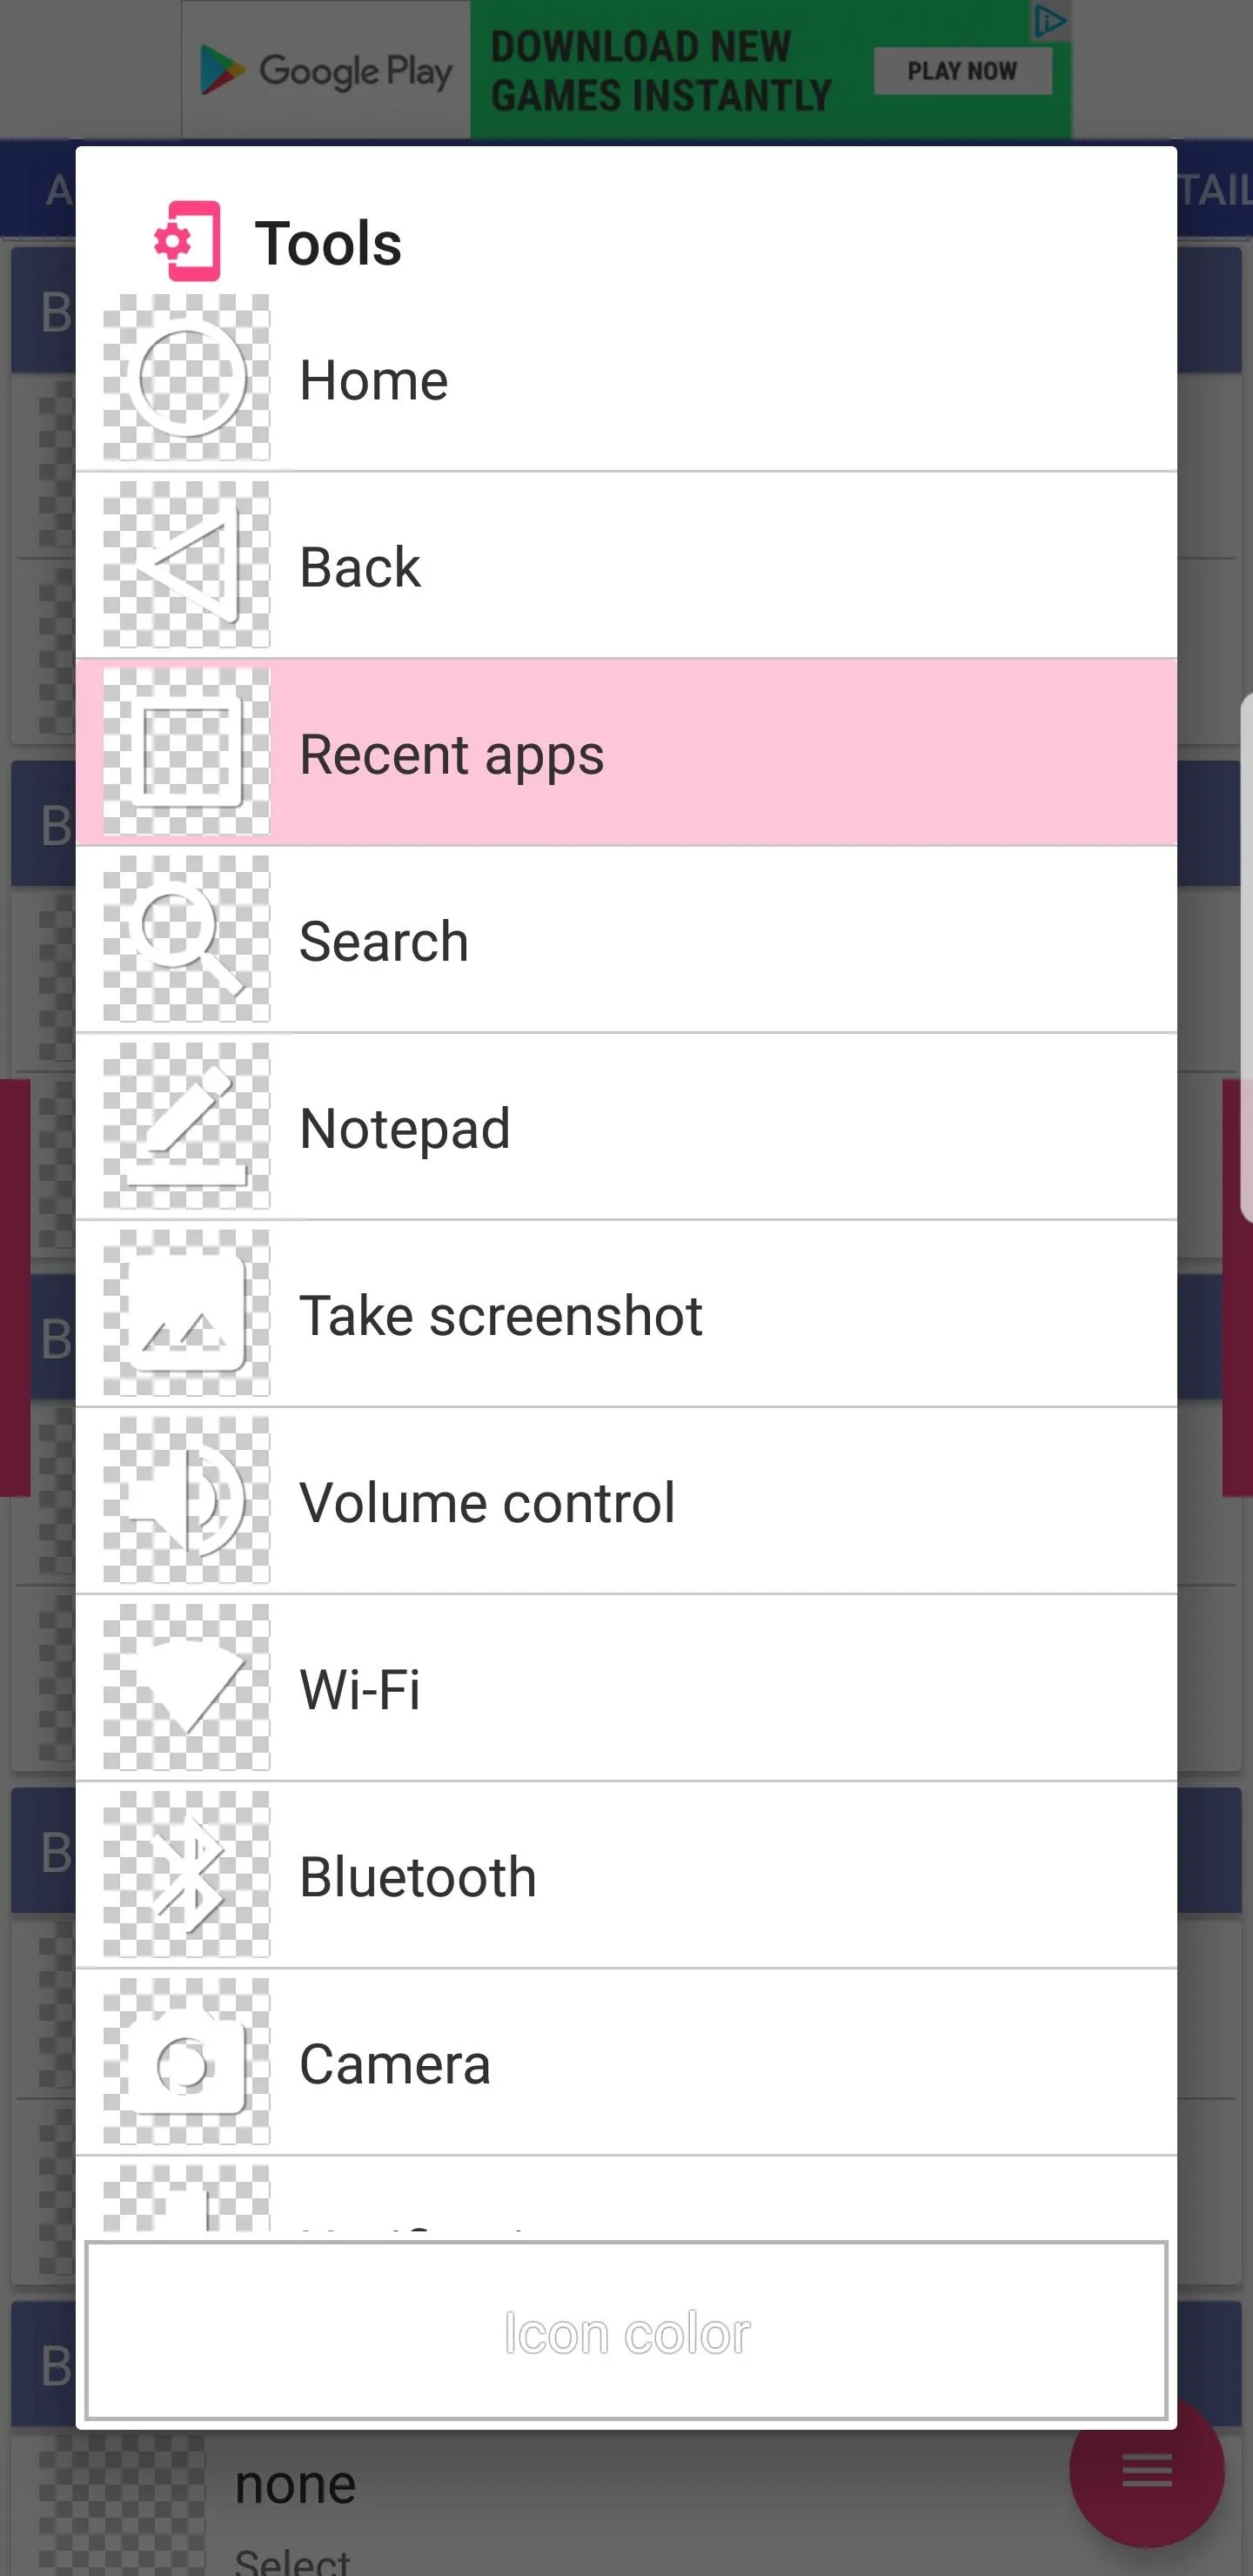
Now that we have a clean slate, it's time to add the buttons that make up the navigation bar. Tap on the top entry under buttons 1, 2, and 3 and select "Tools" from the prompt that pops up. Now choose which navigation icons you'd like to assign to each button. Feel free to experiment with the button order until you find the layout you're most comfortable with.
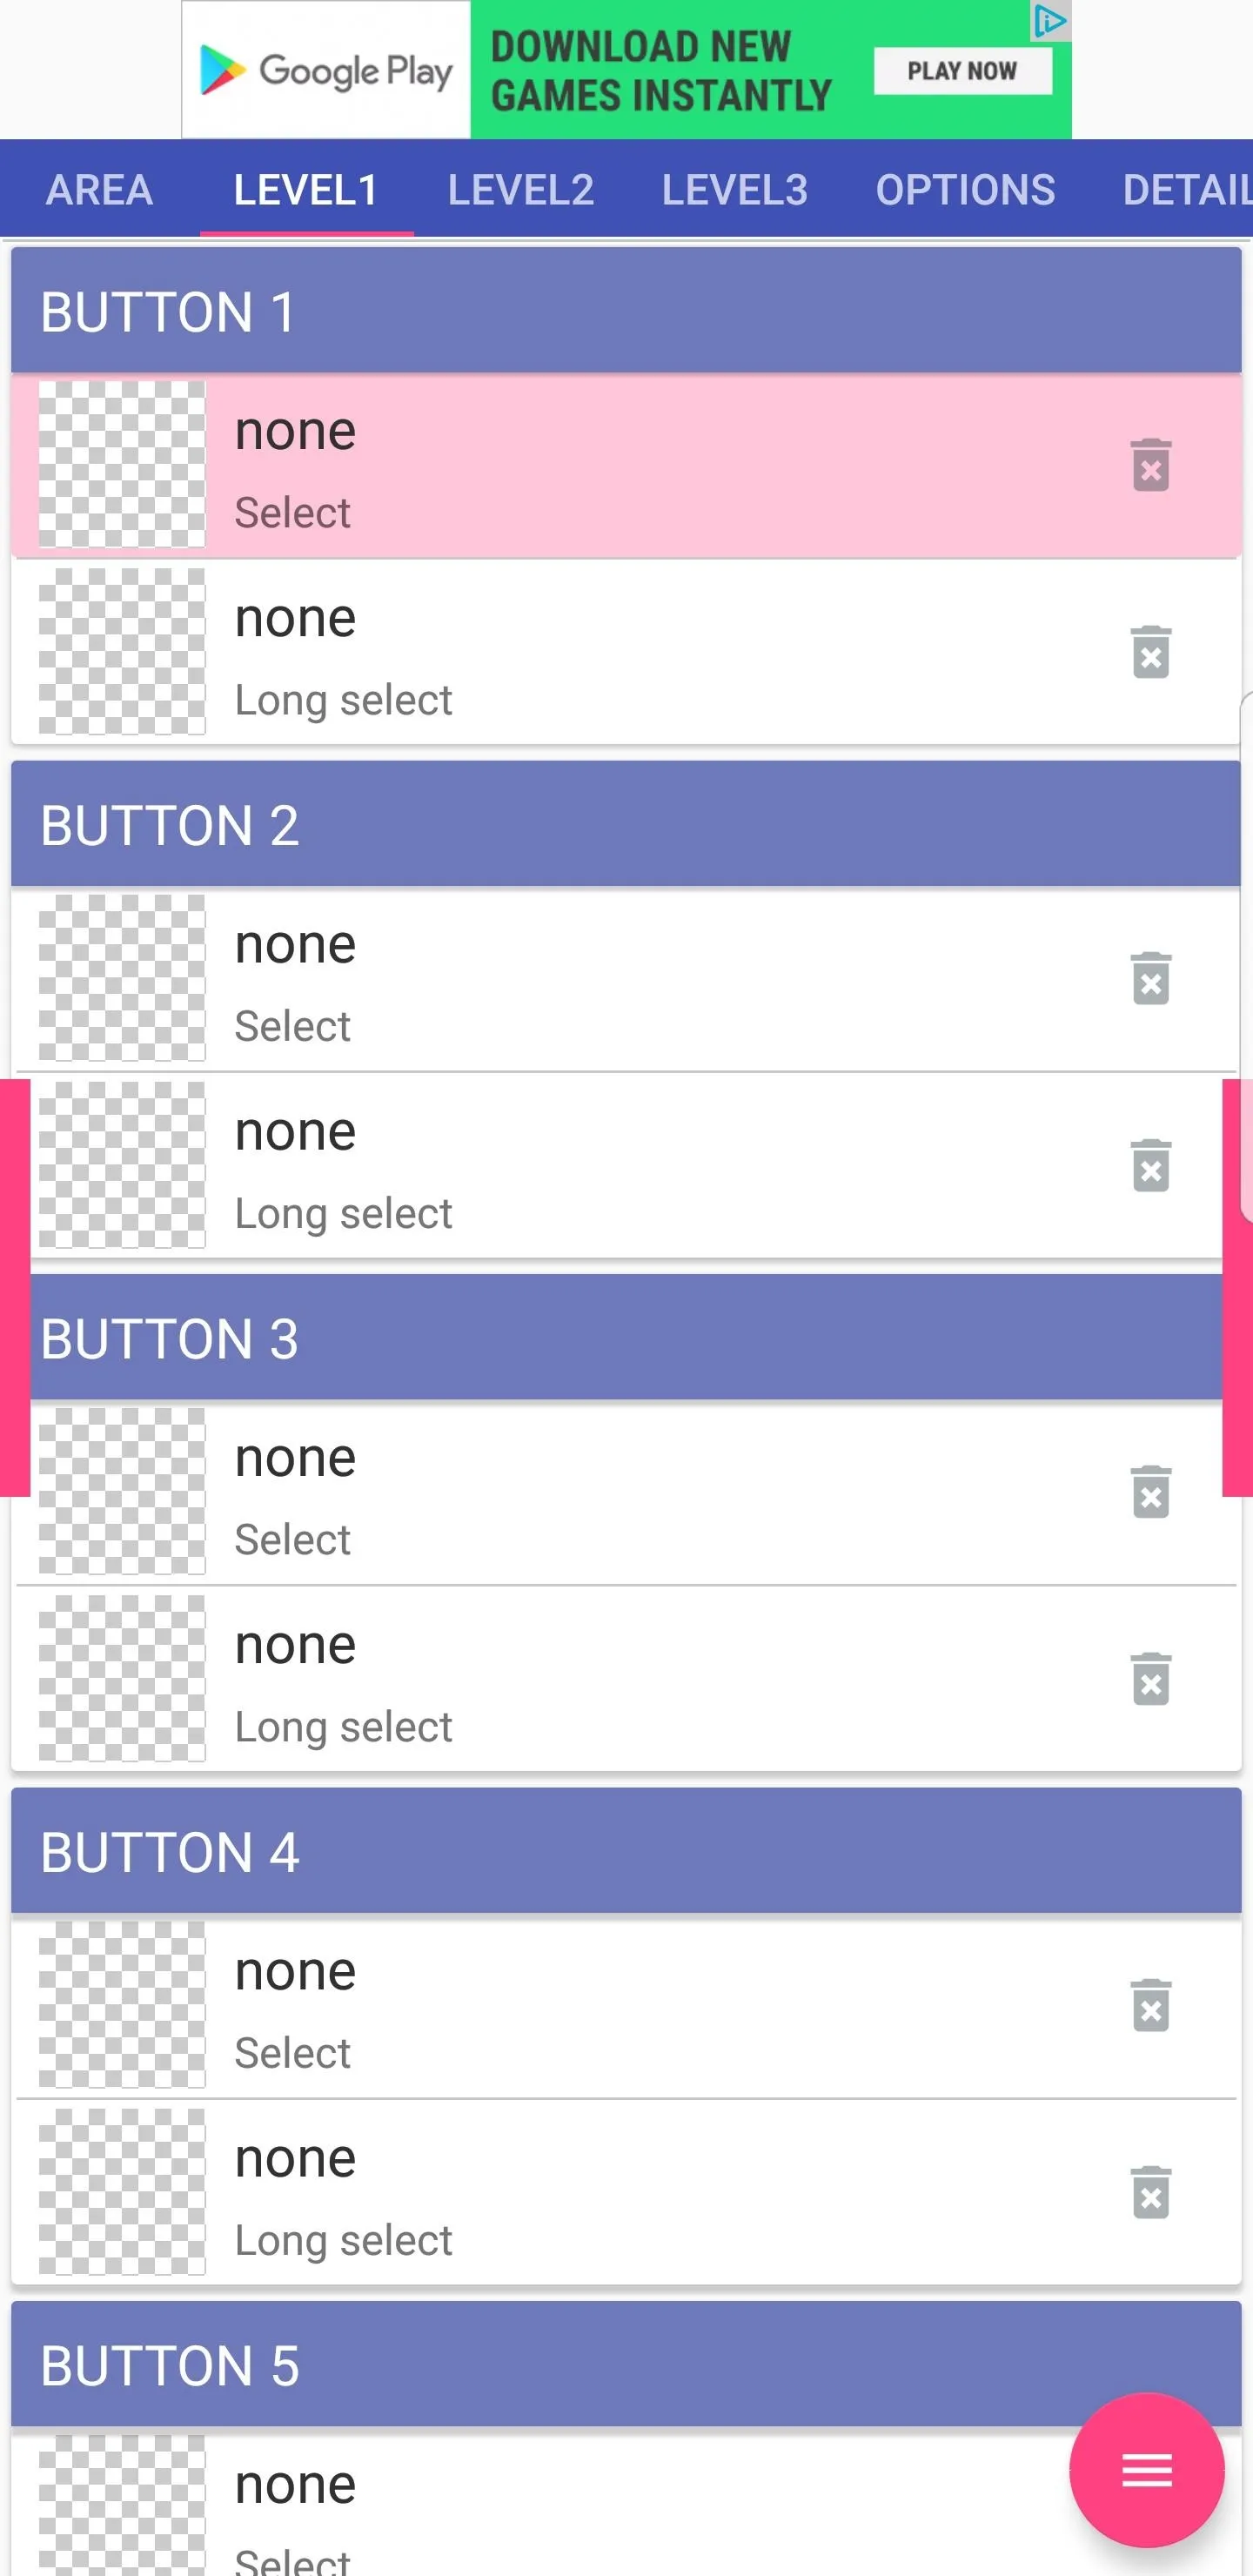
In addition to the navigation bar, you have the option to add up to two more levels on top of it to further customize your Pie Controls. To do so, simply tap on levels 2 and 3 to add more shortcuts like Wi-Fi and Bluetooth toggles, a screenshot button, and so on.
Customize the Trigger Area
Next, you should take some time to customize the trigger area for your new Pie Controls. This is where you'll be able to swipe inward from the edge of your screen to bring up the navigation buttons, and adjusting this area is particularly important if you have a protective case on your phone.
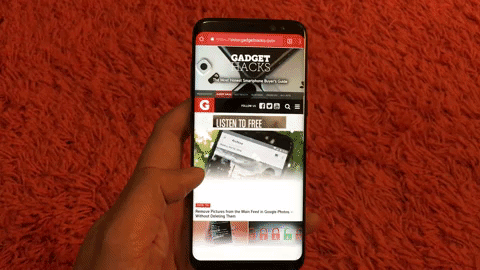
To do so, head to the Area tab and select "Vertical," then make sure the toggle switch at the top of the screen is enabled. From there, experiment with the height, width, and position sliders to find a setup that works for you. The pink bars on the flanks of your display show the trigger areas, but only while you're on this screen.
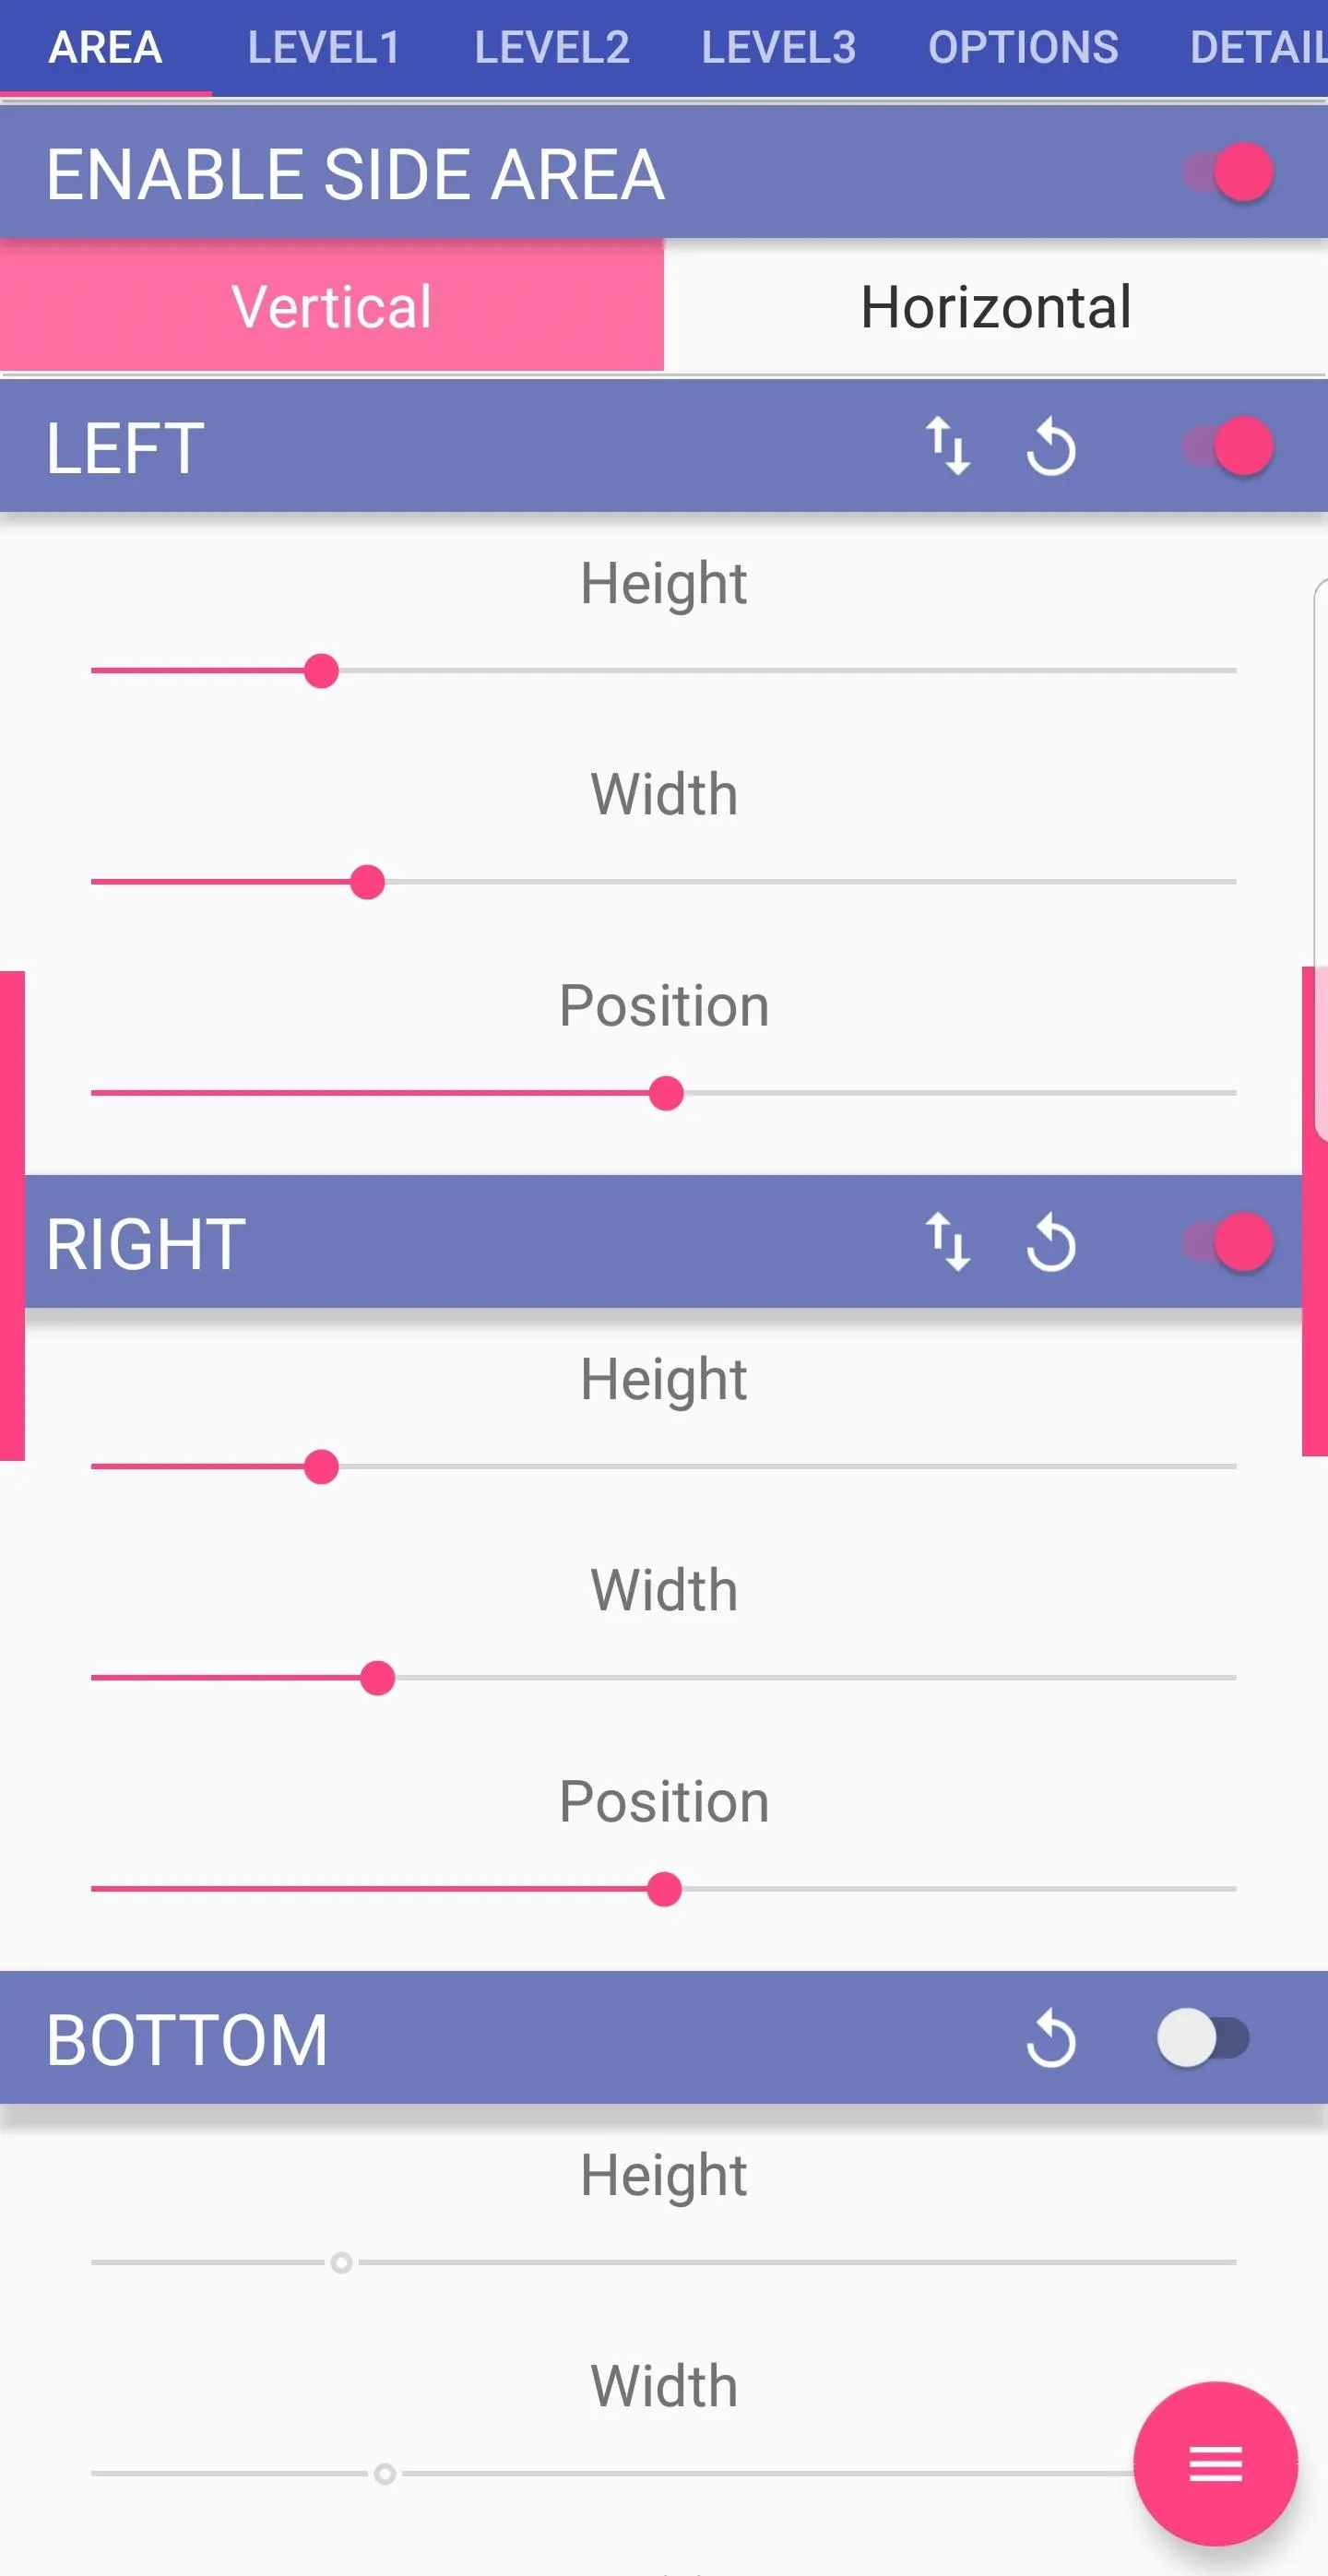
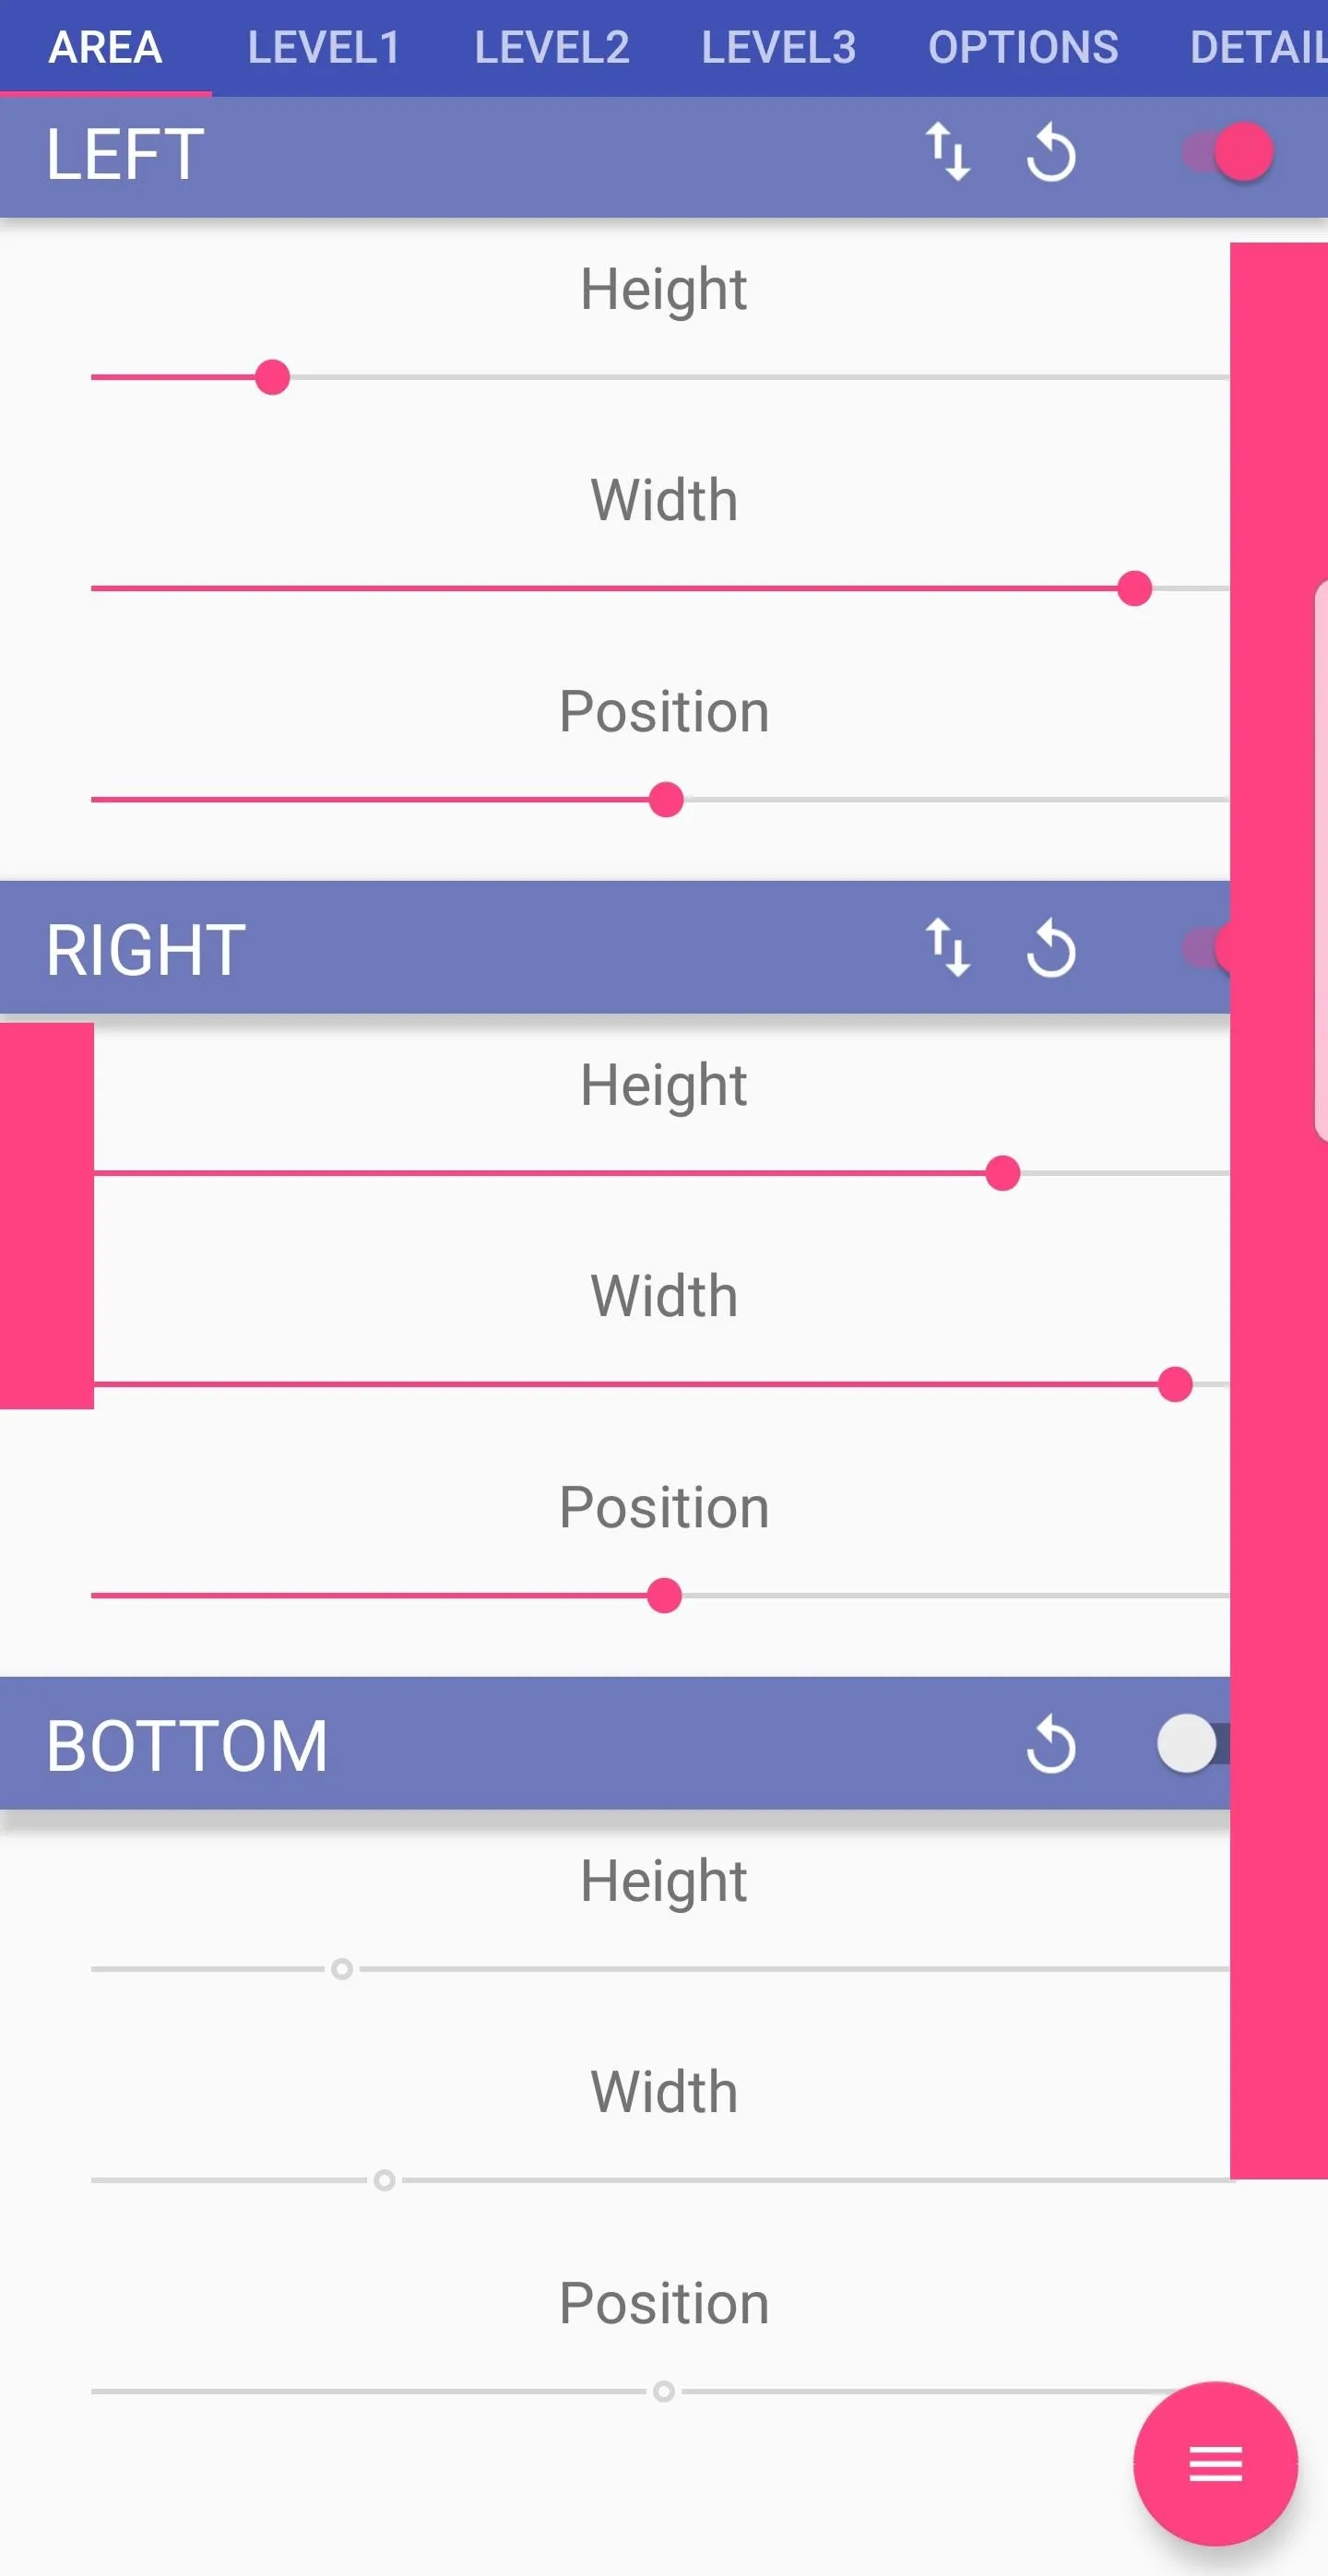
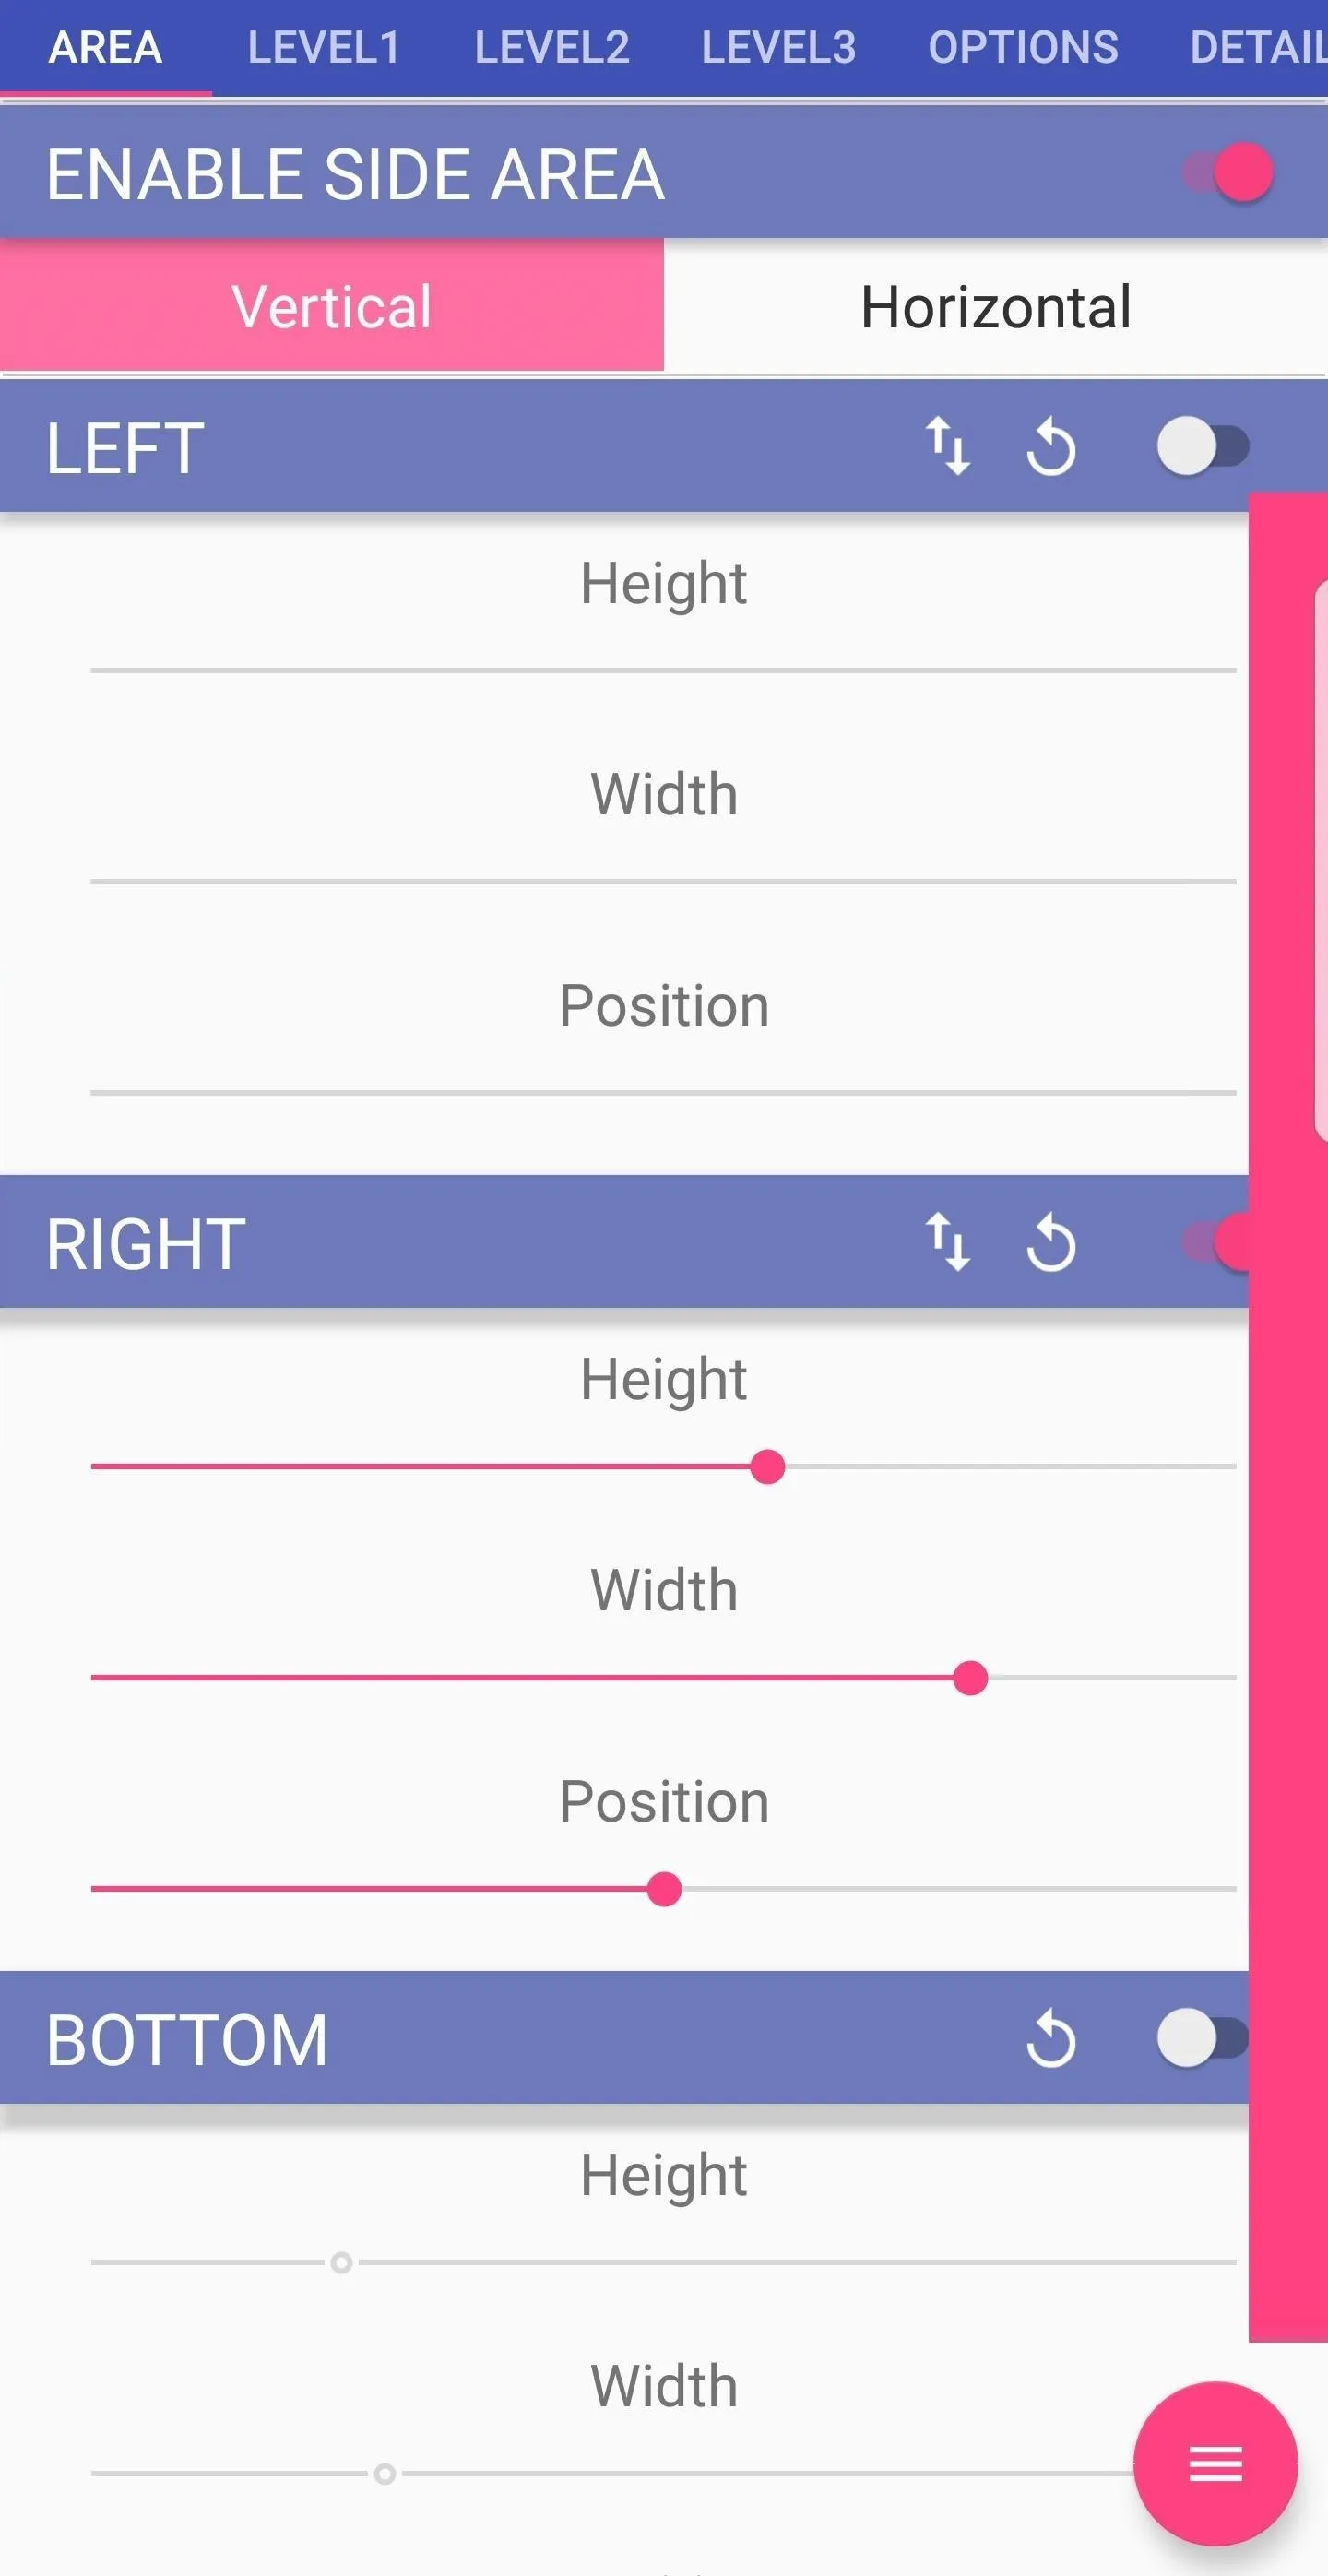
We recommend disabling the left trigger area, because many apps use a swipe gesture on this side of the screen to open the side navigation menu. If you use the Galaxy S8's Edge Screen feature, you should also be careful to avoid overlapping with the trigger area near the top of the right side of your screen.
Beyond that, you'll probably want to keep the trigger area tall to make it easy to swipe in from the edge of your screen anywhere and bring up the Pie Controls. Be careful not to make it too wide, though, as this can give you problems like accidentally triggering the pie controls while typing on your keyboard.
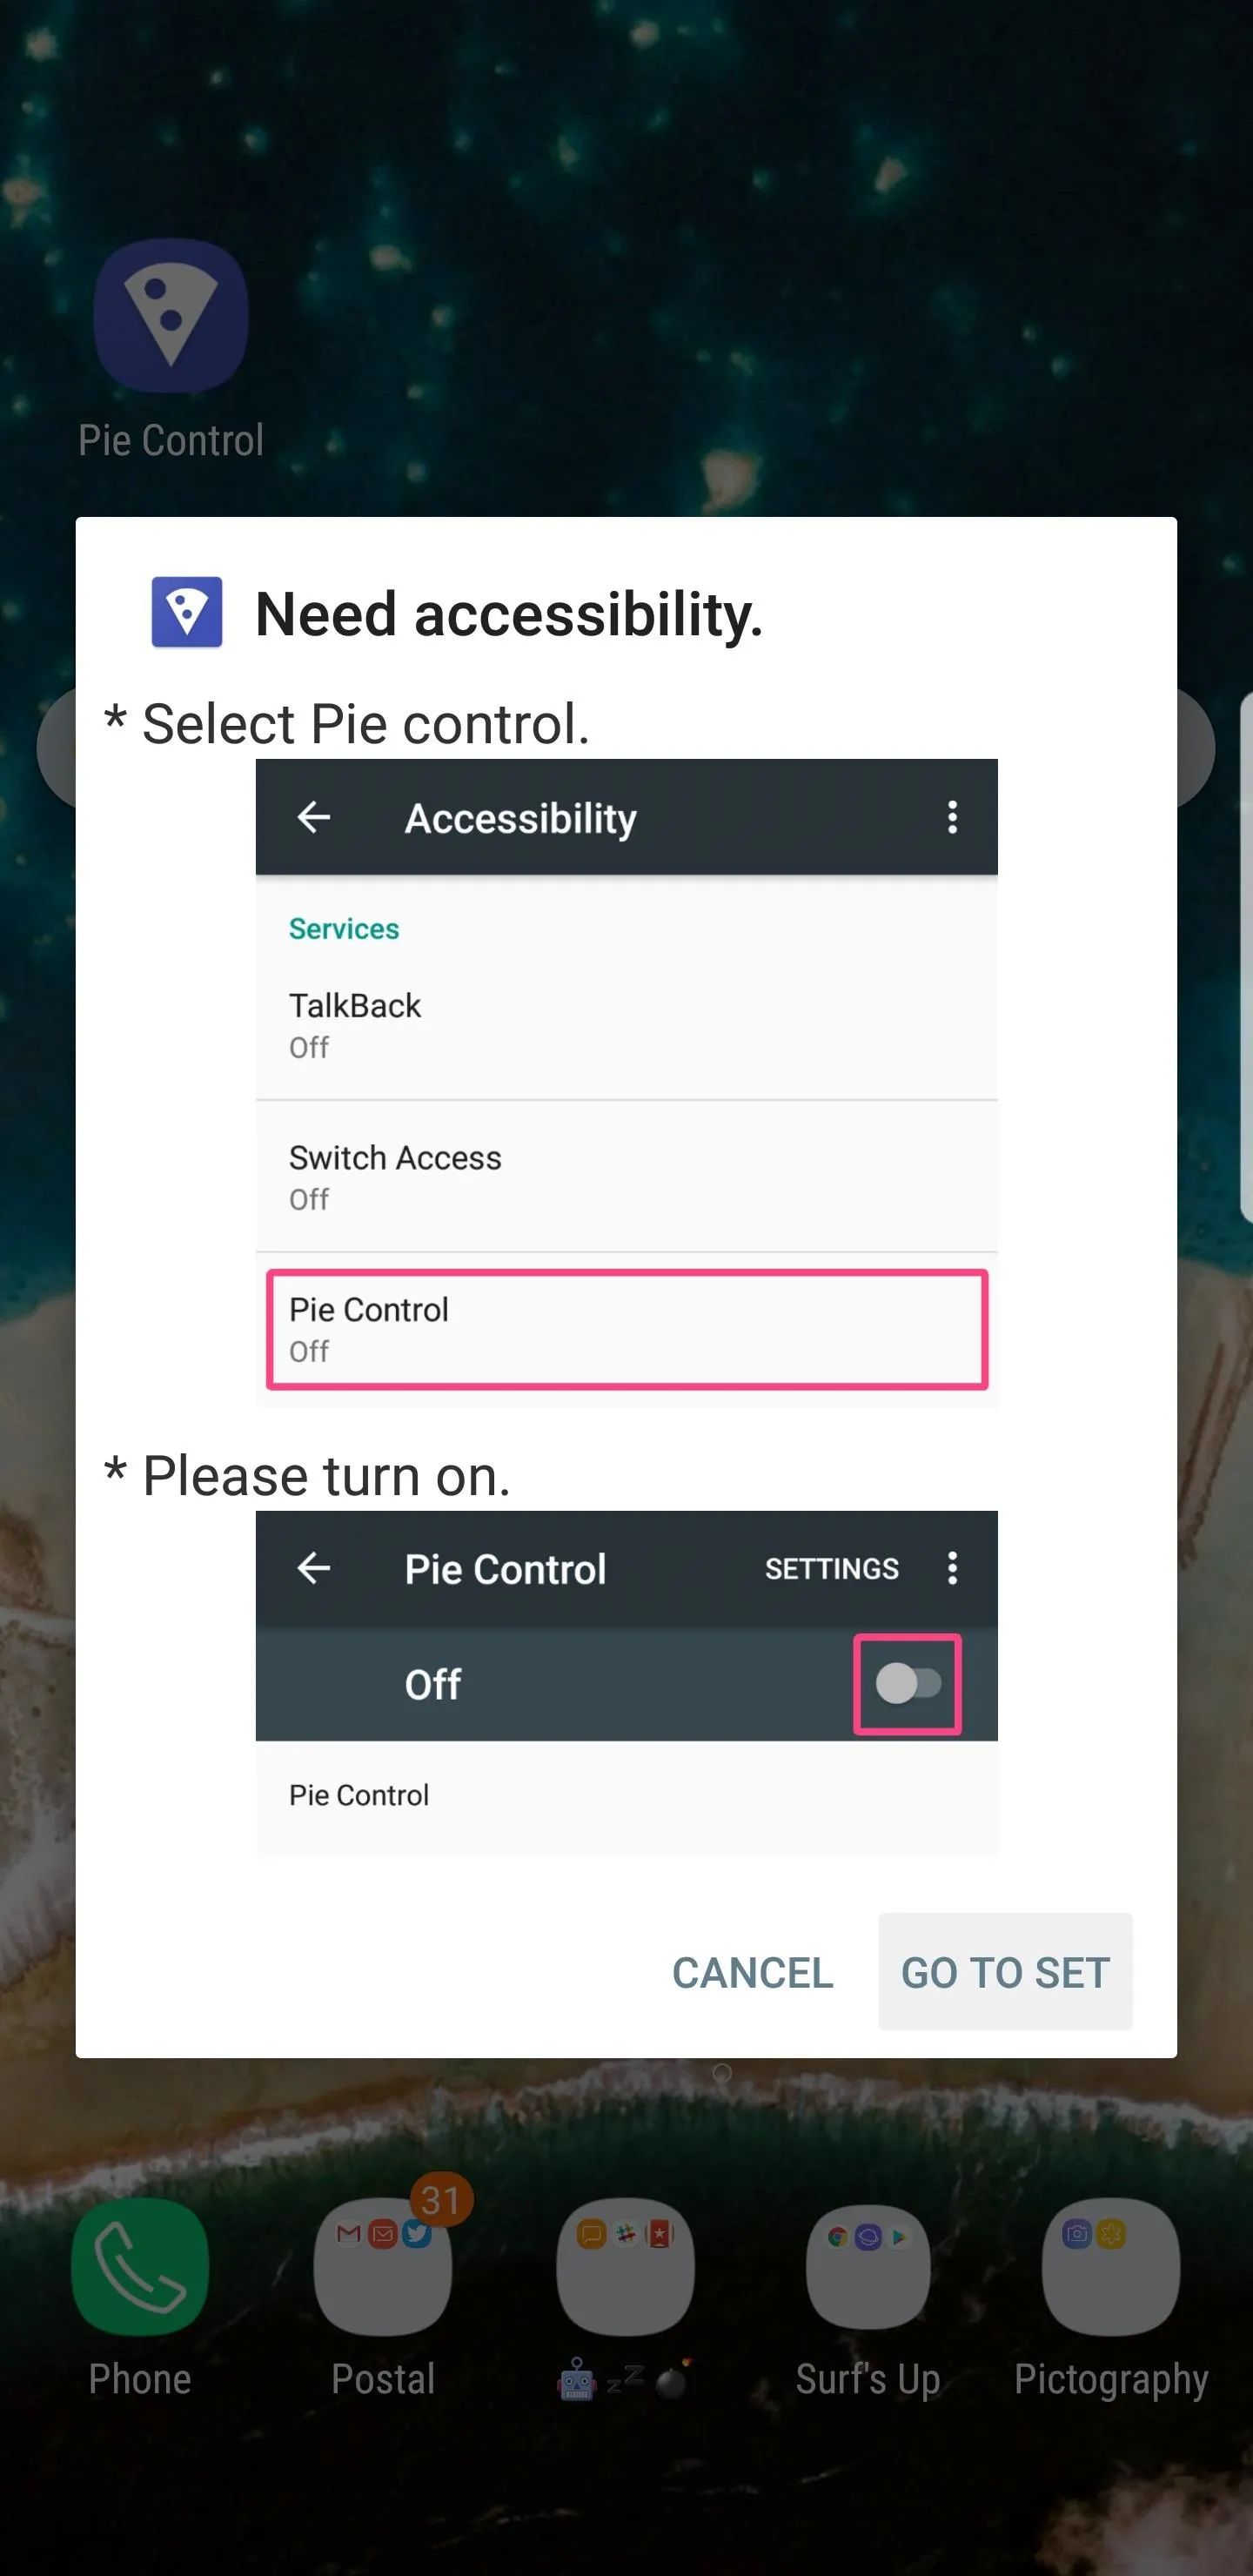
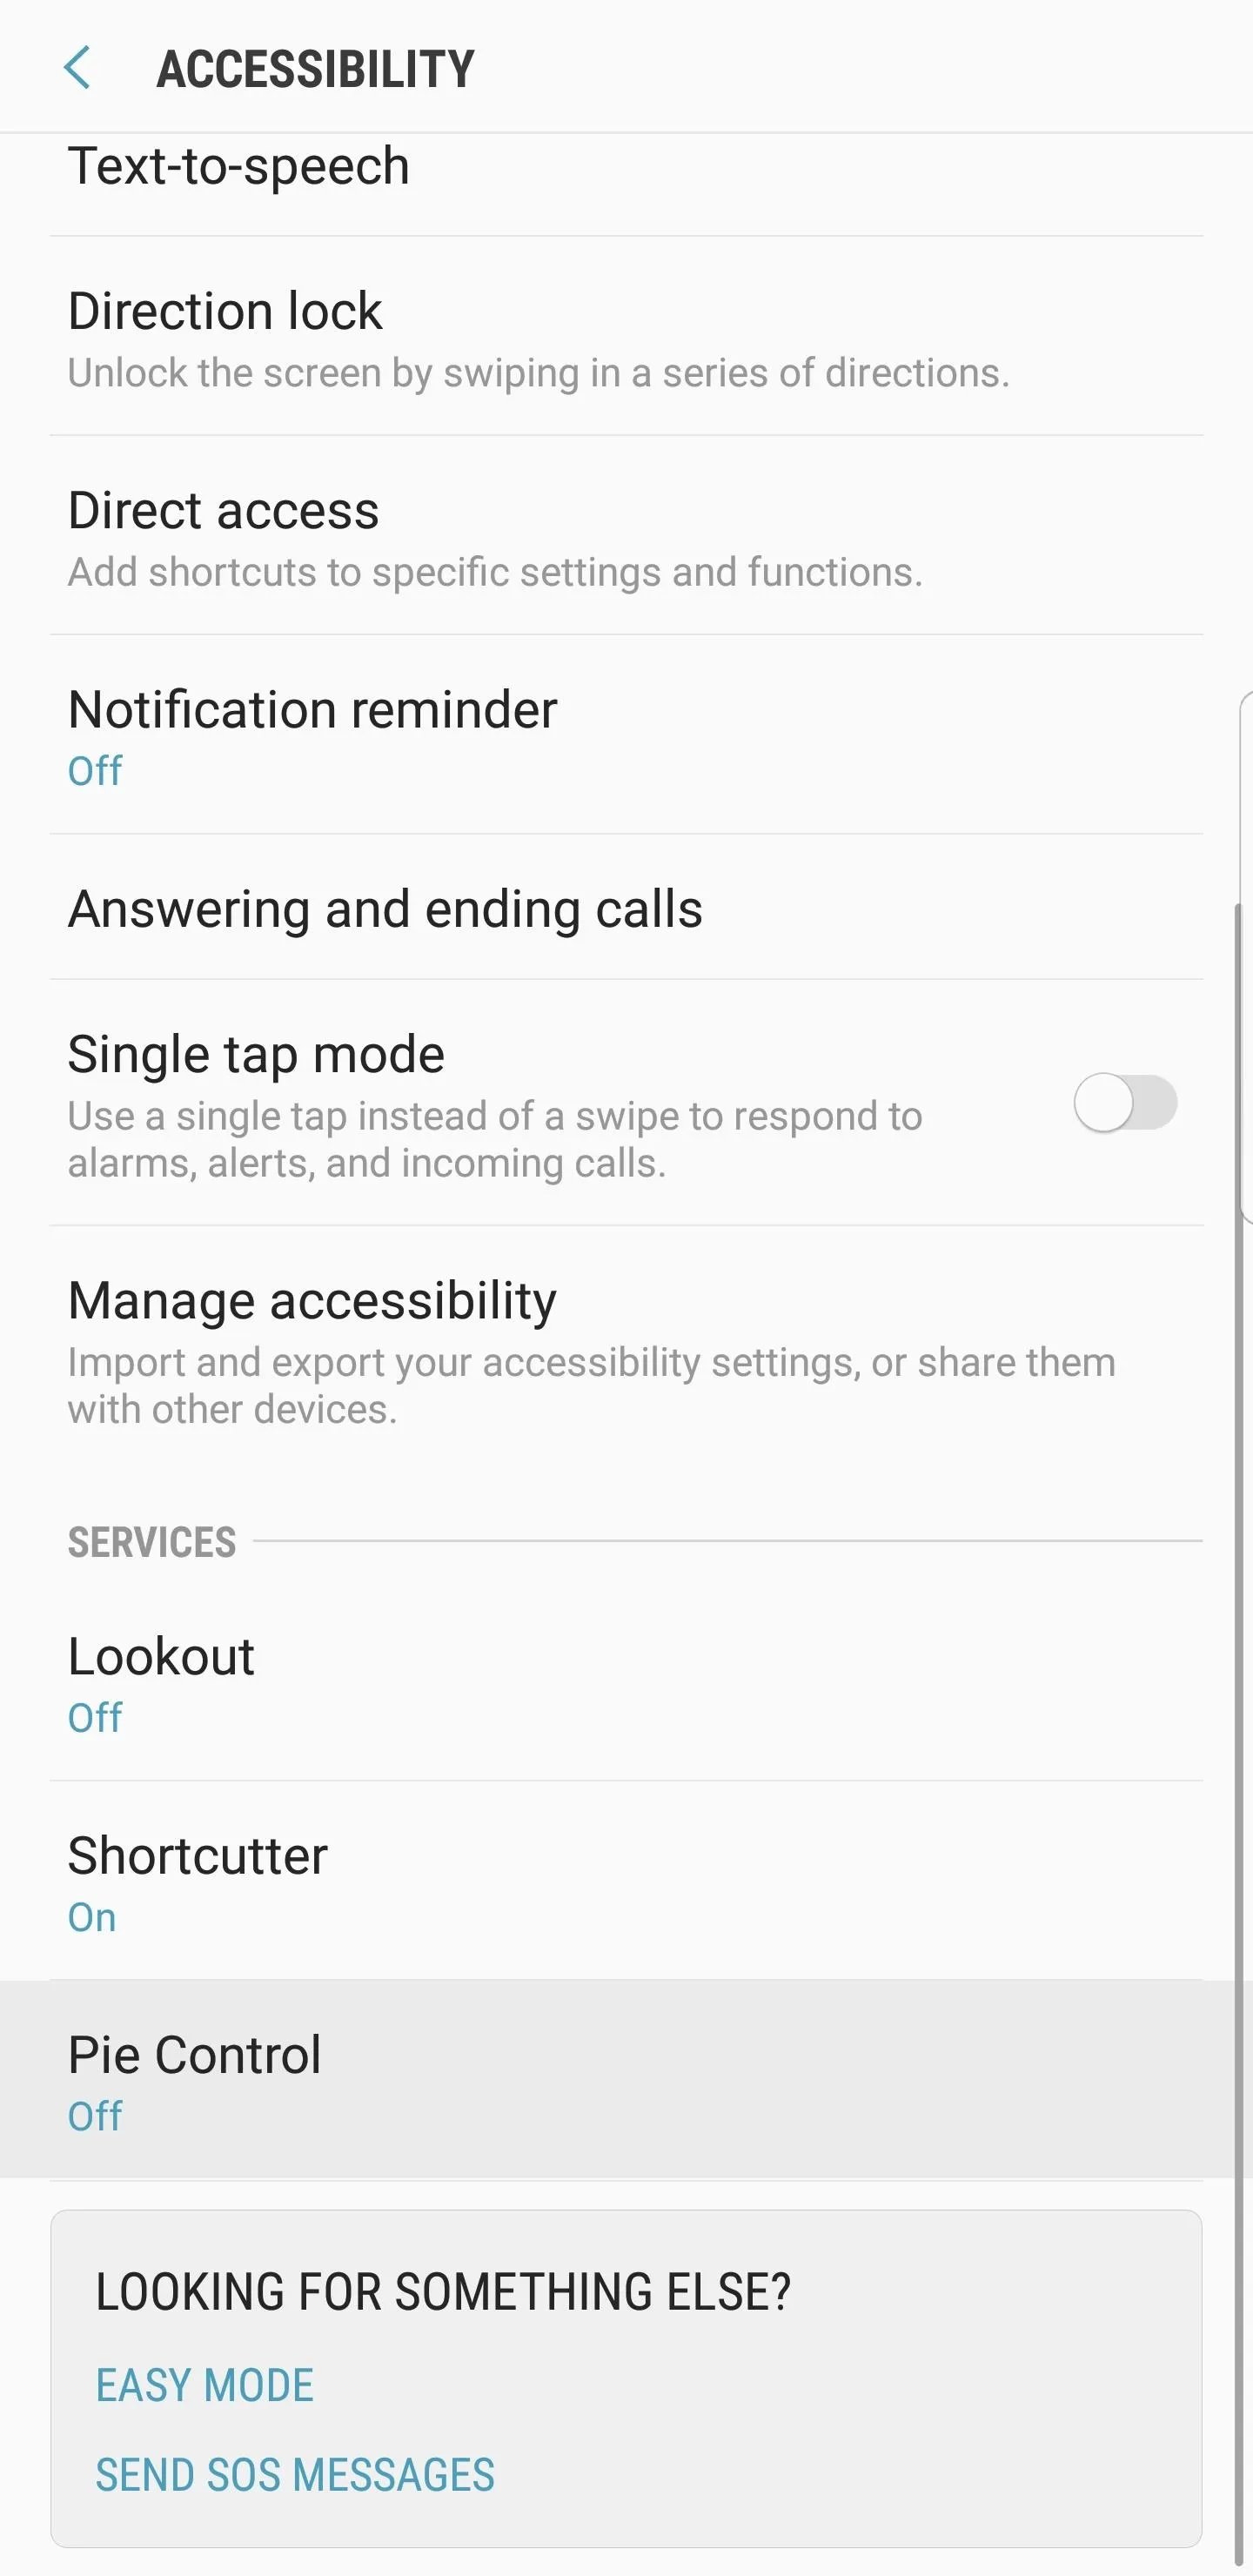
Enable the Accessibility Service
Next, swipe in from the trigger area and drag your finger to either the Back or Recent Apps button, then let go. From here, choose "Go To Set" on the popup that appears.
You'll now be transferred to the Accessibility page within your phone's main Settings menu, so scroll down and select "Pie Control." Finally, tap the toggle switch to enable the app's Accessibility service, which gives it the permission to execute the Back and Recent Apps commands.
Navigate Your Phone with Pie Controls
With the on-screen navigation bar hidden and Pie Controls all set up, you'll no longer have to worry about screen burn-in, but at the same time, you'll still be able to navigate your phone with ease.
To try out your new gesture-based navigation, simply swipe in from the trigger area, then hover your finger over the button you want to use and let go, all in one fluid motion. Once you get the hang of it, navigating your S8 should be almost as fast as tapping the original on-screen buttons.
How are you liking Pie Controls so far? As always, feel free to share your thoughts or any other tips you may have concerning this app by leaving a comment down below.
- Follow Gadget Hacks on Facebook, Twitter, Google+, and YouTube
- Follow Android Hacks on Facebook, Twitter, and Pinterest
- Follow WonderHowTo on Facebook, Twitter, Pinterest, and Google+
Cover image and screenshots by Amboy Manalo/Gadget Hacks


Comments
Be the first, drop a comment!