


One of Android's headlining strengths has always been how it handles notifications, and things have only improved with each new update. More recently, Android has improved notification permissions, so you'll have a choice of whether to receive notifications as soon as you first open an app. It's easy to permit or deny these permissions, but it's just as easy to reverse your decision.
The notification upgrades in Android 13 are simple, but they're pretty brutal for app developers who rely on notifications for daily active user numbers, revenue generation, and other business metrics.
- Don't Miss: Android Lets You Set Different Languages Per App for a Truly Multilingual Experience — Here's How It Works
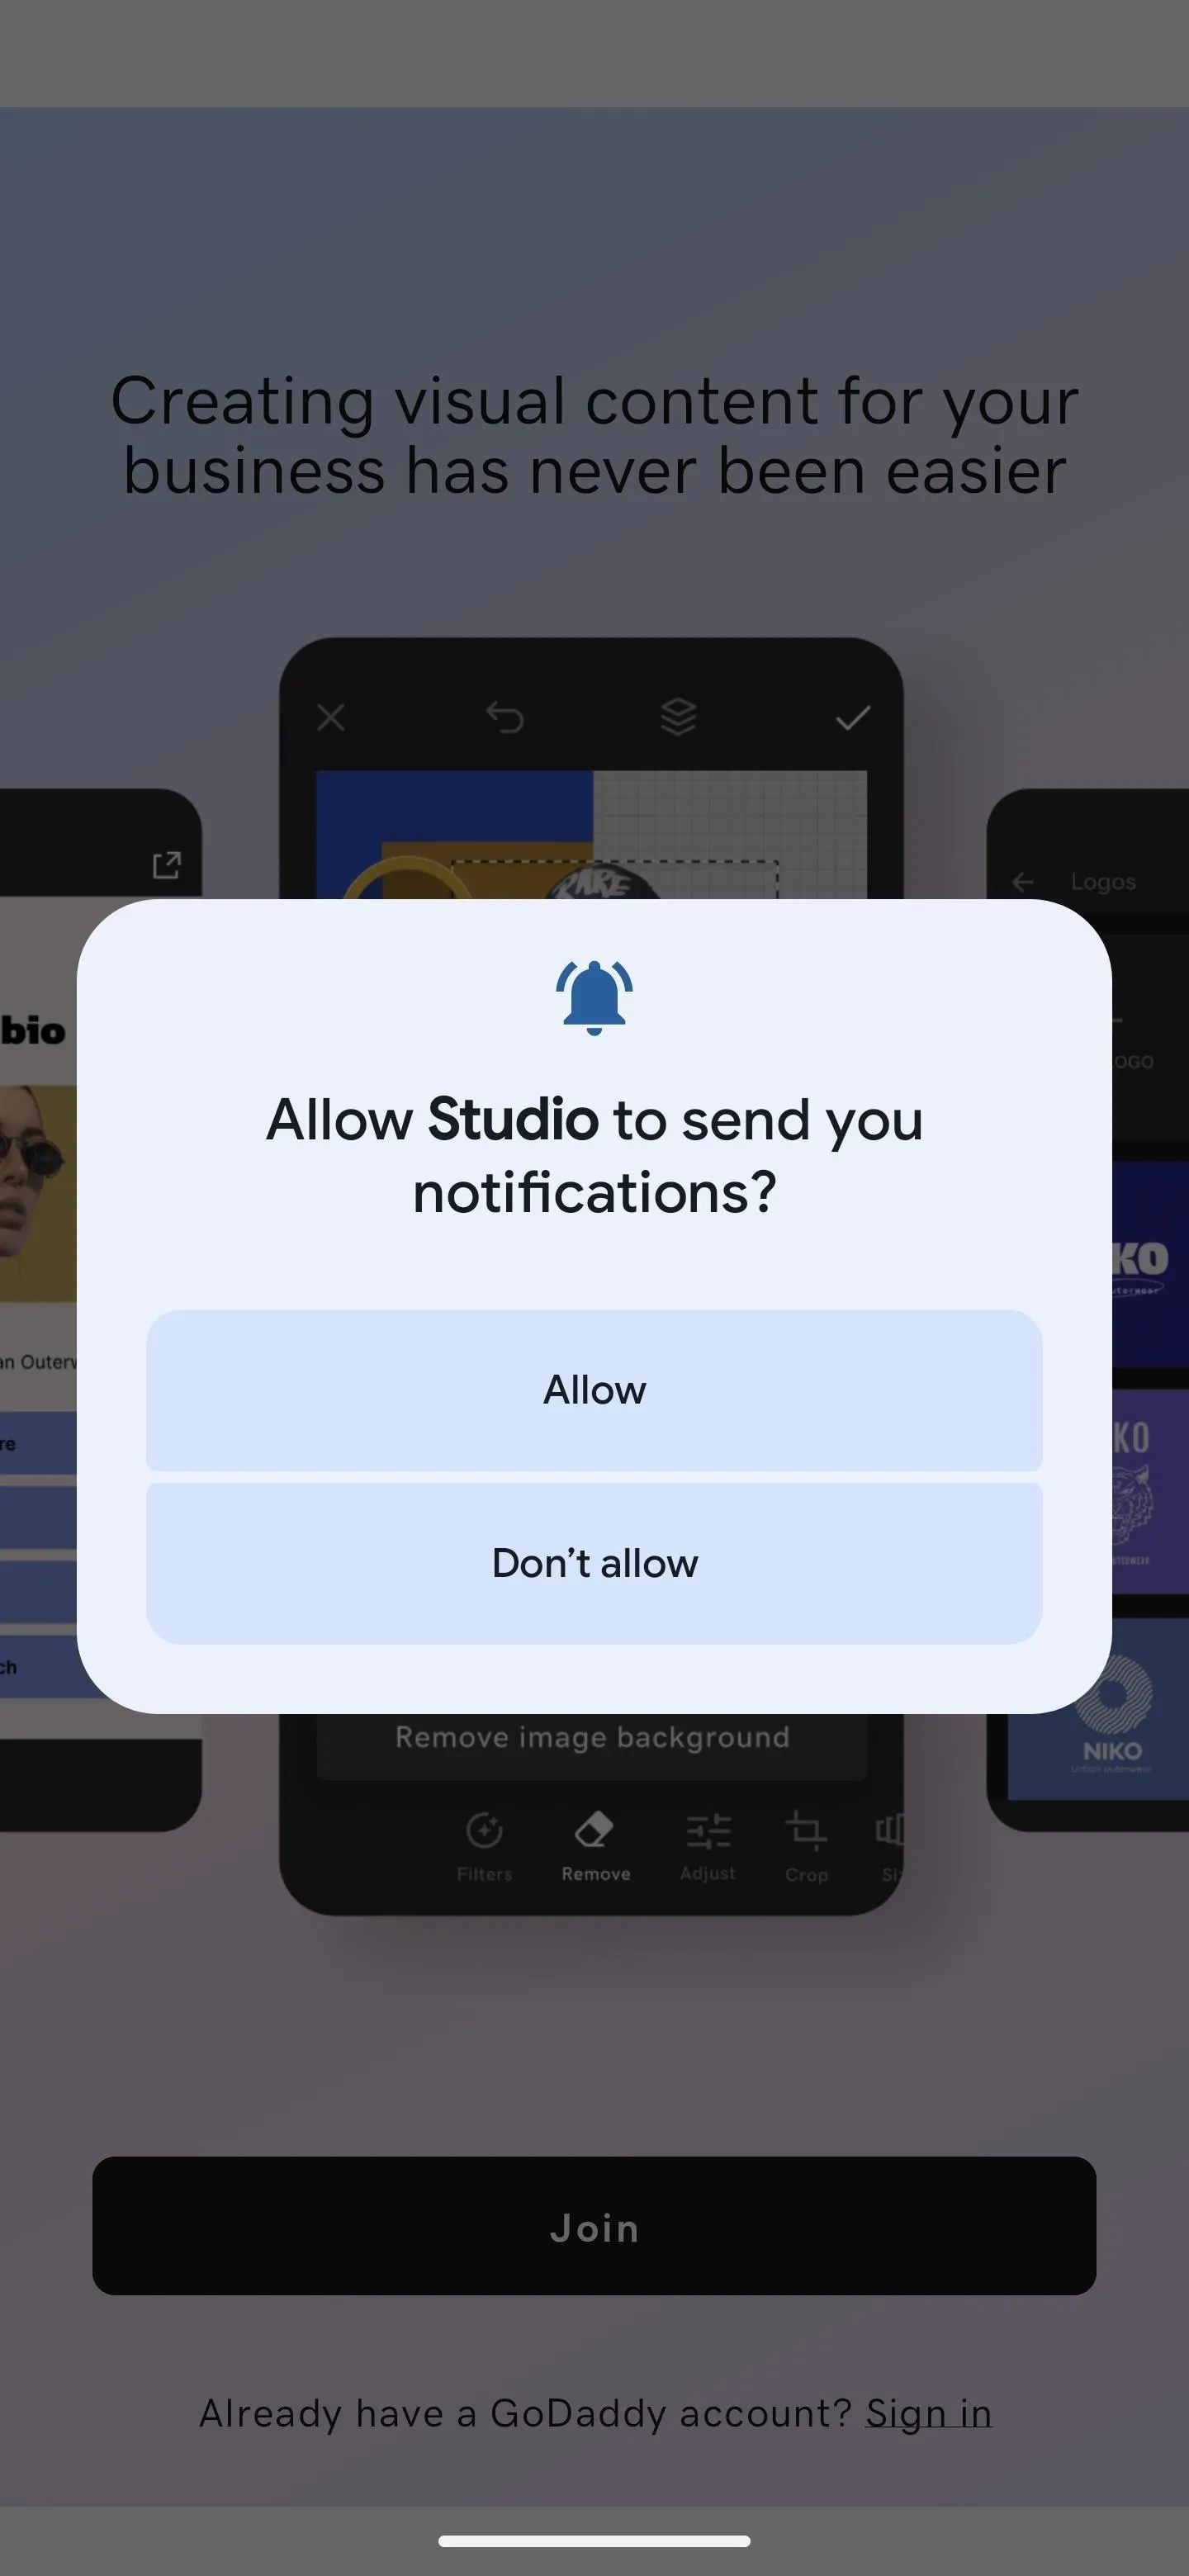
After you install a new app on Android 13, the first thing you'll see upon opening the app is a pop-up asking you to allow or deny permissions for the app to send you notifications. It's an all-or-nothing proposition, but it's a welcomed option if you find yourself overwhelmed with notifications.


Whether you denied or approved permission for an app to send notifications, it's easy to adjust the settings if you ever change your mind. And that goes for any Android phone running Android 13, such as a Google Pixel or Samsung Galaxy model.
If you hit "Don't allow," you can grant notification permissions in just a few taps and even approve or deny certain notification types depending on the app. The same applies if you initially hit "Allow" but want to switch to zero notifications from the app.
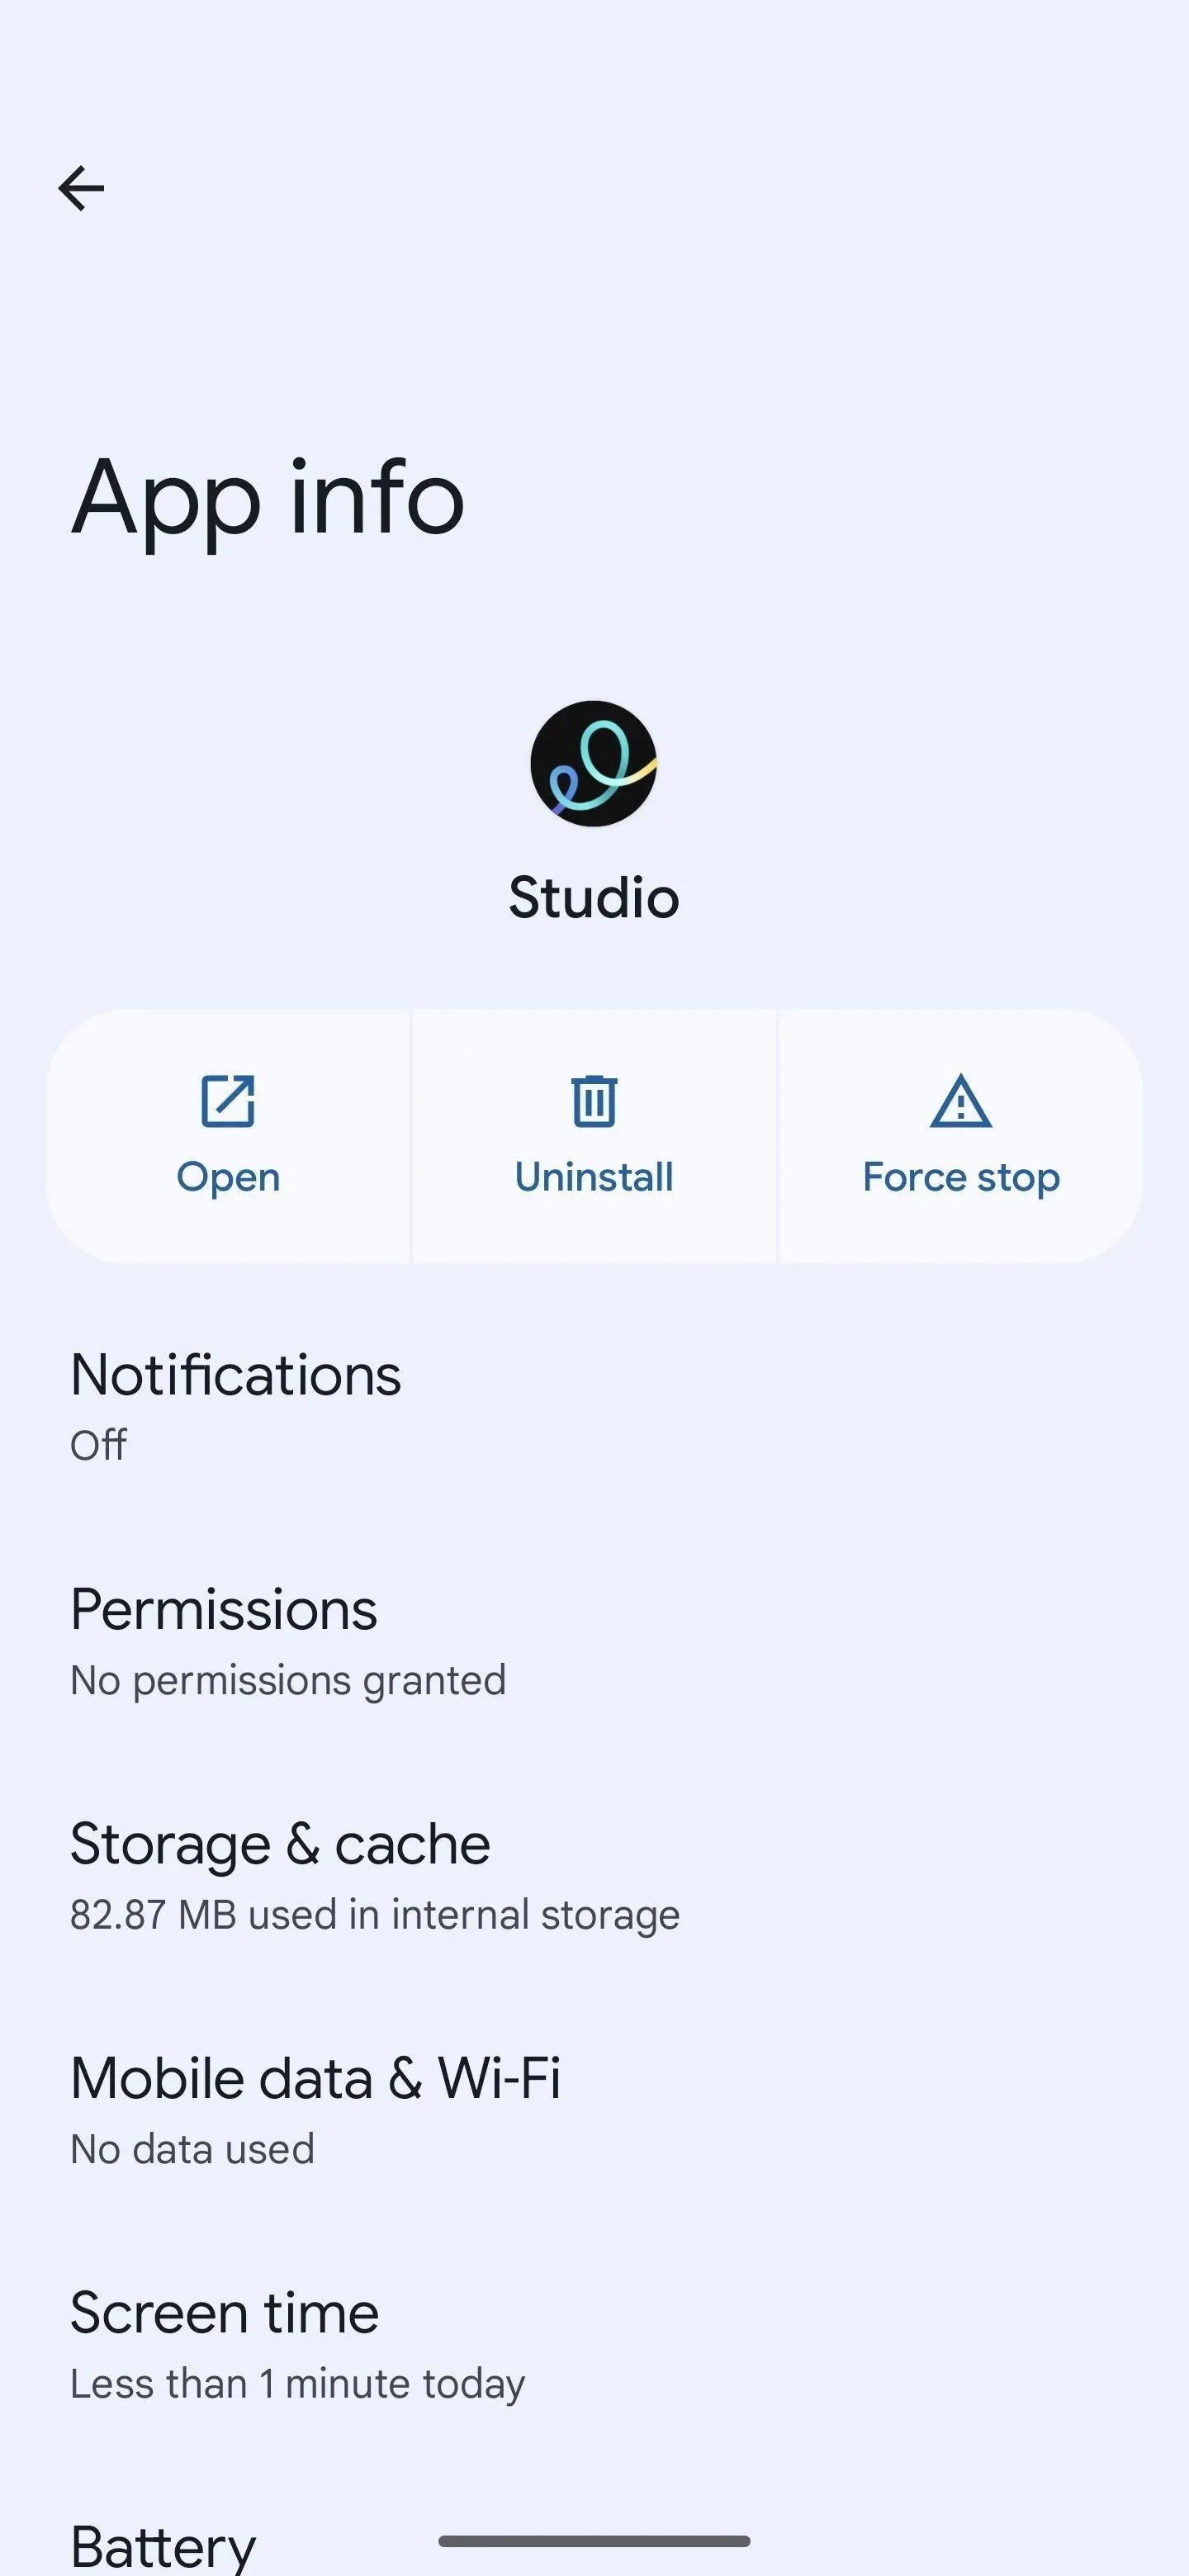
Access the App's Info Page
First, you must open up the info page for the app in question. There are more than a few ways to accomplish this, which are relatively easy and accessible in Android 12, not just Android 13.
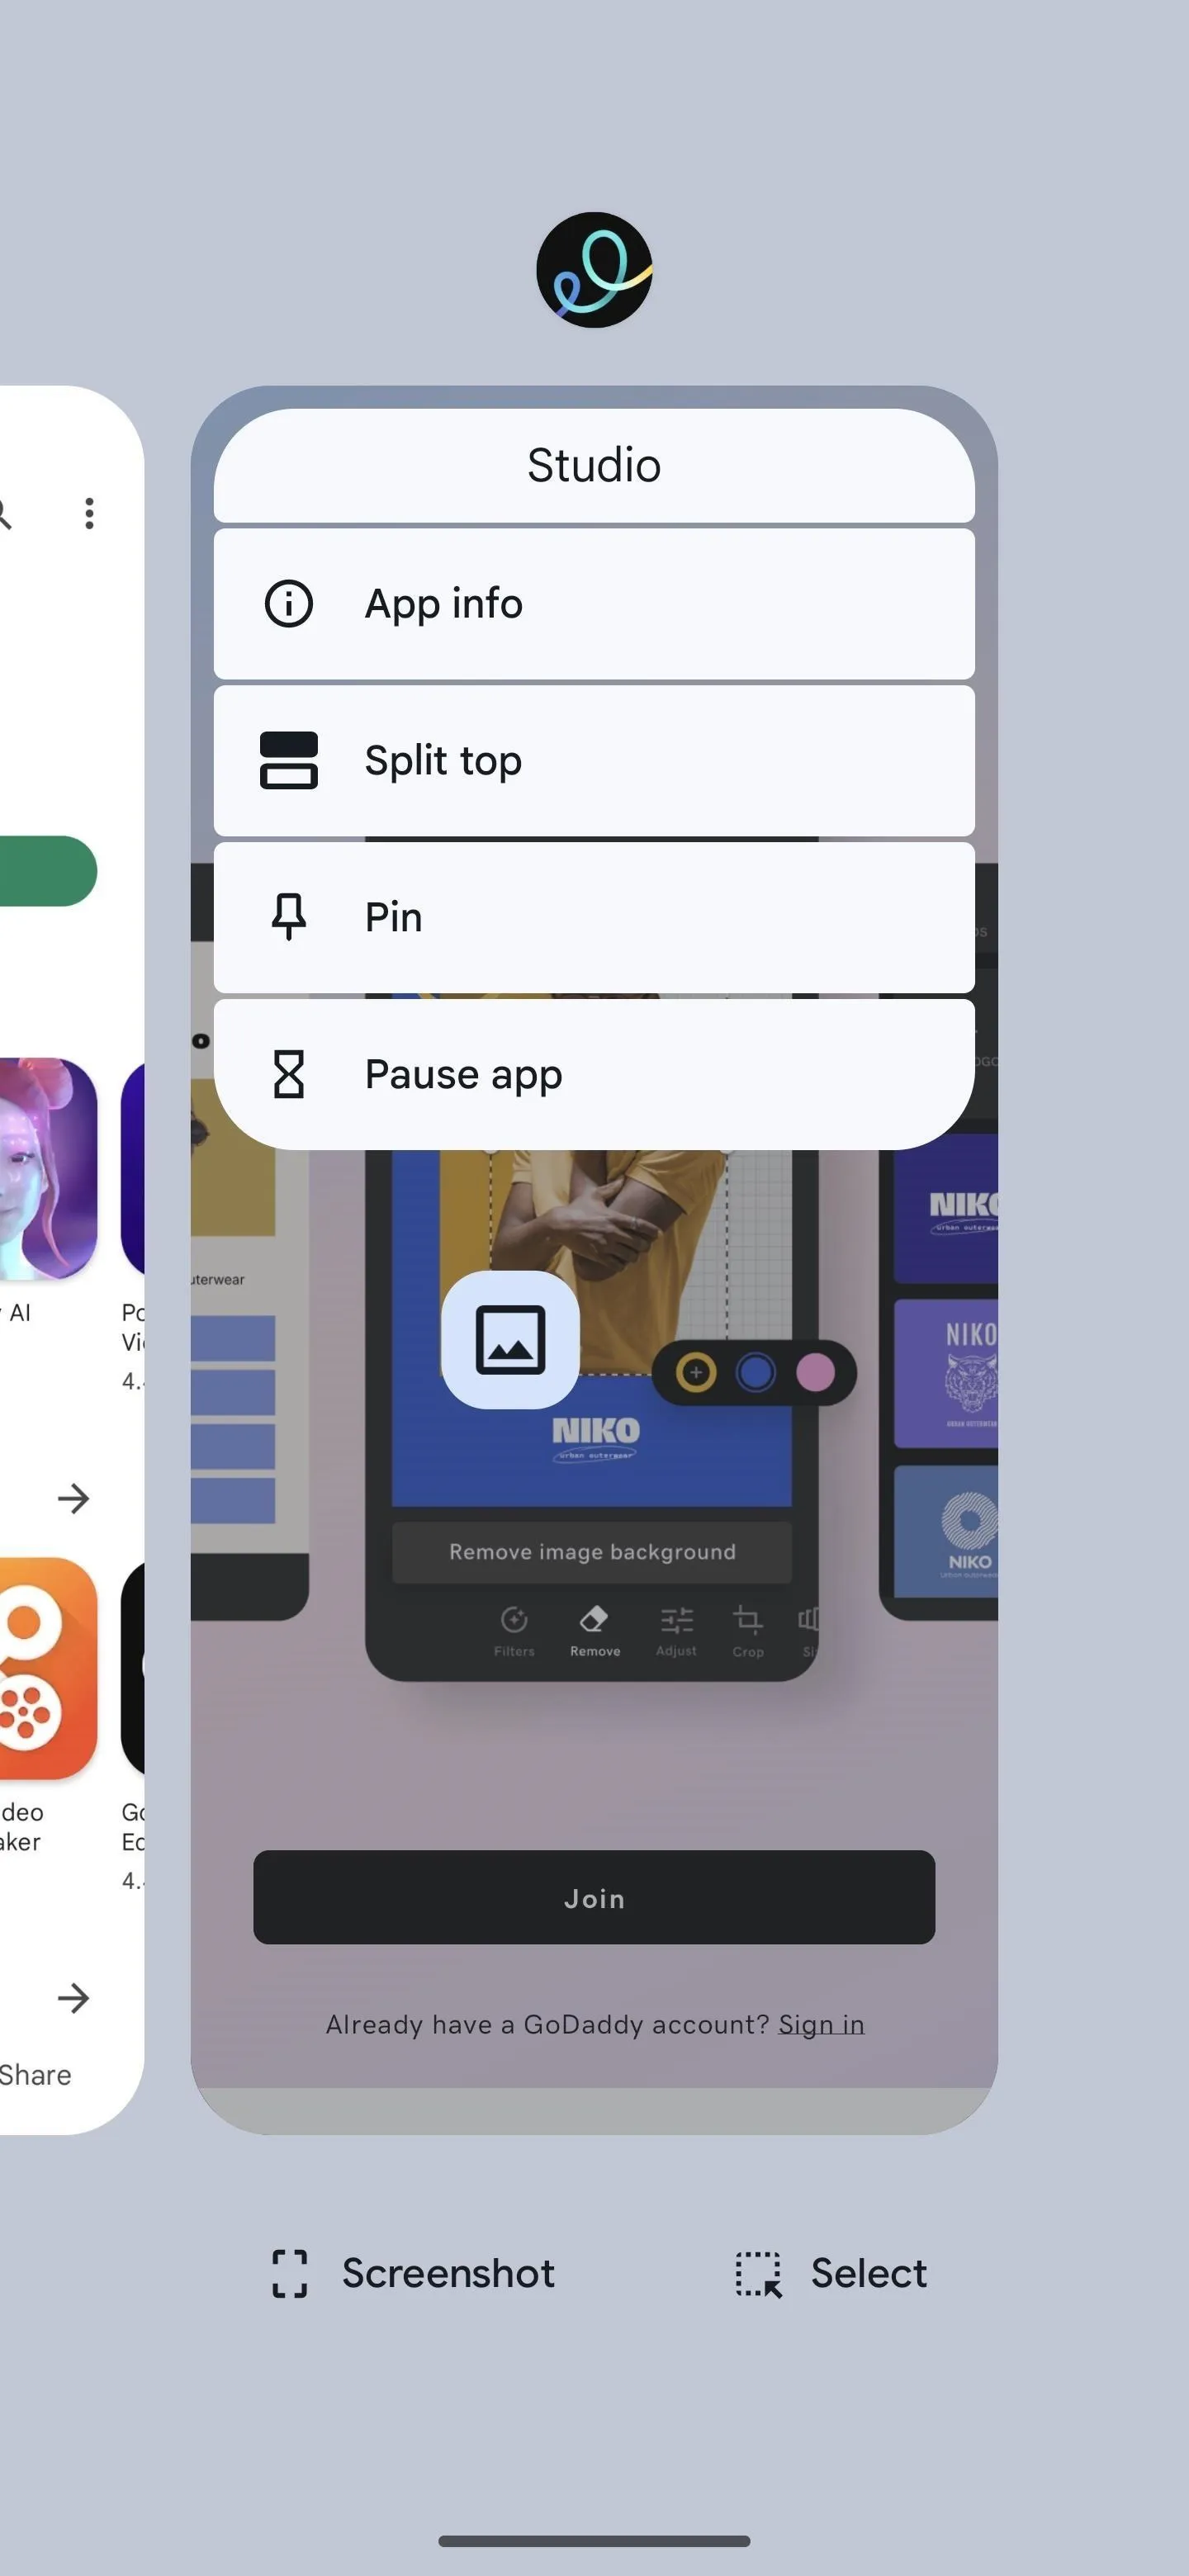
- If you have the app open or recently used it, swipe up from the bottom to open the Recents screen, and ensure the app is centered in the interface. Then, tap its app icon above the preview and choose "App info."
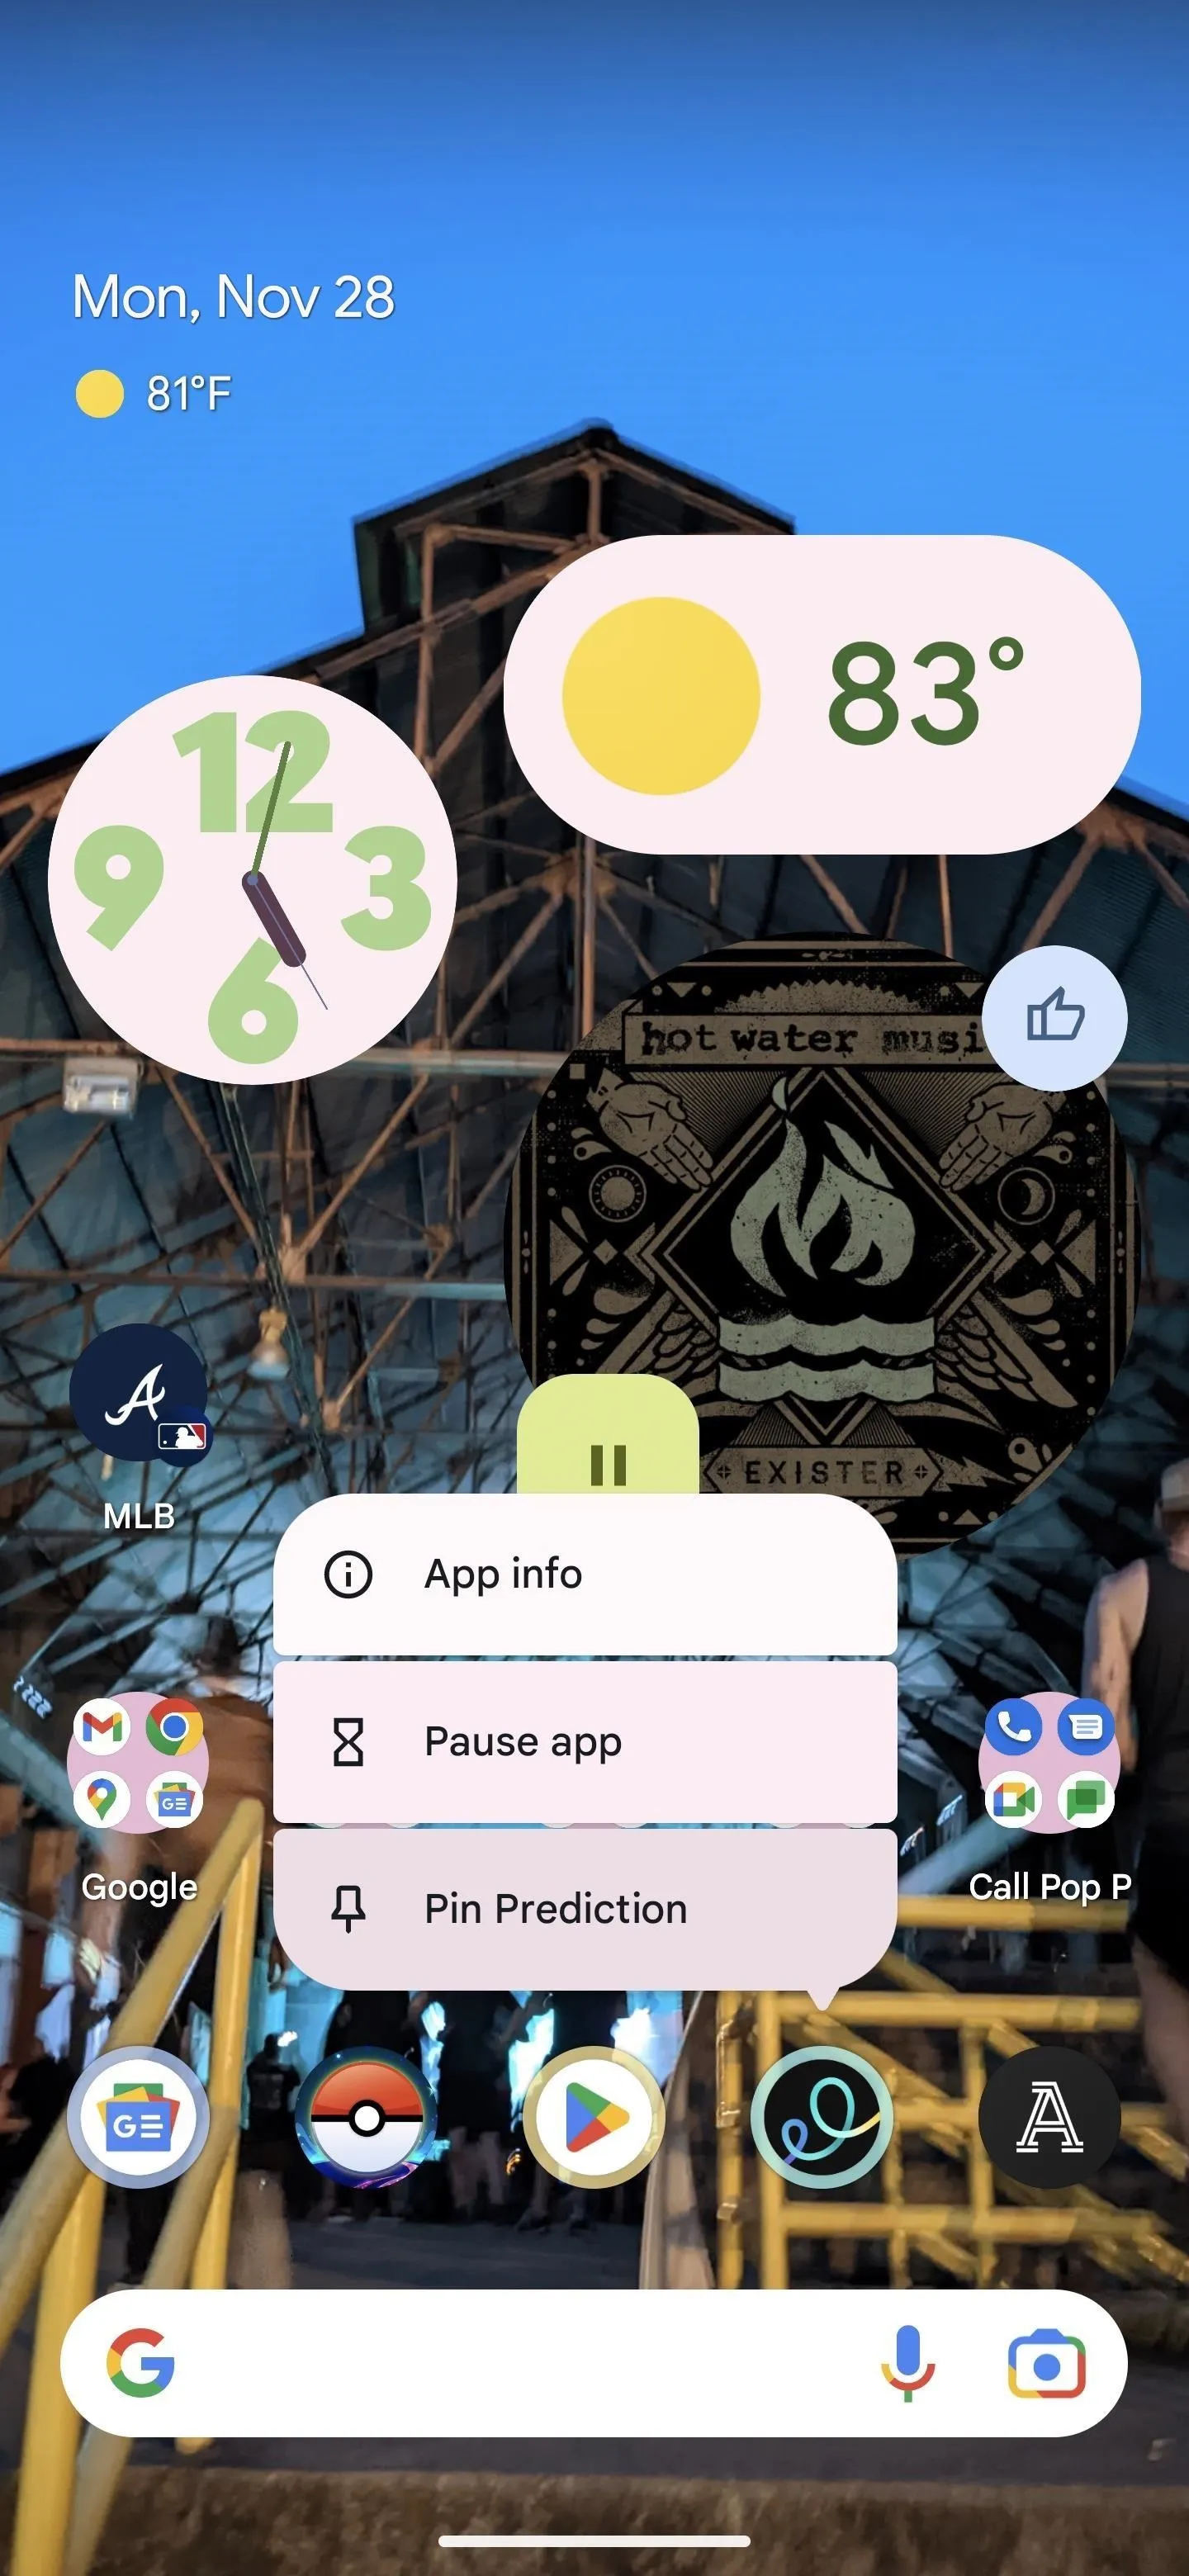
- Locate the app icon on your Home Screen or All Apps list, long-press it to open the shortcuts menu, and choose "App info" or the info (i) button.
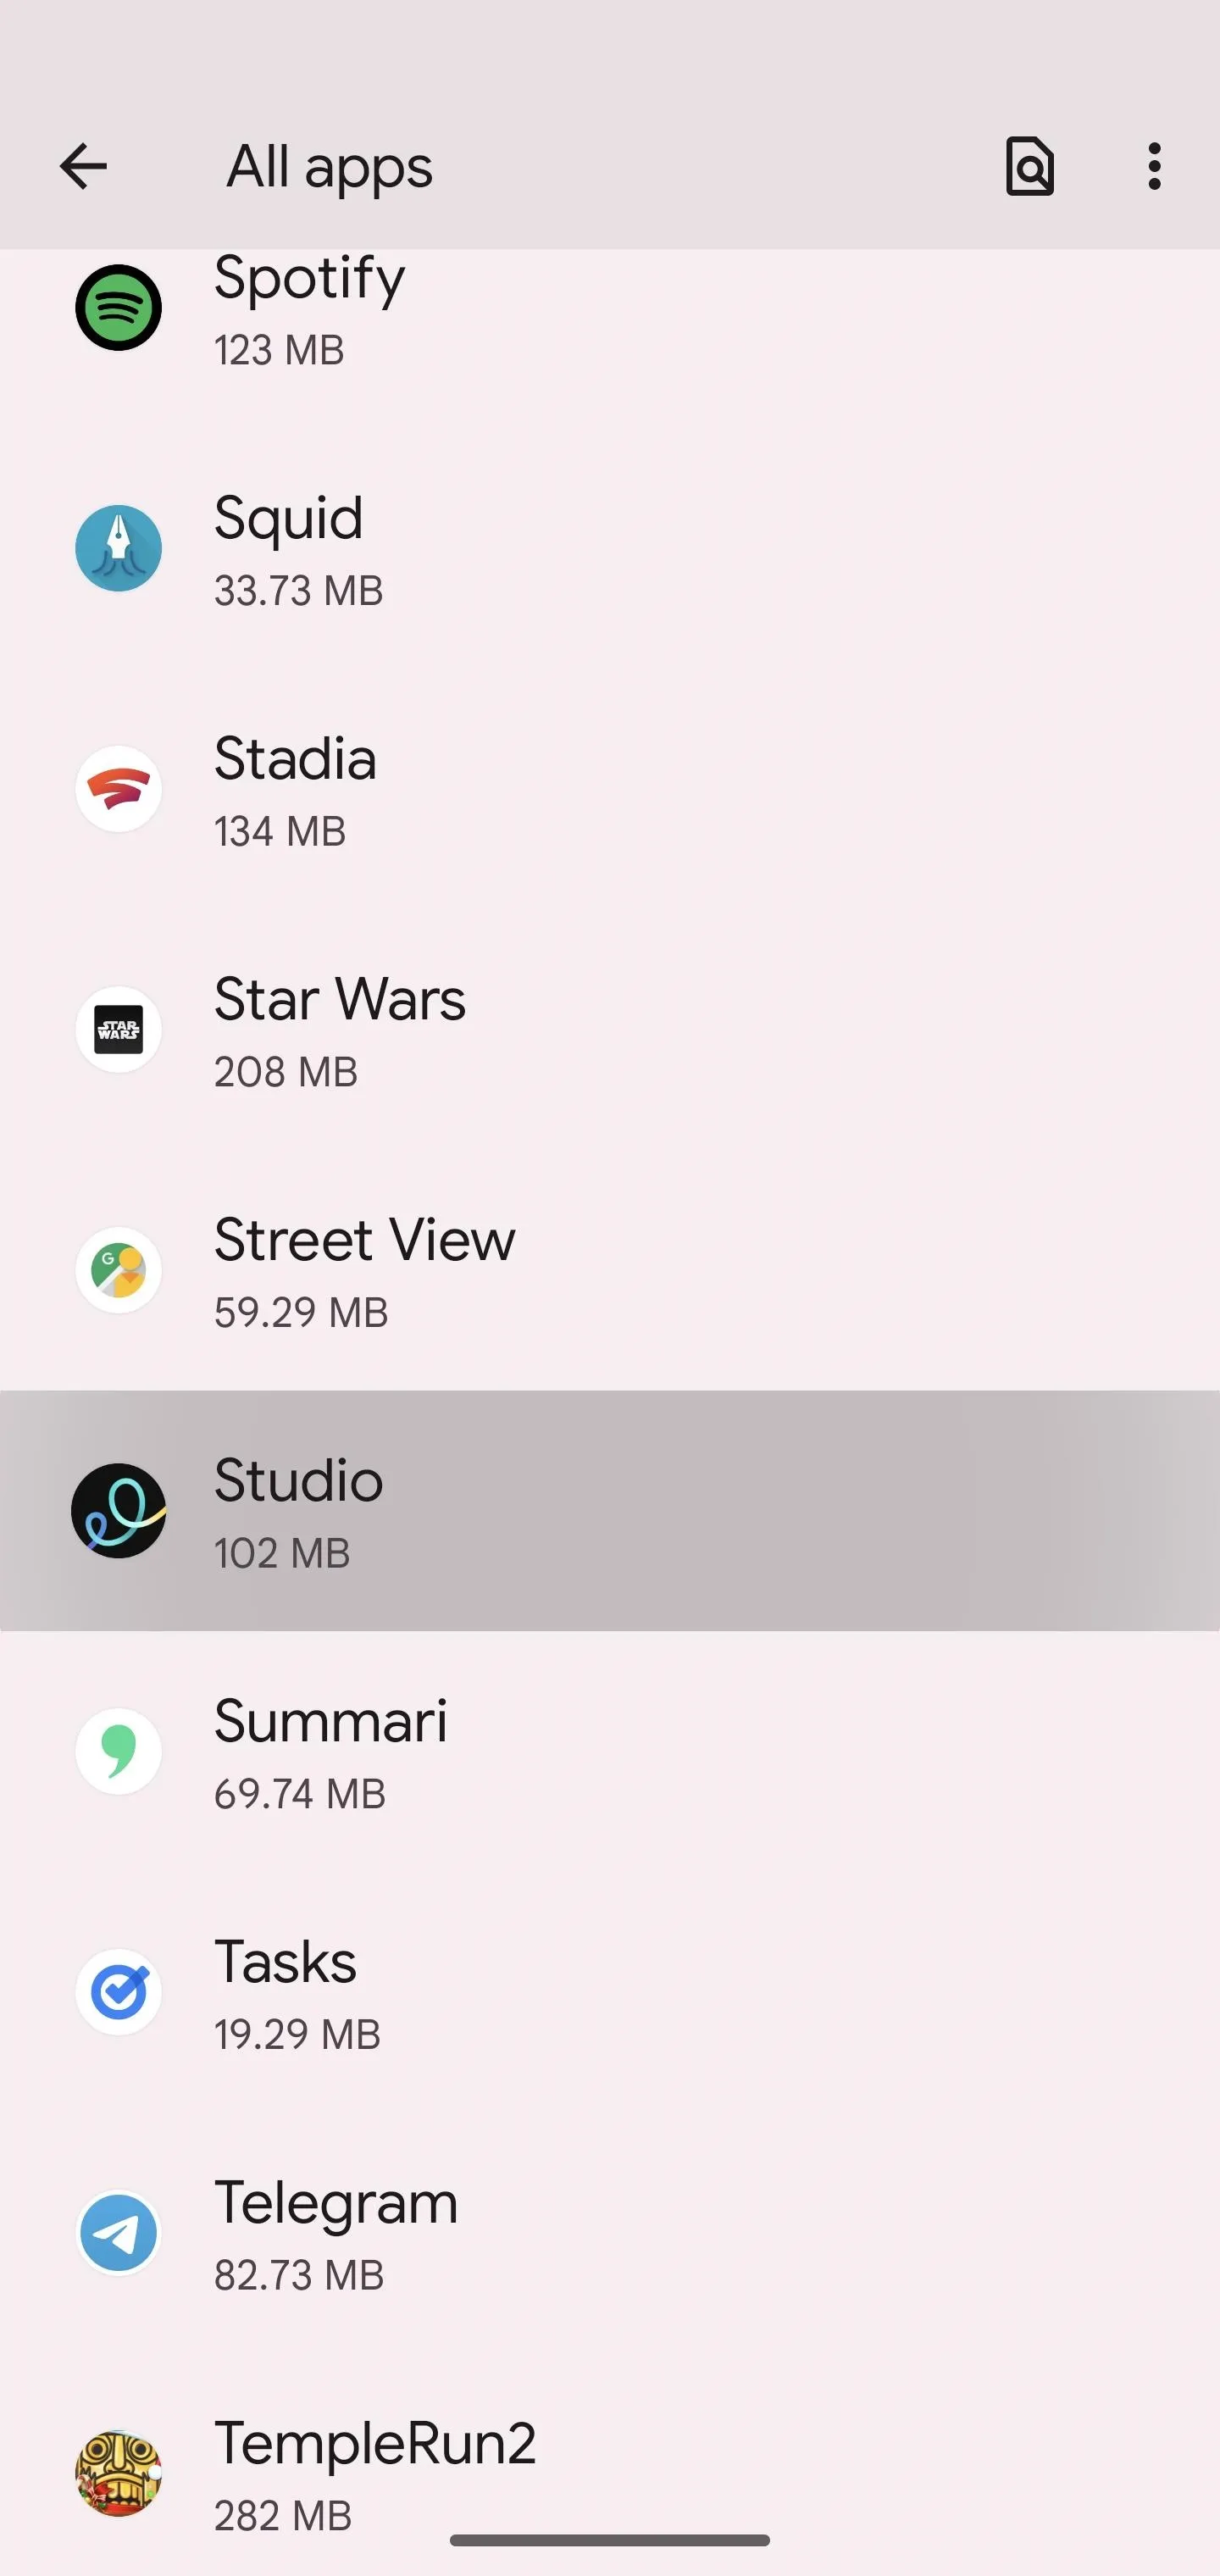
- Open the Settings app and tap "Apps," "App info," or something similar. If you see the app right away, select it. On stock Android, you can tap "See all apps" or "All apps" and then find and select it.
Adjust the App's Notifications Permissions
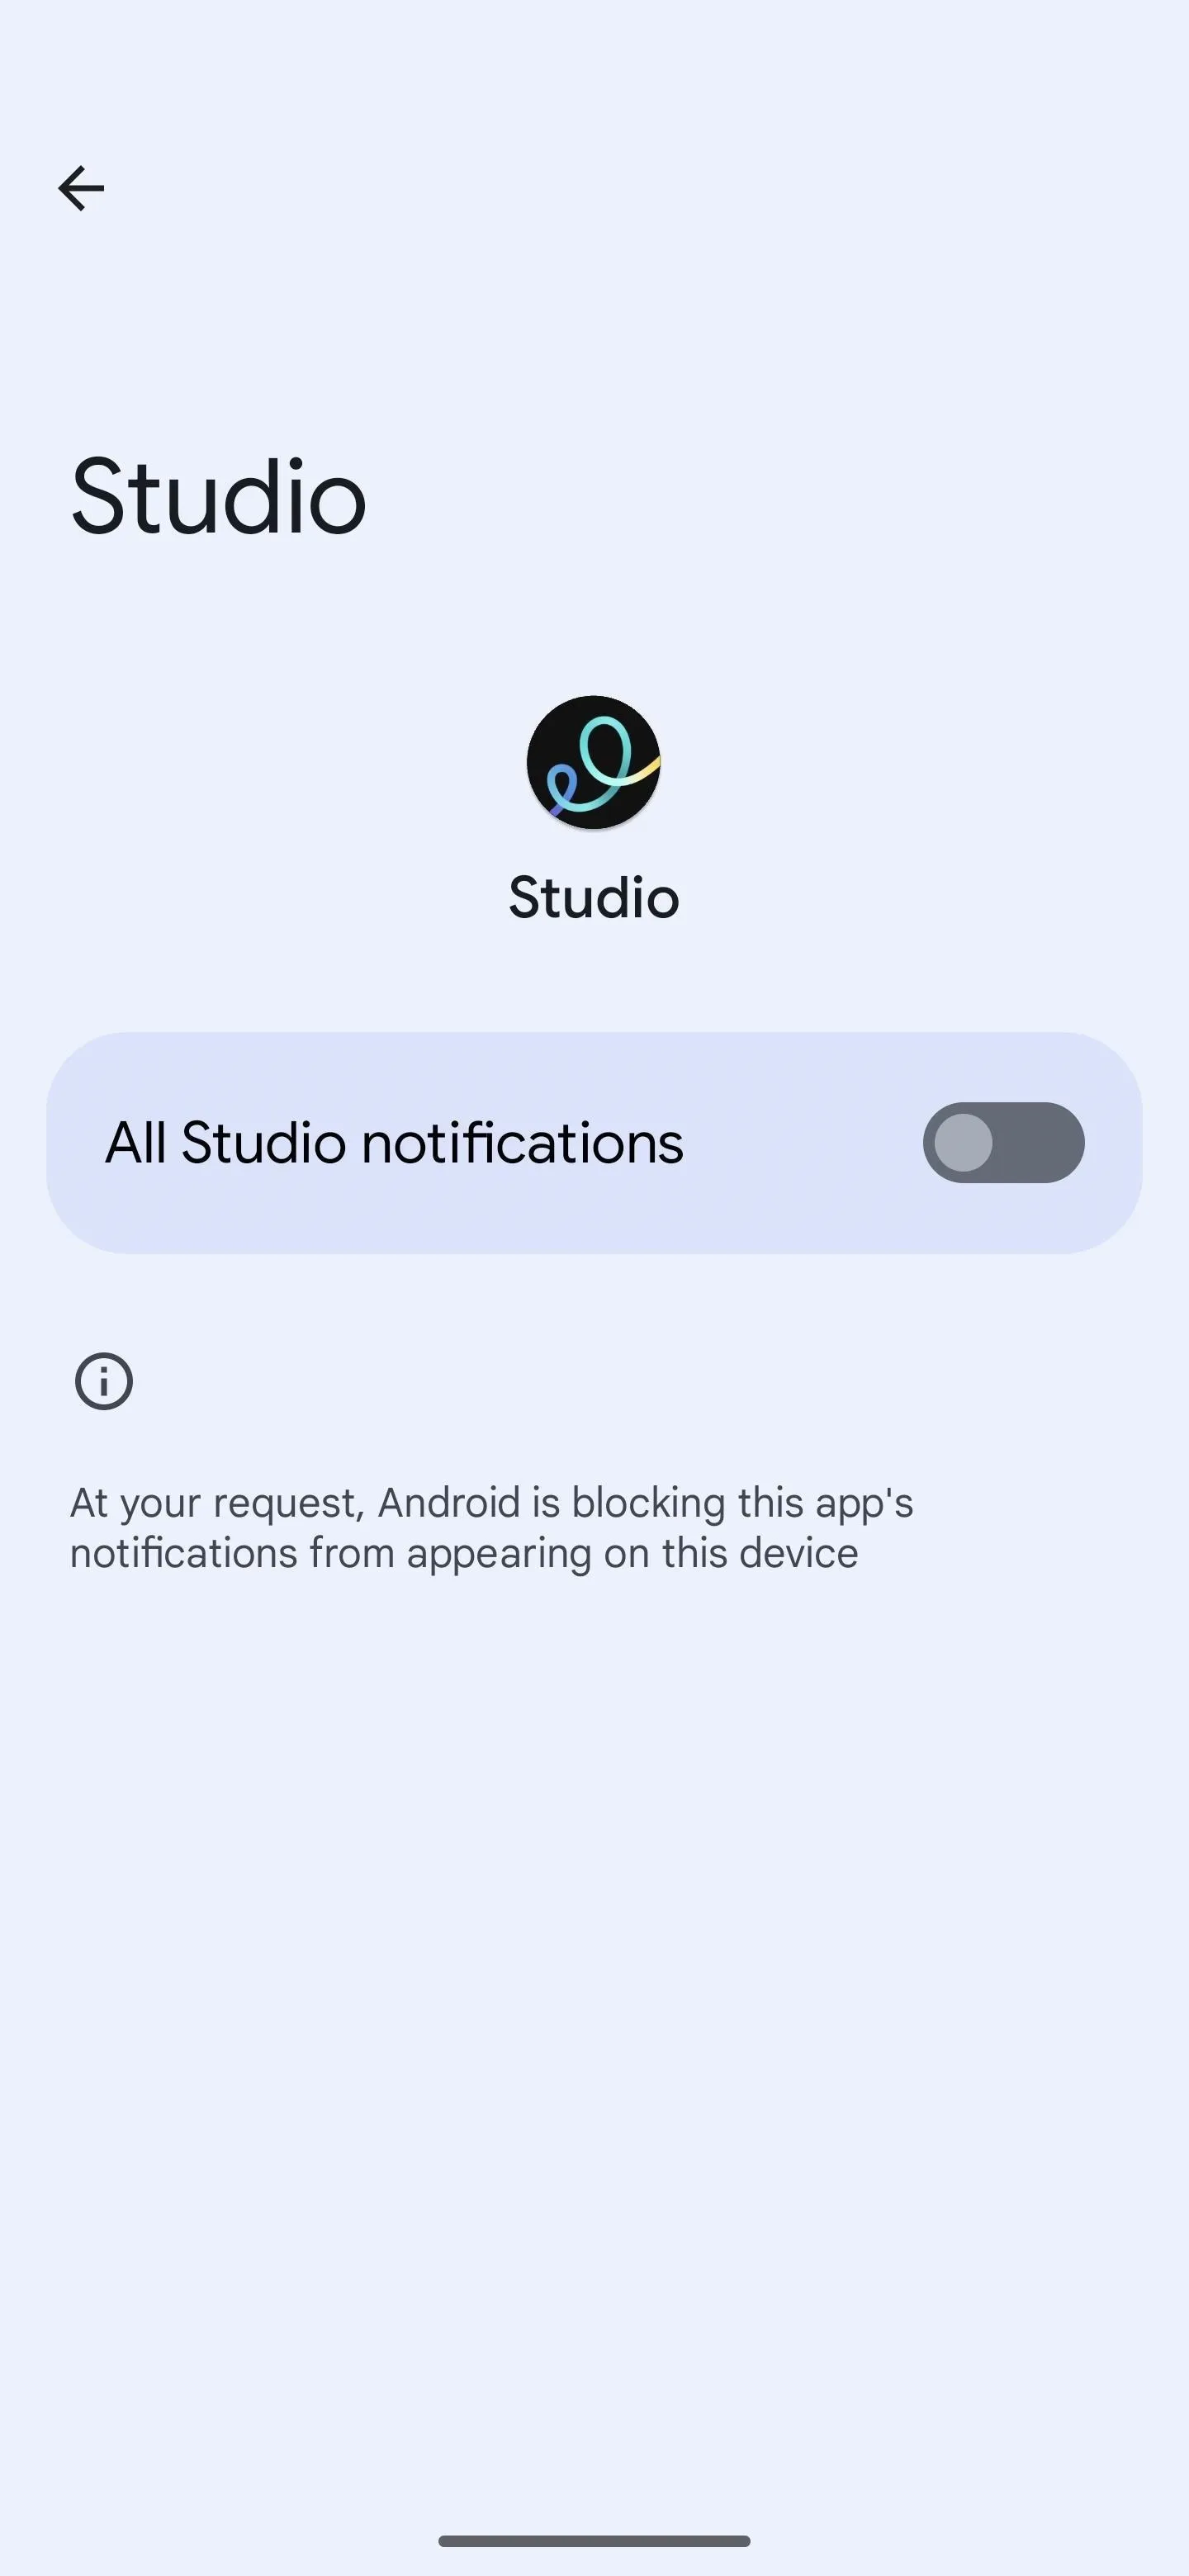
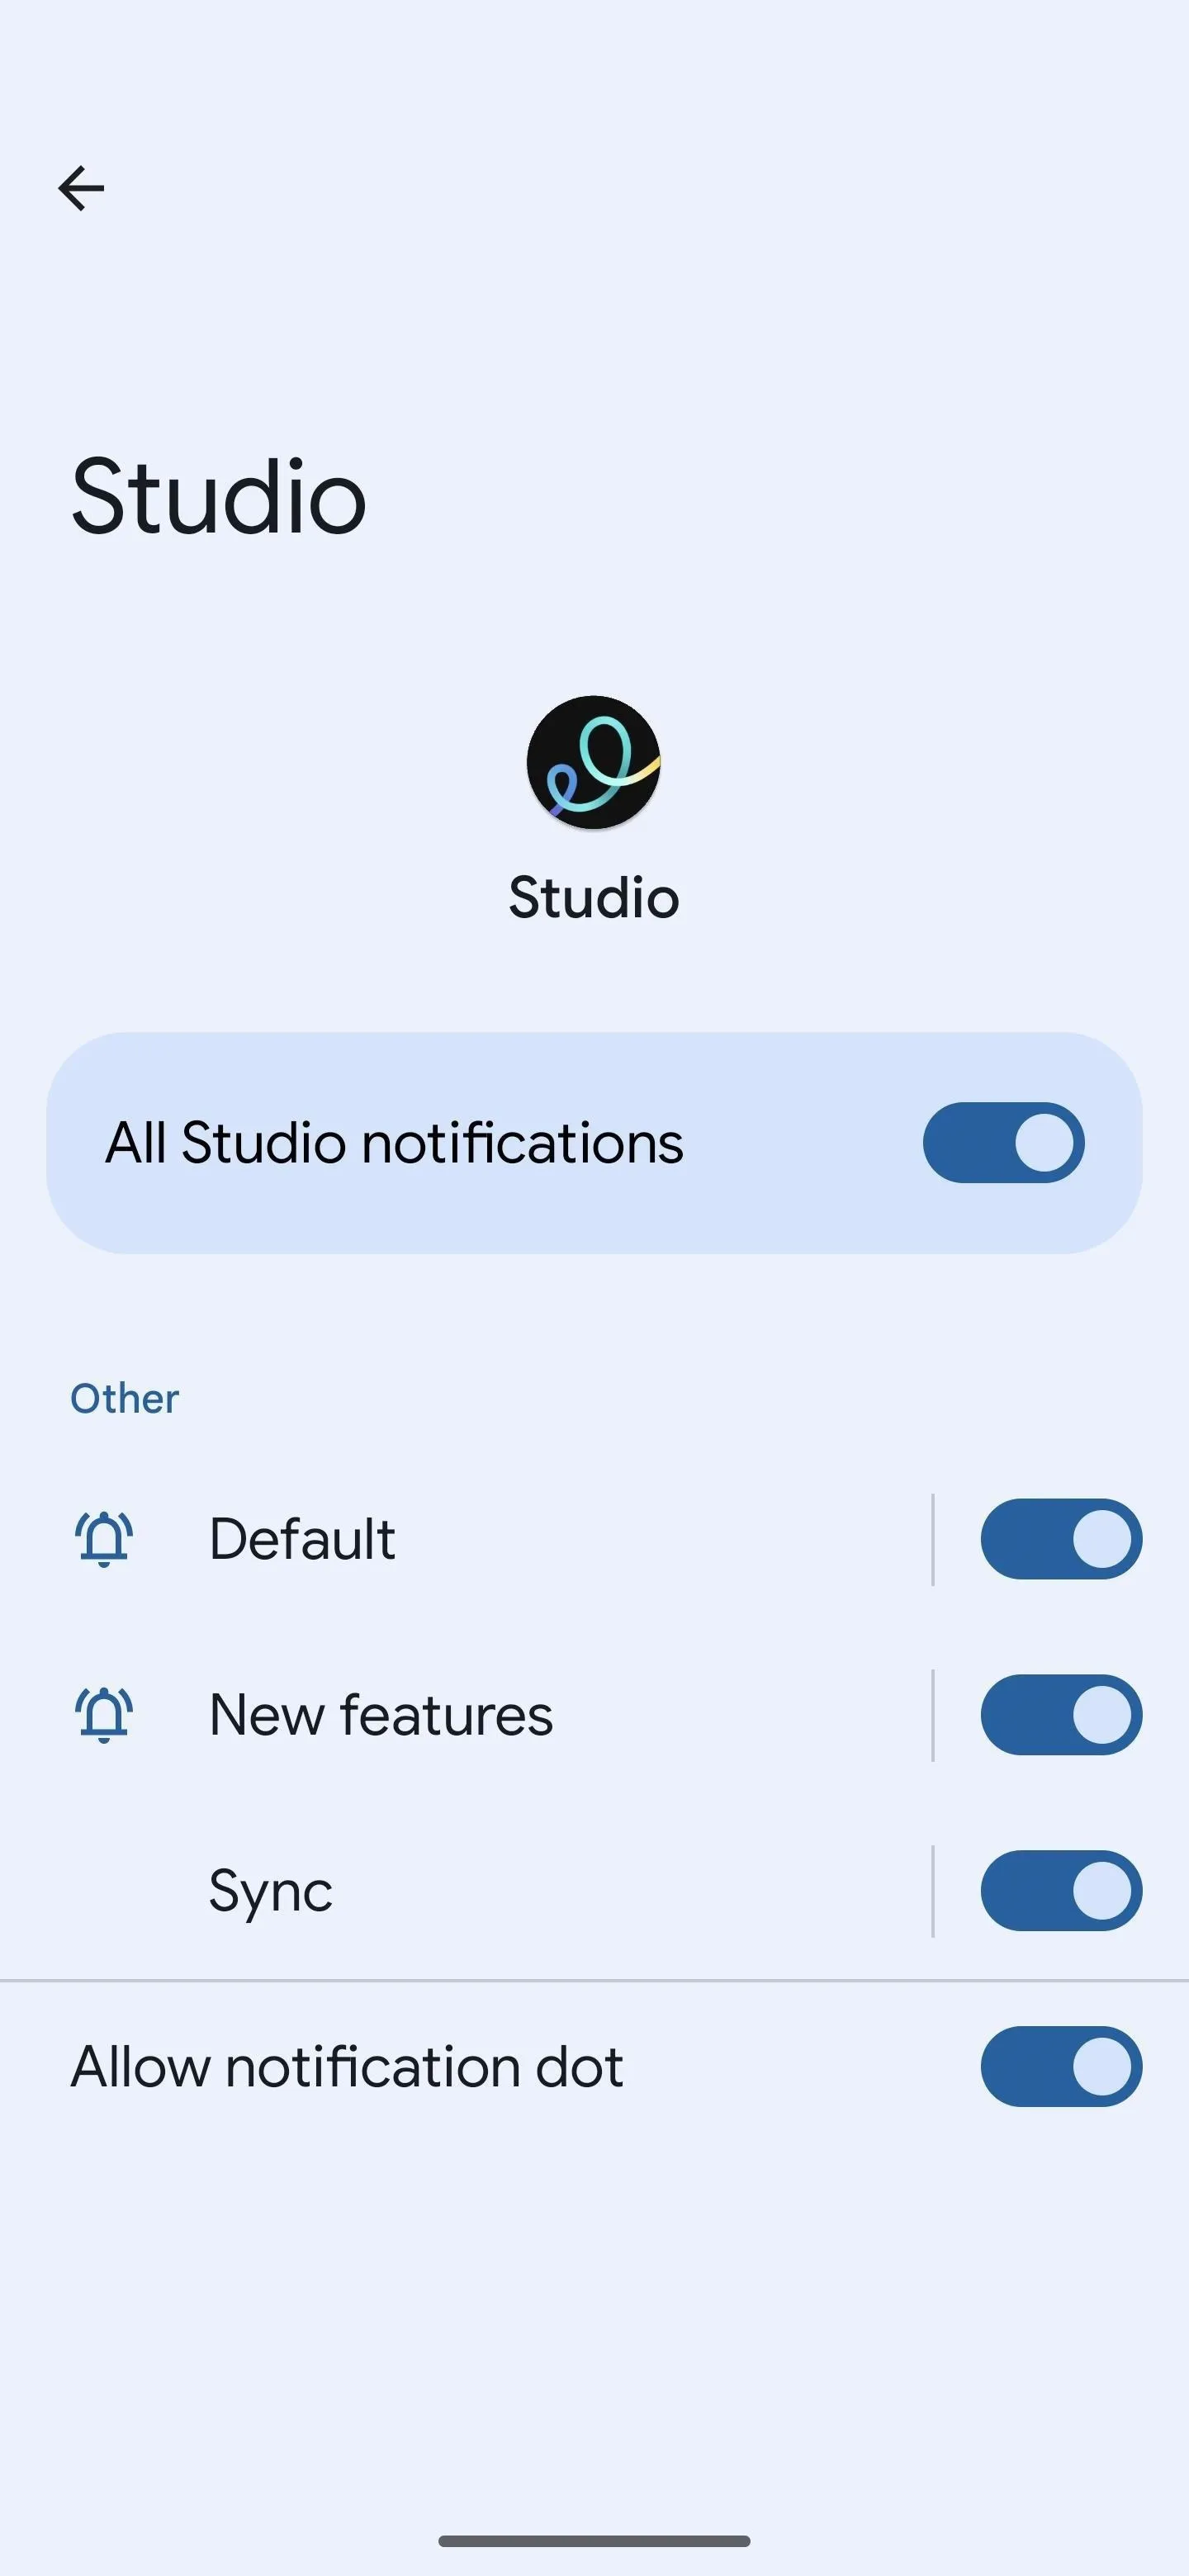
Select "Notifications" at the top of the list on the app's info page. Here, you'll find a toggle switch to turn all notifications for the app on or off, as well as notification categories for more granular control.
Revert Your Decision (If Necessary)
Maybe denying or approving notifications was the right call after all. If that's the case, follow Steps 1 and 2 above to undo the permissions.
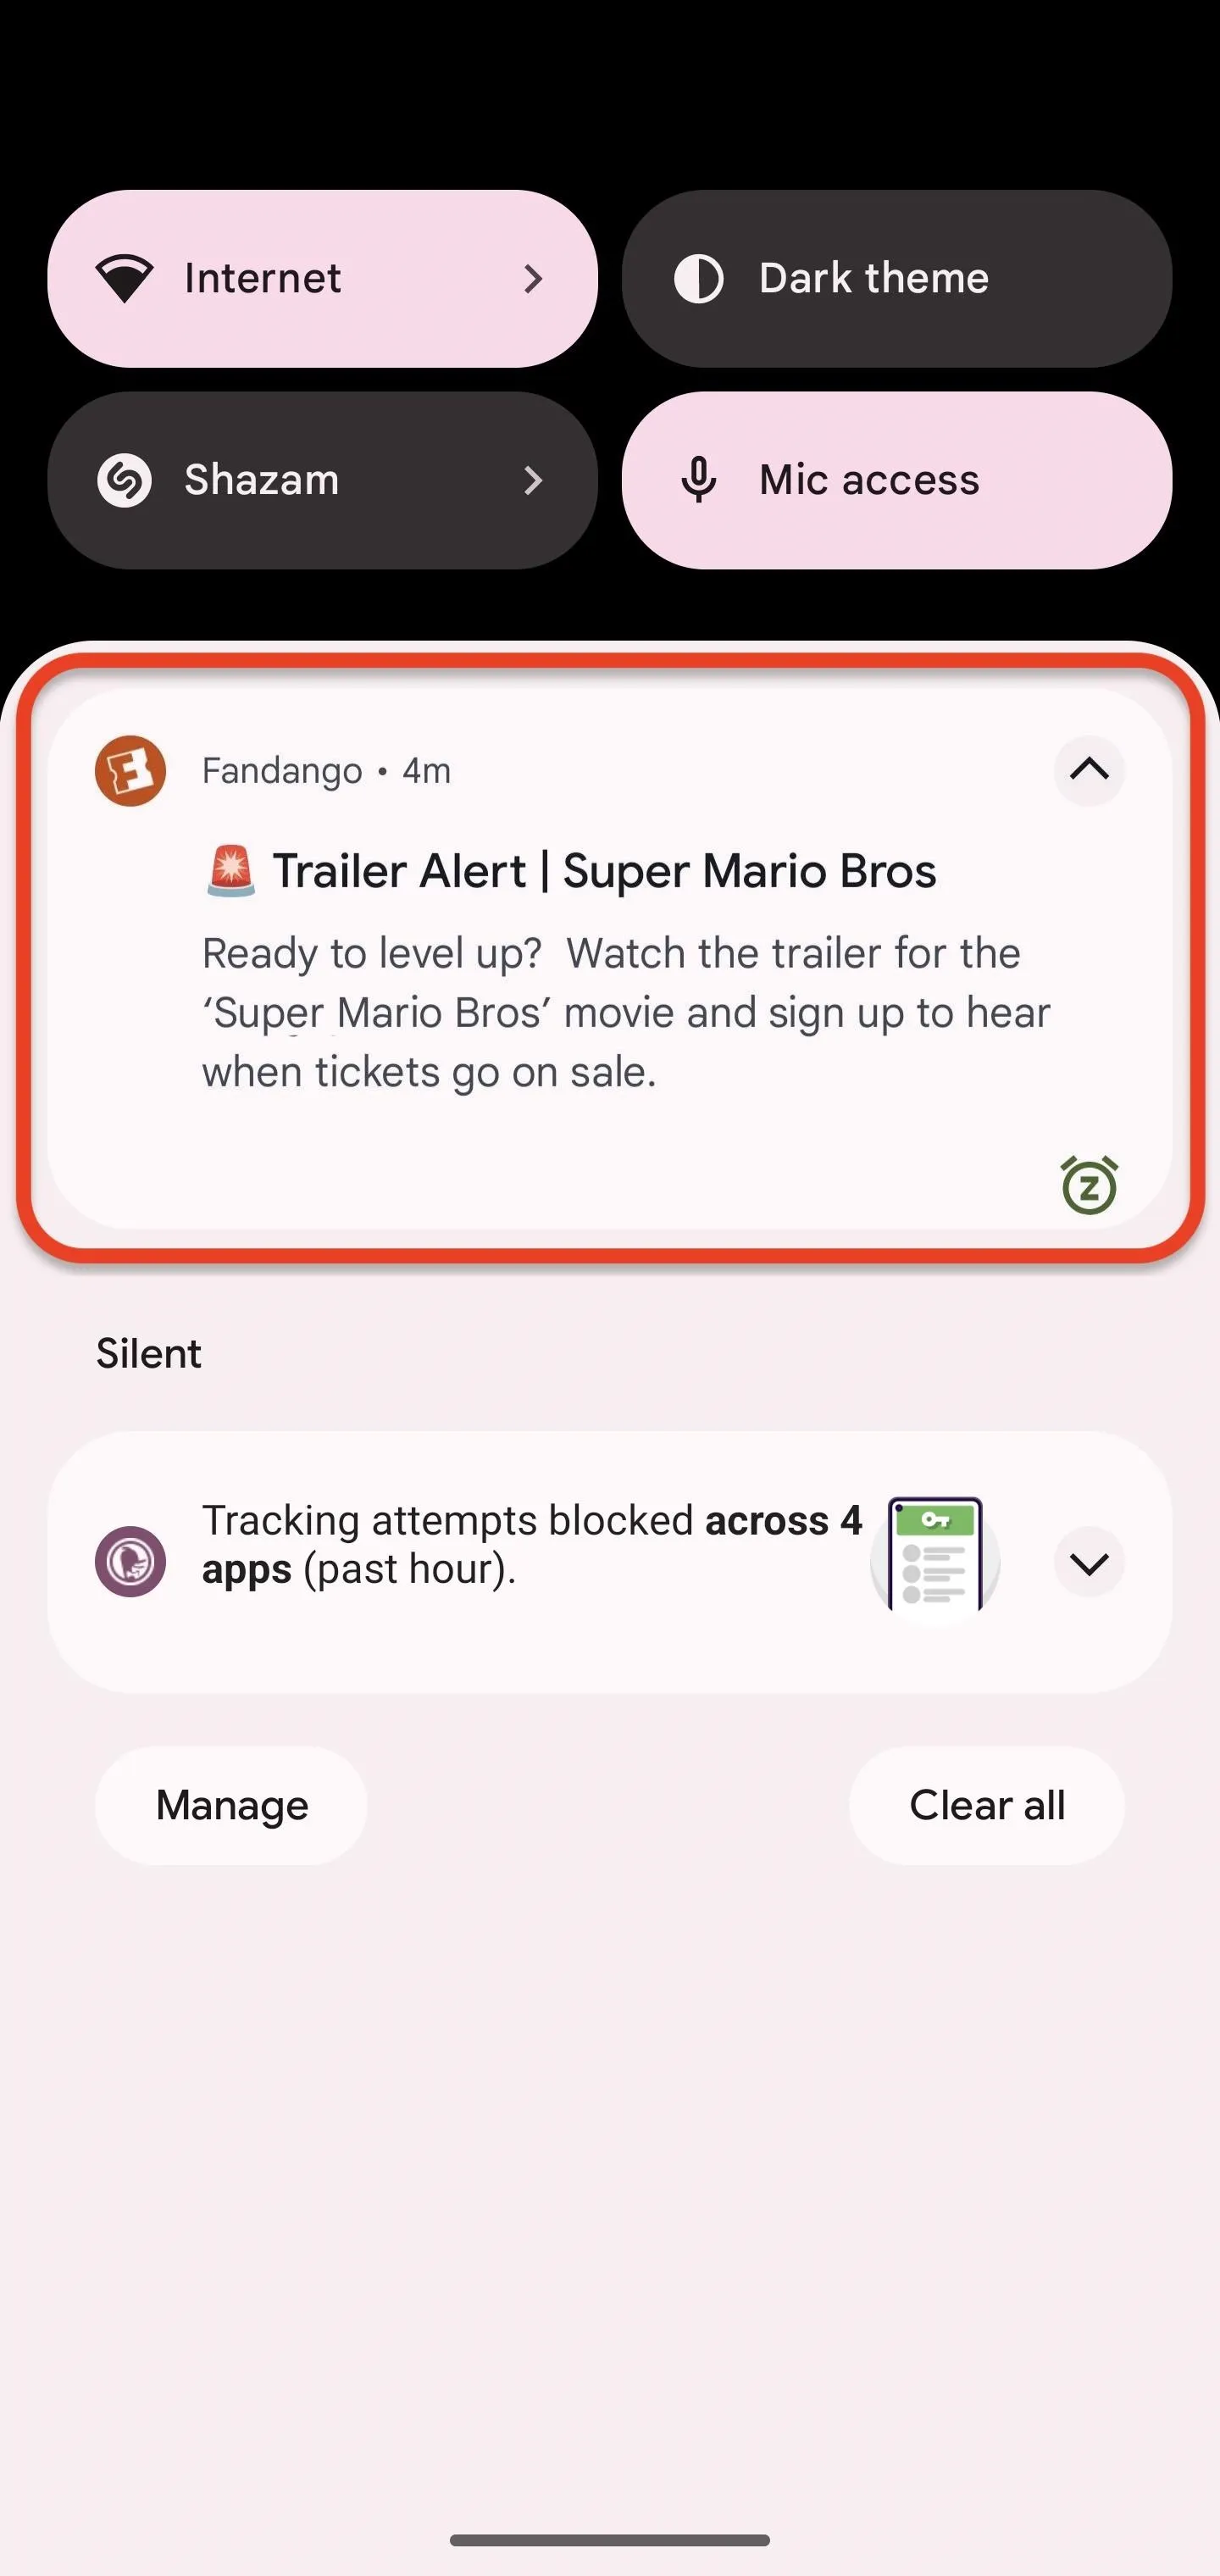
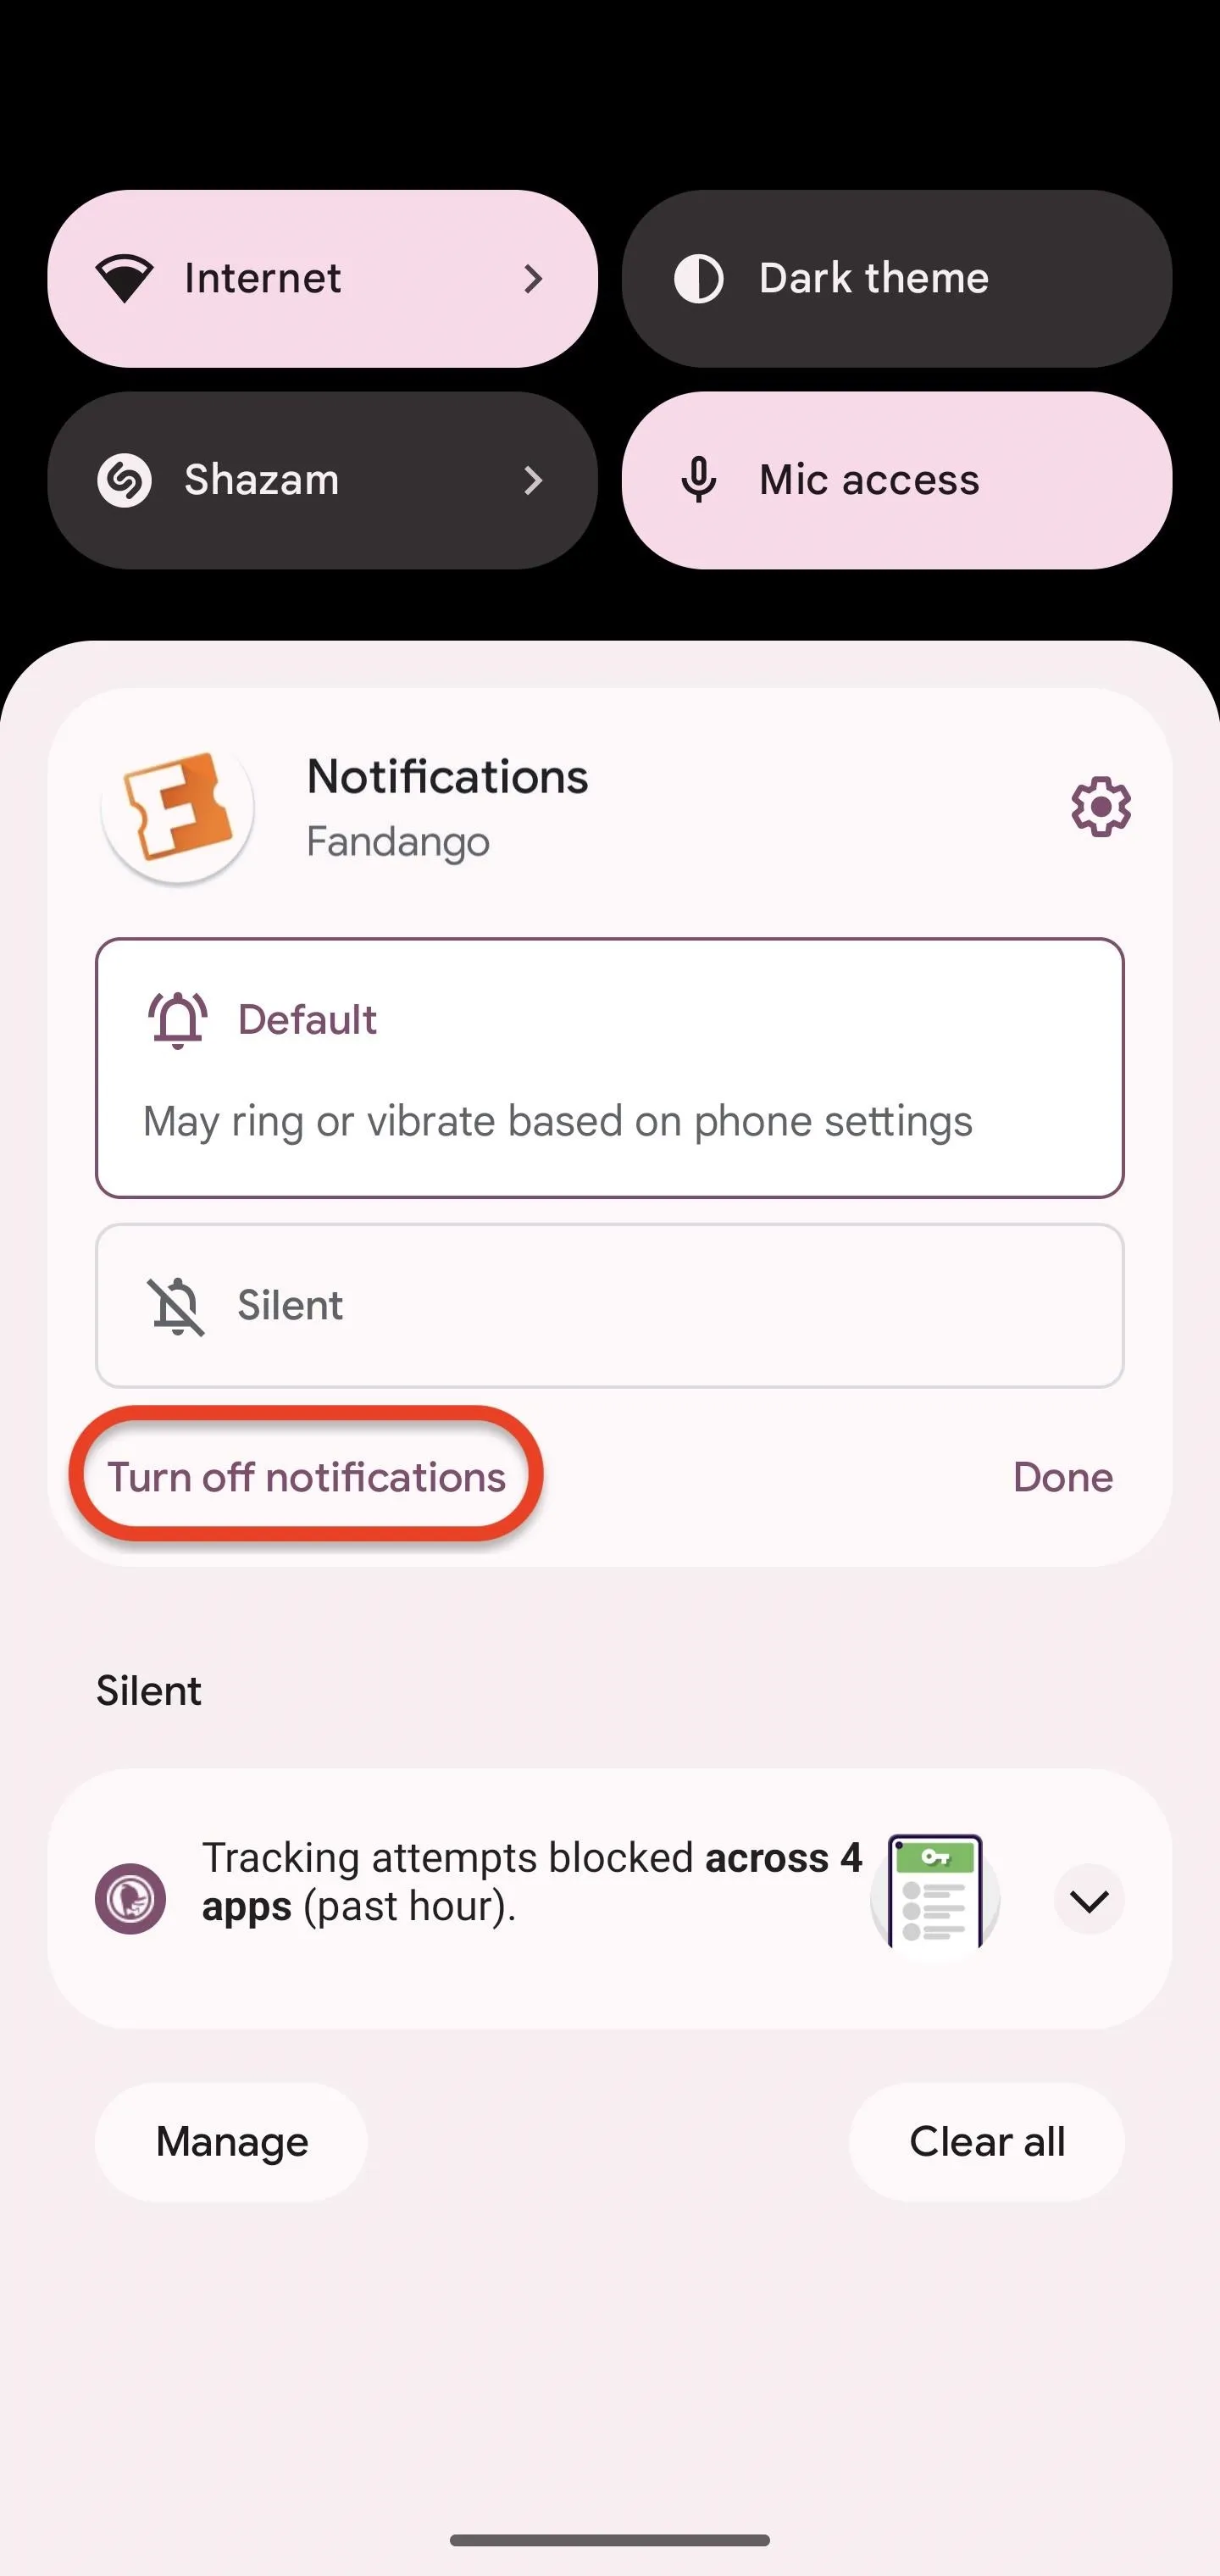
Alternatively, when you want to remove notification permissions, you can long-press a pesky notification from the app right when you get it or from the notification drawer, then select "Turn off notifications" from the options to make them go away. This also works in older Android versions, not just Android 13.
Cover photo and screenshots by Tommy Palladino/Gadget Hacks


Comments
Be the first, drop a comment!