


Lover it or hate it, Android 10 is a big improvement over Android 9 Pie. Based on previous versions, most flagships released in the last two years will get Android 10, but the question is when. So while you wait for those cool new gestures, how about I show you an app that gives you a nearly identical experience?
There are several third-party apps on the Play Store for this, but the one I found to have the best balance of control and consistency is Fluid Navigation Gestures. You can customize it to be exactly like Android 10 or a little different. For now, let me show you how to get it configured for the same performance as stock Android.
- Don't Miss: All the New Features & Changes in Android 10
Install Fluid Navigation Gestures
As I mentioned, Fluid Navigation Gestures (FNG) is one of the best gesture control apps on the Play Store. Not only does it work very well, but it is also free to use with a premium version for even more features. However, for what we are trying to accomplish, you won't need to pay a cent.
- Play Store Link: Fluid Navigation Gestures (free)
Turn on Fluid Navigation Gestures
Open FNG and when you arrive at the main page, select "Enabled." You'll be taken to a page with two permissions. Select each one to be redirected to the corresponding menu where you will need to tap the toggle to enable it. Once you've enabled both toggles, return to main page and select "Enable" again to turn on Fluid Navigation Gestures.
Customize to Mimic Android 10's Gestures
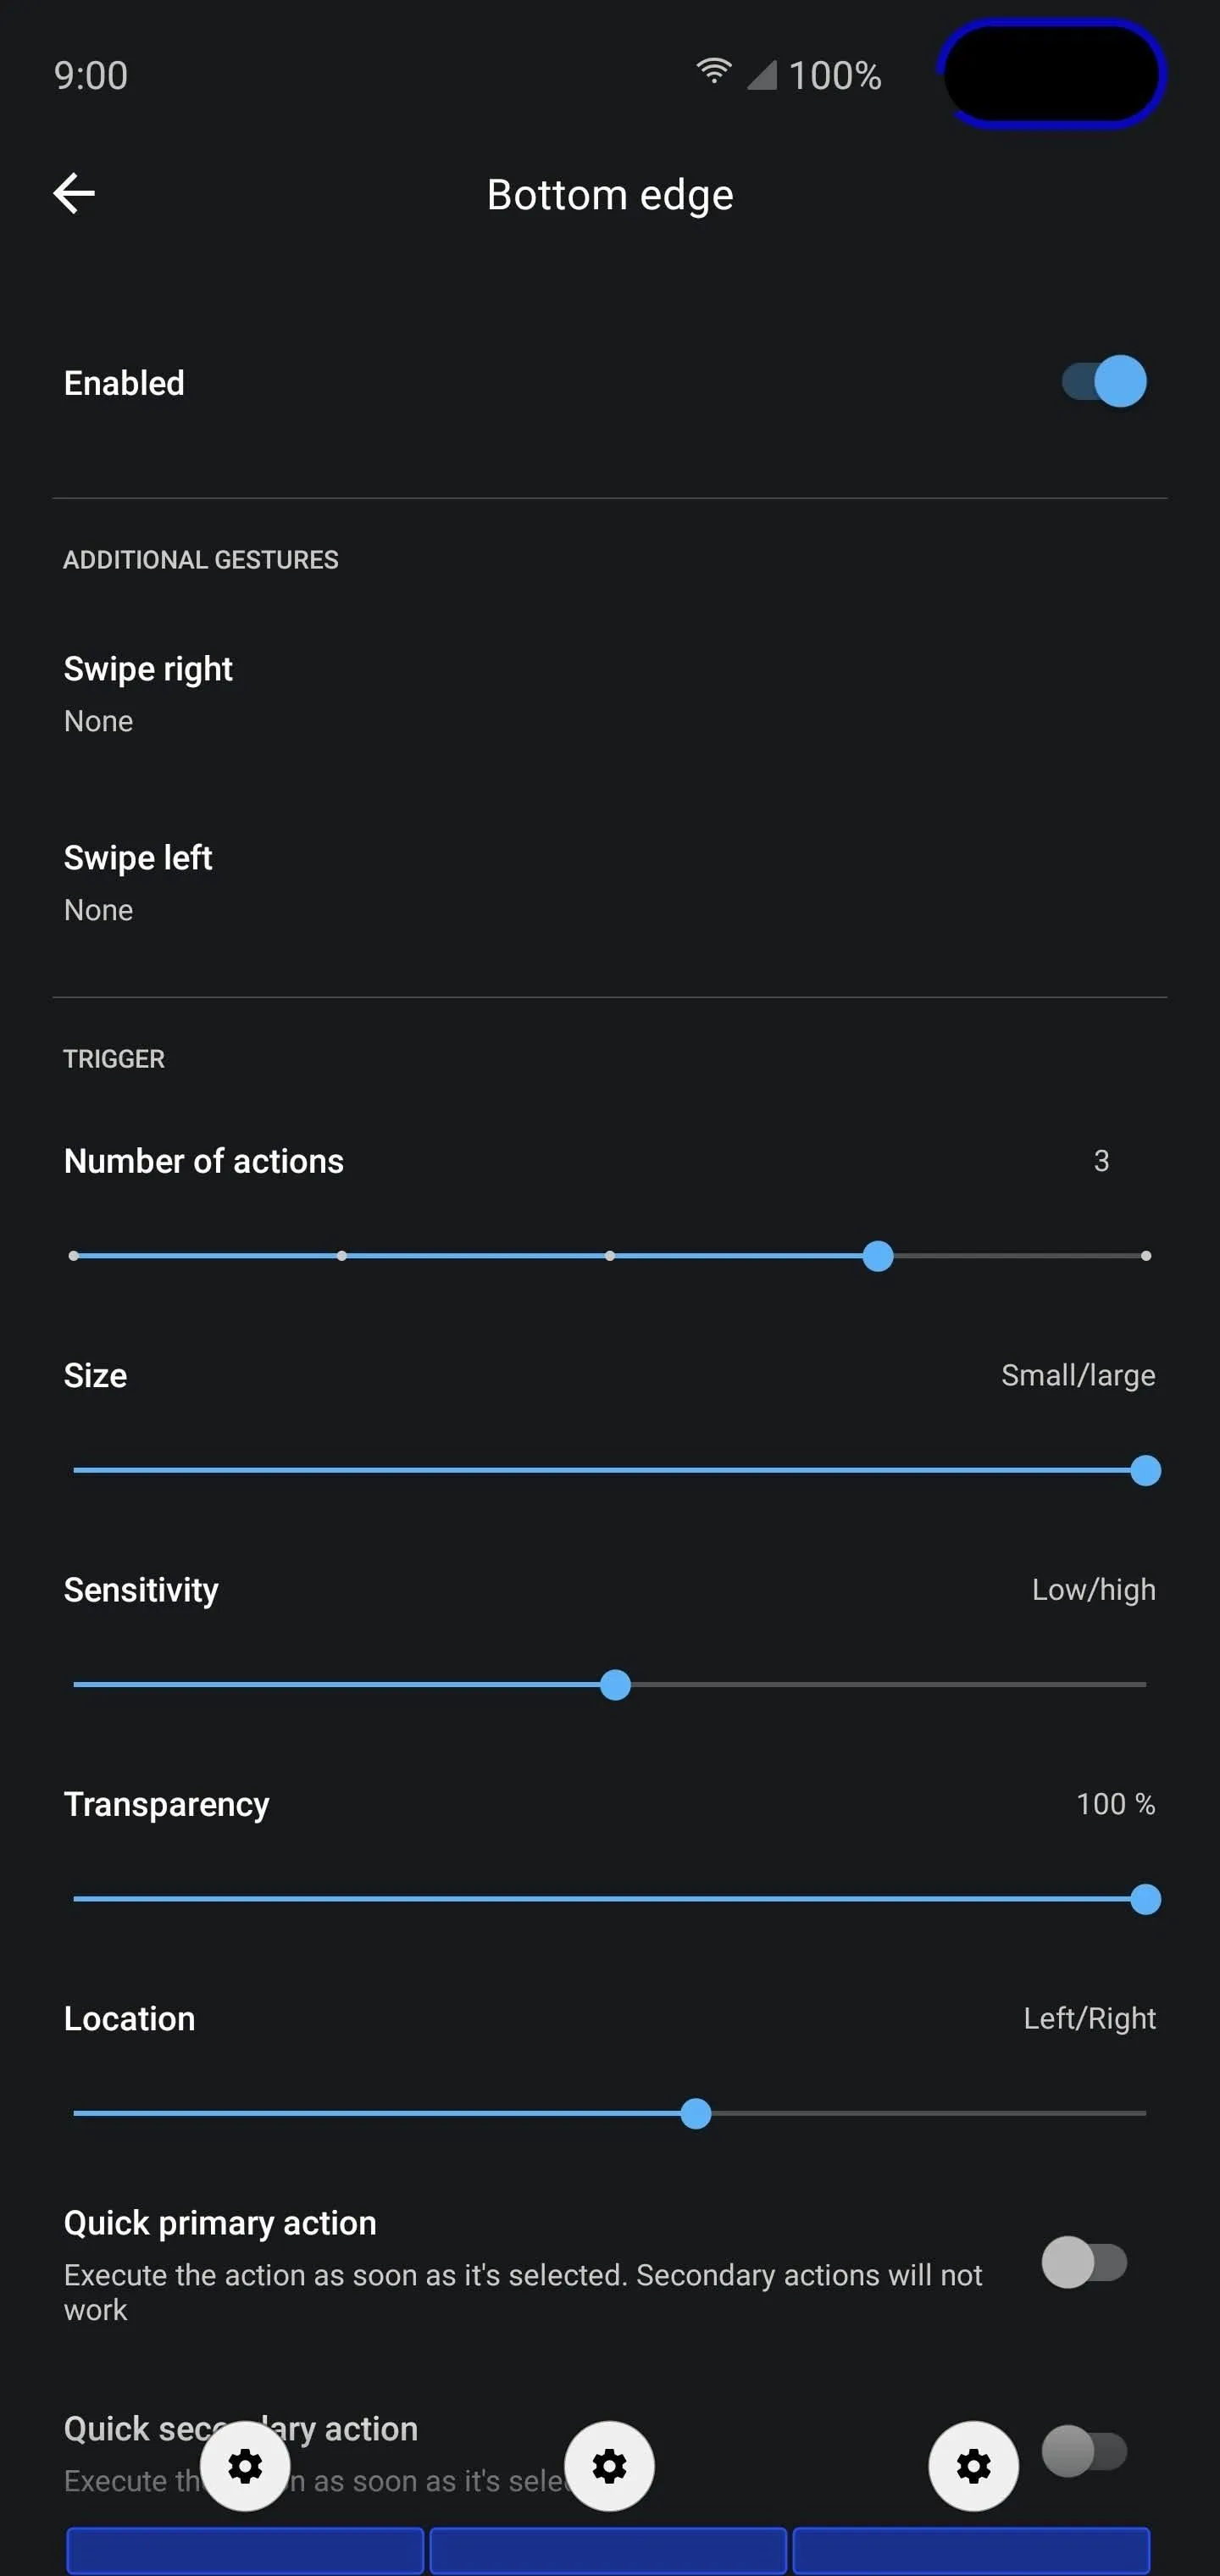
Select "Bottom edge" on the main page to be redirected to its customization options. Right above the navigation bar are three blue rectangles with gear icons above them. The blue zone represents the area where you will perform the gesture, and the gear icon is where you can customize what each swipe activates when performed in the blue region.
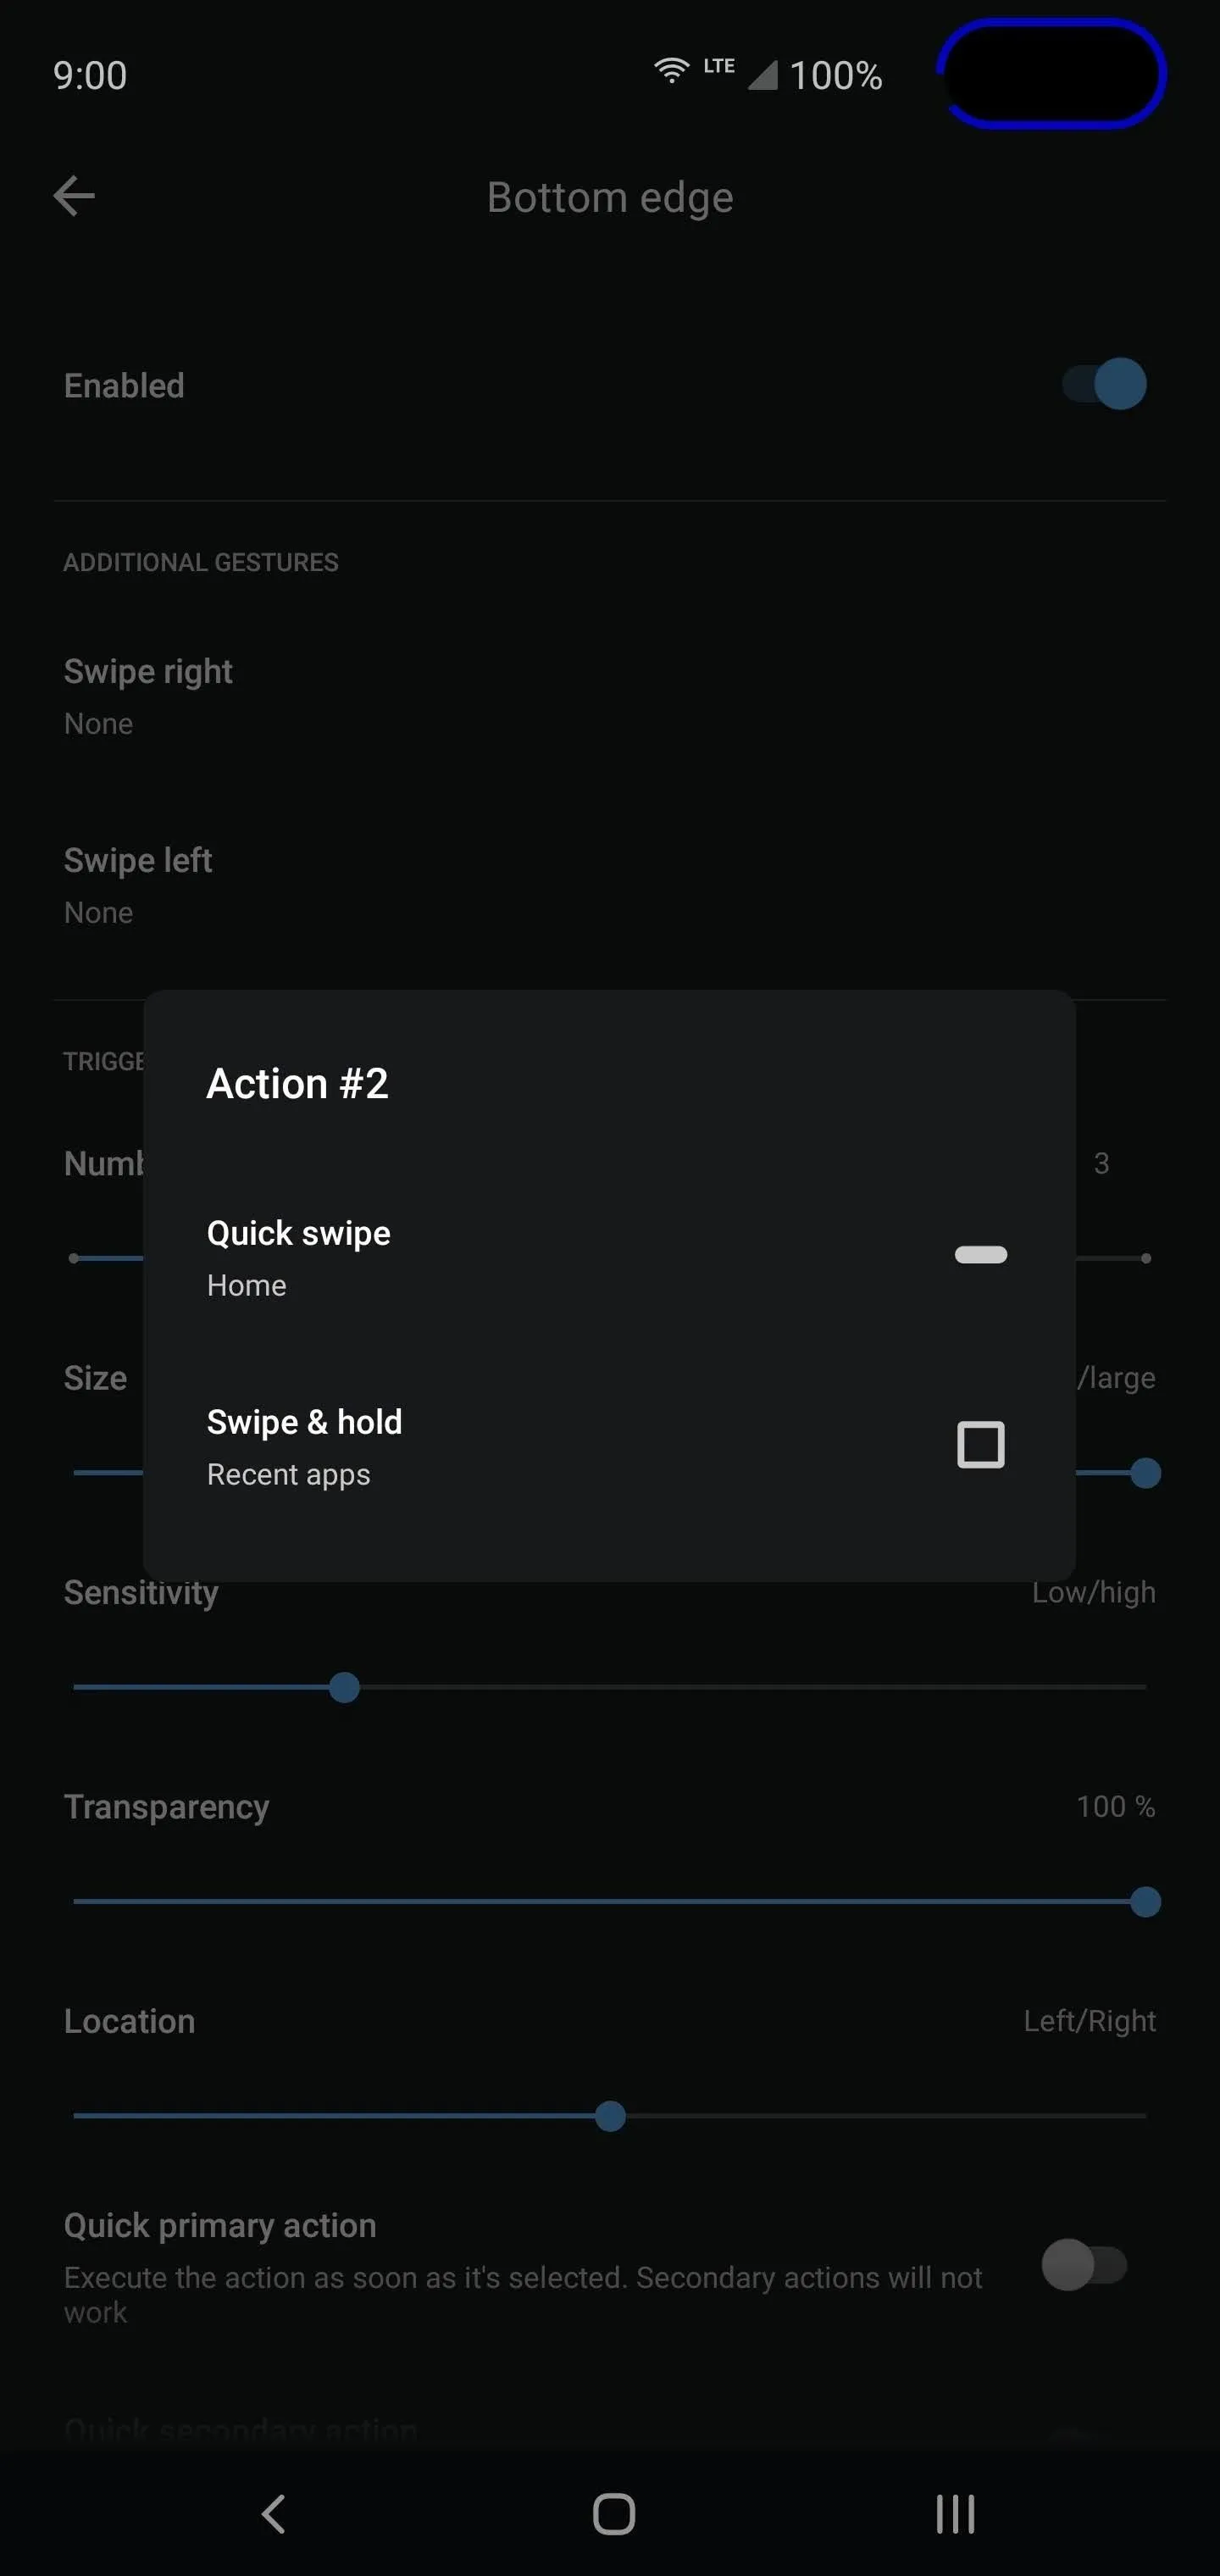
Select the center area's gear icon (labeled Action #2). Choose "Quick swipe" and select "Home" from the list. Then choose "Swipe & hold" and select "Recent apps." Touch outside of the prompt to return to the bottom edge's settings page. Do exactly the same thing with the left and right areas.
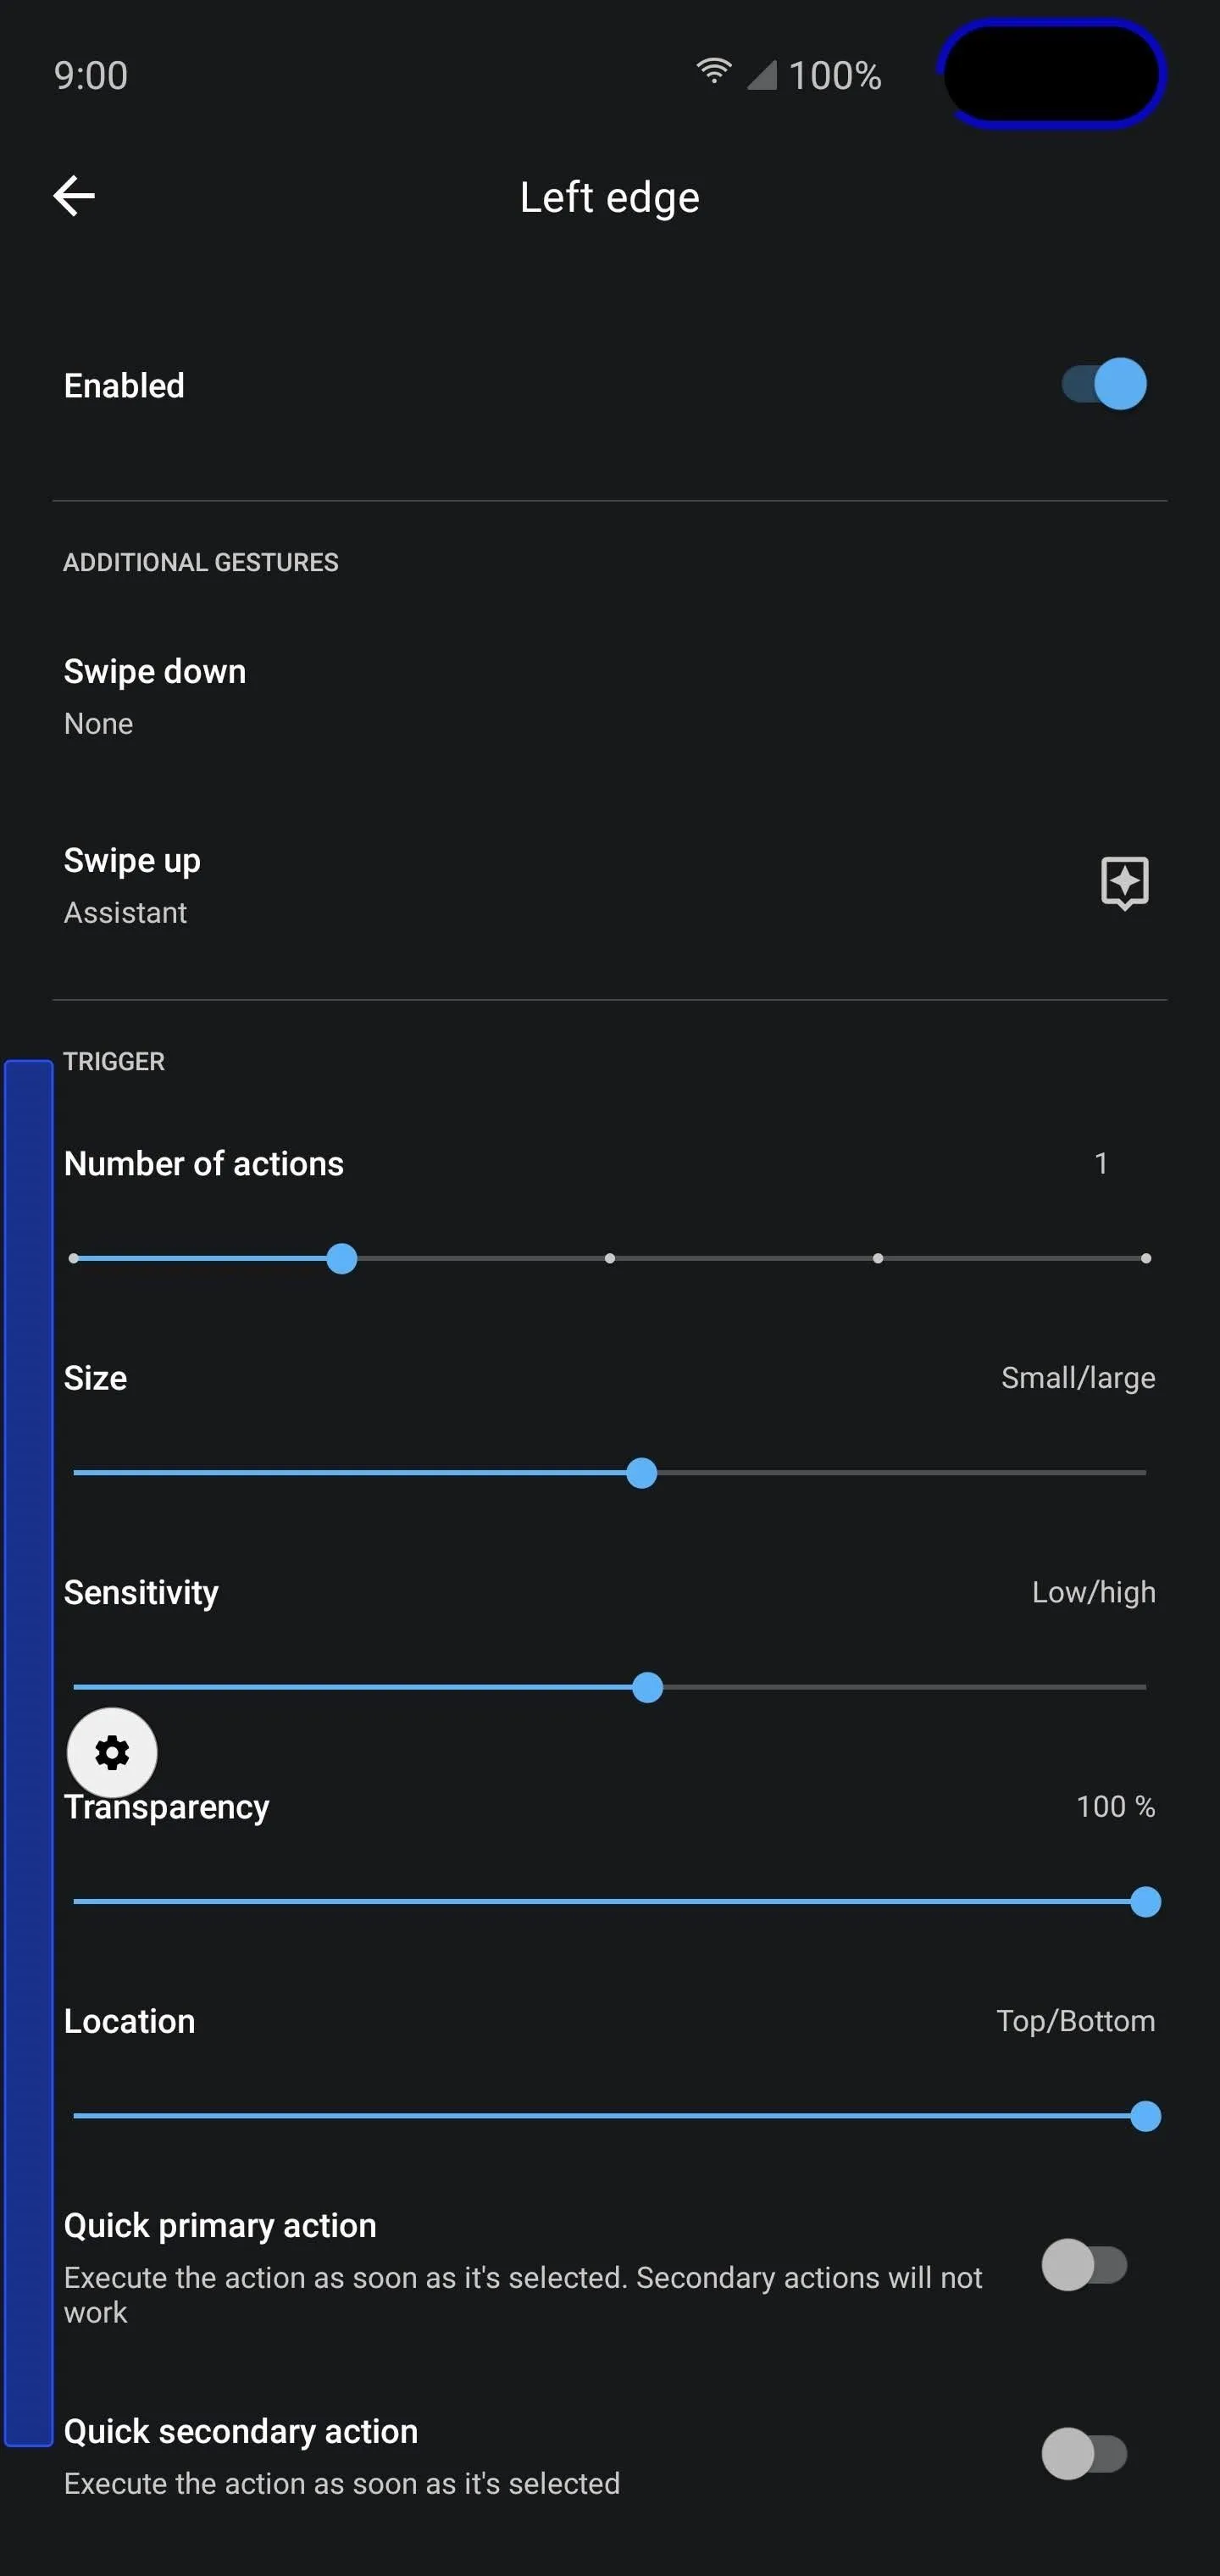
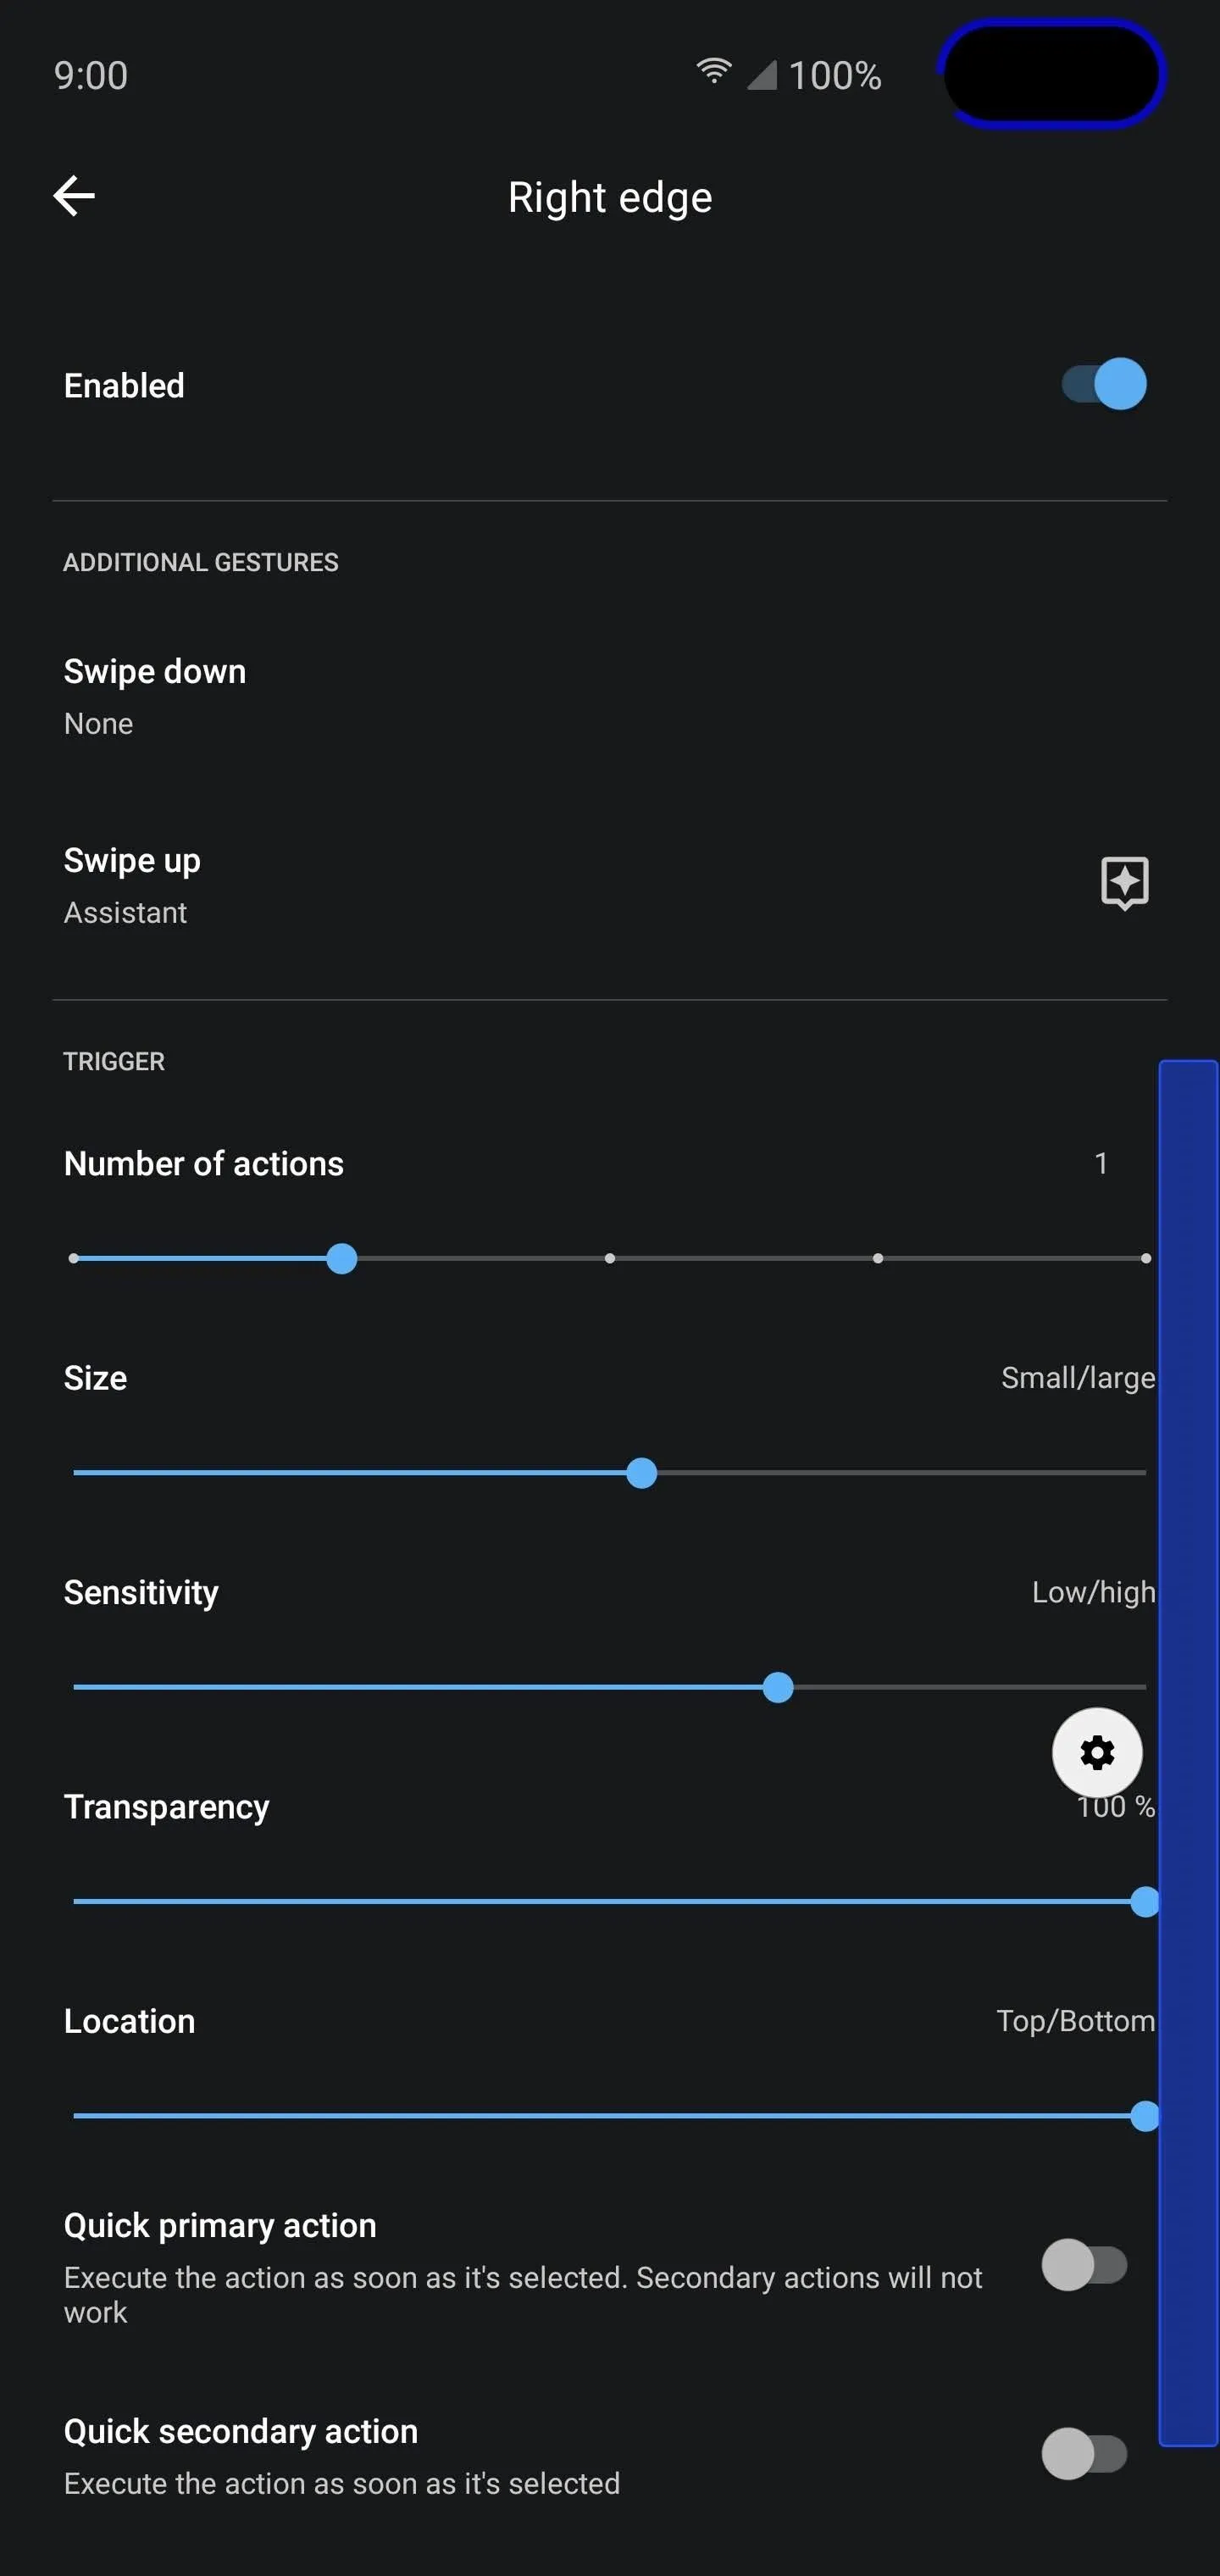
Now, return to the main page and select "Left edge." Tap the gear icon over the blue area and choose "Swipe & hold." Select "None" from the list. If for some reason it wasn't set by default, choose "Quick swipe" and select "Back." Return to the left edge's settings menu and select "swipe up" under Additional Gestures. Choose Assistant from the list. Finally, I recommend raising the "Sensitivity" if you are using a phone with a curved display.
Return to the main page, choose "Right edge," and repeat the same steps as the "Left edge." Once completed, all the Android 10 gestures are in place. We only need to do one more thing.
Prepare Your Computer & Phone for ADB Commands
For not only the same gestures as Android 10 but a similar look, we need to hide the navigation bar. While we can accomplish this a number of ways, the best method is to use ADB commands, which means you'll need a computer and a USB cable.
When you're ready, follow our guide linked out below for help installing ADB and establishing communication between your phone and your computer. Once you have established a connection and have Command Prompt or Terminal open, advance to Step 5.
Open a Command Window in the Right Directory
Once you have ADB installed on your computer, you will need to open either Command Prompt (Windows) or Terminal (macOS or Linux) and point it to the right directory to send ADB commands.
The prompt is the same on all three operating systems. Input the following:
cdHit the space bar after typing "cd," then drag the platform-tools folder you downloaded in Step 4 from your computer's file browser (e.g., Windows Explorer) to the Command Prompt or Terminal window. This will auto-populate the folder's location. Press enter and your Command Prompt or Terminal will be redirected to this folder where you can now send ADB commands.
Hide the Navigation Bar with ADB
With your phone connected to your computer, input the following code into Command Prompt or Terminal:
adb shell pm grant com.fb.fluid android.permission.WRITE_SECURE_SETTINGSIf that returns an error, use this command instead:
./adb shell pm grant com.fb.fluid android.permission.WRITE_SECURE_SETTINGSReturn to Fluid Navigation Gestures' main page and select "Hide navigation bar." You will be presented with two options: 3-button navigation and One UI full-screen gestures. From my testing, it works the best when used to hide 3-button navigation, even when using a Samsung device running One UI. Make sure to enable 3-button navigation on your device, then choose this option, which if you did everything correctly, will place a blue checkmark next to the option.
And now your phone works just like Android 10. The way to tell the difference is the lack of the small white line along the bottom in Android 10's full-screen gestures, but in my opinion, that's even better.
Cover image, GIF, and screenshots by Jon Knight/Gadget Hacks


Comments
Be the first, drop a comment!