


Google recently released a new mesh router known as Nest Wifi. The updated and rebranded Google Wifi brought many improvements, such as faster processing power and an increased level of wireless security called WPA3. But while it's not enabled by default, you can still get the new WPA3 security on your original Google Wifi.
The old wireless security protocol that we still rely on today since its launch in 2006 is known as WPA2. It wasn't made to handle all of the modern devices we use now. The rise of smartphones and other Internet of Things devices, such as Chromecasts, demands a much higher level of security. Since these devices are always online, we needed an updated security measure to modernize our networks.
Enabling WPA3 on the First-Gen Google Wifi
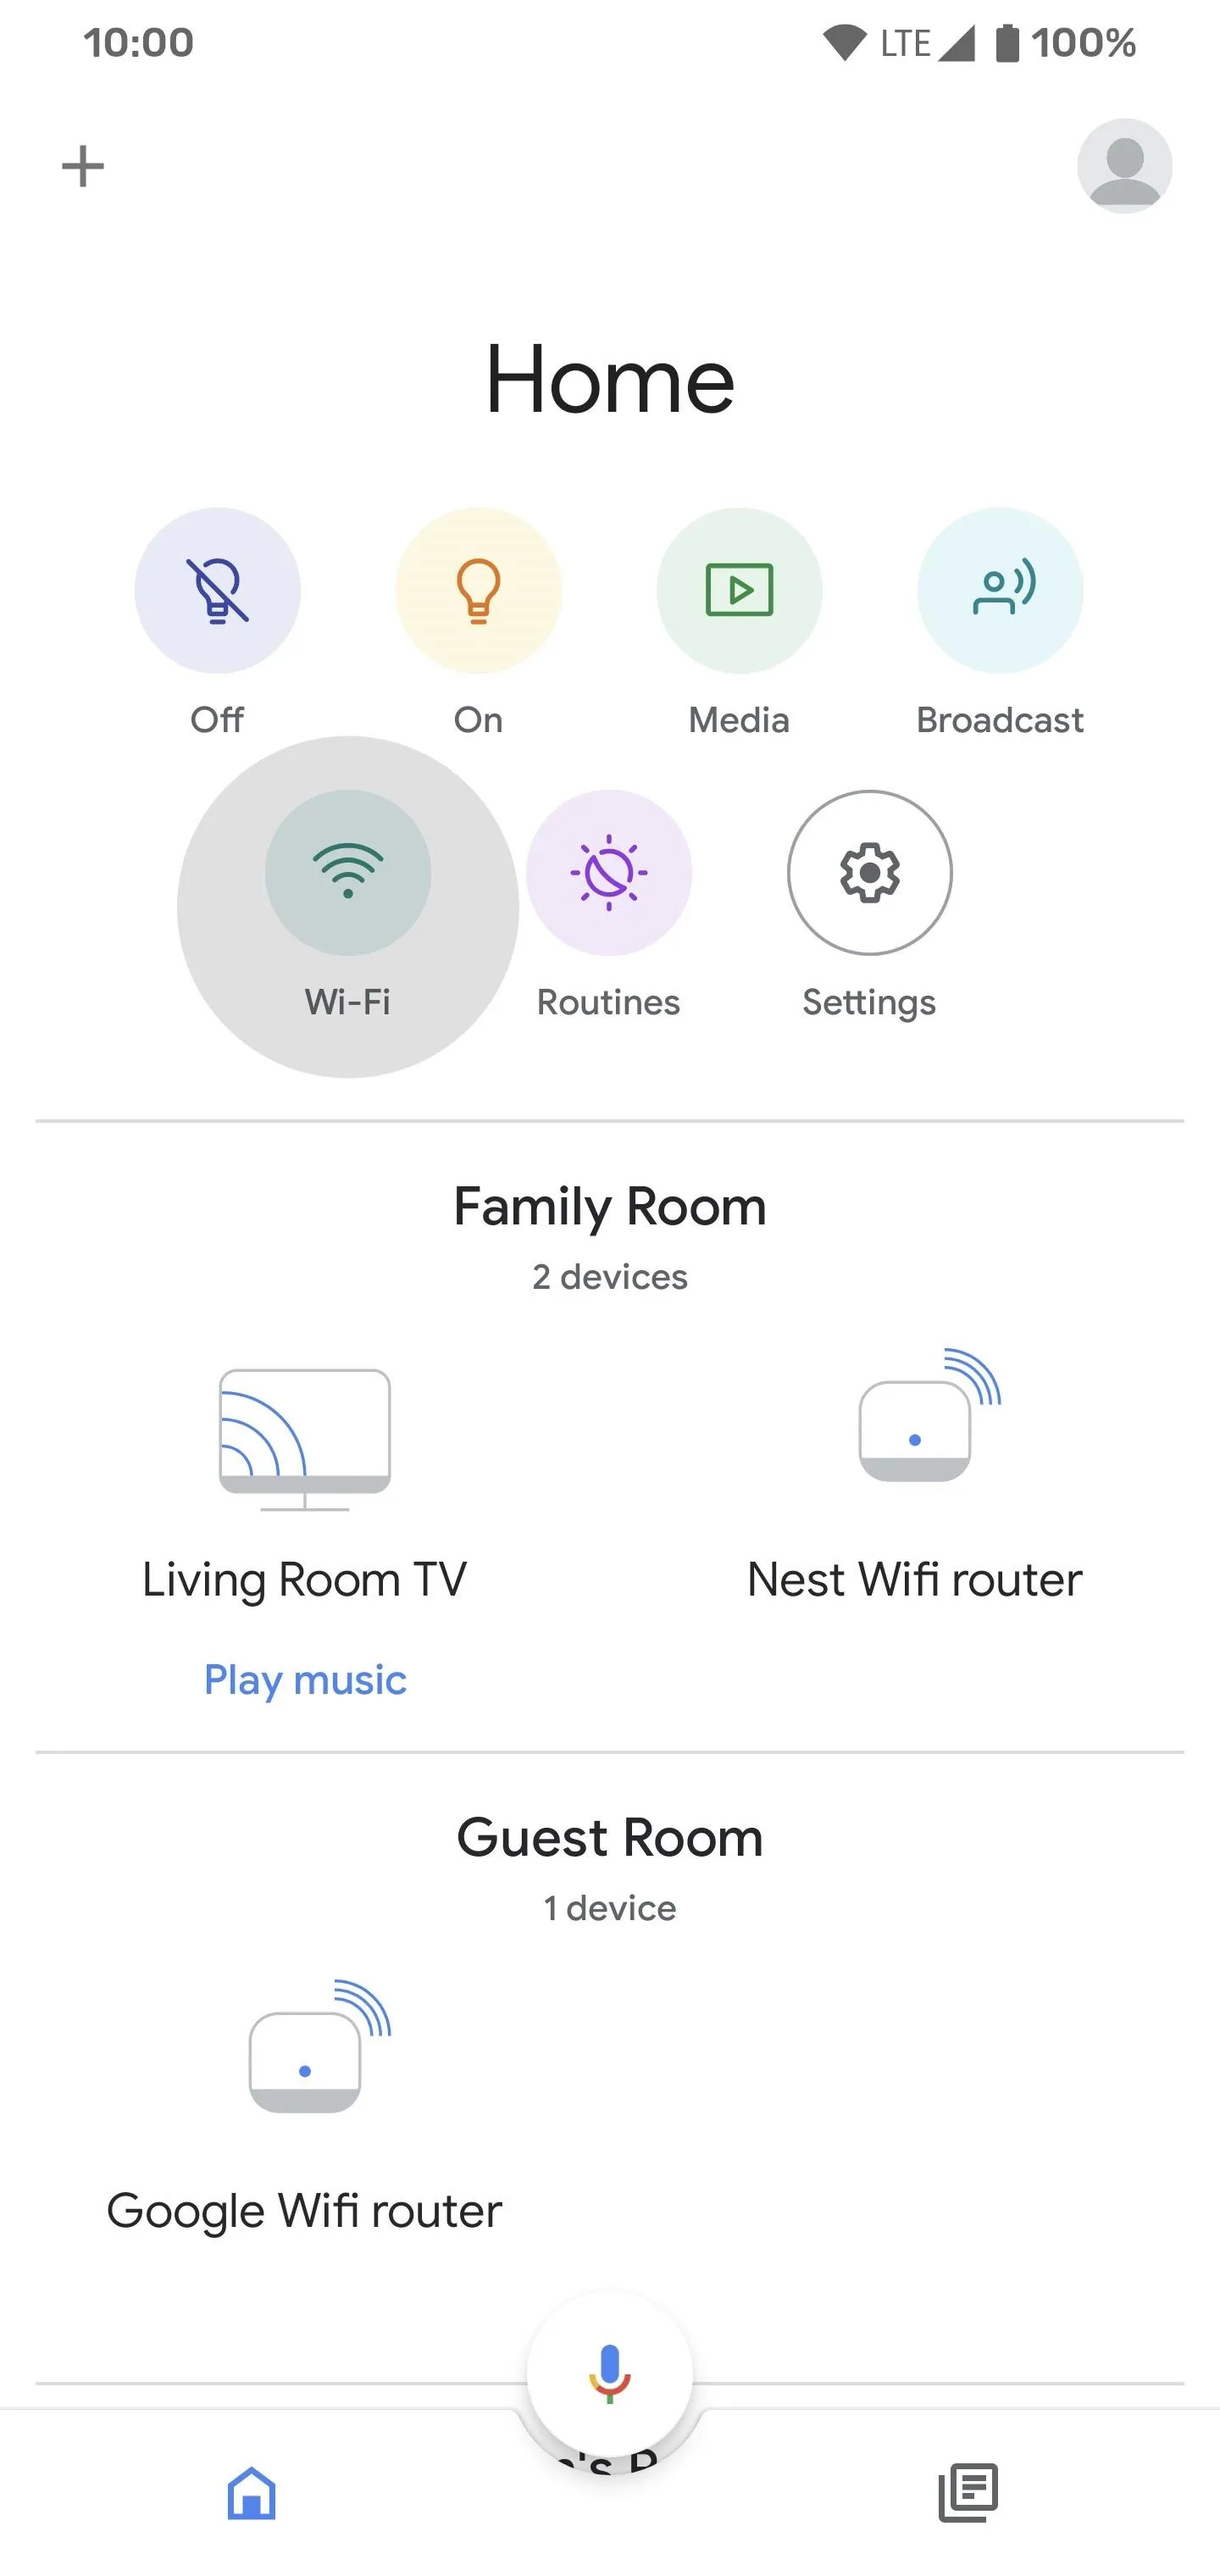
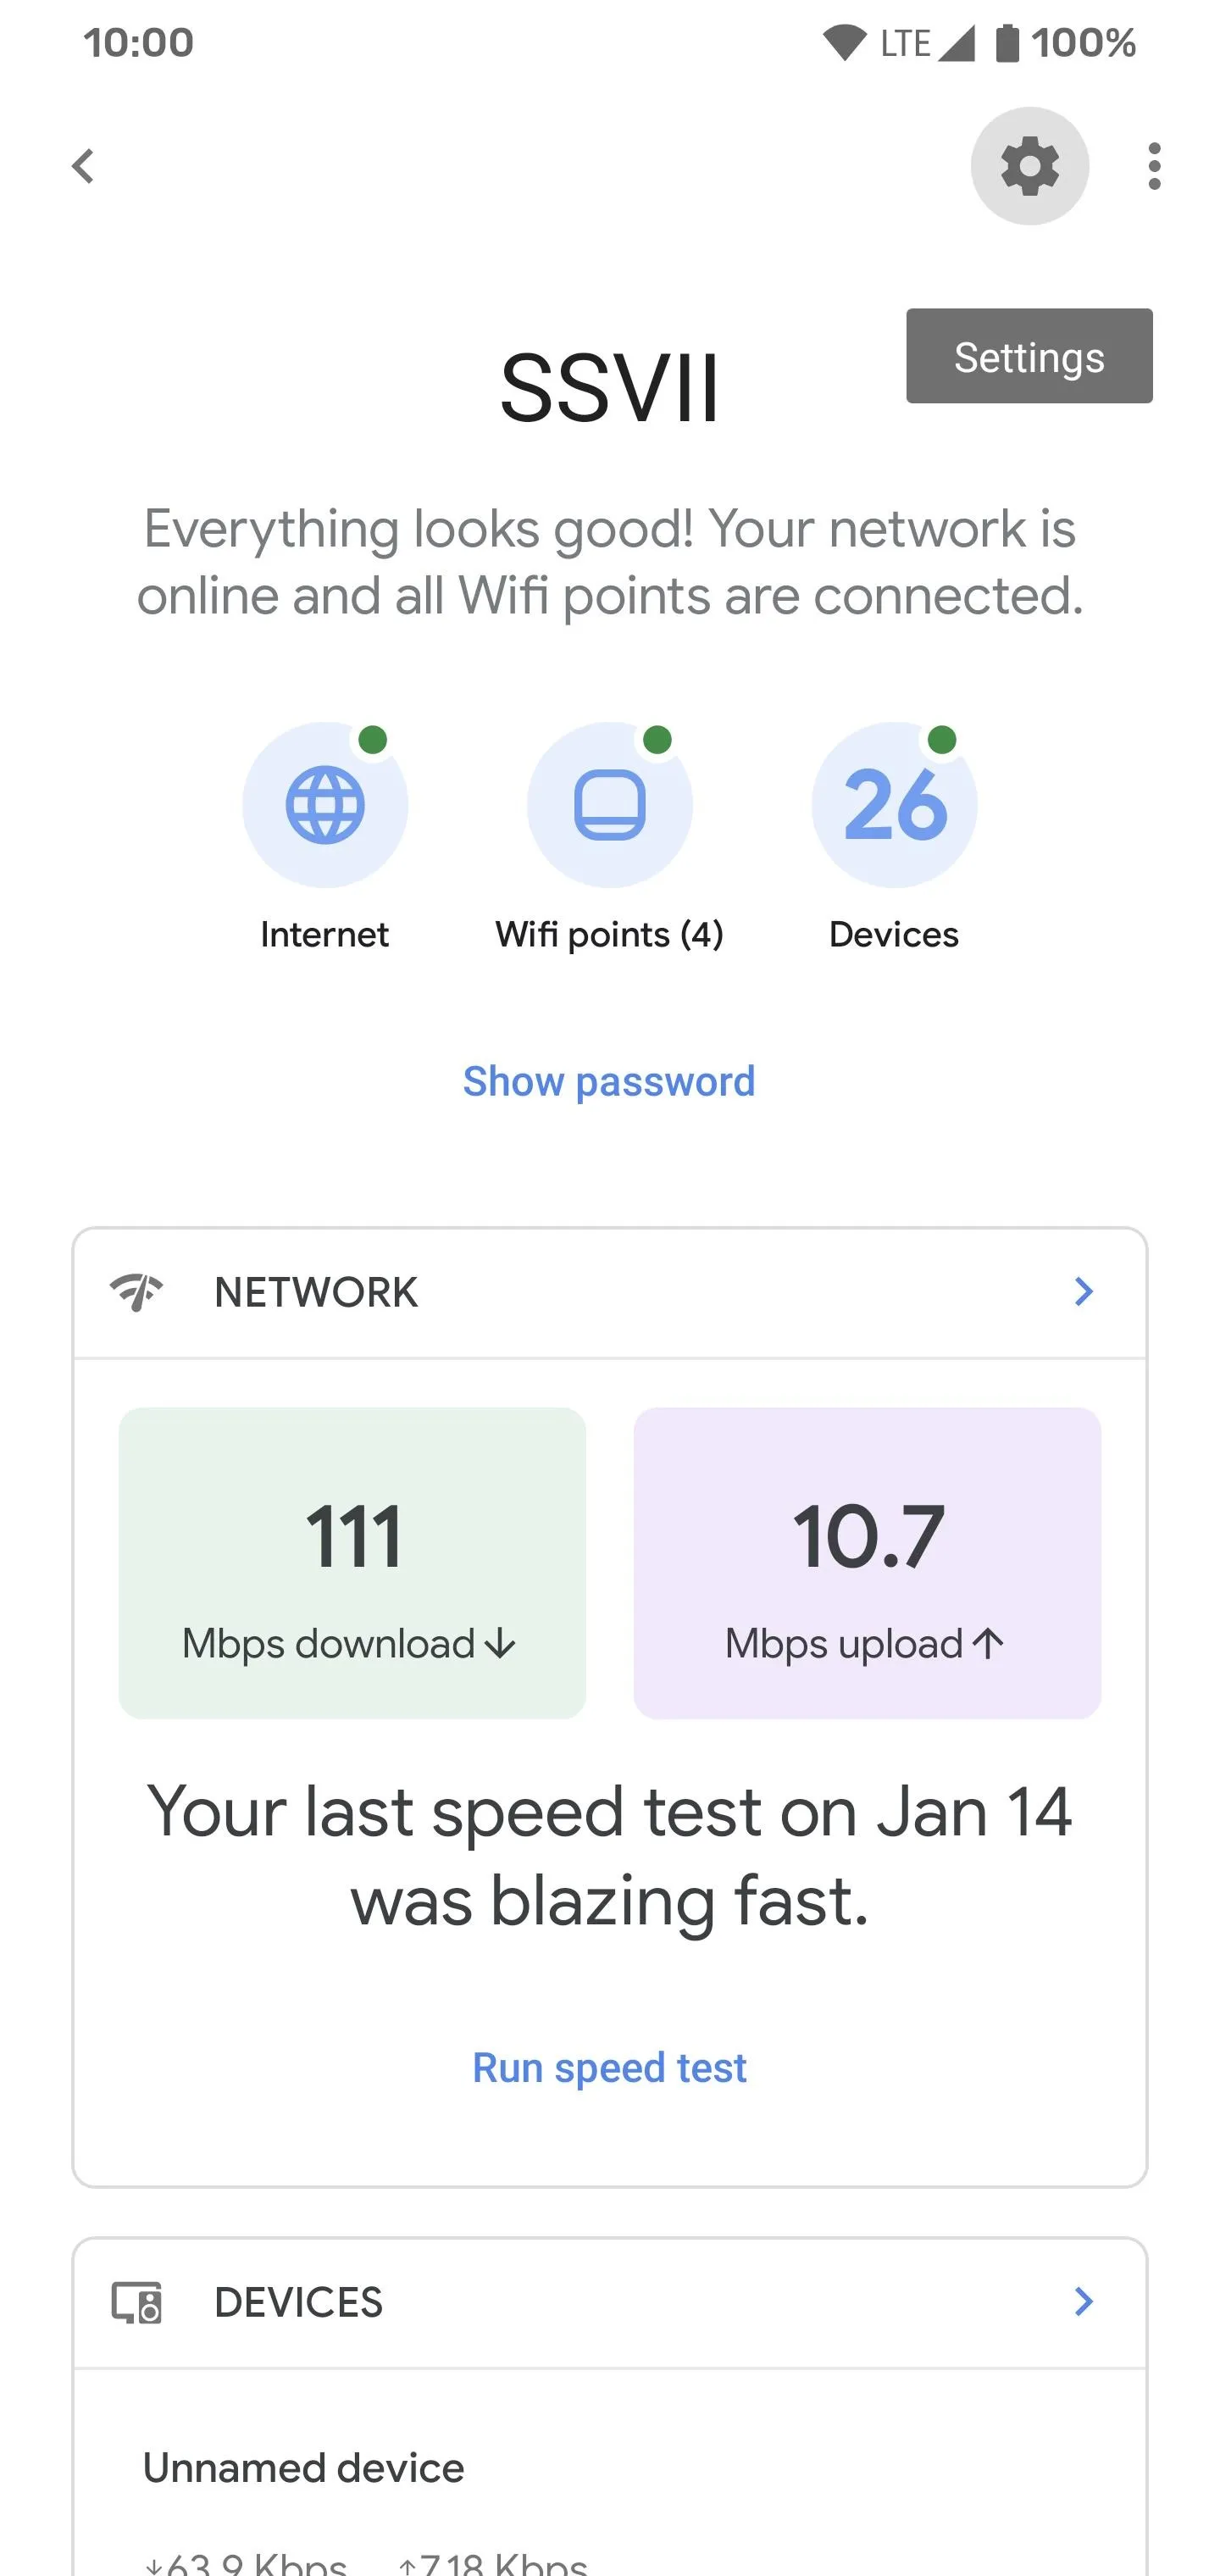
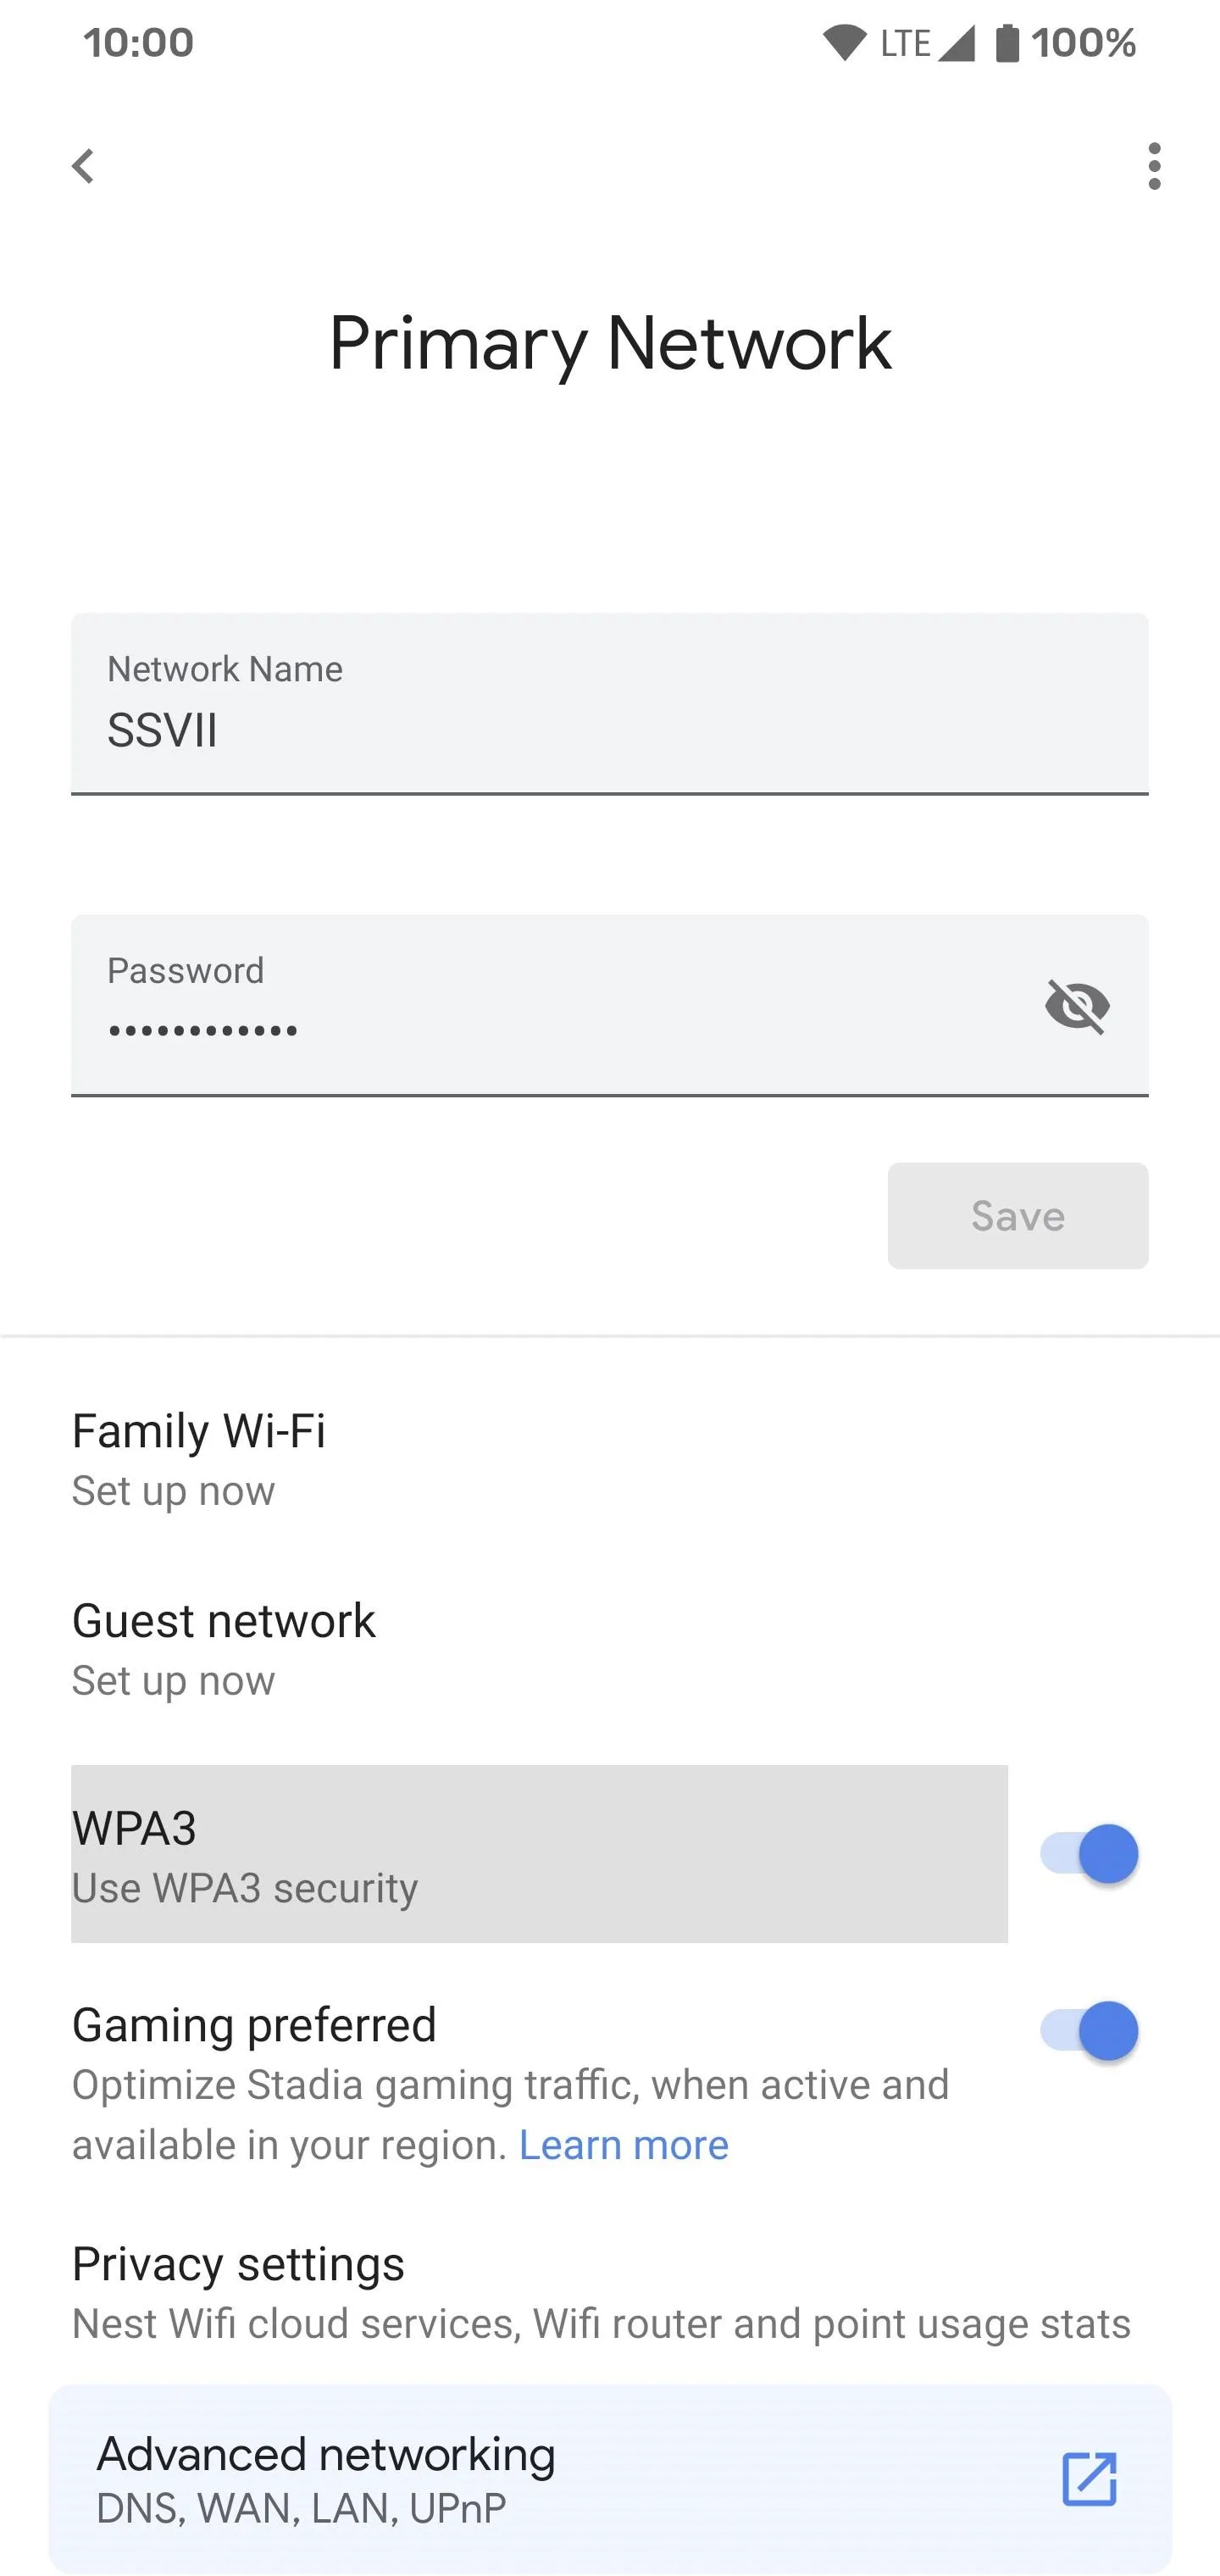
Once you have your Google Wifi network all set up using the Google Home app, you can enable the WPA3 security setting quite easily. Open up the Google Home app to the main screen, tap the green "Wi-Fi" icon under your home name, then hit the settings icon in the upper right.
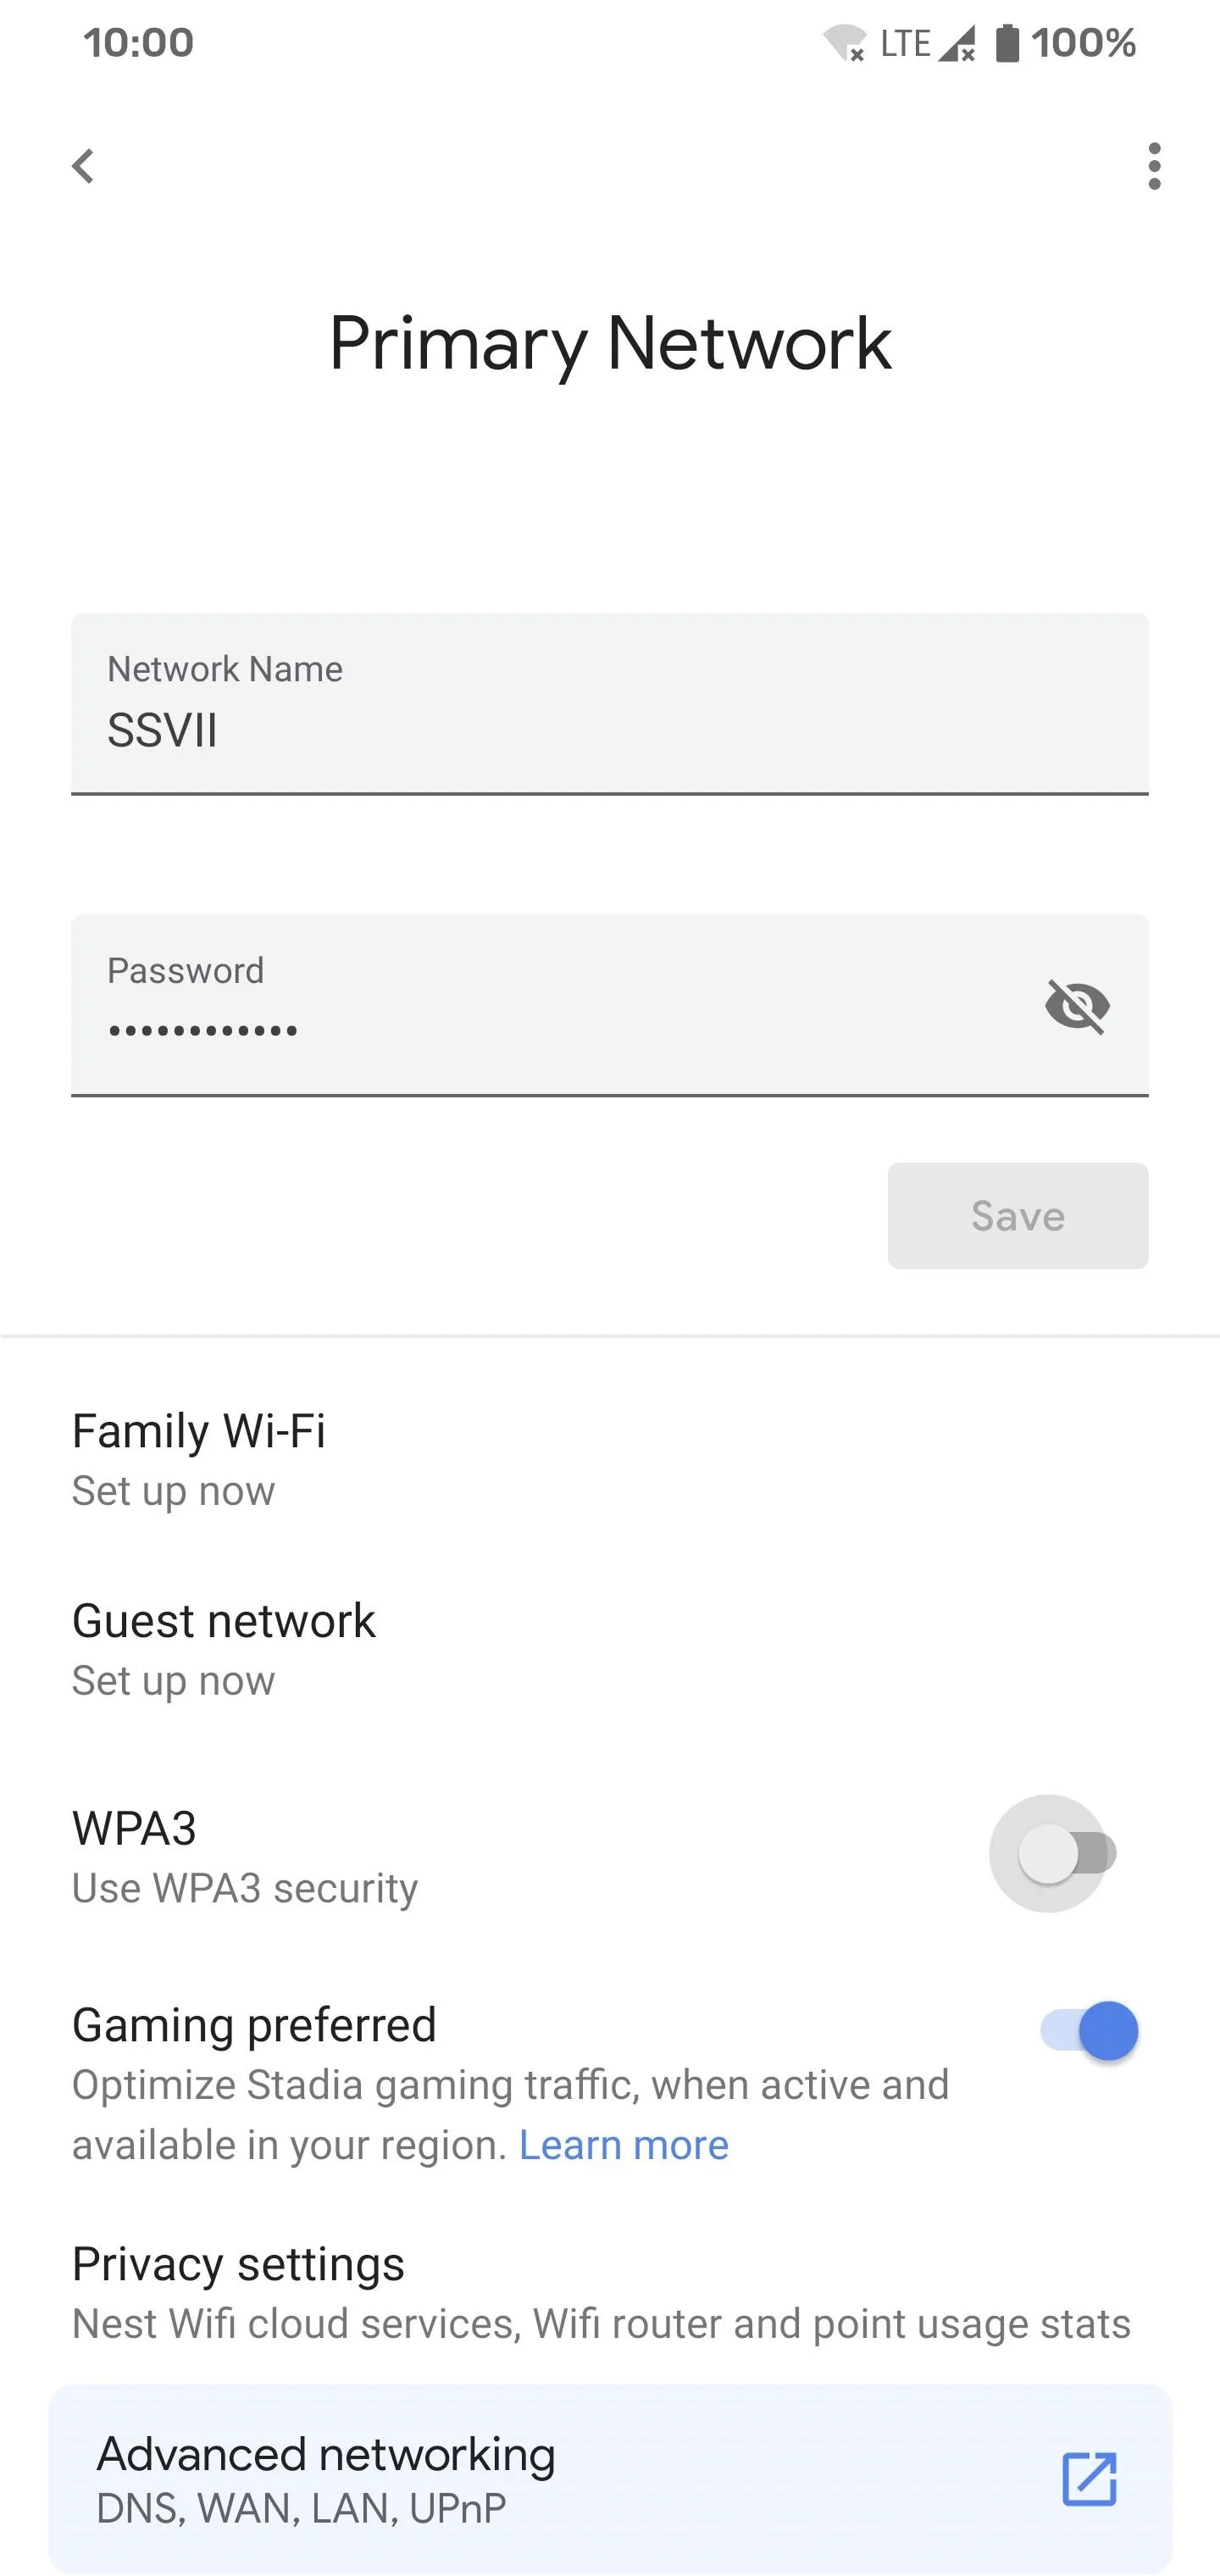
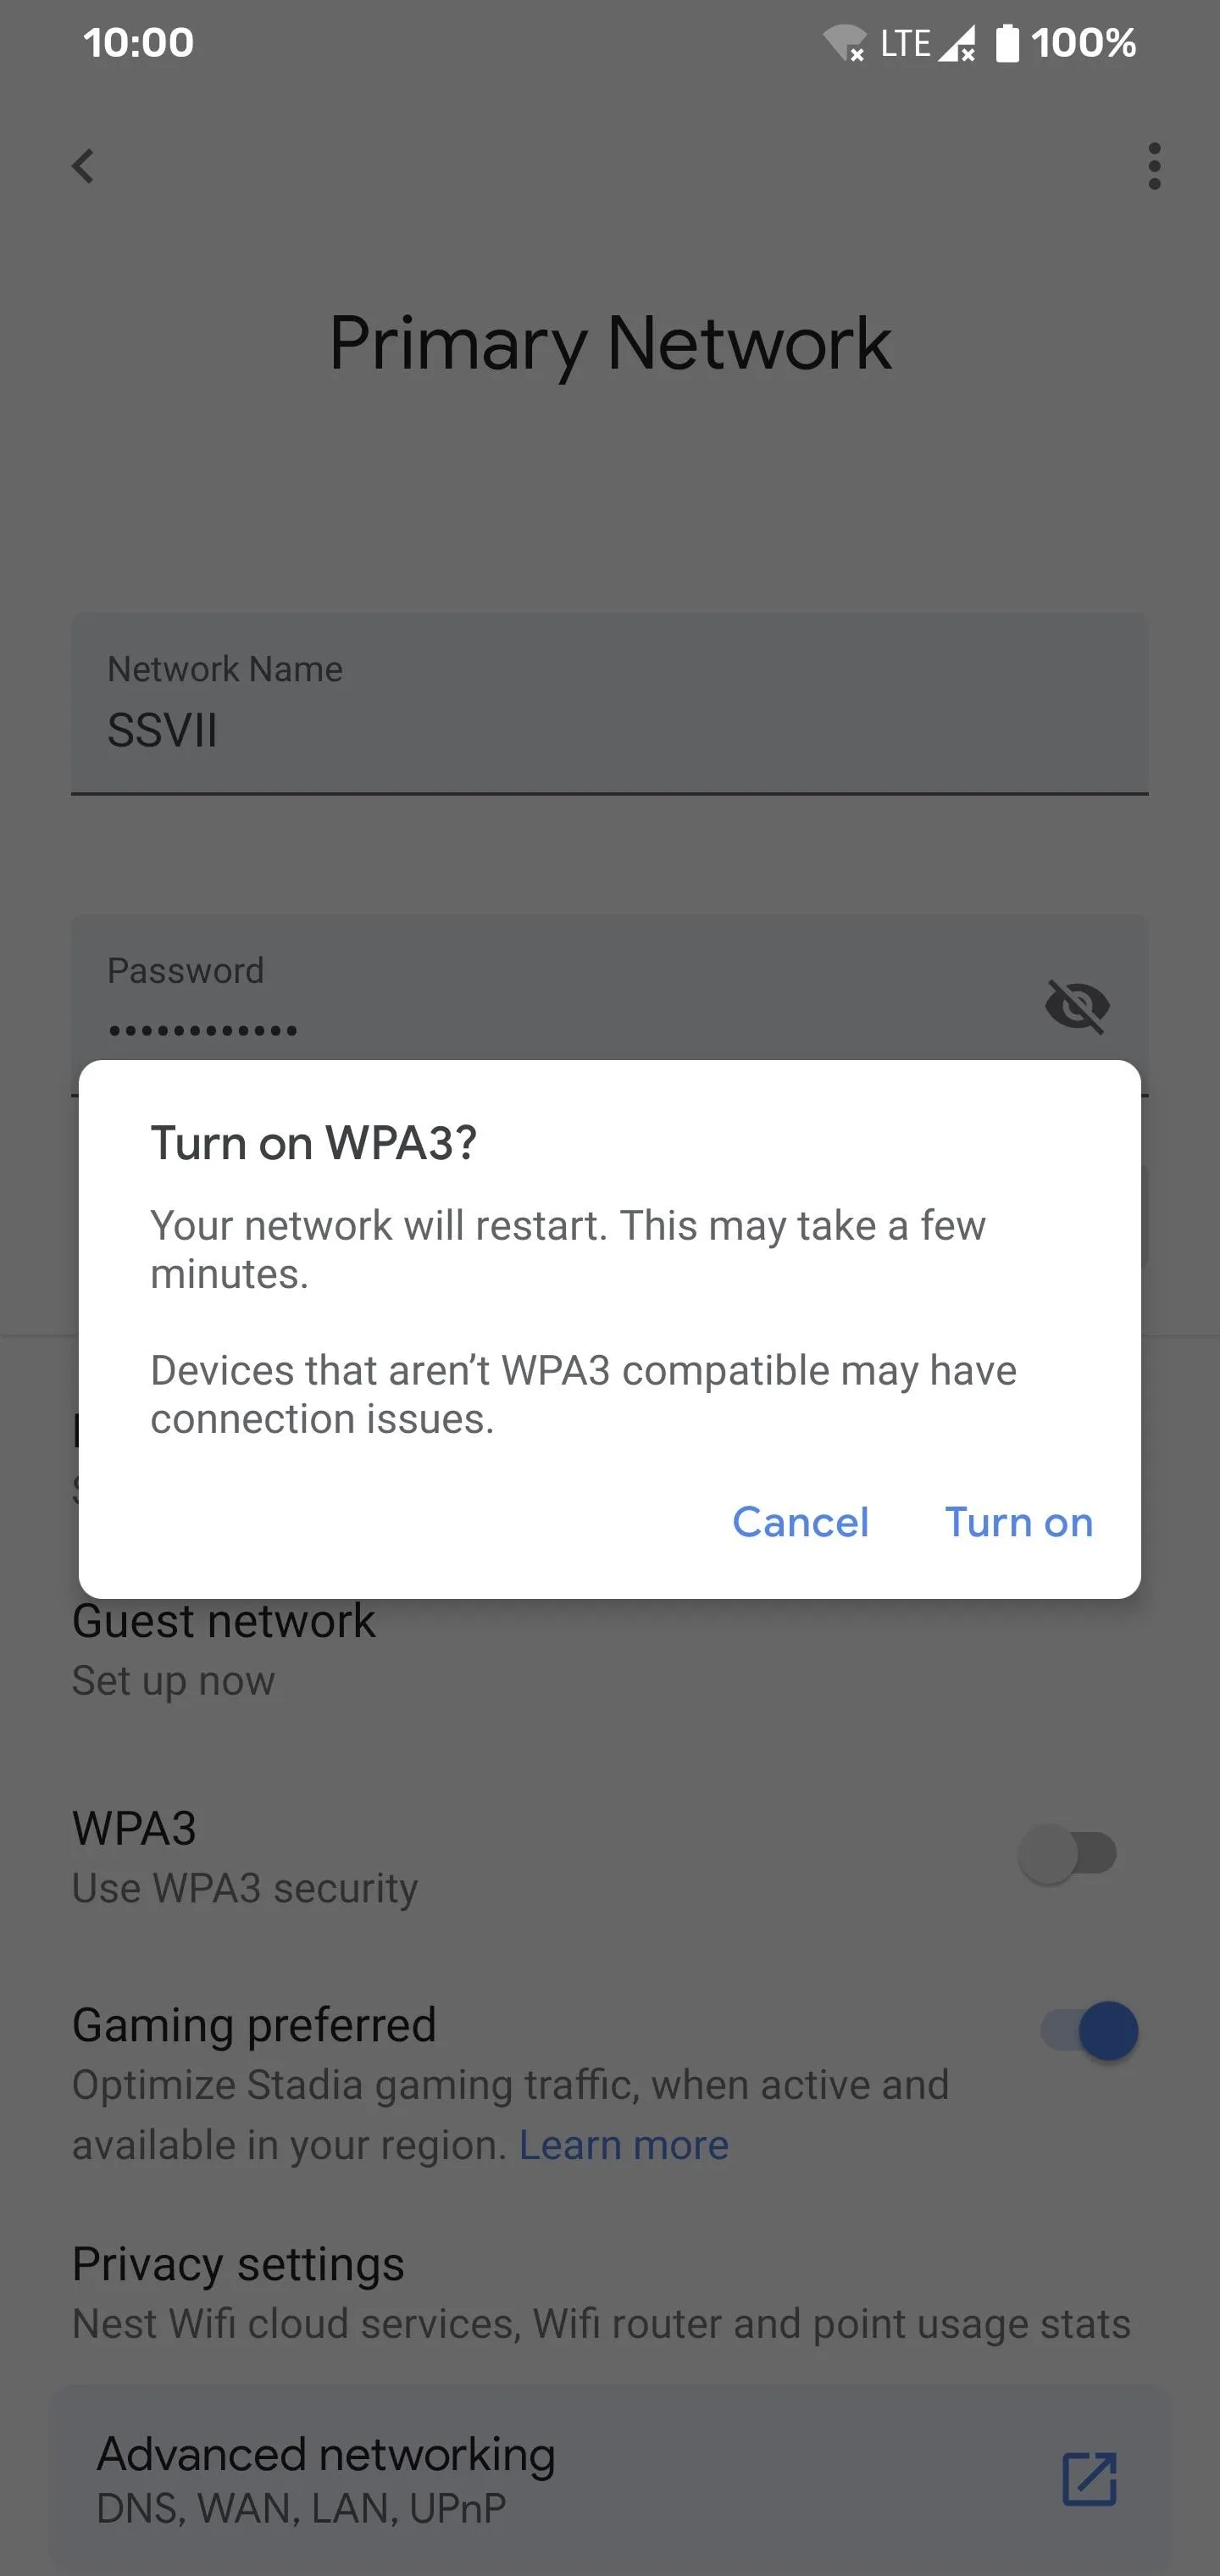
Towards the middle of the screen, you should see the "WPA3" option. Flip the switch to the on position, tap "Turn on" to enable the setting, then your network will restart itself.
Wait for a few minutes until everything comes back online (the lights on your pucks will glow white when they're ready), then you should be good to go. All compatible devices that support WPA3 should now be using it automatically the next time they connect to the network.
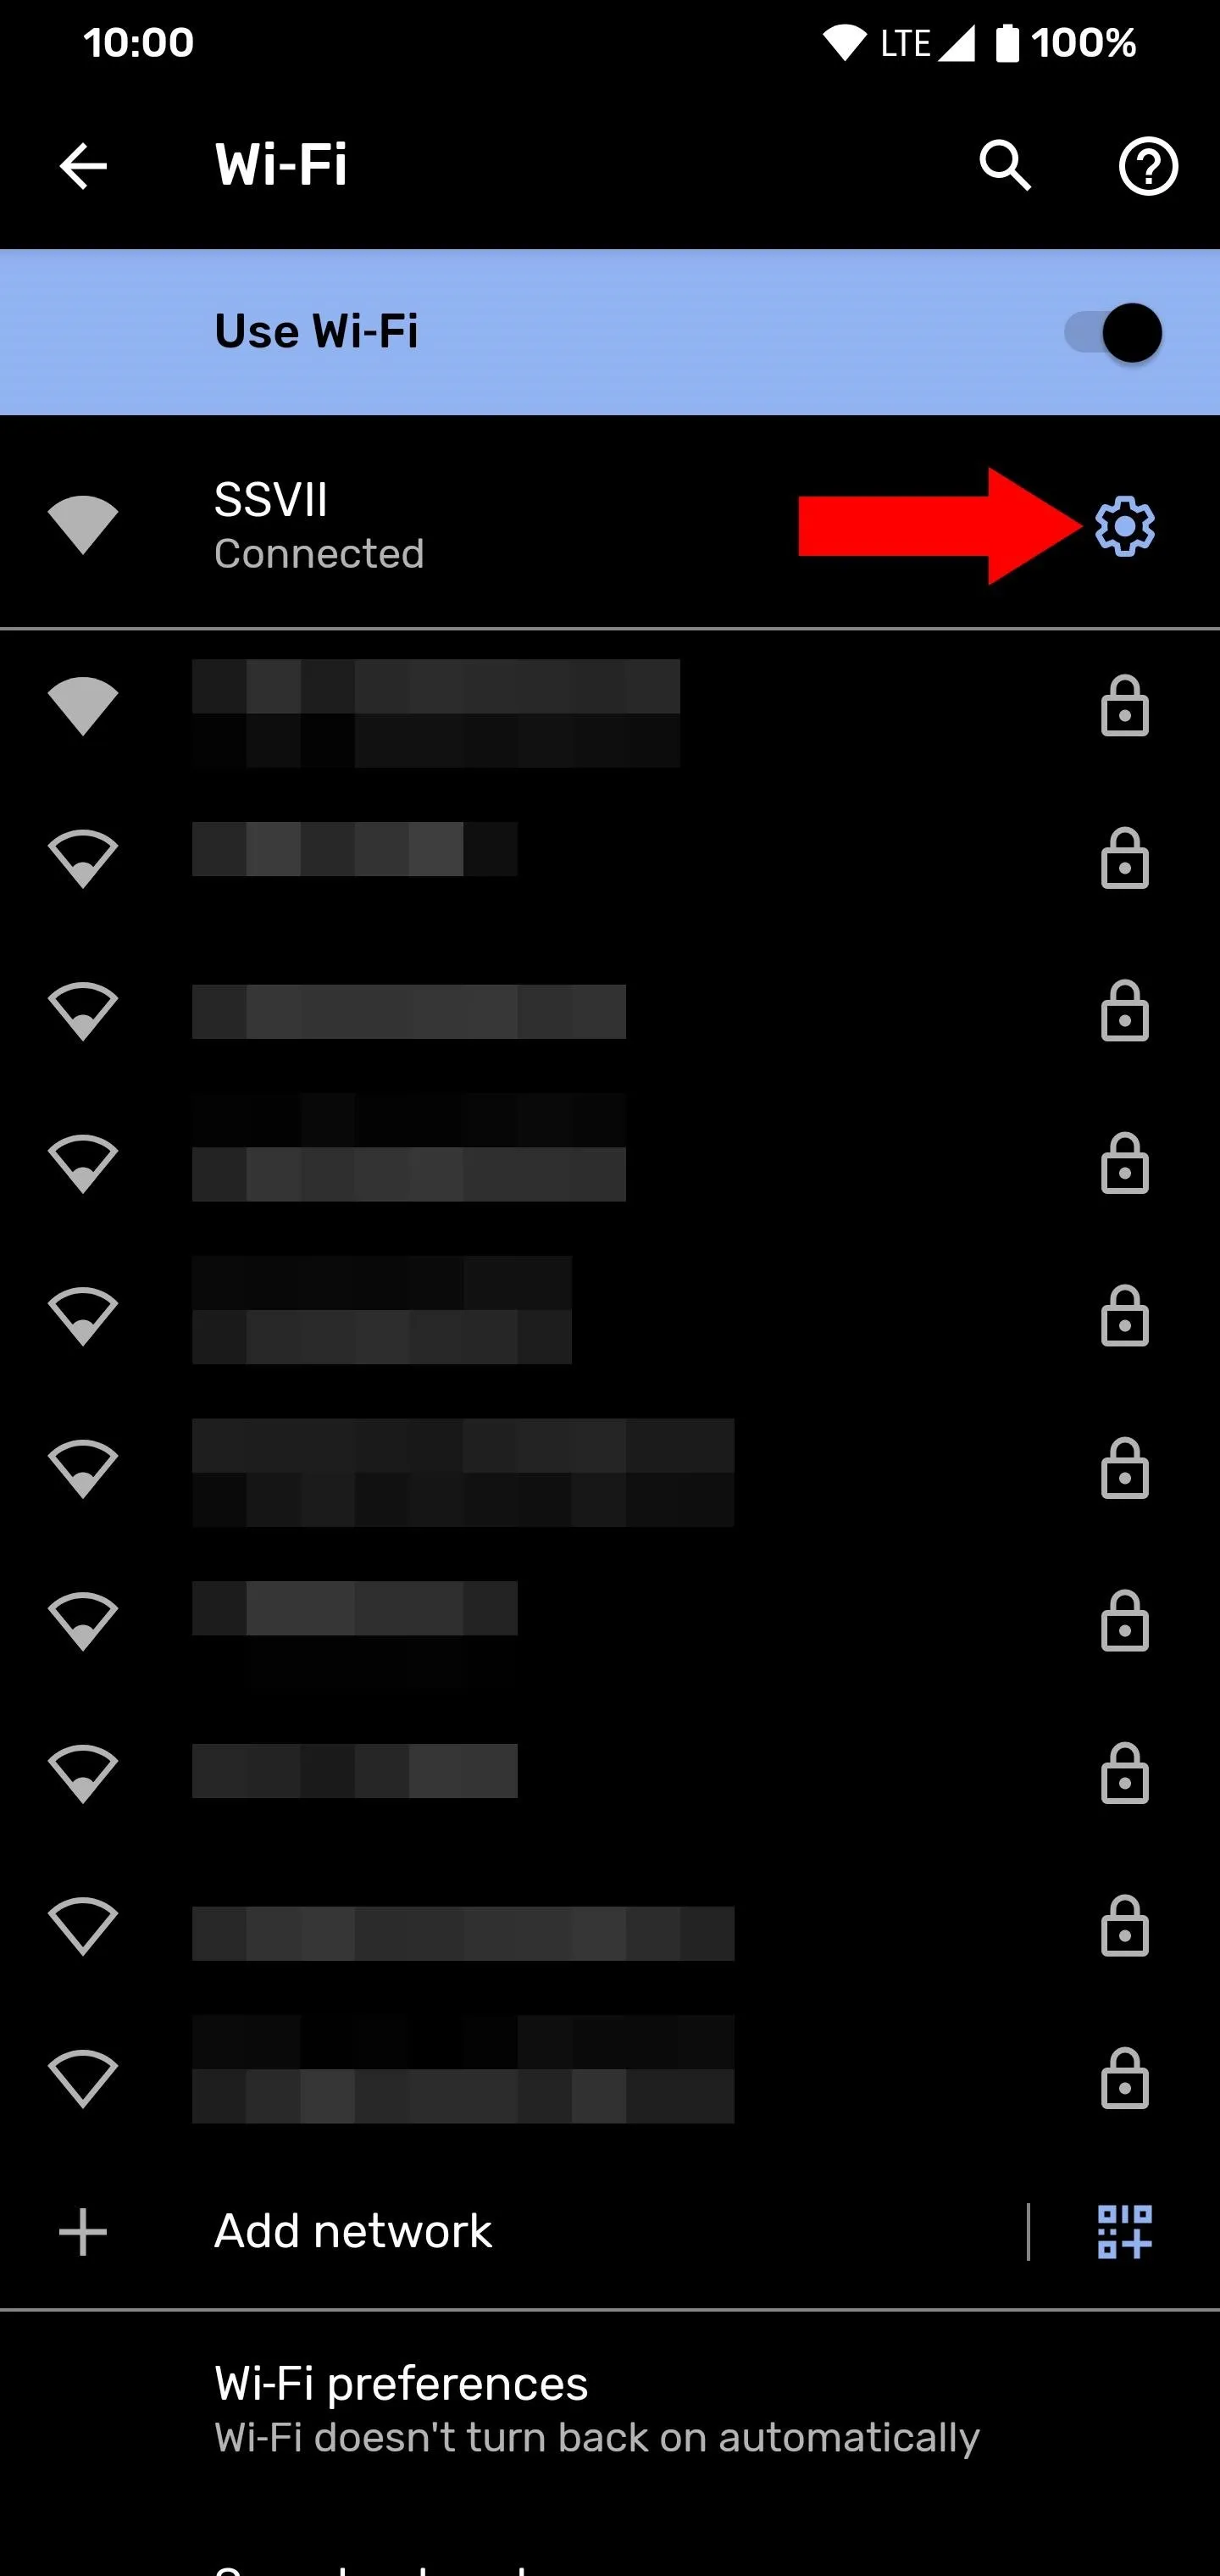
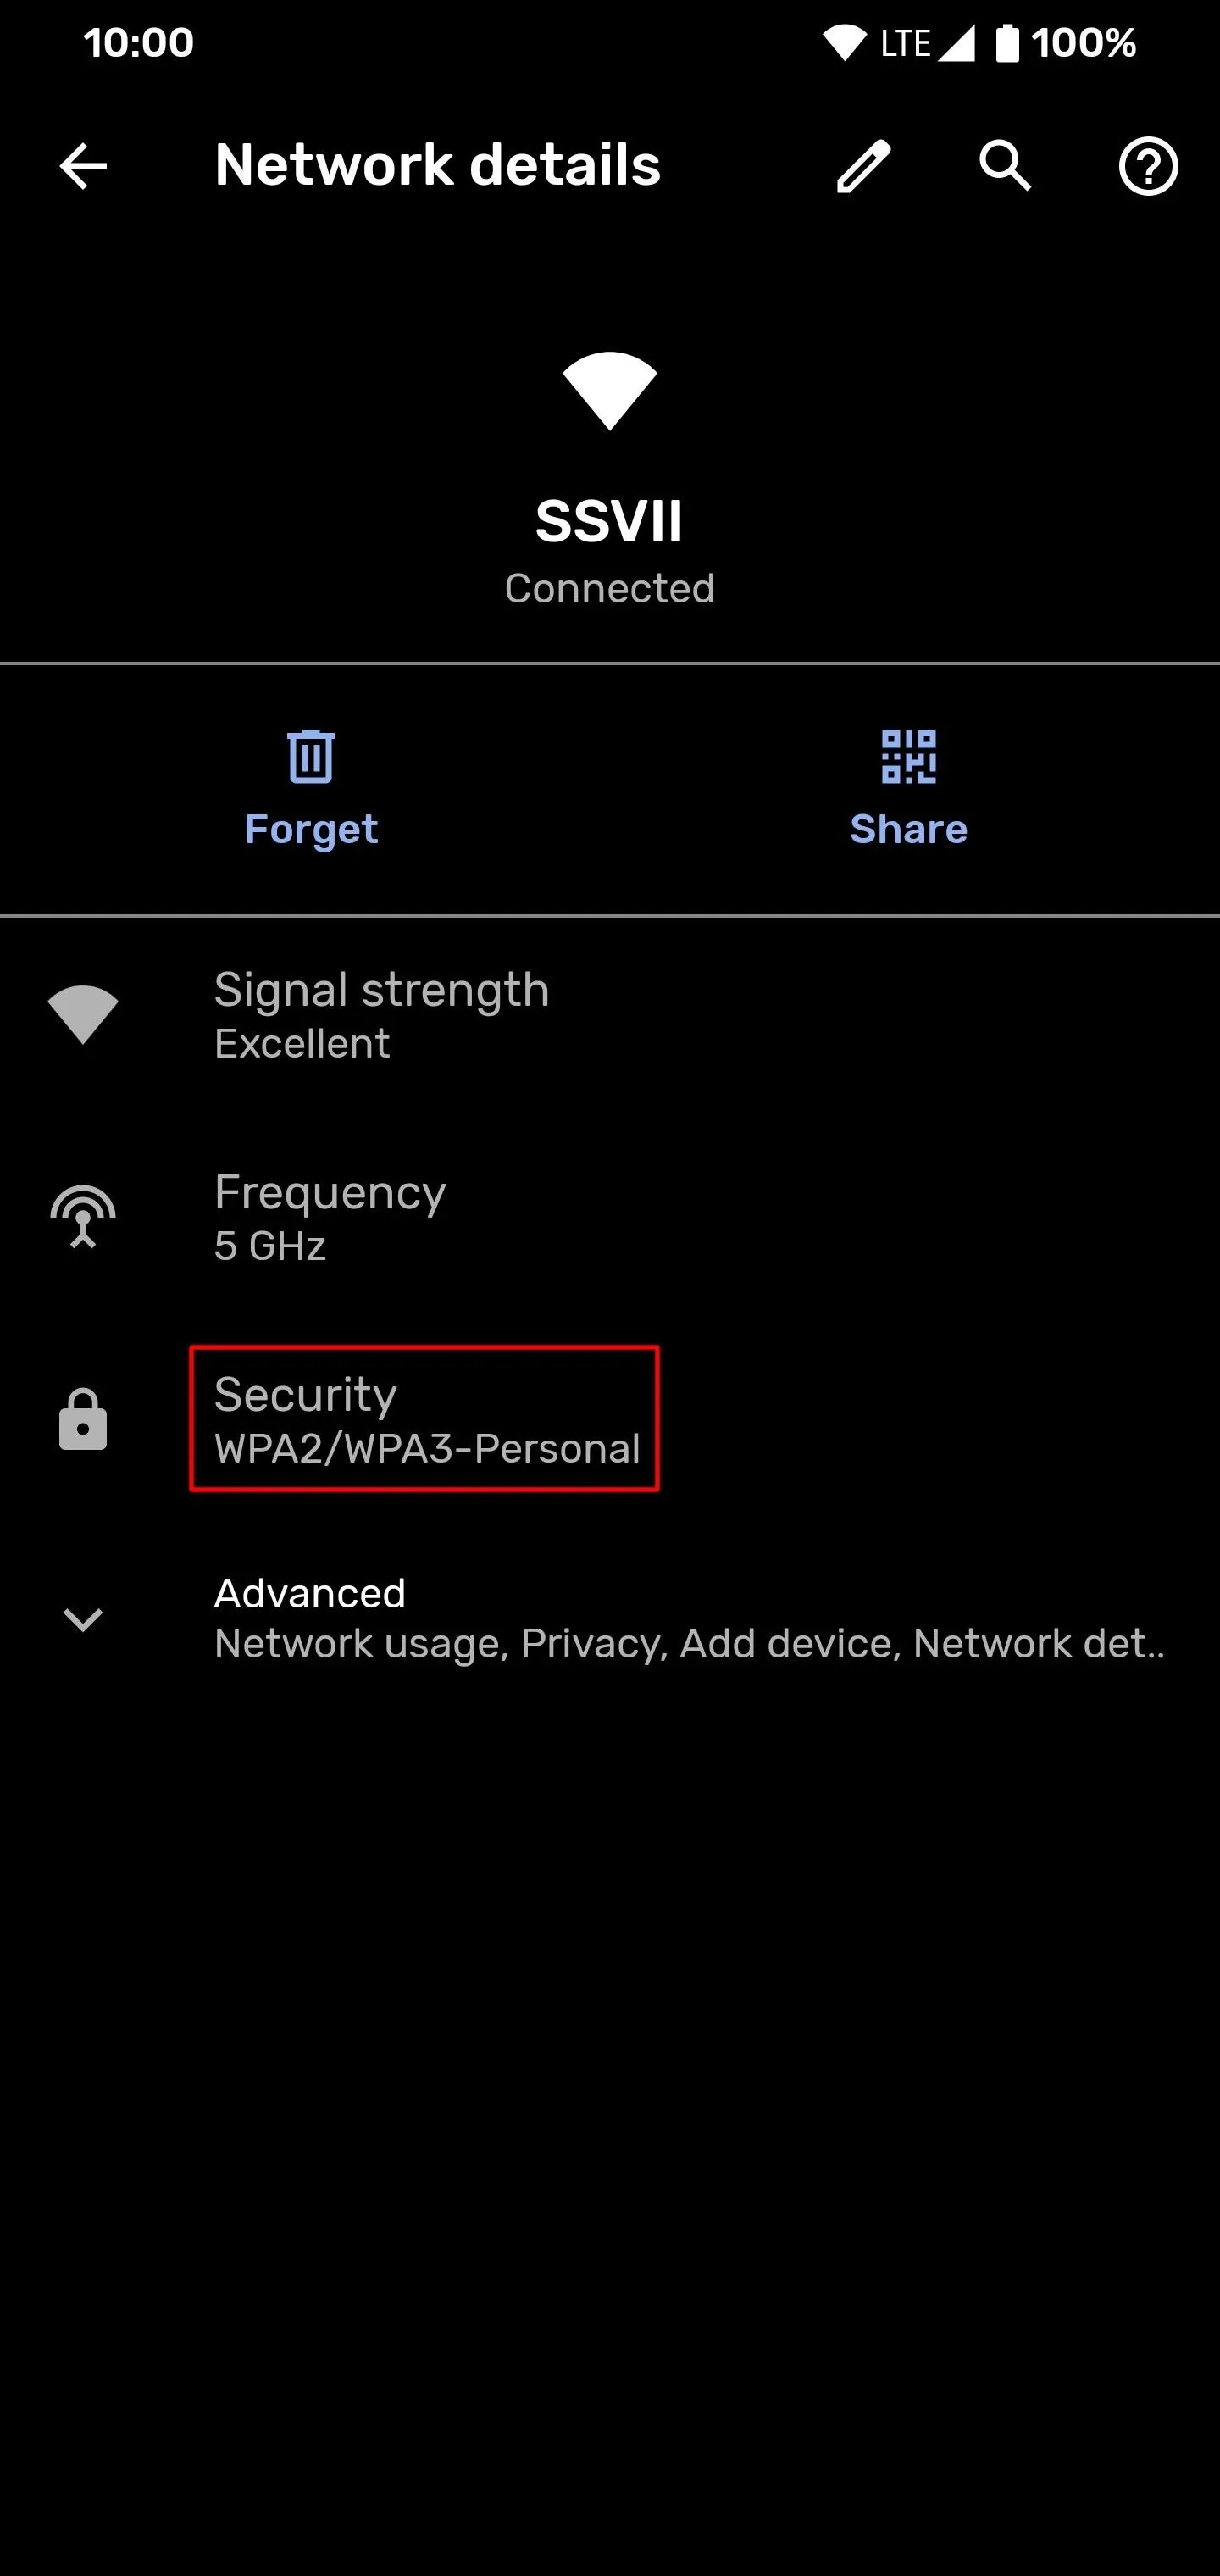
To check if WPA3 is working, go to the Wi-Fi settings on your phone to view the security information. You should see something like "WPA2/WPA3-Personal" or potentially just "WPA3-Personal". If you see something like that, then it's working as intended. Your network security has been upgraded! If not, try removing and reconnecting your Wi-Fi network from the device.
Final Notes
Although I have tested this multiple times and currently use WPA3 on my own Google Wifi network, things might not always go as planned for everyone. Enabling WPA3 on the older Google Wifi products is relatively painless in most cases. Just in case, though, I'll be answering a few questions below to address some of the things that might come up.
Will all of my devices support the new WPA3 security protocol?
WPA3 is generally backward compatible with most devices that already support WPA2. There are a few known isolated cases where WPA2 legacy devices won't work well. However, Google designed it to work just fine with many of the devices you already have in your home today. They are calling it "Transition Mode," which allows both WPA2 and WPA3 products to operate on the same network.
What if I have the updated Nest Wifi instead of the older Google Wifi?
In this case, the guide above would still be relevant. Even the new Nest Wifi ships with WPA3 disabled by default for the time being. This is to provide maximum device compatibility during the initial setup phase. Since WPA3 is not being enforced just yet, the setting is optional. However, increasing your wireless security is crucial for your home network, so it'll be worth it in the long run.
What to do if Google Wifi gets stuck in a reboot after applying the WPA3 setting?
If you find your Google Wifi is stuck in a reboot and won't come online after applying the WPA3 setting, don't panic! Try power cycling it for thirty seconds by unplugging the power cable then plugging it back in. This time it should boot like usual, and the network should come back online just the same.
What if I still can't get it to boot even after power cycling it?
If your Google Wifi still doesn't boot correctly, you might have to revert the WPA3 security setting for the time being. The only way of doing so is through a factory reset, unfortunately. To do a factory reset on your Google Wifi, unplug the device, press and hold the reset button on the back, then plug the power cable in while still holding the button.
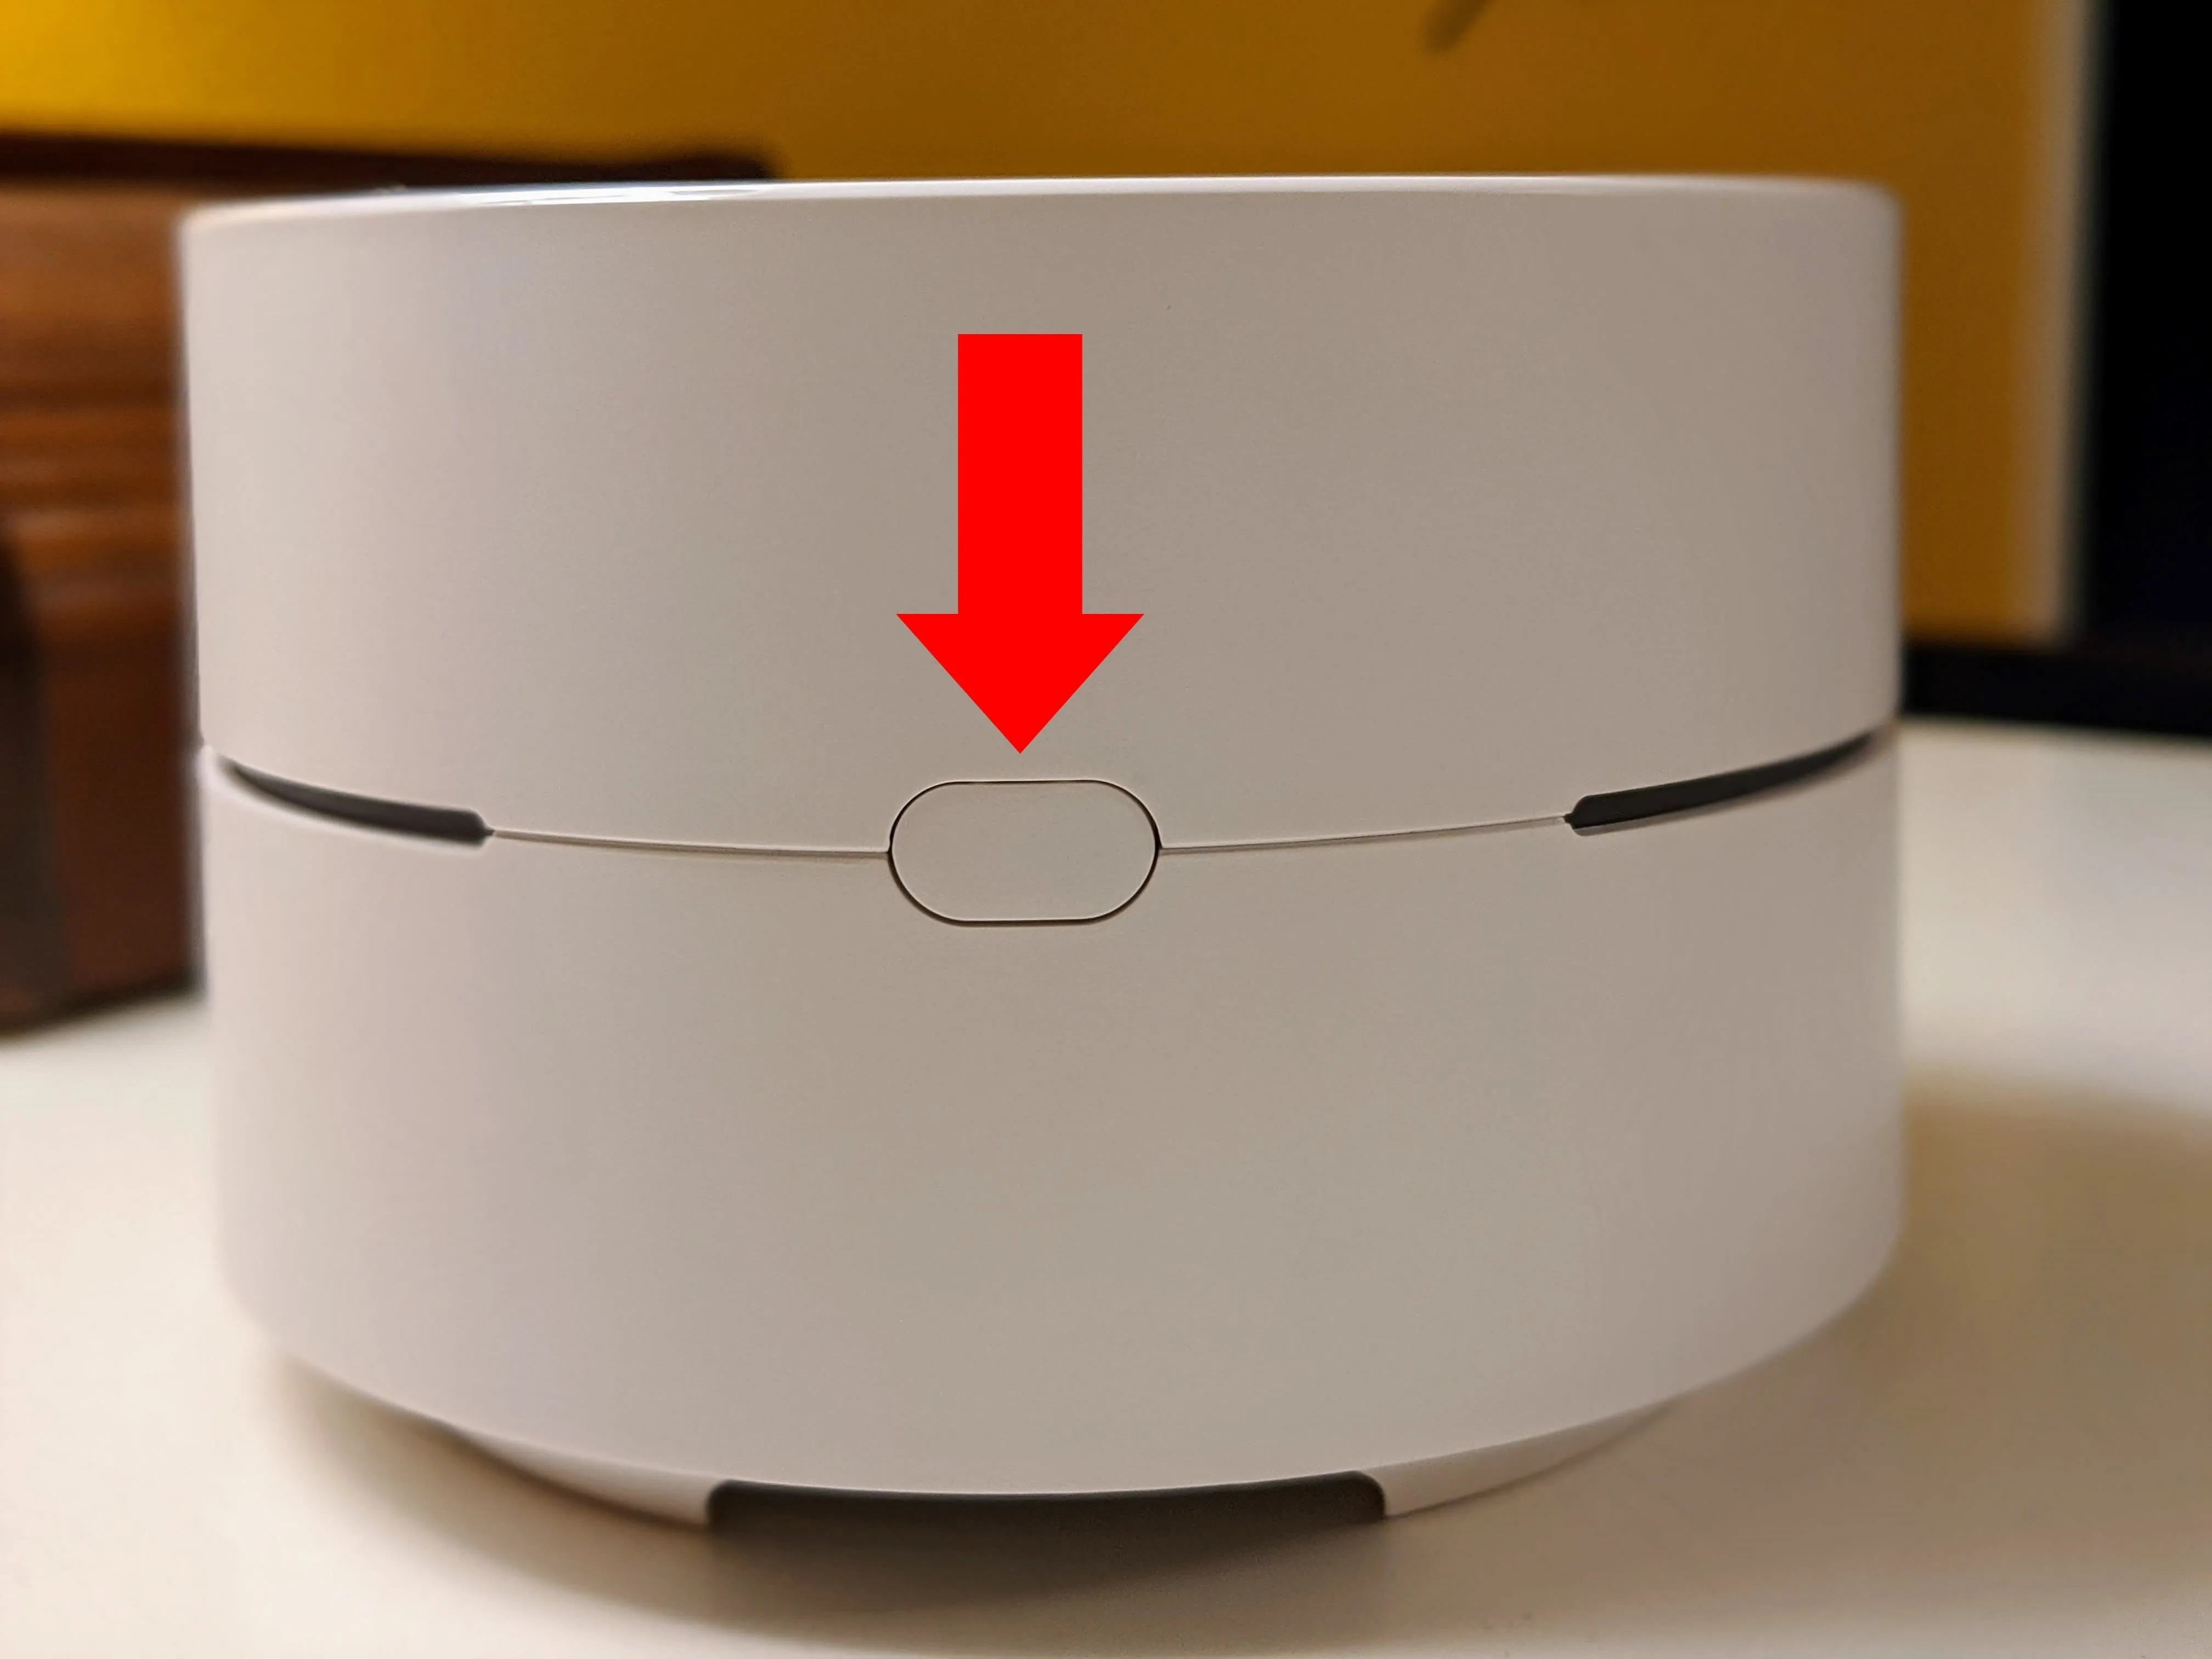
Stephen Perkins/Gadget Hacks
Continue pressing the button for about ten seconds, or until the light ring flashes blue. Let it sit for a few minutes so it can finish up the factory reset process. You'll know it's done when the light continually flashes blue. From there, you can open the Google Home app on your phone to begin the initial Google Wifi setup.
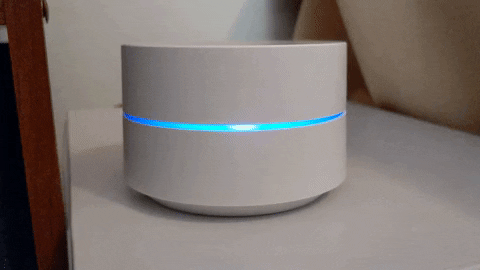
This Google Wifi has been factory reset and is ready to be set up.
This article was produced during Gadget Hacks' special coverage on smartphone privacy and security. Check out the whole Privacy and Security series.
Cover image and screenshots by Stephen Perkins/Gadget Hacks


Comments
Be the first, drop a comment!