


Ever-shrinking bezels and disappearing hardware buttons make for good looking phones, but they also increase the need for gesture controls. Android Pie comes with seven new swipe gestures, but if you don't have the update yet (or find its default gesture options to be lacking), you should take a look at the Microsoft Launcher.
Microsoft Launcher is designed to be fast and lightweight, but without skimping on customization options and useful features — my favorite, of course, being the inclusion of gesture controls which can be customized to your liking.
Say what you want about Windows Phone, but Microsoft has had an impressive mobile resurgence since embracing Android and iOS. Apps like Microsoft Launcher have grown to become some of the most popular and highest rated, and rumors have even suggested they could be working on an Android phone of their own. Microsoft has shifted its focus to bridging the PC-mobile divide so that Windows and its services are seamlessly integrated across all devices — a strategy that's been particularly successful thanks to their investment in the Android launcher space.
Download and install Microsoft Launcher via the link below and read on to find out how to use the launcher to create and customize your own gestures.
Choose a Gesture
Access the launcher settings menu by either selecting the "Launcher Settings" icon on the home screen, or by long-pressing any empty space on the home screen, then tapping "Launcher Settings." Select "Gestures" from the settings menu and you'll see a complete list of gestures which can be customized to control your phone.
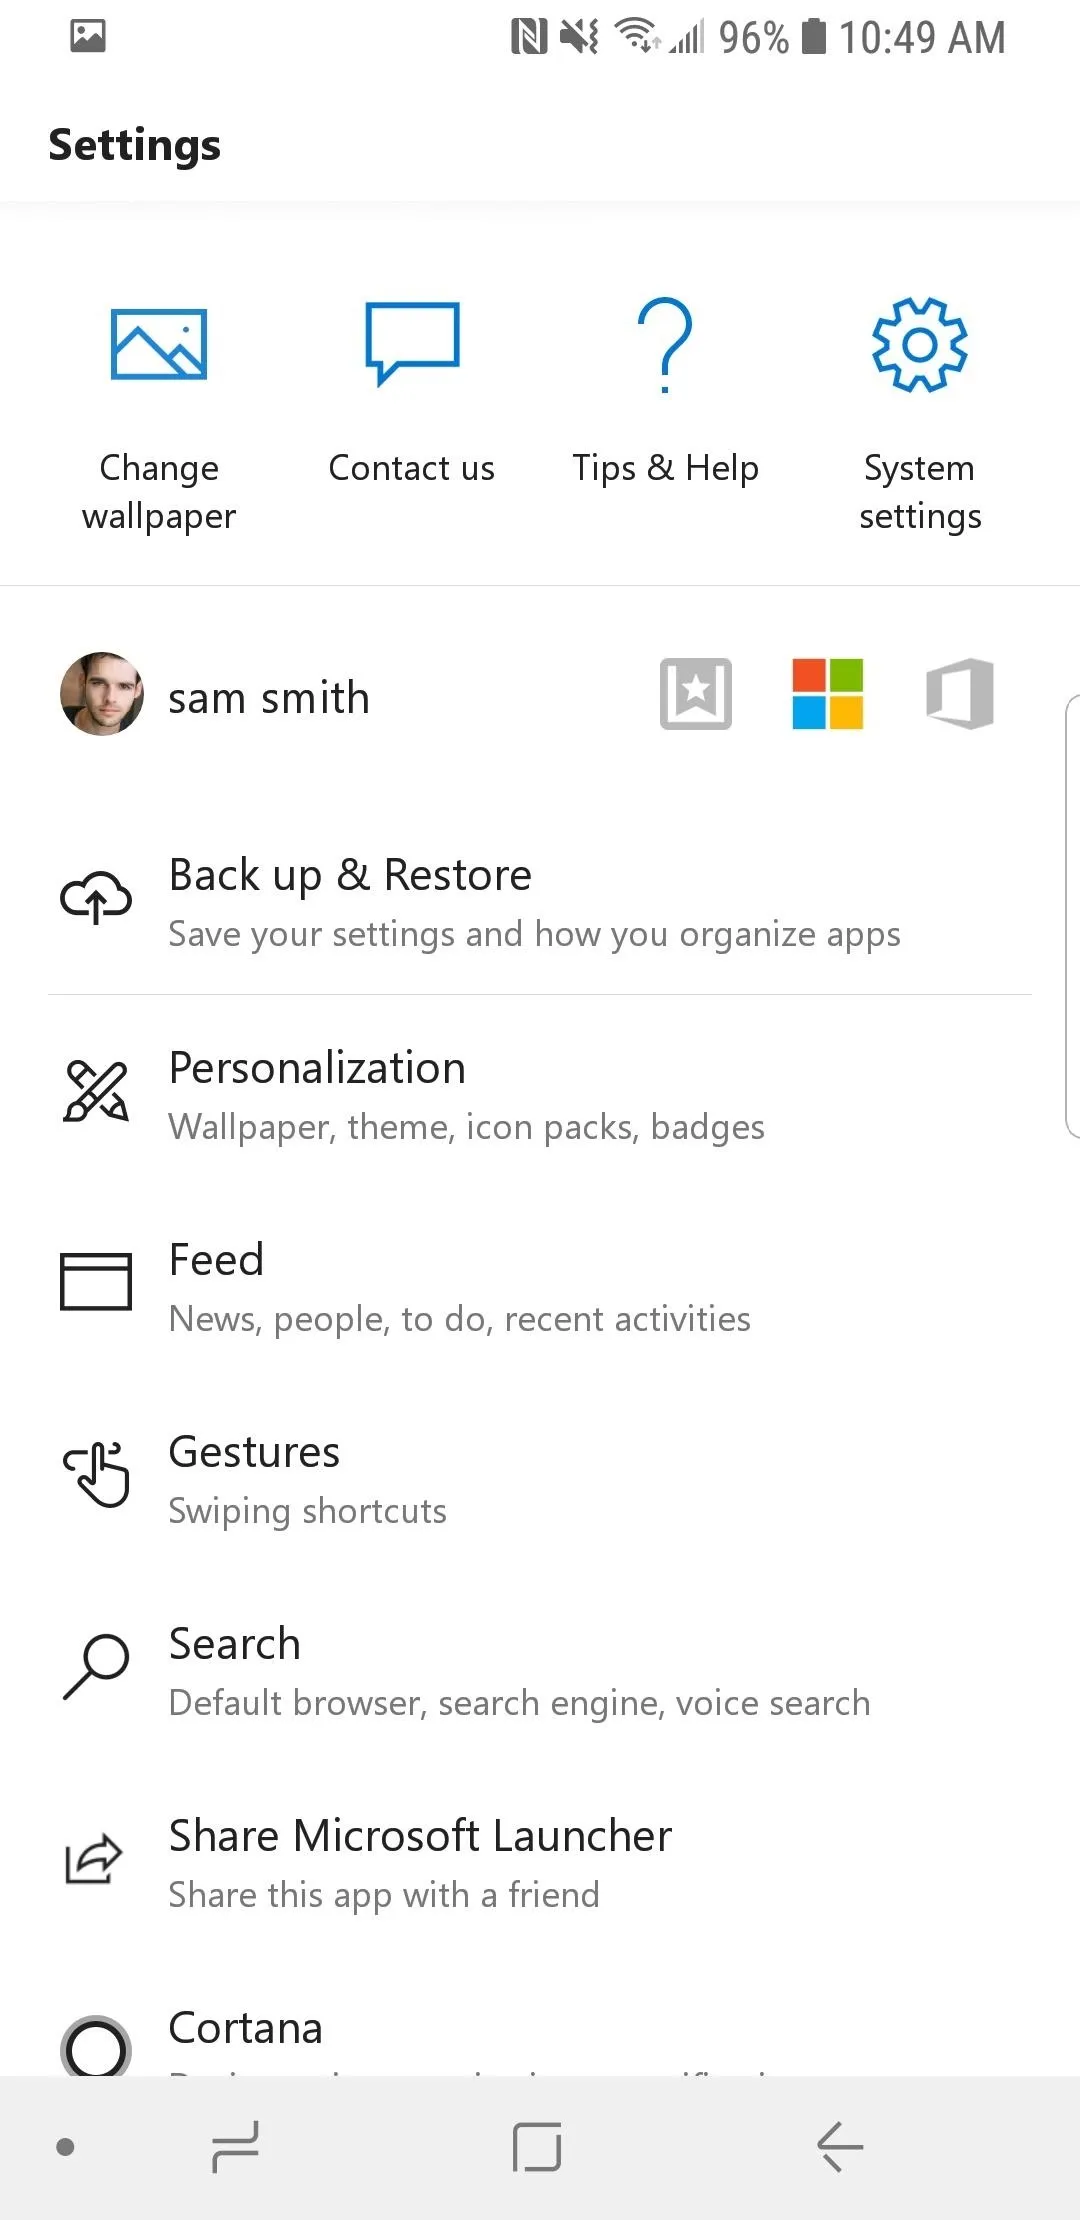
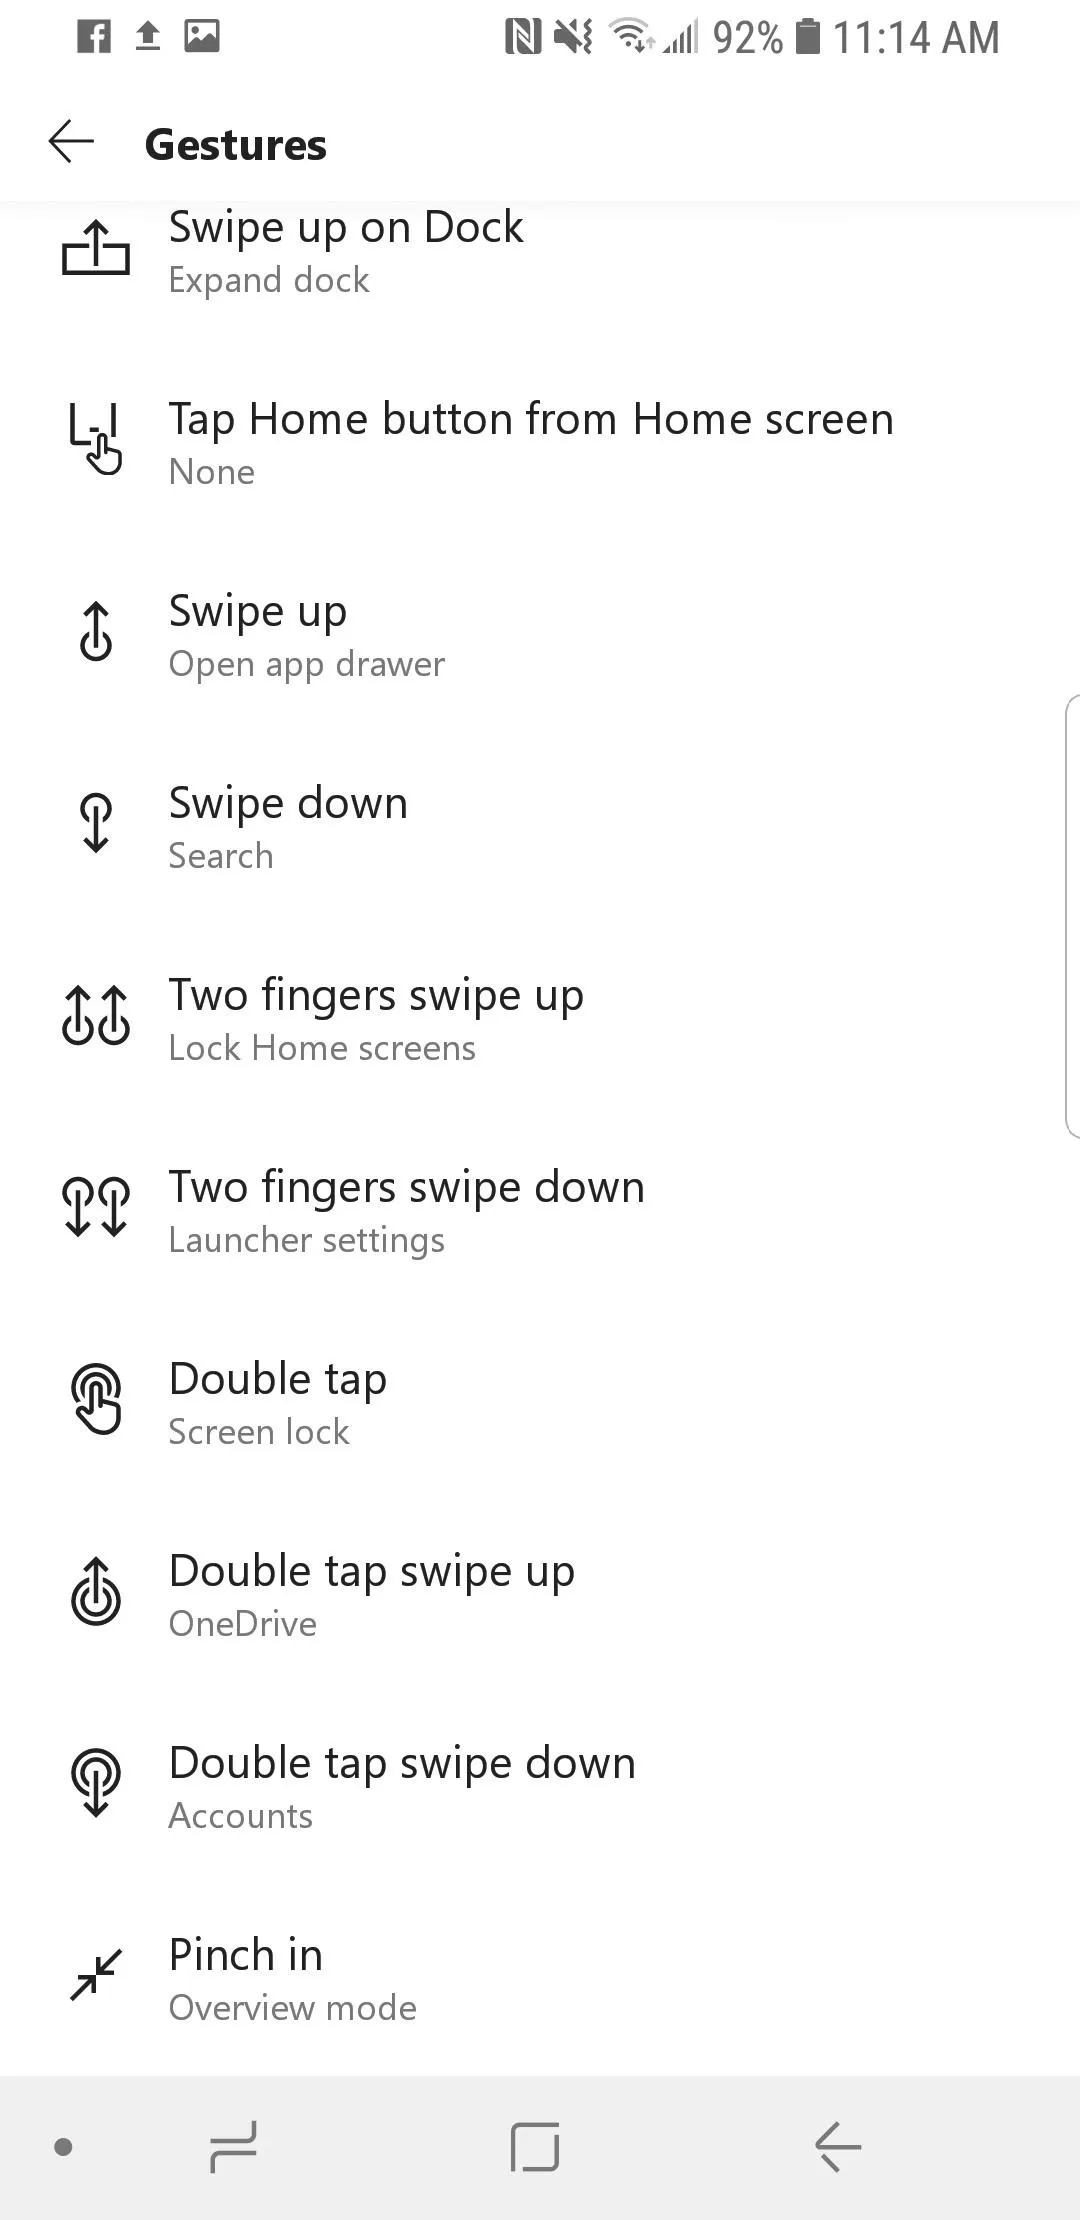
Each gesture has a default setting which can be changed to perform a range of actions and shortcuts. The complete list of gesture controls are as follows:
- Swipe up on Dock
- Tap Home button from Home screen
- Swipe up
- Swipe down
- Two fingers swipe up
- Two fingers swipe down
- Double tap
- Double tap swipe up
- Double tap swipe down
- Double tap
- Double tap swipe up
- Double tap swipe down
- Pinch in
- Pinch out
Select any gesture from the list and move on to change the default action.
Choose an Action for Your Gesture
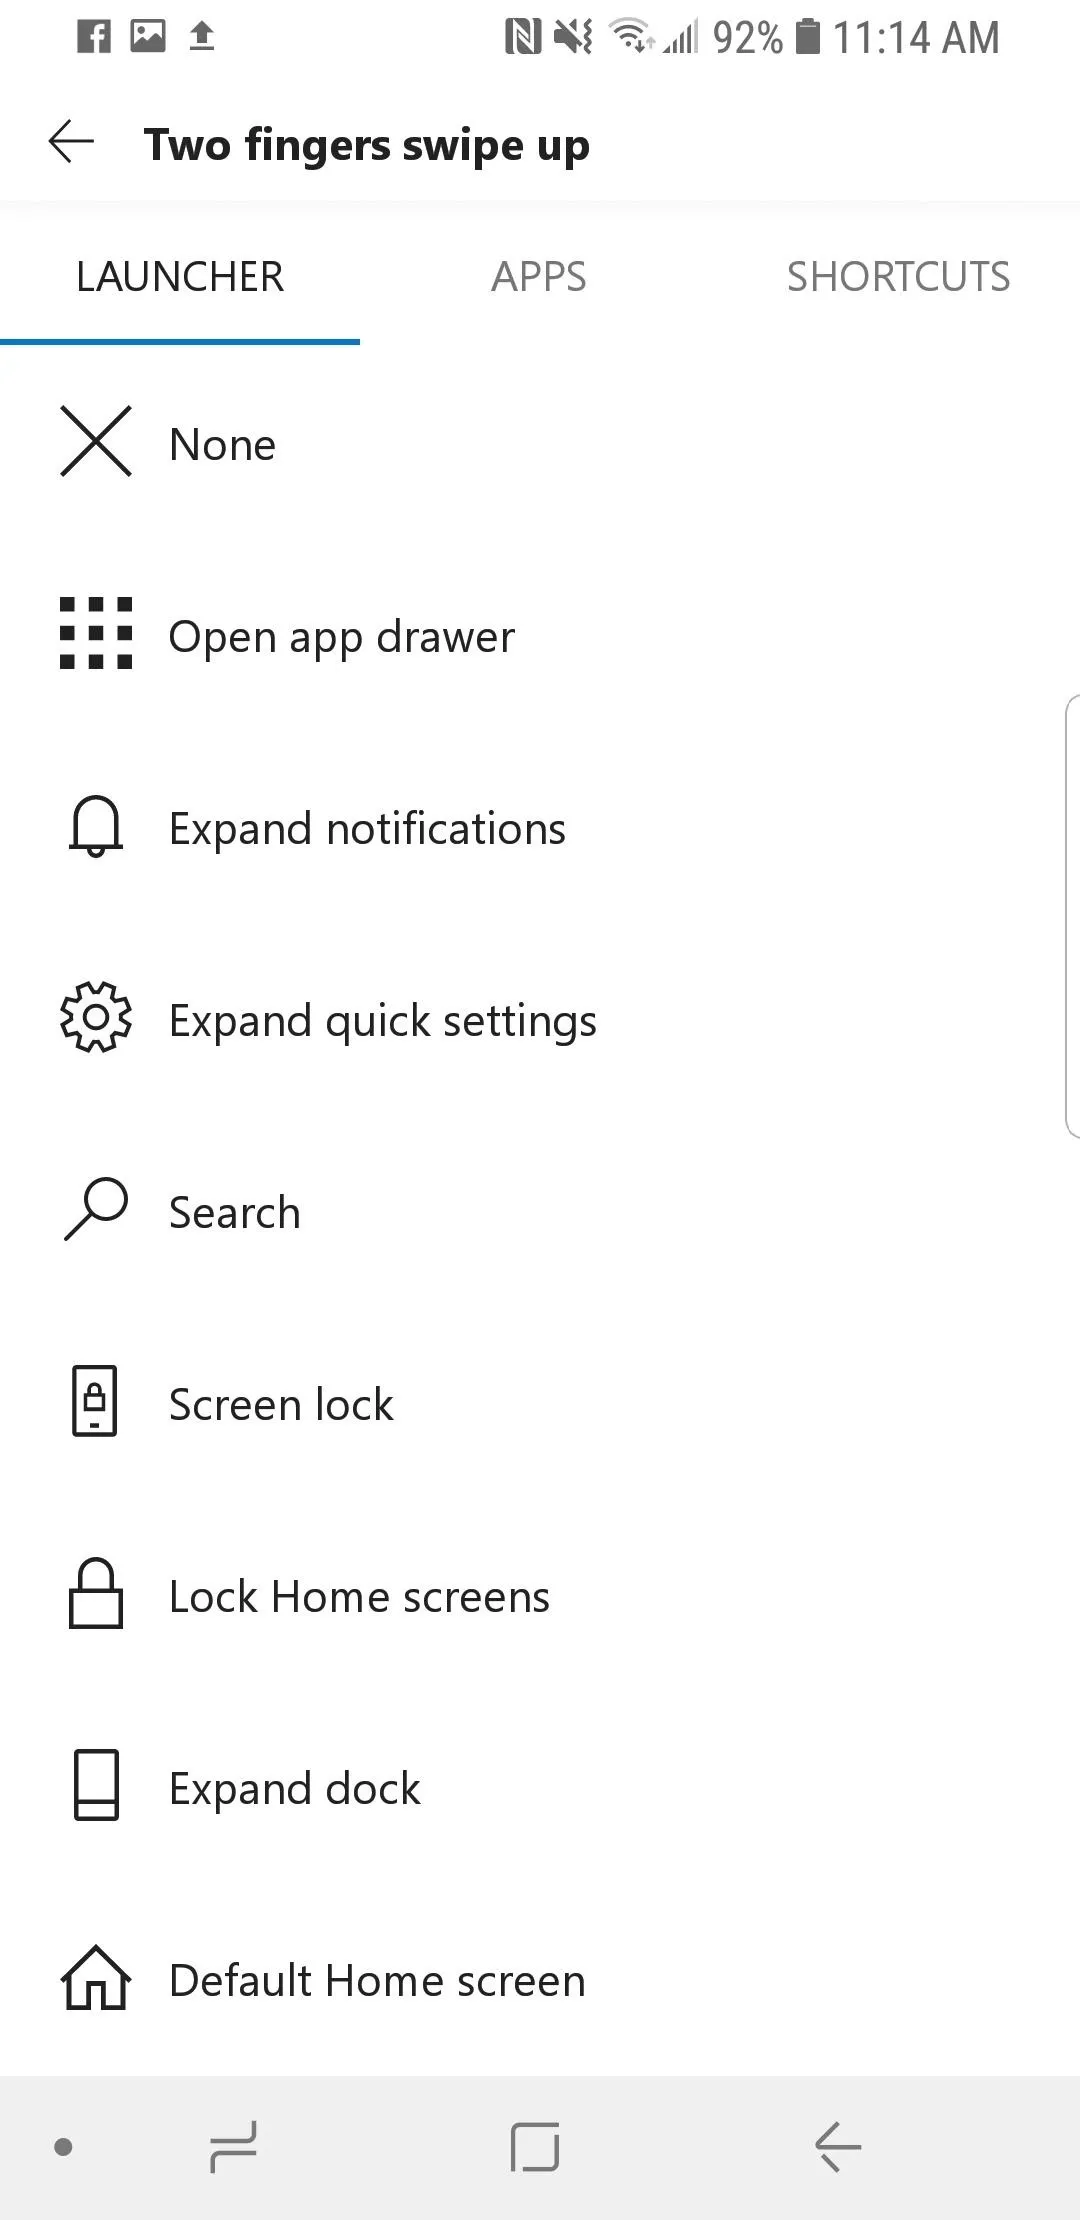
For the purposes of this guide, I'll be changing the "Two fingers swipe up" gesture to perform a Scan to Drive shortcut and upload the scanned image to my Google Drive storage. A shortcut like this is a great way to demonstrate the benefits of gesture controls as it simplifies the action by eliminating the need for multiple button presses.
To customize the gesture yourself, select the "Two fingers swipe up" gesture and you'll find the customization options listed under the following 3 tabs:
- Launcher Open app drawer, Expand notifications, Expand quick settings, Search, Screen lock, Lock home screens, Expand dock, Default Home screen, Overview mode, Launcher settings, Go to navigation page, Accounts, Recent Apps, Assistant, Toggle notification bar, Backup, Rotate to next wallpaper, Cortana
- Apps Open any installed application on your device
- Shortcuts Access shortcuts and perform more advanced actions relating to both system and installed applications
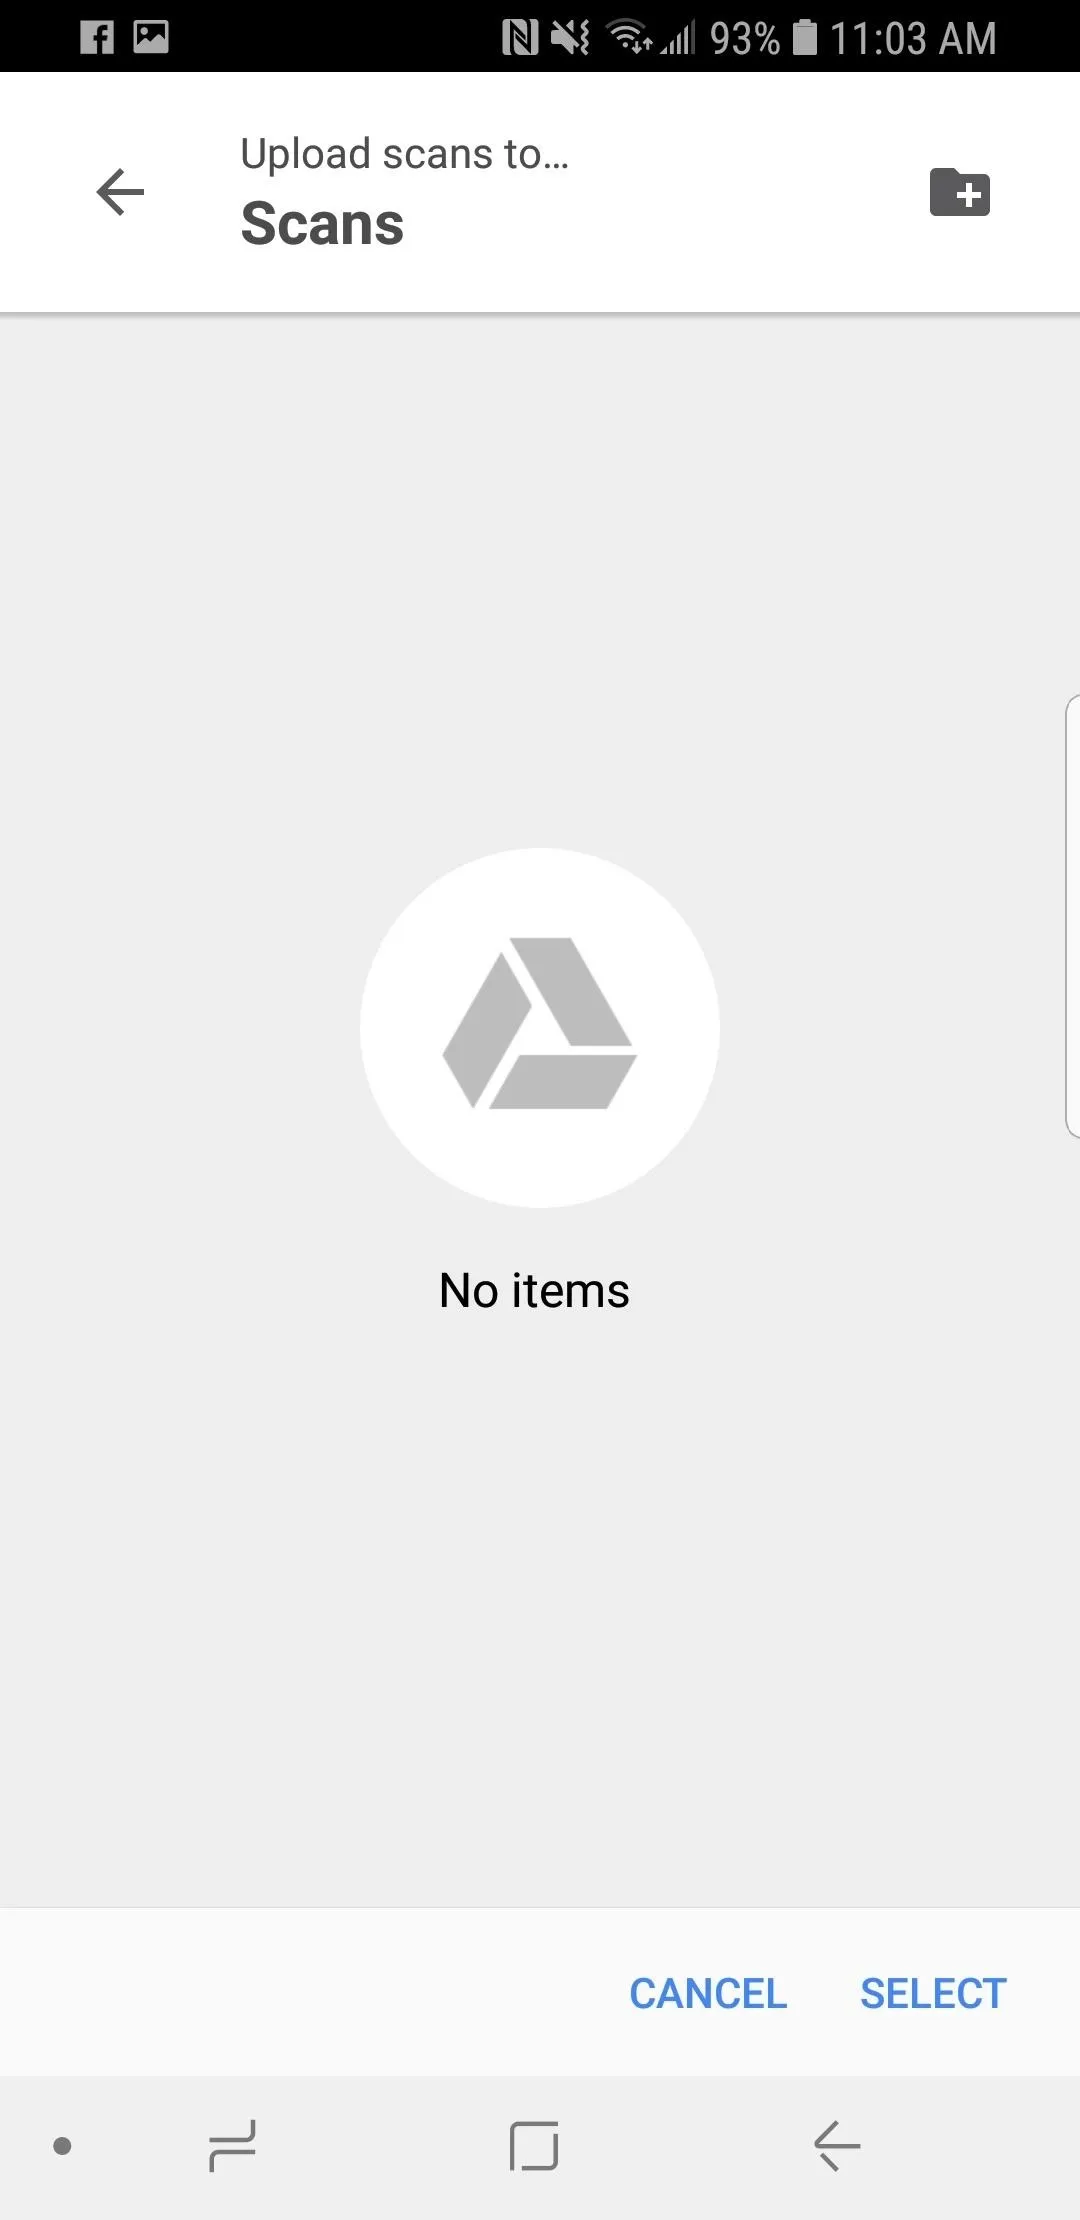
Open the "Shortcuts" tab and tap "Drive scan". You'll then be prompted to select or create a new Google Drive cloud folder for scanned images to be uploaded to. I created a new folder called Scans ... because that makes sense.
Enjoy Your New Gesture Controls
With your new gesture created, you're all set and ready to go. Return to the home screen and test it out by swiping from the home screen with the the gesture you chose to customize.
In this case, I set up a simple Scan to Drive action to scan anything with a two-fingered swipe, but the process is the same for any other action — take a moment to consider the applications and actions you tend to use the most and set things up to best suit your own habits.

Dallas Thomas/Gadget Hacks
- Follow Gadget Hacks on Facebook, Twitter, YouTube, and Flipboard
- Sign up for Gadget Hacks' daily newsletter or weekly Android and iOS updates
- Follow WonderHowTo on Facebook, Twitter, Pinterest, and Flipboard
Cover image and screenshots by Samuel Smith/Gadget Hacks


Comments
Be the first, drop a comment!