


Bootloops are a risk inherent to rooted devices — with great power comes great destroyability, after all. While custom recovery sometimes provides a quick fix when you flash the wrong Magisk module, with TWRP becoming more challenging to implement thanks to Android 10, the solution is a bit more complicated nowadays.
If you find yourself in a bootloop caused by a Magisk module and are without a custom recovery, you need a special boot image to put Magisk into "Core-Only Mode." It's like a safe mode for Magisk, allowing you to boot into Android with all modules disabled, where you could then remove any problematic modules. Afterward, you need only to toggle a setting to disable this mode.
Requirements
- Android phone rooted using Magisk
- bootloop or softbrick caused by faulty Magisk module
- Windows, Mac, or Linux computer
- USB data cable
Get Your 'magisk_patched' Image Ready
This guide is assuming two things: you rooted your phone with Magisk, but you don't have a custom recovery installed. If you have a custom recovery installed, you can simply run Magisk Manager for Recovery Mode.
But since you rooted without a custom recovery, that means you got your phone's stock boot image, ran it through Magisk, then flashed the magisk__patched image file it created to achieve root. The thing is, you need that magisk_patched.img file for this to work.
So if you still have the magisk_patched.img file from when you rooted your phone, move it to a location on your computer that you can access easily.
If you deleted it, you might be out of luck here. But if you search the XDA forums for your phone model, someone may have uploaded the file for your phone. Just note that it needs to have been made with your exact phone model, and it should be made with the same Android version you're running. If you're desperate, a premade magisk_patched file from an older Android version may work.
Download Android Image Kitchen
To boot into core-only mode, you need to unpack the magisk_patched image file, modify it, then repack it to boot off of it temporarily. To do this, you will need Android Image Kitchen, which you can download below.
While this program does work with most Android phones, there are a few confirmed cases where it doesn't. You can read about those in the developer's release thread.
Extract Android Image Kitchen
Once the file is downloaded, extract the ZIP using either your operating system's built-in tools or a third-party archive extractor such as 7-Zip.
Unpack the 'magisk_patched' Image
Locate the magisk_patched image file on your computer and open the extracted Android Image Kitchen folder. Drag the magisk_patched file and drop it right on top of the "unpackimg" shortcut located in the Android Image Kitchen folder.
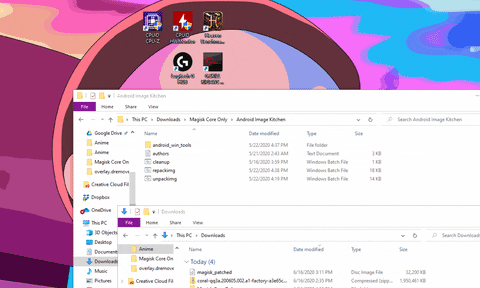
If you are unable to drag and drop, you can also open Command Prompt or Terminal, input the following command and hit space:
cdDrag the Android Image Kitchen folder to Command Prompt or Terminal to auto-populate its location, then hit enter. Afterward, input the following and press the space bar :
unpackimgThen drag the magiskpatched image file to the Command Prompt or Terminal and hit enter.
Either way, a series of commands will appear in Command Prompt or Terminal, with the last line requesting you "Press any key to continue." Follow this direction to close the window.
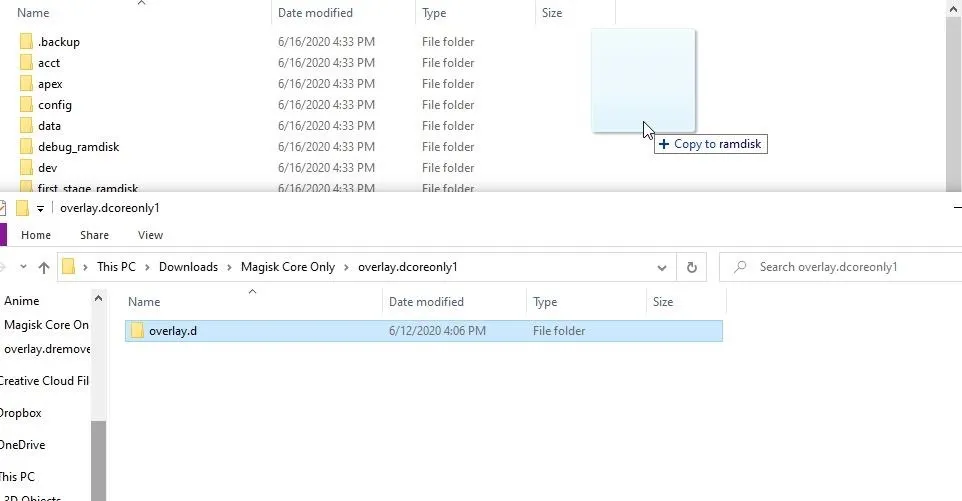
Modify the Image File
You should now see two new folders, "ramdisk" and "split_img." Download the ZIP file linked below and extract it onto your computer in a handy location.
Once extracted, open the folder and copy the "overlay.d" folder into the ramdisk folder located inside the Android Image Kitchen folder.
Repack the Image File
Now that you added the folder, double click the "repackimg" file. You can also use Command Prompt or Terminal (if you didn't close it) by inputting the following:
repackimgEnter Fastboot Mode
Now you'll need to boot into Fastboot mode. For most phones, that can be done by holding the volume down and power buttons from a powered-off state. If not, volume up and power should do the trick. But if you're in a bootloop, you'll have to time it to where you start holding the buttons as soon as you notice your phone rebooting.
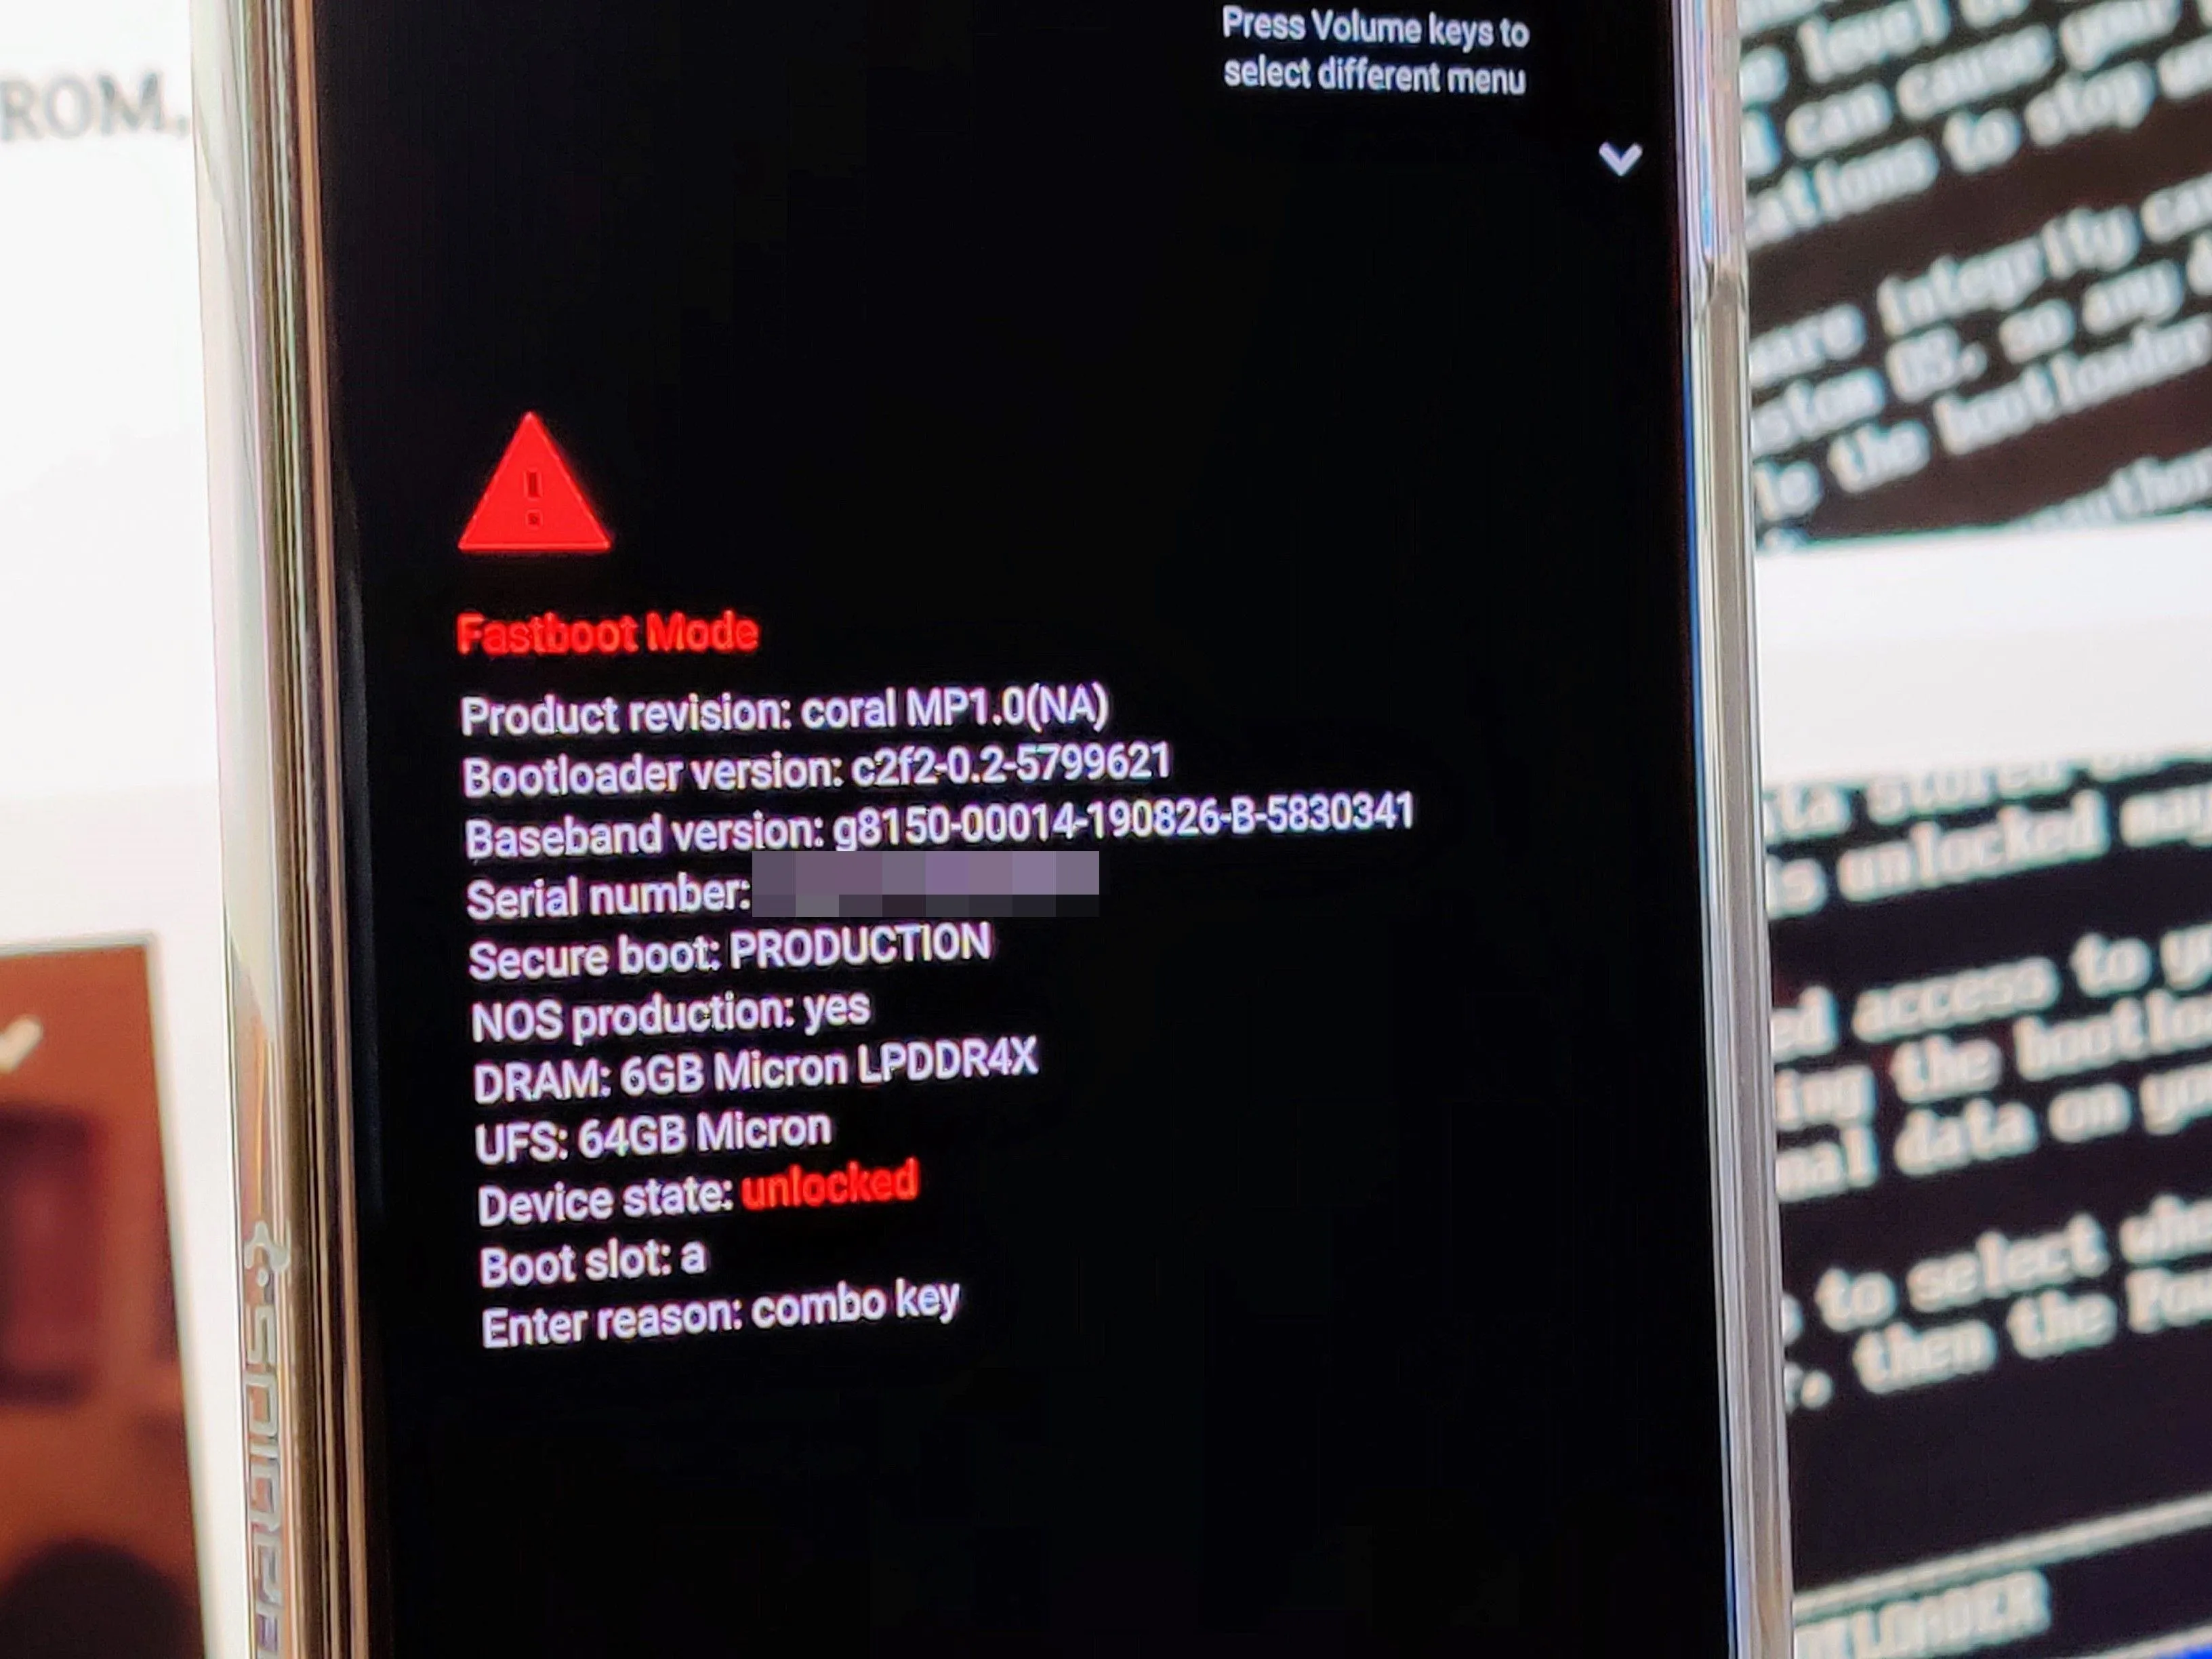
Fastboot mode on the Pixel 4.
Boot from the Image File
Connect your phone to your computer and open a new Command Prompt or Terminal window. Input the following command and hit enter:
cdDrag the platform-tools folder to the window and hit enter. Then type in the following command and hit the space bar:
fastboot bootDrag the "image-new" file from Android Image Kitchen to Command Prompt or Terminal and hit enter to boot from the modified magisk_patched image temporarily.
Disable the Problematic Module
Your phone should now successfully boot, retaining root, but with all Magisk modules deactivated. Open Magisk Manager, select the hamburger menu, then "Modules." Disable or uninstall the problematic module that caused your bootloop in the first place.
Disable Core-Only Mode (Optional)
After deleting the problematic modules, open Magisk Manager's Settings and disable the toggle next to "Magisk Core Only Mode." Your phone will restart, but this time with all modules enabled and no bootloop!


Comments
Be the first, drop a comment!