


Imagine this: you have your finger poised to take the perfect picture — a once in a lifetime opportunity, like a solar eclipse — and you are suddenly caught off guard by a buzz, then "ding!" You look down at your phone to find your perfect pic ruined by distortion from the vibration, all because of an ill-timed notification. It's enough to make you crazy, especially when you find out it could have been prevented.
But don't worry, we'll show you how to make sure this never happens to you. And you don't have to be a computer programmer to understand how, either. You can disable notifications while your camera app is open, then re-enable them when the app is closed. We'll automate this process using an app called MacroDroid, which is a much more user-friendly alternative to Tasker.
Install MacroDroid
MacroDroid is free, and it doesn't require root. There is a lot less of a learning curve when compared with other automation apps like Tasker. Just hop on Google Play and search for it, or simply tap on our link below.
- Play Store Link: MacroDroid (free)
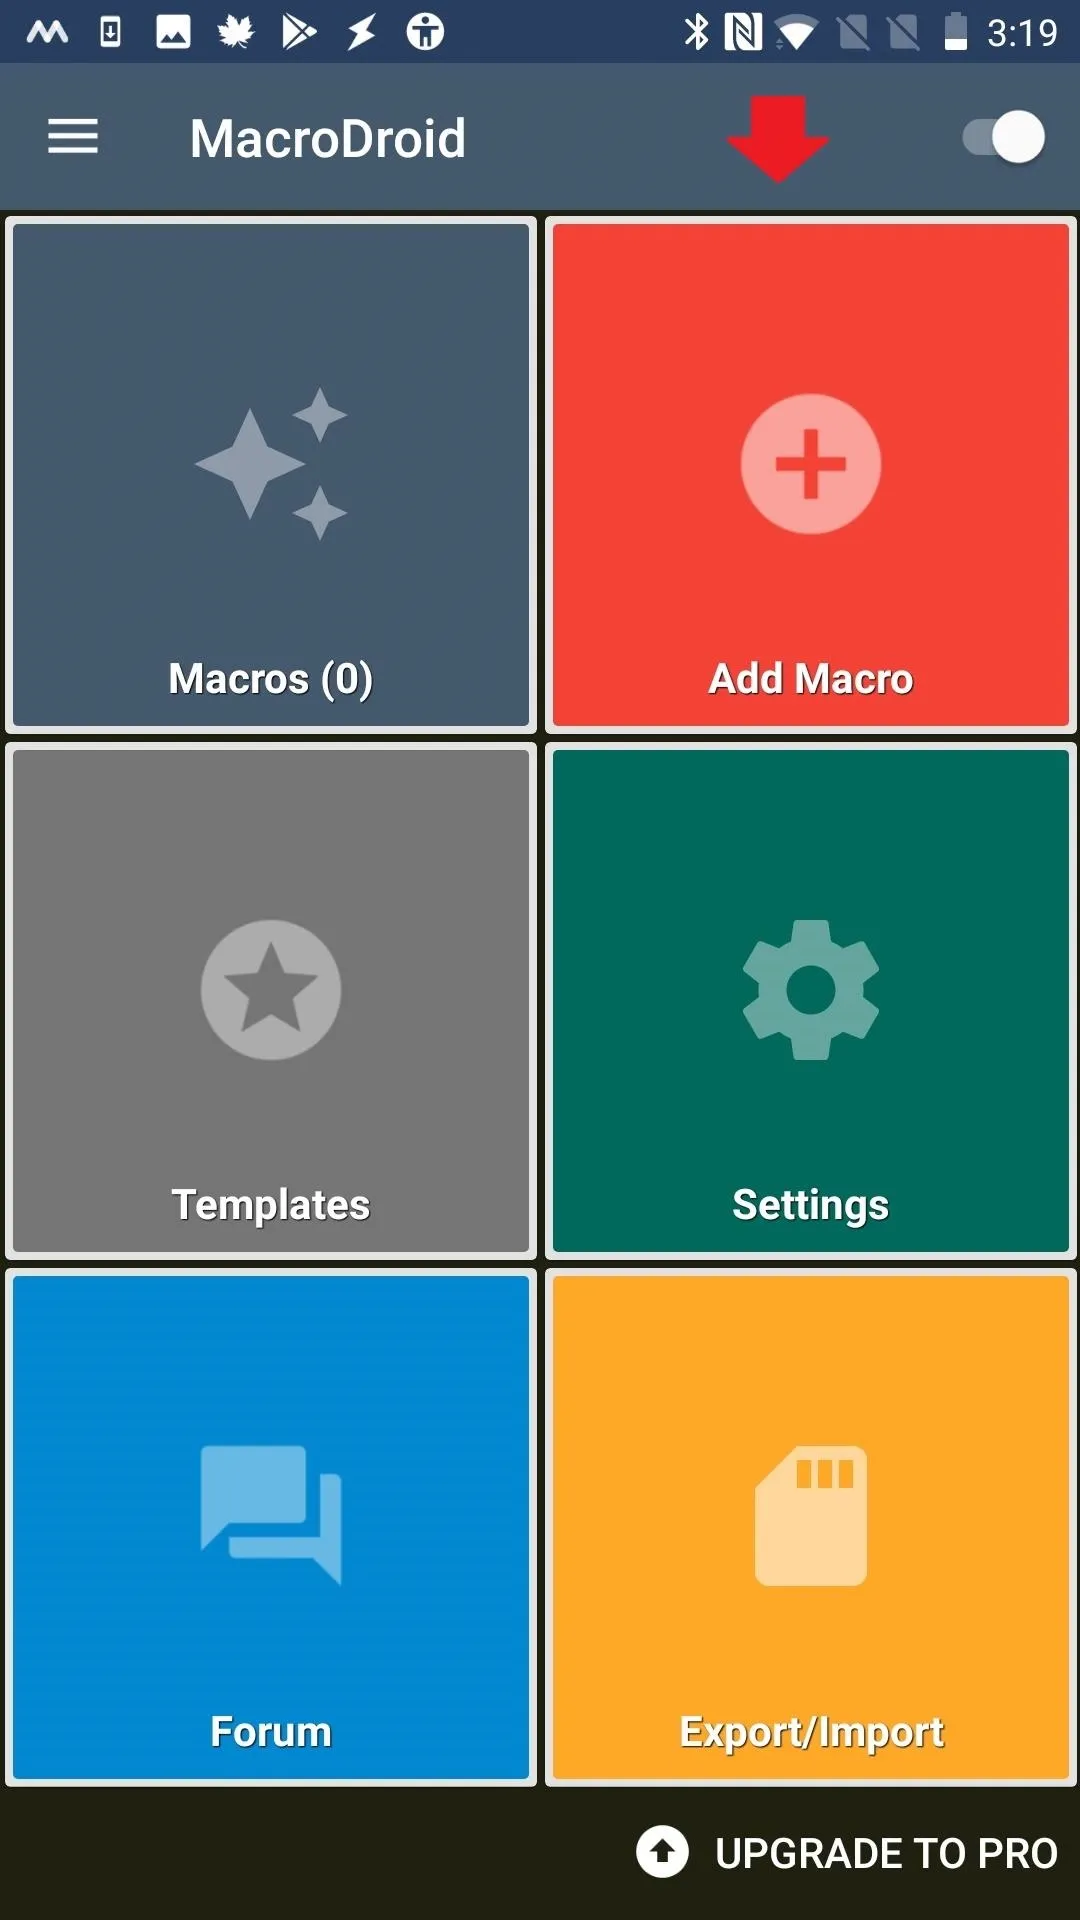
Add a Macro
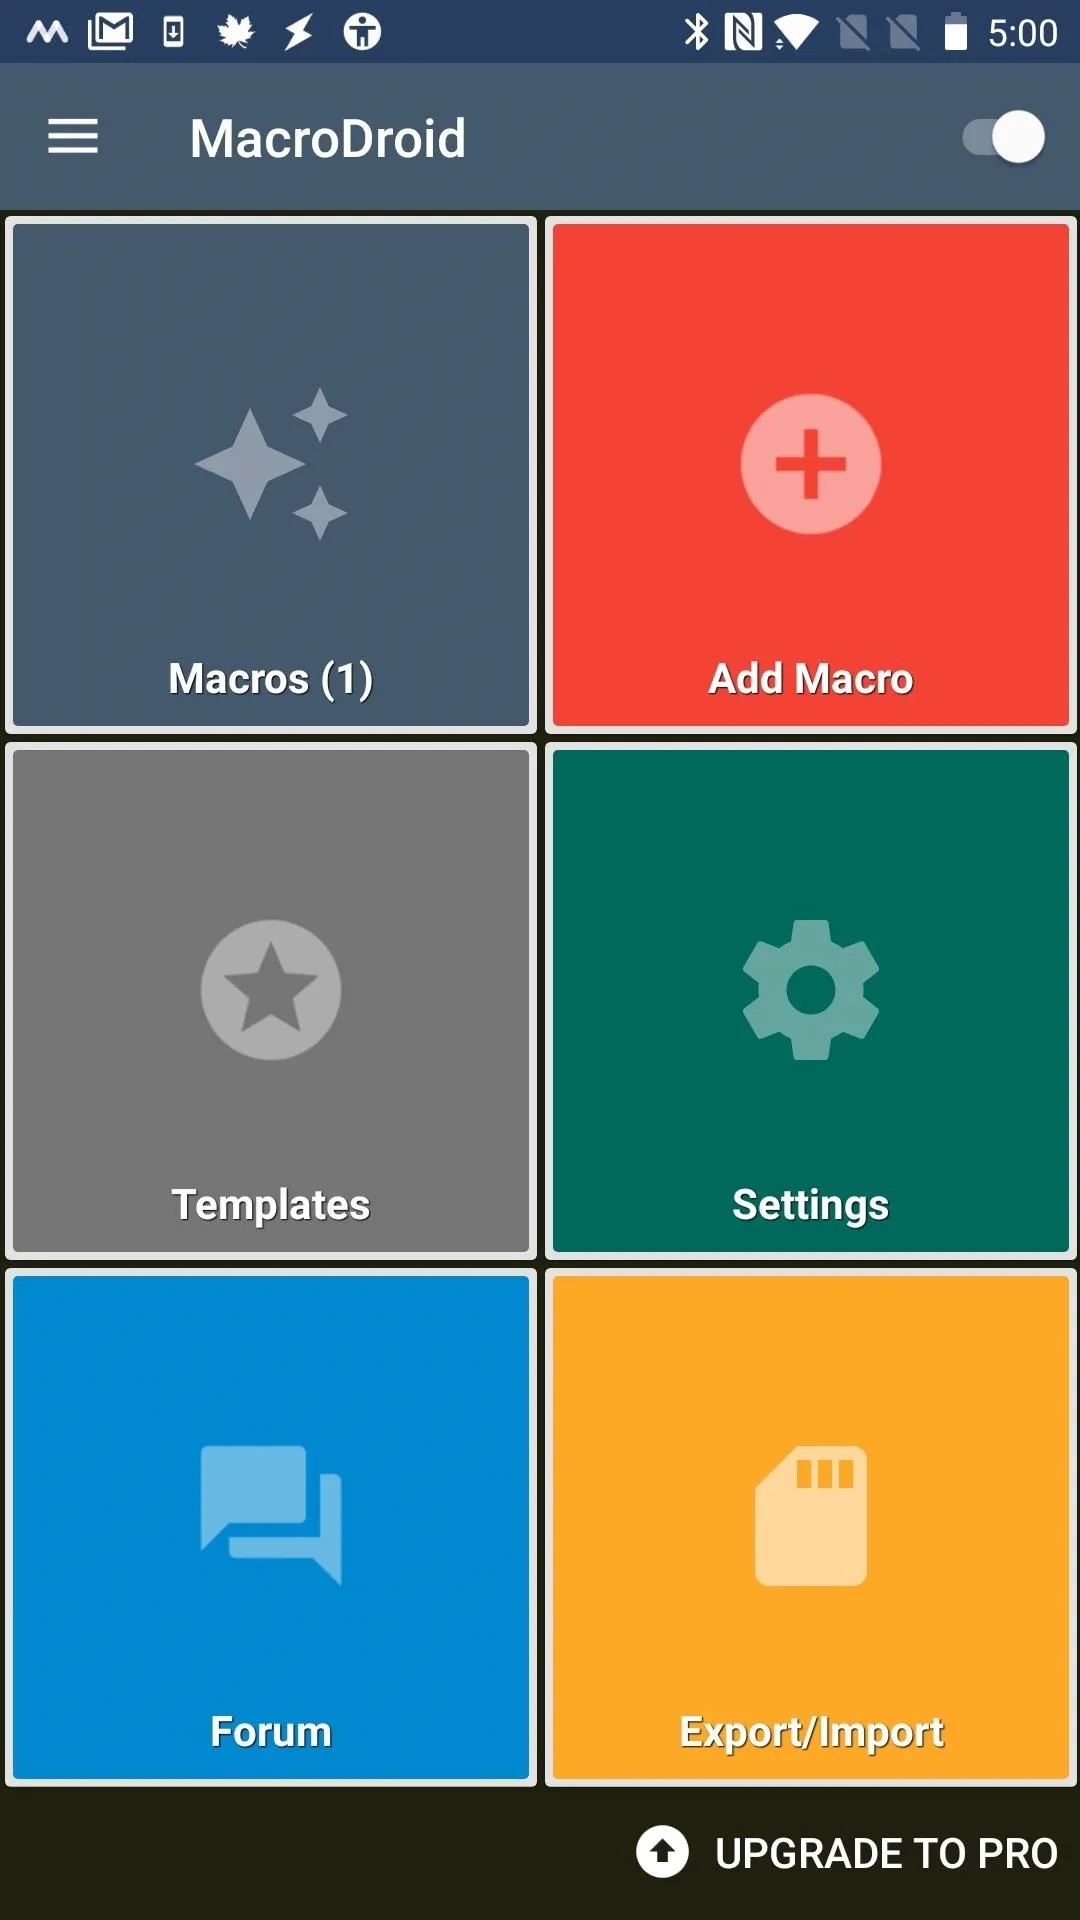
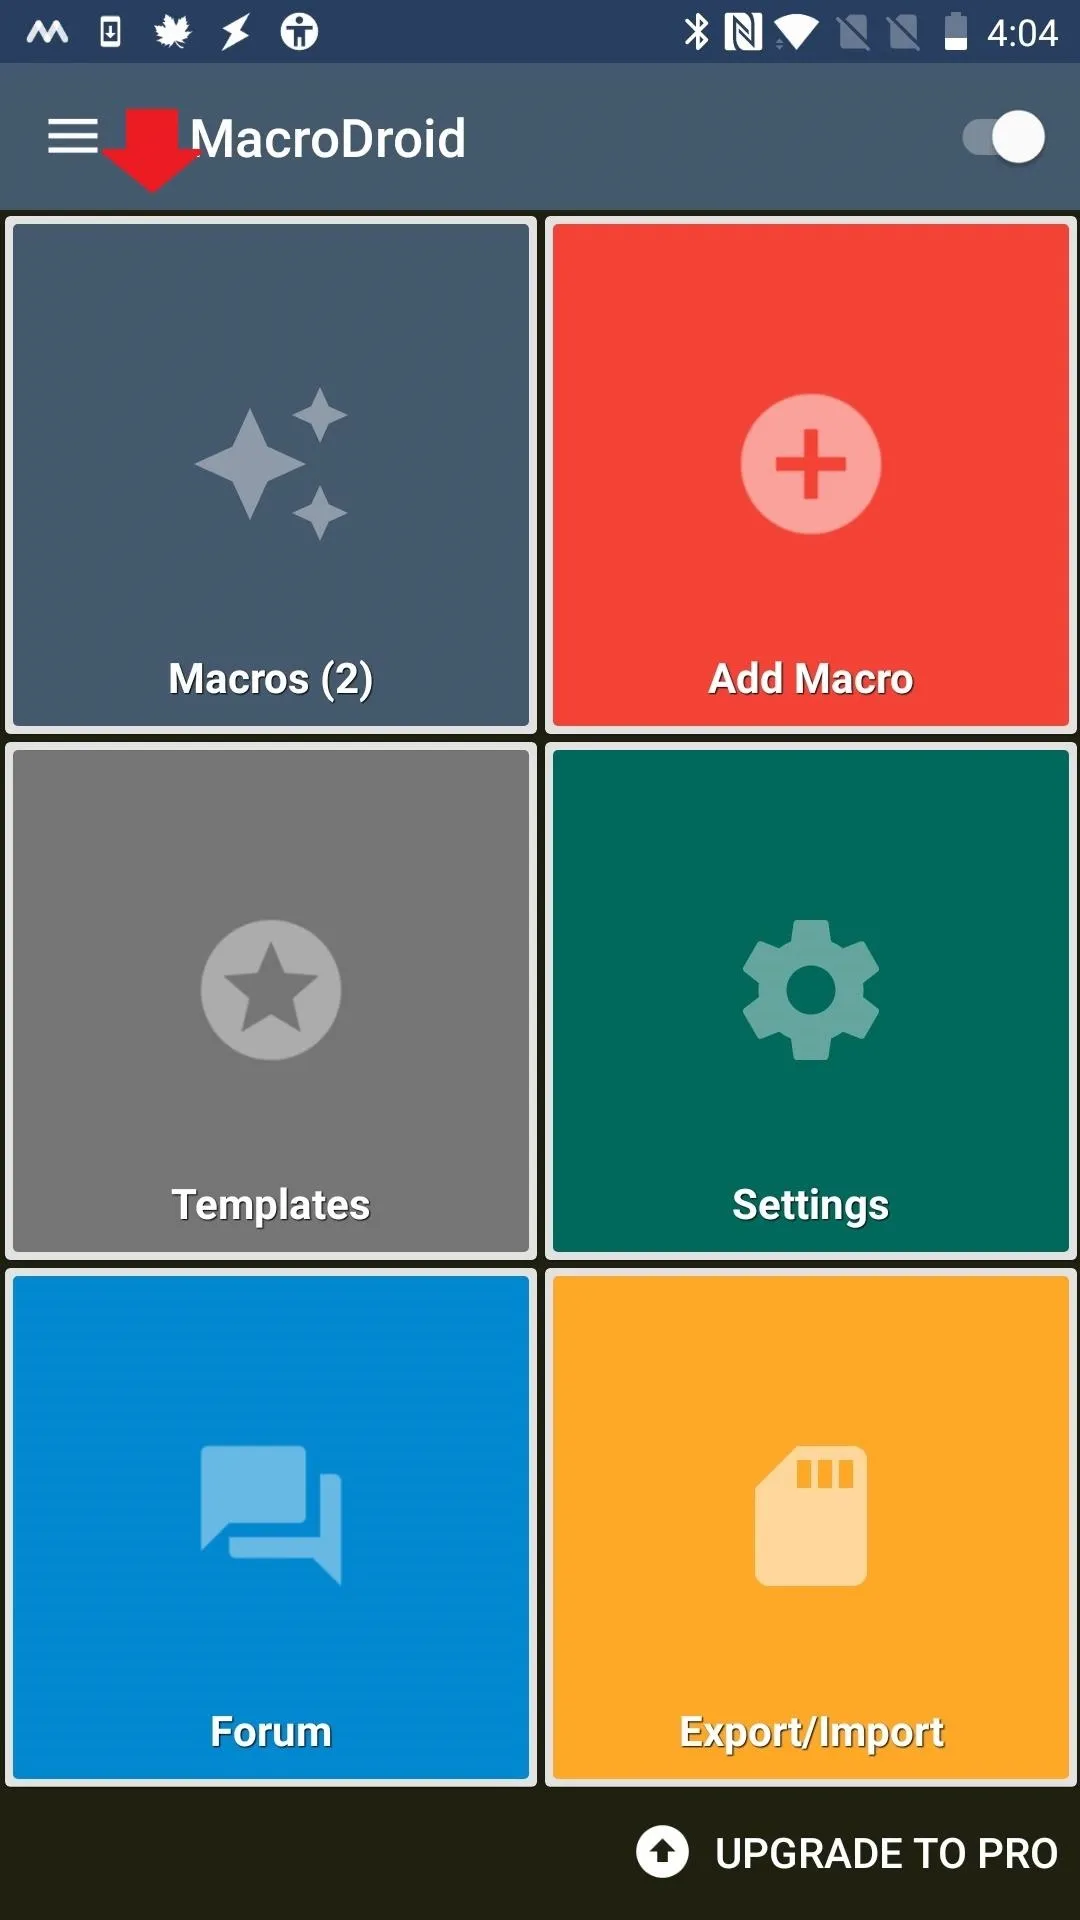
The MacroDroid home screen is pretty user-friendly. The "Templates" option gives you examples of projects other users have made. When we are done, you'll be able to access the macros you've created via the "Macros" button.
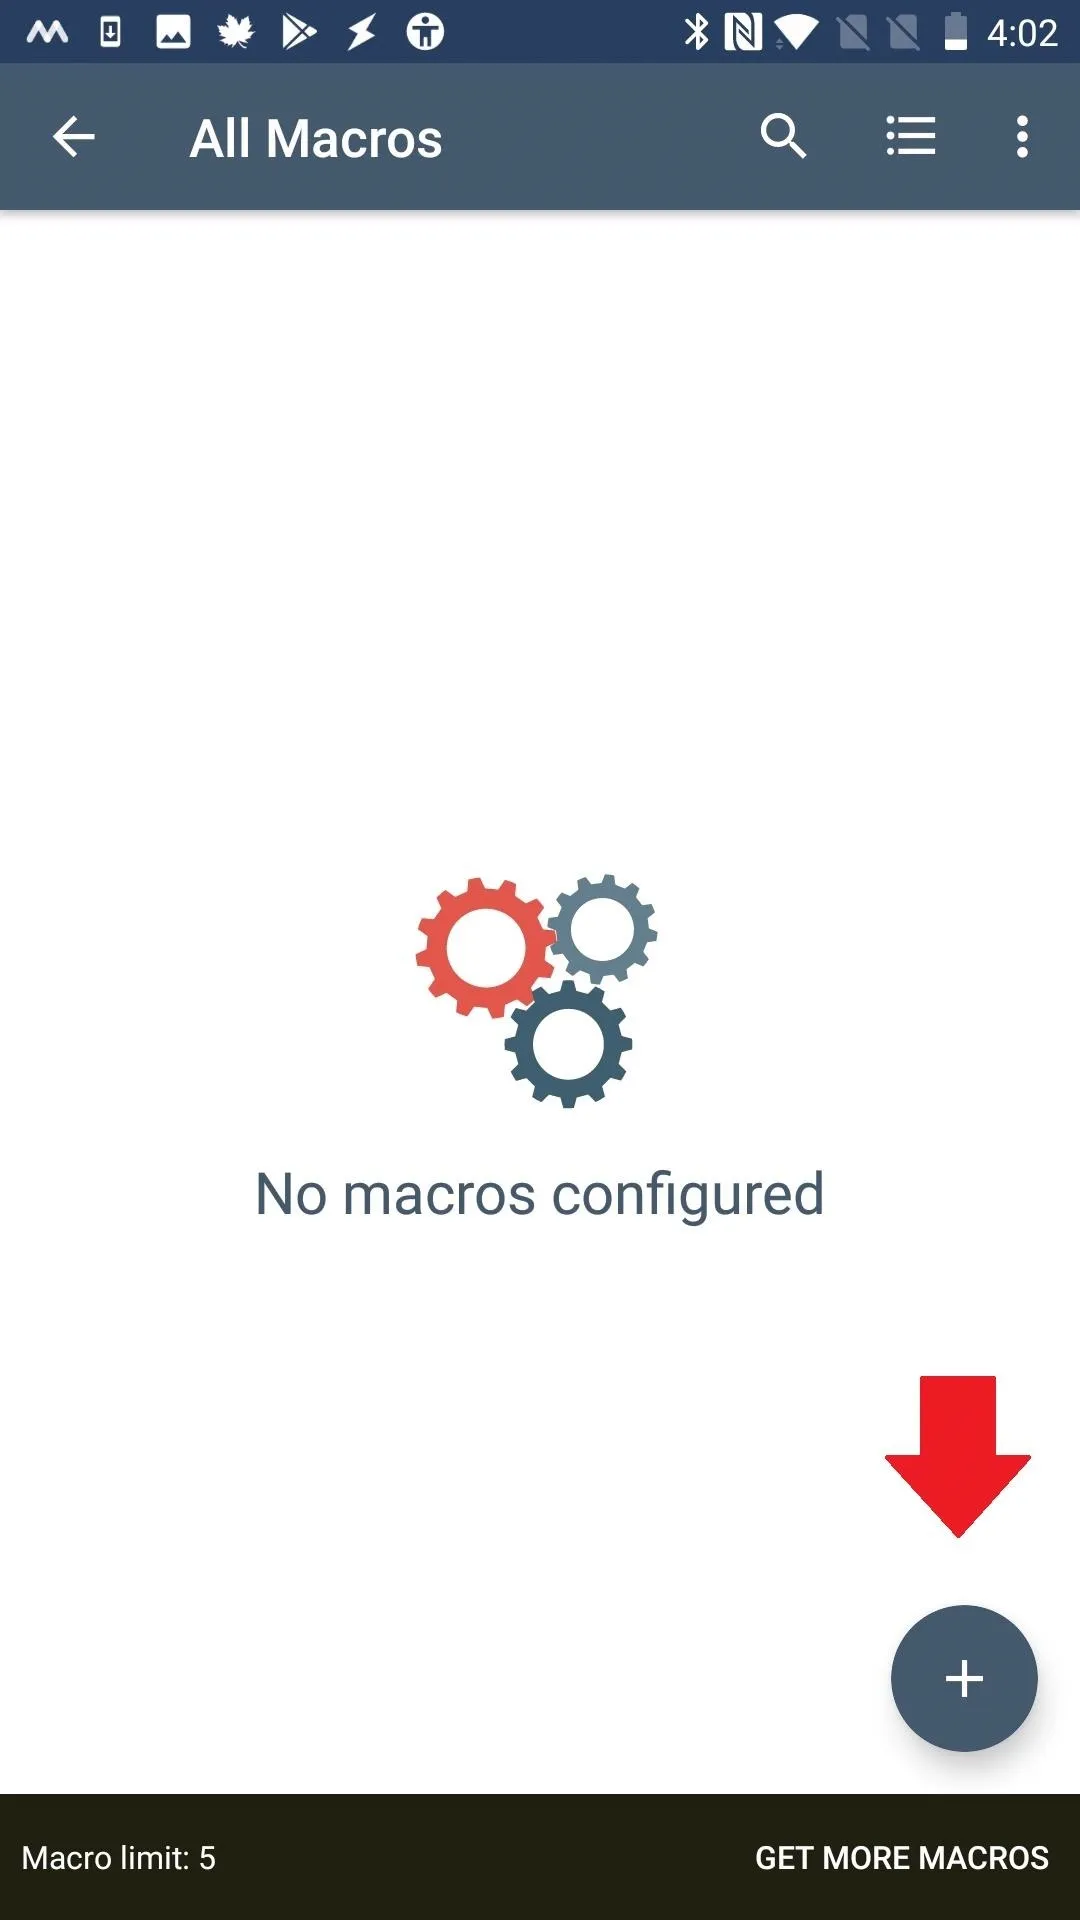
For our purposes right now, we want to start by adding a macro. So tap the "Add Macro" tile on the main screen, then hit the + button in the bottom-right corner.
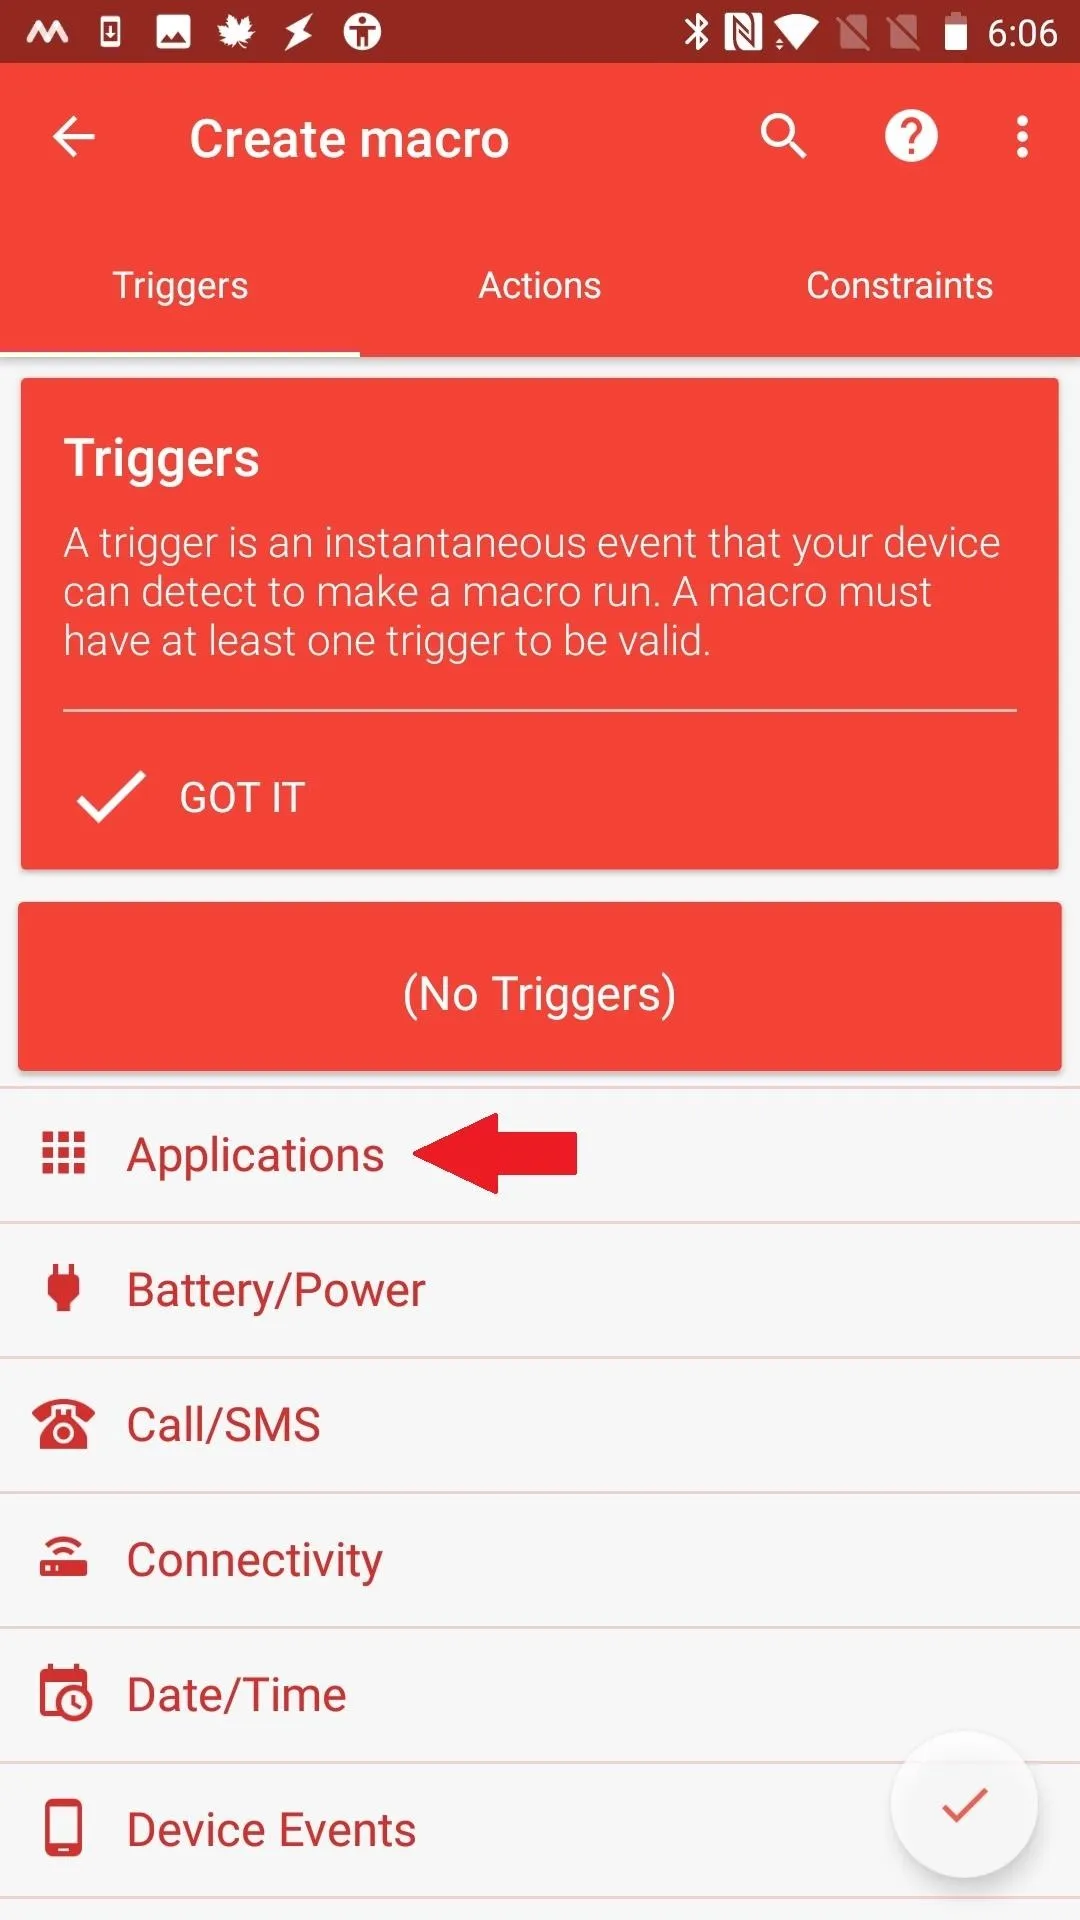
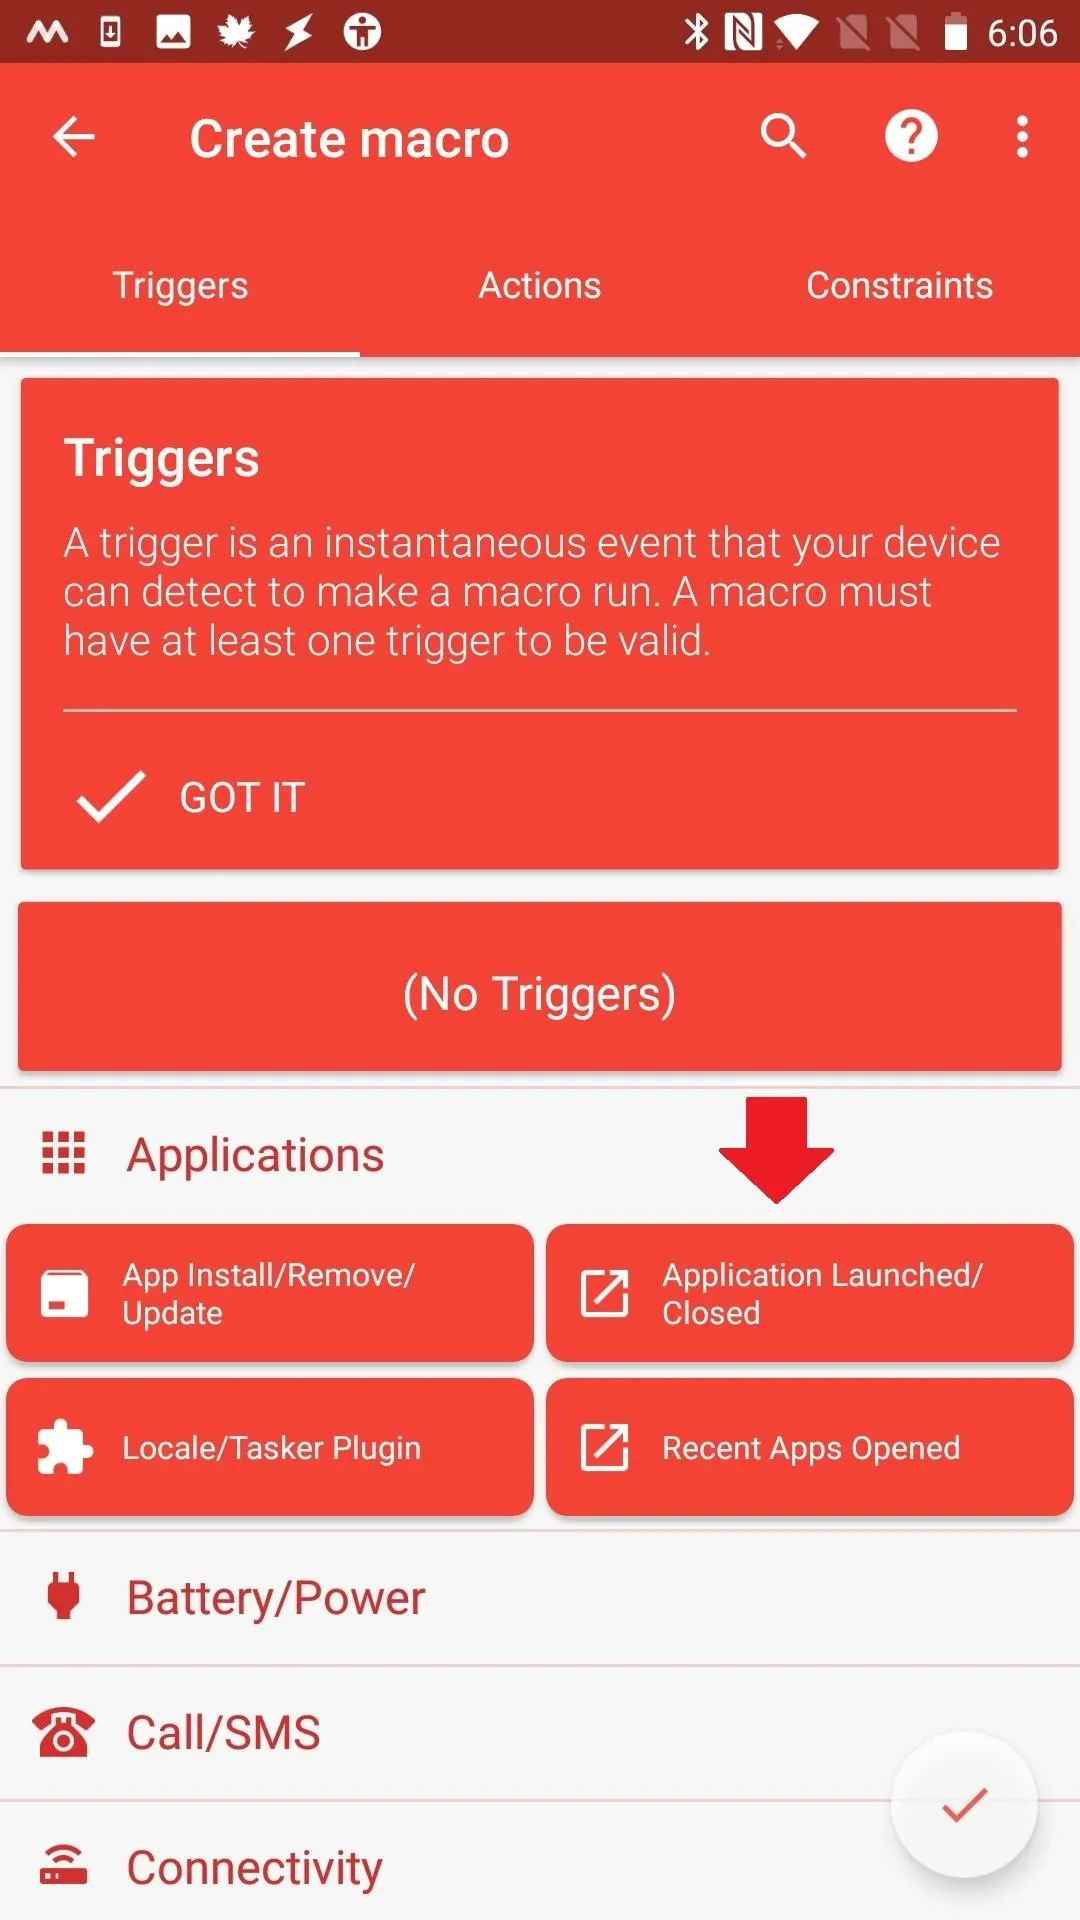
Create a Trigger
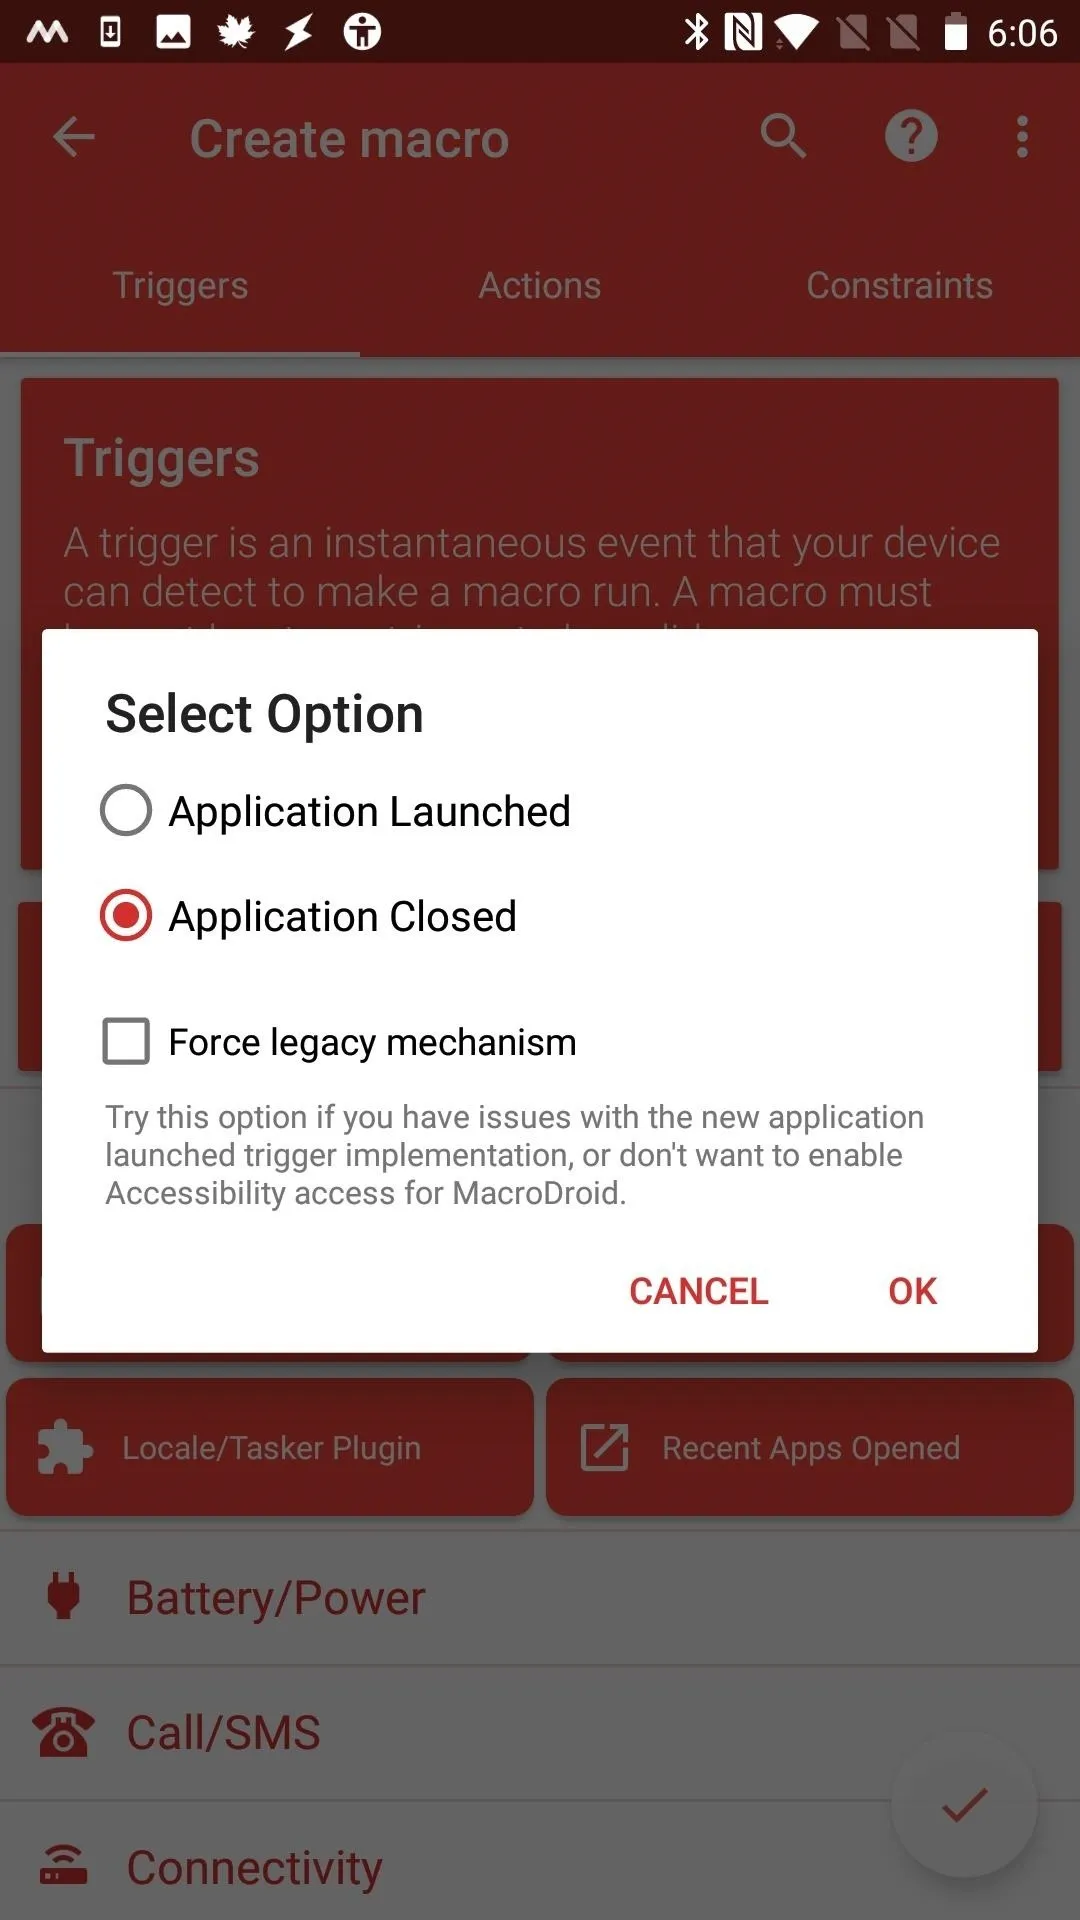
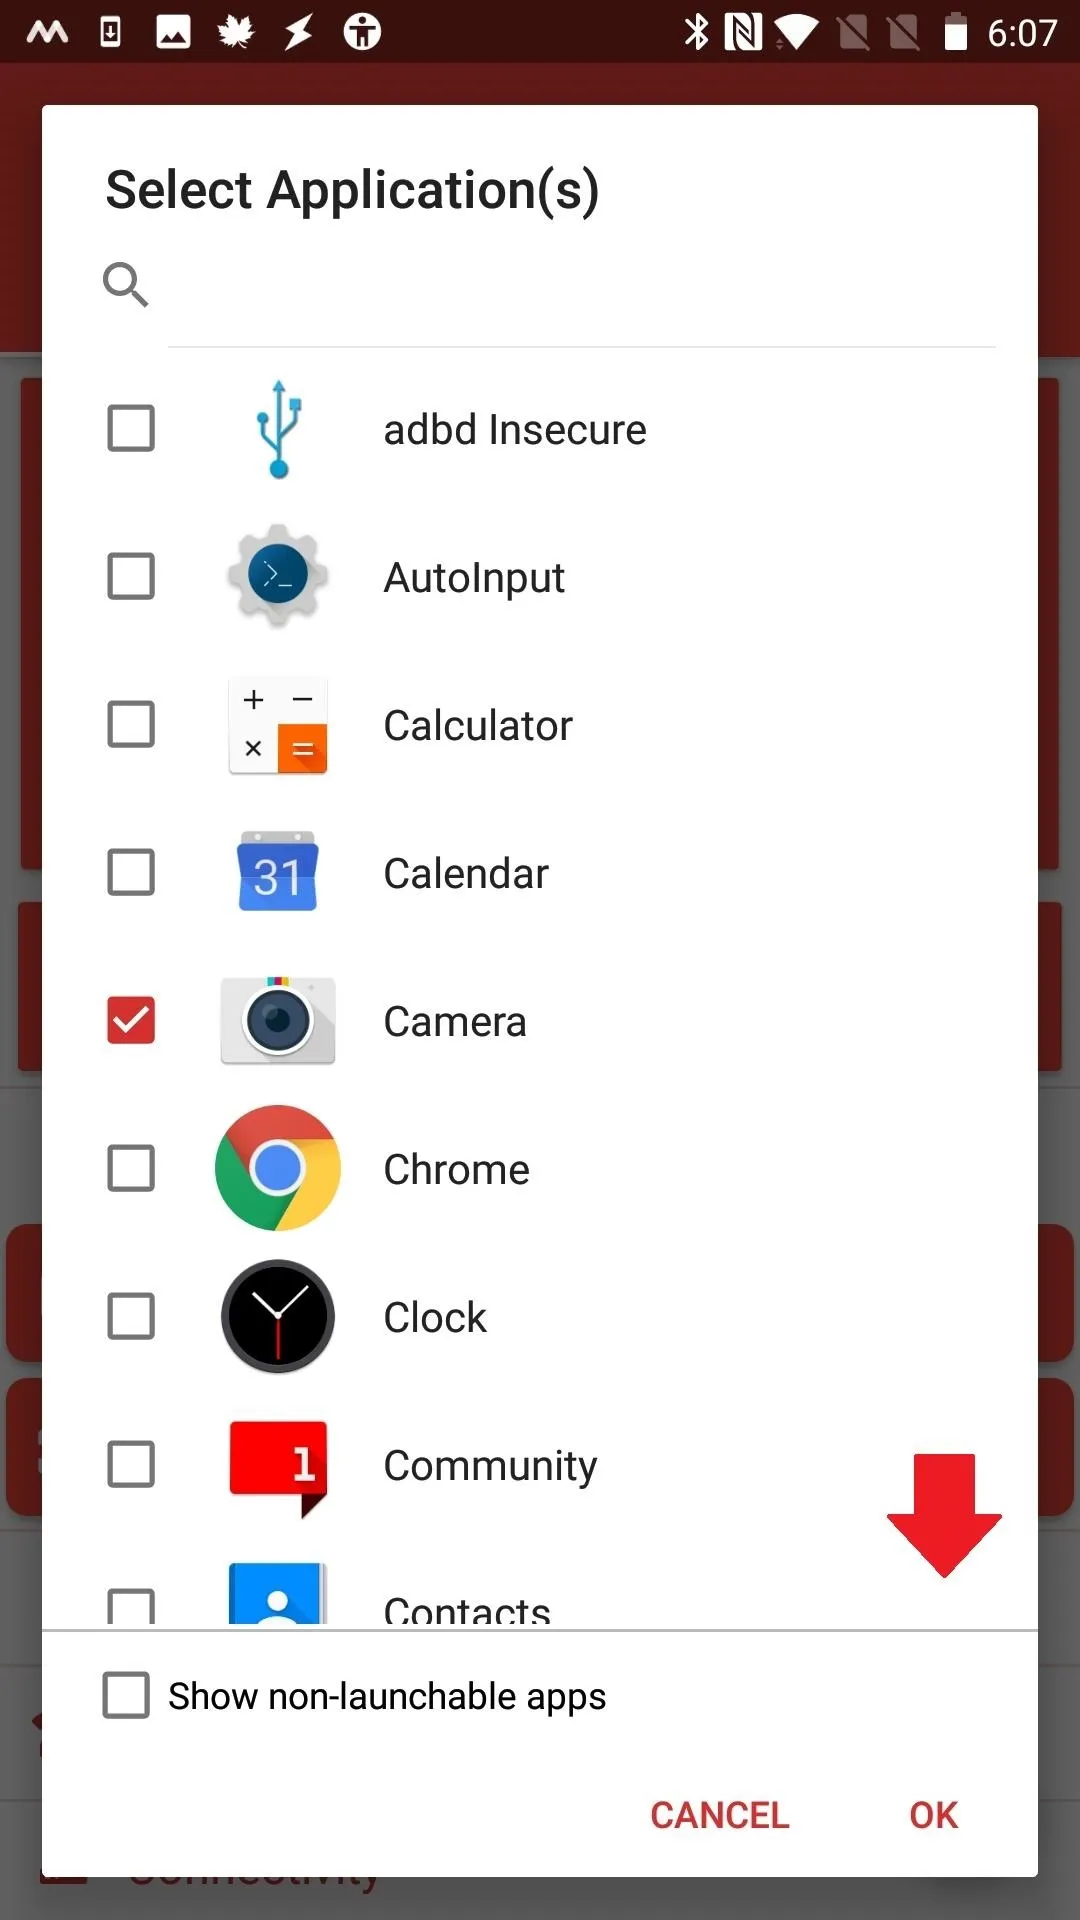
Now, select the "Applications" option. Choose "Application Launched/Closed," then specify that you want the "Application Launched" option. Check the box next to the Camera app, then confirm by pressing "OK."

You'll notice a new pop-up window that says "Accessibility Required." Tap "OK". You'll be whisked away to the Accessibility Settings, where you can select MacroDroid. Tap the toggle to enable accessibility features for the MacroDroid app, then press your back button to head back to MacroDroid.
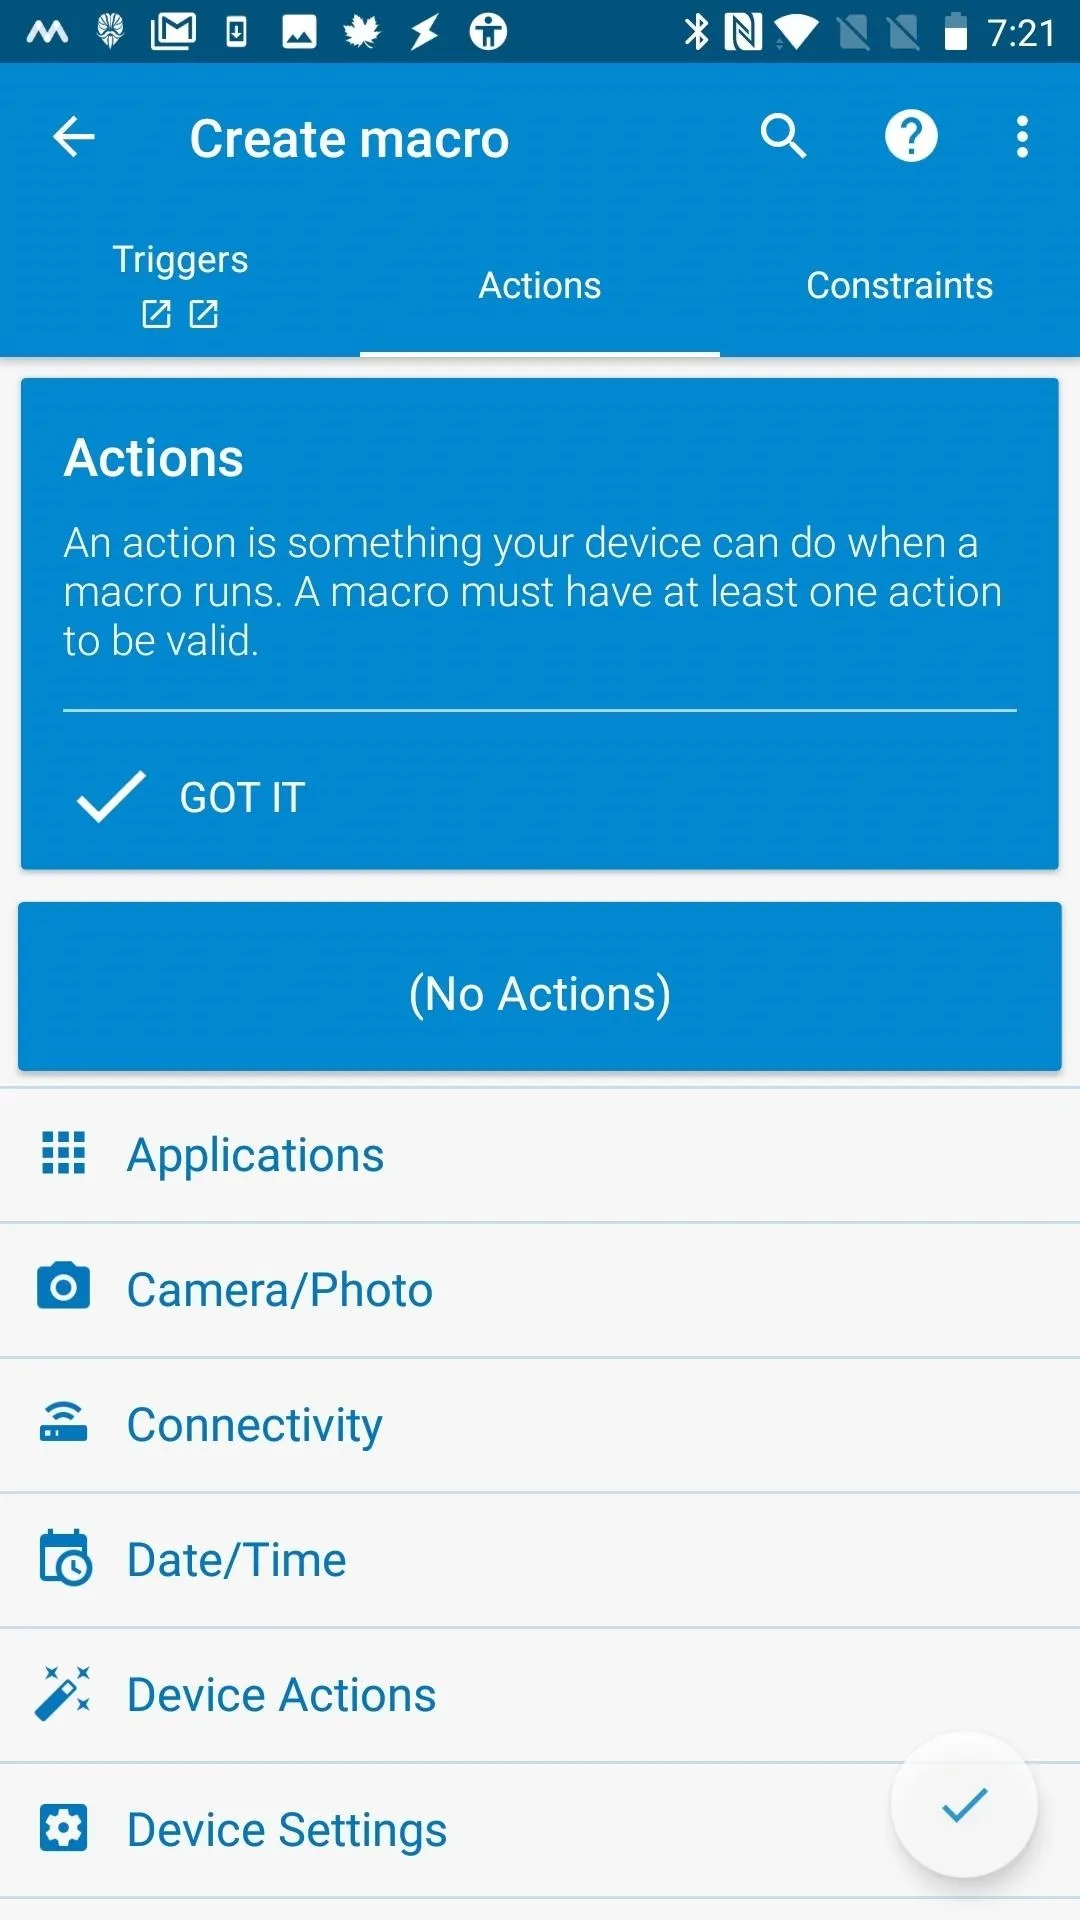
Add an Action
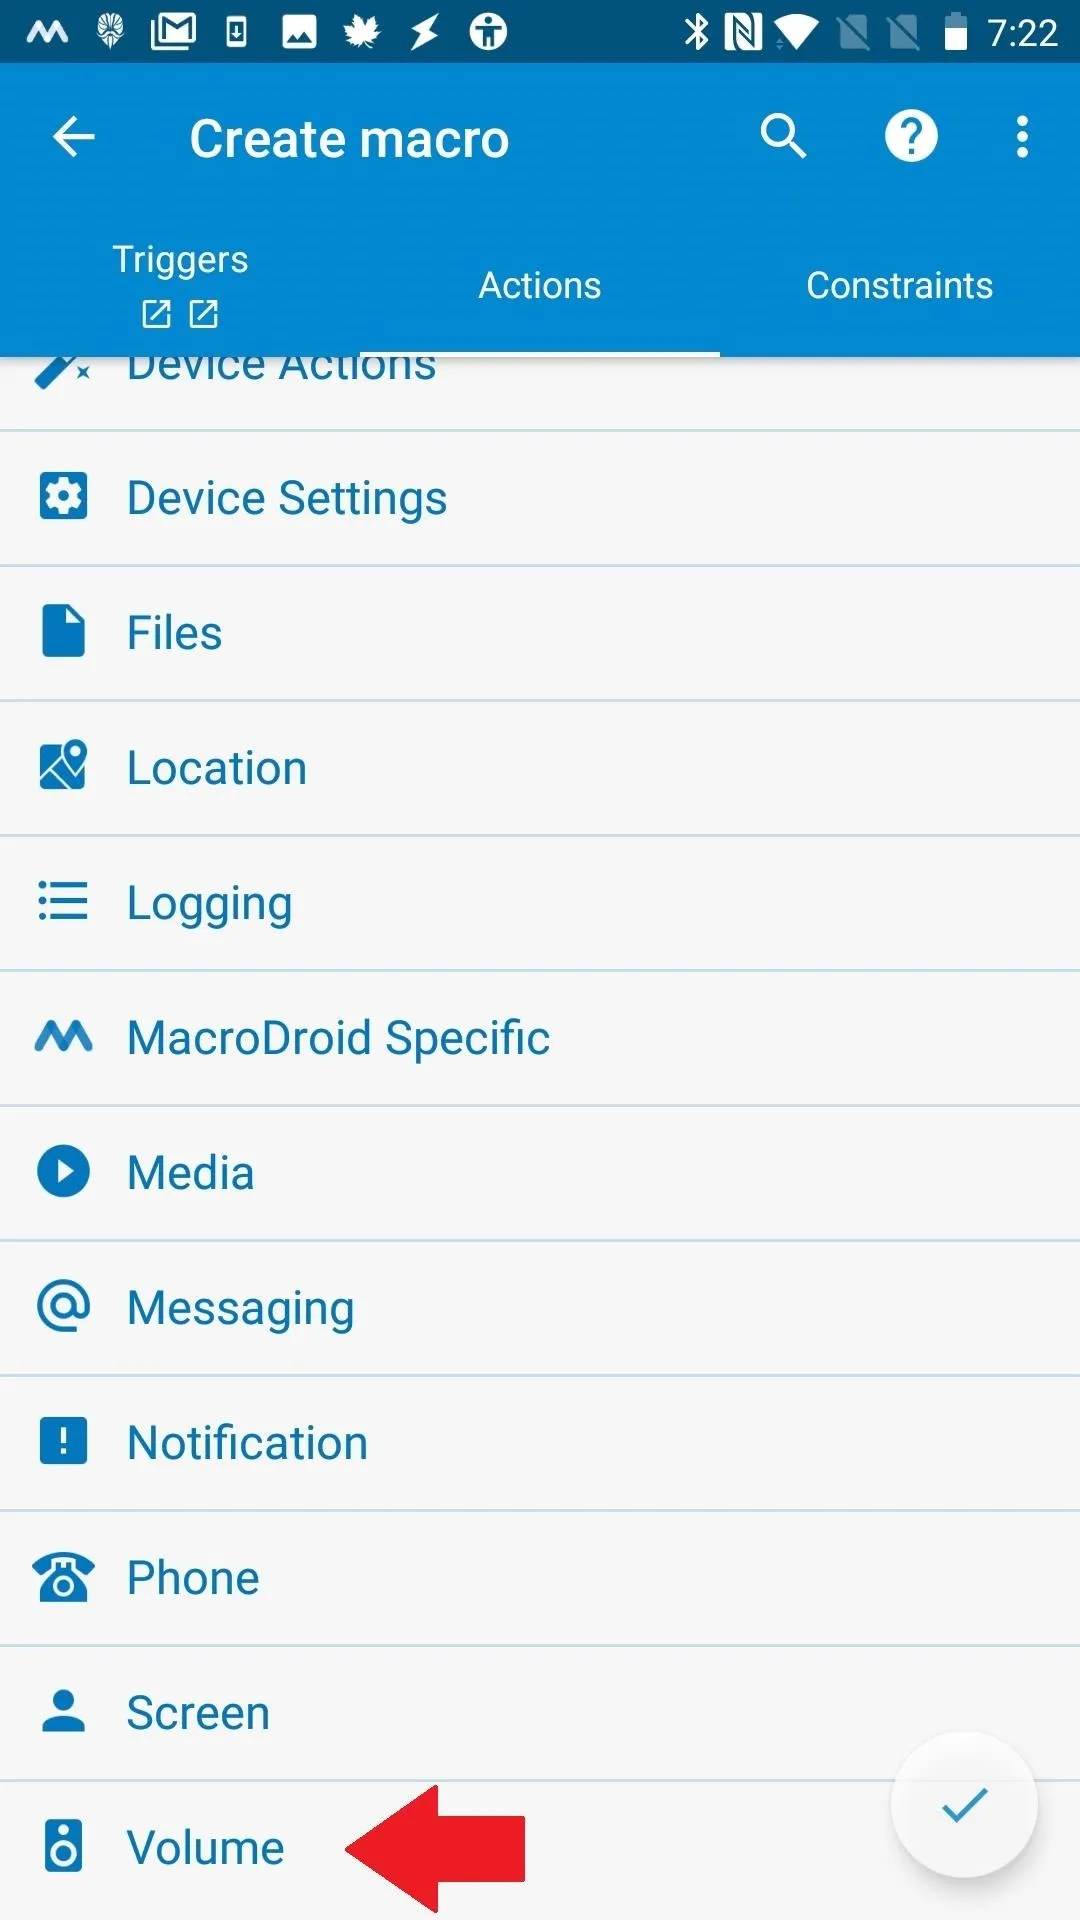
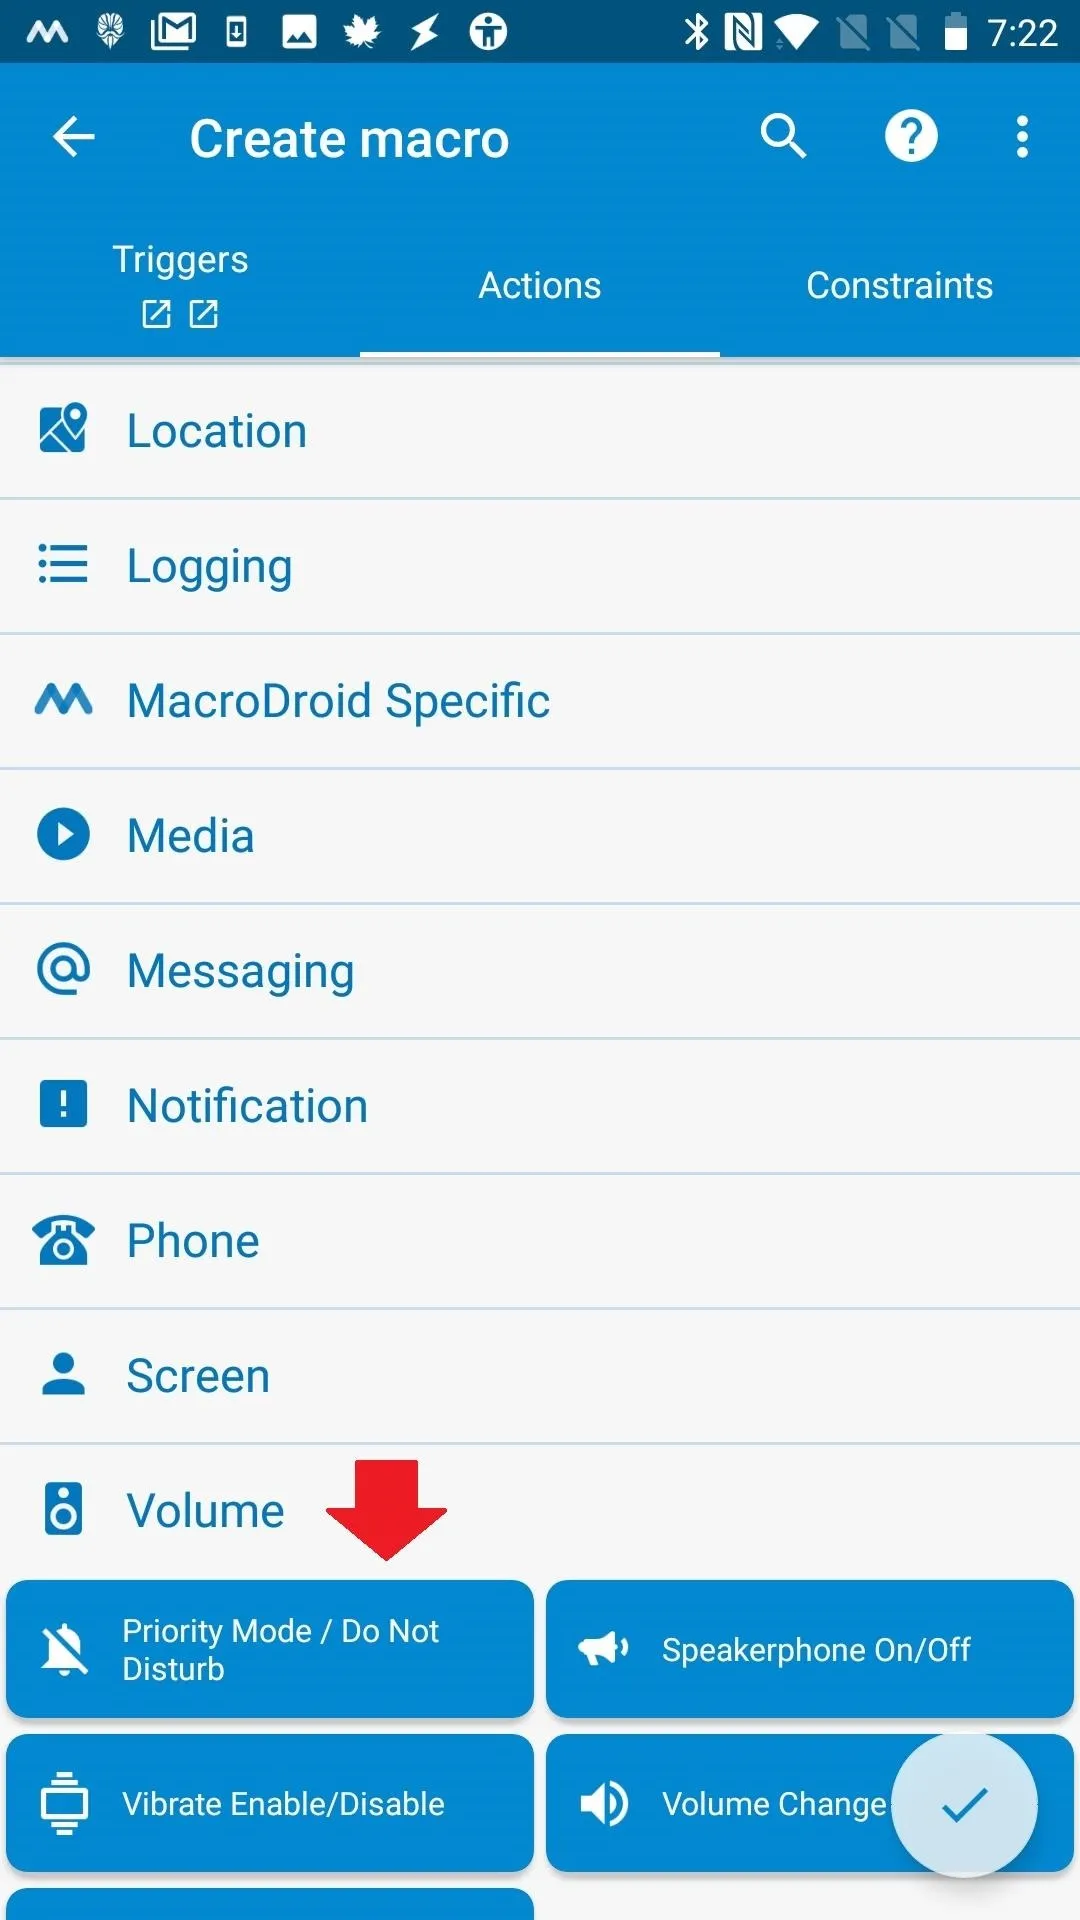
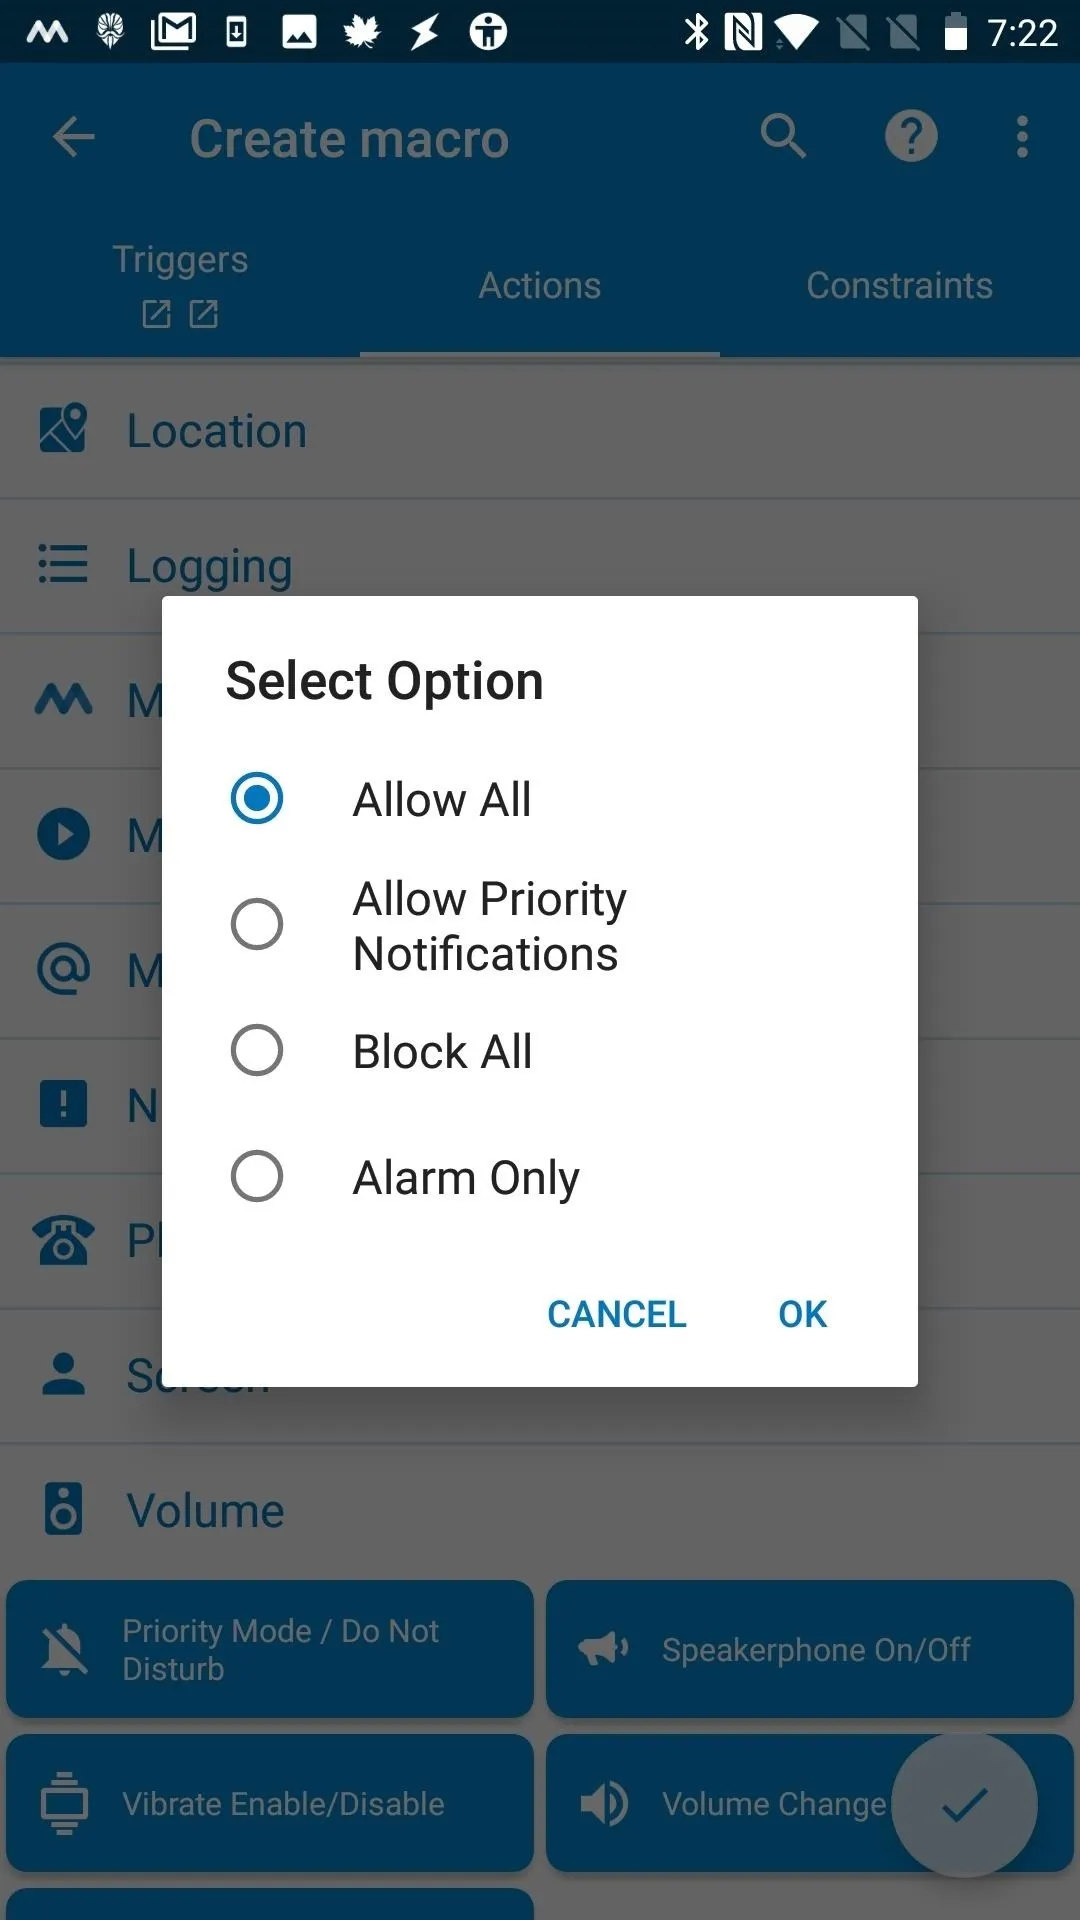
Right next to the Triggers tab toward the top of your screen is a tab titled Actions. Tap on it, and the interface turns blue. Scroll down to choose "Volume," then select "Priority Mode/Do Not Disturb." If you do not already have Do Not Disturb mode enabled, you will be prompted to enable it now.
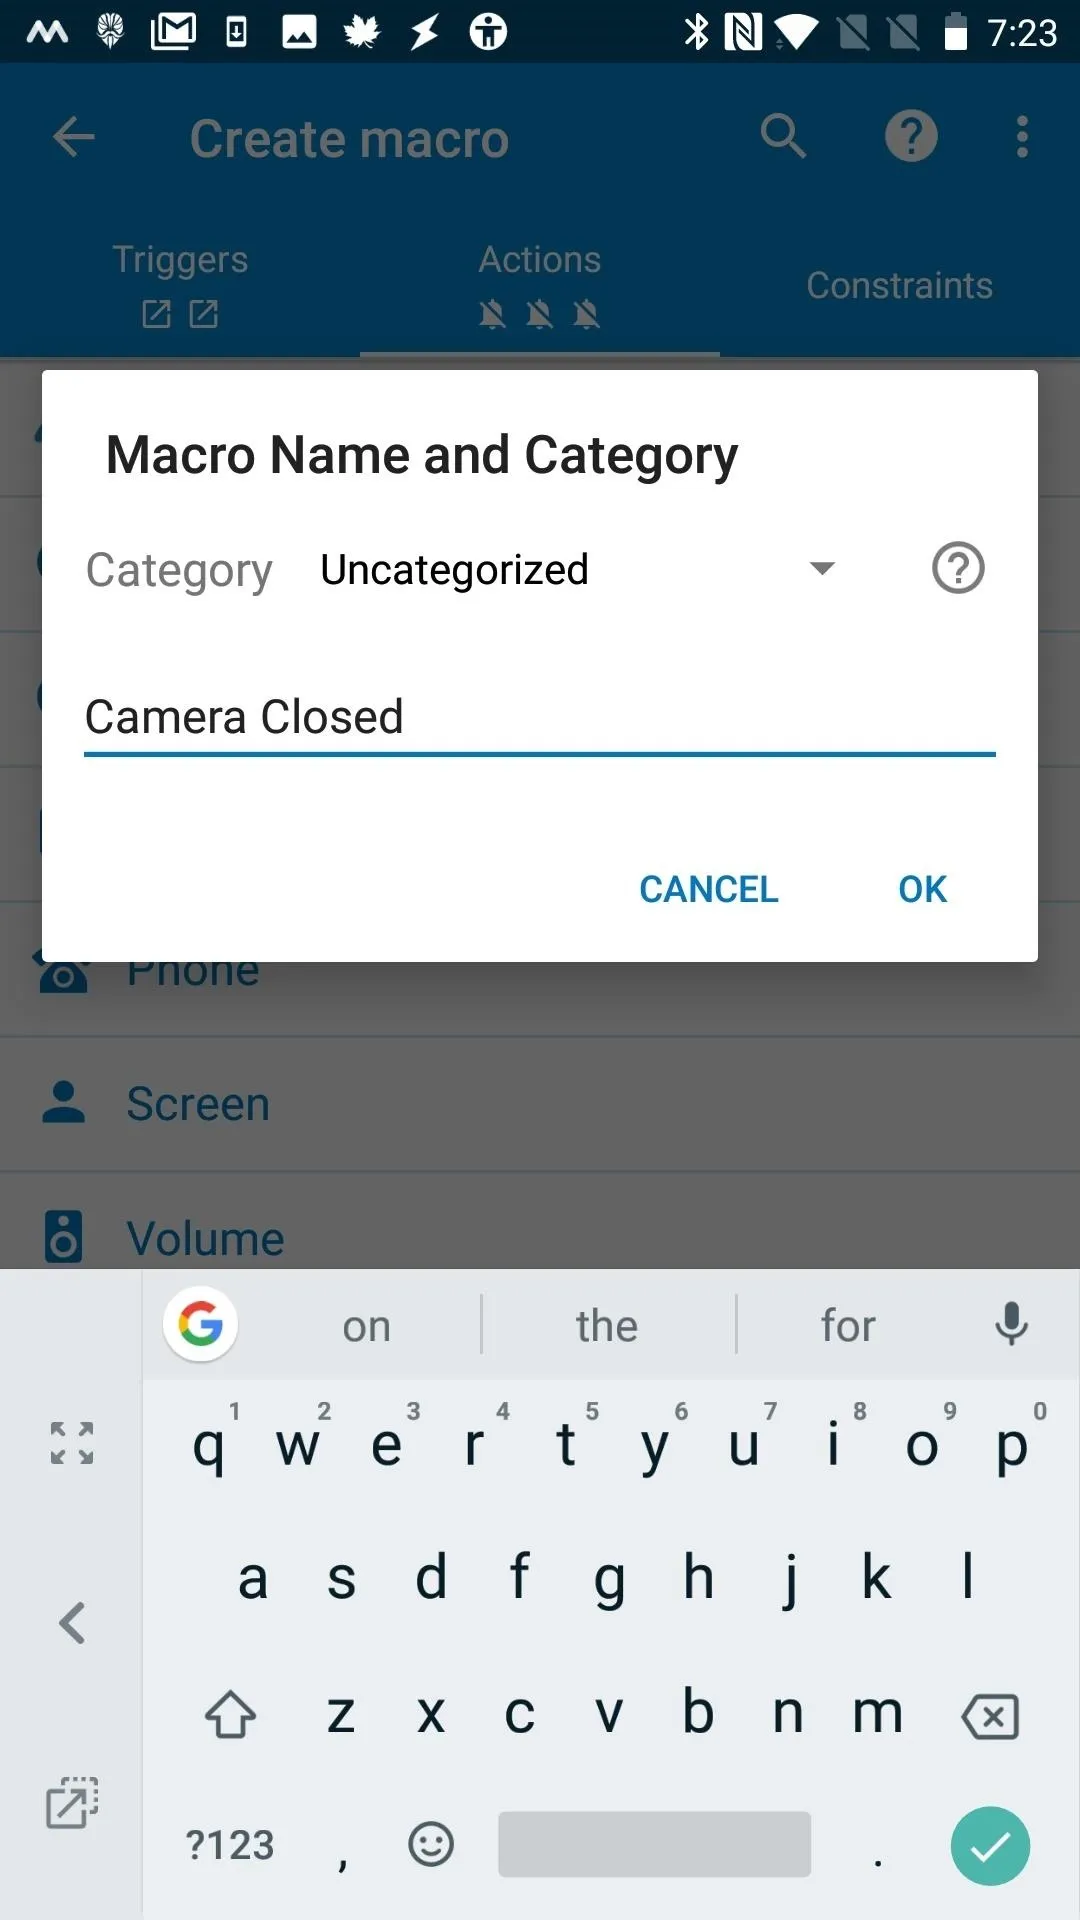
You will be asked to specify which types of notifications you want Do Not Disturb mode to apply to. Make your selection and press "OK." Tap the green check mark to confirm you are done setting up the action. You will be asked to name your macro — any name will do here.
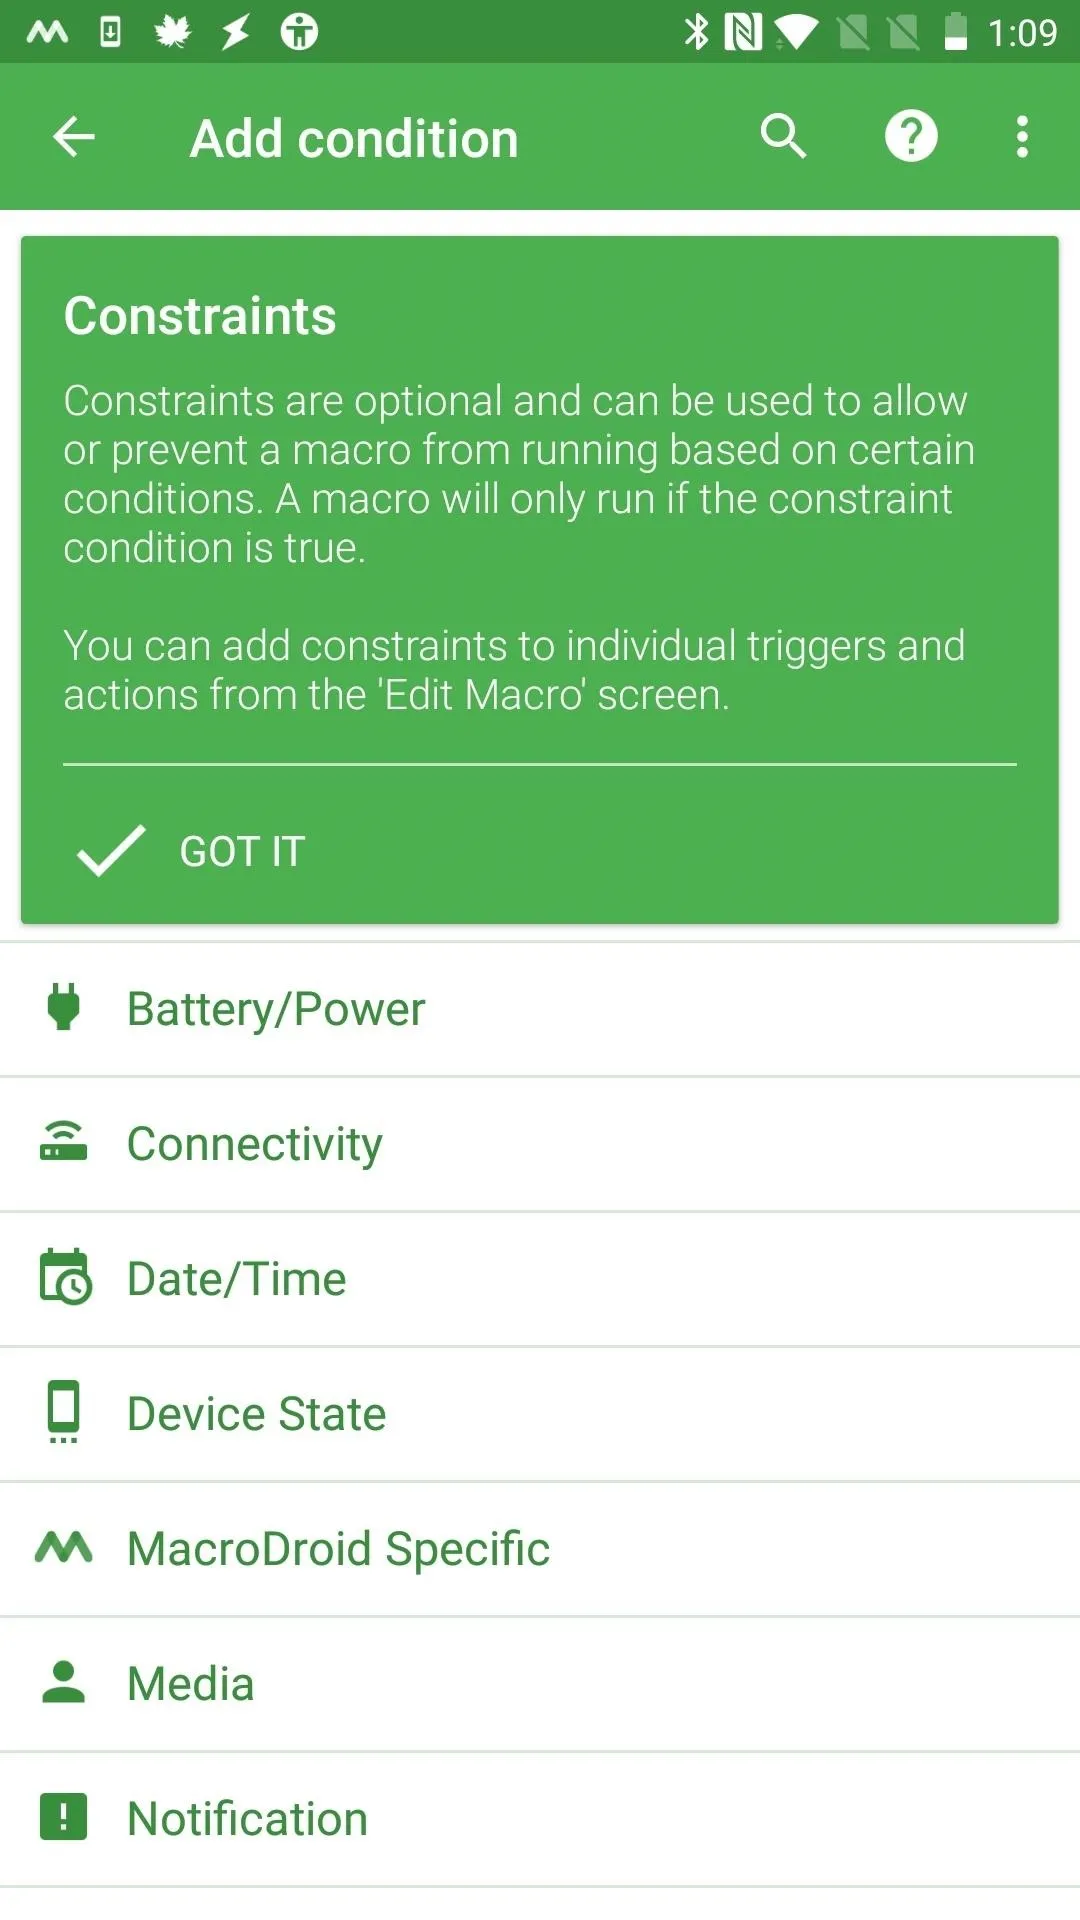
Set Constraints to 'None'
Moving to the right, next to the Actions tab is Constraints. Tap on it, and your interface will turn green. We want our macro to run the entire time the camera app is open, so select the "(No Constraints)" button. There are other various options below, however, if you would like to personalize.
Confirm with the green check mark again. Don't be alarmed if it says the macro's not activated yet. After you launch the camera app, it will be.
Add a Macro to Turn Notifications Back On
If you don't want to be perpetually in Do Not Disturb mode the instant you launch your camera app, you'll want to make a second macro to apply when you close the camera app. Return to MacroDroid's home screen. Tap on the "Add Macro" option and hit the + button again.
Create a Trigger
We are doing the first set of steps basically in reverse, so you'll still start by choosing the Applications tab. Then select "Application Launched/Closed." This time ,choose "Application Closed." Check the box next to the camera app again and hit "OK."
Set Action to Turn Off 'Do Not Disturb'
Now select the Actions tab once more. Find "Volume" at the bottom of list. Choose "Priority Mode / Do Not Disturb," but this time, select the "Allow All" option and hit "OK." Tap the green check mark and give this macro a name.
Try It Out
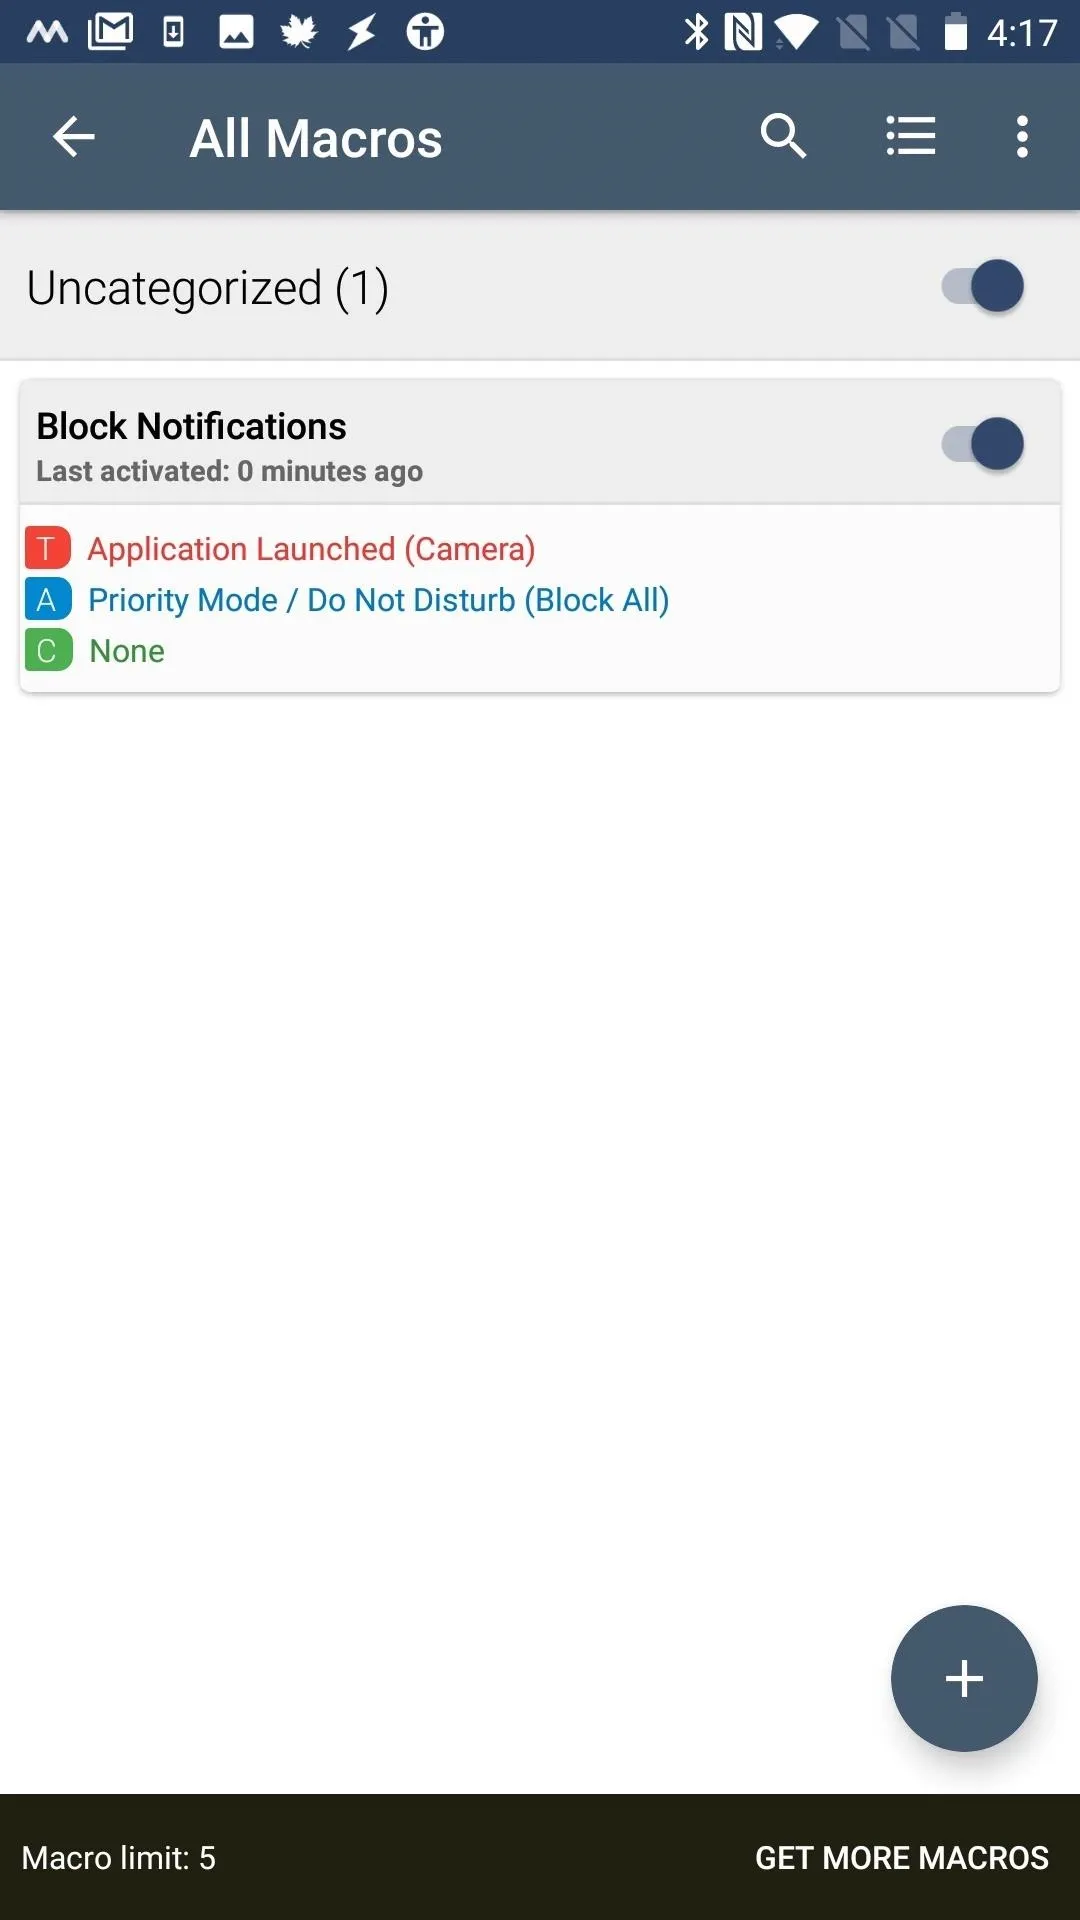
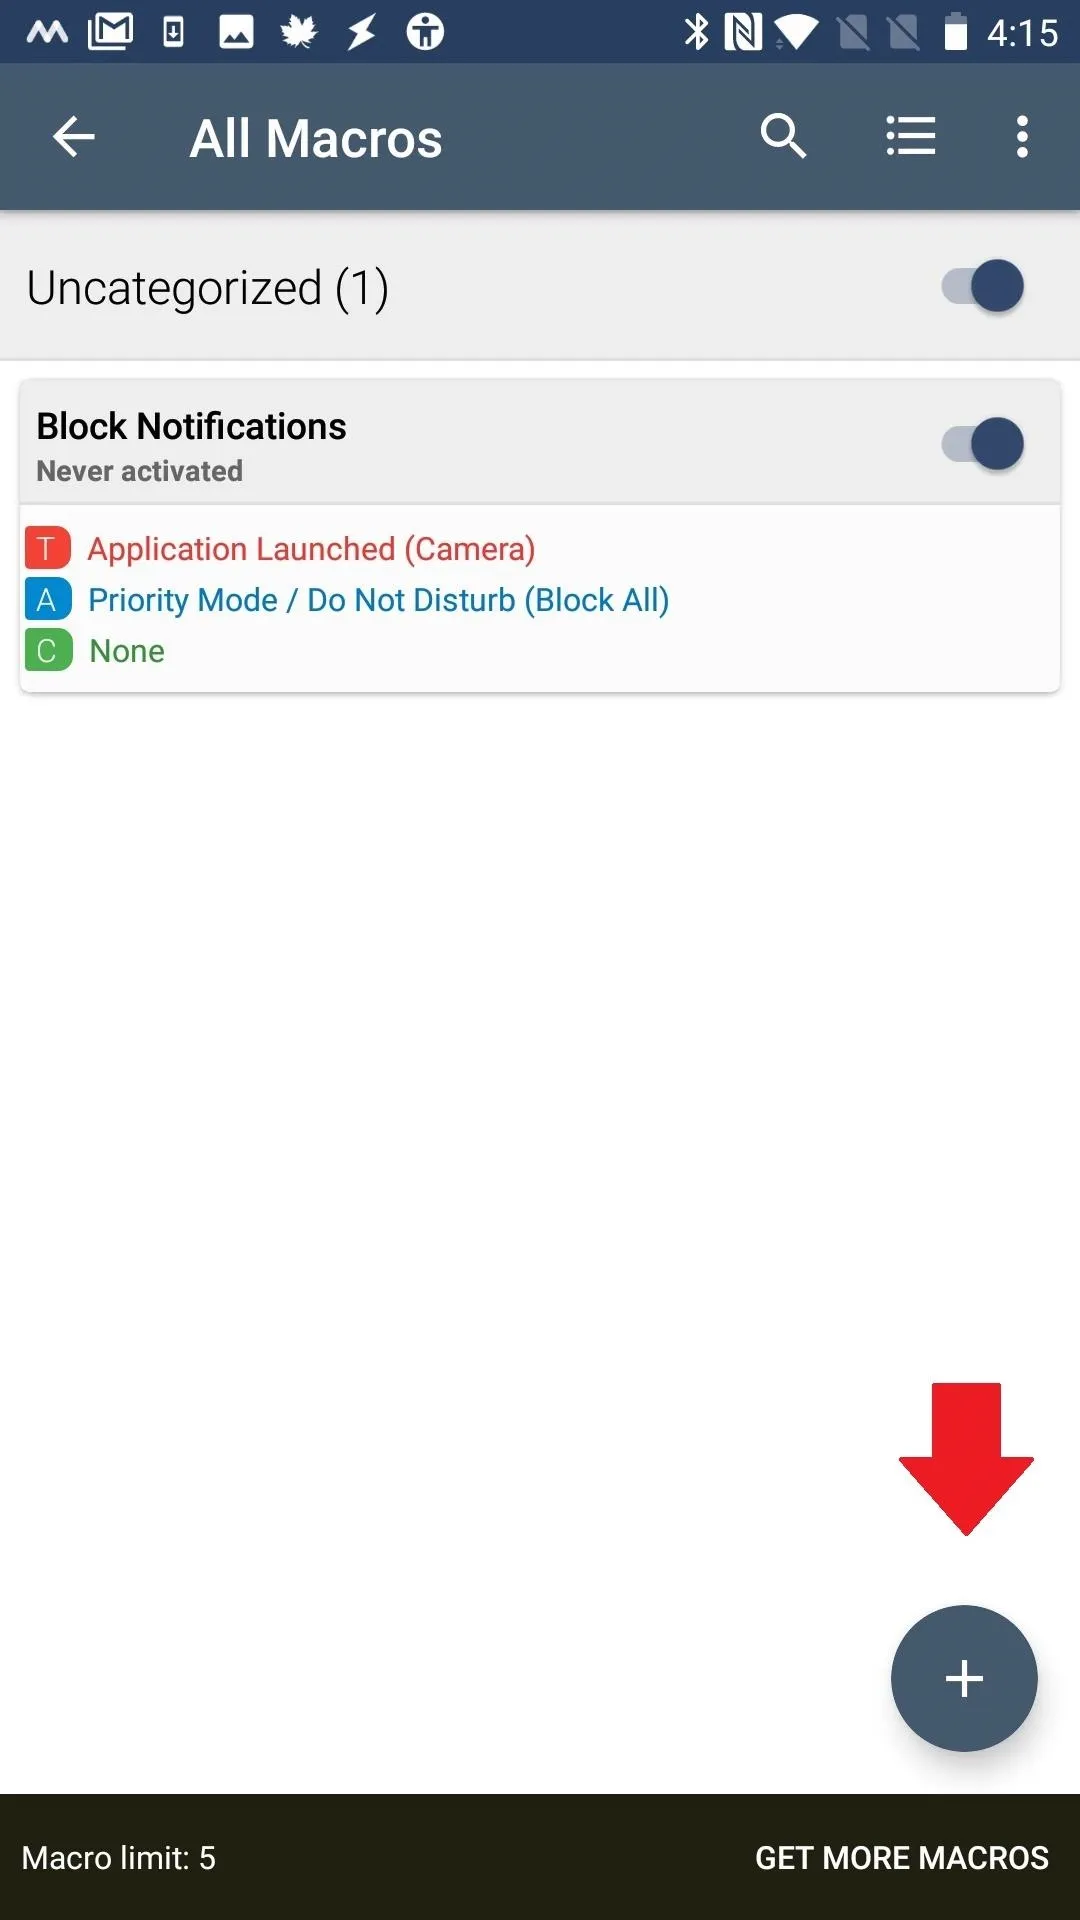
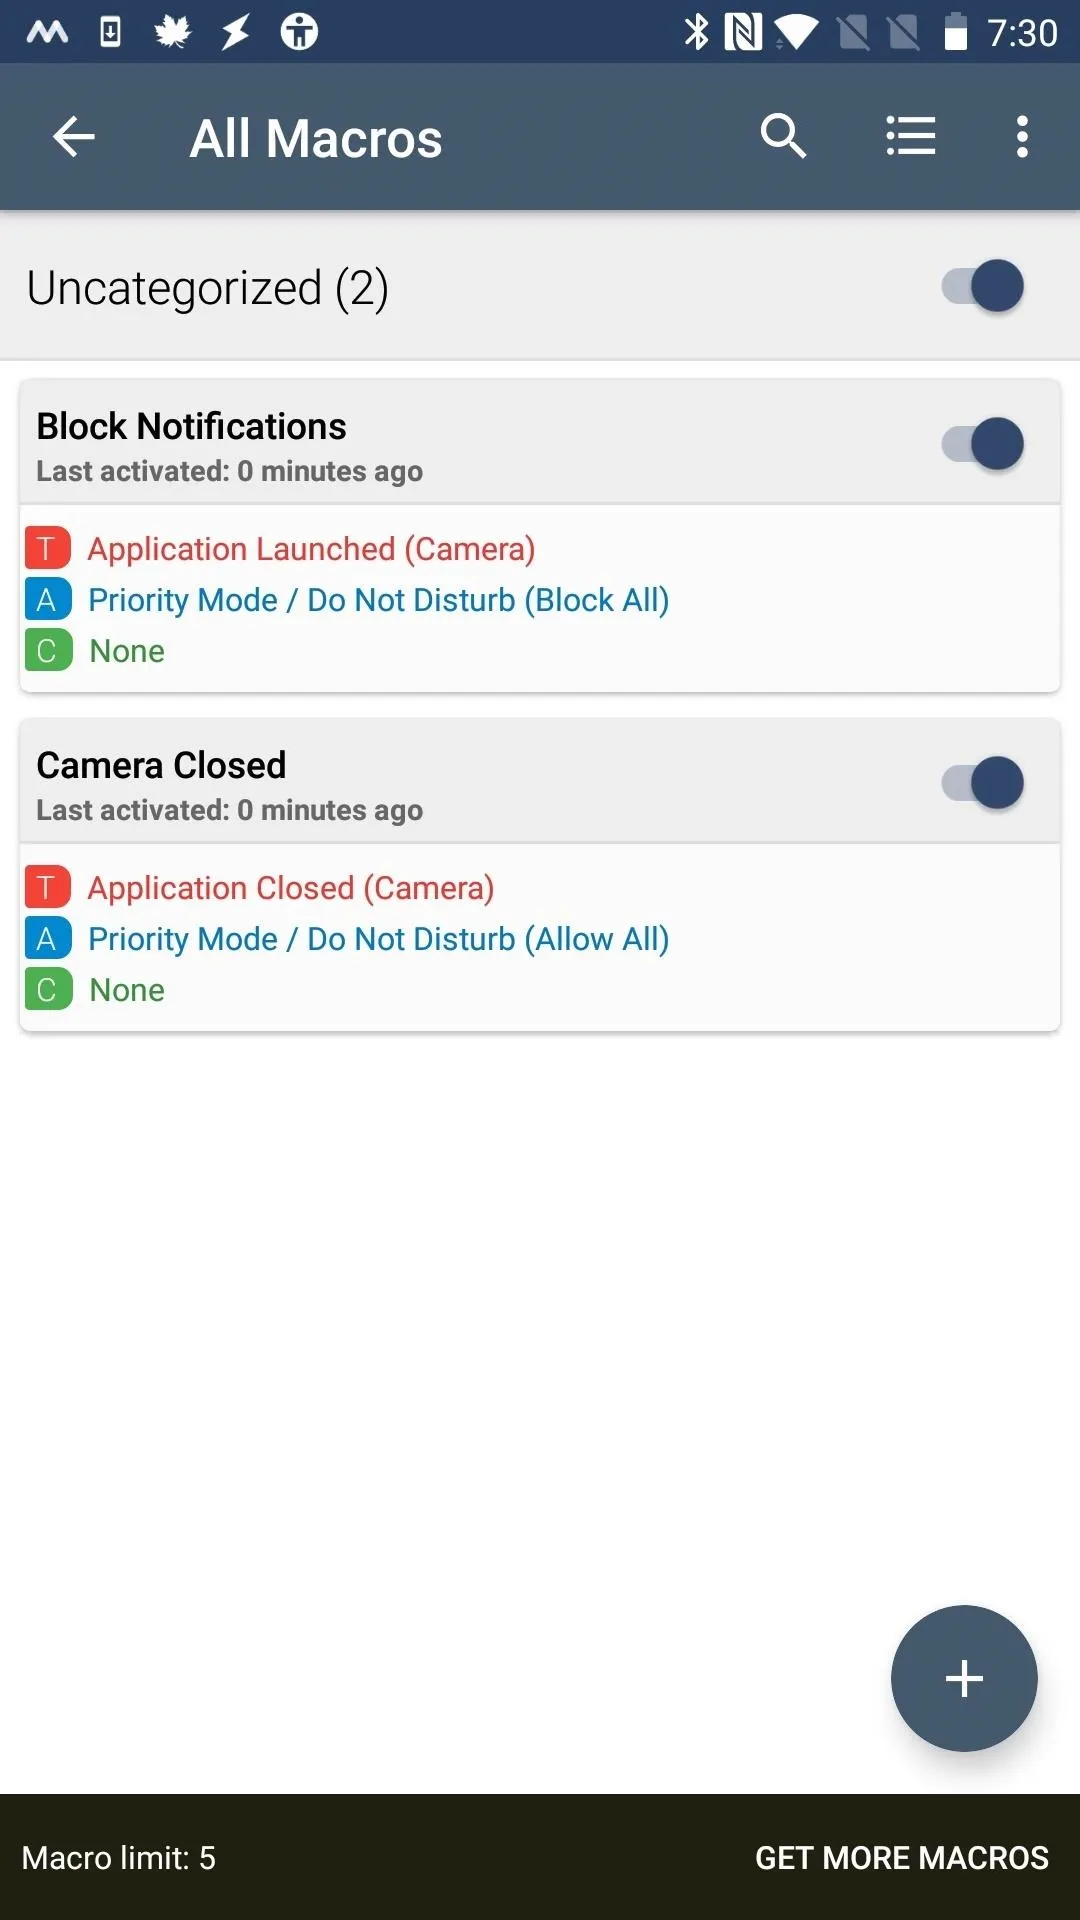
Now, open your Camera app. When you do, you should see an indicator in your status bar showing that Do Not Disturb mode is enabled. This means you won't have to worry about notifications interrupting your perfect shot or video again. But then, if you close the camera app, that status bar indicator should go away and notifications should resume. Even if you don't get any notifications when you launch your camera app this time, you can confirm that it will work by viewing your macros in MacroDroid. They should both be activated.
Now you're done. Notifications are a good thing, but there's a time and place, and when you are trying to take a picture is not the time. Luckily, you can personalize your phone to work specifically how you want it to.
- Follow Gadget Hacks on Pinterest, Reddit, Twitter, YouTube, and Flipboard
- Sign up for Gadget Hacks' daily newsletter or weekly Android and iOS updates
- Follow WonderHowTo on Facebook, Twitter, Pinterest, and Flipboard
Cover image and screenshots by Delani Clatfelter/Gadget Hacks


Comments
Be the first, drop a comment!