


Anyone who has rooted their Android device has likely used a tool called Android Debug Bridge, better known as ADB, at some point during the process. For most, that is their only interaction with the ADB, but to be a true Android power user, you need to really know the tools at your disposal.
Delving deeper into what ADB is and what it can do will help you to be more confident when modifying your device, as well as assist you in troubleshooting and fixing issues that you might experience along the way.
What Is ADB?
ADB is a versatile command line tool that allows you to communicate with your device and accomplish a host of different tasks from your computer, such as transferring data, recording the screen's output to a video file, and running powerful shell commands.
ADB is, as the name suggests, used primarily as a debug tool for Android developers. It is included in the Android SDK, or Software Development Kit.
How to Install ADB
If you only need ADB, downloading the entire Android SDK is overkill. Thankfully, it is possible to download and install the specific tools that we need in just a few easy steps, on all major operating systems.
Installing ADB on Windows
Getting ADB to work on Windows has always been a bit of an annoying task. Thankfully, XDA forums user Snoop05 created an installer that massively simplifies the process, by installing ADB and Fastboot (another useful tool), installing necessary device drivers, and adding these tools to your system PATH (allowing them to be run from any folder via the command line) into a 15-second operation.
Simply download and run the installer. You will be asked if you want to install ADB and Fastboot—type "Y" and press enter. It will then ask if you want to install ADB system-wide—again, type "Y" and press enter.
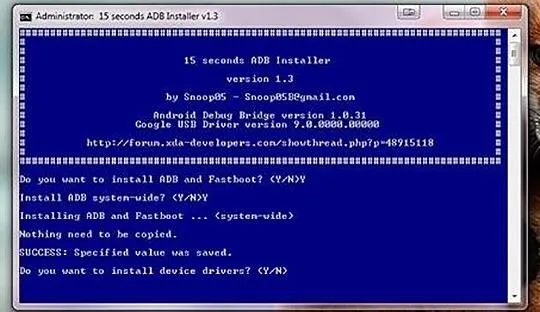
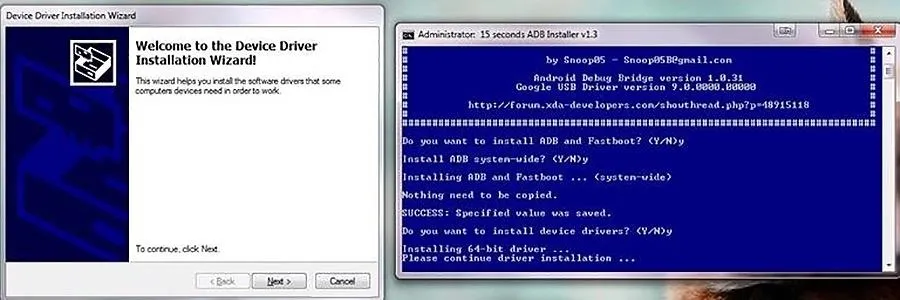
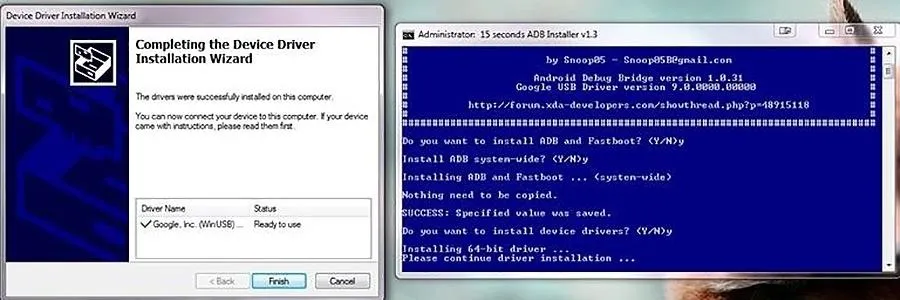
Next, it will ask if you want to install device drivers. Once again, type "Y" and press enter, which will open another installer for the drivers. Simply click "Next" and allow the drivers to install.
Once the installation is complete, the installer will close and you are all done.
Installing ADB on Mac OS X
In the same vein as the Windows installer used above, scripts have been written for Mac OS X that massively simplify the ADB installation process.
Follow the process in the above video and described here by Andrew to quickly install ADB and Fastboot on your Mac.
Installing ADB on Linux Systems
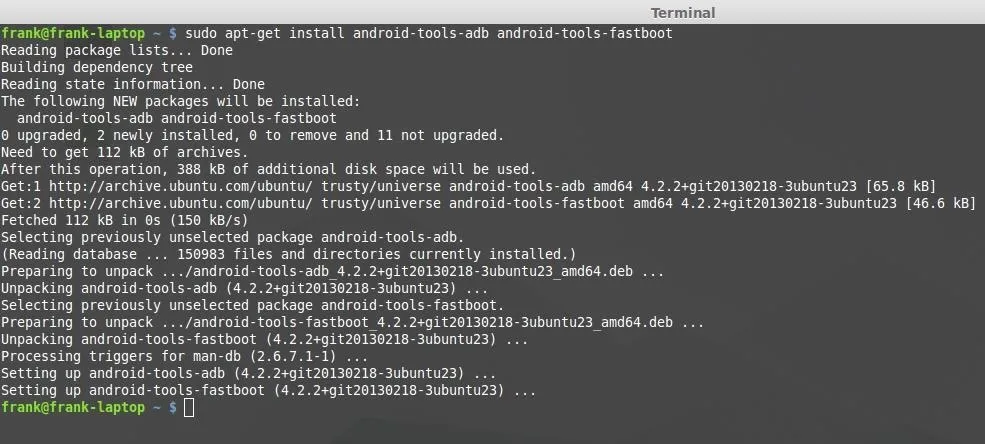
By far the easiest installation process of them all. On many Linux distros, you will only need to issue a single command from the terminal:
sudo apt-get install android-tools-adb android-tools-fastboot
If for some reason that does not work, you may need to manually add a repository to APT, with this command:
sudo add-apt-repository ppa:phablet-team/tools && sudo apt-get update
Once that is complete, issue the first command again and it should install.
Note: If you are using a flavor of Linux that does not use APT, you will need to look up the installation procedure for your specific package manager, though it should be fairly similar.
Configure Your Device to Work with ADB
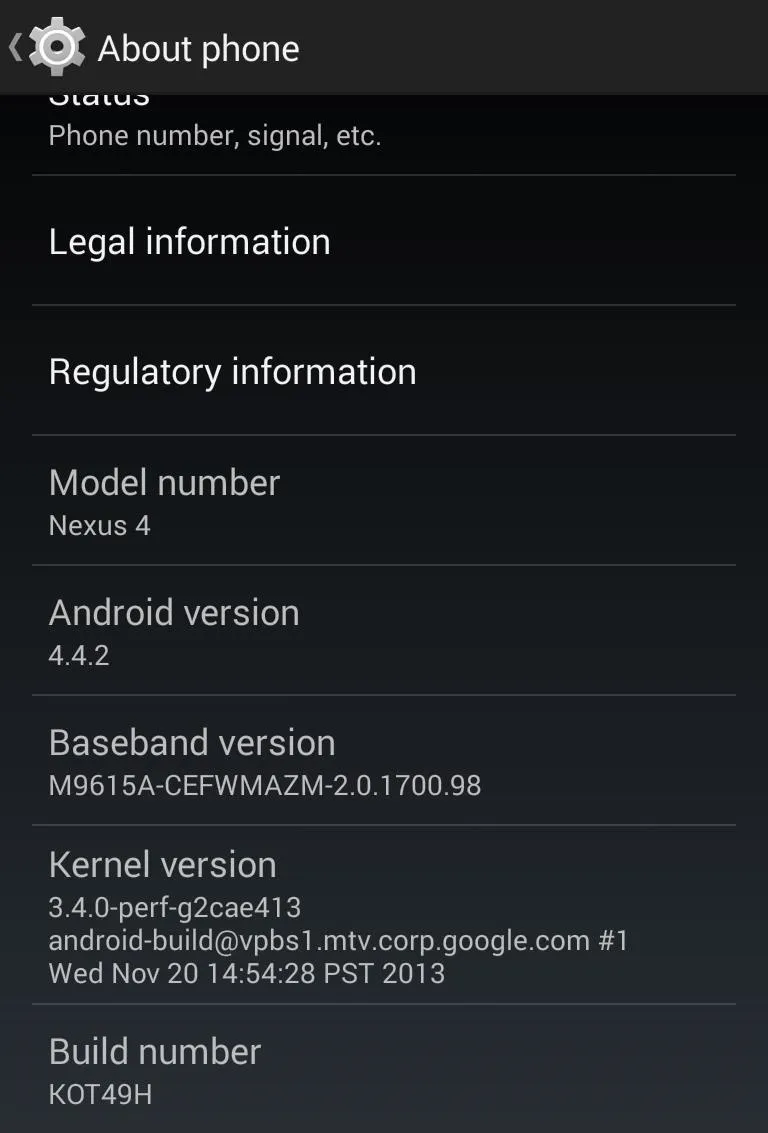
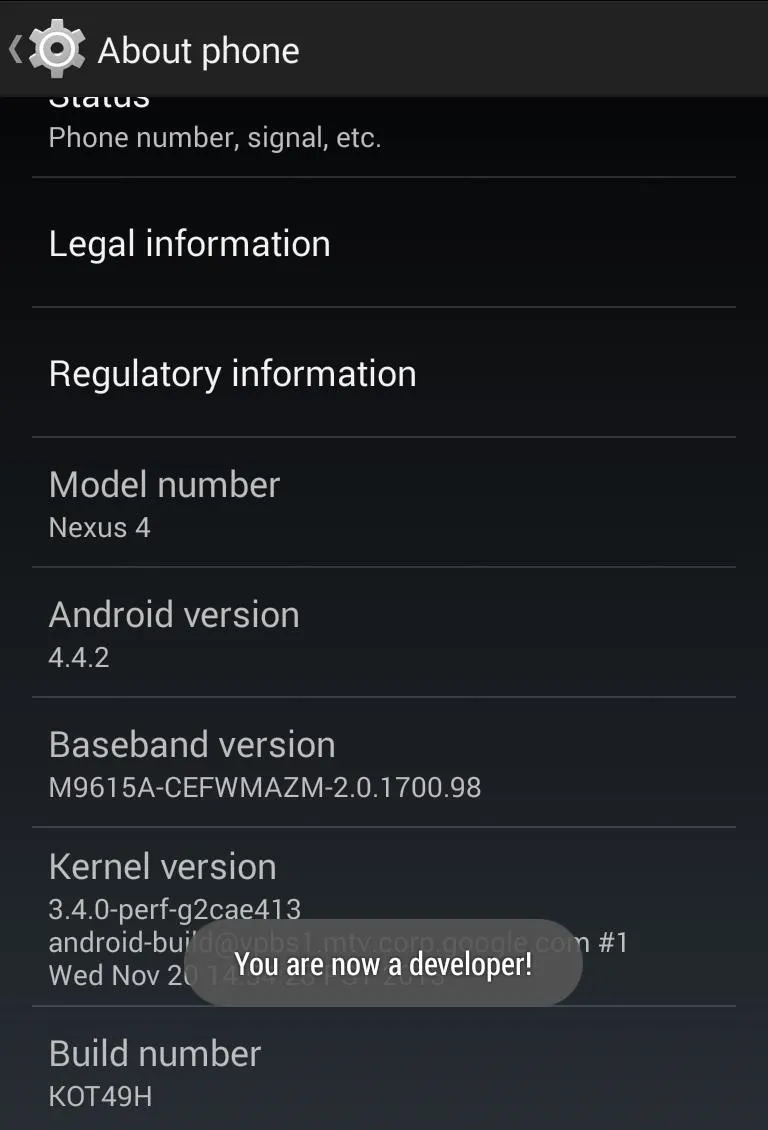
First, you need to enable developer options on your device. This is done by going to Settings -> About phone and tapping the Build number 7 times.
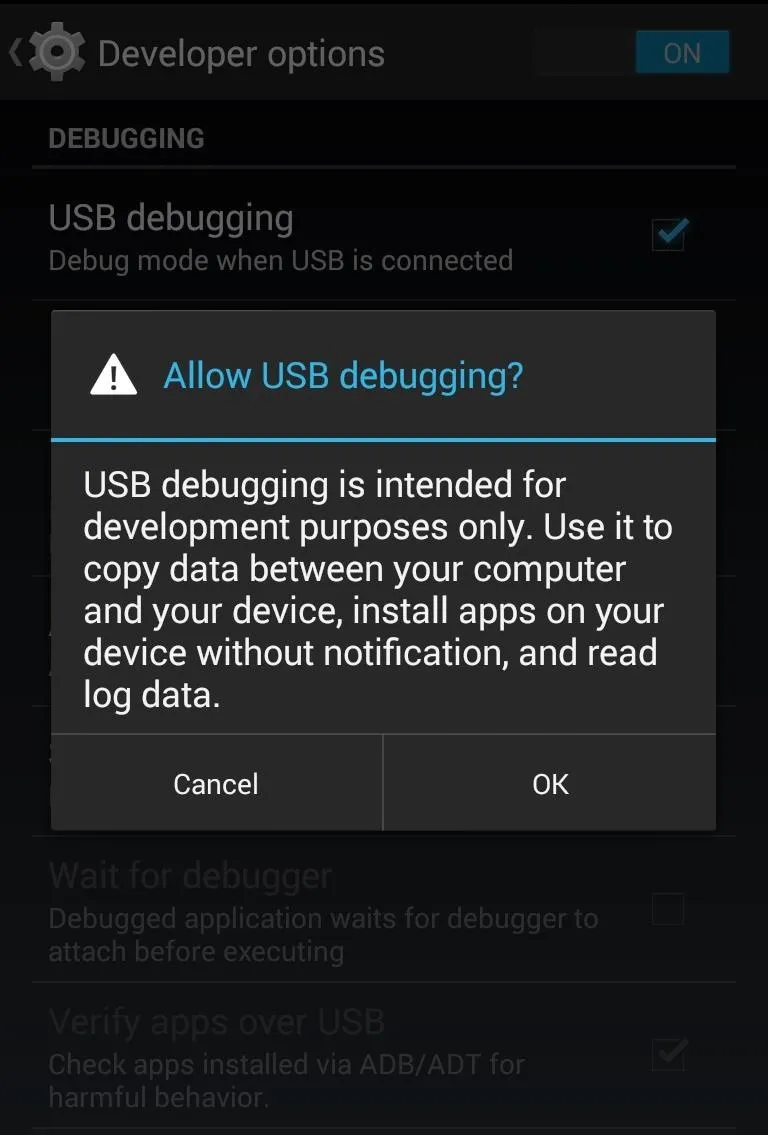
You will now have Developer options available in the Settings menu. Enter Developer options and click the check box that says USB Debugging. A popup box will appear that asks you to confirm your choice.
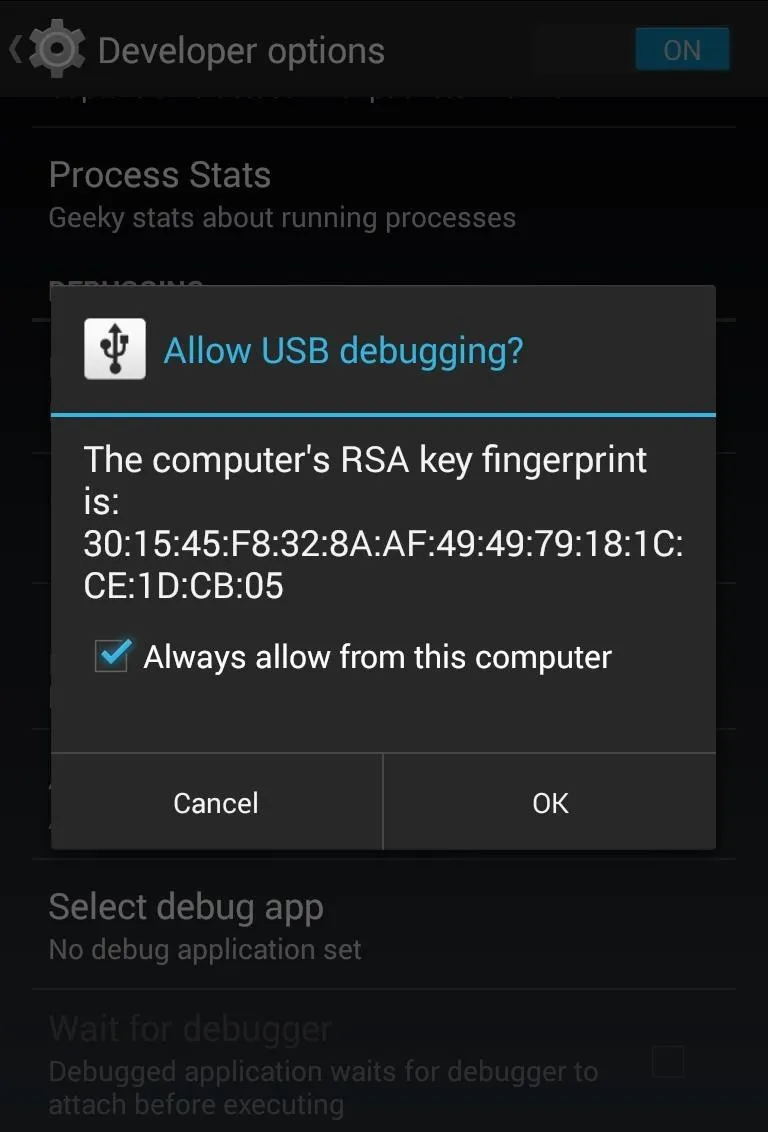
Next, attach your device to your computer via a USB cable. At this point you should get a popup that asks you if you would like to allow USB debugging from this computer. It will display your computer's RSA key fingerprint. Check the "Always allow from this computer" box and tap OK.
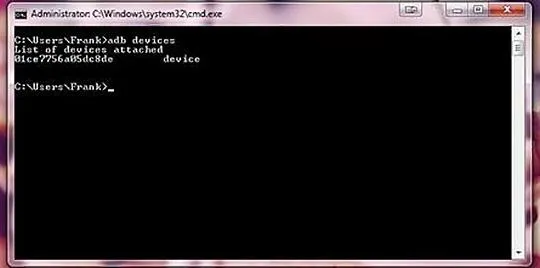
Now open up the command prompt on your computer and type:
adb devices
You should see it list your device by its serial number with the word "device" next to it. If you do, ADB is properly configured and communicating with your device.
If your device does not show up, you may have an issue with your drivers. Try completely uninstalling them in Device Manager and reinstalling.
If, instead of device, it says "unauthorized" next to your serial number, make sure that you clicked "OK" on both Allow USB debugging boxes. If you have, try disconnecting and reconnecting your USB cable.
Basic ADB Commands
Now that ADB is installed and working properly, let's see what it can do.
Pushing Files
adb push <path-to-file> <device-destination>
This command pushes a file from your computer to your device.
Use-case: Pushing a ROM on to your phone when copying it over normally is not possible, for example, if your current ROM won't boot and you are stuck in recovery.
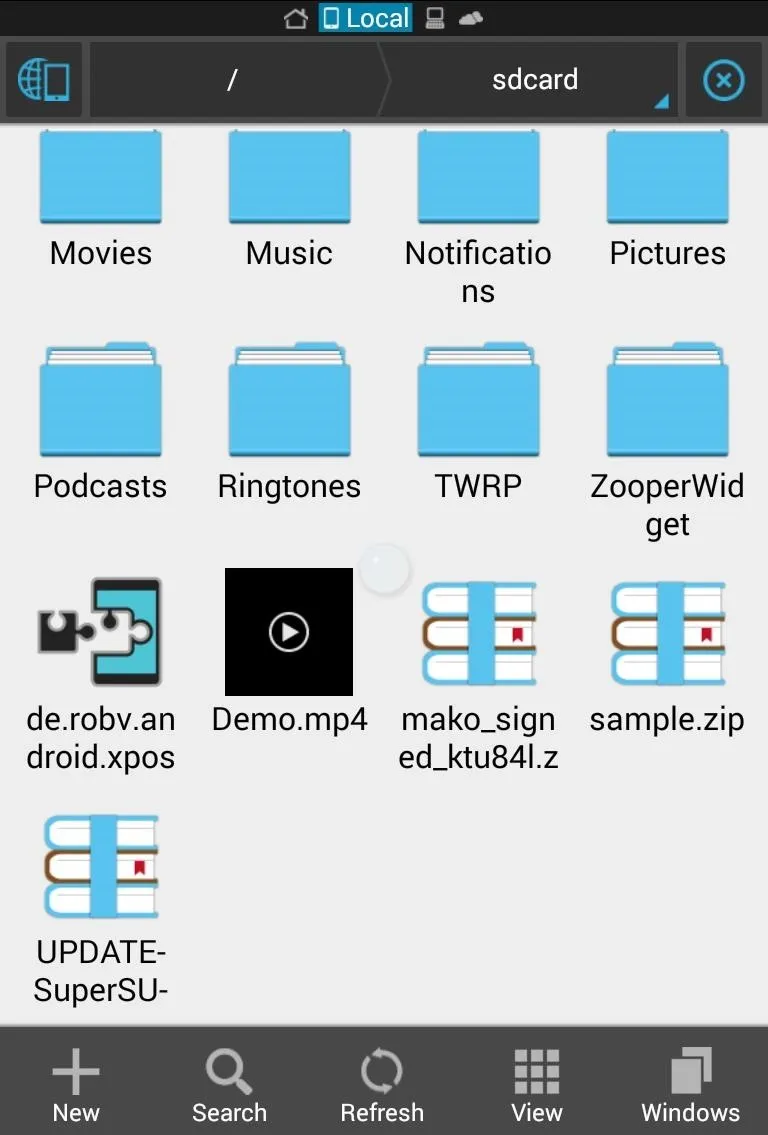
Example: adb push sample.zip /sdcard/
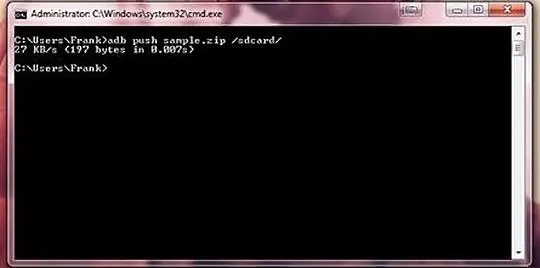
This would send a file called sample.zip (in this case the file is in the current folder you are in when you issue the command) to the root of the SD card on your Android device.
Pulling Files
adb pull <path-to-file-on-device> <destination-path-on-computer>
This command pulls a file from your device to your computer.
Use-case: Pulling important files off of your device before performing a full wipe.
Example: adb pull /sdcard/sample.zip C:\
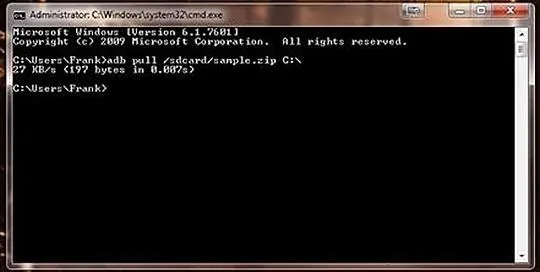
This command copies a file called sample.zip from the root of the SD card to the root of my C drive.
Installing Apps
adb install -r <path-to-APK-file>
This command installs an APK file (an app) from your computer to your phone. The optional -r flag tells ADB to reinstall the app and keep existing data if it is already on your device. Using this method, the app will be installed very quickly, without any prompts displaying on the device itself.
Use-case: Quickly installing apps that you have backed up on your computer.
Example: adb install -r C:\AppBackups\NerdRage.apk
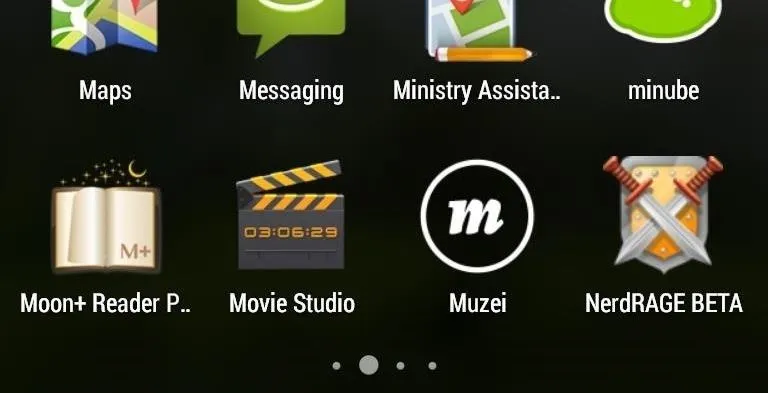
This command installs an app located in a specific folder on my computer to my device, silently. If you watch the phone, nothing seems to happen, there are no popups or notifications displayed, the app just appears in your app drawer.
Logging
adb logcat
This command displays a real-time stream of your device's log on your computer.
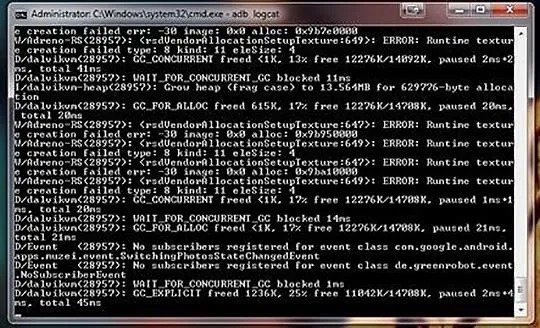
However, raw logcat output is not very helpful as it is very difficult to sort through, and continues to stream until you stop it (Ctrl+C). Thankfully, logcat output can easily be filtered in a number of useful ways, though a discussion of that is outside the scope of this tutorial.
Use-case: You are troubleshooting an app you built or you are an awesome end user assisting a developer to troubleshoot their app.
Advanced Techniques
Here are a couple of advanced ADB commands that you can use to do some really cool things.
Enter Your Device's Shell
adb shell <command>
This command executes a single shell command.
adb shell
This command opens a remote shell on your computer, allowing you to enter multiple commands.

Interacting with your device's shell is identical to navigating the terminal in Linux in terms of command syntax, however, your device has a significantly smaller set of commands available to you. If you would like more command line tools at your disposal, try installing Busybox.
The shell gives you access to a very wide variety of functions, however, most shell commands of any consequence will require your phone to be rooted to run. In addition, playing around in the shell with root access can be disastrous if you don't know what you are doing, so exercise caution.
Use-case: Too many to list.
Example: adb shell pm list packages -f
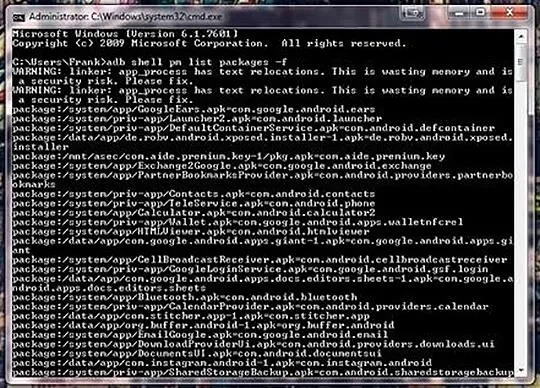
This command displays all the packages (apps) currently installed on your device.
Example: adb shell top
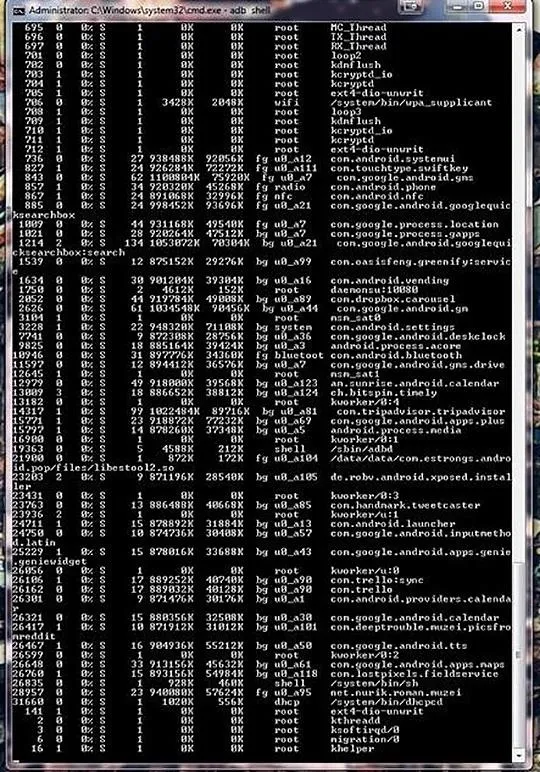
This command runs a binary called "top" that displays running processes and their CPU and memory usage.
These are just a couple of very basic examples—when it comes to the shell, the sky's the limit and people are constantly coming up with new uses for this functionality.
Recording Your Screen's Output to a Video File
This feature is new to Android 4.4 KitKat. It allows users to record screen activity to an MPEG-4 file, which you can then download.
adb shell screenrecord <path-on-device-to-save-video-to>
Running this command will start a screen recording that is saved locally on your device. The recording will continue until you stop it by hitting Ctrl+C, or automatically after three minutes of recording.
Use-case: Creating a video presentation that involves using your Android device.
Example: adb shell screenrecord /sdcard/Demo.mp4
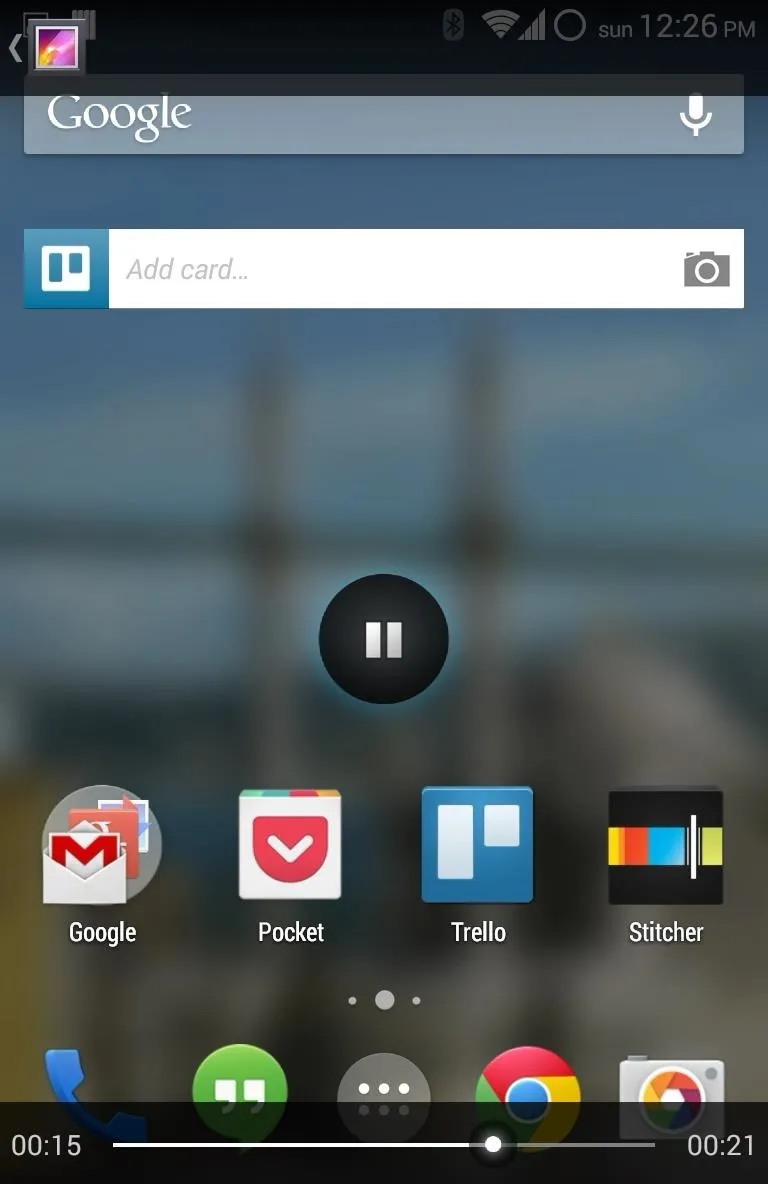
The video file that is created displays smoothly, and the actual act of recording the screen does not seem to adversely affect device performance.
This method of screen recording does have some limitations, for example, it cannot record audio, and doesn't yet support screen rotation. You can see more on screen recording in KitKat with this guide from Neil.
Conclusion
Now that you know what ADB is, and what you can do with it, go out and conquer the command line with confidence.
Next time, we will take an in depth look into that other command line tool we installed at the outset, fastboot. And as always, let your comments and questions fly in the section below.


Comments
Be the first, drop a comment!