After teasing the feature in Android 10, Google finally added proper native screen recording to Android 11. But when you start a capture, you'll see a small red indicator in your status bar as long as recording is ongoing, which can really distract from your video. Thankfully, it can be removed with a little ingenuity.
When initiating a screen recording in stock Android 11 (or stock-like skins), a countdown will appear on the right side of the status bar. Upon reaching zero, a red dot will appear, indicating your screen is currently being recorded.
Thankfully, there's an app that can remove this red dot. To properly use the app, you will need to execute ADB commands. If your devices are already set up for ADB, you can skip ahead to Step 5.
- On Your Phone? Open These Instructions in Split-Screen View
Requirements
- Windows, macOS, or Linux computer
- USB data cable
Download Google's Platform Tools
First, download platform-tools from Google onto your computer. The files are free, and there are versions for each of the three primary desktop operating systems.
Extract the ZIP
Once downloaded, extract the ZIP. This can be done using the native archive extractor or with a third-party option like 7-Zip. To make things easier, move the extracted folder onto the desktop so it's handy.

Dallas Thomas/Gadget Hacks
Open a Prompt in the Platform-Tools Folder
Now, if you're on Windows, open Command Prompt by pressing the Windows key on your keyboard, then typing "cmd" and hitting enter. If you're on Linux or Mac, open the Terminal app from your Applications folder.
Now, type in the following, then hit your spacebar once to add a single space, but don't hit enter yet.
cdWith the command line reading "cd " now, drag the platform-tools folder from your desktop and drop it right on top of the command window to auto-populate its location. Once you see the full platform-tools file path, go ahead and hit enter.

Dallas Thomas/Gadget Hacks
Enable Developer Options
On your phone, enable Developer Options by opening your Settings app and going to "About Phone," then tapping "Build Number" seven times. You'll have to enter your lock screen passcode, then a toast message will inform you that you've unlocked Developer Options. You can find the new menu by returning to the main page of Settings, selecting "System," then "Advanced."
Allow USB Debugging
Now, open Developer Options and enable the toggle next to "USB Debugging," then confirm your choice on the prompt.
From here, connect your phone to your computer with a USB data cable. A prompt will appear asking you to "Allow USB debugging." Tick the box next to "Always allow from this computer," then press "Allow."
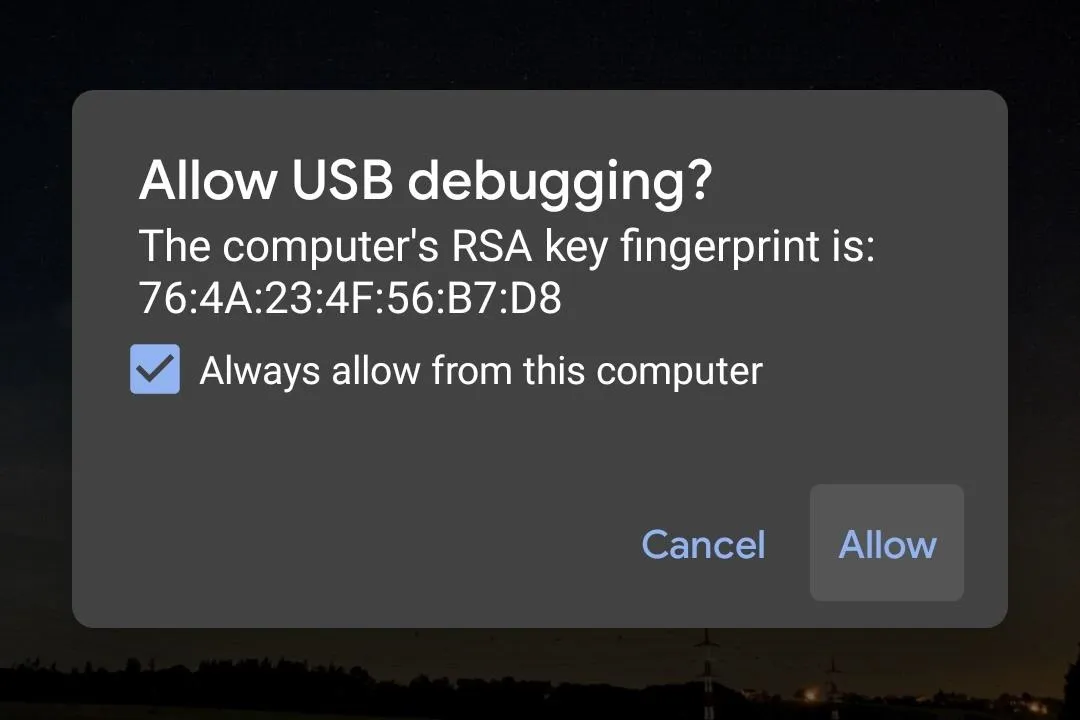
If you don't see this prompt, input the following command in your computer's command line tool, then the popup should appear on your phone:
adb devicesIf you receive an error after sending the above command, place a "./" before each ADB command throughout this article:
./adb devices- Full Guide: How to Set Up ADB on Your Phone & Computer
Install SystemUI Tuner
On your phone now, install SystemUI Tuner by developer Zachary Wander. You'd normally be able to do this through the app's Play Store page, but as of version 300, the auto-detect feature is no longer working in SystemUI Tuner.
So for now, you'll have to sideload an older version of the app. The most recent version with this feature working is v288, which you can find at the link below.
Download the APK, then open it. You may have to tap "Settings" on the prompt, then enable the switch next to "Allow from this source" and press your back button. From there, it's just a matter of pressing "Install."
Grant Permissions
Open the app and follow the instructions on the initial setup prompts. You will eventually see a page listing three ADB commands the app would like you to send in order to give it the elevated permissions it will need to modify your status bar and remove the screen recording indicator.
Leave the app on this screen and connect your phone to your computer with a USB data cable. Back in the command line tool on your computer (which should still be redirected to platform-tools directory), copy and paste the following commands one-by-one and hit enter after each one:
adb shell pm grant com.zacharee1.systemuituner android.permission.WRITE_SECURE_SETTINGSadb shell pm grant com.zacharee1.systemuituner android.permission.PACKAGE_USAGE_STATSadb shell pm grant com.zacharee1.systemuituner android.permission.DUMPIf you're on Mac, Linux, or Windows PowerShell and the above commands return a "command not found" error, add a "./" to the front and re-send them (as follows):
./adb shell pm grant com.zacharee1.systemuituner android.permission.WRITE_SECURE_SETTINGS./adb shell pm grant com.zacharee1.systemuituner android.permission.PACKAGE_USAGE_STATS./adb shell pm grant com.zacharee1.systemuituner android.permission.DUMPHide the Recording Icon
After sending those commands, tap the check mark in SystemUI Tuner and the app will close out. Open it again and tap "To the tweaks."
On the main page, choose "Status Bar," then "Auto Detect." After a second or two, the app will display a new page with every status bar icon available on your Android 11 device, including the hidden screen recording icon. Disable the toggle next to the "screen_record" option and you're all set!
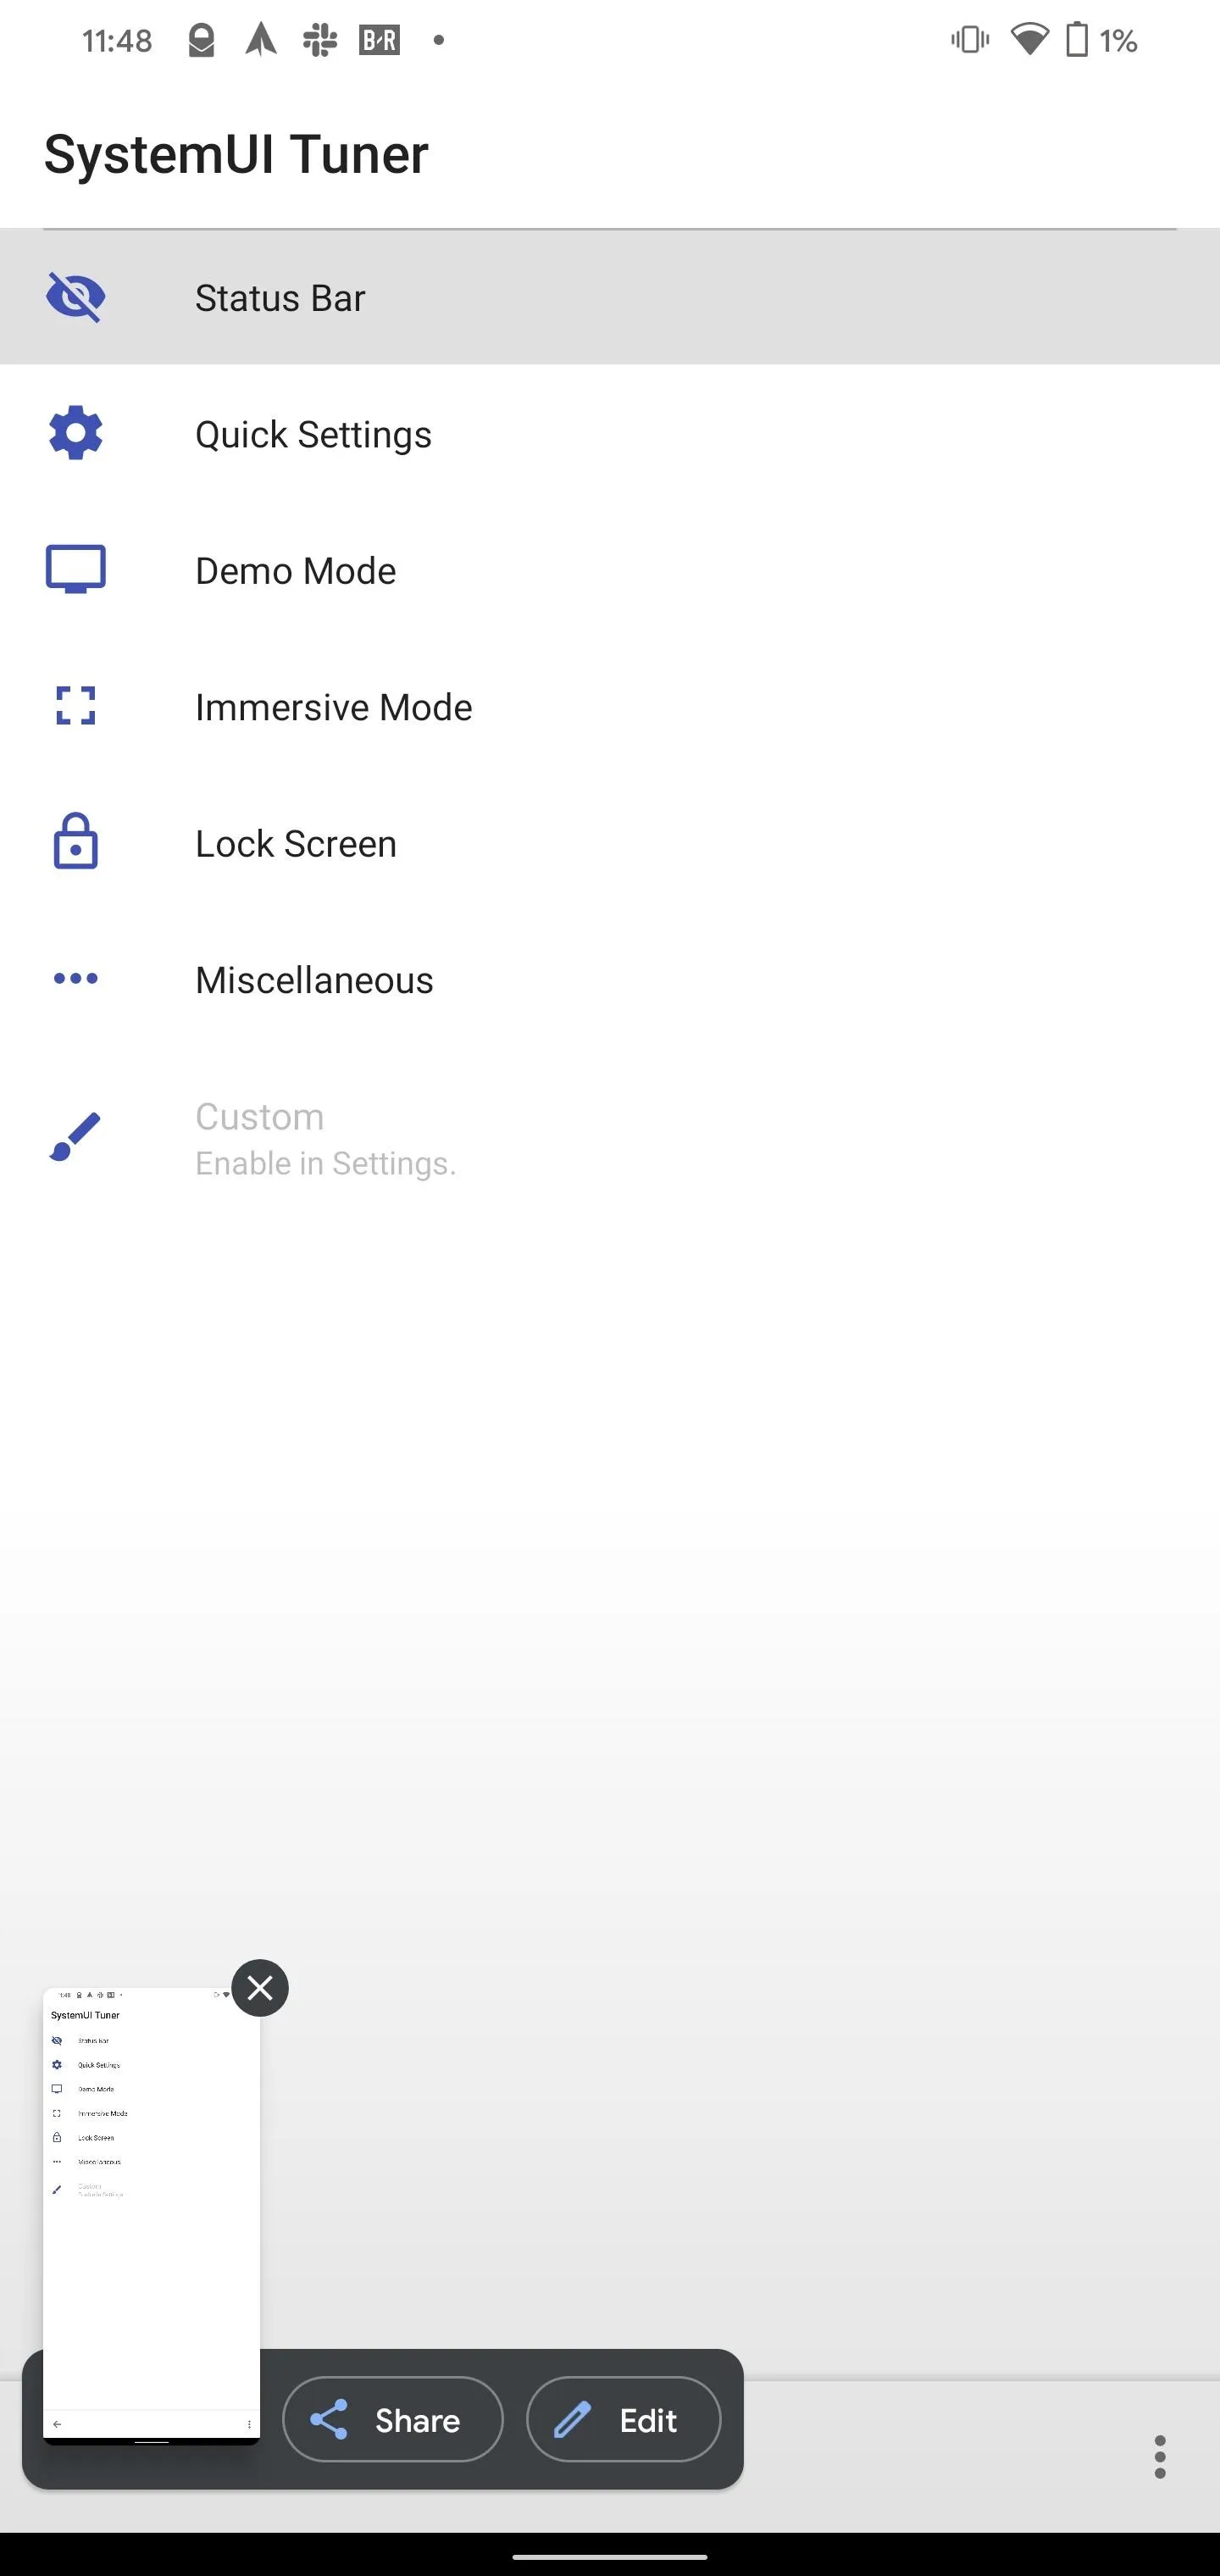
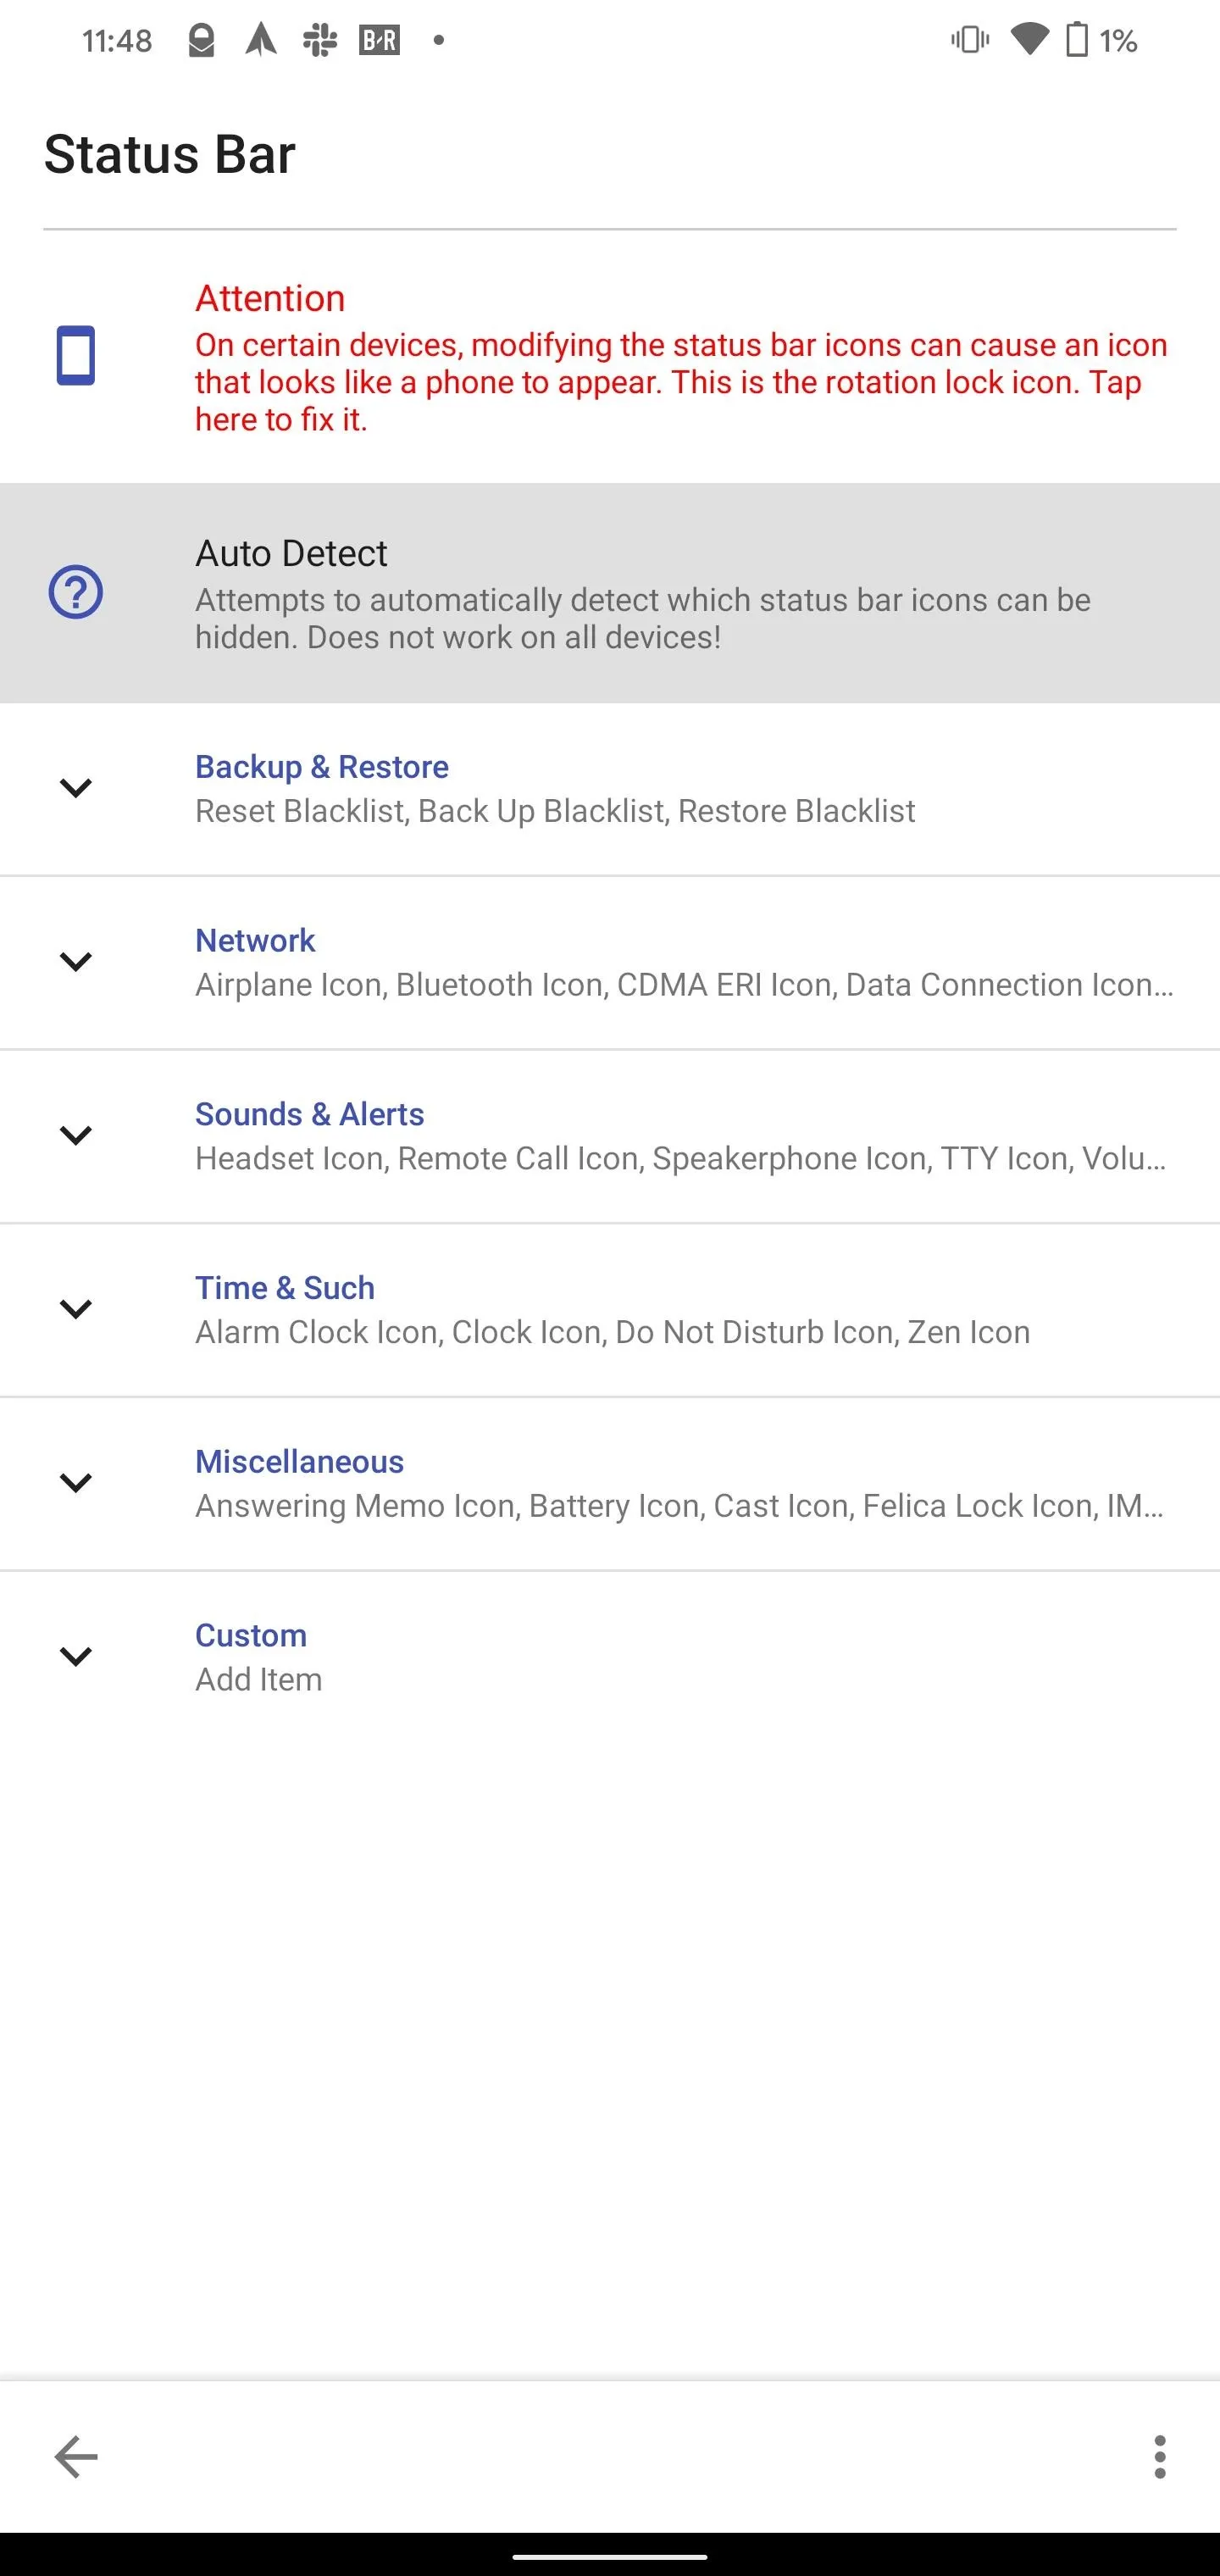
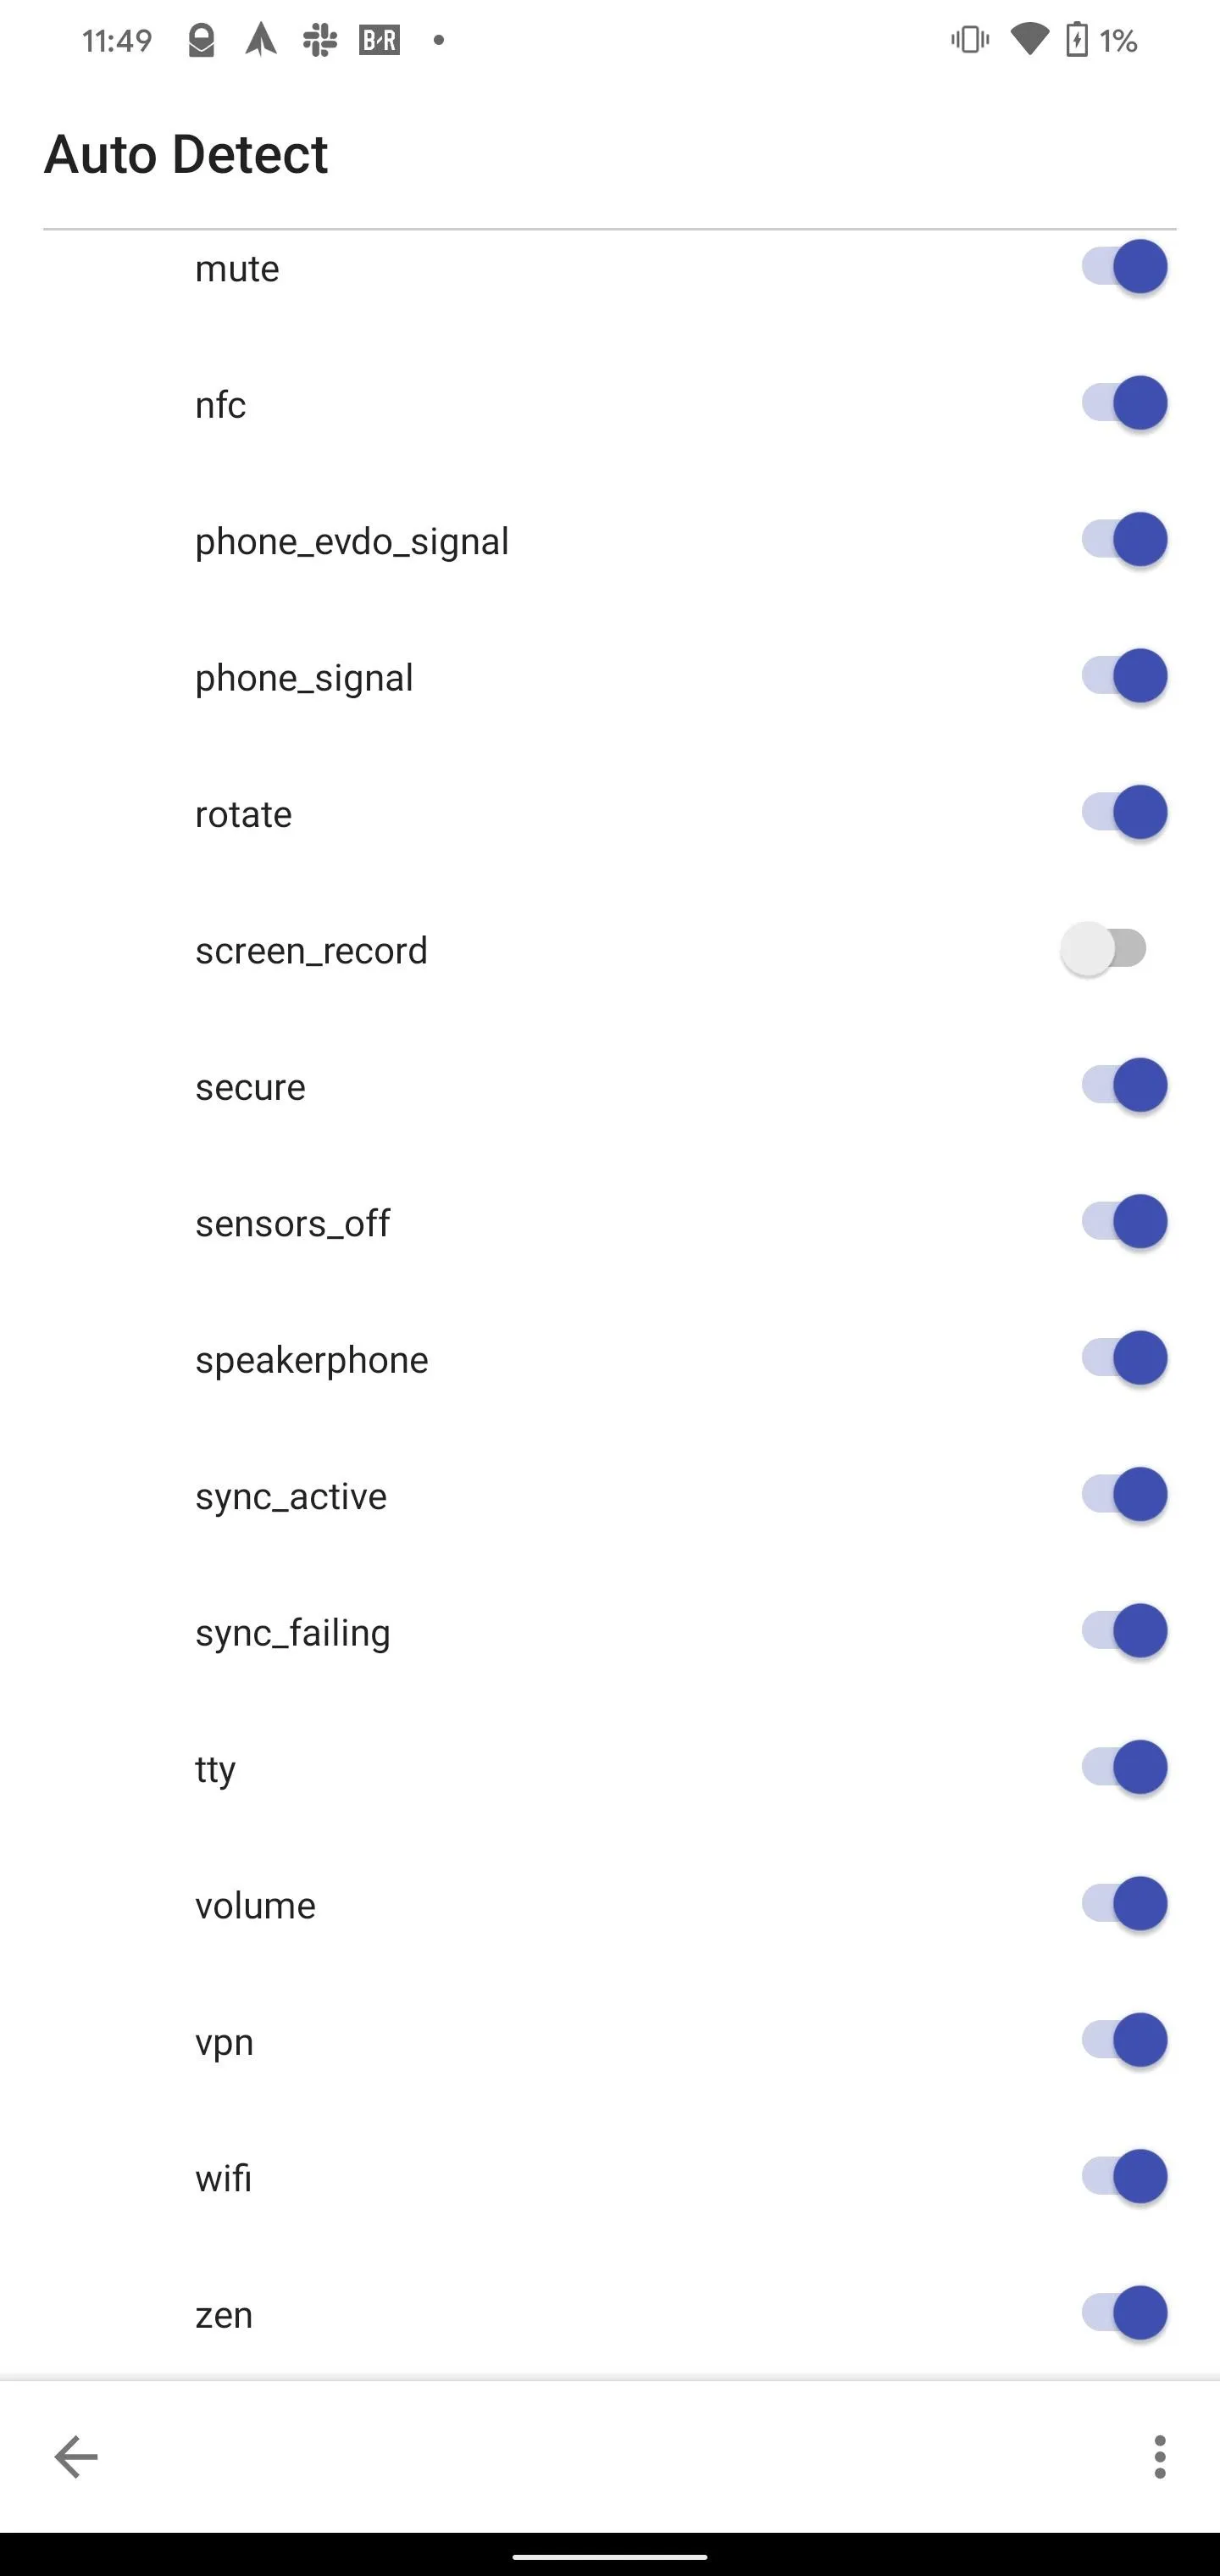


Hide the Notification Icon (Optional)
Now, when you record, you won't see the red dot on the right side of your status bar. You'll also lose the animated countdown timer when you start a recording (three seconds after you press "Start"), but you'll know when recording has started because you'll see a notification icon (white circle) on the left of your status bar.

If you'd like to remove this icon, too, just know that you'll have to manually count those three seconds from hitting "Start" on the prompt until the system actually starts recording.
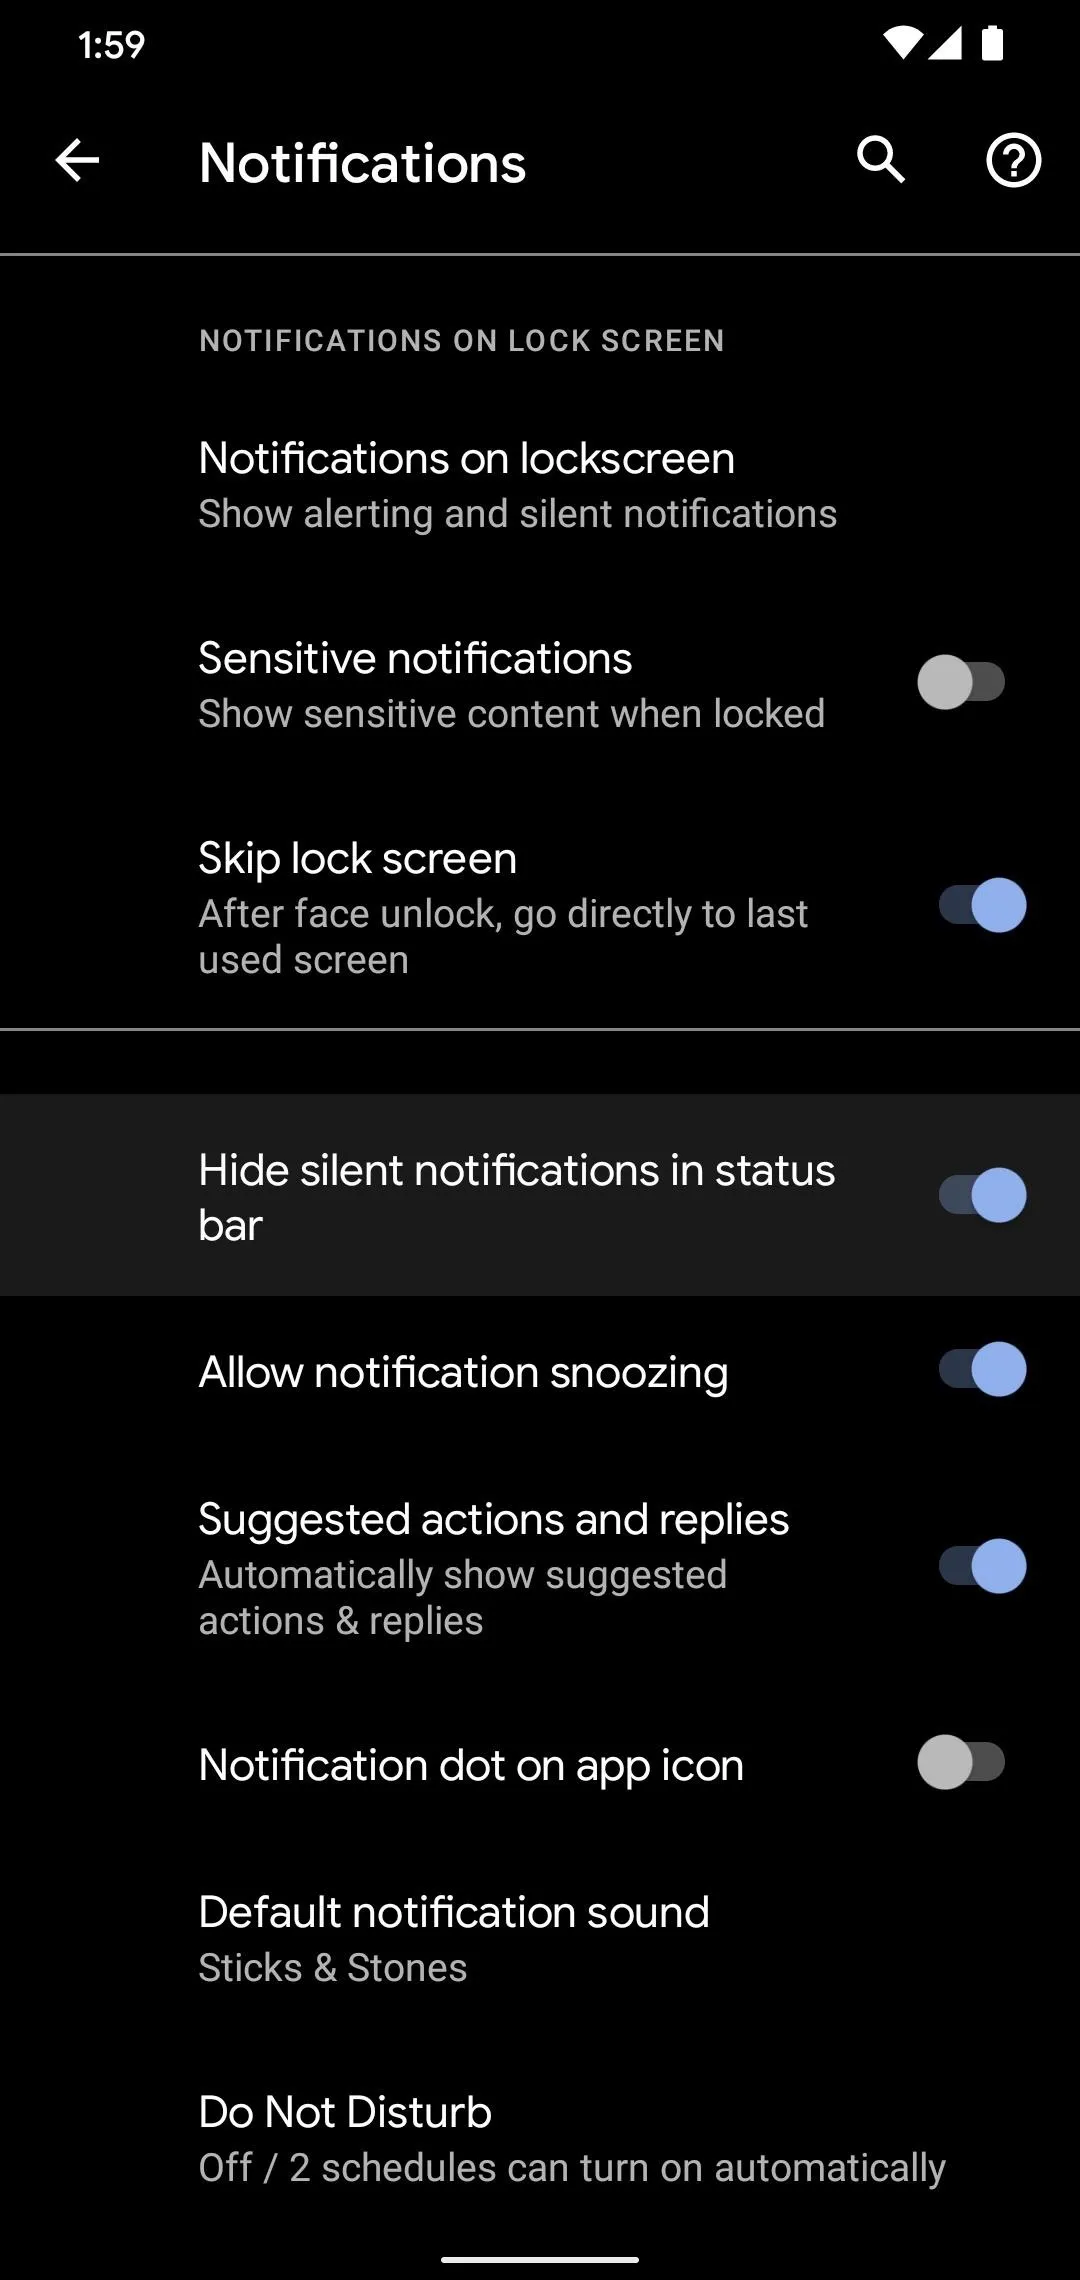
If you're fine with that, go to Settings –> Apps & Notifications –> Notifications –> Advanced, then enable the toggle next to "Hide silent notifications in status bar."
From there, start a recording, then expand your notification shade and long-press the recording notification. Select the gear icon that appears, then choose "Screen Recorder" and set it to "Silent" on the next screen. Now, you'll still have the notification for stopping recording, but you won't see any icons in your status bar!


Cover Image by Jon Knight/Gadget Hacks






Comments
Be the first, drop a comment!