


It just keeps getting harder to enjoy all of the benefits of root without sacrificing features. Thanks to SafetyNet, we've lost the ability to use Android Pay, Pokémon GO, and even Snapchat to an extent. But the most recent news on this front is perhaps worst of all: Netflix has already stopped showing up on the Play Store for rooted users, and soon, it may refuse to run even if you've sideloaded the app.
The fact of the matter is that if you modify anything on your system partition using root, SafetyNet will trip. Not only does this cause the Play Store to list your device as "Uncertified," but SafetyNet also provides an API that flat-out tells apps your device is modified. All of this has created a new trend: If an app has anything to do with security, payments, or DRM, you can bet it'll refuse to run on a rooted device.
But thankfully, there are still ways to bypass SafetyNet. By uninstalling any root mods and removing SuperSU, then switching to topjohnwu'sMagisk instead, you can enjoy almost all of the benefits of root access without touching files on your system partition. So below, I'll show you how to convert your current root setup to a truly systemless one, and when you're done, you'll be able to run any app you want.
Requirements
- TWRP recovery installed
- device rooted using systemless SuperSU
- "Unknown Sources" enabled
A Note About Pixel Devices
Before you get started, understand that this method will not work on Google's new Pixel and Pixel XL flagships. This is because of the Pixel's A/B partition layout for seamless updates, which breaks compatibility with the regular version of Magisk.
If you're using a Pixel or Pixel XL and would still like to get these features, you're in luck. We've covered an entirely separate method that will give you root while keeping SafetyNet intact — just head to the following link to check it out:
Uninstall Xposed (If You Have It)
First, you'll need to remove the Xposed Framework if you currently have it installed — but don't worry, there's a systemless version of Xposed that you can install through Magisk later.
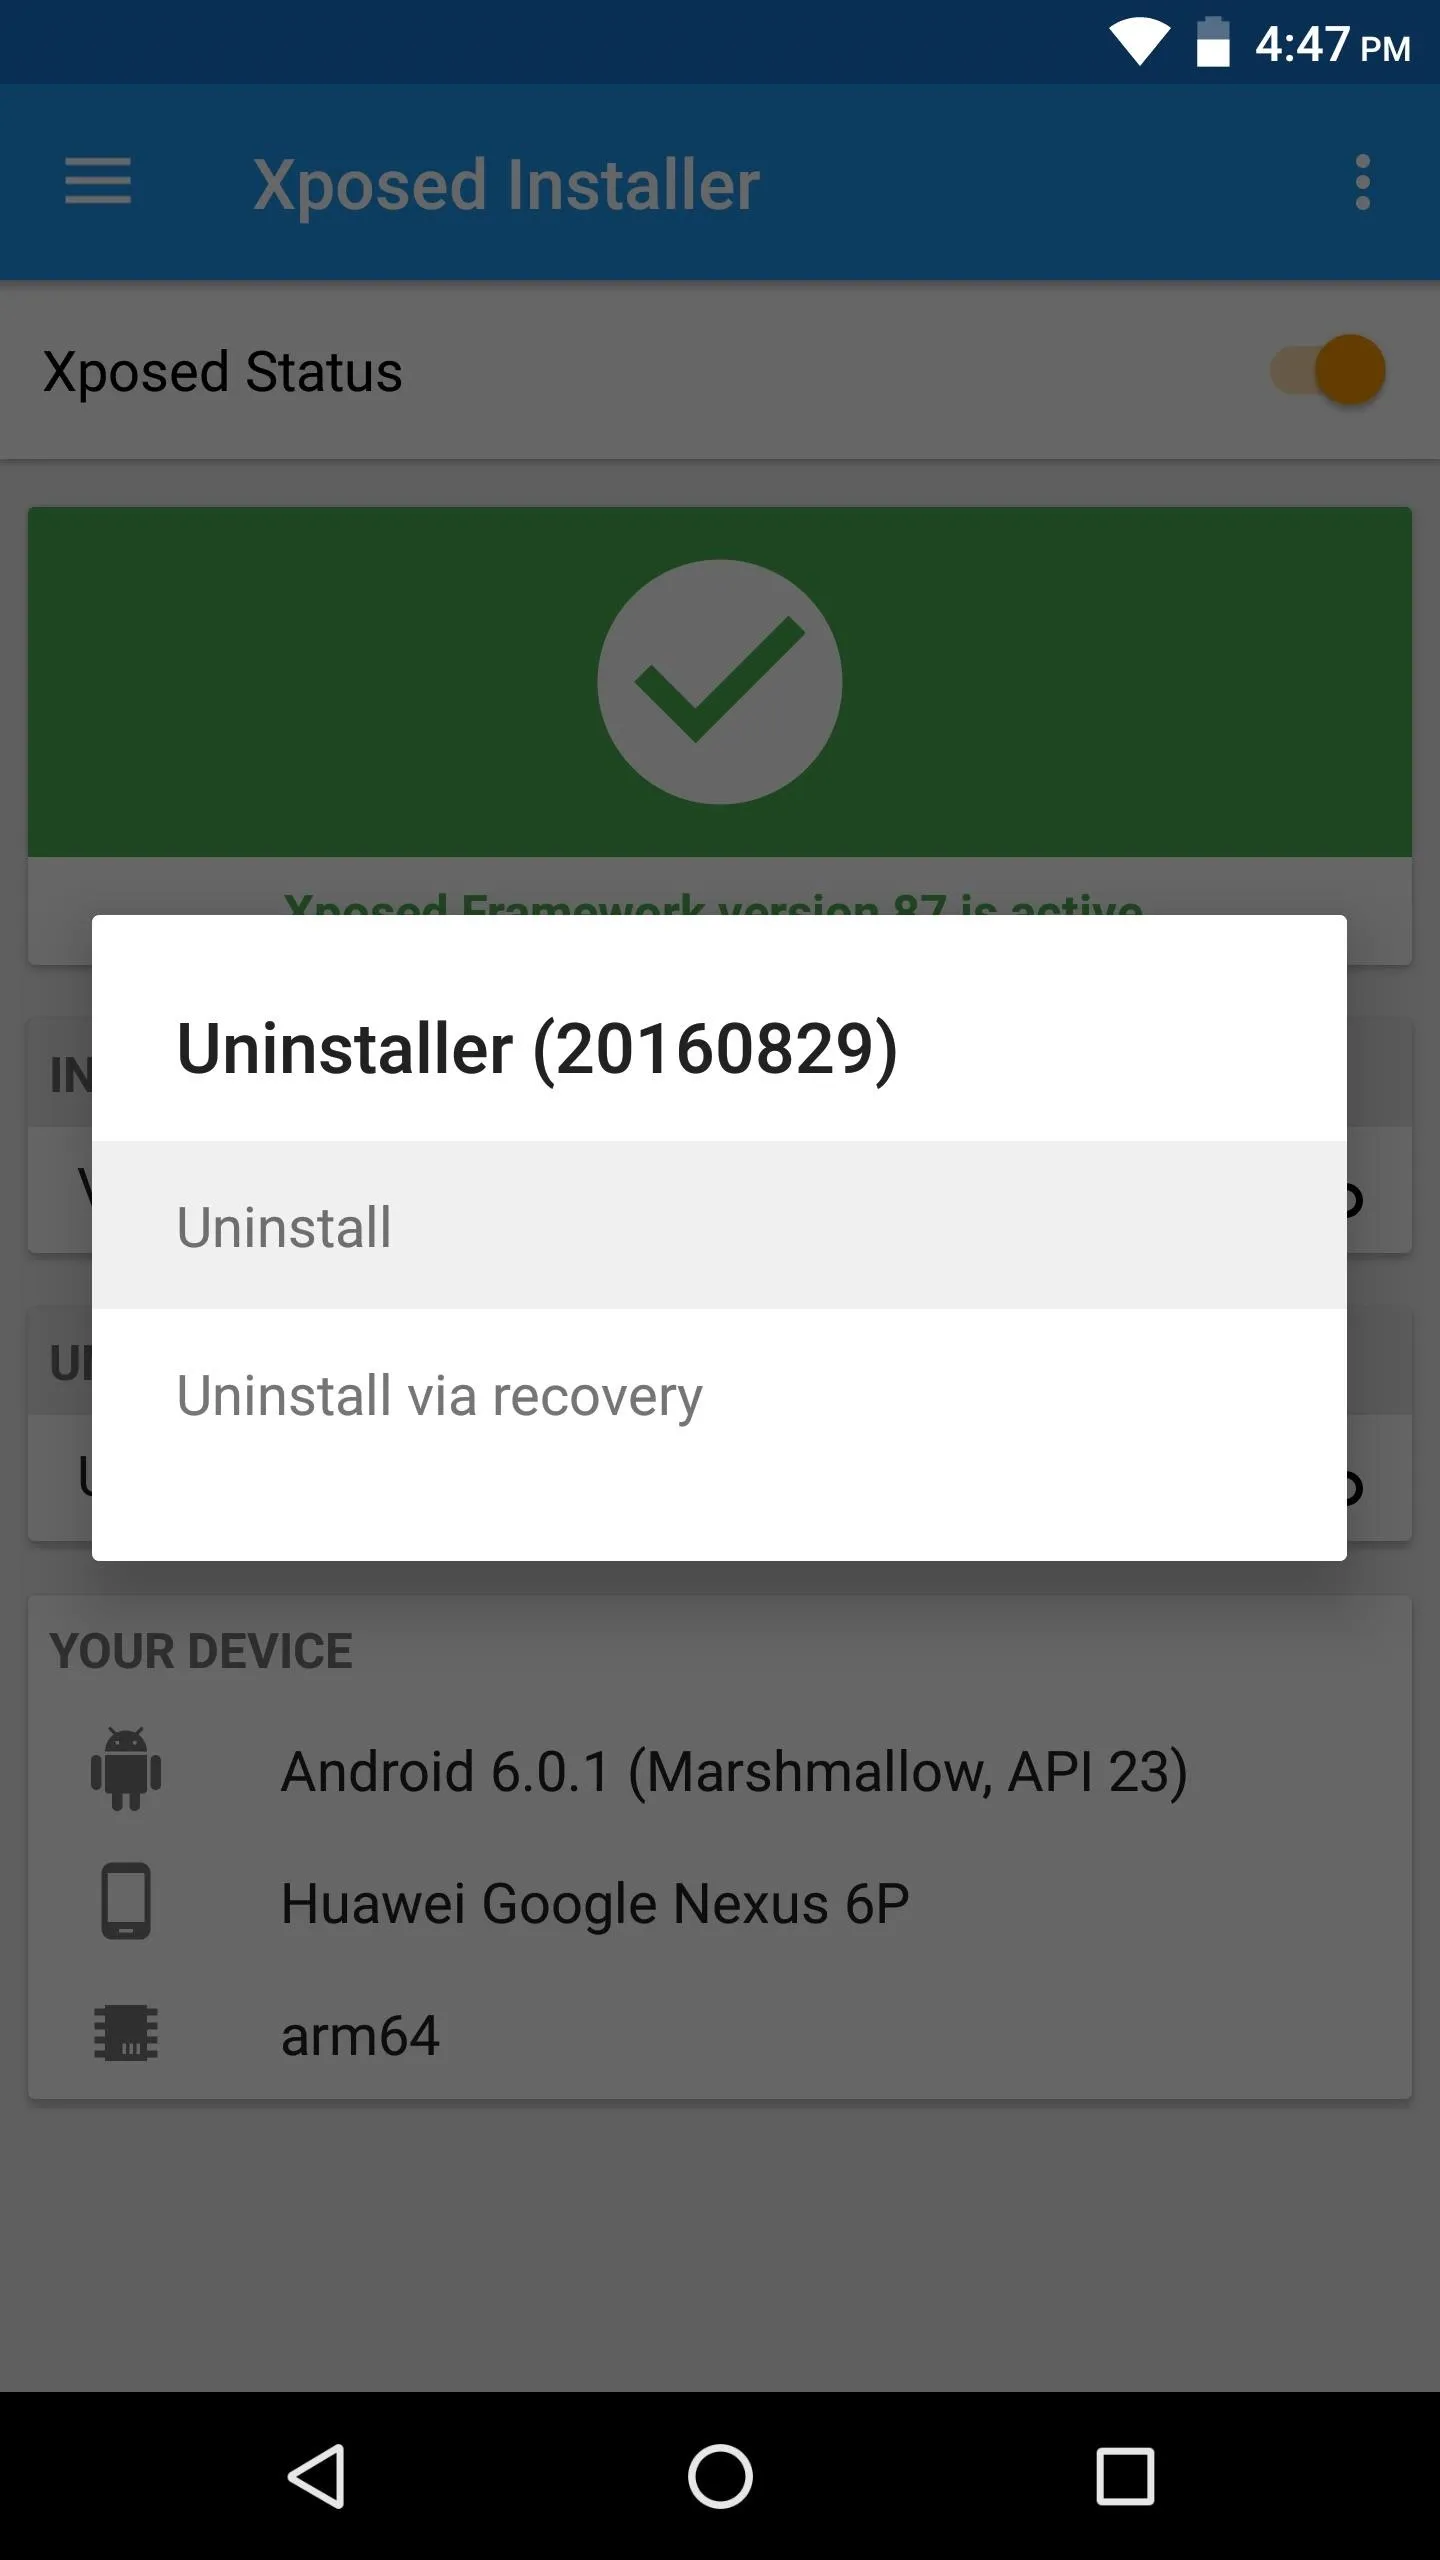
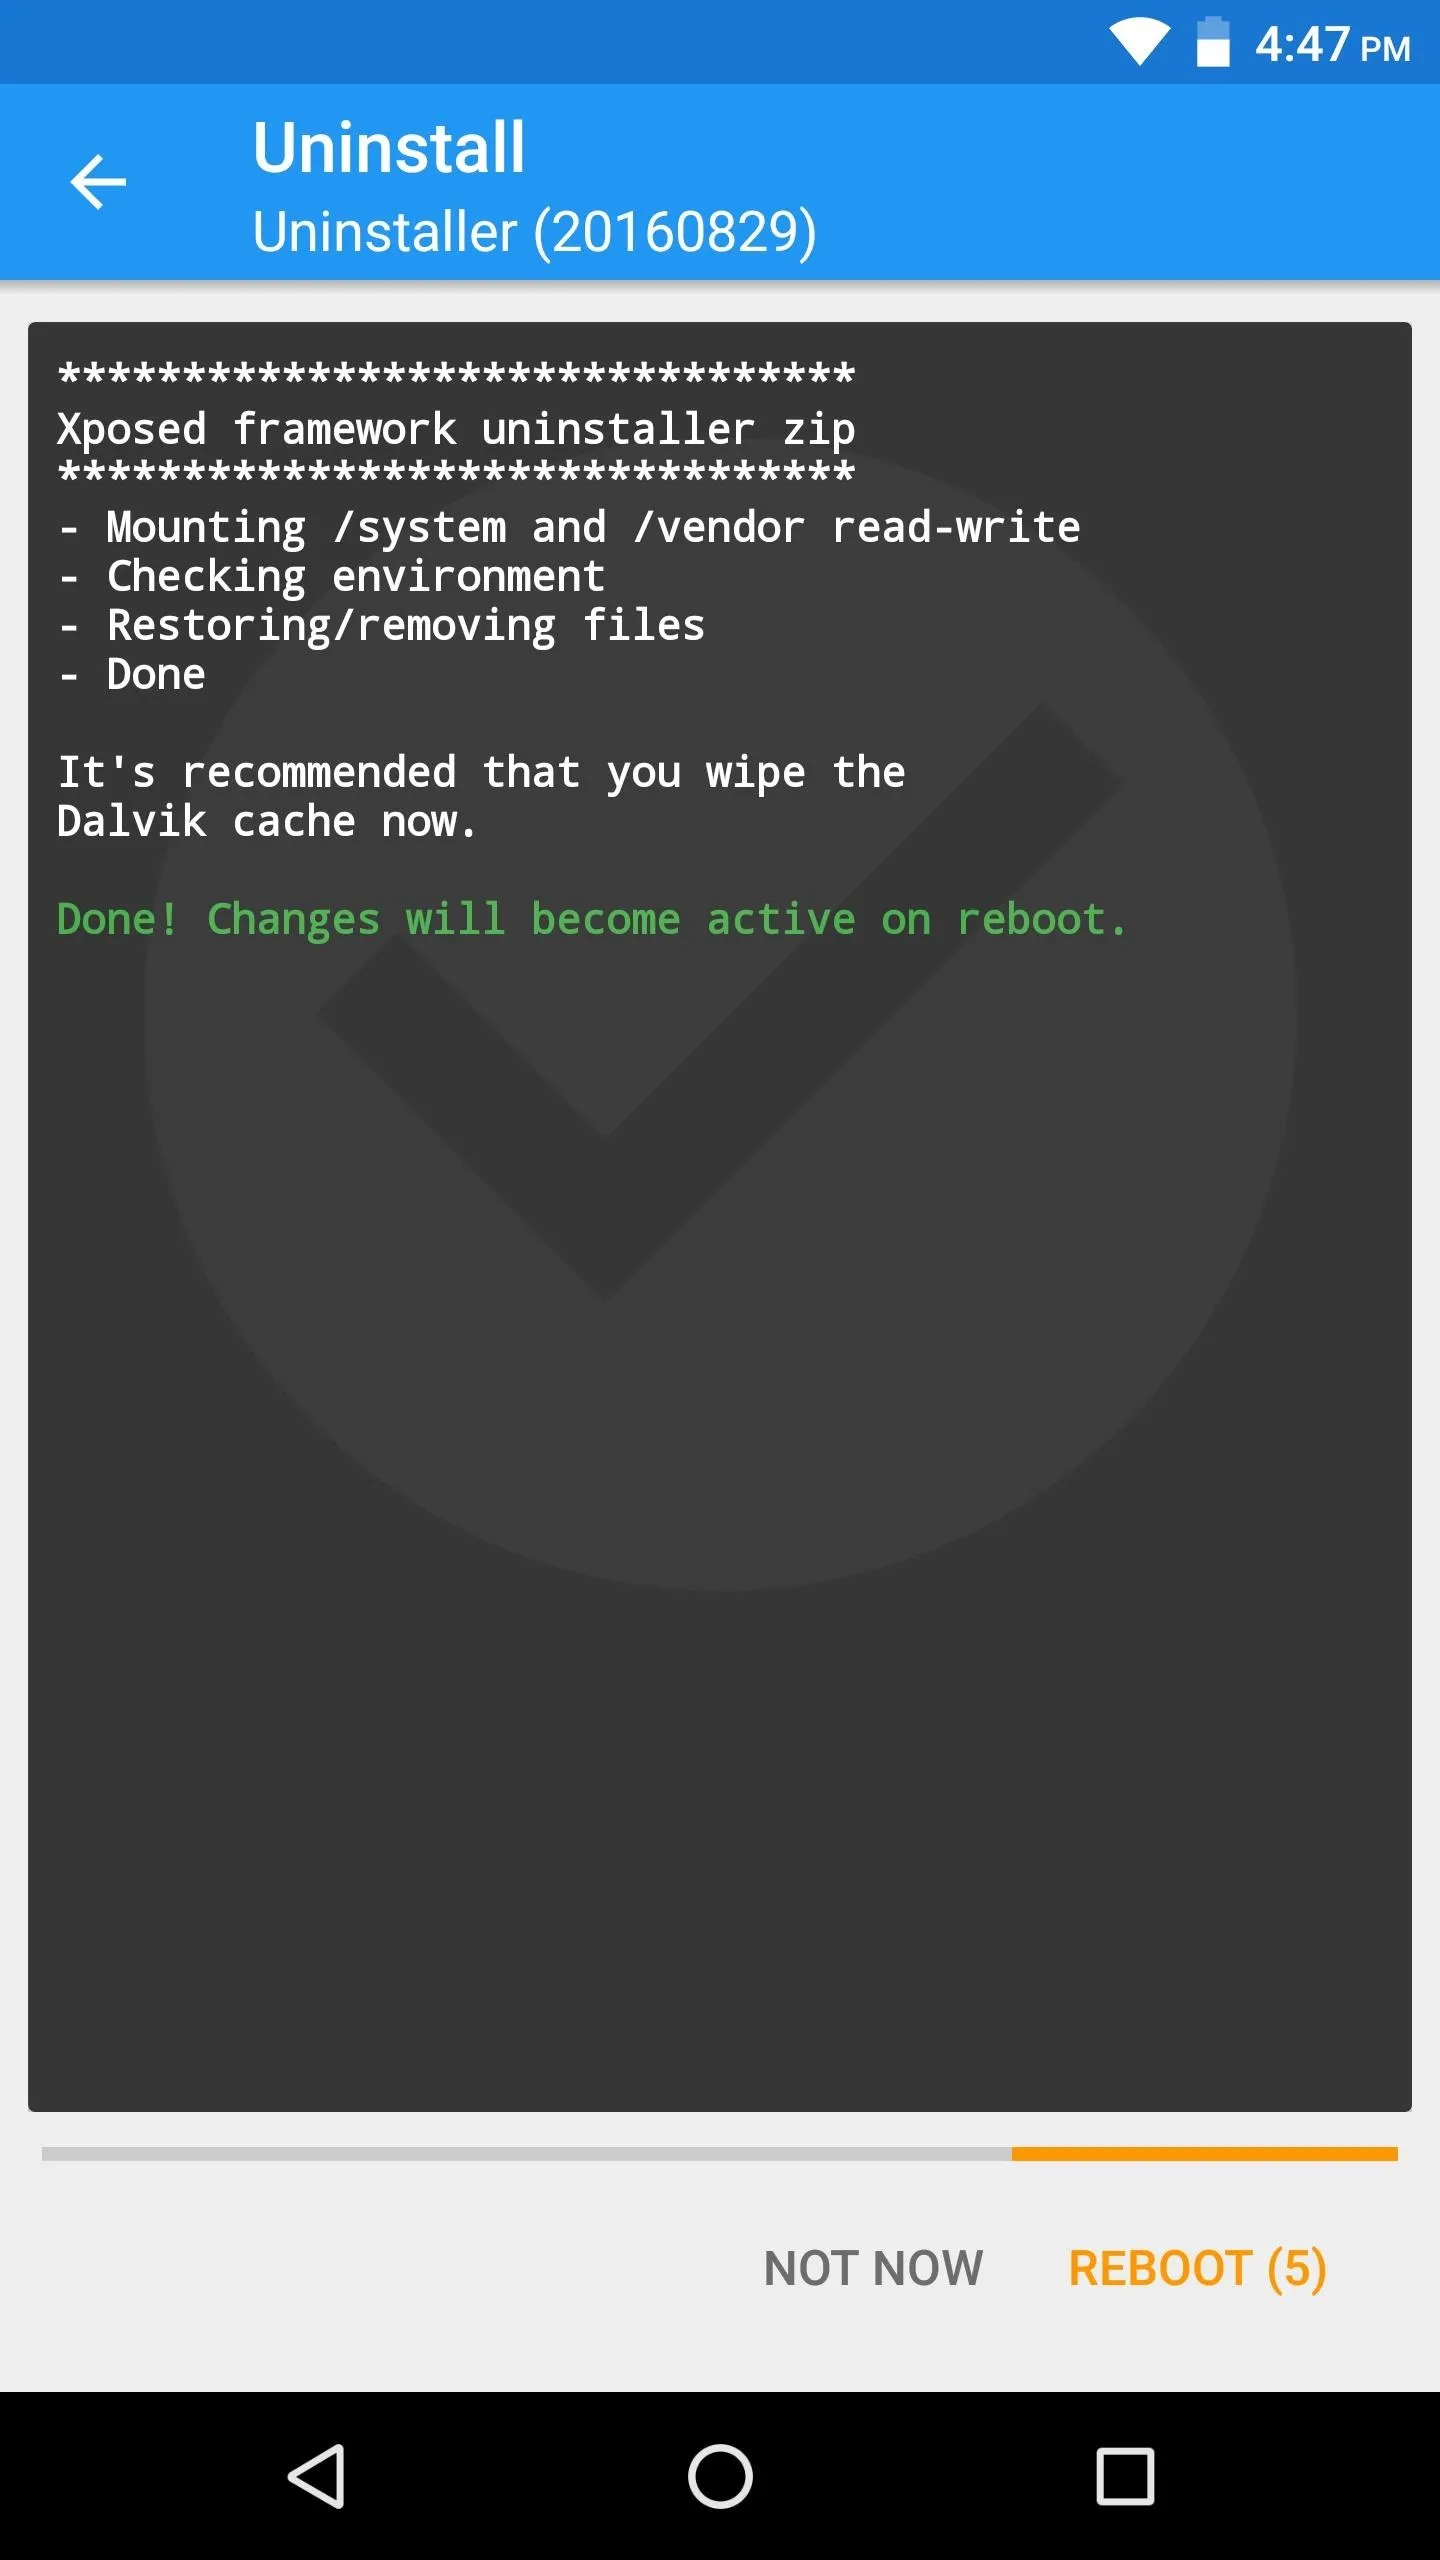
So head to the Framework section in your Xposed installer app and tap the "Uninstaller" button, then choose "Uninstall" on the popup. From there, wait a few seconds for the process to complete, then tap the "Reboot" button in the bottom-right corner. Your device may take as long as 10 minutes to boot after doing this.

Revert Any Other System Mods
If you previously used root to modify any files on your system partition, SafetyNet will stay tripped until you revert these changes. For example, if you uninstalled bloatware apps with Titanium Backup, you'll need to reinstall the apps before you can proceed (note that disabling or "freezing" is fine). As another example, you'll also need to disable ad blocking in apps like AdAway, though note that you can re-apply these mods after rooting with Magisk.
If you haven't kept track of all the changes you've made to your system partition using root, then your best bet would be to re-flash the stock system image for your particular phone using Fastboot. We've covered that process in the past, so head to the following link if you need help.
If your phone does not support Fastboot flashing, or if your stock system image is not freely available for download, you may have to completely restore your stock firmware (but again, only if you've used root to irrevocably change something on your system partition). This process will vary depending on your device, so do a Google search for "restore stock firmware
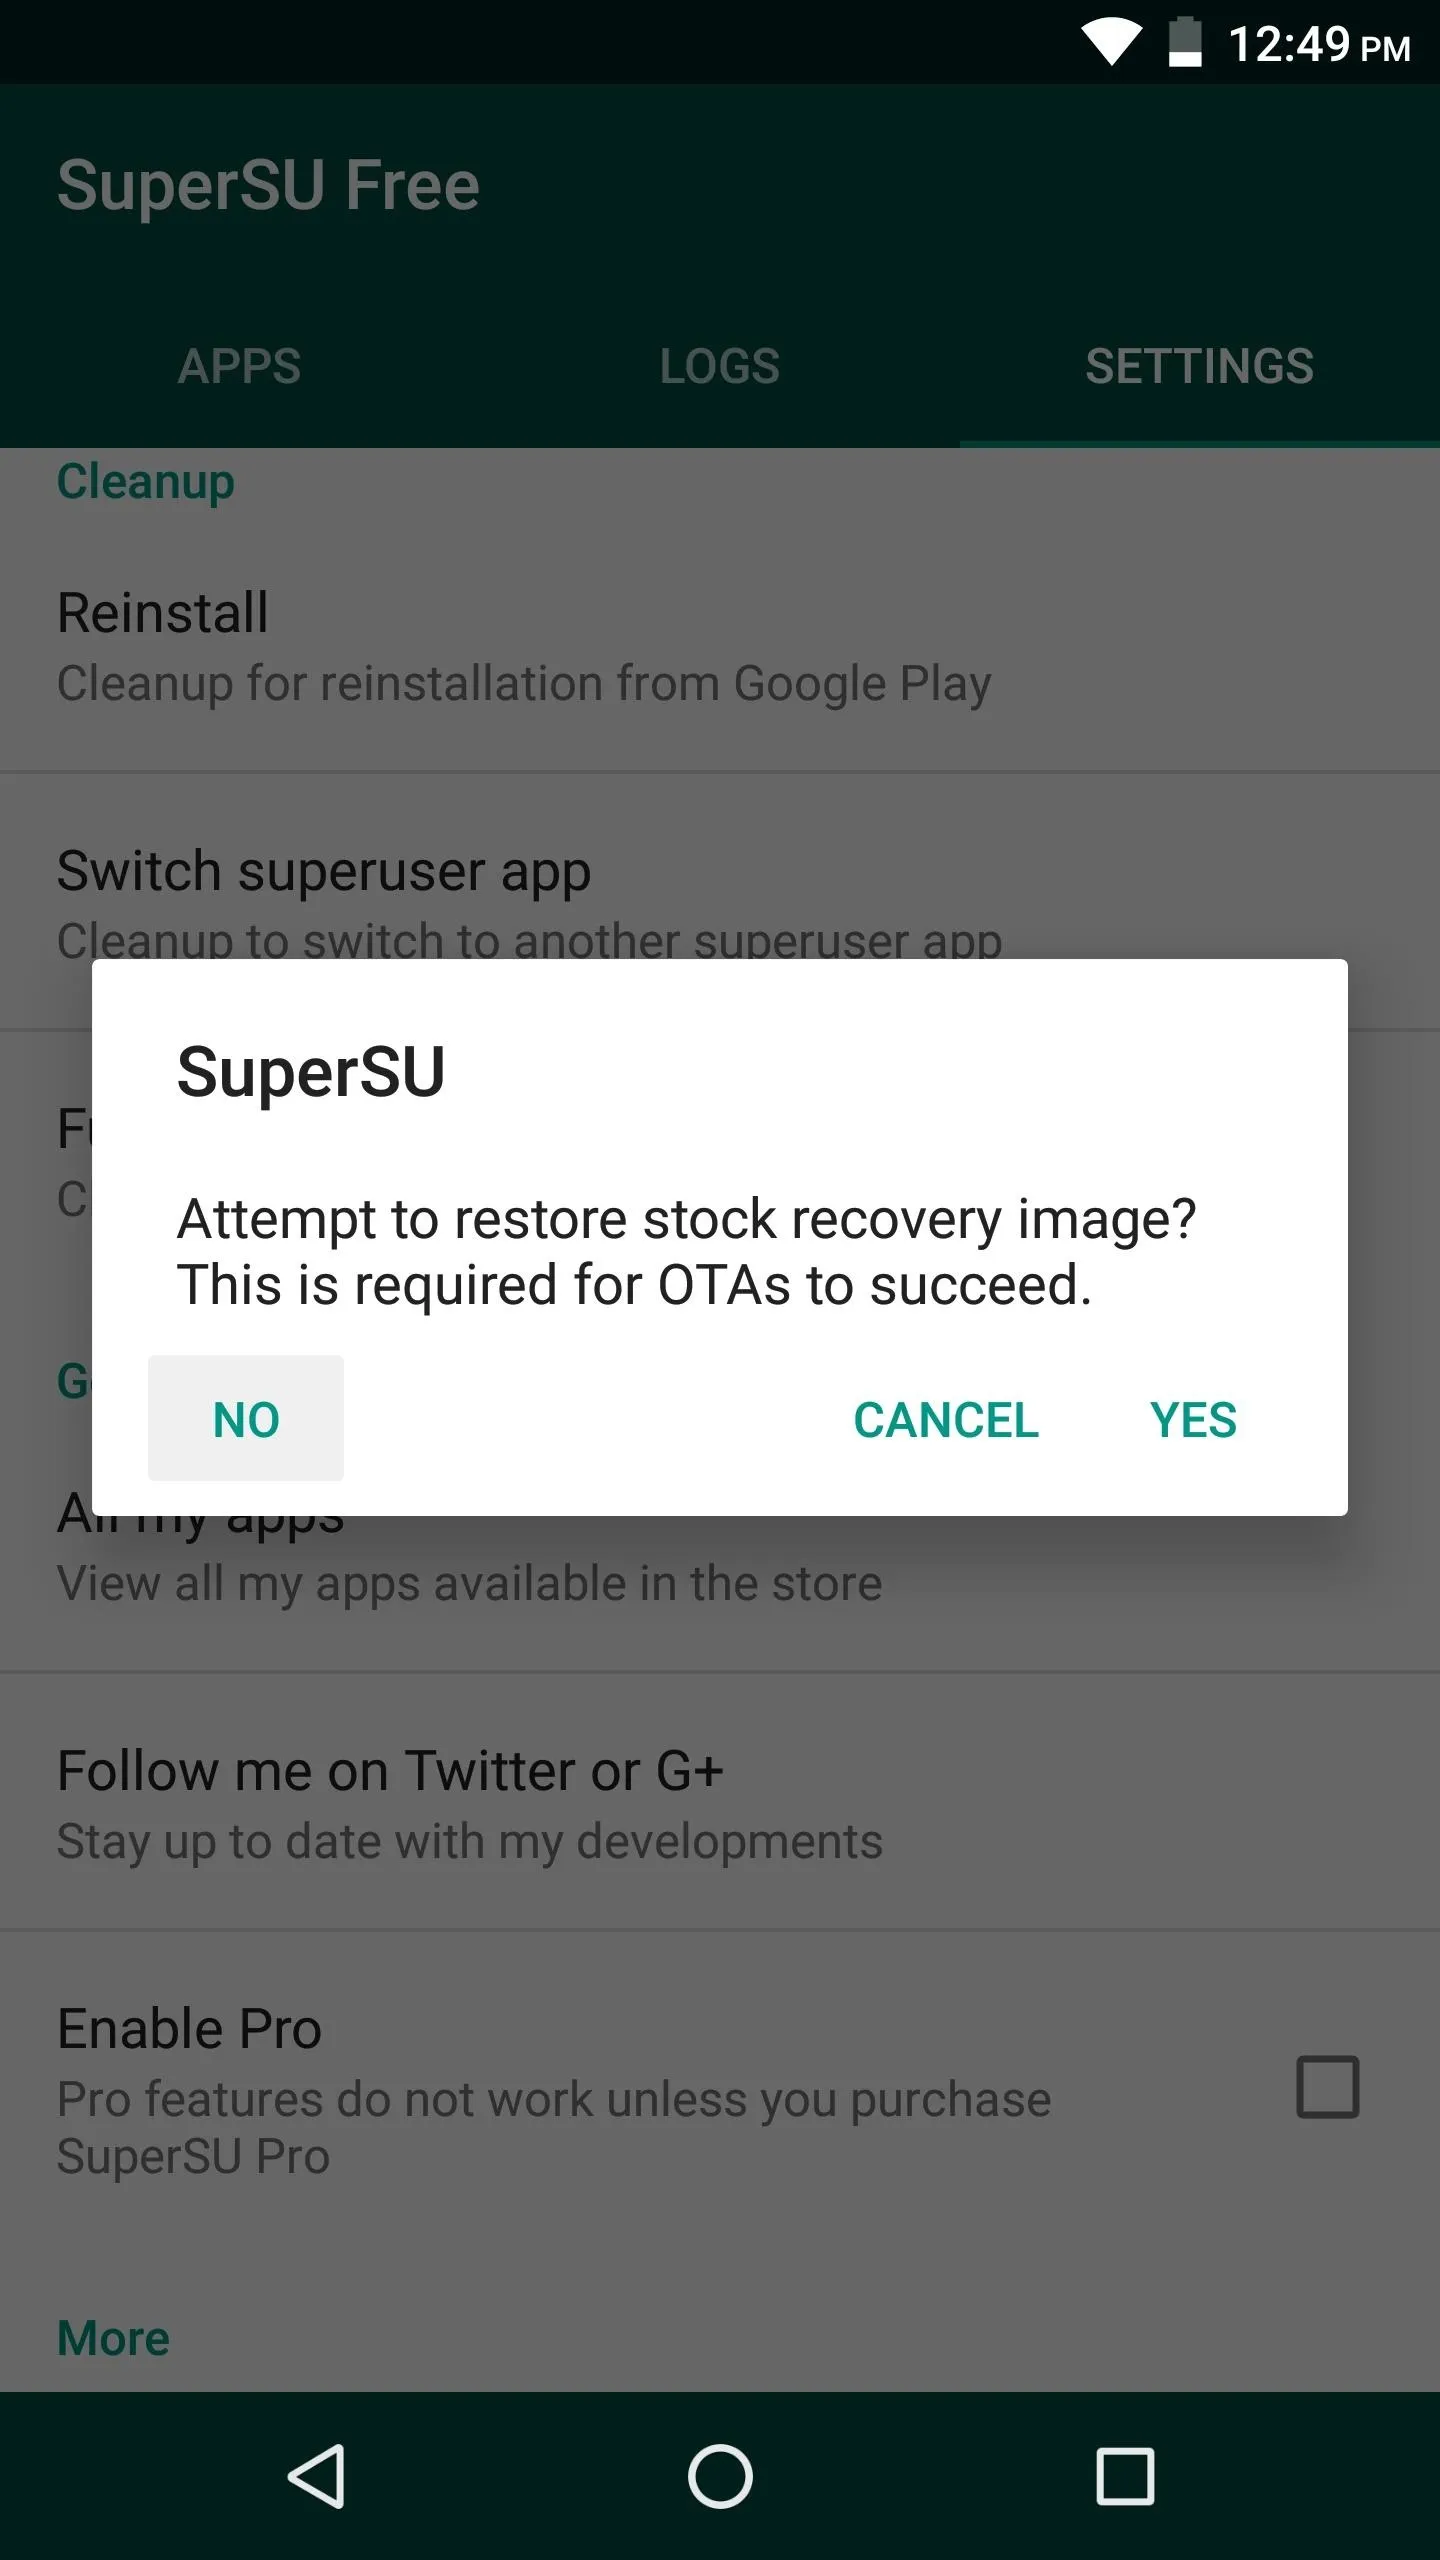
Unroot in SuperSU & Restore Stock Boot Image
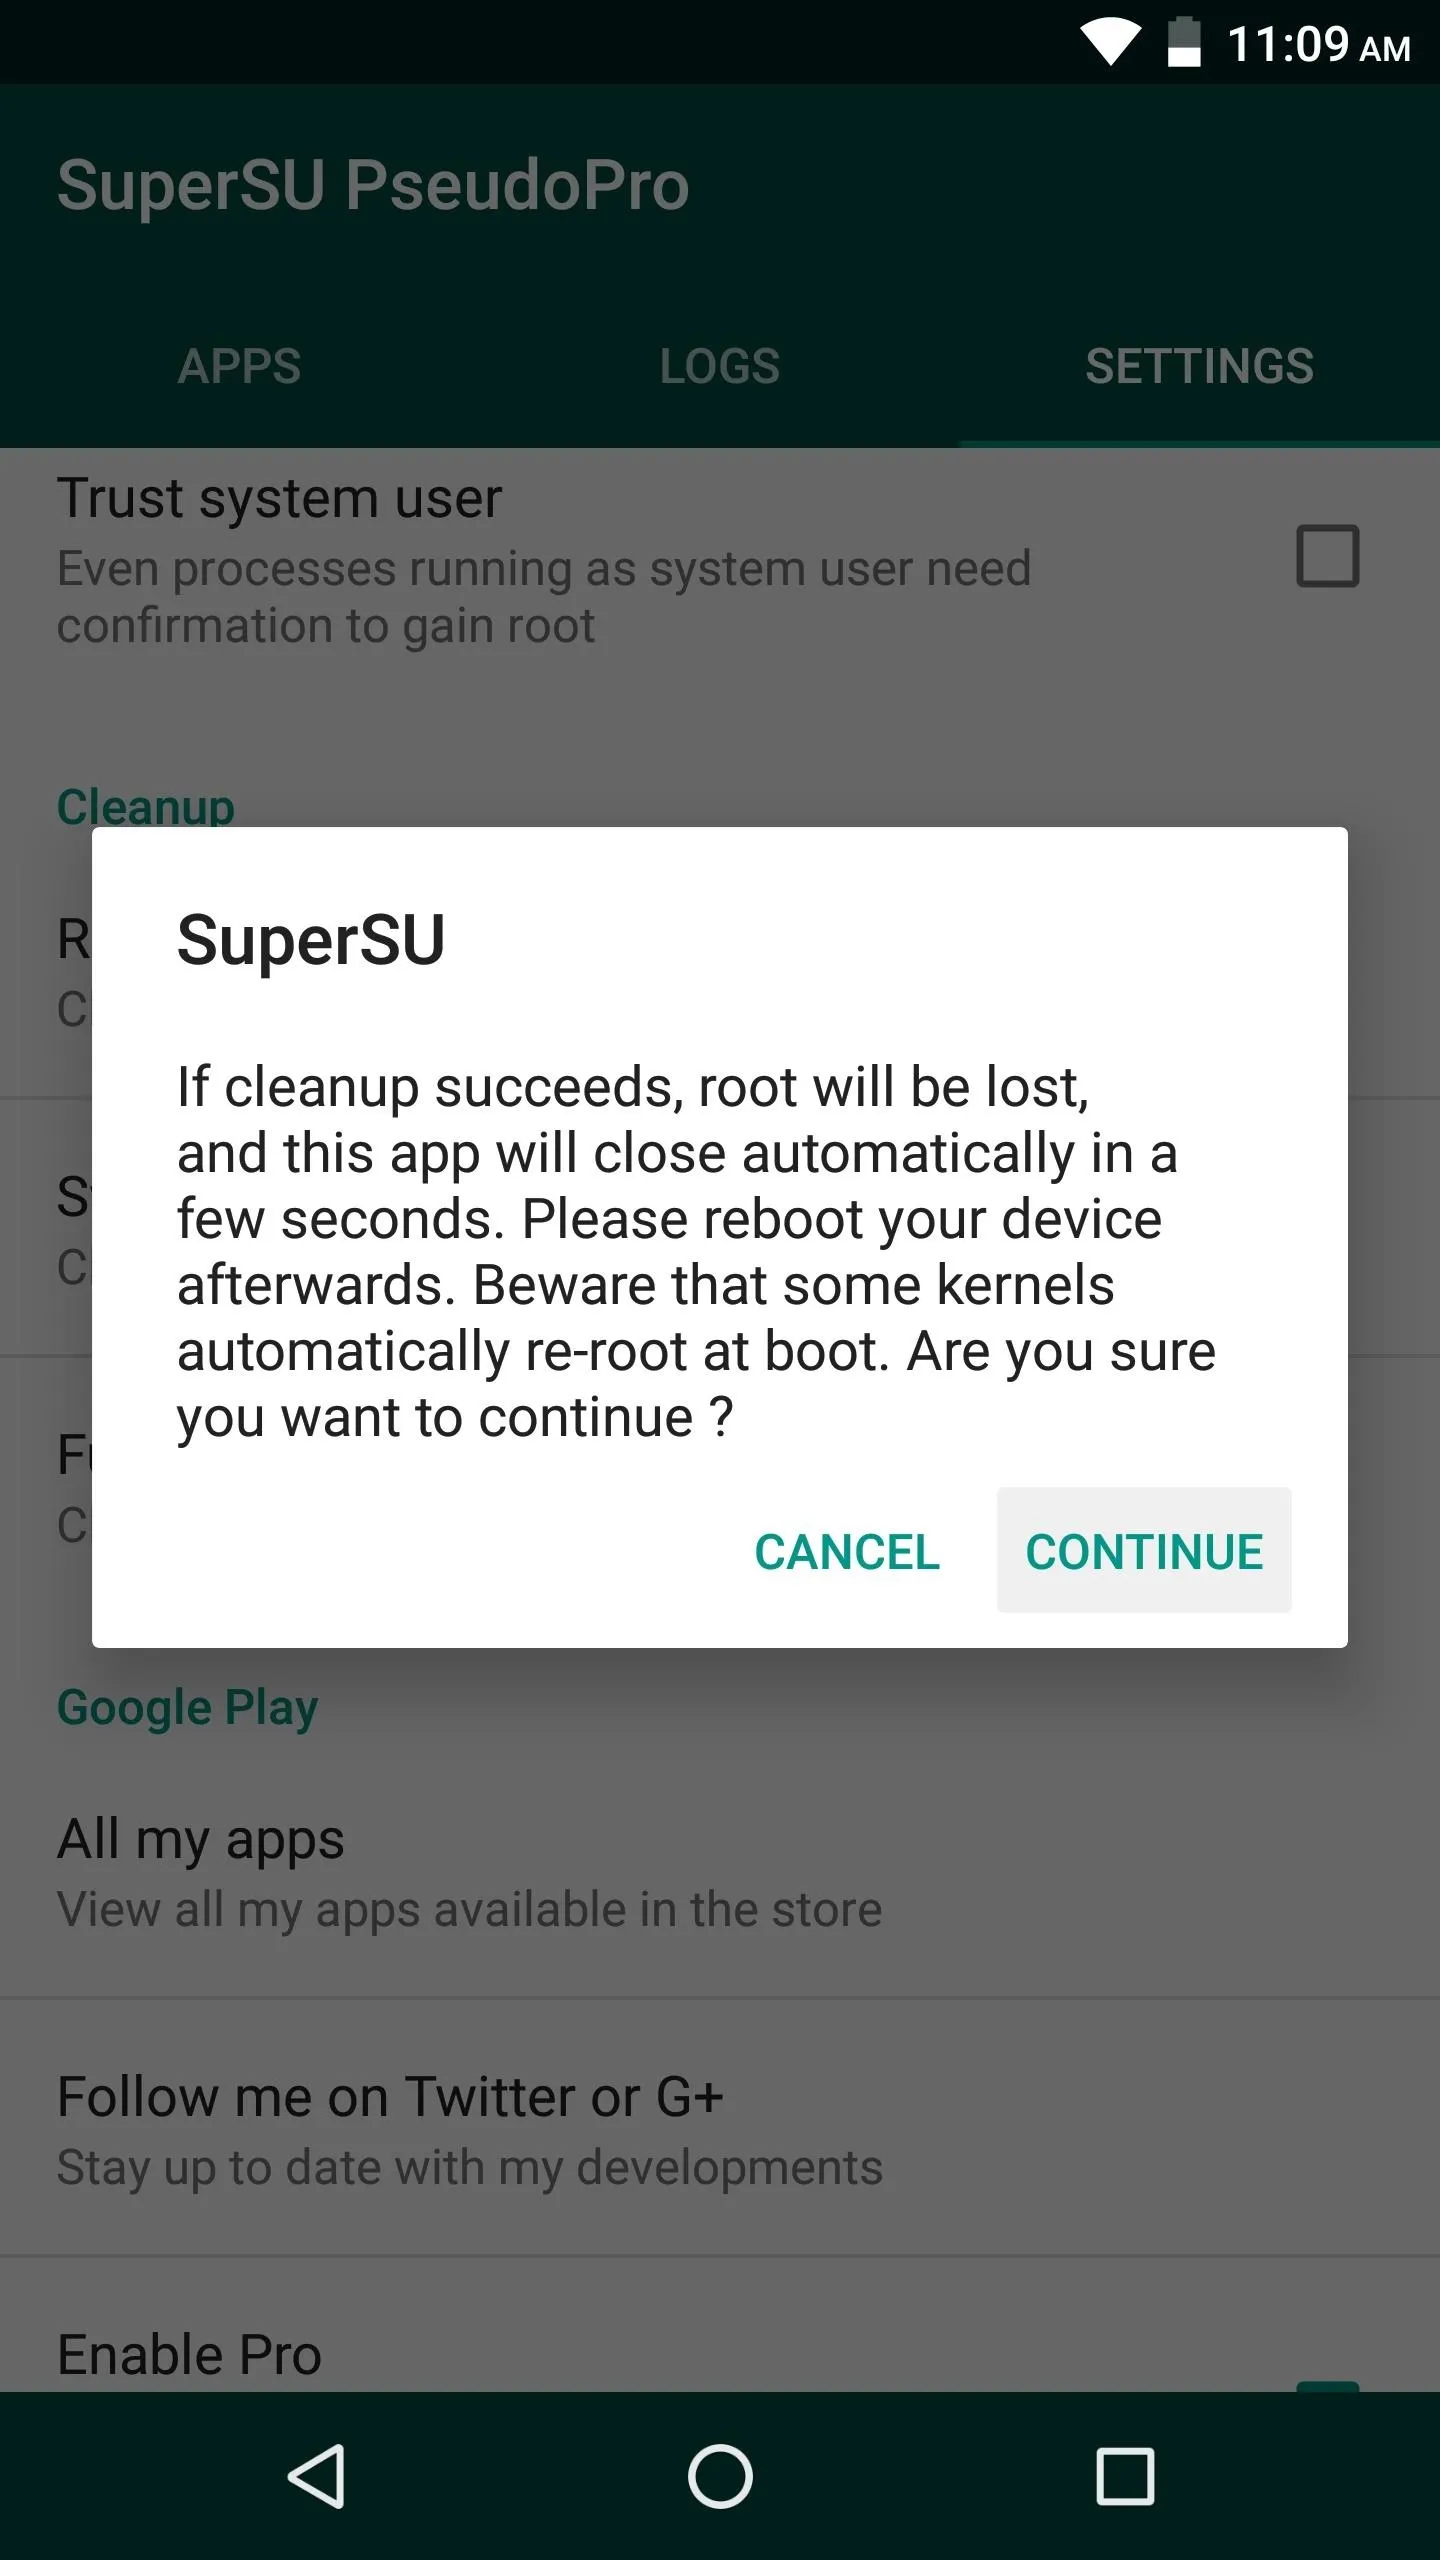
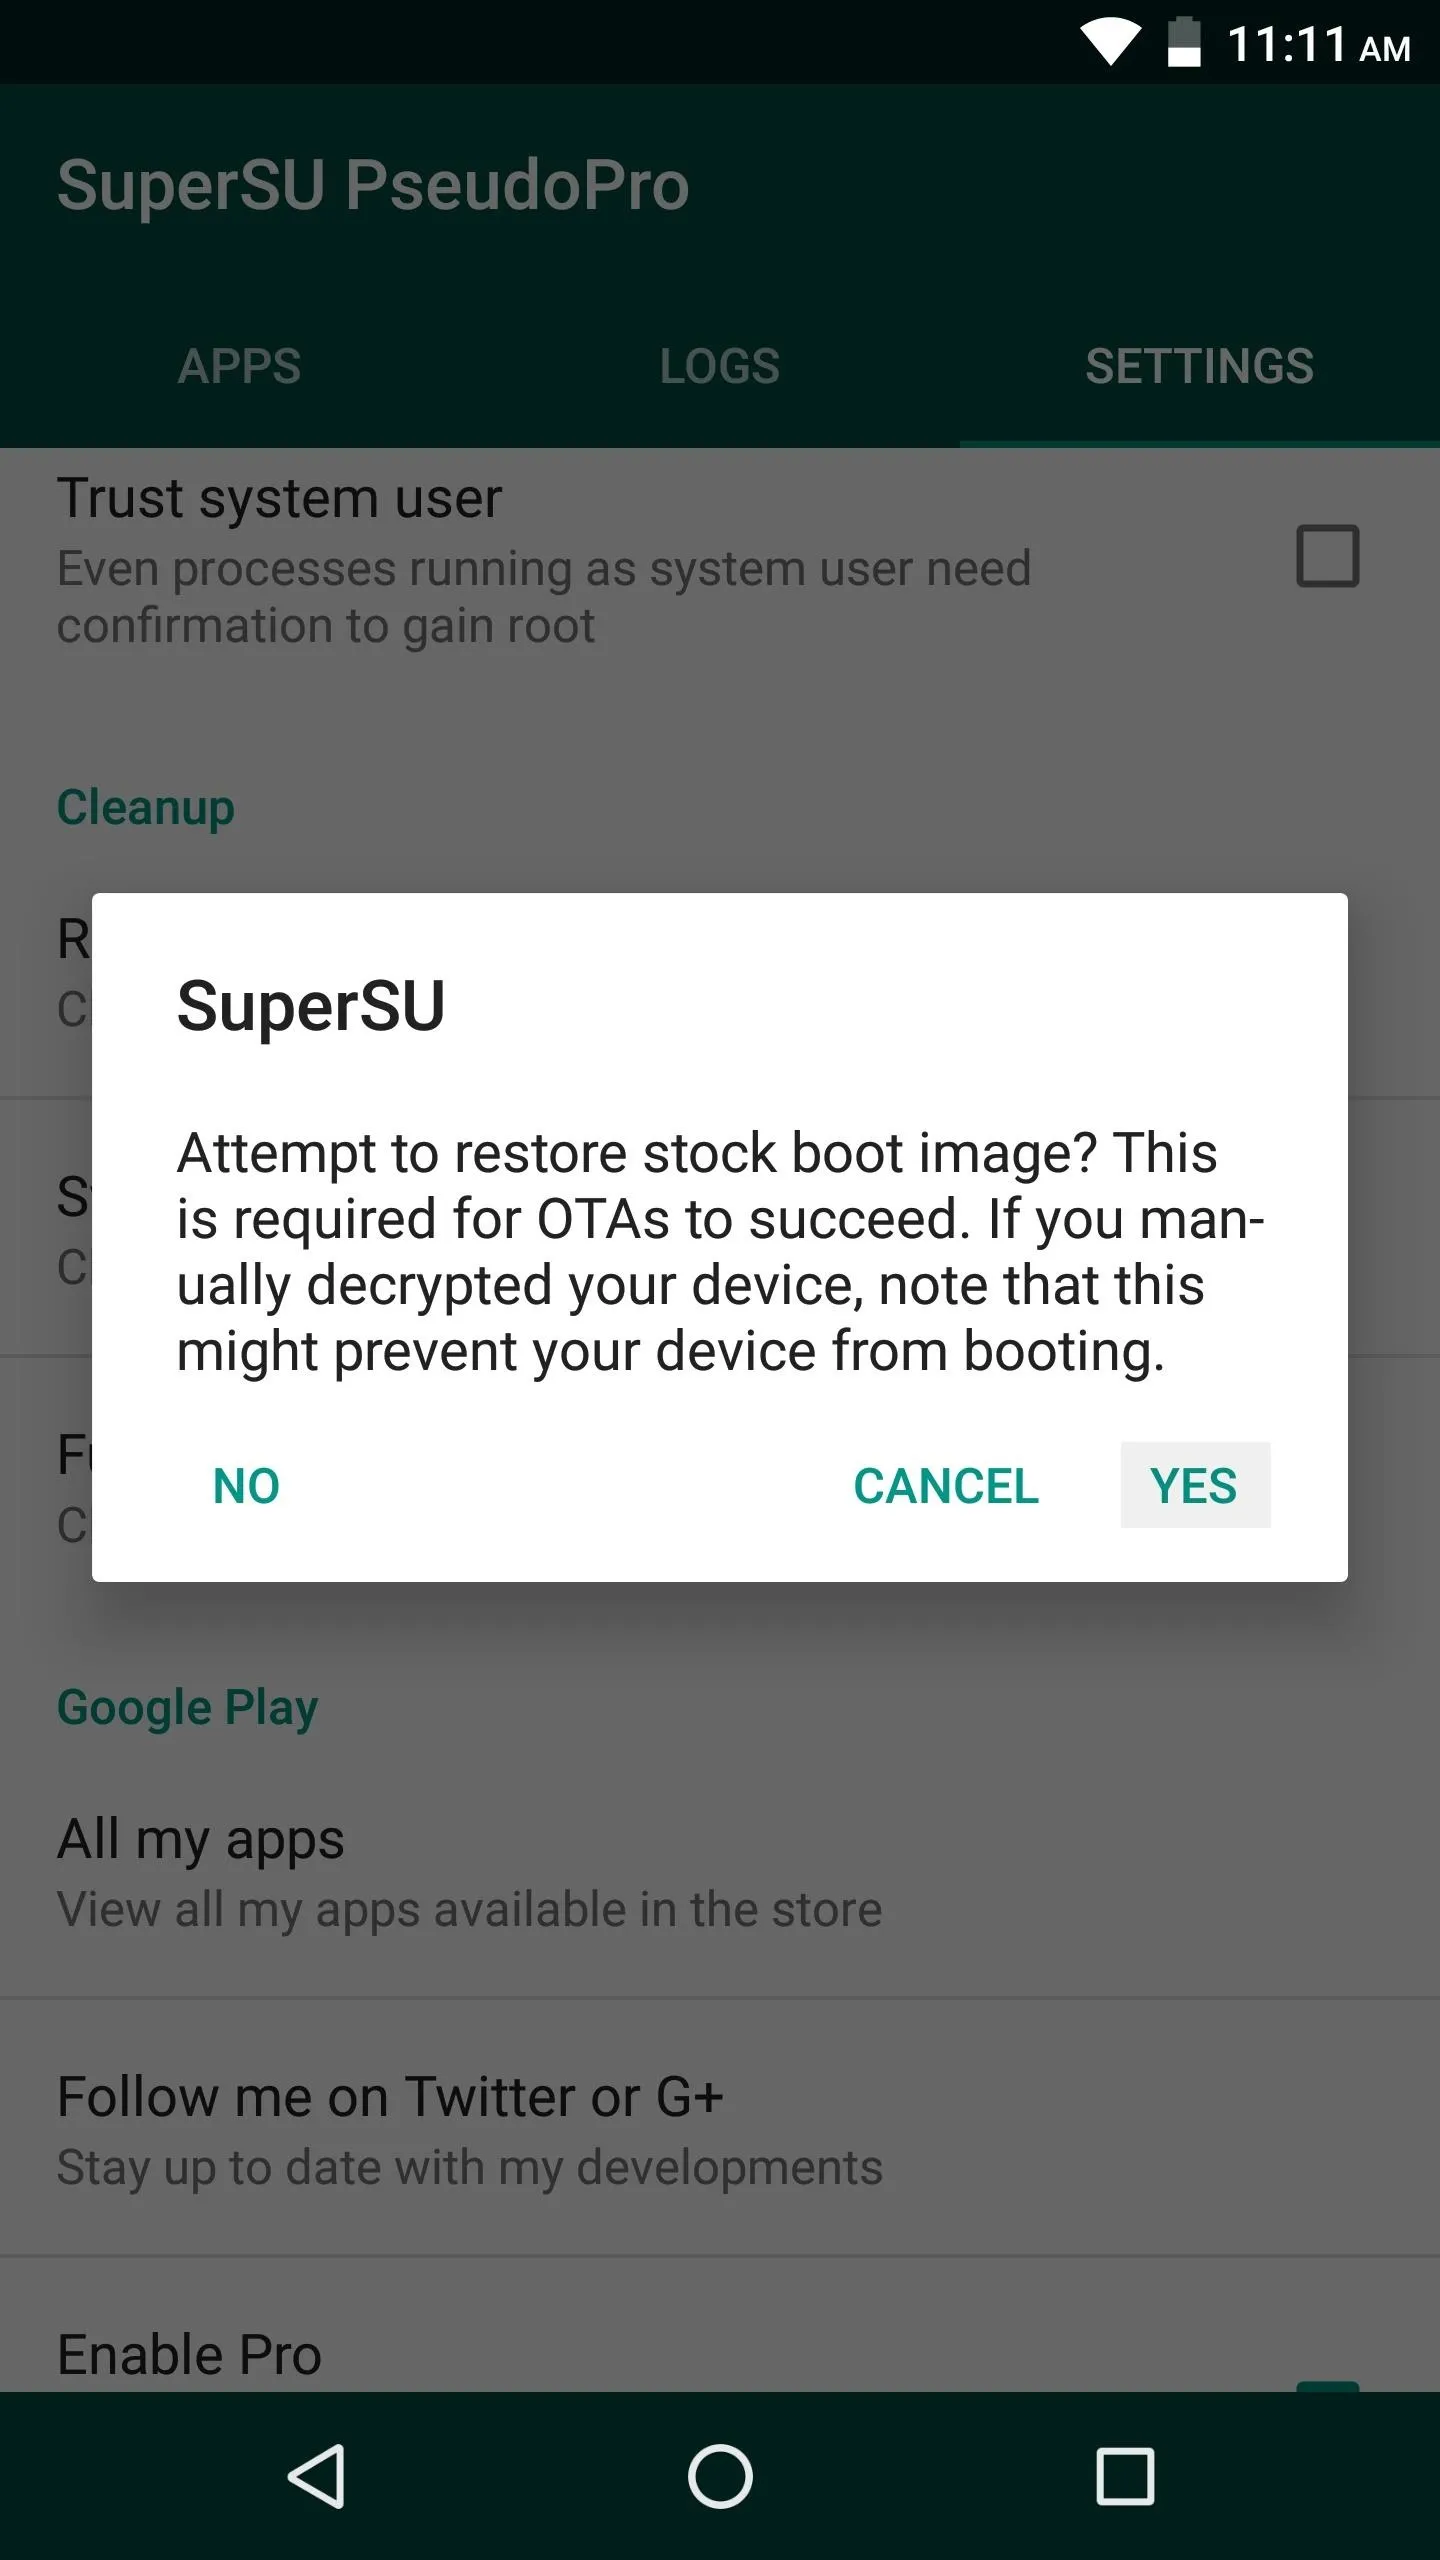
First, open your SuperSU app and head to the Settings tab, then scroll down and select the "Full unroot" option. From here, tap "Continue" on the first popup, then SuperSU will ask if you'd like to restore your stock boot image — make sure to tap "Yes" here. Finally, it'll ask if you want to restore the stock recovery image, but you'll still need TWRP to flash Magisk, so tap "No." After a few seconds, your phone will reboot.
Download the Boot Image Signer (Some Phones)
If your device received the May 2017 security patches that altered the Android Verified Boot process, there's an extra ZIP you'll need to flash right after installing Magisk. At the time of this writing, this only applies to Google's Nexus devices, though more manufacturers may incorporate these changes soon.
So if your phone is affected by these changes, make sure to grab this ZIP and save it to your SD card or internal storage. If you're unsure, it would also be a good idea to download the ZIP, as it won't break anything even if your device is using the old Android Verified Boot system.
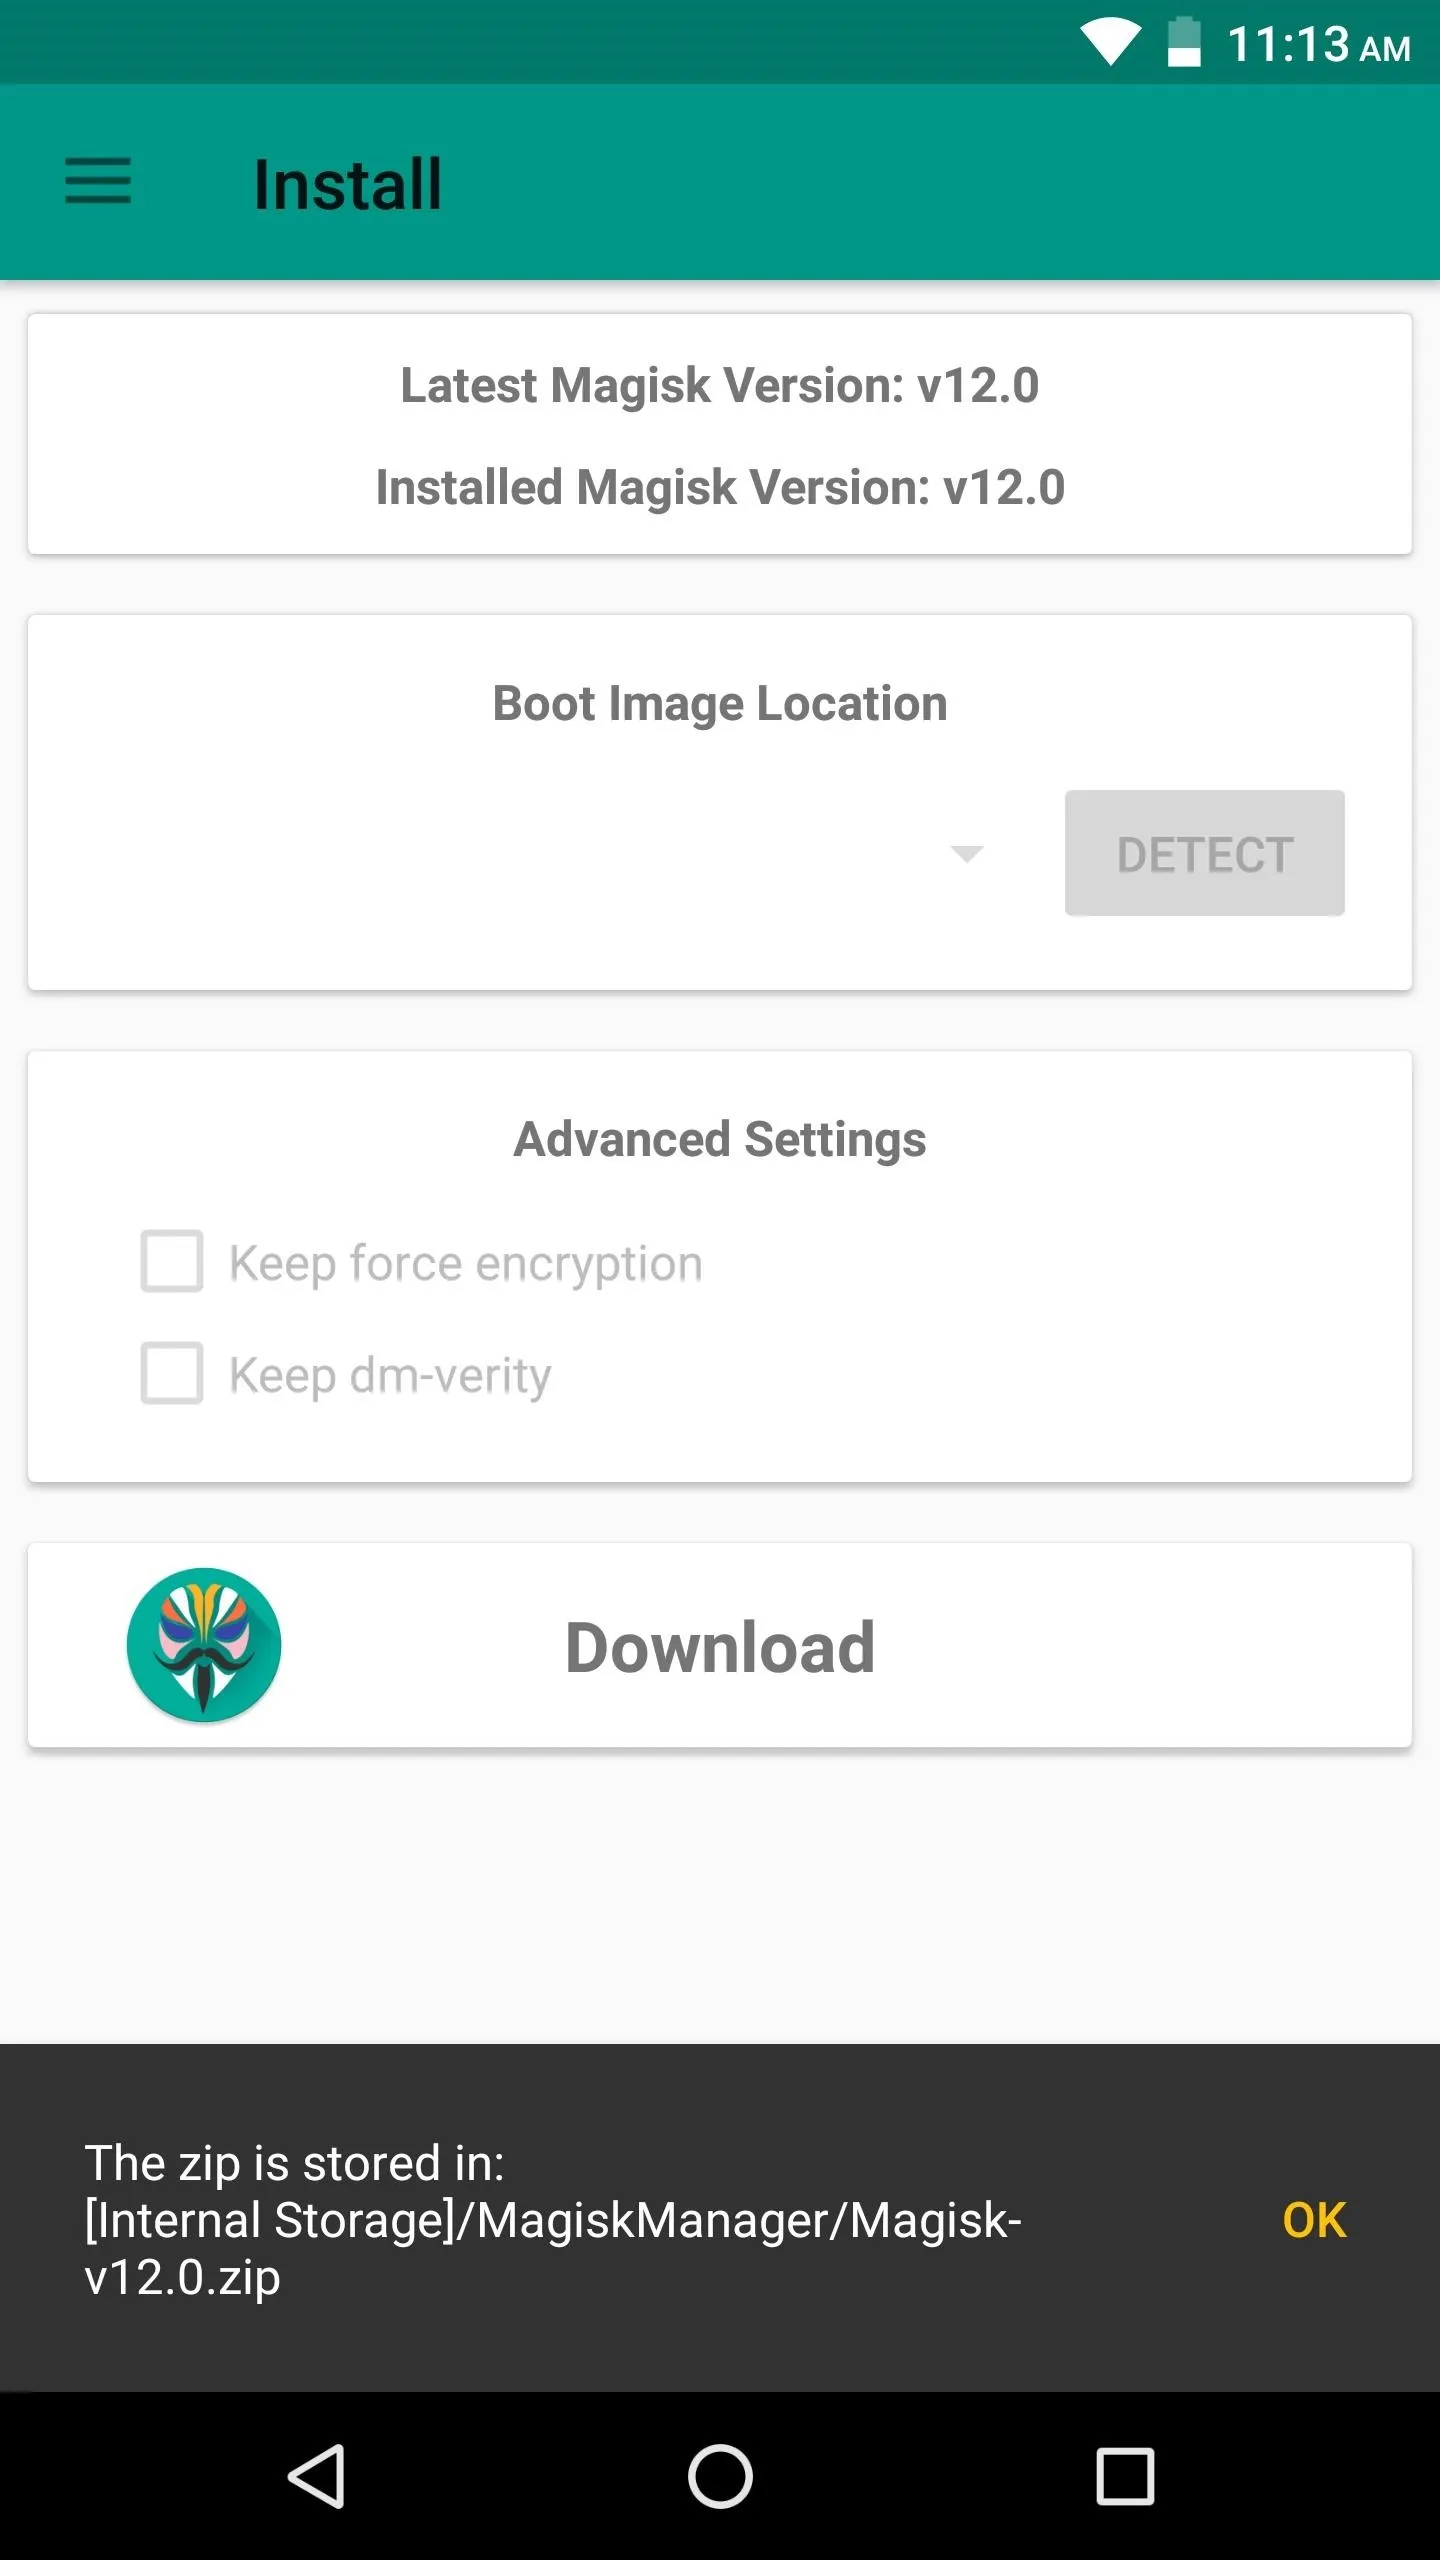
Download the Magisk ZIP
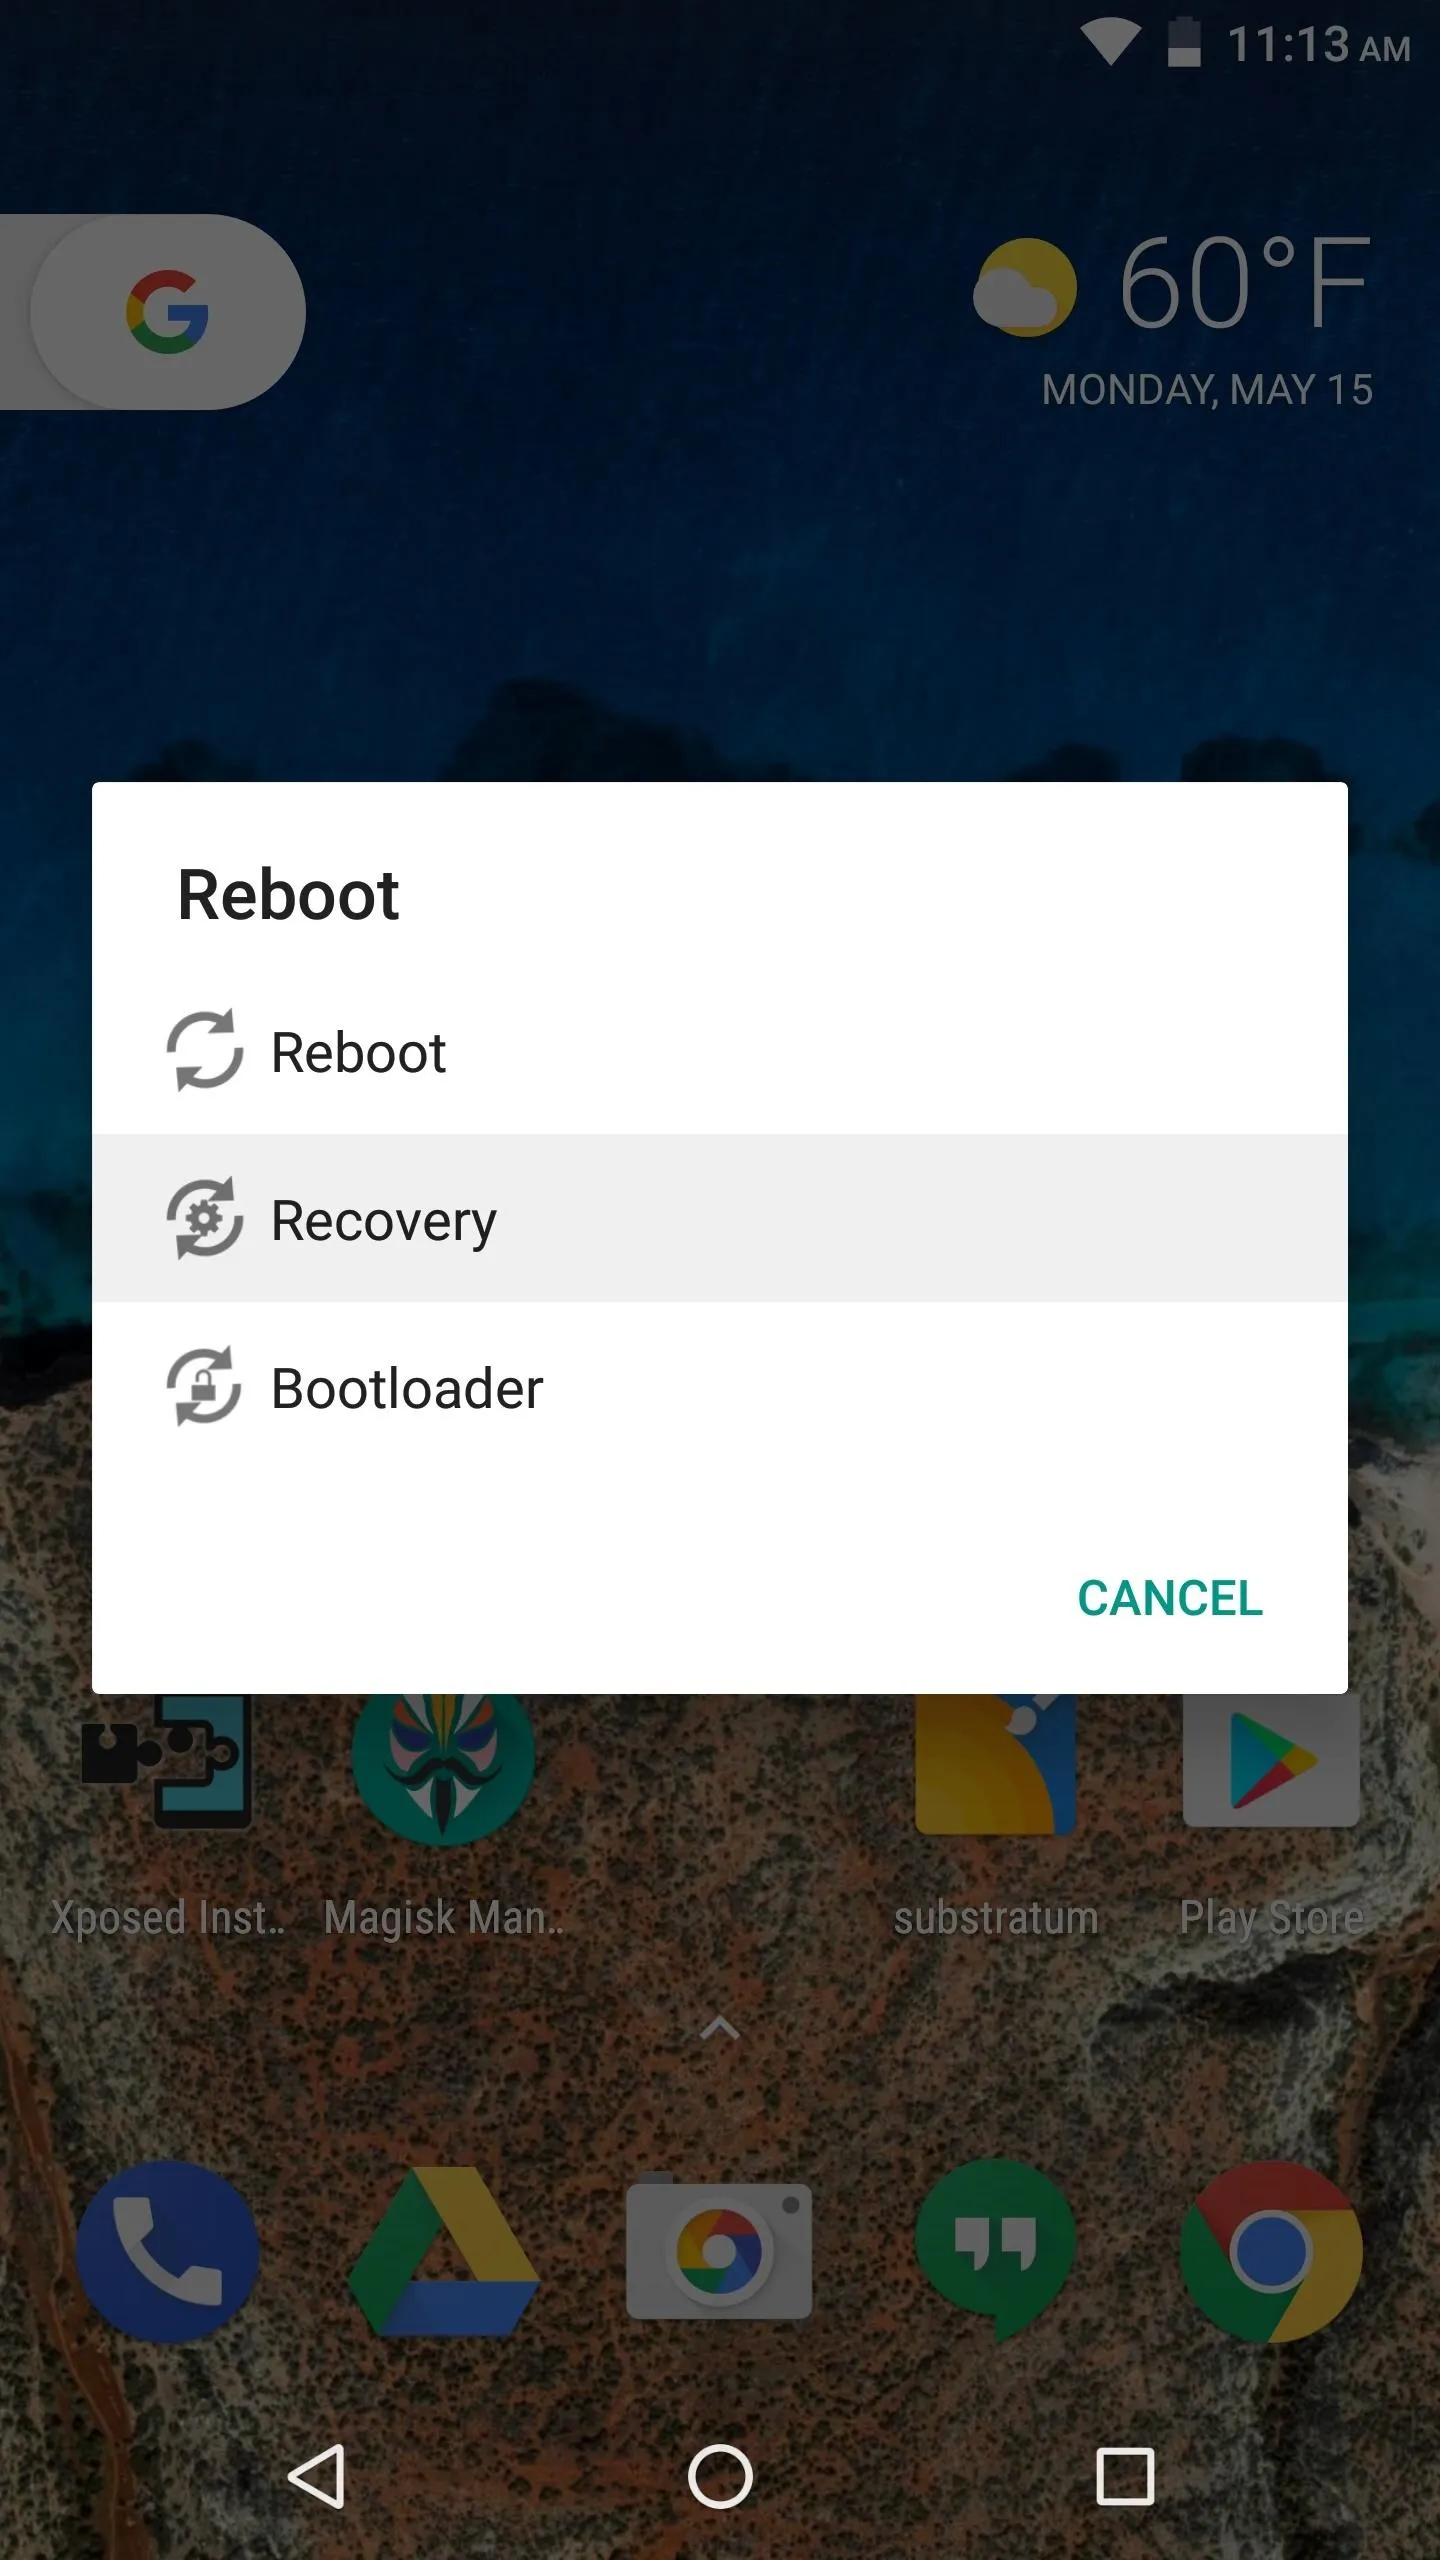
Next up, install the Magisk Manager app. From there, open the app and head to the Install section, then tap the "Download" button towards the bottom of the screen. Once the file finishes downloading, go ahead and boot your phone into recovery mode.
Note: If you previously installed Magisk through the Magisk Manager app using SuperSU, you'll still have to download the flashable ZIP at this point.
Flash Magisk in TWRP
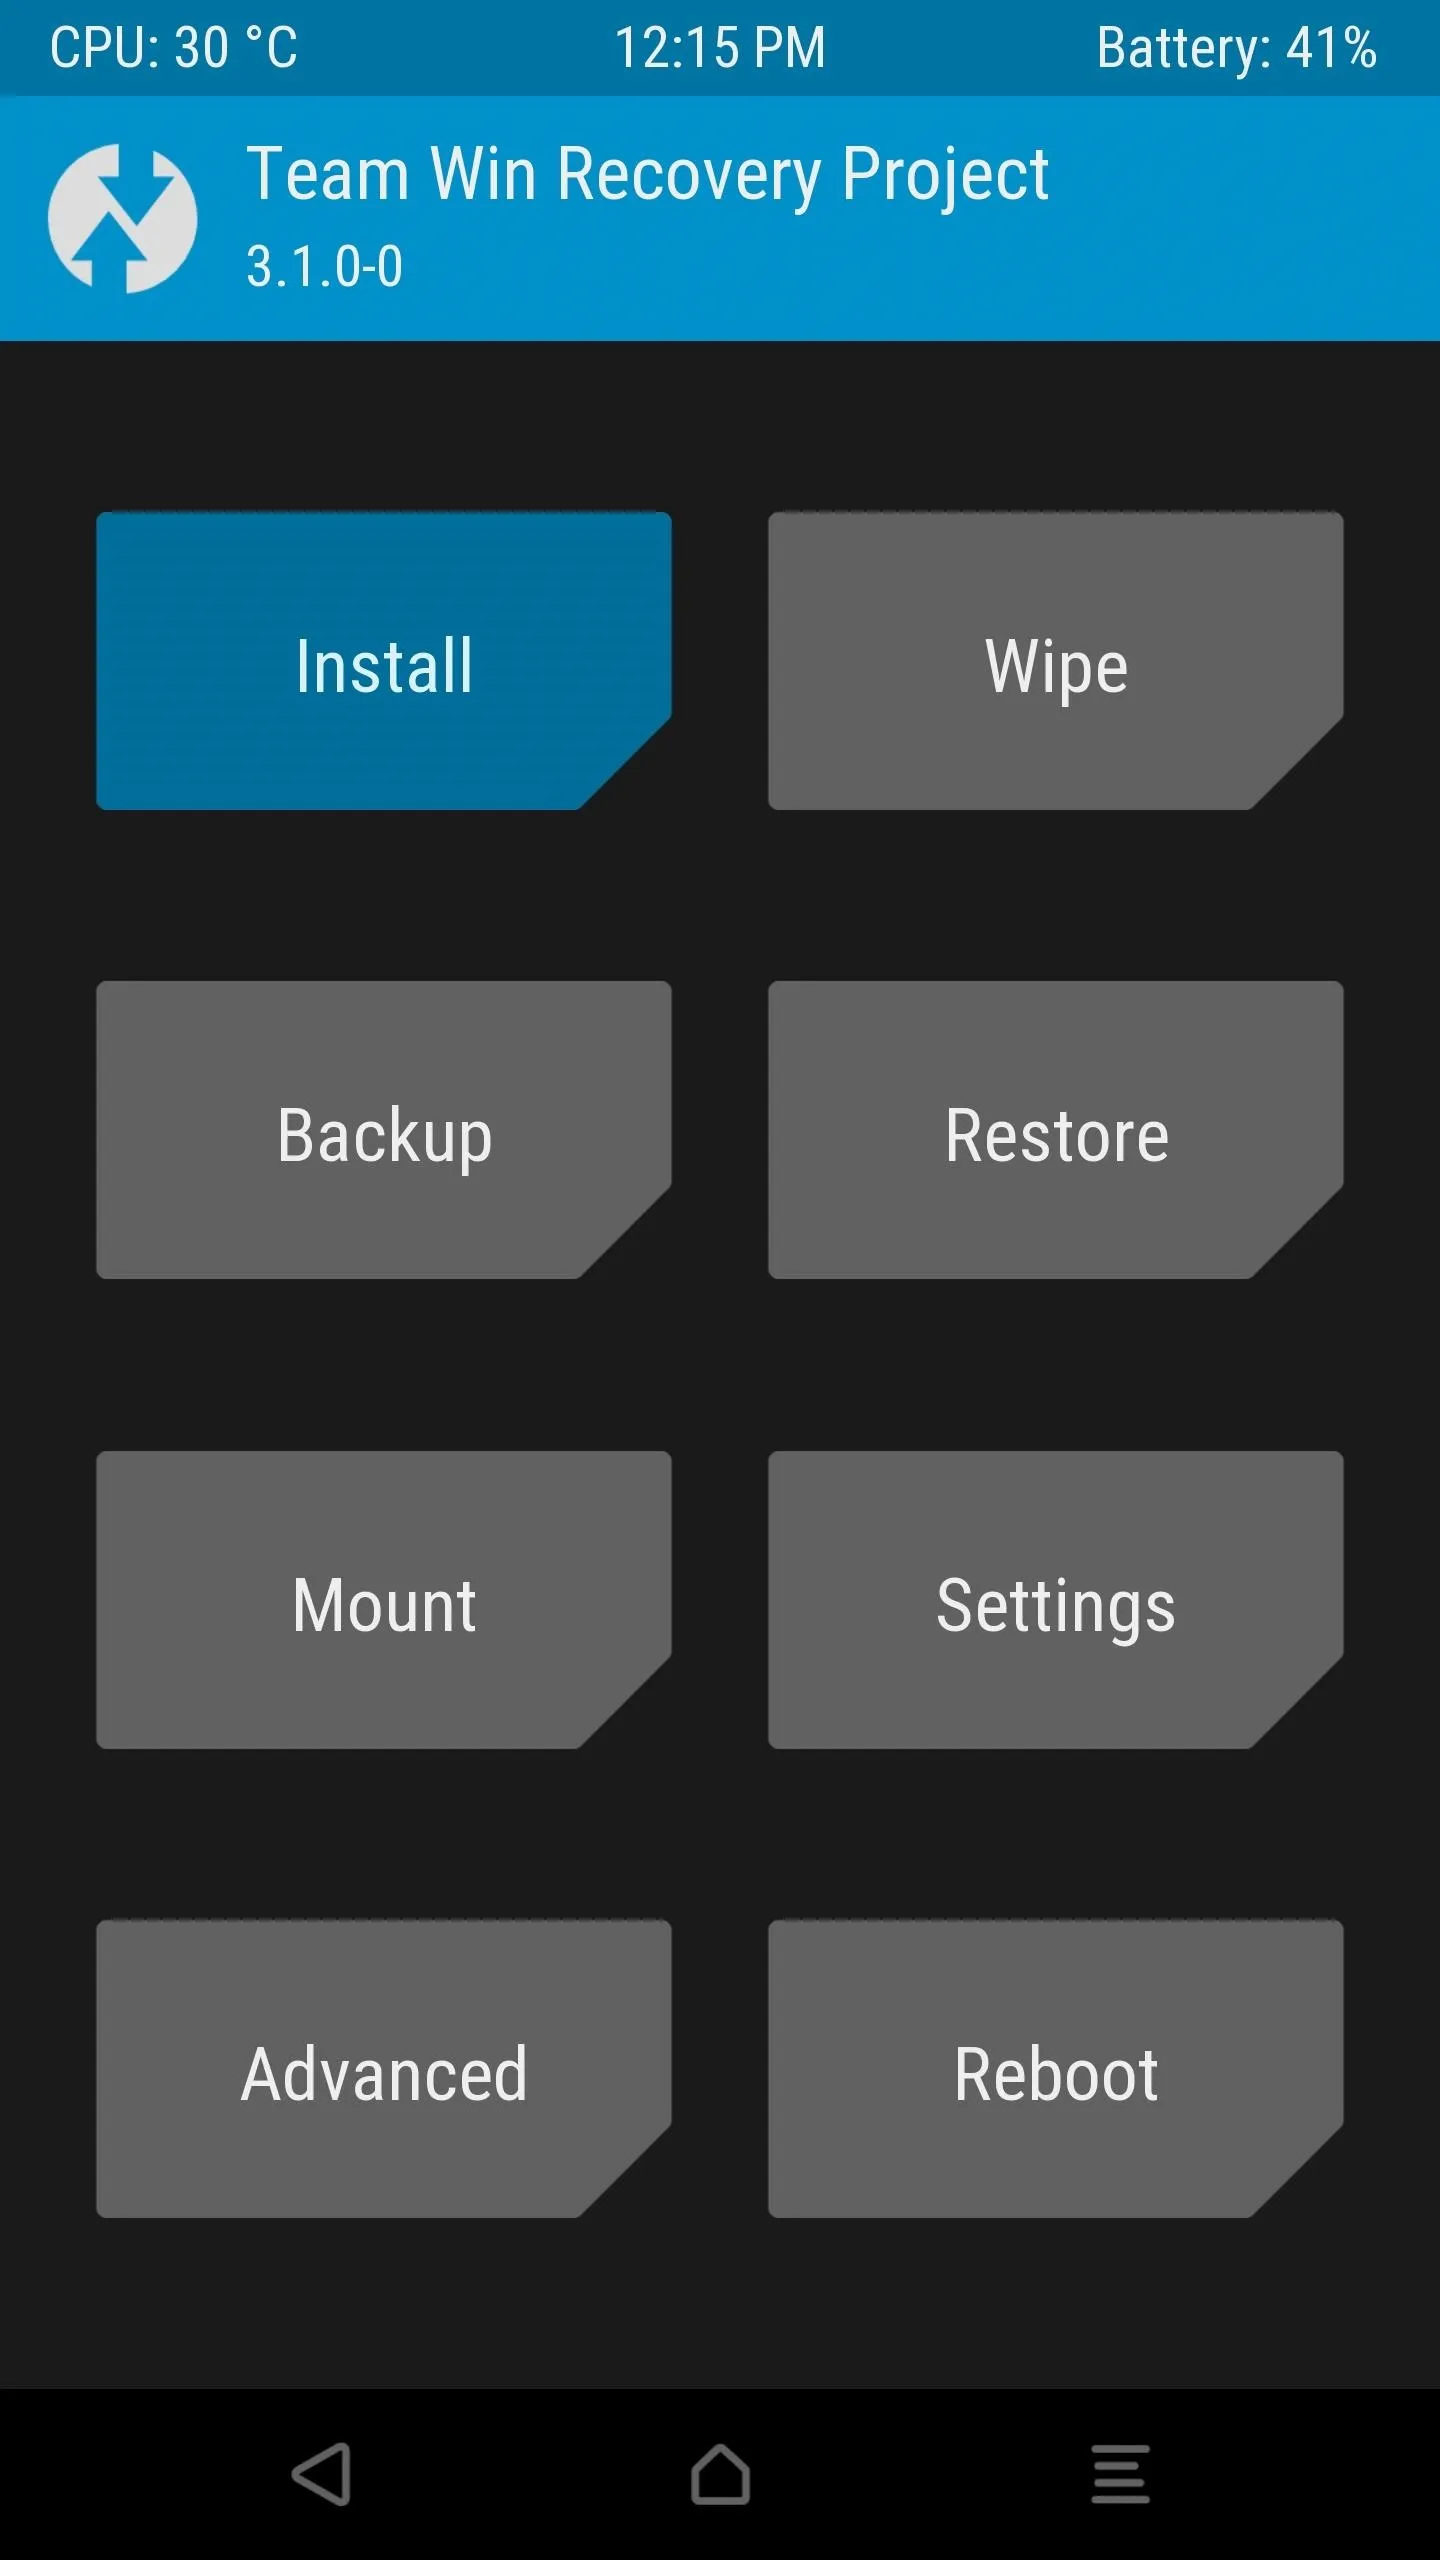
At this point, you're ready to flash Magisk, but it's always a good idea to make a full NANDroid backup before flashing anything, so make sure to take care of that.
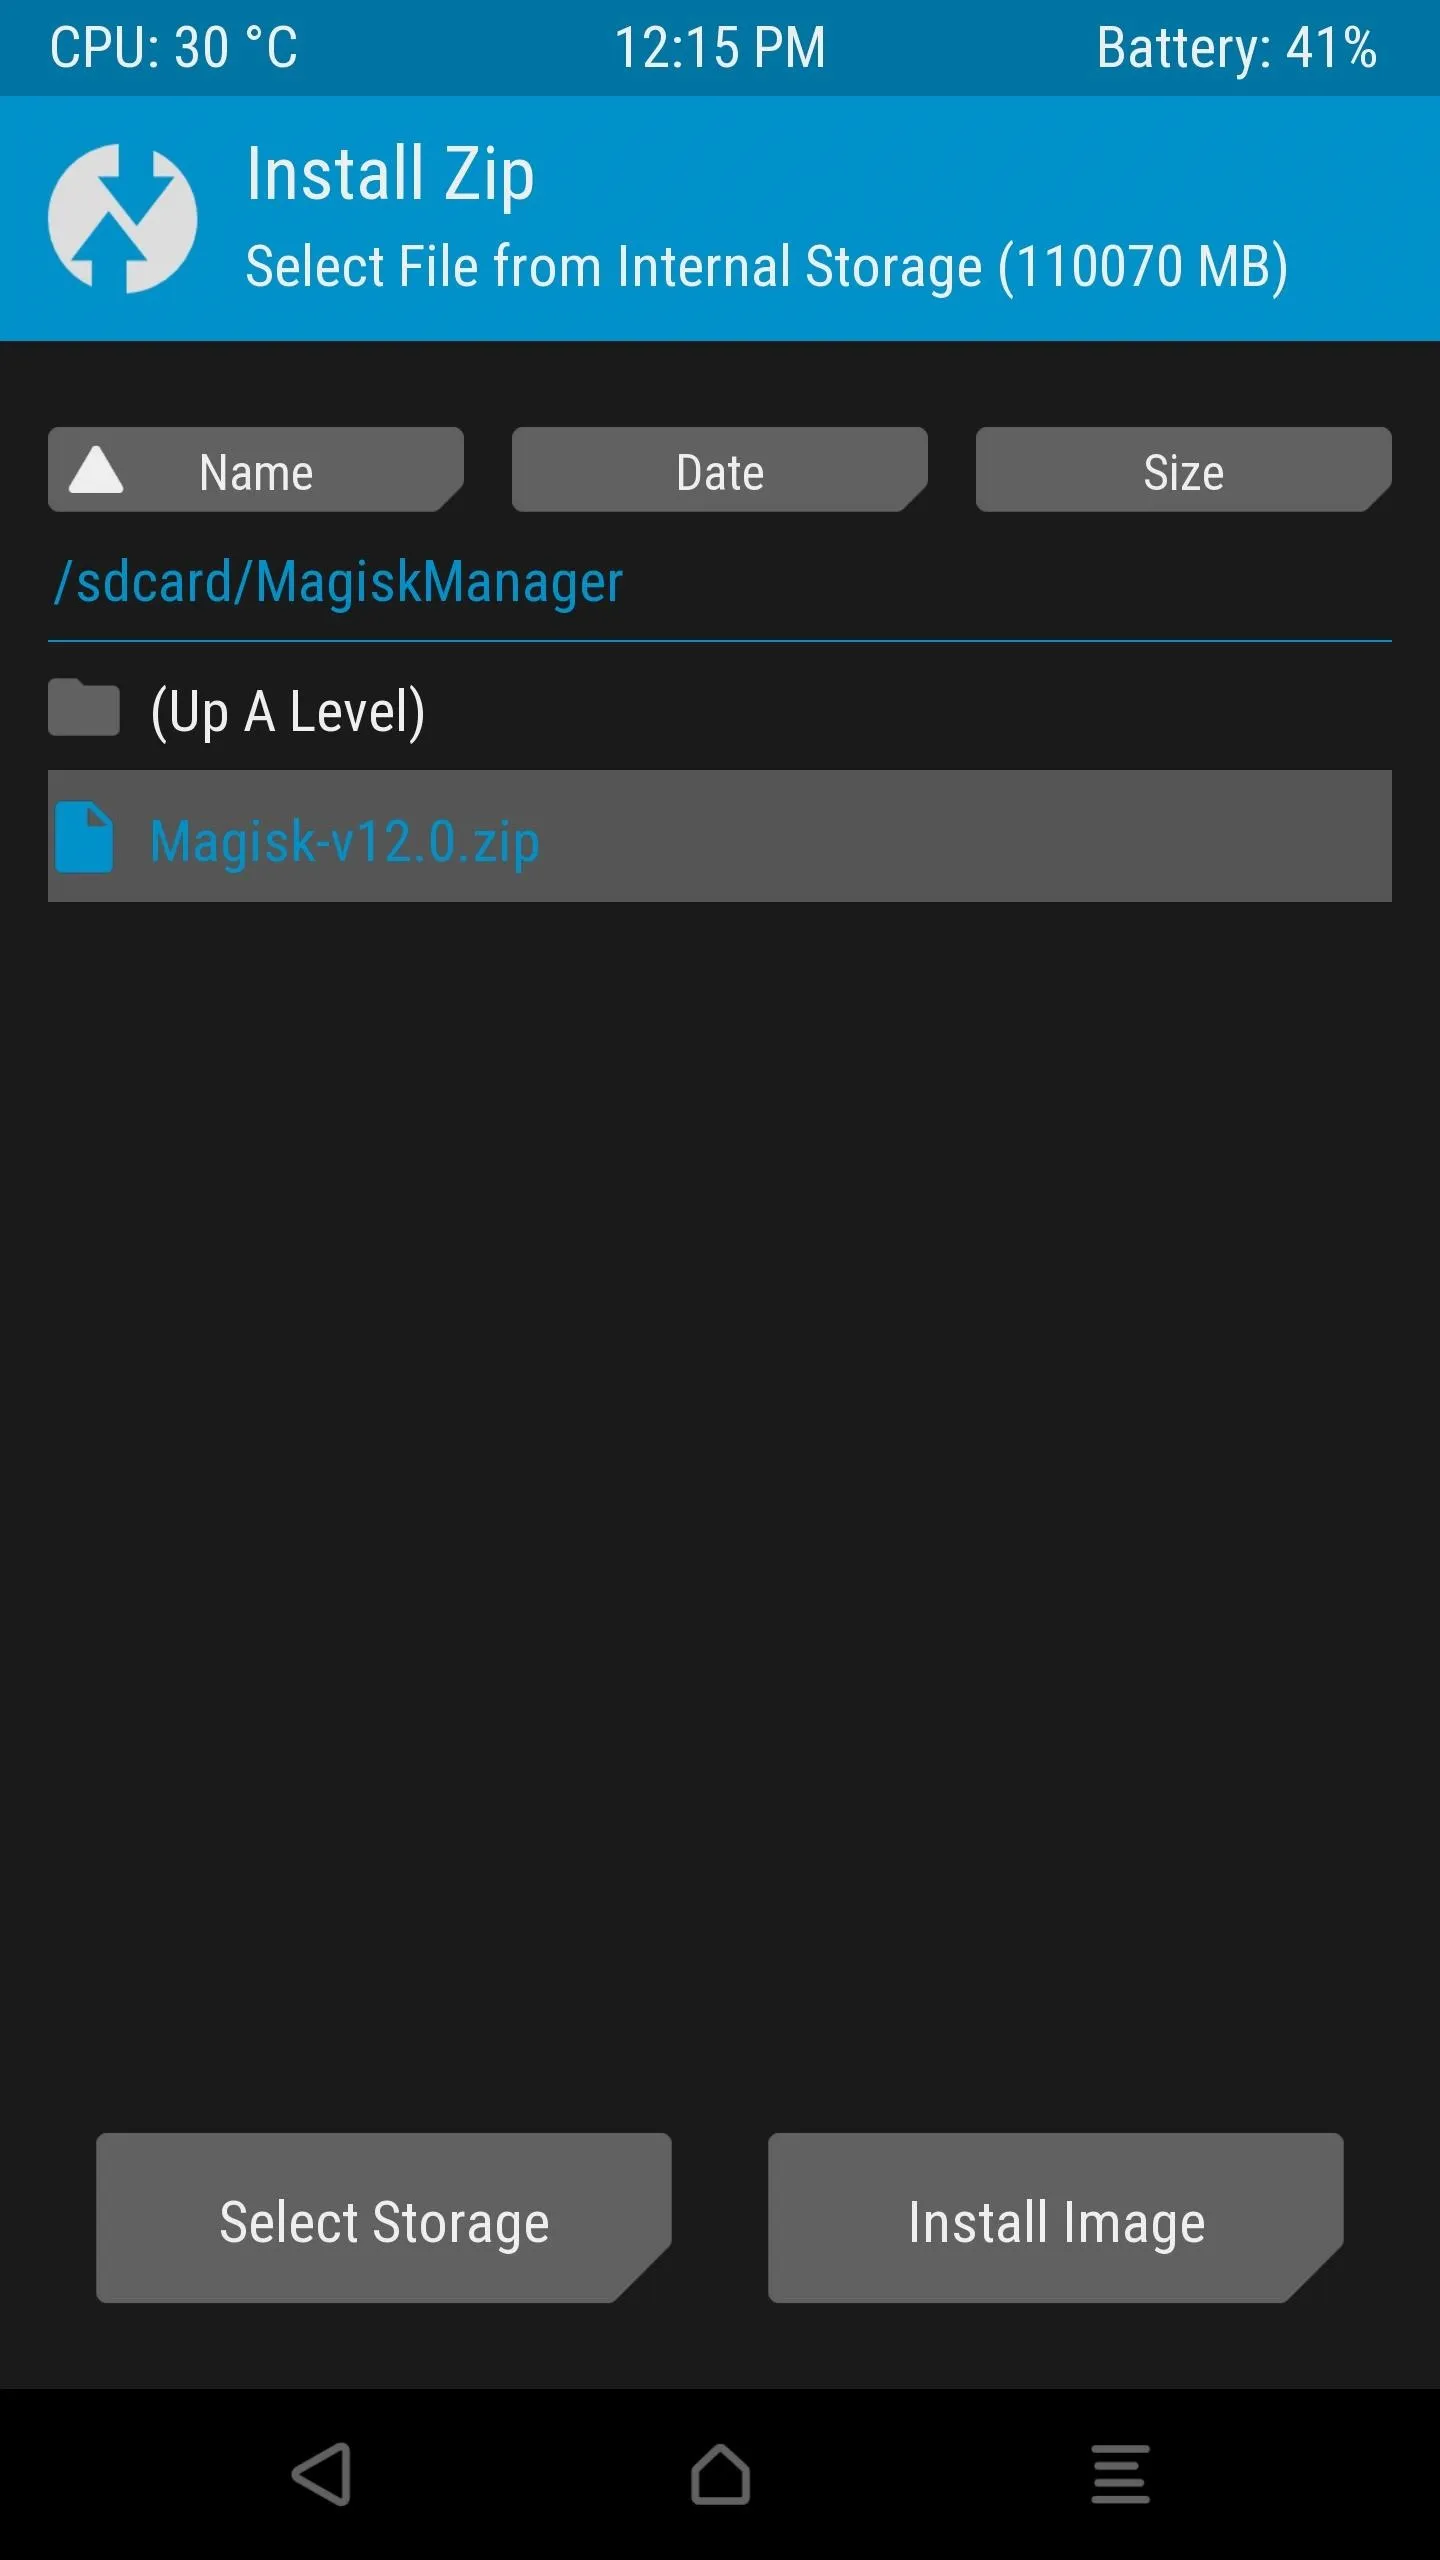
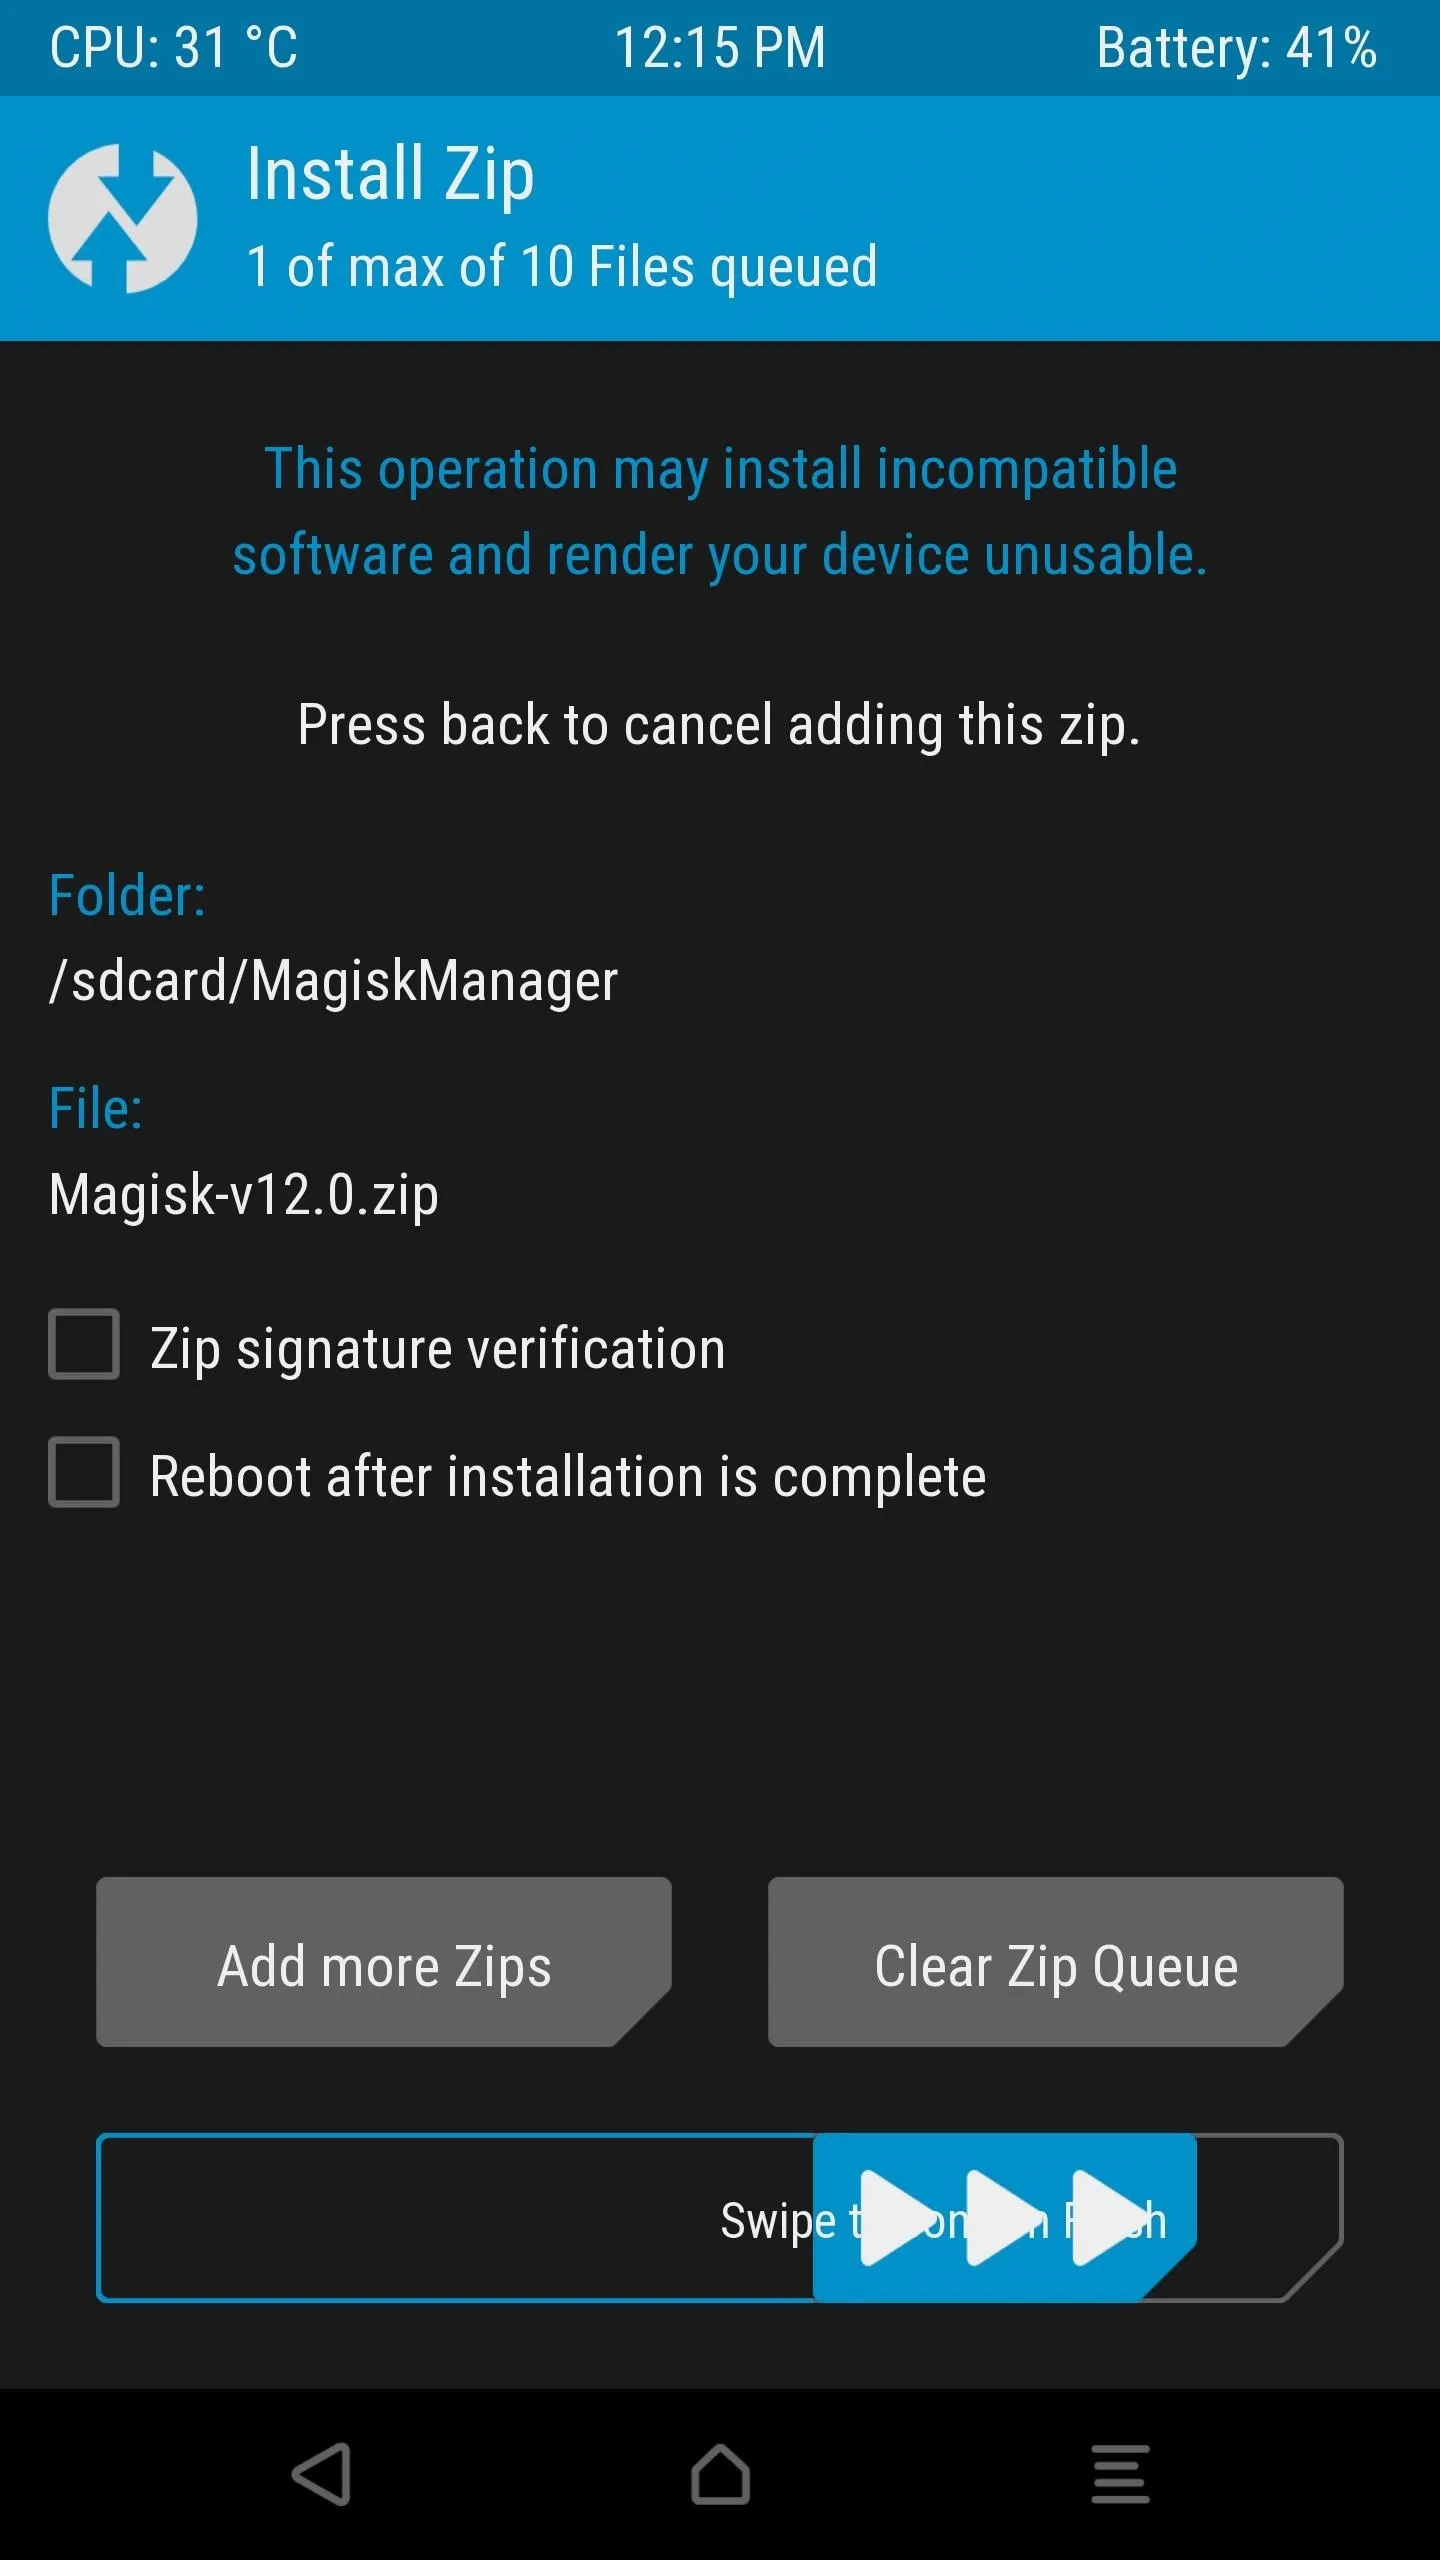
Next, tap the "Install" button in TWRP's main menu. From there, navigate to the MagiskManager folder, then select the Magisk ZIP file. If you downloaded the Boot Signer ZIP in Step 4, tap the "Add more ZIPs" button, then head to your Download folder and select the VerifiedBootSigner file at this time. After that, simply swipe the slider to install Magisk, then hit "Reboot System" when it's done.
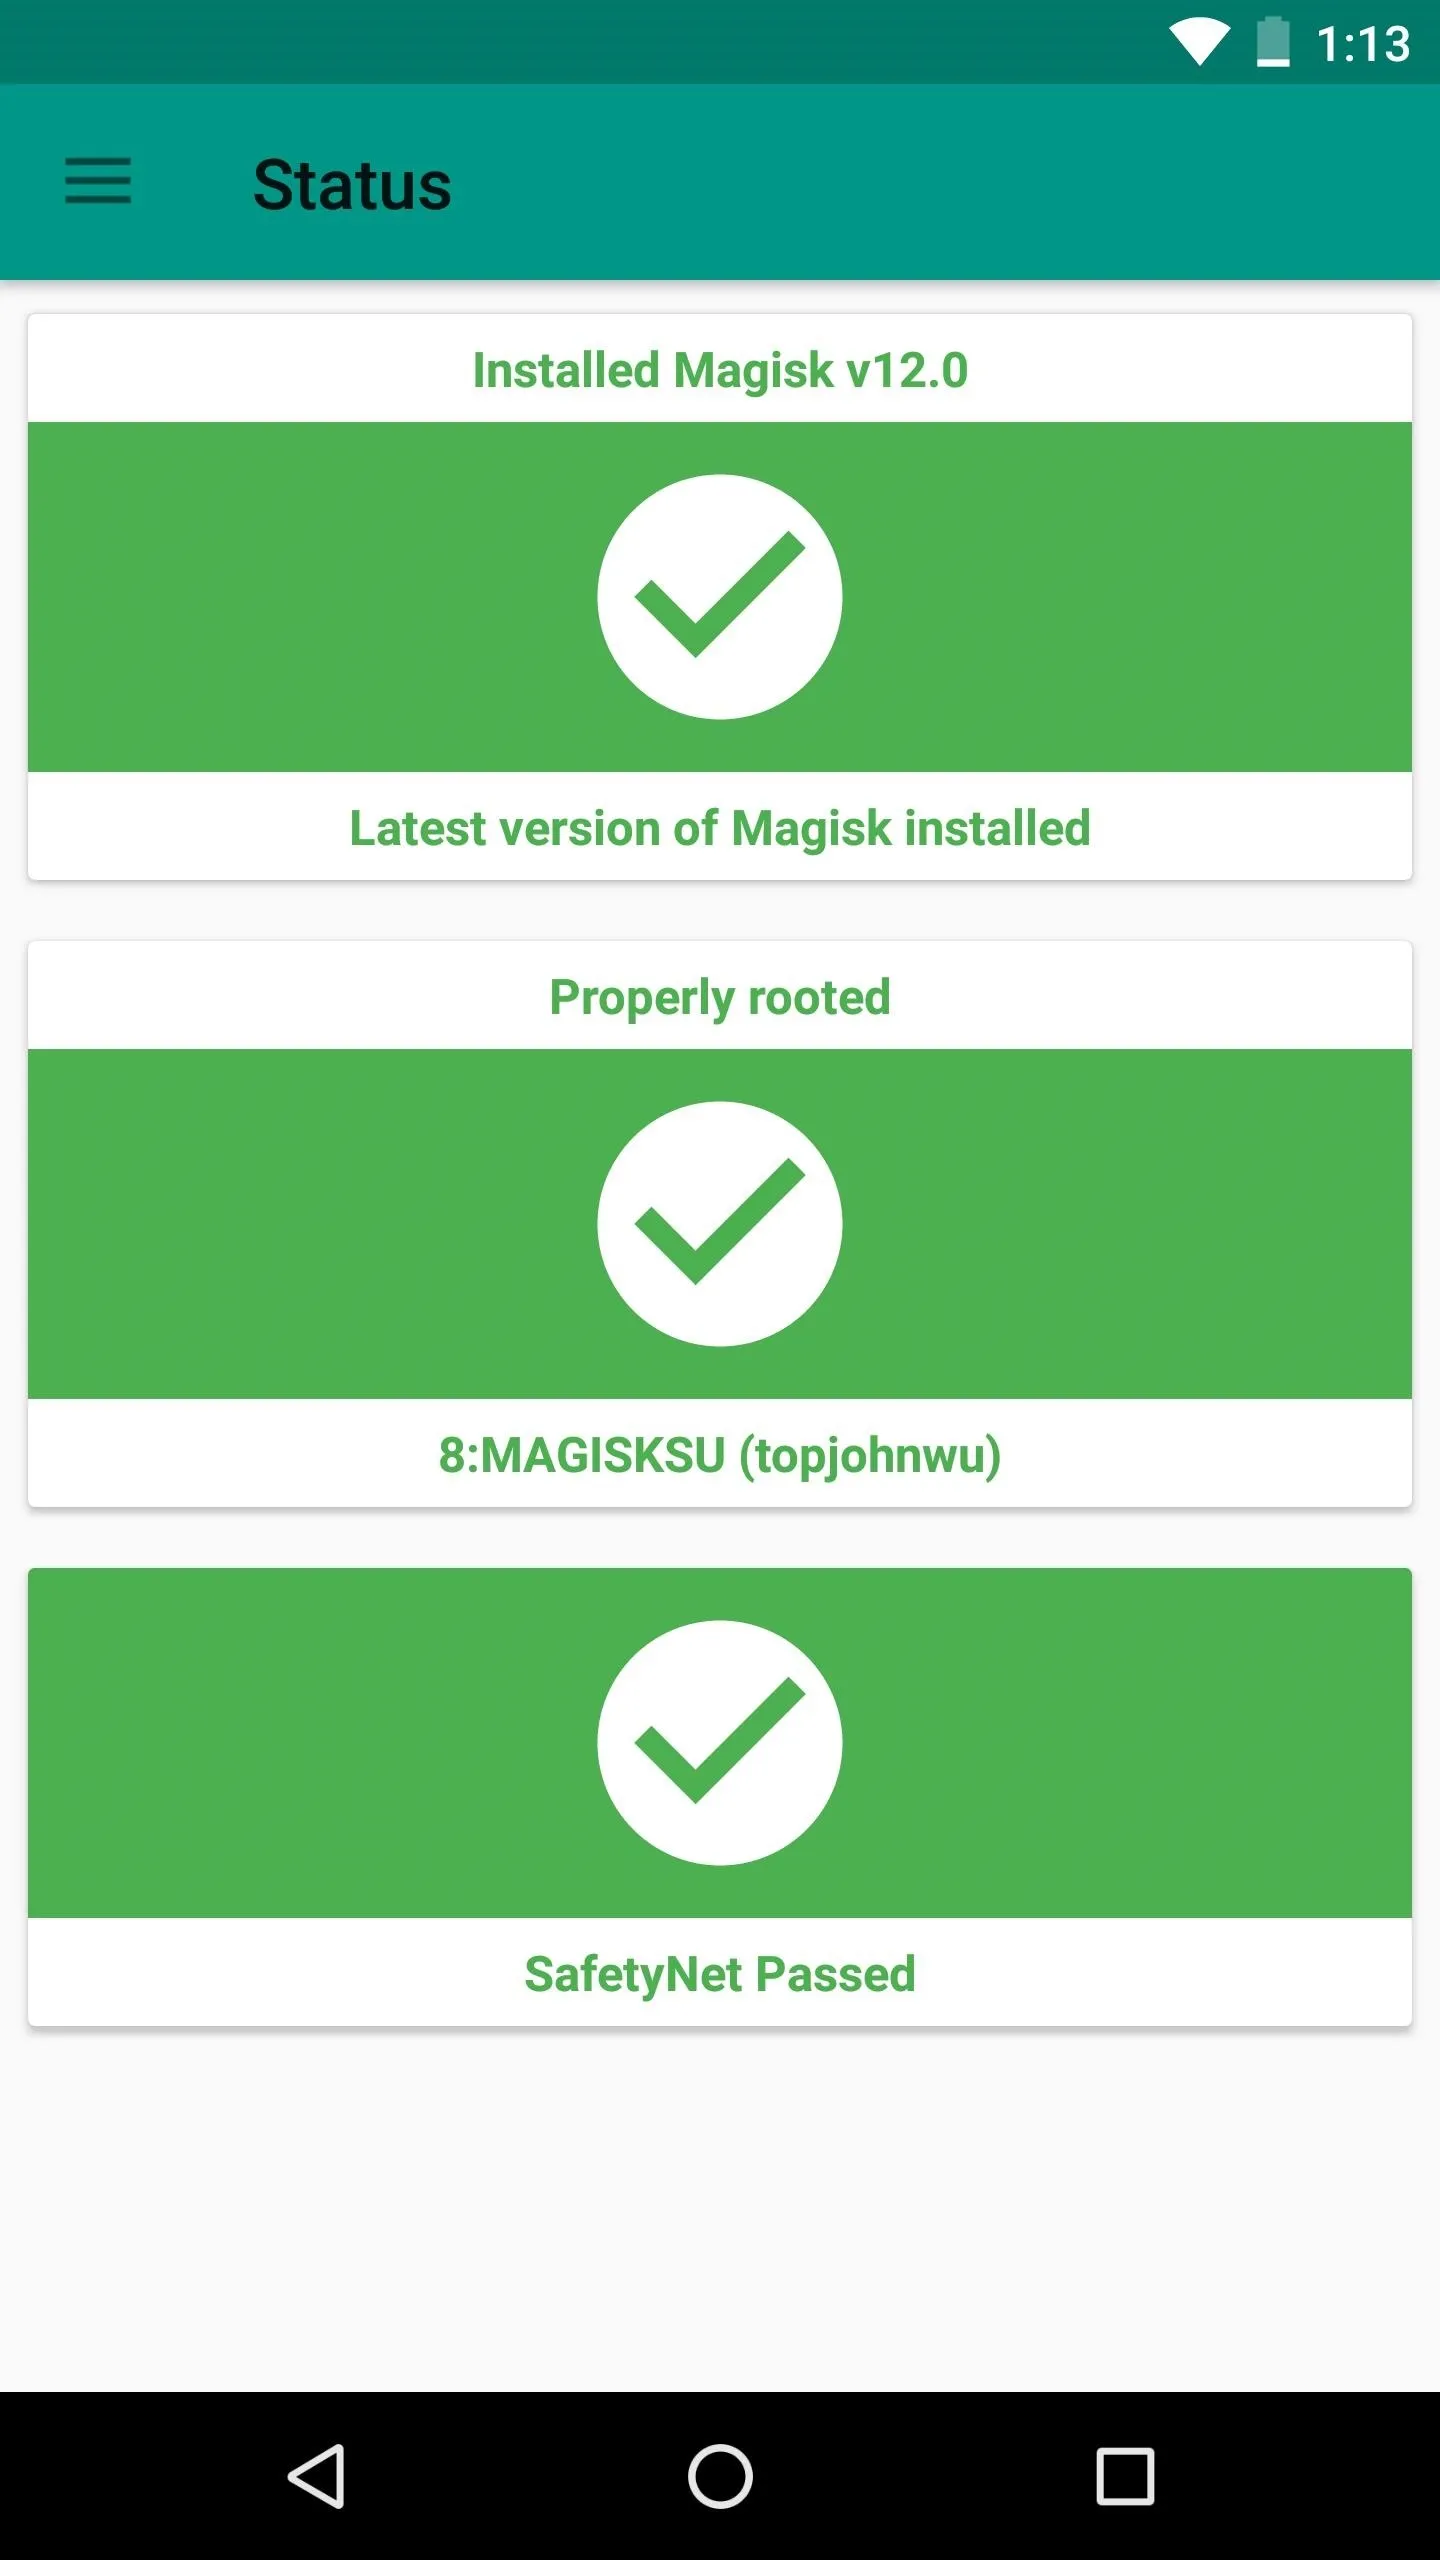
Adjust Magisk Settings & Run SafetyNet Check
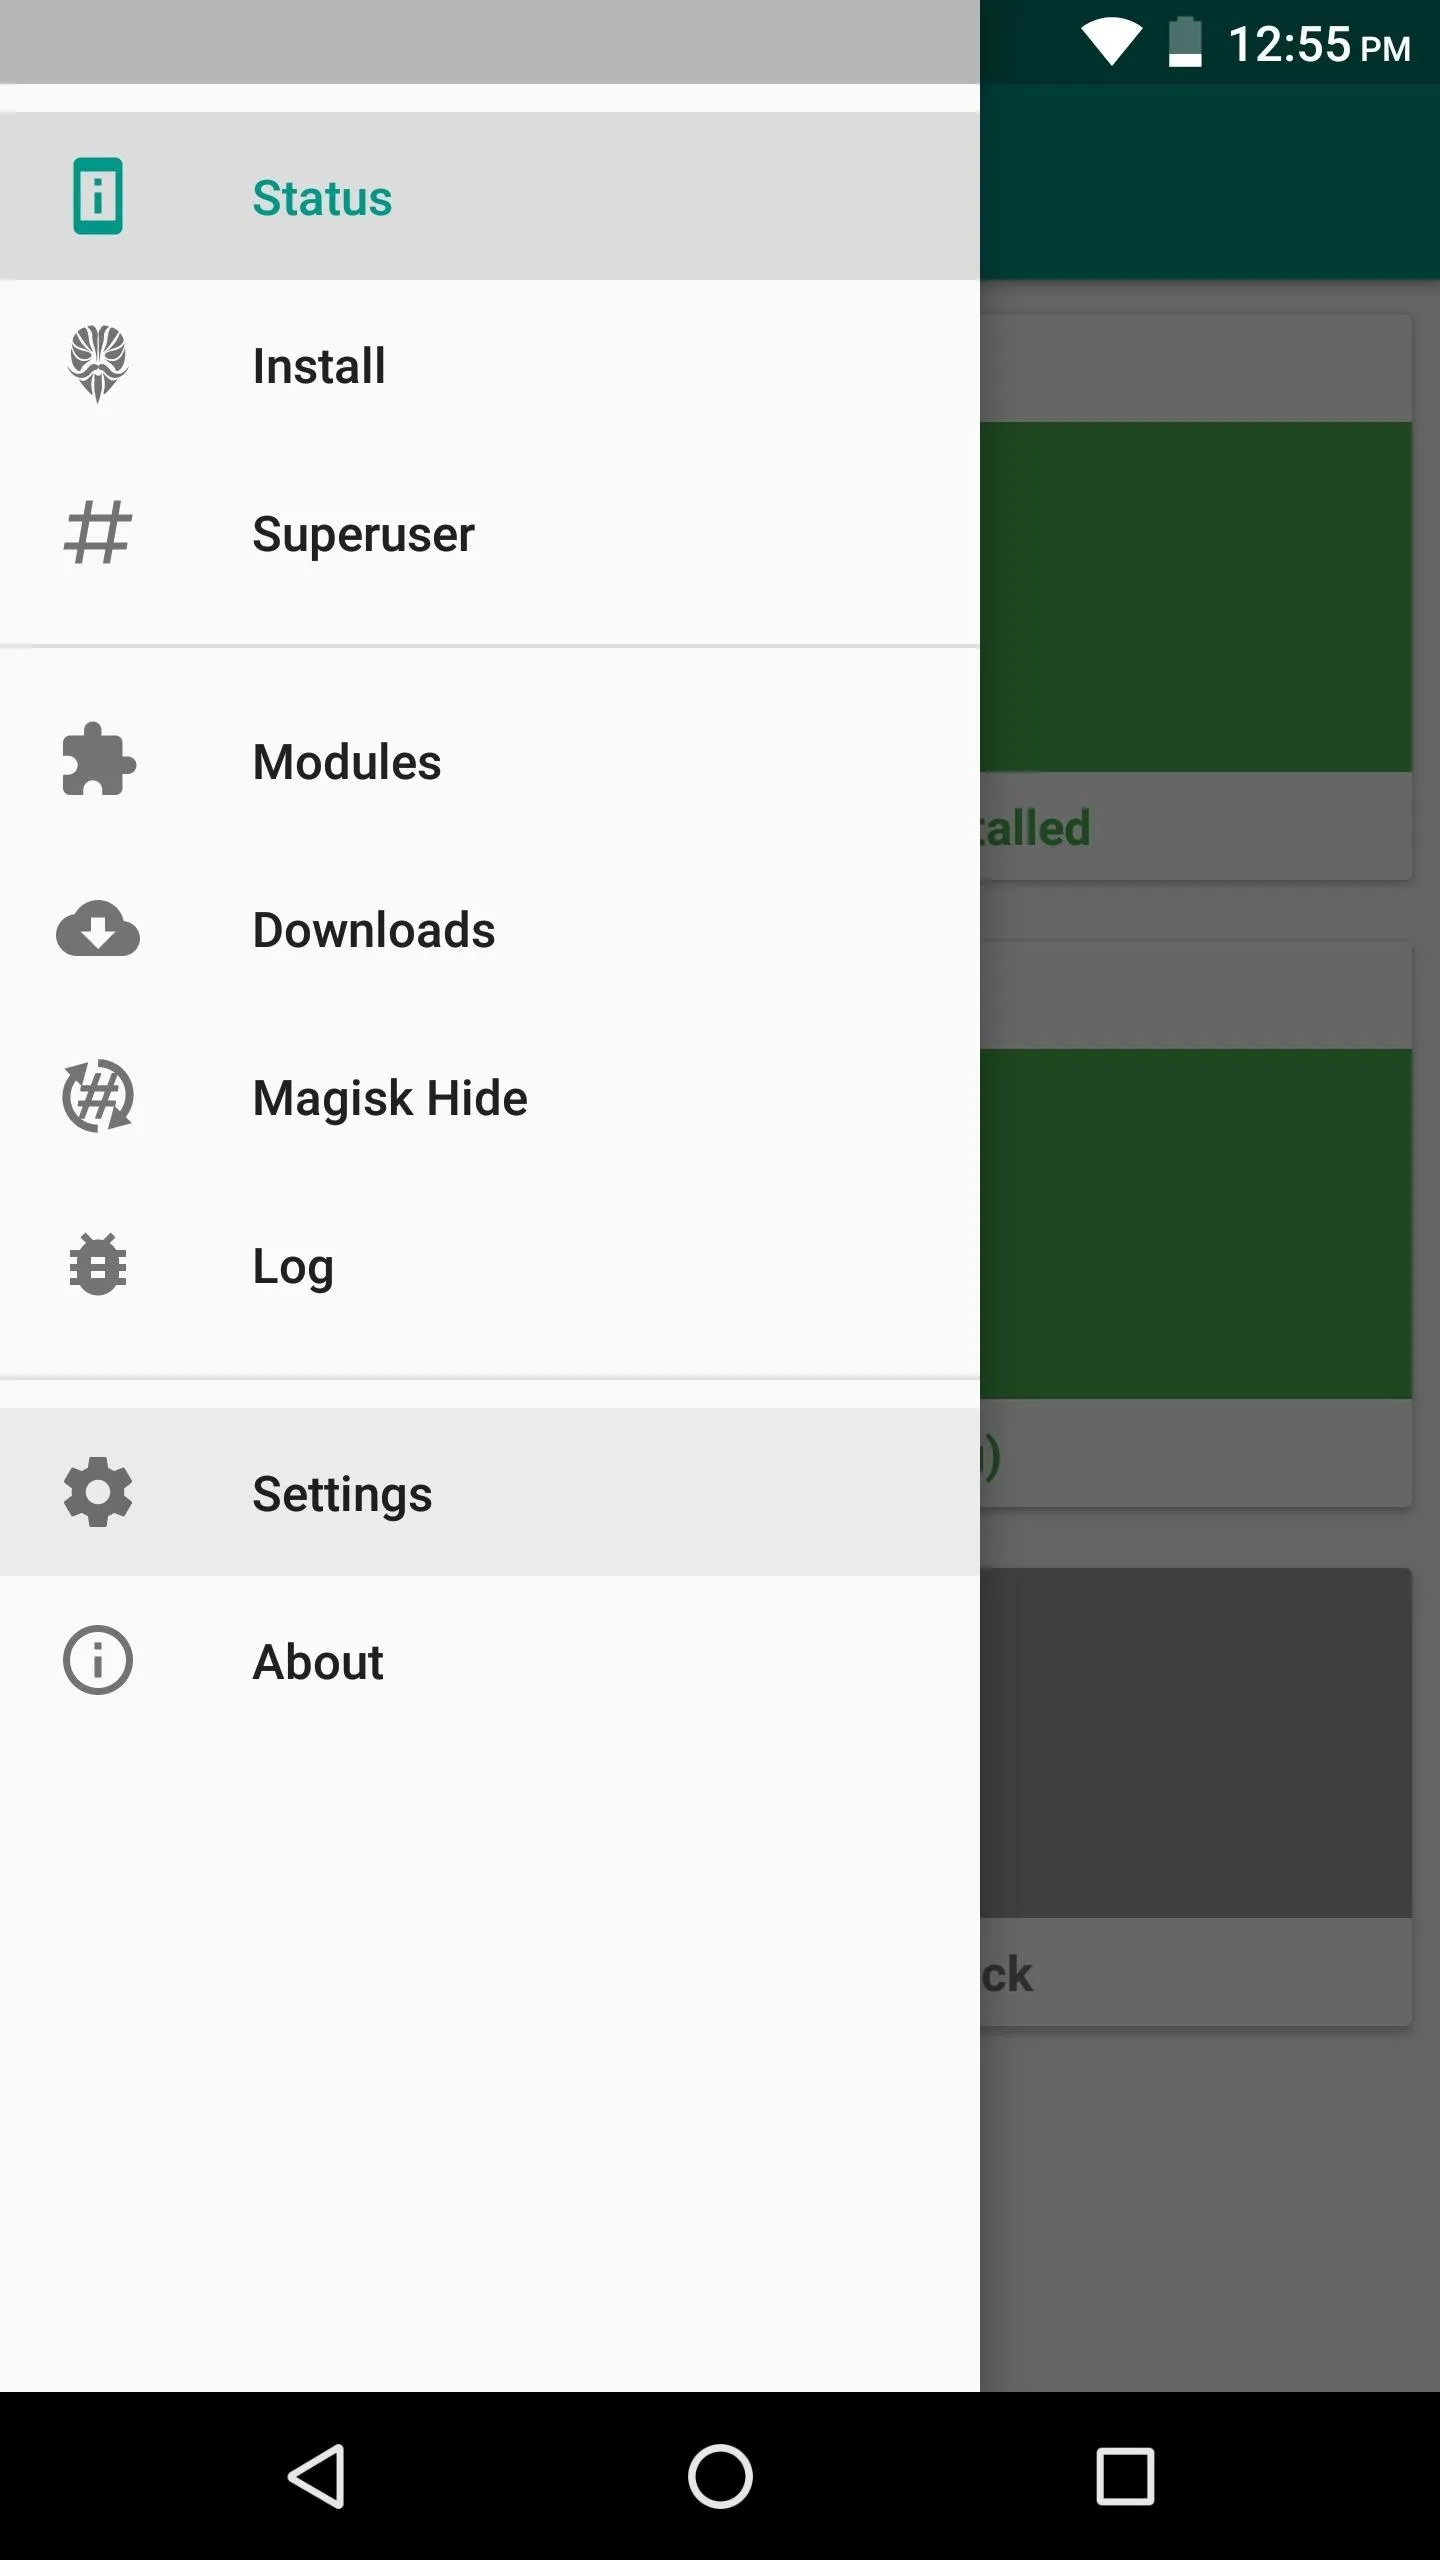
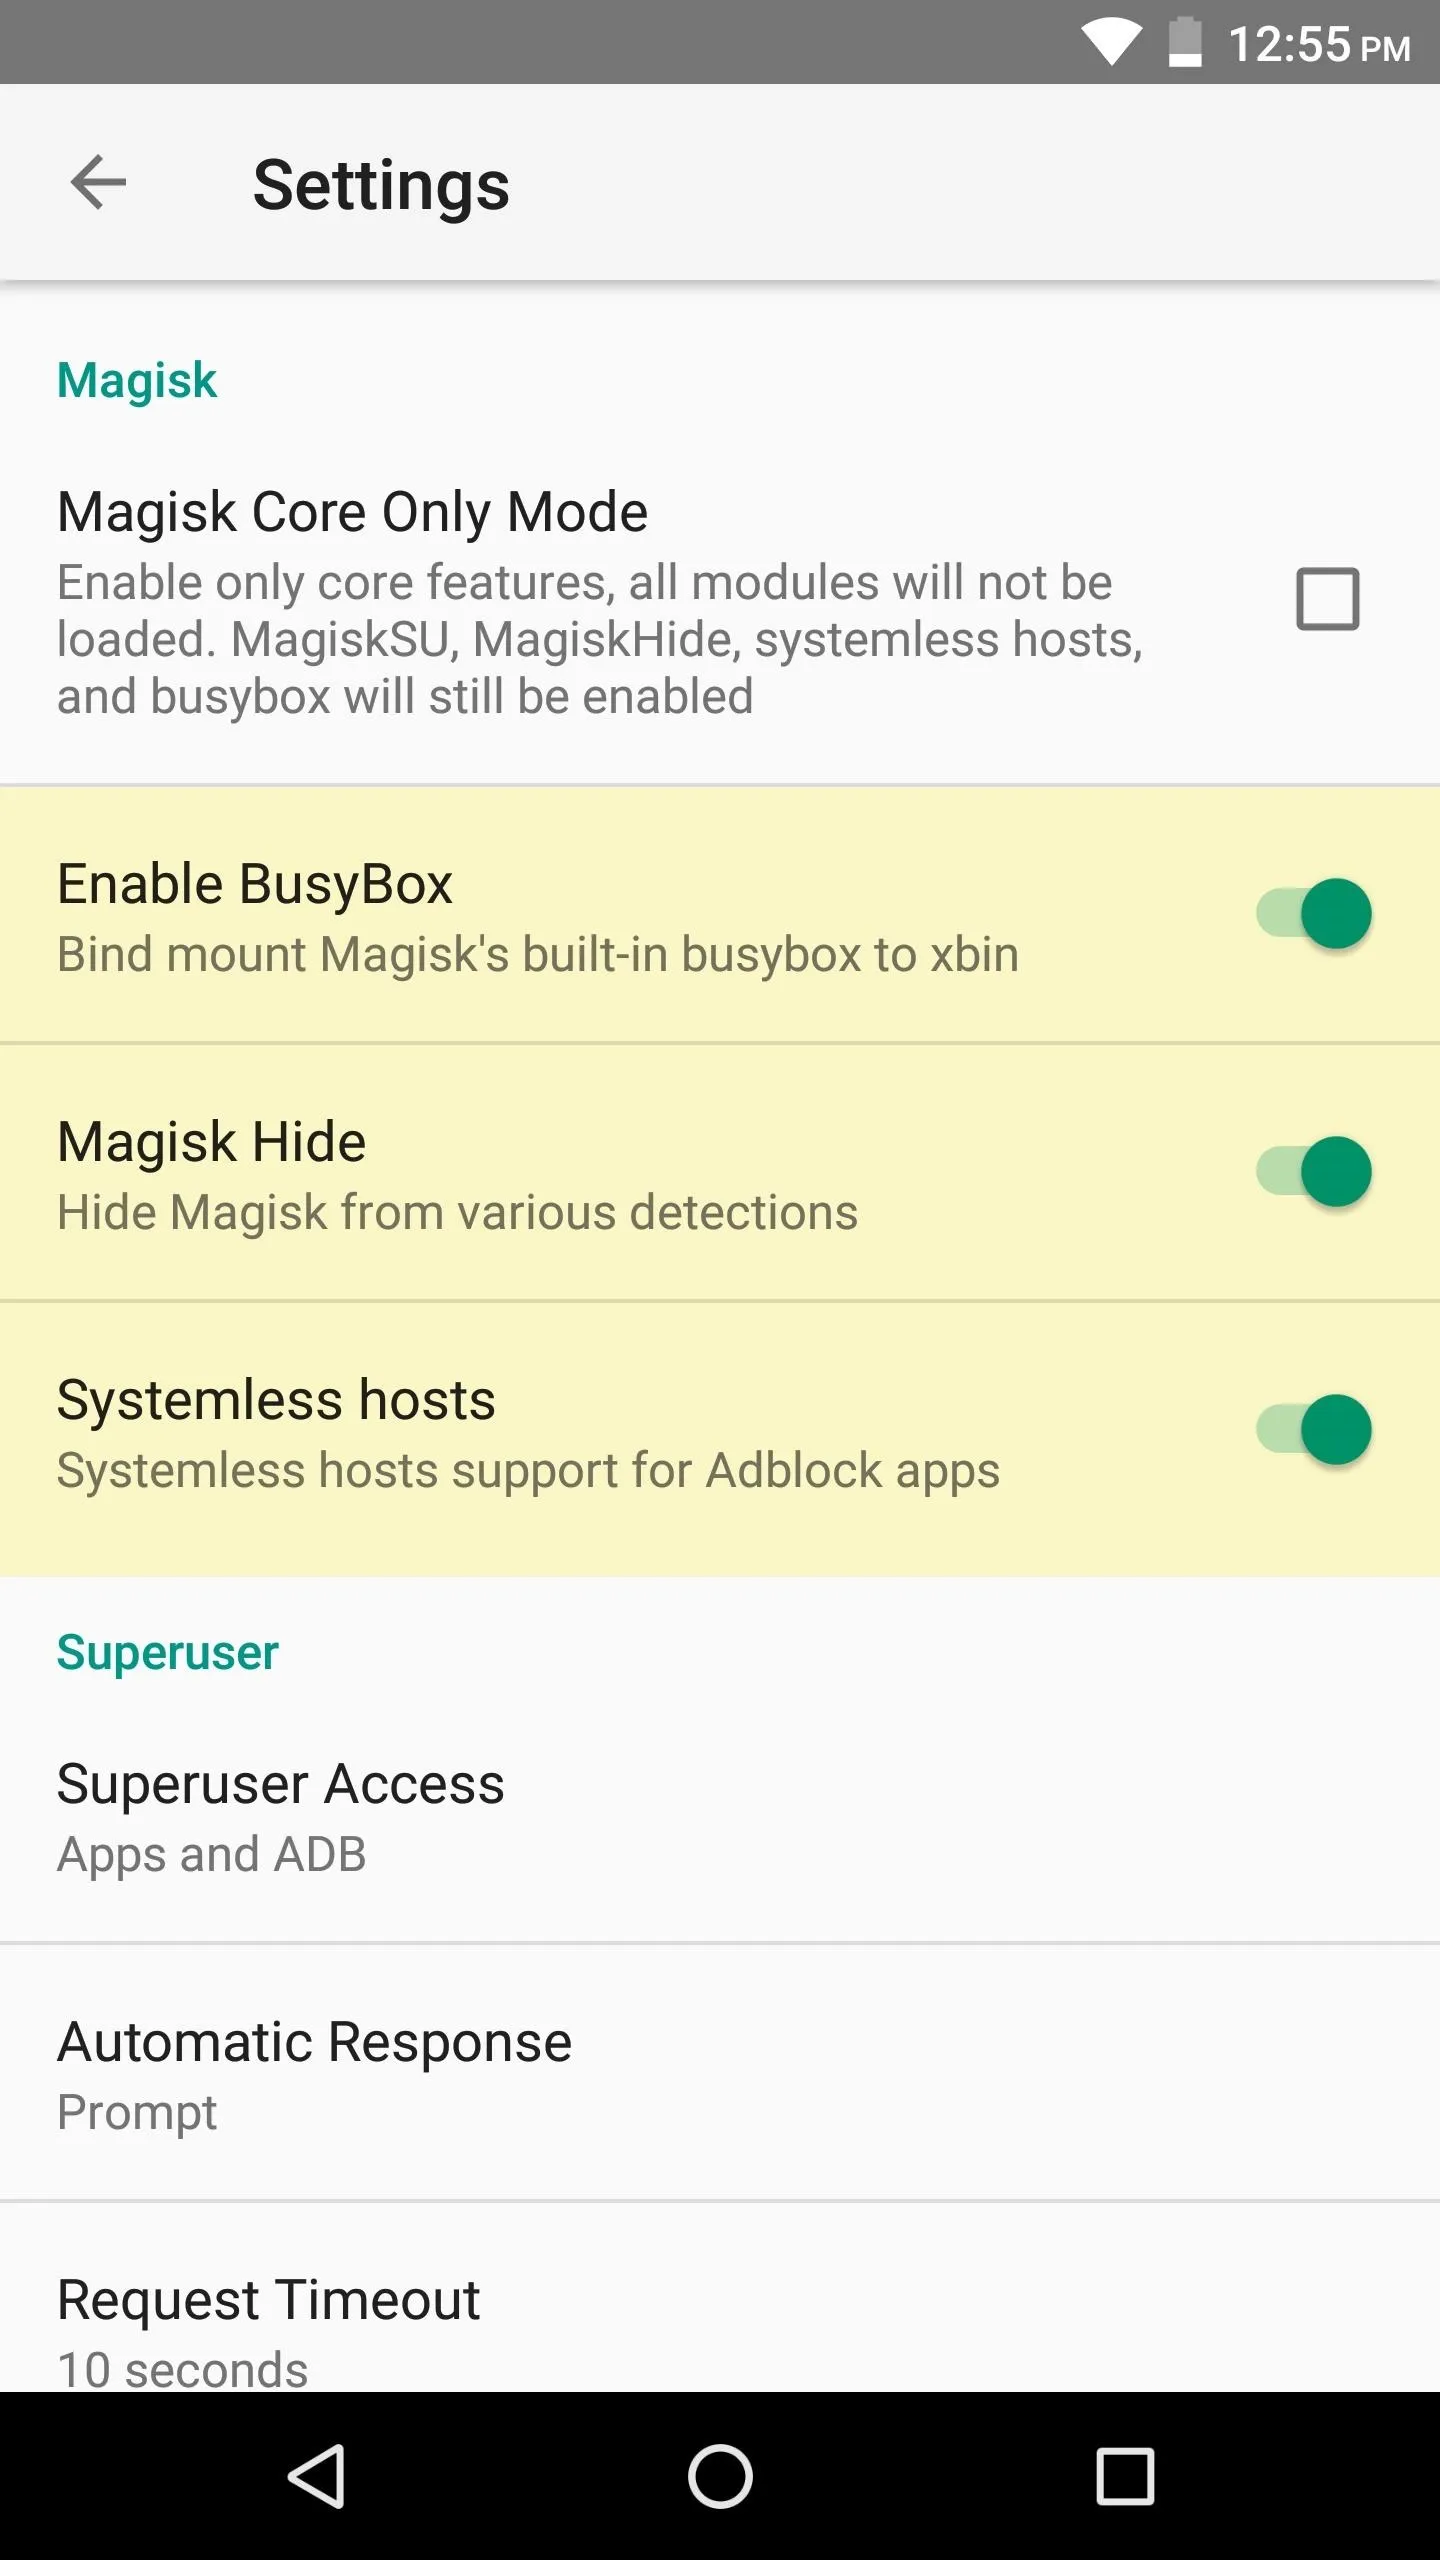
When you get back up, go ahead and open the Magisk Manager app, then head to the settings menu from the side navigation panel. After that, enable the BusyBox, Magisk Hide, and Systemless hosts options, then head back to the Status section. Now, if you tap the "SafetyNet check" button, you should see a message that says "SafetyNet Passed."
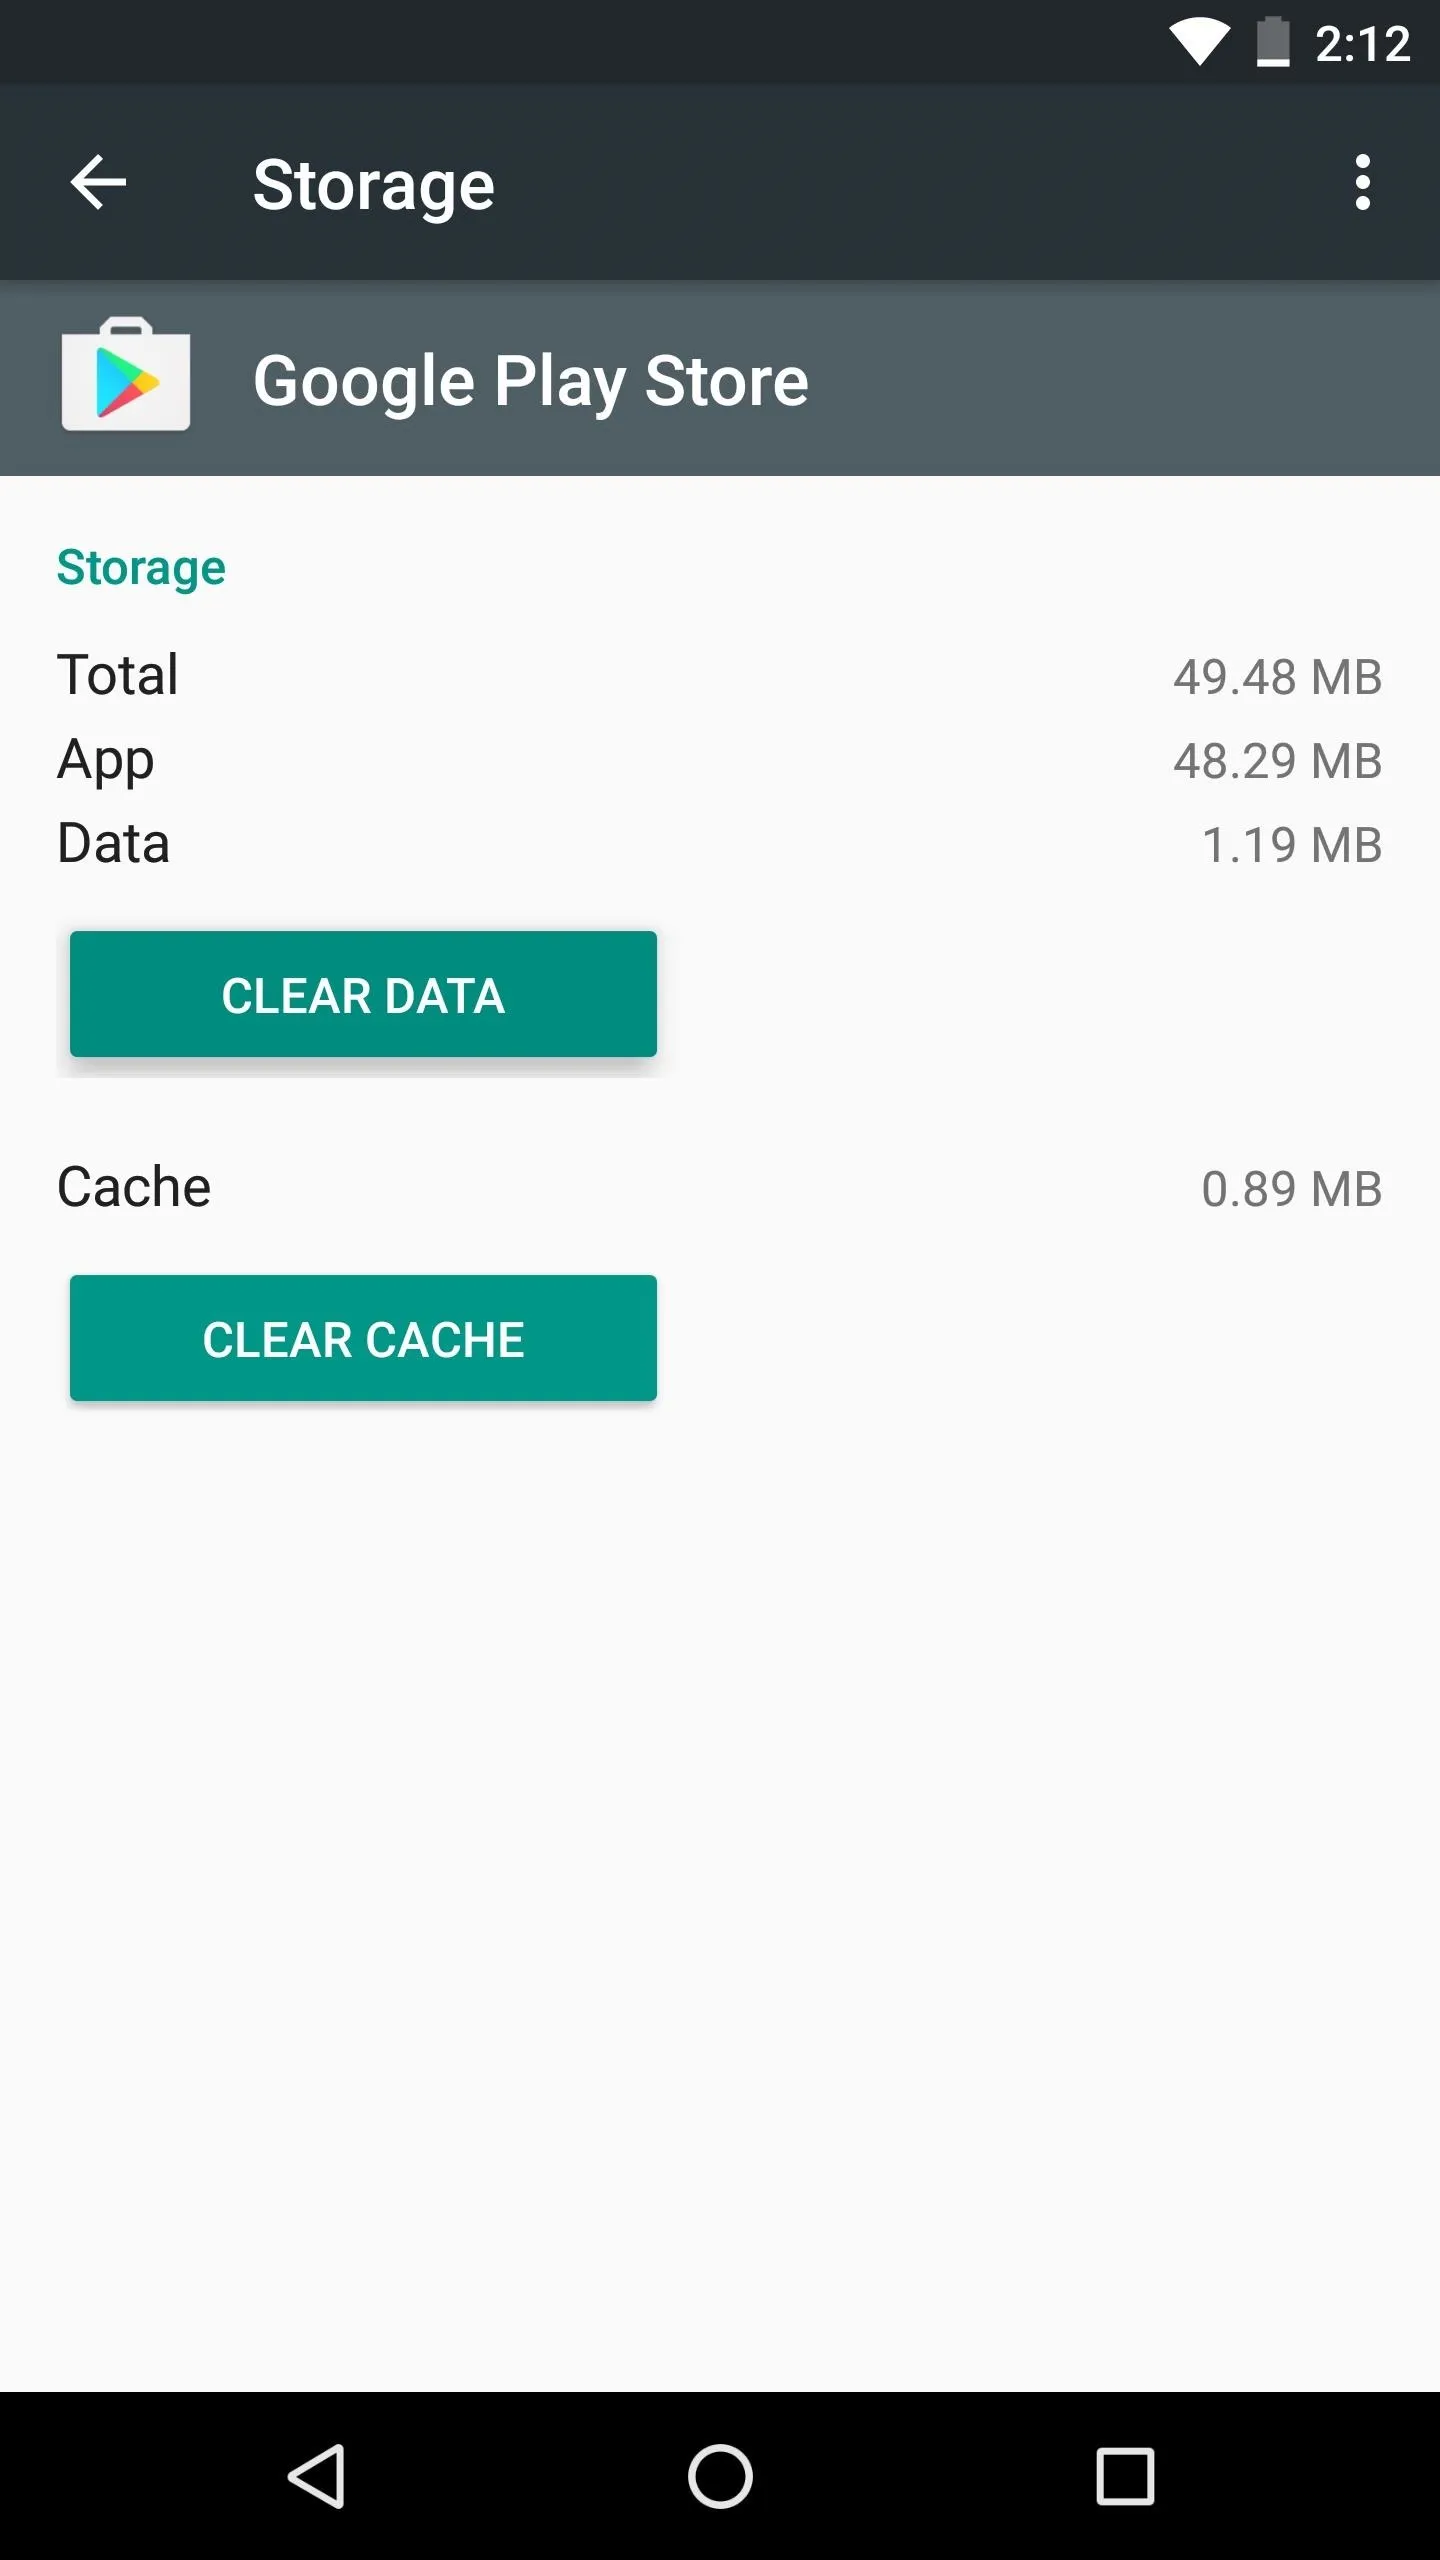
Clear Data on the Play Store App
At this point, the only hurdle left to clear is your device's Play Store certification. If you were previously rooted using a method that didn't pass the SafetyNet check, your Play Store app will still report that the device is uncertified.
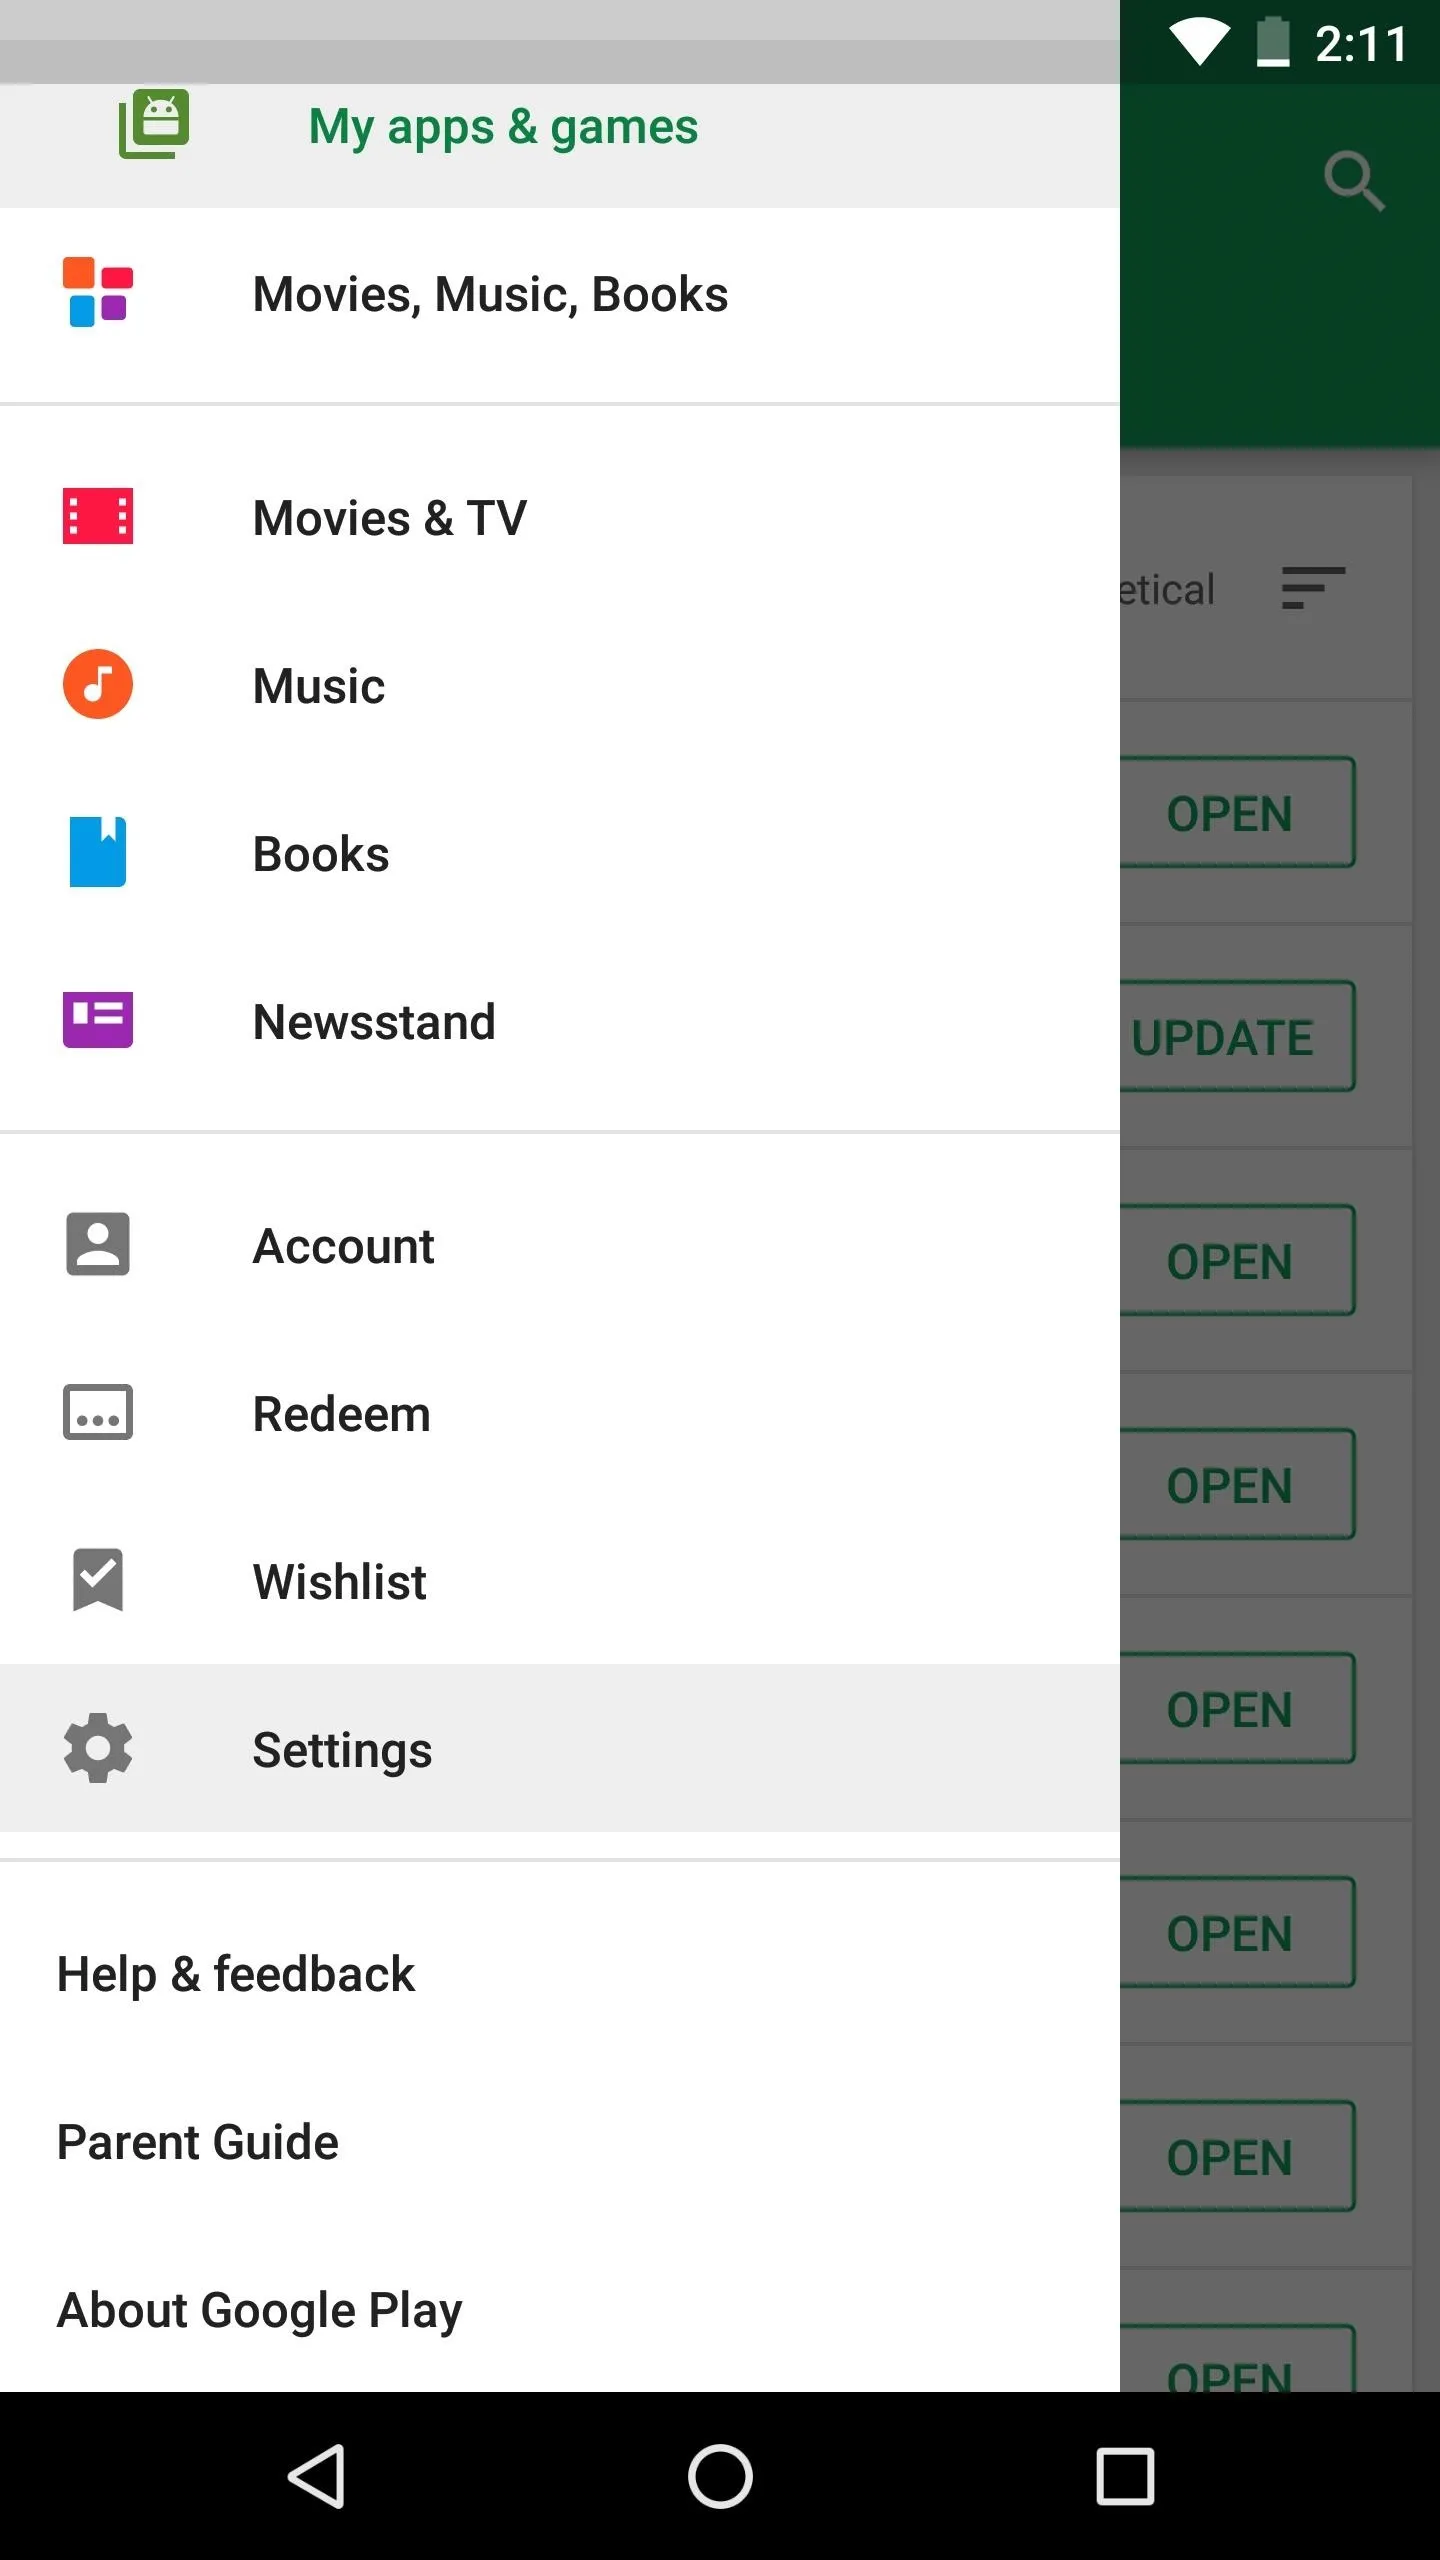
To fix this issue, head to the Apps menu in Settings and select Google Play Store. From there, tap "Force Stop," then hit "Manage Space" and select "Clear Data." When you're done there, head to the Play Store's Settings menu and scroll down to the bottom, where you should clearly see the Device certifiation field reporting that your phone is "Certified."
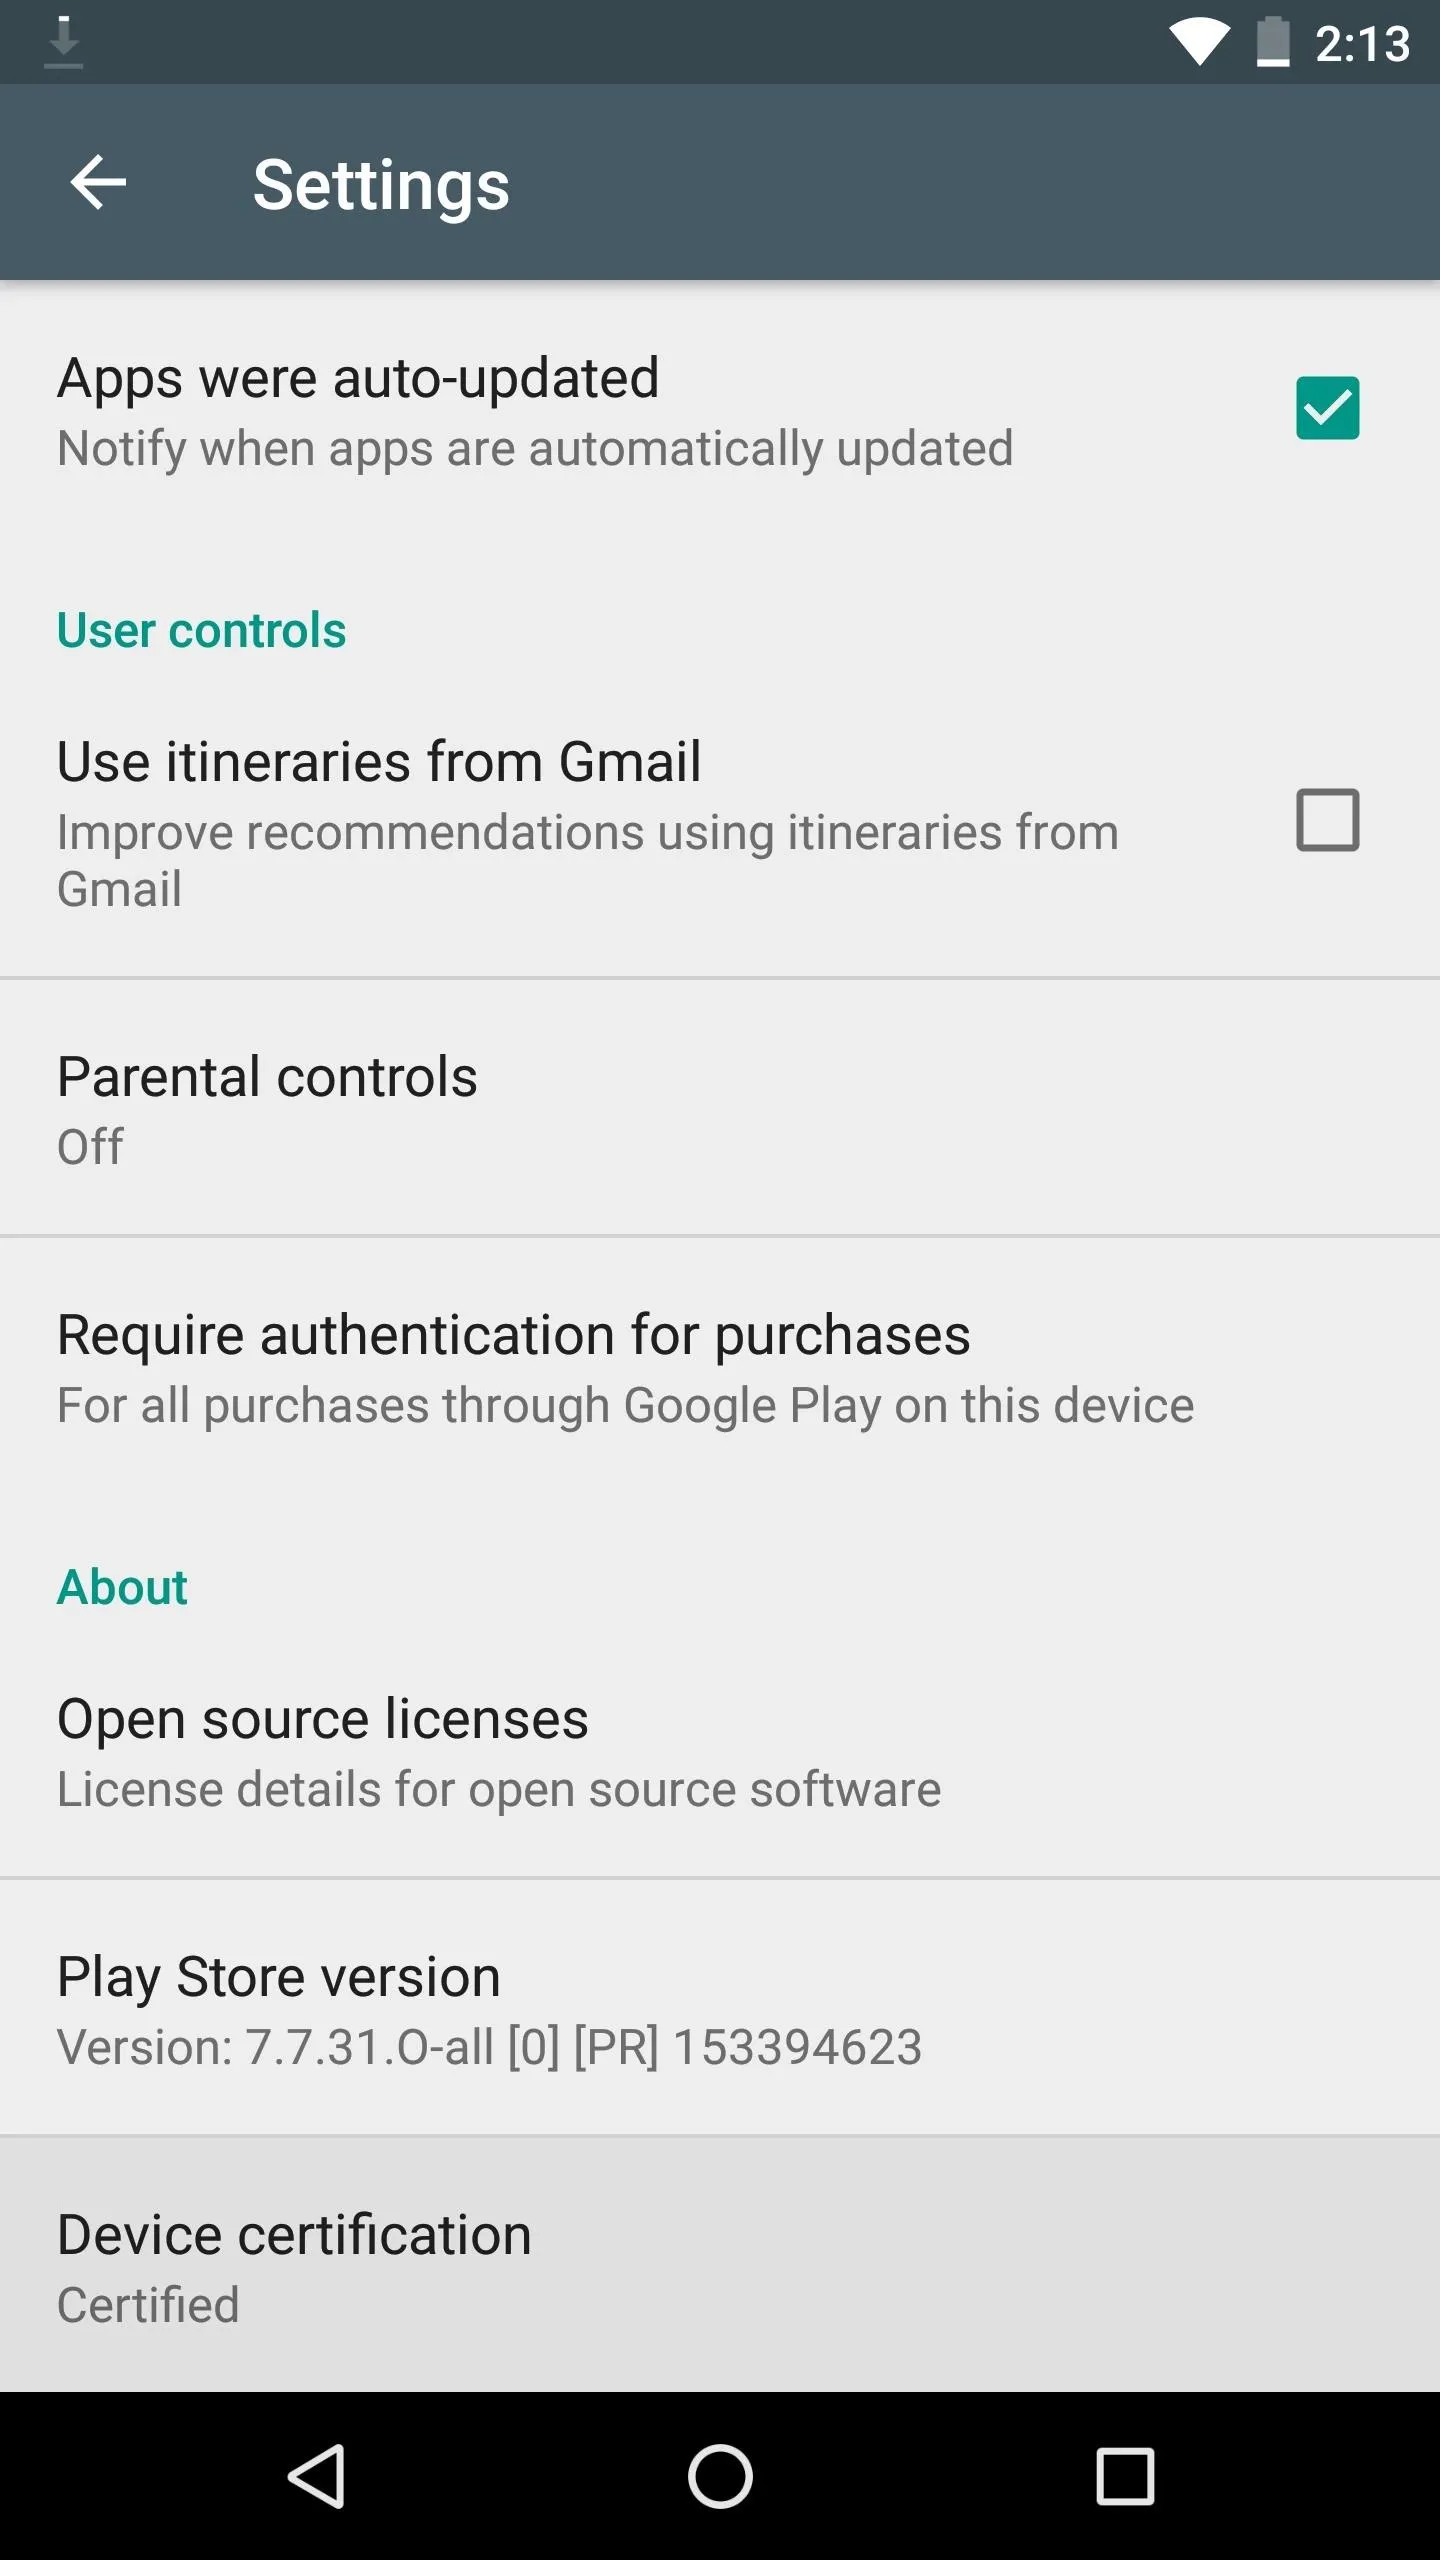
At this point, you're free to download and use apps like Netflix, Android Pay, and Pokémon GO, because SafetyNet passed and your device is Google Play certified — even though you're rooted.
Replace Old Root Features with Systemless Mods
If you want to get Xposed back, you can download a systemless version from the Download section inside your Magisk Manager app (though note that modules which alter system files will still trip SafetyNet). You can even download this APK if you want to use AdAway without tripping SafetyNet, so there's almost no downside to going fully systemless.
Going forward, you'll have to avoid root apps that modify your system partition in any way. But that's definitely achievable, as Magisk modules can replace popular root mods without altering the system partition or tripping SafetyNet. There's one for removing bloatware, another that gives you Greenify's root features, and even one that'll convert apps to system apps. Most of these can be found in the Magisk Manager app, though a few more are hosted on XDA.
So really, Magisk's systemless interface offers the best of both worlds — root-level tweaks with SafetyNet intact. The biggest difference you'll likely notice is that the Superuser access request popup looks different. This is because root will now be managed by Magisk instead of SuperSU.
Why did you opt to switch from SuperSU to MagiskSU? Was it Netflix, Android Pay, or something else entirely? Let us know in the comment section below.
- Follow Gadget Hacks on Facebook, Twitter, Google+, and YouTube
- Follow Android Hacks on Facebook, Twitter, and Pinterest
- Follow WonderHowTo on Facebook, Twitter, Pinterest, and Google+
Cover image and screenshots by Dallas Thomas/Gadget Hacks


Comments
Be the first, drop a comment!