UPDATE 11/17/15
The Xposed Framework now officially supports Android 5.1 through 5.1.1 Lollipop devices as well. Everything will still work the way it has with Android 5.0 through 5.0.2, but there are a separate set of files for the newer Android version. I'll cover both below, but make sure to download the proper file for your particular version of Android.
END UPDATE
Oh Rovo89, you sly dog. The developer behind Android's most popular modding platform had us worried that the Xposed Framework might be nearing the end of development, but after a tease earlier this week, it has finally been made compatible with Android Lollipop.
Installation is a bit different this time around (at least for now), but Xposed is definitely alive and kicking. This Lollipop-compatible build is in its earliest stages of development right now, so bugs are to be expected, but I'll show you how to install it below.
Note: if you haven't updated to Android 5.0 Lollipop yet, please see one of our other guides on installing the Xposed Framework for 4.4 KitKat and below.
Requirements
- Rooted device running Android 5.0 through 5.1.1
- Custom recovery installed
- "Unknown sources" enabled
Update: For the time being, do not install this on Samsung devices running TouchWiz (Samsung devices running AOSP-based ROMs should be fine).
Find Your Device's CPU Architecture & Android Version
There are three different versions of the Xposed Framework for Lollipop devices, and each is designed for a specific CPU architecture. It can be fairly difficult to find your device's CPU architecture, so if you don't know this information off the top of your head, I'd suggest that you download a free app called Hardware Info.

Once you've installed Hardware Info, simply open the app and tap the "Processor" entry. From here, look for one of three CPU architecture types—ARMv7, ARM64, or x86. The exact location of these CPU architecture names will vary, but you should see one of the three somewhere under the Processor category.
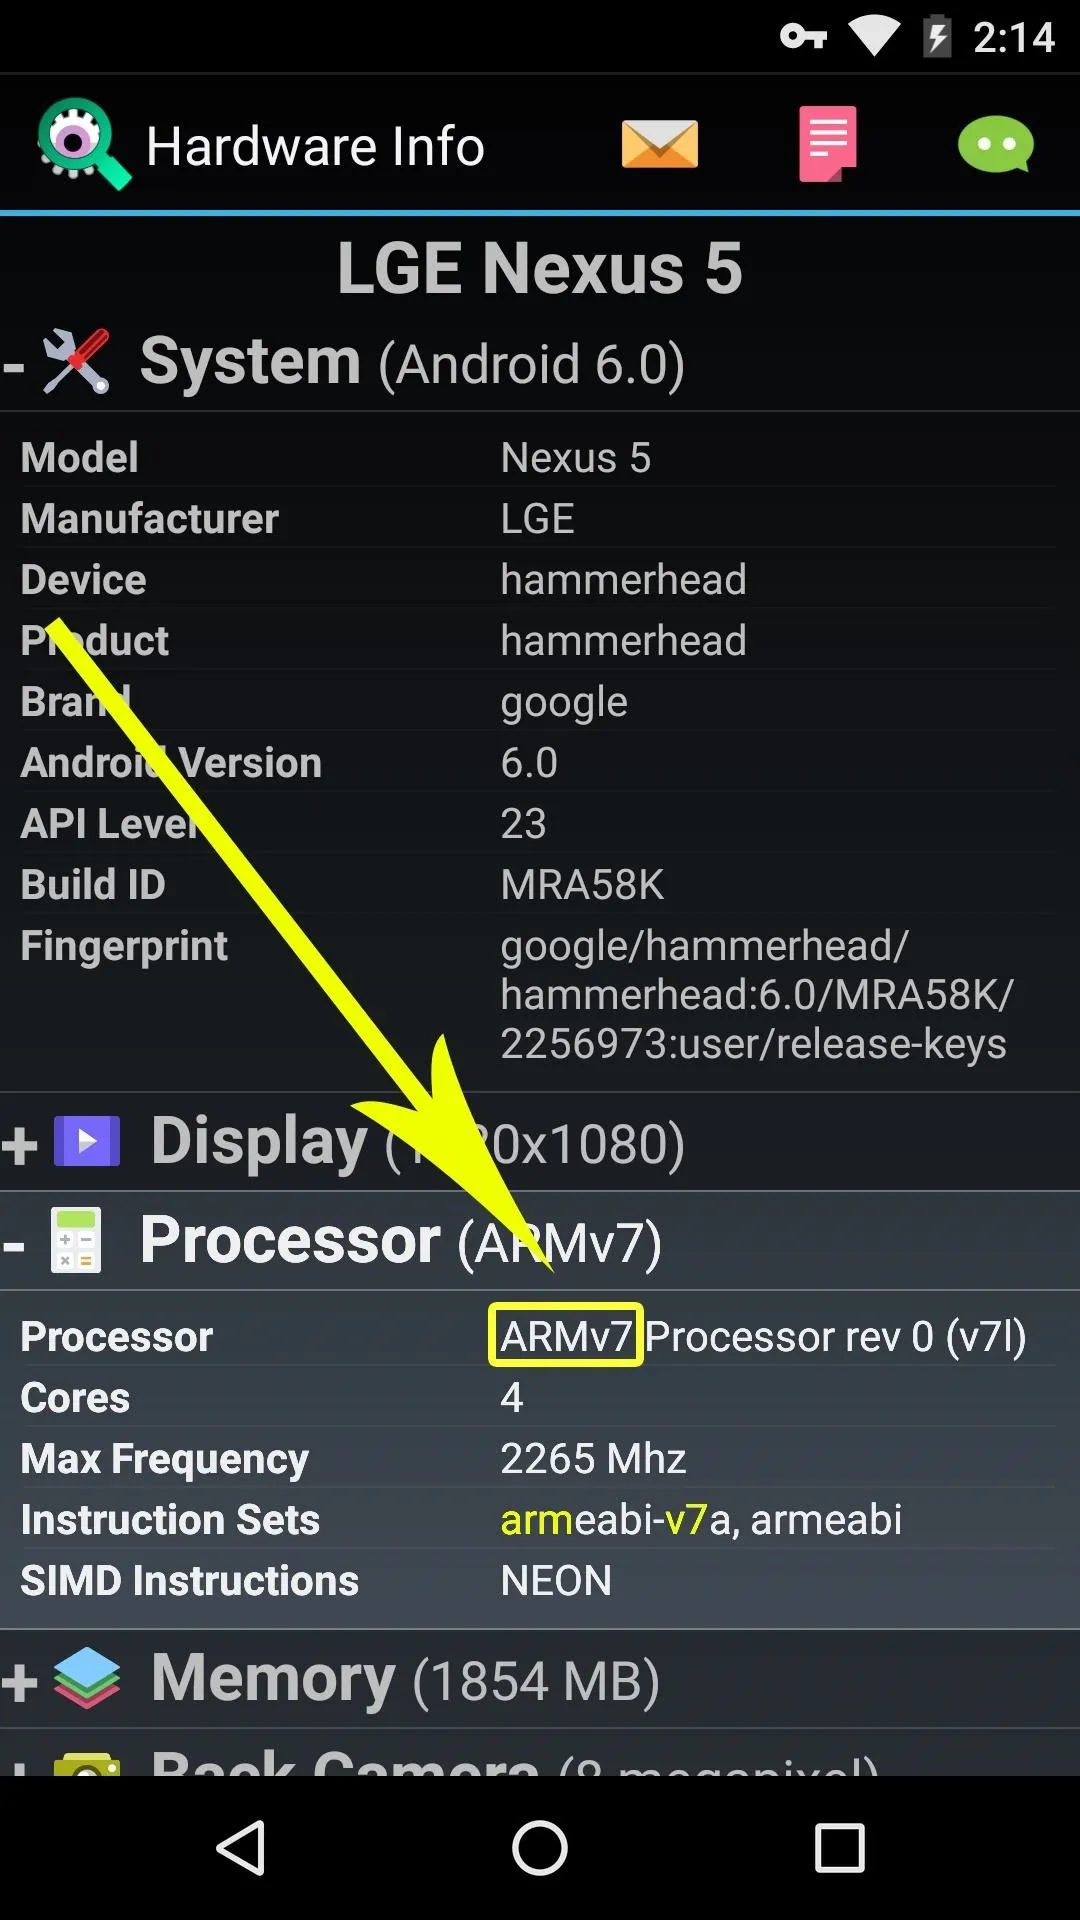
ARMv7
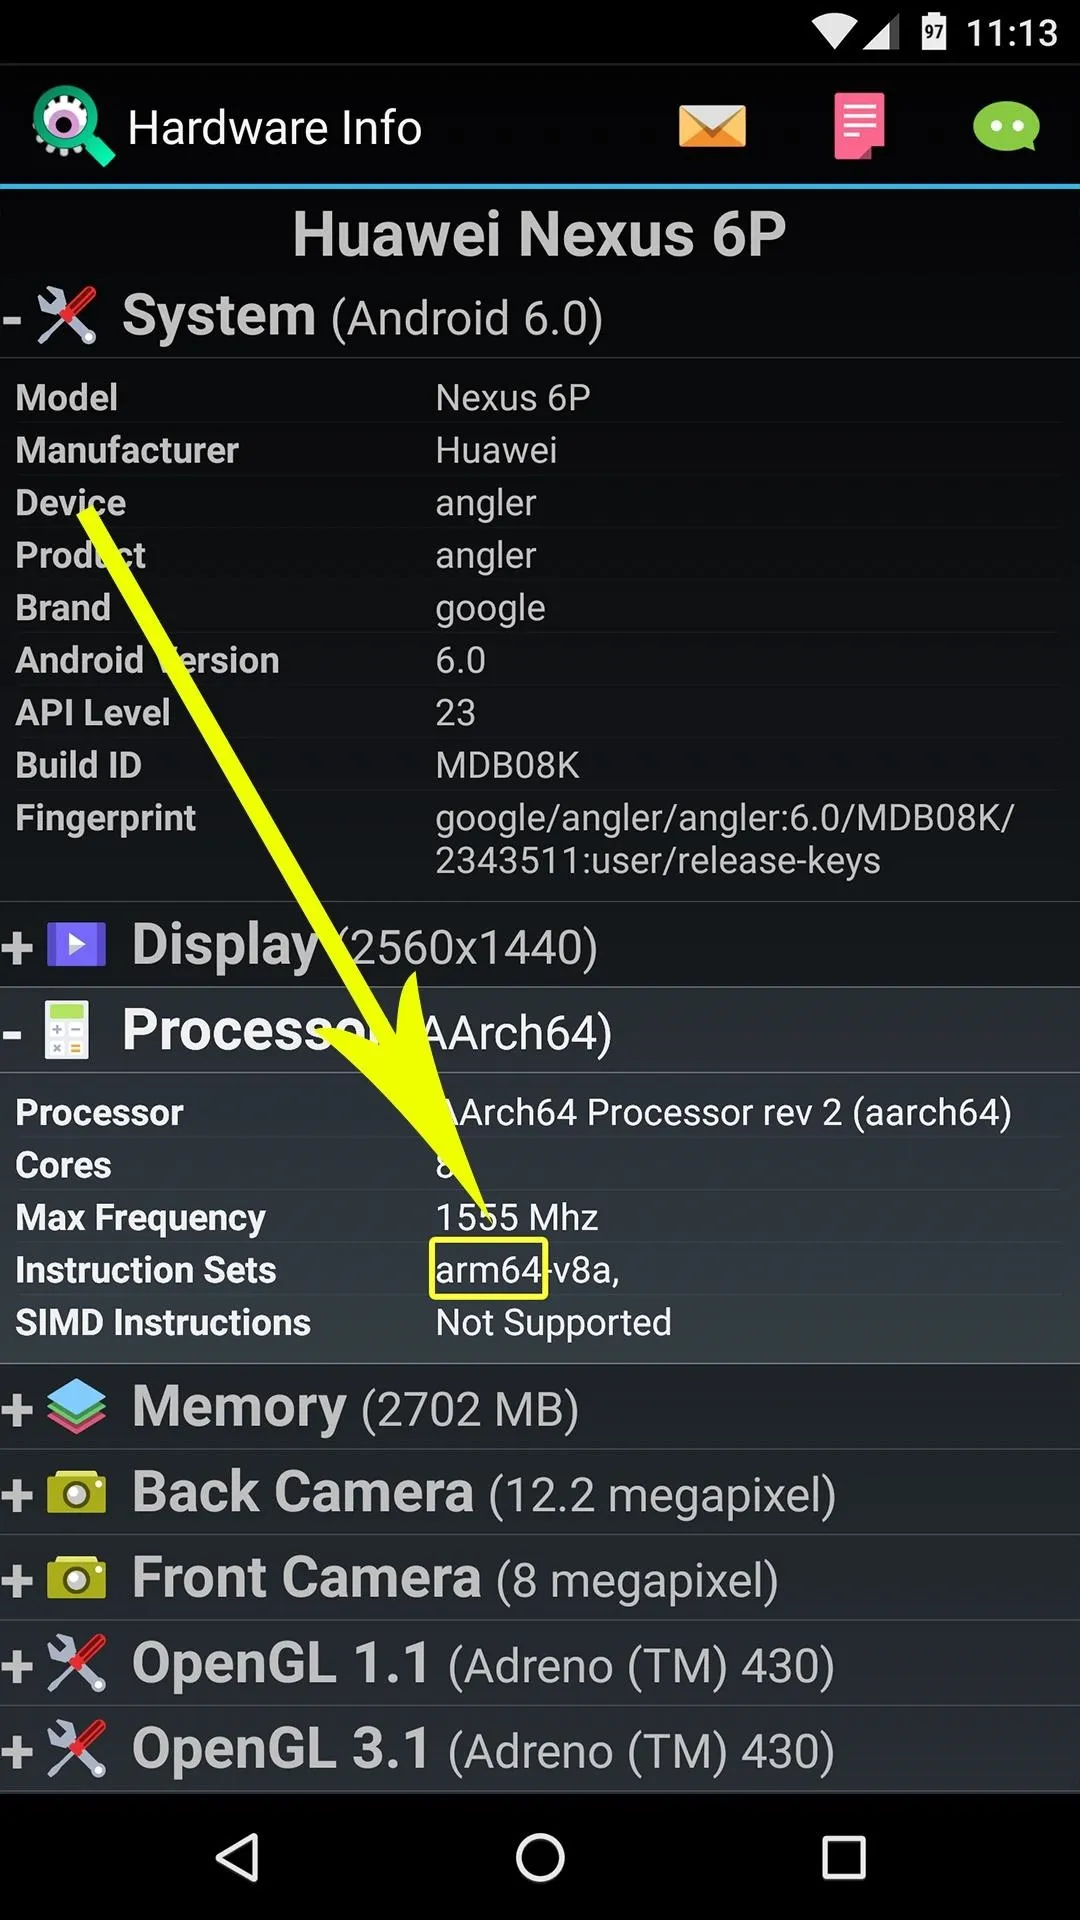
ARM64

ARMv7

ARM64
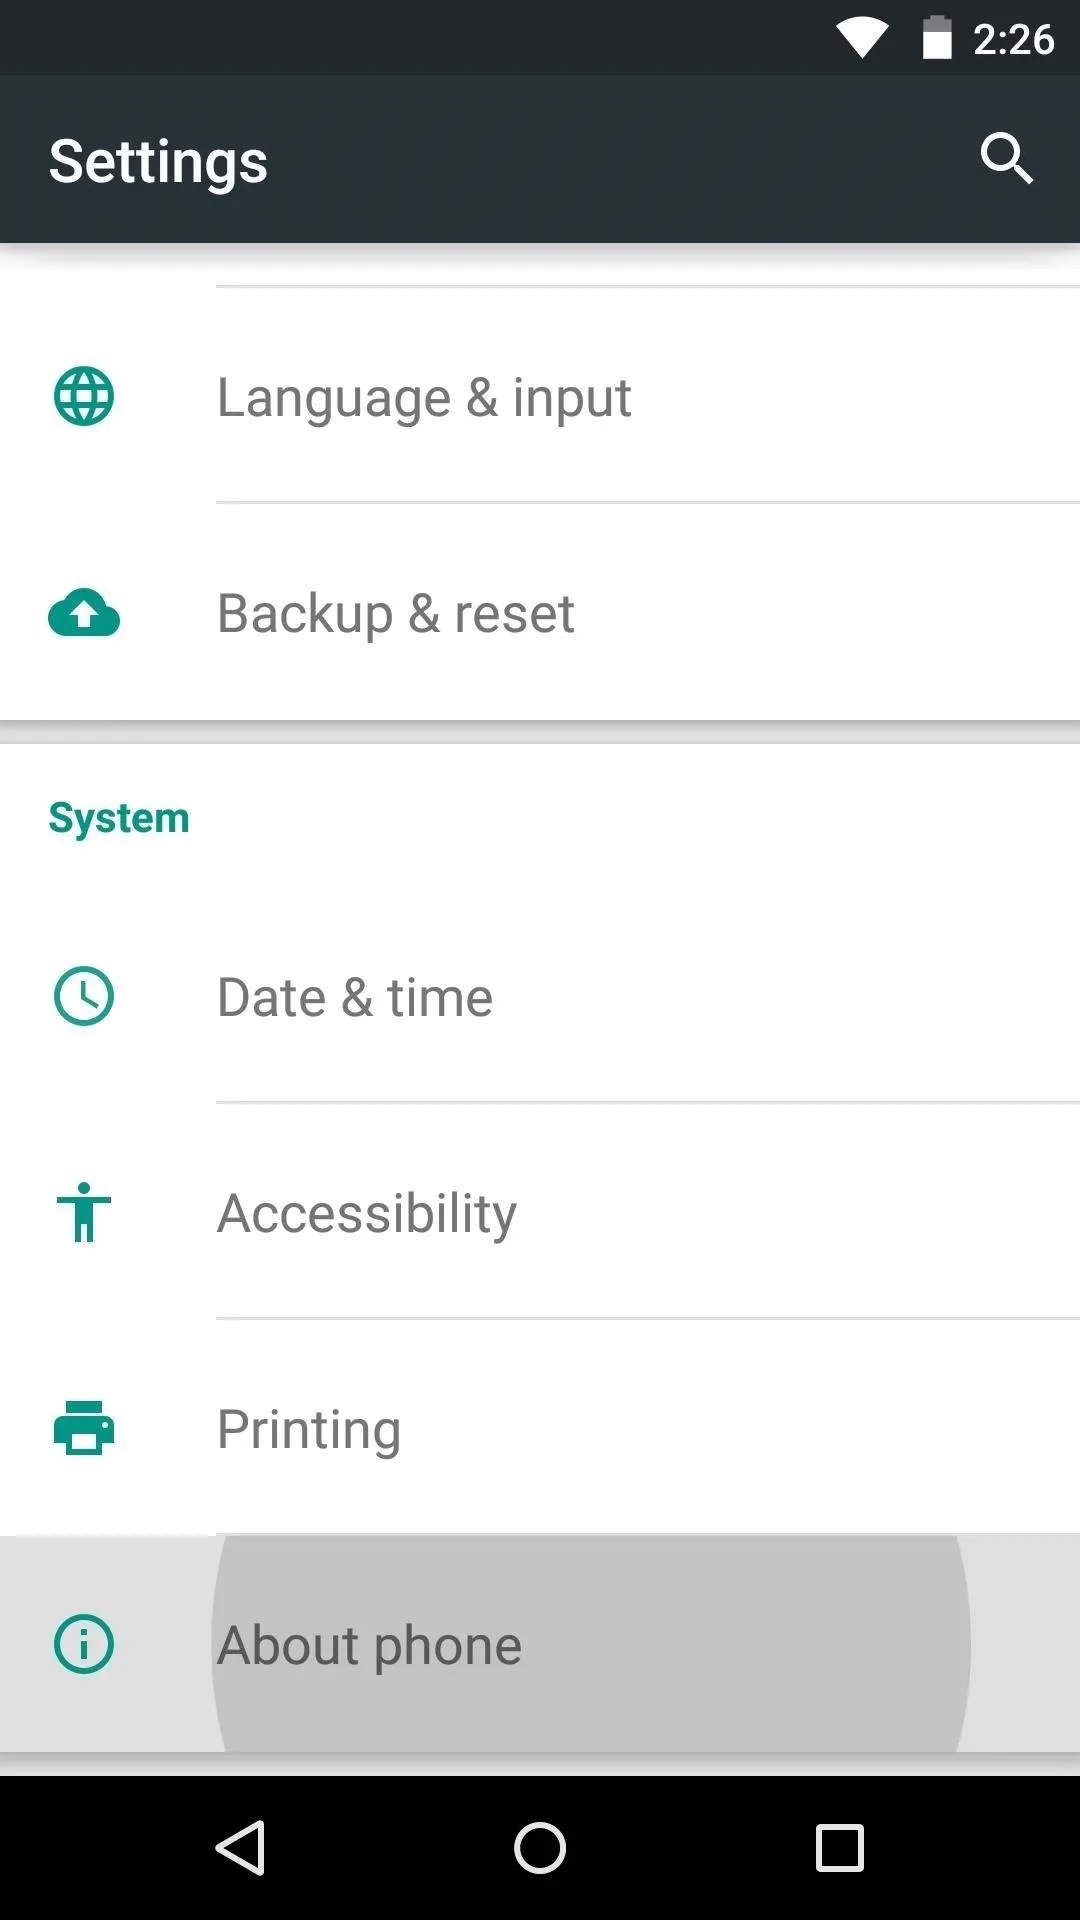
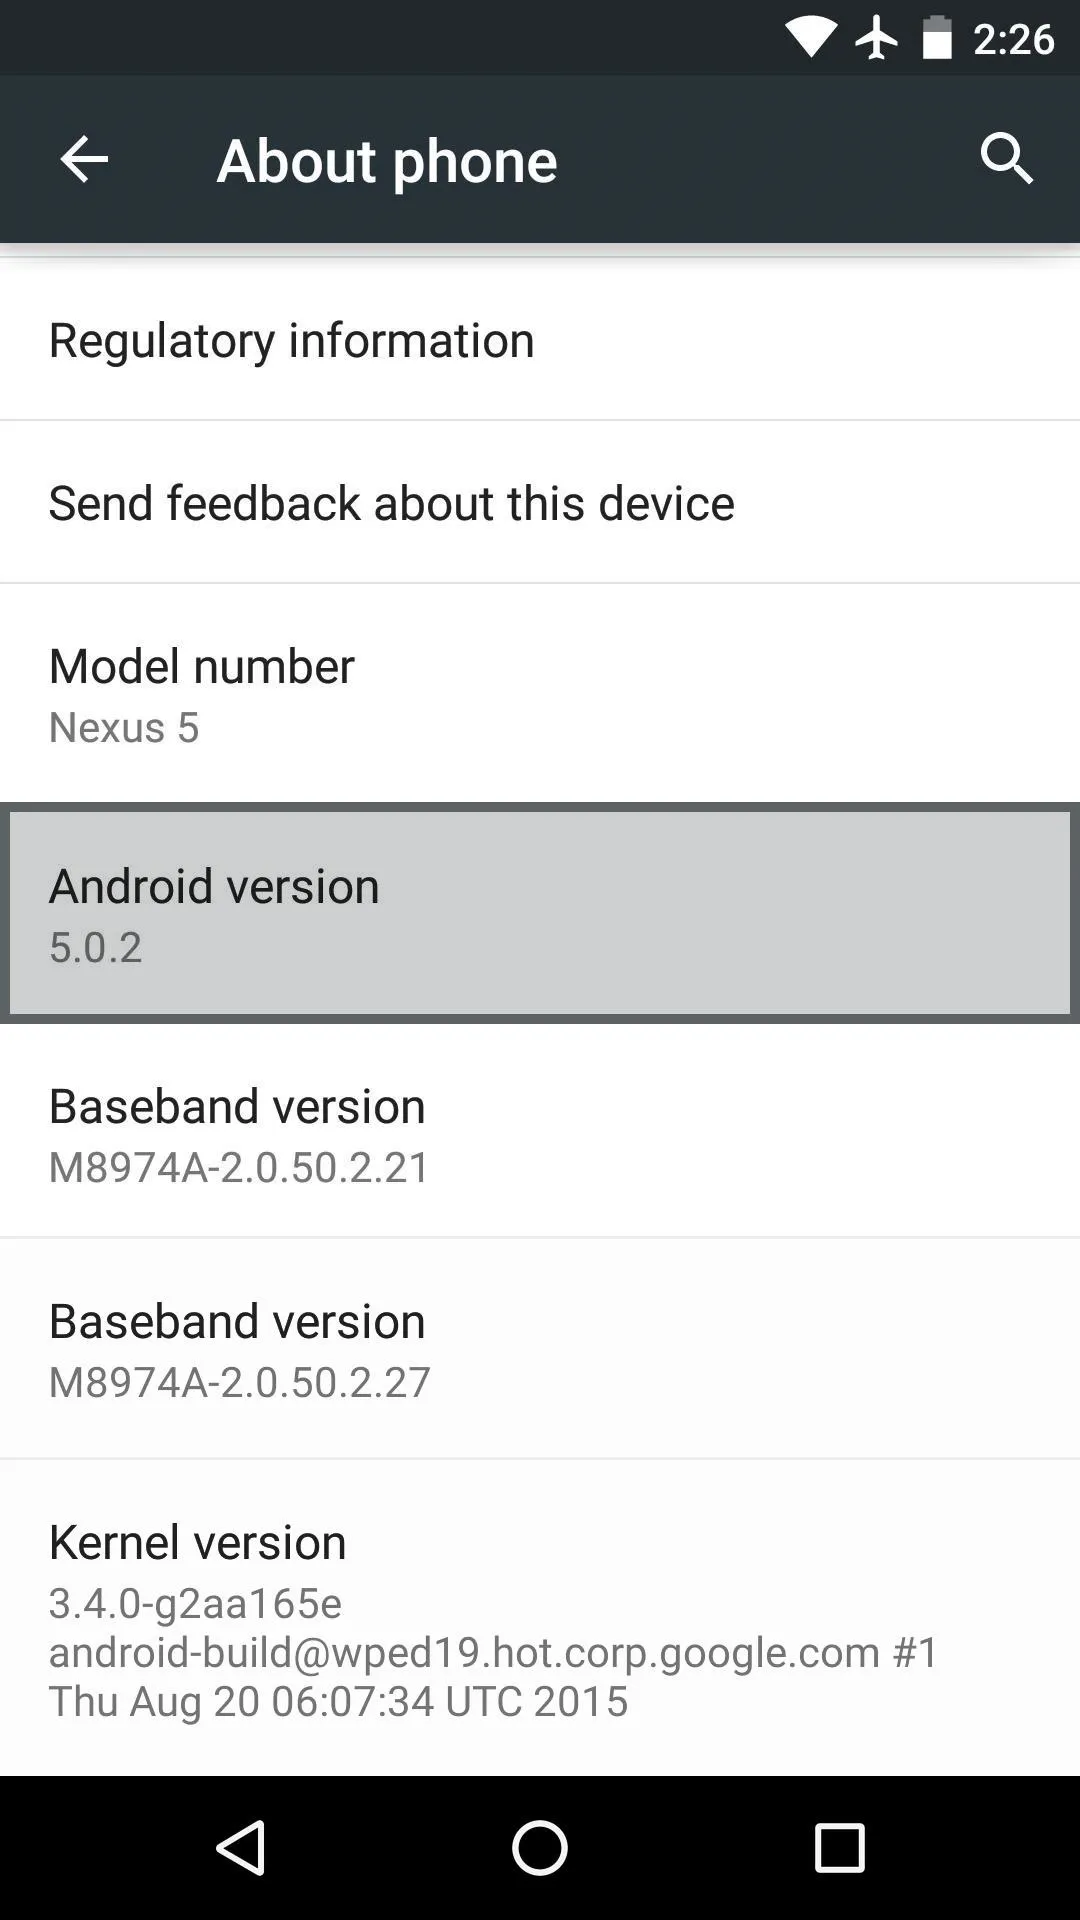
From there, head to the "About Phone" or "About Tablet" menu in Settings, then take note of your Android Version, as this will be used to determine the right files that you'll need to download.


Download Necessary Files
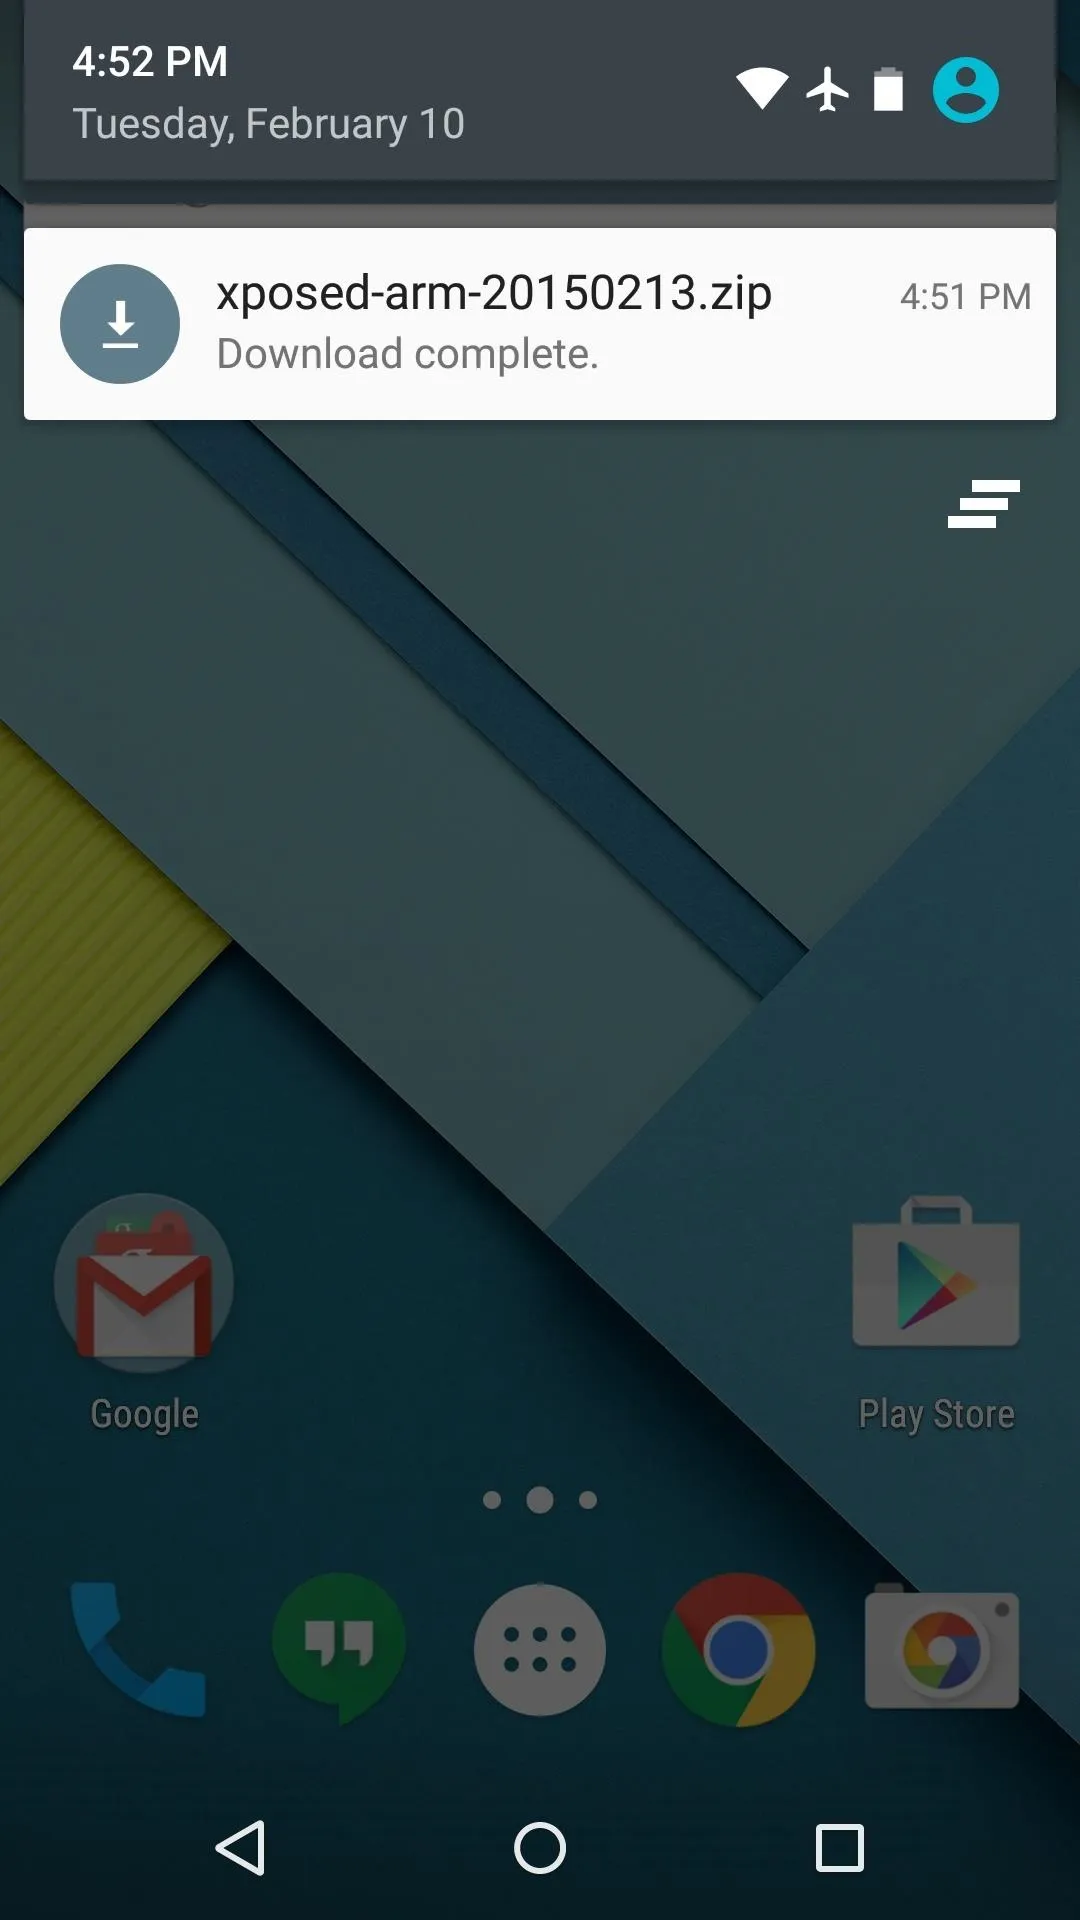
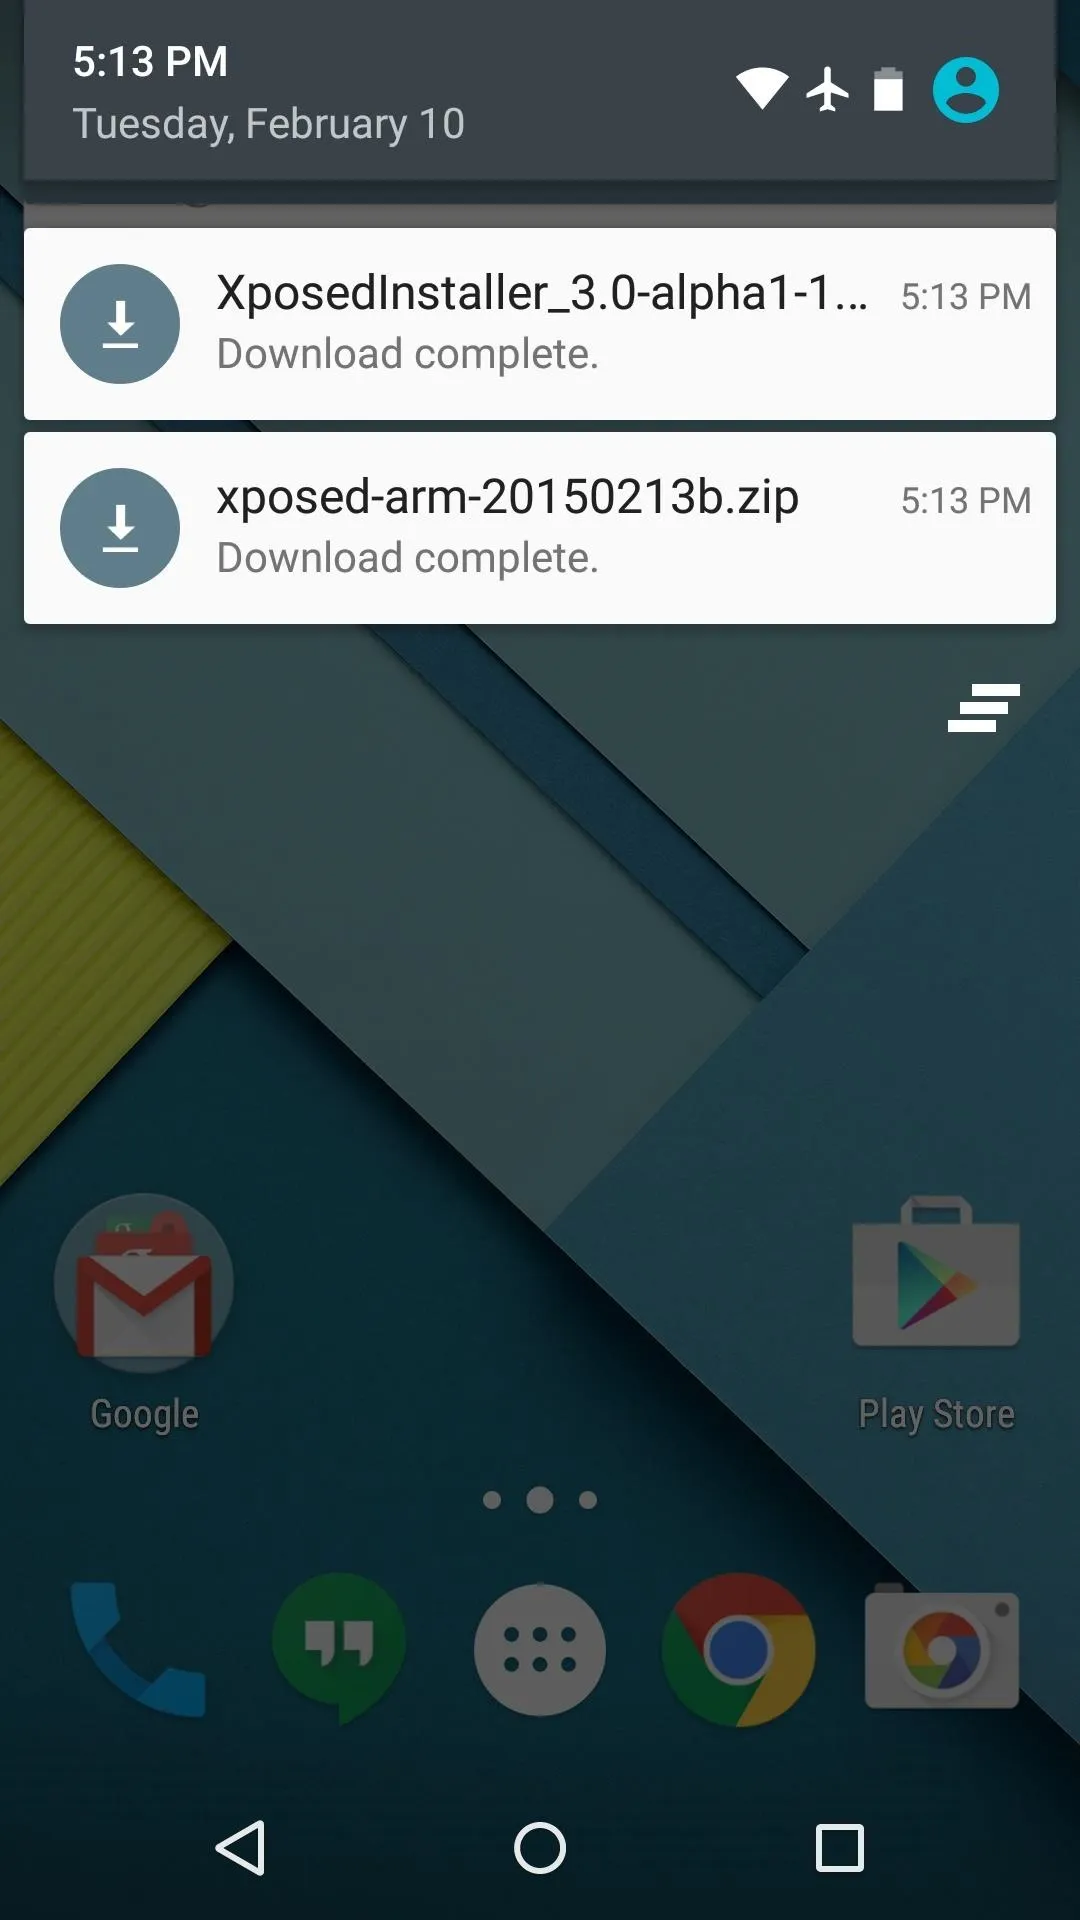
There are two core elements to Xposed—one is the Xposed Framework, which lays all of the groundwork, and the other is the Xposed Installer app, which allows you to download and manage modules. First up, grab a copy of the Installer from the following link, as this is the same for all devices:
Nowadays, the Framework will have to be flashed in custom recovery. There are 3 different version of the Framework for Android 5.0.X, and three more versions for Android 5.1.X. So first up, if your device is running Android 5.0 through Android 5.0.2, download the ZIP below that matches your CPU architecture type:
- Xposed Framework for 5.0.X devices (ARMv7)
- Xposed Framework for 5.0.X devices (ARM64)
- Xposed Framework for 5.0.X devices (x86)
On the other hand, if your device is running Android 5.1 through Android 5.1.1, find the link below that matches your CPU architecture to download the proper Xposed Framework ZIP for your device:
- Xposed Framework for 5.1.X devices (ARMv7)
- Xposed Framework for 5.1.X devices (ARM64)
- Xposed Framework for 5.1.X devices (x86)


Boot into Custom Recovery
When the files have finished downloading, the next step is to boot into custom recovery. To do that, start by powering your device completely off. This next part may vary, but for most devices, press and hold the volume down and power buttons simultaneously.
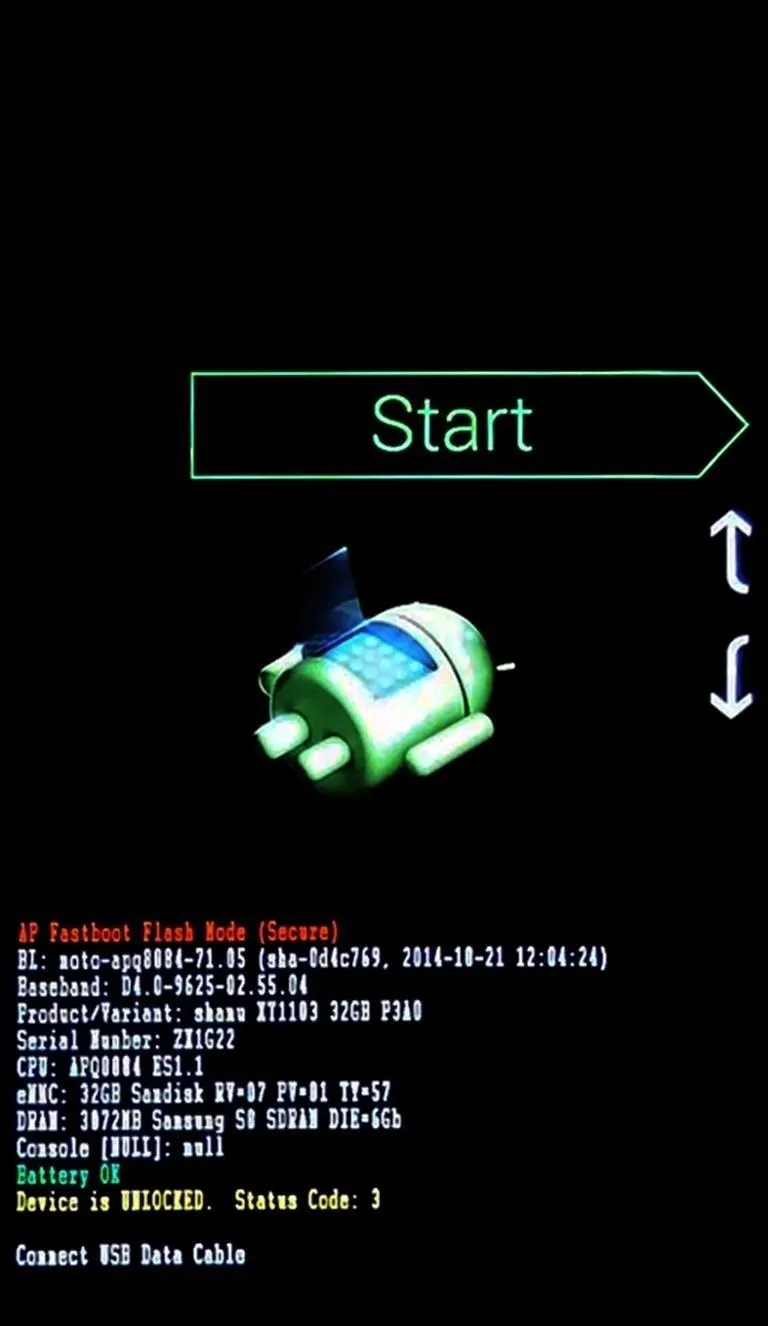
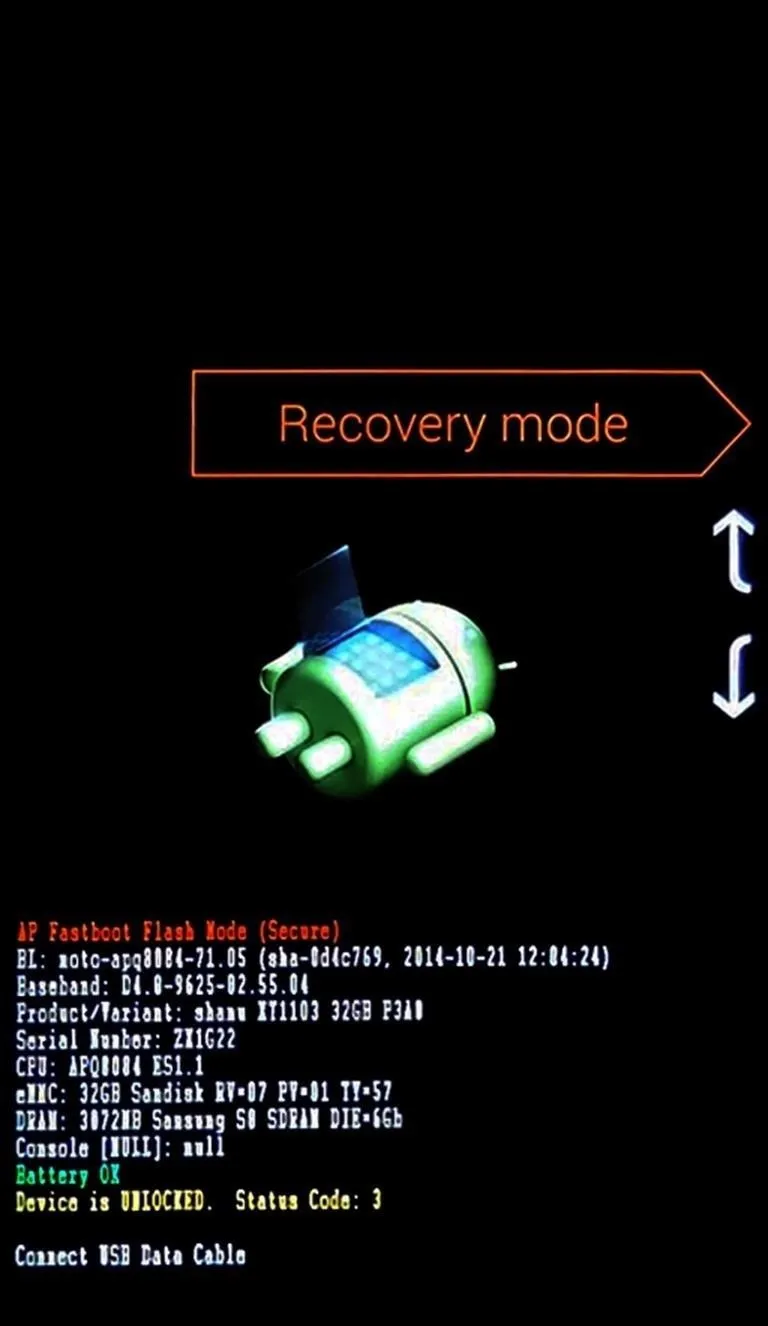


This will bring up Android's Bootloader menu. From here, use the volume down button to highlight "Recovery mode," then press the power button to select it.
Install the Framework in Custom Recovery
Before you flash anything in custom recovery, it's always a good idea to make a full NANDroid backup. That's extra important in this case, since the Xposed Framework is in its early stages and may cause issues with some devices. Do not skip this step!
Then, to get started, go ahead and tap the "Install" button from TWRP's main menu. Next, navigate to your device's Download folder, then select the Xposed ZIP file that you downloaded in Step 1.
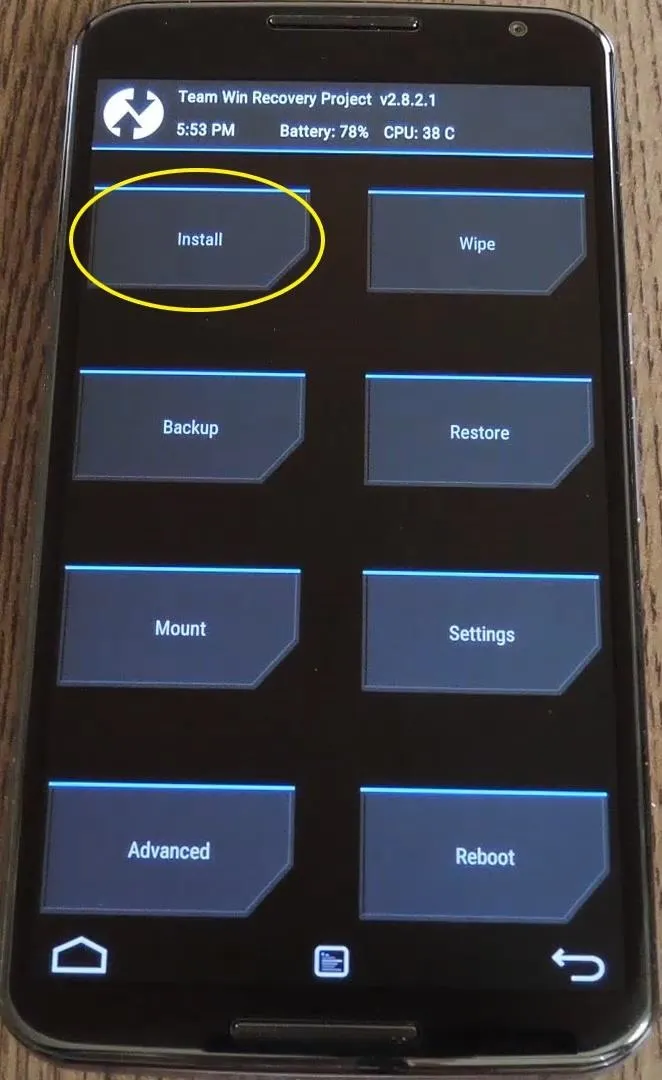
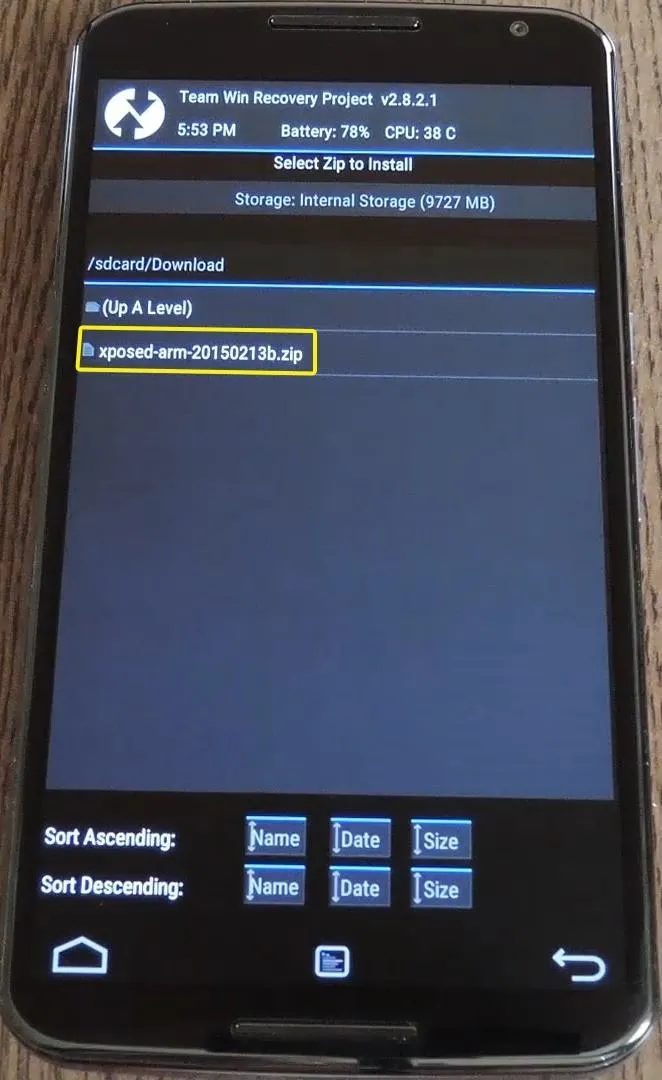


After that, just swipe the slider at the bottom of the screen to install the Framework, and when that's finished, tap "Reboot System."
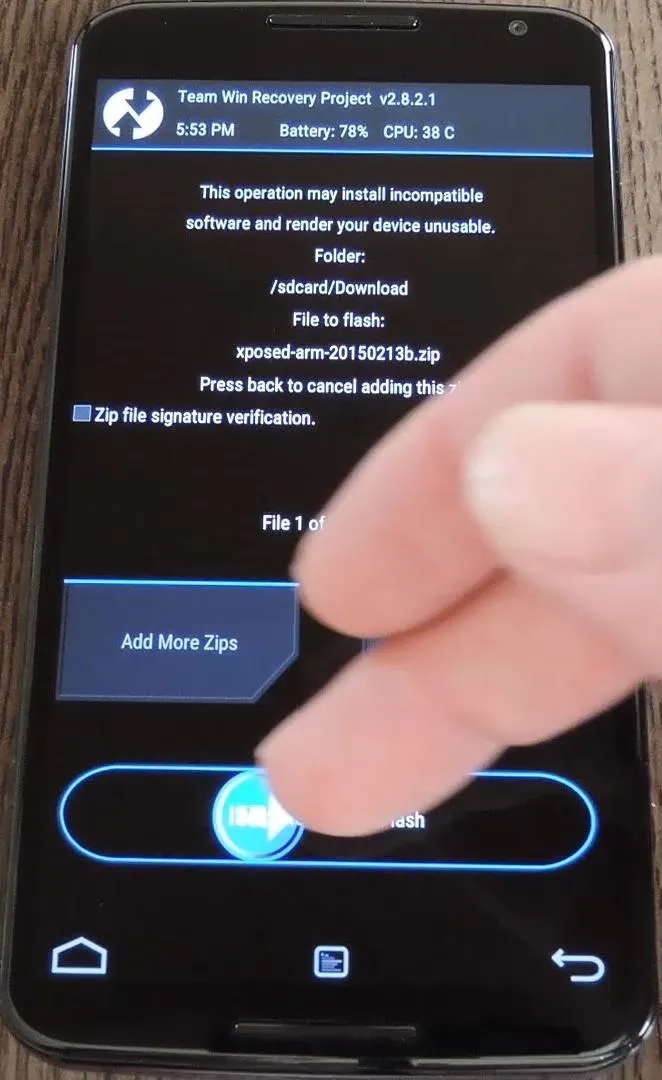
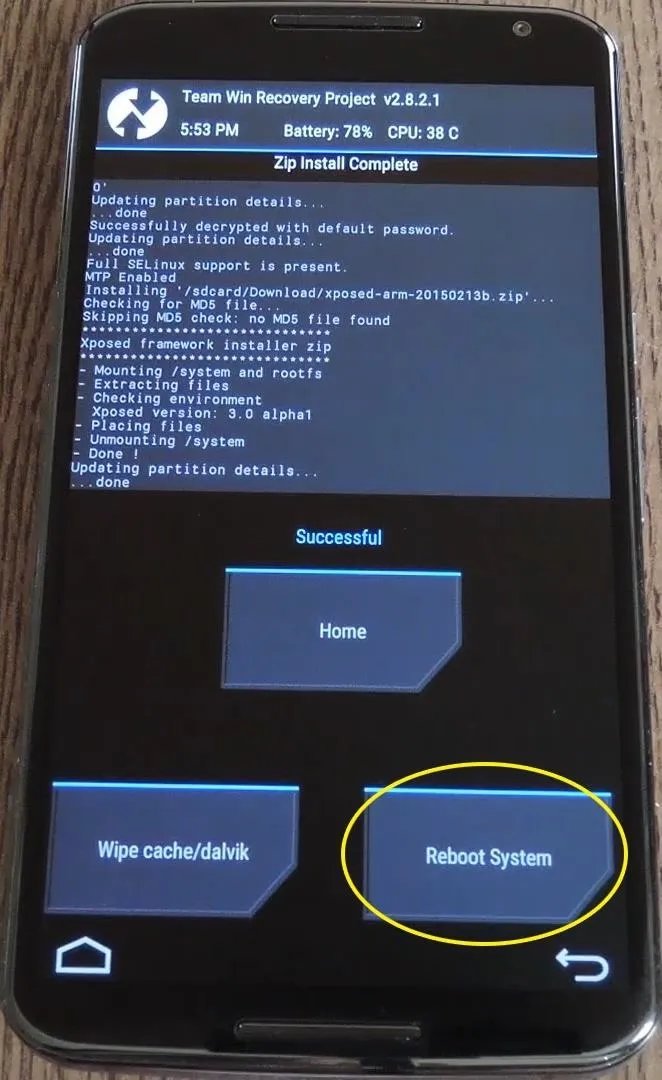


Your device will take longer than normal to boot up here. This is because the Xposed Framework ZIP had to clear away some library files, which will need to be restored. Expect this process to take at least 10 minutes.
Install the Xposed Installer App
When you get back up, it's time to install the actual Xposed Installer app. Tap the Download Complete notification for the "XposedInstaller_3.0-alpha4.apk" file, then press "Install" and "Open" on the next two menus.
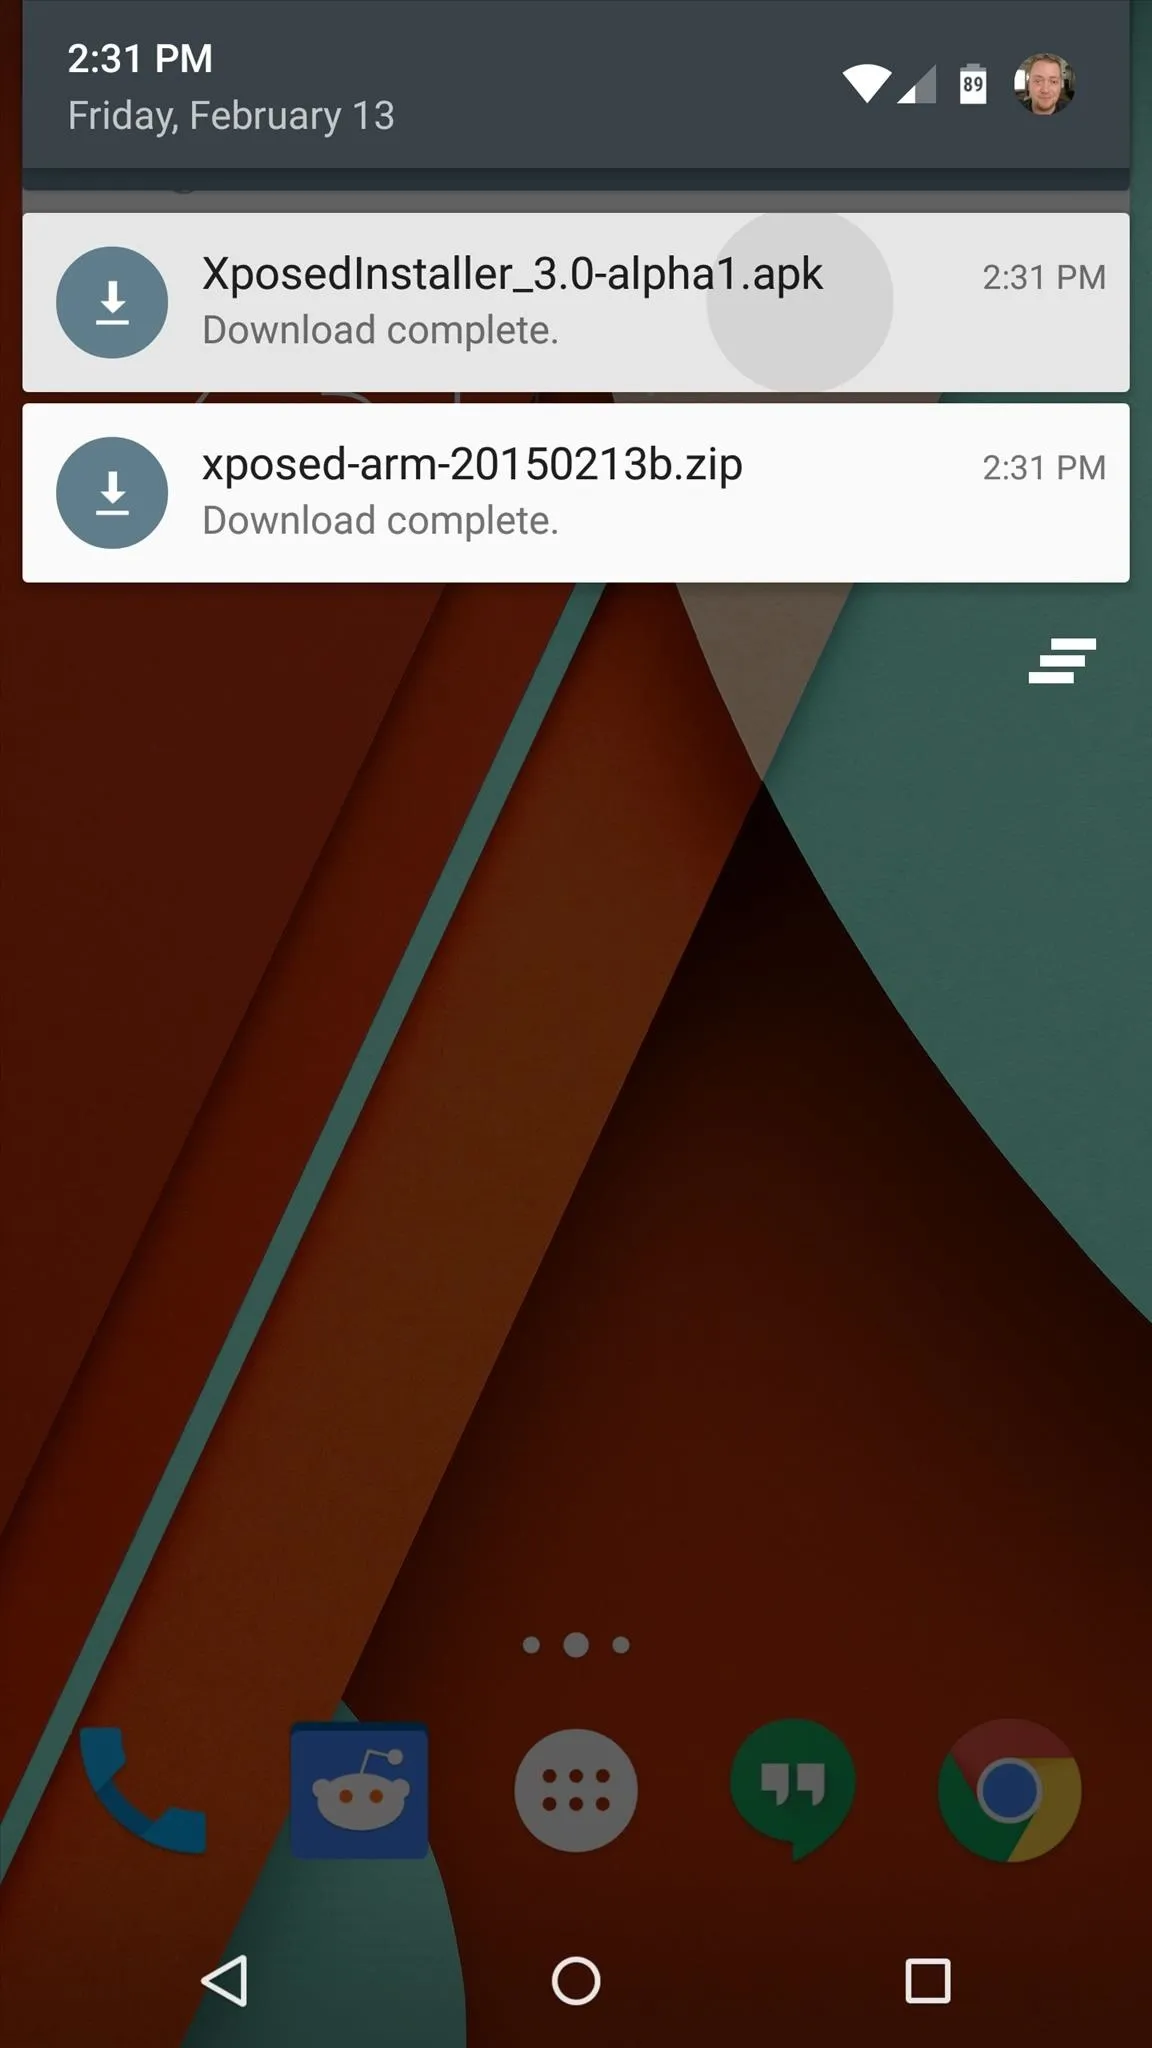
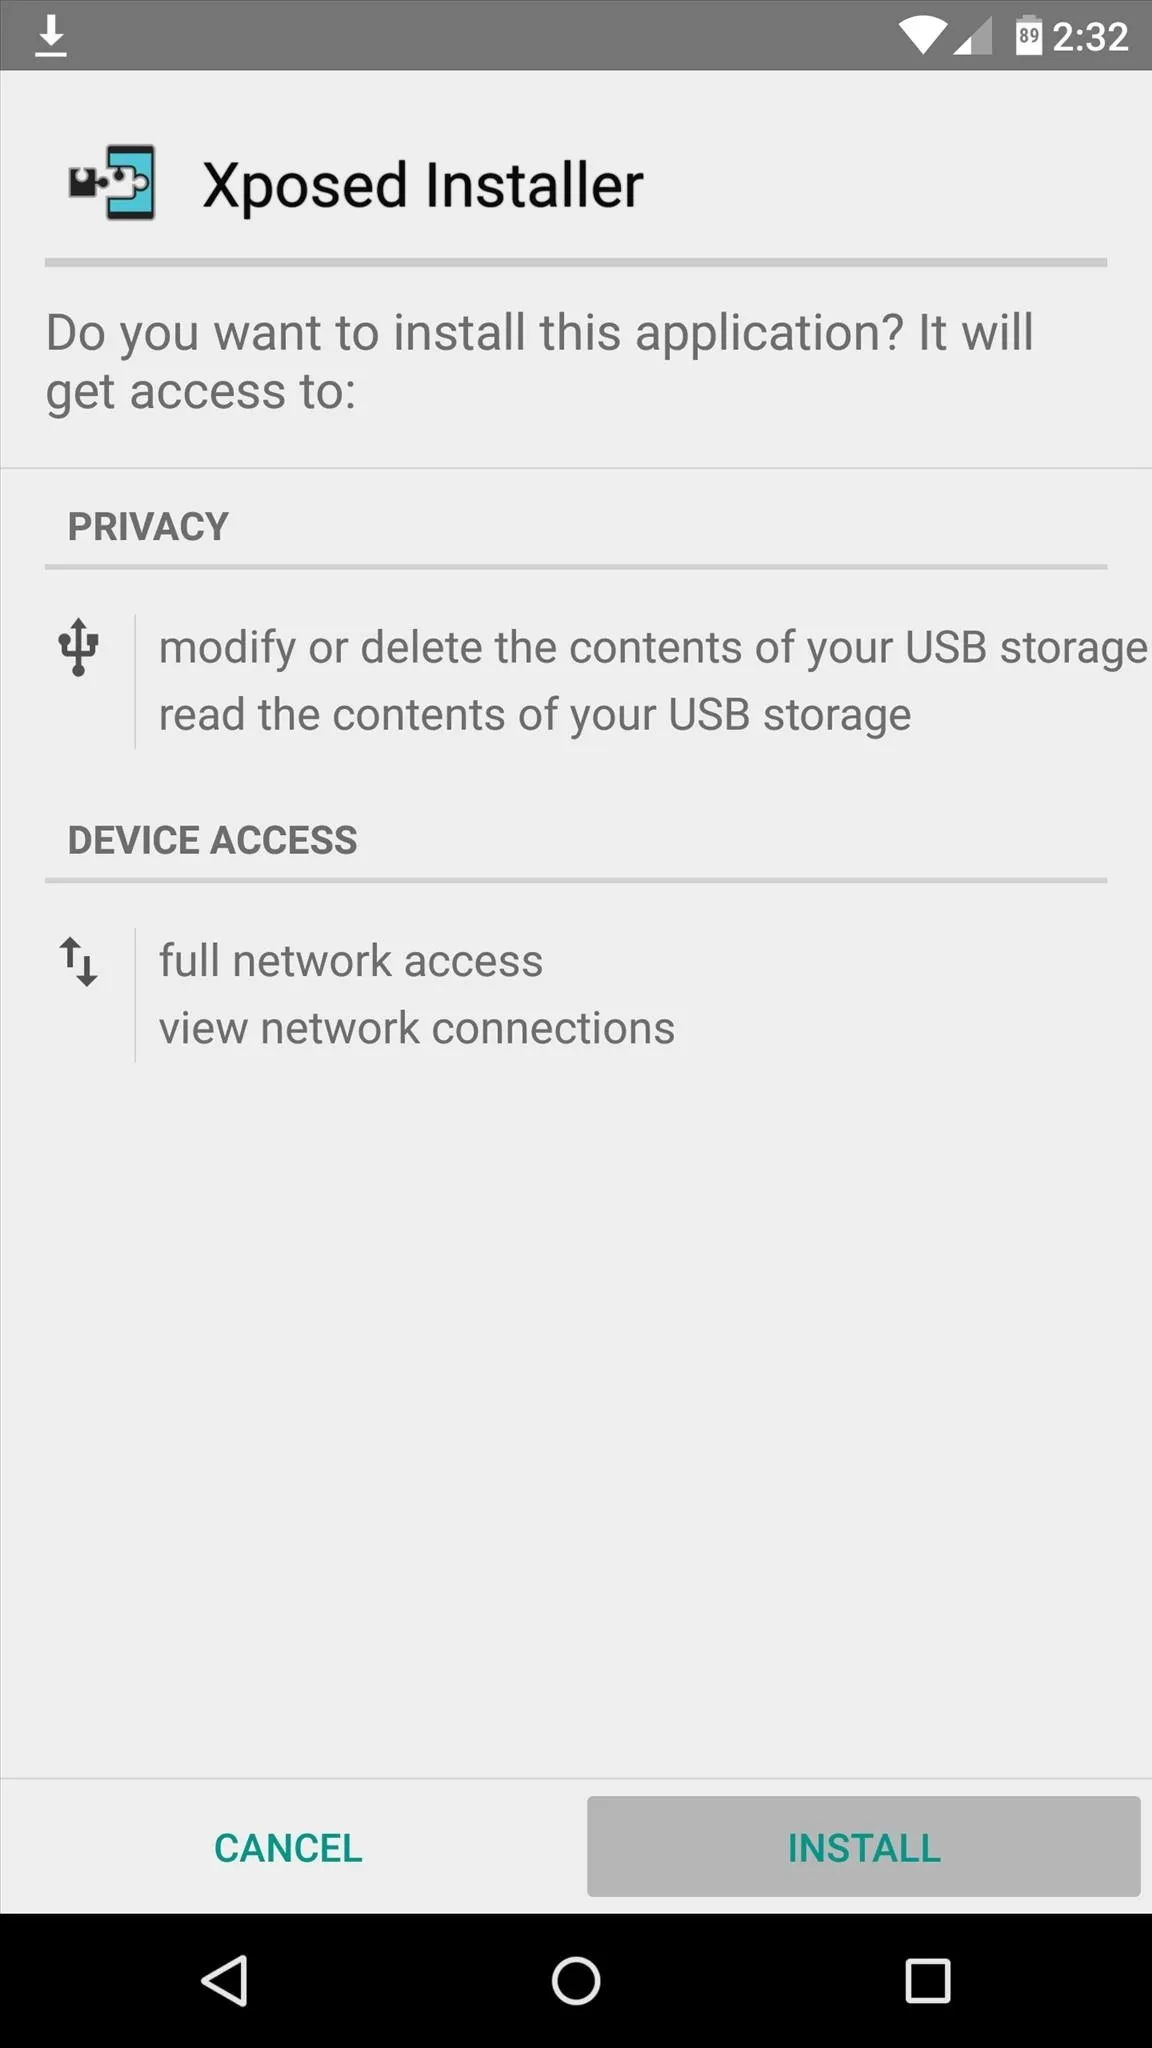


At this point, you should be looking at that familiar Xposed interface we all know and love. Head to the "Download" section to begin browsing modules, but keep in mind that some may not work on Lollipop.
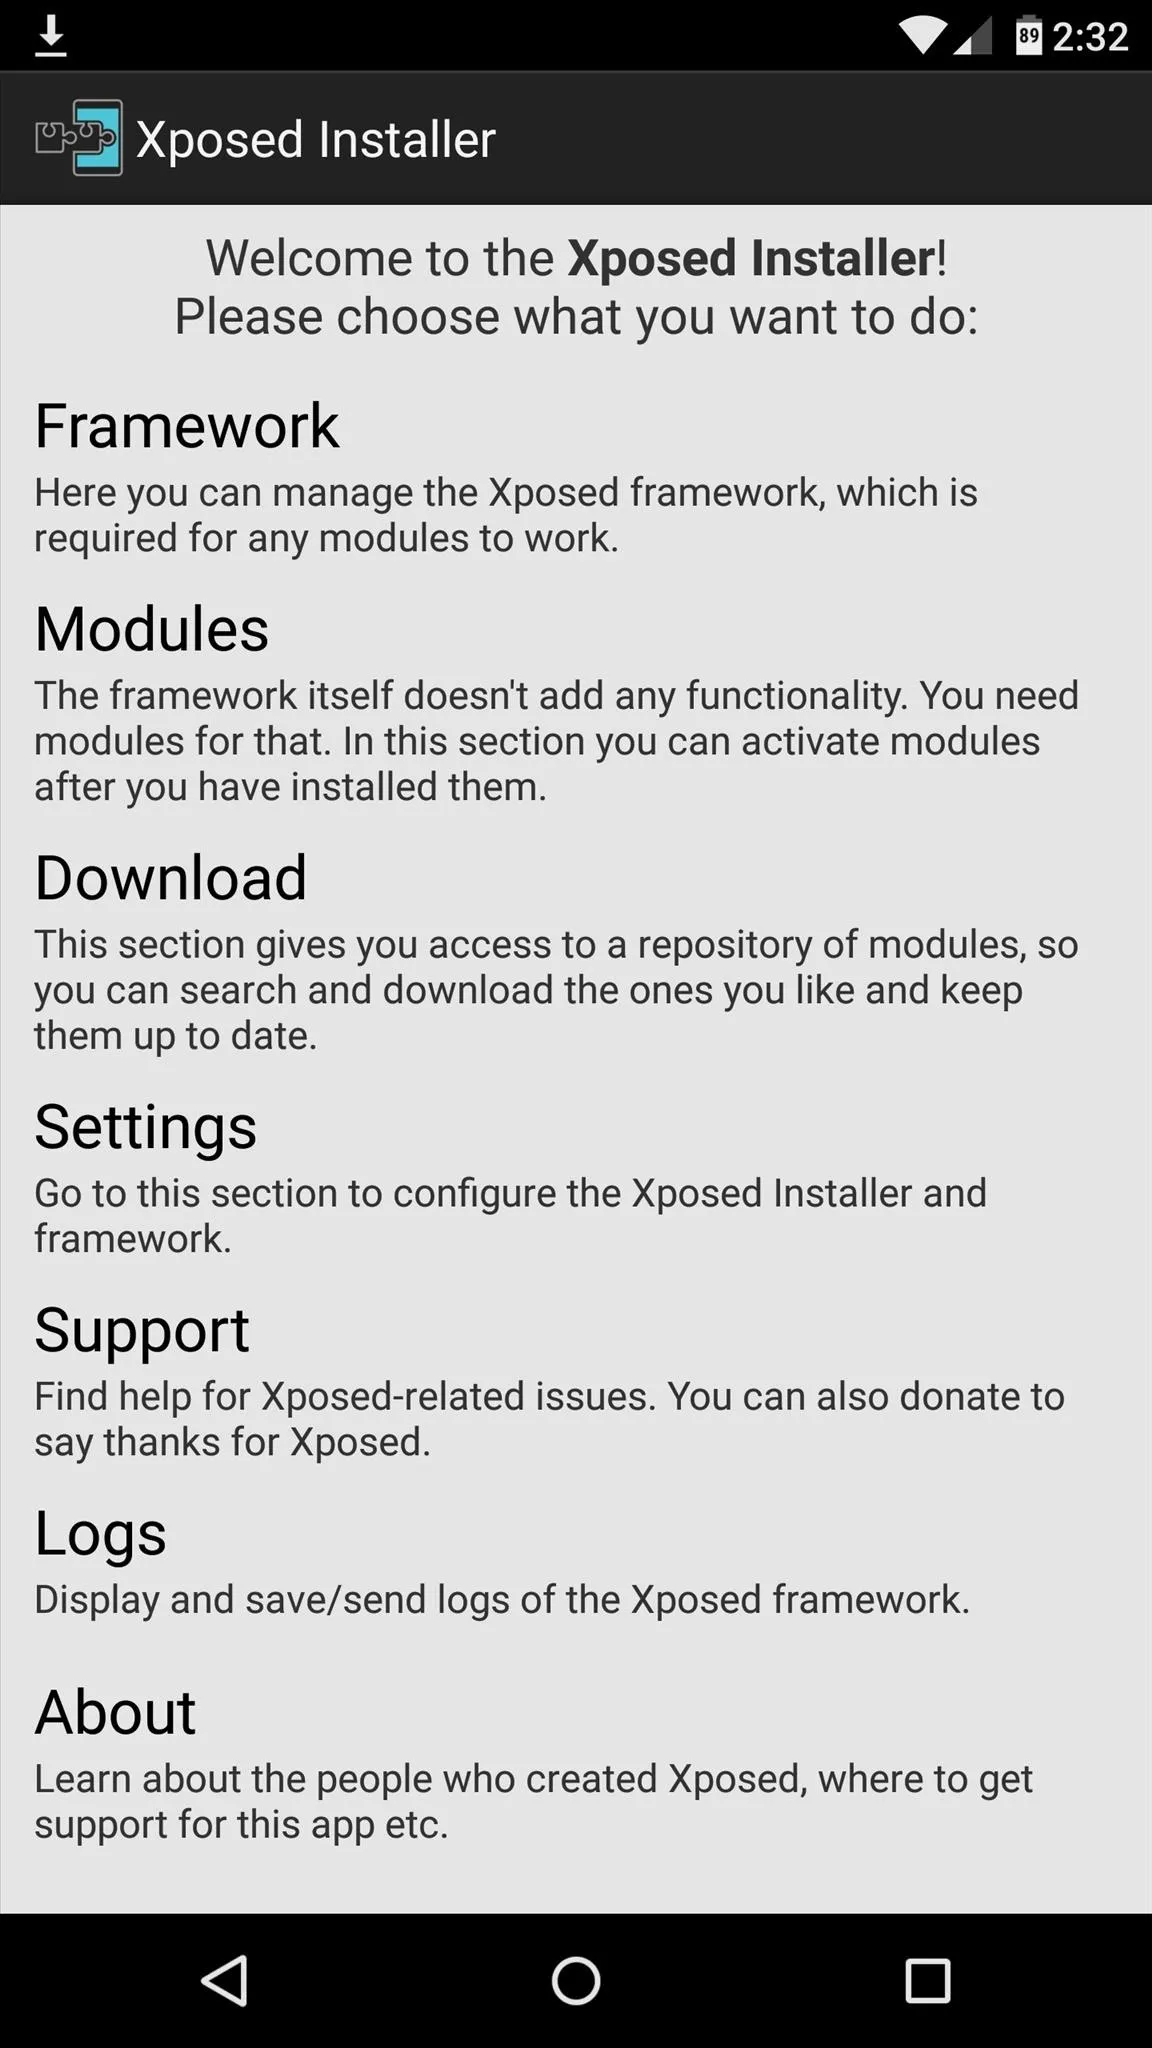
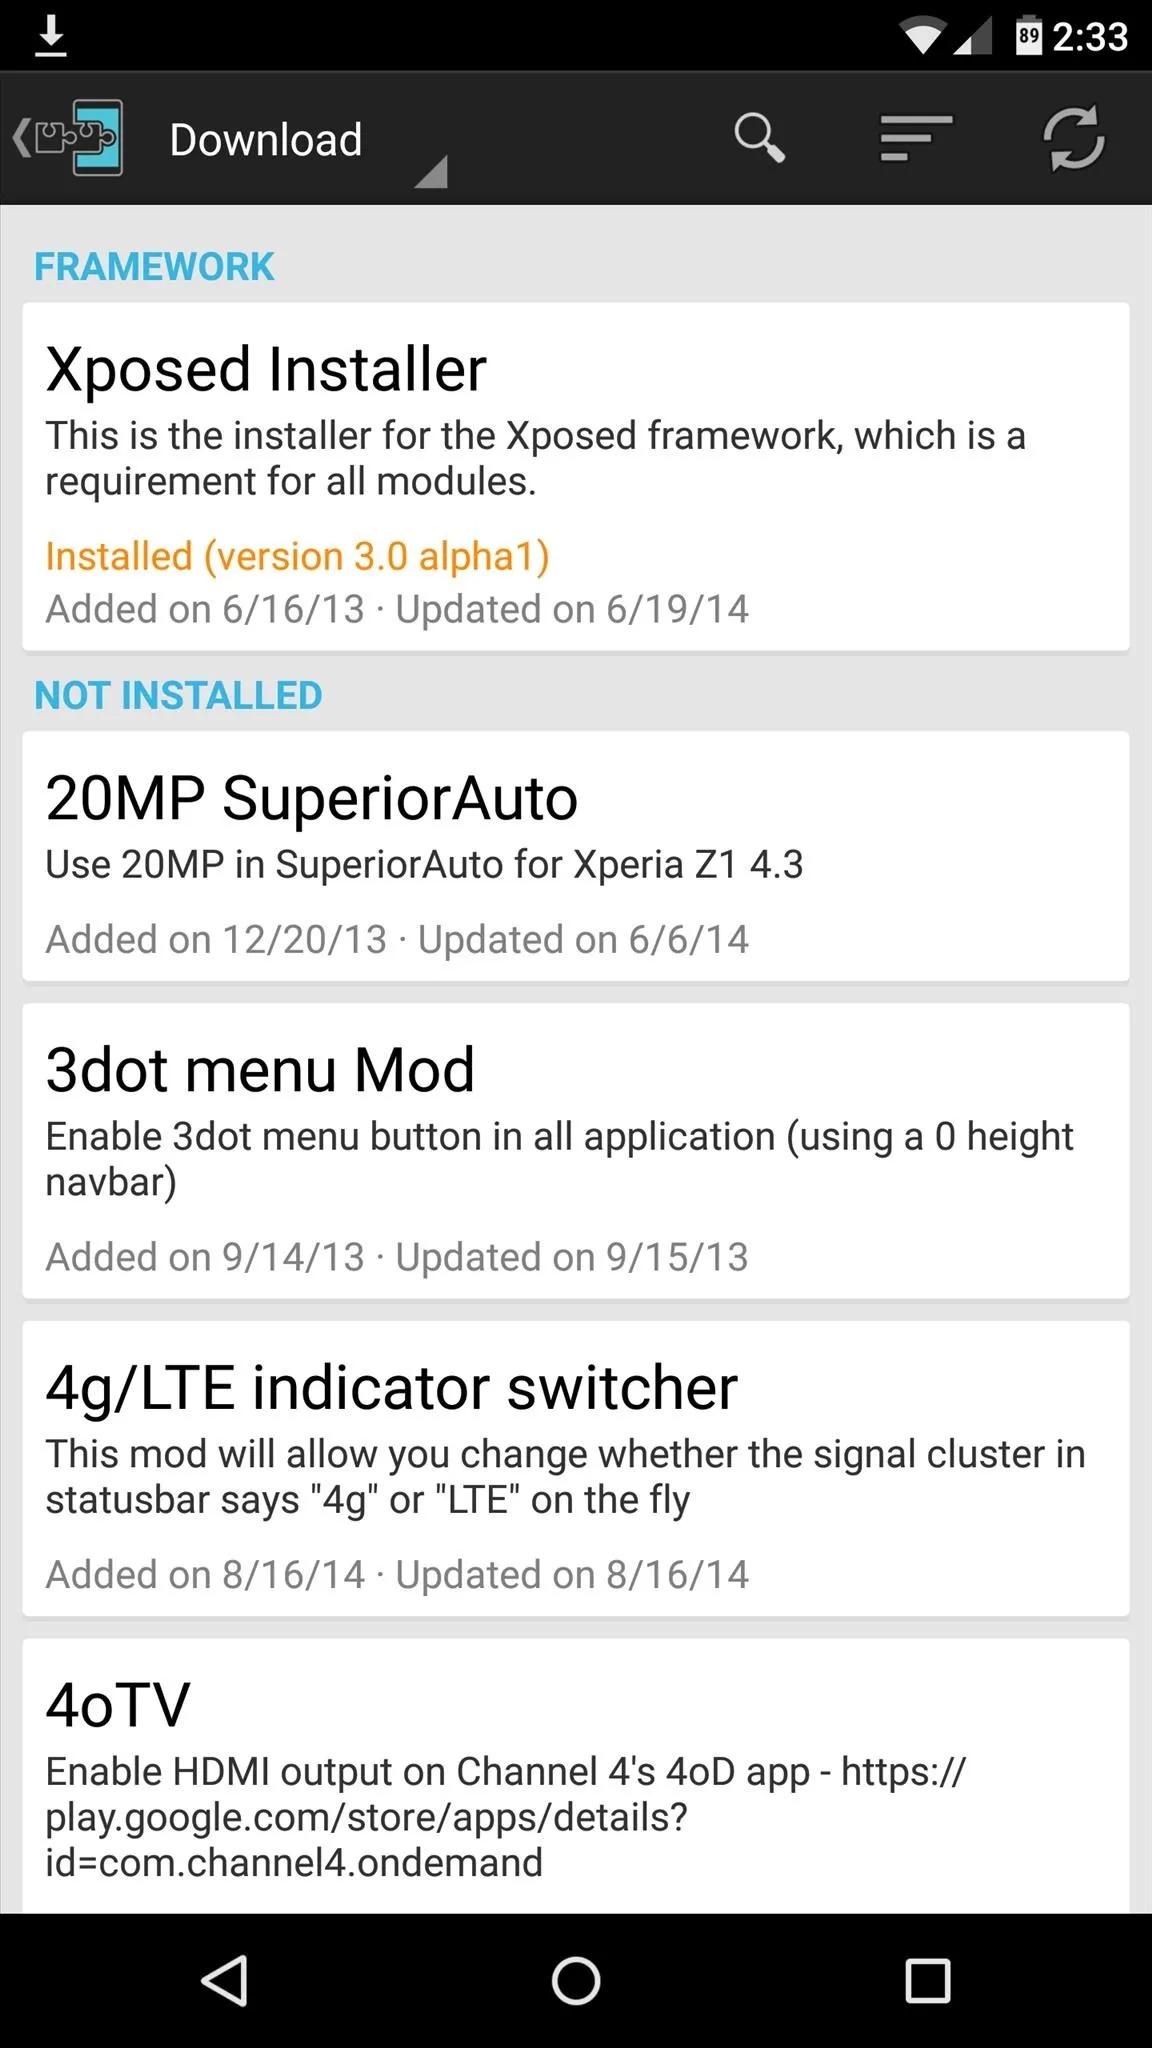


Mainly, any modules that deal with system modification are hit-and-miss, while those that deal with app customization are working for the most part. For a list of modules that are known to be working with Lollipop, check out this article.
What were some of the first Xposed Modules that you installed on Lollipop? Let us know in the comments section below, or drop us a line on Facebook, Google+, or Twitter.











Comments
Be the first, drop a comment!