


Android O has finally arrived—well, it's technically a beta version, but that isn't stopping Android enthusiasts from going crazy about it. The first Developer Preview was released earlier today and is available right now to install on Nexus and Pixel devices. While Android O doesn't have an official name or Android number yet (we're betting on "Android Oreo"), Google has released a feature list and a blog post explaining almost all of the new changes and features.
It only takes a few minutes to install the Developer Preview of Android O, but it will require you to unlock your bootloader, which means your device will be wiped. As it stands, flashing the factory images is the only way to get Android O right now. You could enroll in the beta program and hope the update gets pushed to your device at some point—but nobody wants to wait that long, so let's get to flashing.
Requirements
- supported Nexus or Pixel device
- Windows, Mac, or Linux computer
- USB data cable
Set Up ADB & Fastboot
To begin, you'll need to install ADB and Fastboot on your computer. It's a fairly simple process which shouldn't take more than three minutes. Our full ADB and Fastboot installation guide can be found at the link below, just in case you've never heard of those terms before.
Download & Extract the Update
For the second step, you'll want to download the Android O factory images for your device. Make sure to download the correct ZIP for your model, as the update is quite large and will take a while to download.
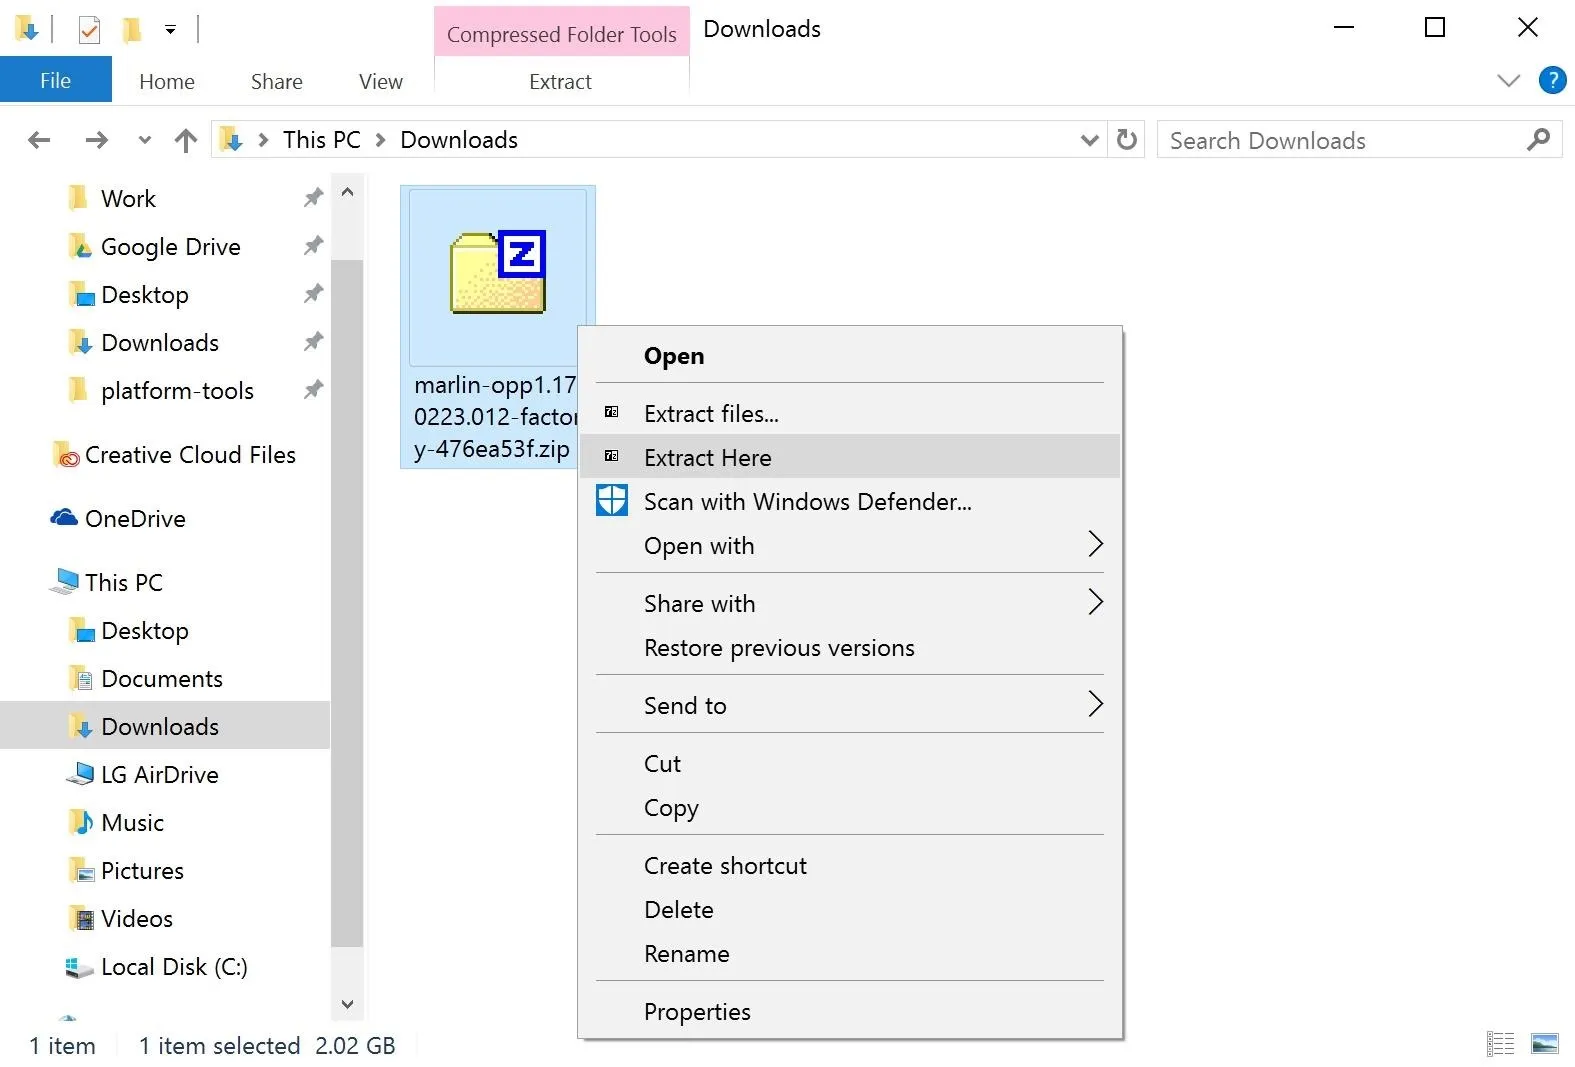
Once the download has completed, right-click the ZIP file and choose Extract Here. This will extract the update contents from the ZIP, as they've been compressed a couple of times to reduce the total ZIP size.
Move the Files to Your Platform-Tools Folder
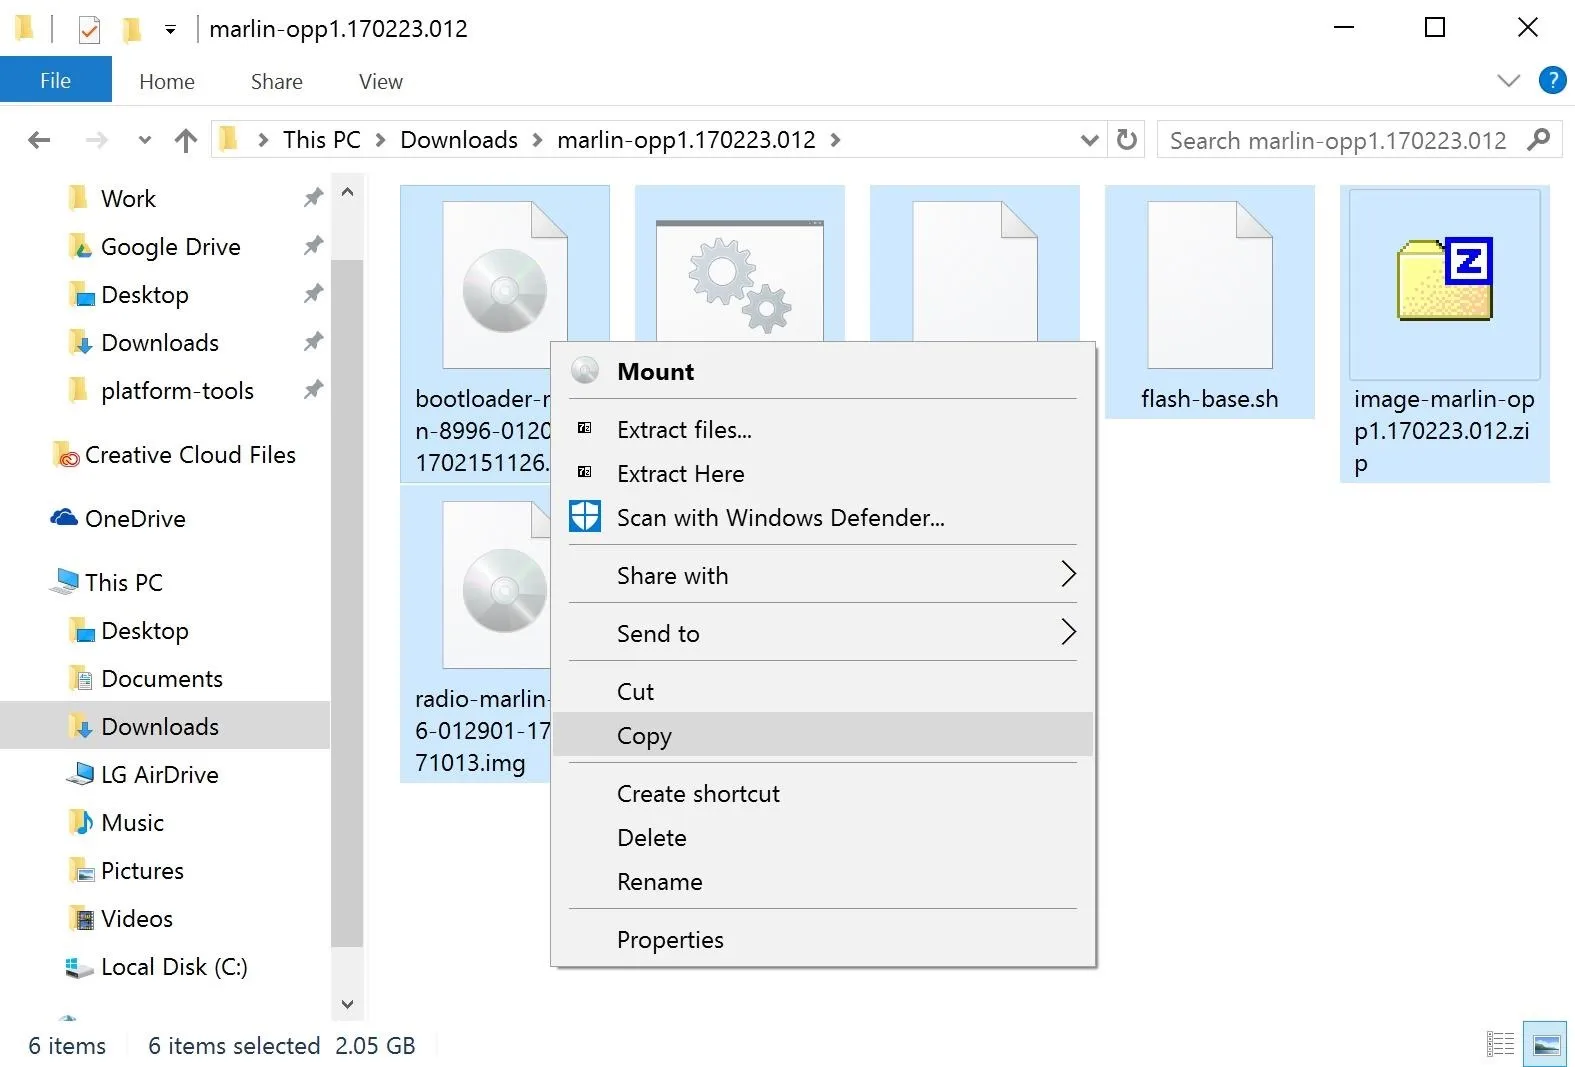
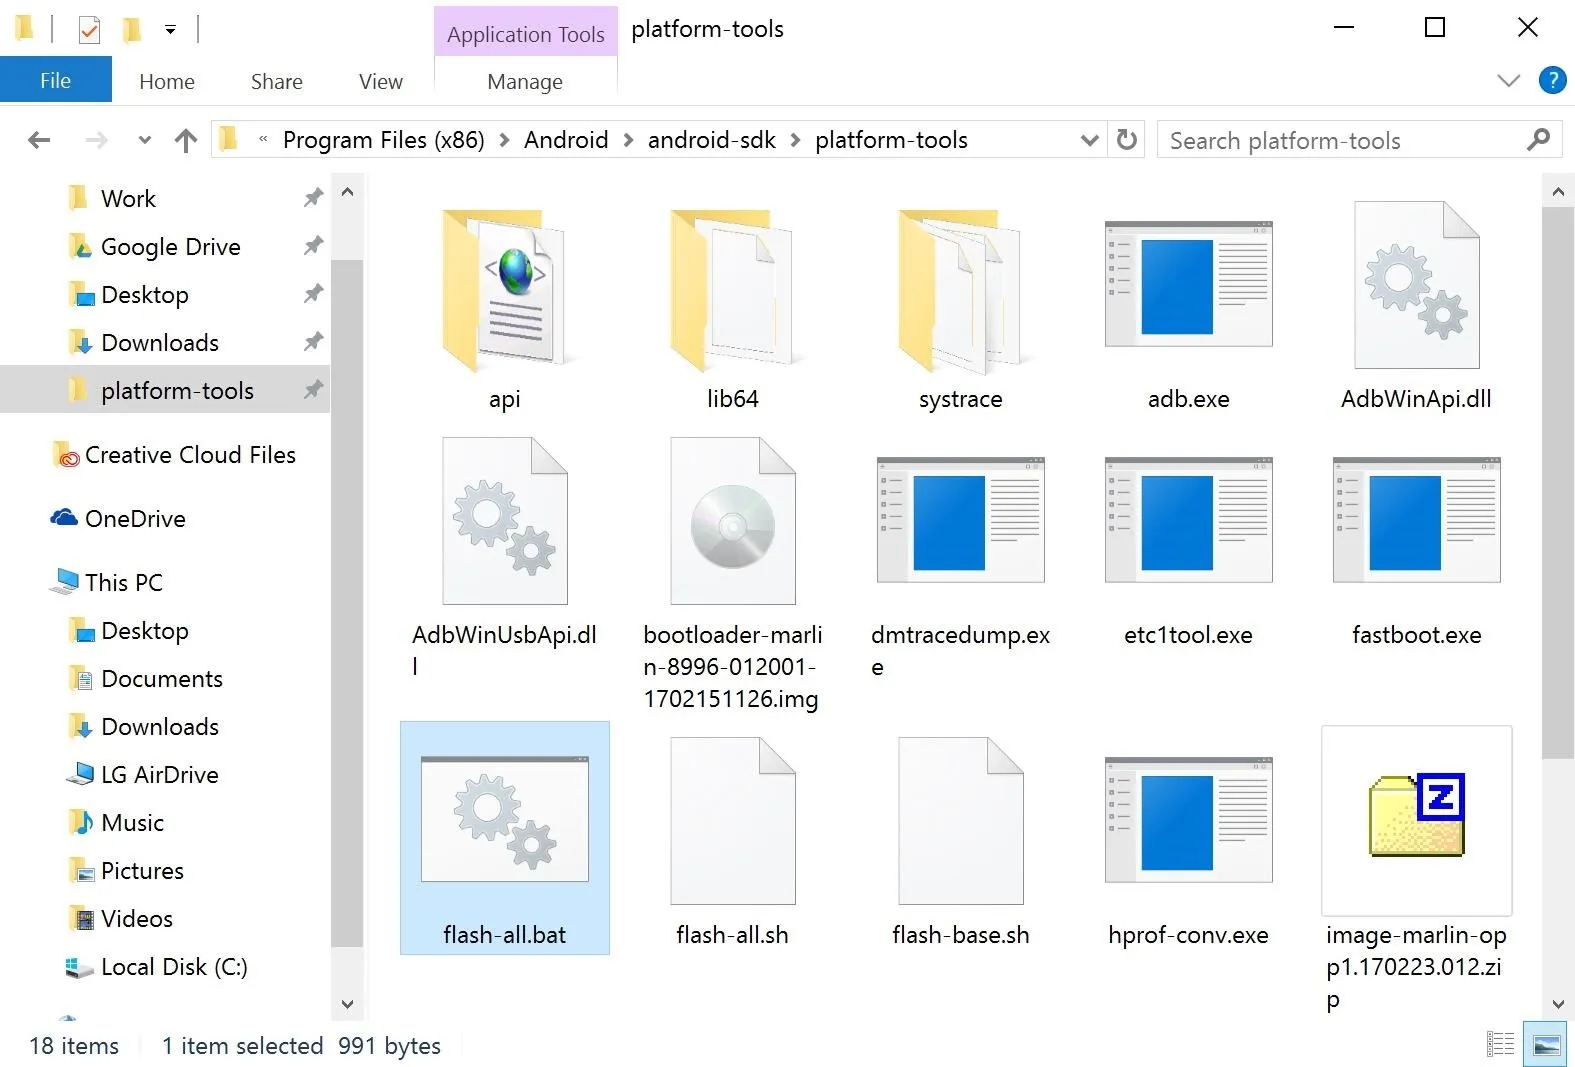
After you've extracted the files from the Developer Preview ZIP, you'll want to copy and paste the extracted contents into your platform-tools folder. So to start, open the folder you extracted in Step 2, then copy (or cut) every last file you find.
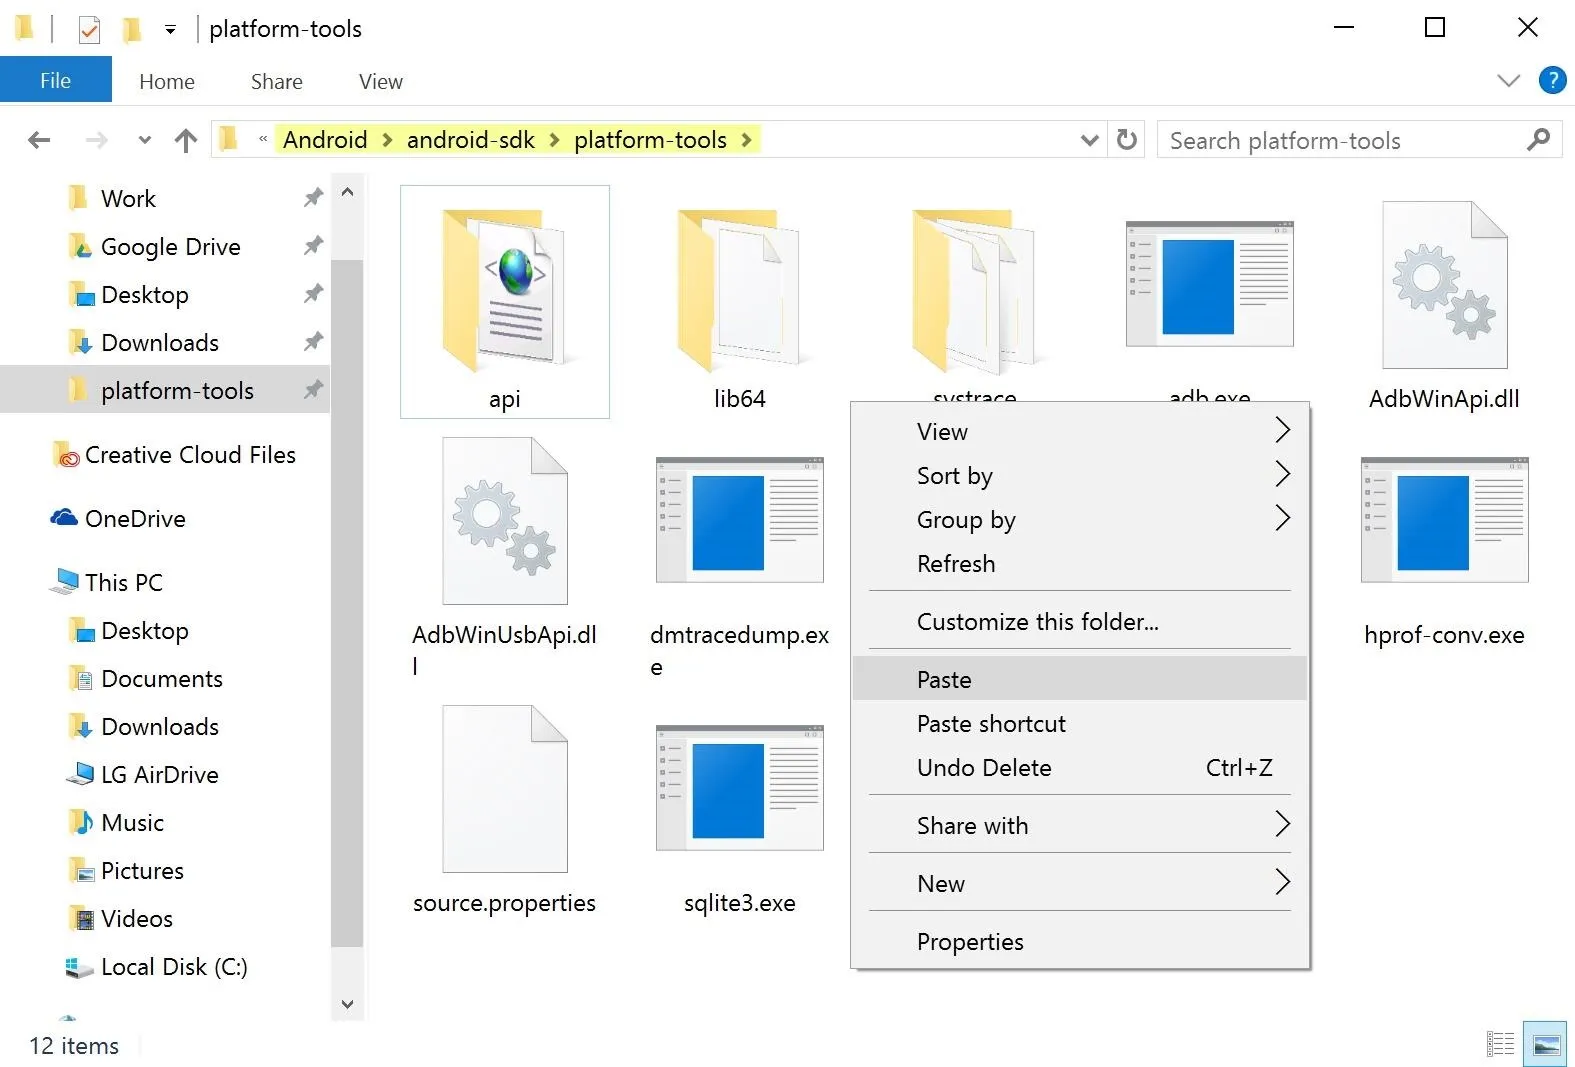
Next, paste all of these files into the platform-tools folder inside of your ADB installation directory. For most users, this can be found at C:\Program Files (x86)\Android\android-sdk\, so go ahead and move the files to that directory.
Enable Developer Options, OEM Unlocking & USB Debugging
Like with all Android phones, if you want to unlock your bootloader and flash factory images, you have to activate the hidden Developer options menu in order to enable a pair of settings. So open up Settings and navigate to About phone -> Software info, then spam-tap the "Build number" entry until you get a toast message stating "You are now a developer!"

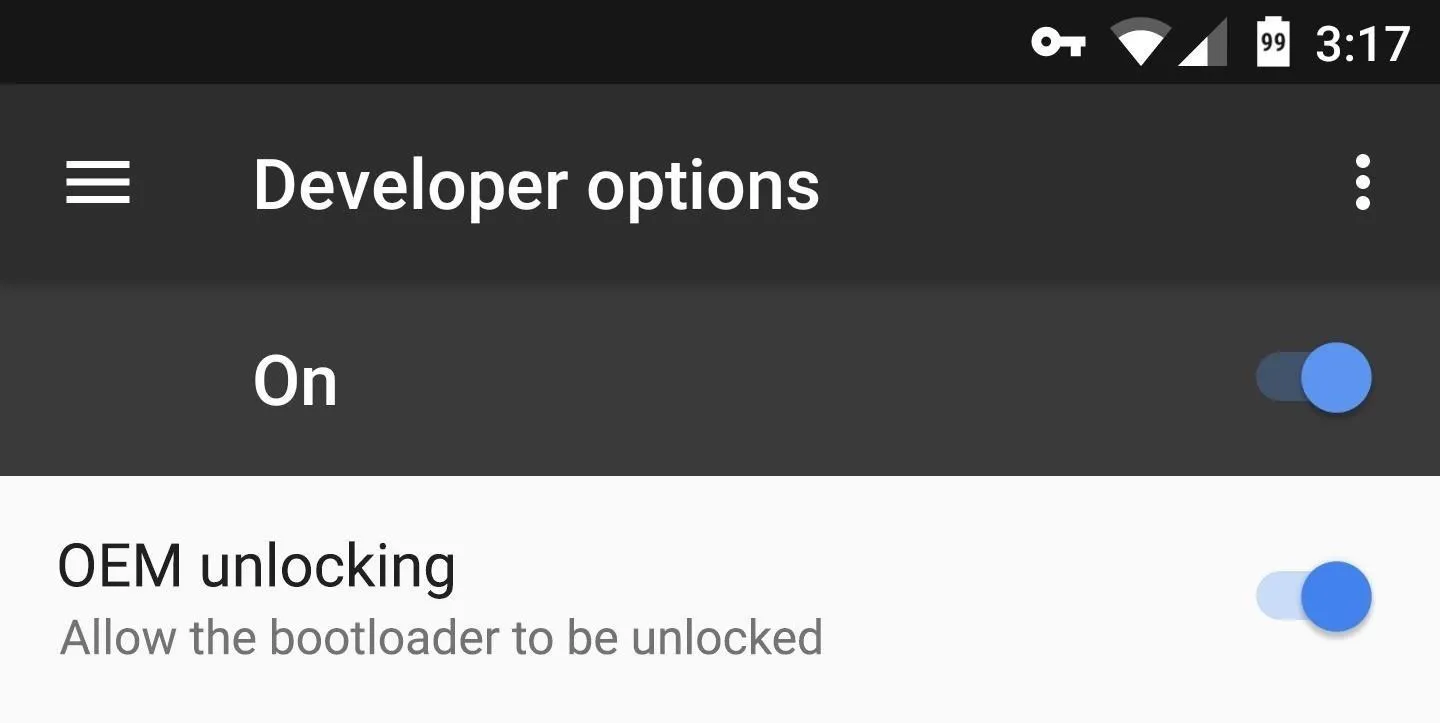
After successfully doing this, tap the back arrow and open up "Developer options" (it'll be right above "About phone"). In this menu, you'll need to enable two things. The first is the "Enable OEM unlocking" setting, and the second is "USB debugging".
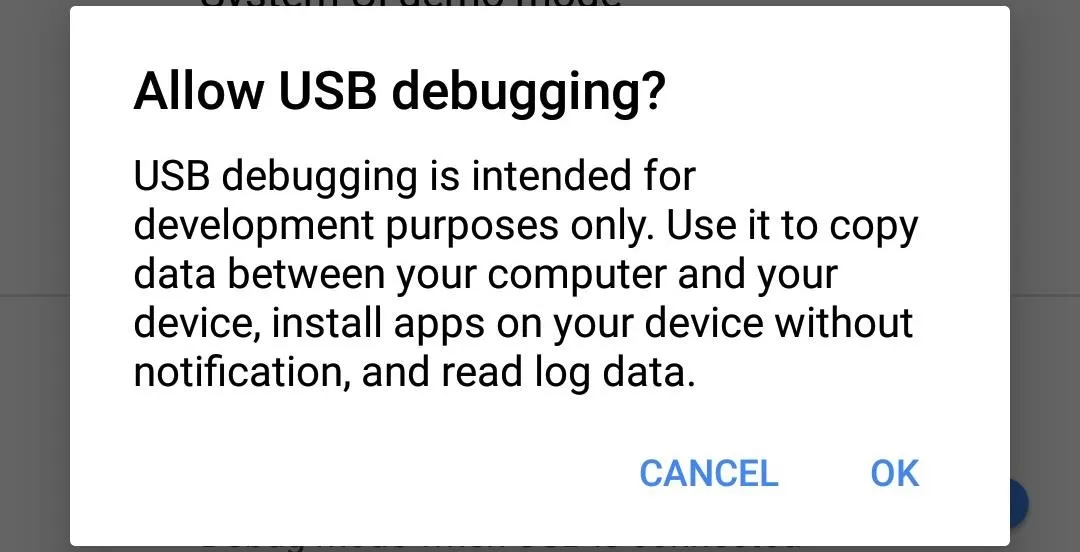
When you tap on USB debugging, you will get a pop-up message asking you to confirm that you want to enable to USB debugging, so go ahead and tap "OK" when that shows up.
Put Your Phone into Bootloader Mode
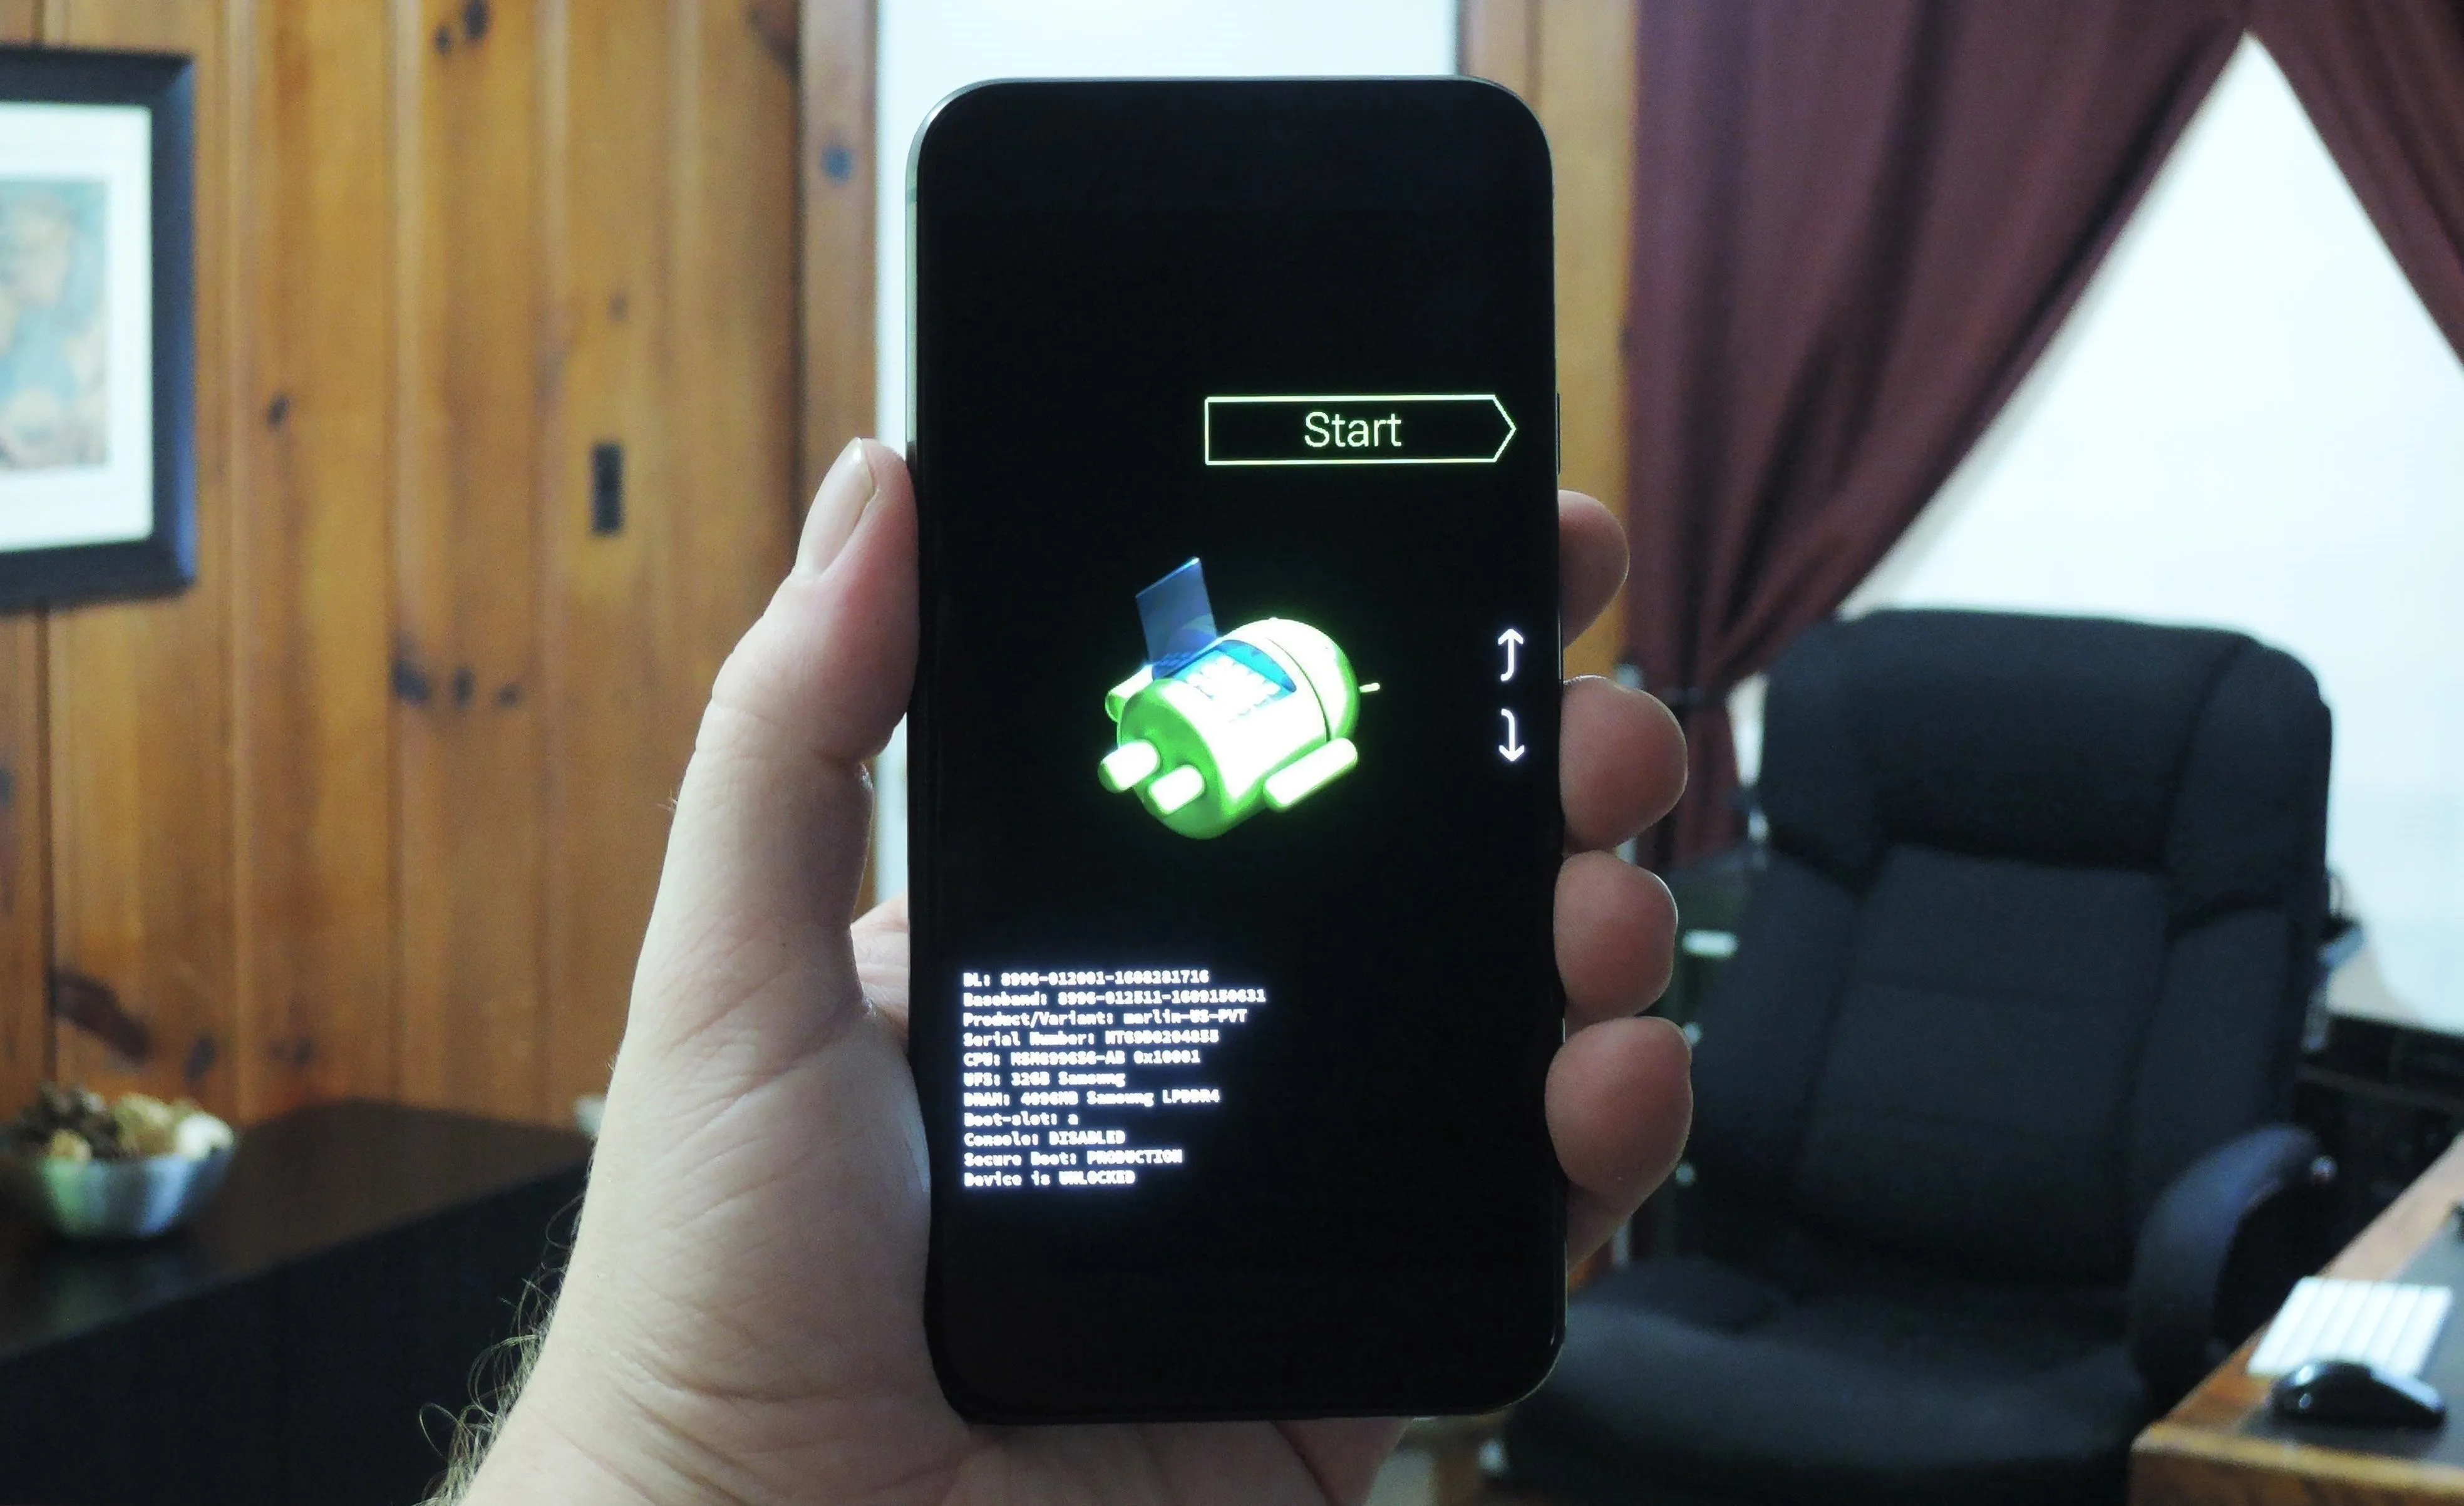
In order to run any Fastboot commands, your phone or tablet will need to be in bootloader mode. This process is exactly the same for all Nexus and Pixel devices. Start by powering your device completely off. When the screen goes black, press and hold the volume down and power buttons simultaneously, and keep holding them for about 10 seconds.
Within moments, you should be greeted by Android's Bootloader menu. Once you see this screen, go ahead and connect your phone to your computer with a USB data cable.
Unlock Your Bootloader
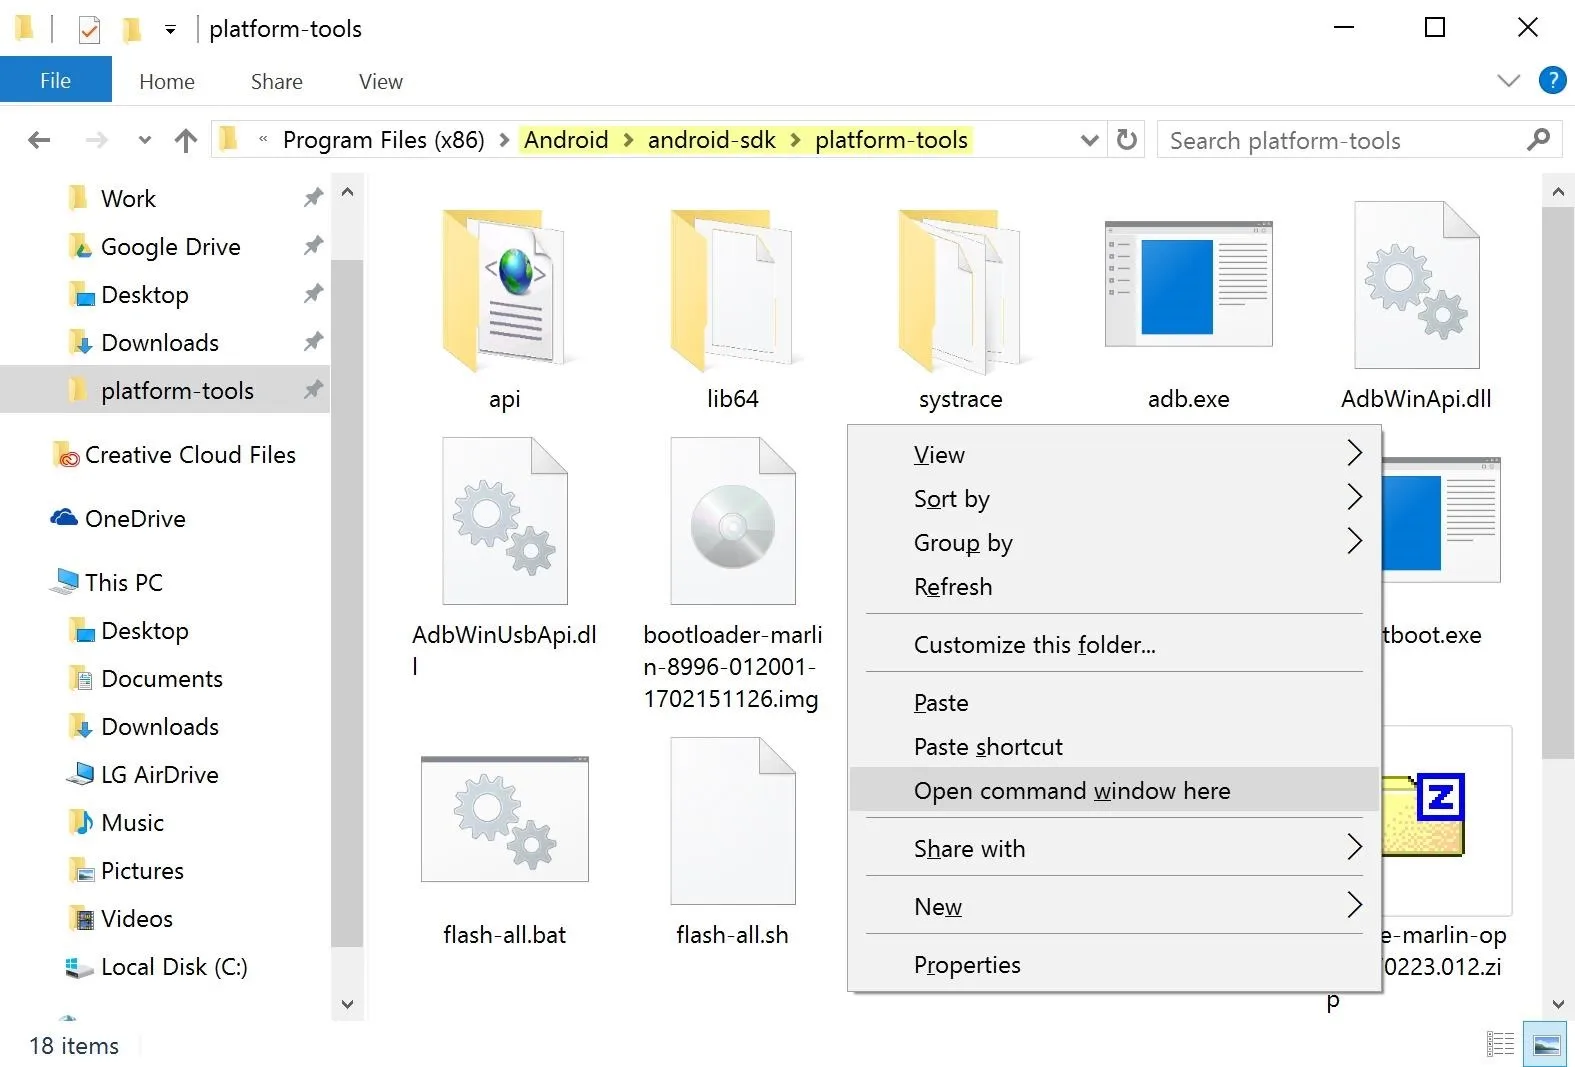
If you're using a Windows PC, hold down the shift button on your keyboard, then right-click any empty space inside of the platform-tools folder and choose "Open Command Window Here." If you're using a Mac or Linux machine, open Terminal, then change directories to your platform-tools folder.
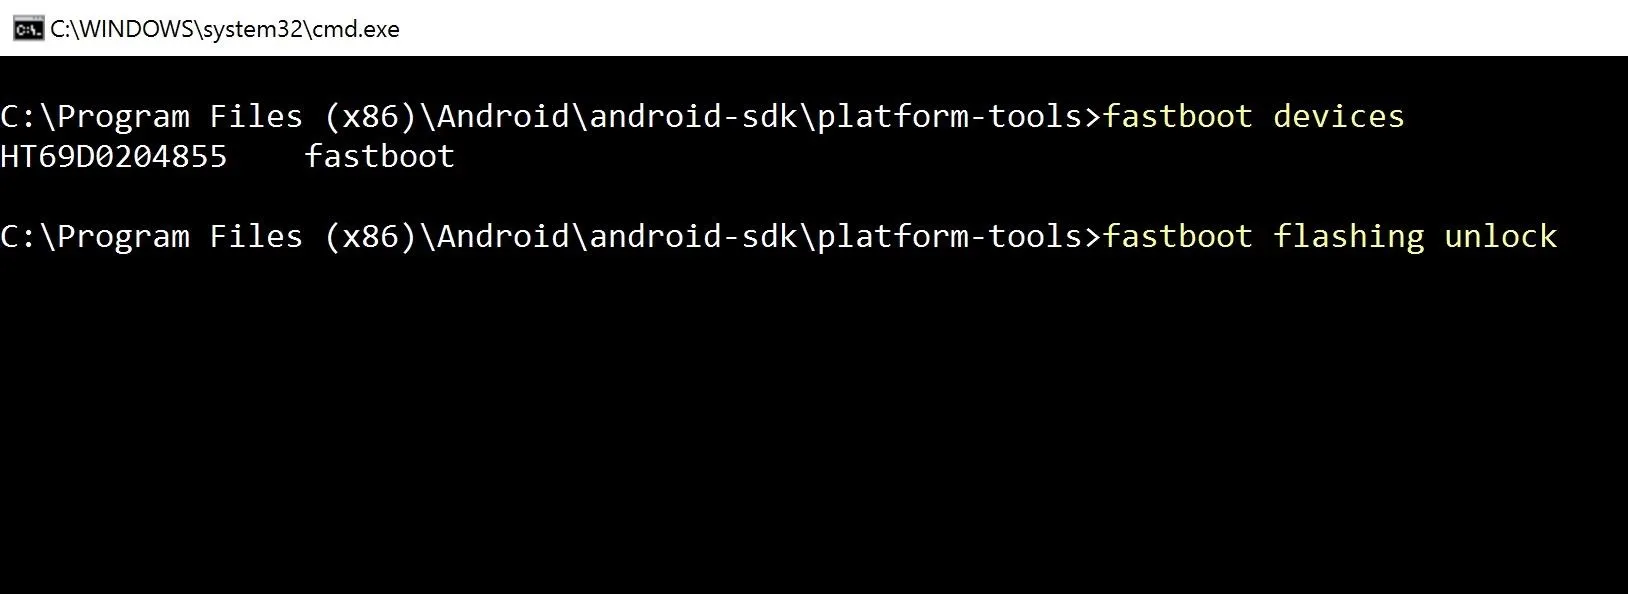
Next, type the following command, then hit enter. If this returns a series of letters and numbers, then you're good to go. Otherwise, refer back to the guide in Step 1 to check your ADB and Fastboot installation.
fastboot devices
After that, it's time to unlock your bootloader if you haven't already done so. To do that, enter the following command, but note that this is the part that will wipe your device.
fastboot flashing unlock
Flash Android O
Once your bootloader is unlocked, all you have to do to install Android O is double-click the flash-all.bat file that you pasted in your Platform Tools directory in Step 3. This BAT file will automatically flash and install all of the Android O files on your device.
You can also manually enter the flash-all command, which will provide you with the proud feeling of learning another Fastboot command! Either way, you'll see that Android O has now begun installing on your device.
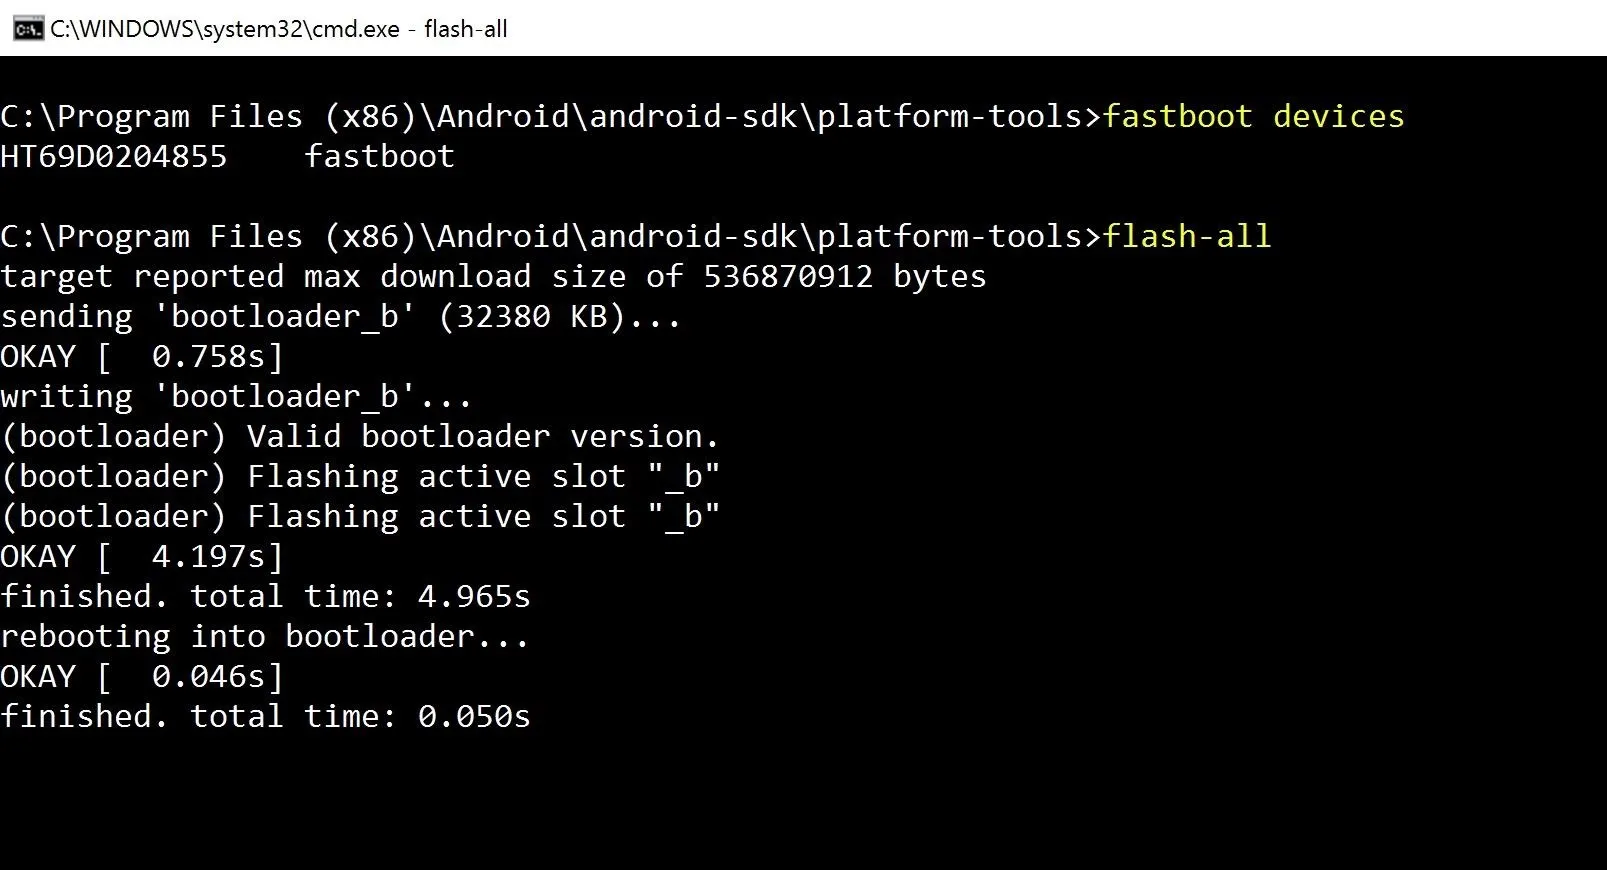
Next, just sit back and wait until you see the final "finished" line pop into the command prompt. When all of the flashing has been completed, your device will automatically reboot, at which point it's safe to disconnect the USB cable.
Congratulations are in order, as you are now one of the first adopters of Android O! All that's left to do is set up your device and begin exploring Android O. It is worthwhile to note that while everything should be working fine, there is the possibility for random bugs, since this version of Android was intended for developers. Other than that, you're all good to go. Be sure to leave a comment below and share your thoughts on Android O with us.
- Follow Gadget Hacks on Facebook, Twitter, Google+, and YouTube
- Follow Android Hacks on Facebook, Twitter, and Pinterest
- Follow WonderHowTo on Facebook, Twitter, Pinterest, and Google+
Cover photo by Kevin M./Gadget Hacks
Screenshots by Dallas Thomas/Gadget Hacks


Comments
Be the first, drop a comment!