The OnePlus 5T was just released, and it's packing several new useful features. While many OnePlus 5 buyers are feeling frustrated with the quick release cycle, lots of fans are still clamoring to buy the new device. Aside from the larger screen, most of the buzz around the 5T has centered around the new face unlock method. Thanks to a clever hack, you can now get this feature on almost any phone!
In addition to being extremely accurate, the new method speeds up the overall unlocking process. Google already built face unlocking into the Smart Lock feature of Android, but it has a significant drawback: When using Smart Lock's version of facial recognition, users must swipe up on the lock screen after the phone is unlocked. Similar to Apple's Face ID setup, this is an annoying and unnecessary step that companies like Samsung and LG have already done away with in their recognition algorithms. Luckily, it's incredibly quick and easy to enable the OnePlus 5T's lock screen bypass method.
The only requirement here is that your phone is running Android 7.0 or higher, so if you're interested in a quick video tutorial on this process, check out our guide embedded below. If you want the nitty gritty details, read on for the full rundown.
Join the Beta for AutoInput
The new auto-unlocking functionality is currently a beta feature in developer João Dias' AutoInput app, so you'll need to join the beta program in order to try it. In order to join the Beta, you first need to join the Google+ Community for AutoApps. Simply tap on the "Join" button on the Google+ page to become a member of the community. After joining the G+ Community, head to the link below and make sure you're signed in with the same Google account you use on your Android device, then tap the "Become a Tester" button.


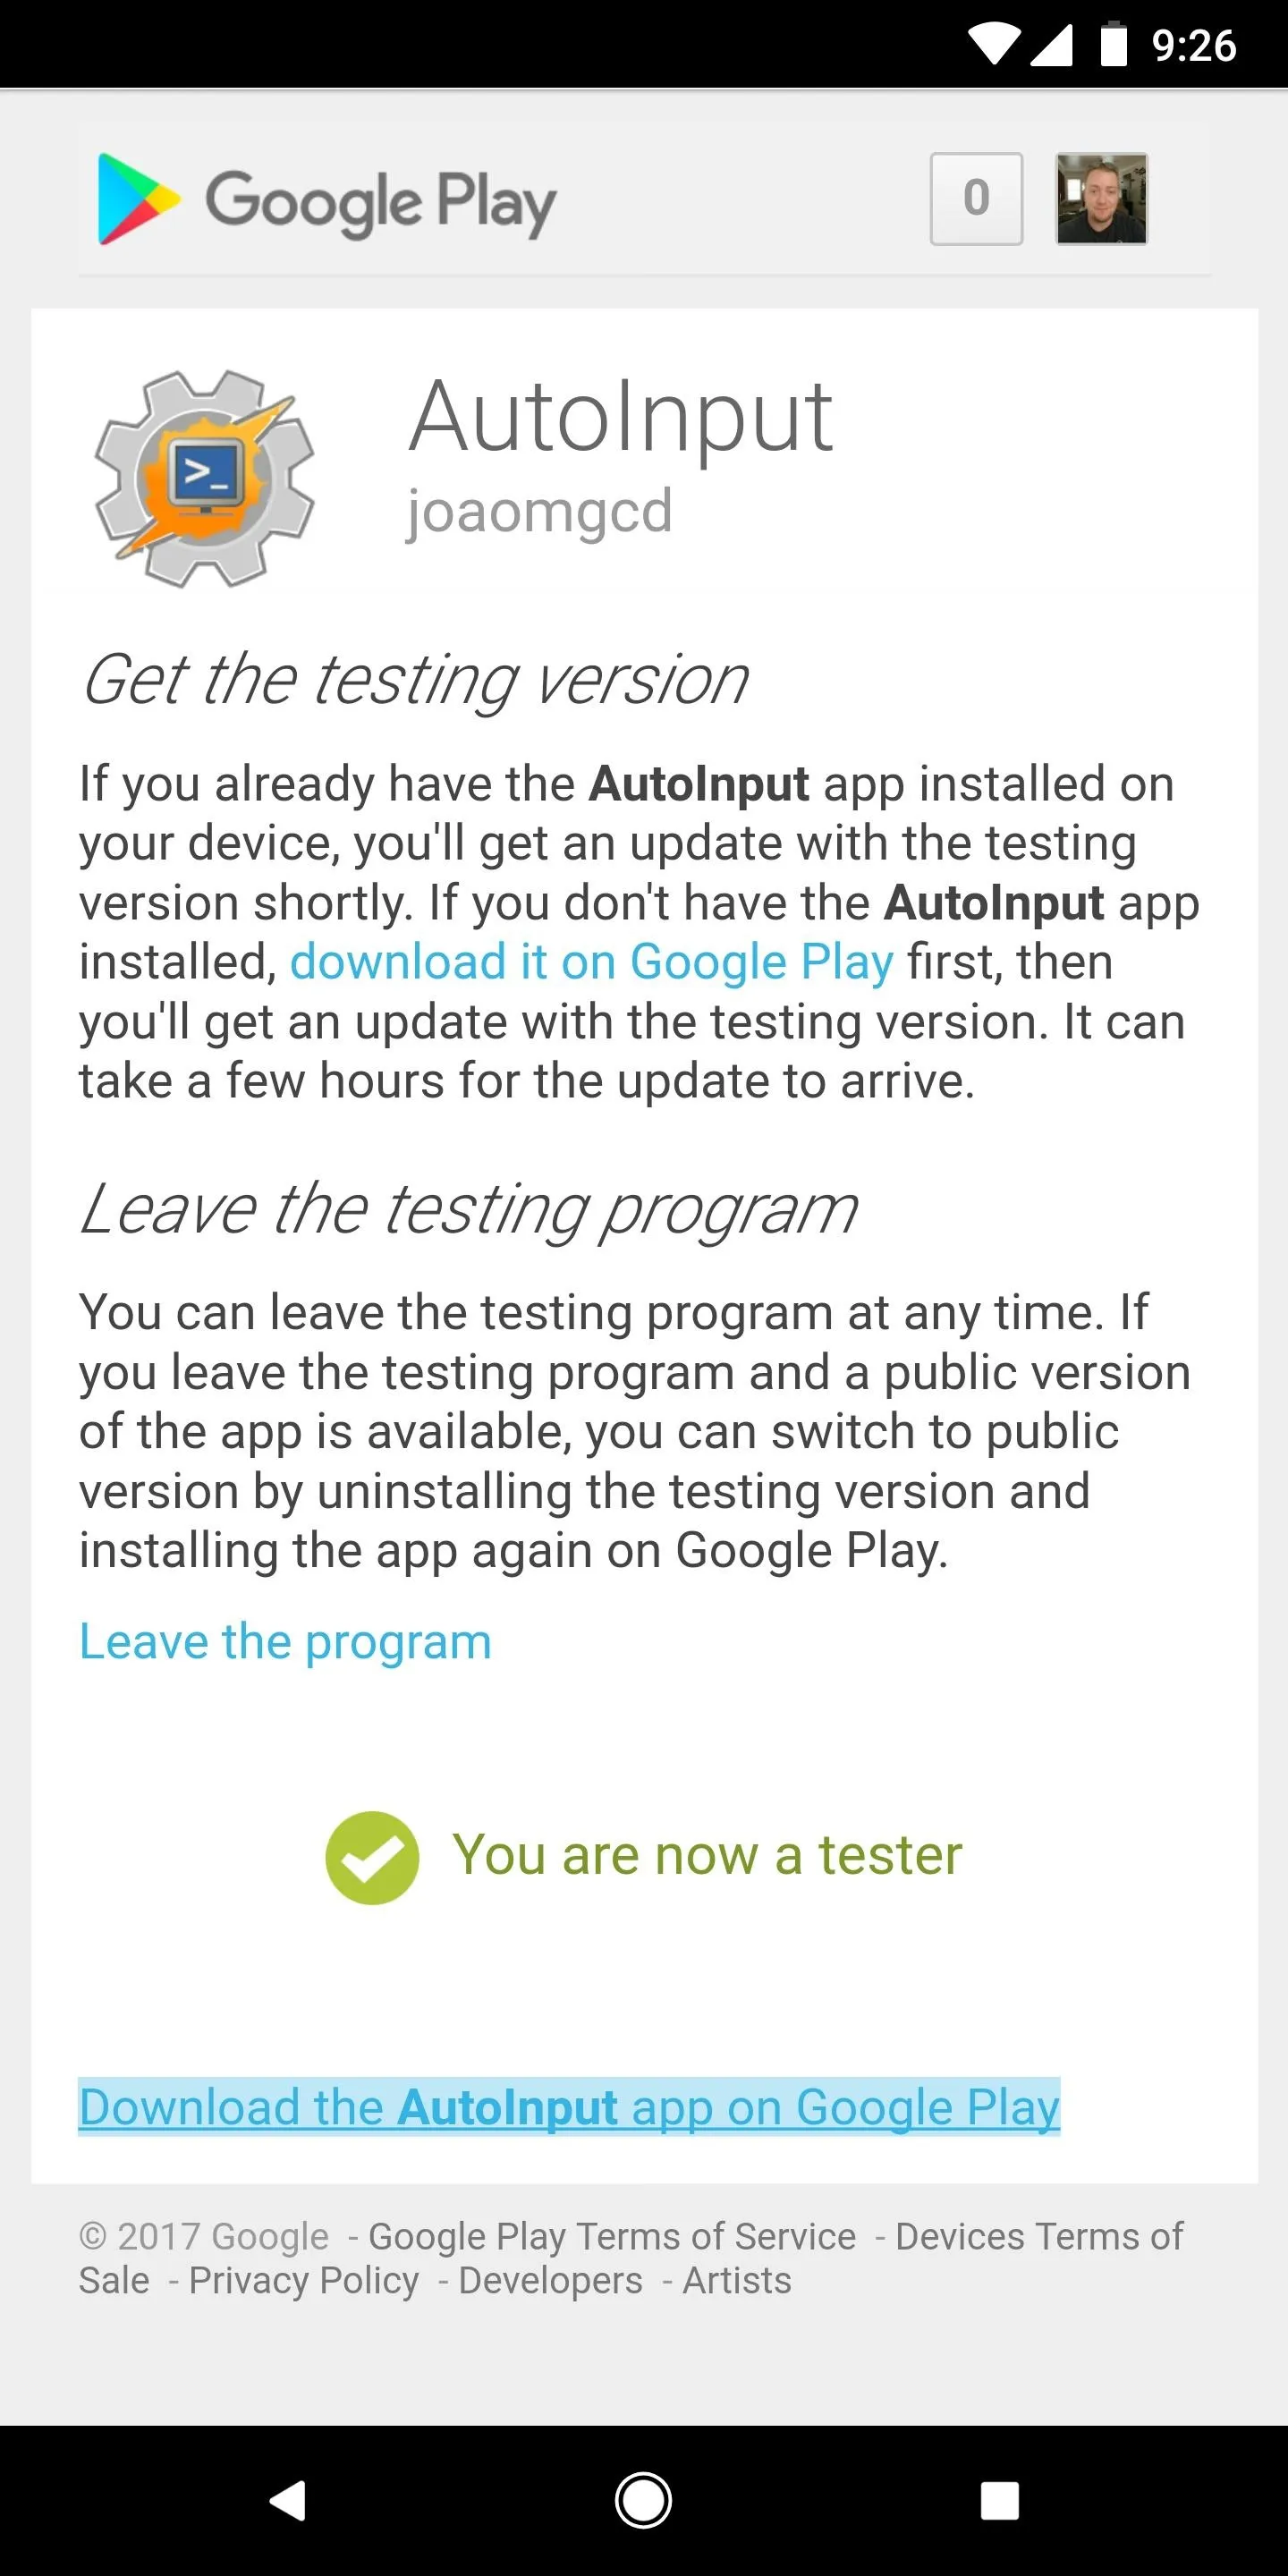


Download the Newest AutoInput Beta
Next, head over to the Google Play Store and install the latest version of the AutoInput app. You might need to wait up to 30 minutes after joining the beta program before the newest version will be available, so if the steps below don't work, check back on the Play Store for an update. You may notice that this app is actually a Tasker plug-in, but that isn't important here and we do not need Tasker to complete this hack.

Start a Free Trial or Buy the Pro Version
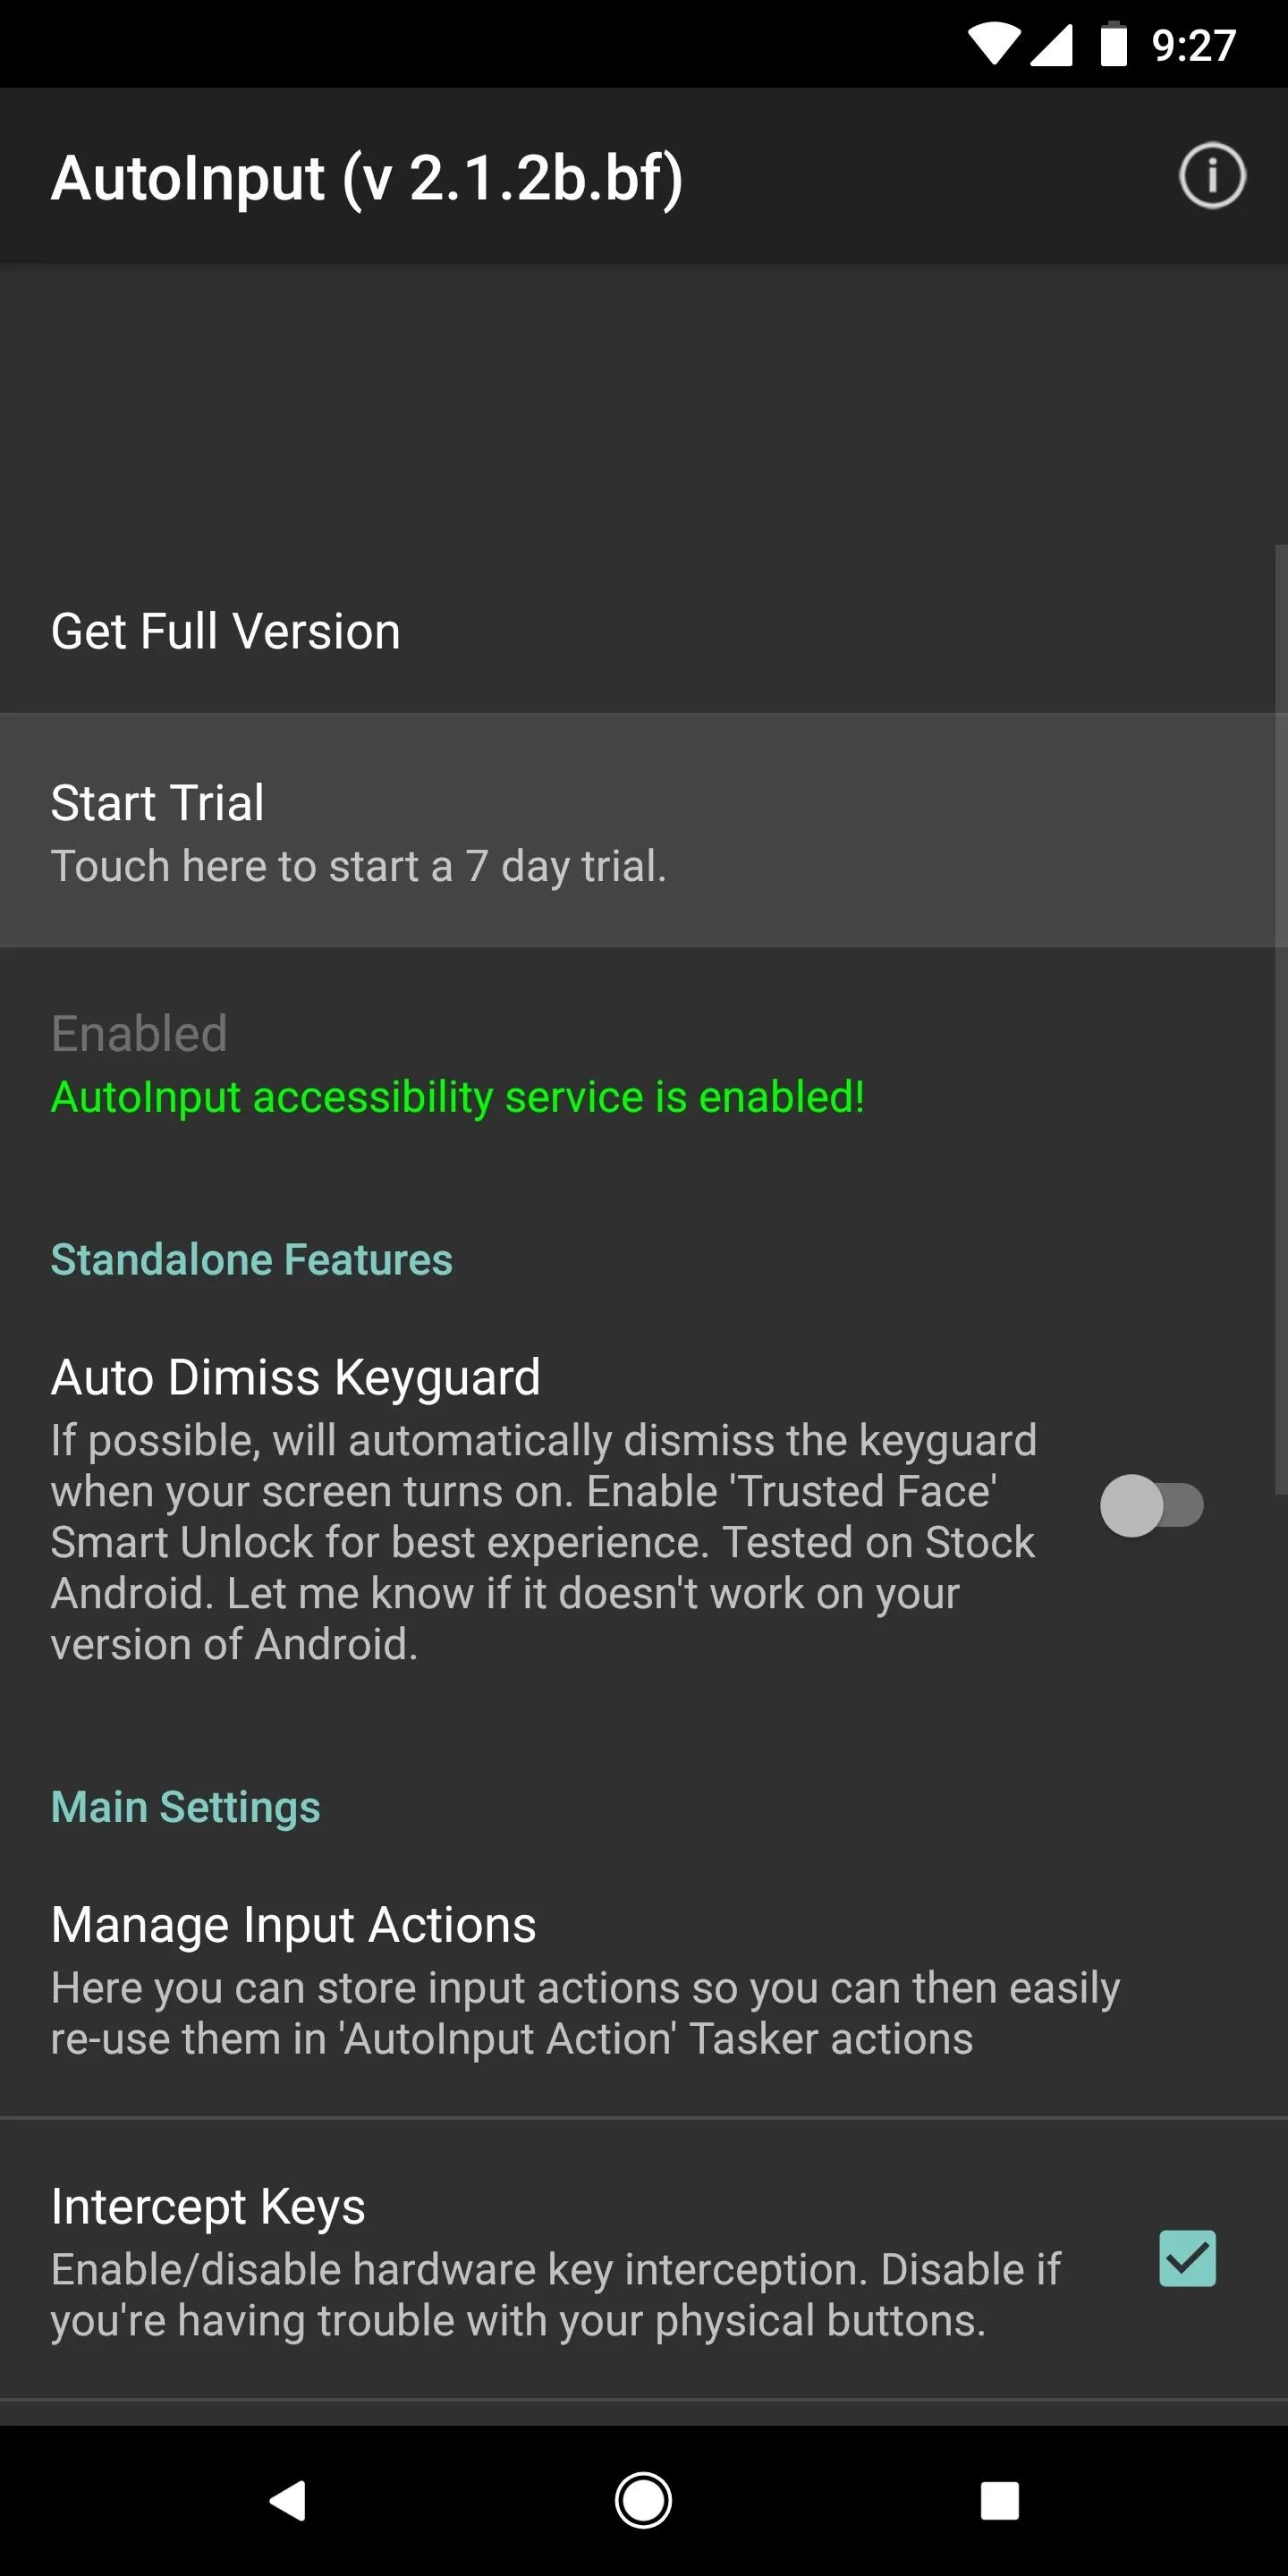
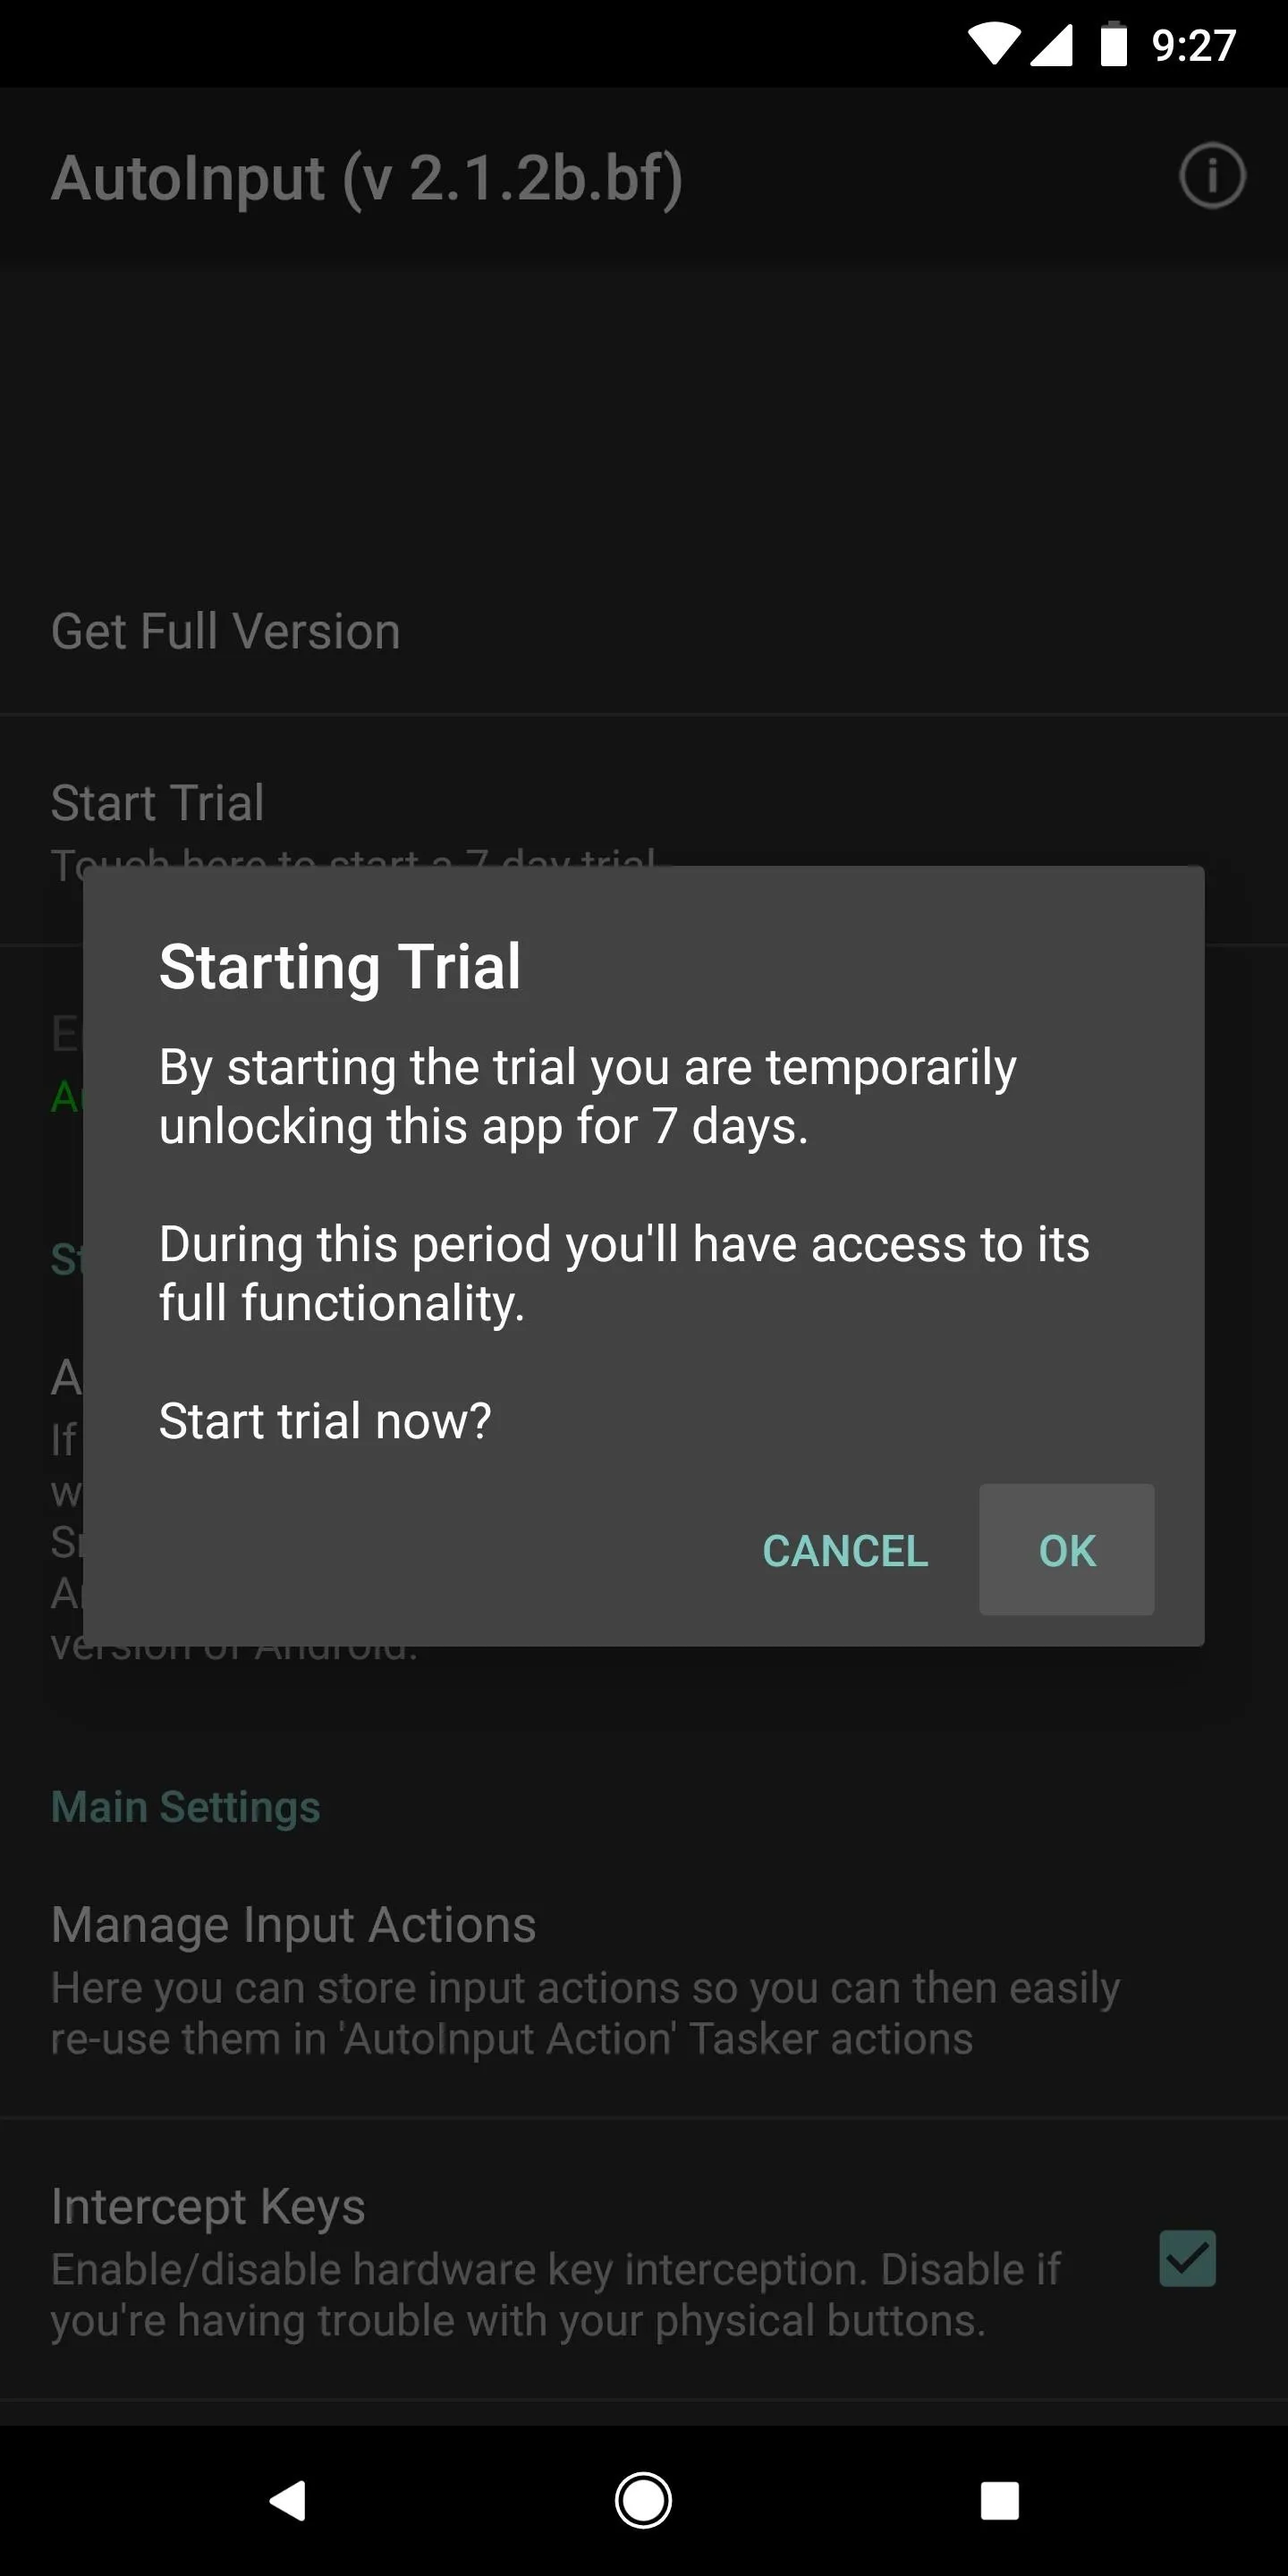
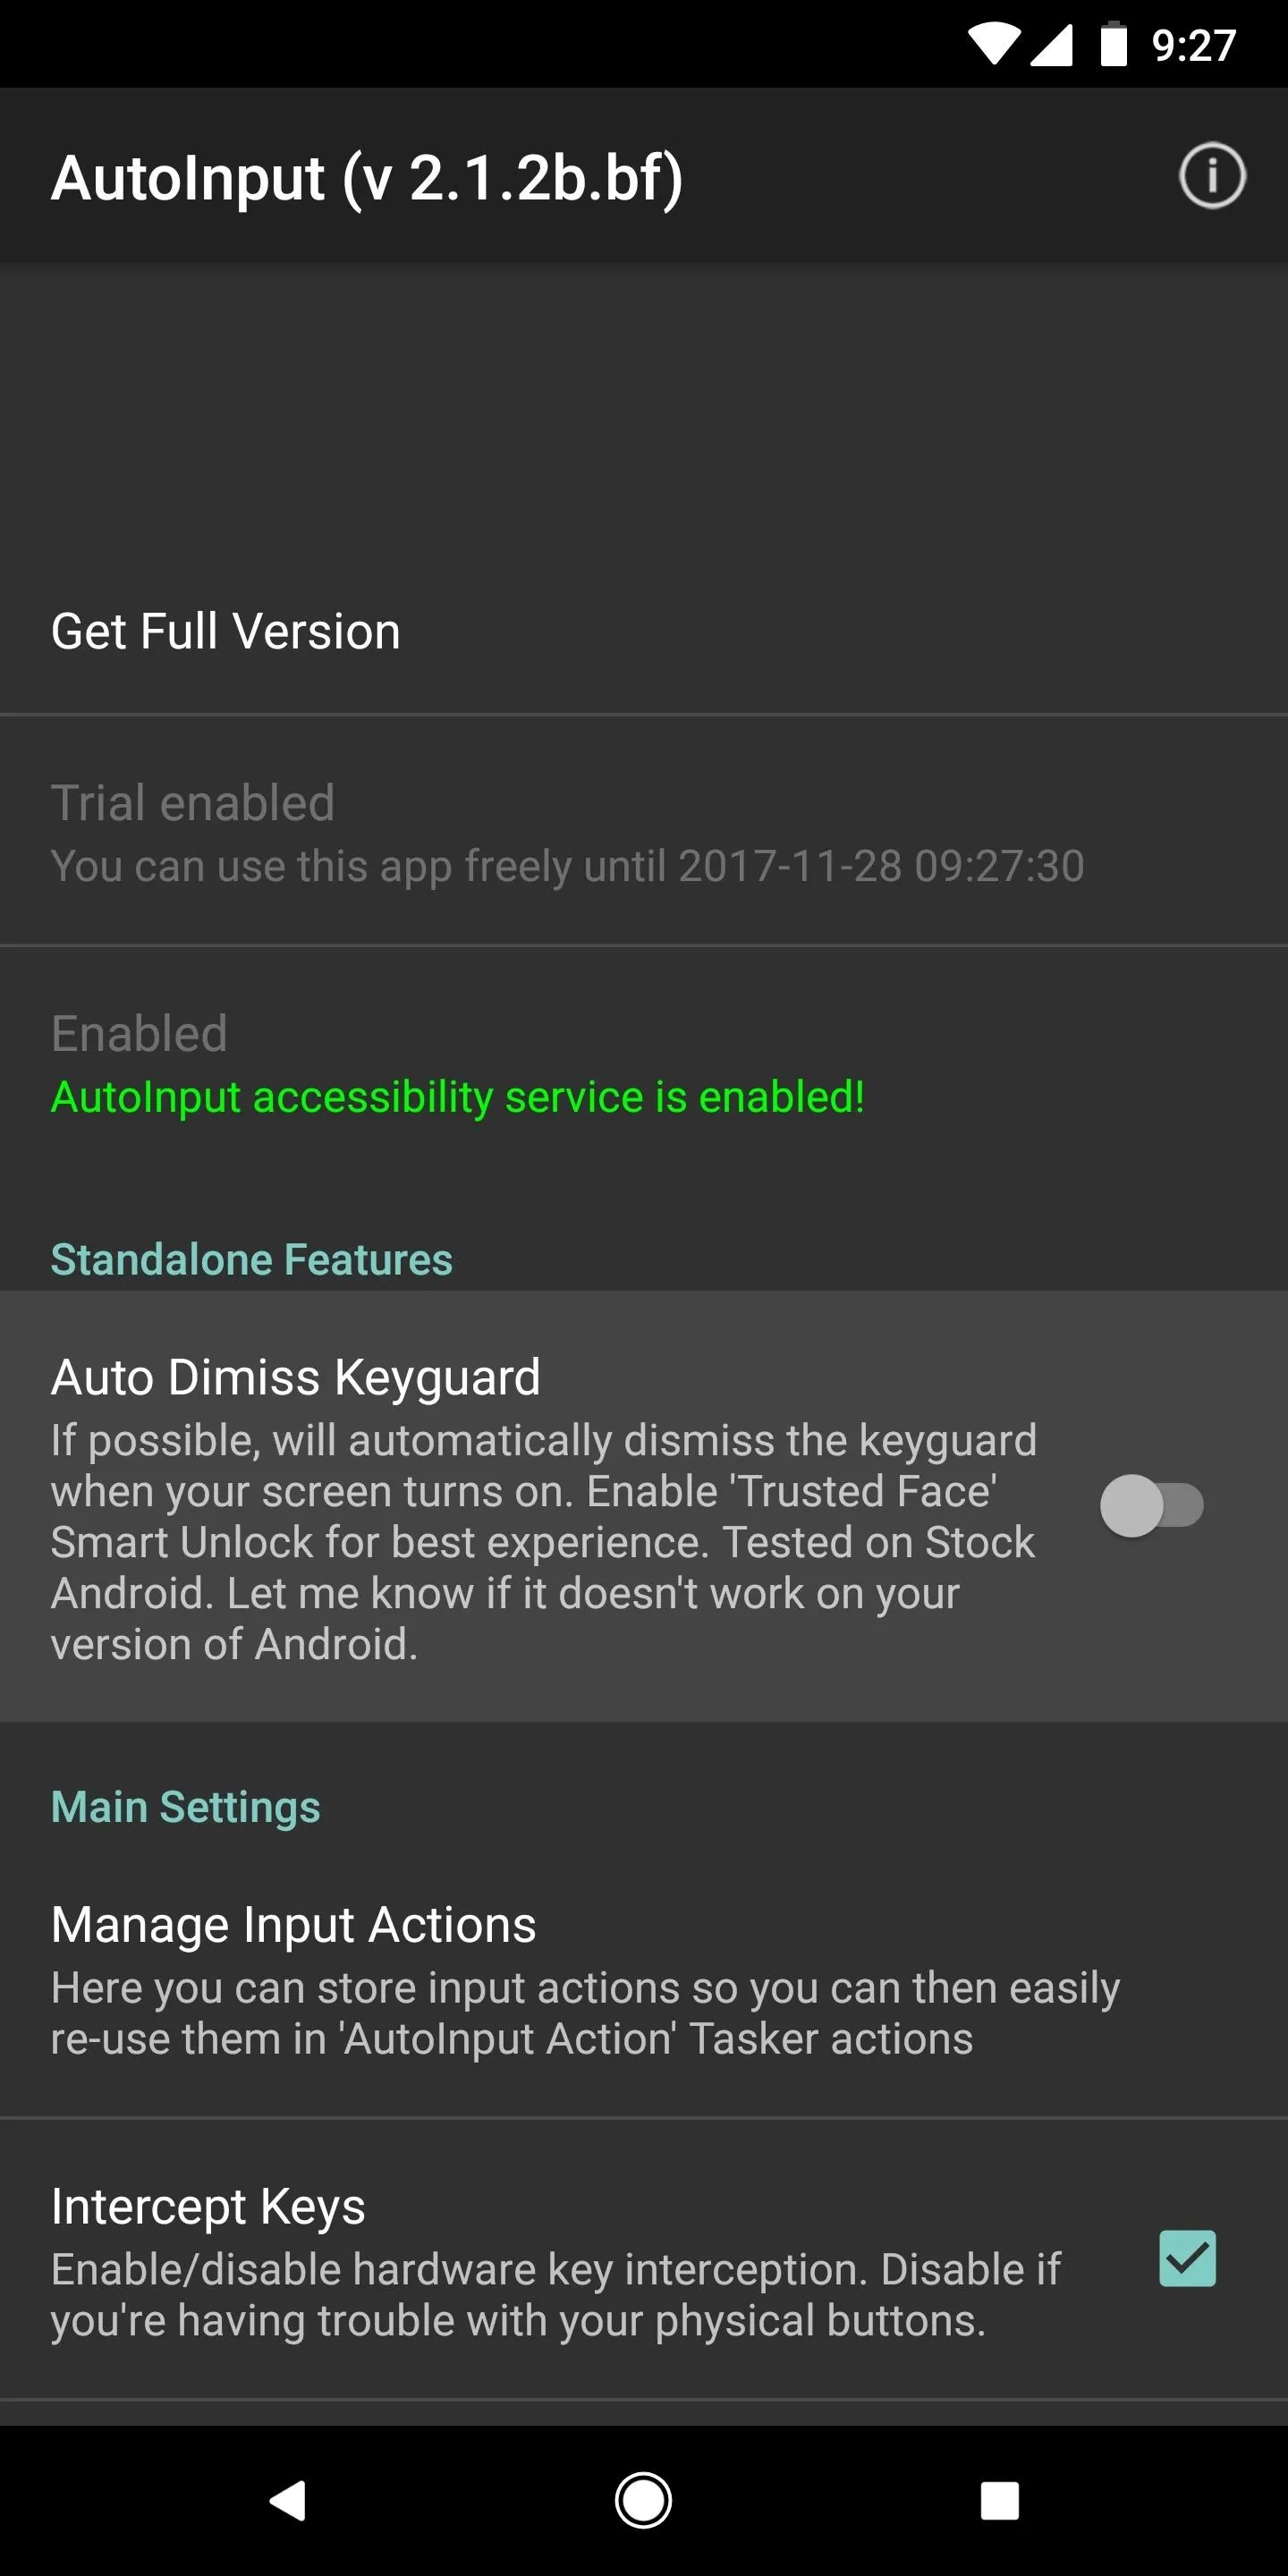
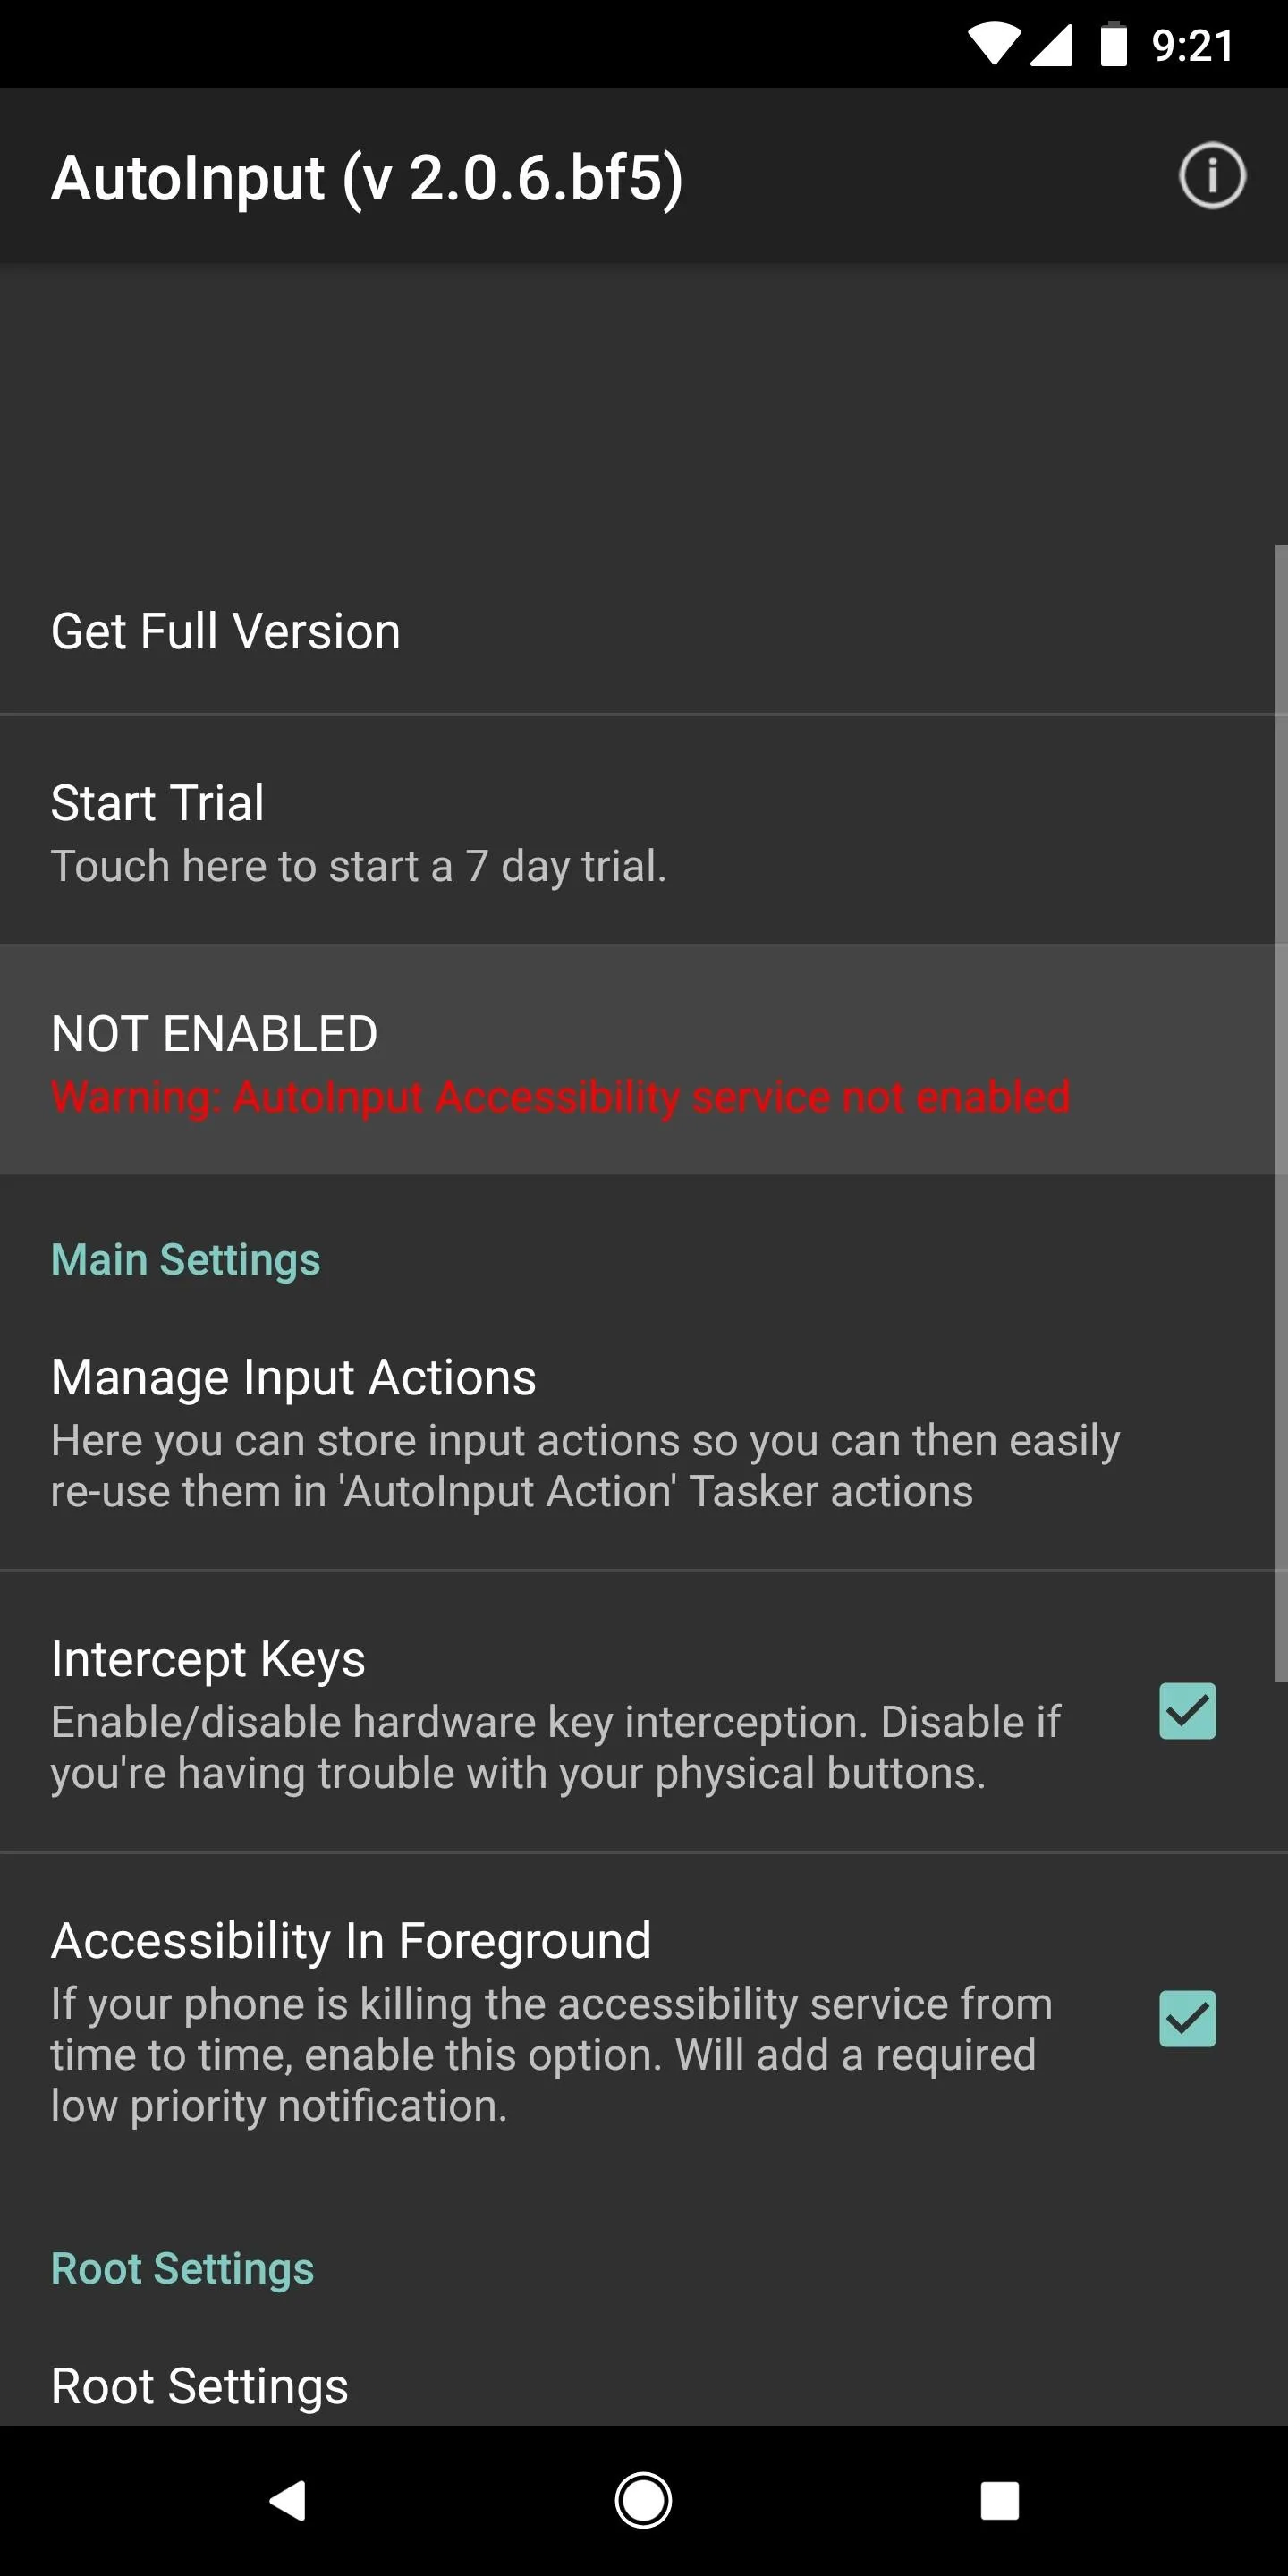
In order to access all of the features in AutoInput, you will need to start a 7-day free trial of the app by tapping on "Start Trial." Alternatively, you can purchase the full version. The free trial is a good idea if you're not sure you will use the app on a long-term basis. If you do enjoy modding your phone regularly, AutoInput Pro can be purchased for only $1.99 and is an excellent value for use with Tasker.


Activate the Accessibility Service in AutoInput
Note: This step is only required for those on Android Nougat, it is not needed in Oreo.
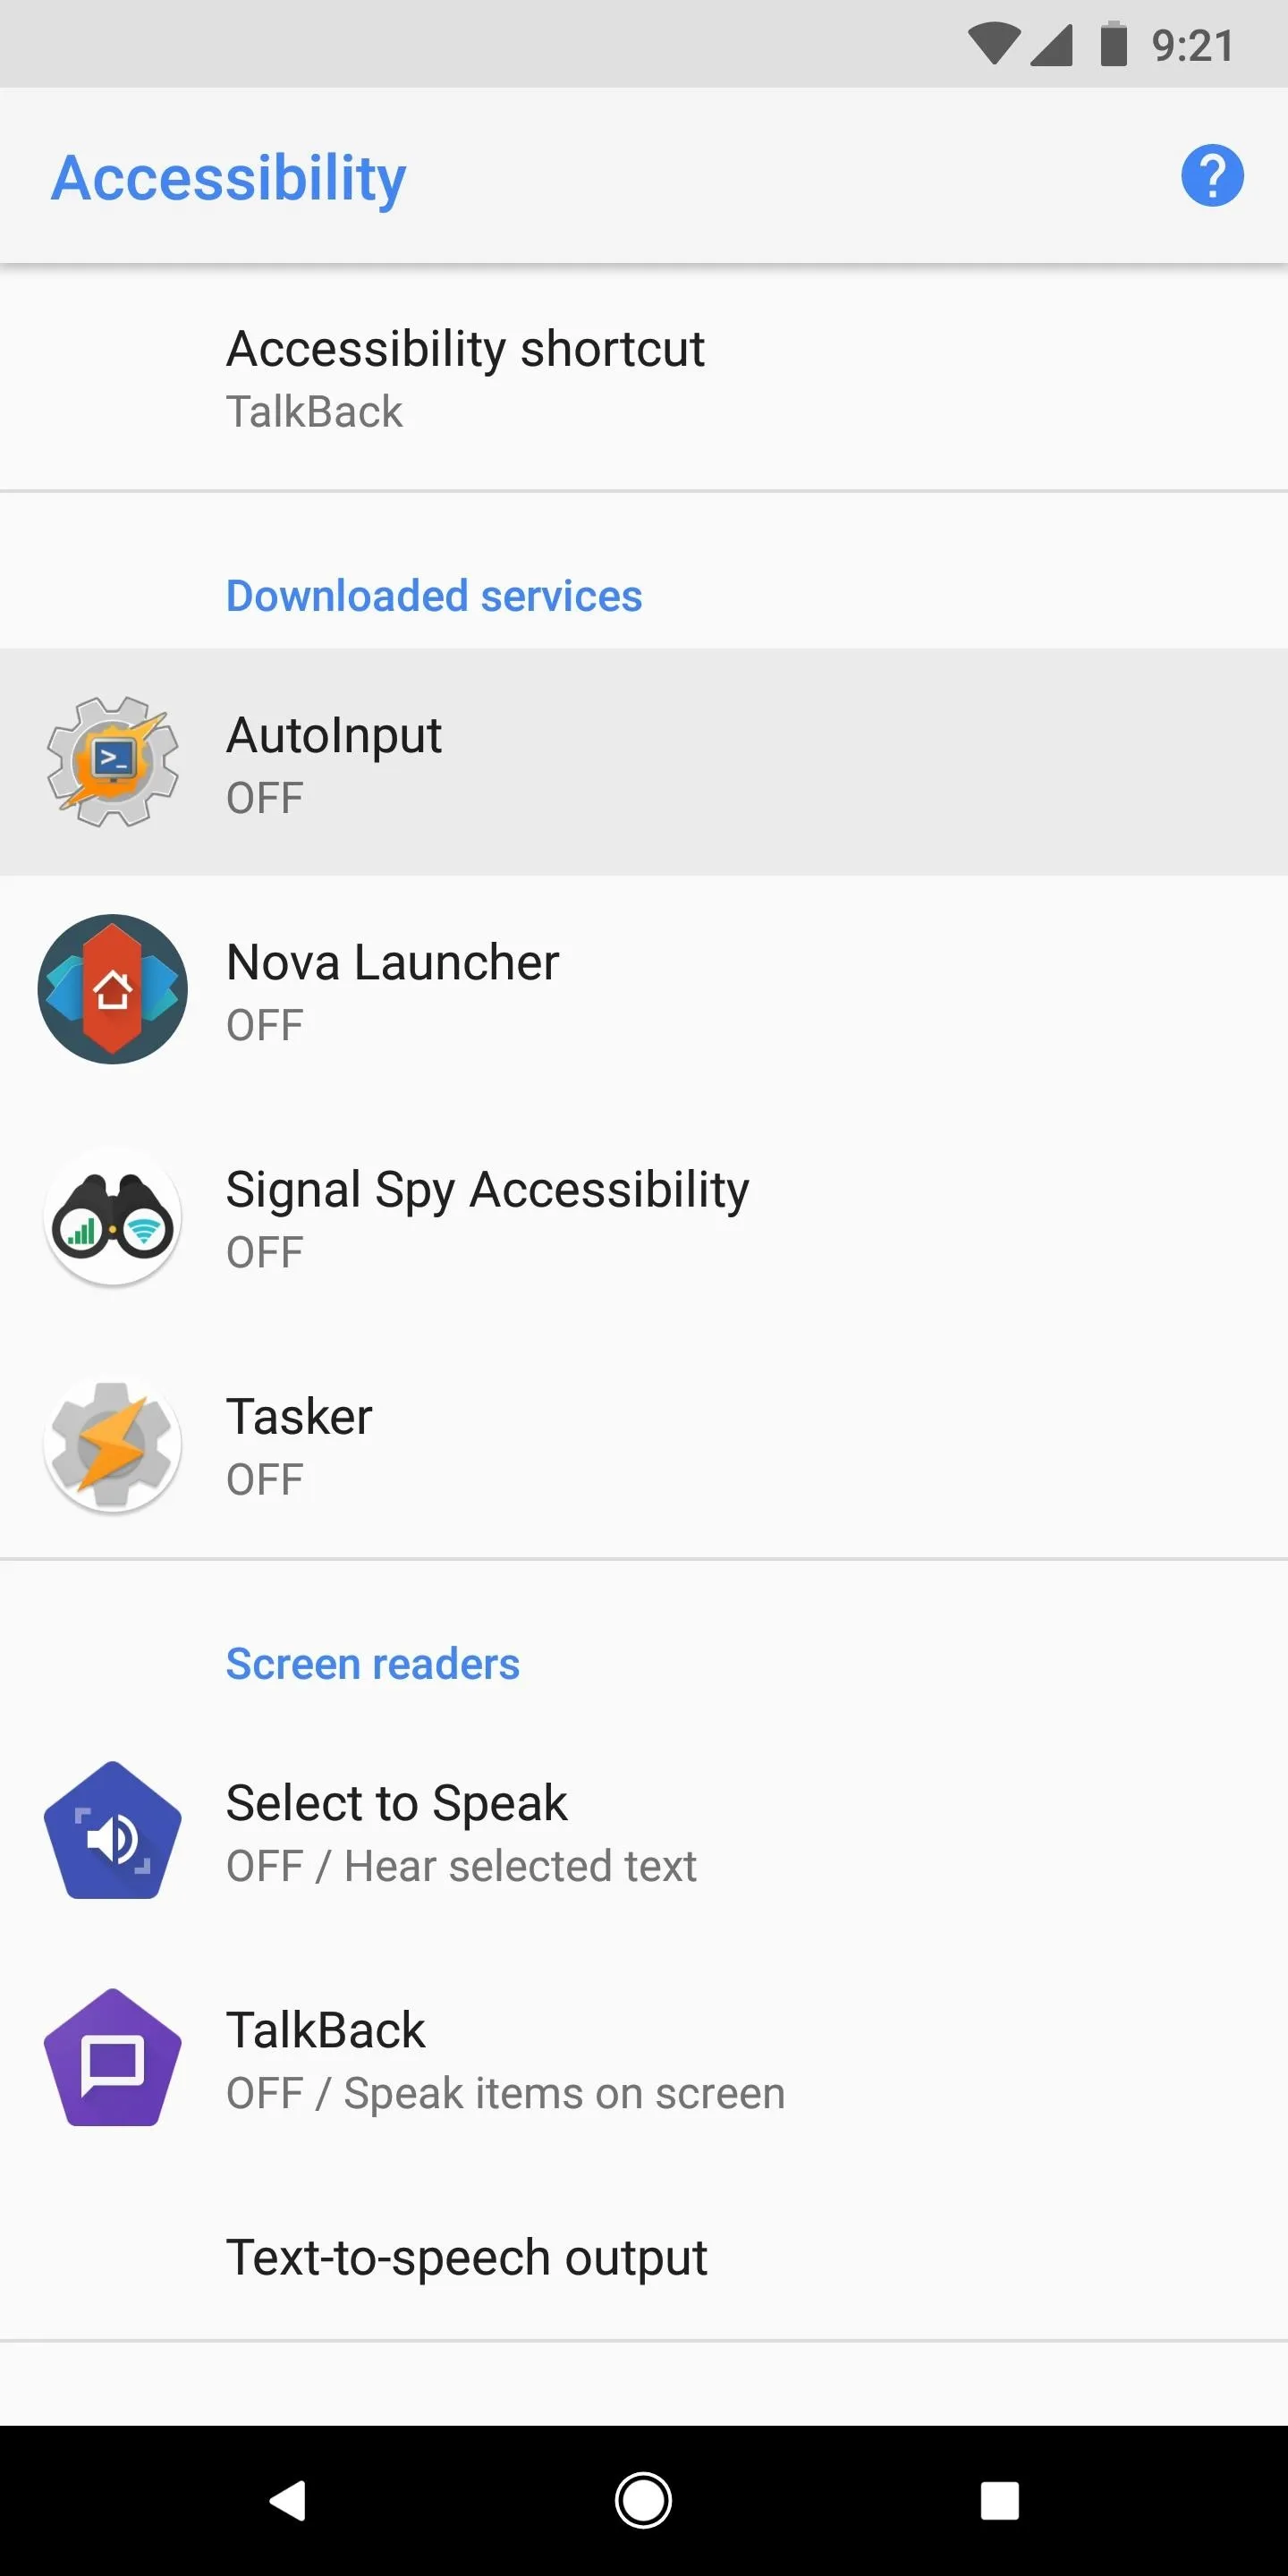
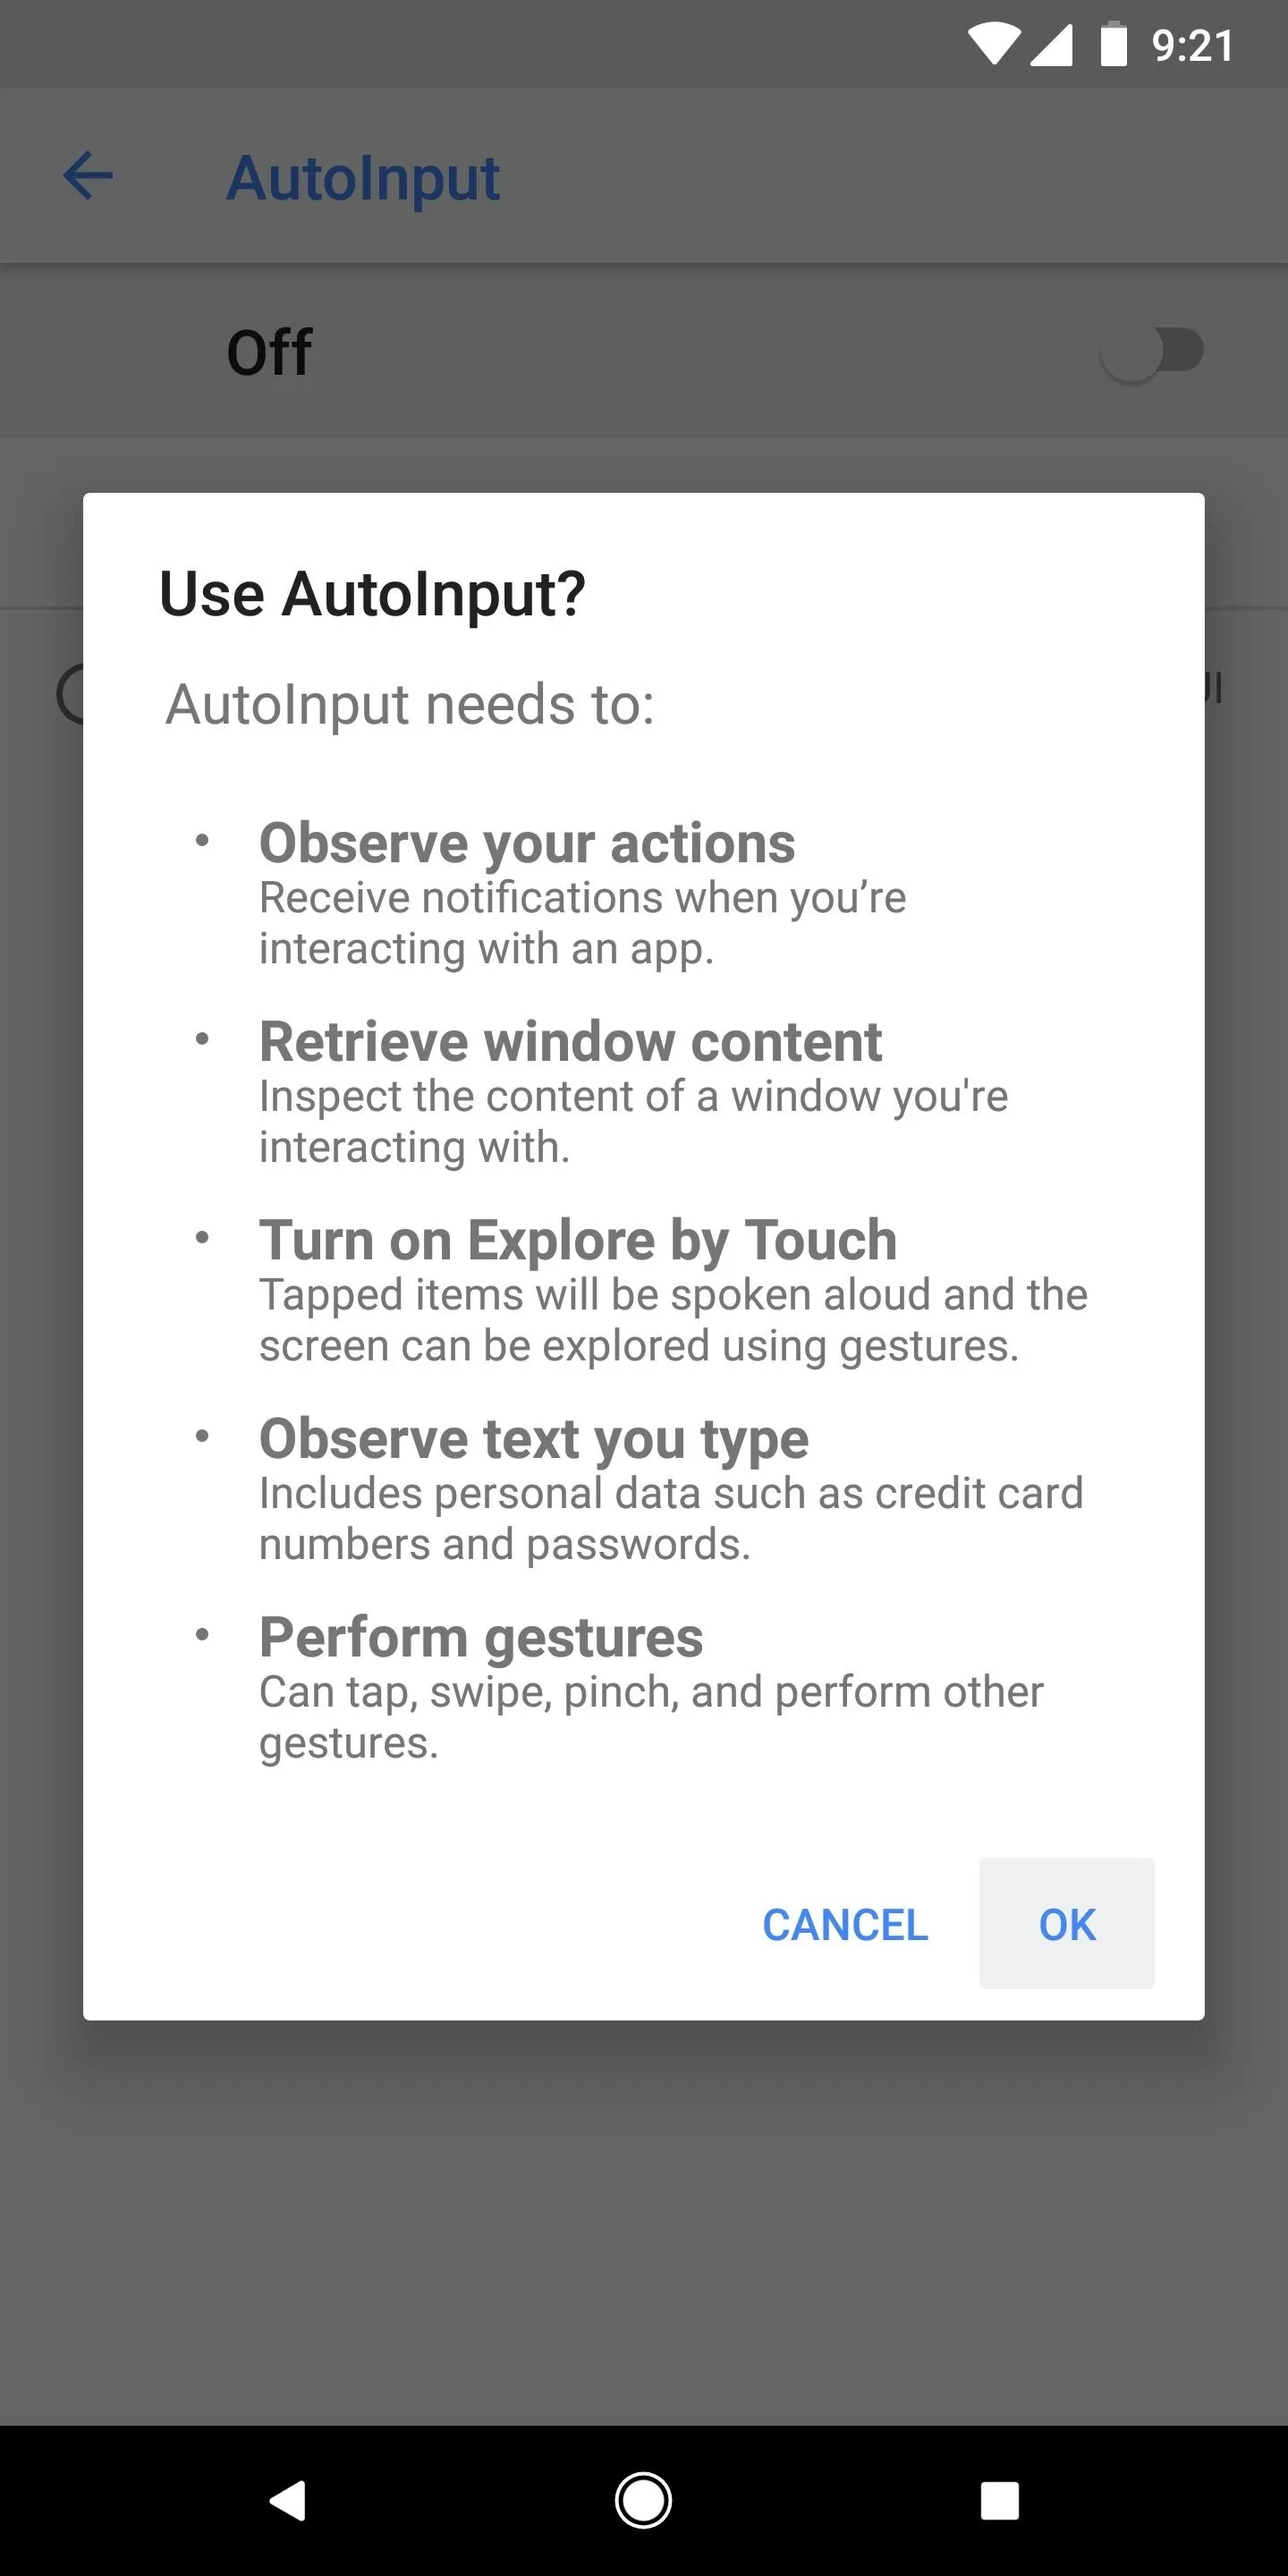
Like many apps that enable impressive hacks, AutoInput requires access to Accessibility Services to do its magic. When you open the app for the first time, you will notice a large block of red text prompting you to enable this needed service. Tapping on this dialog box will take you into Accessibility Services in your Settings menu. Scroll down to "AutoInput" and tap the toggle to enable it. Tap the back button a few times on your device to get back inside the AutoInput app.


Enable 'Auto Dismiss Keyguard' in AutoInput
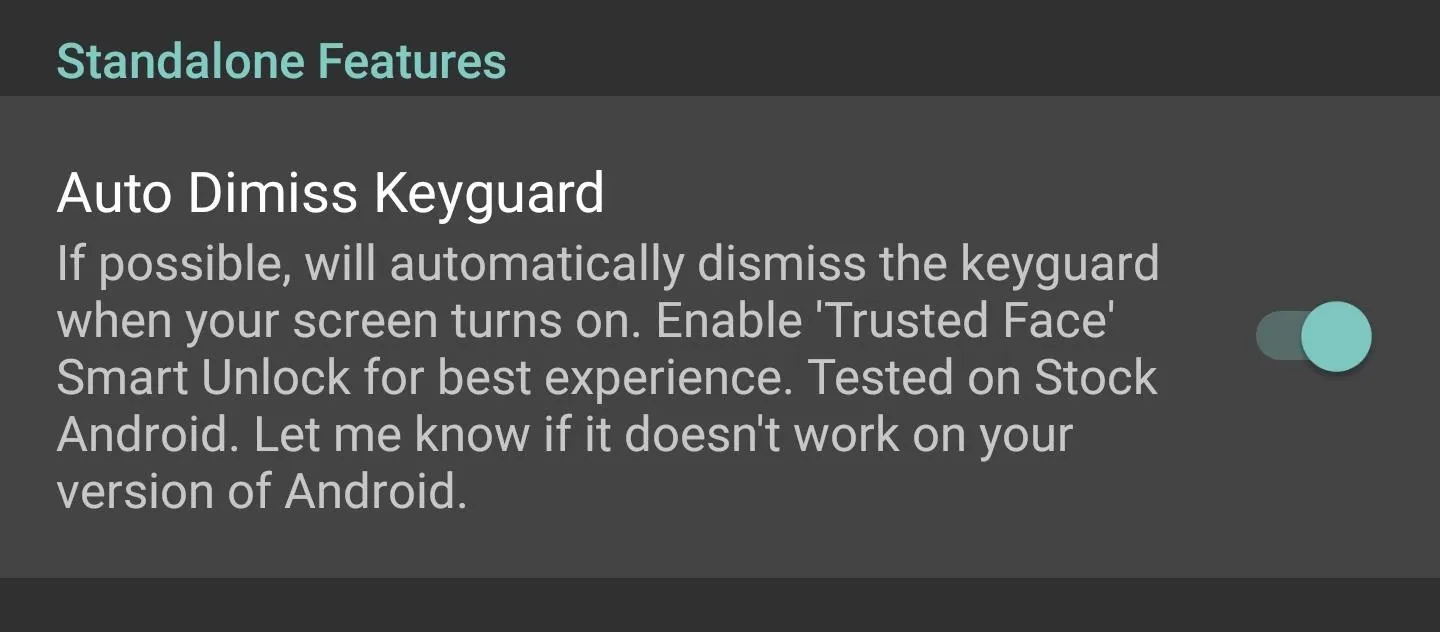
After enabling AutoInput in Accessibility Services, you will notice that the previous dialog box of red text in the app is gone. Below the new dialog box indicating accessibility is enabled, you will notice an option that says "Auto Dismiss Keyguard". Tap the toggle to enable this feature.
Set a Trusted Face in Smart Lock
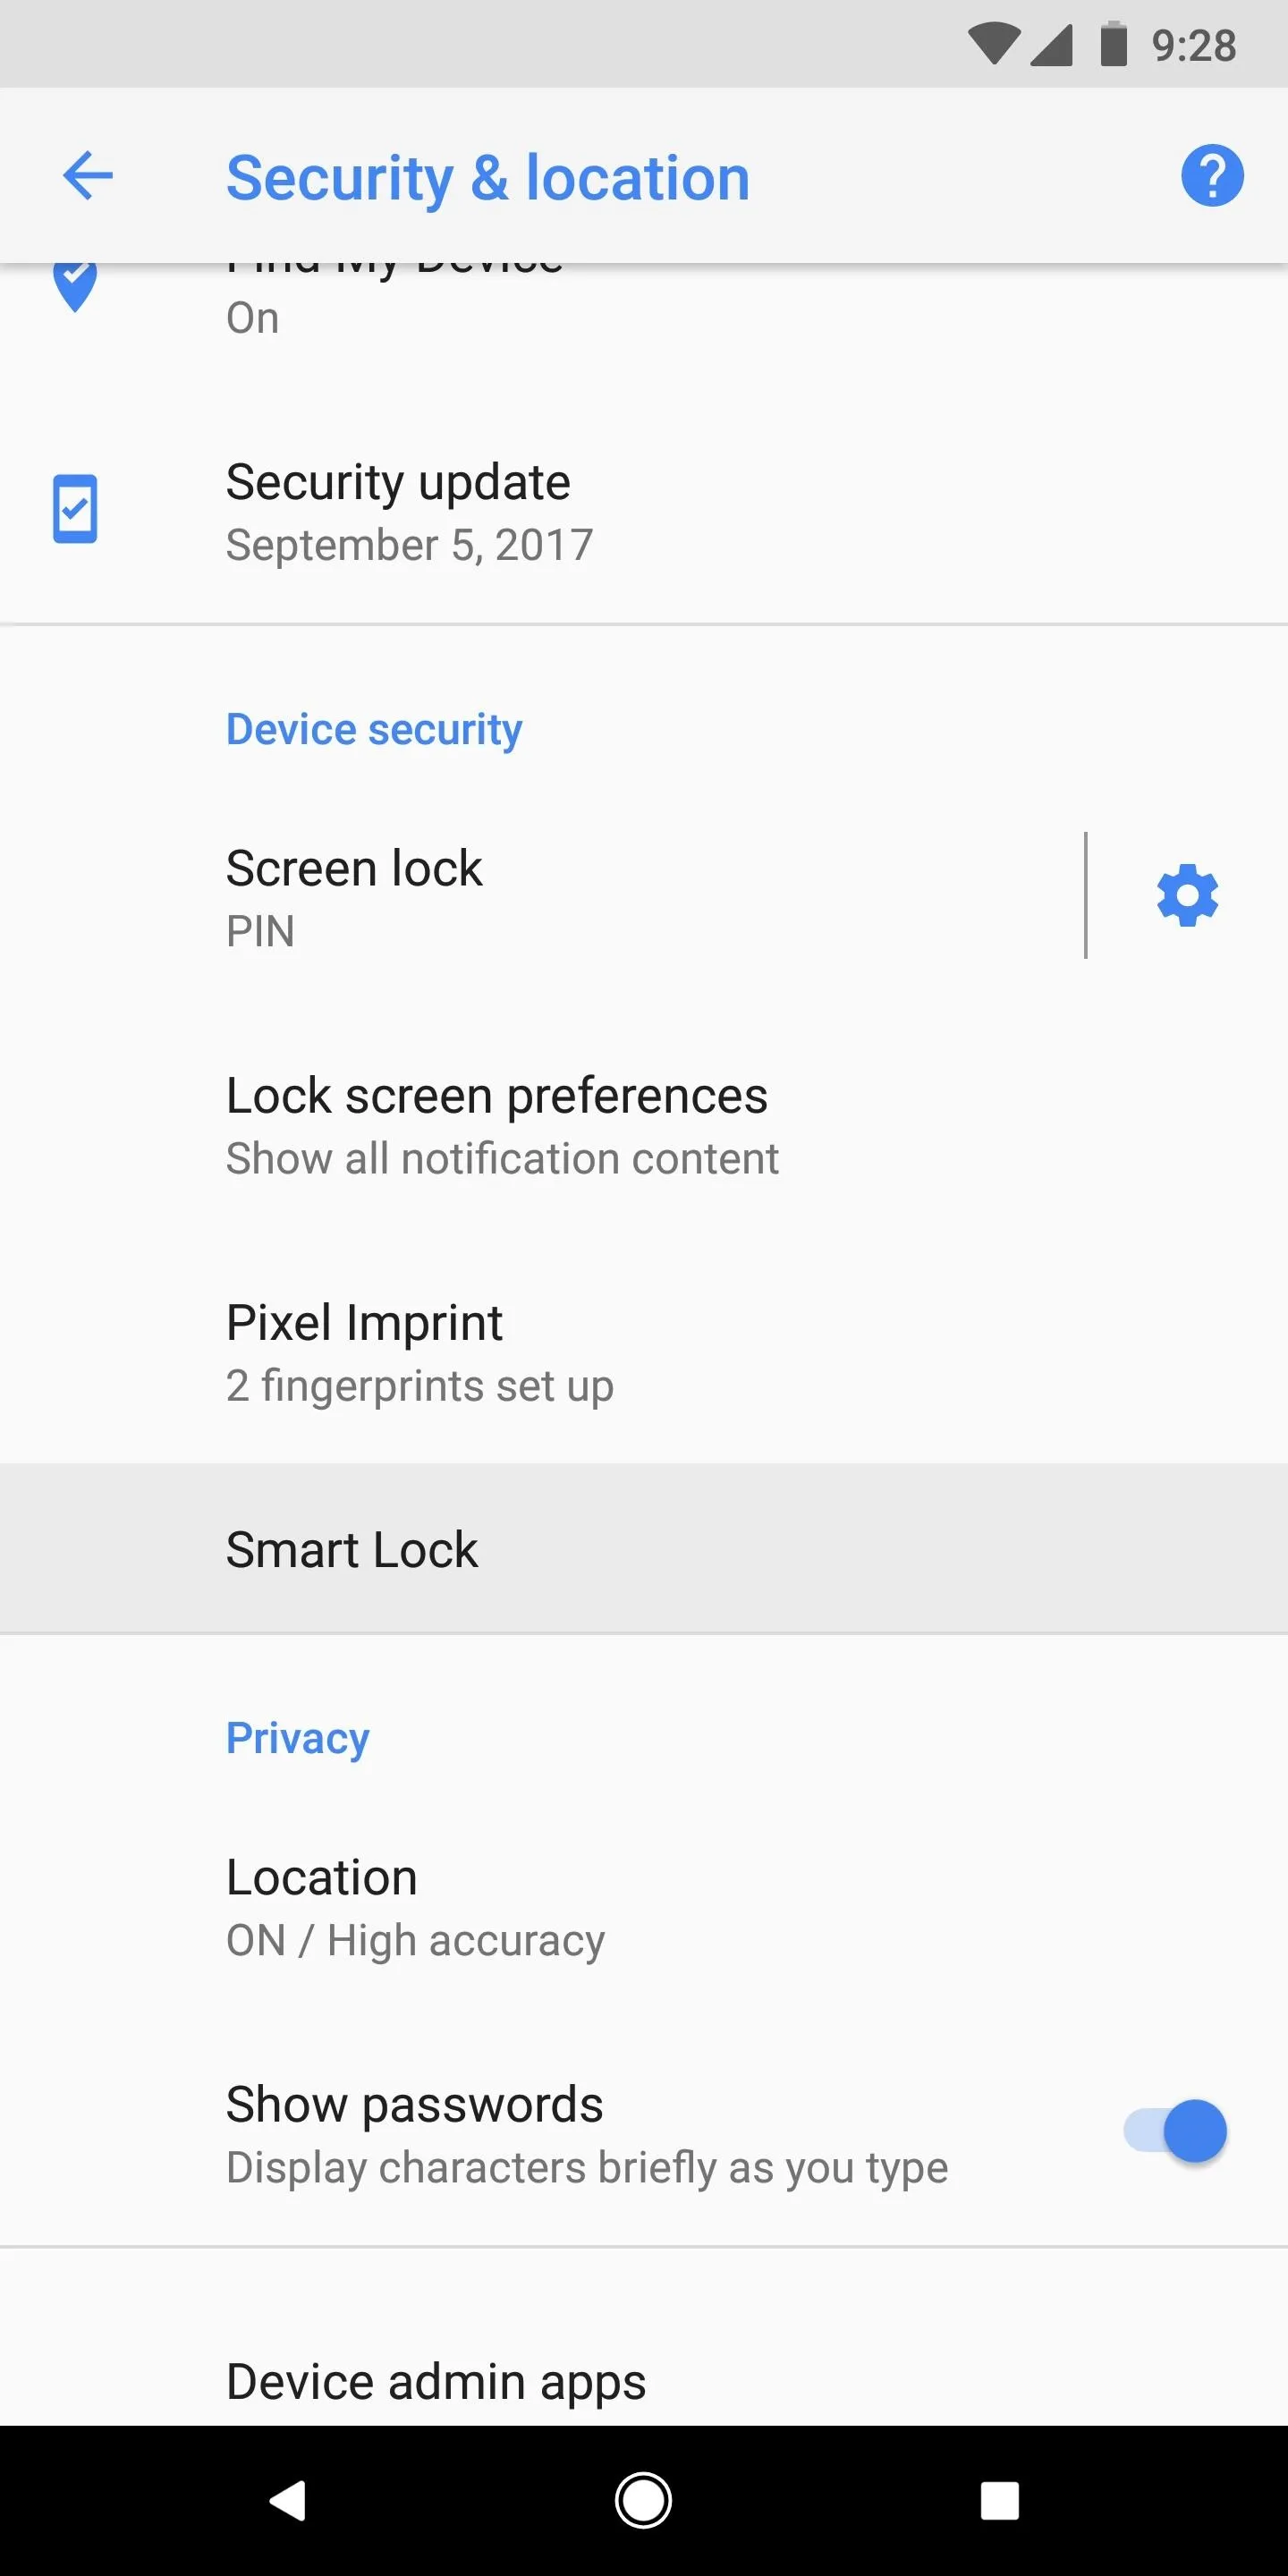
Finally, you're ready to set up your face unlock and give it a try. Head to Settings –> Security (or "Security and Location" on newer phones), then tap on "Smart Lock". From here you will need to enter your current PIN or pattern, if you have one.
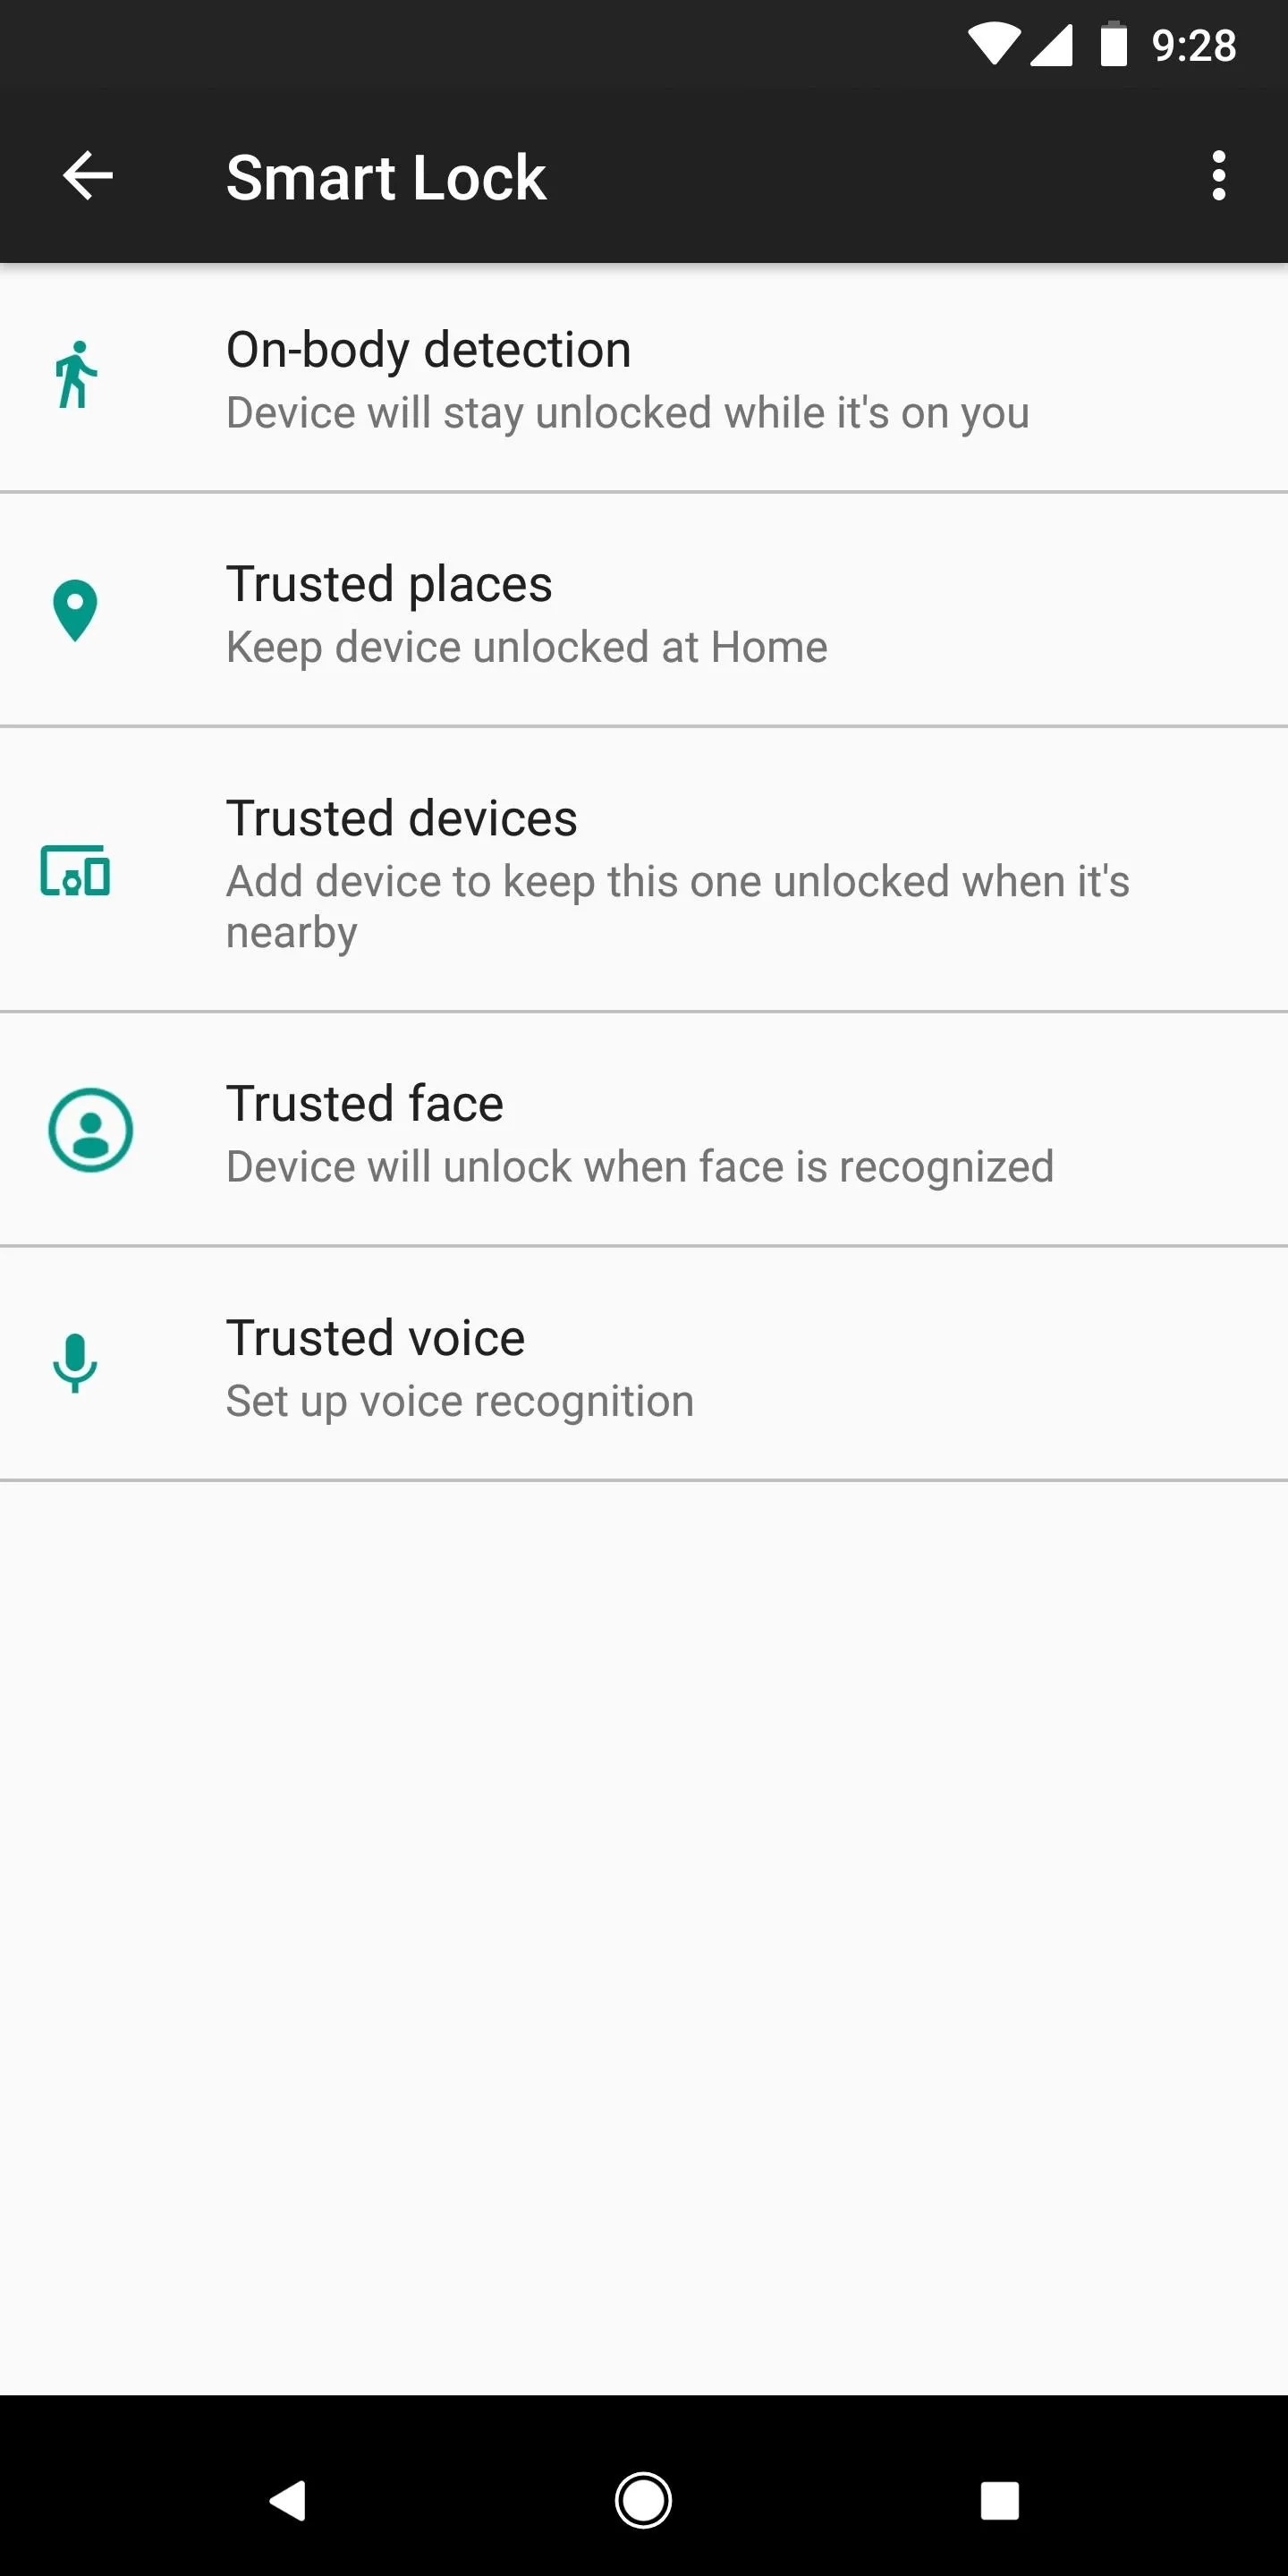
After this is completed you, will see several options to use with the Smart Lock service. Tap on "Trusted Face" and follow the prompts to scan your face. You can improve the recognition by repeating the process in a different lighting condition, or from a different angle.


Unlock Your Phone with Your Face
After you're satisfied with the scan, head back to your lock screen and test out your automatic face unlock. Like the OnePlus 5T, you still have to wake your phone to unlock it, but now, as soon as your device "sees" your face, you'll be taken directly to your home screen. In other words, just click your power button, look at your phone, then it will automatically unlock! We should note here that the dismiss keyguard feature works with any of the Smart Lock options, not just Trusted Face. This means your phone will automatically unlock when using a trusted location or trusted device as well.
While it may seem like quite a few steps, the actual process only takes a few minutes, as seen in our tutorial video above. One important note here is that this method is likely a bit less secure than the actual implementation found on the 5T. Overall, we've found that this method makes it much easier to use face unlock on Android phones that don't have the feature built in. Let us know in the comments if you have any questions and tell us how the new feature is working for you!
- Follow Gadget Hacks on Facebook, Twitter, Google+, YouTube, and Instagram
- Follow WonderHowTo on Facebook, Twitter, Pinterest, and Google+
Cover image and screenshots by Jeff Springer/Gadget Hacks







Comments
Be the first, drop a comment!