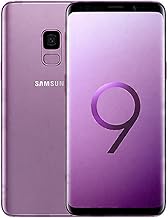
All the Android fans out there undoubtedly remember the squeeze gestures introduced with the HTC U11. Google continued the trend by bringing the gestures to the Pixel 2 and Pixel 2 XL. Thanks to a brand new app, you can now enable similar squeeze actions on your Galaxy S9 or S9+, and even some older Samsung phones.
The HTC U11 and Pixel 2 both have special sensors embedded in the hardware to detect pressure exerted when squeezing the sides of your phone. Luckily, you can use another sensor in your phone to achieve a similar end result. As first reported by XDA, the new app SideSqueeze uses the phone's barometric pressure sensor to detect squeeze gestures. In order for this to work, your phone must also have some type of water resistance rating, so that it is properly sealed.
Compatibility
Theoretically, this tutorial should apply to any device with a barometric pressure and water resistance, but we will focus on the Galaxy S9. It is worth noting that the developers of SideSqueeze only tested their app on the S8 and Note 8 running Nougat. We have independently verified that the app runs fine on both the Snapdragon and Exynos models of the Galaxy S9 and S9+.
Install SideSqueeze
To start, grab the SideSqueeze app from the link below. After installing the app, open it and accept the required permissions. There are a few important steps to undertake in this initial setup process, so do not click through all of the prompts before reading ahead!
Enable SideSqueeze in Accessibility Services
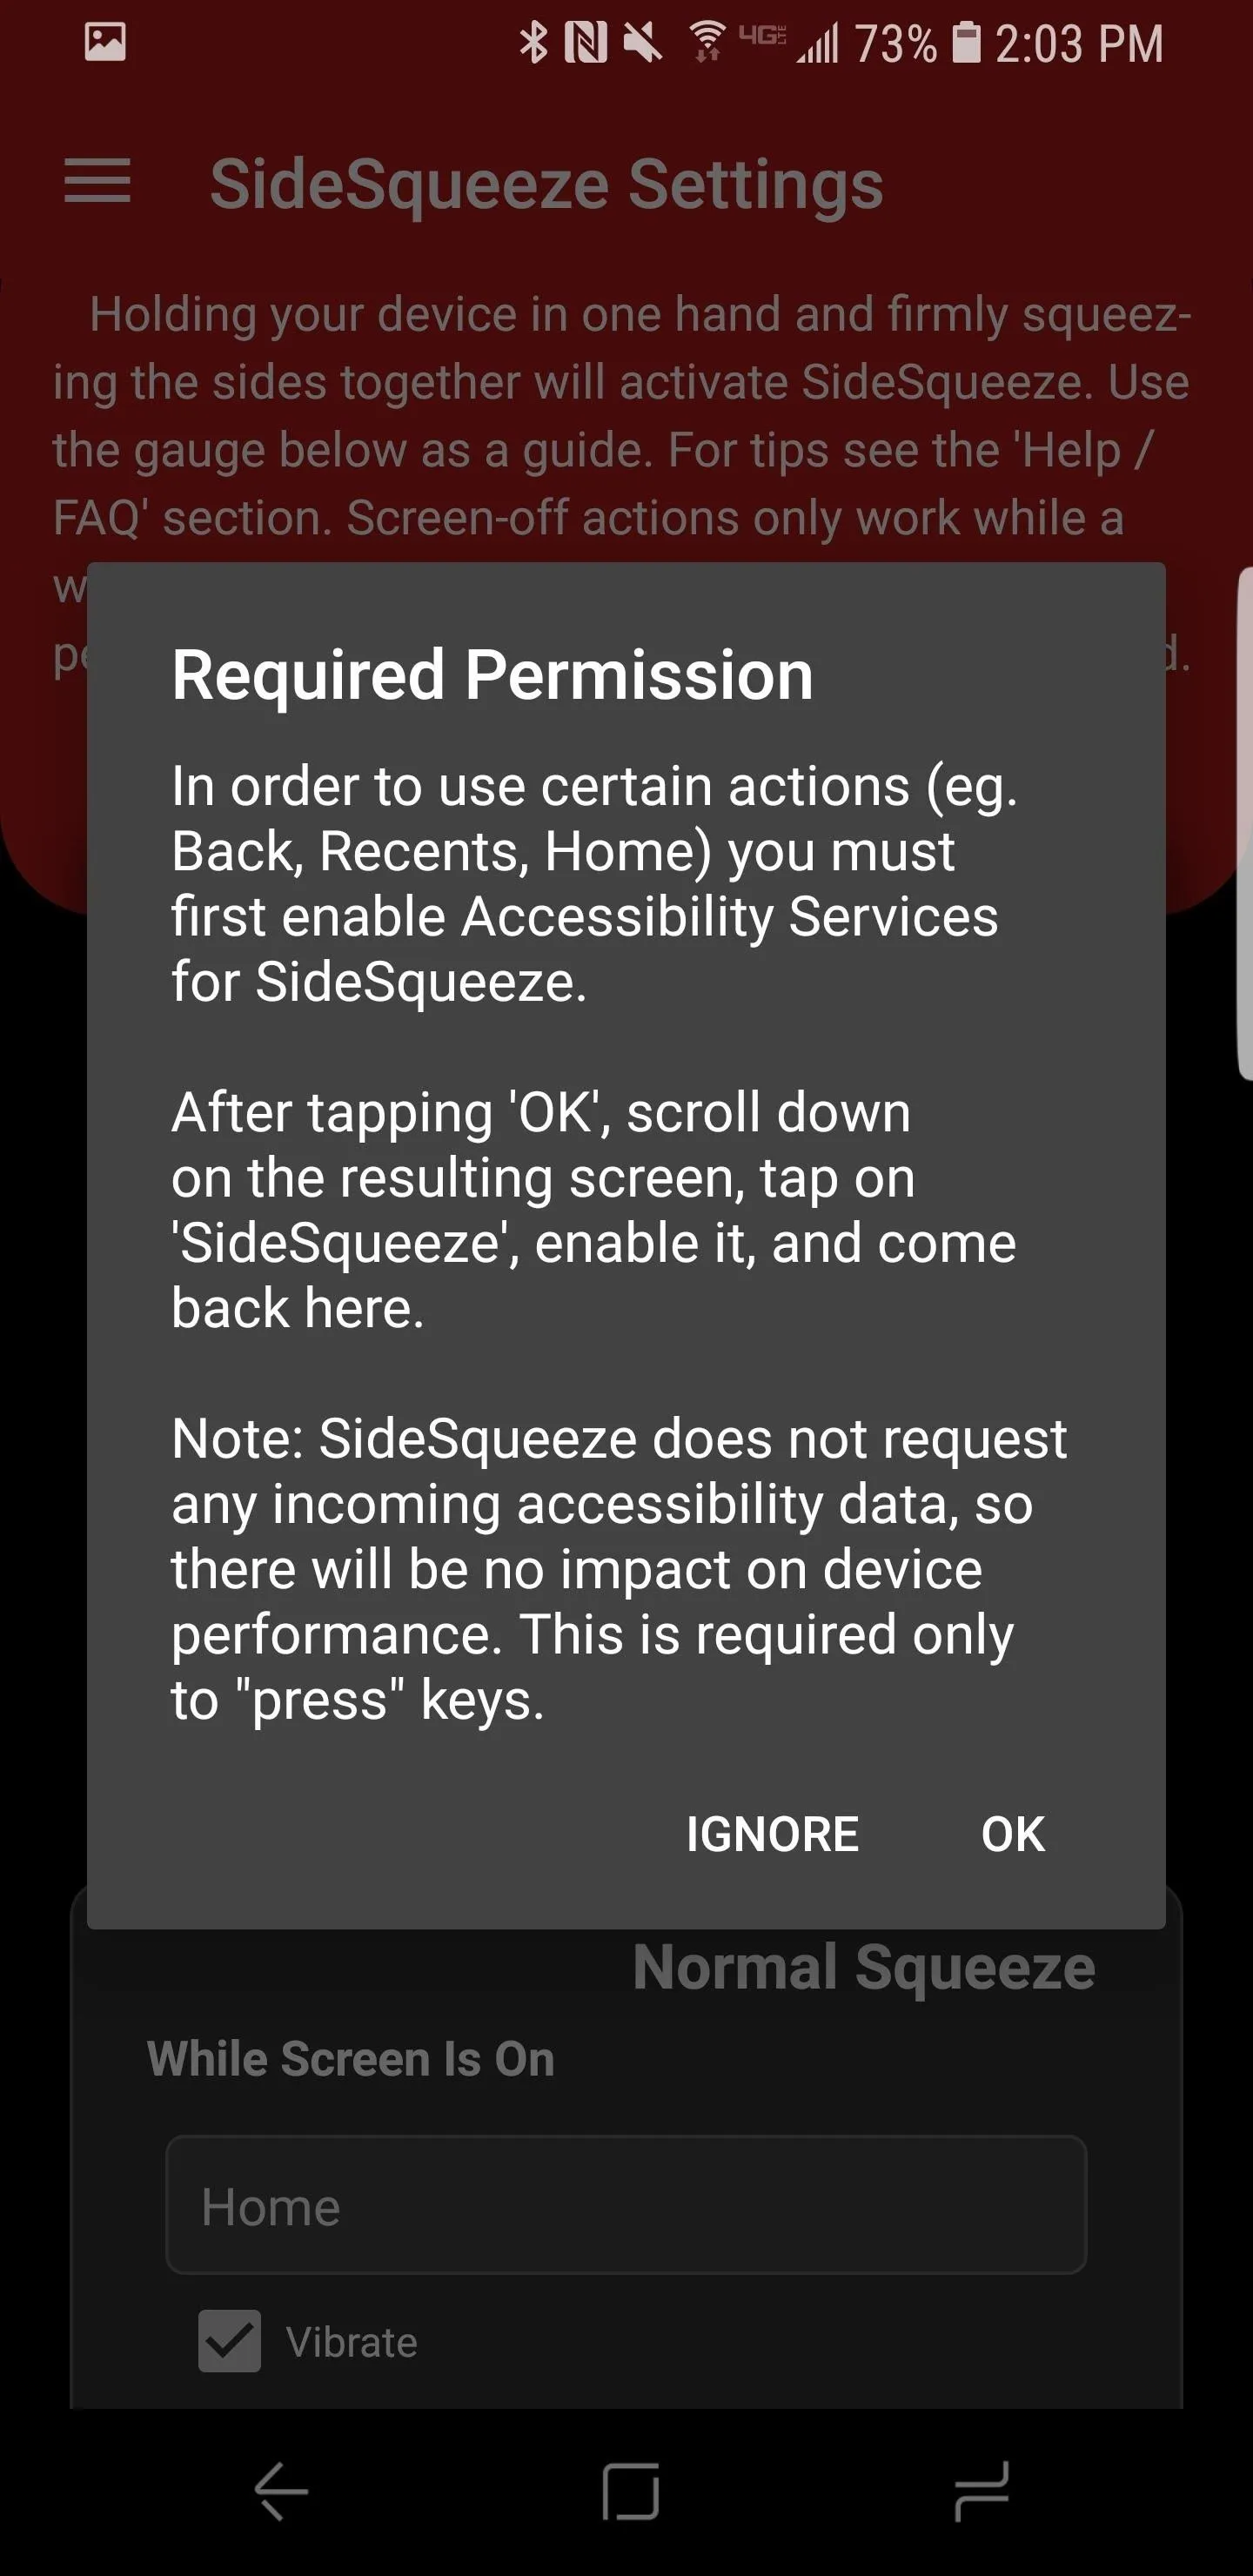
After accepting the required permissions, you will receive a popup box indicating that SideSqueeze needs access to Accessibility services. Tapping on OK will take you to the Accessibility Services page in Settings.
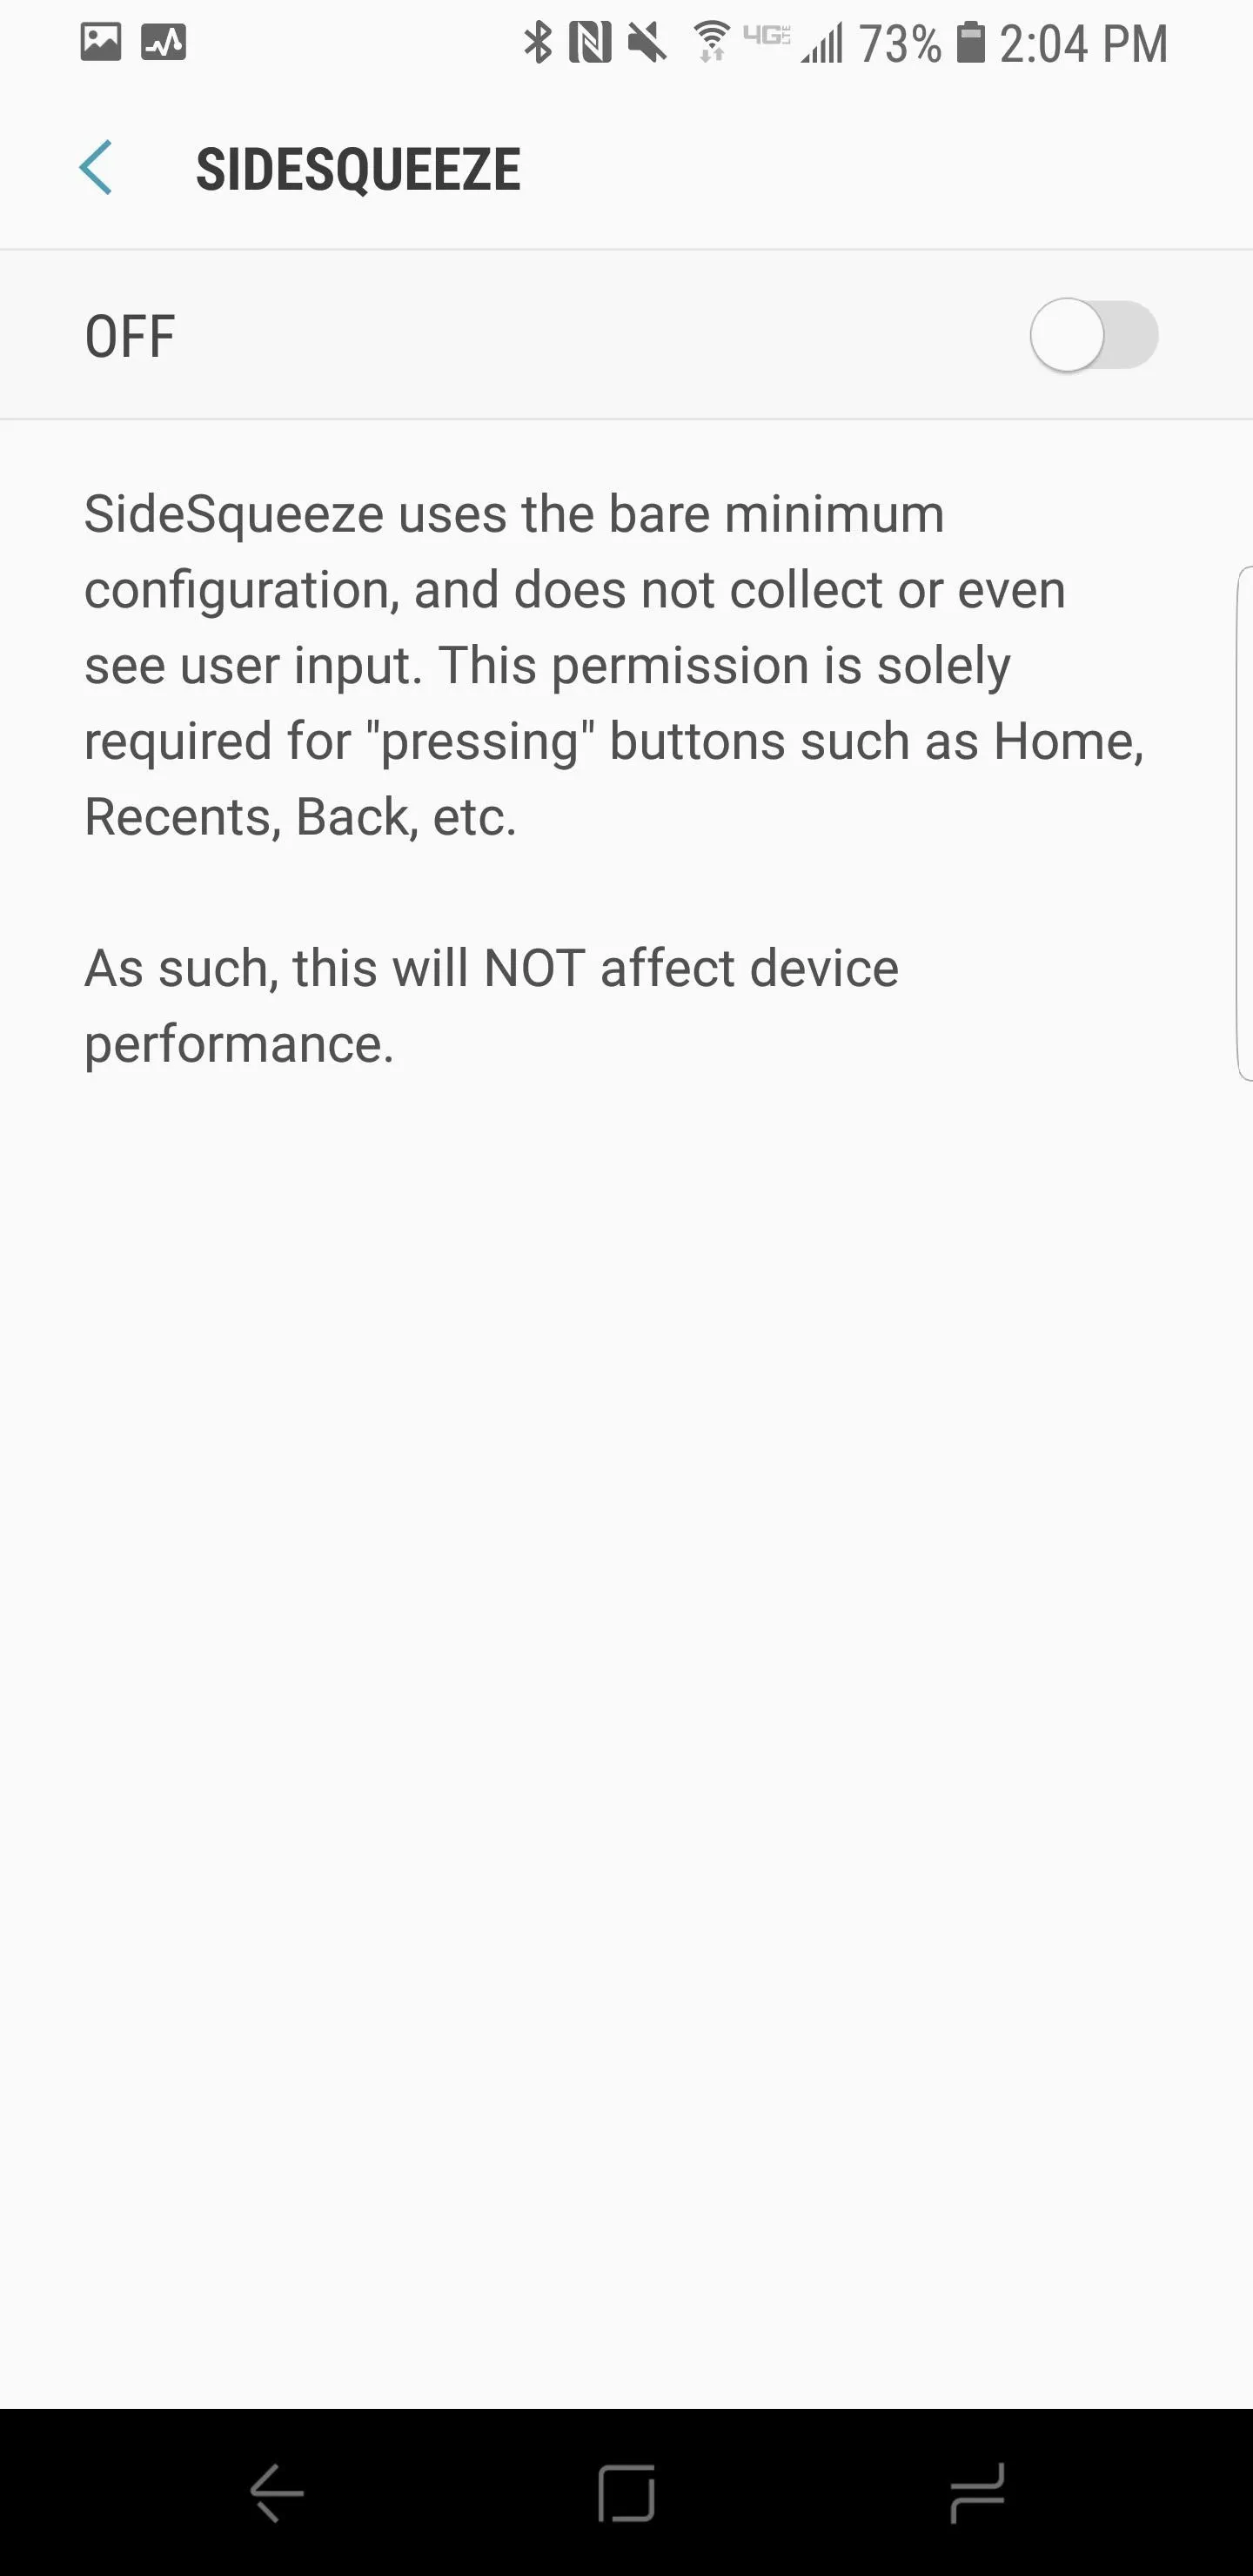
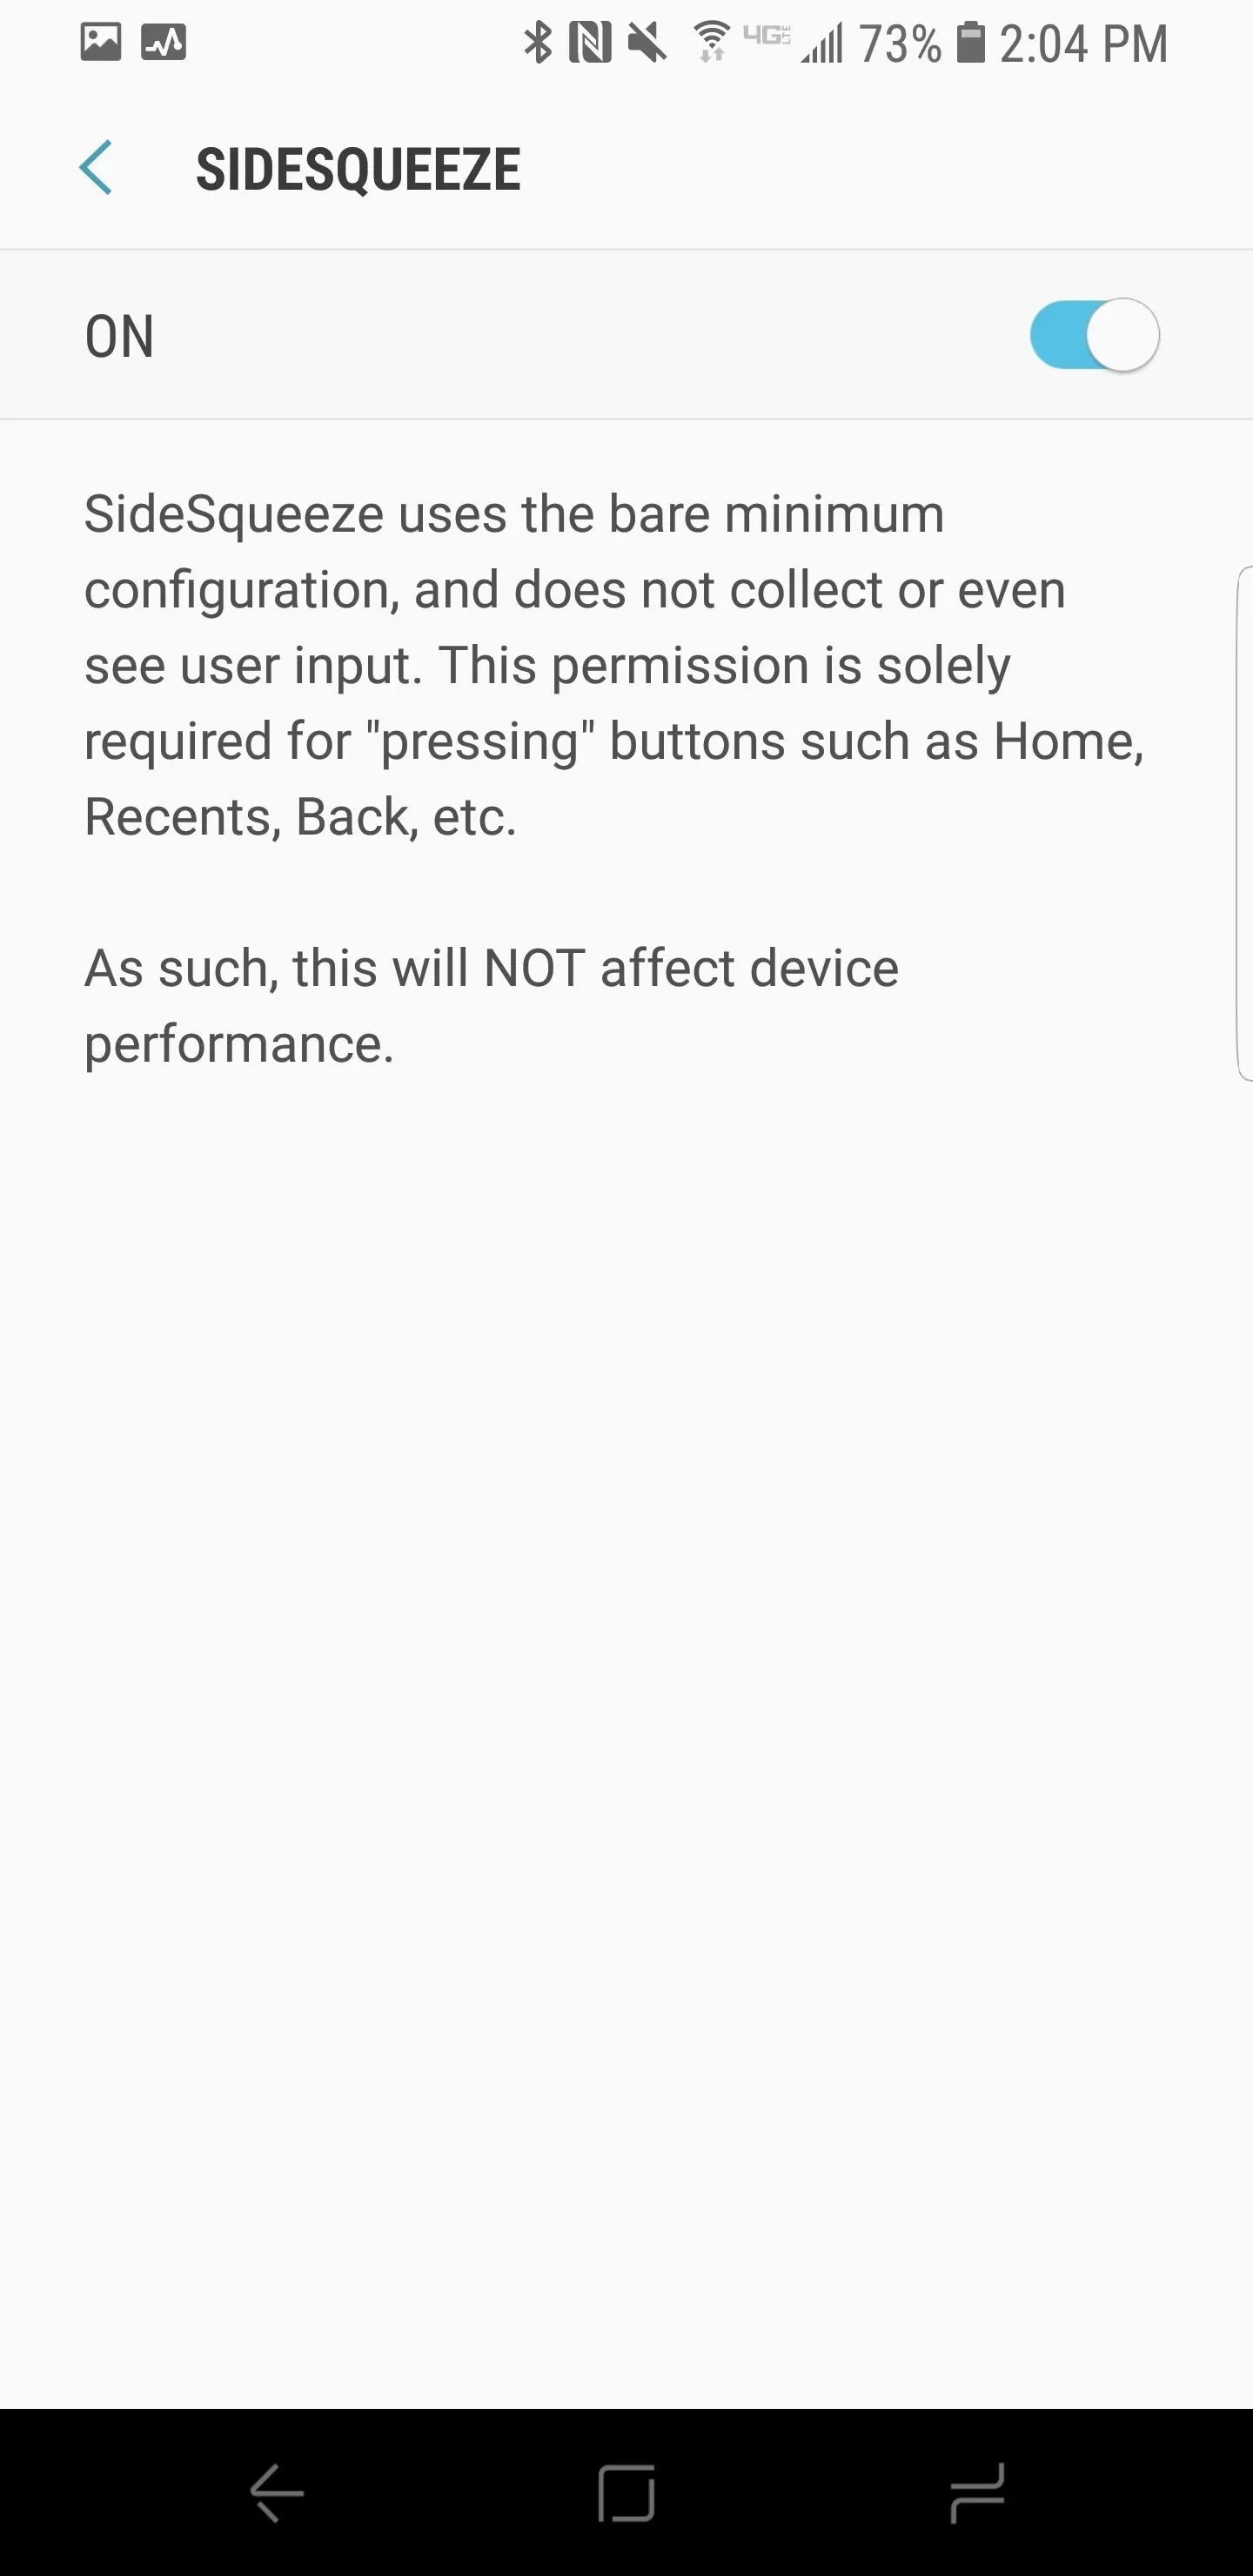
Scroll down until you see the SideSqueeze label, tap on this tile and enable the switch on the following screen. This allows SideSqueeze to work its magic by reading the barometric pressure sensor and launching specific apps or actions. After enabling, tap on the back button a few times to return to the app.


Remove SideSqueeze from Battery Optimization
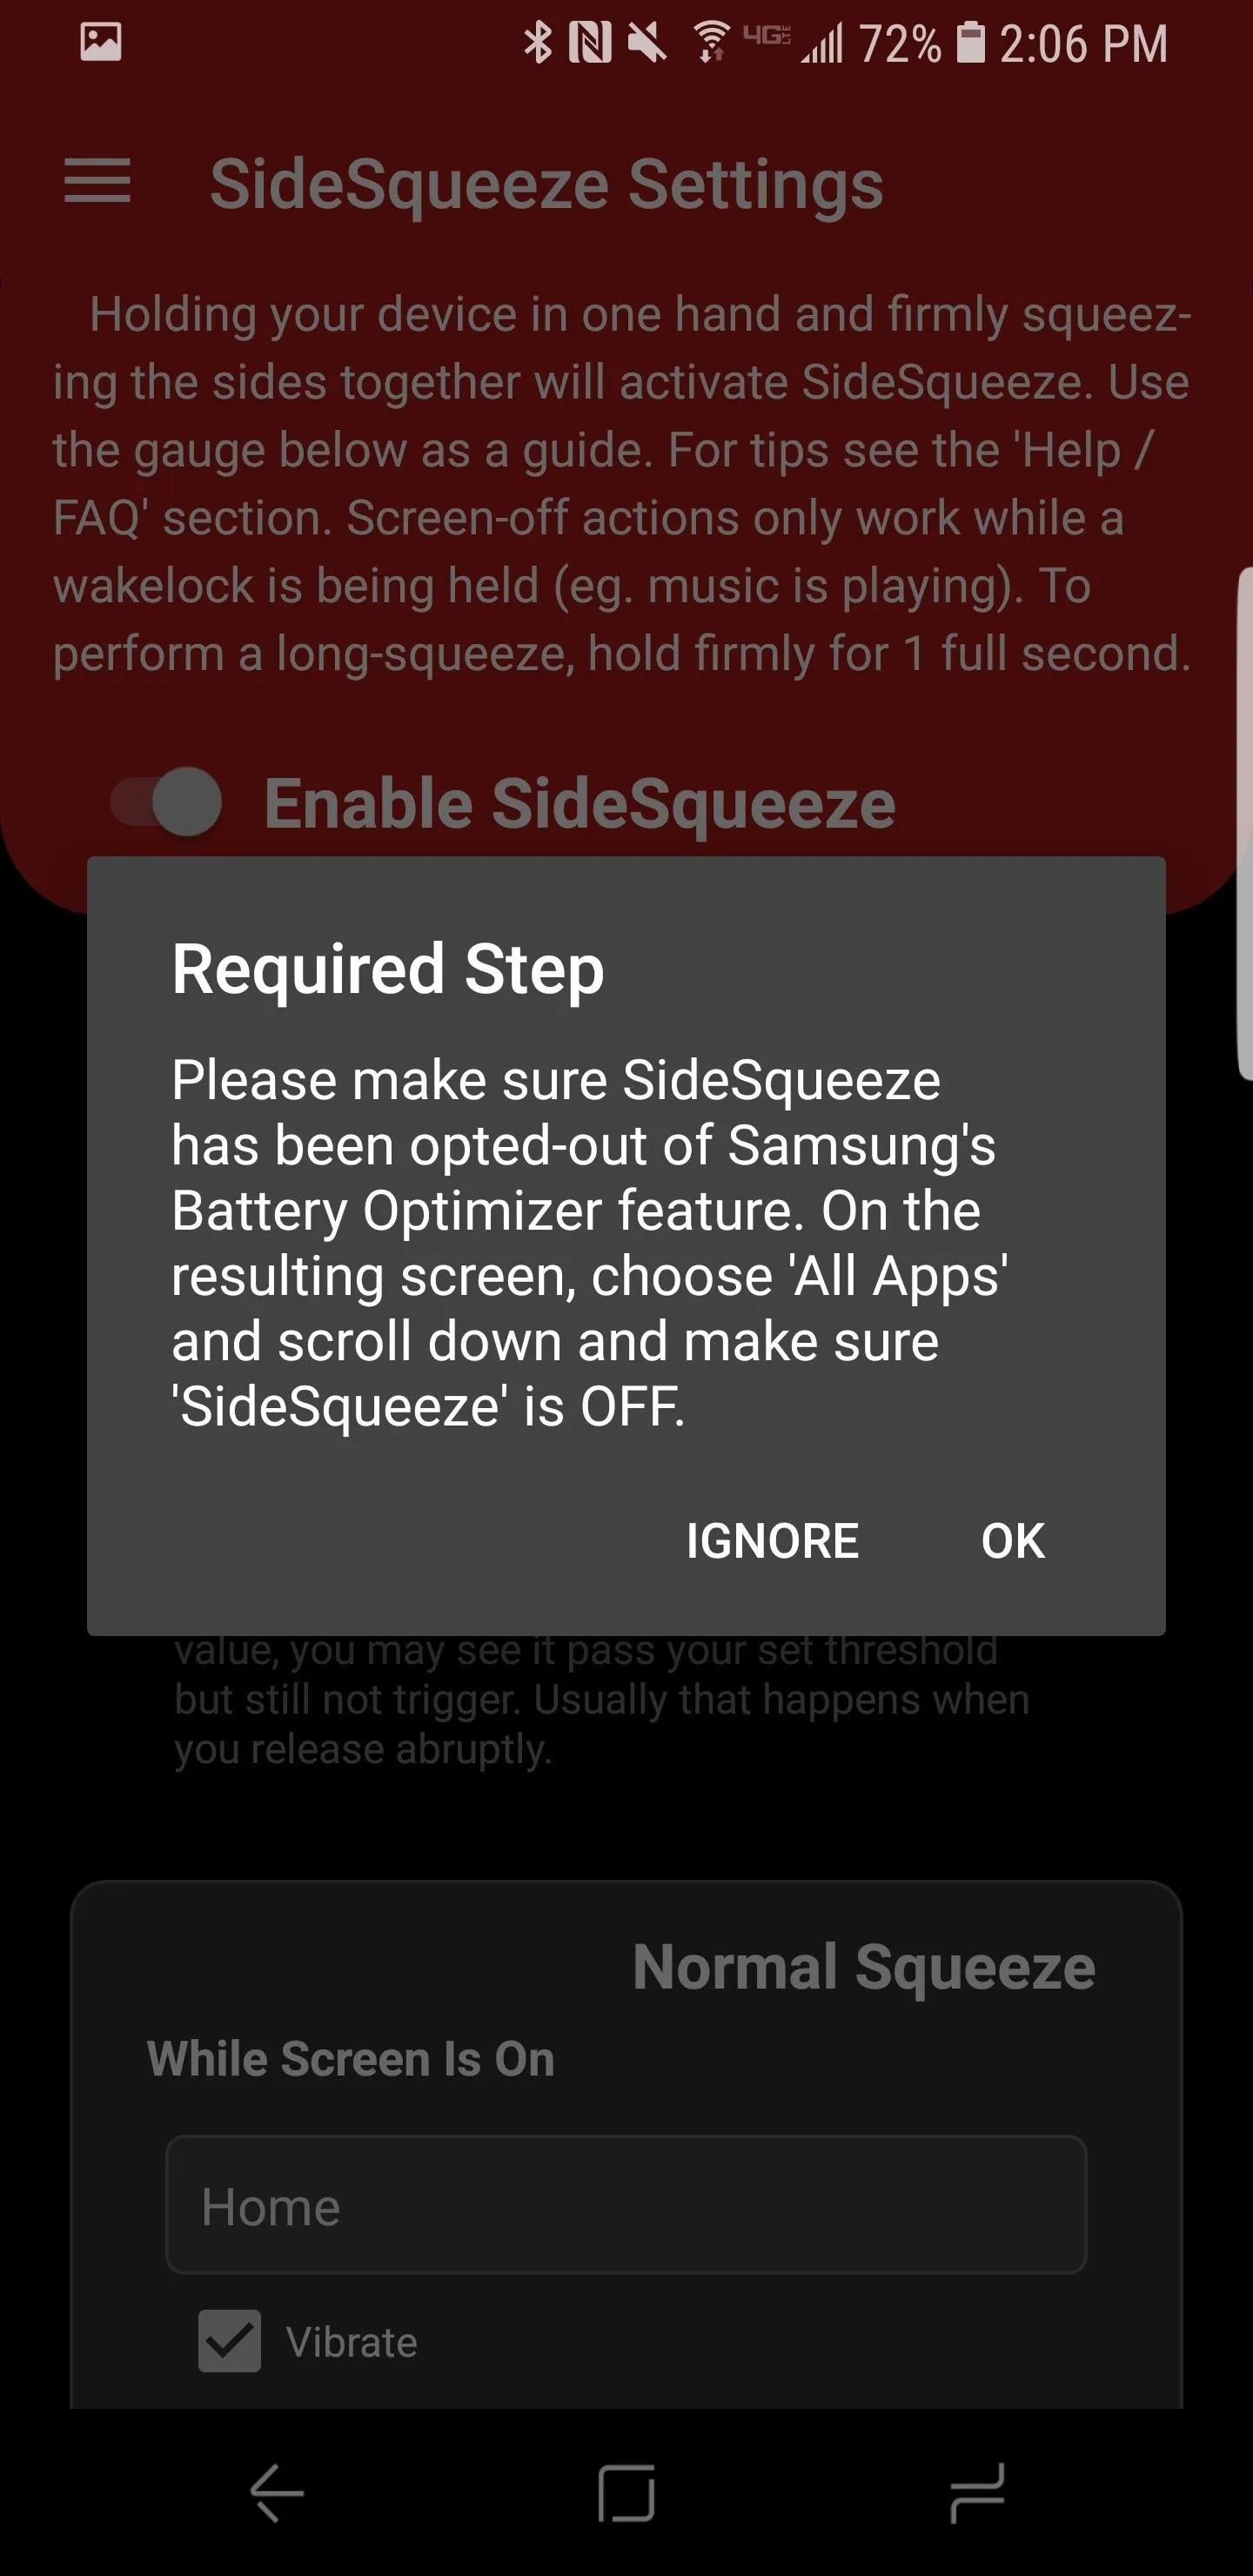
Next, you will receive a popup explaining that SideSqueeze should be removed from Samsung's battery optimization to function properly. Tapping on OK will take you to the Settings page for battery optimization.
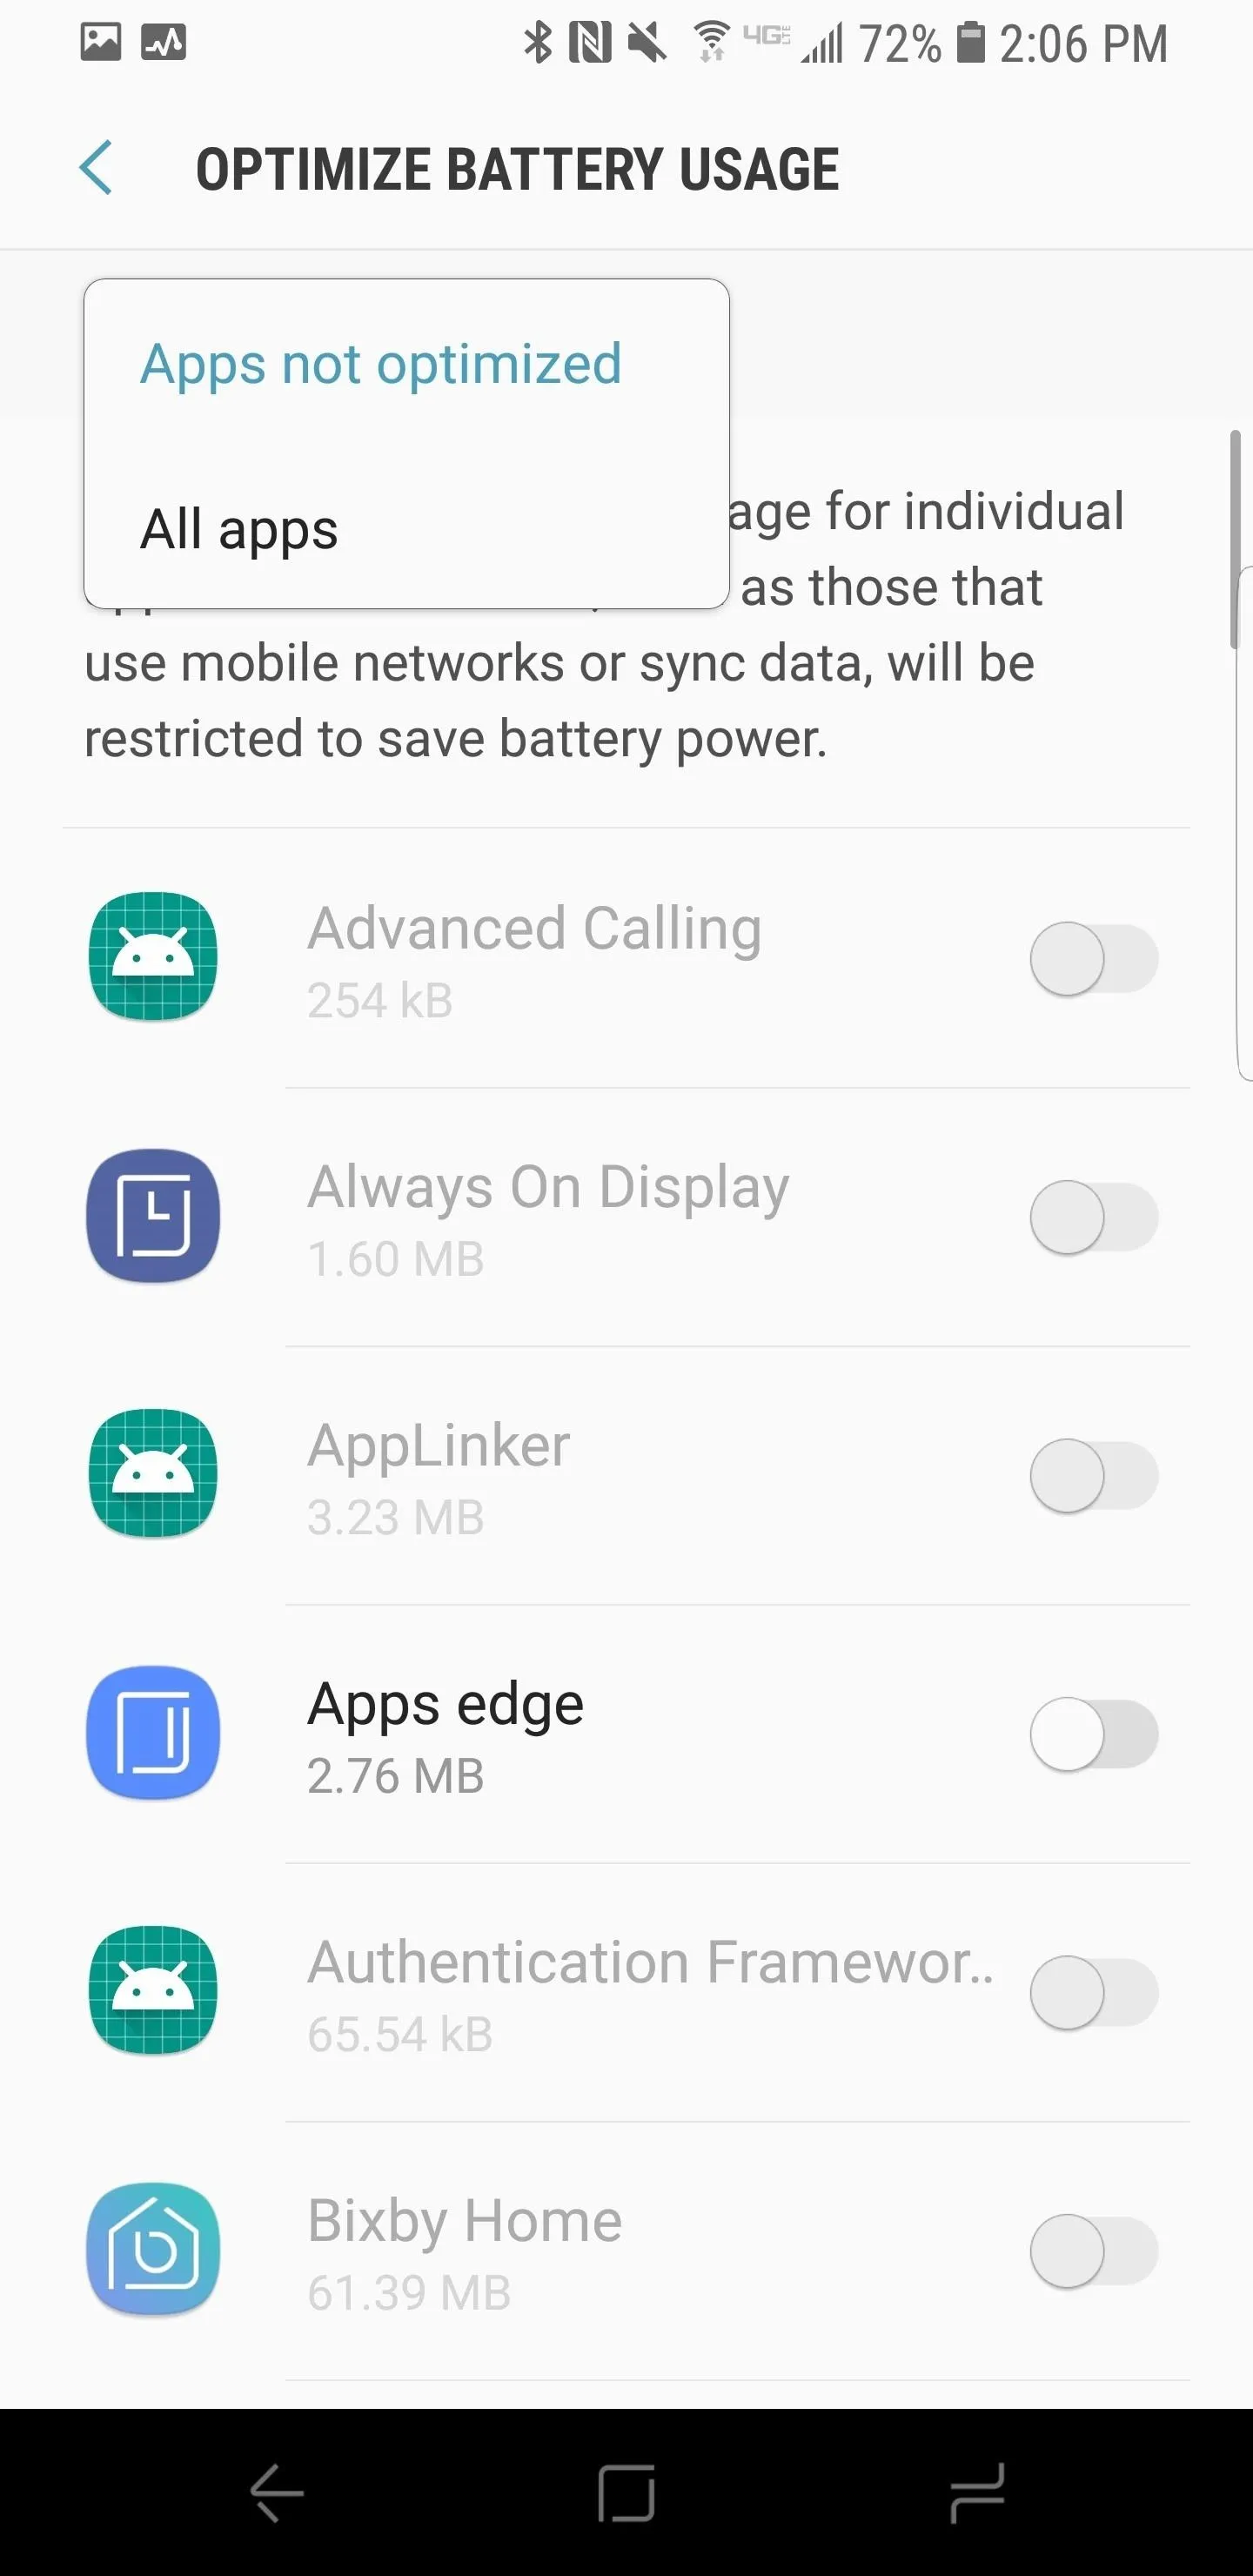
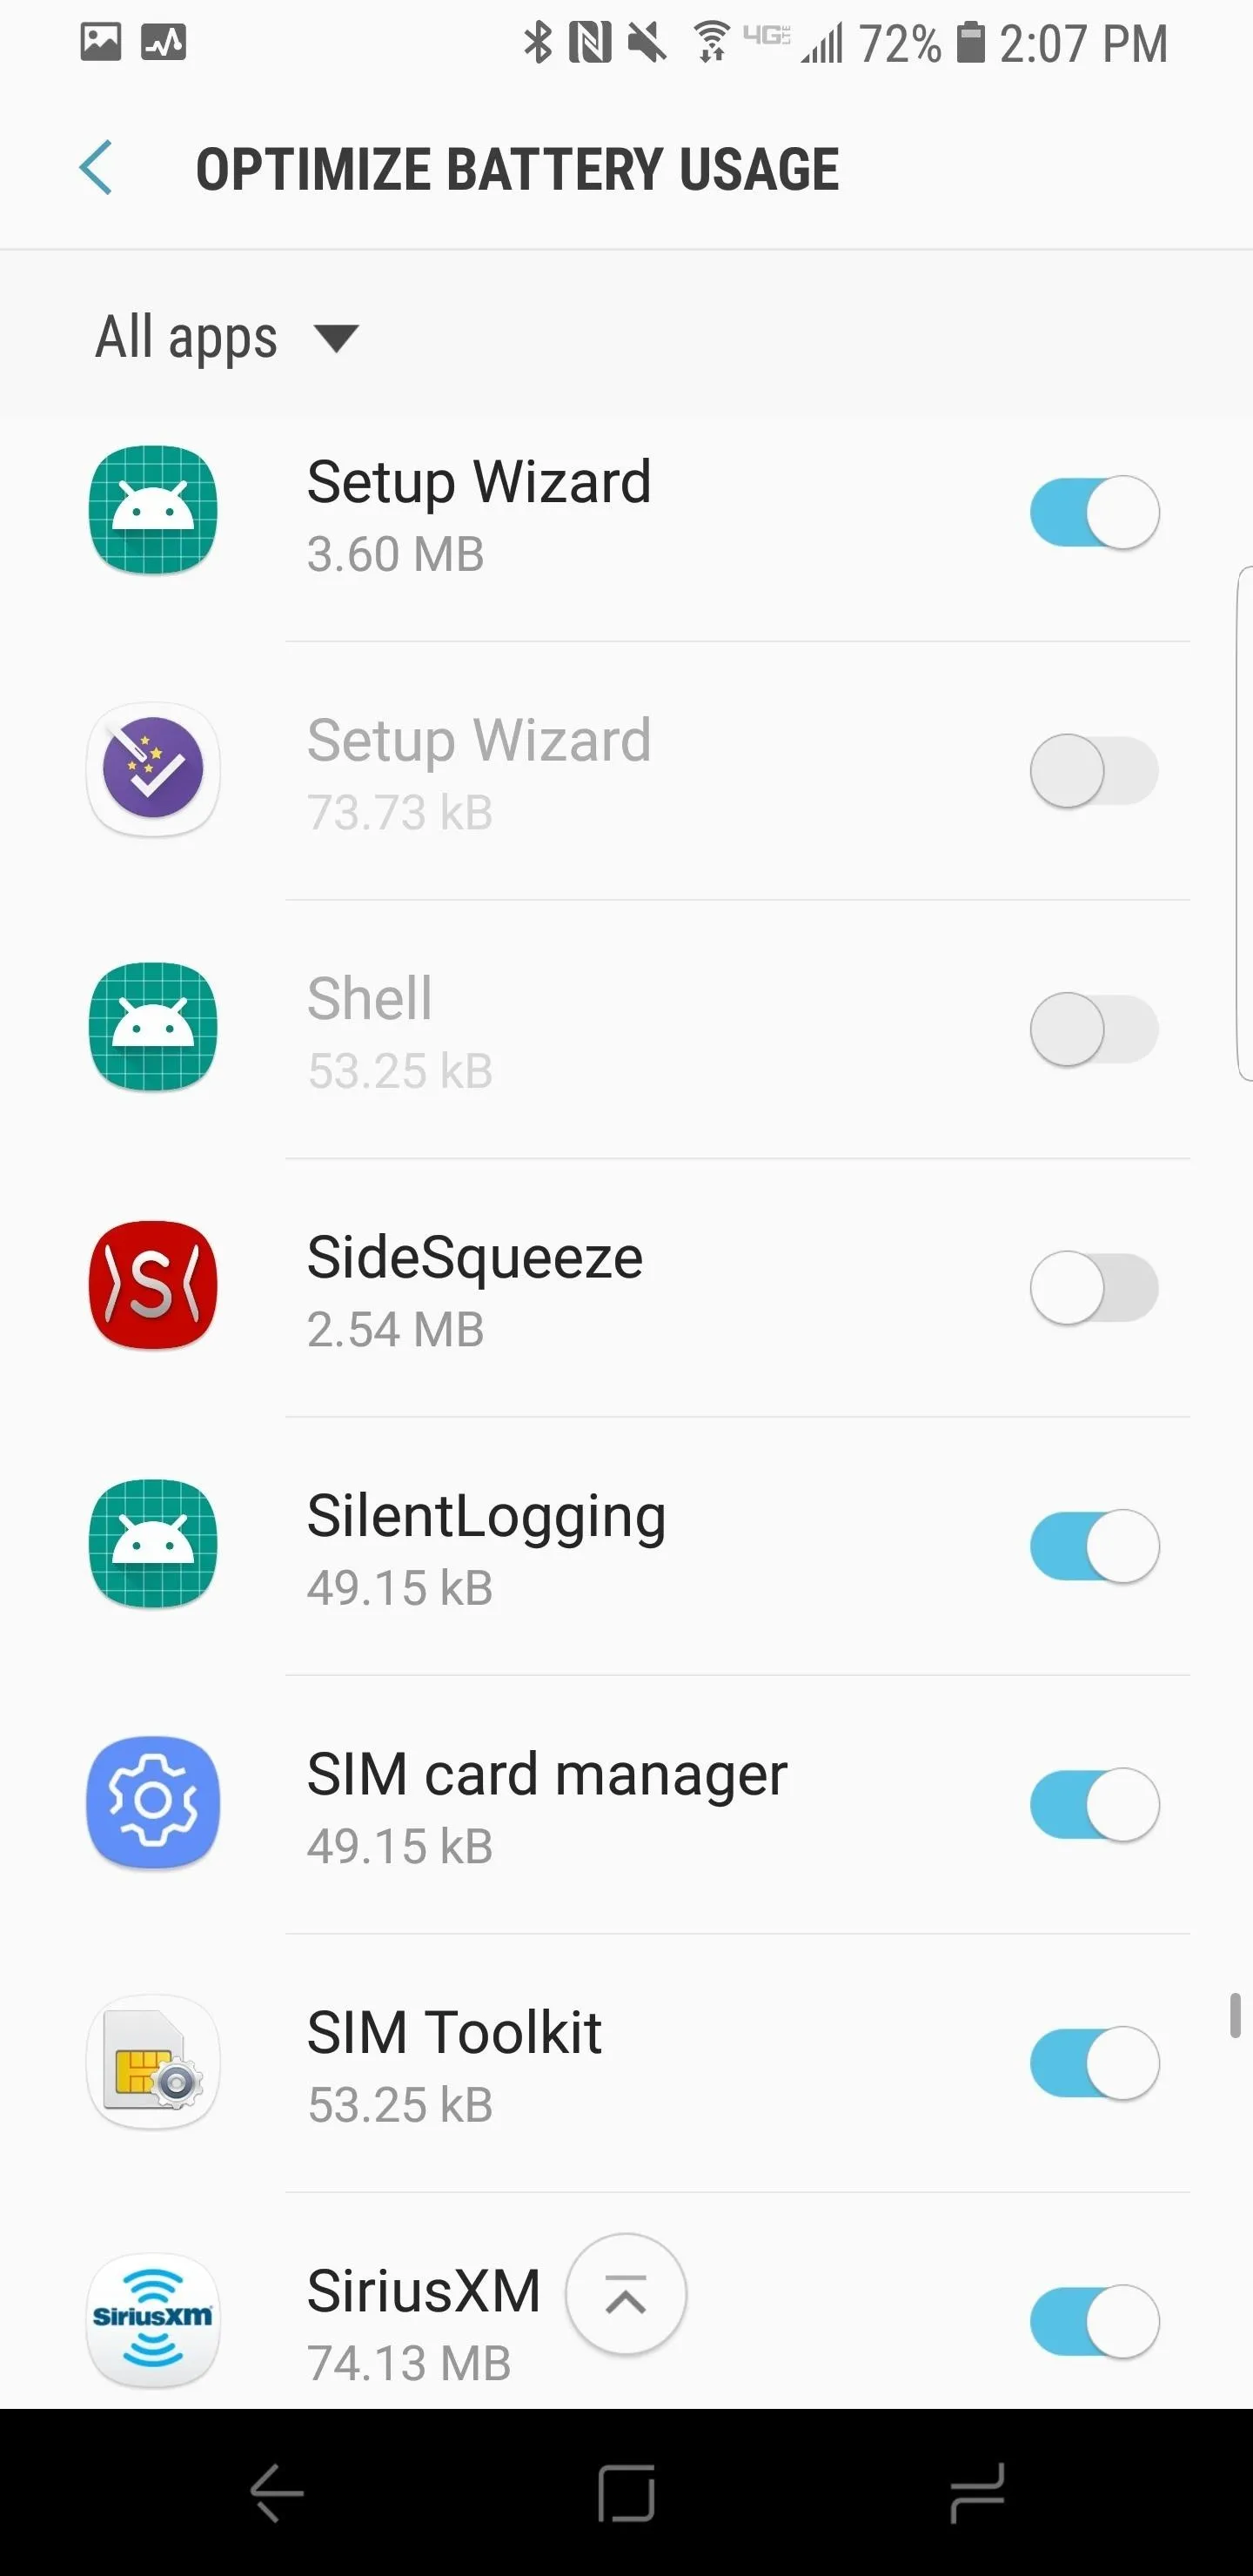
At the top of the Settings page, select "All Apps" from the drop-down menu, then scroll down and verify that SideSqueeze is turned off. After completing this, tap back a few times to return to the app. If you're worried about battery drain with the app, we've noticed minimal drain in our several days of use (less than .05% per hour).


The final popup you will encounter warns about excessive squeeze force. This should be obvious, but make sure you are careful when applying force to the sides of your smartphone. If the squeeze function does not appear to work properly, adjust the pressure threshold (discussed below).
Adjust Pressure Threshold
Before setting your custom squeeze apps and action, you should find the ideal pressure threshold for you and your device. It is worth mentioning that each device has a slightly different preferred grip when performing squeeze gestures.
If you are using the Galaxy S9 or Note 8, it helps to curl your fingers around the sides when squeezing the phone. On the other hand, the S8 and S8+ prefer a more square squeeze, without curling of the fingers.
With these guidelines in mind, use the meter at the top of the app's home page to test the pressure threshold. We have found that a pressure threshold between 10 and 12 is ideal for the Galaxy S9 devices.
Enable Custom Home Screen Actions via ADB (Pro Only)
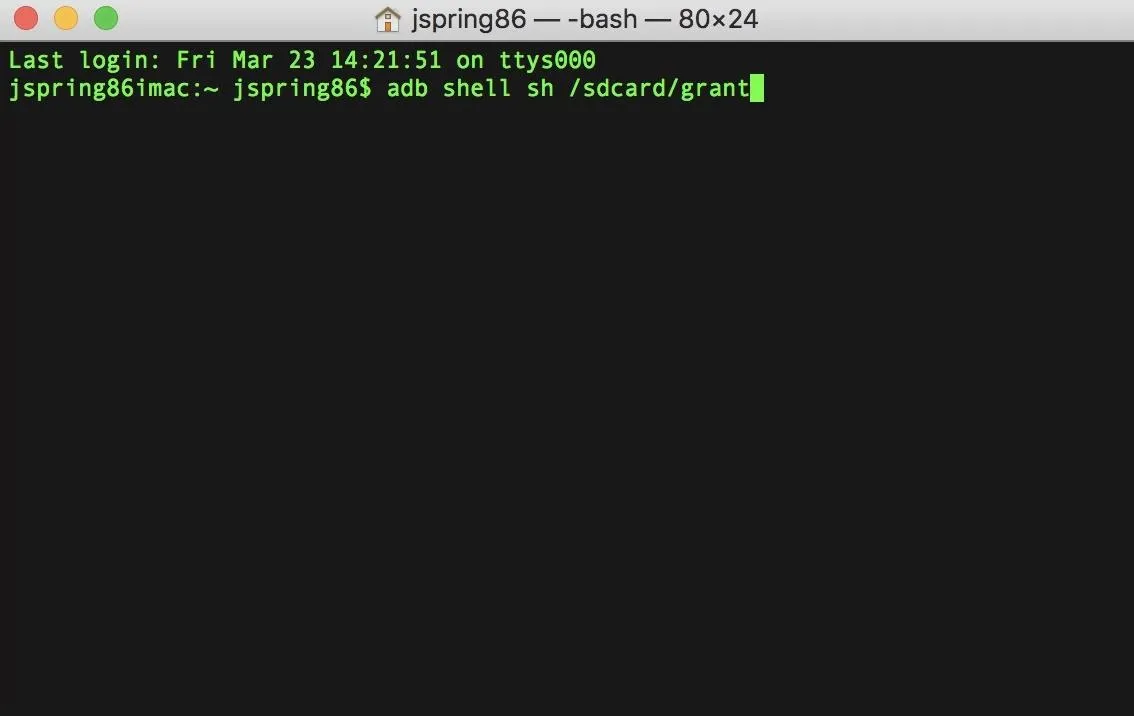
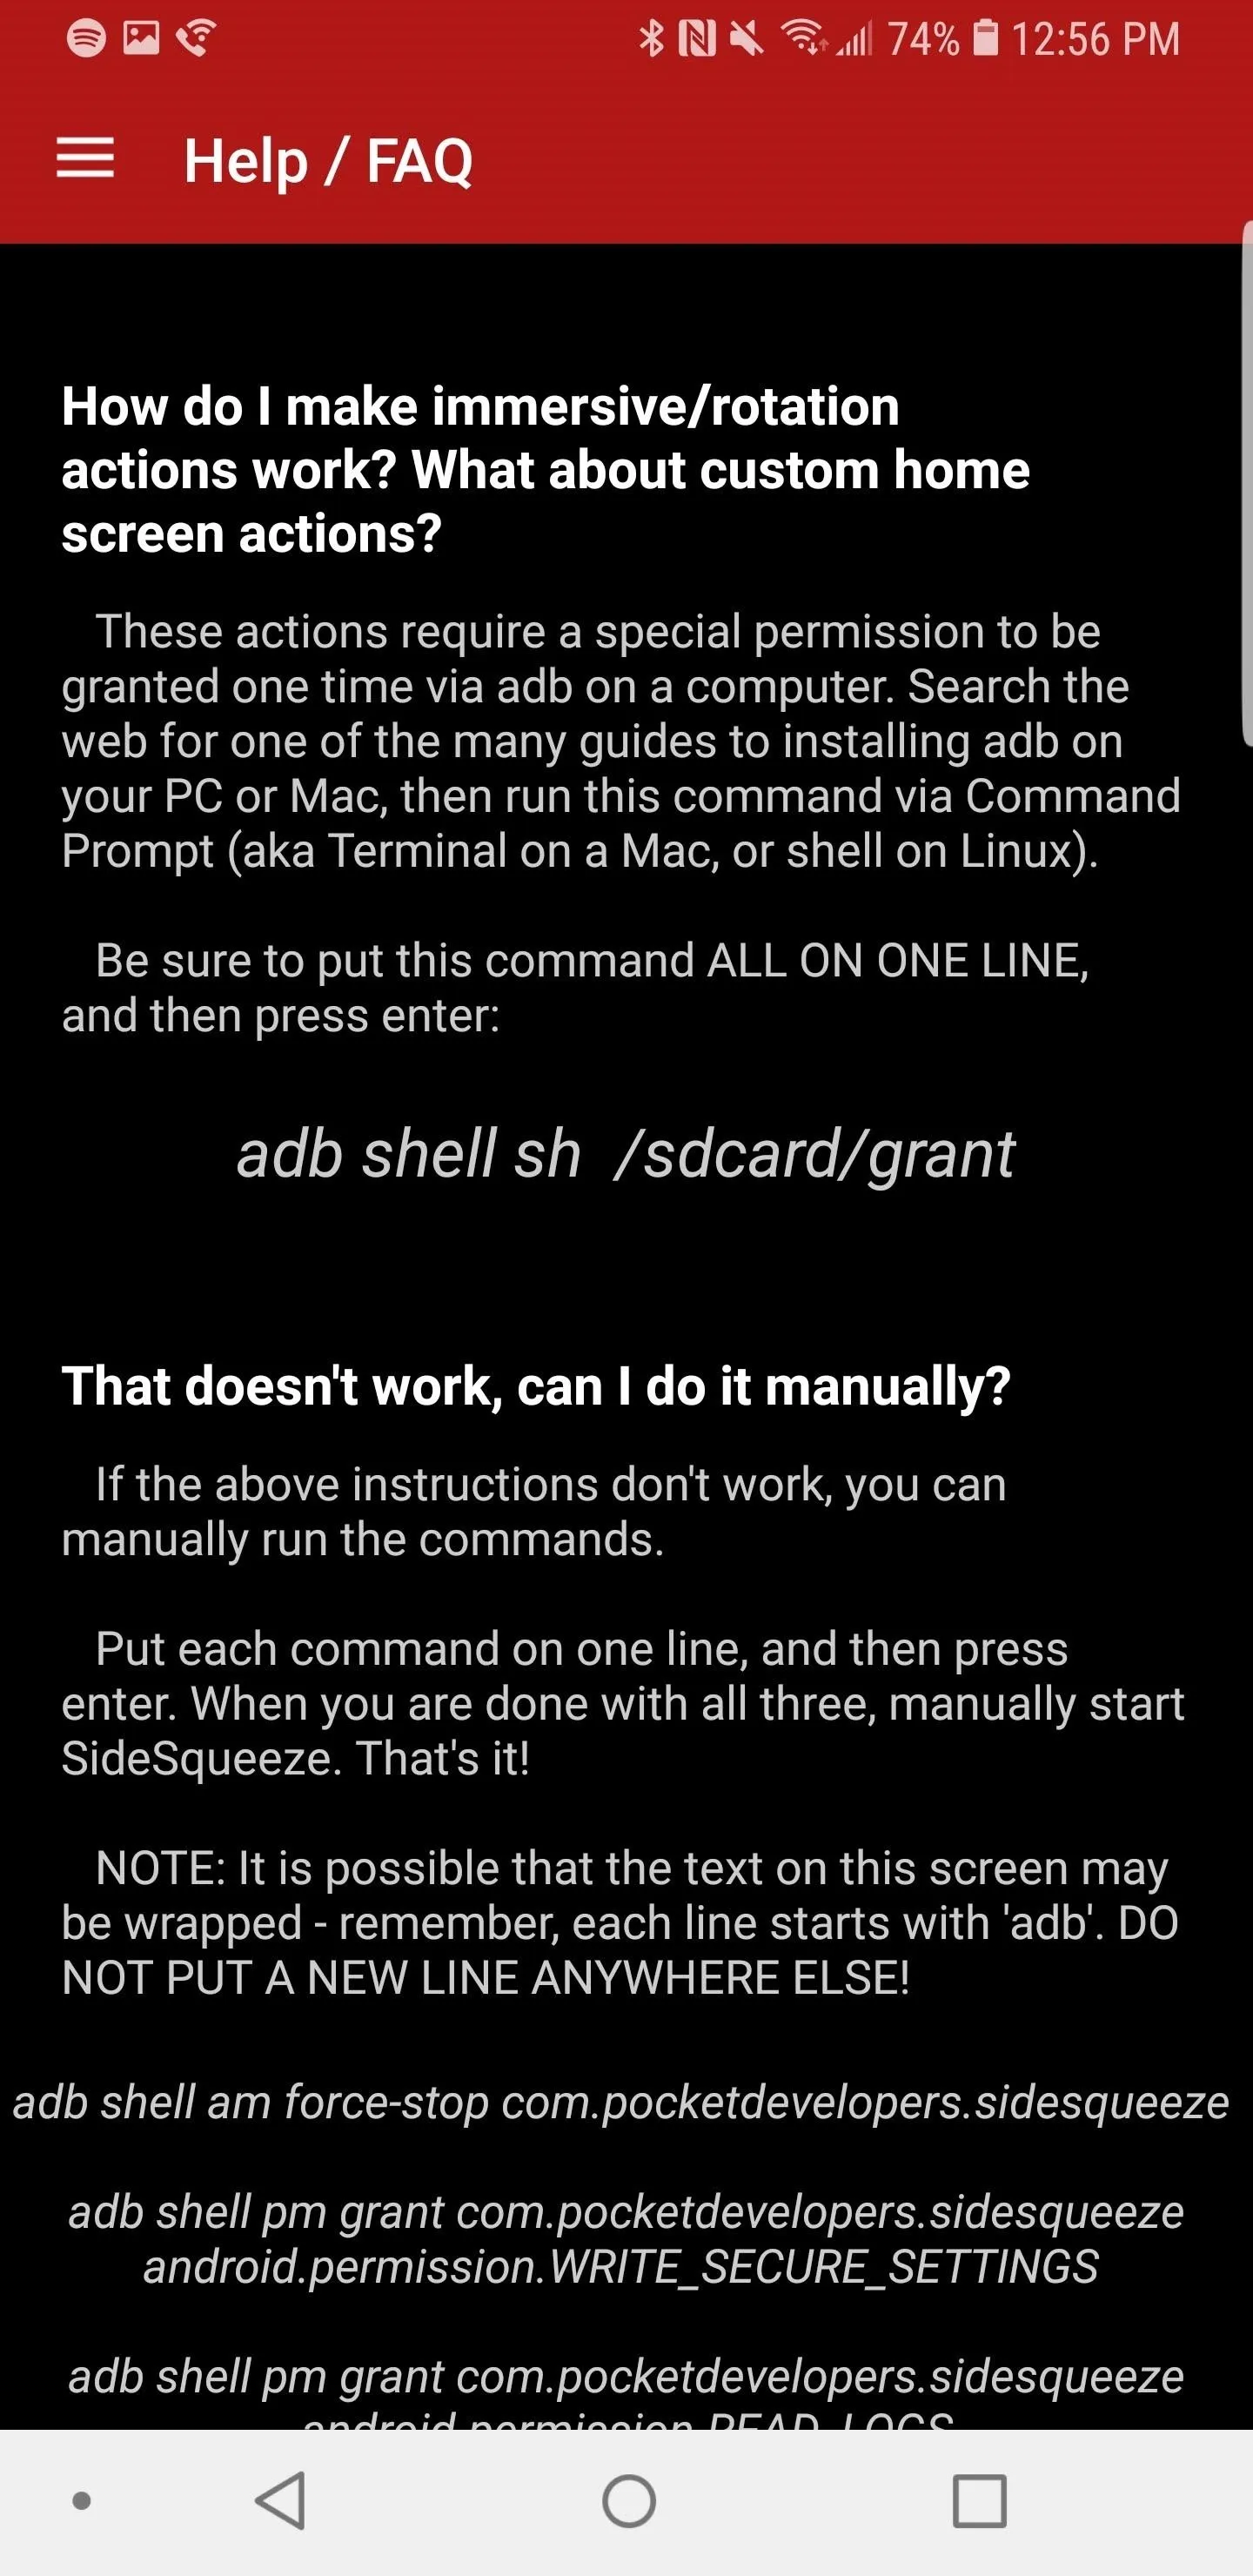
One of the most useful features of SideSqueeze is the ability to enable custom actions from the home screen, separate from the action enabled while in other apps. In order to enable this, you need to execute a simple ADB command from the command line on your PC.
If you're not familiar with ADB or the command line, we have an excellent guide for helping you install the necessary tools. After installing the ADB tools, open up the command window on your PC and type adb shell sh /sdcard/grant. When finished, you should now be able to set custom home screen actions and immersive mode in SideSqueeze.
Tweak Settings for Better Performance
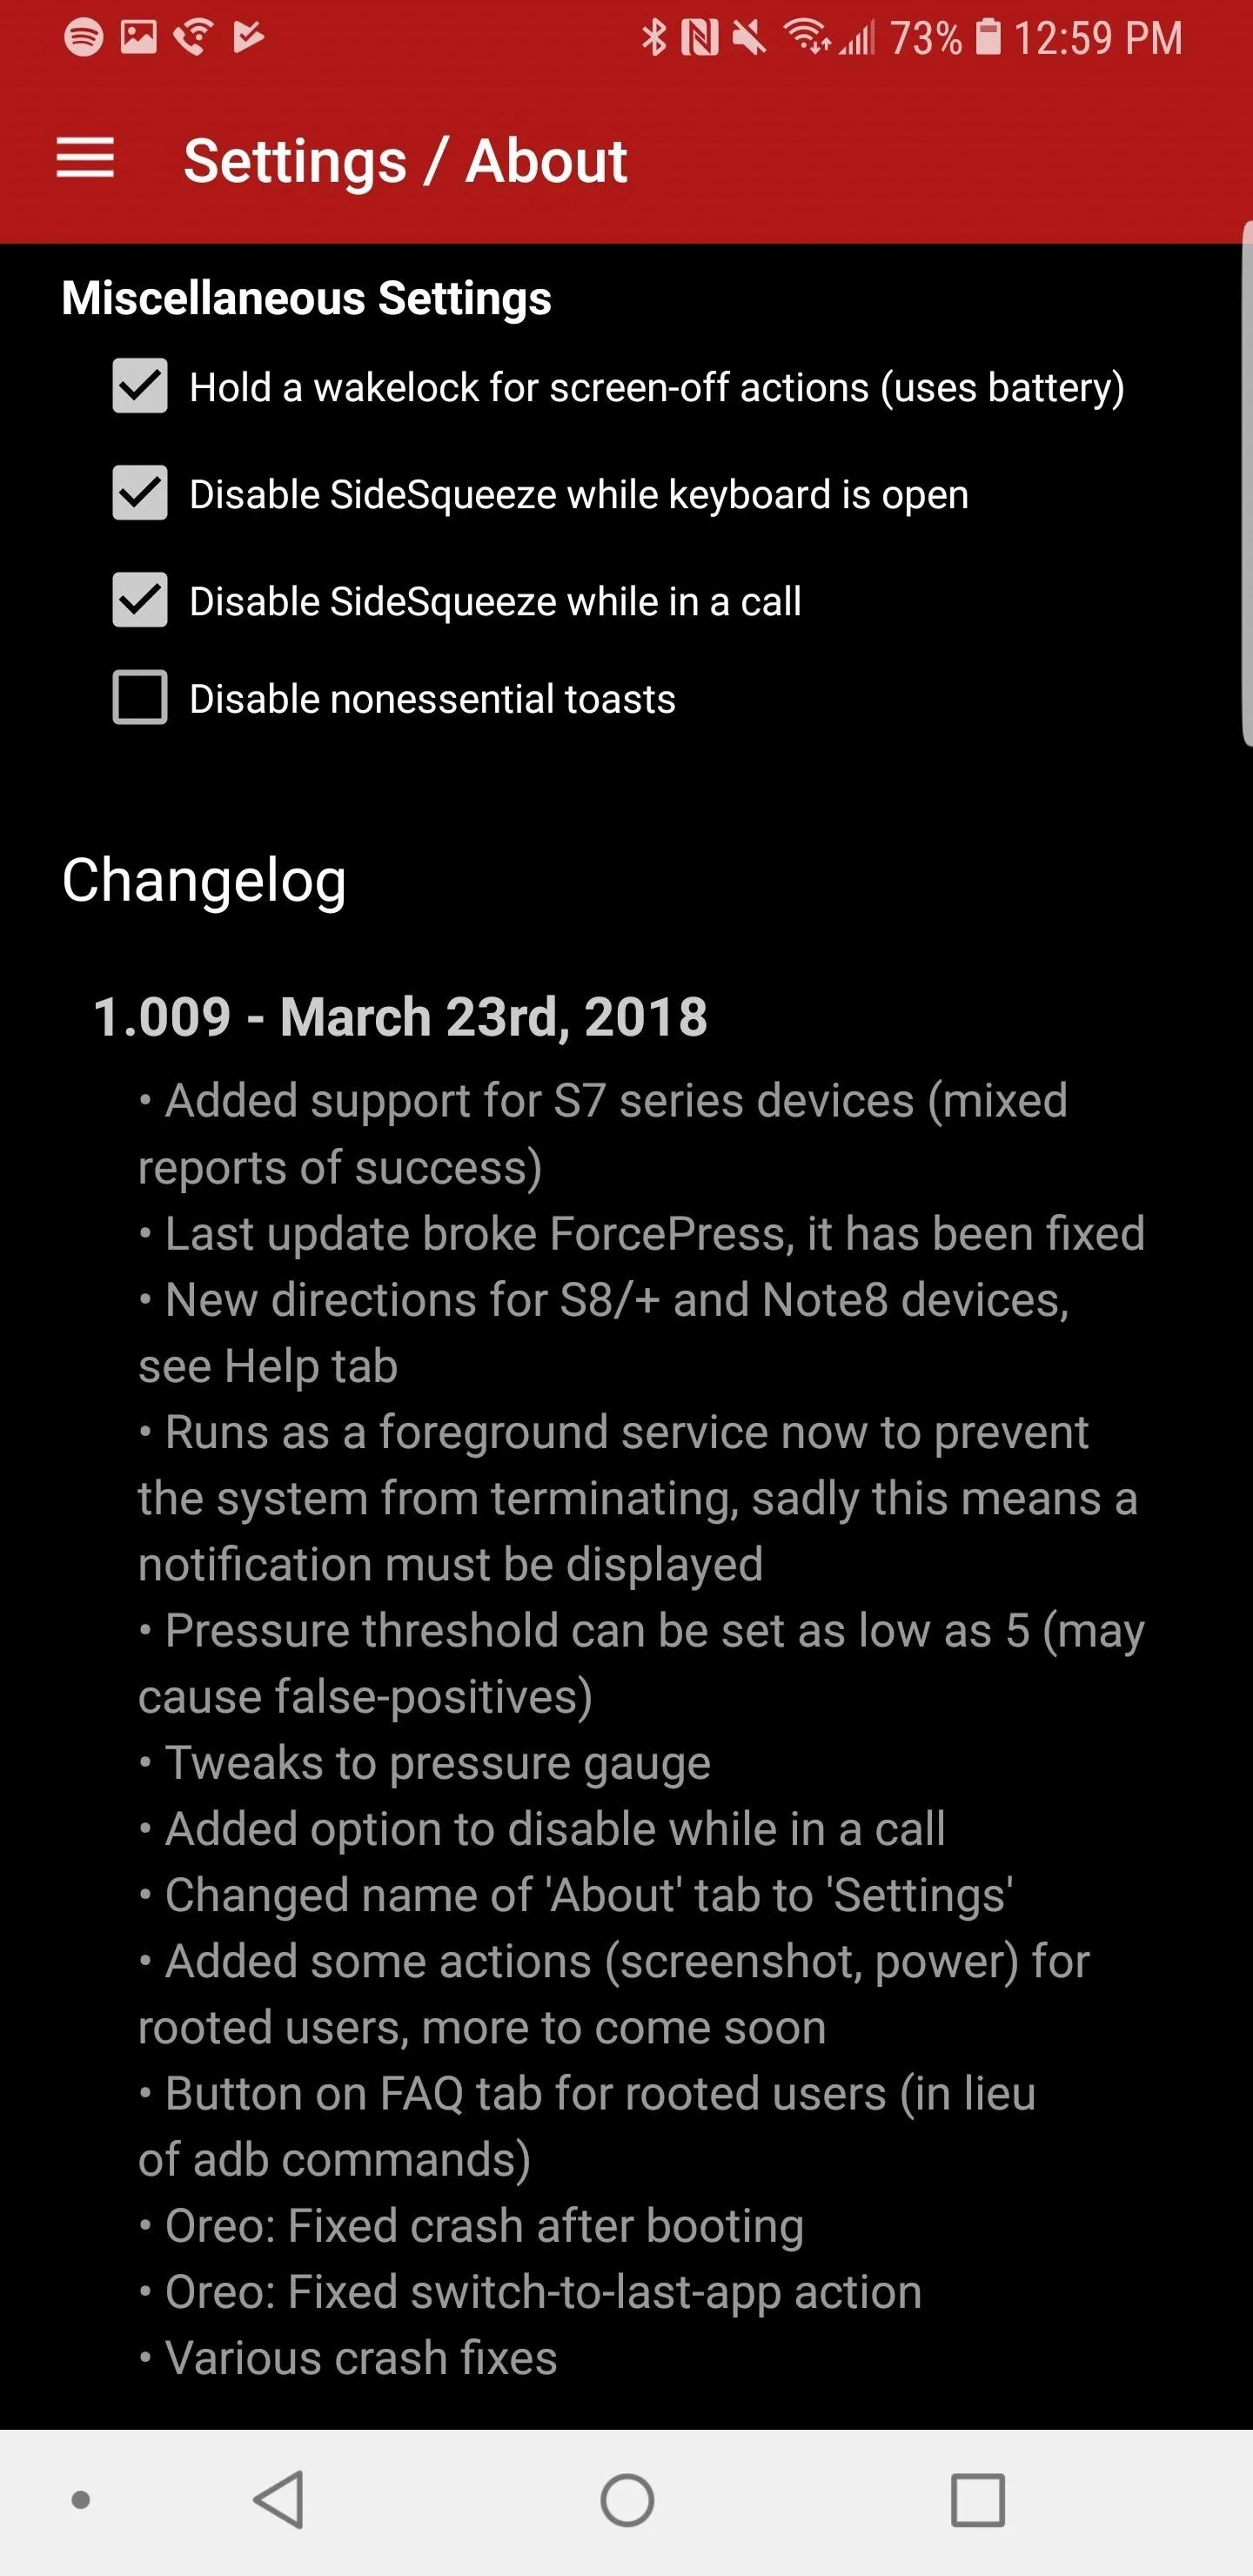
There are a few helpful settings to enable in SideSqueeze to improve performance. Tap the menu in the top-left corner of the app, and then tap on "Settings." Verify that "Disable SideSqueeze while in a call" and "Disable SideSqueeze while keyboard is open" are both selected.
In addition to these options, you may also want to enable "Hold a wakelock for screen-off actions (uses battery)." This final setting does drain extra battery, but it also seems to improve recognition of squeeze gestures on the lock screen in our experience. It is worth testing to see if the wakelock drains too much battery for your liking.


Set Your Custom Squeeze Actions
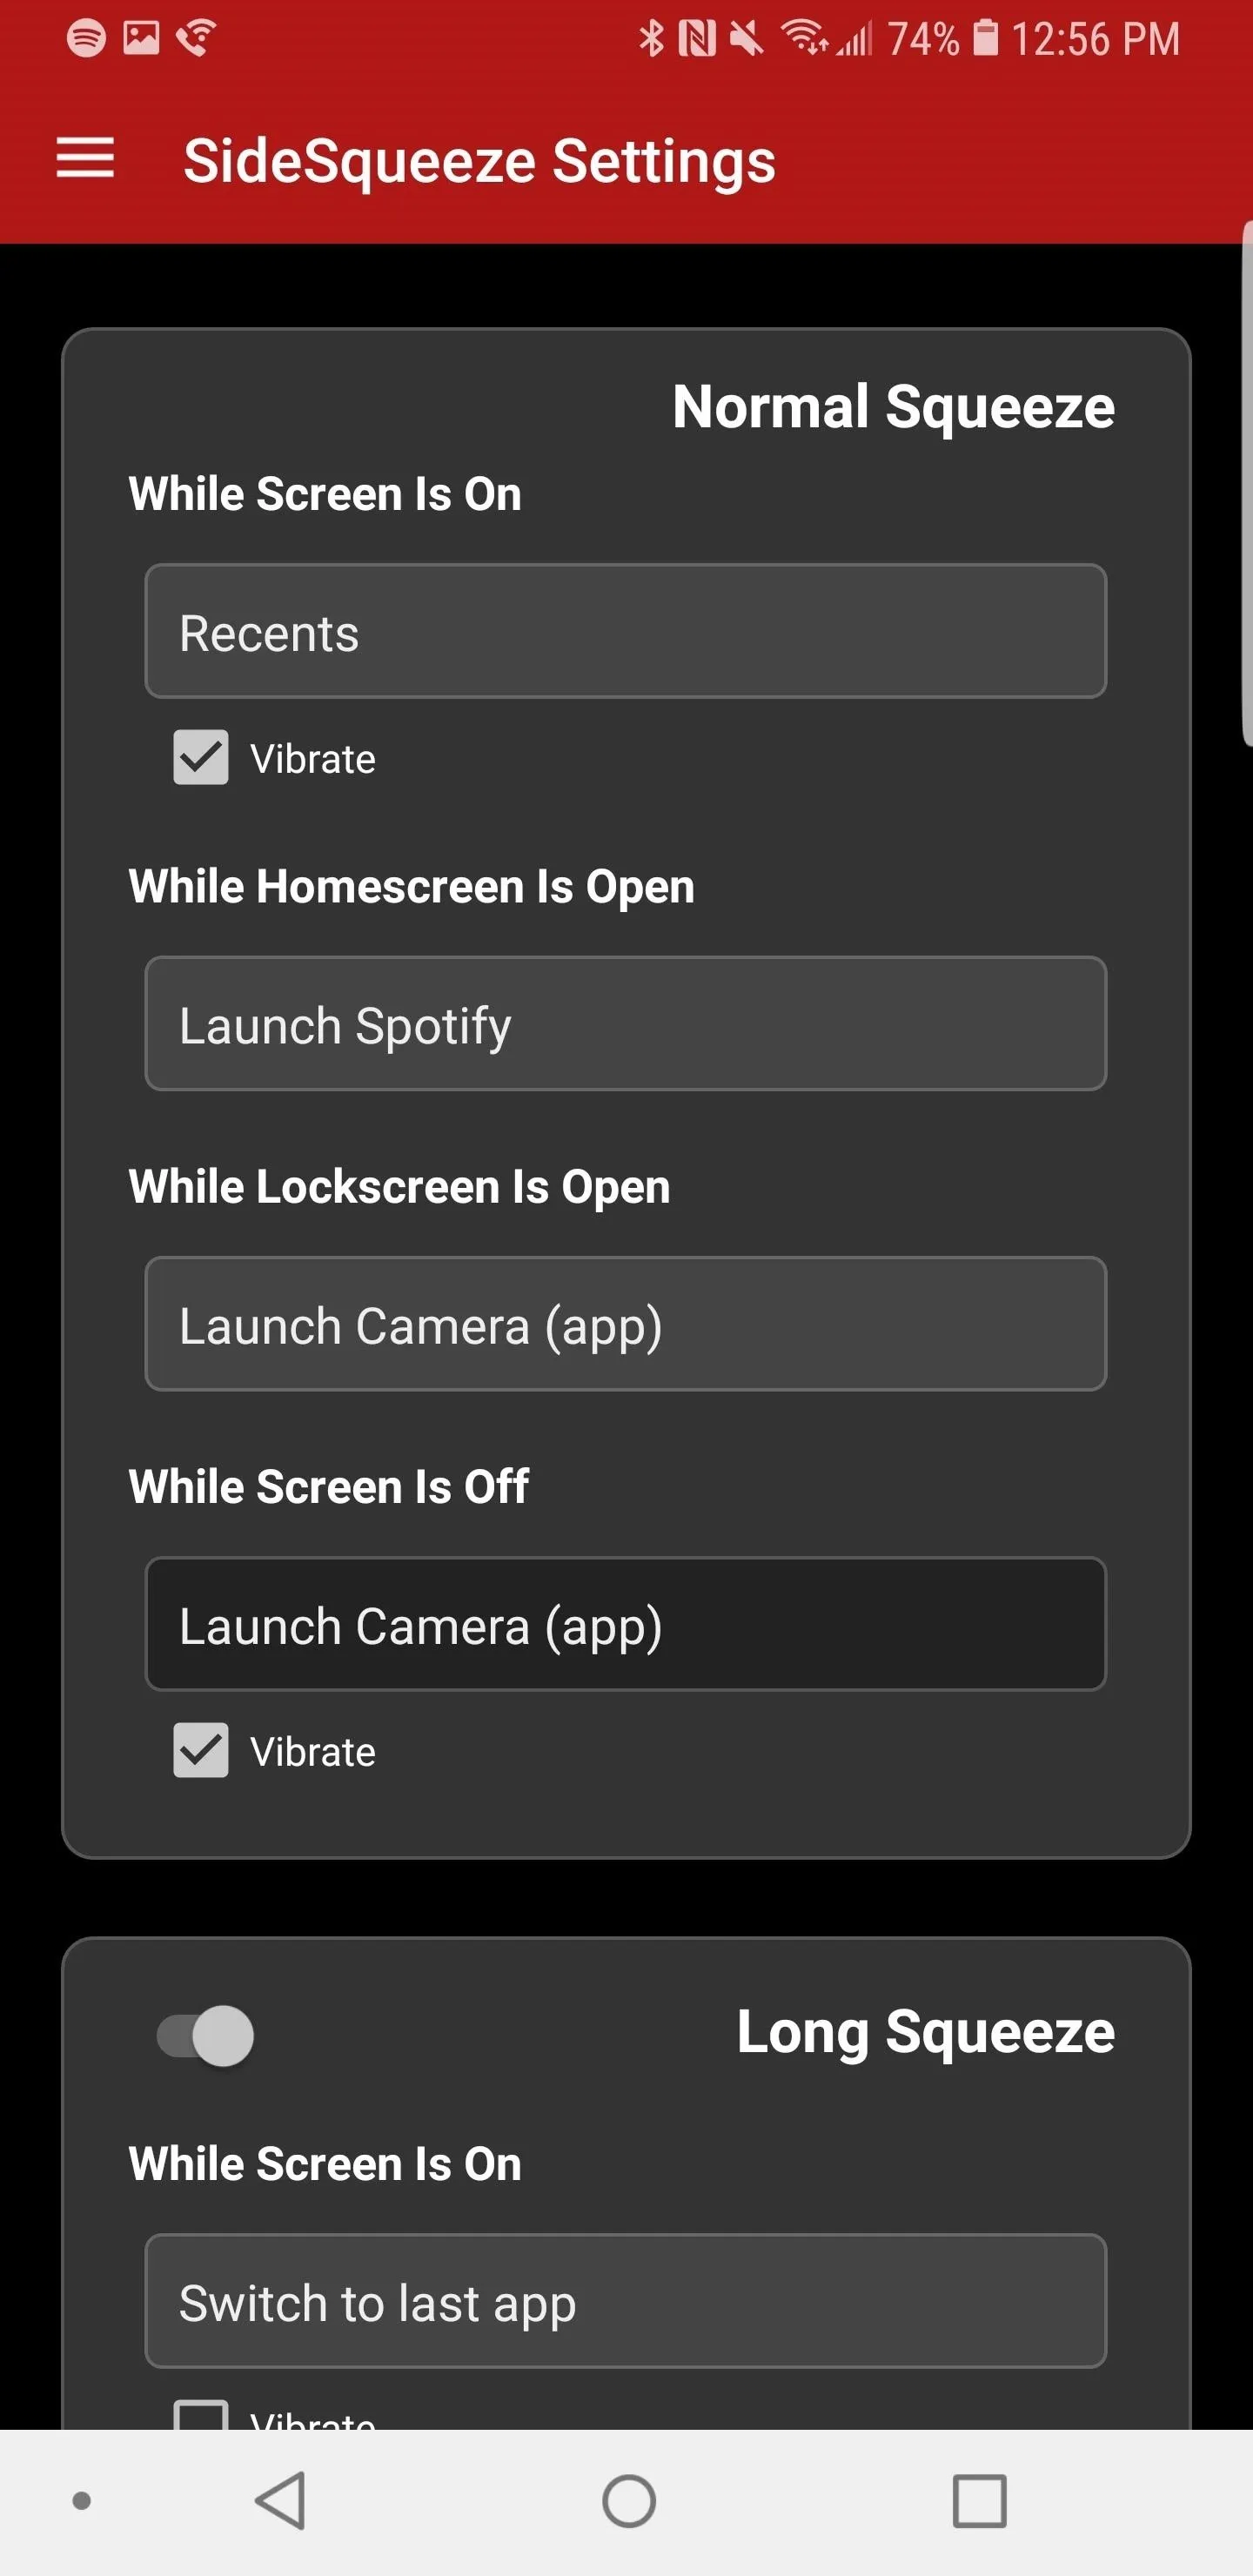
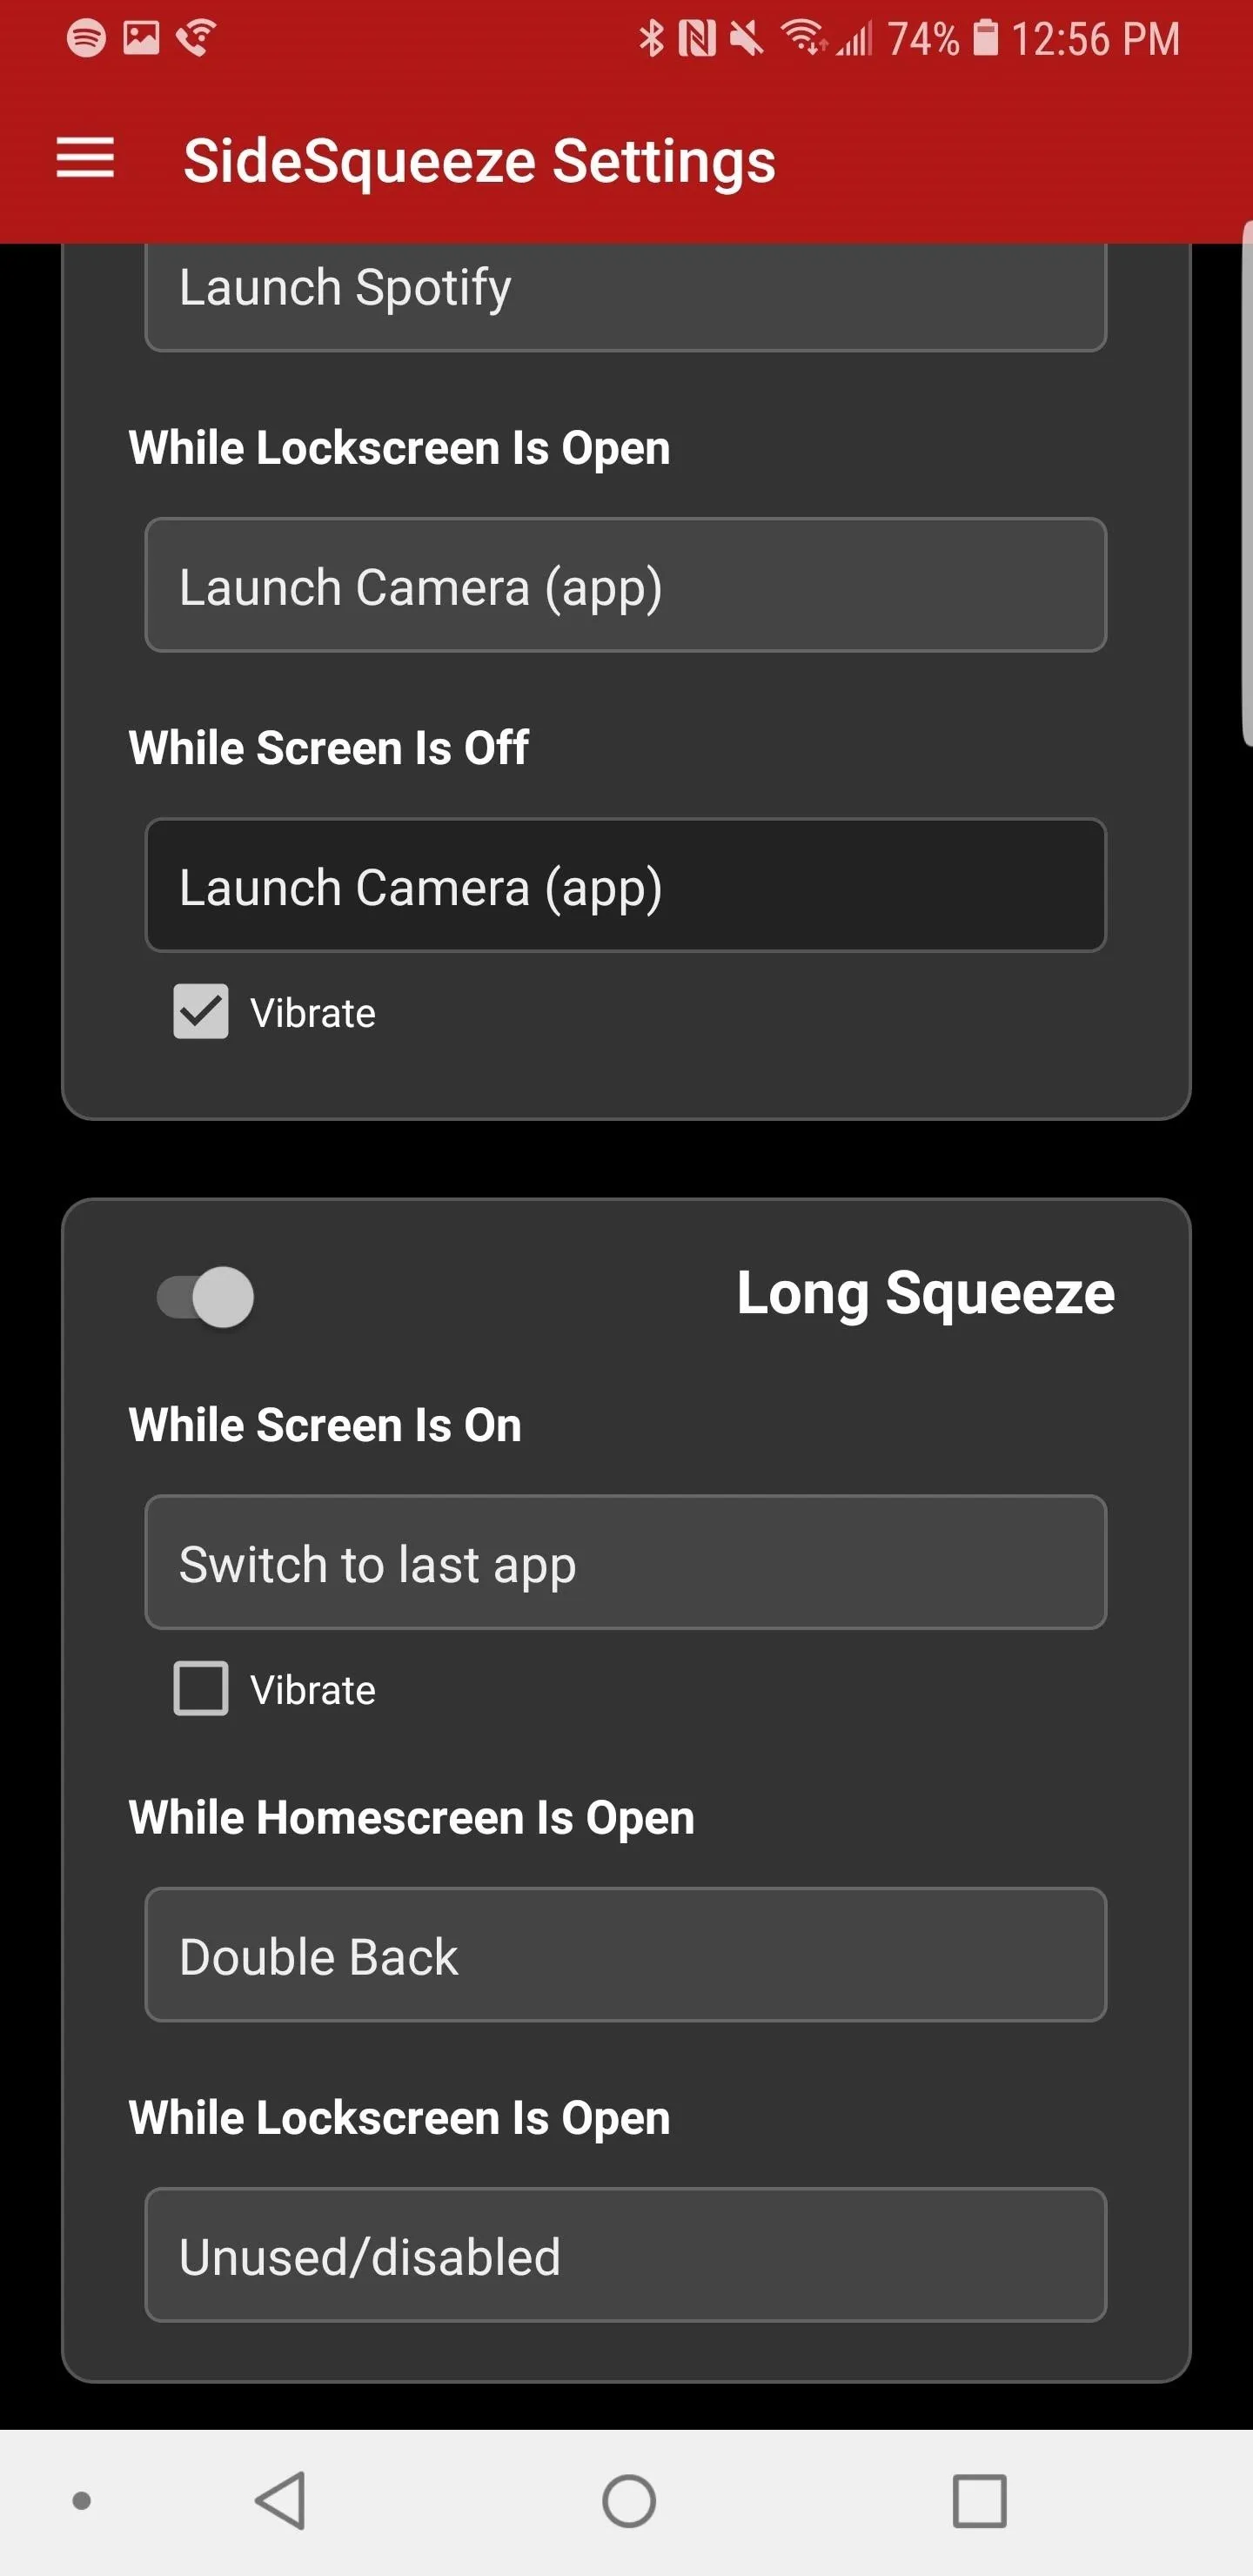
Now for the fun part. Navigate to the SideSqueeze home page and set your custom actions for both "Normal Squeeze" and "Long Squeeze." Each of these can be customized with different actions for Screen On, Homescreen Open (Pro Only), Lockscreen Open, and Screen Off.
We have noticed that the LockScreen actions do not appear to work with the Always on Display enabled. There are numerous actions to choose from in each category, and you can enable even more by paying $1.99 for the Pro version of the app. In our testing, we found the Google Assistant and Recent Apps actions to be very convenient.


Using squeeze gestures to control your phone takes a bit of getting used to, but can be very convenient if you perform certain actions multiple times throughout your day. While this functionality might not be everyone's cup of tea, the fact that developers added this feature to new devices using software is remarkable. Let us know in the comments if the app works on your device, and tell us what you think of the functionality!
- Follow Gadget Hacks on Facebook, Twitter, YouTube, and Flipboard
- Follow WonderHowTo on Facebook, Twitter, Pinterest, and Flipboard
Cover image and screenshots by Jeff Springer/Gadget Hacks












Comments
Be the first, drop a comment!