When it comes to note-taking, Google Keep is one of the most diverse and functional applications on the Android platform. Sure, there are a plethora of other note-taking apps to choose from, such as ever popular OneNote and Evernote, but Google Keep differentiates itself from the crowd with its user-friendly interface and Google Now integration.
There's a lot Google Keep can do to help keep your personal and work life organized, and today, we're going to cover 10 tips for making Google's best notes app work better for your specific needs.
1. Write Quick Notes with a Floating Window from Any Home Screen
If you want a quick way to jot down notes without having to worry about opening up Google Keep every time, or using a completely different app, there's a way to do so, but you'll need to get Nova Launcher Prime on your device.
After you've installed Nova Launcher Prime, launch it and head into the Settings, then Gestures & inputs. From here, select a gesture you wish to use to activate a Google Keep floating window.
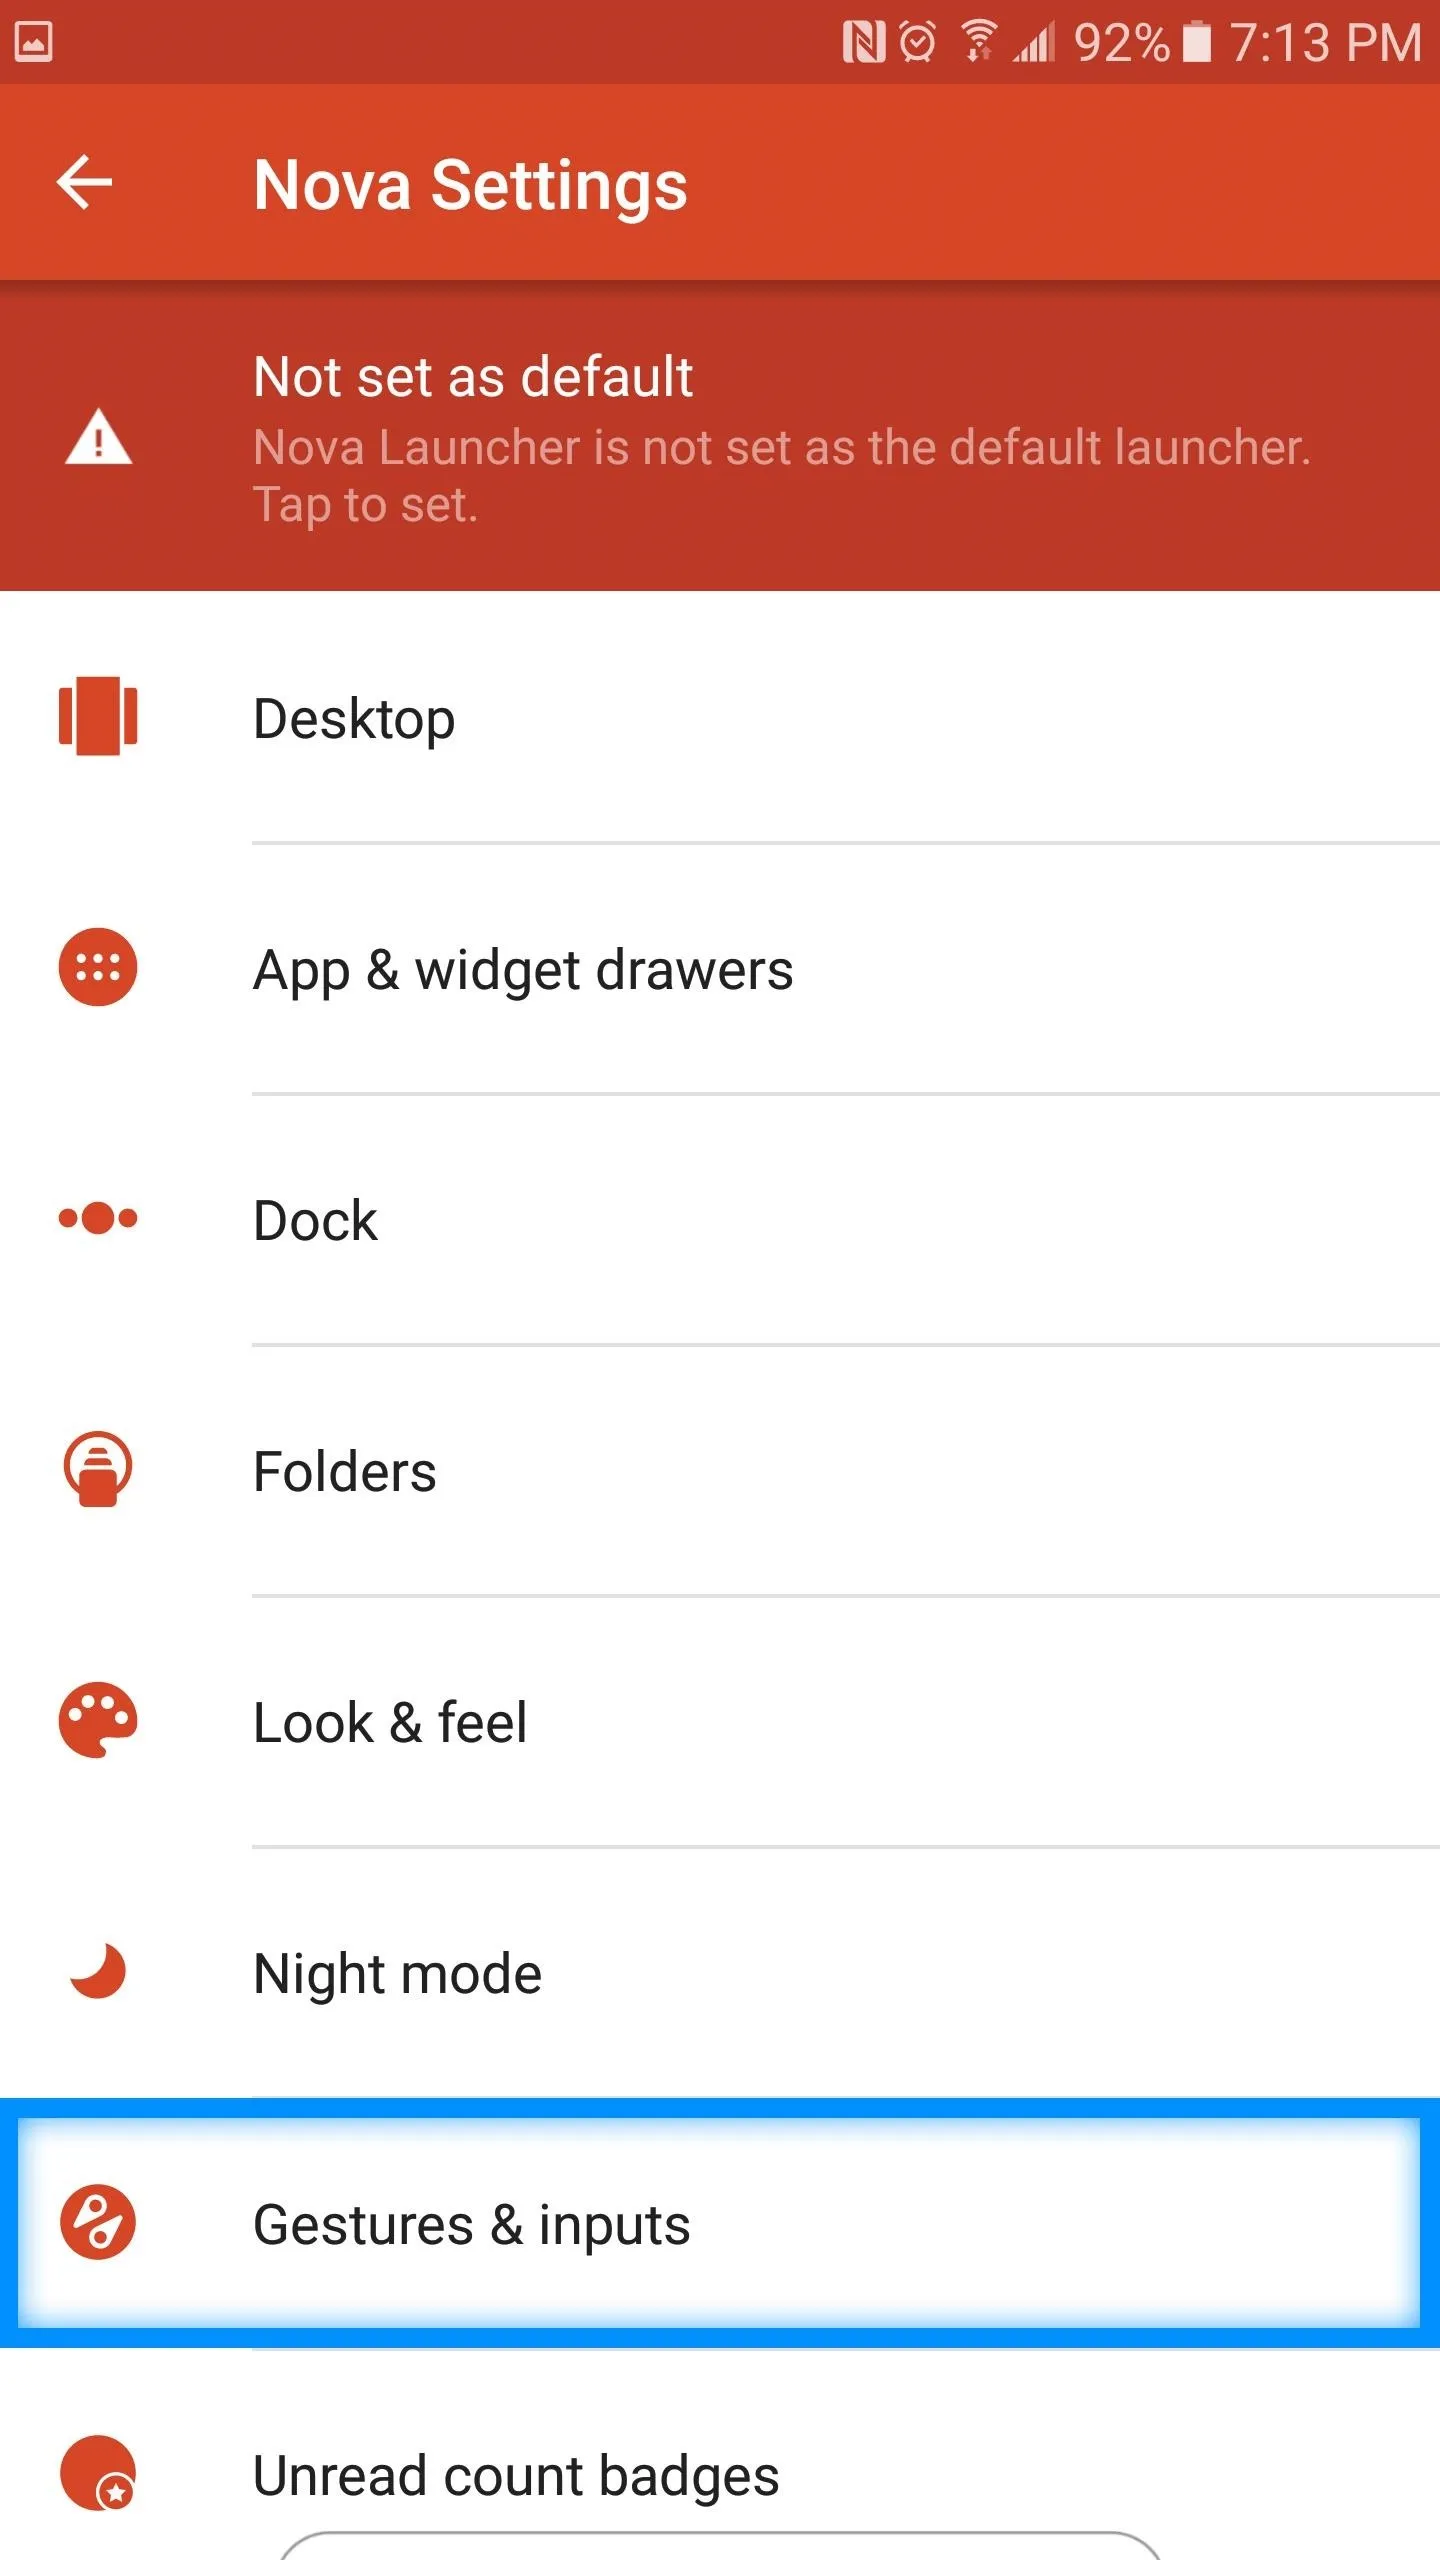
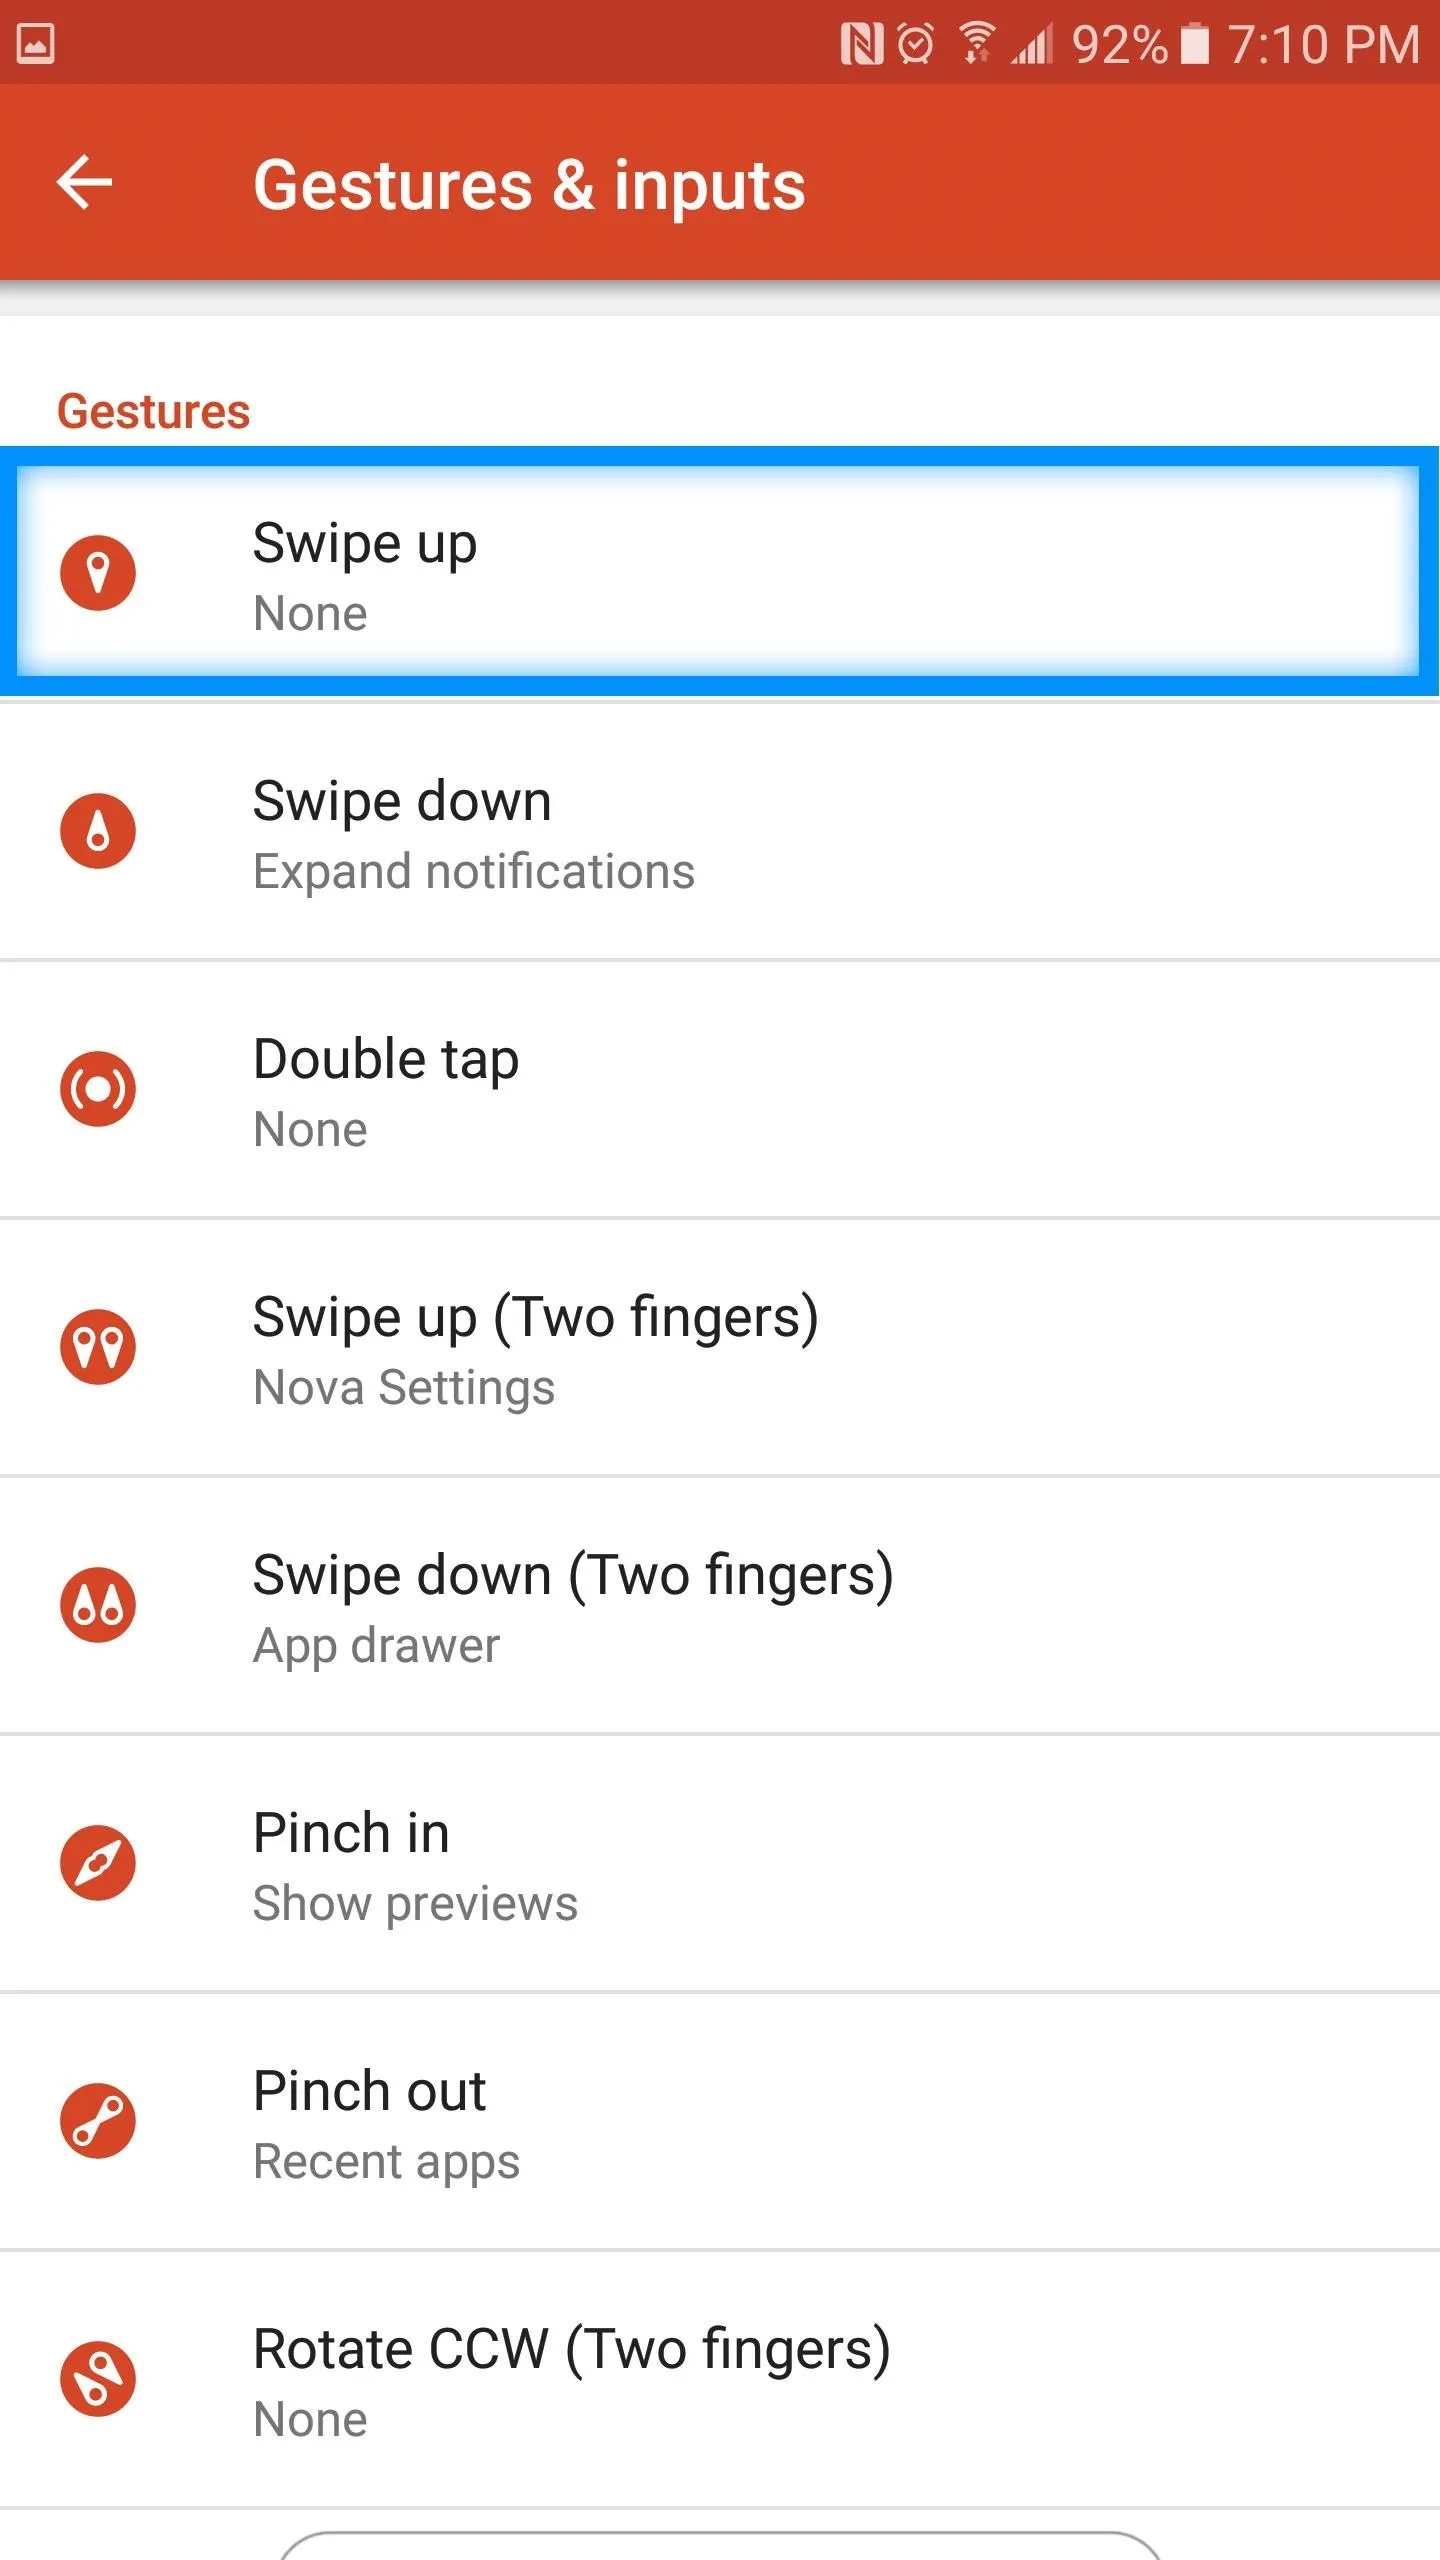


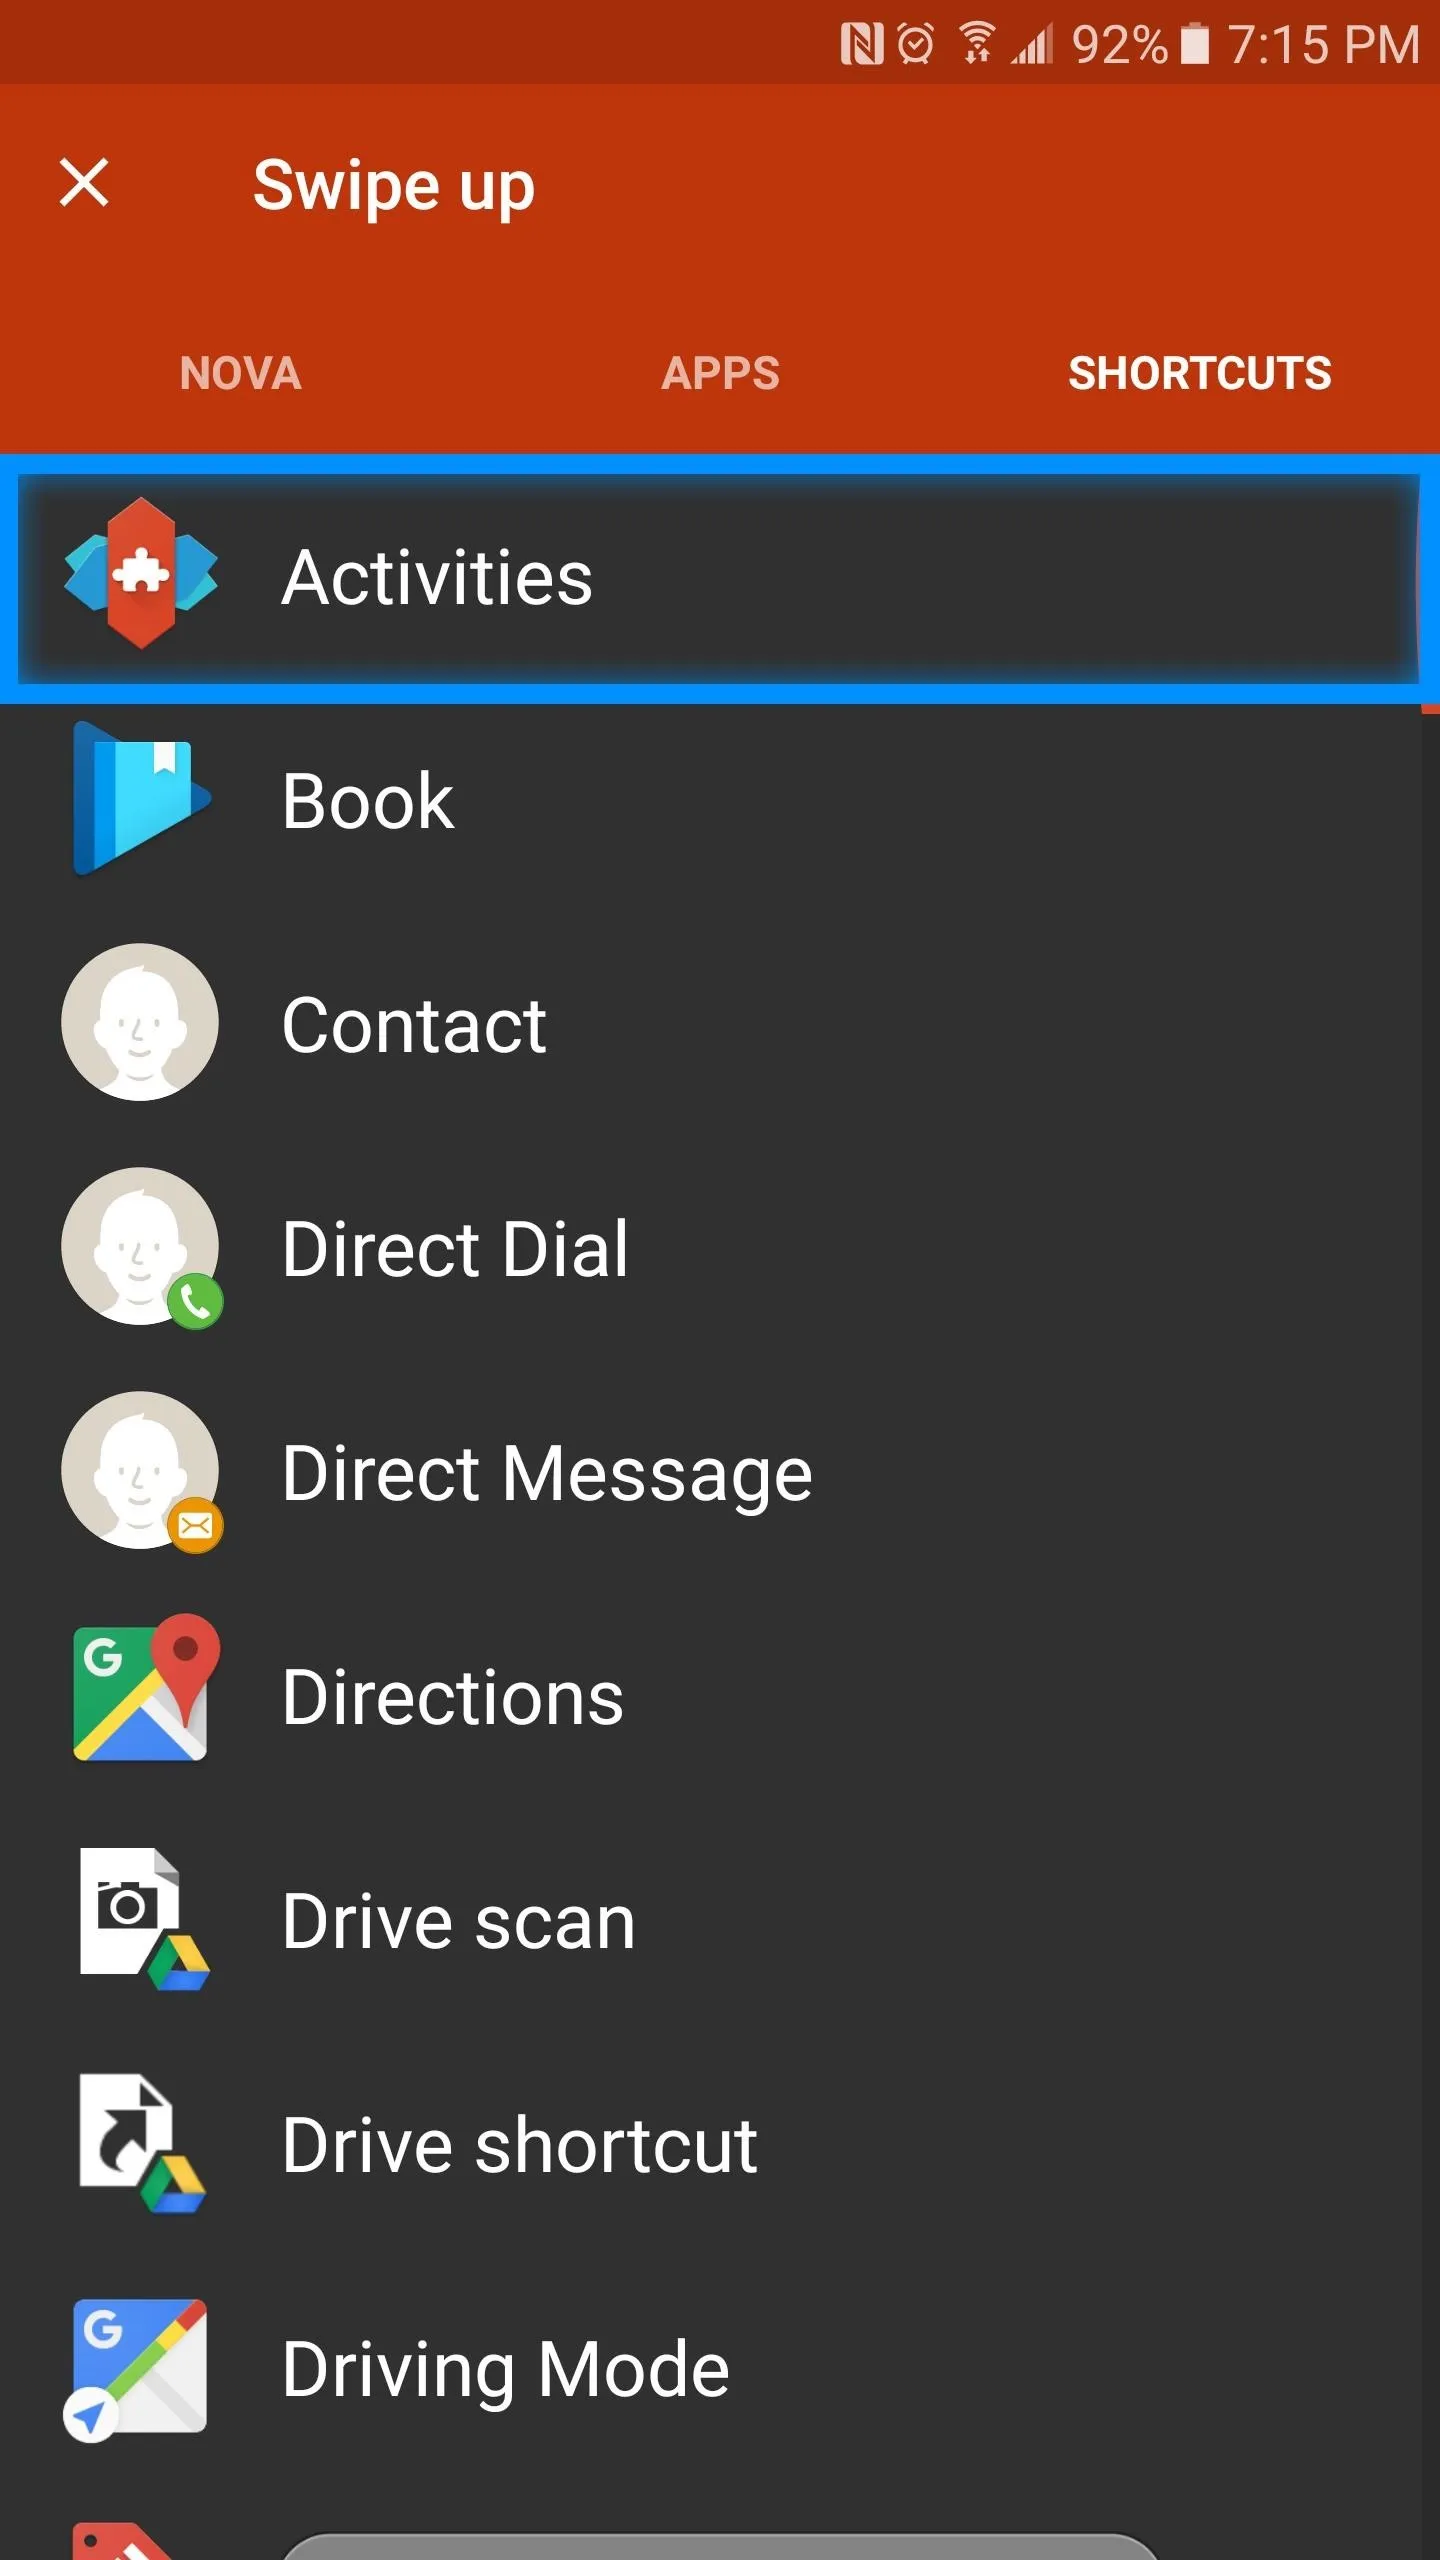
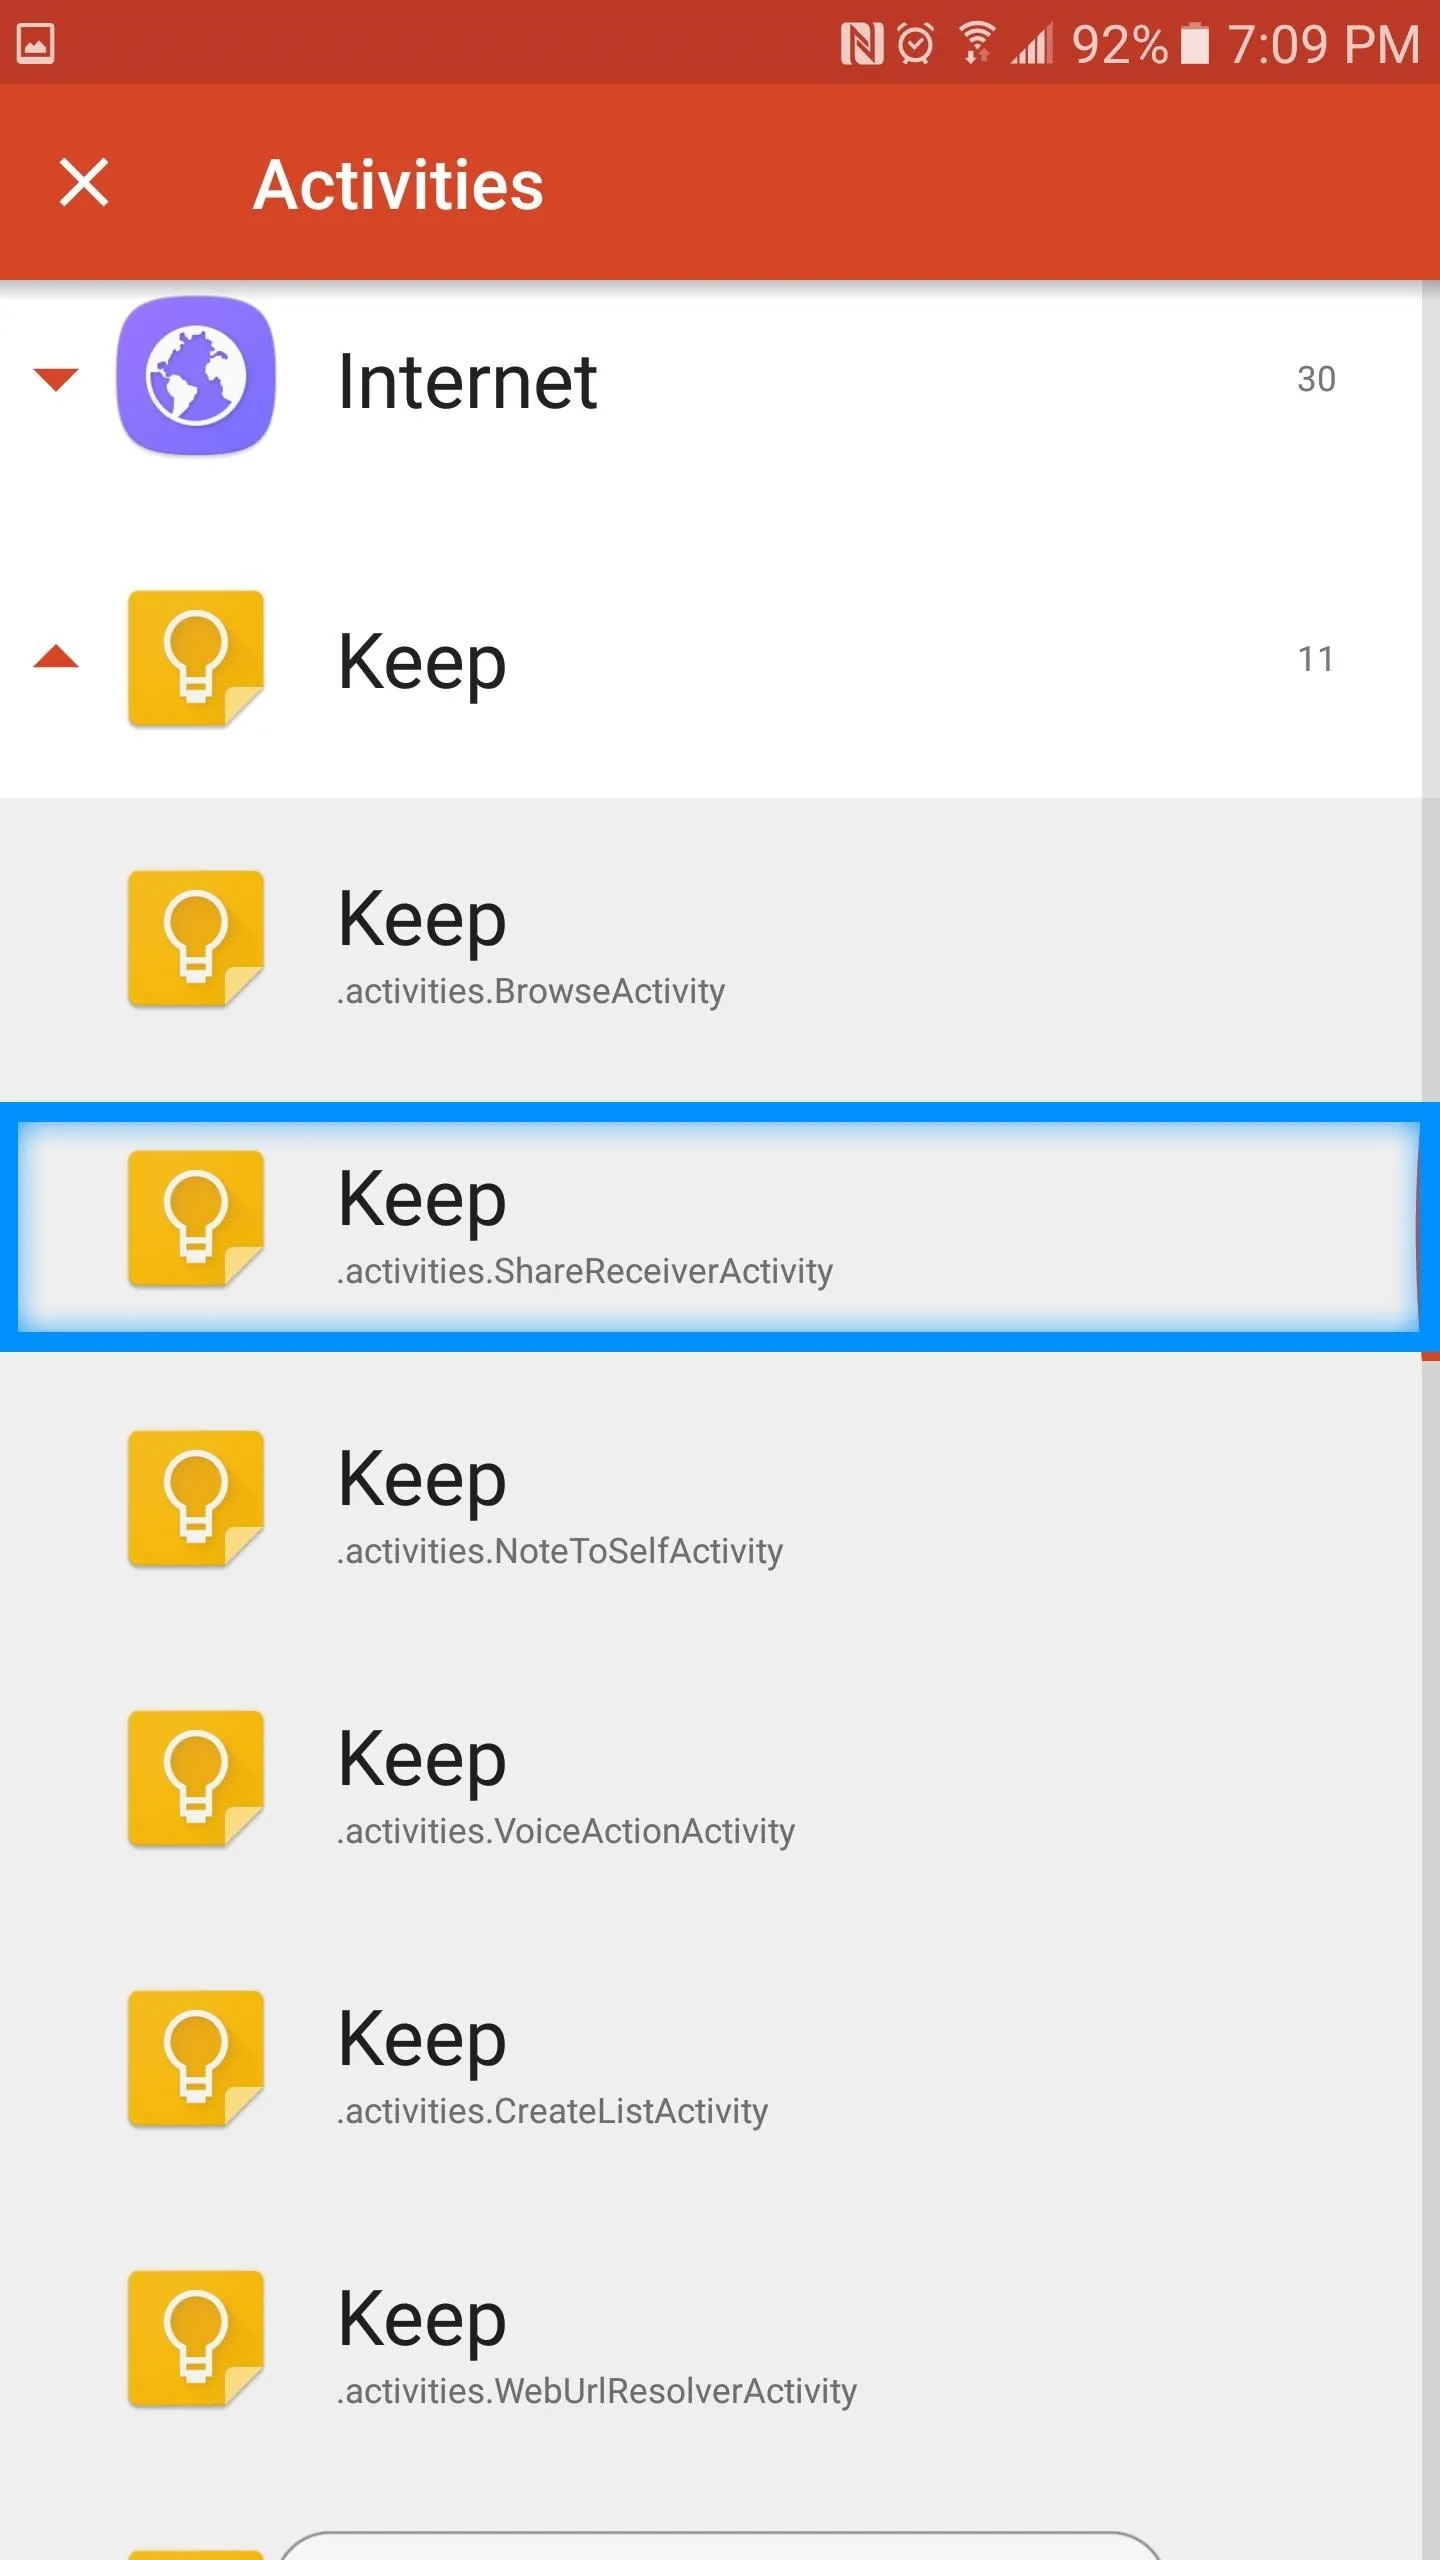
Once you've selected your gesture of choice, head to the Shortcuts tab, then Activities, and scroll down to Keep. After selecting it, a pull-down menu will activate, revealing a few options for you to choose from.
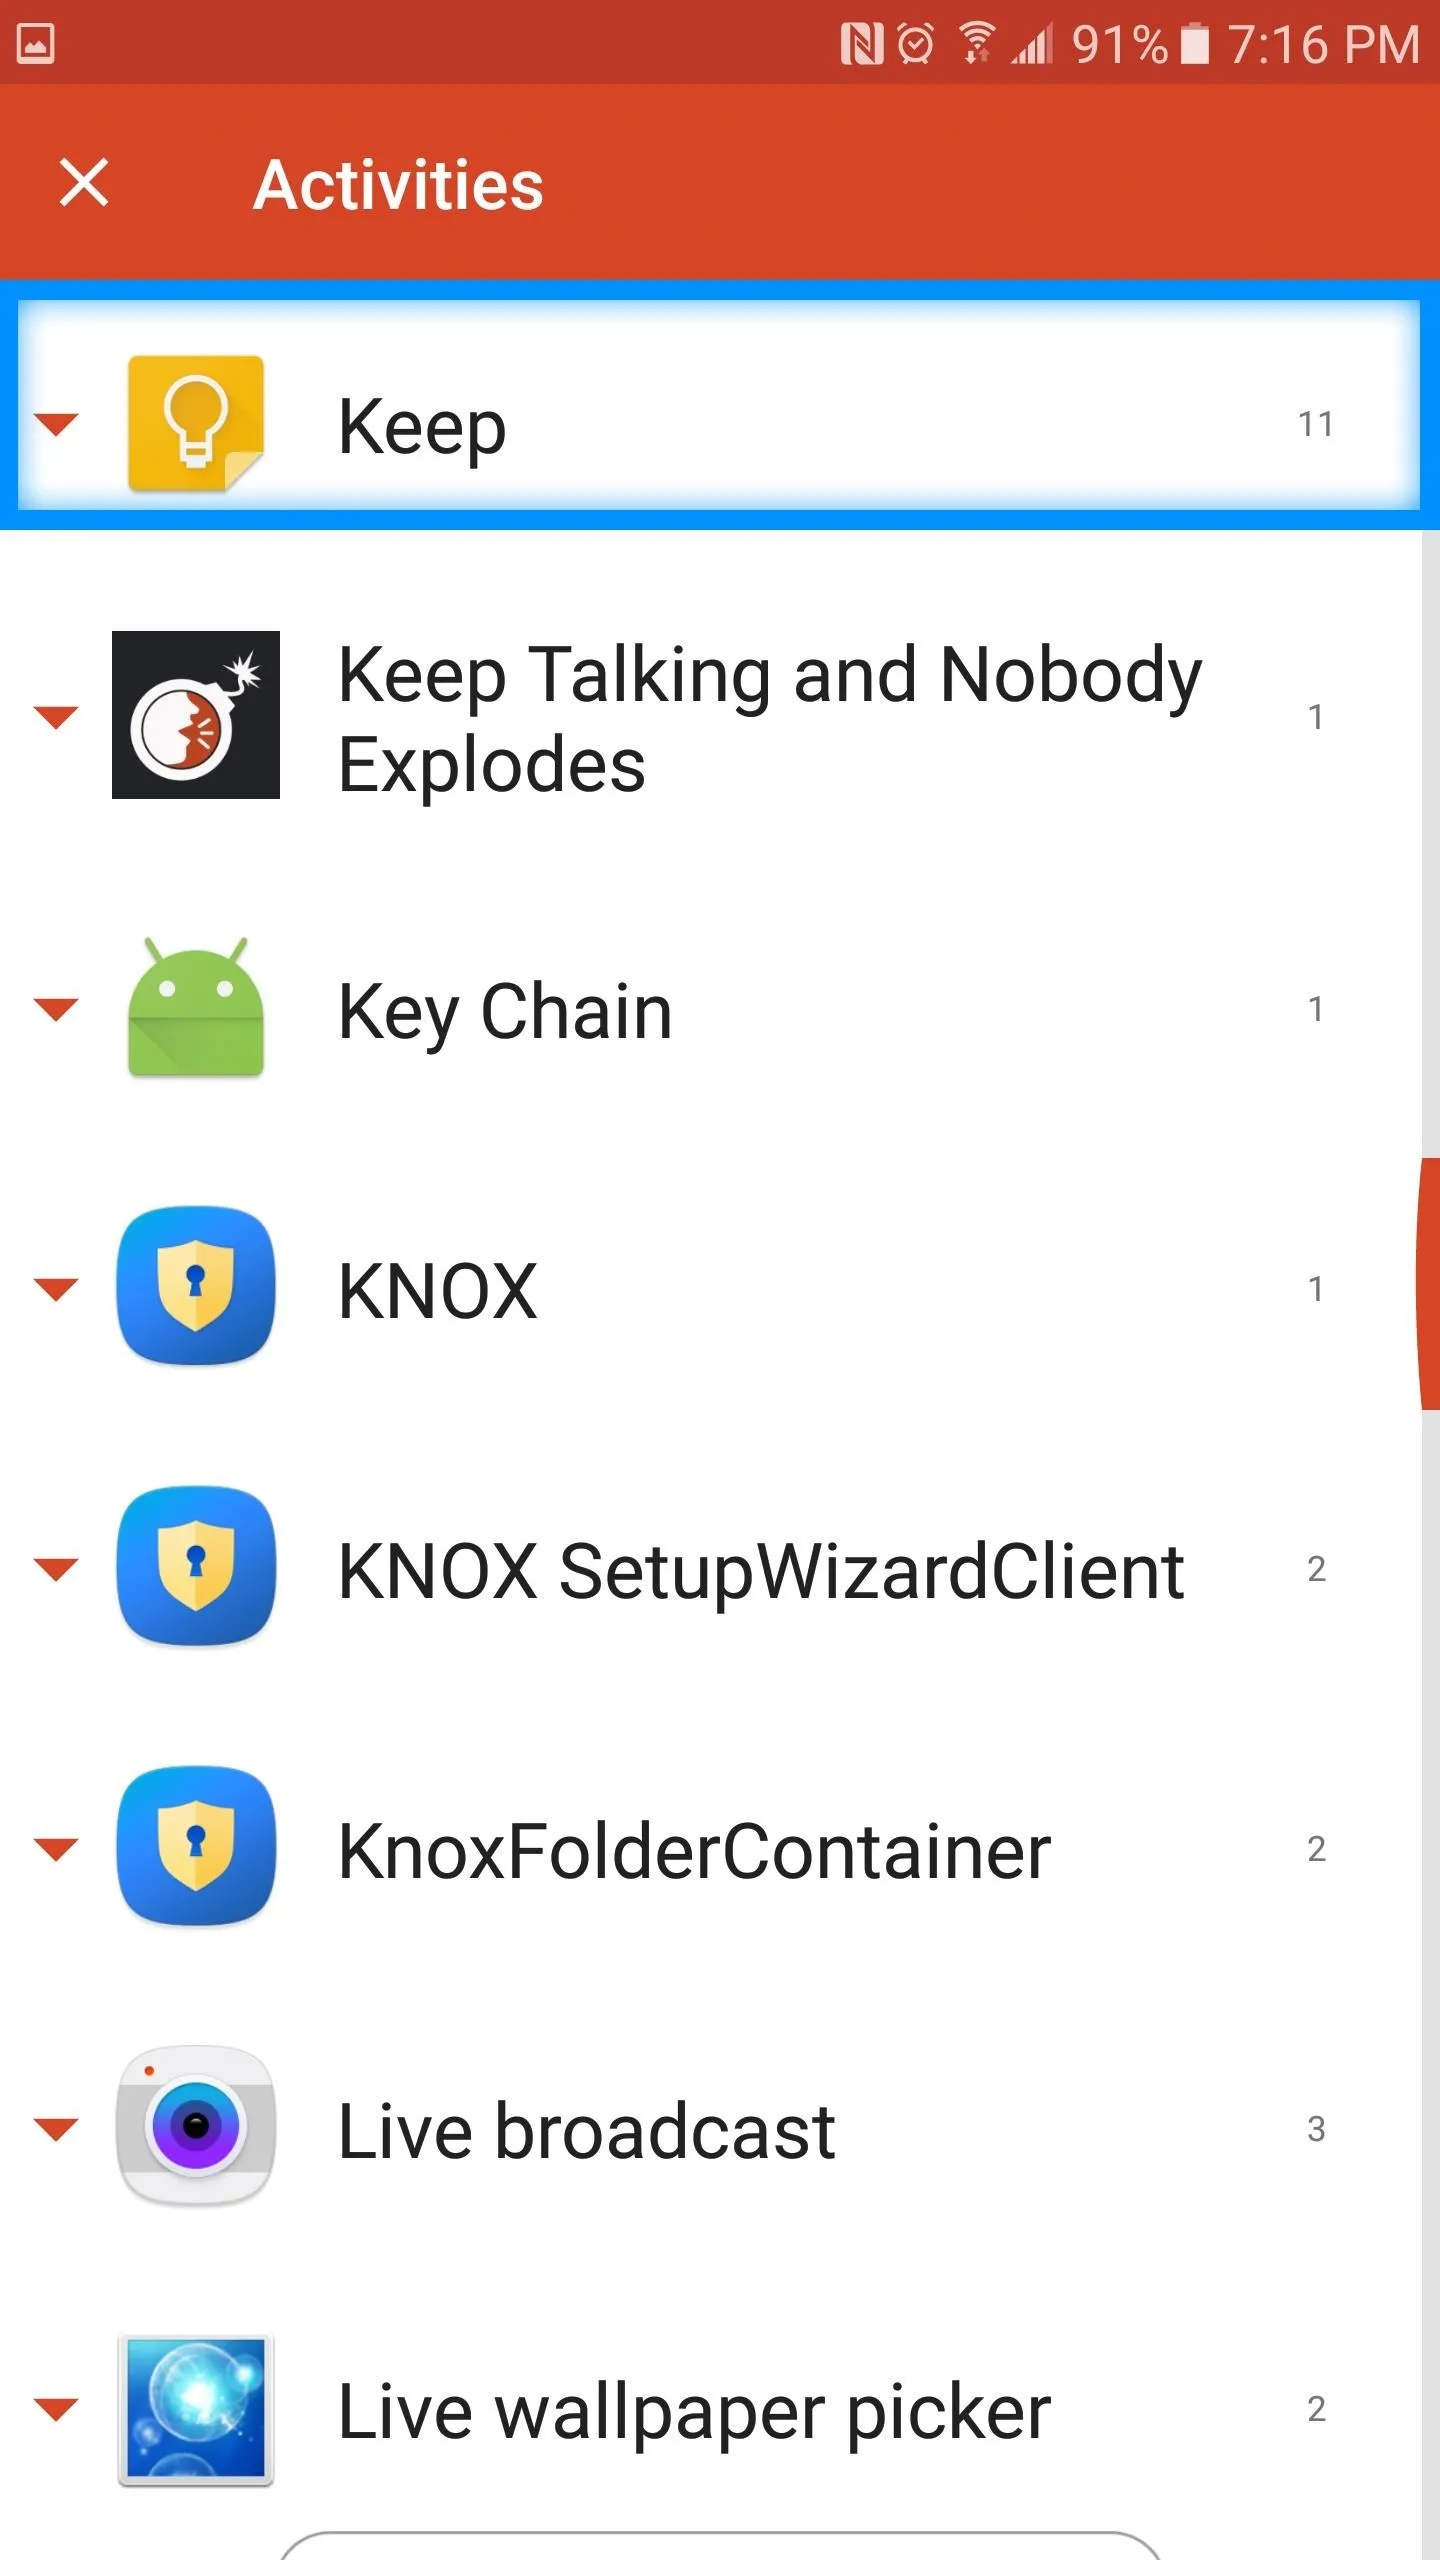


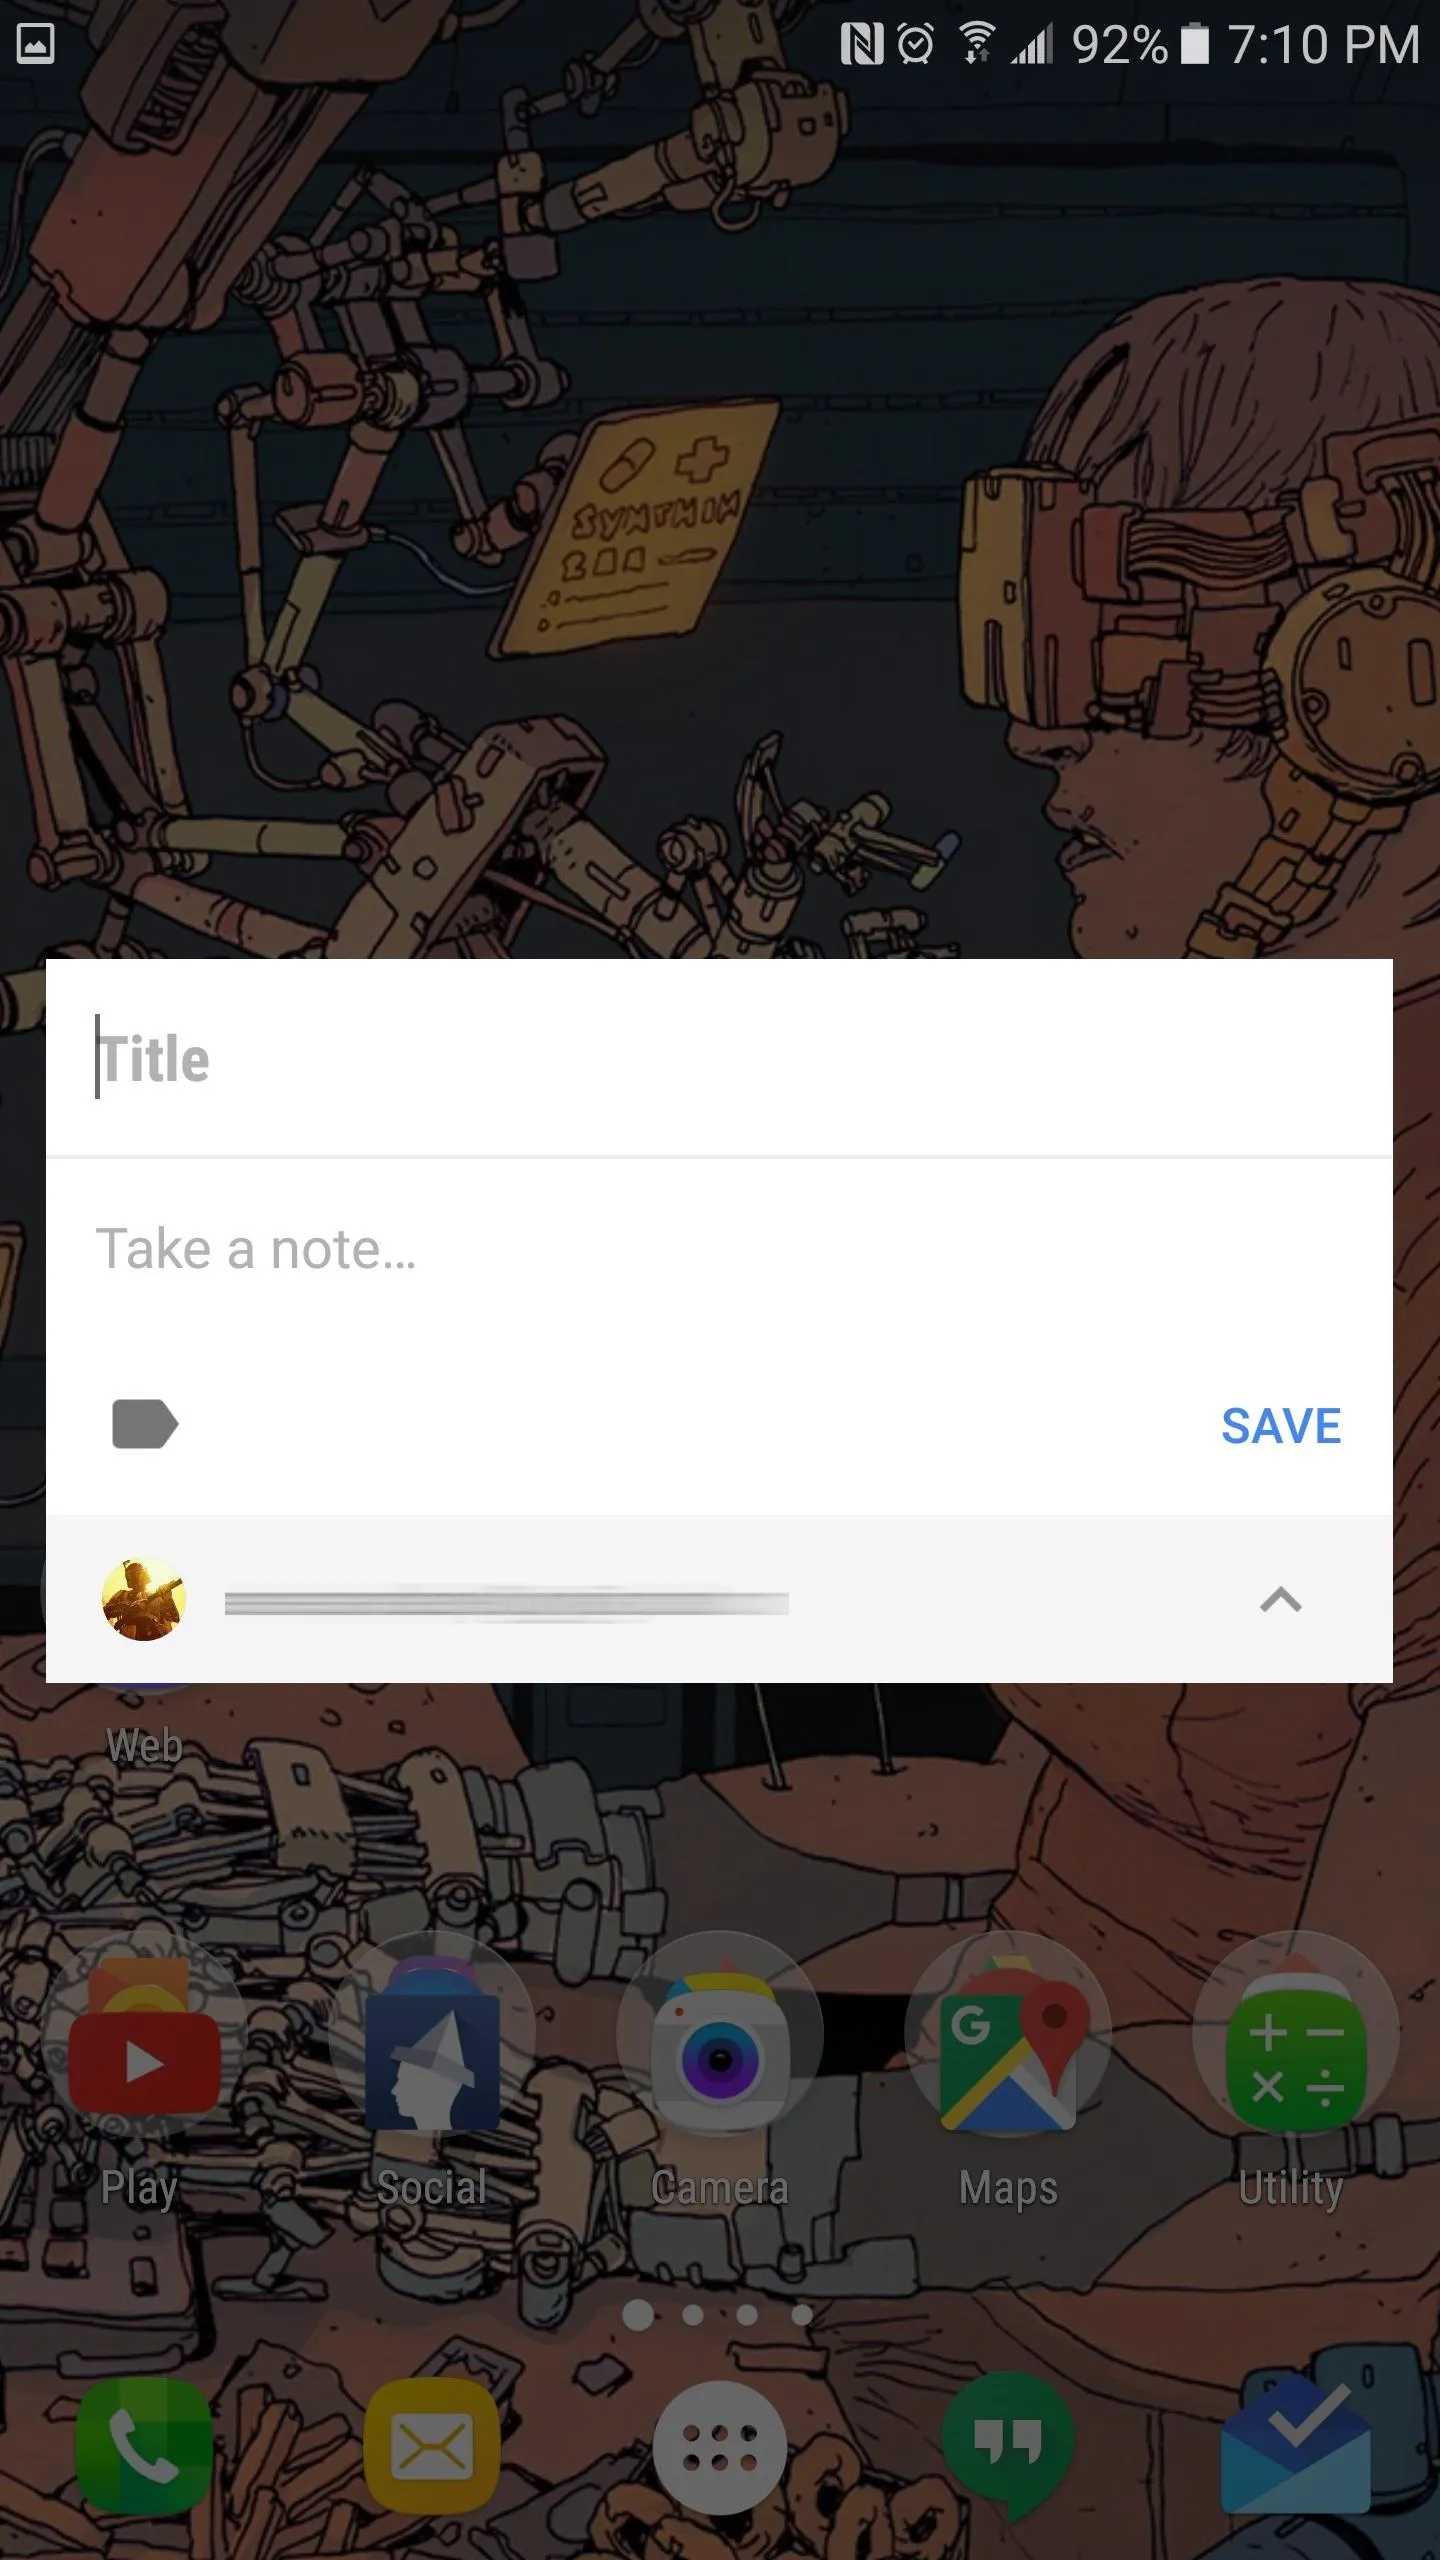
The option we are looking for is called .activites.shareReceiverActivity. Selecting this option will assign the function to whatever gesture you decided on. Now, simply activate the gesture—in this case swipe up—and voilà! A floating window will automatically activate on your screen, allowing you to make a quick note at a moment's notice, on whatever screen you're on.


2. Set Location Based Reminders
Ever create a to-do or shopping list that you had every intention of sticking to, but then completely forgot about it once you arrived at your destination? Well, Google Keep has a nifty way of reminding you to adhere to your carefully planned out list based upon location.
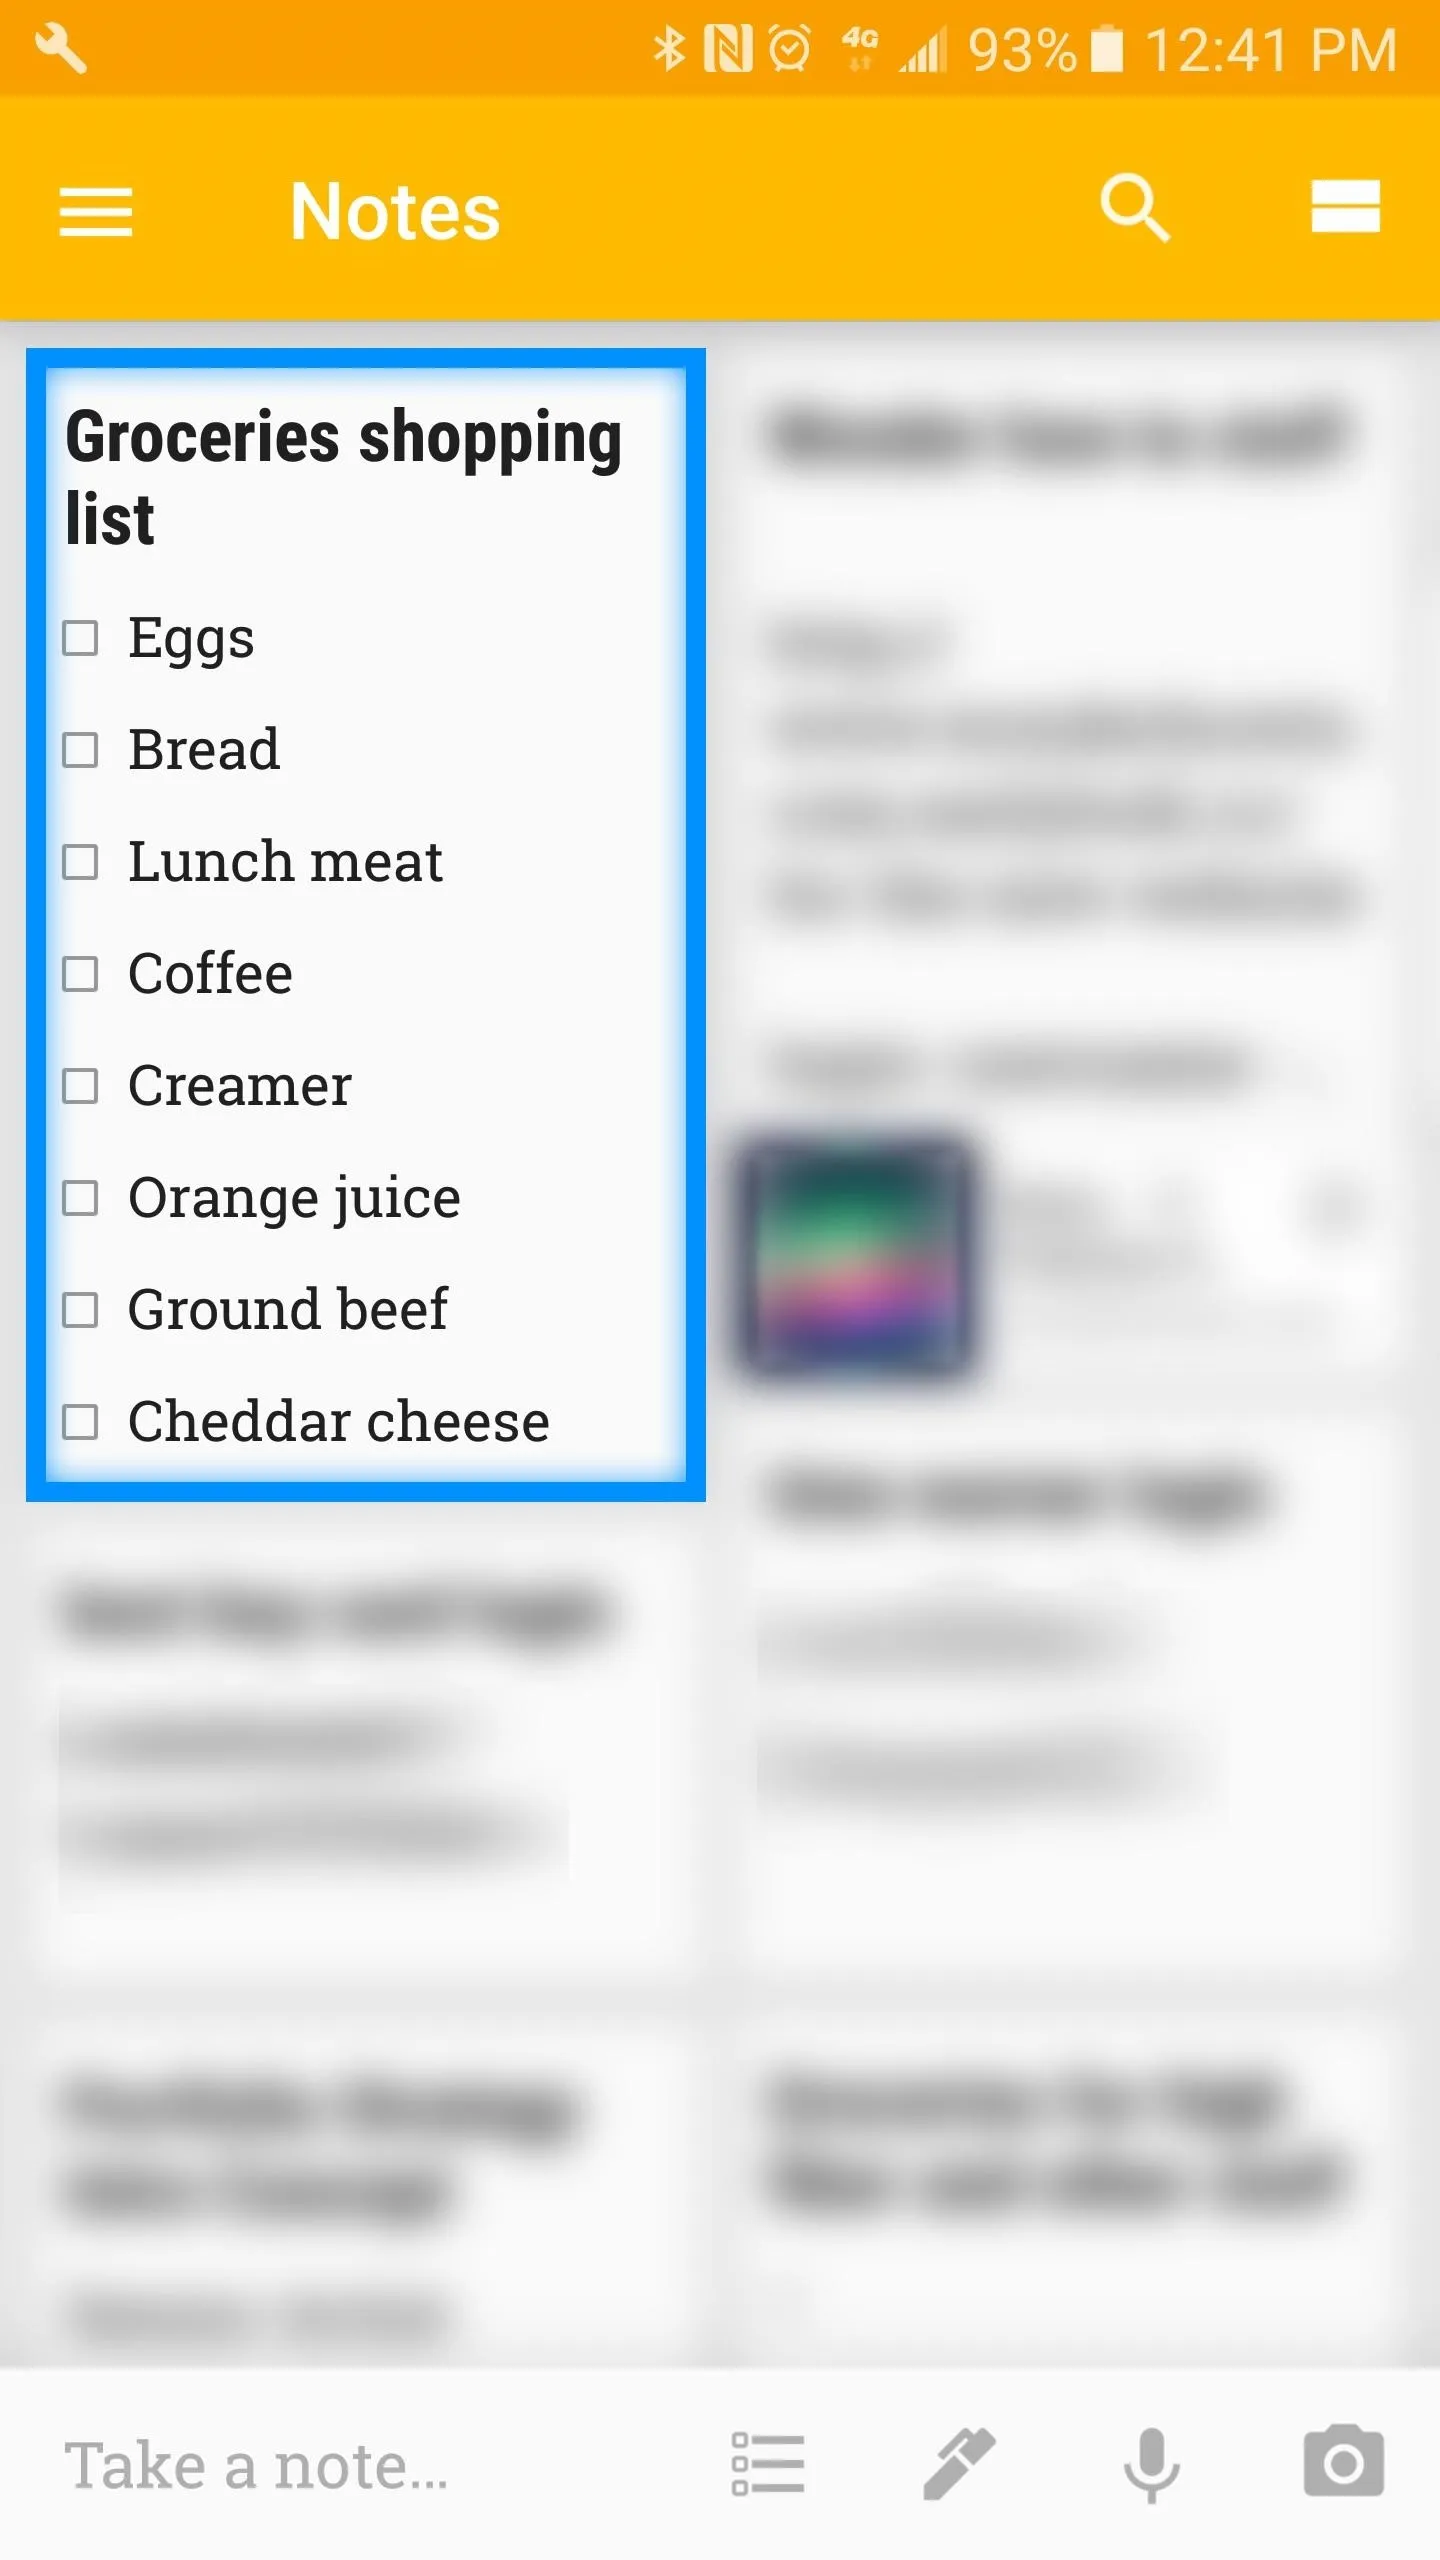
To set up a location based reminder, simply find a note you wish to use, select it, then select the reminder button on the top right.
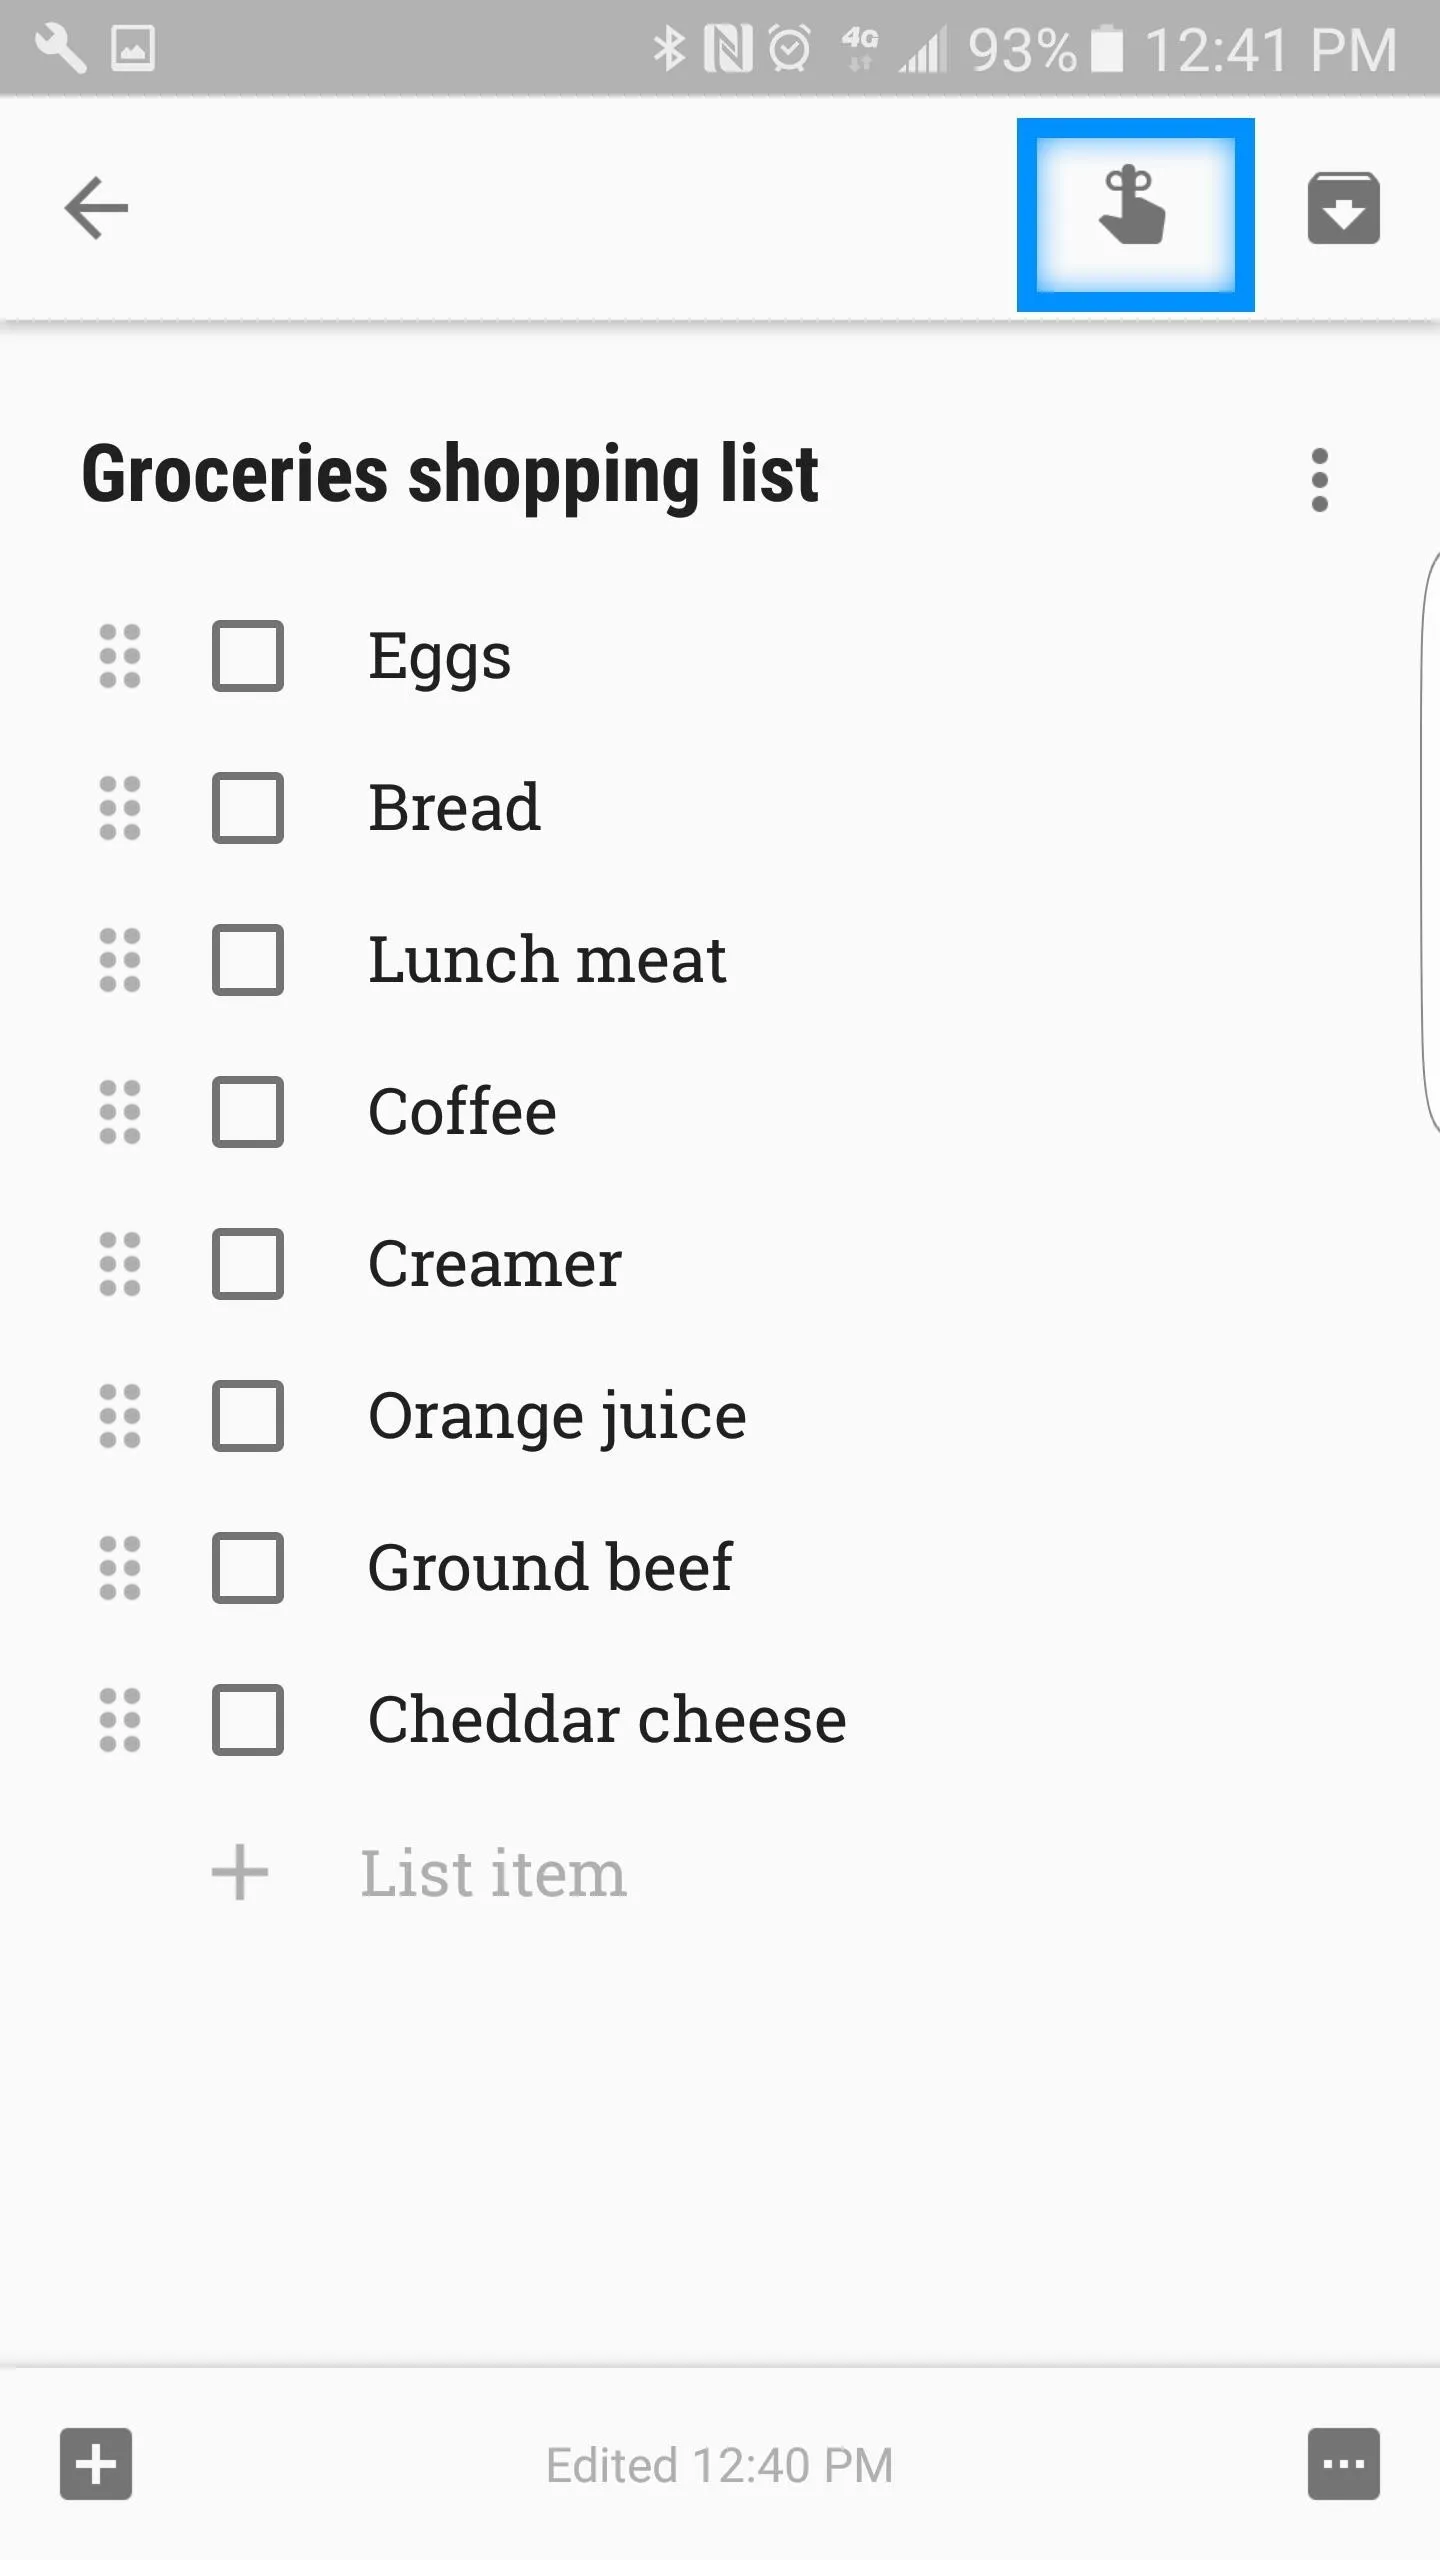


Once you've selected the reminder button , select Place (allow Google to access your location if prompted), and Google Maps will appear on the screen. From here you can input your destination manually or search for a place.
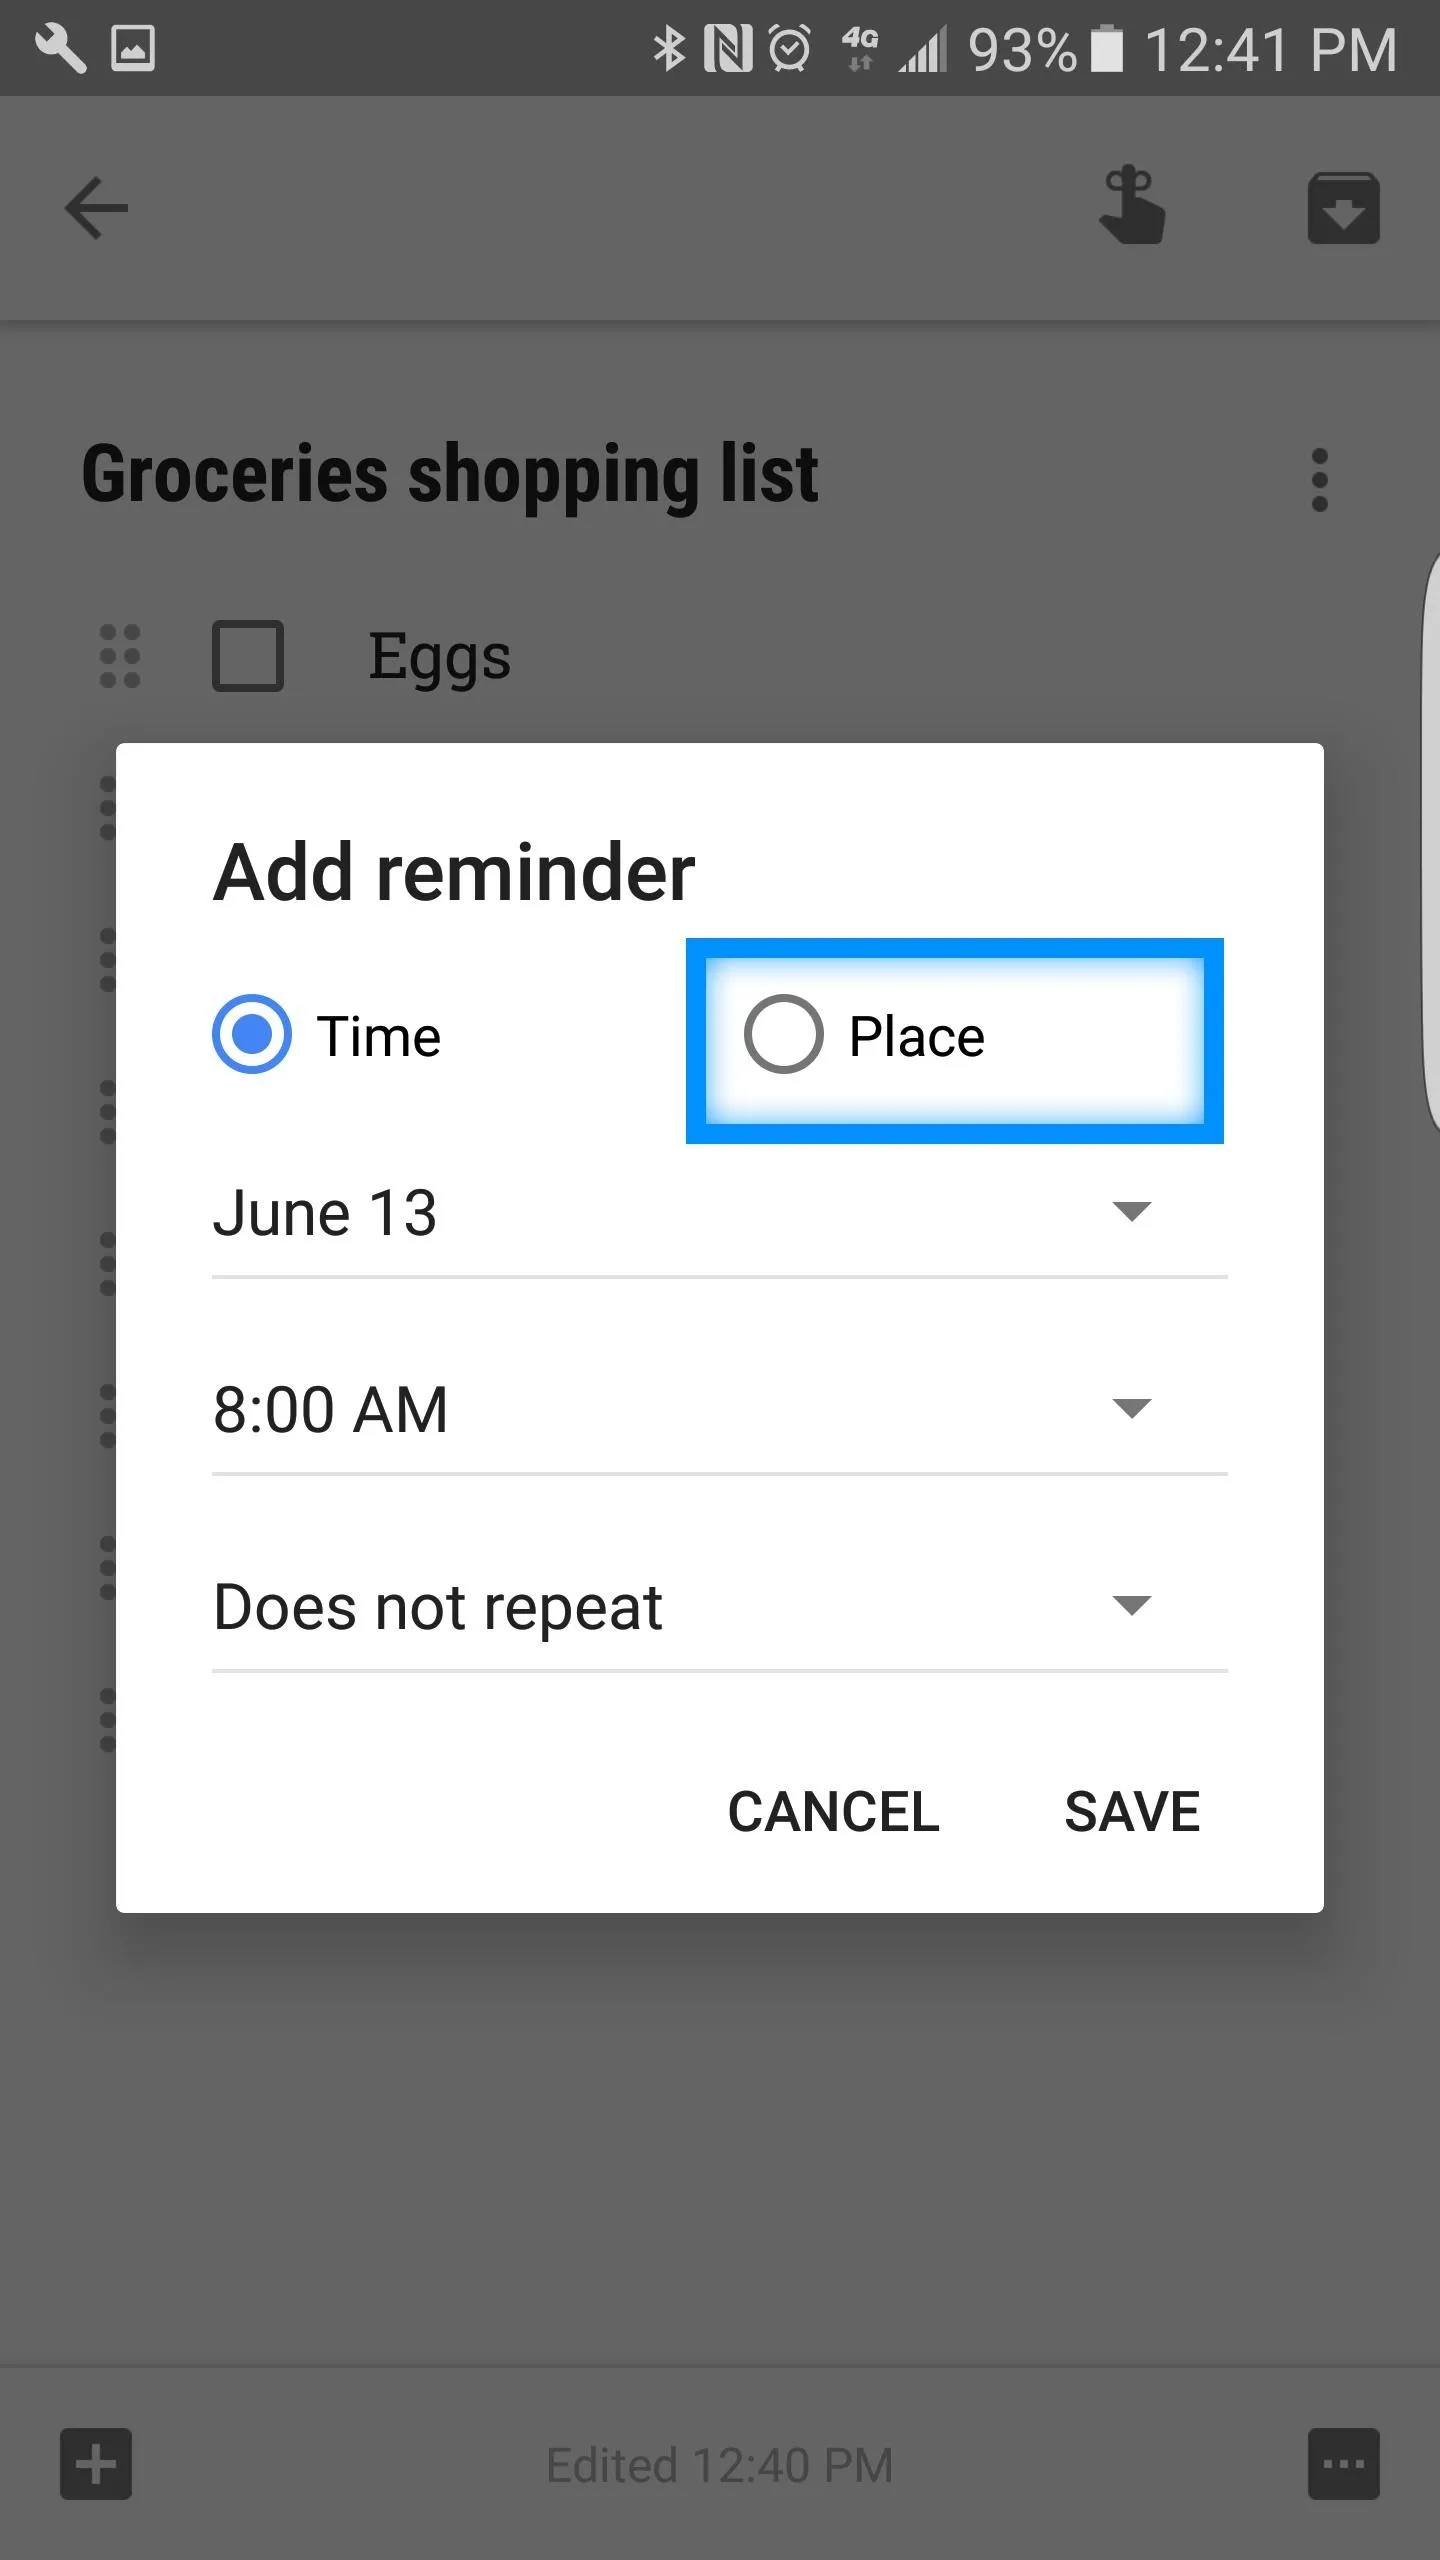
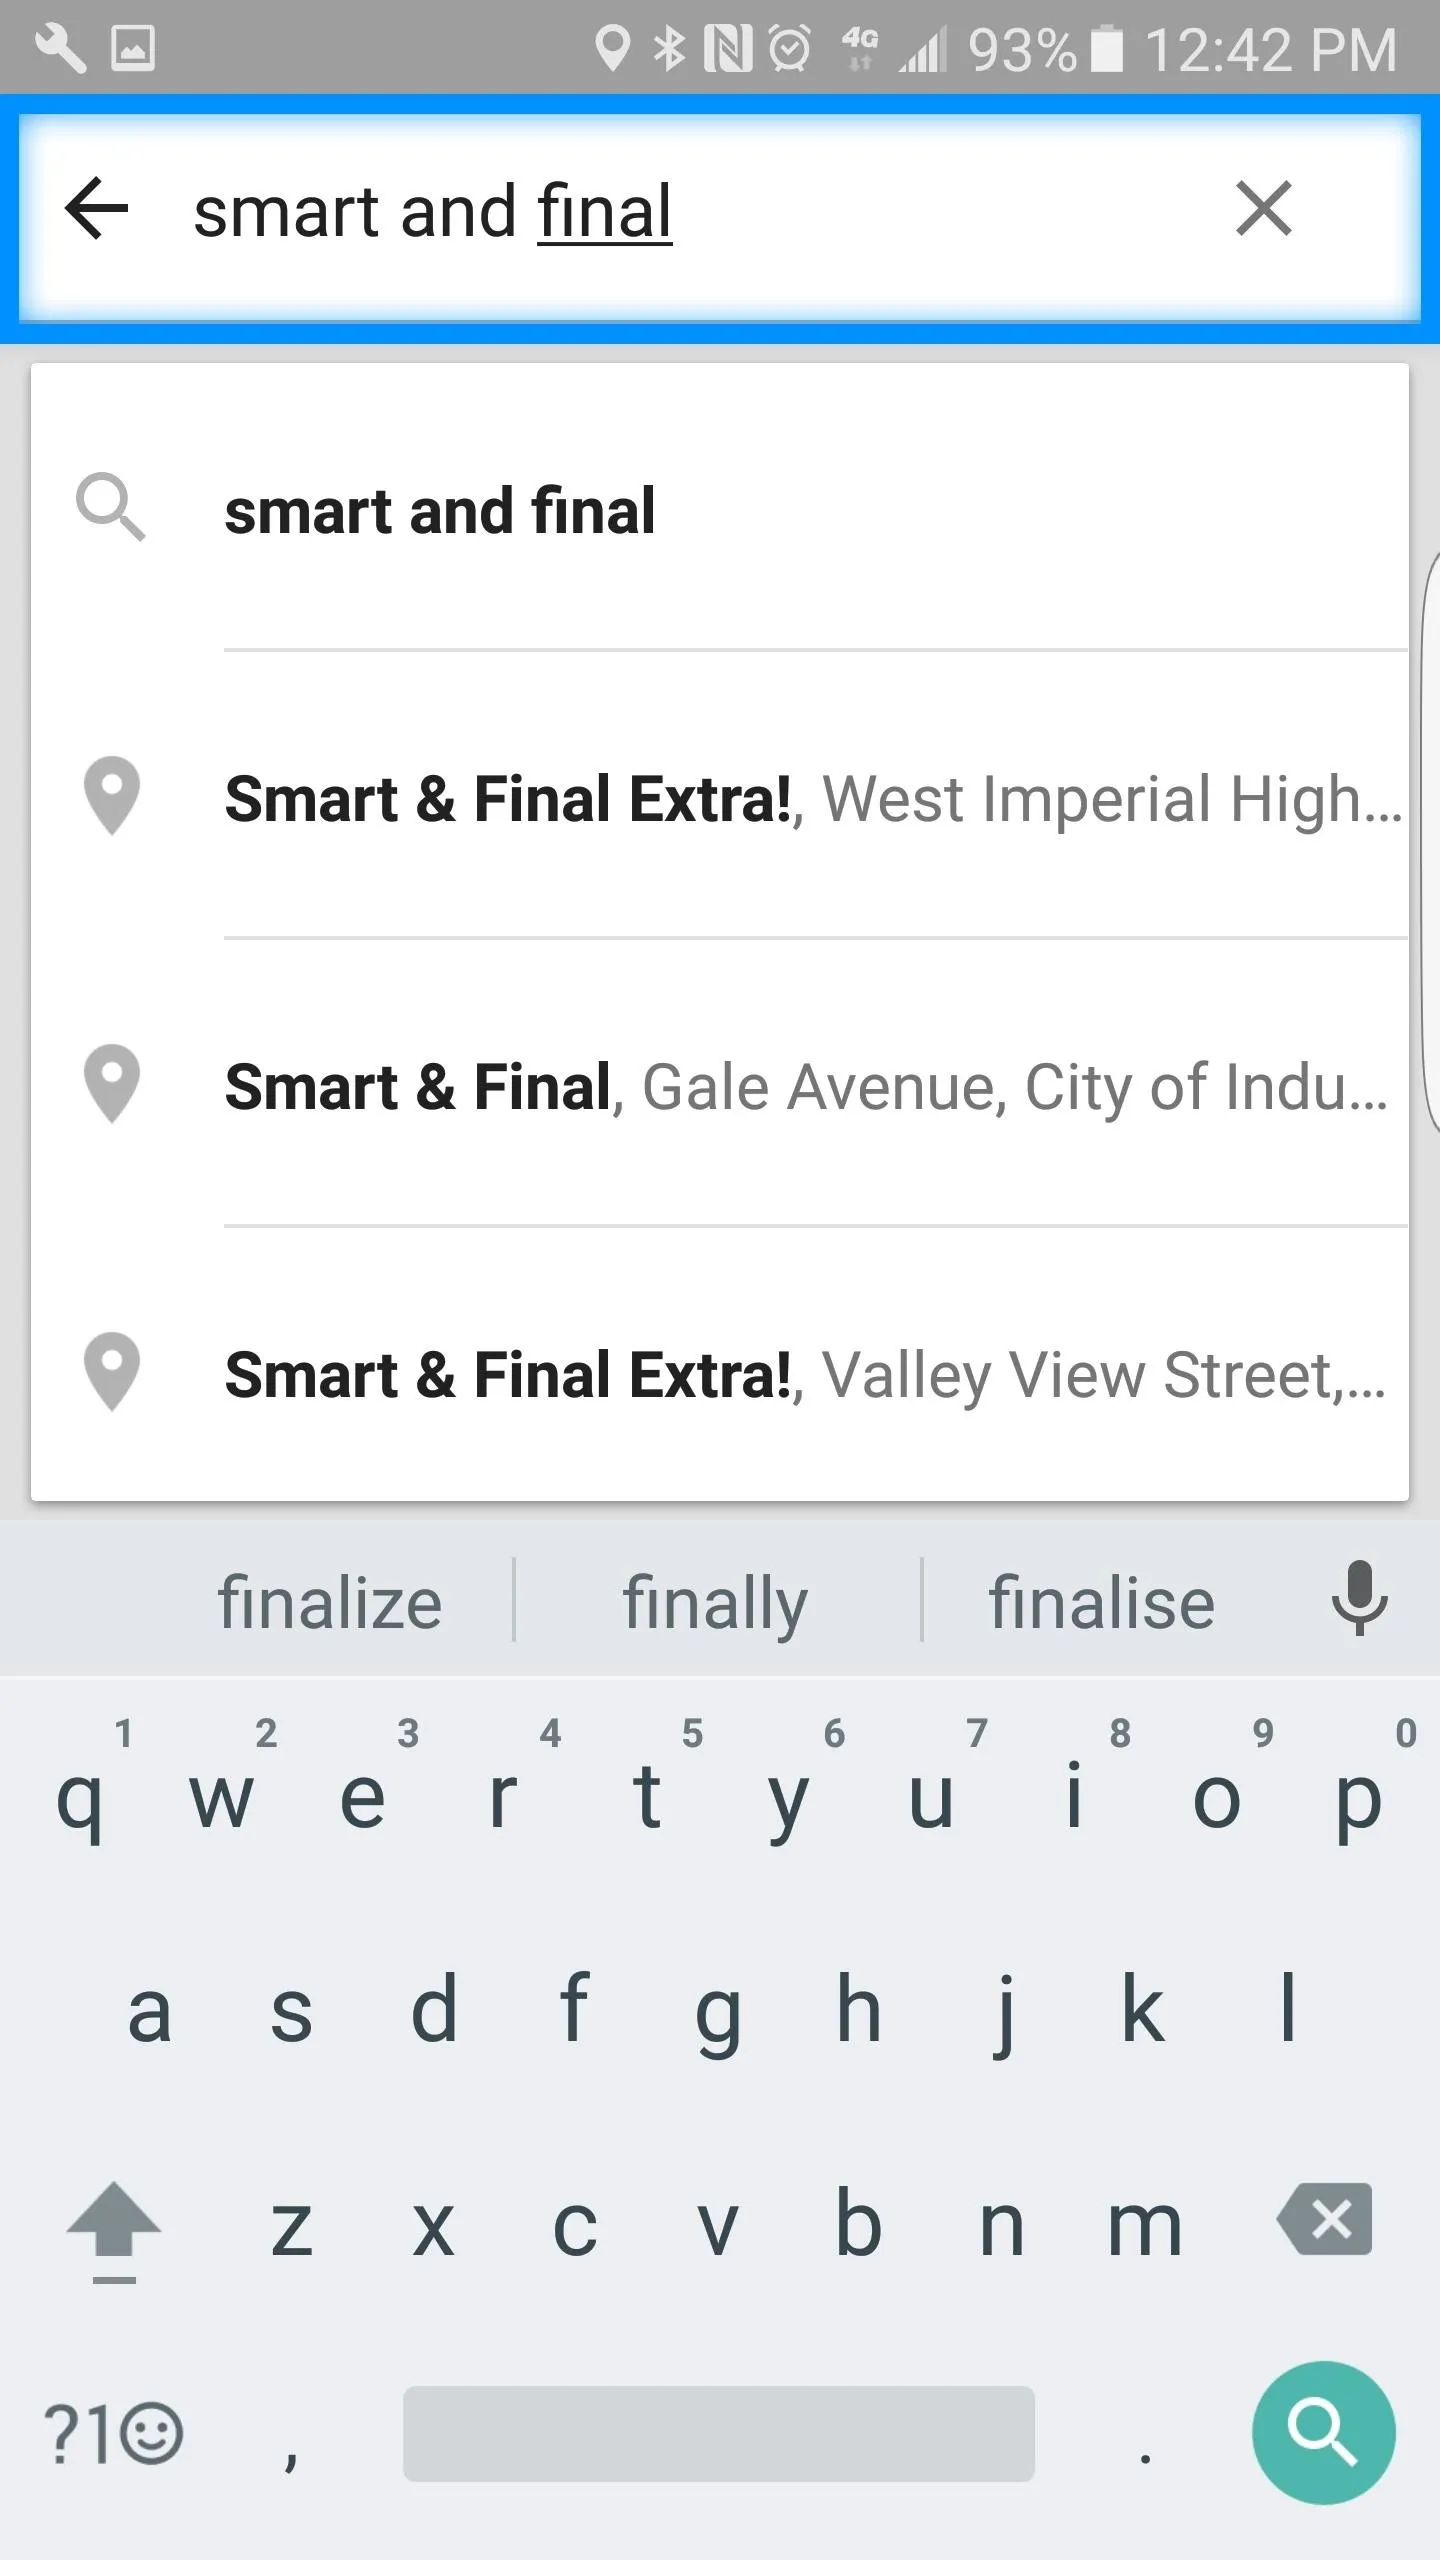


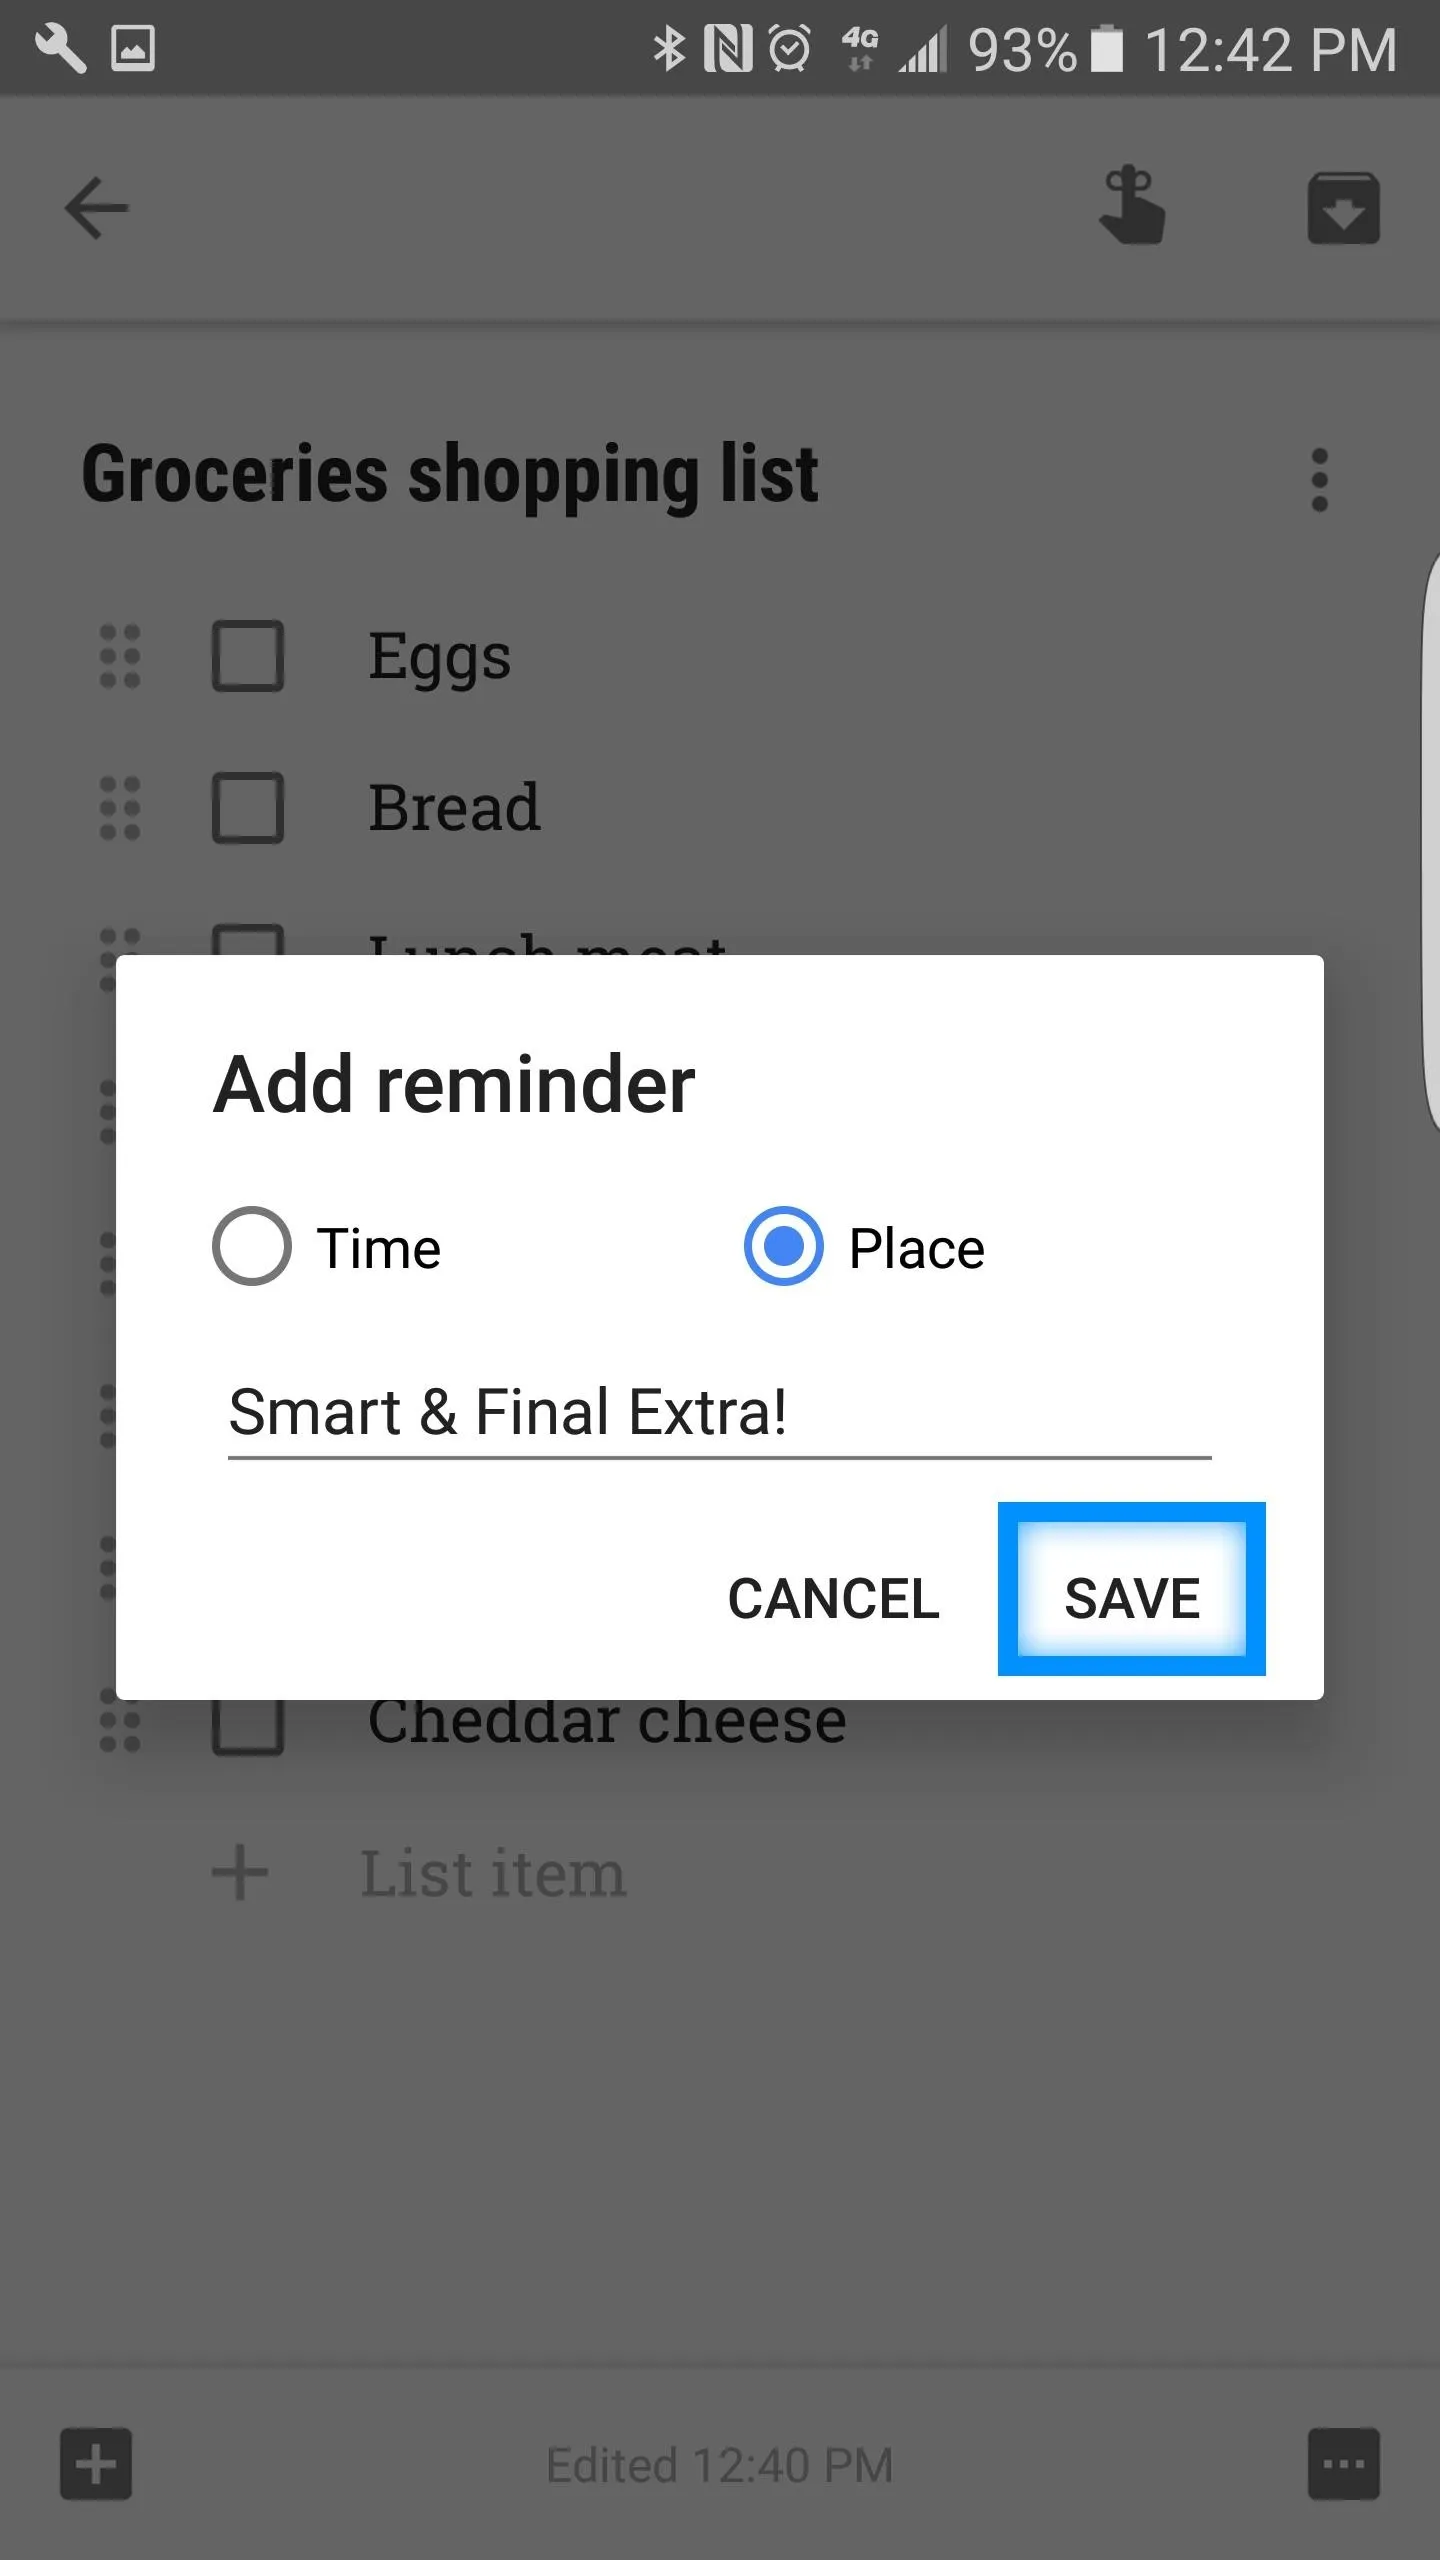
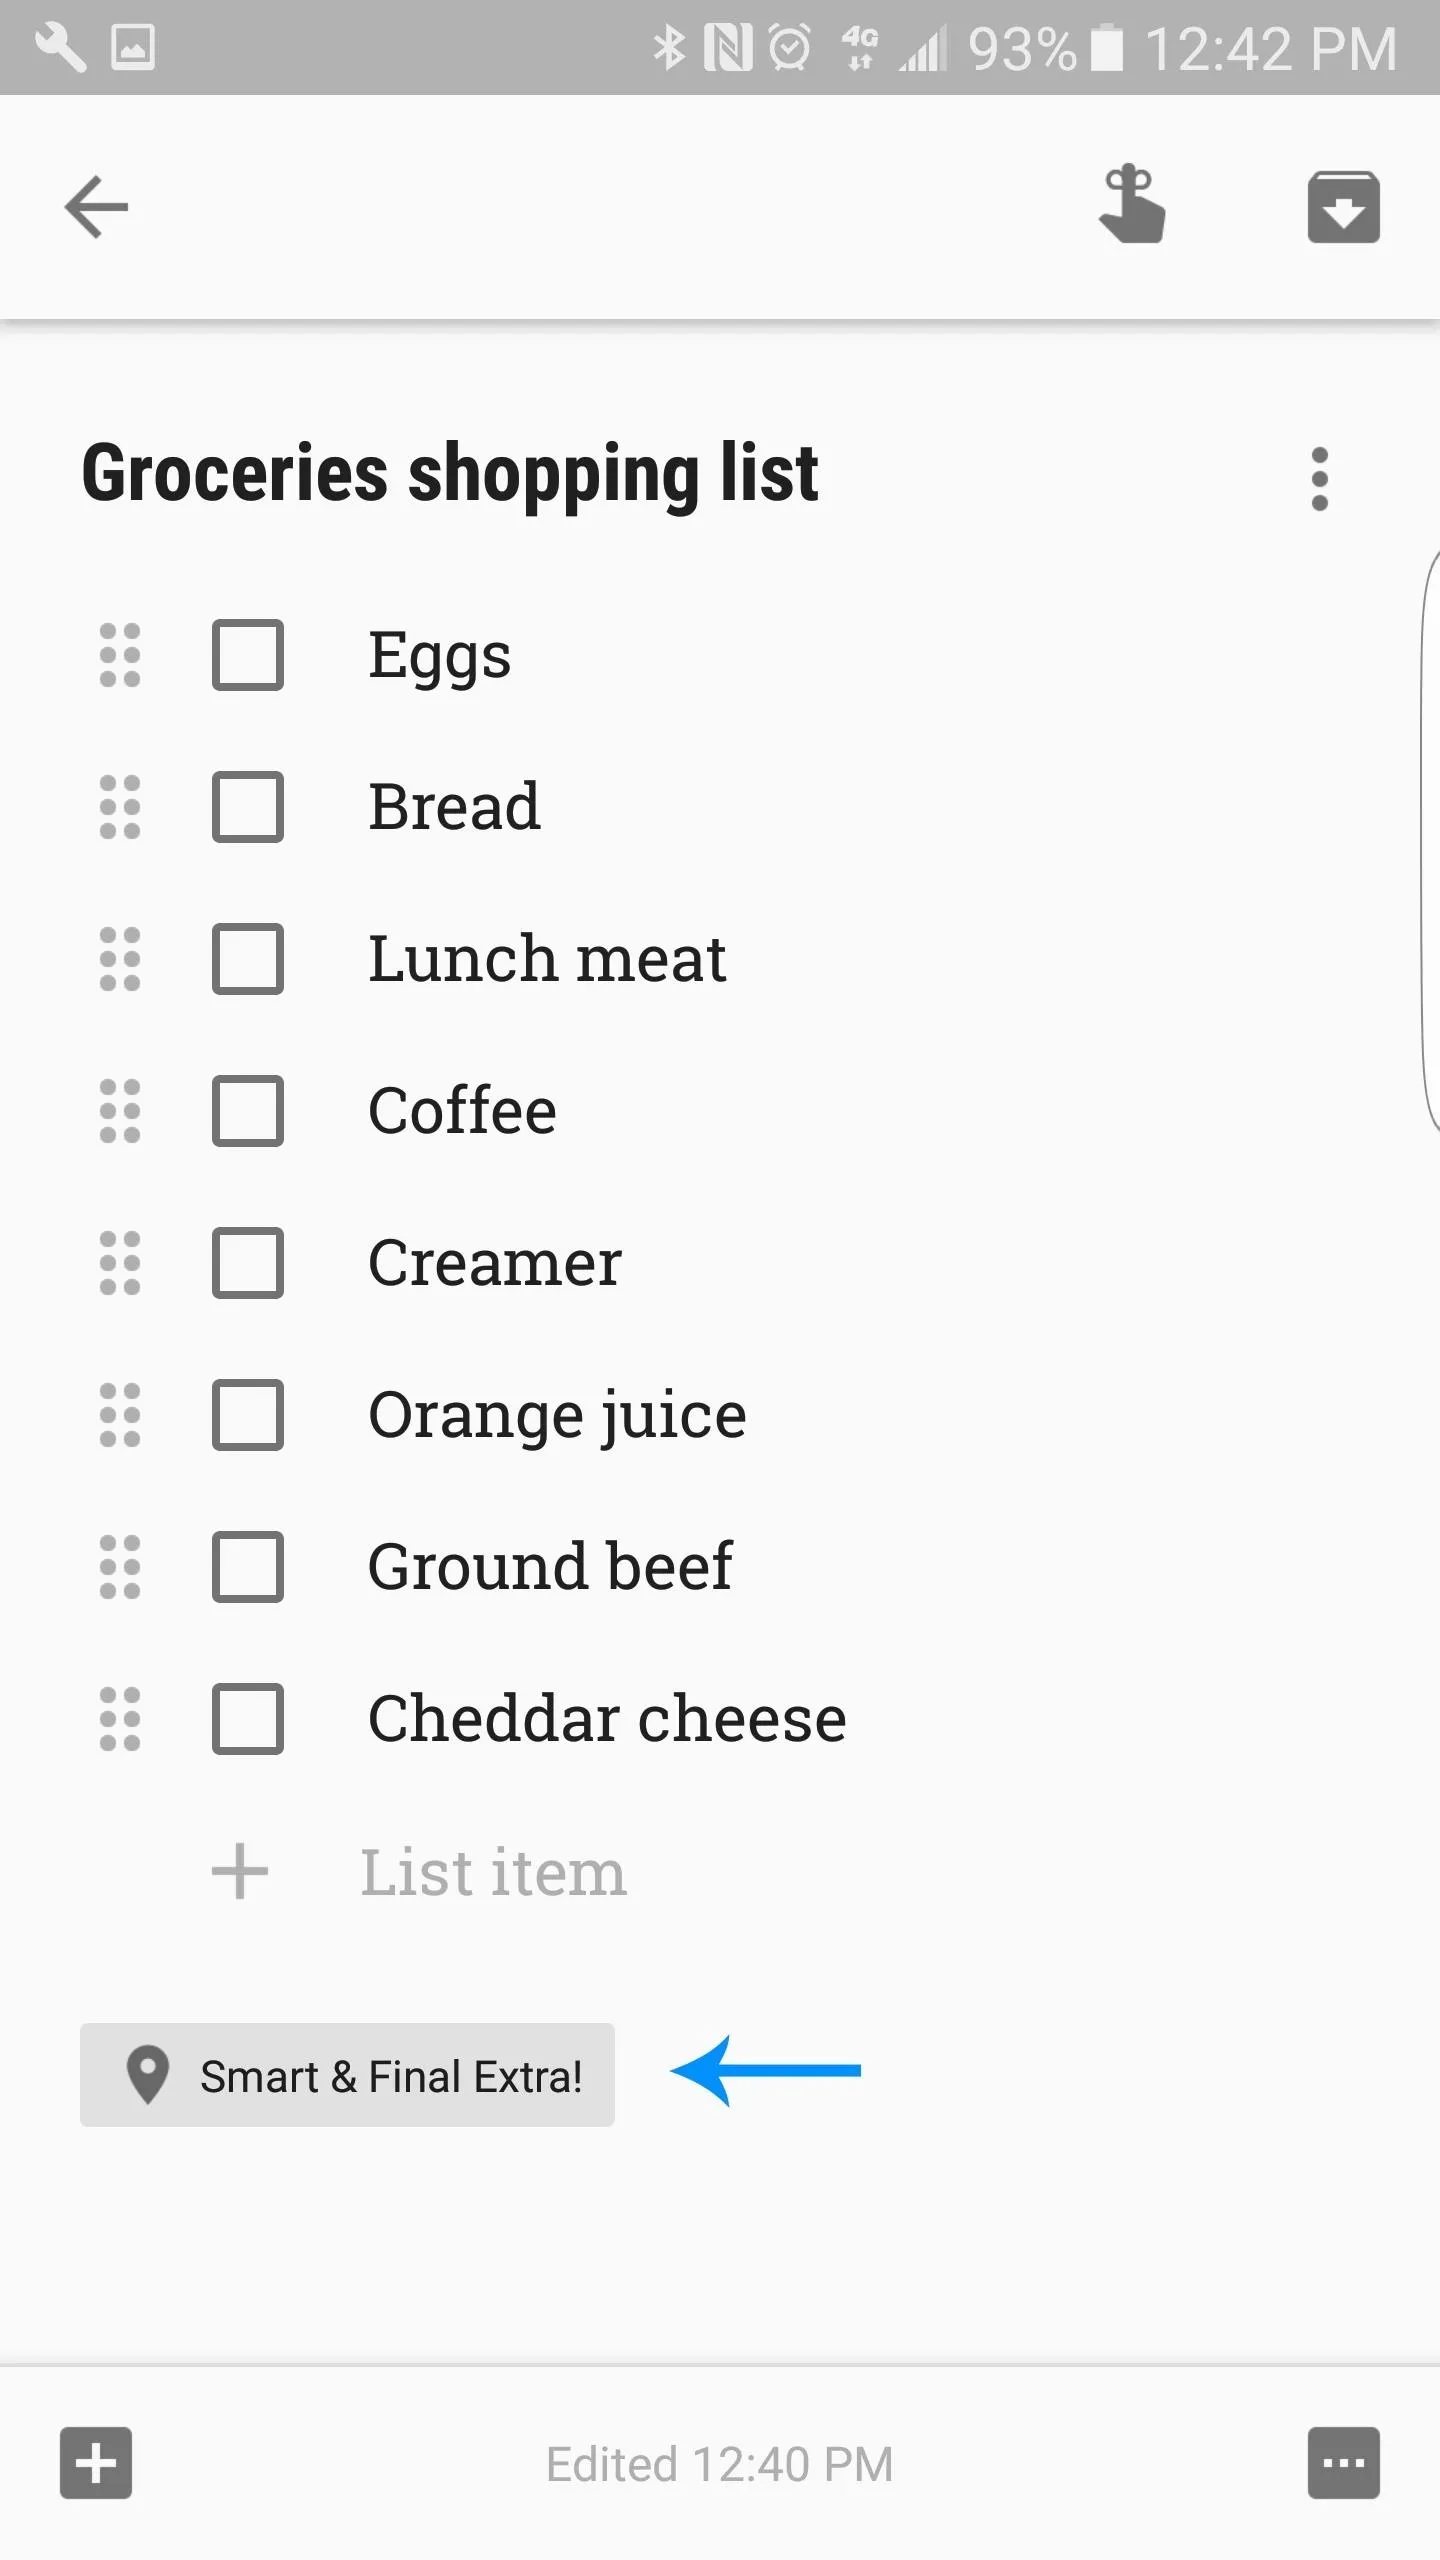
Once you have your chosen place, select it, then Save, and Google Keep will remind you of your beautiful list once you have arrived at your chosen destination.


3. Record a Voice Memo
Google Keep is not only great at keeping notes in a manner that is visually pleasing and functional, but it is also capable of recording voice as well.
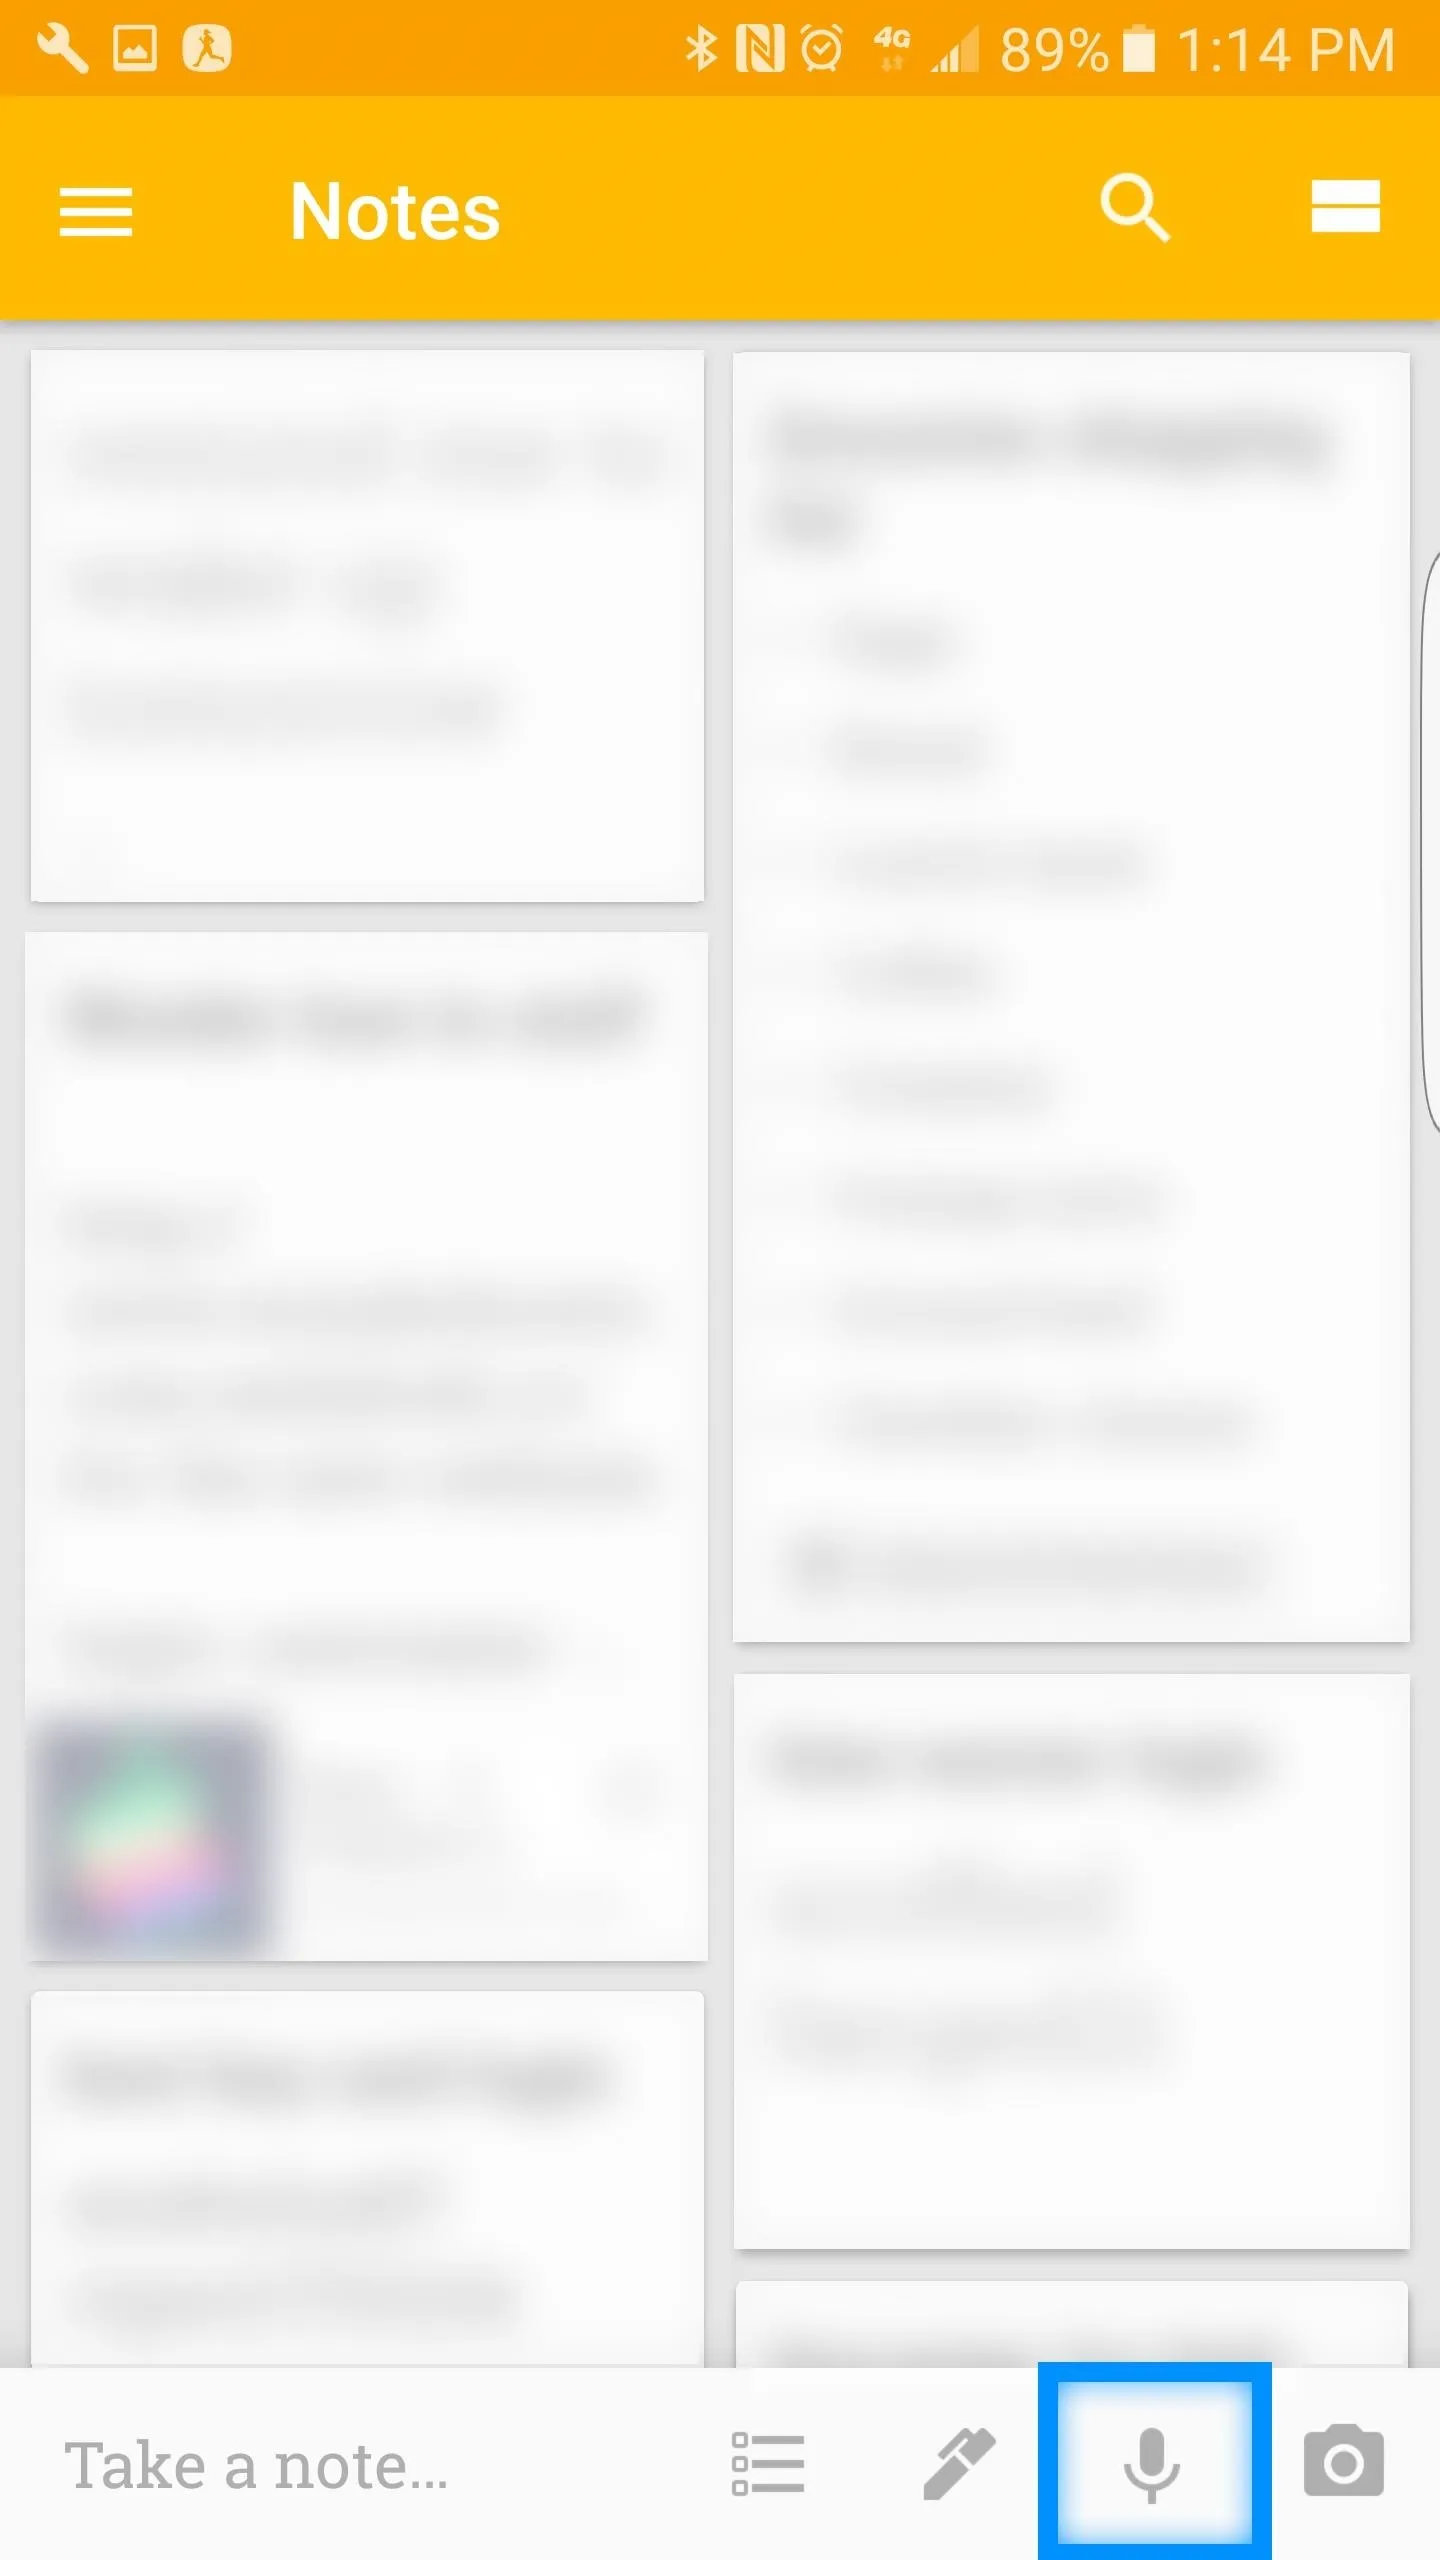
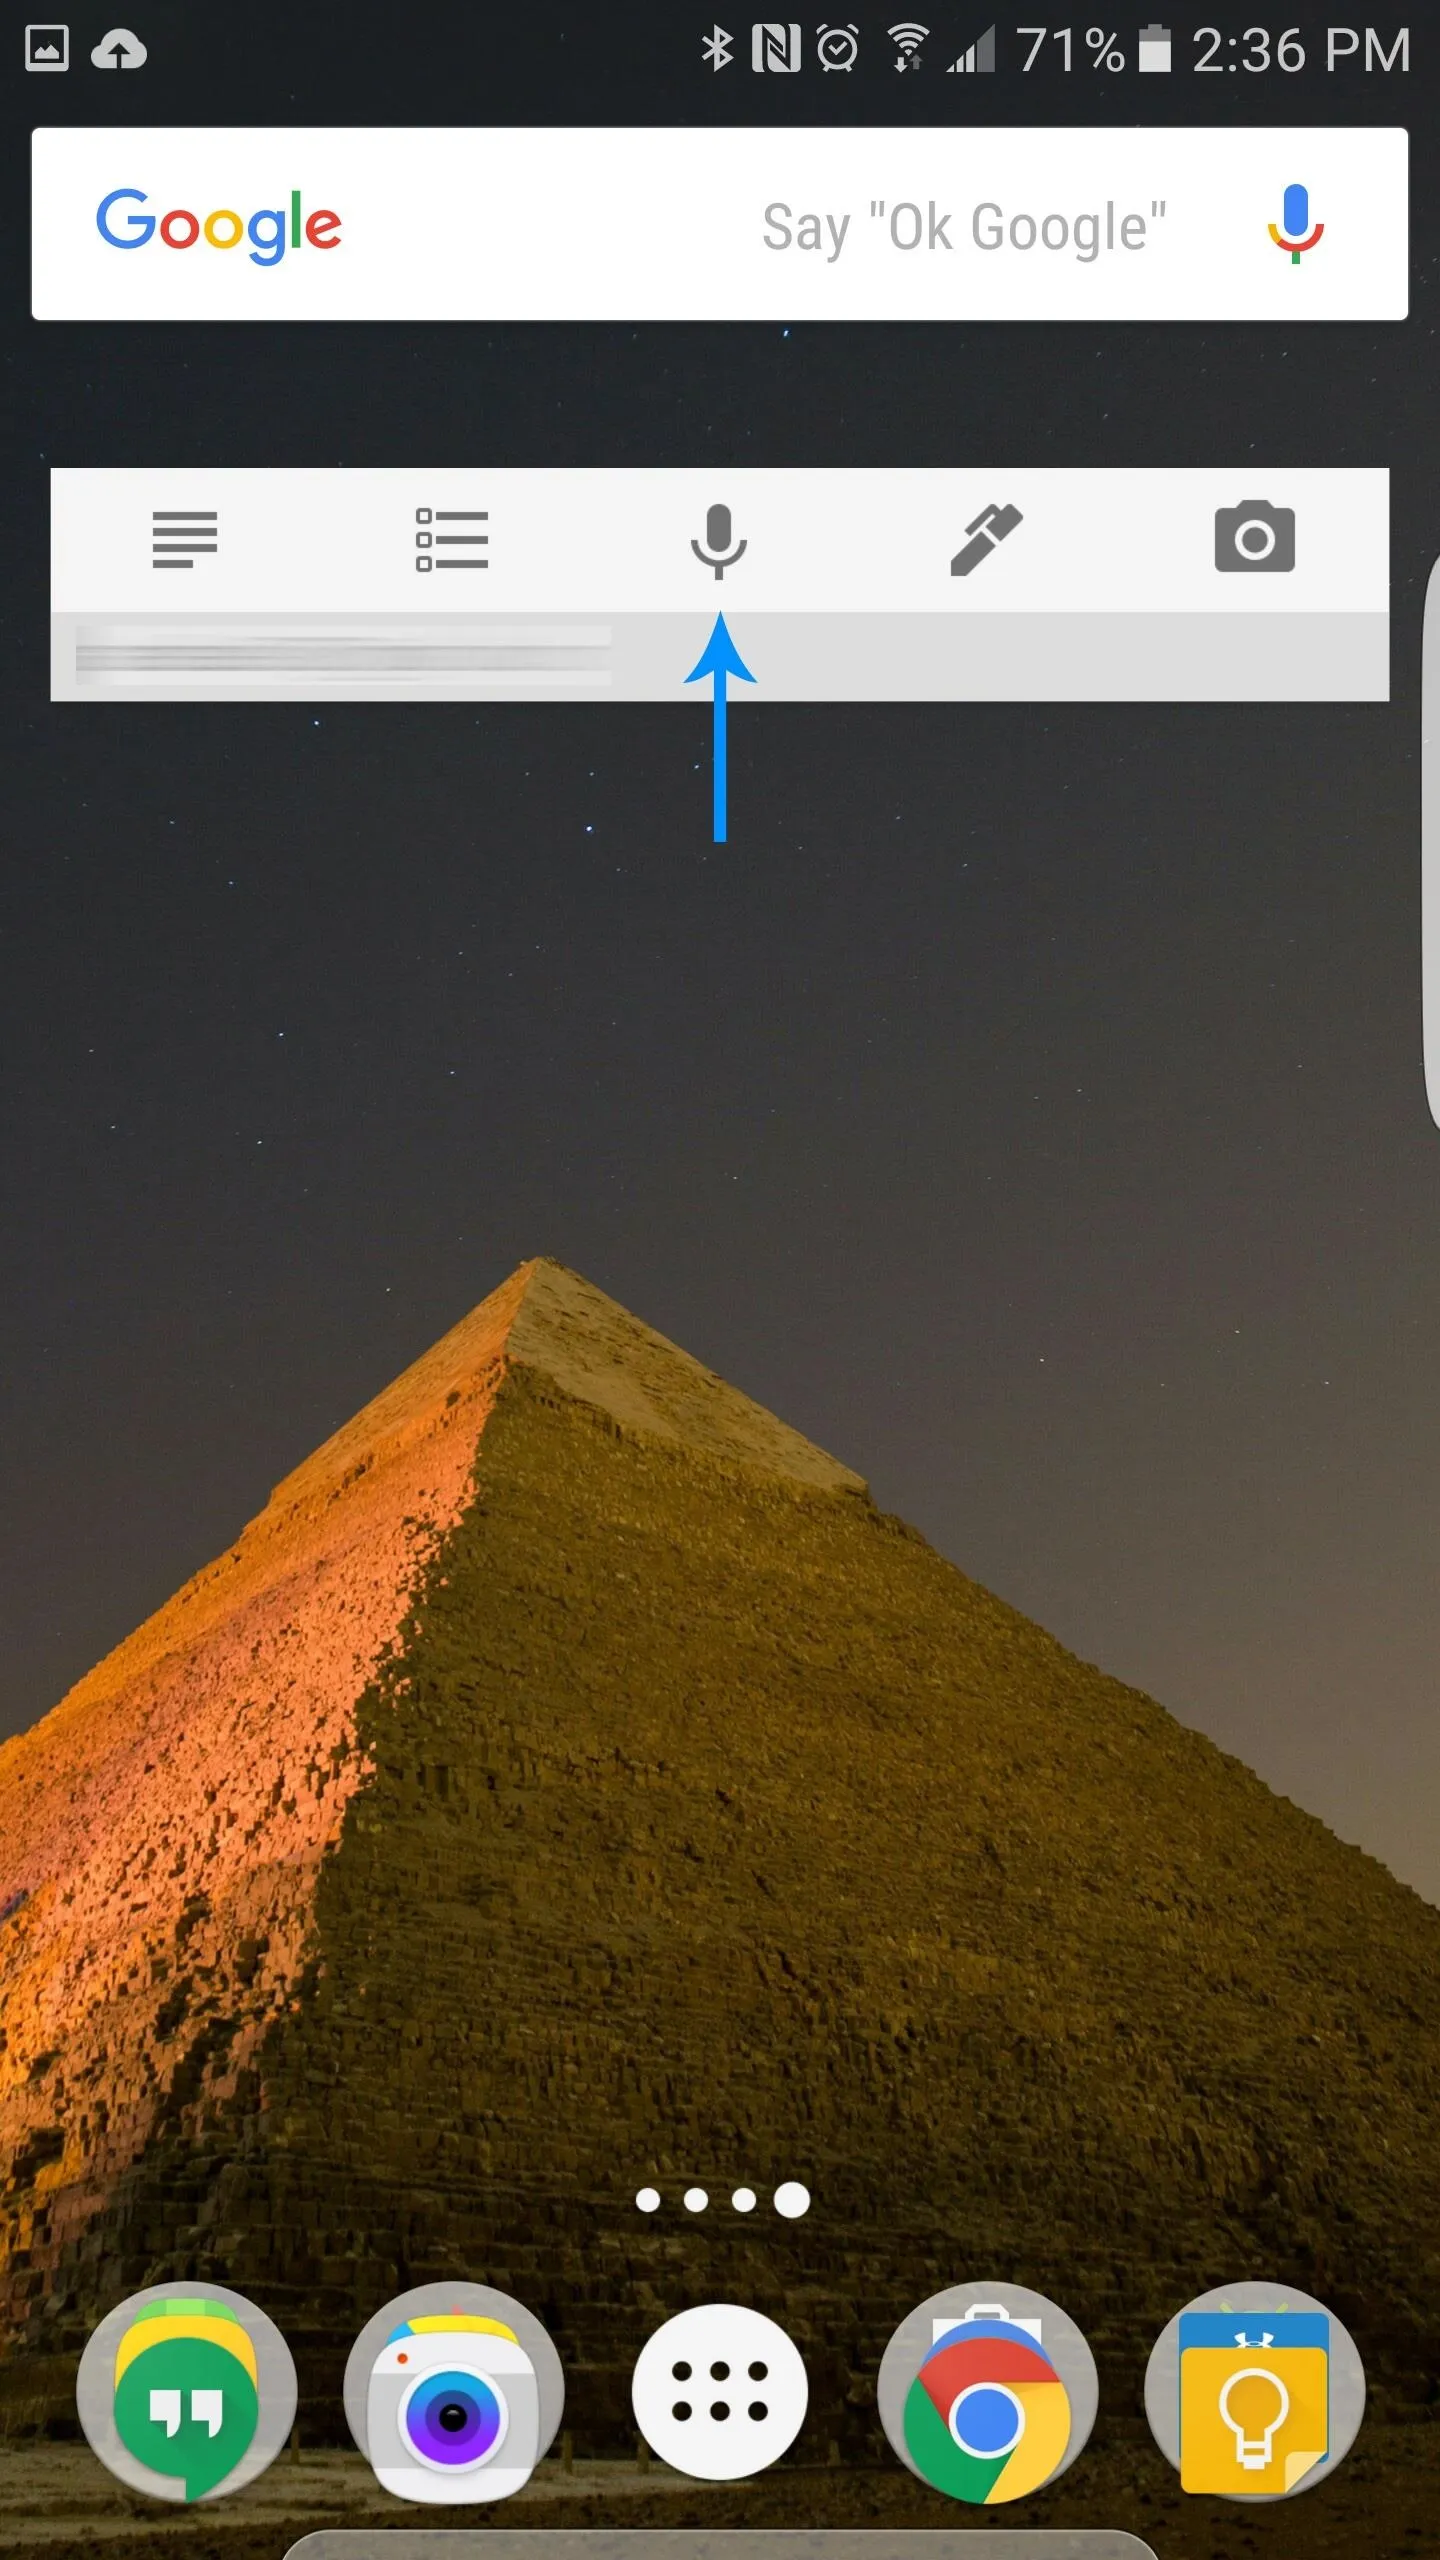
To record your lovely voice in a memo, simply open Google Keep and select the voice icon on the bottom right of the screen. Additionally, if you are using the Google Keep widget (highly suggested if you're not using Nova Launcher Prime), you can select the voice record button on there as well.


4. Convert Your Standard Lists into an Ordered List
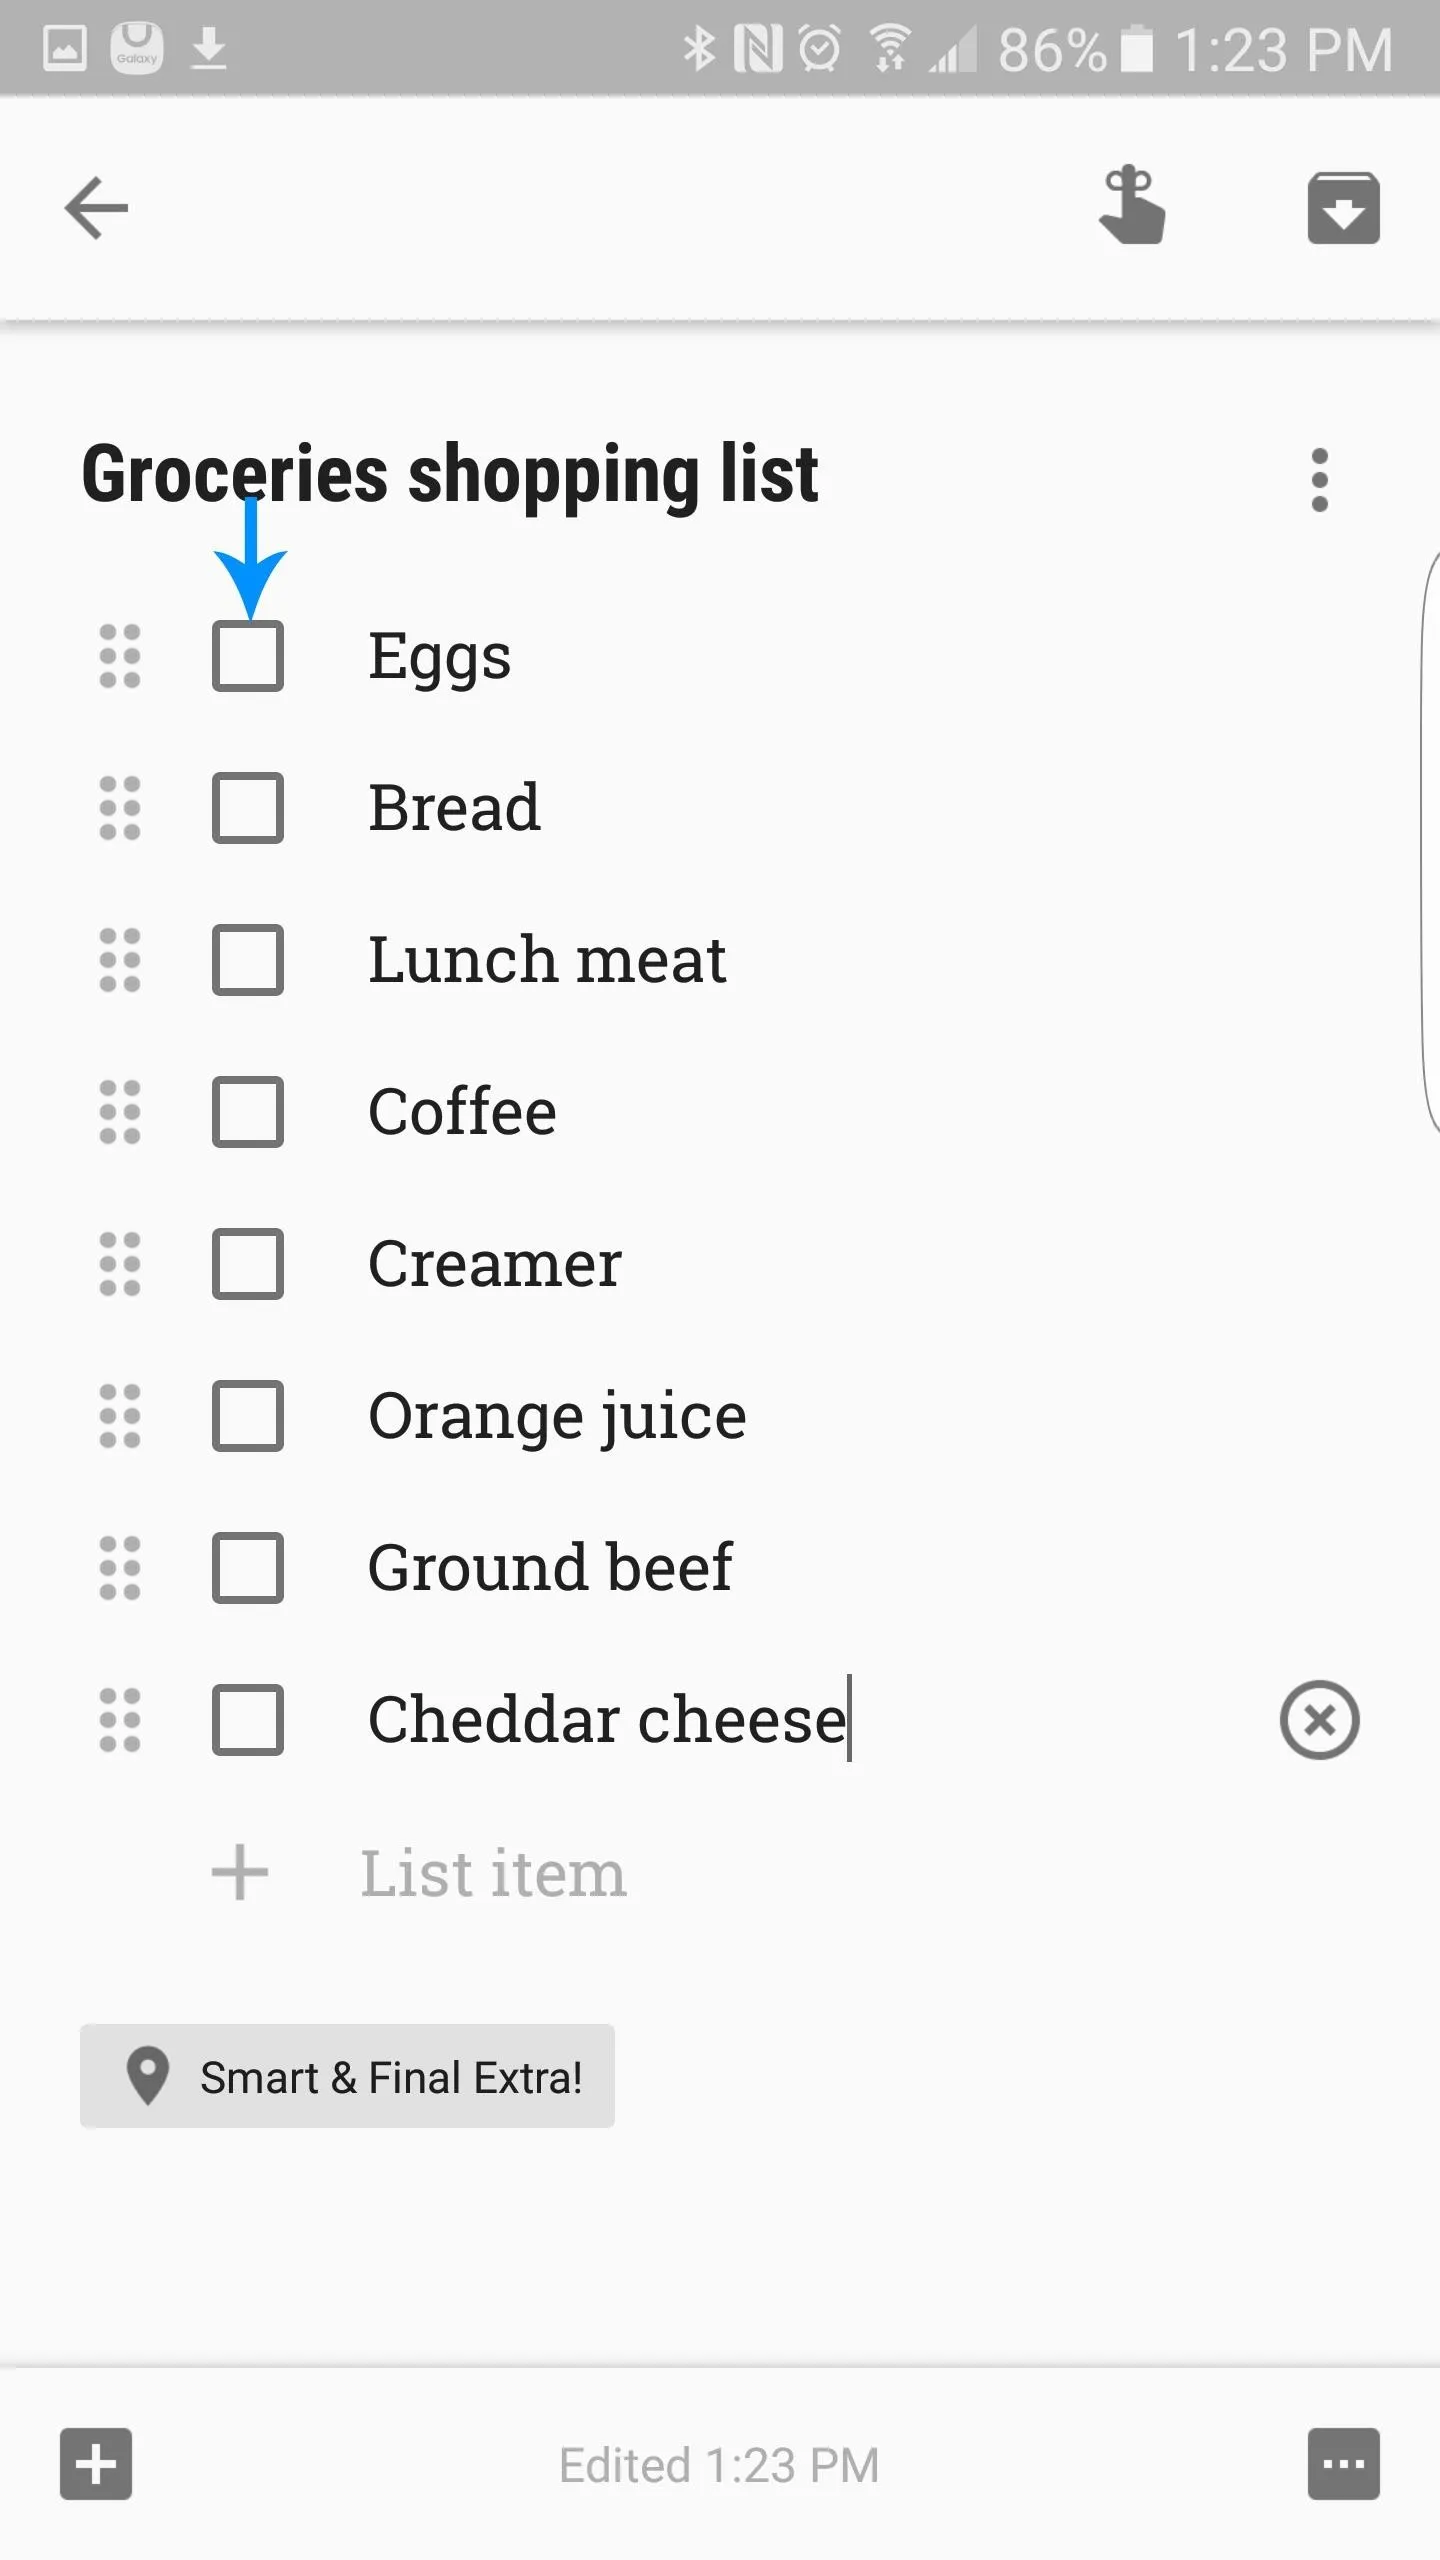
Lists are an extraordinary tool for helping us keep our priorities straight. Unfortunately, though, sometimes we simply forget to put checkboxes next to the items on our list, which provide a visual representation of what has already been completed. Fortunately, Google Keep has a simple way of converting a standard list into a list with checkboxes.
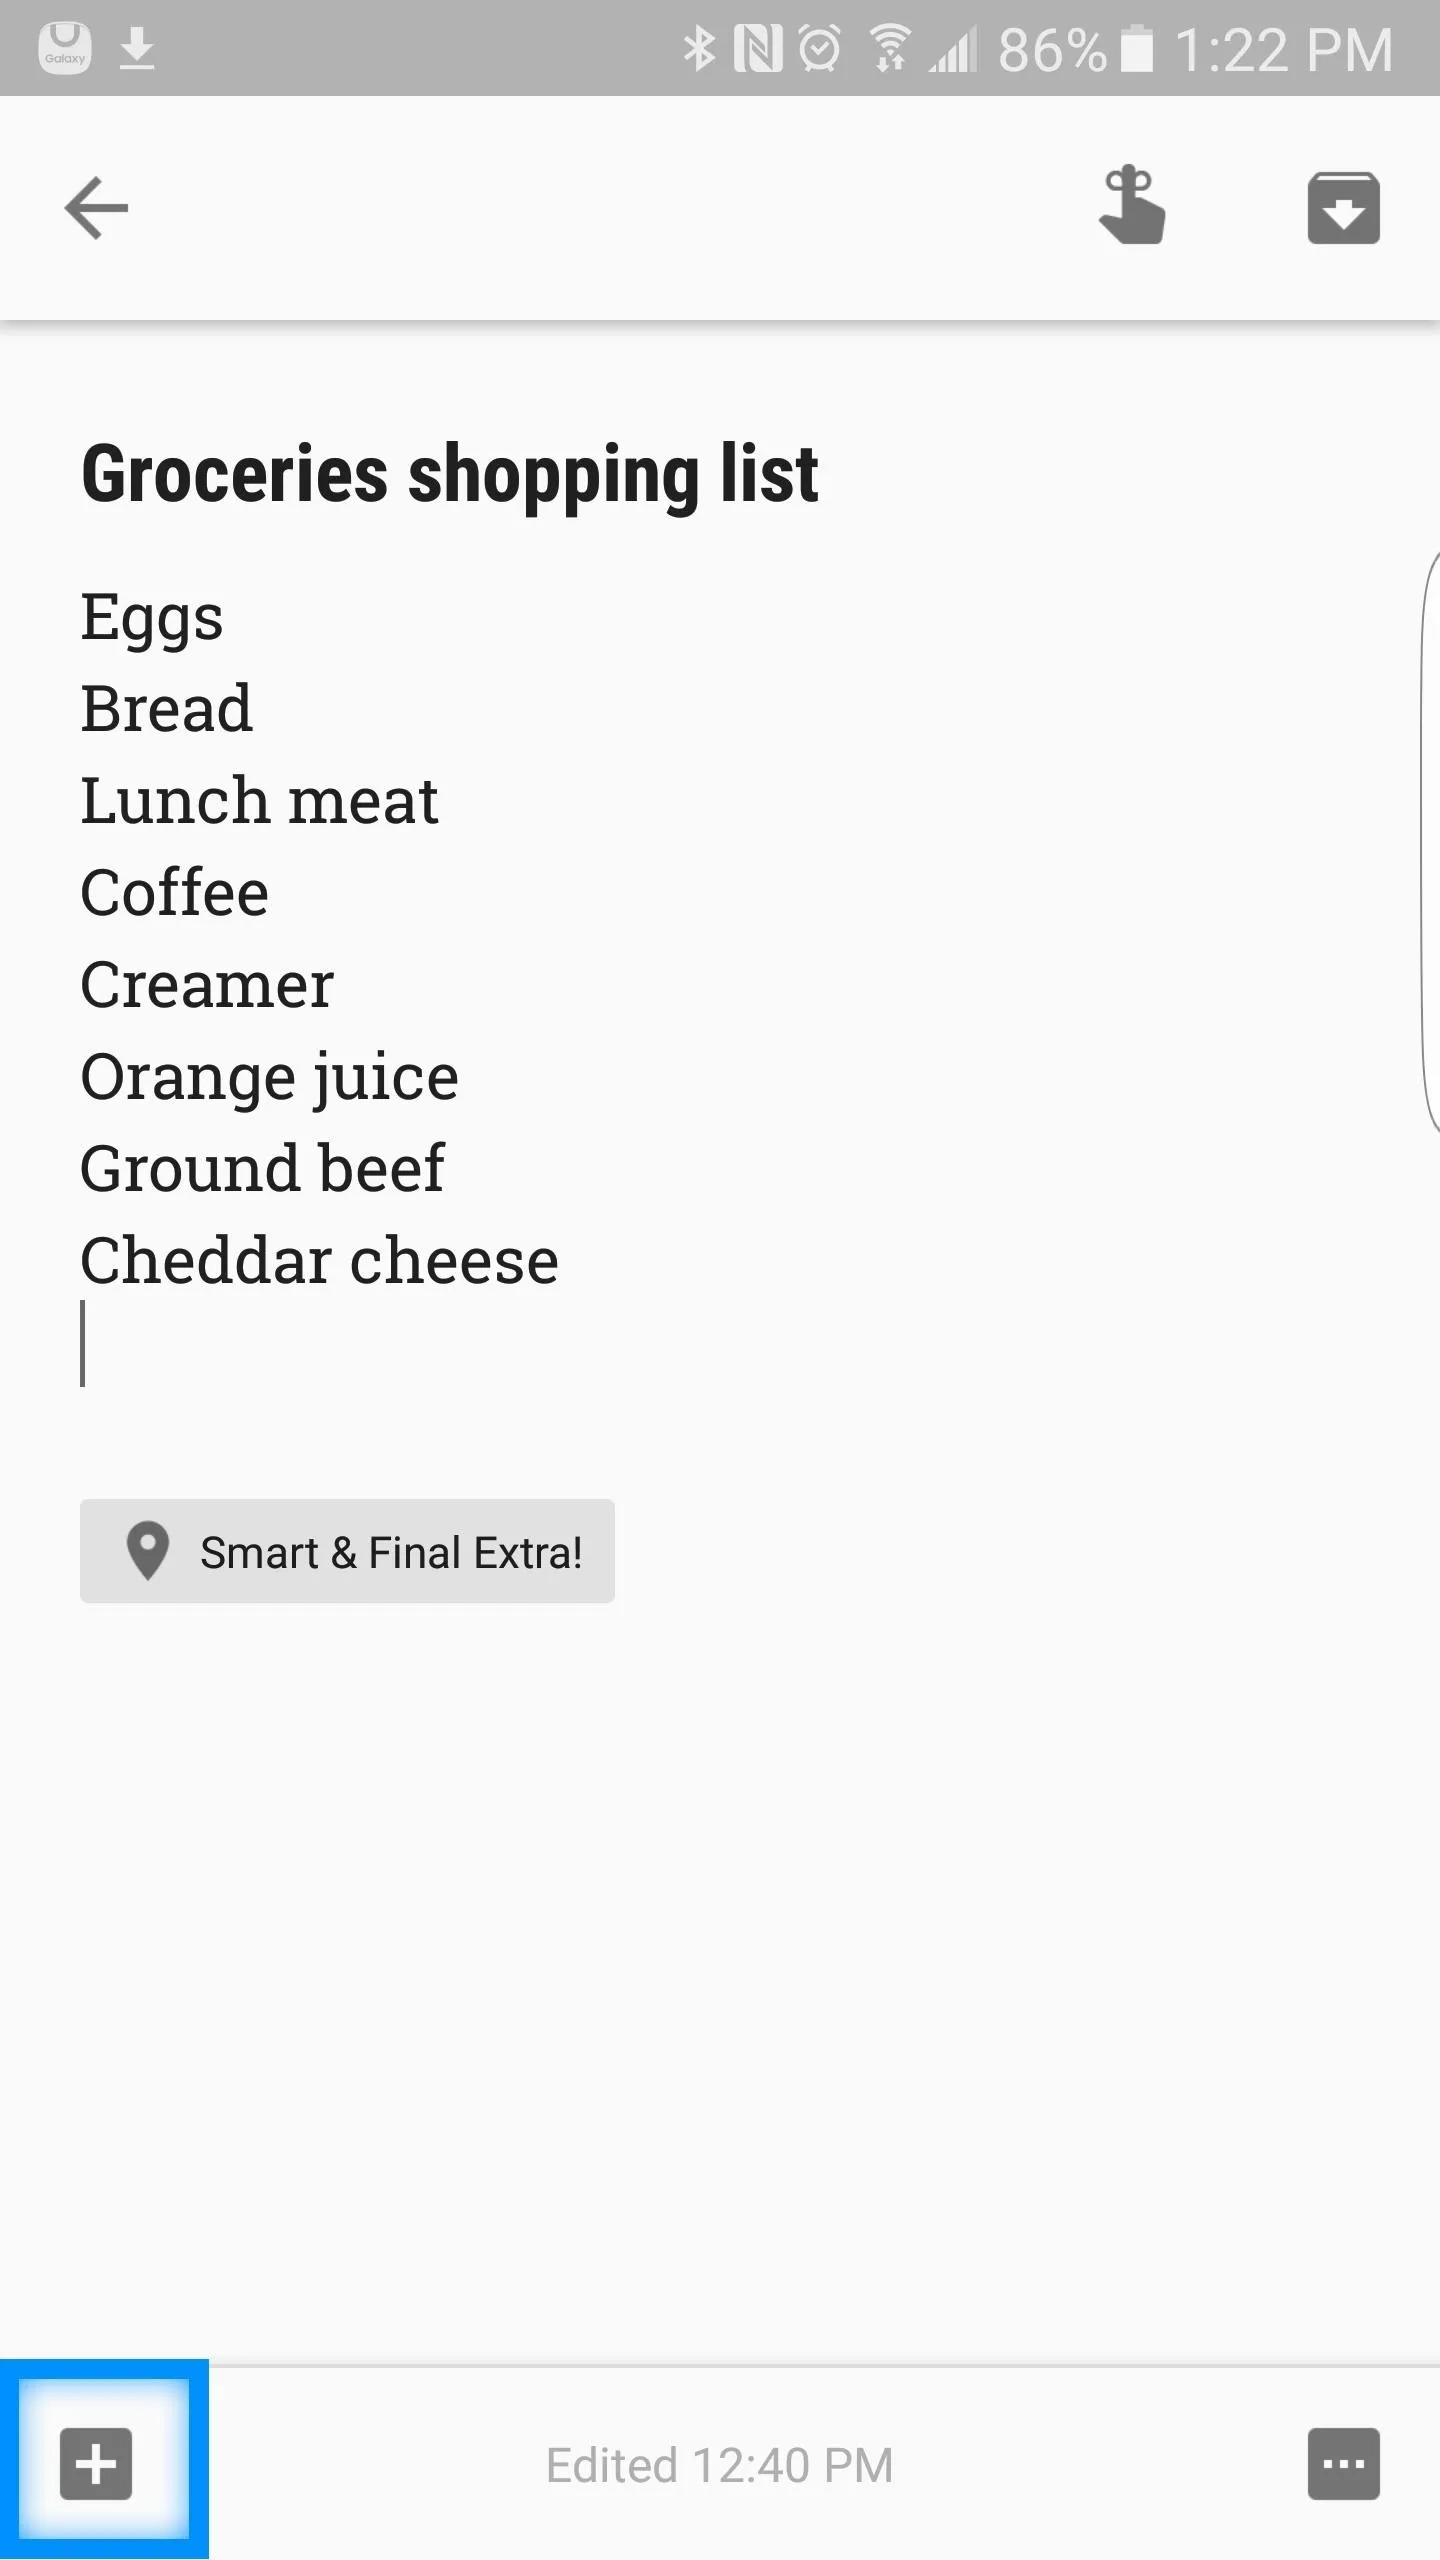
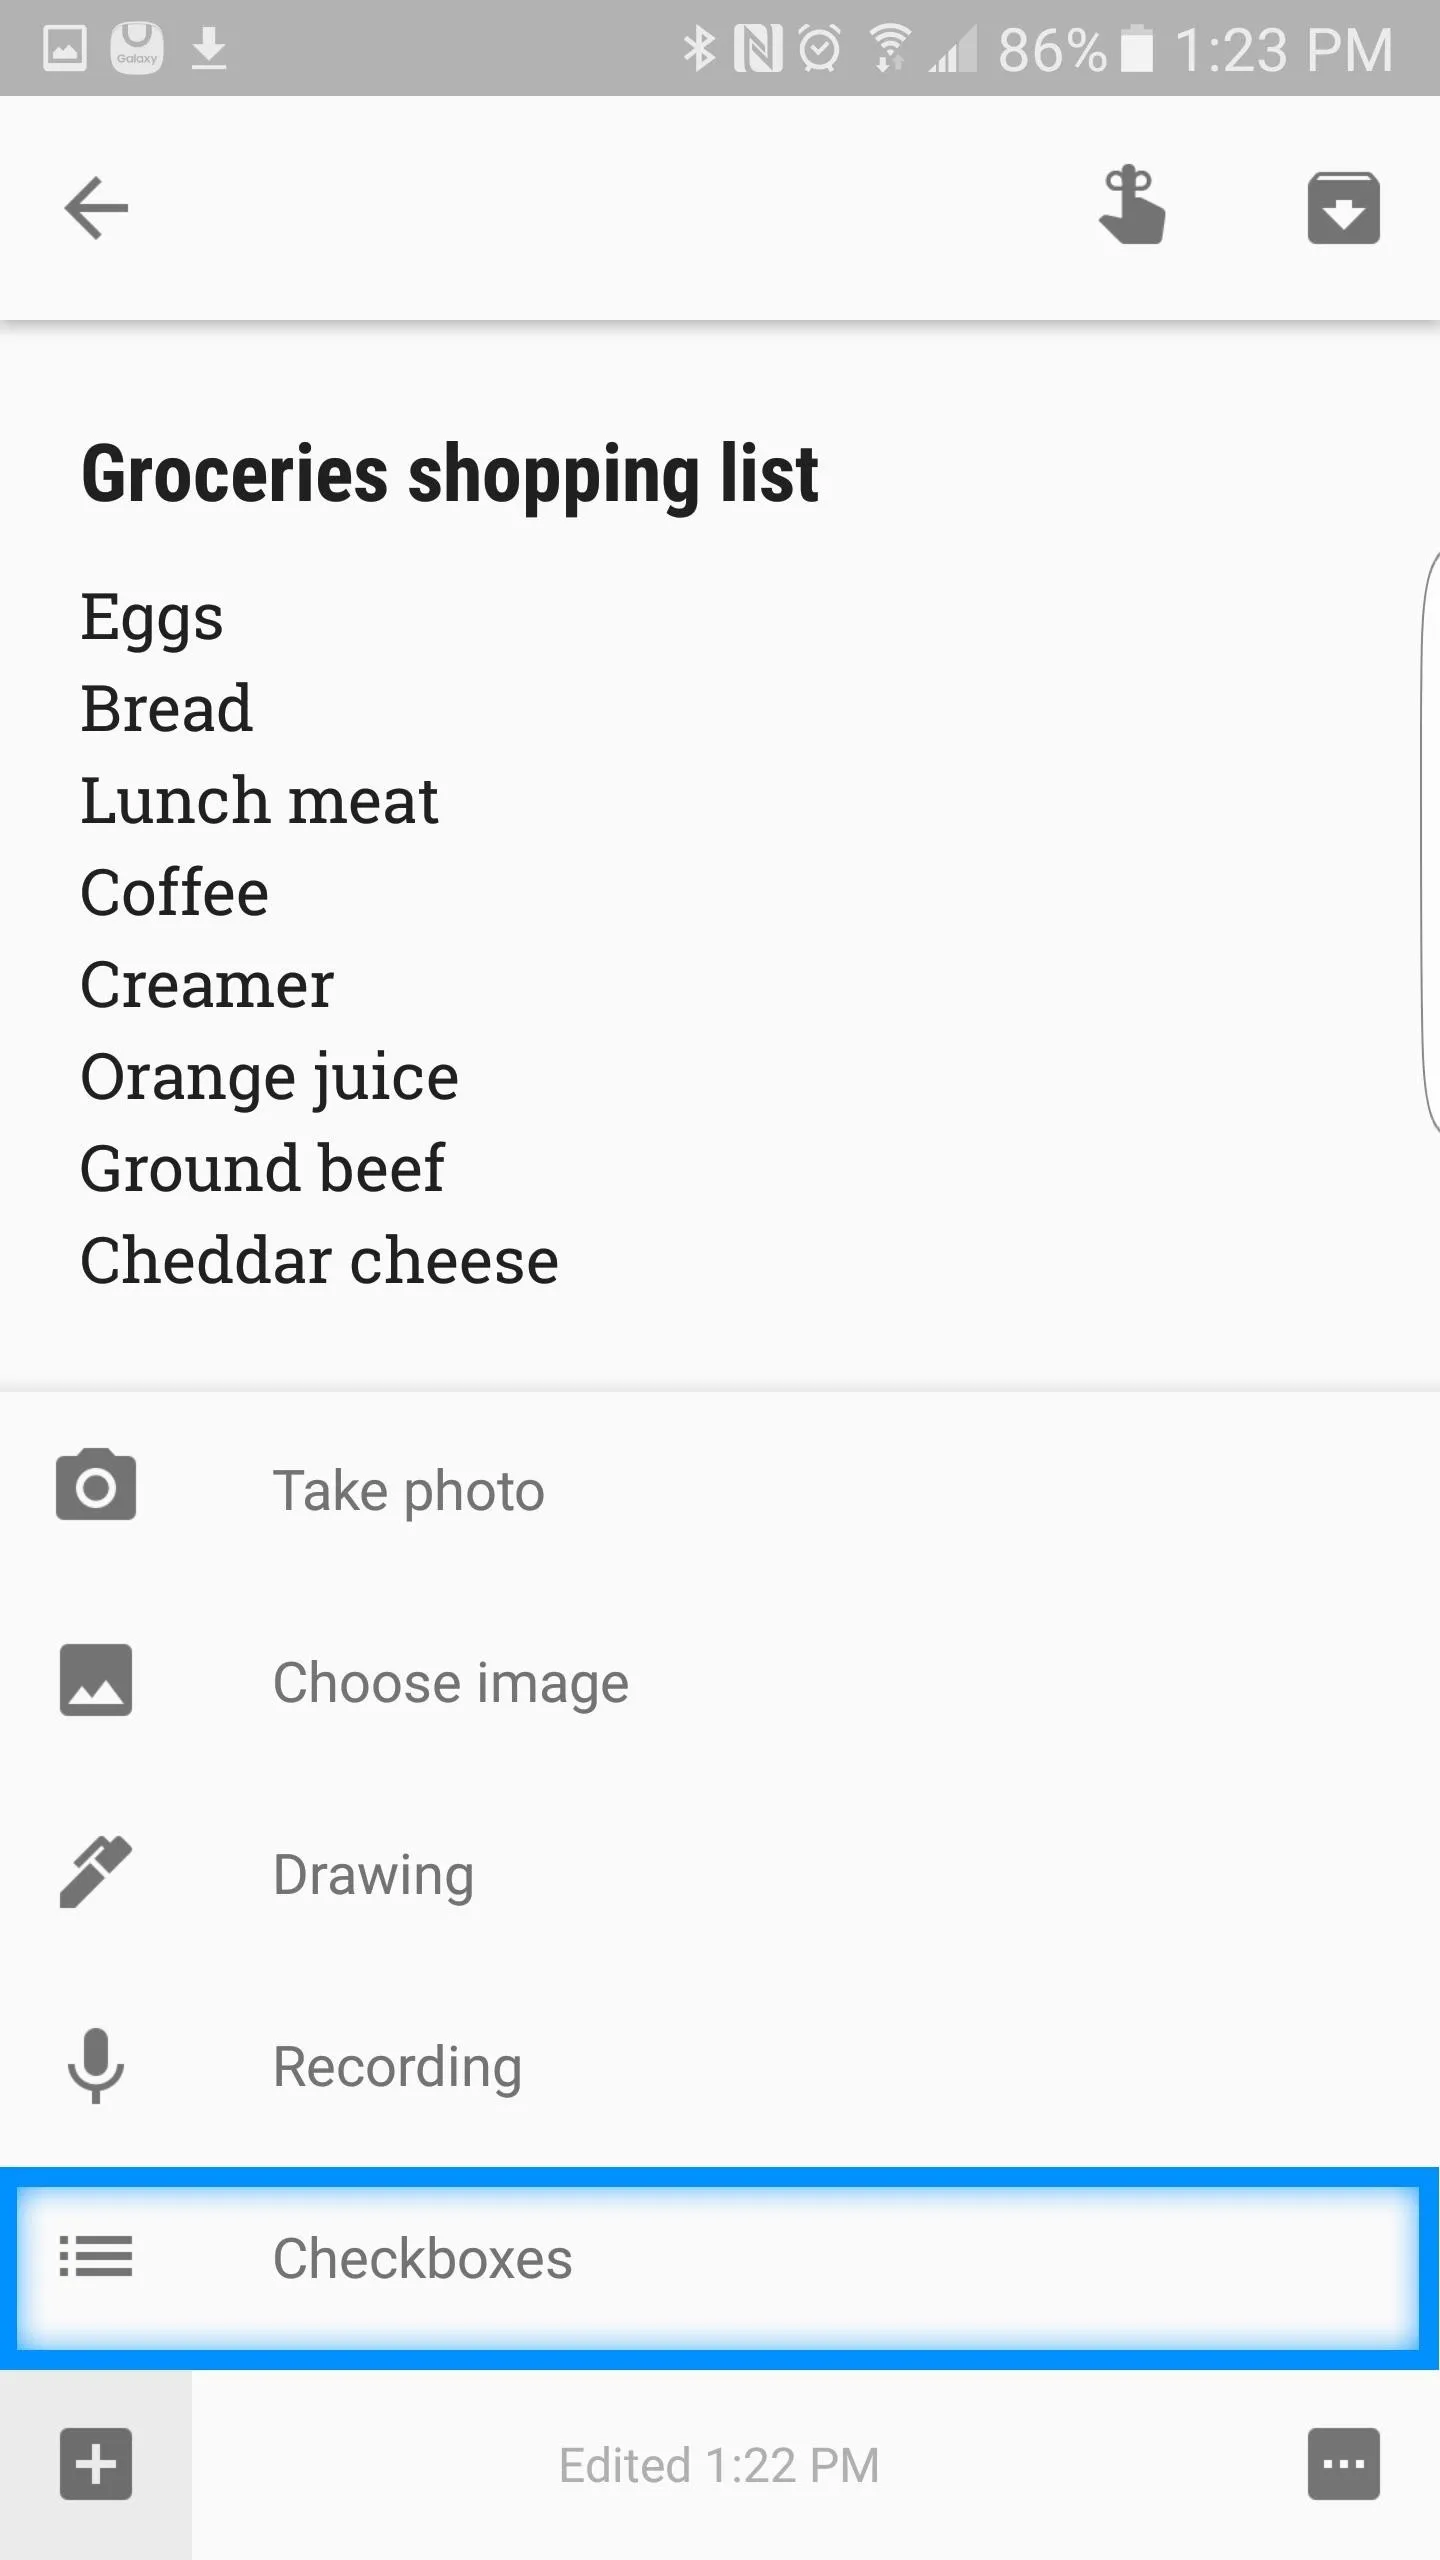
Simply select your note, and at the bottom left of the screen will be a "+" sign. Select this + and the option of converting your standard list to a list with checkboxes will appear—select Checkboxes and you're done!


5. Use Google Now Commands to Add Items to Lists
Google Keep has a built-in feature that allows you to add items to a "To Do" and "Shopping List" by utilizing the "Ok Google" voice function.
To quickly add items to these two lists, simply activate Google Search by saying "Ok Google," and then proceed to use one of the two voice command formats listed below:
- "Ok Google, add bananas to my shopping list"
- "Ok Google, add getting my life together to my to do list"
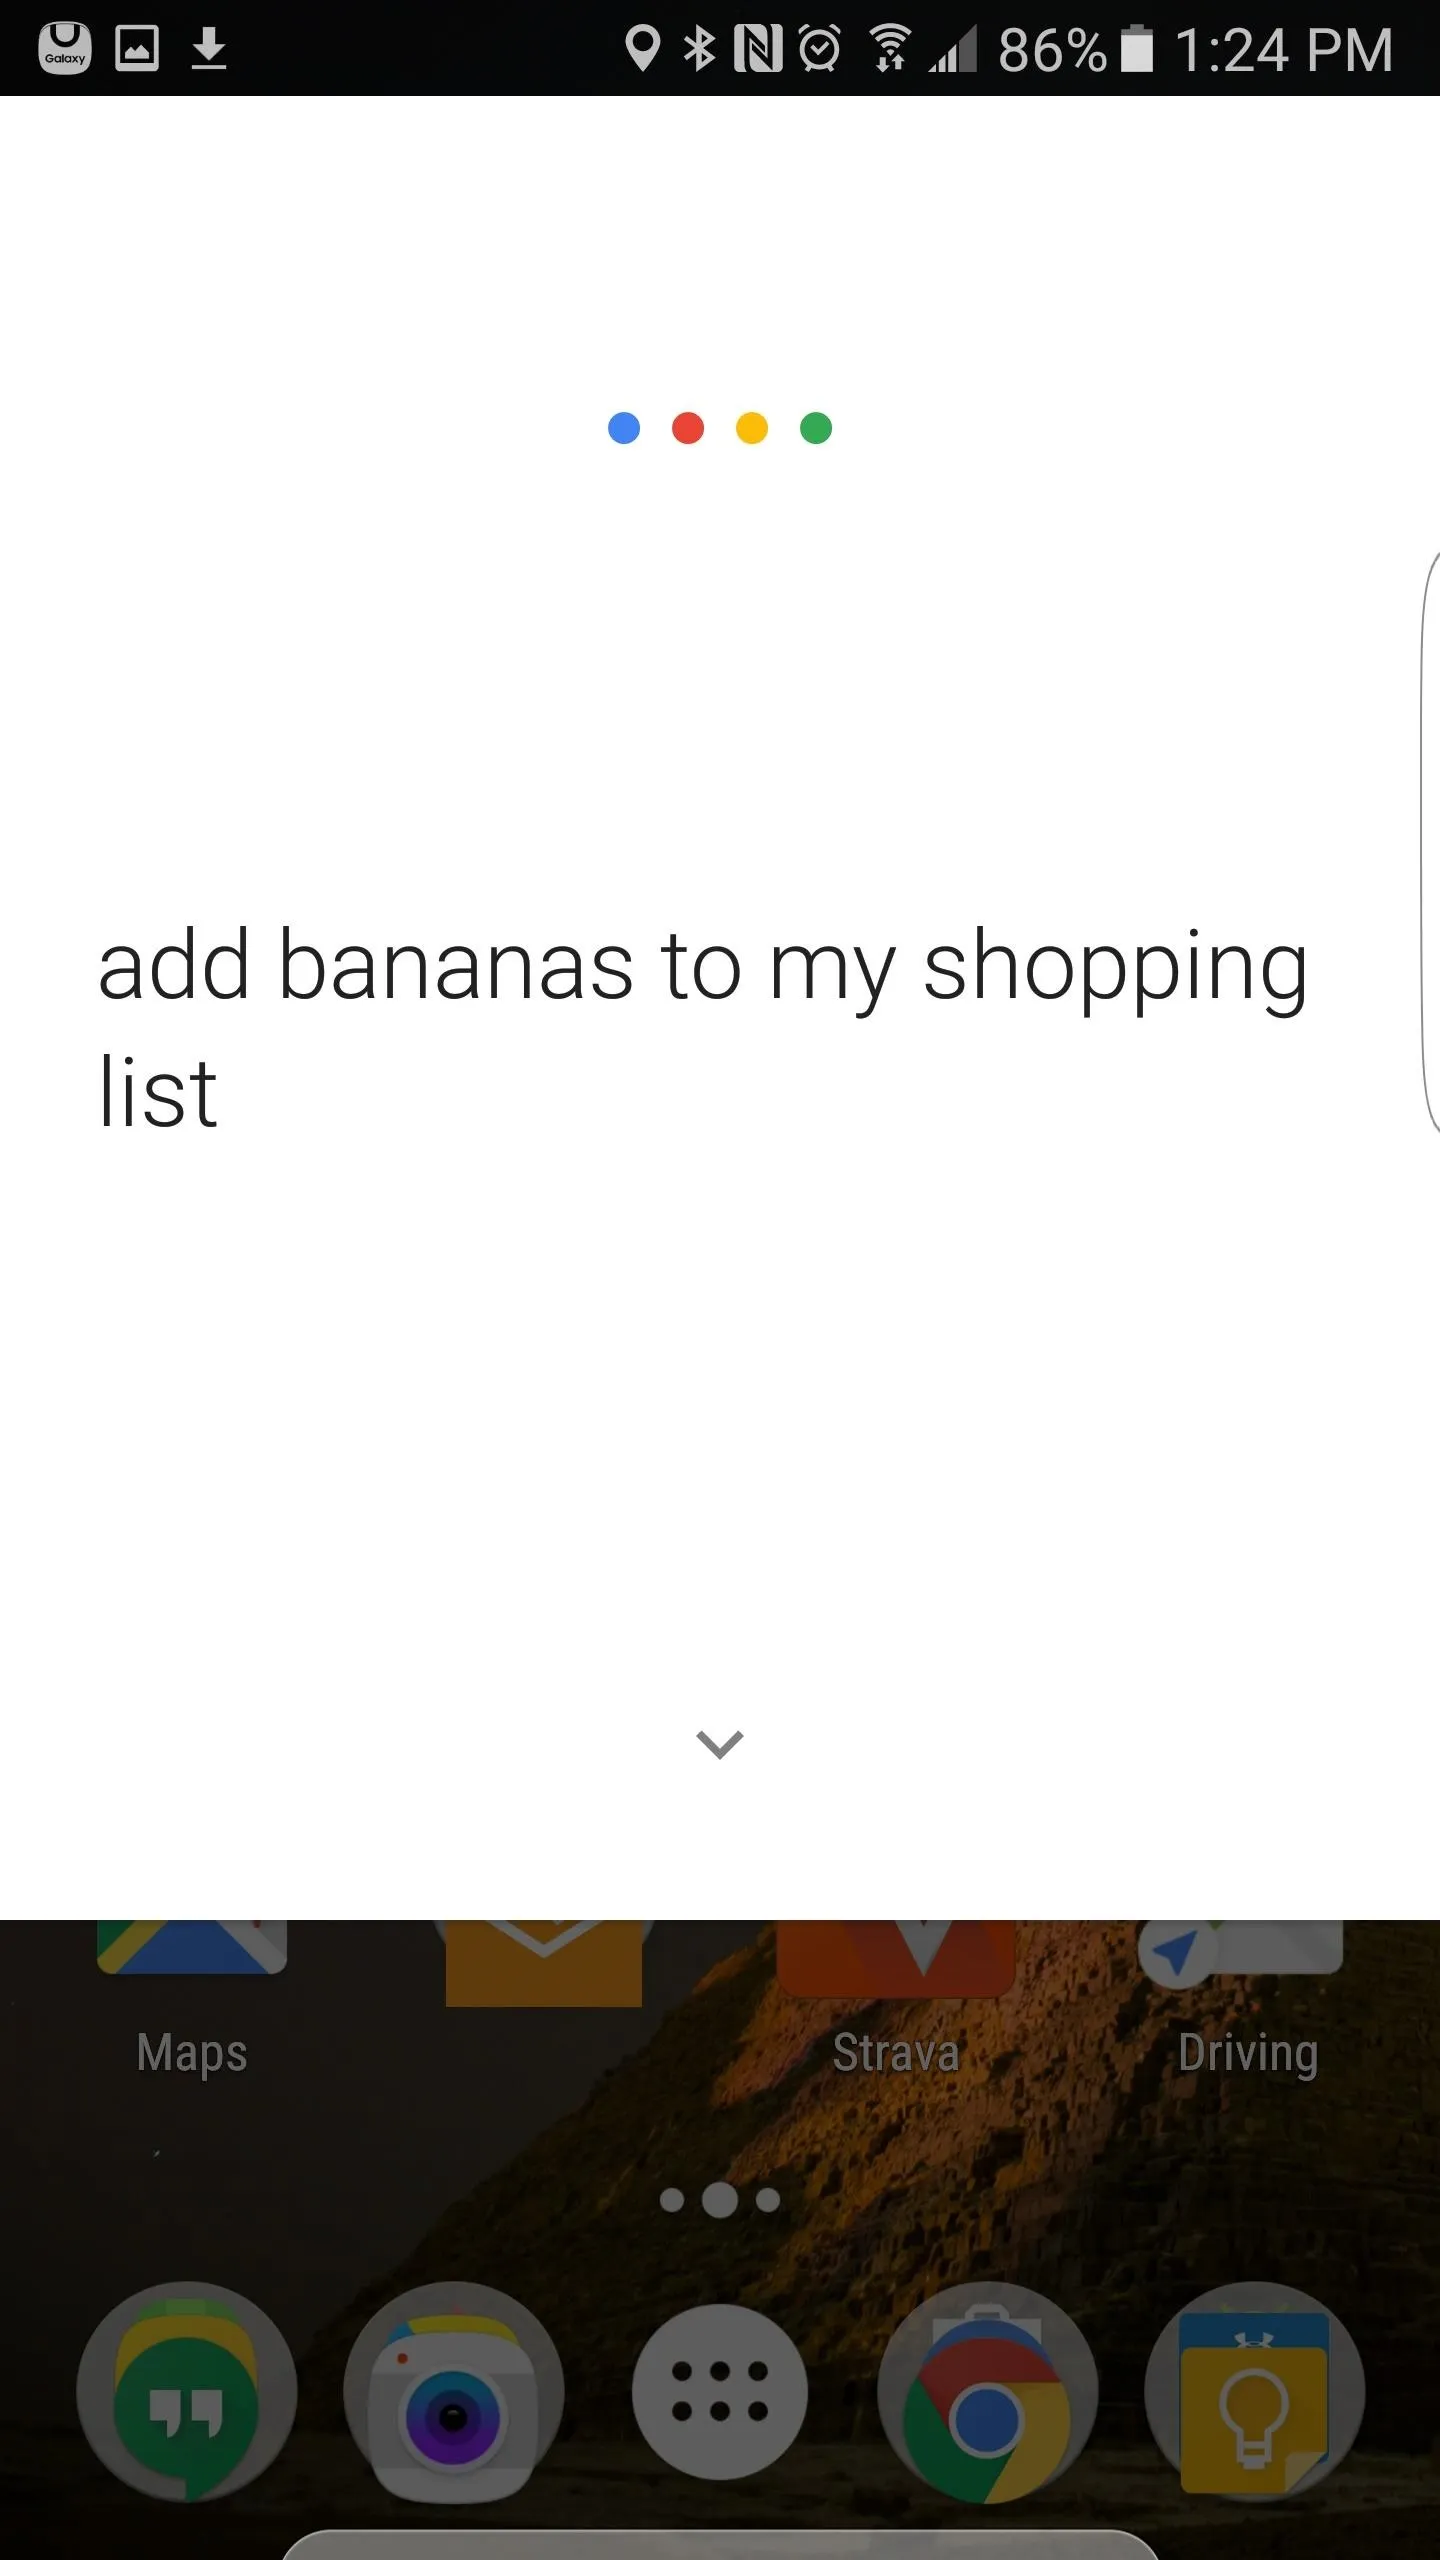
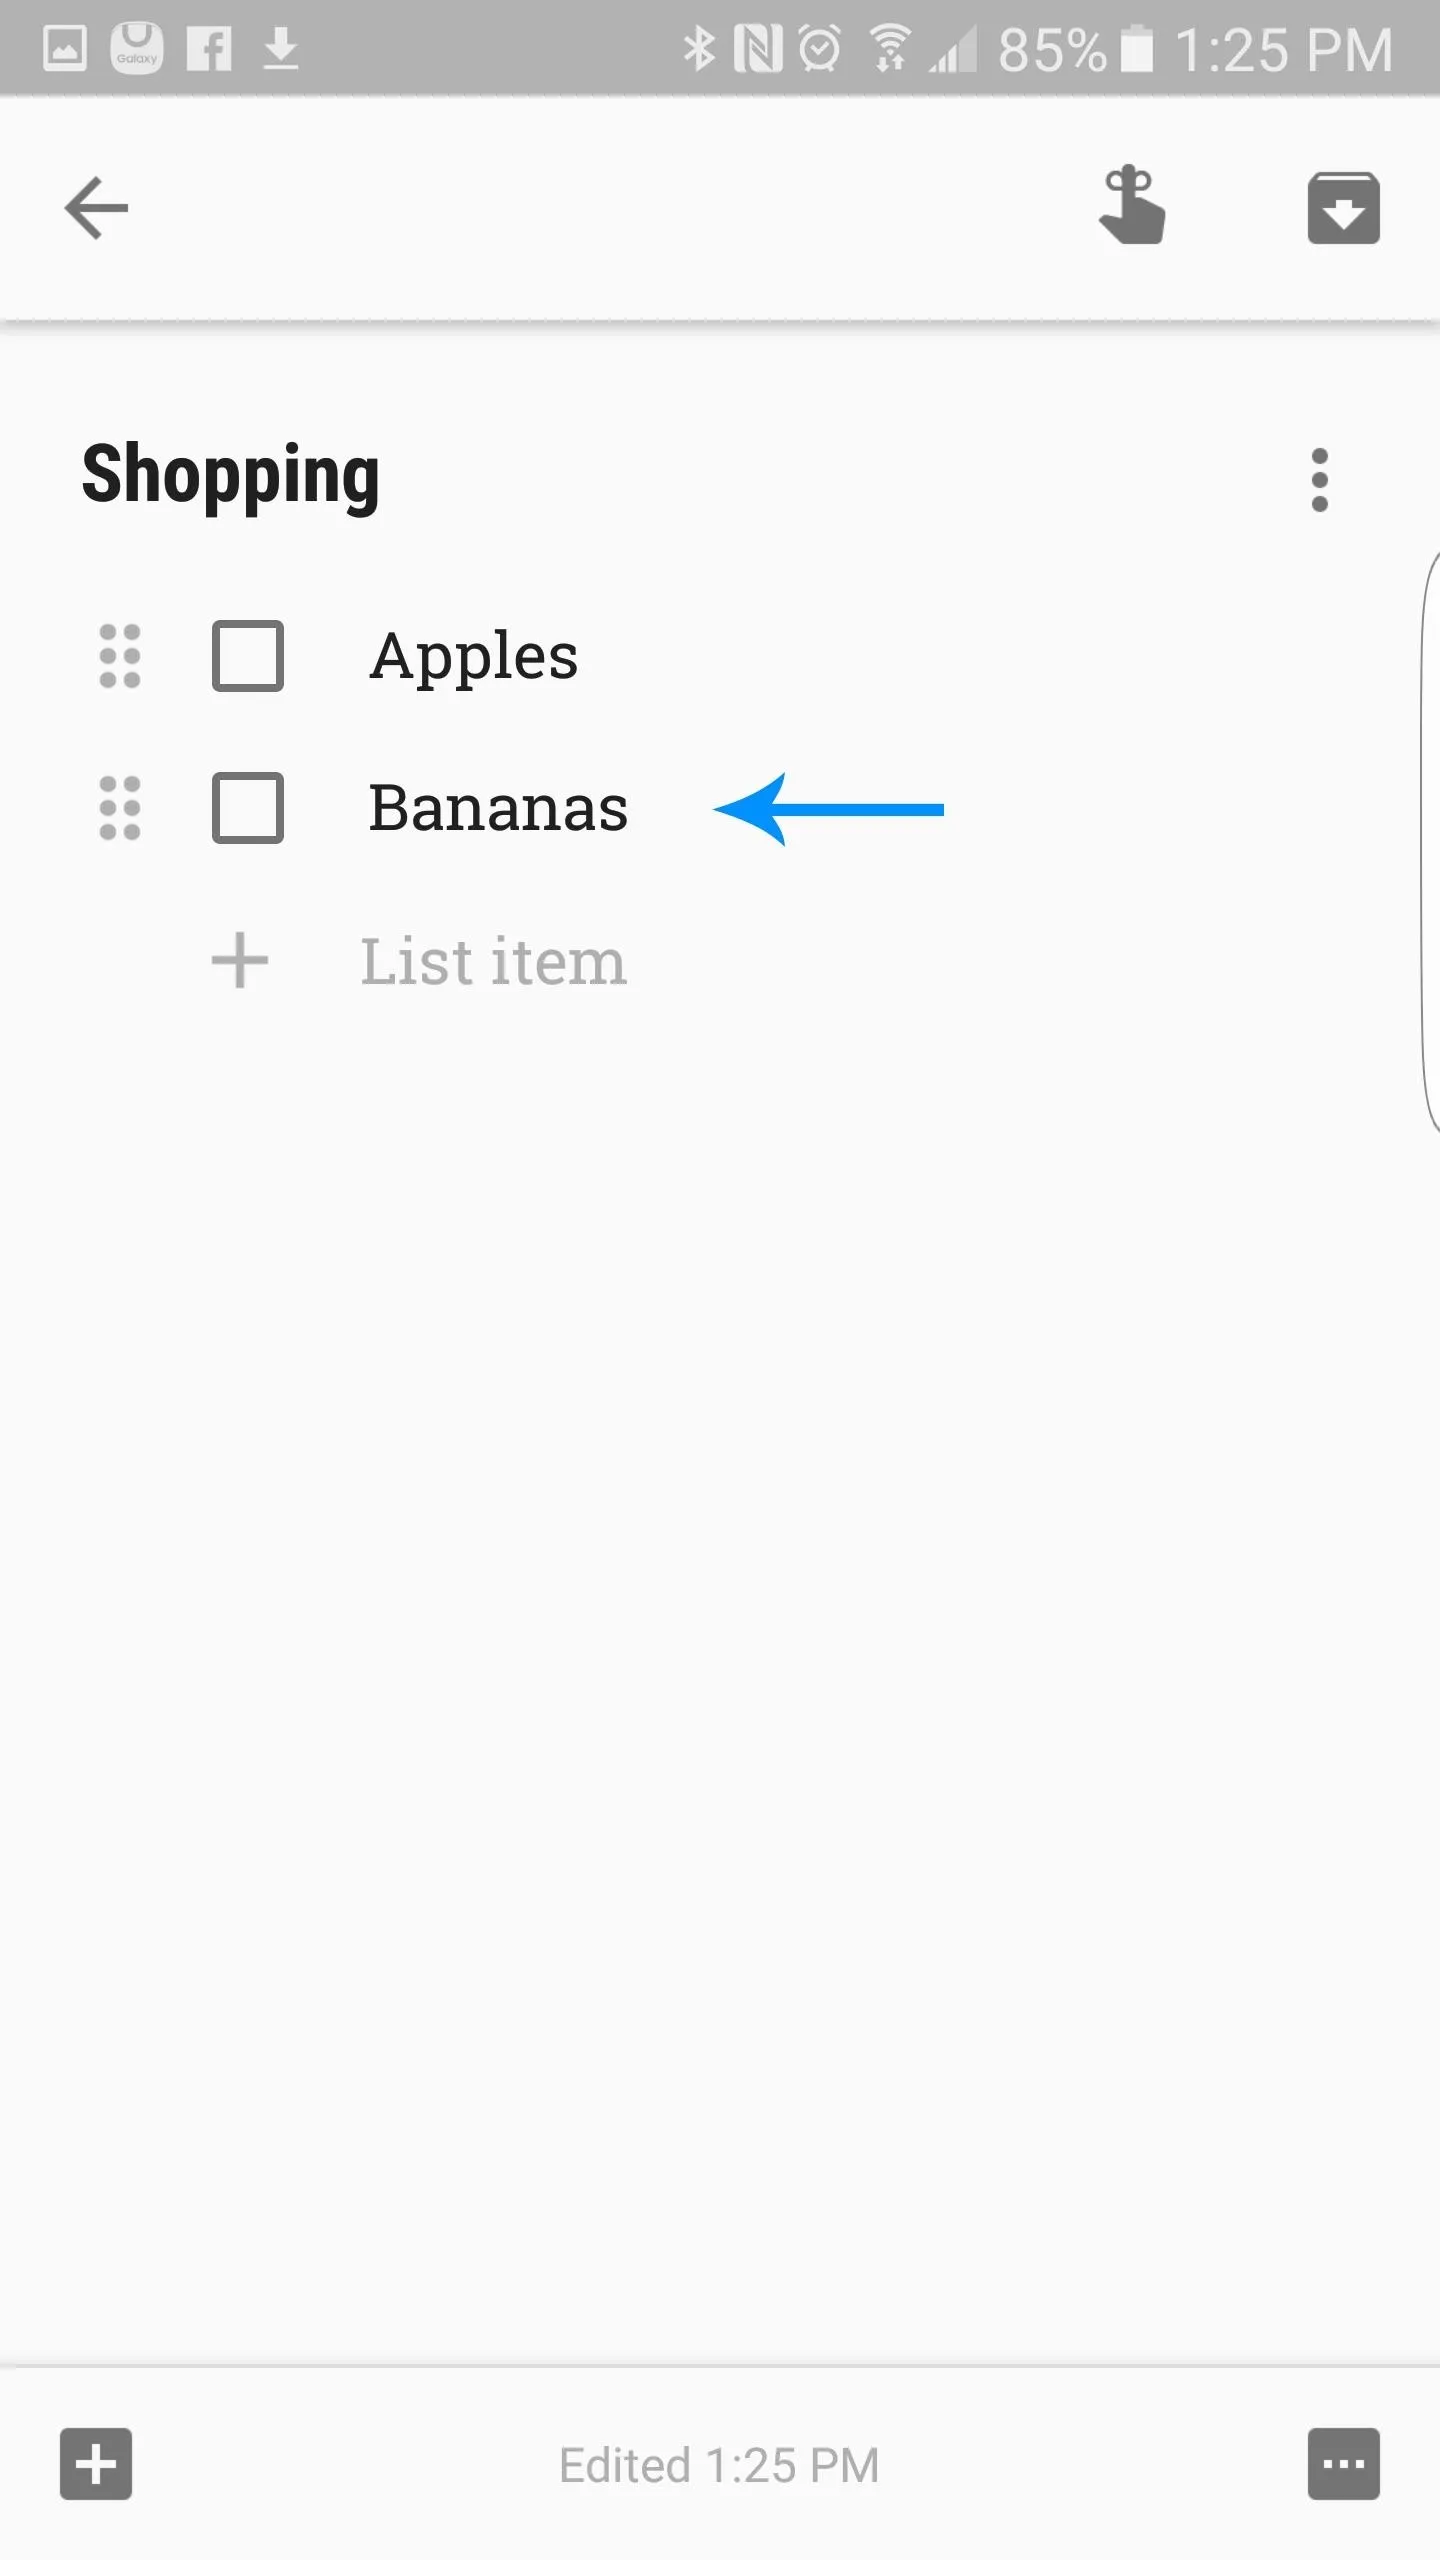
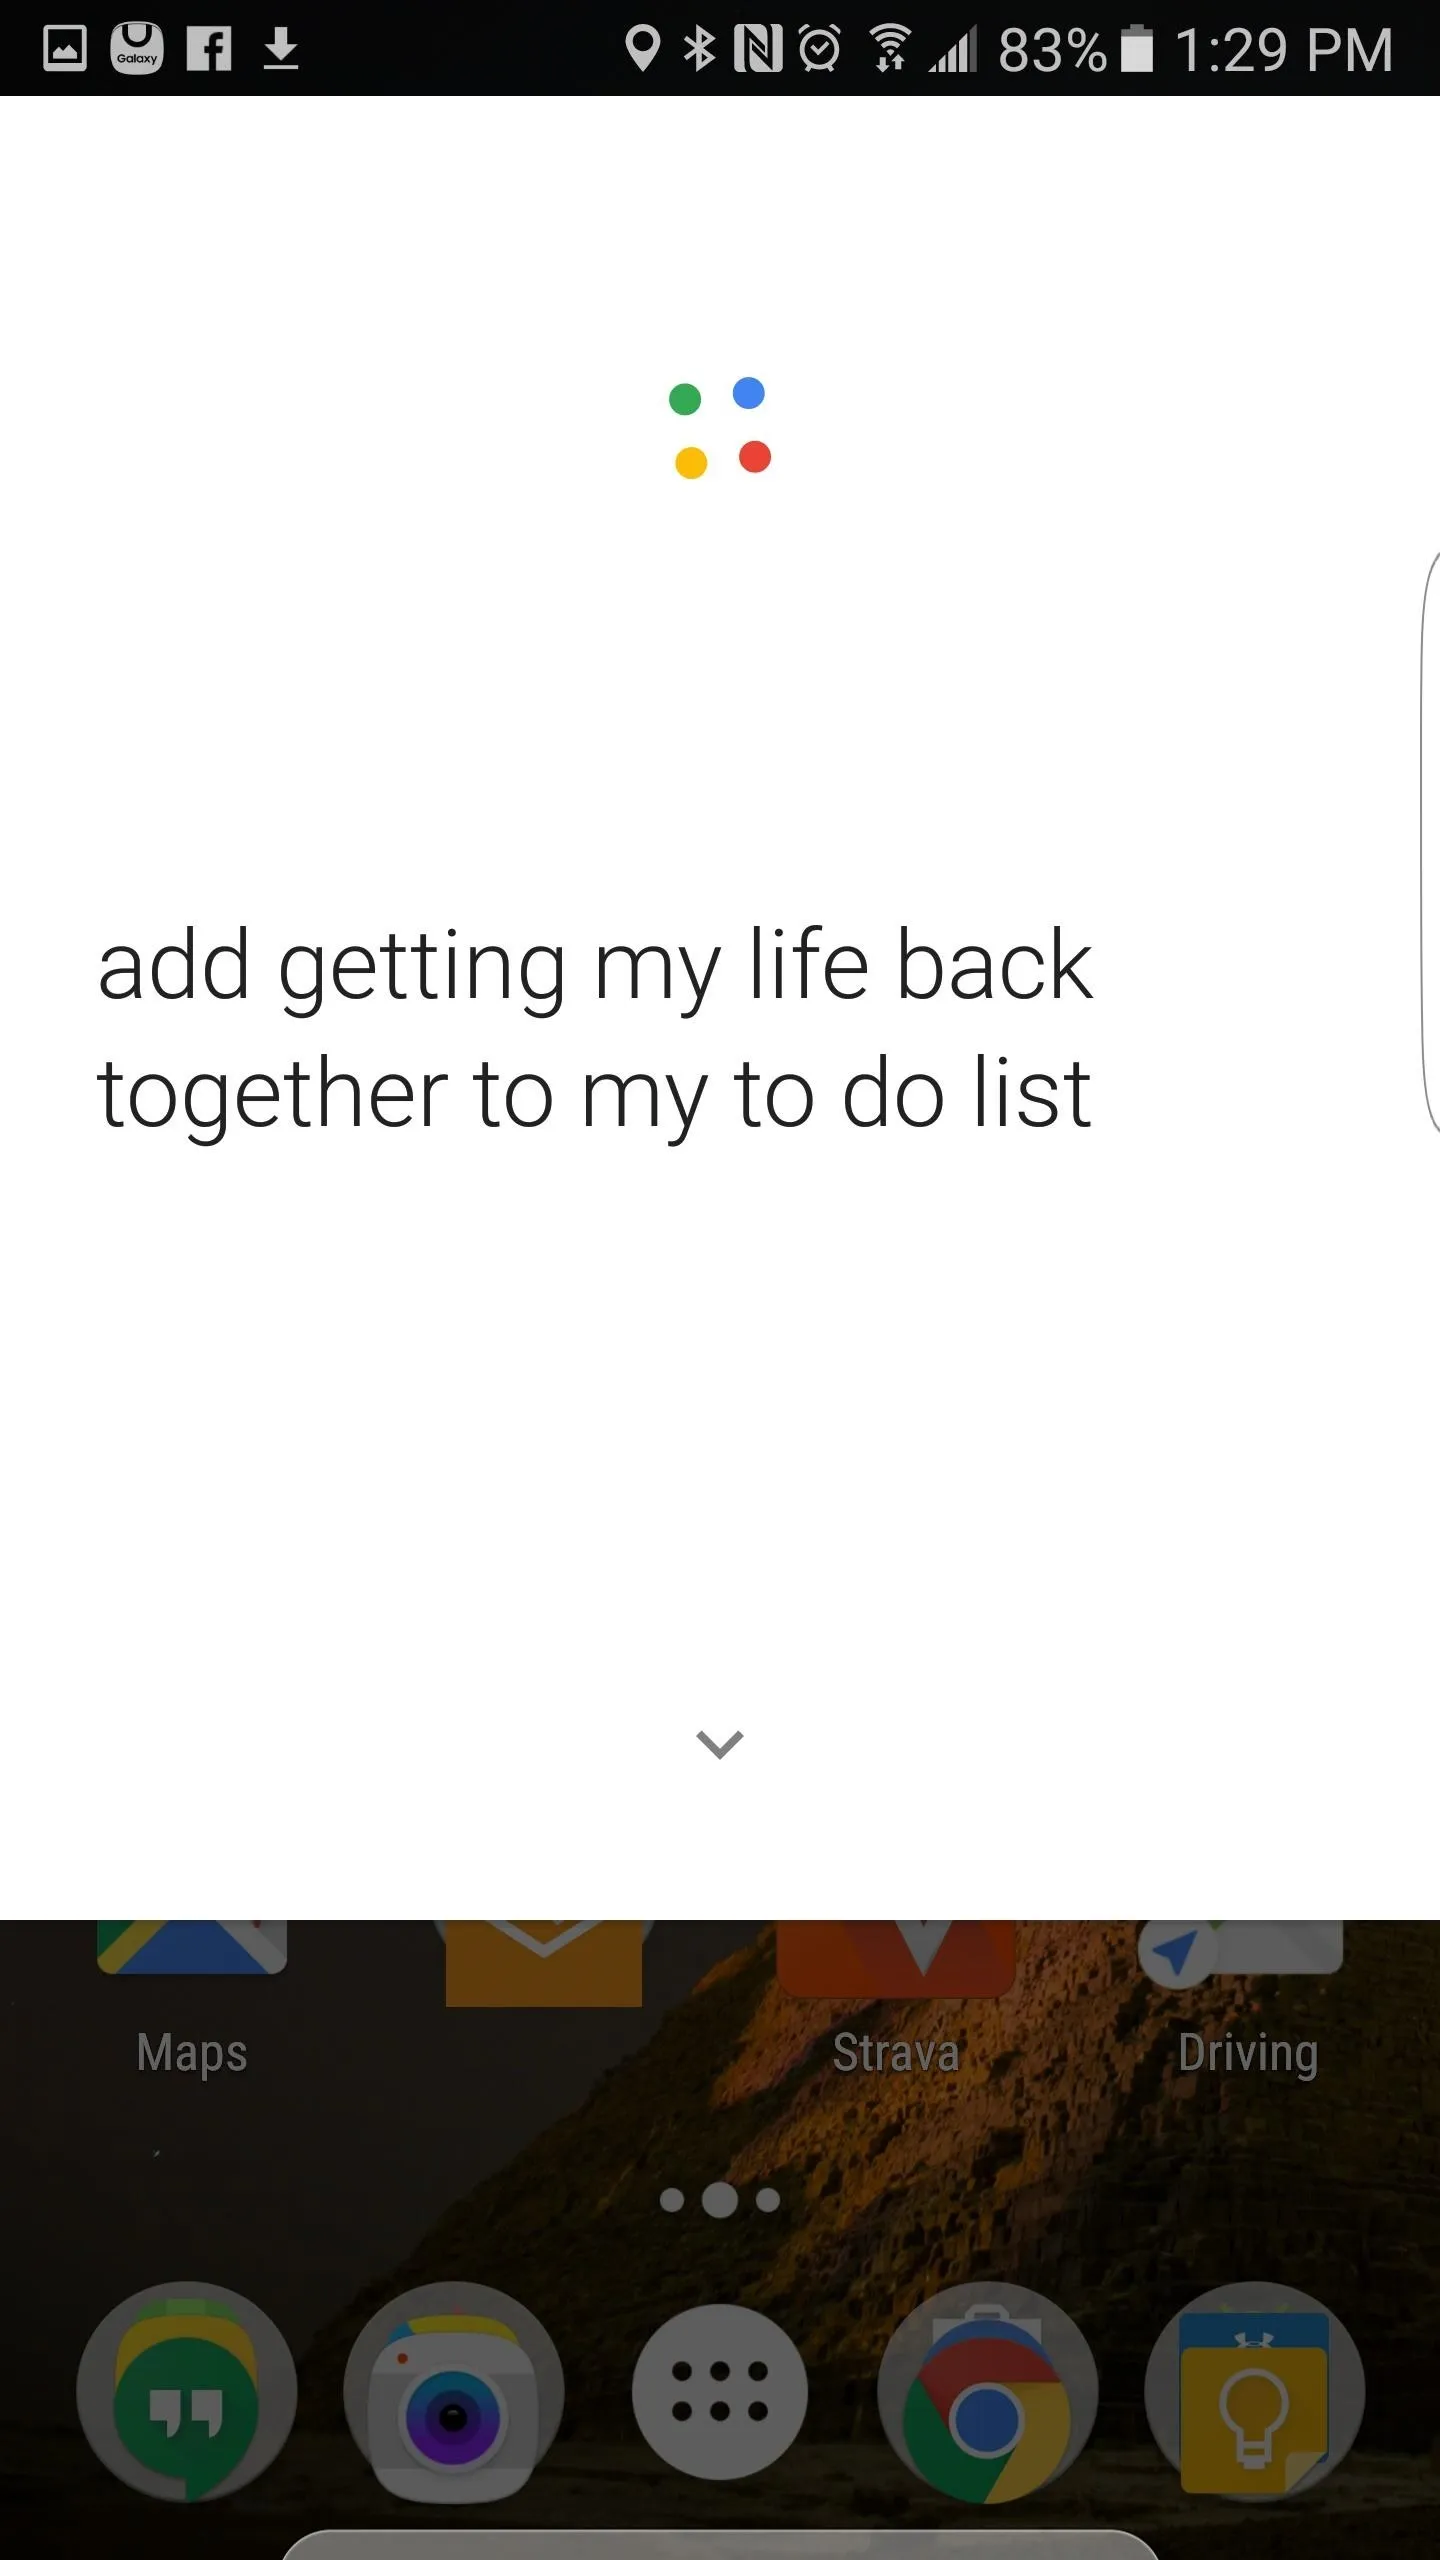
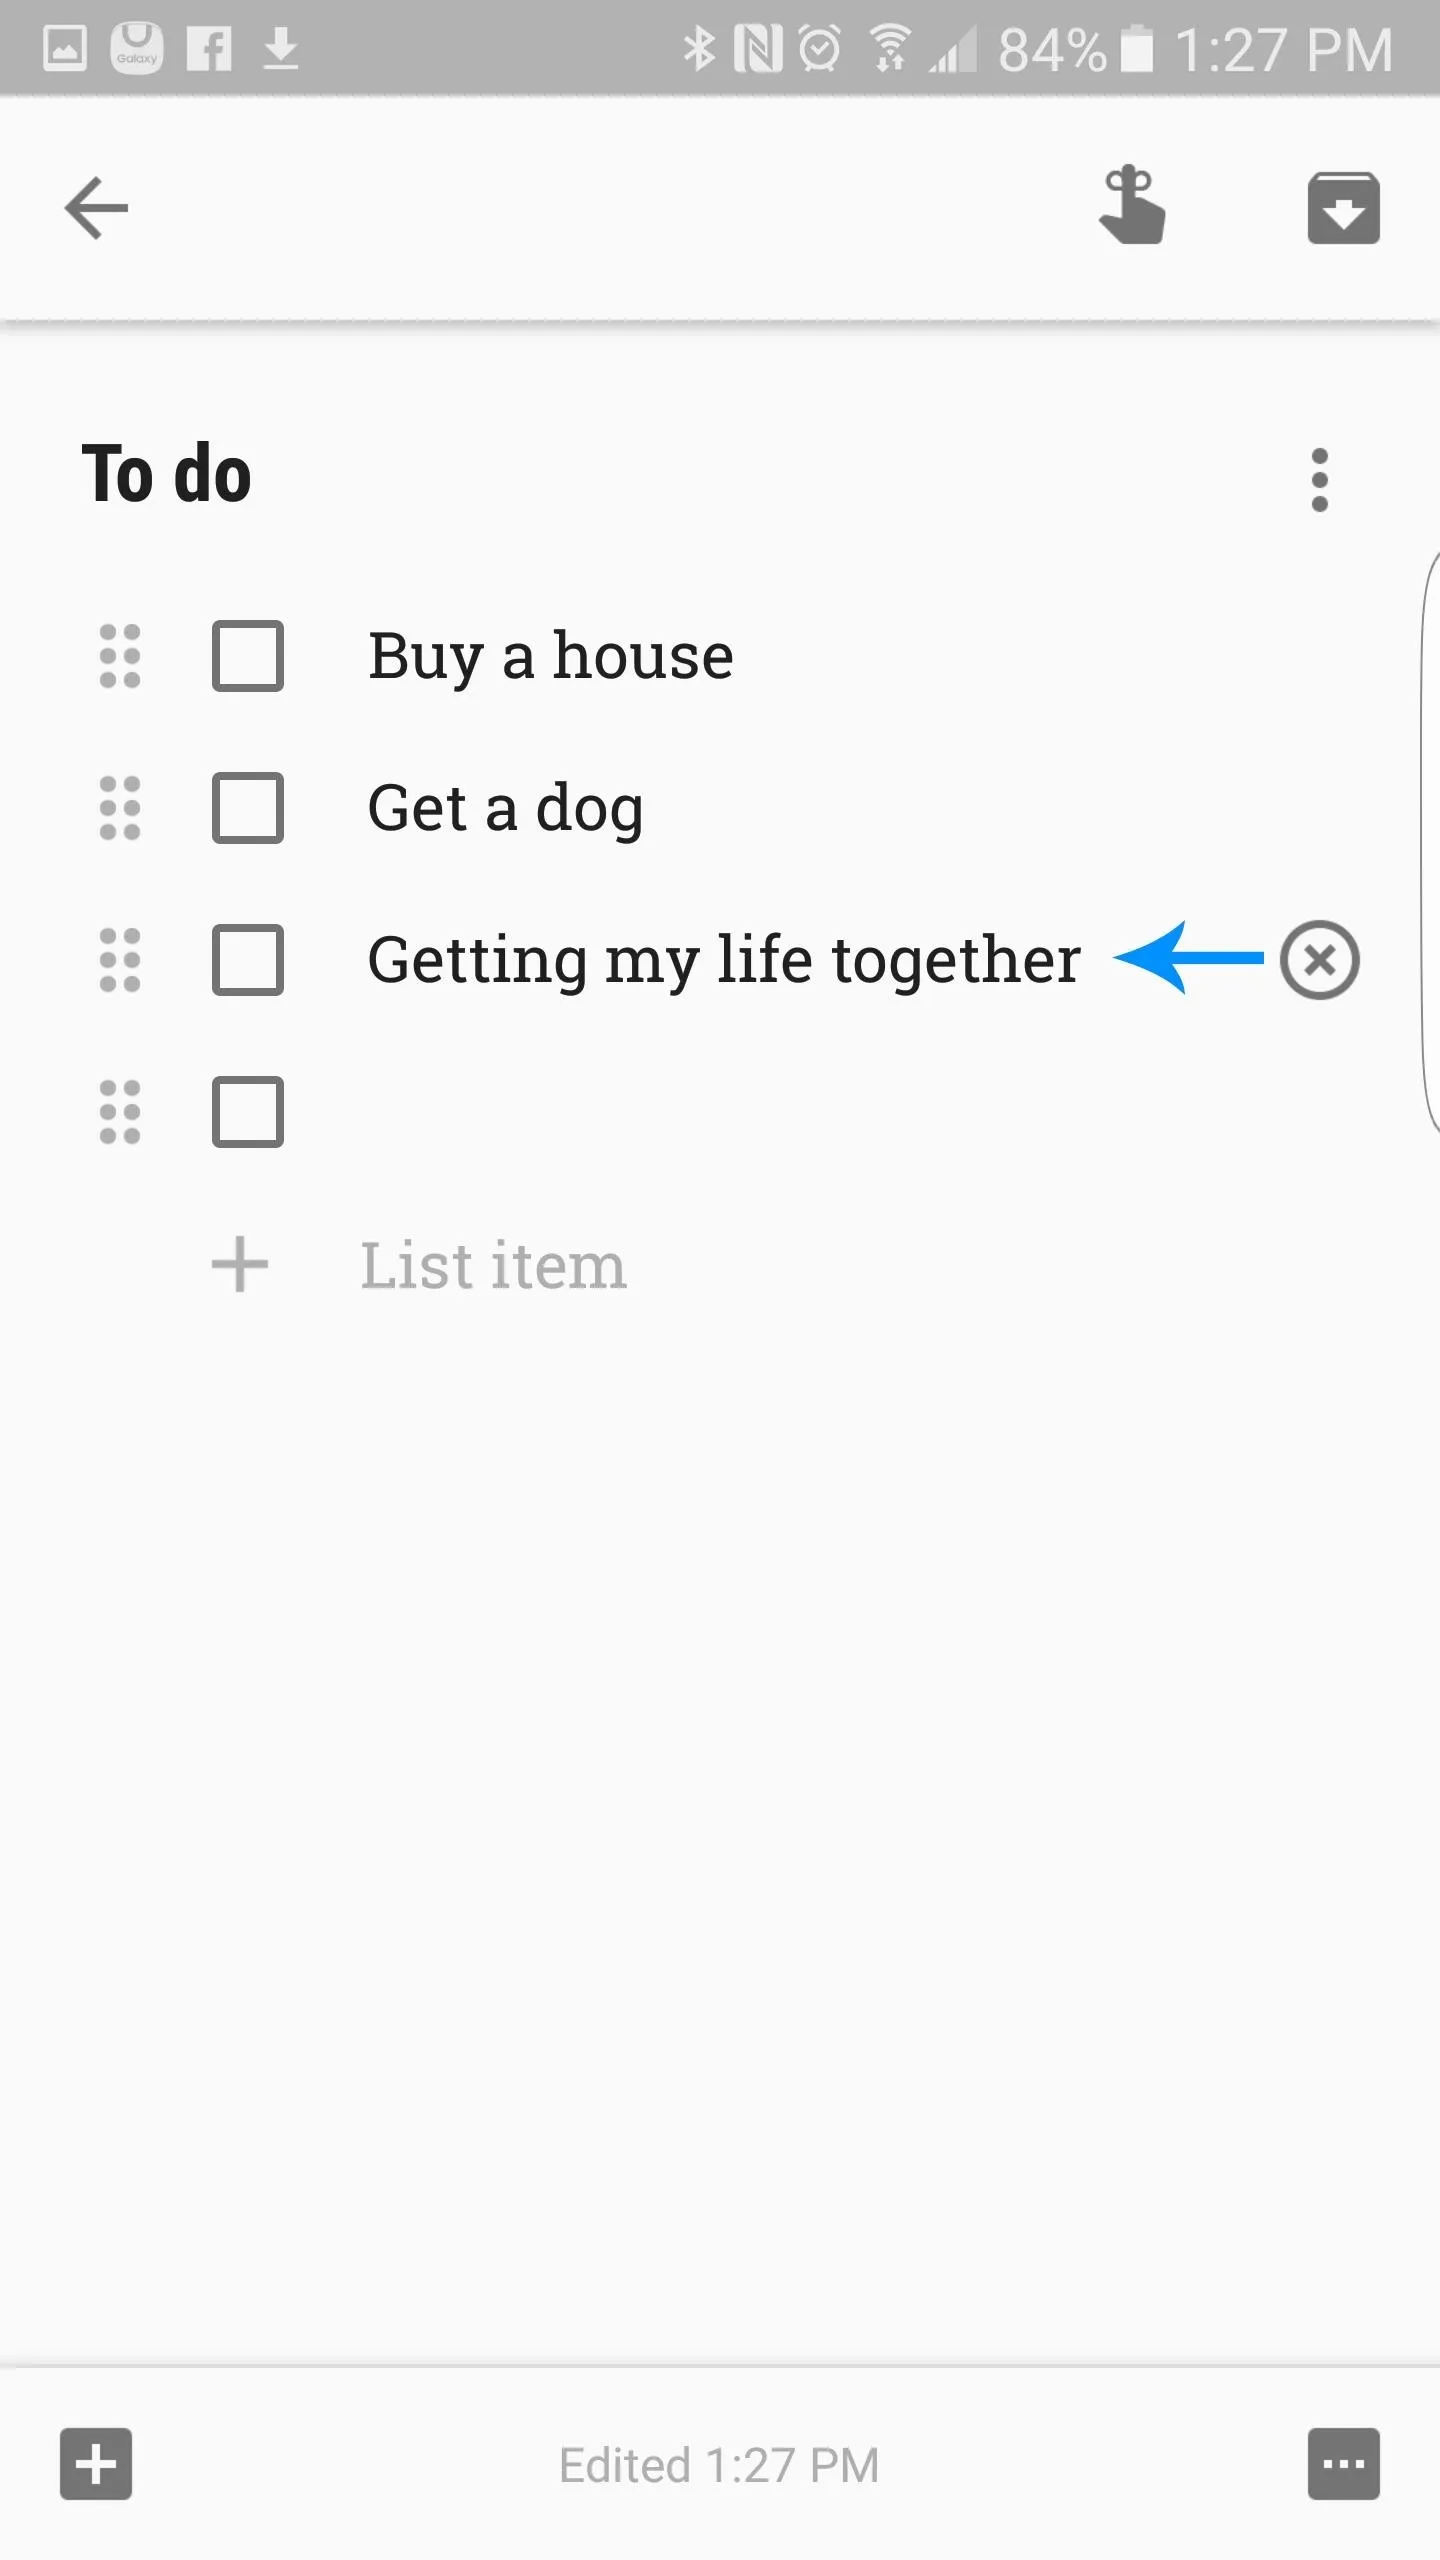


Performing these voice commands will automatically add said items to these default lists. Also, you can add items to an already existing list you made on your own. Pretty amazing right? To see how it's done, check out our guide on using voice commands in Google Keep.
6. Use Hashtags to Keep Your Notes Organized
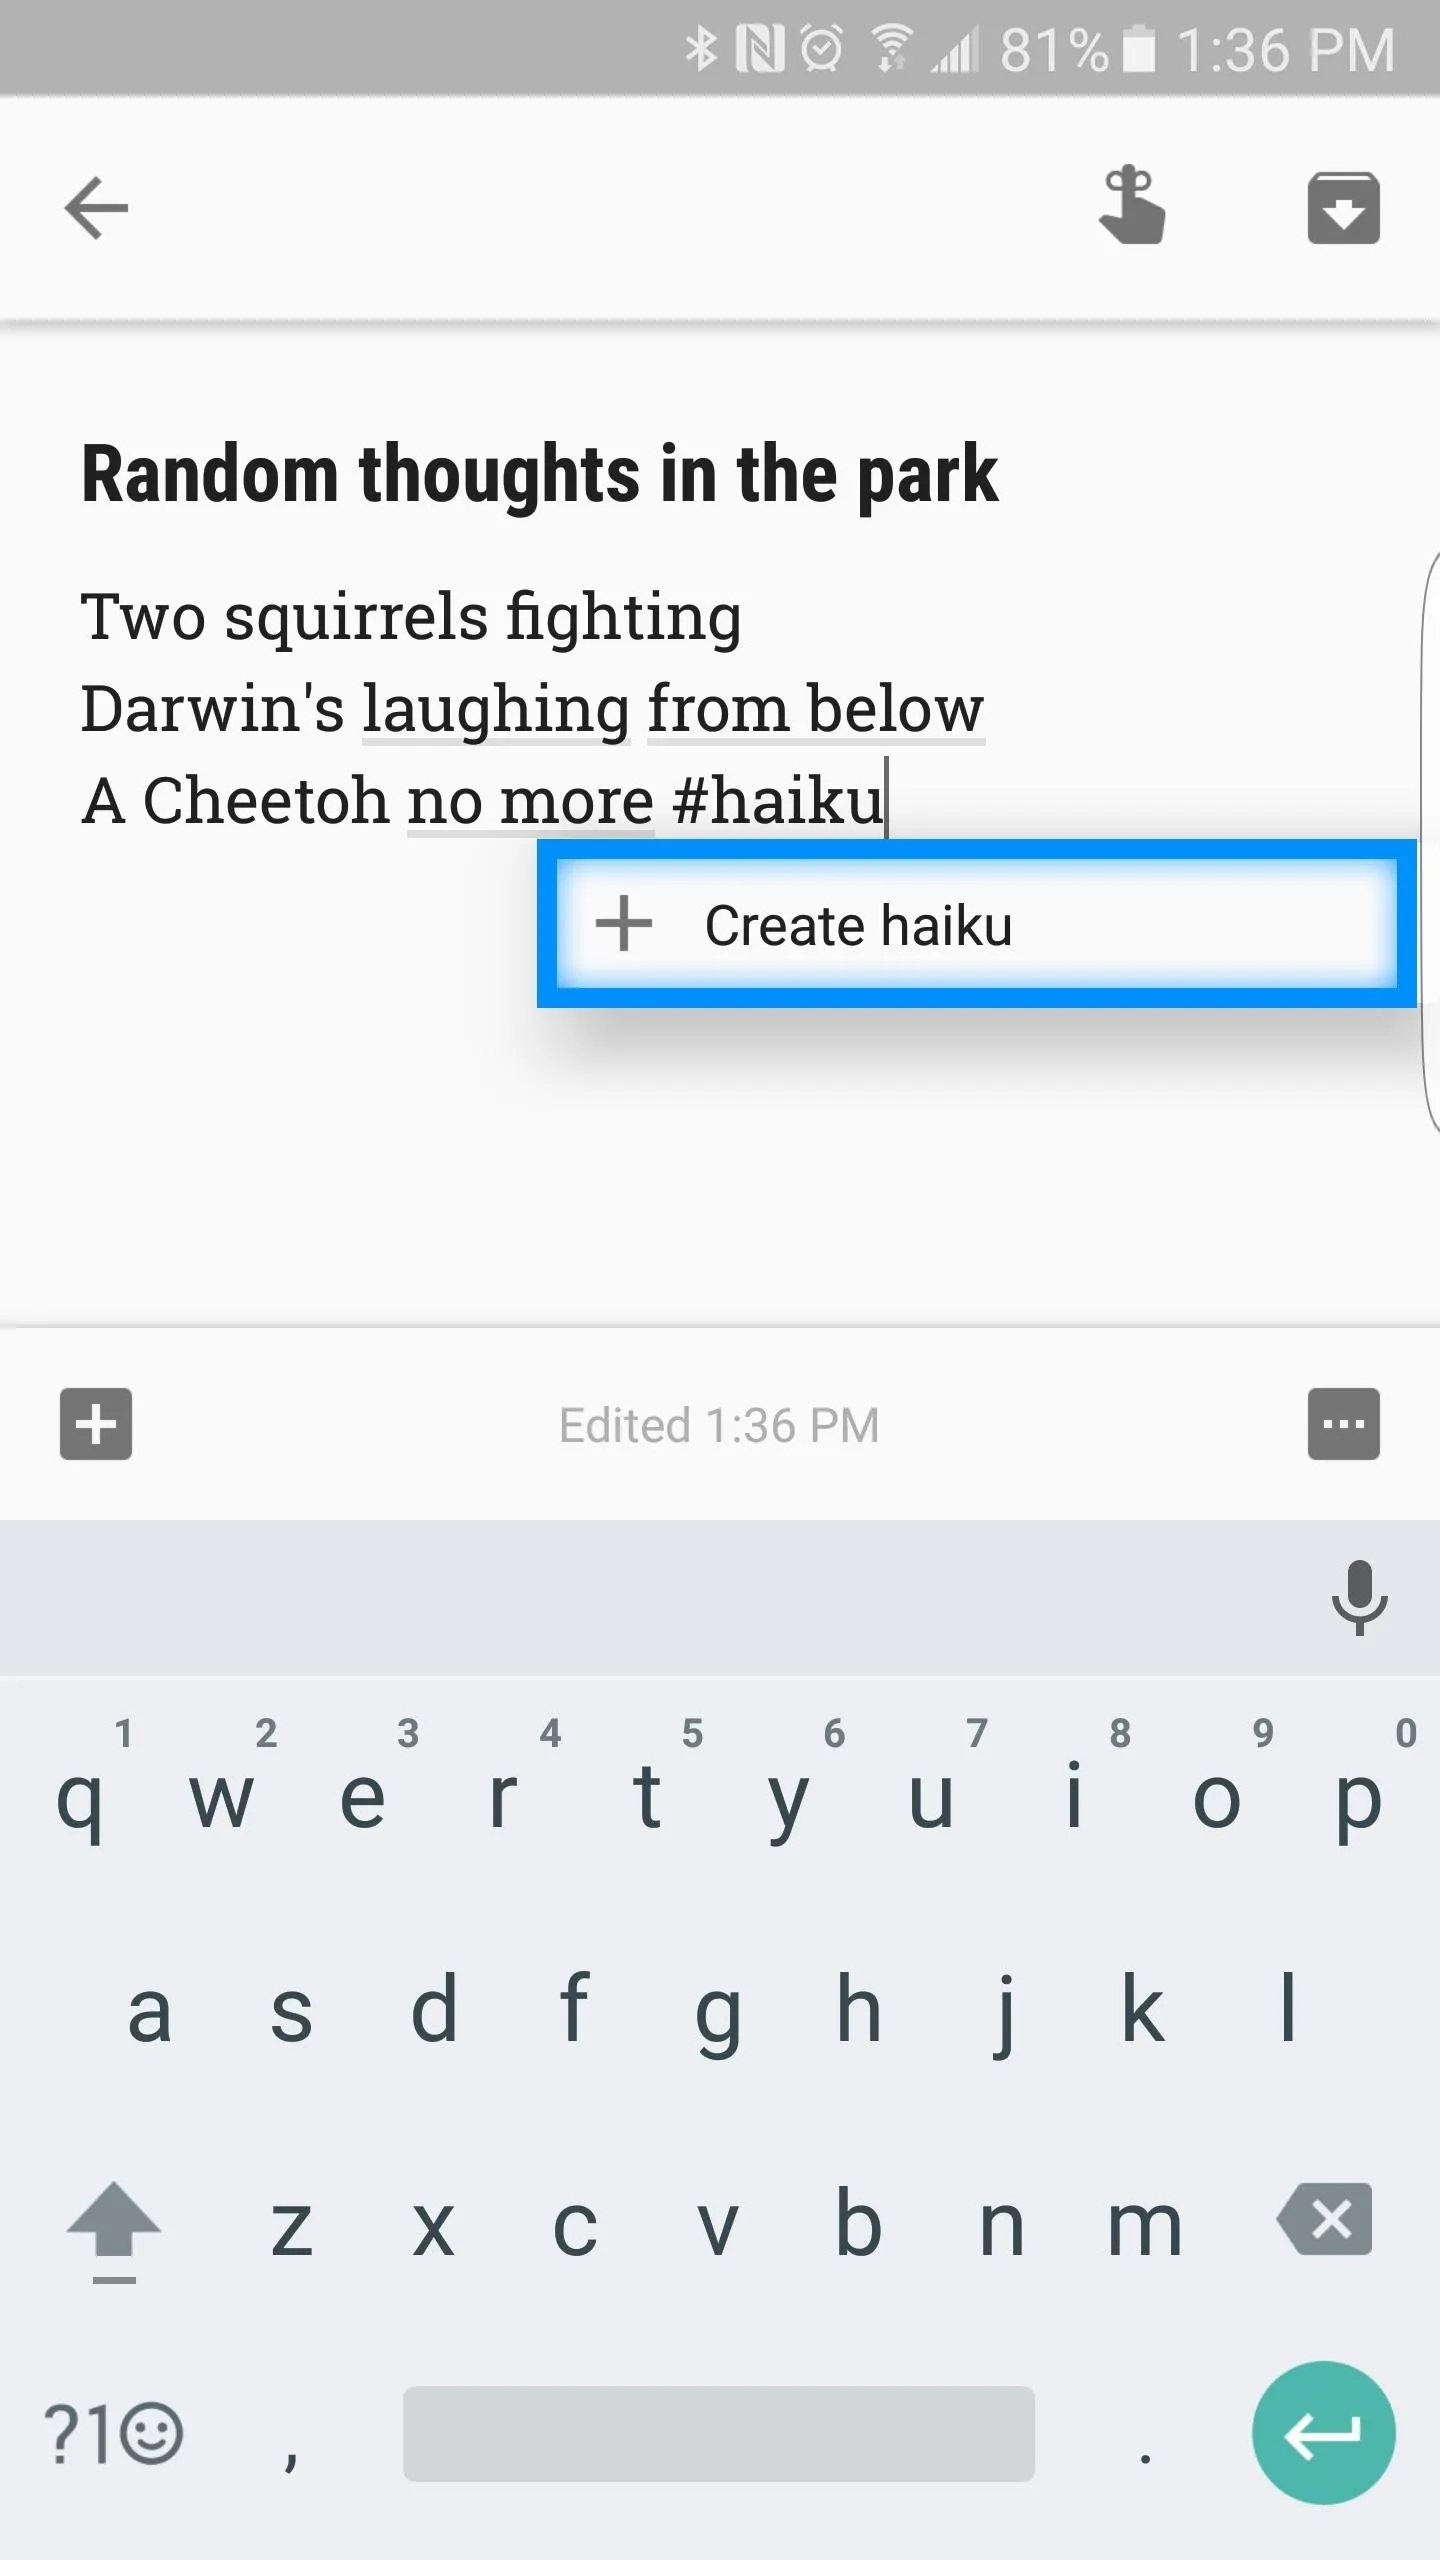
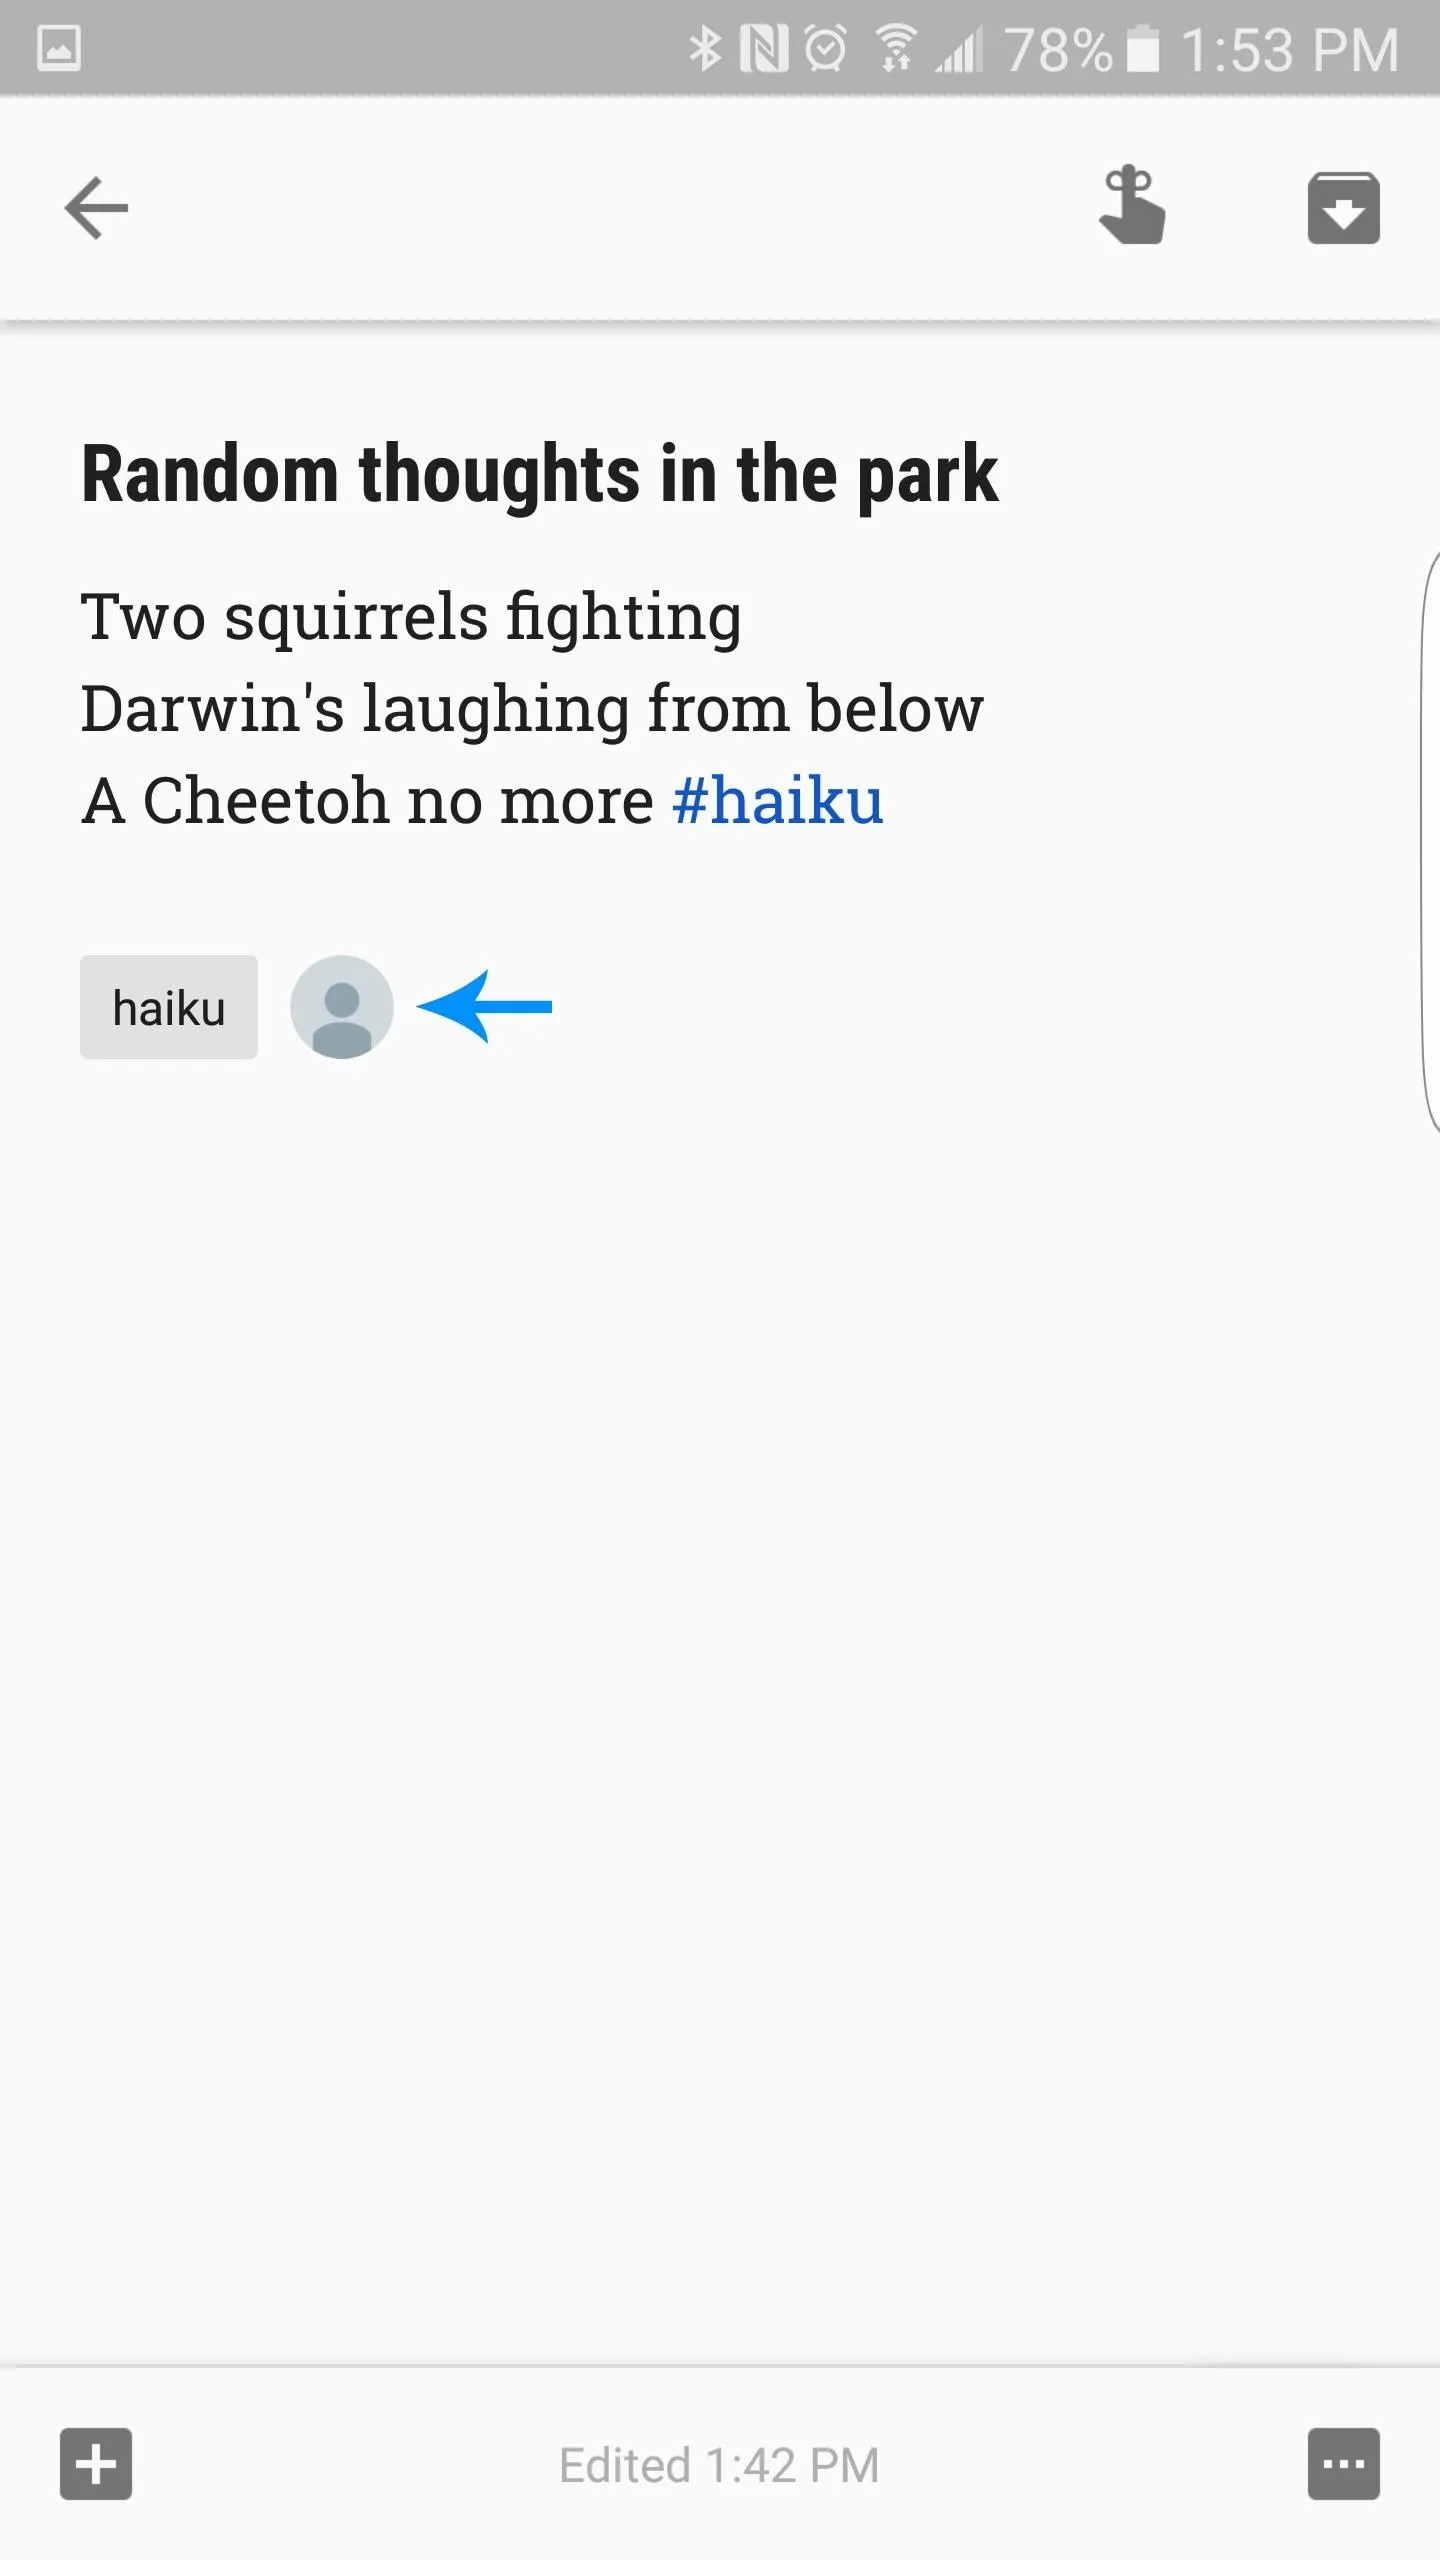
You may not be able to escape hashtags—but that's not such a bad thing. You probably know that you can create labels to help organize your notes (right?), but what you might not know is that you can quickly assign a new note to a category but simply using a hashtag.
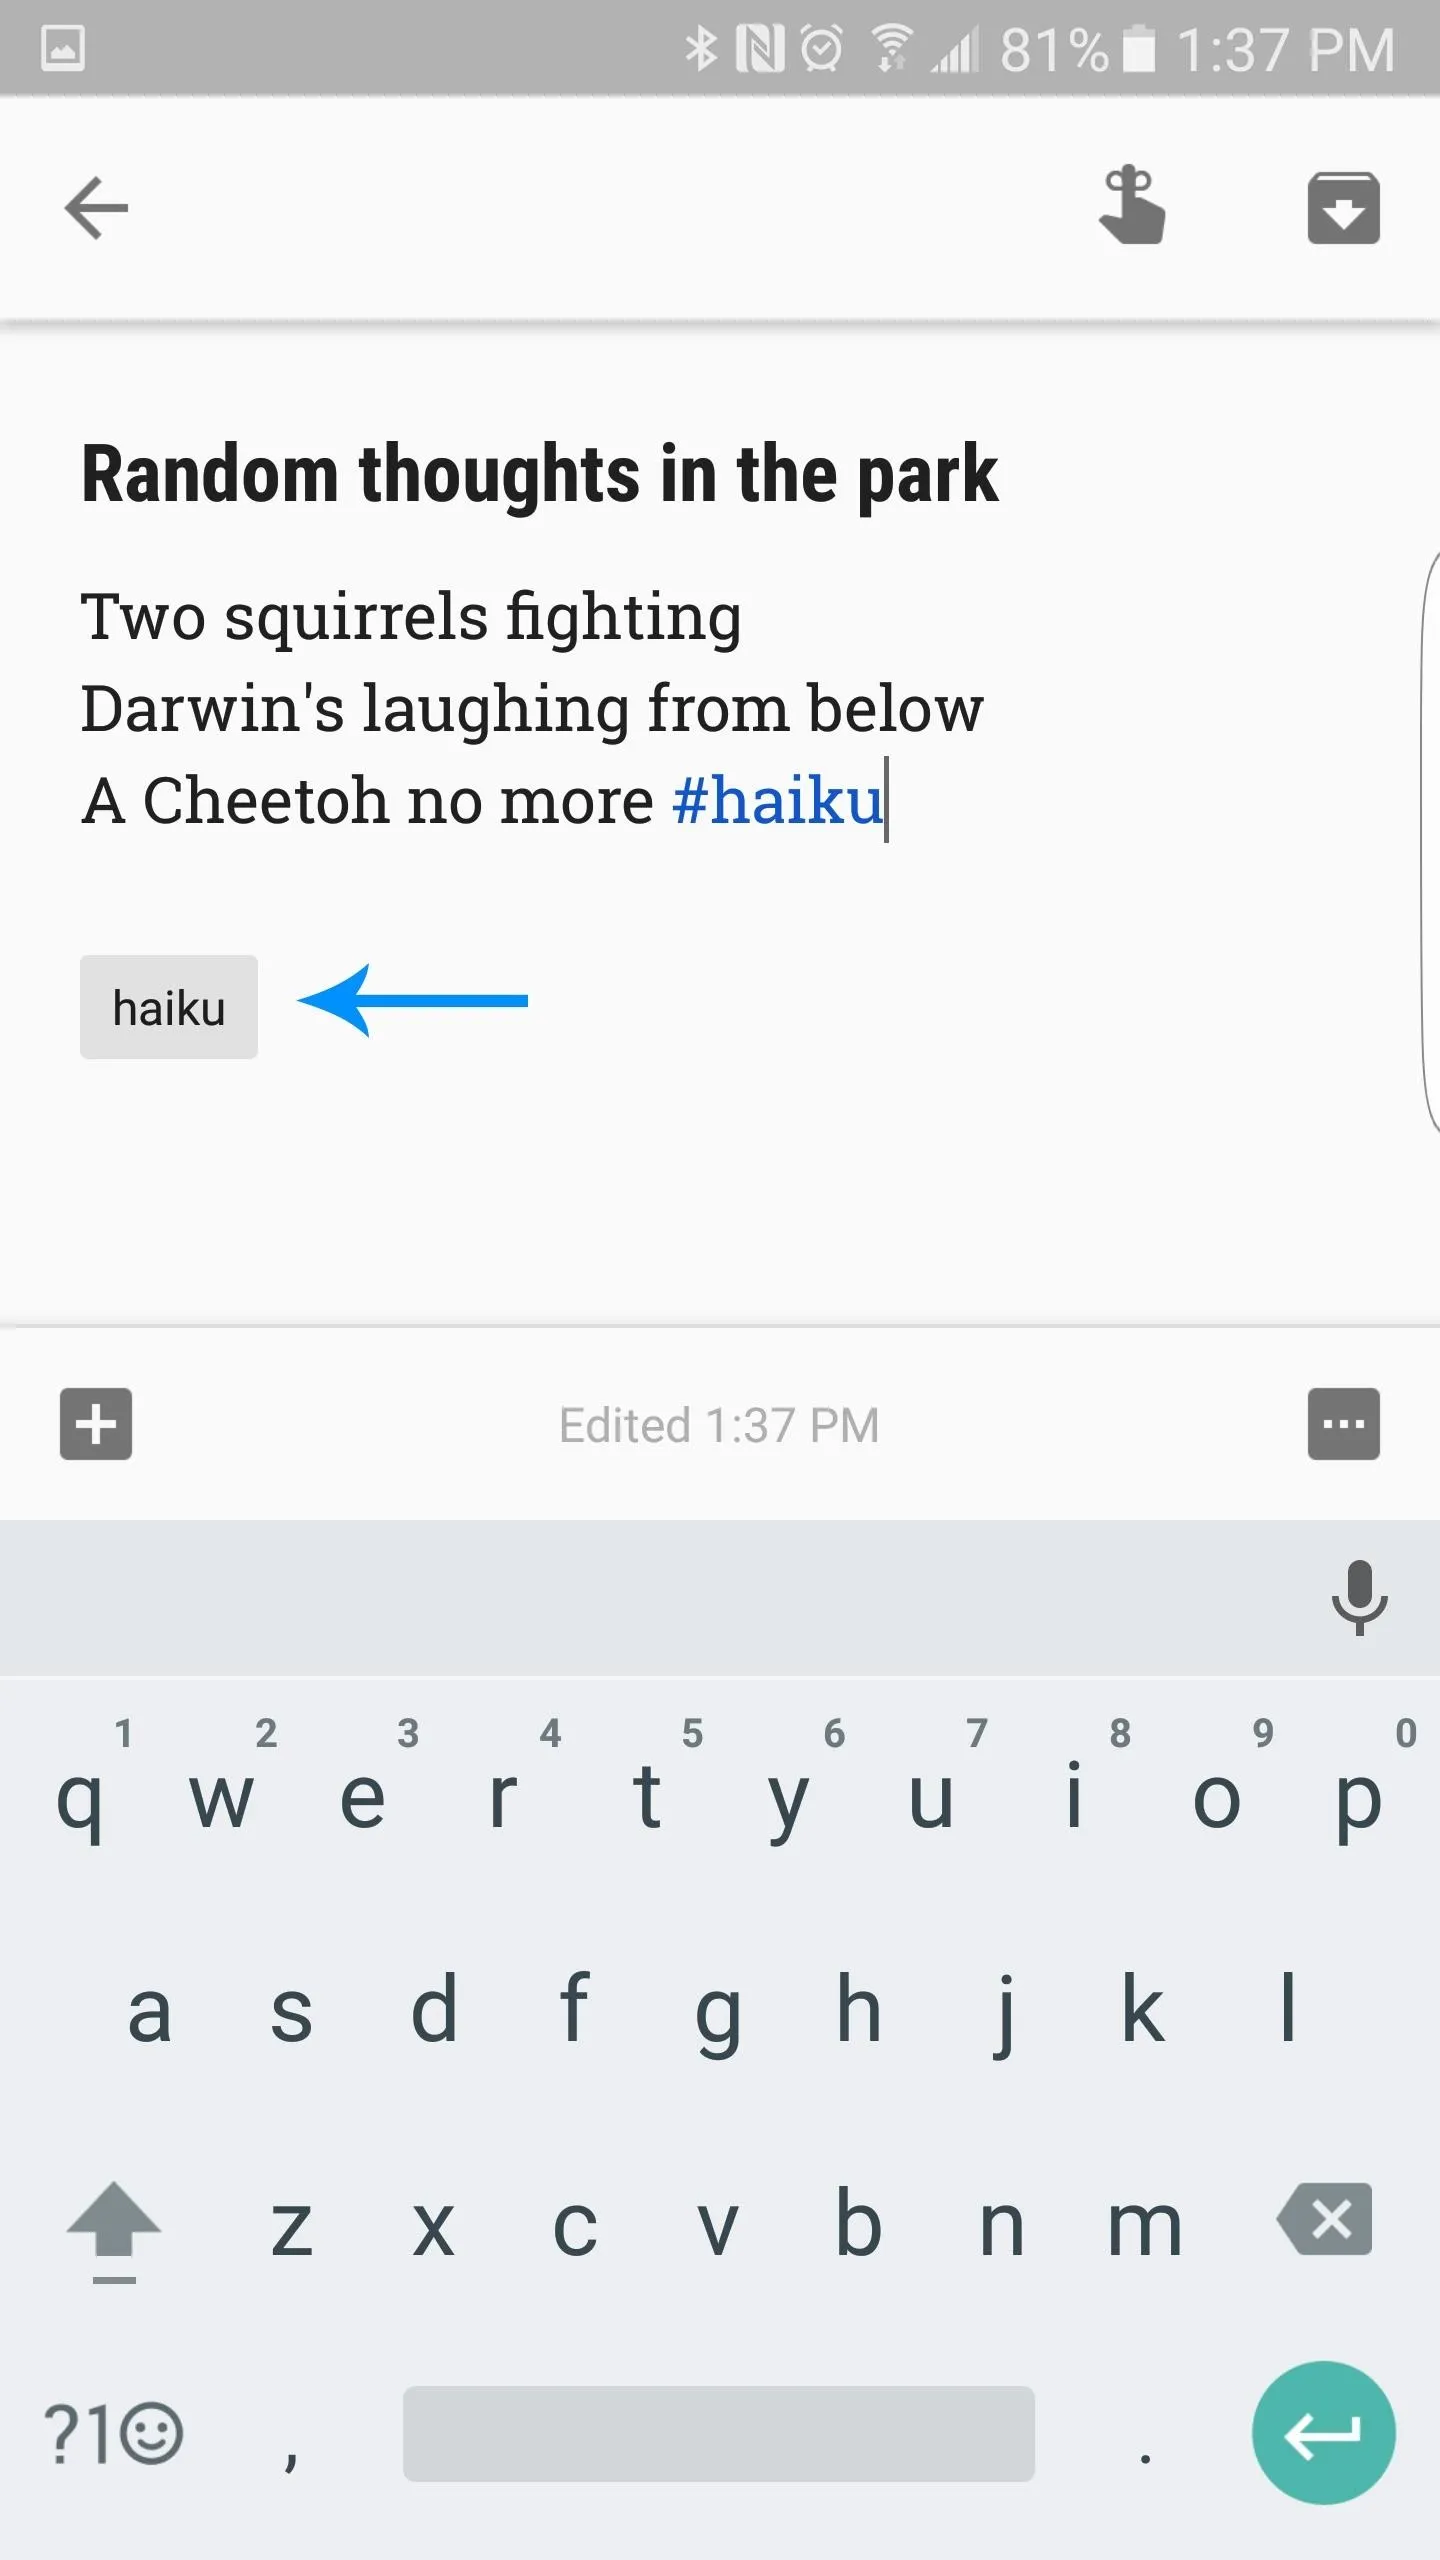
To assign a note to a particular category, simply add a hashtag at the end of the note. For example, say you want to add a brilliant thought you had for a haiku while you were watching a couple squirrels fight over a flaming hot Cheeto, and you wanted to add it to your haiku category. To do so, simply create your note as you normally would, then add #haiku at the end. This will automatically group your new note with everything else labeled as 'haiku.'


7. Copy Notes to Google Docs
There comes a time in every note's life when they outgrow their humble beginnings and need more space to spread their colorful wings. When one of your notes reaches this point of maturity, Google Docs is ready to save the day. All notes can be copied to Google Docs where you can then format and add content as you normally would with any other document.
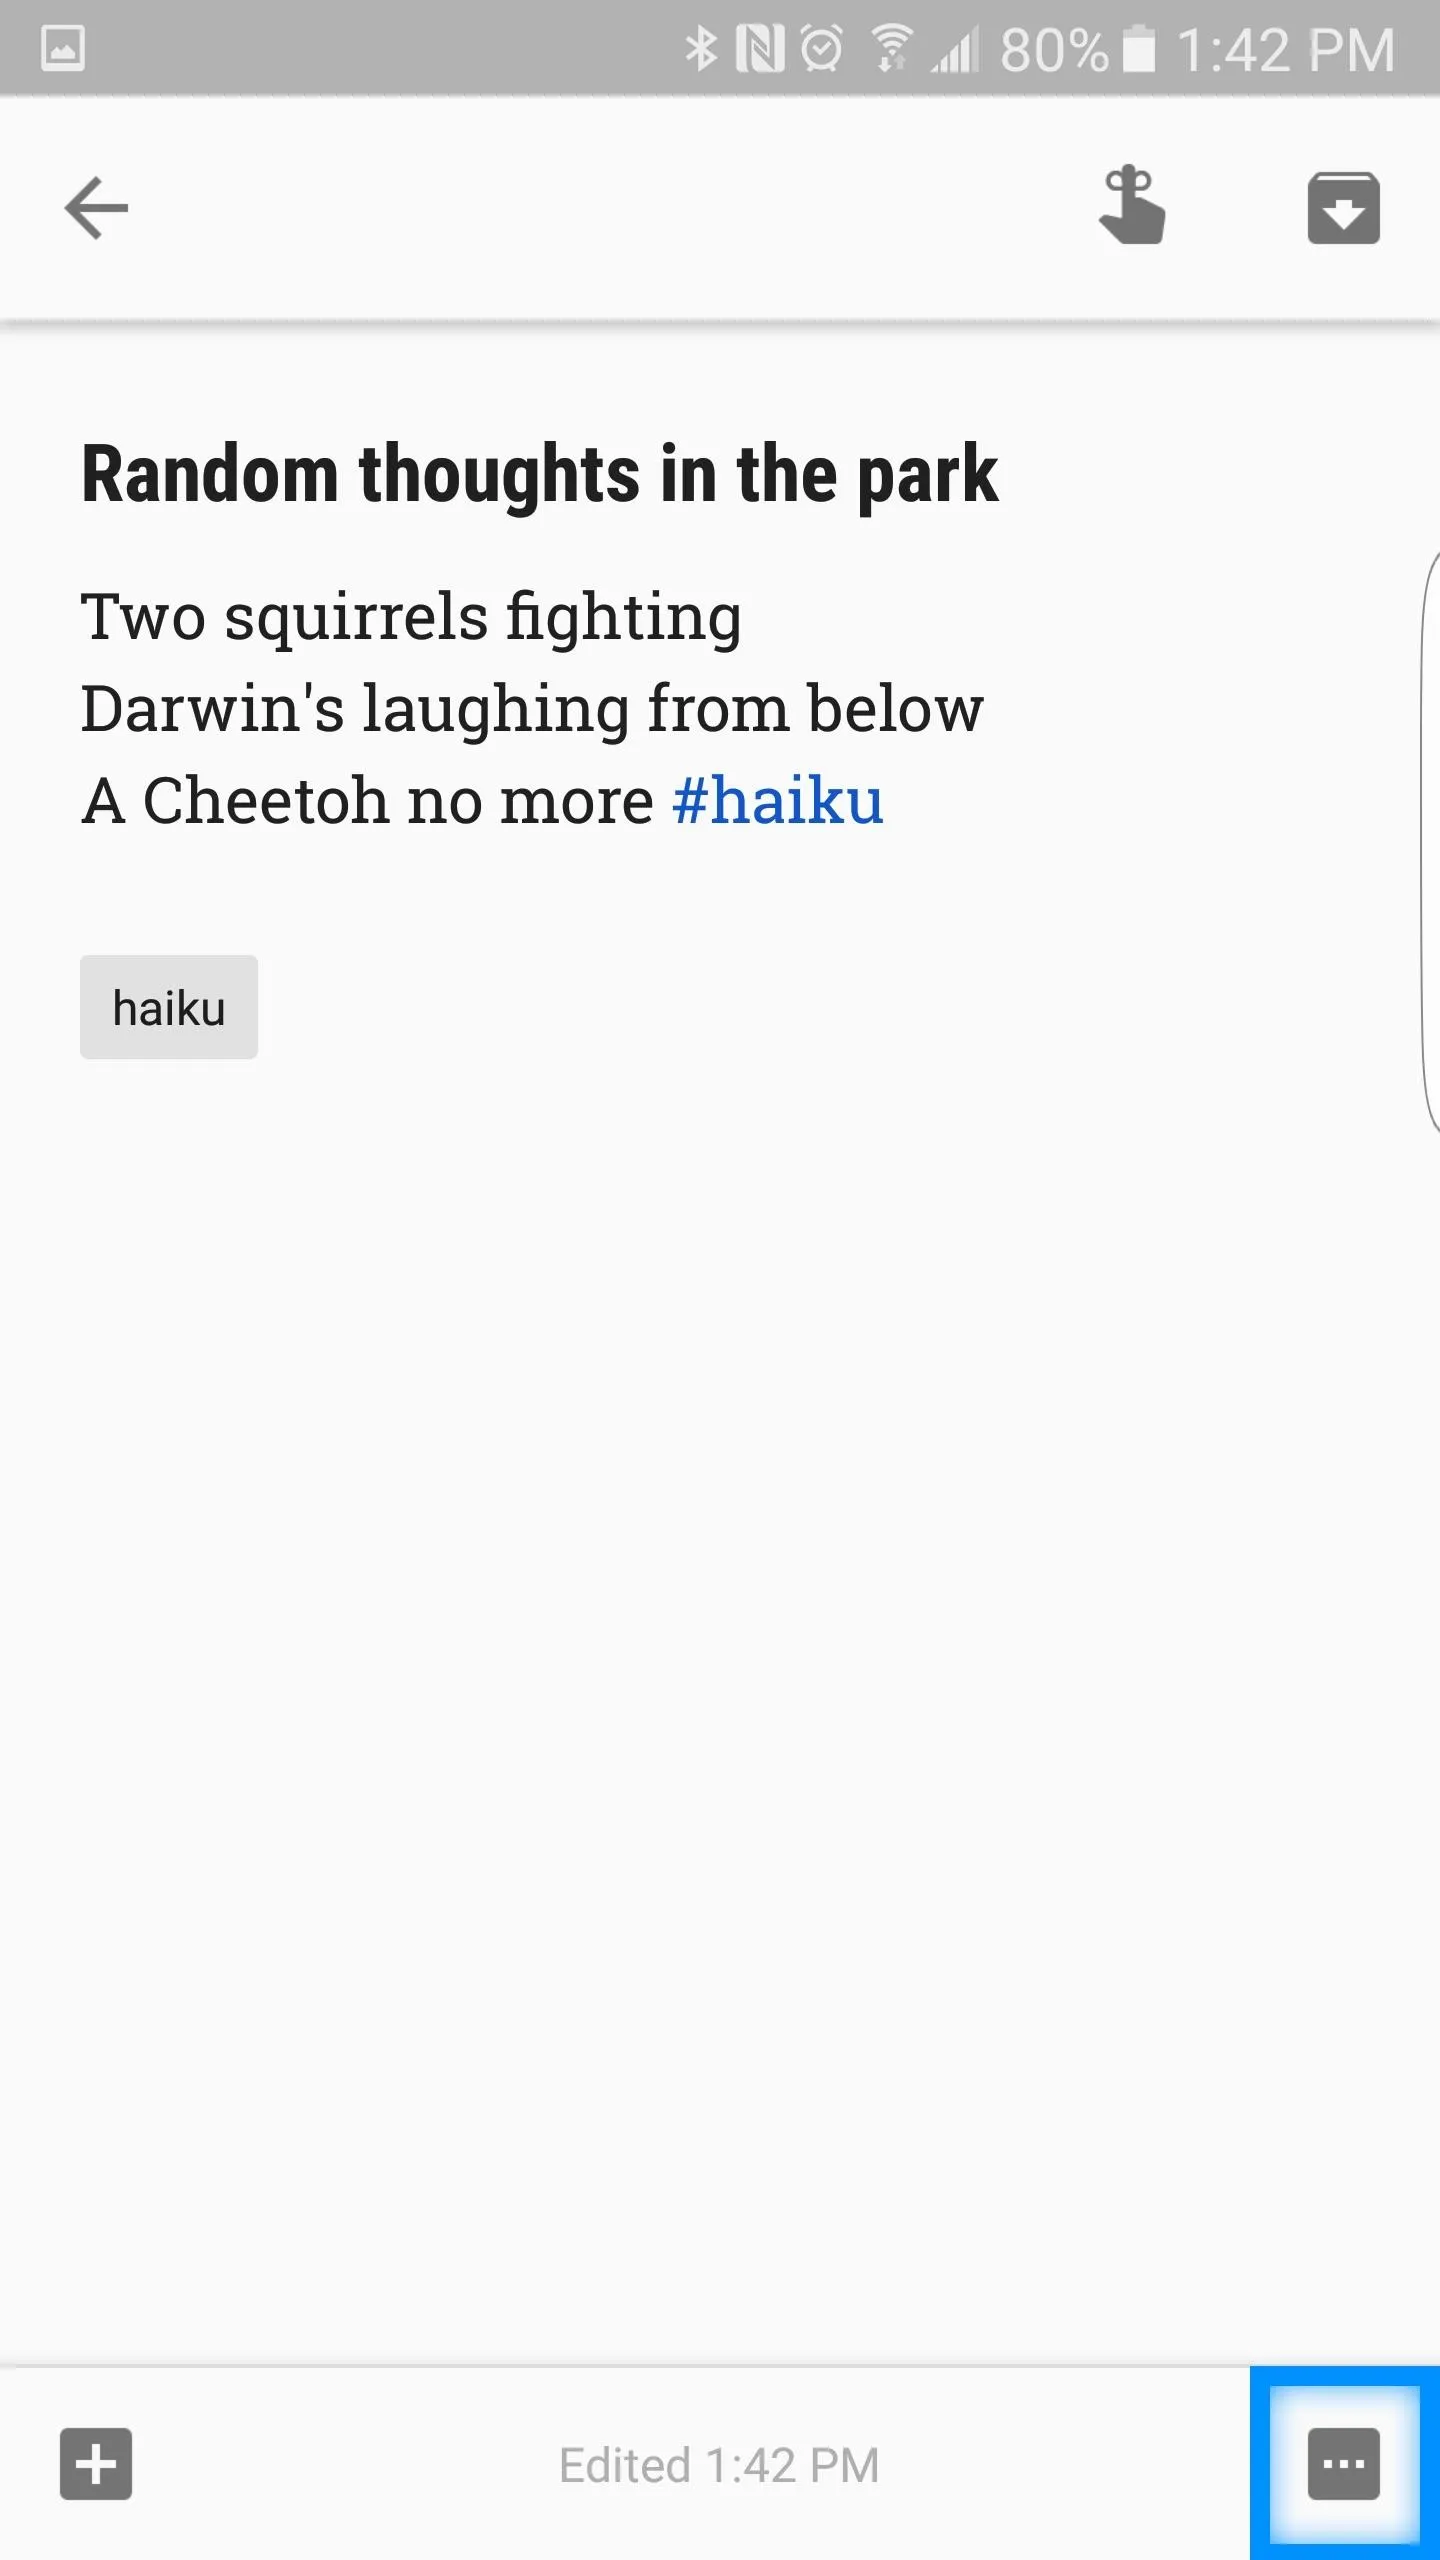
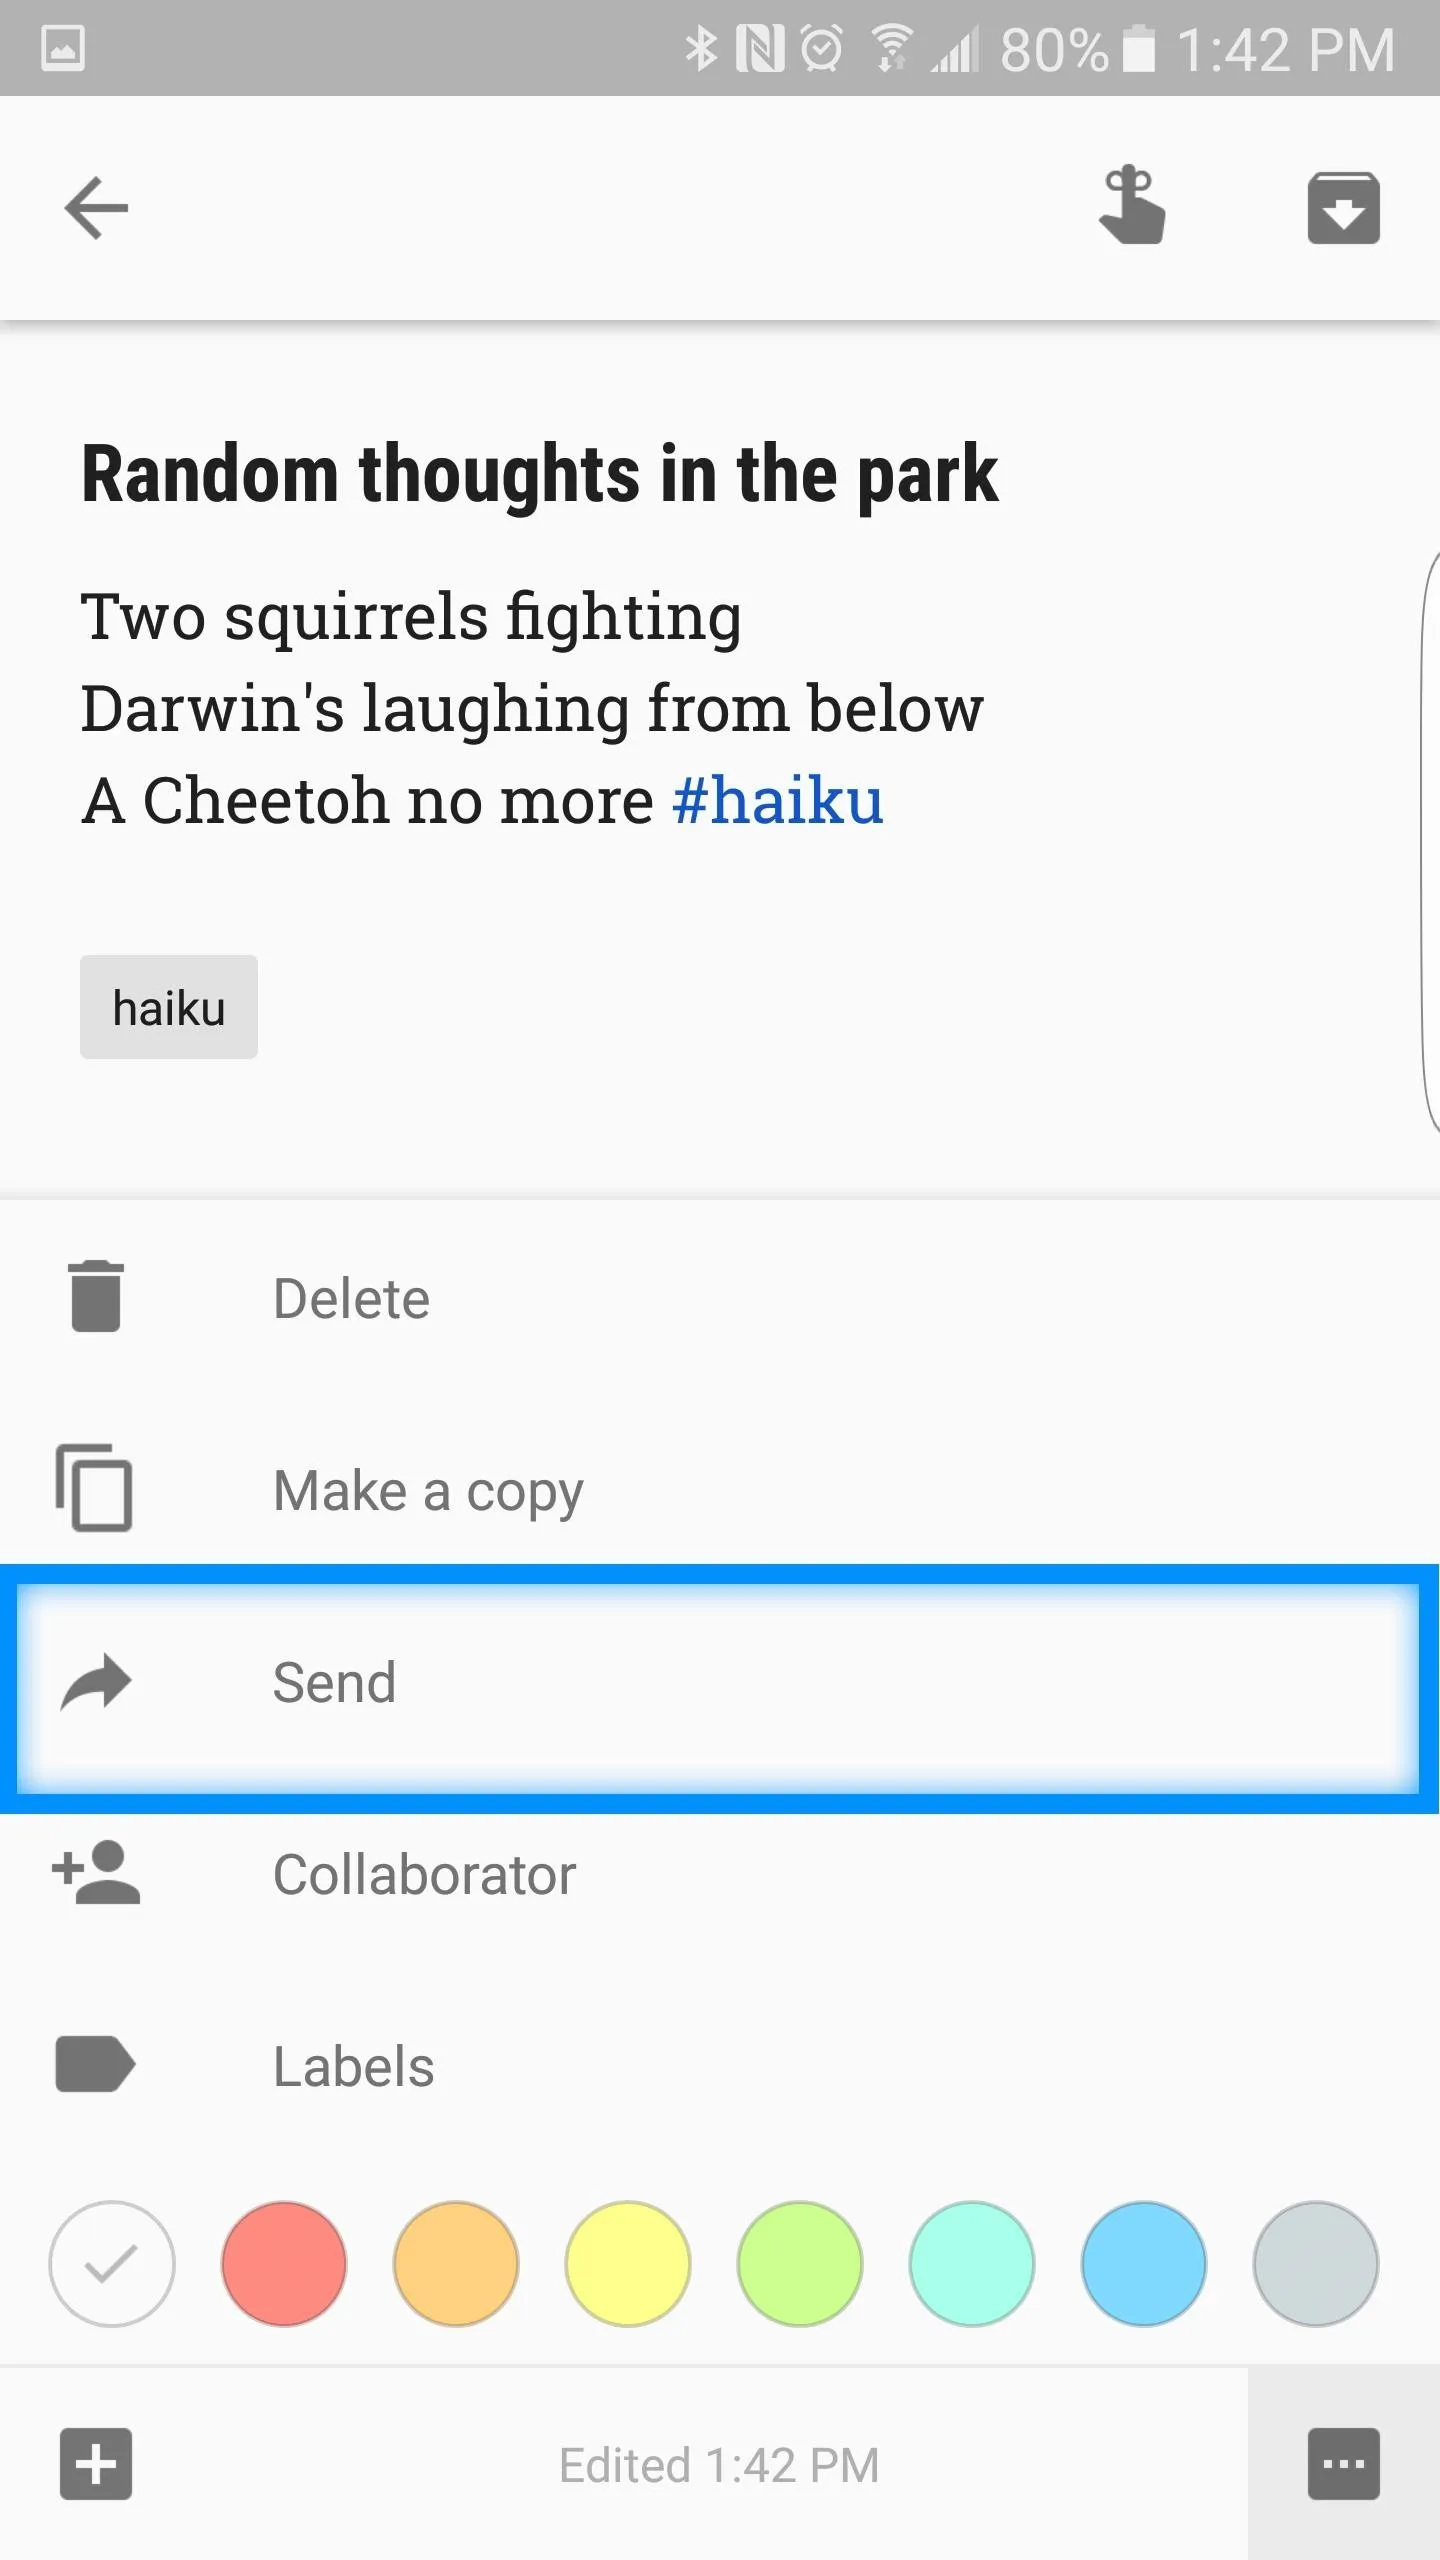
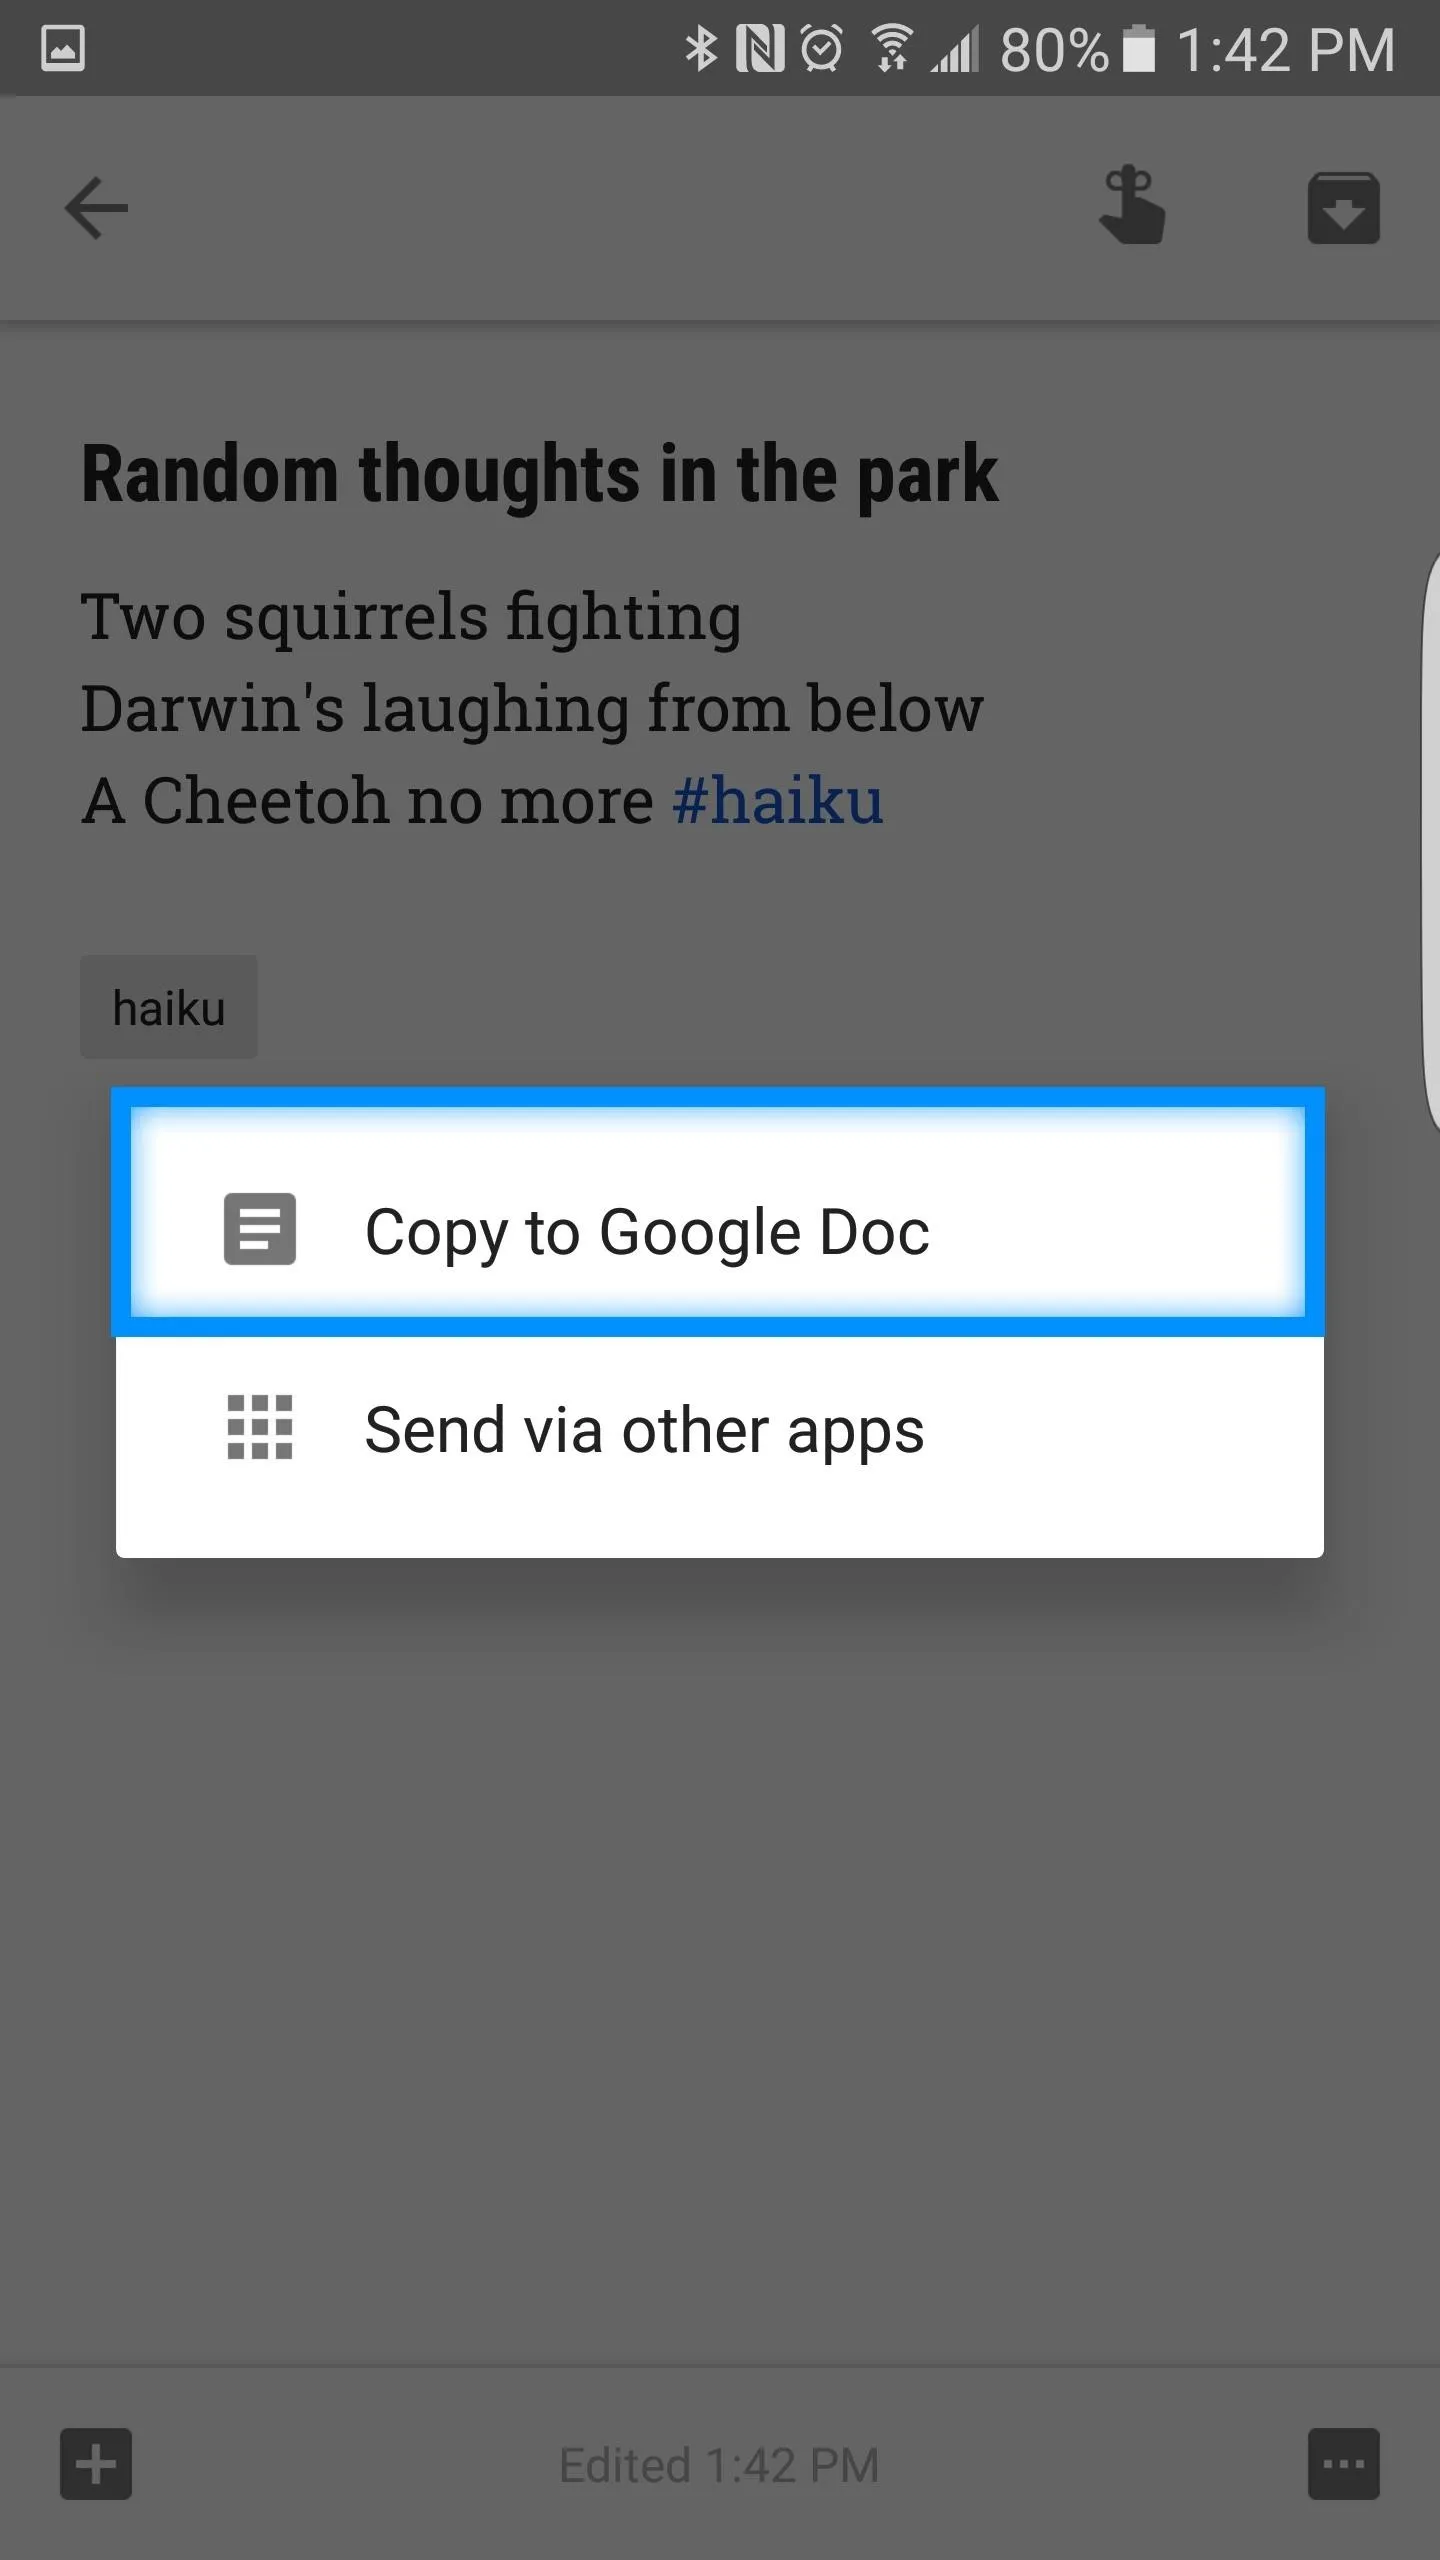
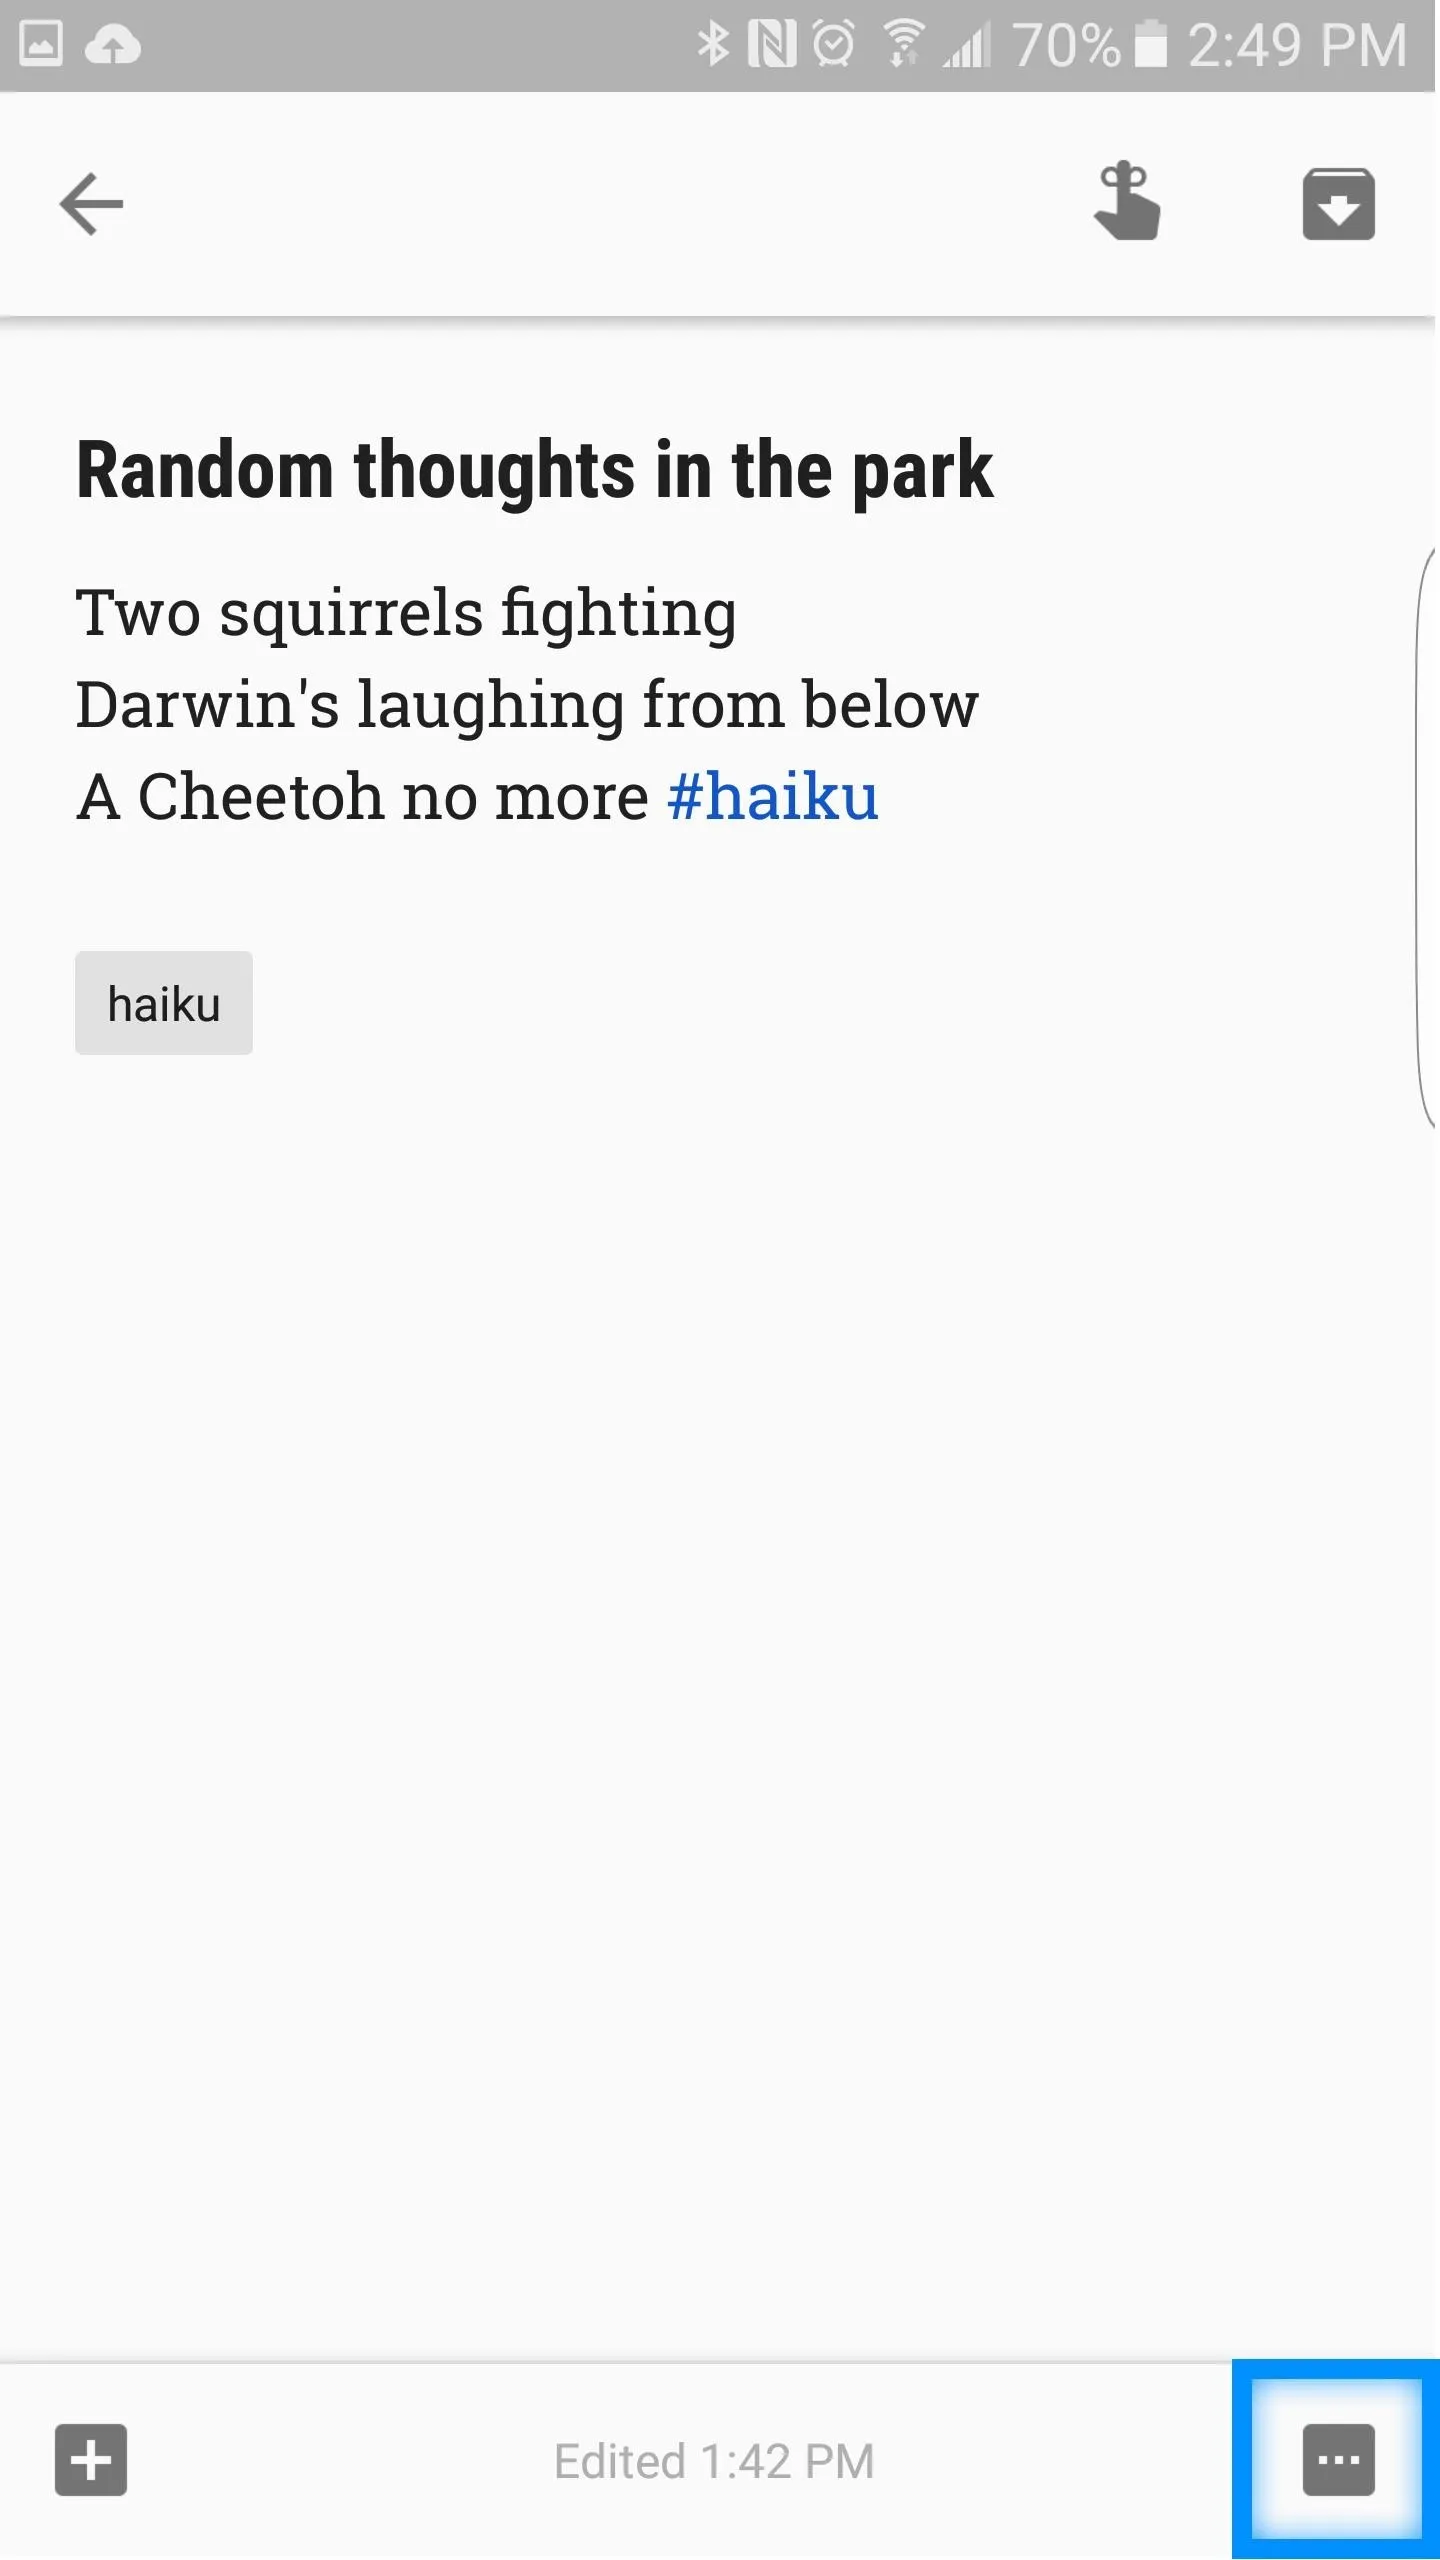
To copy a Google Keep note to a Google doc, simply select your note, press the three-dots icon on the bottom right, select Send, then Copy to Google Doc.


8. Collaborate with Friends, Family, & Colleagues
For any note, you can also collaborate with a friend, family member, colleague... whoever. Collaborating on a note will allow the invited parties to add, edit, and delete note entries as they see fit. This is especially useful for lists such as a 'Camping Shopping List' where multiple parties might want to keep track of items needed for camping.
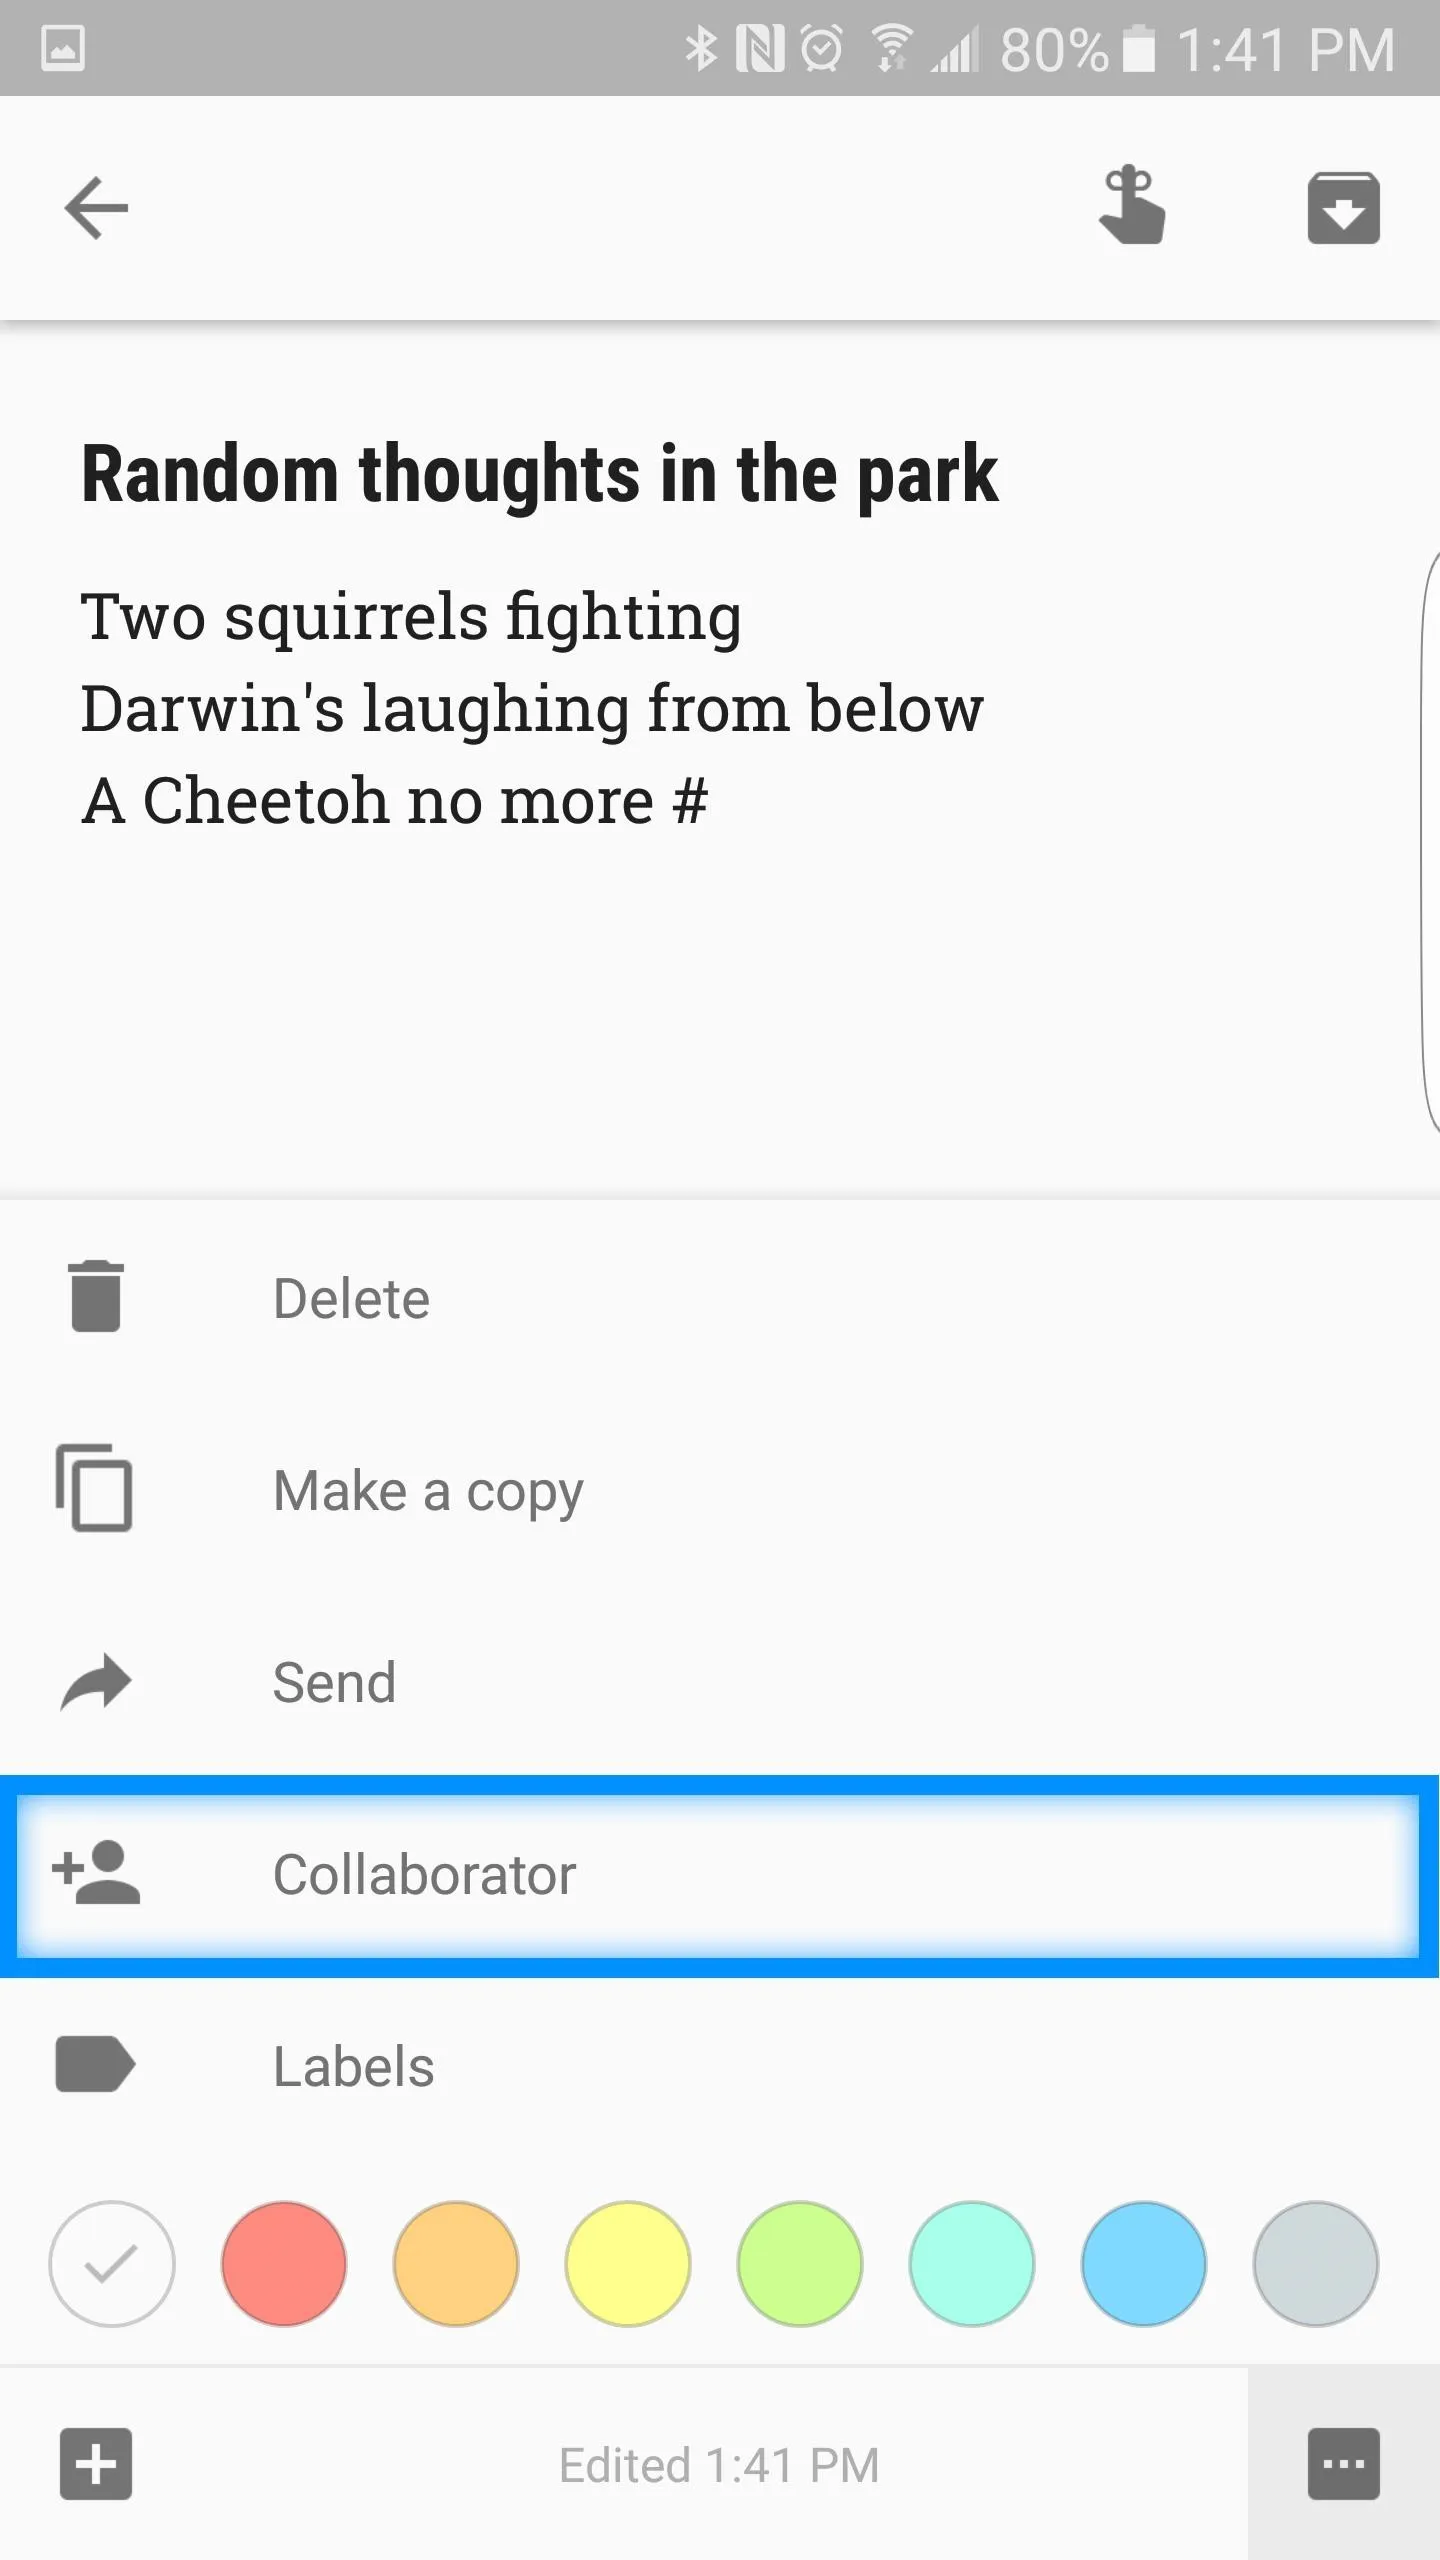
To collaborate with a friend or family member, simply select the note you want to collaborate on, select the three-dots icon, then Collaborator, and choose who you want to add.


9. Recover a Deleted Note
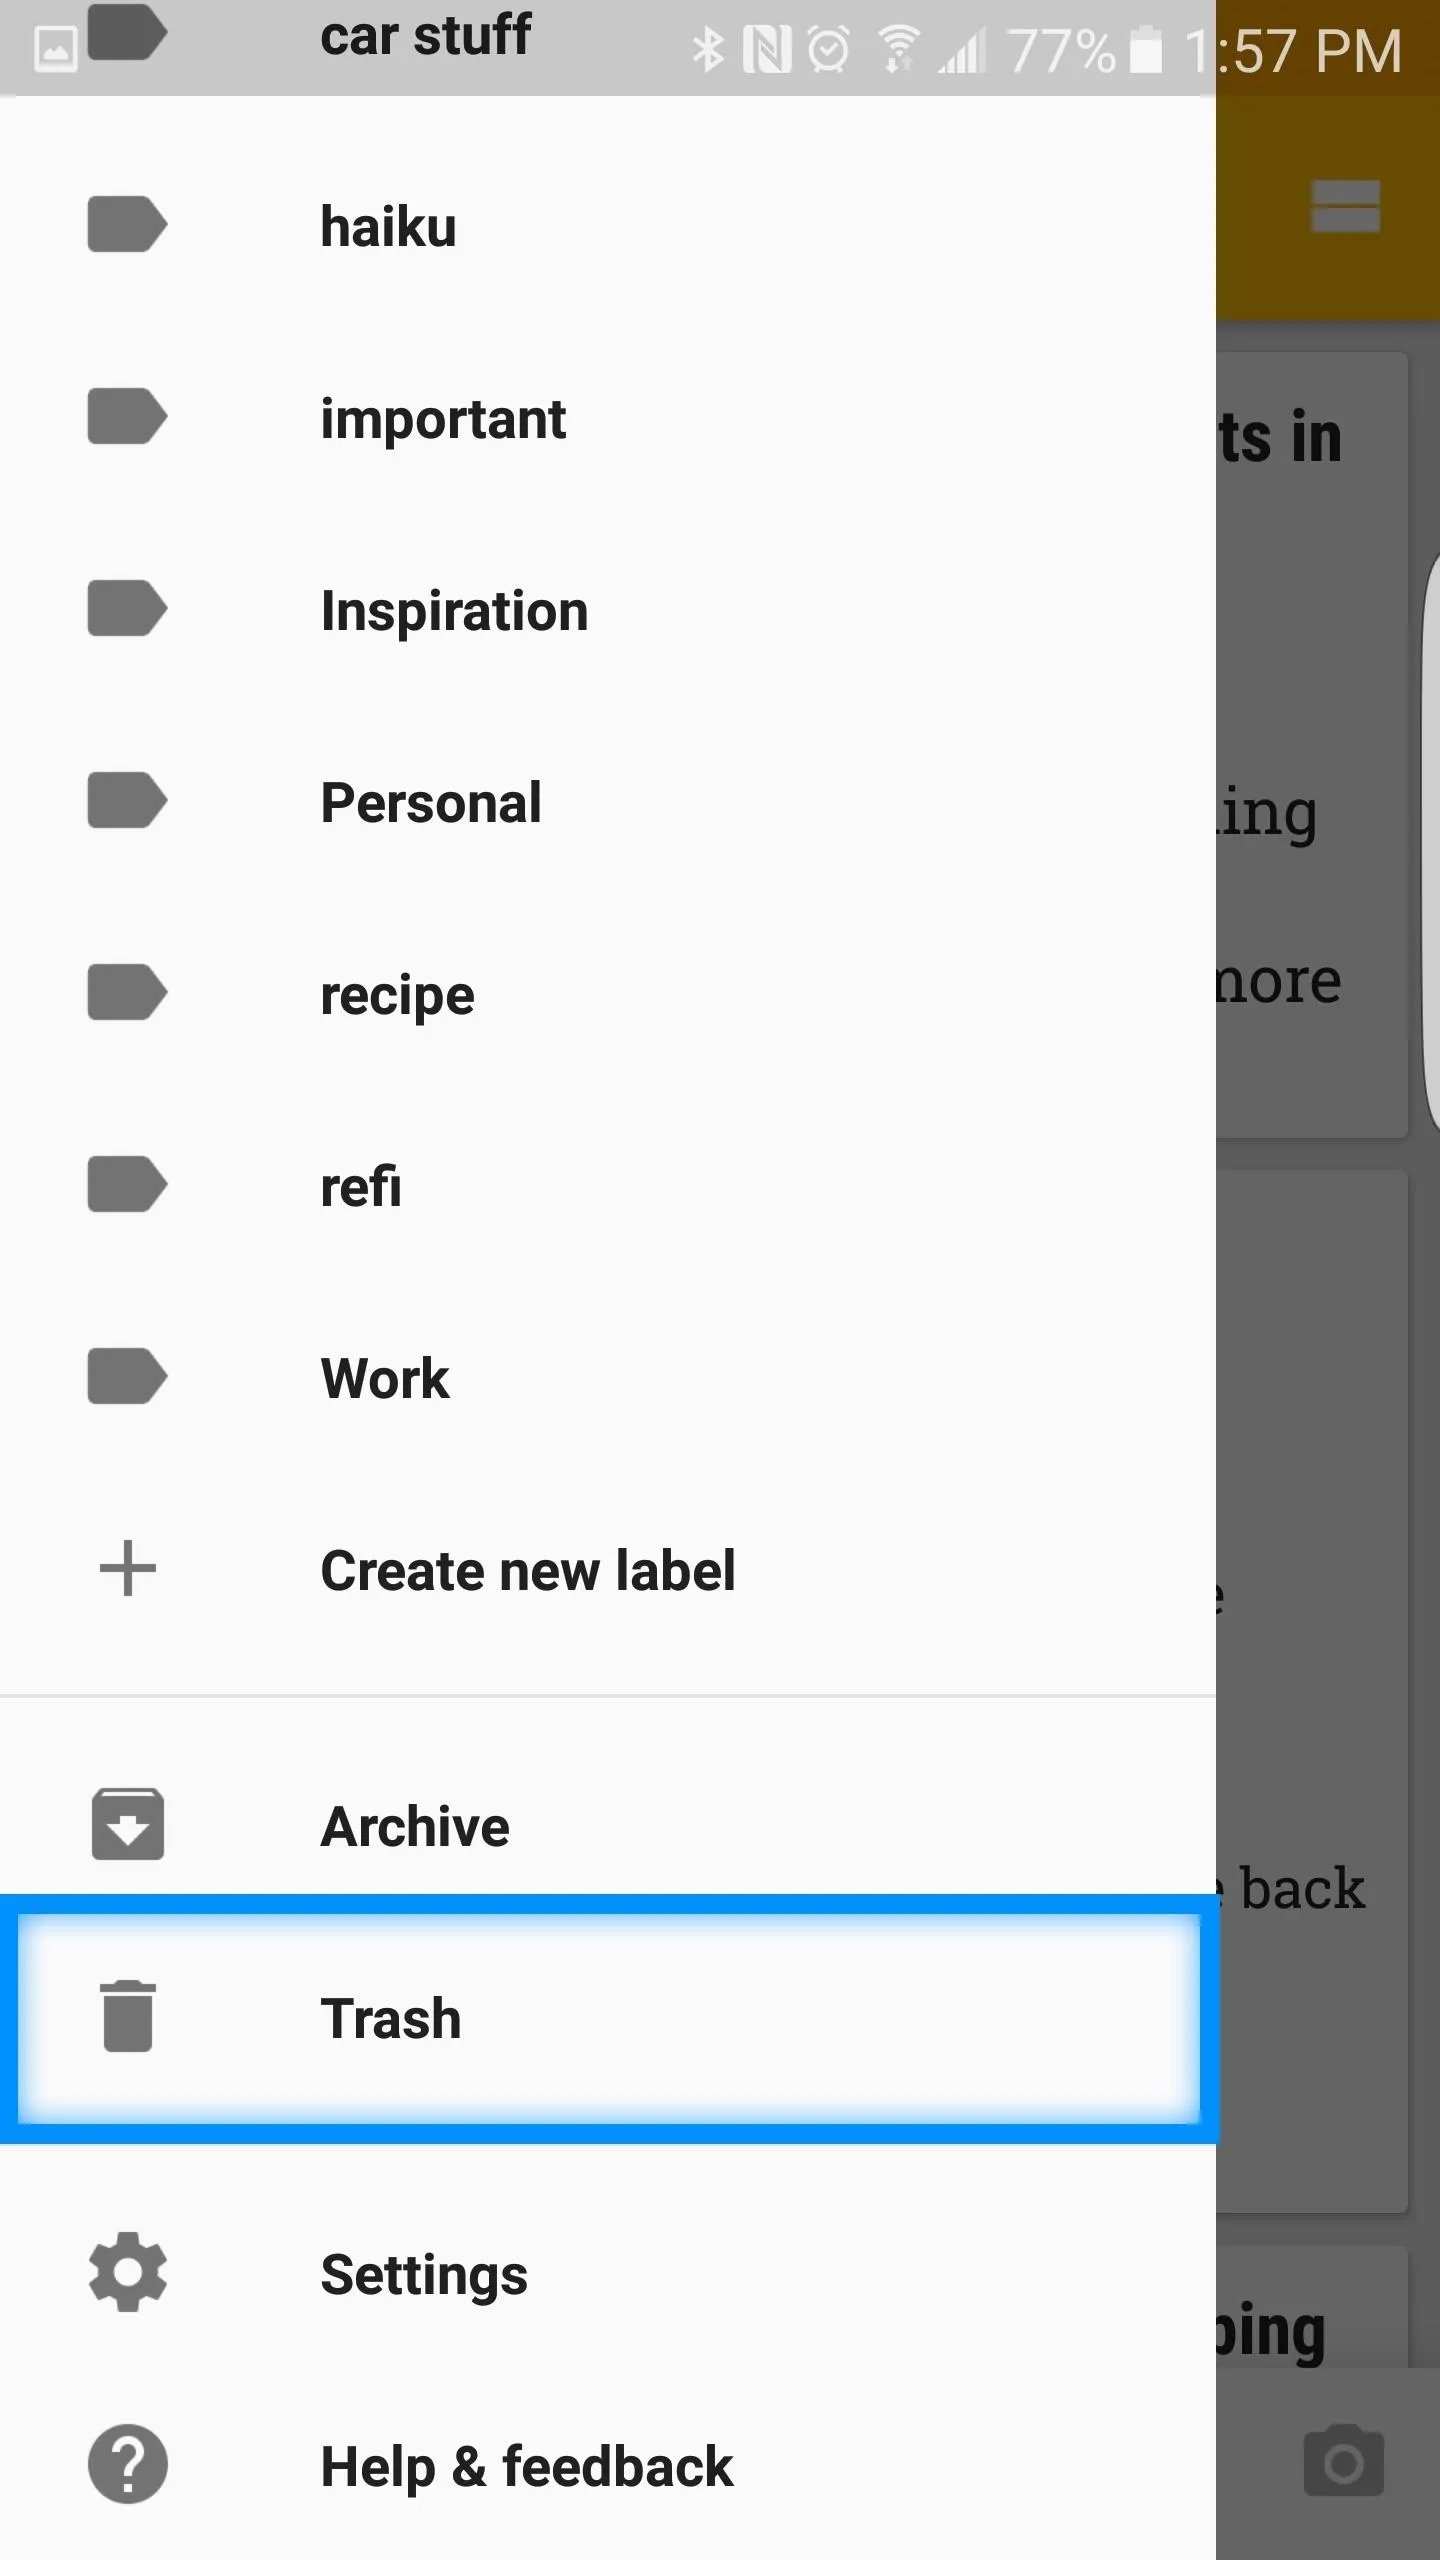
If you accidentally deleted a note that contained valuable information, there is a way to recover it. Simply swipe from the left to bring out the Google Keep menu, then navigate to the Trash folder. Here, you will find all of your deleted notes.
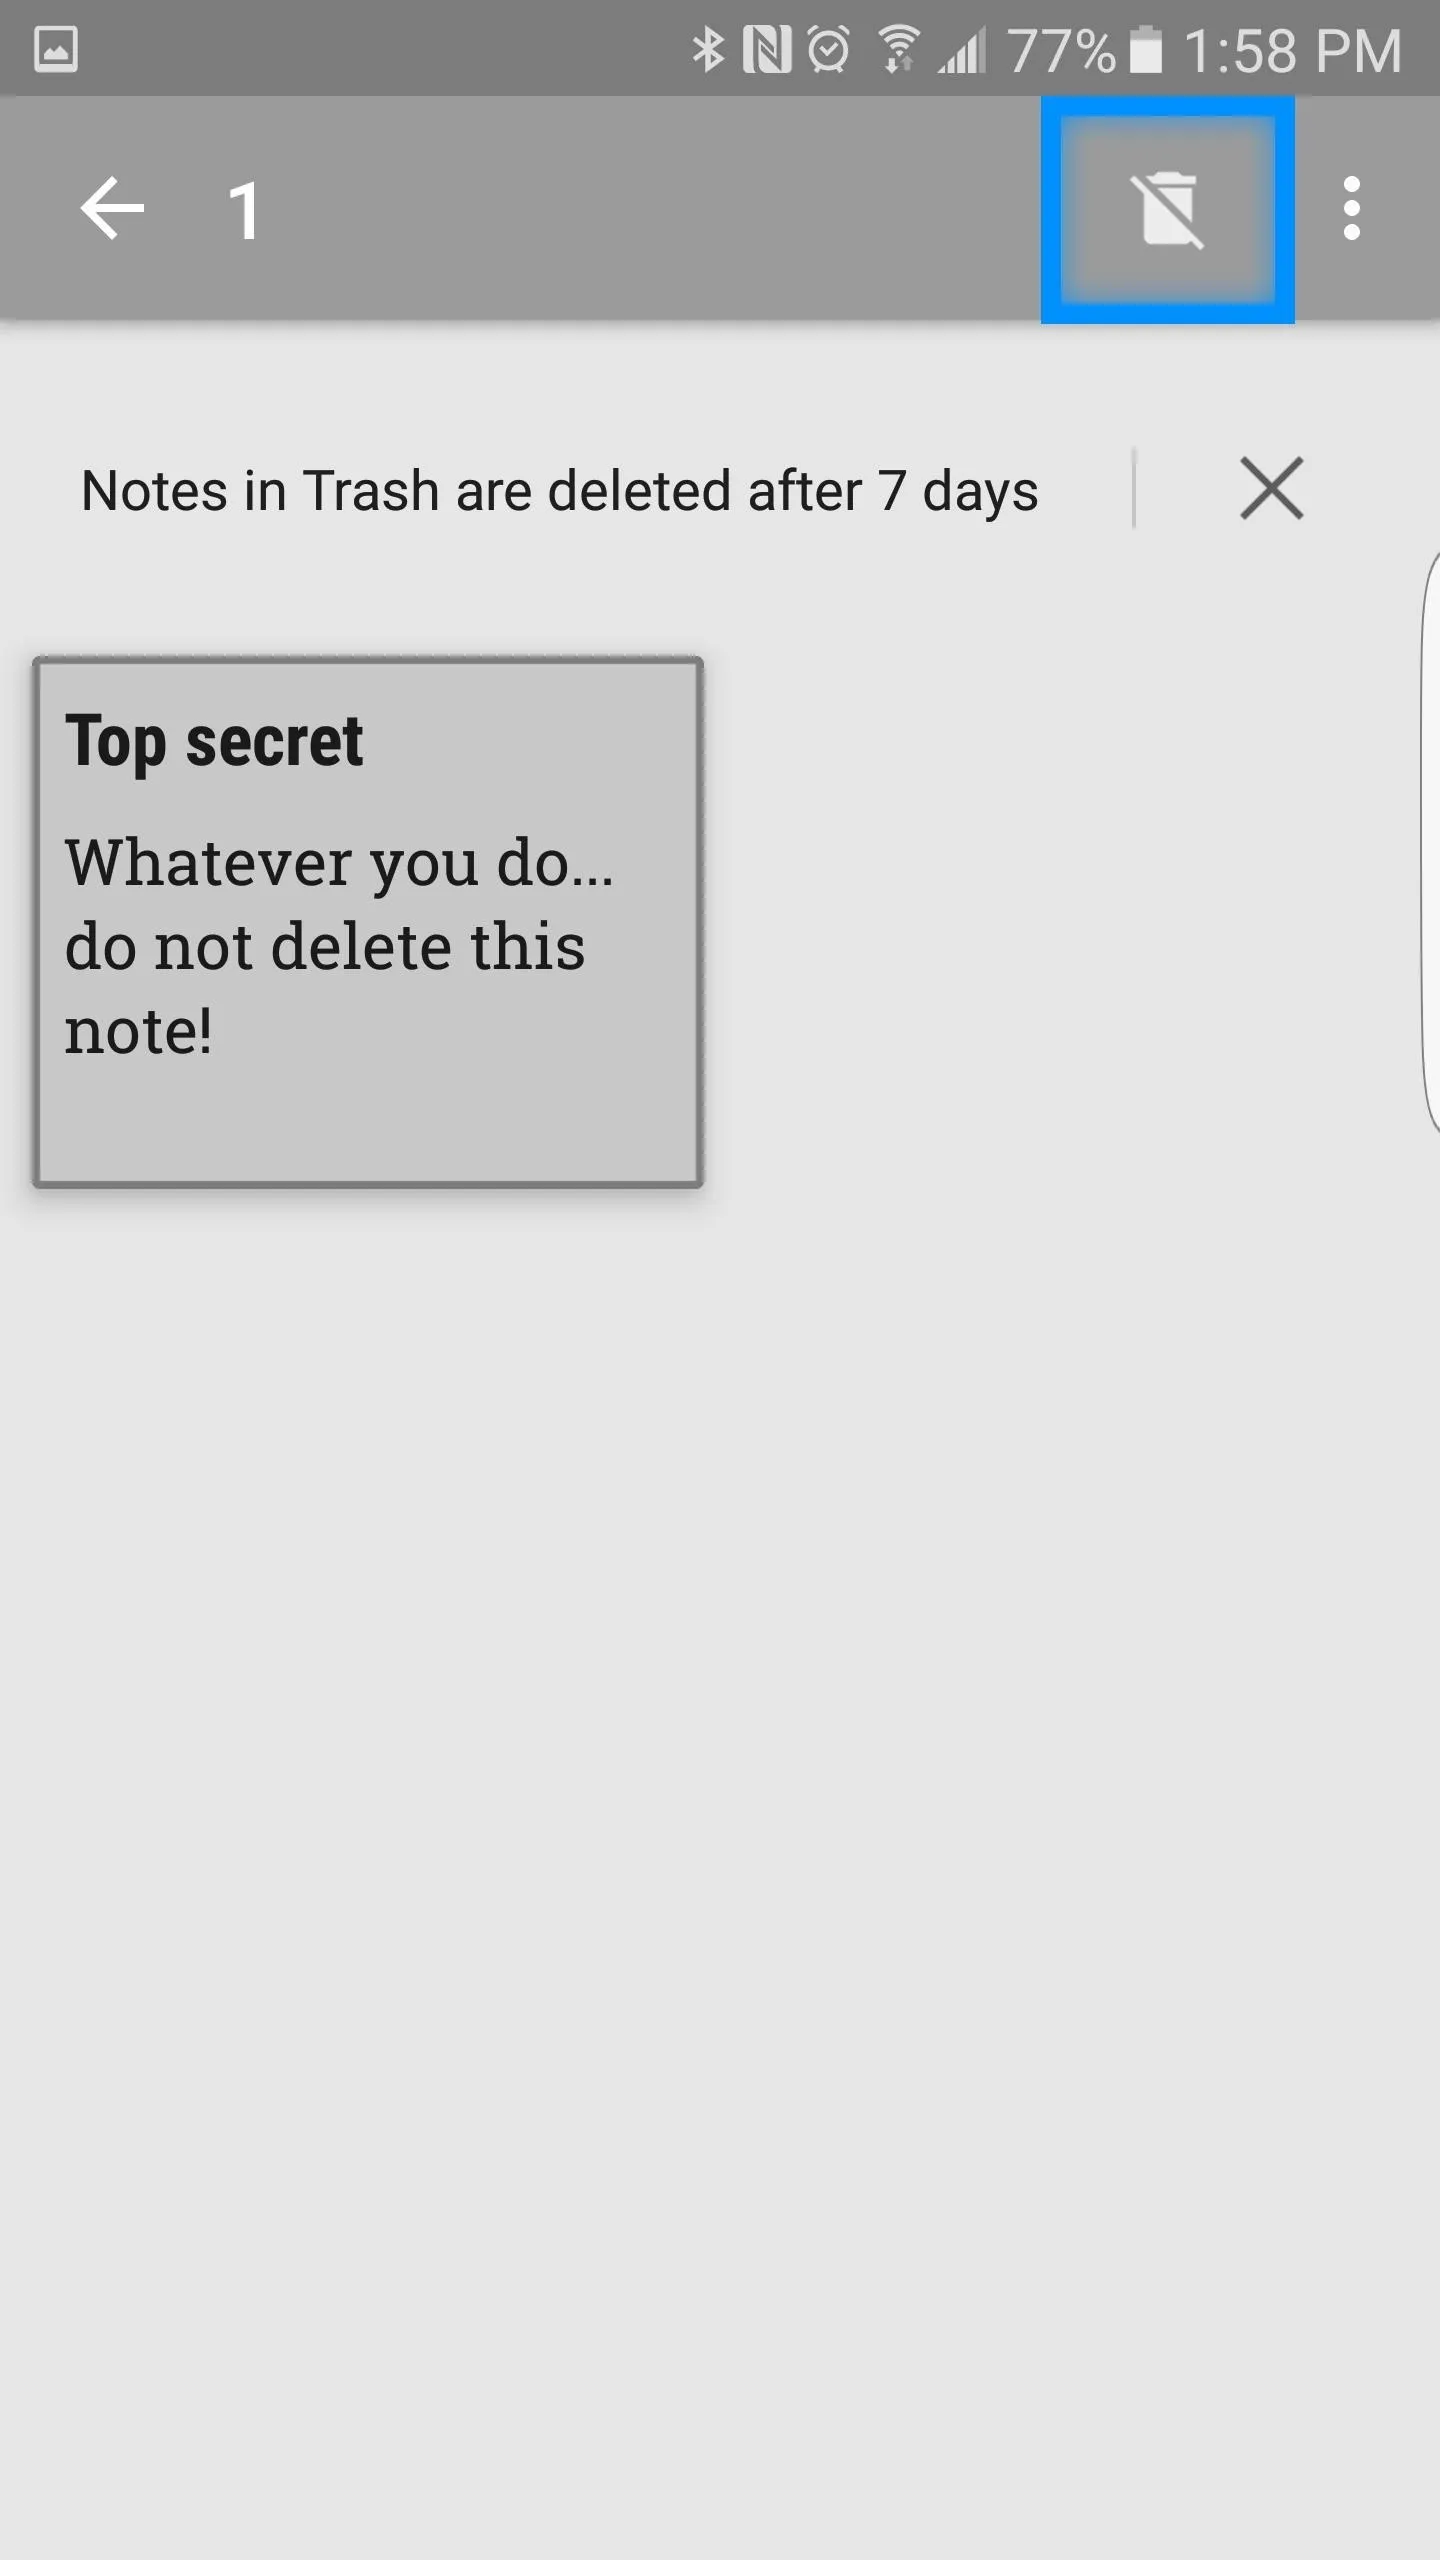
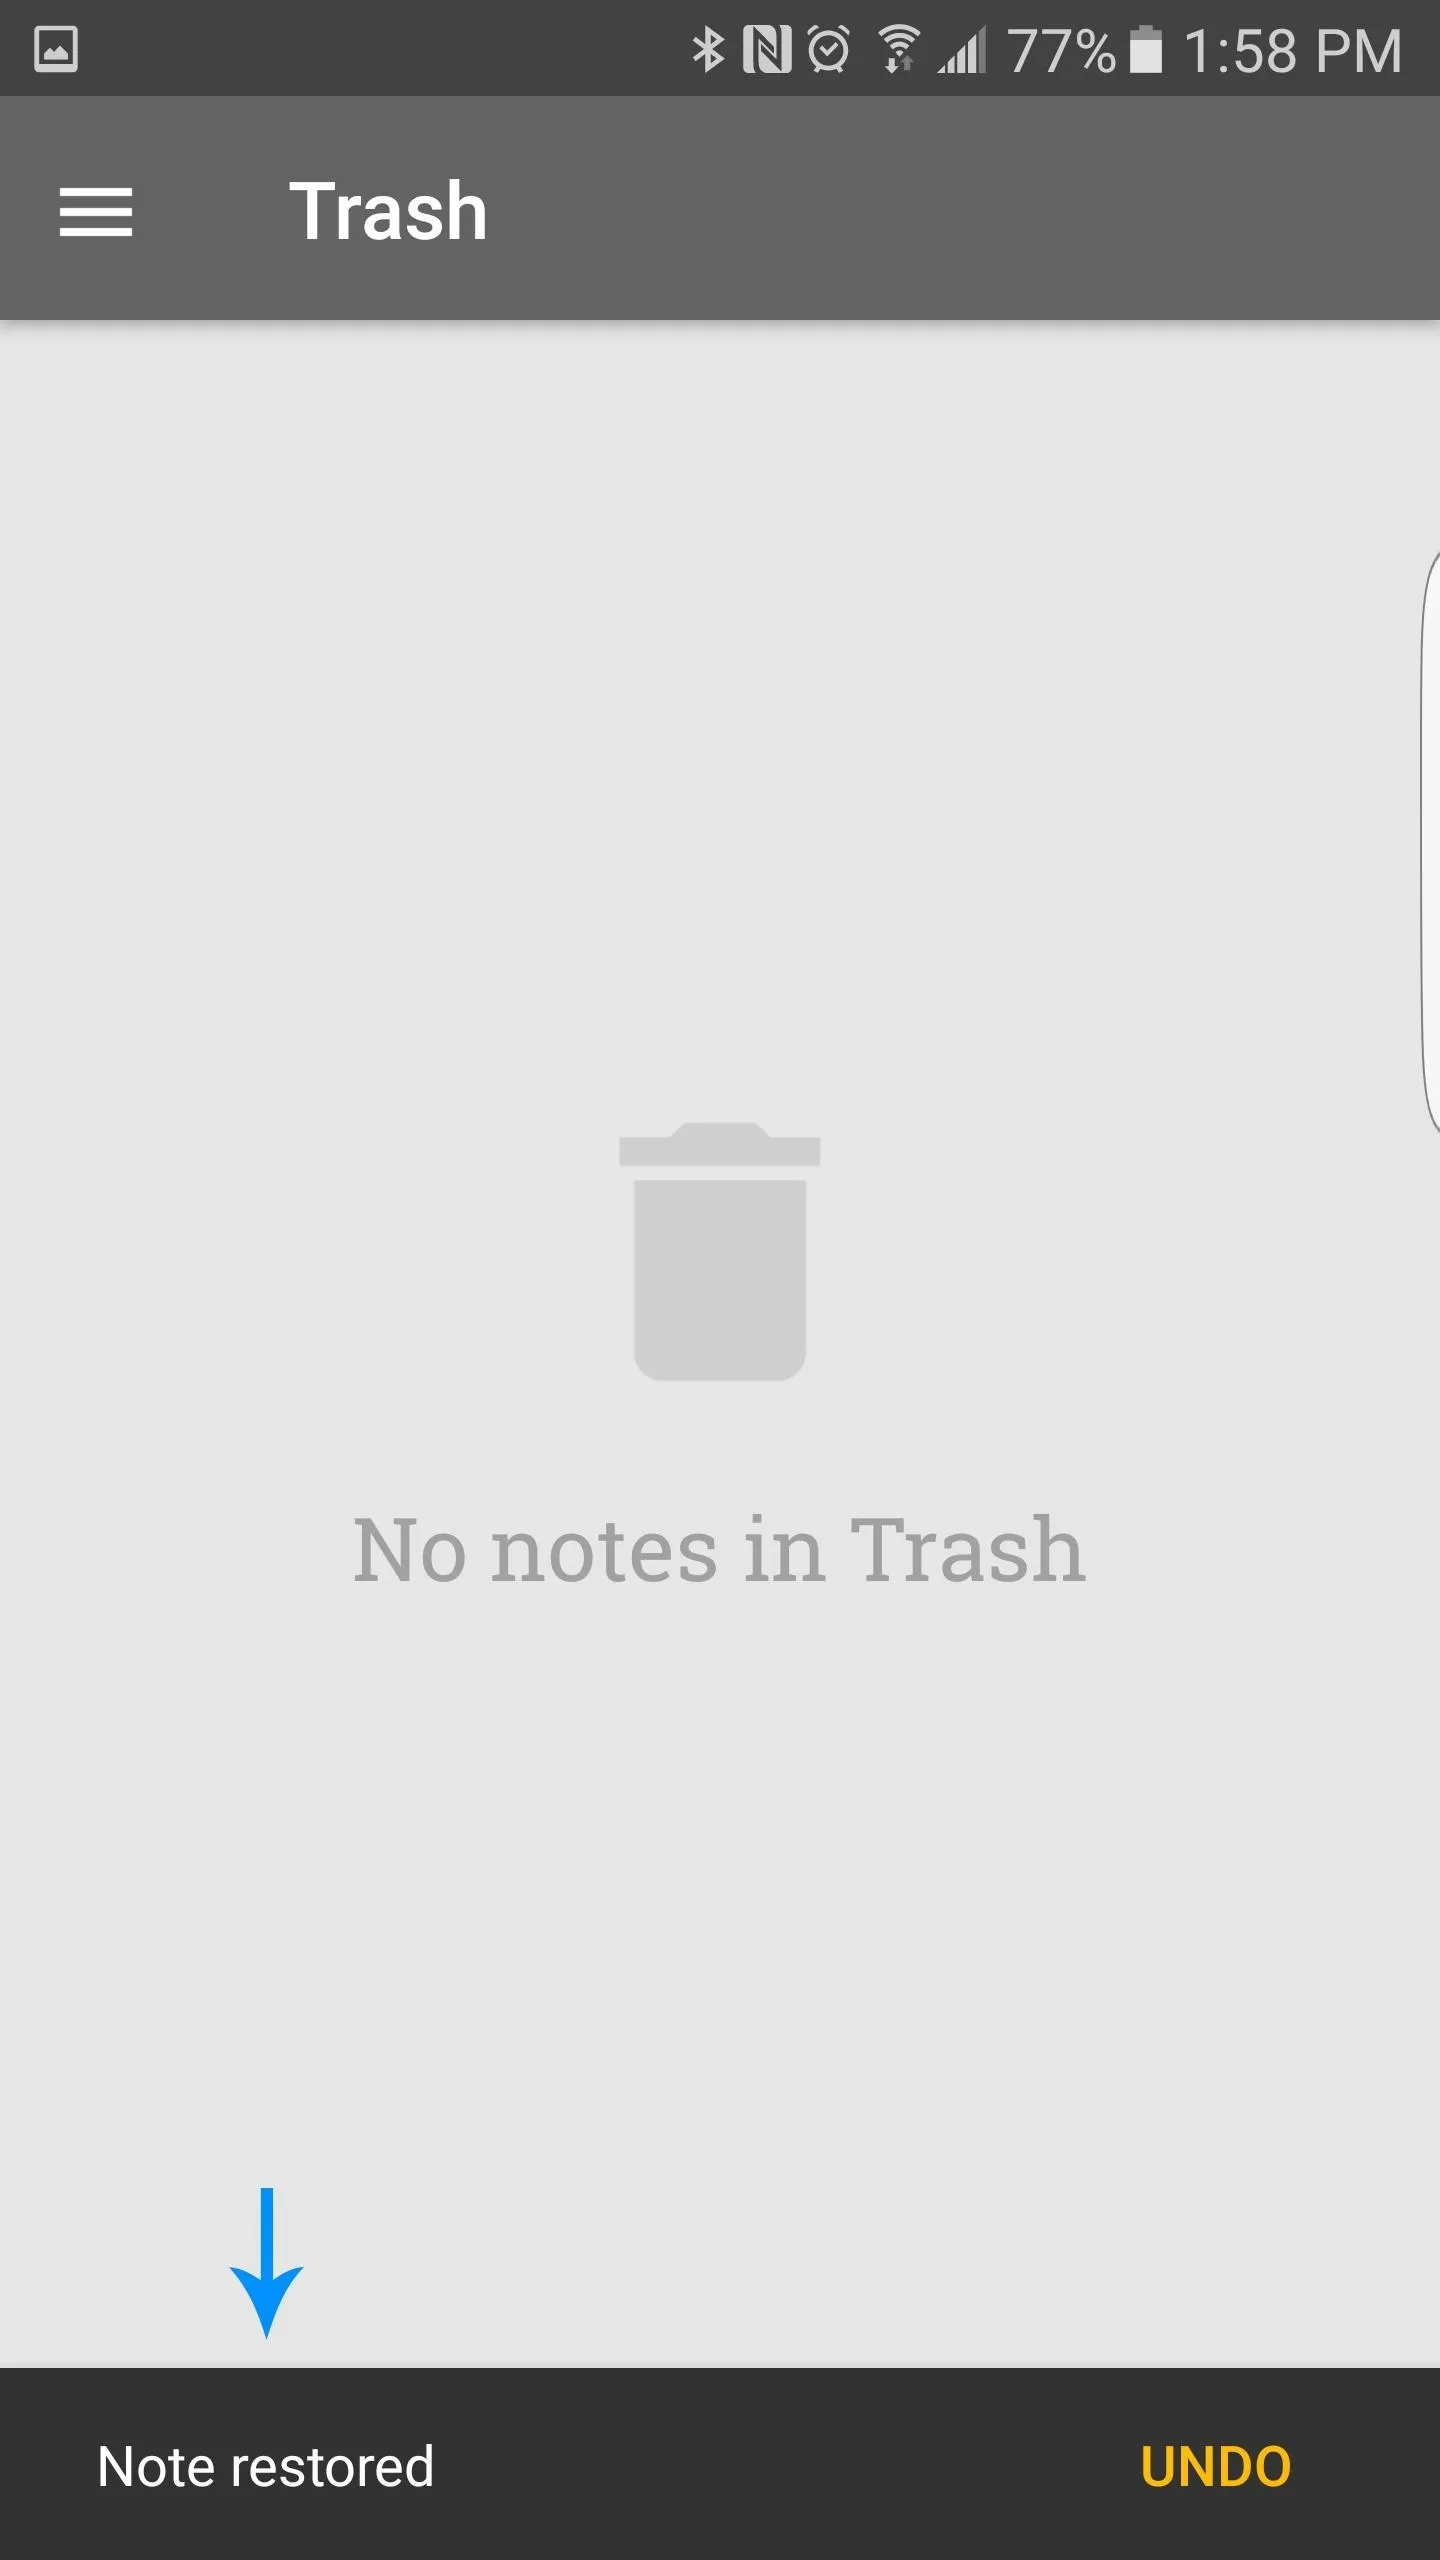
To restore a note, simply long-press it and select the crossed-out trash can on the top right of the screen.


10. Turn Real World Text into Digital Text
Google Keep has a nifty feature that allows you to convert text located in an image into actual text. To do so, simply open a picture in Google Keep, tap it once more to select it, then select the three-dots menu in the top right. From here, simply select Grab image text. Google Keep will then transcribe the text on the screen for you to edit or make notes as you please.
Have you own awesome Google Keep tip? Share below!
- Follow Gadget Hacks on Facebook, Twitter, Google+, and YouTube
- Follow Apple Hacks on Facebook and Twitter
- Follow Android Hacks on Facebook and Twitter
- Follow WonderHowTo on Facebook, Twitter, and Google+
Cover image and screenshots by Jacob Medel/Gadget Hacks











Comments
Be the first, drop a comment!