
To please those of us who love to mod and root our Androids, OnePlus has made both the OnePlus 5 and 5T relatively easy to customize — so much so that the 5T topped our list for the best phones for rooting. Unfortunately, unlocking the bootloader and using root to modify the firmware on your OnePlus 5 or 5T makes it hard to update to a new firmware such as Oreo when compared to stock.
Reverting your OnePlus 5 or 5T to stock in order to update it to the latest OxygenOS Android version can end up bricking your phone if done incorrectly. Because of this, we've covered every step of the process below to help you get through this hurdle. As long as you carefully read through and follow the steps, you'll be enjoying everything that Android Oreo has to offer on your OnePlus 5 or 5T in no time flat!
Requirements
- OnePlus 5 or 5T with unlocked bootloader
- Windows, Mac, or Linux computer
- USB data cable
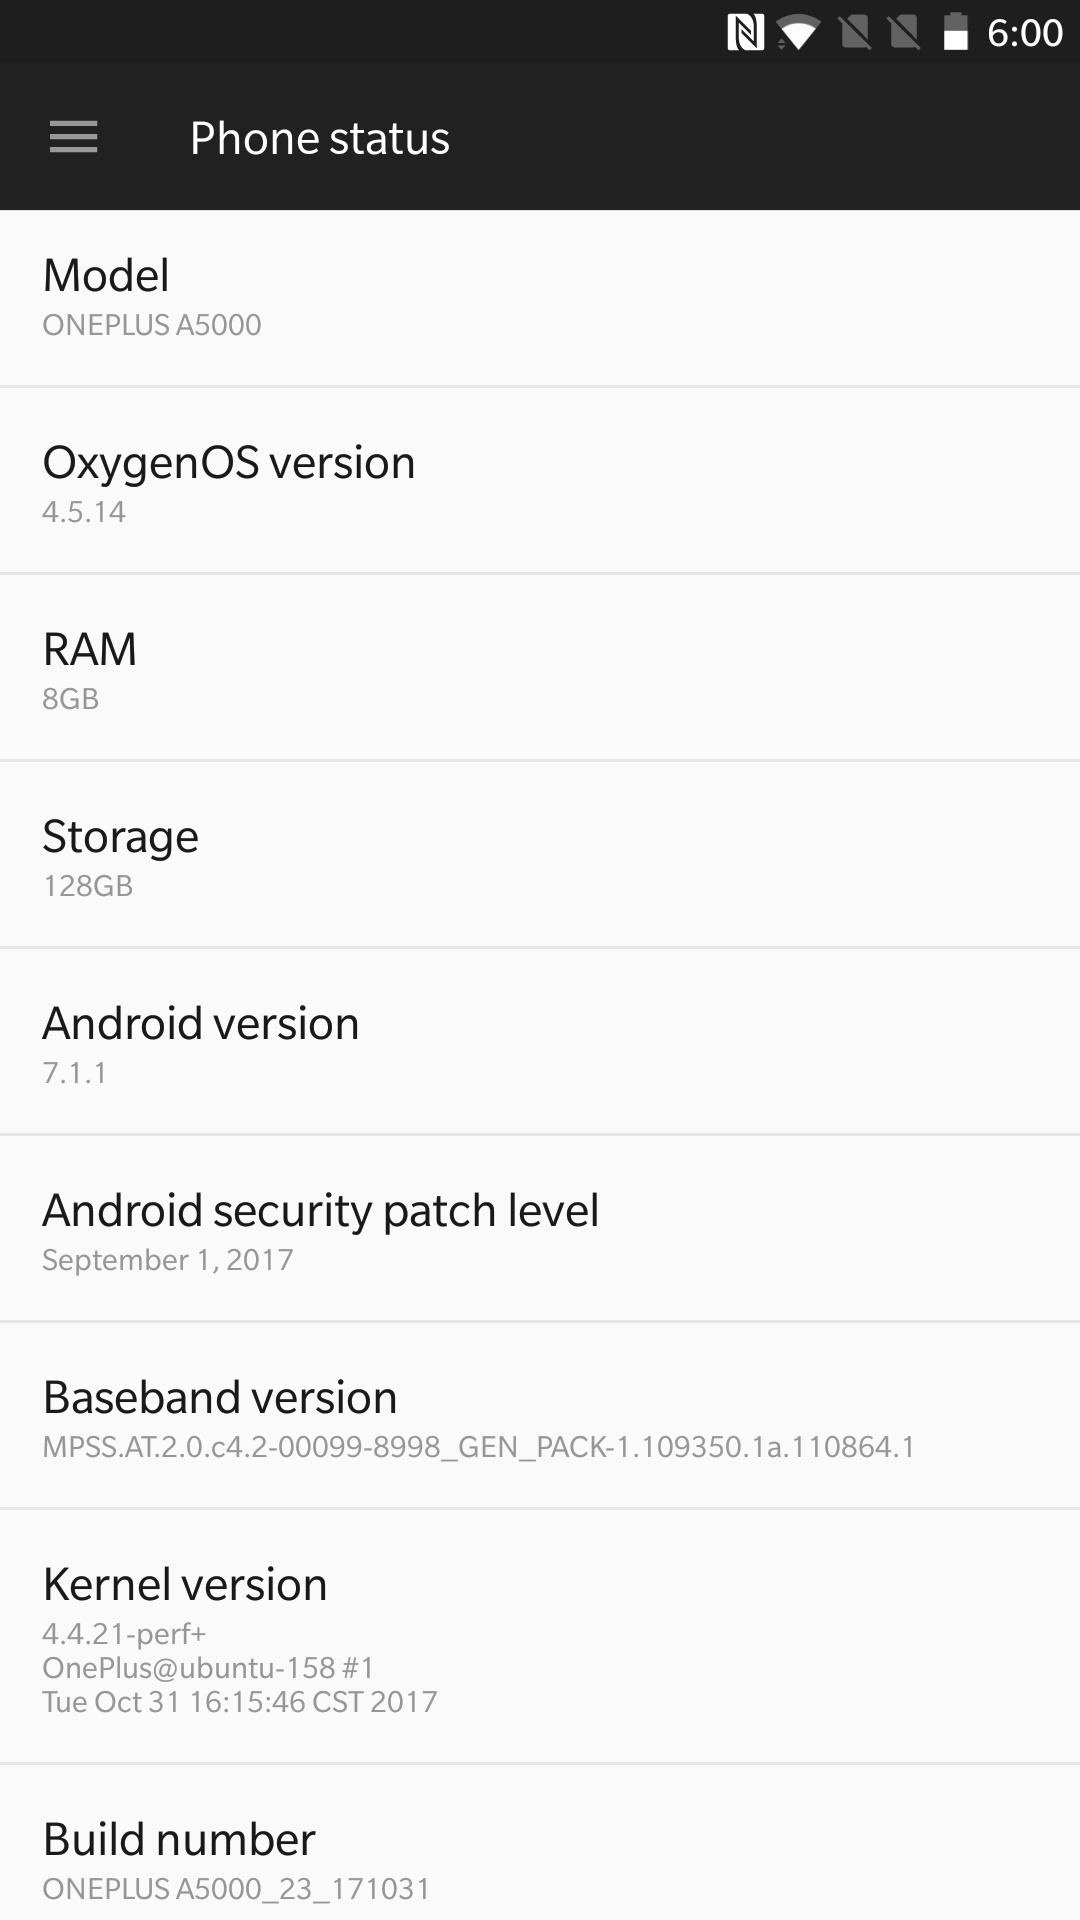
Step 1: Find Your Current Firmware Version
First, you'll first have to find your phone's firmware version. This is a very important step, as downloading the most current OxygenOS may fail to properly install no matter how many times you try. In other words, you'll want to reinstall your current firmware from scratch to overwrite any changes you've made with root or custom recovery, then you'll be able to accept OTA updates.
To find your phone's current firmware version, simply go into Settings and tap "About Phone" at the bottom of the menu. From there, take note of the numbers under "OxygenOS version."

Note: If you're running a custom ROM, you can skip this step and simply download the latest firmware version from OnePlus.
Step 2: Download Your Stock Firmware
Once you've found the exact OxygenOS and Android version for your OnePlus 5 0r 5T, head to one of the links below on your phone.
- Official firmware download page: OnePlus 5 | OnePlus 5T
From there, scroll down and look through the available firmware versions (you might have to put your phone in landscape mode to see them). Find the one that matches your current OxygenOS version (you may have to go back a few pages), then select it. Finally, tap "Continue to Download," then scroll down to the bottom of the next page and hit "Download." The firmware file is rather large (1–2 GB), so it will take at least a few minutes to download.

Step 3: Download the Stock Recovery Image for Your Device
This step is vital if your have a custom recovery such as TWRP installed, since OnePlus's firmwares do not have the stock recovery image included. If you're already using your OnePlus 5 or 5T's stock recovery, however, you can skip this section and proceed to the next step.
That said, here's the stock recovery image files for the OnePlus 5 and 5T. Download the file from your computer, then move it to your desktop, as you'll want to easily access it later on.
- Stock Recovery Image Files: OnePlus 5 | OnePlus 5T
Step 4: Install ADB & Fastboot on Your Computer
This step can be a little intimidating if you're new to ADB and Fastboot, but if you're already familiar with the process, you can skip to Step 5.
You won't need ADB at all during this process, but you will need Fastboot, and the two utilities are bundled together. So head to the following link for a detailed guide on installing ADB and Fastboot, then come back here and pick back up at Step 5.
- Don't Miss: How to Install ADB on Windows, Mac, or Linux
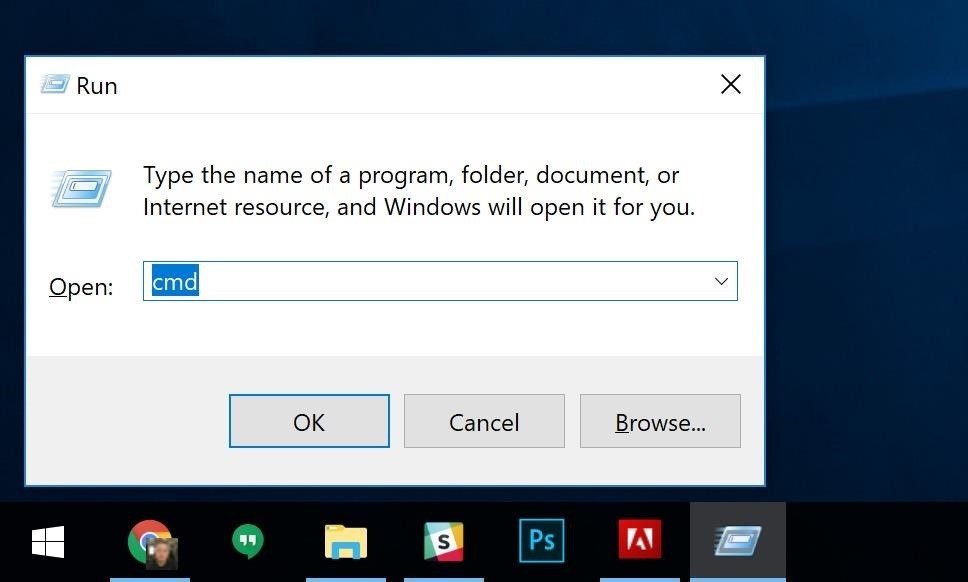
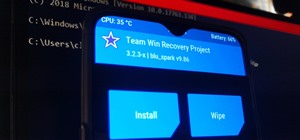
Step 5: Open a Fastboot Command Window
Next, you'll need to open a command window on your computer, which is how you'll send the fastboot command to re-flash the stock recovery image and lock your the bootloader on your device. The tricky part is making sure the command window is open to the right directory.
If you're using Windows, hold down the Windows button on your keyboard, then press the "R" key. From there, type "cmd" into the prompt and hit enter.
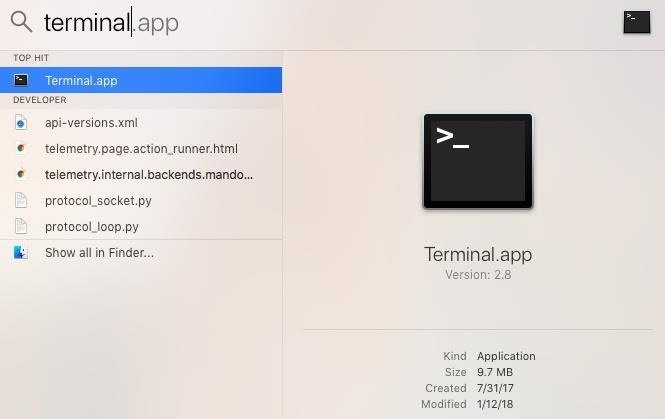
If you're using a Mac or a Linux machine, you'll just need to open the Terminal app. Tip for Mac users: Press command and space bar simultaneously, then type "Terminal" into Spotlight search and hit enter.
With your command window open, now it's time to change directories — this is the tricky part. You'll need to run this command from the platform-tools folder within your ADB installation directory, which will vary depending on how you installed ADB.
So search your hard drive for the platform-tools folder — most built-in file browsers (like Windows Explorer) will have a search bar in the top-right corner, so just type in "platform-tools." Once you've found the folder, copy its full location, which should look something like this, depending on your operating system:
C:\Program Files (x86)\Android\android-sdk\platform-tools
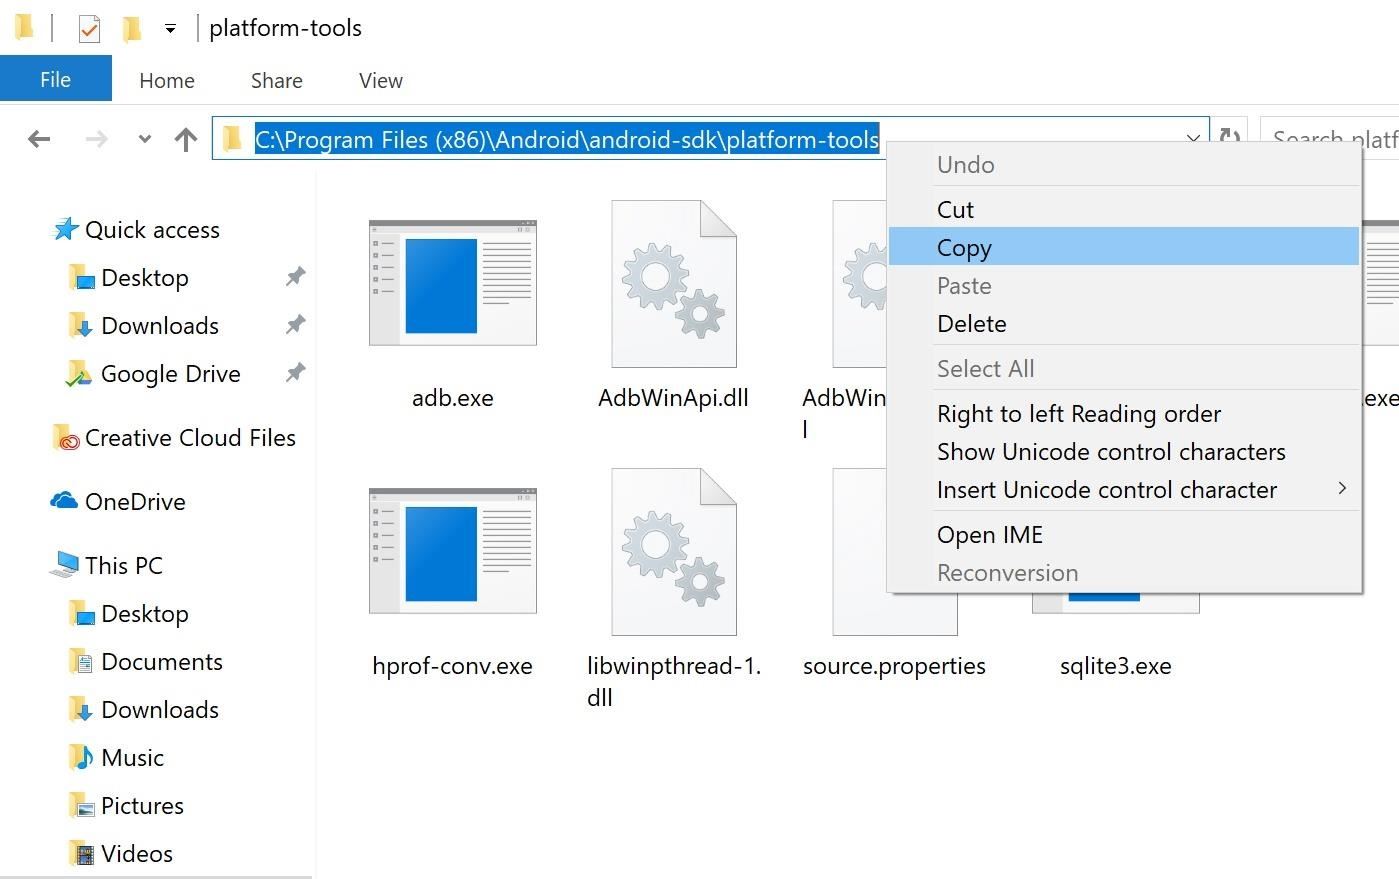
Once you've found the full location of the platform-tools folder, type "cd" into the command prompt, then add a space. Finally, paste the full folder location into the prompt and hit enter. The end result should look like this:
cd C:\Program Files (x86)\Android\android-sdk\platform-tools

Step 6: Put Your Phone into Bootloader Mode
With Fastboot up and running on your computer, you now need to put your OnePlus 5 or 5T into bootloader mode, which is the mode that accepts Fastboot commands and allows you to flash images.
To do so, turn your device off, then press both the power and volume down buttons at the same time and hold them until your phone boots up. From there, use your volume buttons to highlight the "Fastboot" option, then press the power button to select it. After getting to the Fastboot screen, connect the phone to your Mac or PC using a USB data cable.
Step 7: Check the Fastboot Connection
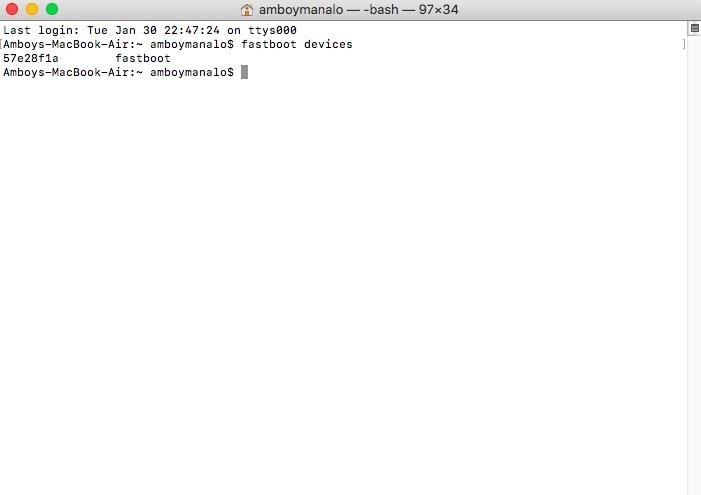
You now have to make sure that you've successfully established a connection between your OnePlus 5 or 5T and your Mac or PC. So on your computer's terminal, type in fastboot devices and hit enter. The command prompt should now show a series of numbers and letters followed by the word "fastboot." If that's the case, you can proceed to the next step. Otherwise, go back to Step 4 and double check to make sure you installation went through without a hitch.
Note: Mac, Linux, and Windows PowerShell users may need to add a period and a slash (./) to the beginning of any commands listed here (e.g., ./fastboot devices).
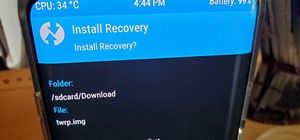
Step 8: Flash the Stock Recovery Image
If you installed TWRP after unlocking your OnePlus 5 or 5T's bootloader, now's the right time to flash the original stock recovery image you downloaded earlier in Step 3.
With your device in Fastboot mode and connected to your Mac or PC, go to the open terminal on your computer and type fastboot flash recovery — but don't hit enter just yet.
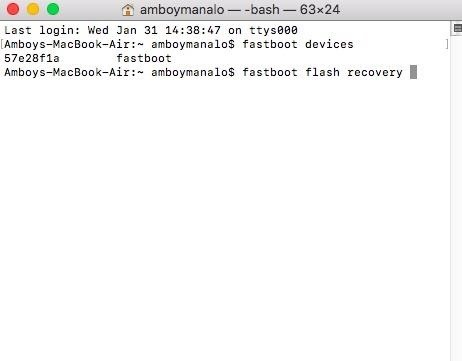
Instead, add a space after what you just typed, then grab the recovery.img file you downloaded earlier from the desktop, and drag and drop it in into the terminal window to add the full file location and complete the command.
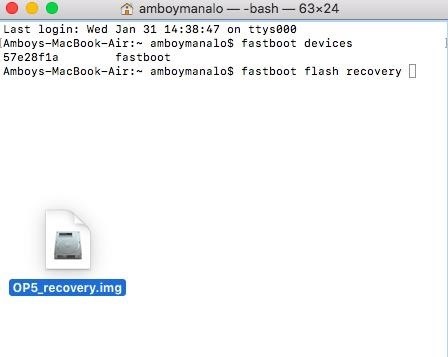
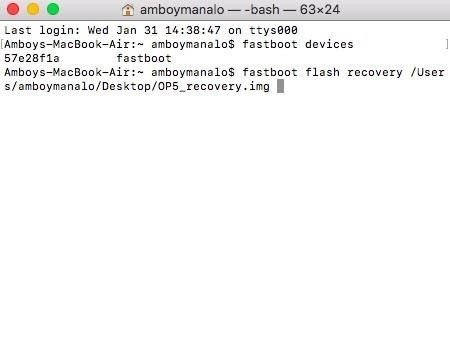
With the full command properly inputted now, hit enter to flash recovery, then type fastboot reboot-bootloader and hit enter once again to finish flashing.
Note: Mac, Linux, and Windows PowerShell users may need to add a period and a slash (./) to the beginning of any commands listed here (e.g., ./fastboot flash recovery).
Step 9: Boot into Recovery Mode
Now that the stock recovery has been flashed onto your OnePlus 5 or 5T, you'll now need to make preparations to re-install the stock firmware to bring your device back to its factory state.
To get started, turn off your device, then simultaneously press both power and volume down buttons, and let go once your see the OnePlus boot screen appear. You should now be taken to your device's boot menu, so either tap "English," or choose it using your volume and power buttons to select and confirm to get into recovery.
Step 10: Re-Install the Stock Firmware
Once inside the recovery screen, select "Install from Internal Storage," then choose the stock firmware file you downloaded back in step 2. You'll now be taken to a page to confirm package installation, so select "Yes" to flash the firmware onto your OnePlus 5 or 5T. The process is automatic, so sit back and wait for installation to finish, then proceed to the final step once it's done.
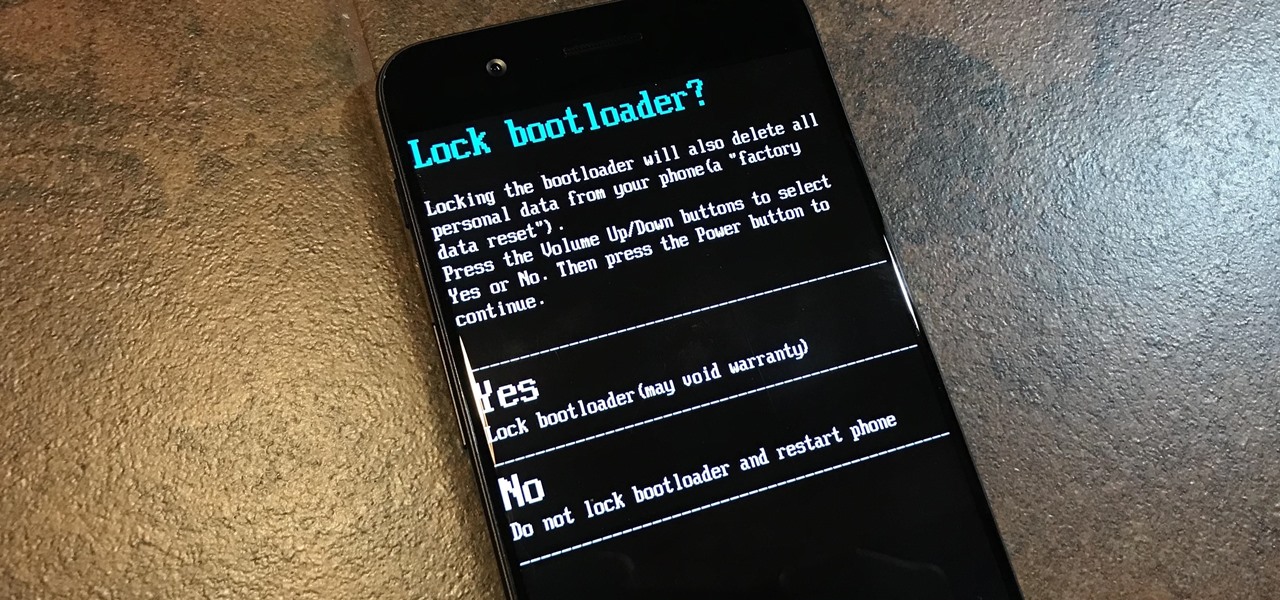
Step 11: Re-Lock Your Bootloader
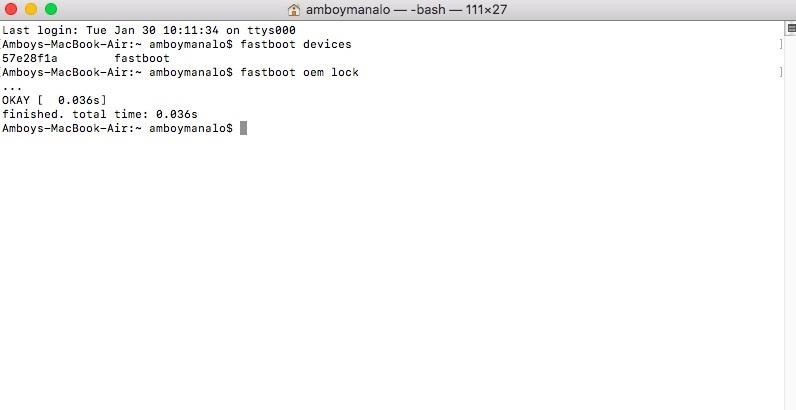
Before starting with the final step, it is very important to note that locking the bootloader on your Oneplus 5 or 5T will erase all the data in your device, so if you have important files you want to save, do so before performing this step.
That said, to lock the bootloader on your OnePlus 5 or 5T, first turn off your device and put it back to Bootloader mode as outlined in Step 6, and reconnect it to your Mac or PC. Now, type fastboot oem lock in the terminal window (or ./fastboot oem lock for some computers) and hit enter. Your OnePlus 5 or 5T will now ask you if you want to lock your bootloader, so use the volume keys to choose "Yes" and press the power button to confirm. After that, reboot your phone and you'll be all set!
With your OnePlus 5 or 5T back to a 100% factory state, you should now be able to successfully update your device to Android Oreo using the standard "Check for updates" button in Settings. If you ran into any issues along the way, let us know in the comments below and we'll try to steer you in the right direction.
Just updated your iPhone? You'll find new emoji, enhanced security, podcast transcripts, Apple Cash virtual numbers, and other useful features. There are even new additions hidden within Safari. Find out what's new and changed on your iPhone with the iOS 17.4 update.


Be the First to Comment
Share Your Thoughts