


With the S9 and S9+ upon us, you maybe wondering if it's time to retire your aging Galaxy and either sell it or do a trade-in to get Samsung's latest flagship. Before you do, however, it's important to make sure that all its components — most notably the sensors — are working fully in order to avoid potential headaches.
Fortunately, Samsung has a secret feature that lets most Galaxy owners test out their device's components. And best of all, this hidden diagnostic mode can be accessed simply by inputting a little-known code, making it extremely easy to test if your Galaxy's sensors are running as they should.
Accessing the Secret Diagnostic Menu
Before we get started, it's worth noting that this feature may not be available on your device. Some carriers like Verizon and Sprint are known to block the code-based diagnostic mode on their Samsung smartphones and tablets. Though newer phones from Sprint, such as the Galaxy S6, seem to have this functionality restored.
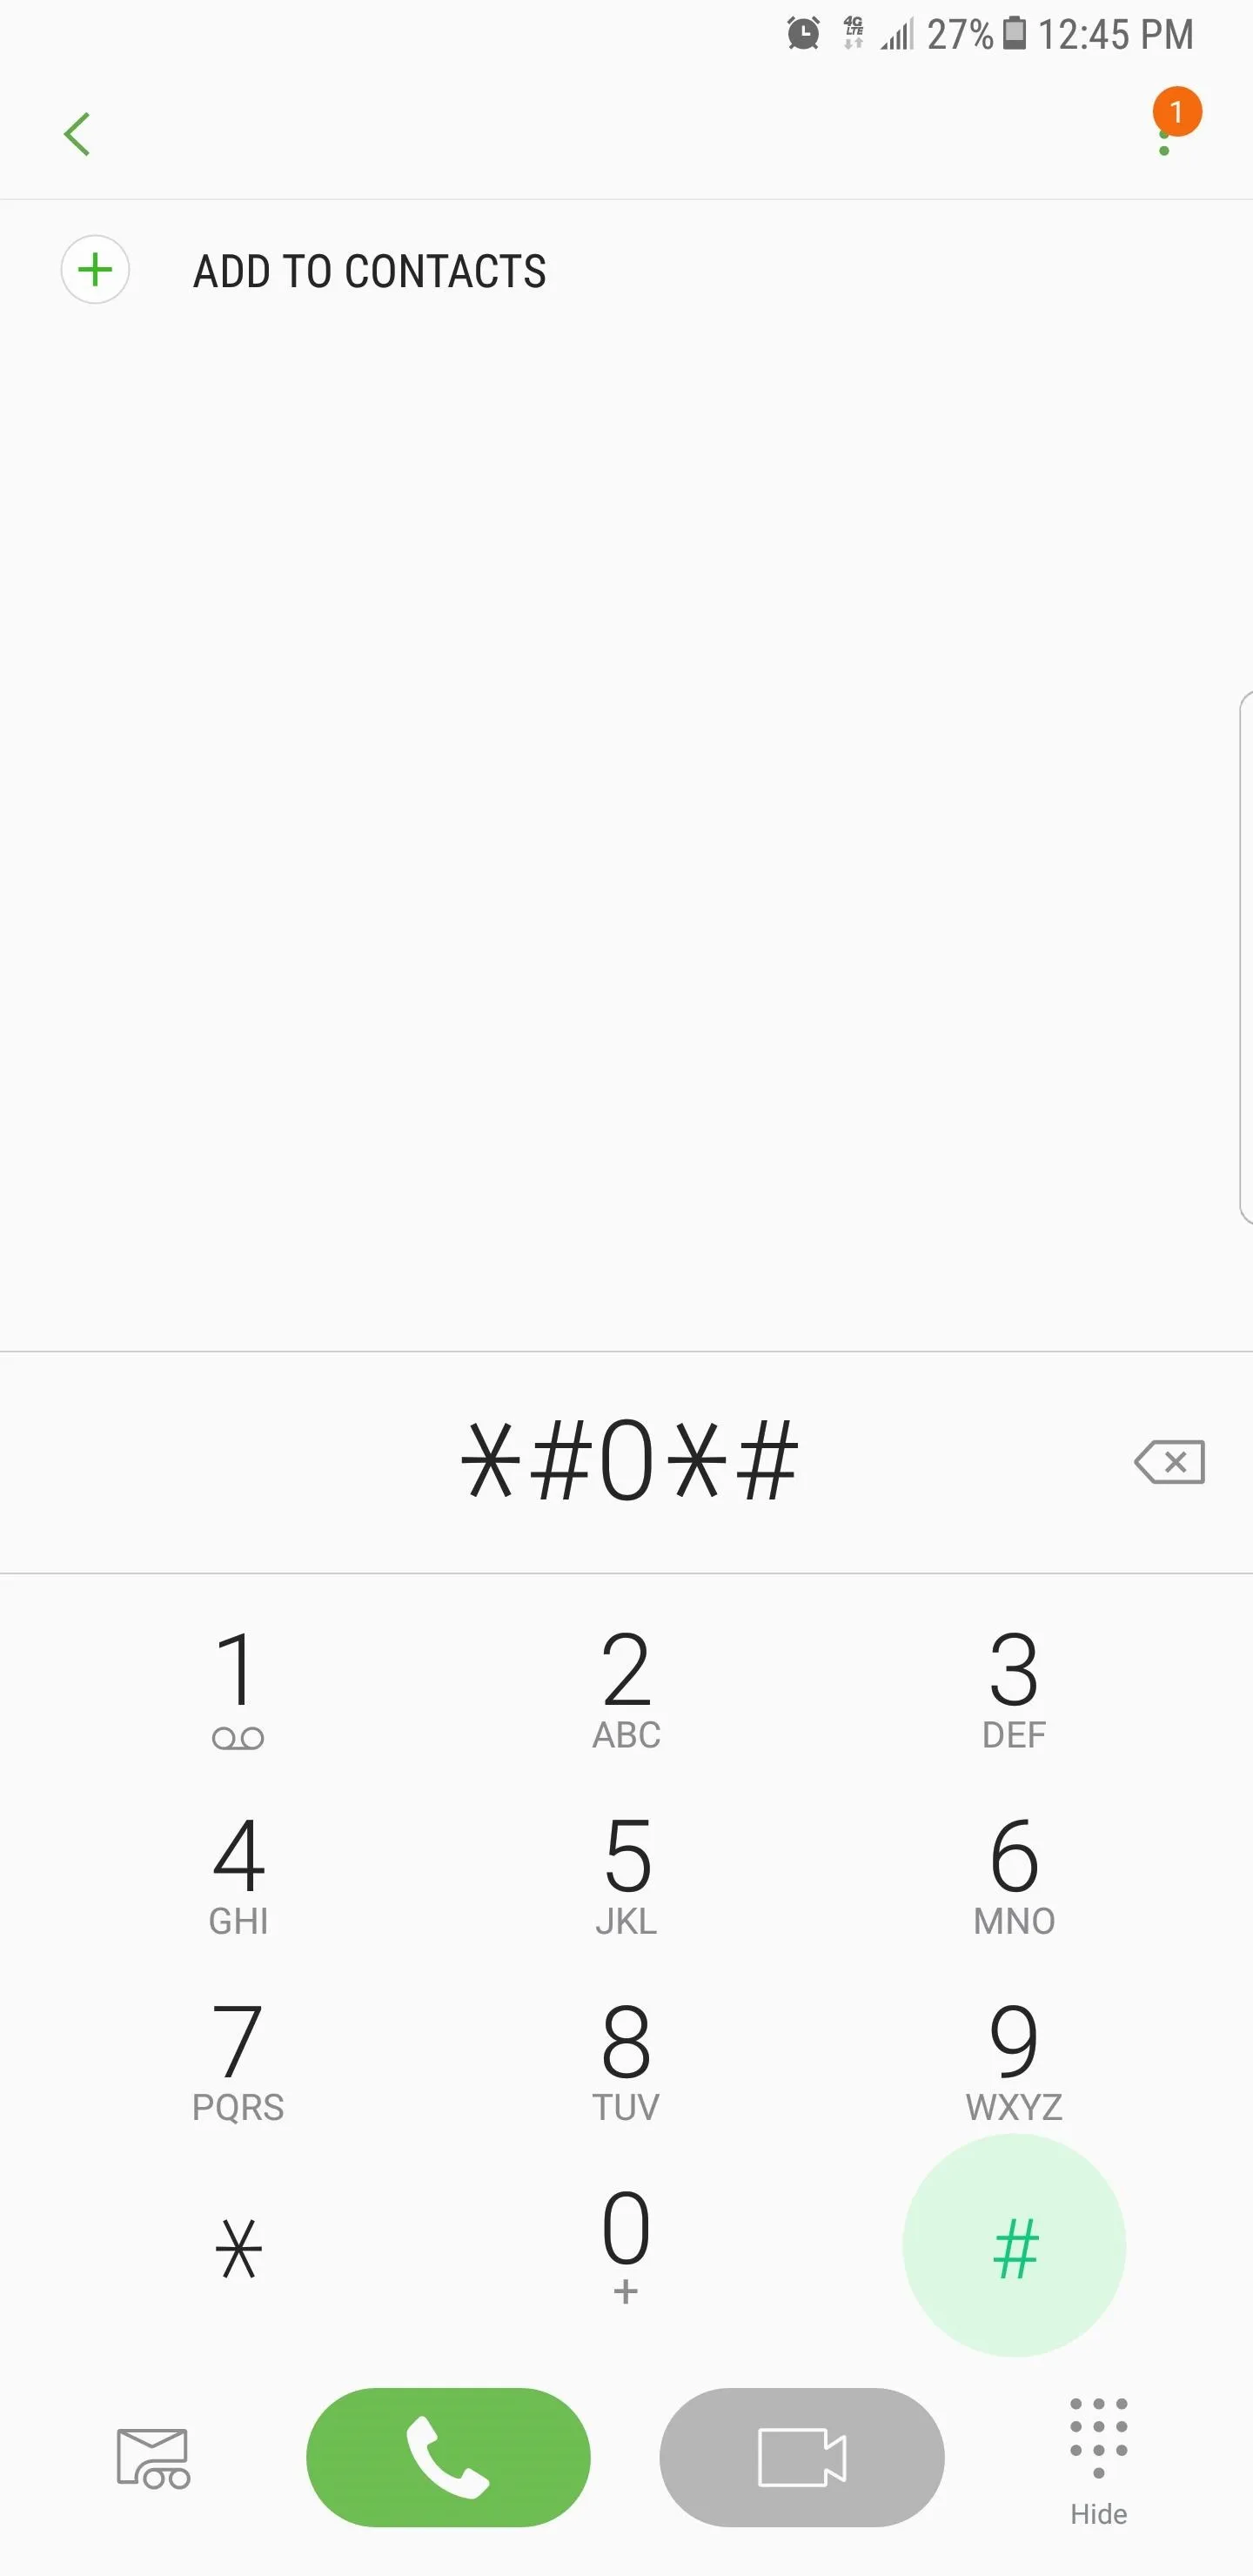
With that out of the way, it's time to get started, so open your Samsung's phone app. From there, enter *#0*# using the dial pad and the phone will immediately go into its secret diagnostic mode. The process is automatic, so there's no need to tap on the green call button to input the command. If you enter the code and nothing happens, the feature is disabled on your device.
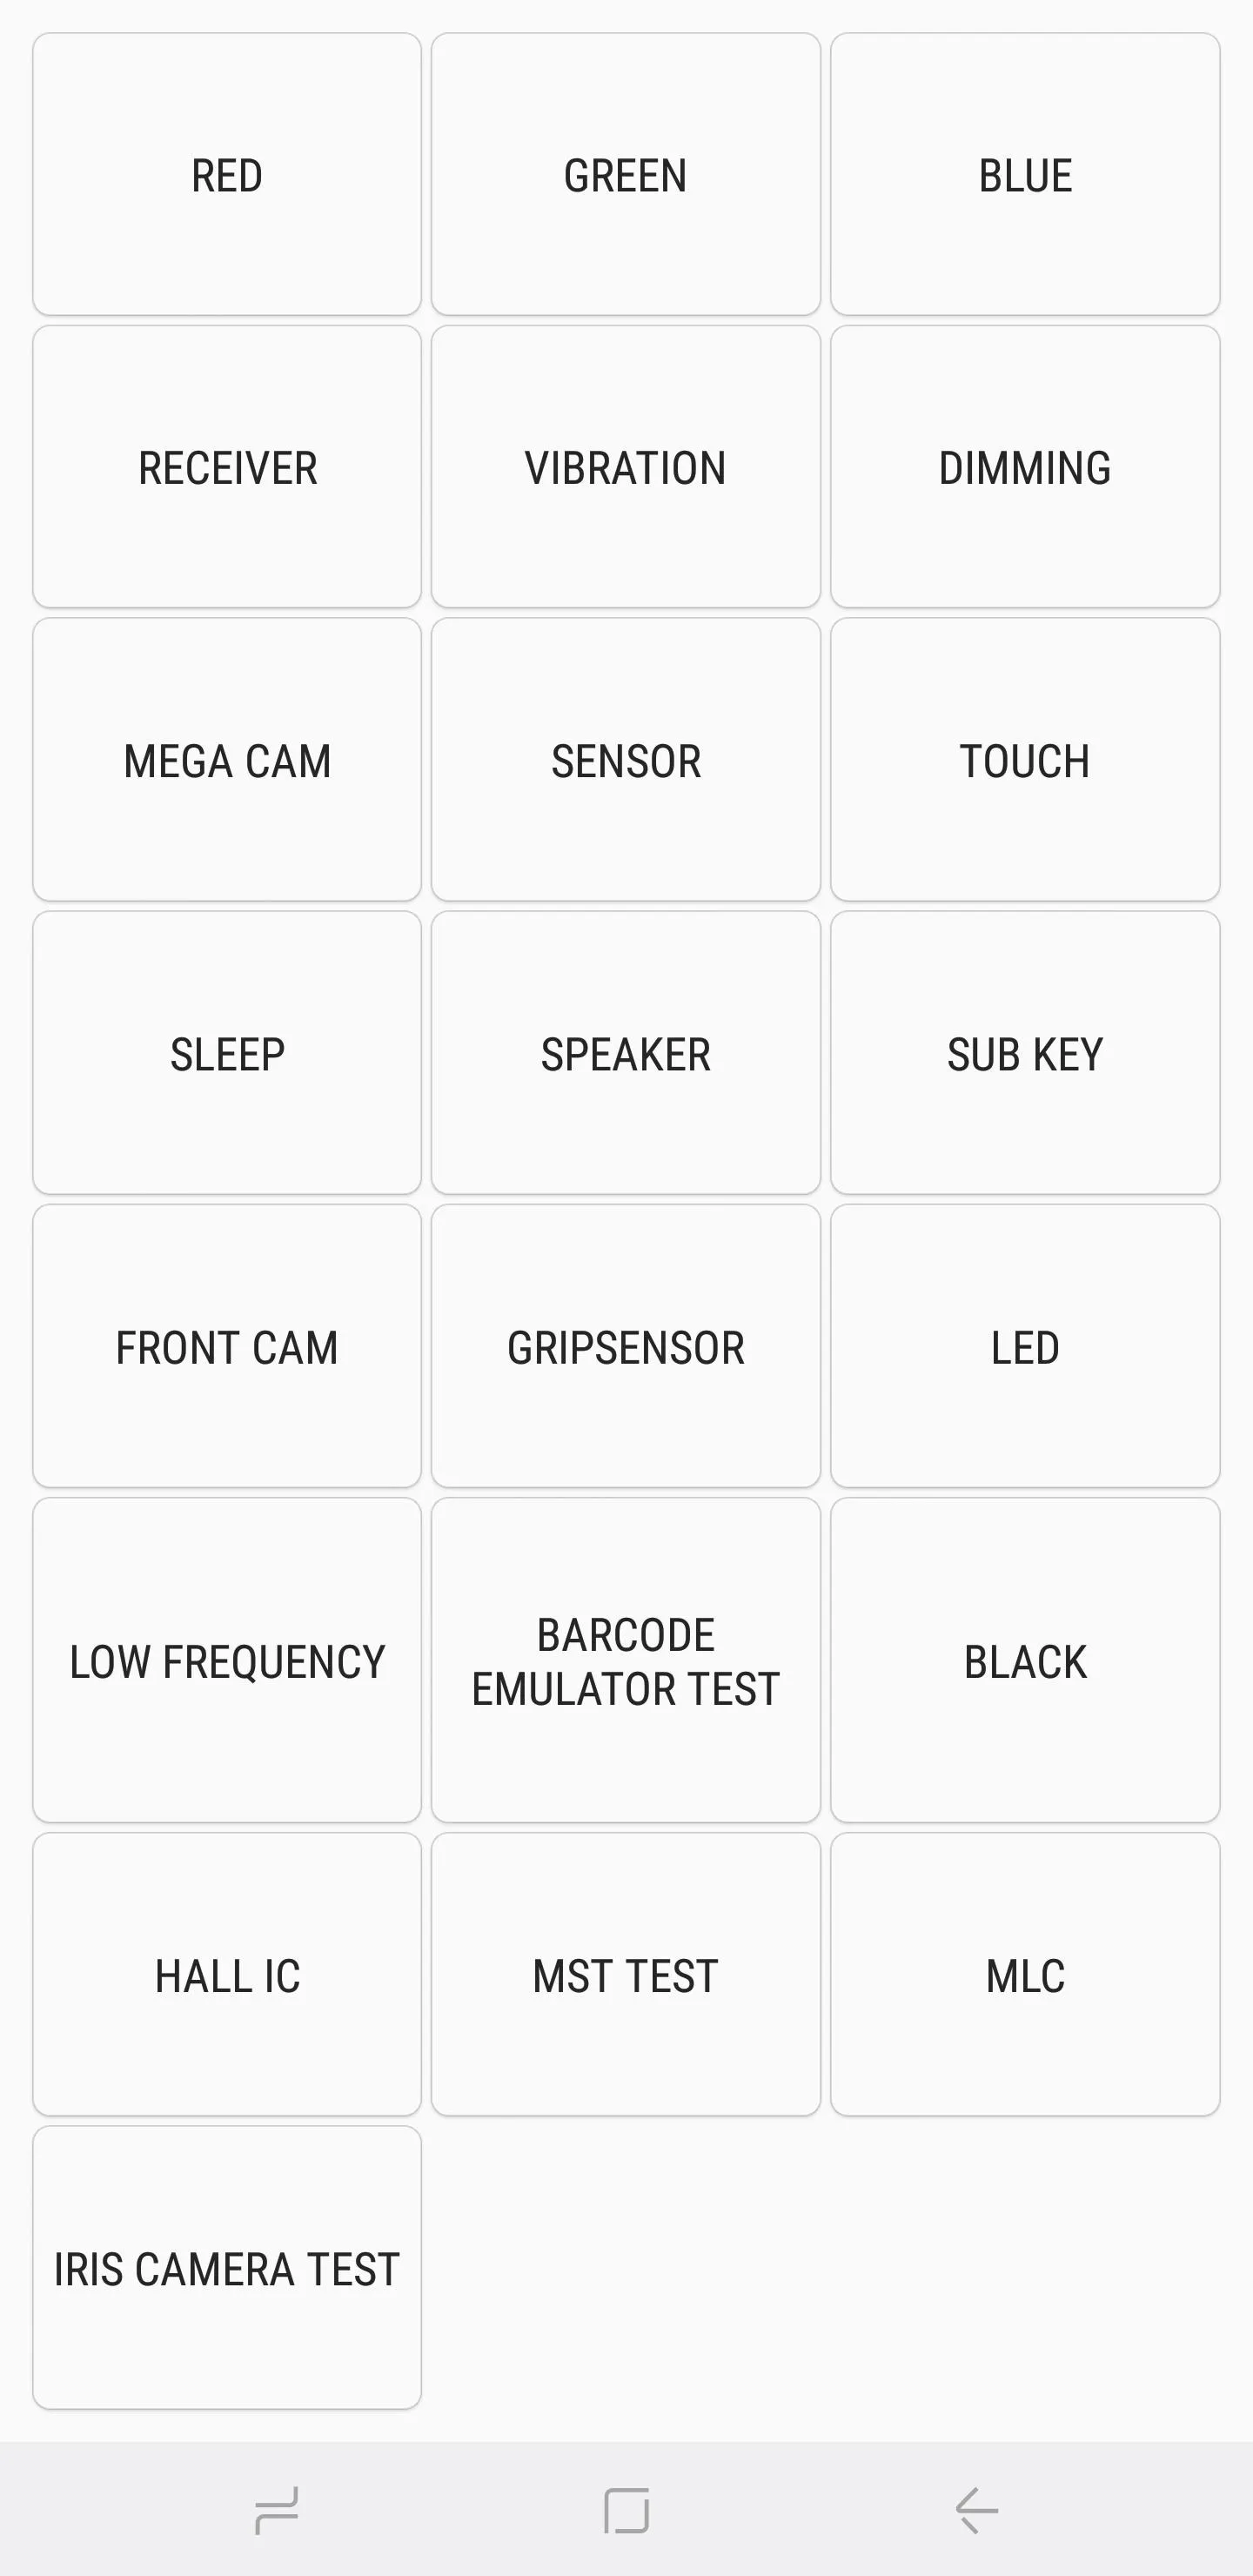
Now, tap on the "Sensor" button to access the diagnostic page. This will yield a test page for a variety of sensors — namely the accelerometer, proximity sensor, barometer, light sensor, gyroscope, magnetic sensor, HRM, and fingerprint scanner. Let's go over all of them in more detail.
Accelerometer
The accelerometer detects the orientation of your phone and measures its linear acceleration of movement. To check if it's working properly, tap on either "Image Test" to check for landscape-to-portrait transitions, or "Graph" to see how well the sensor detects movement by shaking your device up and down.
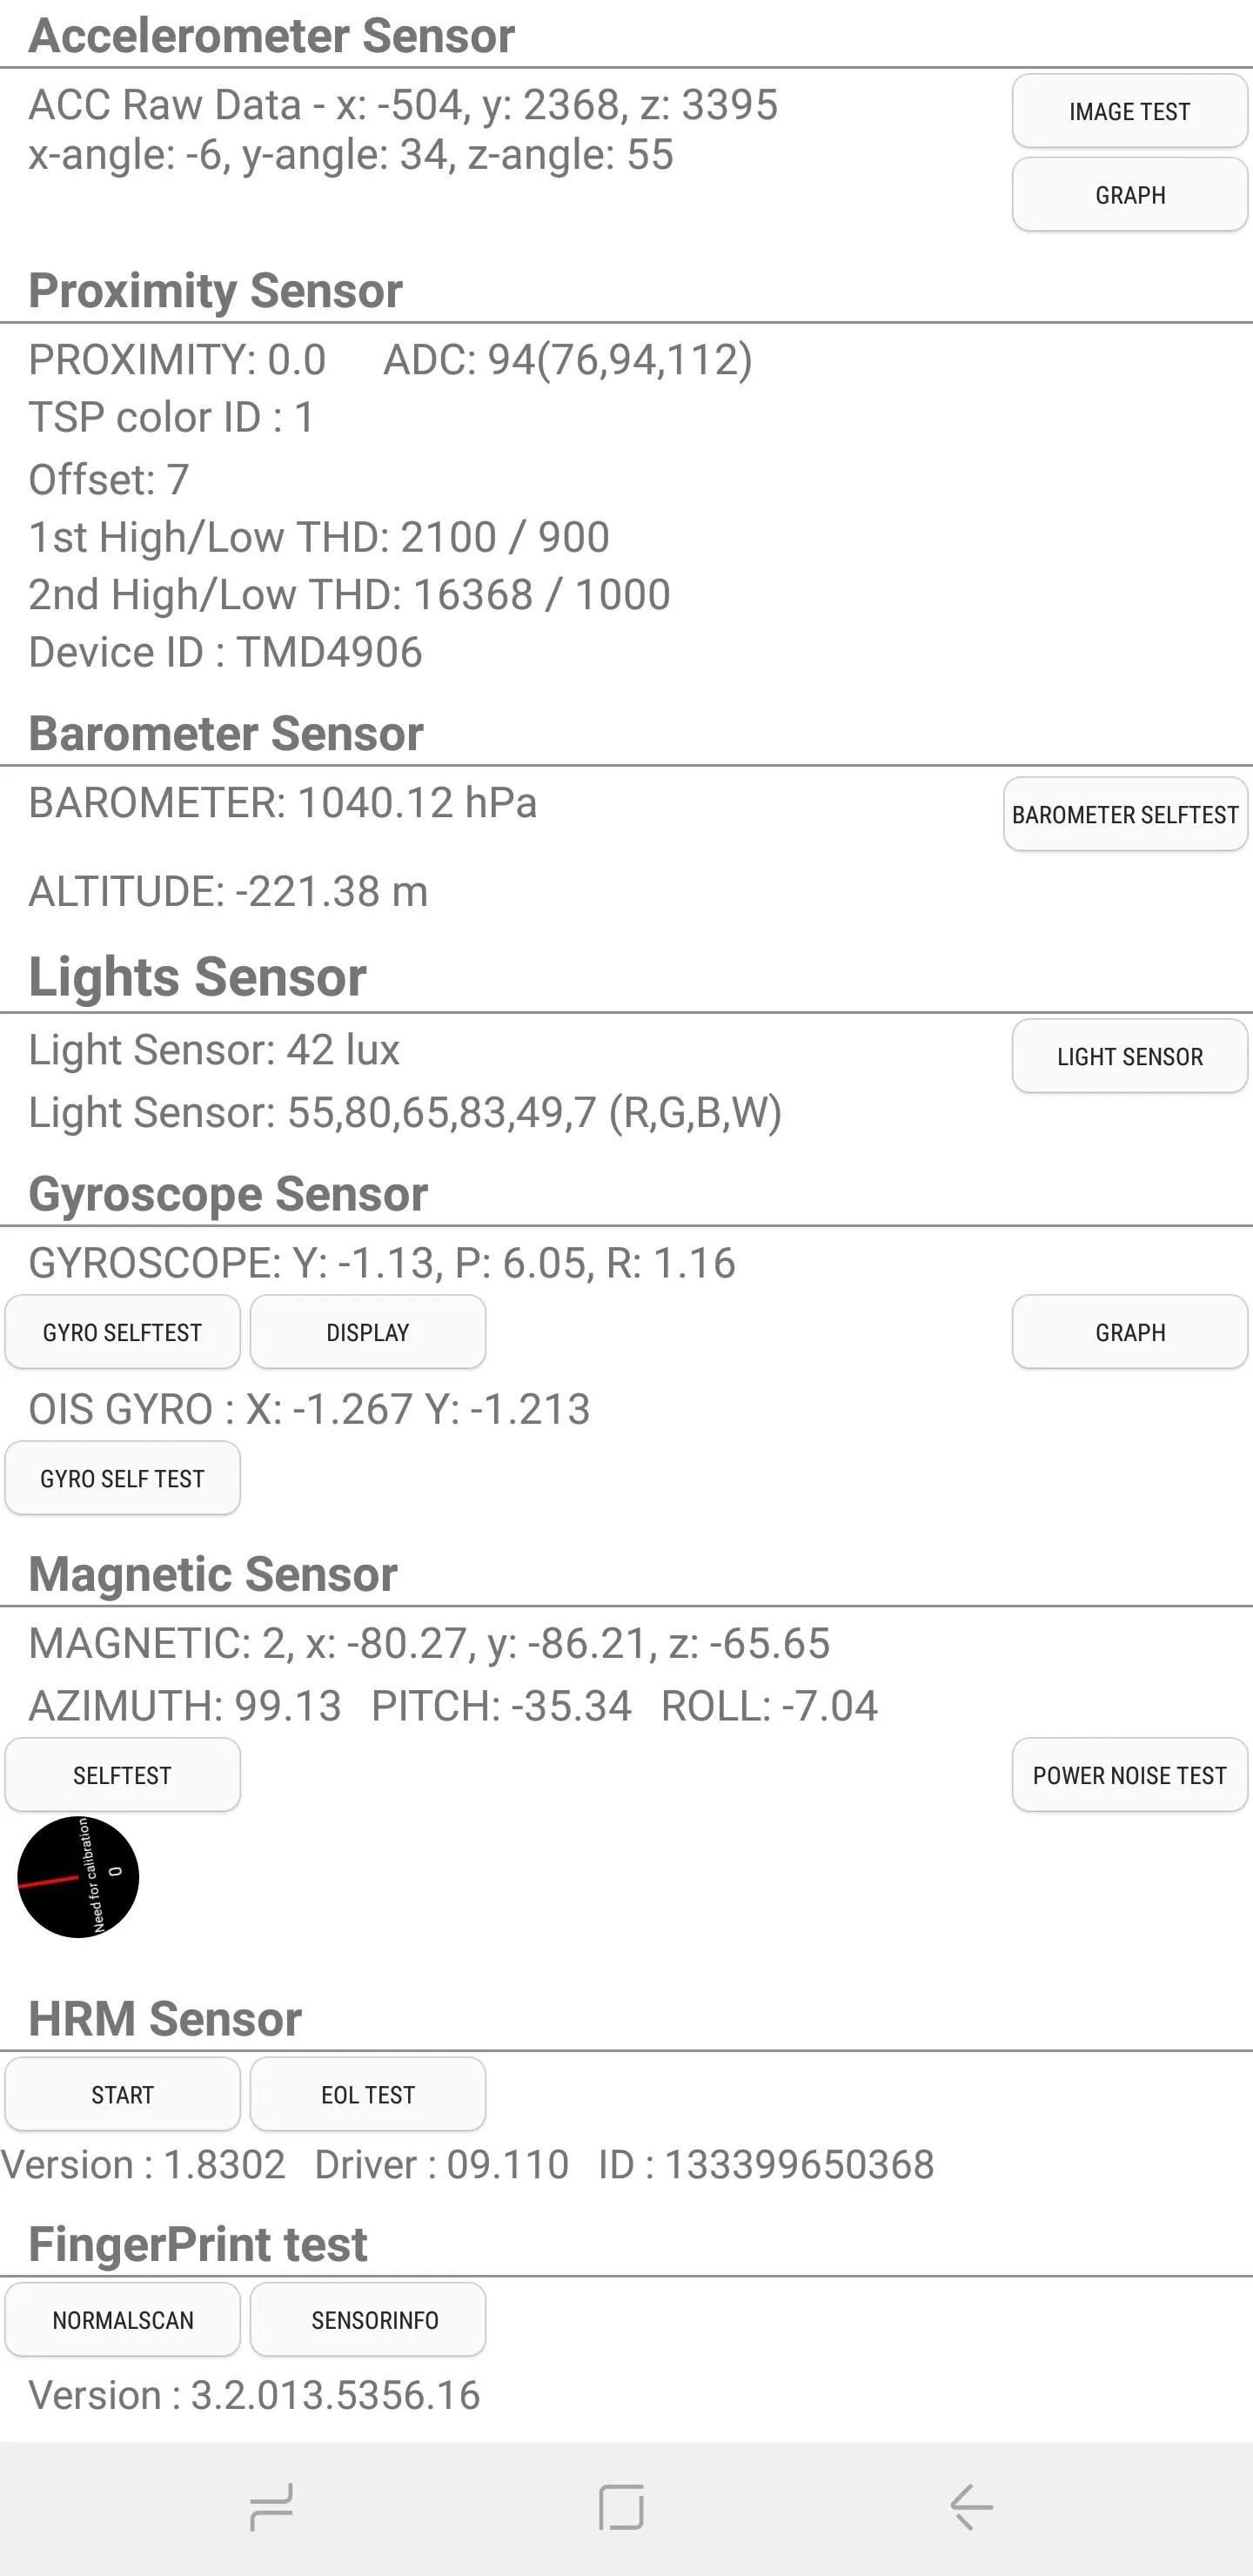


Proximity Sensor
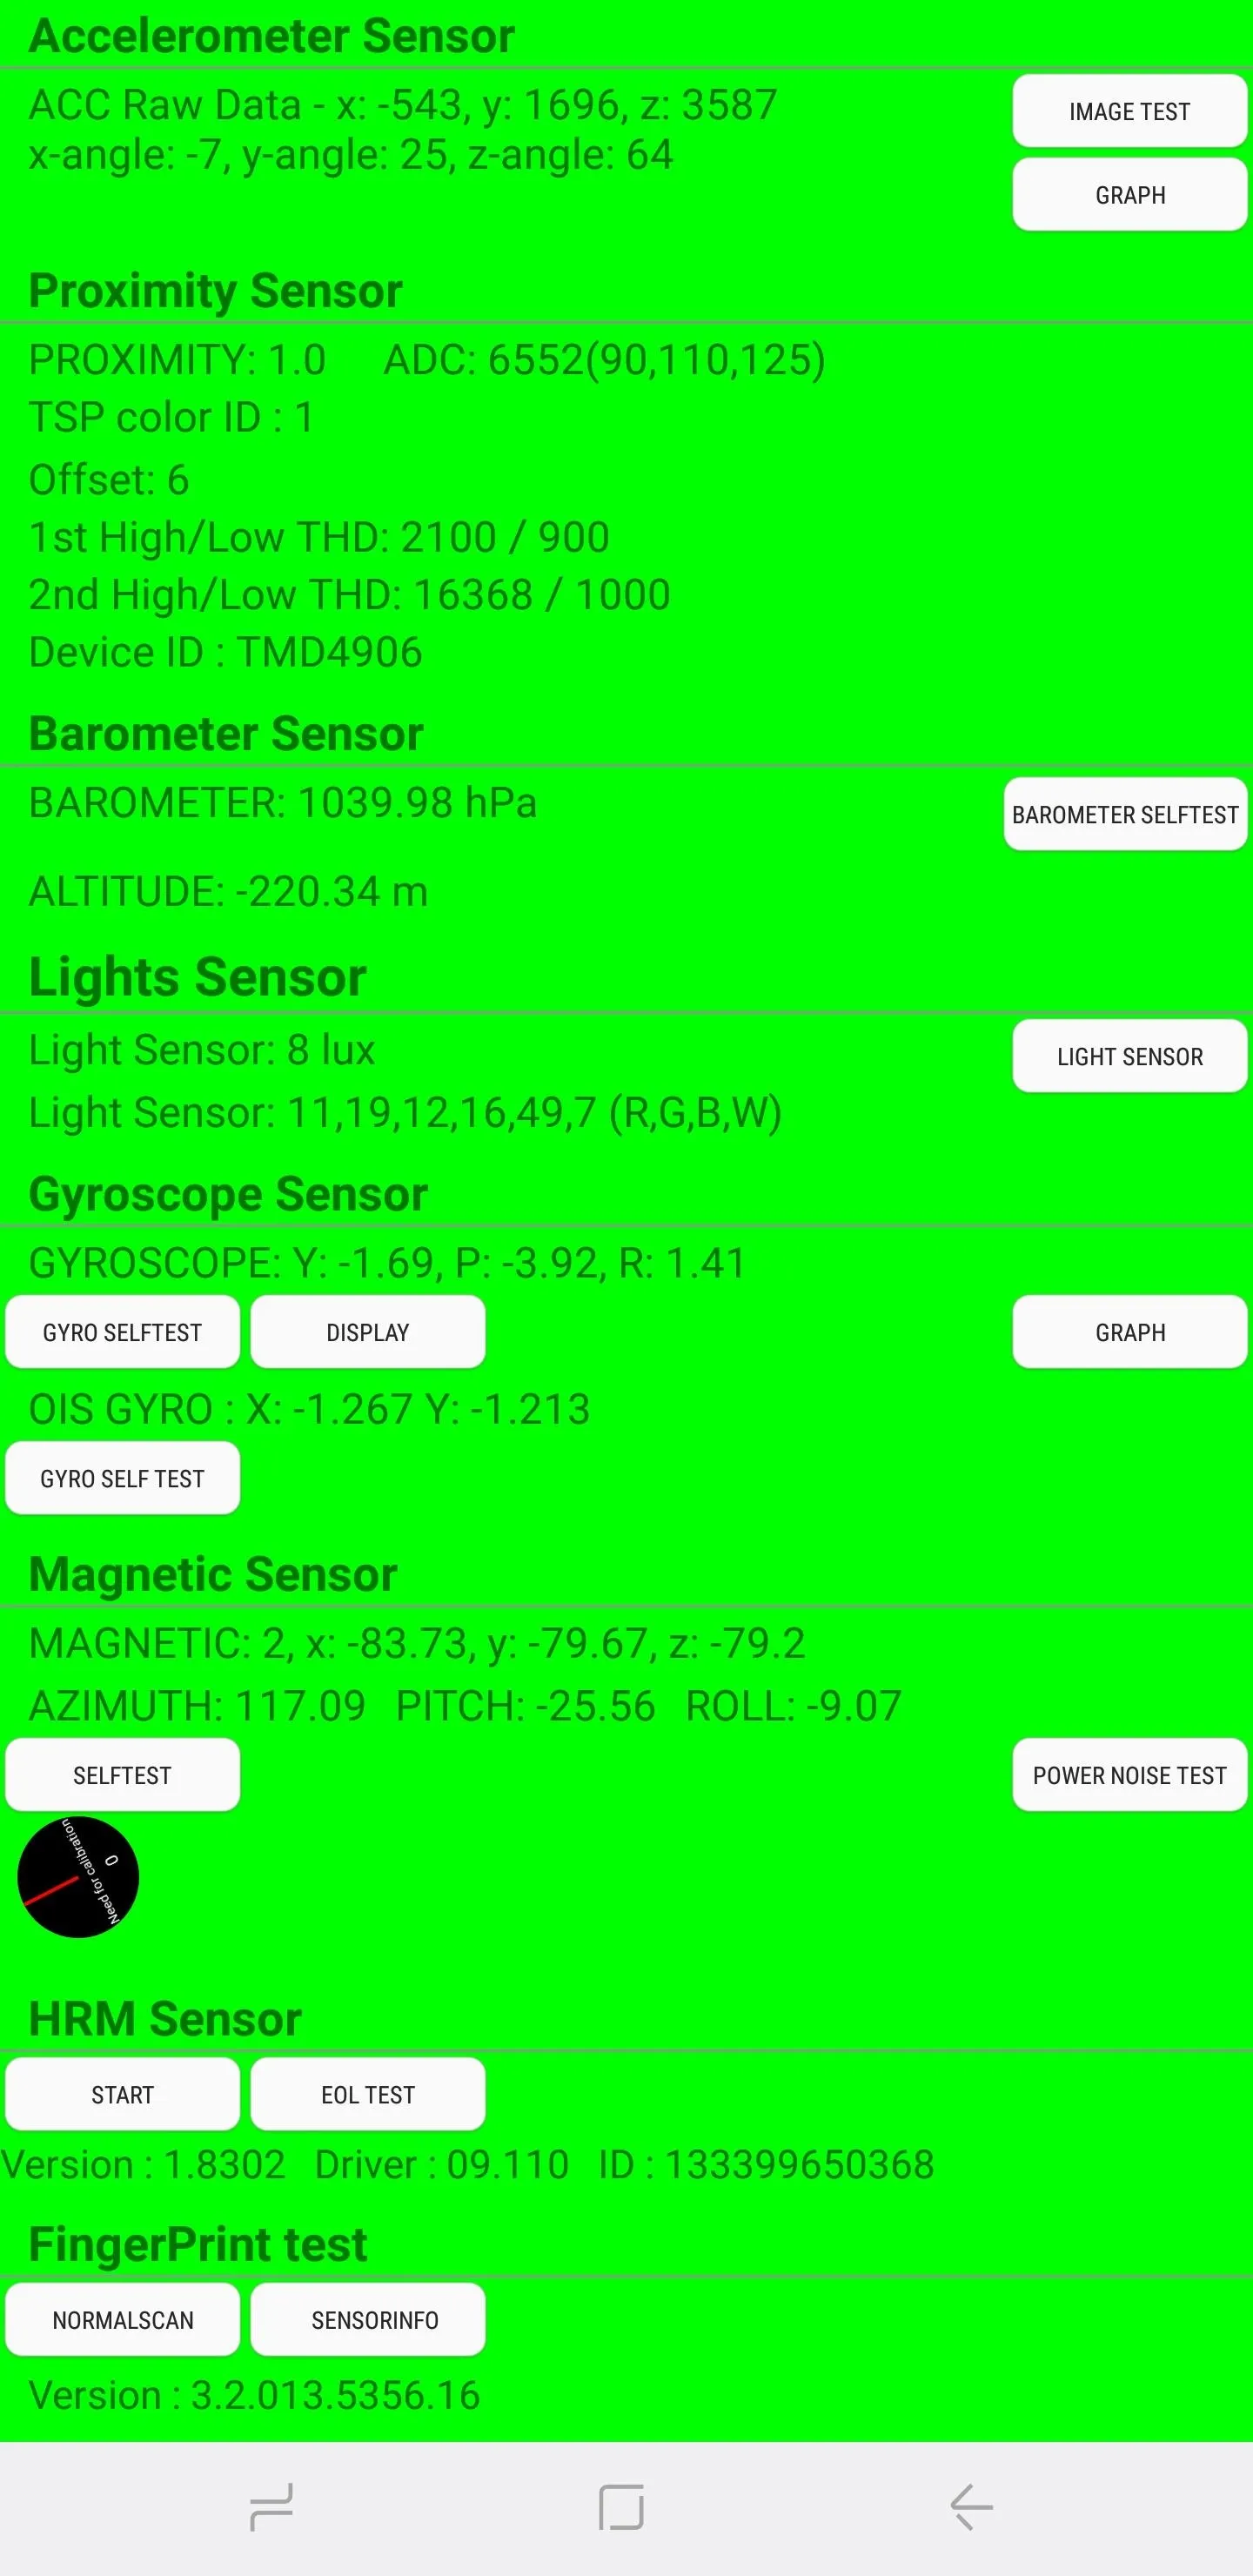
The proximity sensor is responsible for putting your screen to sleep whenever your phone is against your face during phone calls (to prevent unintentional touches). Testing for this feature is easy and involves simply covering the top of your phone with your hand. If the sensor works, the screen will turn green every time you cover it and revert back to white once you remove your hand.

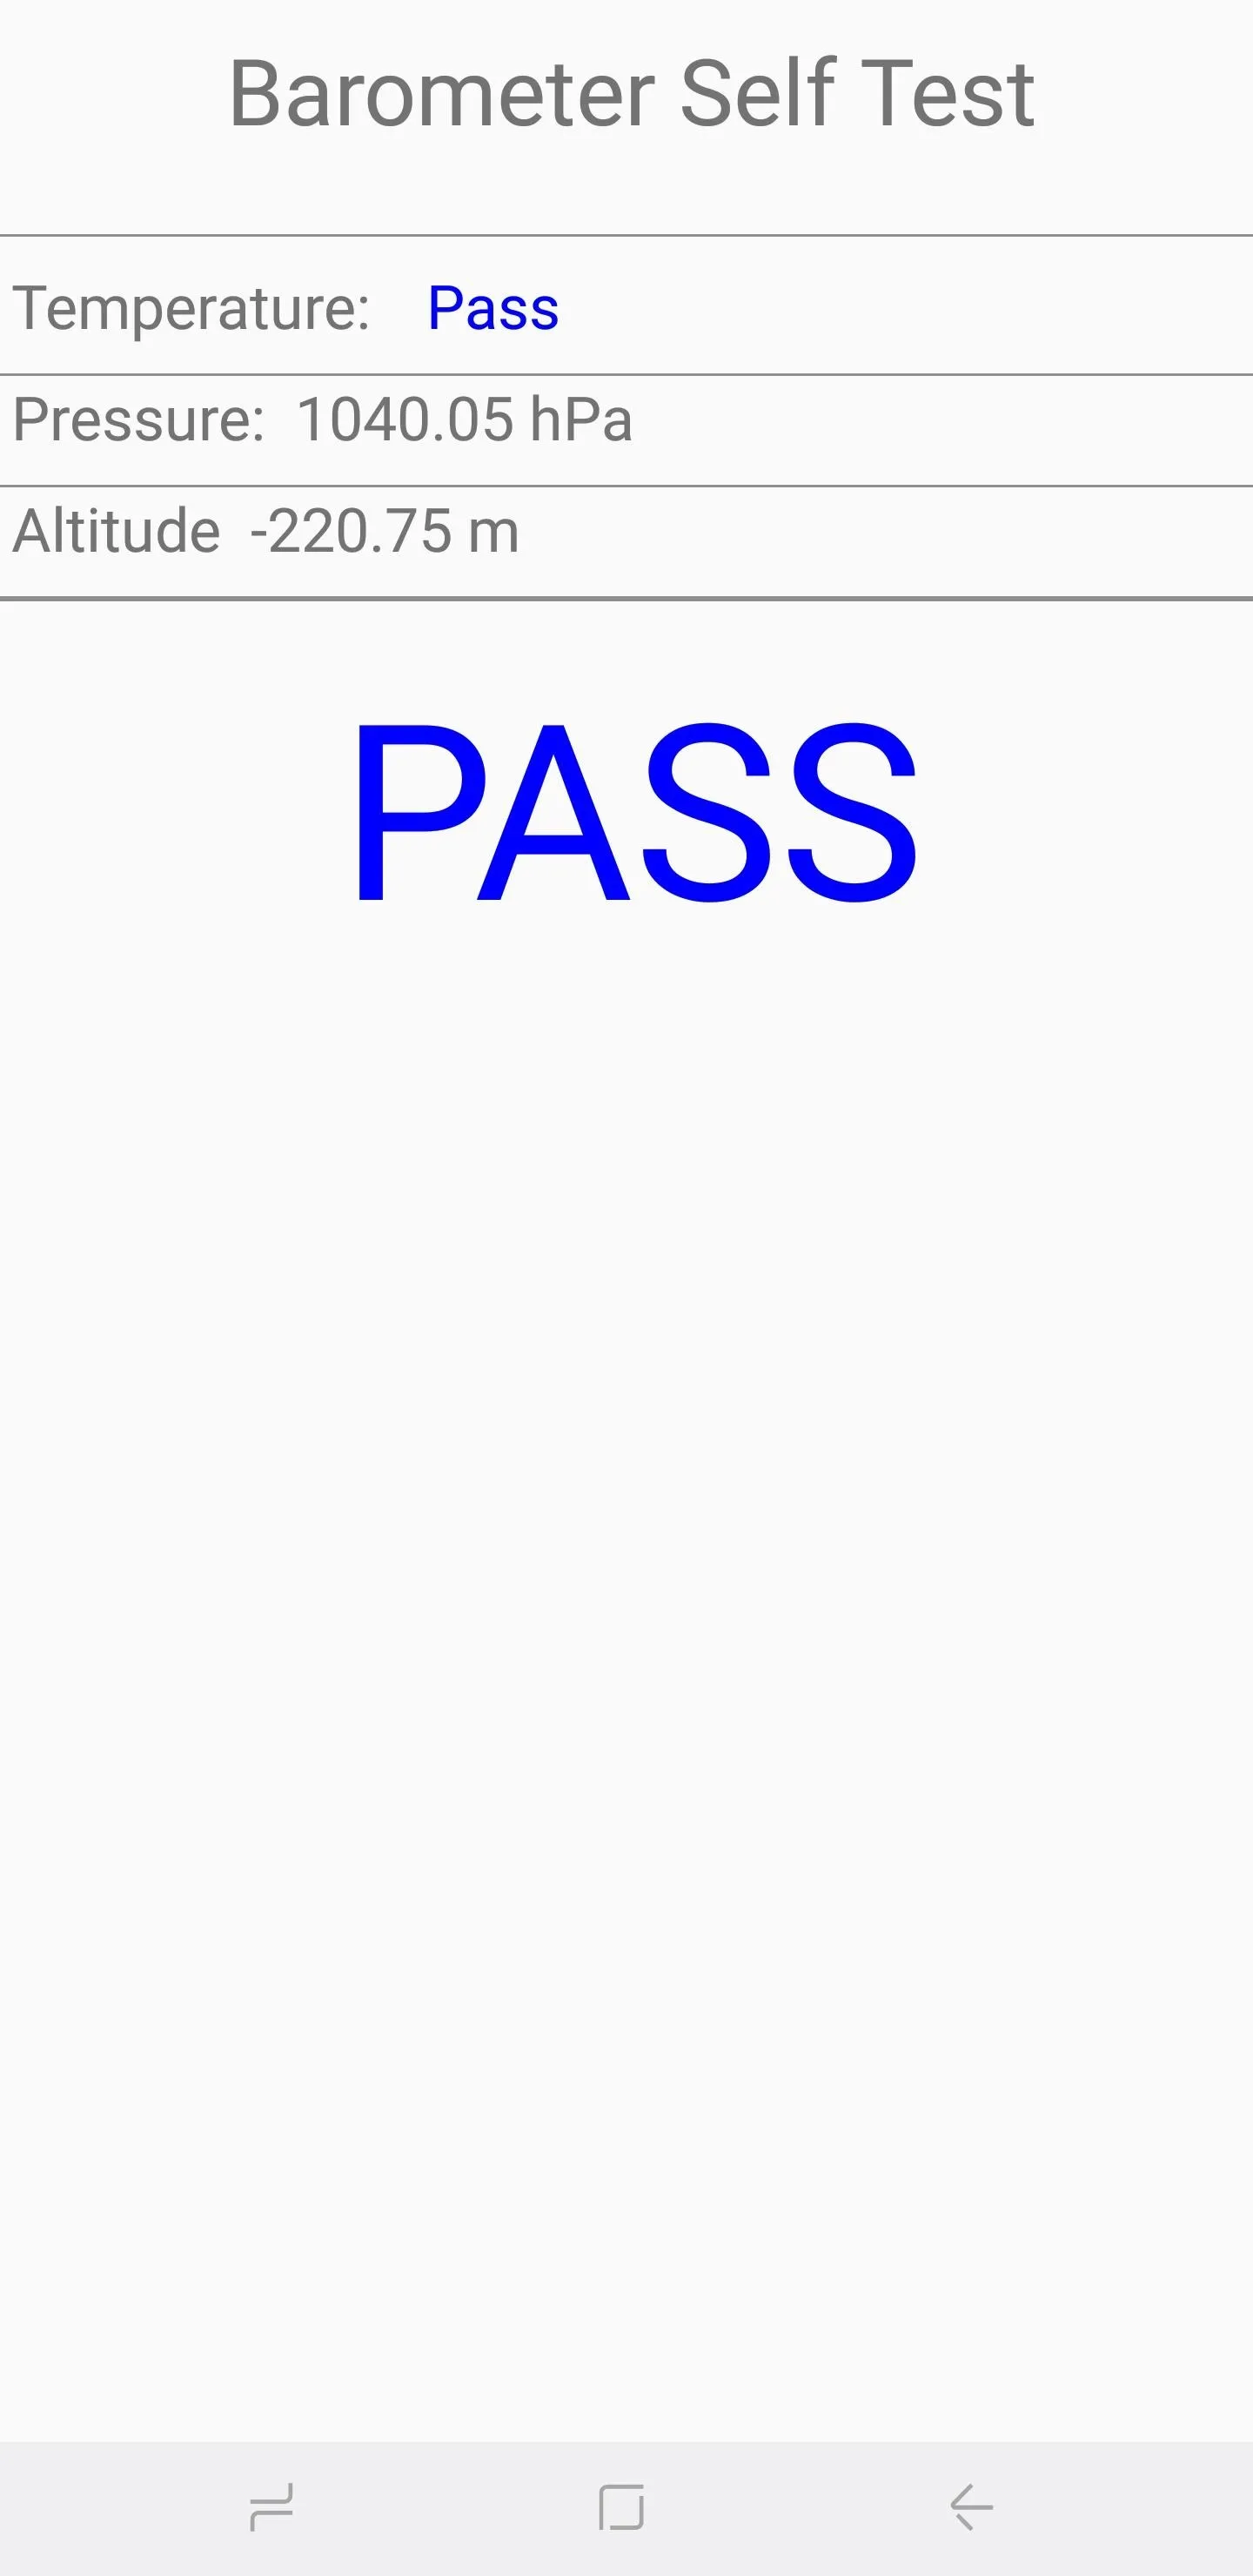
Barometer
This sensor primarily keeps track of altitude, which contributes to more accurate GPS readings. Testing for this function is straightforward — select "Barometer Selftest" to start an automatic test which will instantly let you know if it's functioning as it should.

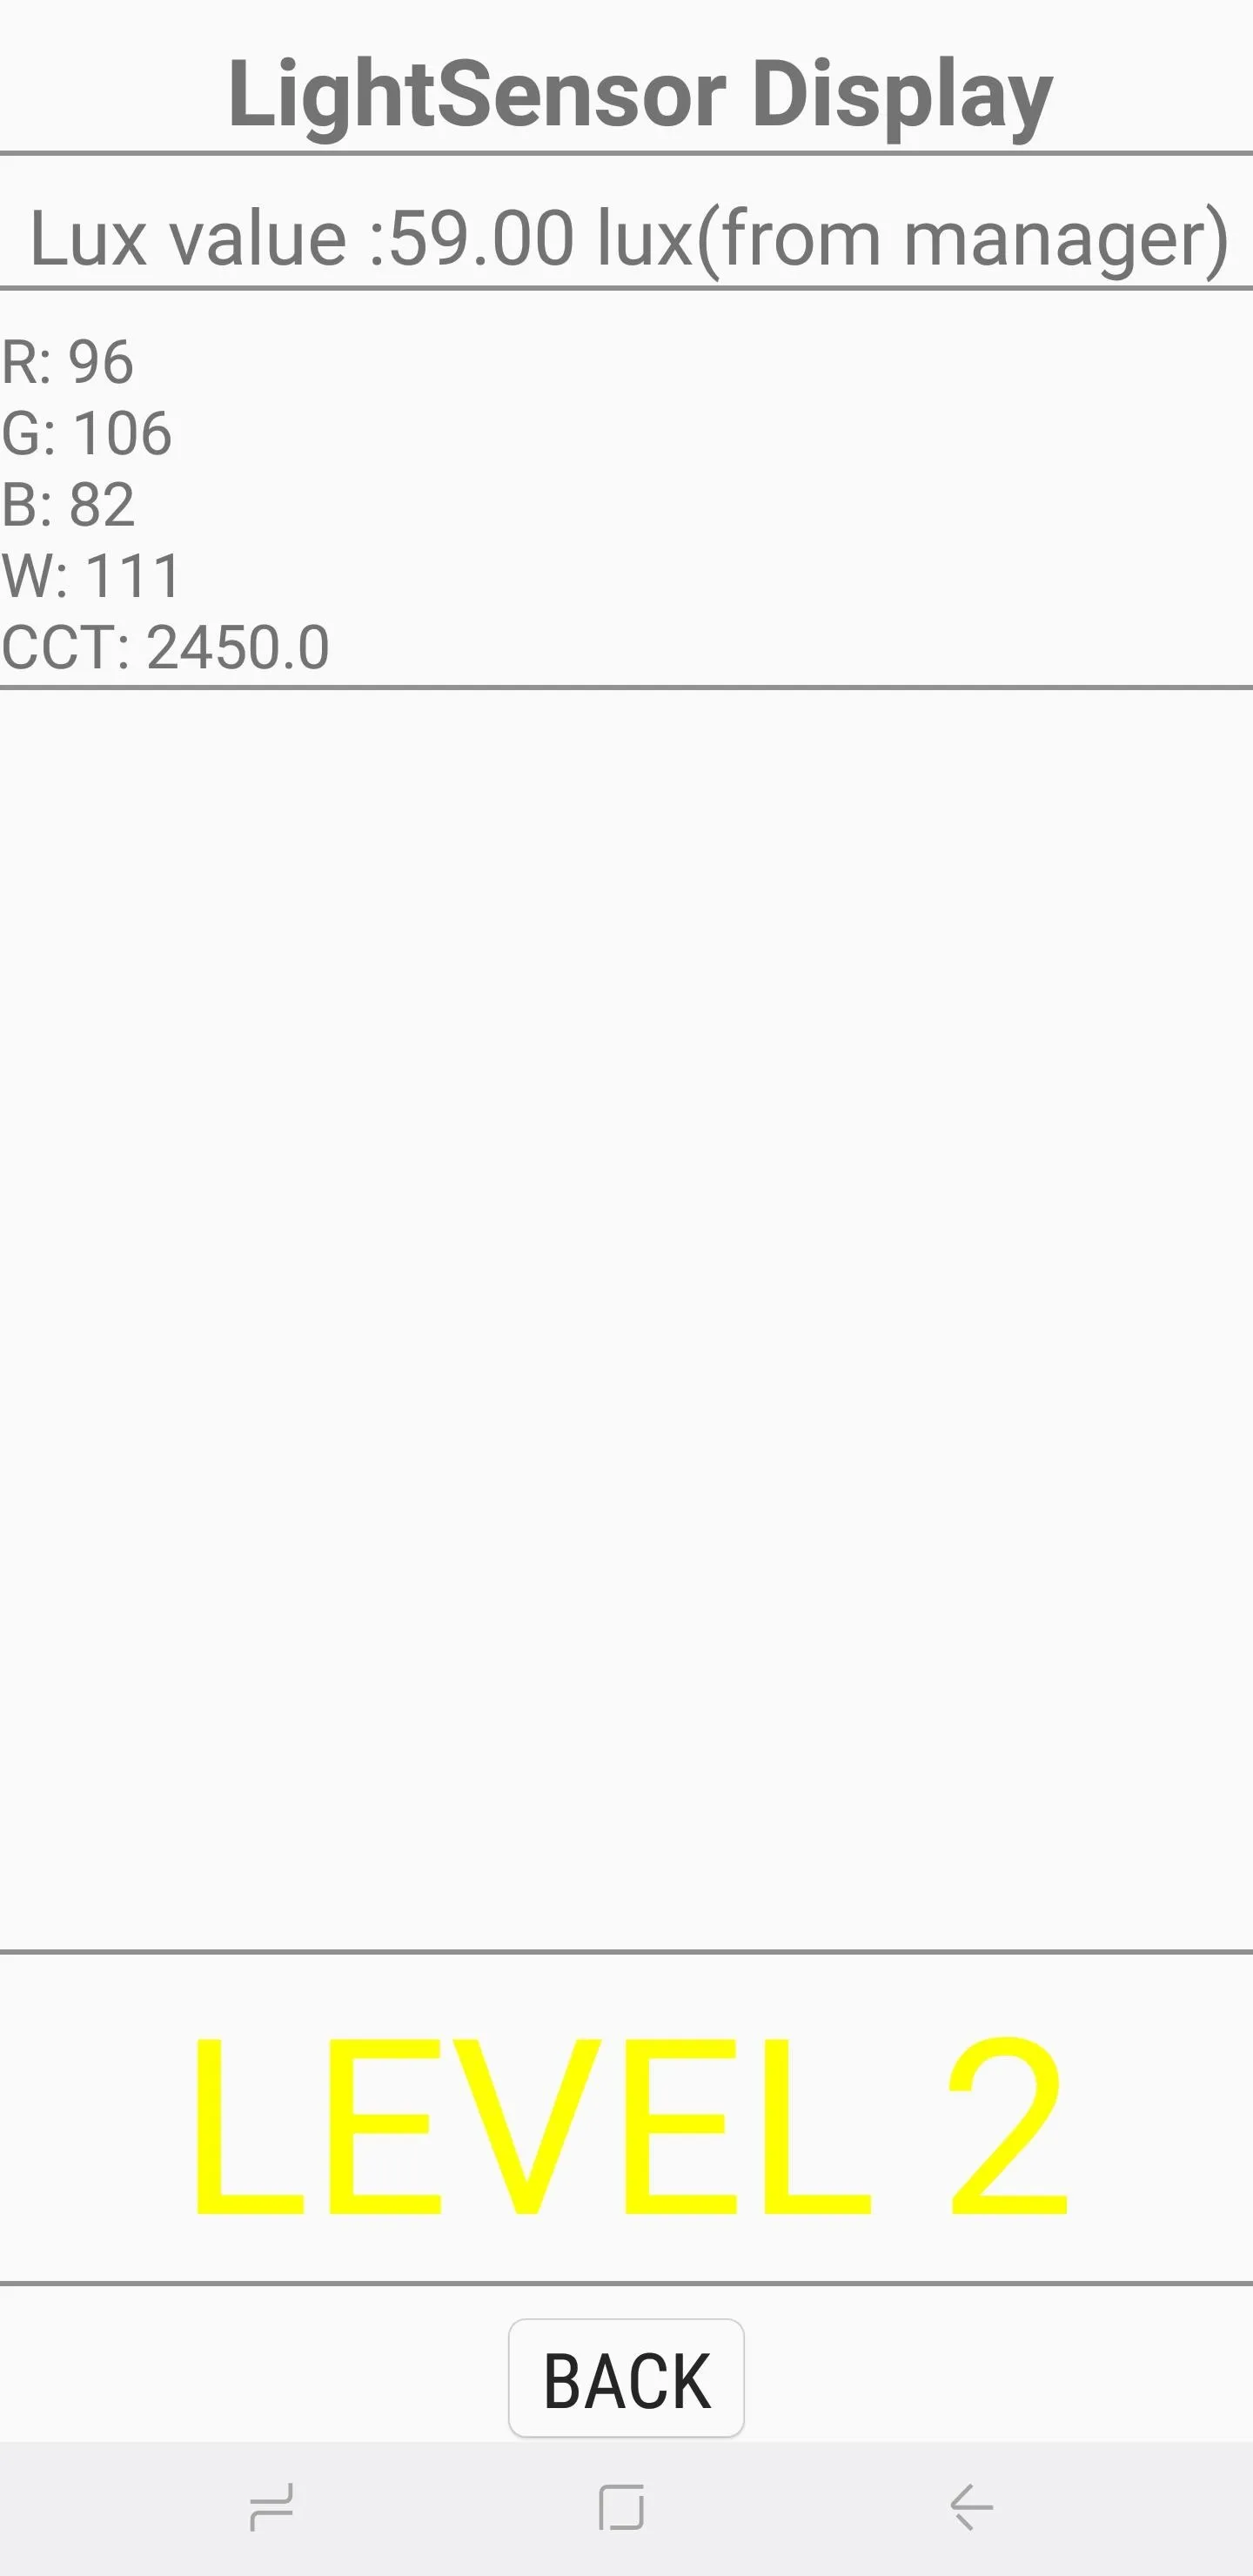
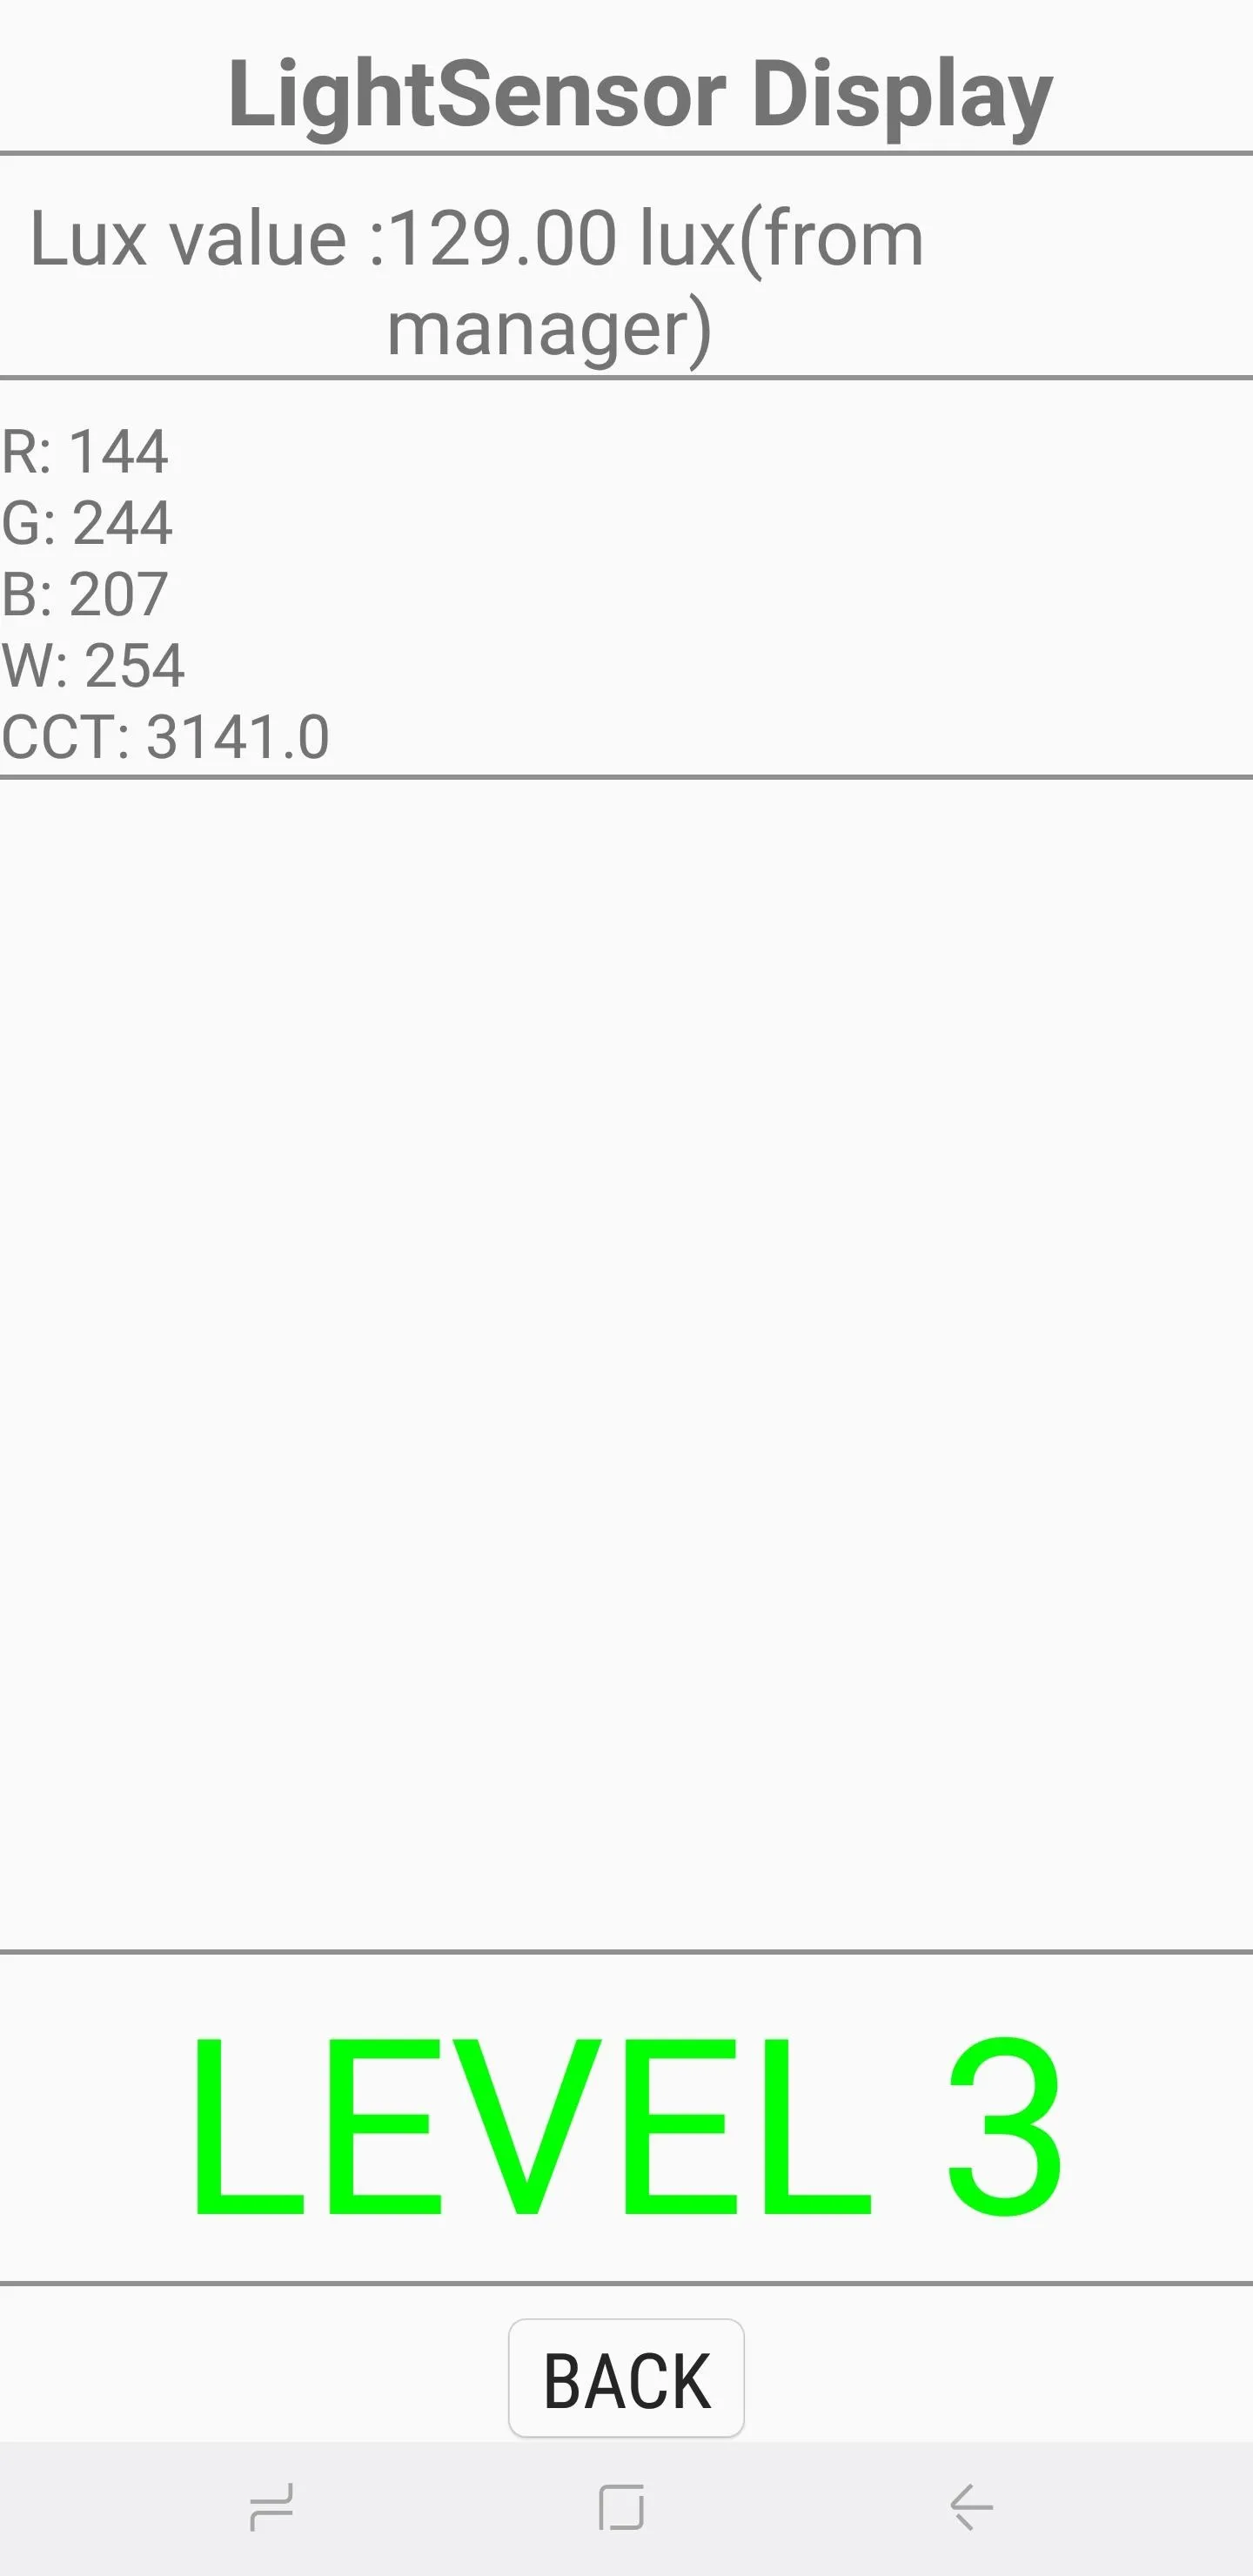
Light Sensor
The light sensor detects ambient light. To test for its functionality, simply tap on "Light Sensor" to begin. Now, expose your phone to light of varying brightness, and three levels should register in turn. These levels start from "Level 1" for dim lighting, all the way up to "Level 3" for extremely bright.

Gyroscope
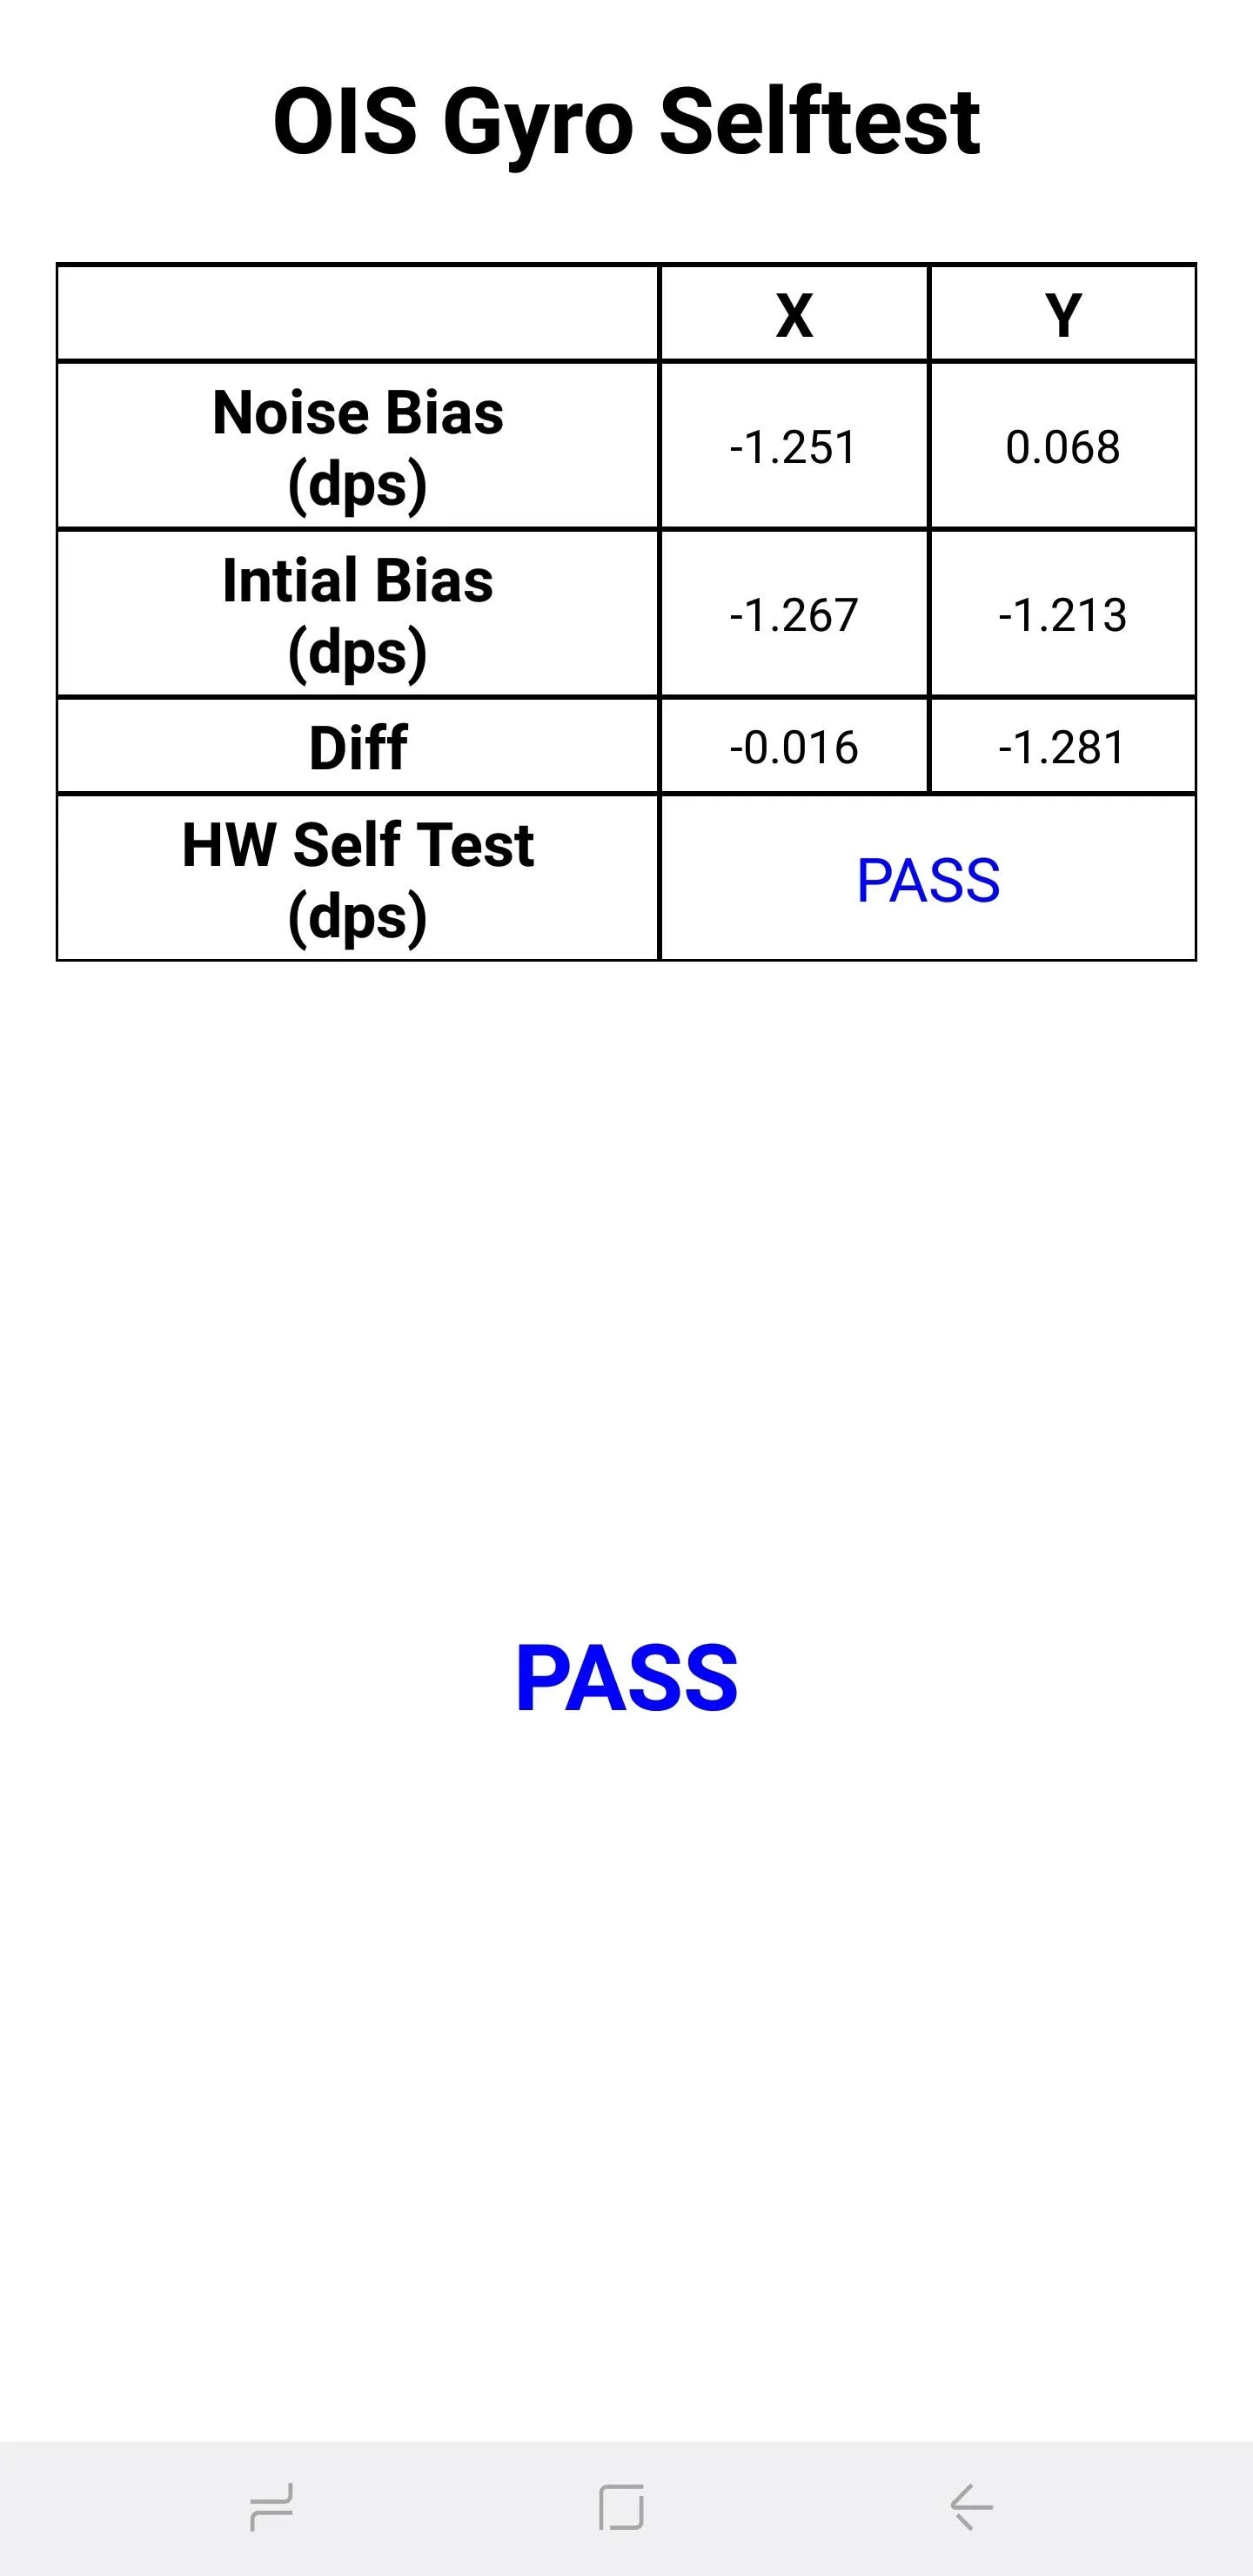
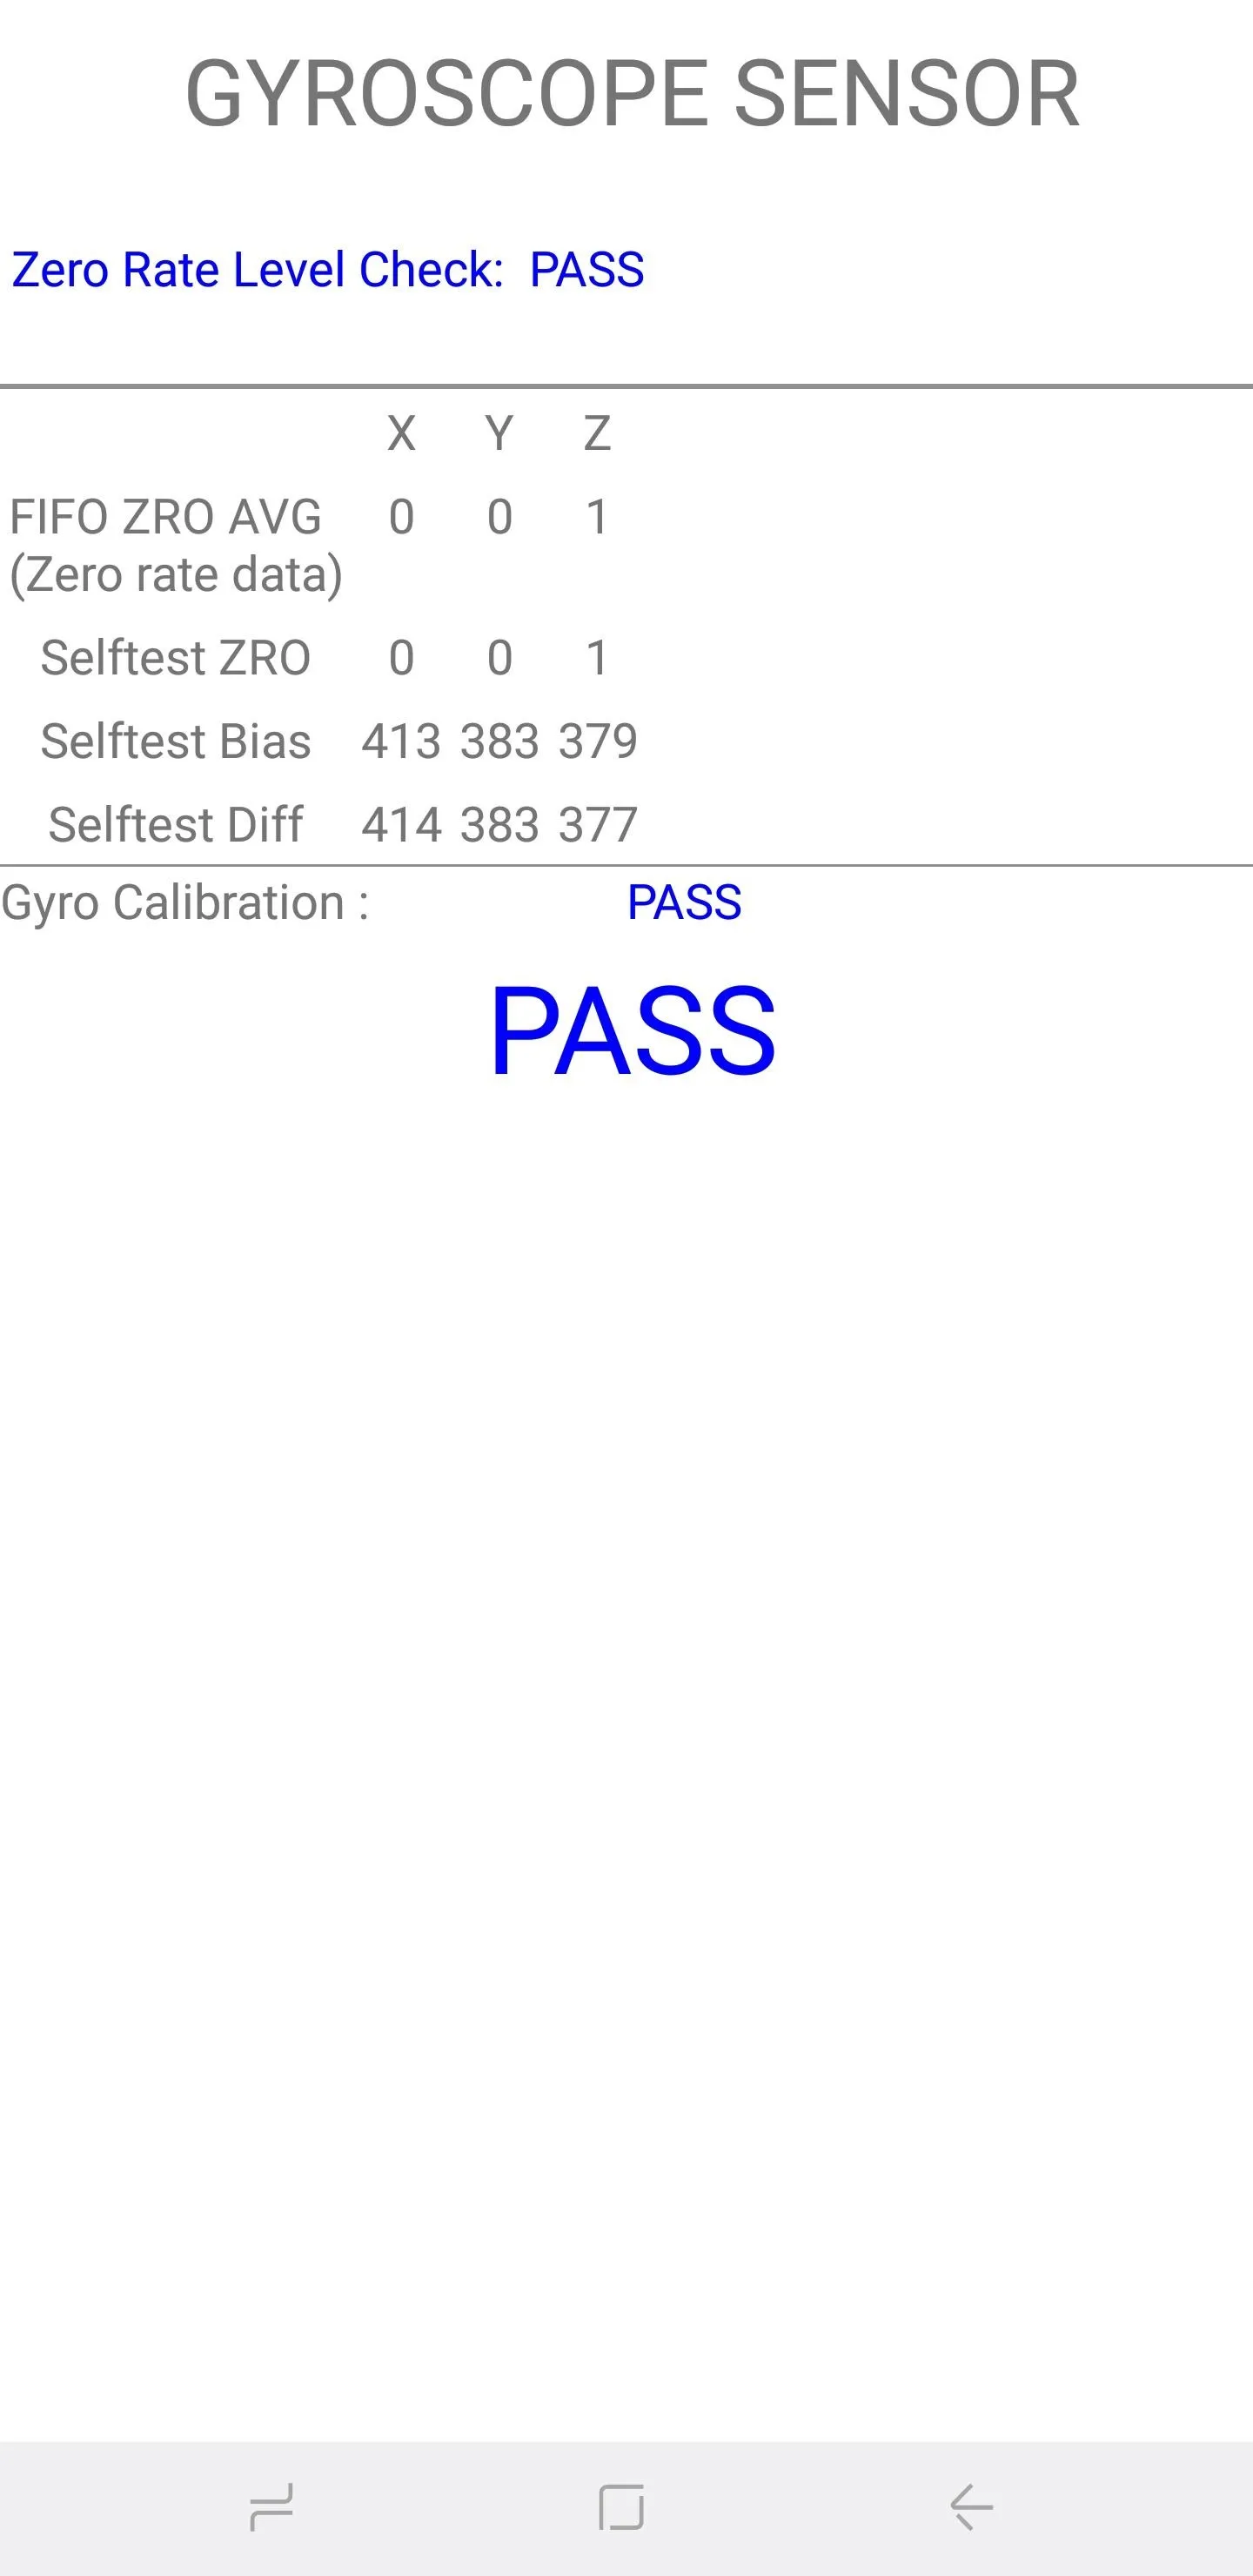
The gyroscope measures your phone's rotations and works in conjunction with the accelerometer to paint a more thorough picture of general movement. There are two main ways to test your handset's gyroscope — you can perform a manual test by tapping on either "Display" or "Graph," and rotate your phone around while reading the corresponding results in either numbers or linear graph form.
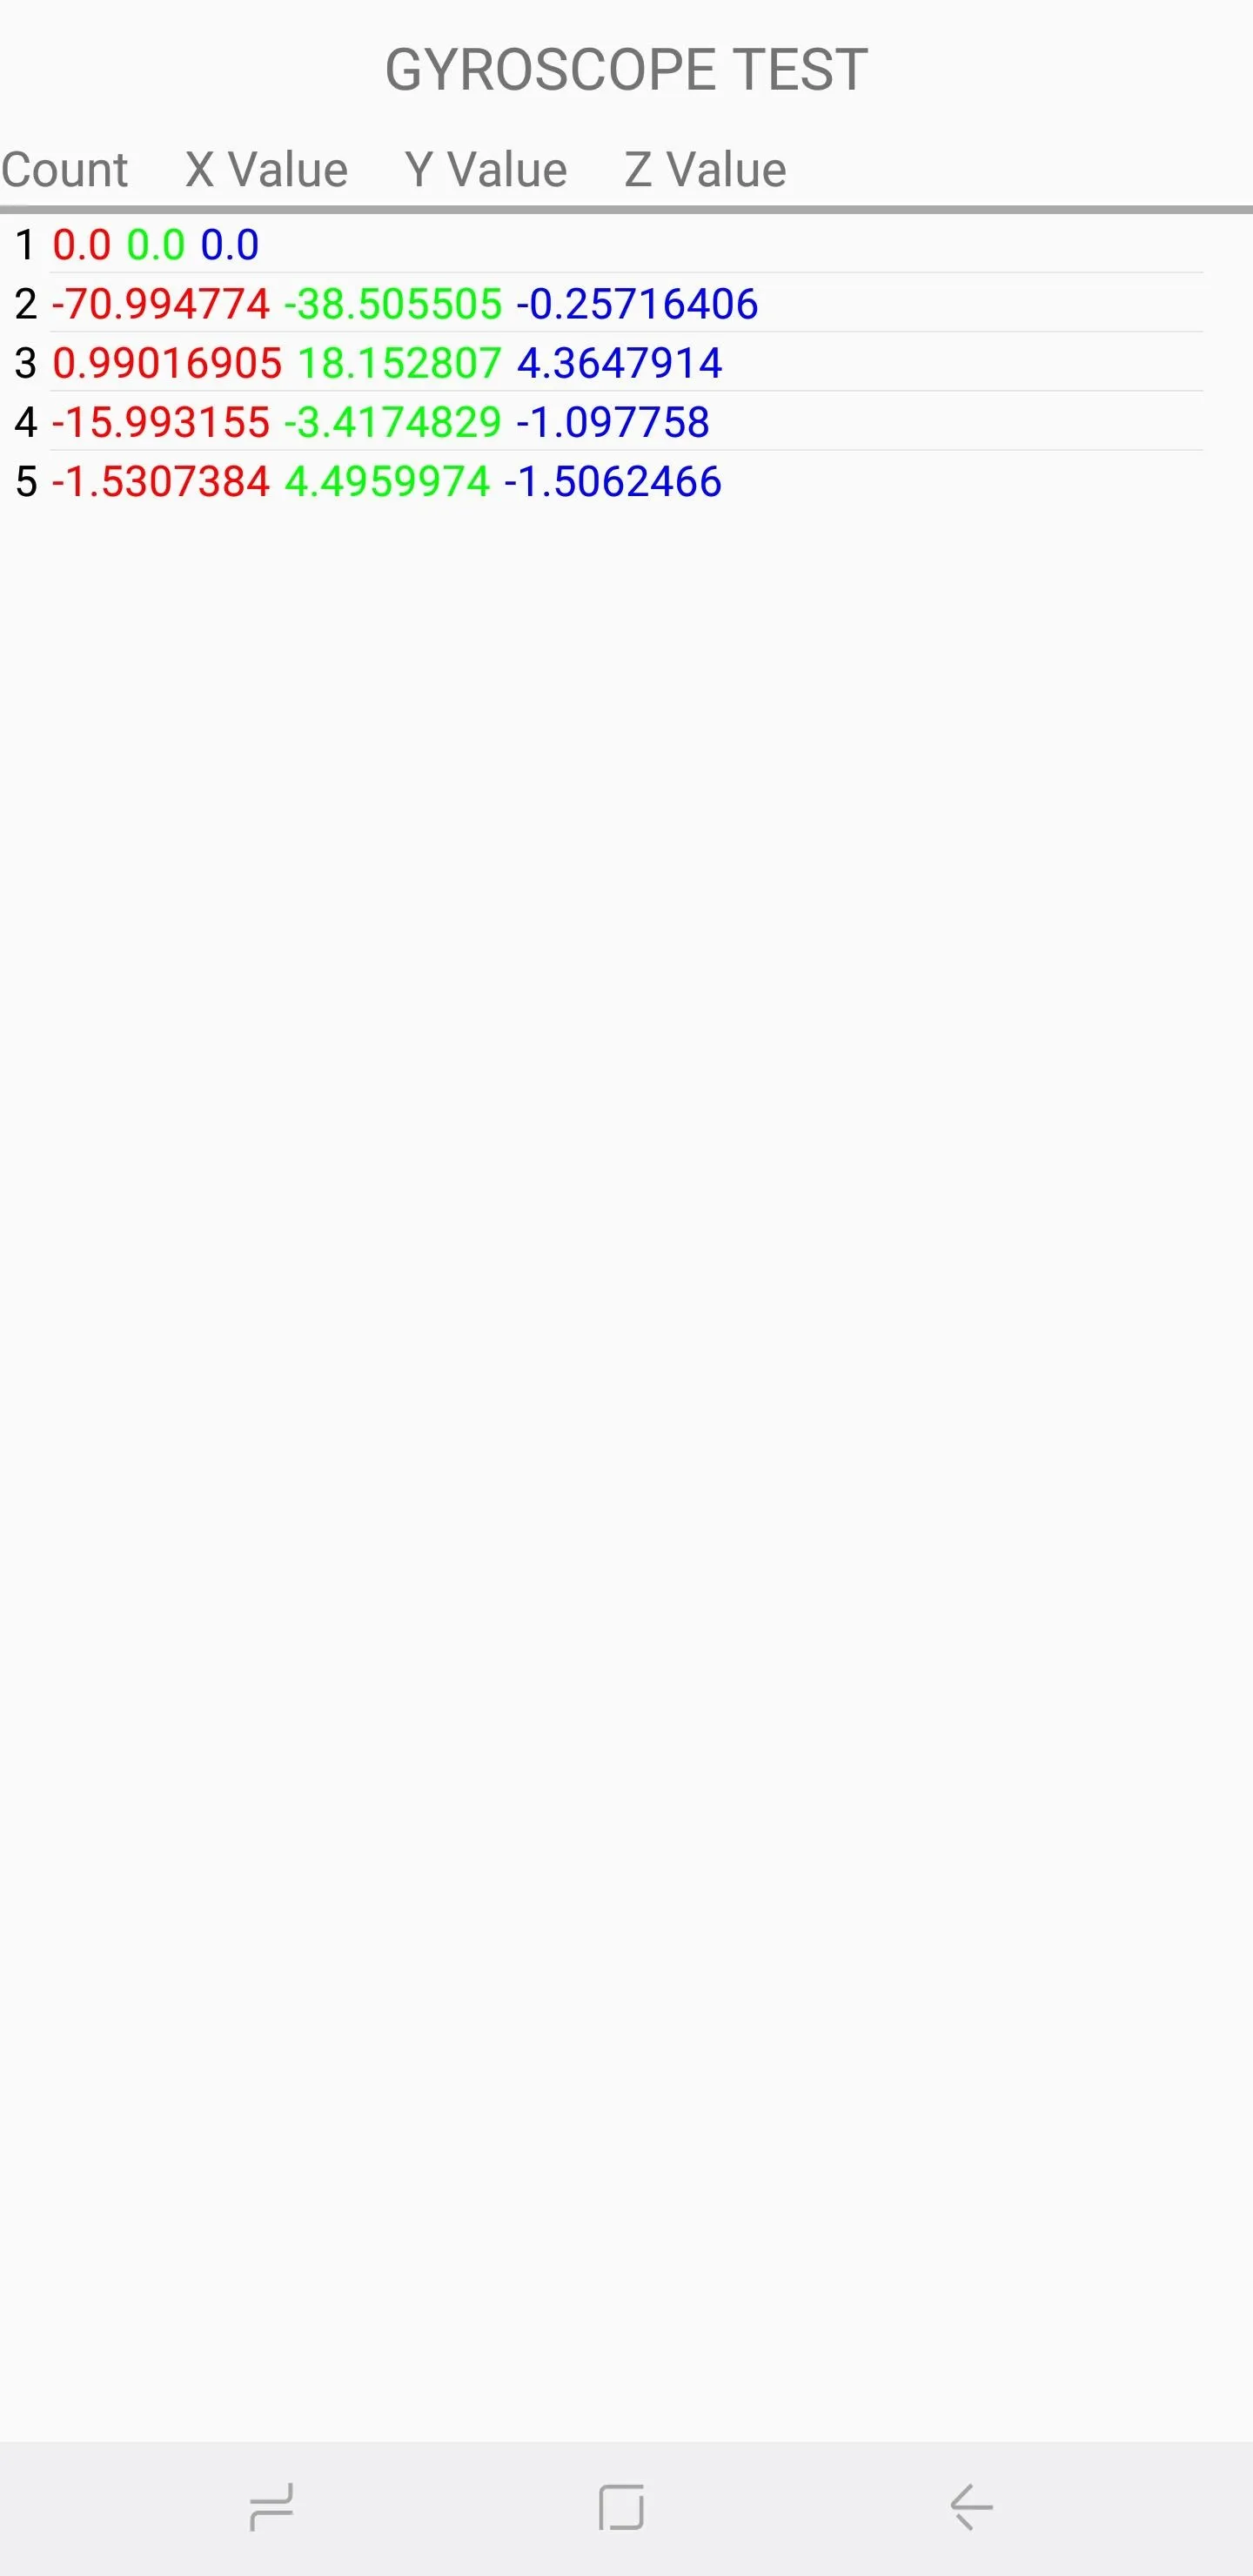
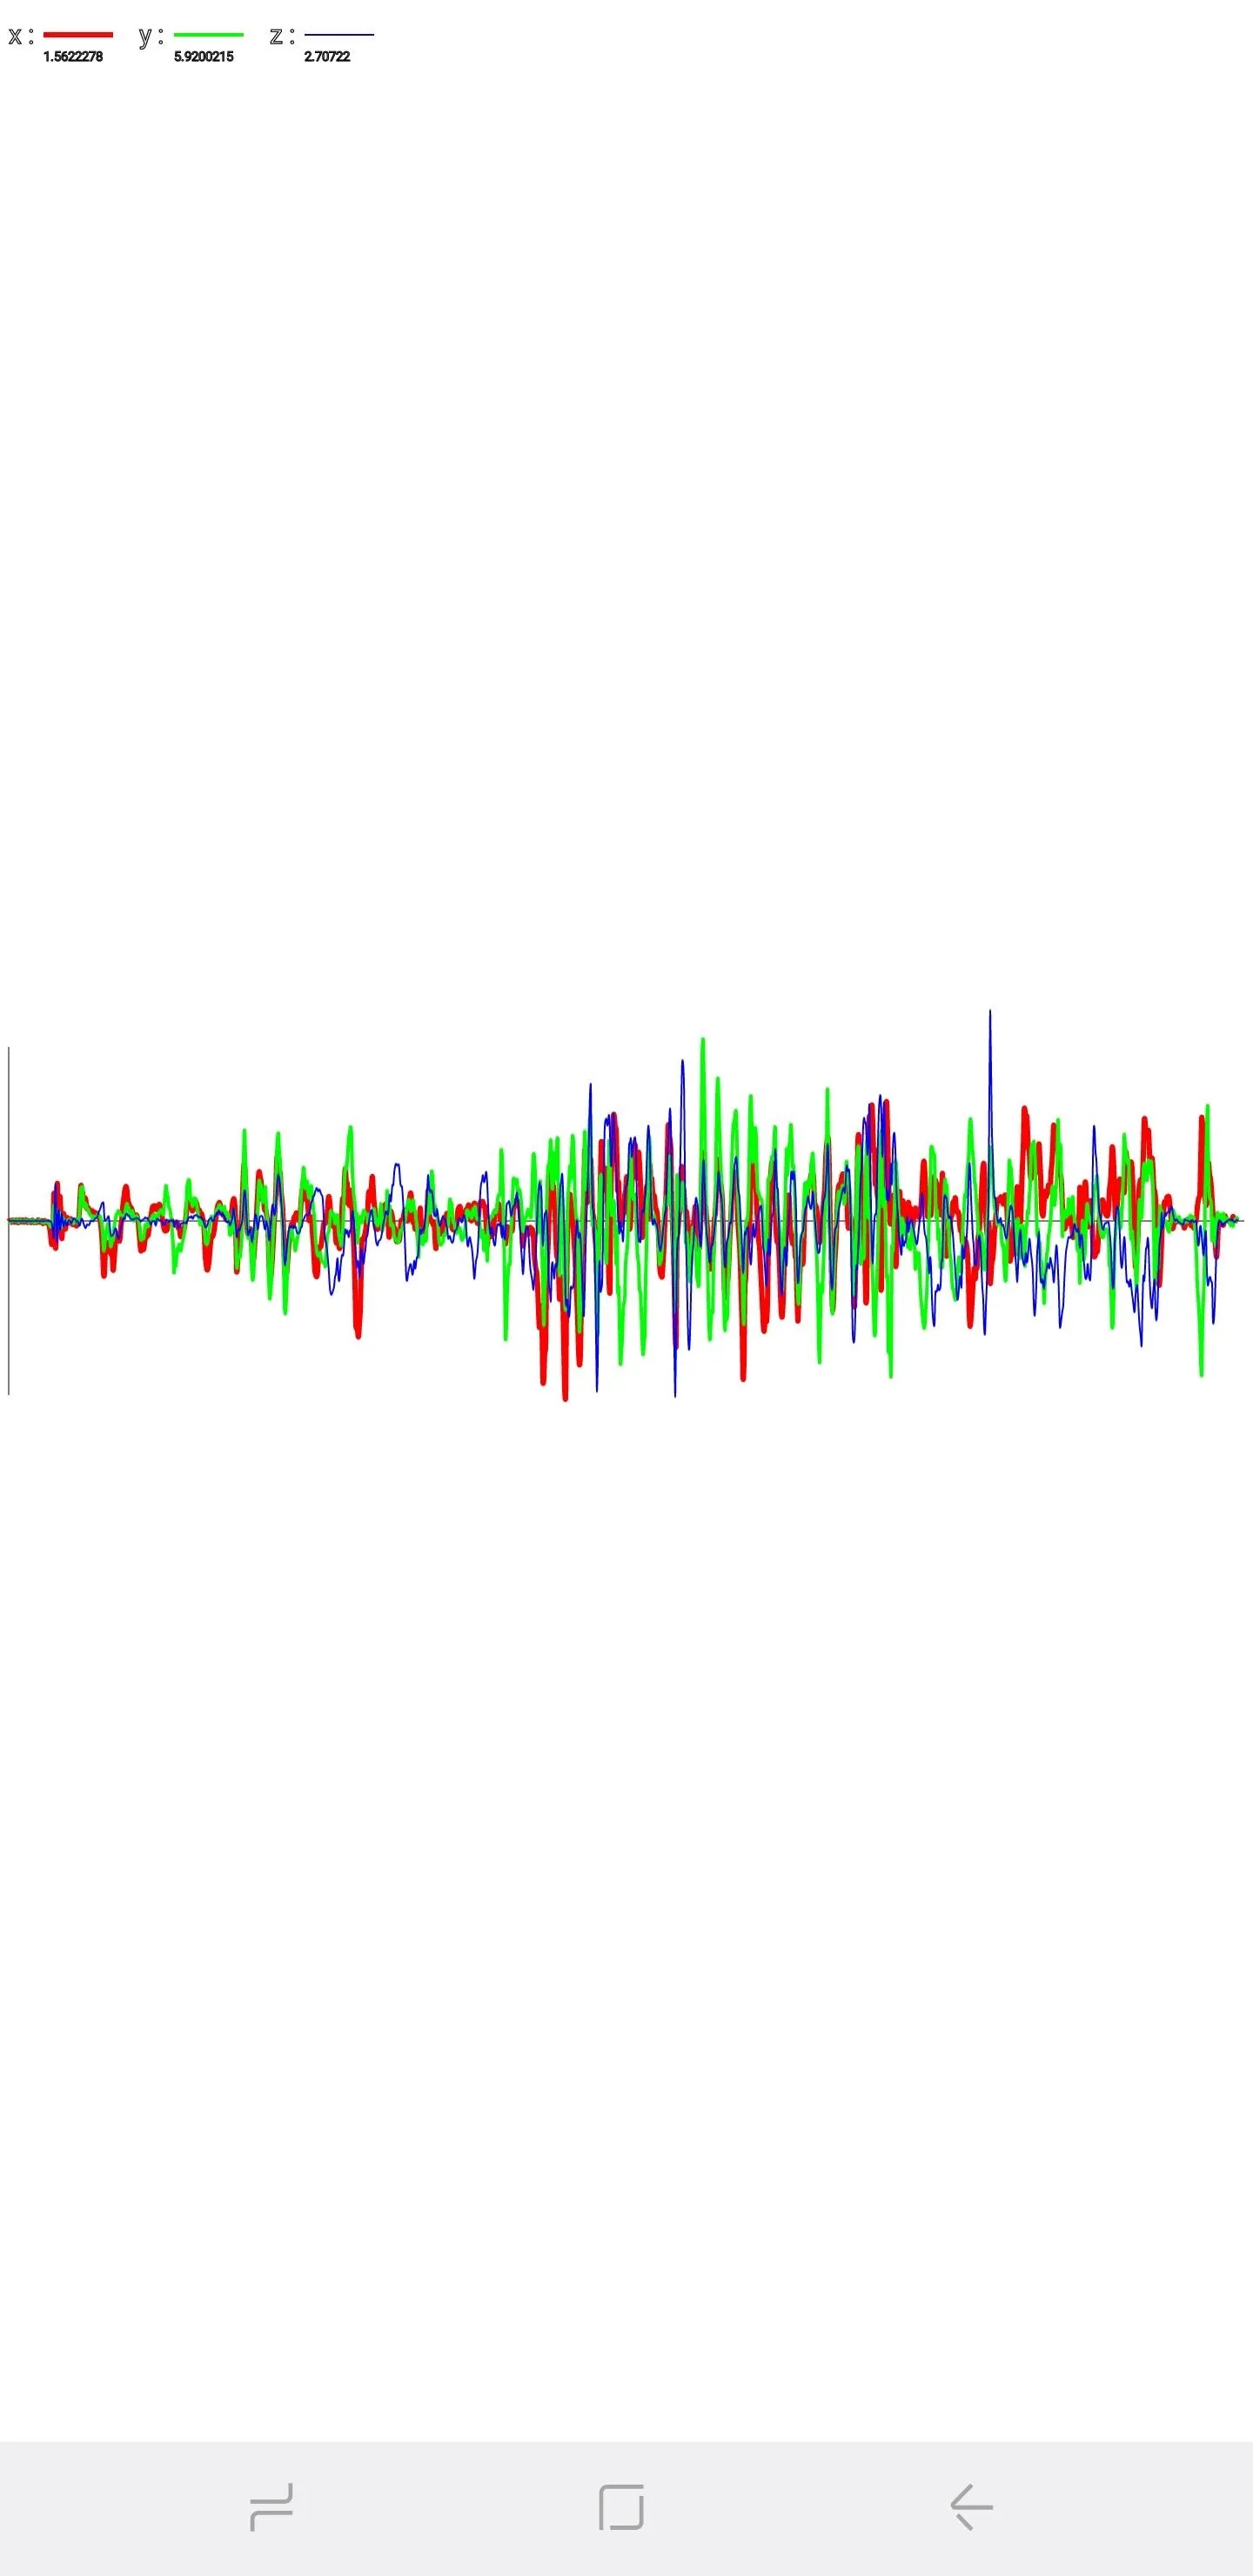
The second main test is automatic — you can perform by tapping on "Gyro Selftest," which will yield a result of either pass or fail for both the x and y axis.
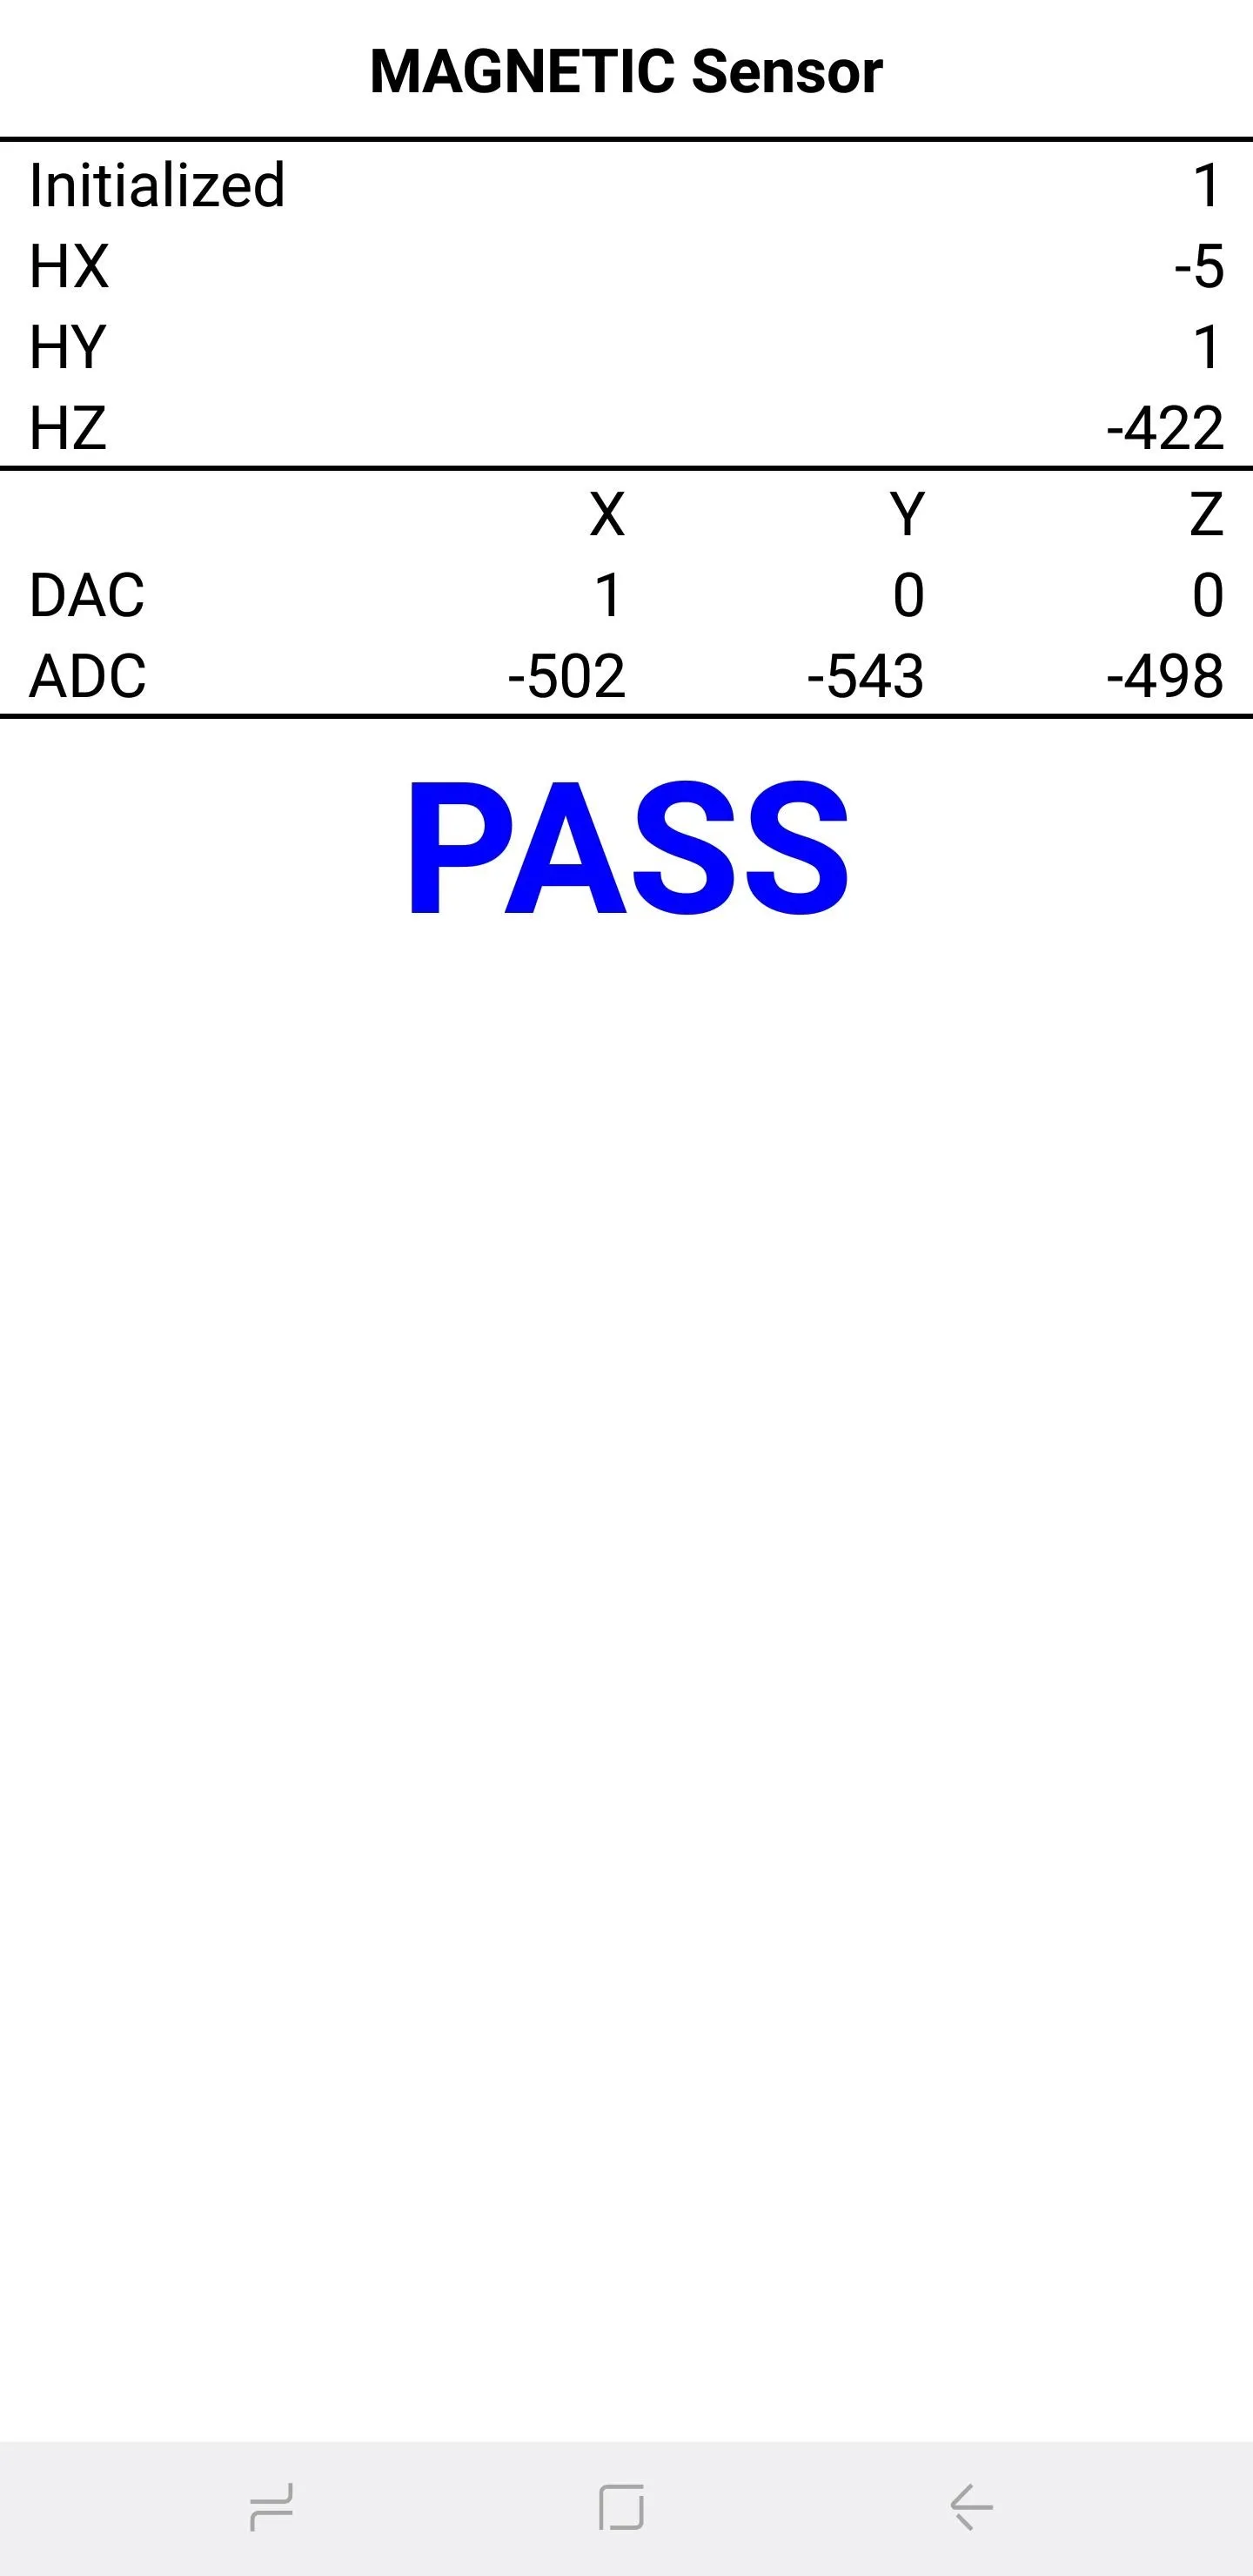
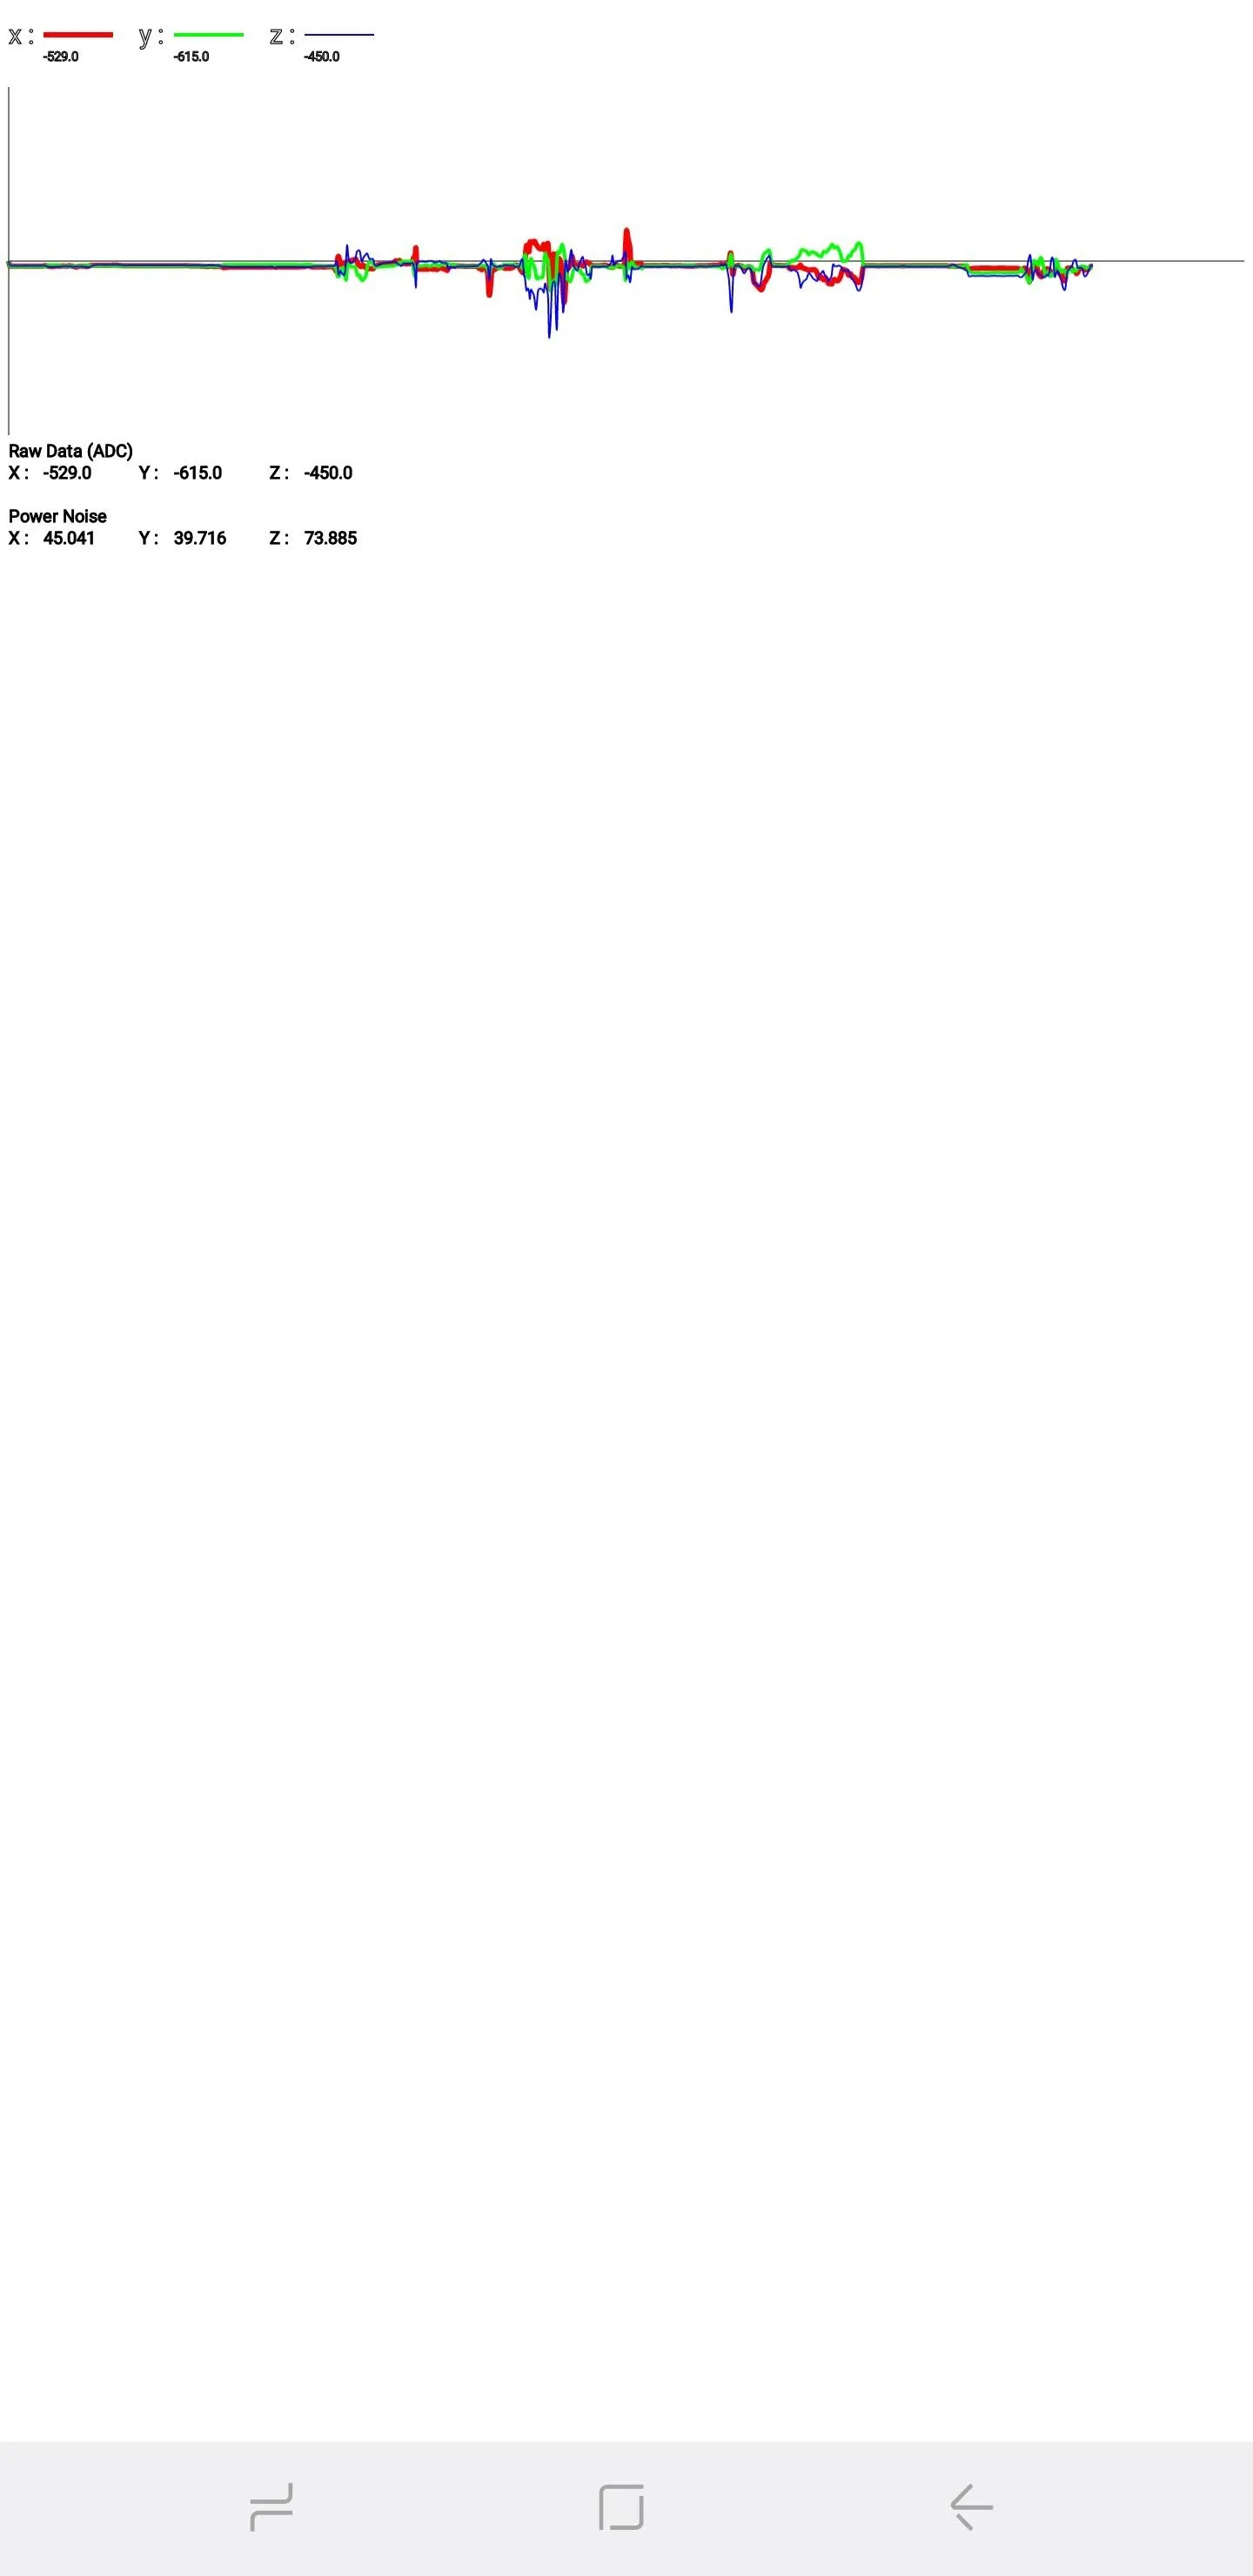
Magnetic Sensor
You can test for the functionality of your phone's magnetic sensor in two ways. Selecting "Selftest" will run an automatic test to see if your device passes or fails. To perform a manual test, tap on "Power Noise Test," then run a magnet around your phone. On the S8, for example, the magnetic sensor is located along the top-left corner of the phone, as shown by spikes on the graph when a magnet is close to it.
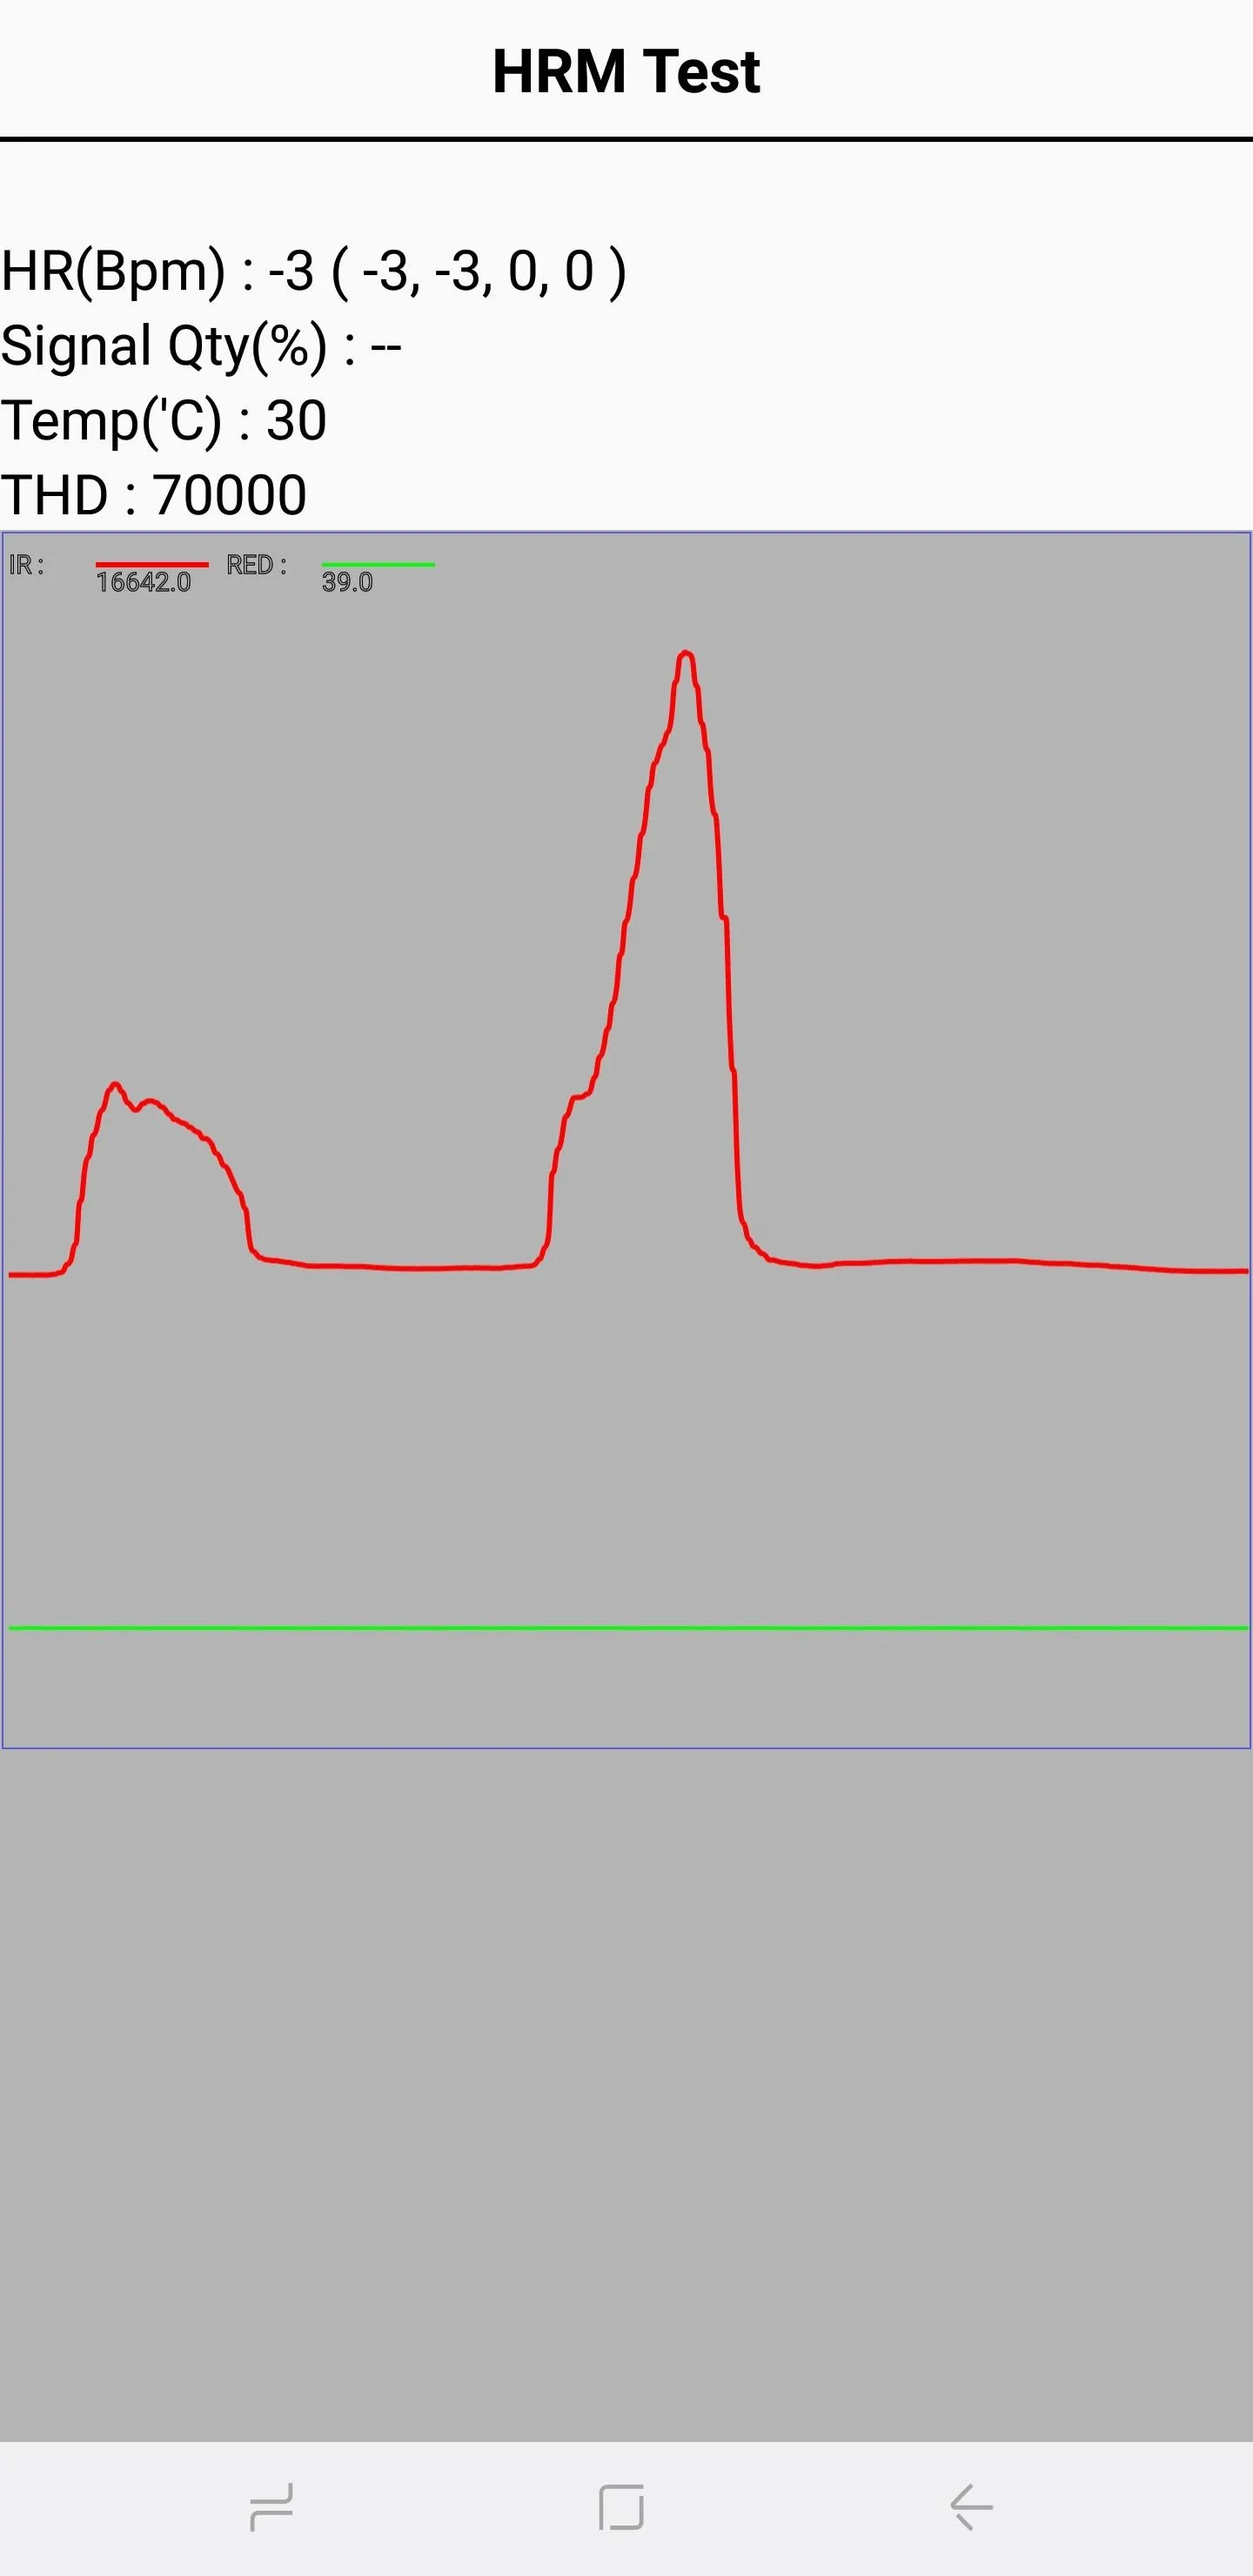
Heart Rate Monitor (HRM)
The HRM section contains a series of tests for your smartphone's heart rate monitor, which can be performed in two ways. To manually test the sensor, tap on the "Start" button within the "HRM" tab to go to the "HRM Test" page. From there, simply place your finger on the sensor to see if it successfully reads your heart rate.
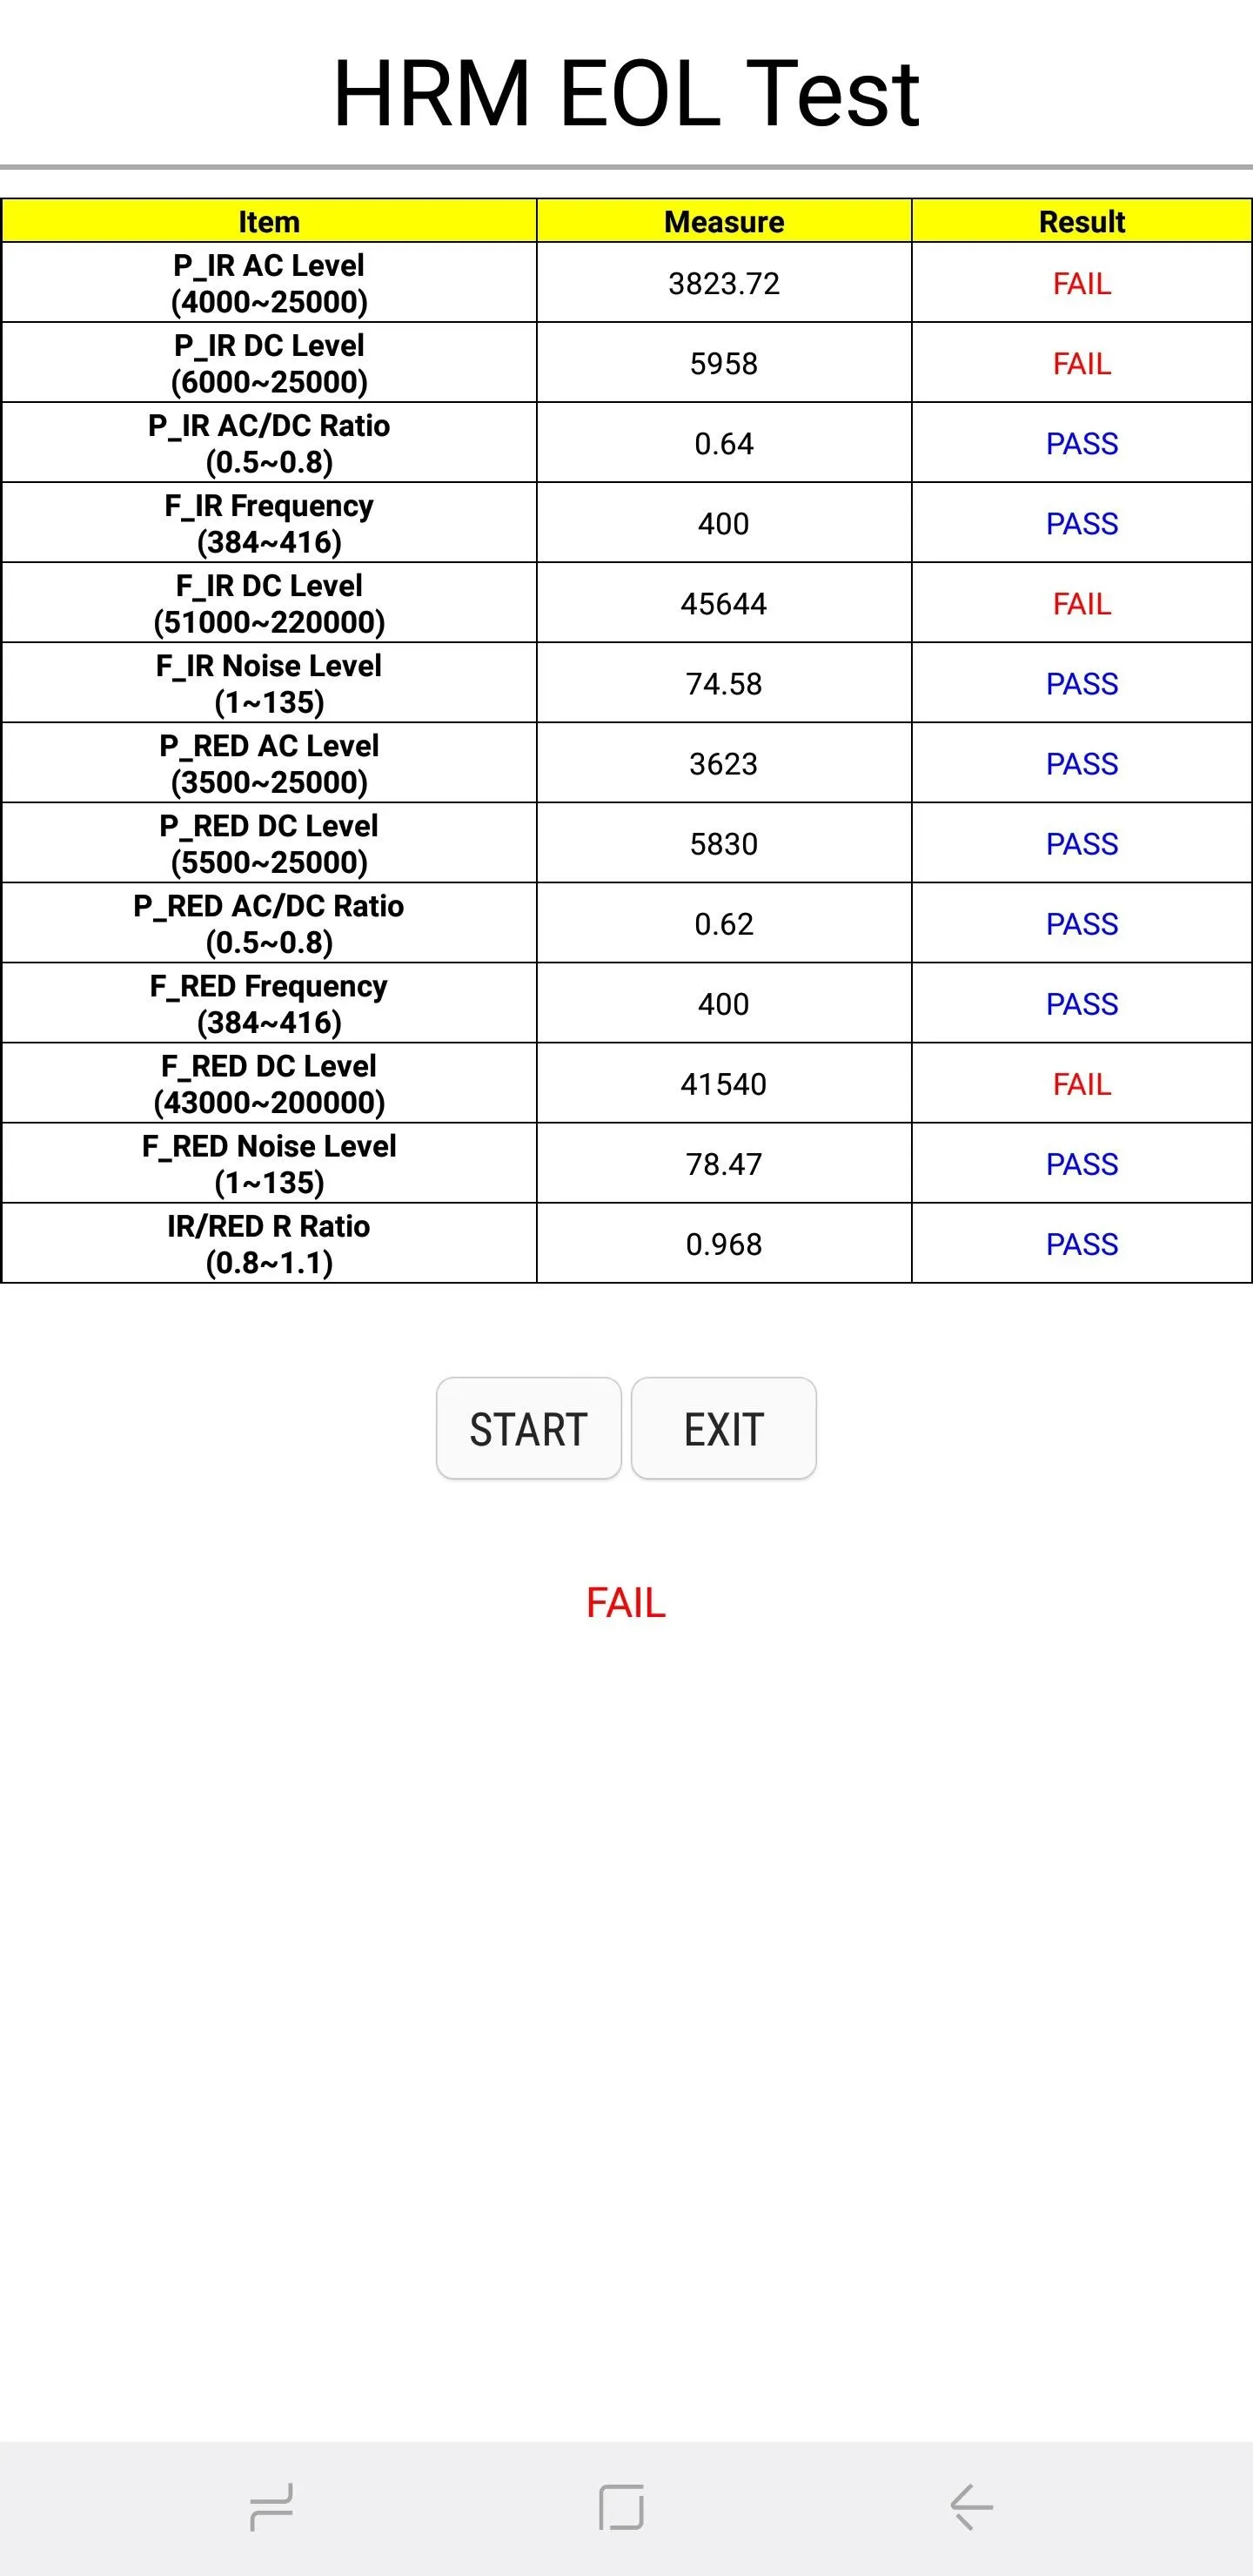
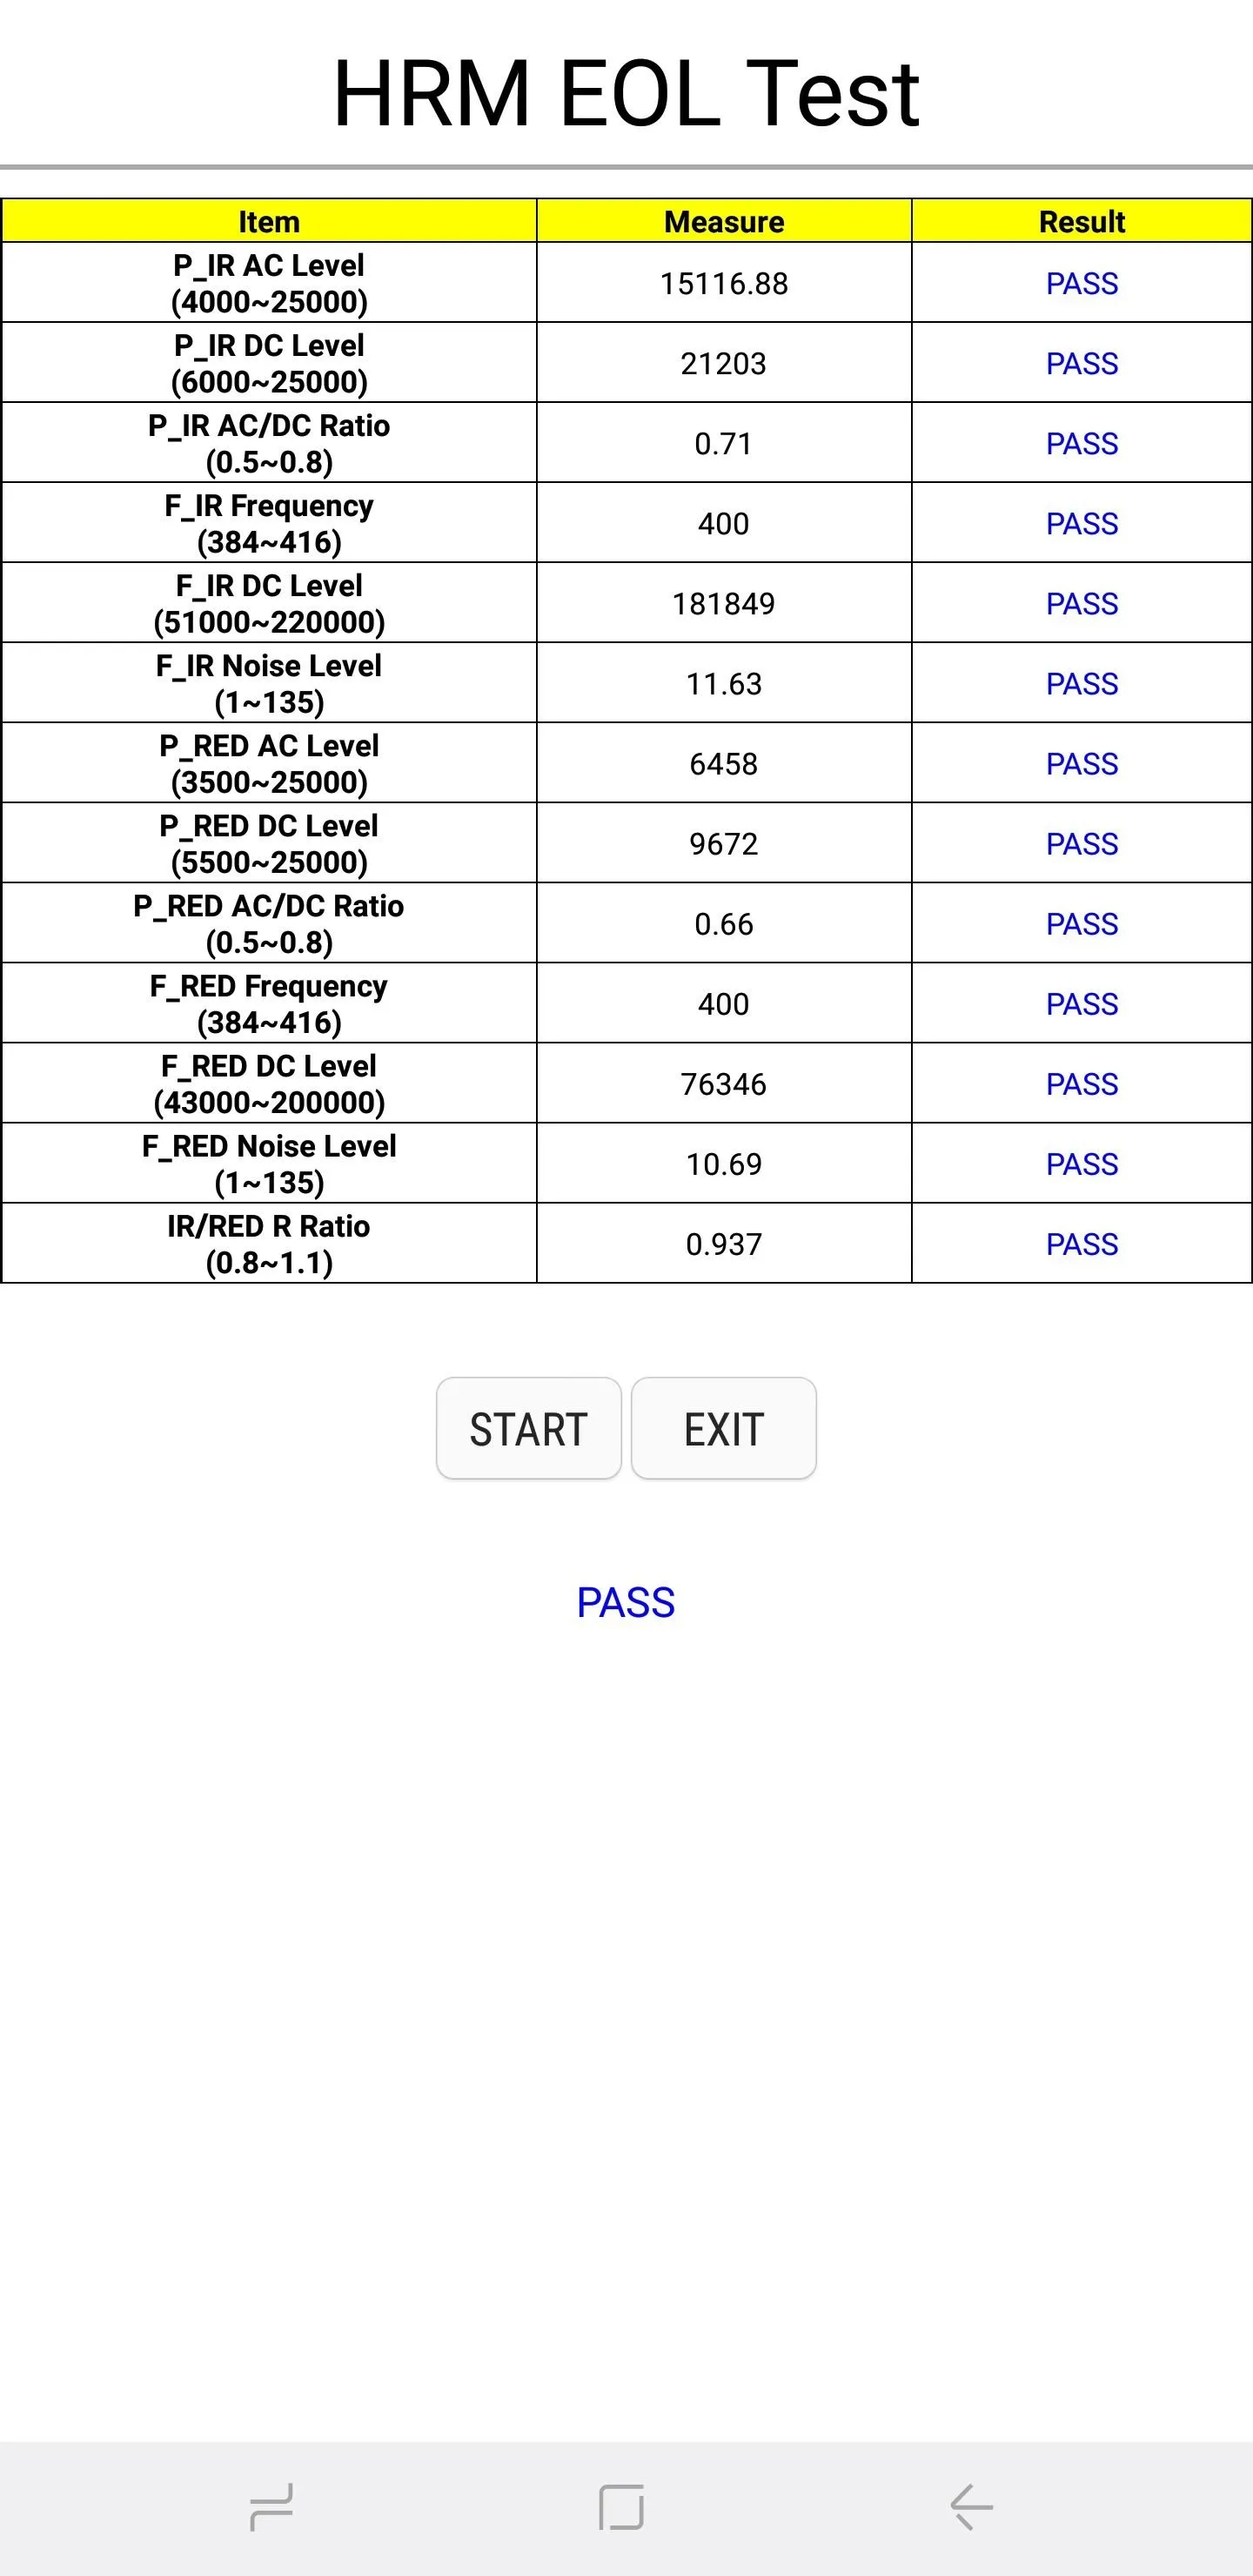
To run an automatic diagnostic test, select "HRM EOL," then place your phone on a flat surface and keep it completely still. This is very important, as any movements will interfere with the test and result in multiple component failures.
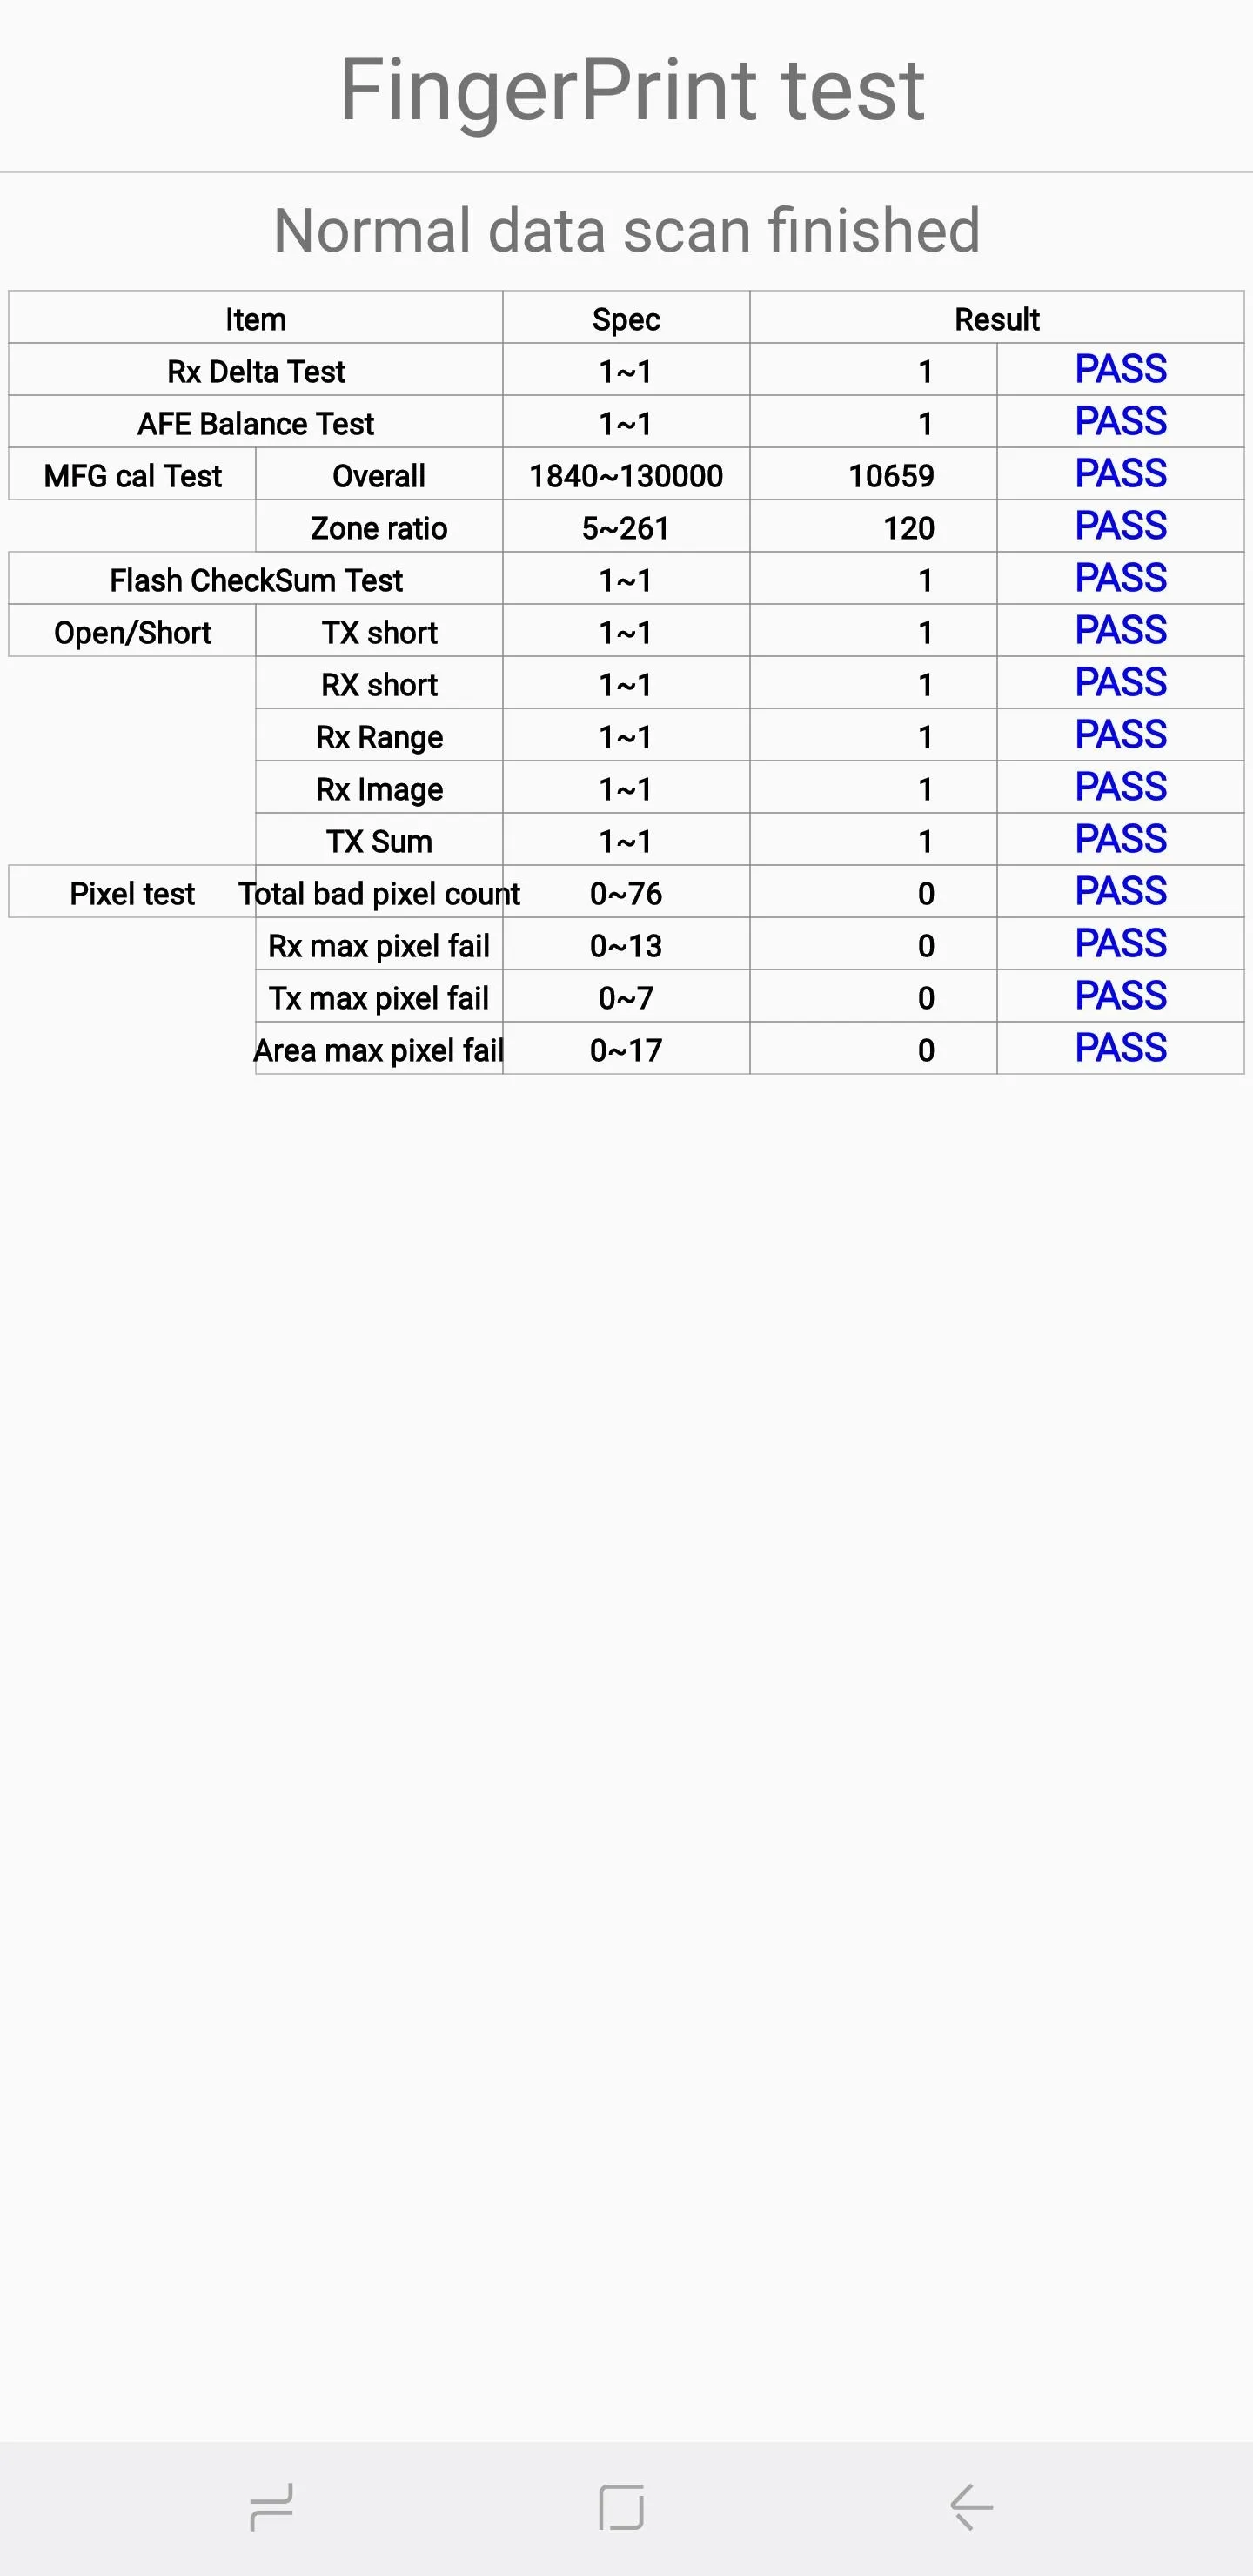
Fingerprint Sensor
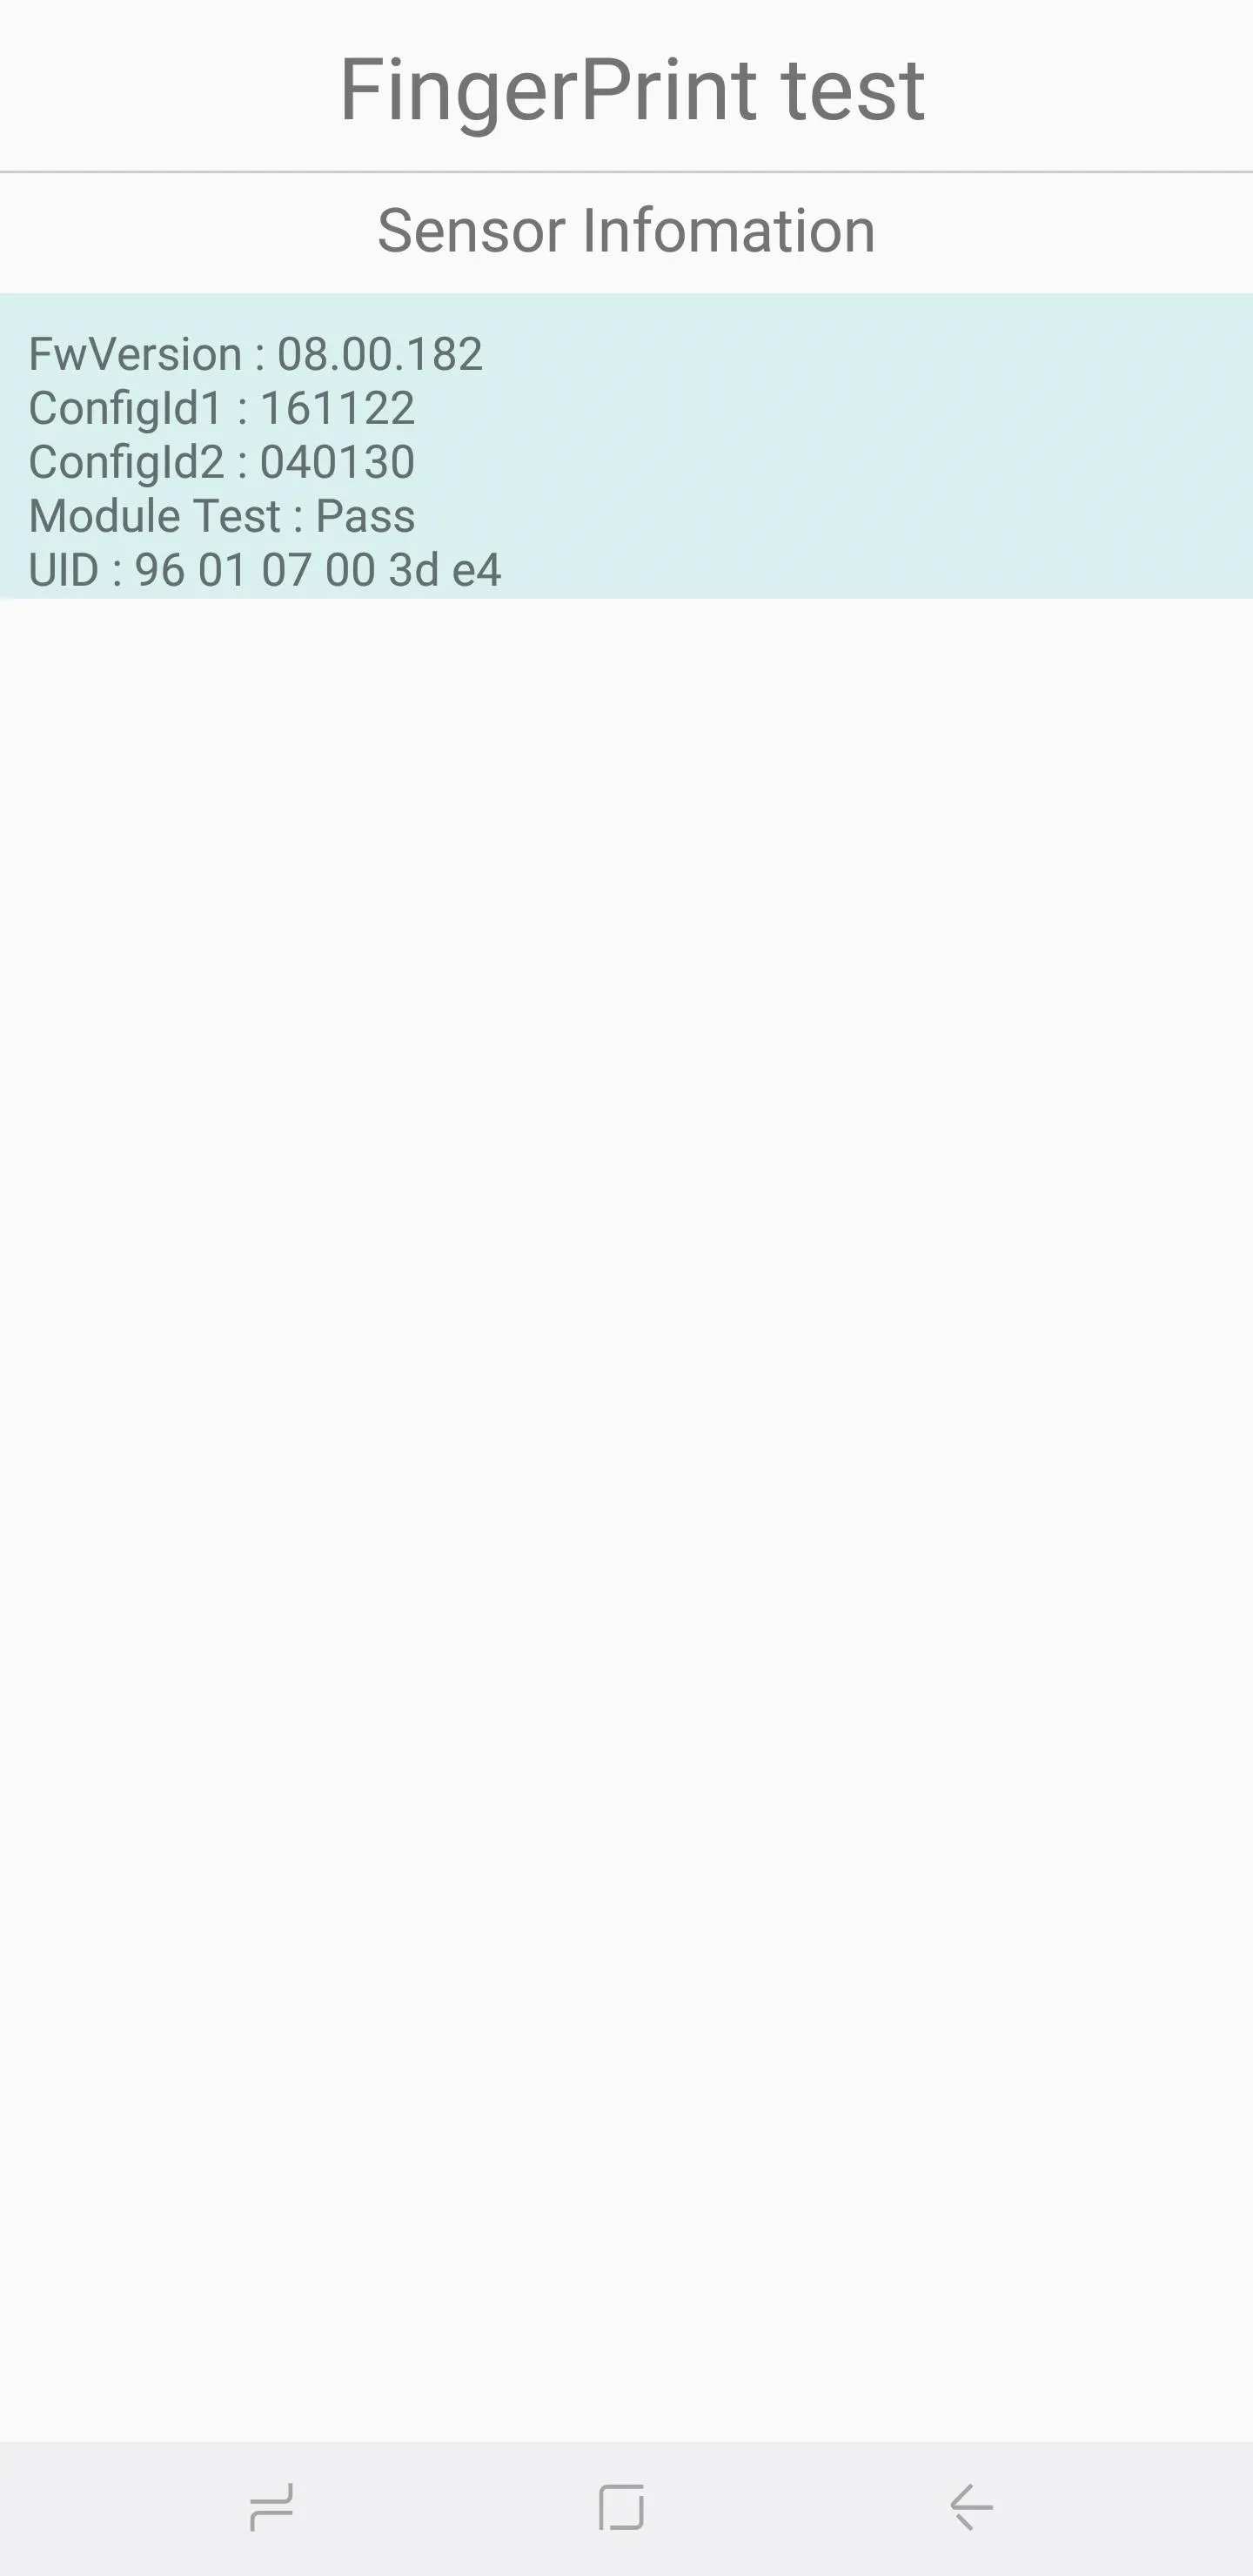
To test out your device's fingerprint sensor, tap on "Normal Scan" to get started. The test itself is automatic and checks for each component's functionality. If you'd like to find out the sensor's firmware version, simply tap on "Sensor Info" to view it.
Exiting Out of Test Mode
After you've finished testing our your phone's sensors, you're free to exit out of HwModuleTest Mode. To get out of diagnostic mode, tap on the back button twice bring you back to the dialer page, then exit from there as you normally would.
- Follow Gadget Hacks on Facebook, Twitter, YouTube, and Flipboard
- Follow WonderHowTo on Facebook, Twitter, Pinterest, and Flipboard
Cover image and screenshots by Amboy Manalo/Gadget Hacks


Comments
Be the first, drop a comment!