Thanks to Magisk, you don't have to lose root when updating to Android 11. The popular systemless rooting tool already achieved superuser access on Google's latest OS, even before the official release. It's currently in its experimental stages so the process is trickier than usual, but it does work.
Unfortunately, due to changes in Android 10, we'll have to wait a while for an official TWRP custom recovery. This makes flashing Magisk more challenging, and it also means you're more vulnerable if a soft brick (or bootloop) occurs, so be careful.
- On Your Phone? Open These Instructions in Split-Screen View
Requirements
- Android 11 device with unlockable bootloader
- Windows, Mac, or Linux computer
- USB cable
Unlock Your Phone's Bootloader
To install Magisk, and thus, root your phone, you'll need to flash a modified image onto an OS-level partition on your phone. That is exactly what unlocking your bootloader allows you to do.
So it's time to unlock your bootloader if you haven't already. But know that doing so will erase your internal storage, meaning all your data that's not backed up to the cloud will be lost.
This step is complex, so we've written a separate guide to walk you through it:
Download the Android 11 Factory Images on Your Computer
Now, you'll need the factory images for the version of Android 11 your device is currently running. This is a set of IMG files, usually inside a ZIP archive, that are a perfect copy of your phone's internal storage partitions, minus any user data.
If your phone has an unlockable bootloader, it's highly likely that your phone's manufacturer offers a free download of these factory images. For what it's worth, you don't need all of the factory images, just the boot image. So if your phone's OEM offers a direct download for the boot.img file, that would be faster.
Otherwise, you can use the following links to find the factory images for the two major brands in the US that allow bootloader unlocking. While you're there, go to "About Phone" in Settings and read the "Build Number" at the bottom. Make sure this matches the version you're downloading.
Extract the Boot Image
Extract the ZIP file using either your computer's preinstalled ZIP extractor or a third-party option such as 7-Zip. Open the folder, then open the ZIP file that starts with "image-" followed by a name and a series of numbers of letters. Extract the "boot" IMG file that you'll find inside of this ZIP to your desktop.

If you're on a OnePlus phone, it's not as simple as unzipping a file. Instead, you'll need to use a utility to pull the boot image out of the "Payload.bin" file. Use the guide below to get squared away:
Move the Boot Image to Your Phone
Now, move the boot IMG file you just extracted to your phone and place it in the Downloads folder. We'd recommend doing this with a physical connection (i.e., a USB data cable), as uploading to a cloud service could corrupt the file.
If you'd like more help with this part, see Google's guide on transferring files from Android to Windows or our guide on transferring from Android to Mac.
Install Magisk Manager Canary on Your Phone
On your phone now, you'll need to install the "Canary," or pre-beta build of Magisk Manager. Below, we've linked the official version as provided by topjohnwu, so tap or long-press the link to save the file. Because it is an APK, you will need to enable "Install unknown apps" for your browser and sideload the app to install it.
Patch the Boot Image with Magisk Manager
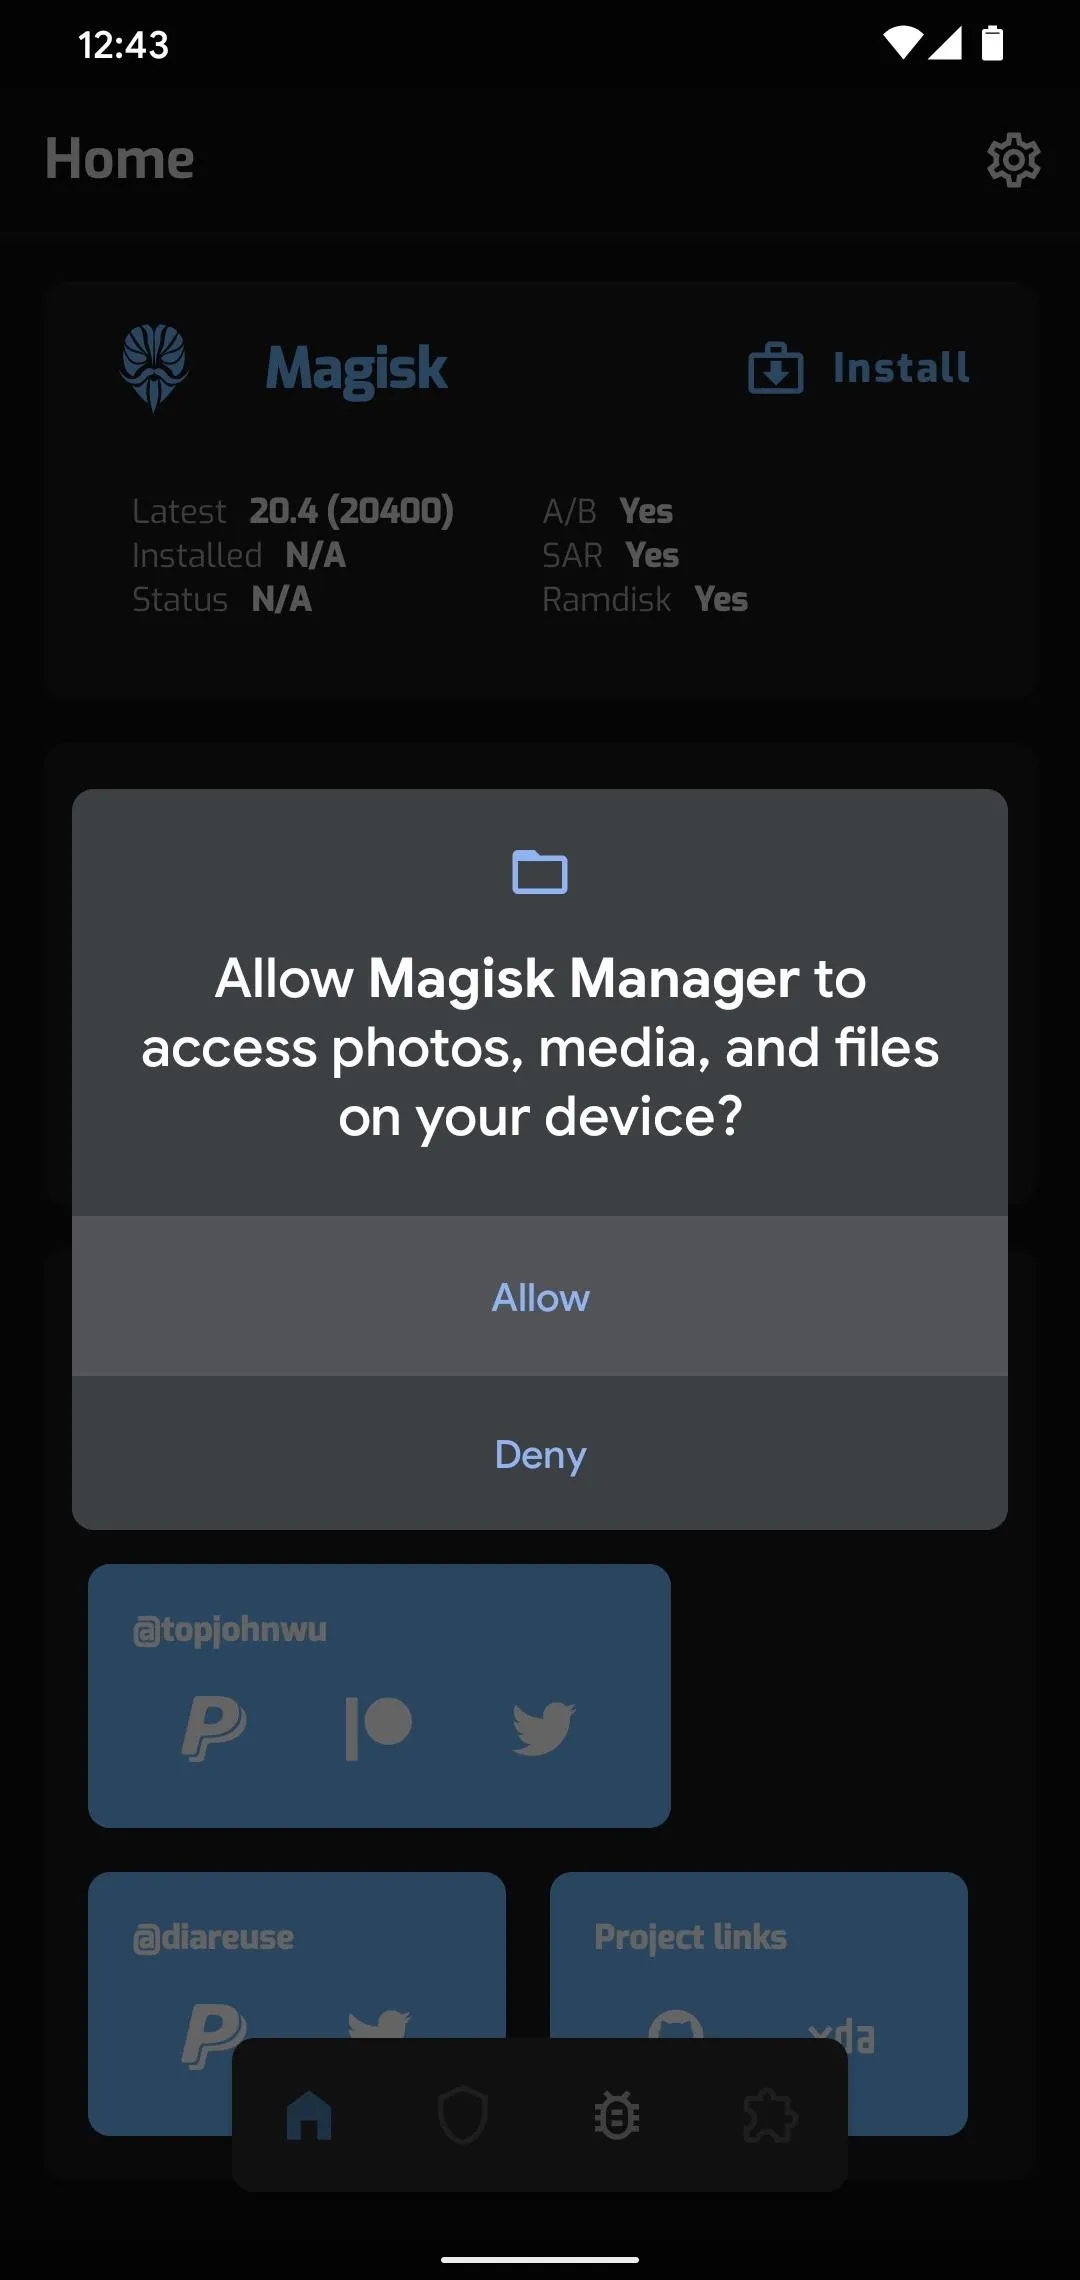
Open Magisk Manager and select "Install" in the top-right corner of the Magisk card. Tap "Allow" when prompted to give Magisk permission to access your files.
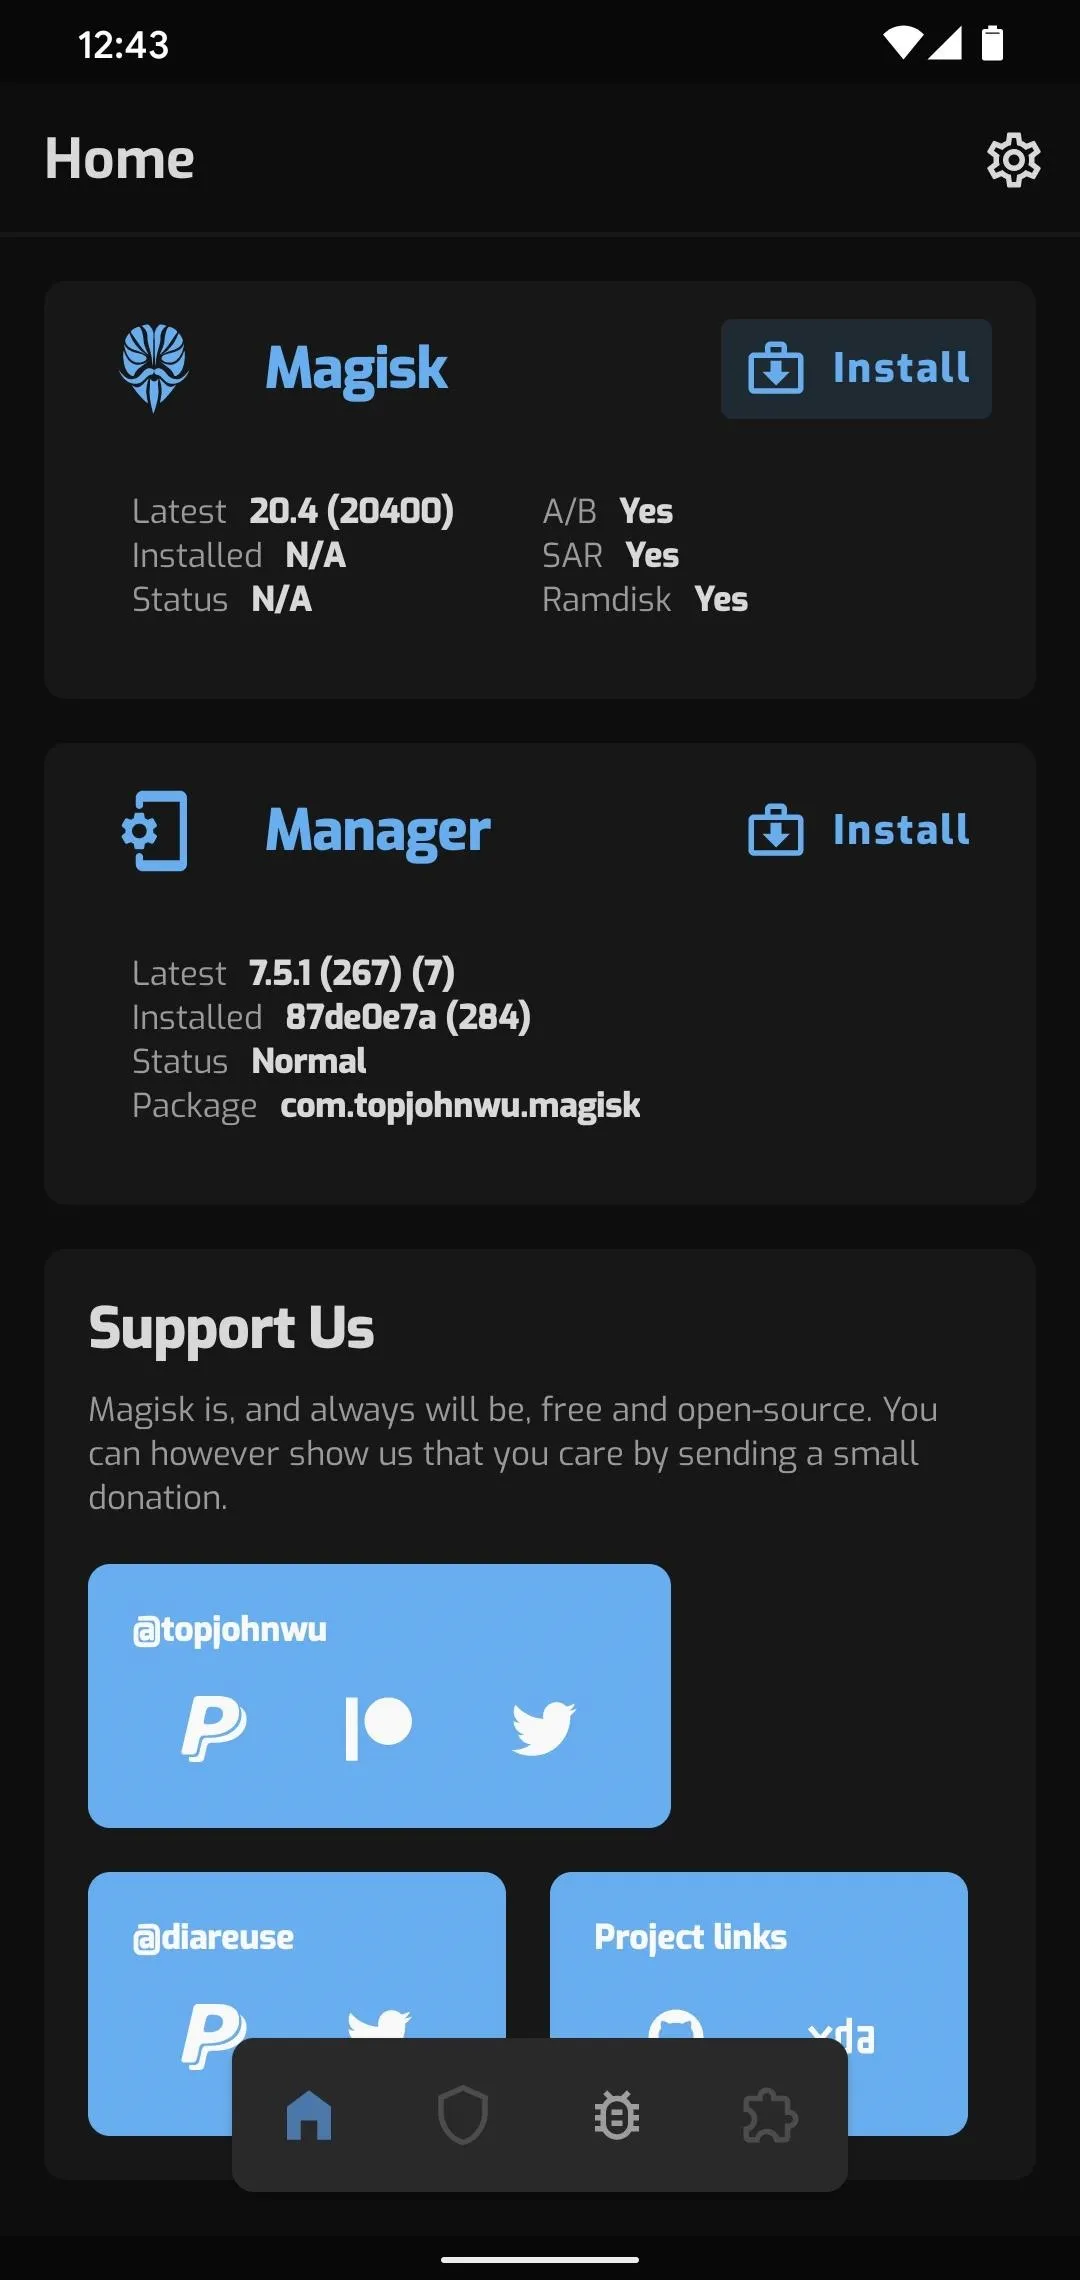


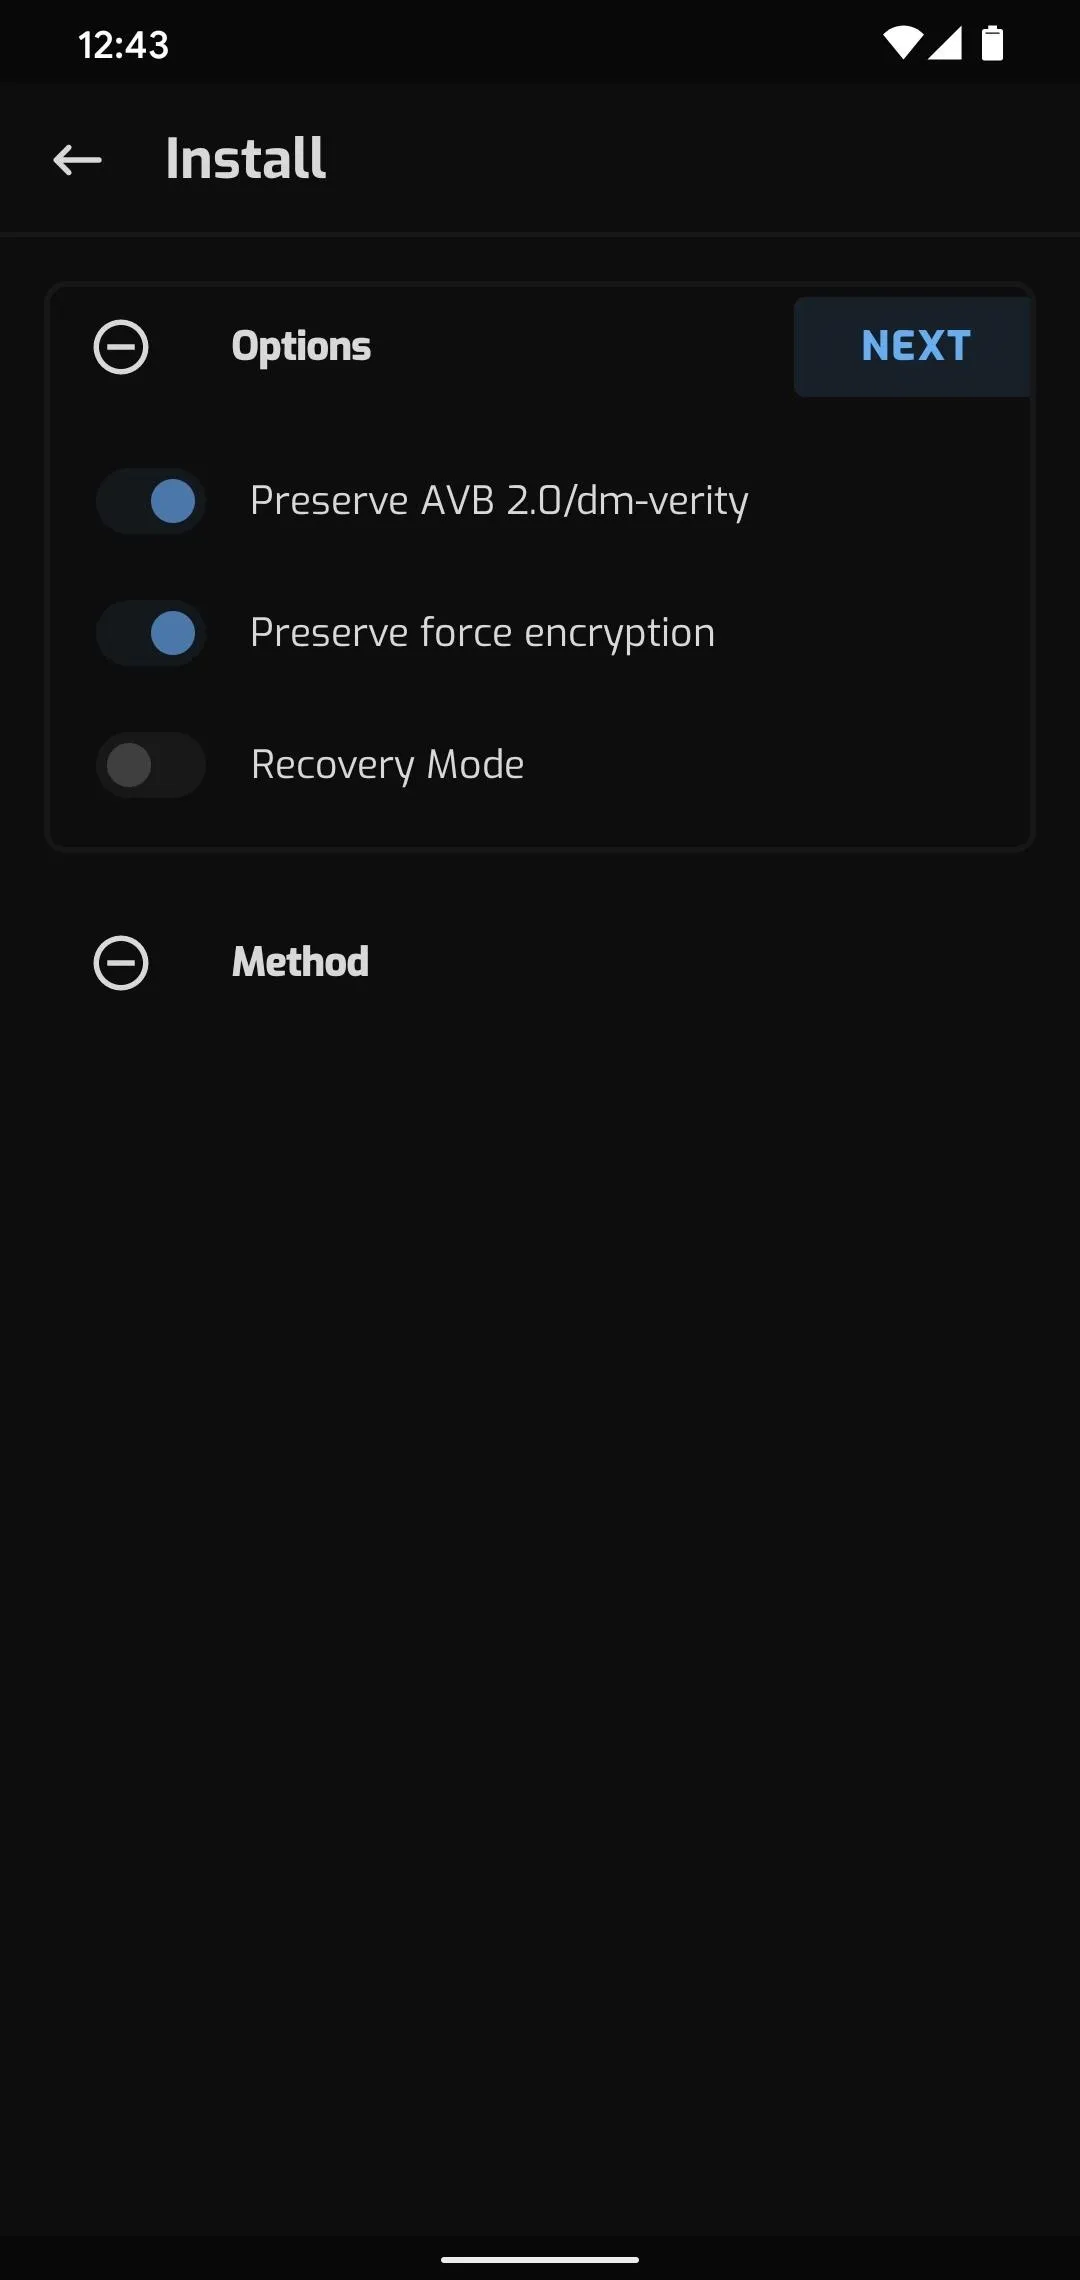
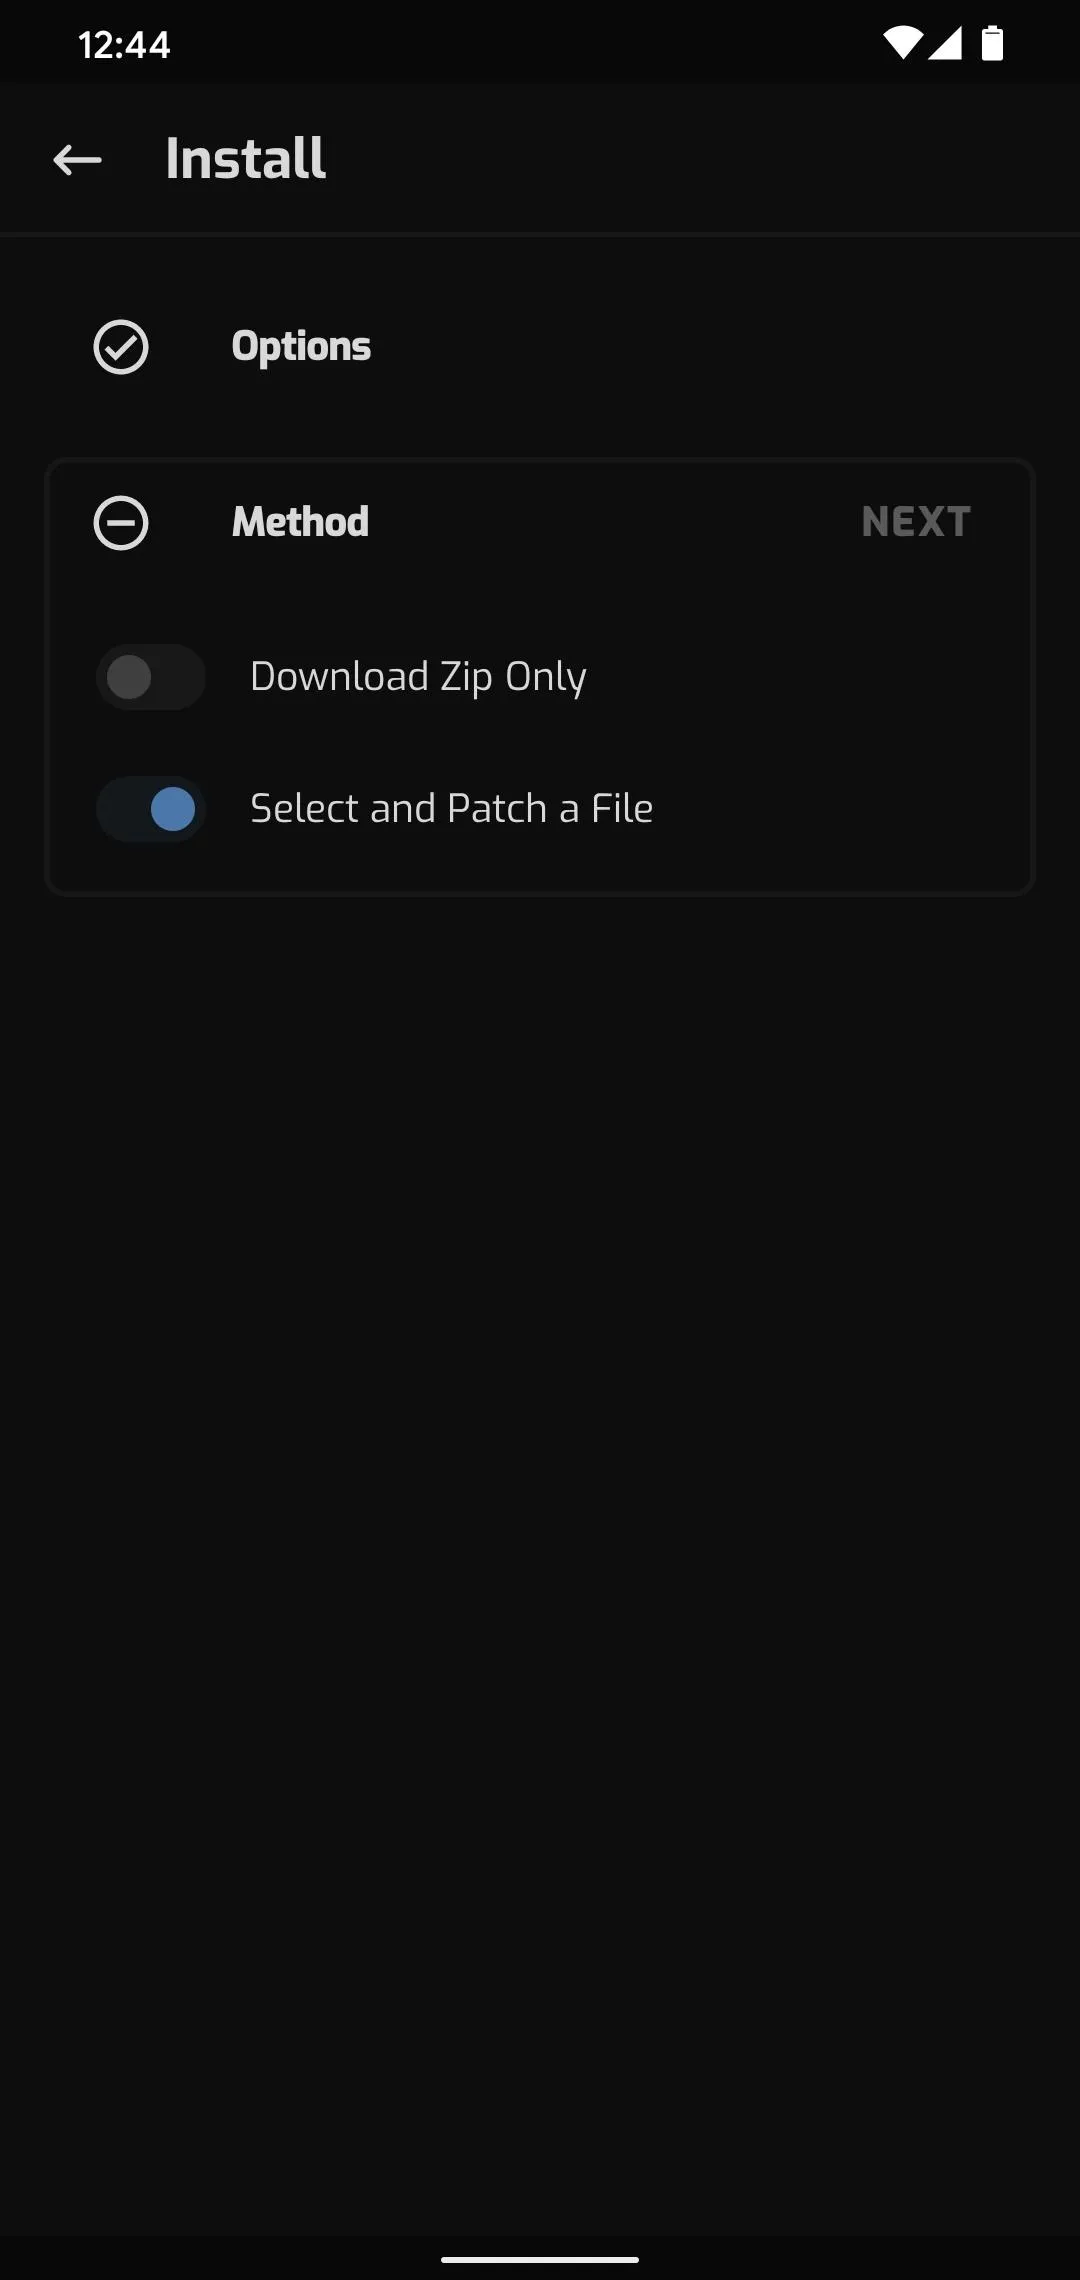
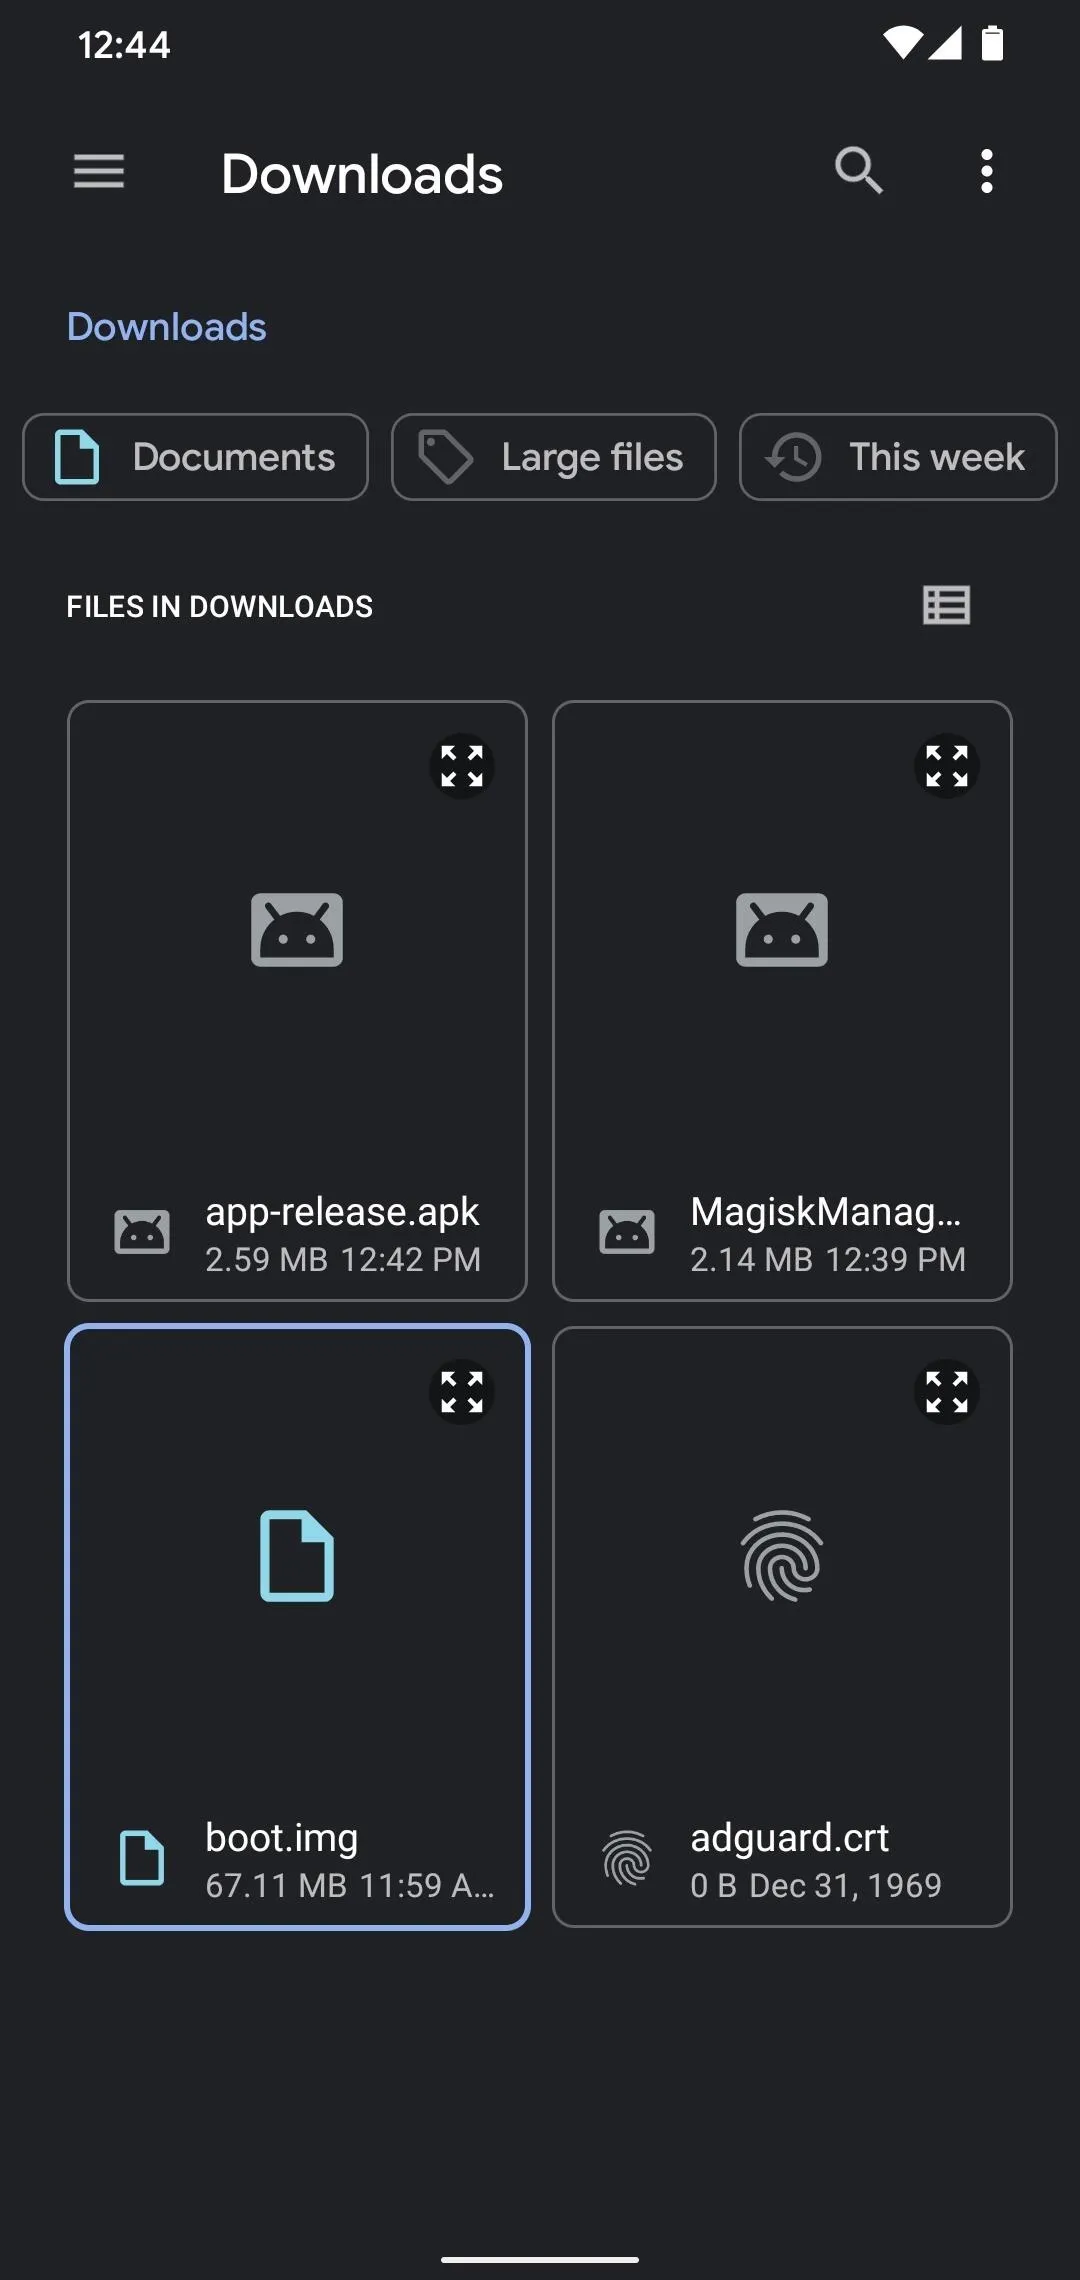
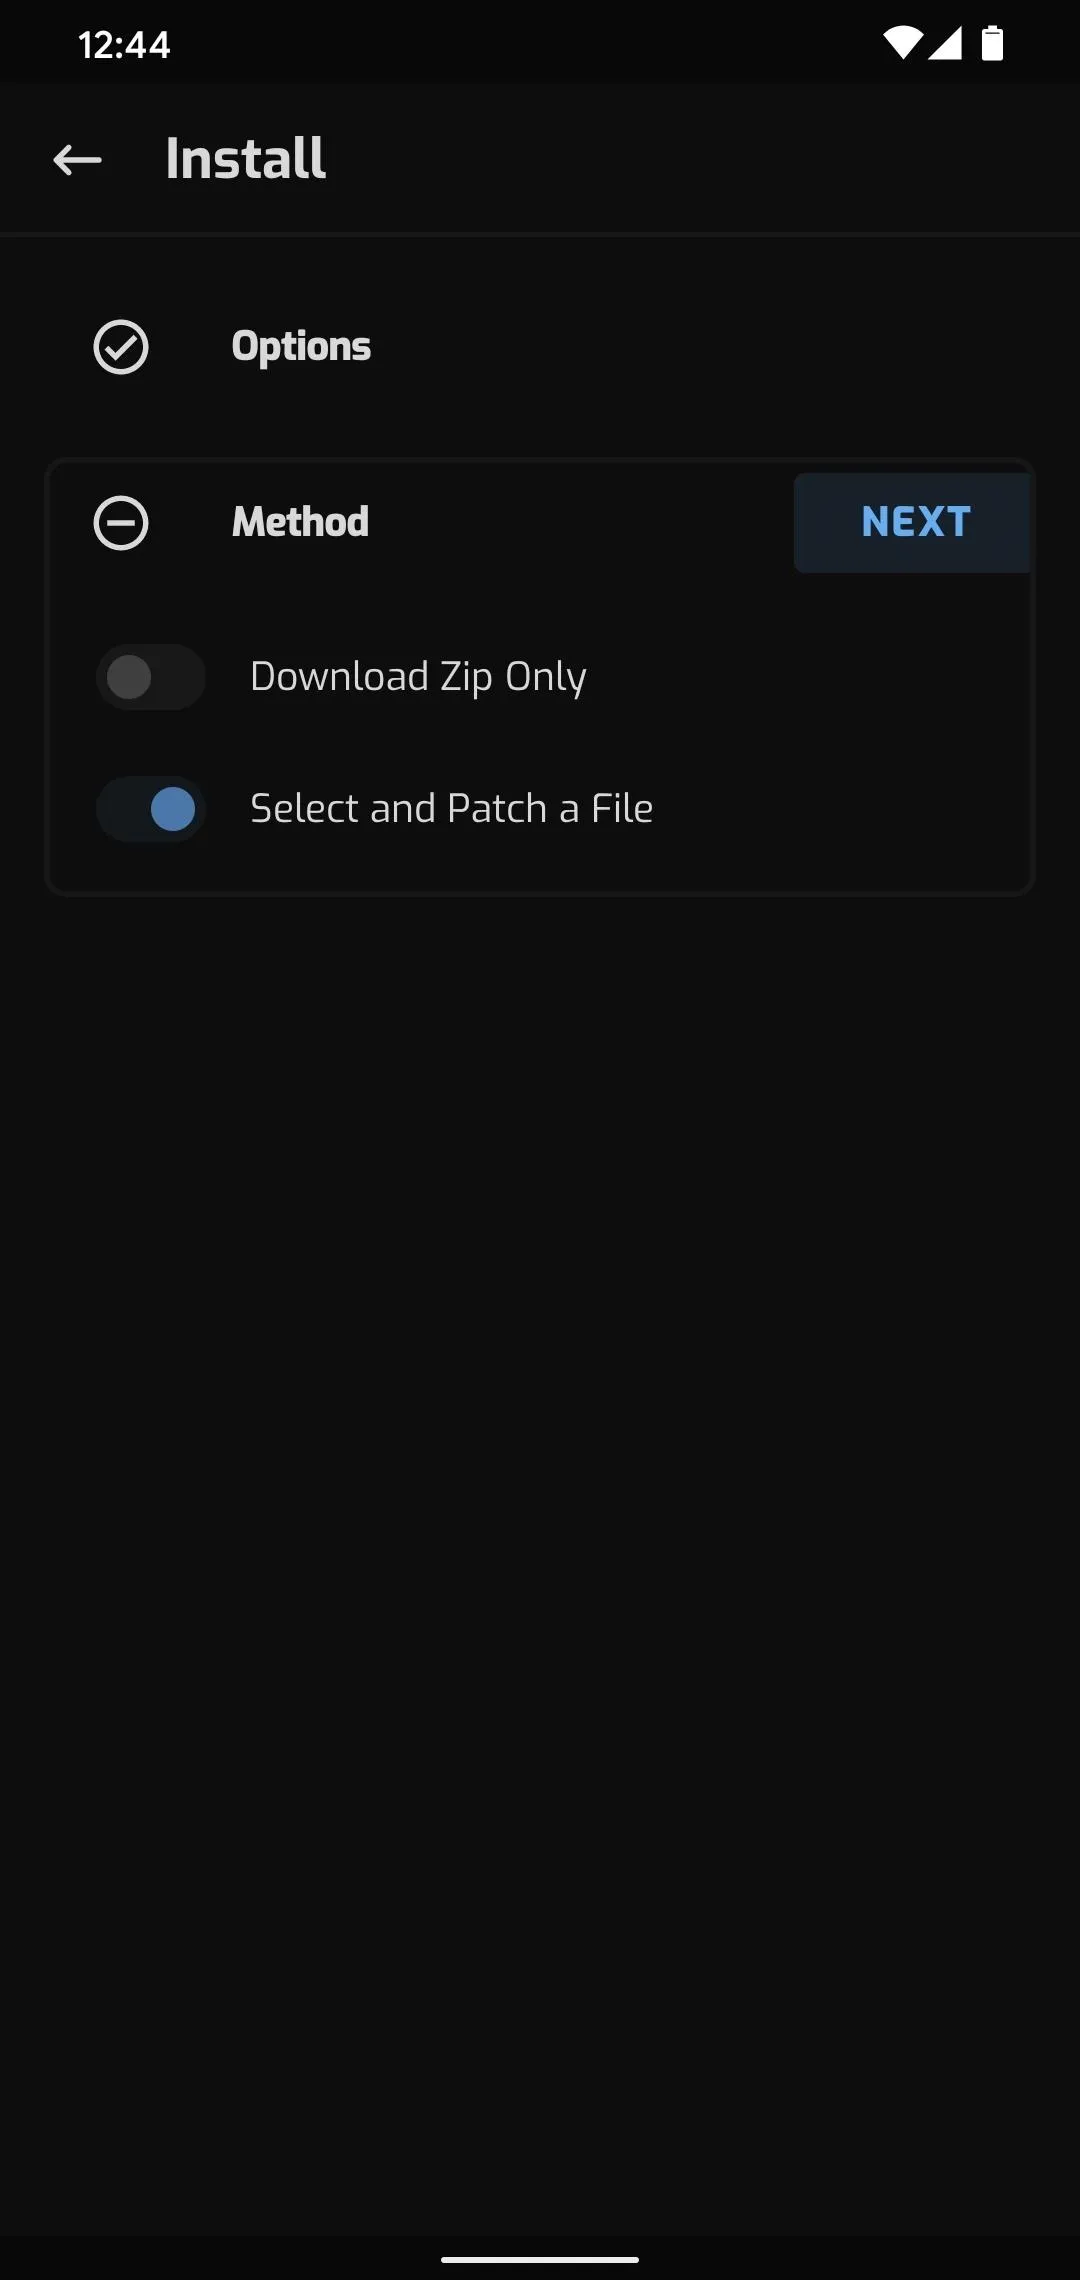
On the Install screen now, leave both "Preserve" options enabled and leave "Recovery Mode" disabled, then press "Next." Tap "Select and Patch a File" on the next menu and your system file picker will appear. Use the hamburger menu to find your Downloads folder and select the "boot.img" file you copied over in Step 4.


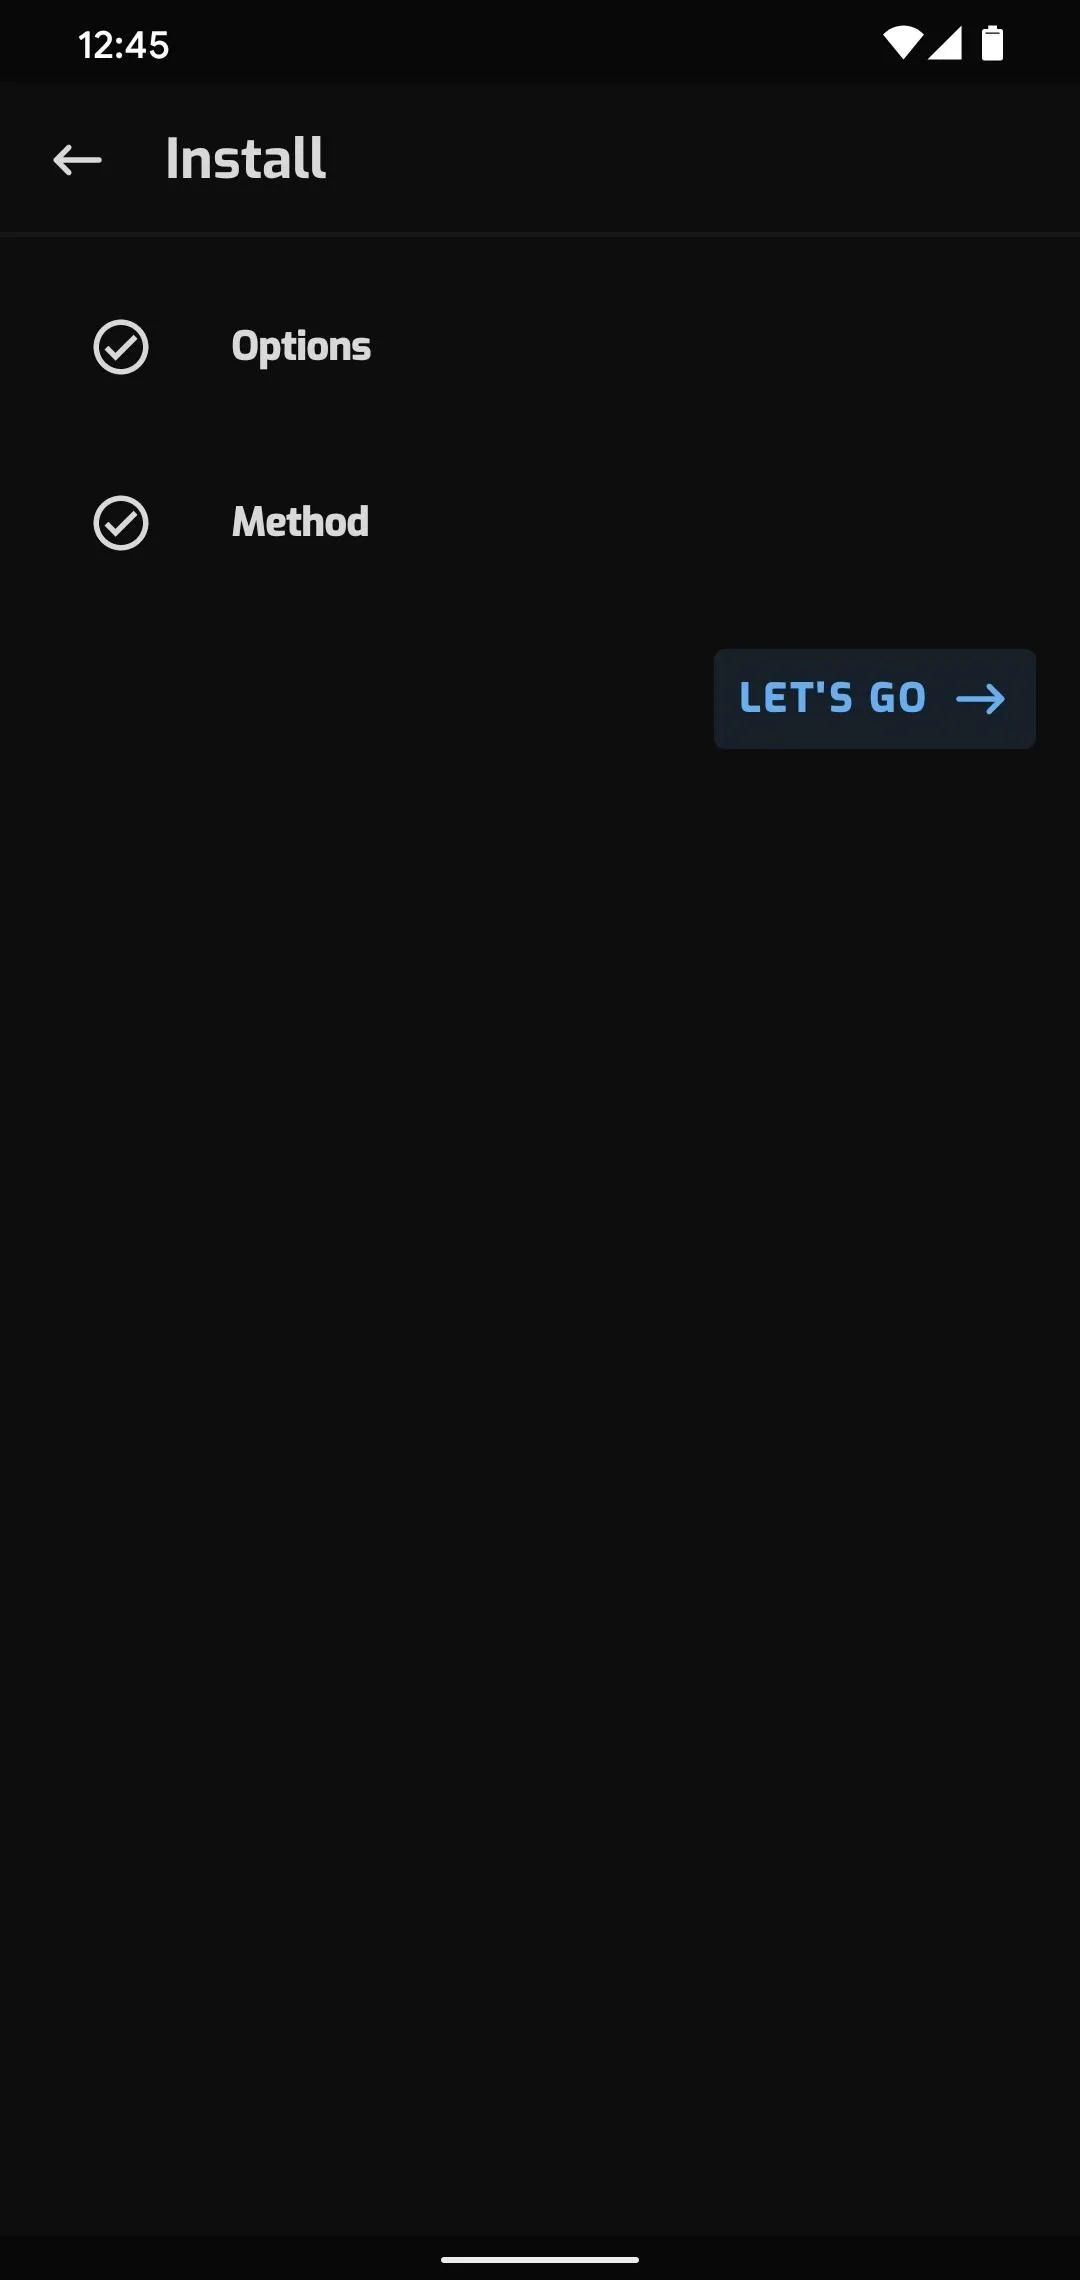
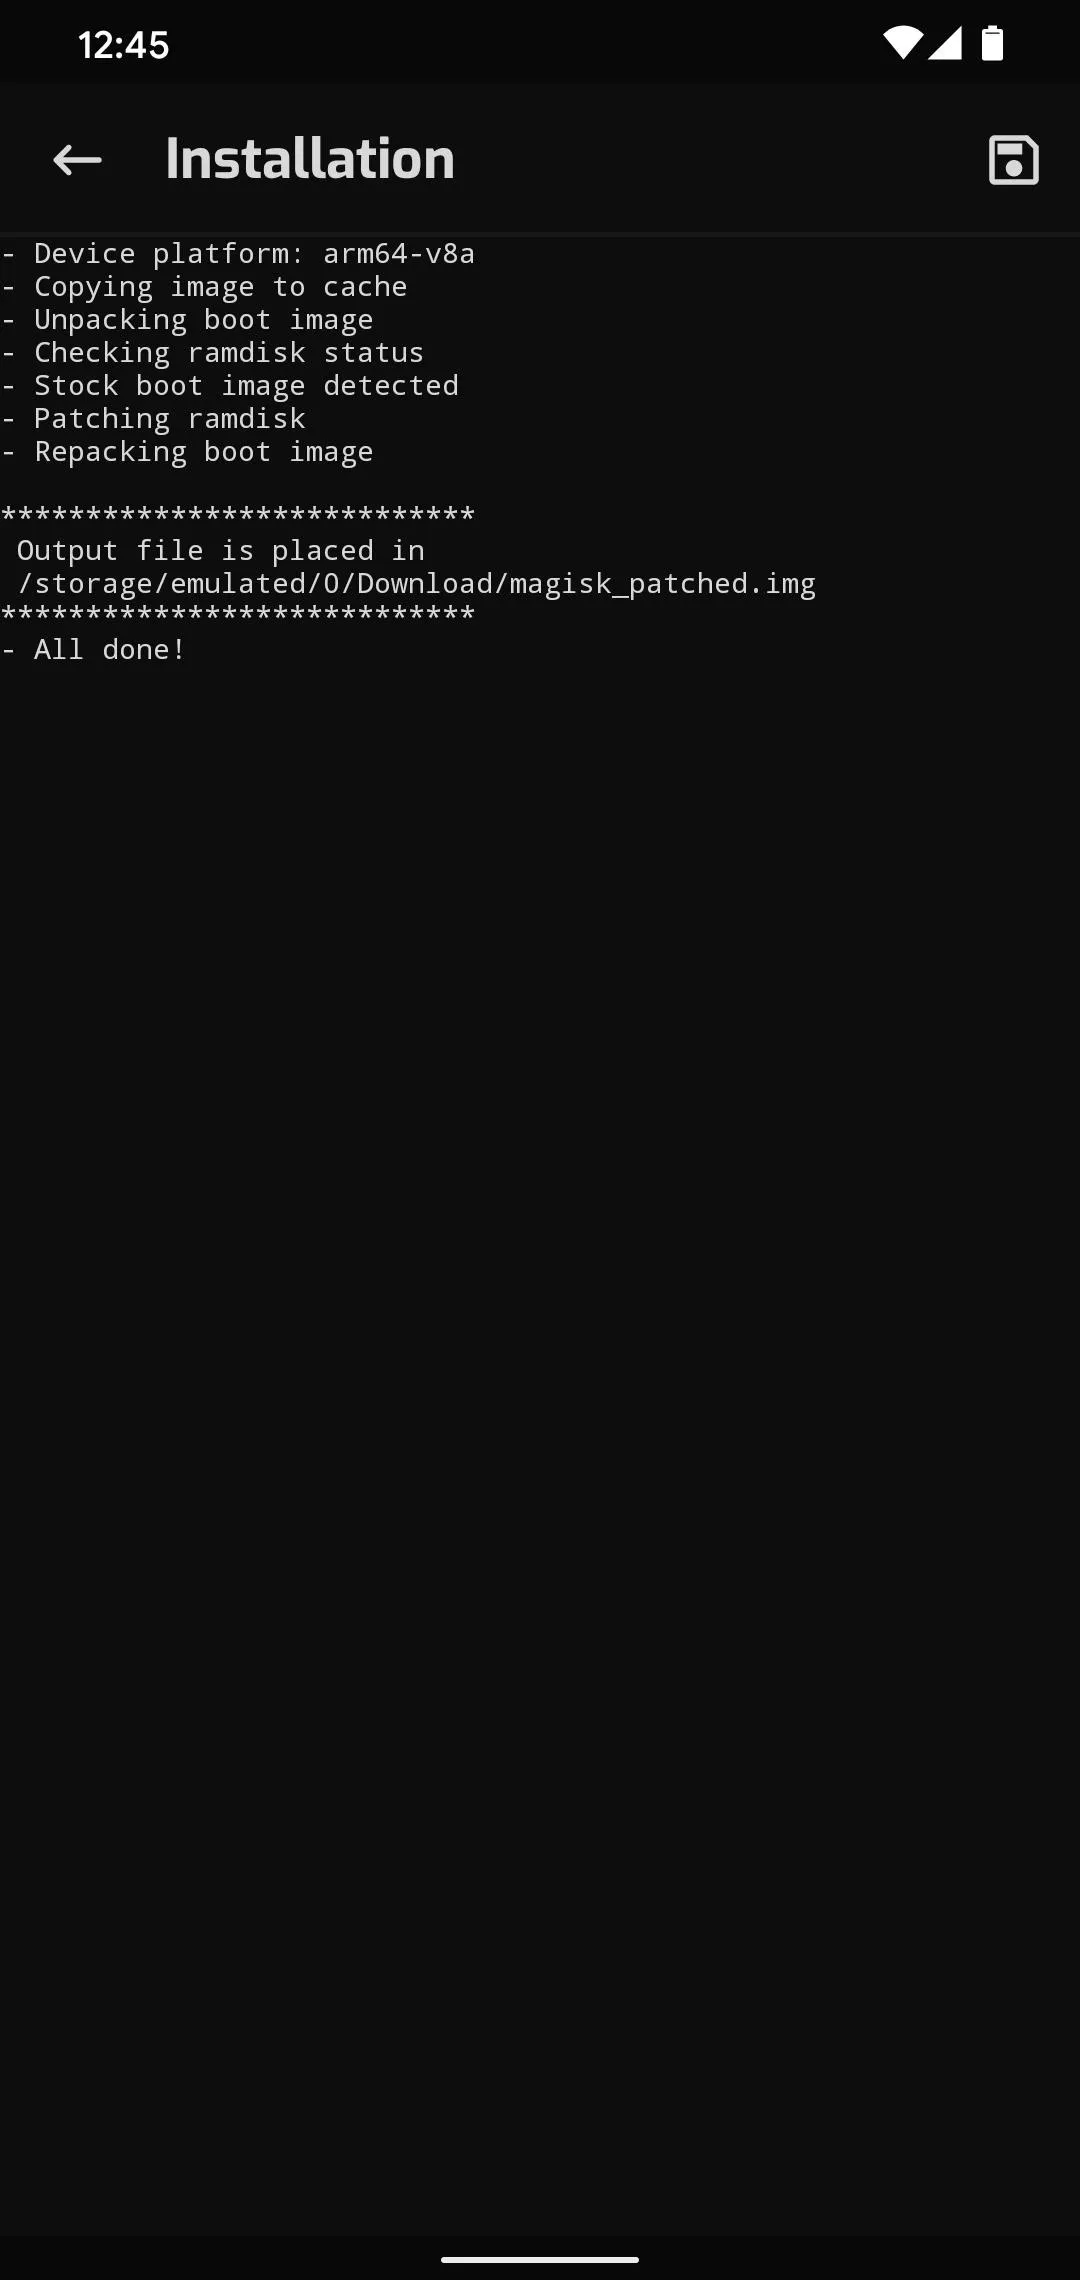
Now you'll be taken back to the Install screen in Magisk Manager. Tap "Next" here, then hit "Let's go." Finally, just wait until the readout says "All done!"


Move the Patched Boot Image to Your Computer
From here, move the magisk_patched.img file from the Downloads folder on your phone over to the desktop on your computer. Again, use a data cable if possible.
Download Google's Platform-Tools on Your Computer
You'll need to send Fastboot commands to your phone in order to root it. To do that, you'll need a small piece of free, first-party software created by Google.
You can download these "platform-tools" directly from Google using the link below. Just select the link corresponding to your computer's operating system.
Extract the Platform-Tools ZIP
Once downloaded, extract the file using your operating system's built-in tools or by using a third-party program such as 7-Zip. Once extracted, copy and paste (or drag and drop) the platform-tools folder to the desktop for easier access since you will be using it later.

Dallas Thomas/Gadget Hacks
Open a Prompt in the Platform-Tools Folder
For macOS and Linux users, open the Terminal app from your Applications folder. If you are using Windows, open Command Prompt from the Start Menu.
Once your command line tool is open, type the following, but don't hit enter yet:
cdNow, press your spacebar once to add a single space after "cd." Still don't hit enter.
Finally, drag the platform-tools folder from your desktop and drop it right on top of the command line window. This will auto-populate its full file name and folder location, at which point you can go ahead and press enter on your keyboard.

Dallas Thomas/Gadget Hacks
Put Your Phone into Bootloader Mode
Now you'll need to boot into bootloader mode so you can send the Fastboot command that will install Magisk.
You could do this by activating Developer Options, enabling USB Debugging, allowing the connection, then entering adb reboot-bootloader into the command prompt on your computer, but there's an easier way: button combinations.
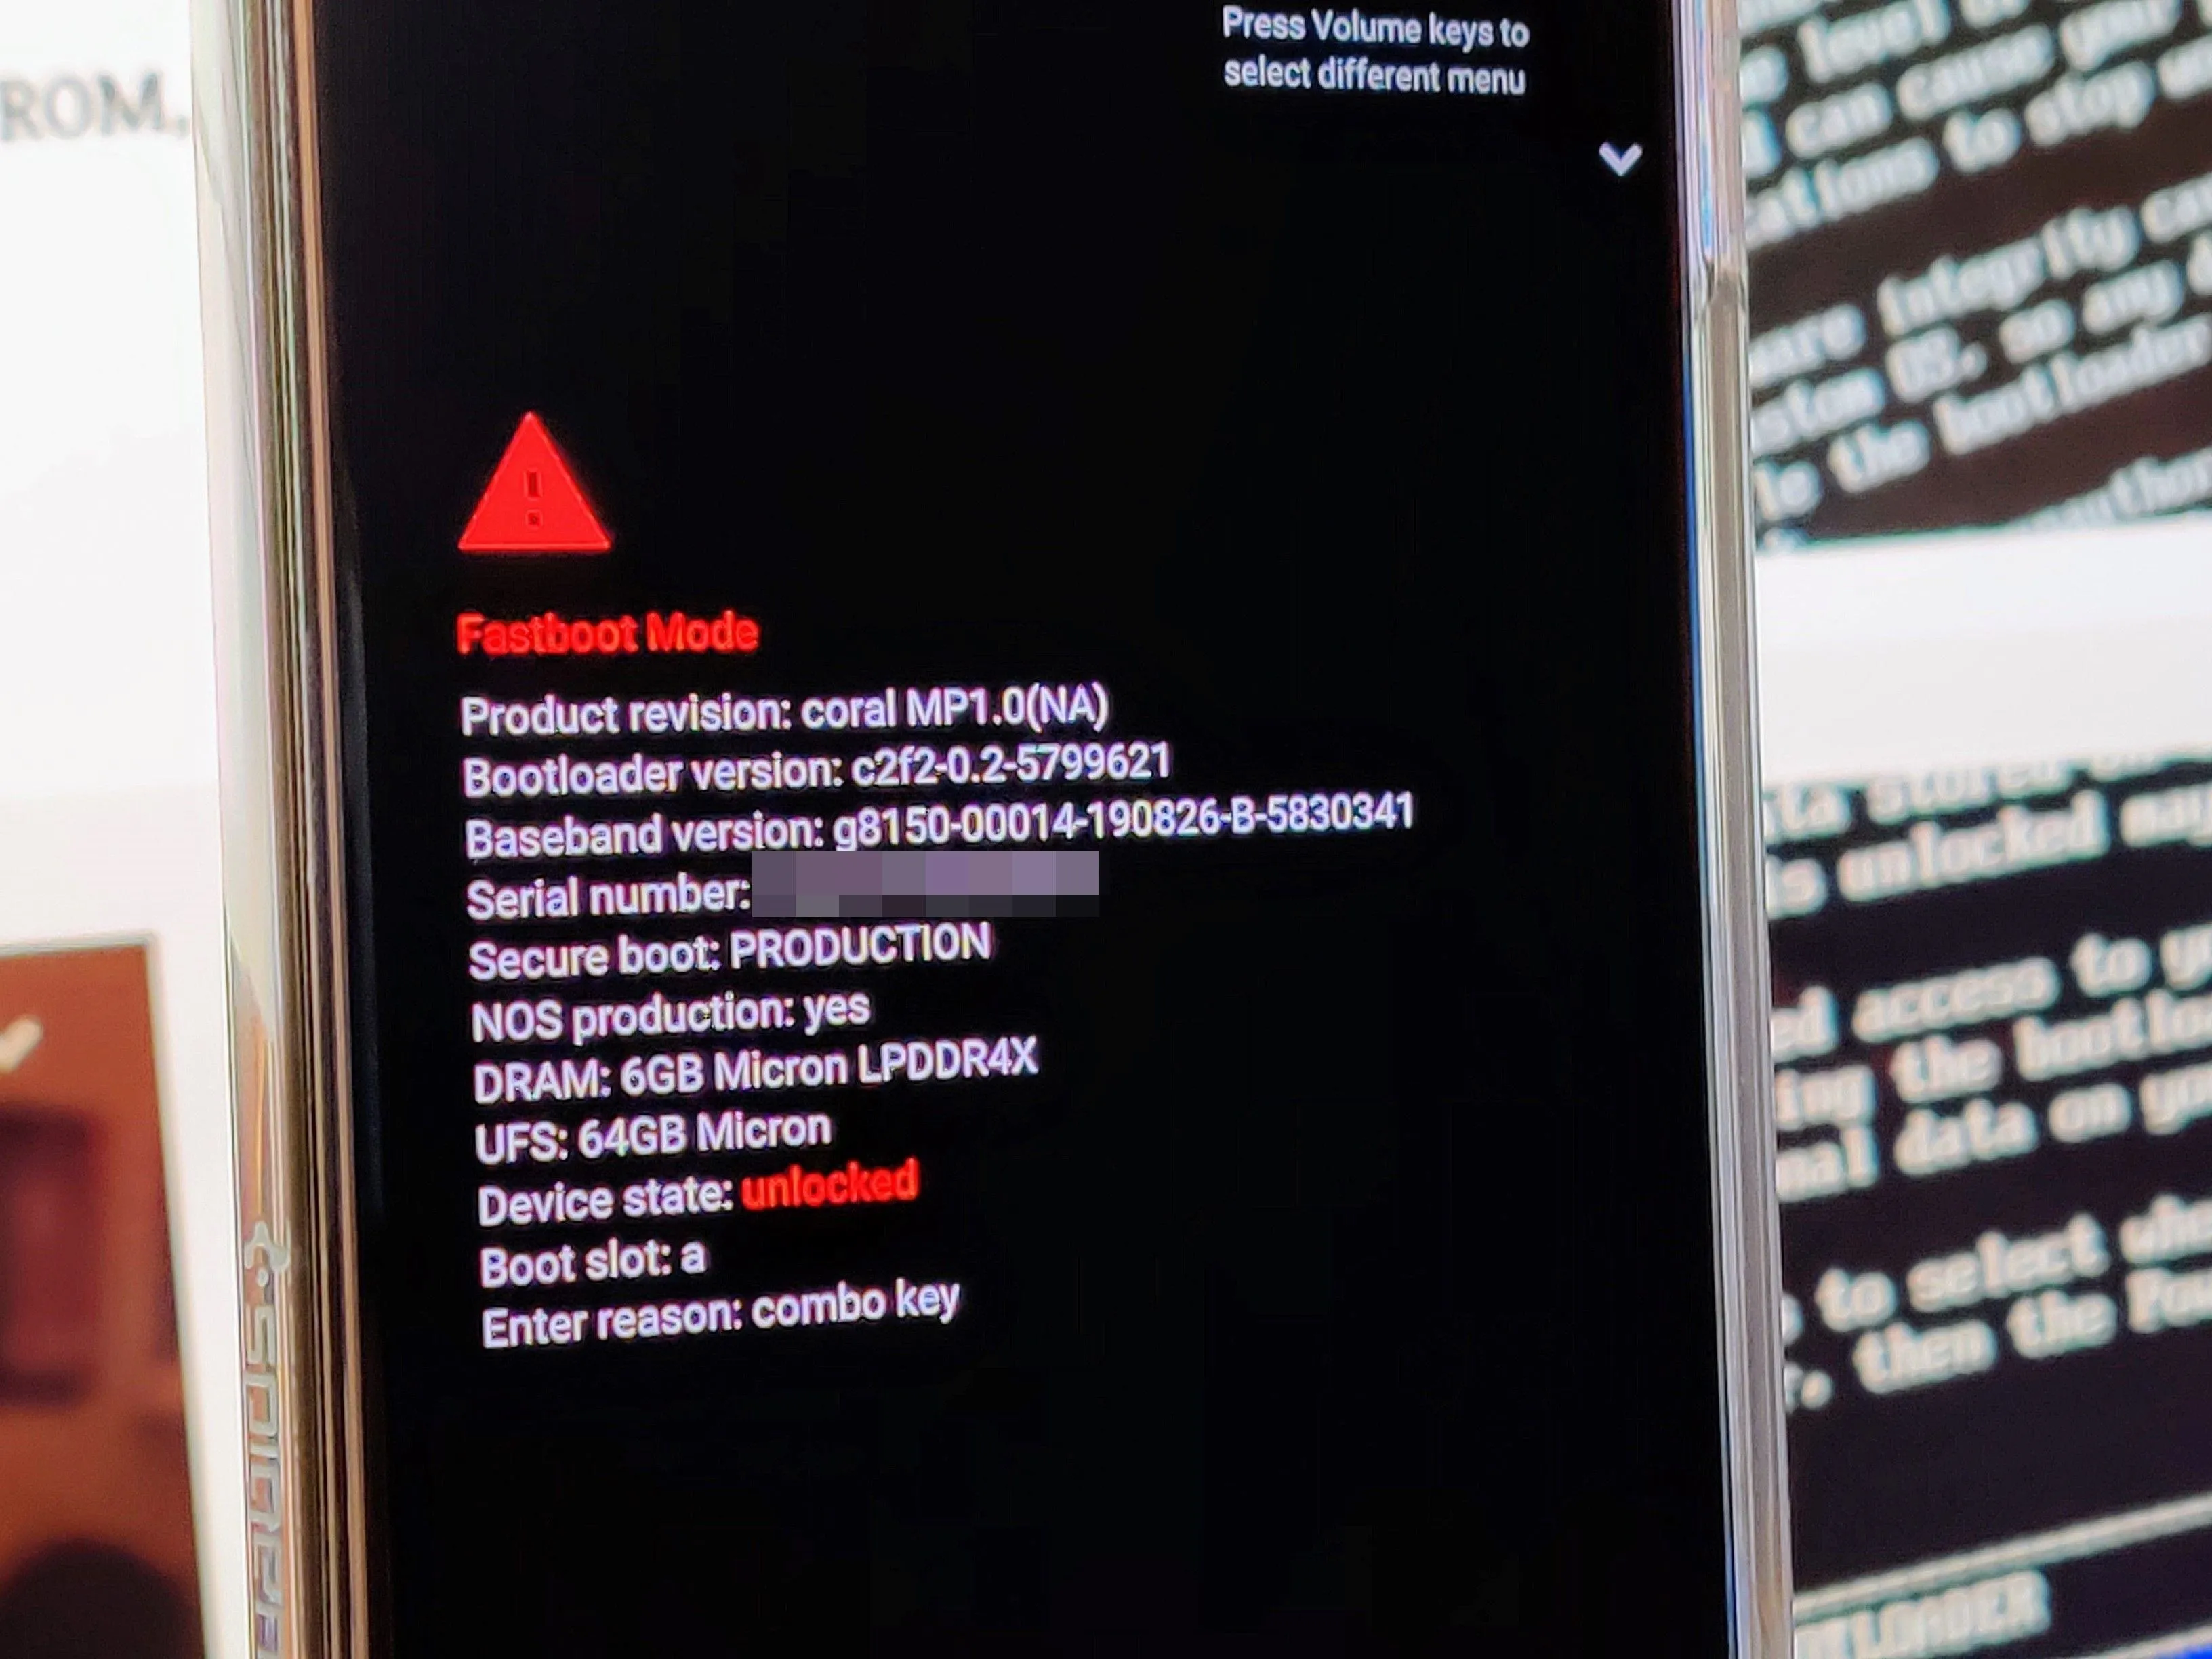
For most phones, power the device completely off, then press and hold the volume down button. While still holding volume down, press and hold the power button until your phone starts to boot up, then let go of both buttons. If this shows a menu like the one below, you're good to go. Otherwise, use the ADB command.
Stephen Perkins/Gadget Hacks
Connect to Your Computer
Now, plug your phone into your computer with a USB data cable. Ideally, this would be the cable that came in the box with your phone, but if not, at least make sure it's a good quality cable.
Flash the Patched Boot Image
Type the following command into the command line tool on your computer, then press enter to verify the Fastboot connection.
fastboot devicesYou should see your phone's serial number. If you do, you can proceed. Input the following and press the spacebar once to add a single space, but don't hit enter:
fastboot flash bootDrag the "patched_magisk" IMG file from your file explorer to the command line tool, then drop it right on that window to auto-populate the file path. From there, press enter to send the full command.
Note: If you're on Mac or Linux and receive an error message after sending the above command, add a period and a slash (./) to the beginning and send it again. Example: ./fastboot flash boot boot.img

After a series of lines, including two that spit out "OKAY," input the following command to reboot back to Android:
fastboot rebootAnd again, add "./" to the front if it doesn't work the first time:
./fastboot rebootVerify Root
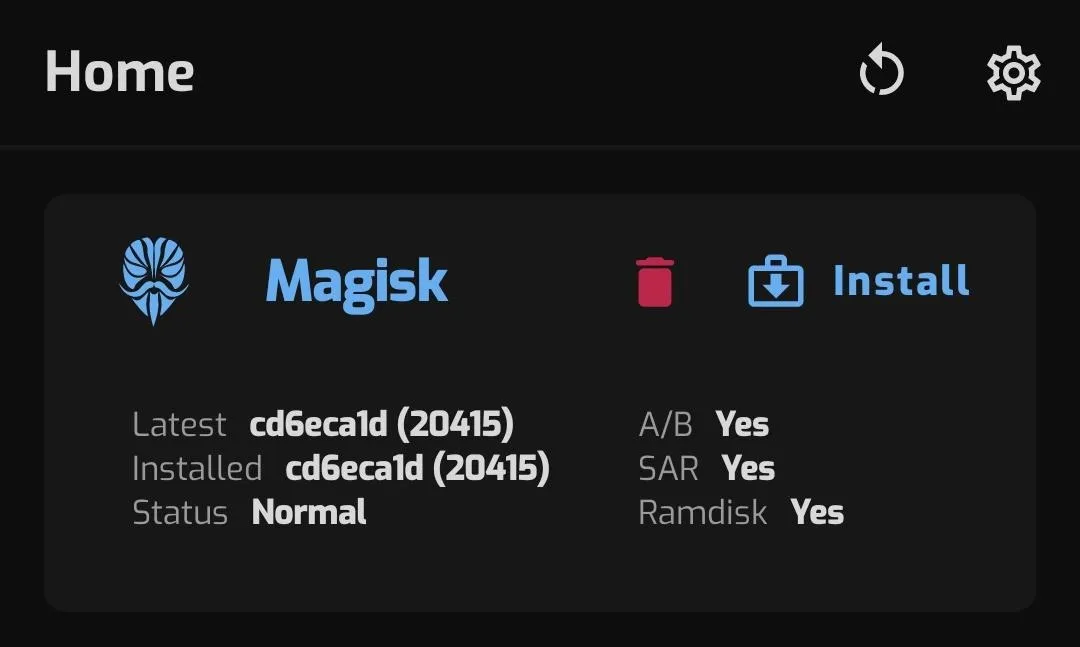
When you get back up, all that's left to do is to verify root. Open Magisk Manager, and now you should see "Status: Normal" in the Magisk section alongside a build number next to "Installed." Go ahead and download any root app and tap "Grant" when asked for superuser access to see if everything works as intended.
Be aware that due to changes to Android, SafetyNet will no longer pass by default. Therefore, you will lose access to Google Pay, Pokémon GO, and some banking apps which use SafetyNet to check if your device is rooted or modified.
Cover image, screenshots, and GIFs by Dallas Thomas/Gadget Hacks










Comments
Be the first, drop a comment!