


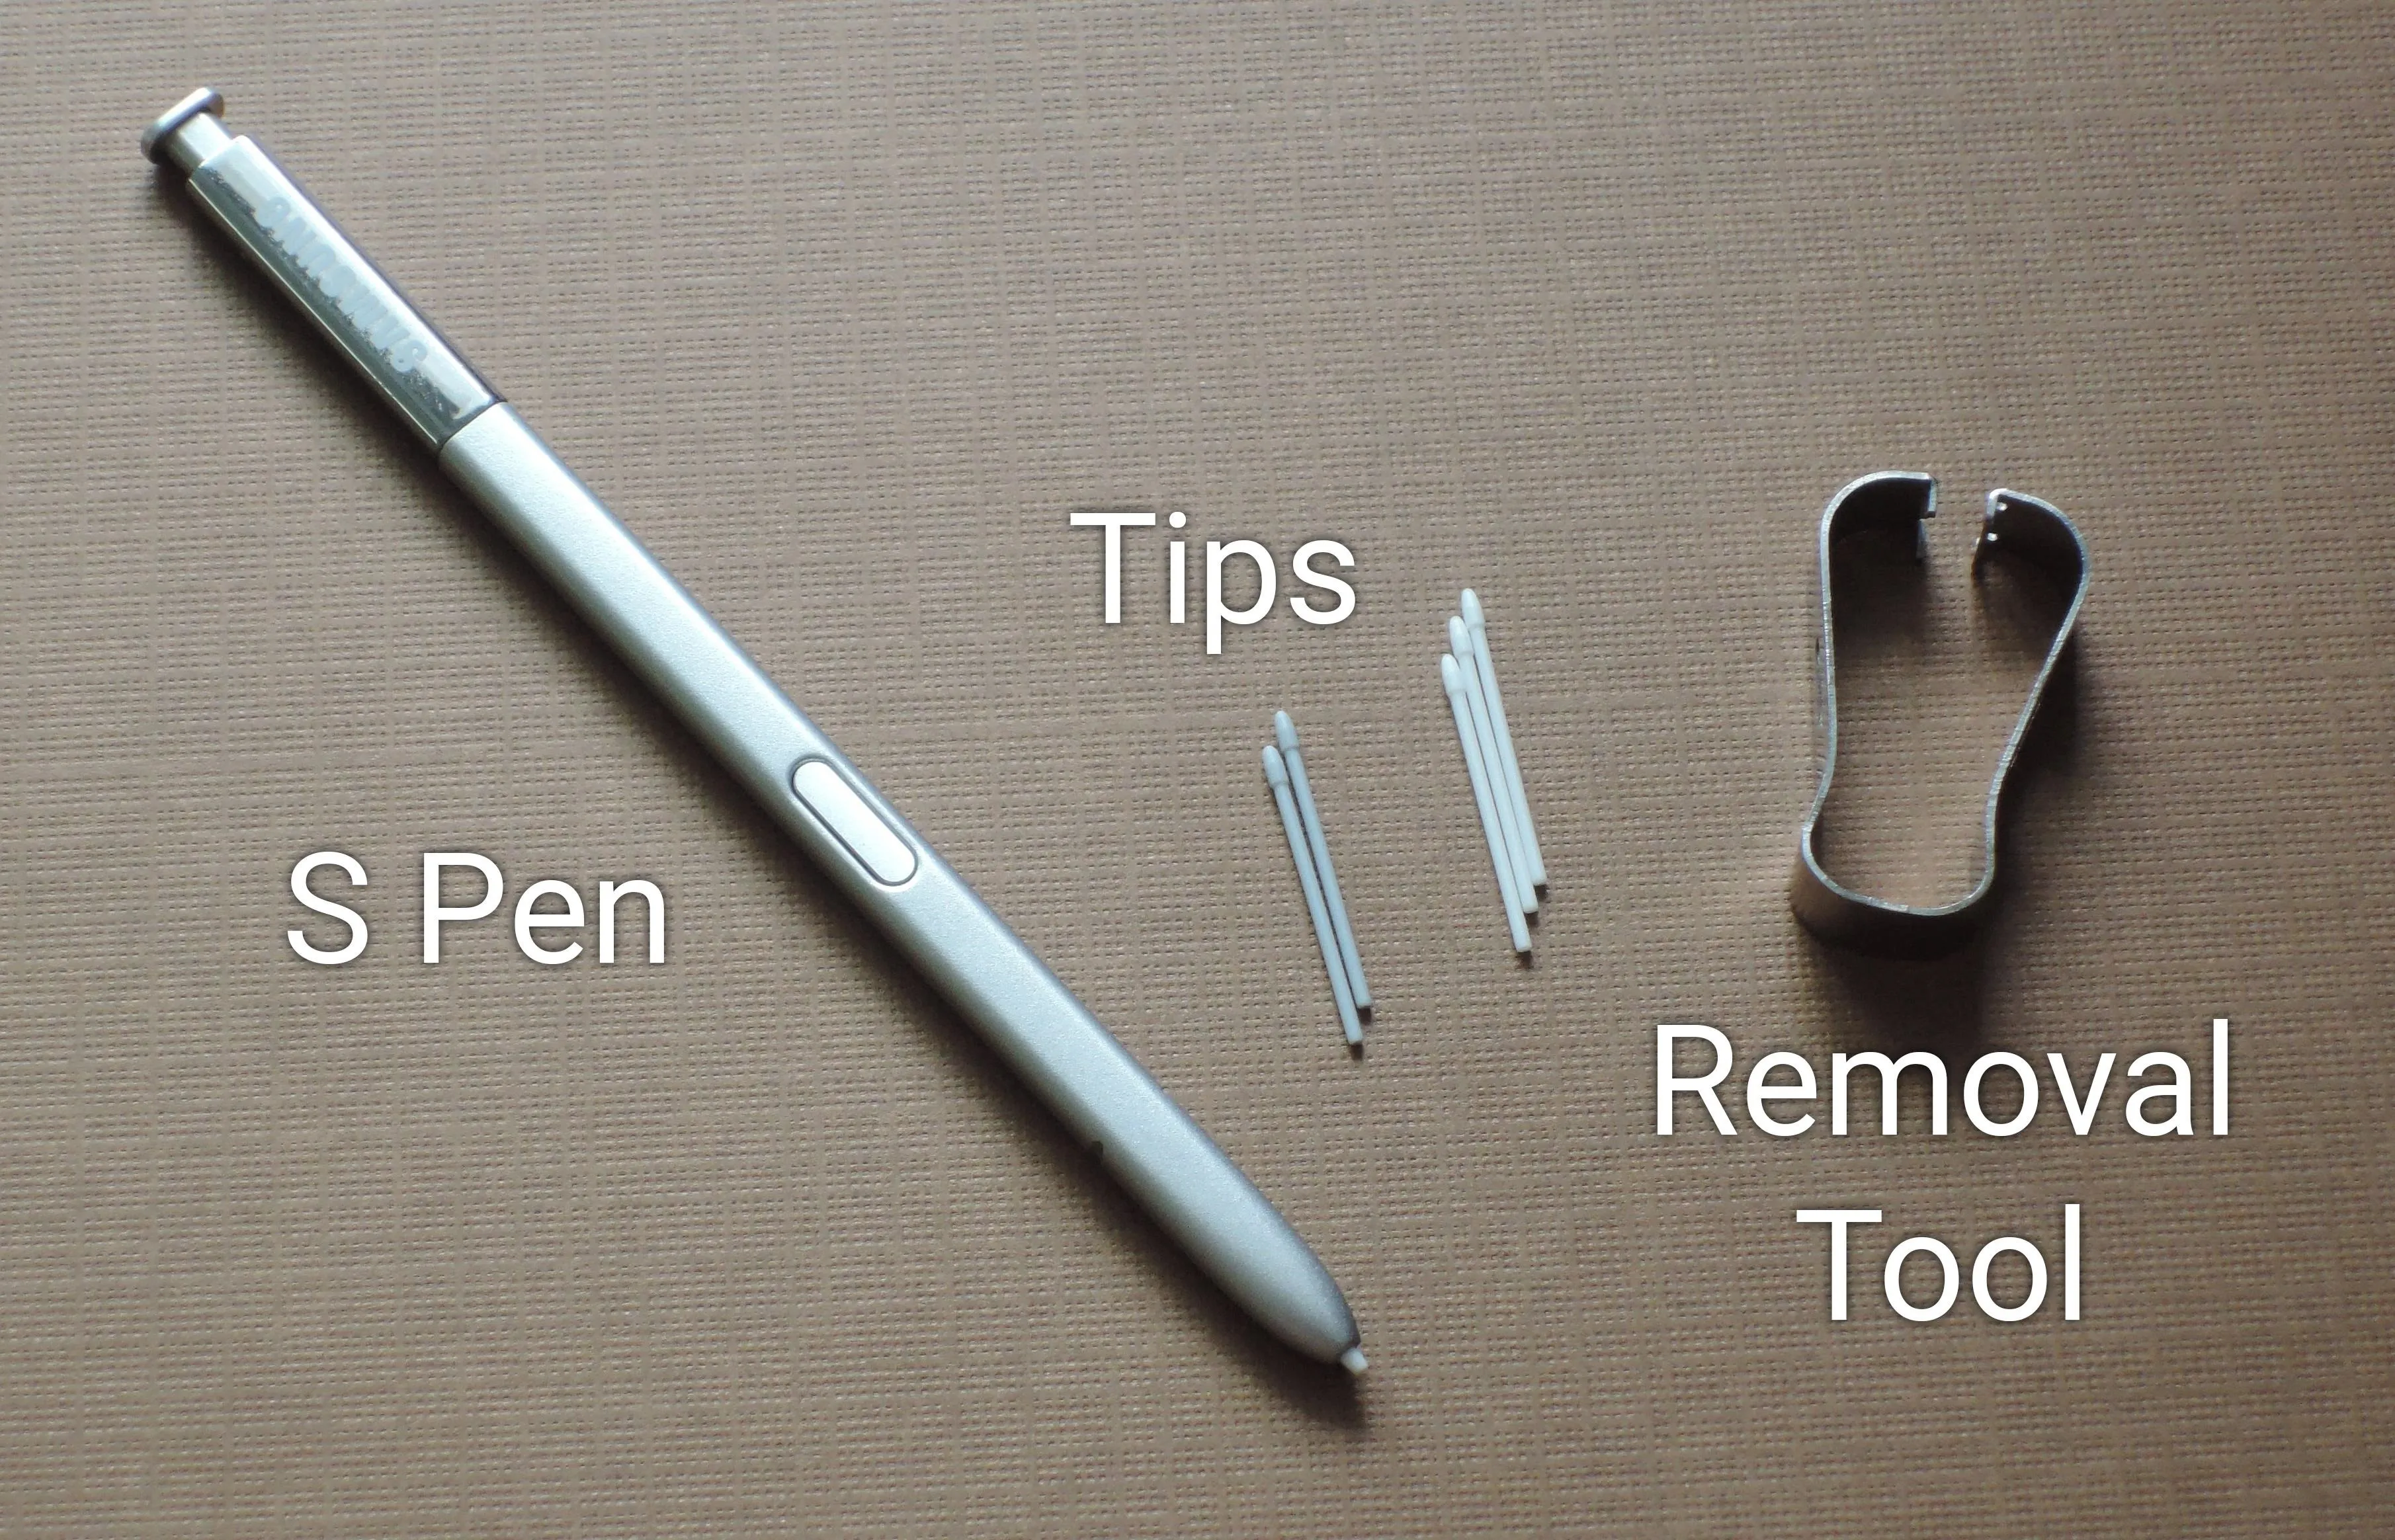
When you were unboxing your Galaxy Note7, you probably wondered why a little metal claw tool was included in the packaging. Then, if you looked closer, you saw there were five plastic sticks included with the claw tool that came in two different colors.
Well, these pieces are actually quite essential, as the little sticks are S Pen replacement tips, and the metal claw is a tool for removing them. The two different colors indicate different hardness levels, which help if you use a plastic screen protector. Really, there's a lot to learn about replacing the nib on the end of your S Pen, so I'll cover the whole process in detail.
Gather Materials
To get started, grab your S Pen, and take the removal tool out of its packaging. In the same plastic bag, you'll find the set of five replacement tips, so take those out as well.
Choose the Right Tip
As I mentioned earlier, the replacement tips come in two different colors—the darker ones are made out of softer plastic, and the lighter ones are harder. If you installed a plastic screen protector, the softer tips will prevent your S Pen from scratching the flimsy plastic over your screen. However, these tips have more friction to them, so they will leave marks on regular glass.
So bottom line, use the darker and softer tips if you have a plastic screen protector. If you use a tempered glass screen protector, or no screen protector at all, the lighter and harder tips are the ones to use.
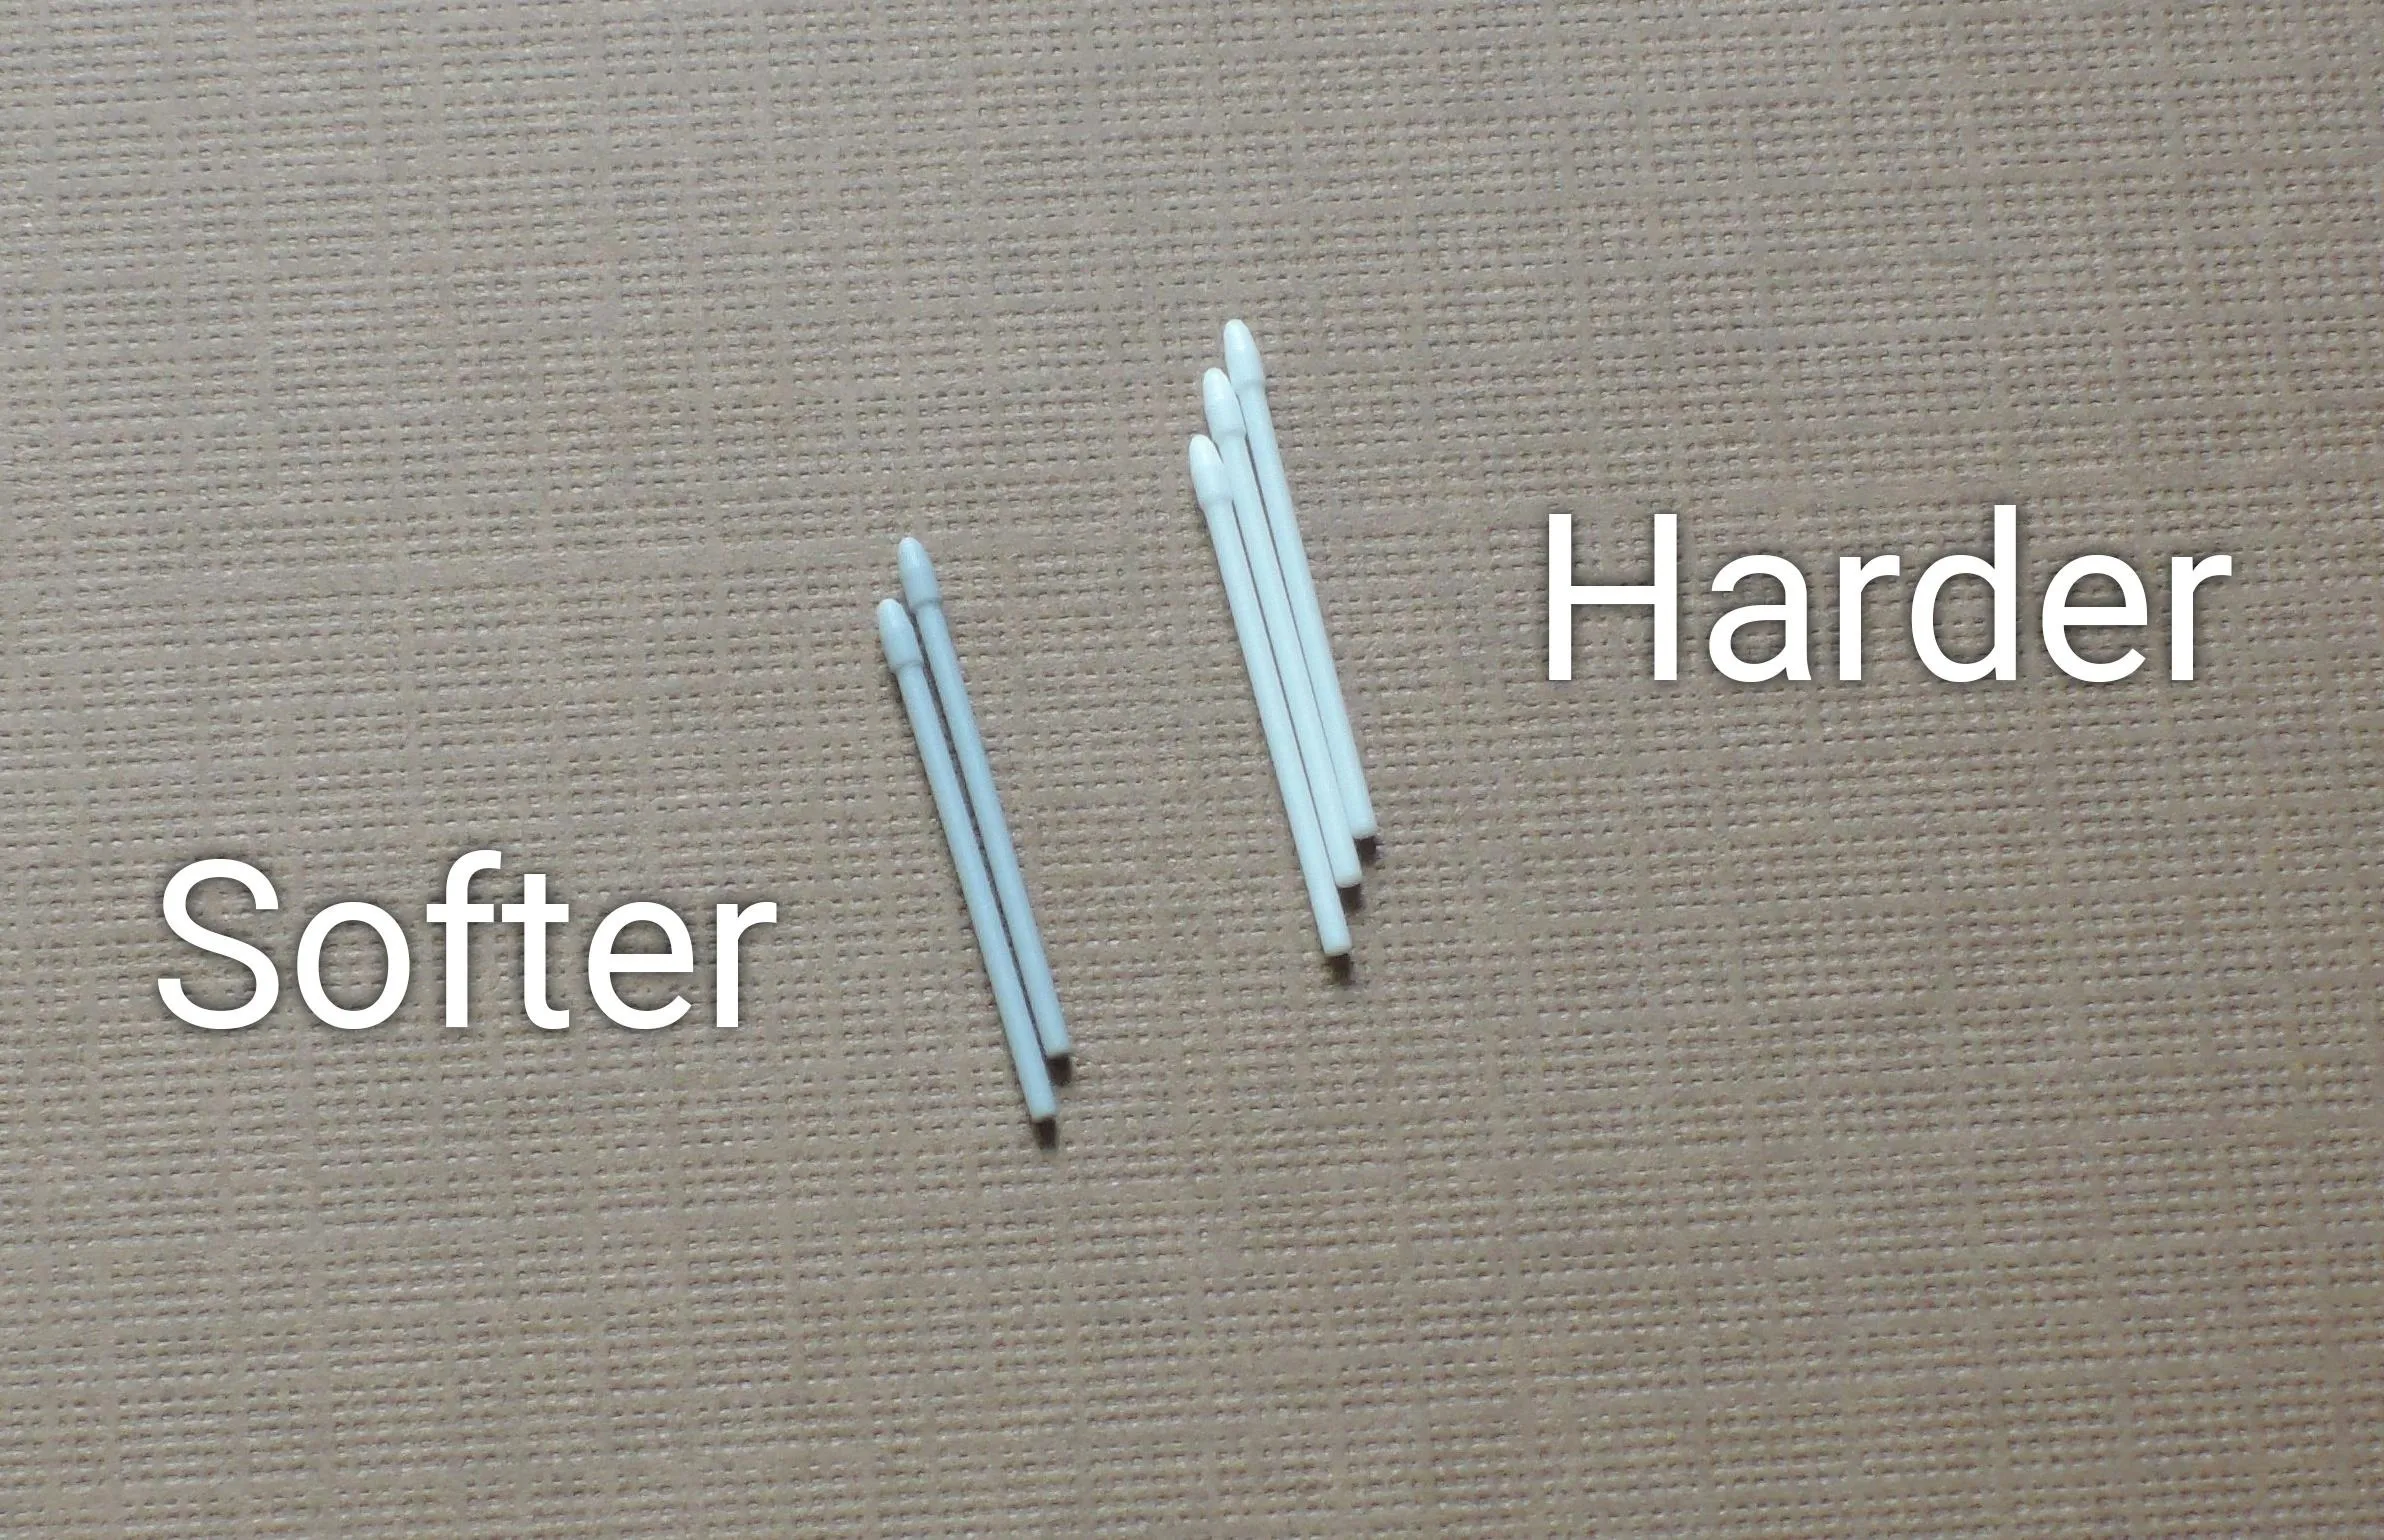
Use the softer tips for plastic screen protectors. Otherwise, use the harder tips.
Remove the Old Tip
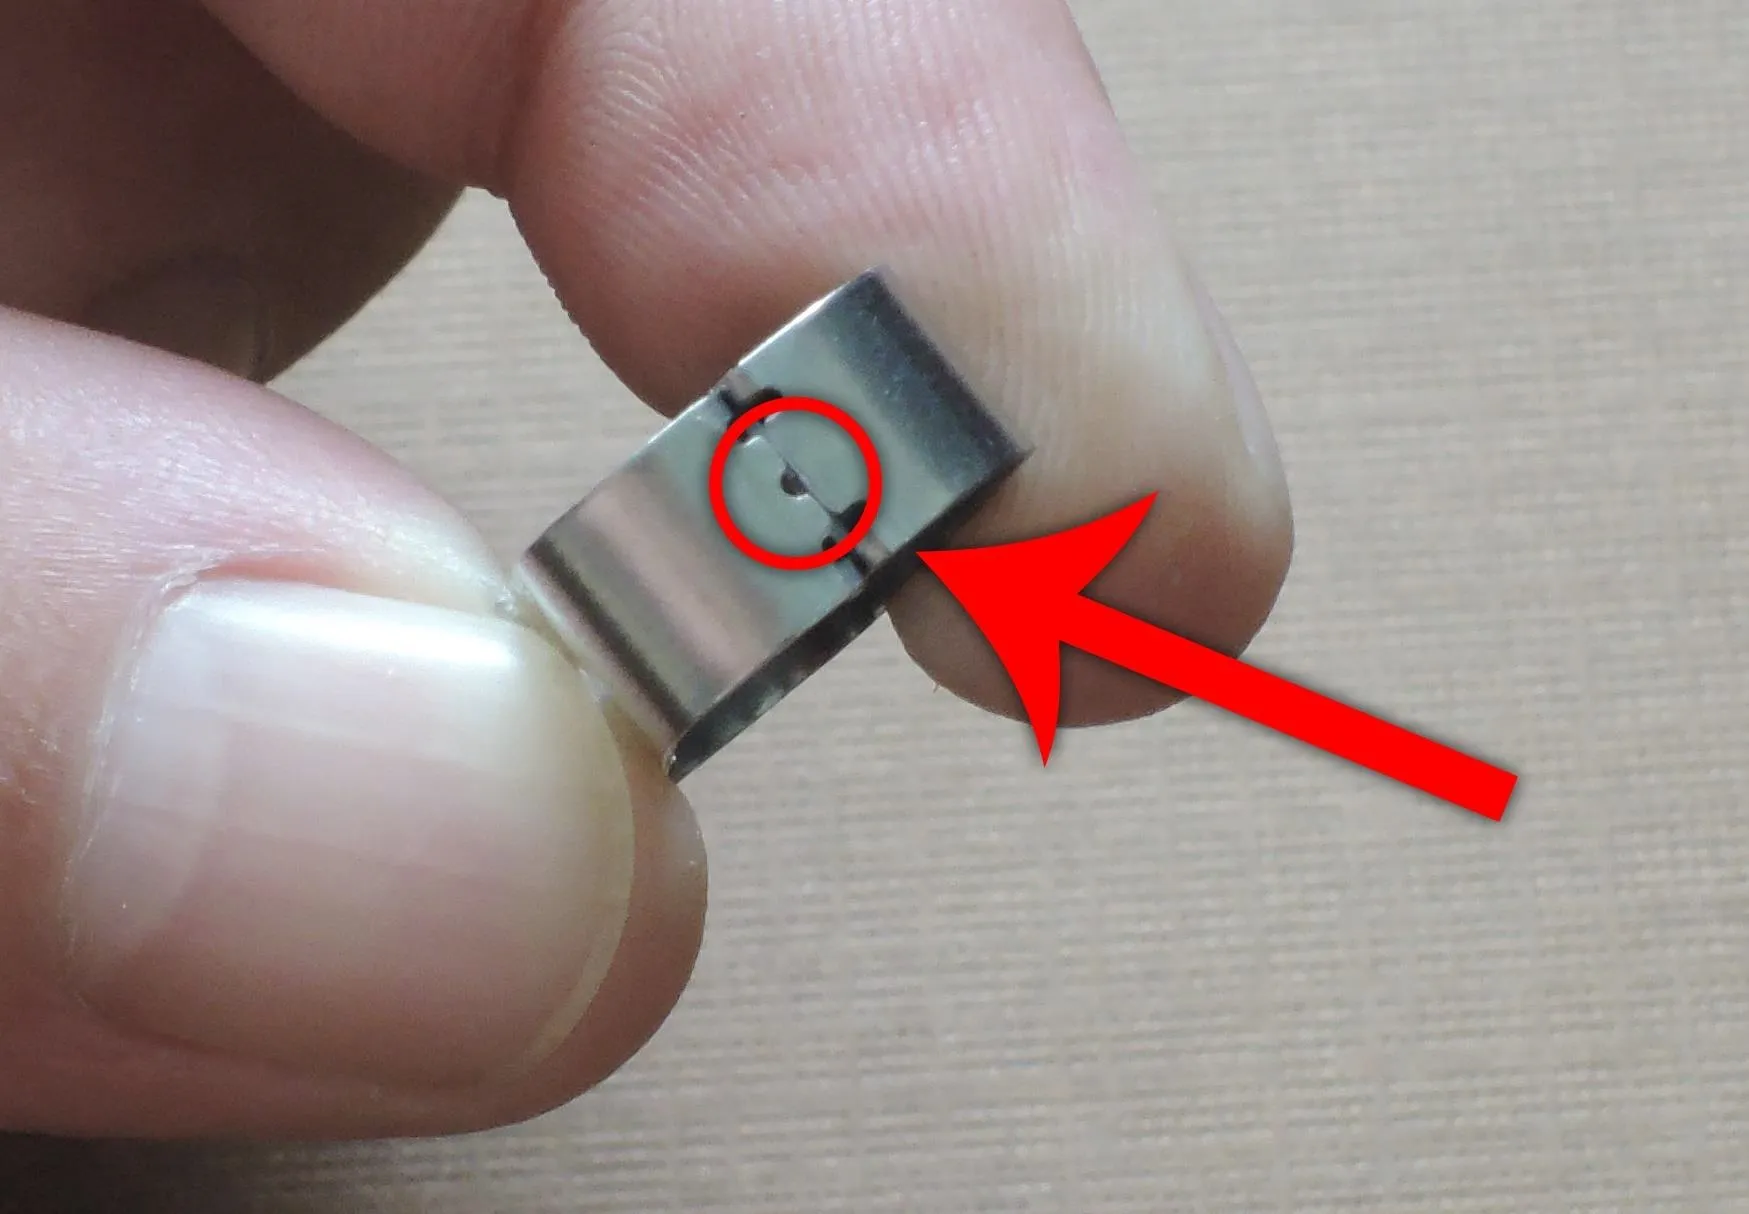
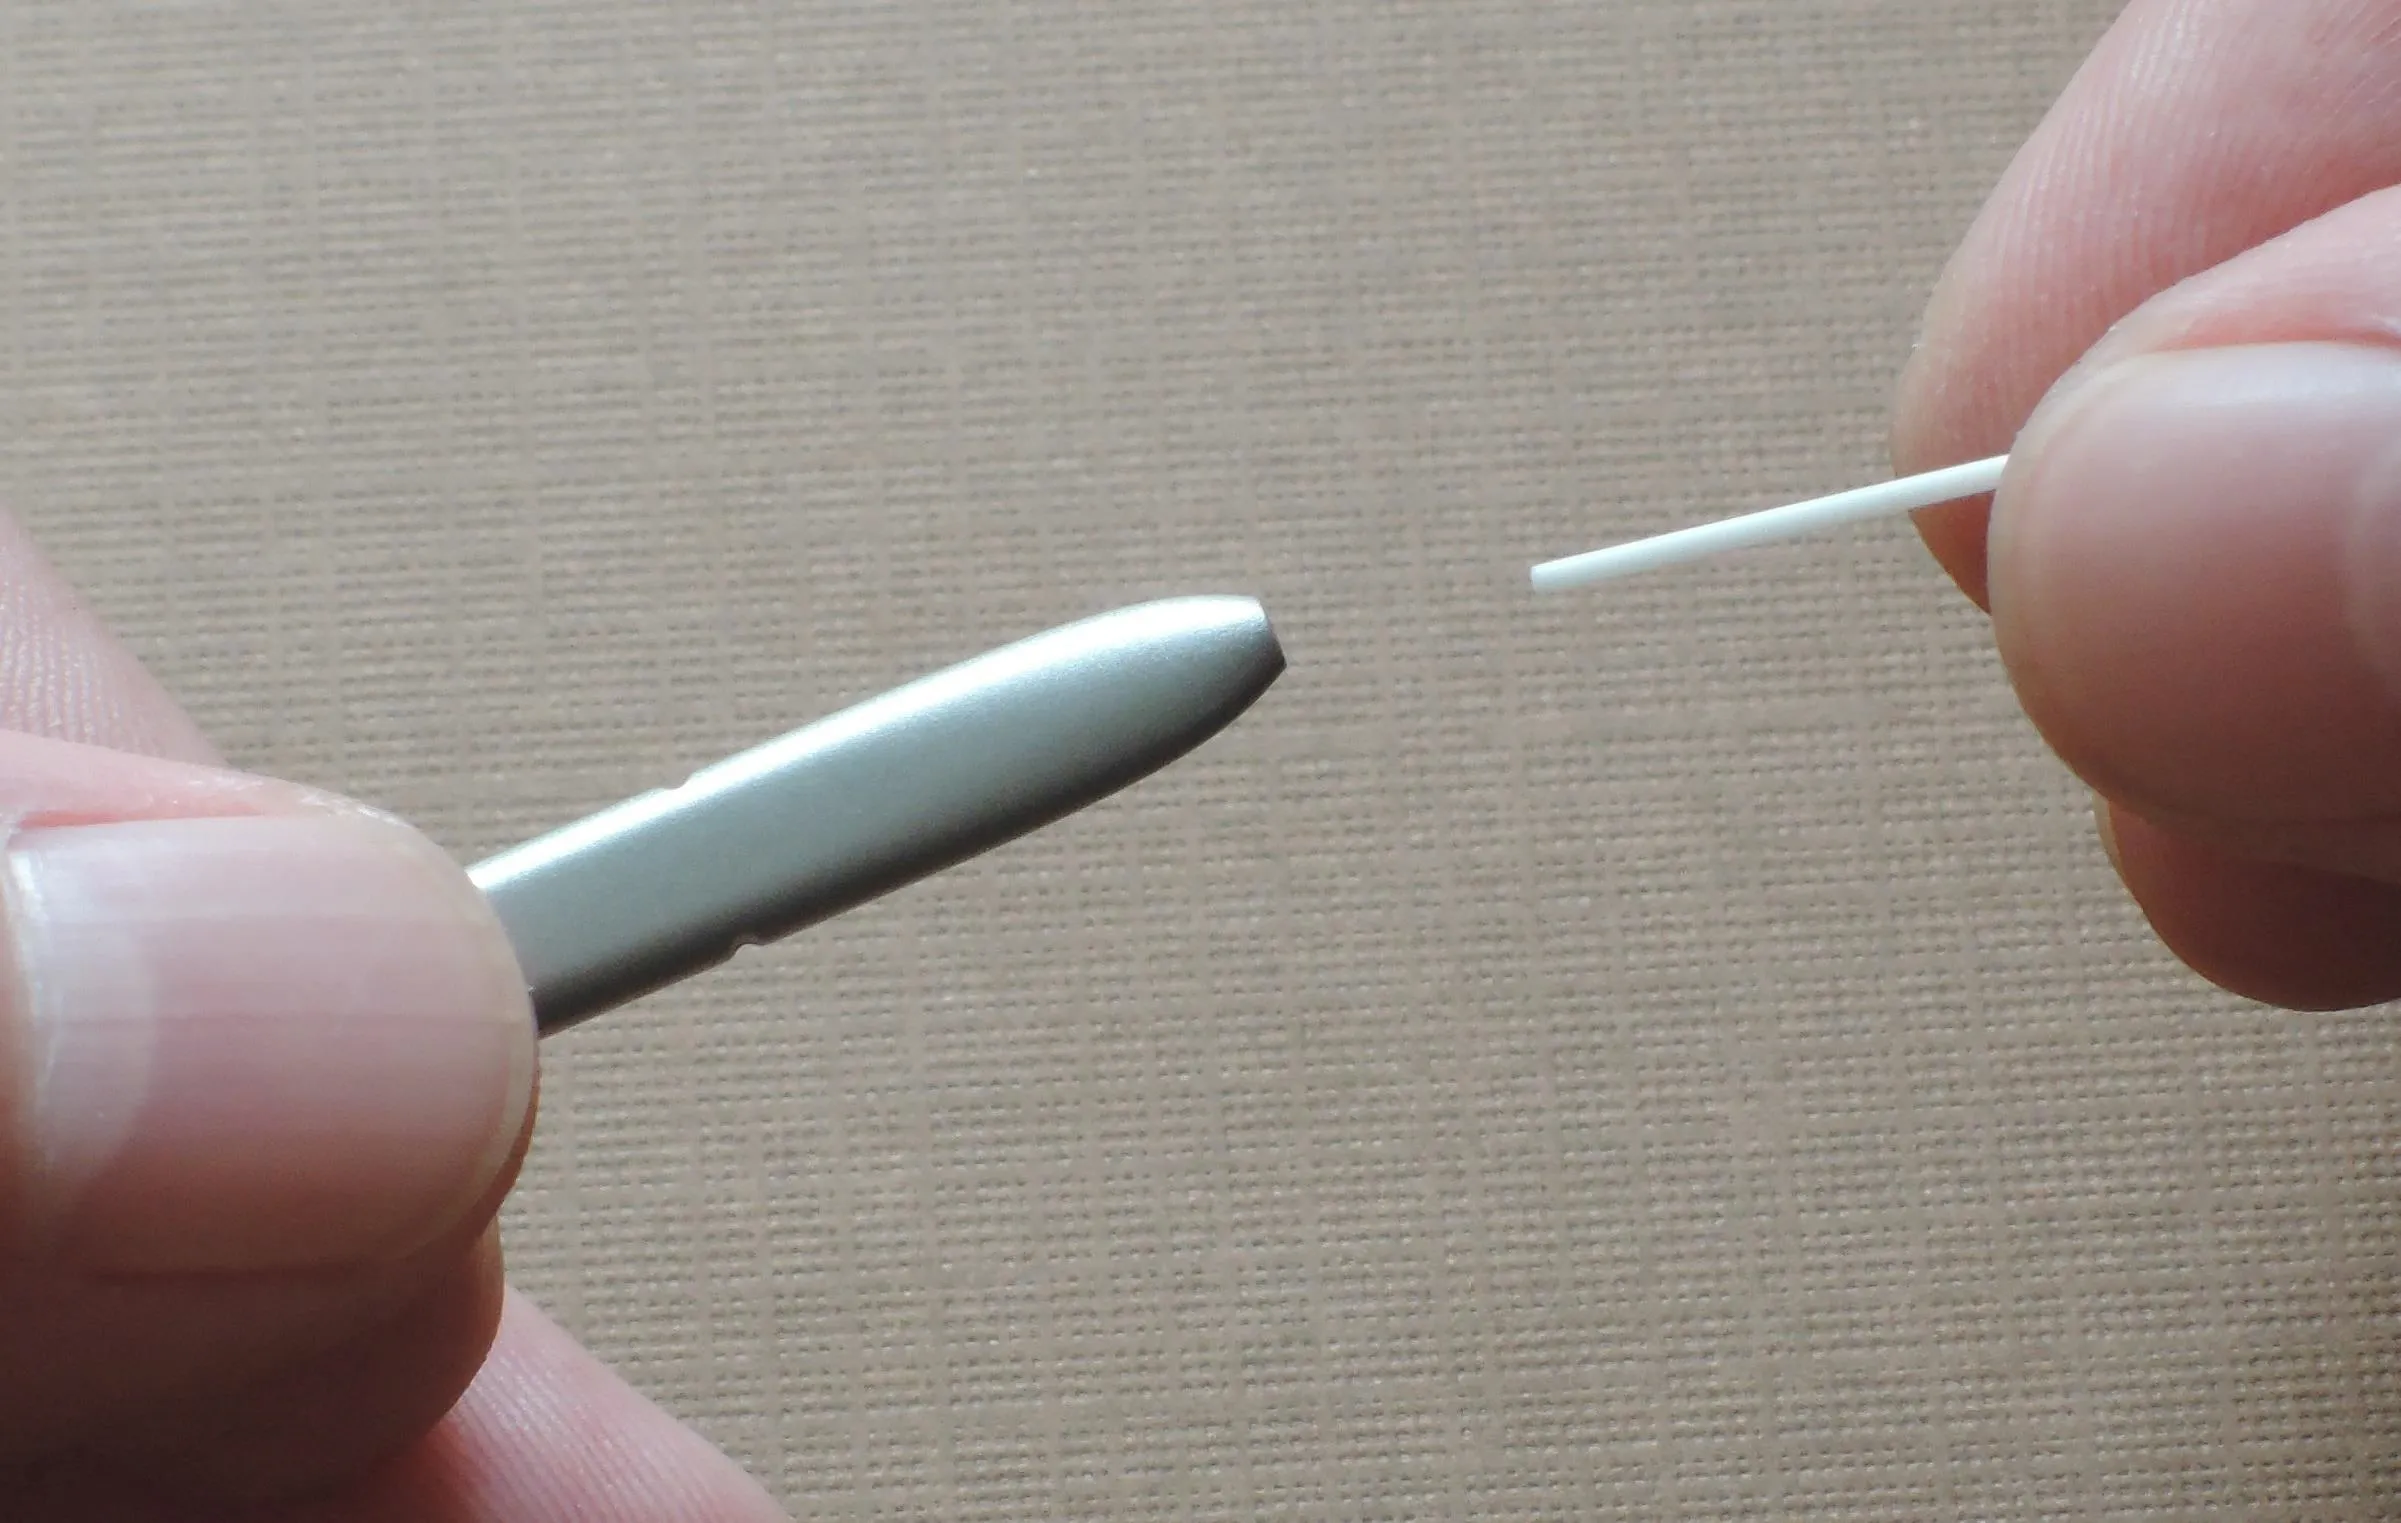
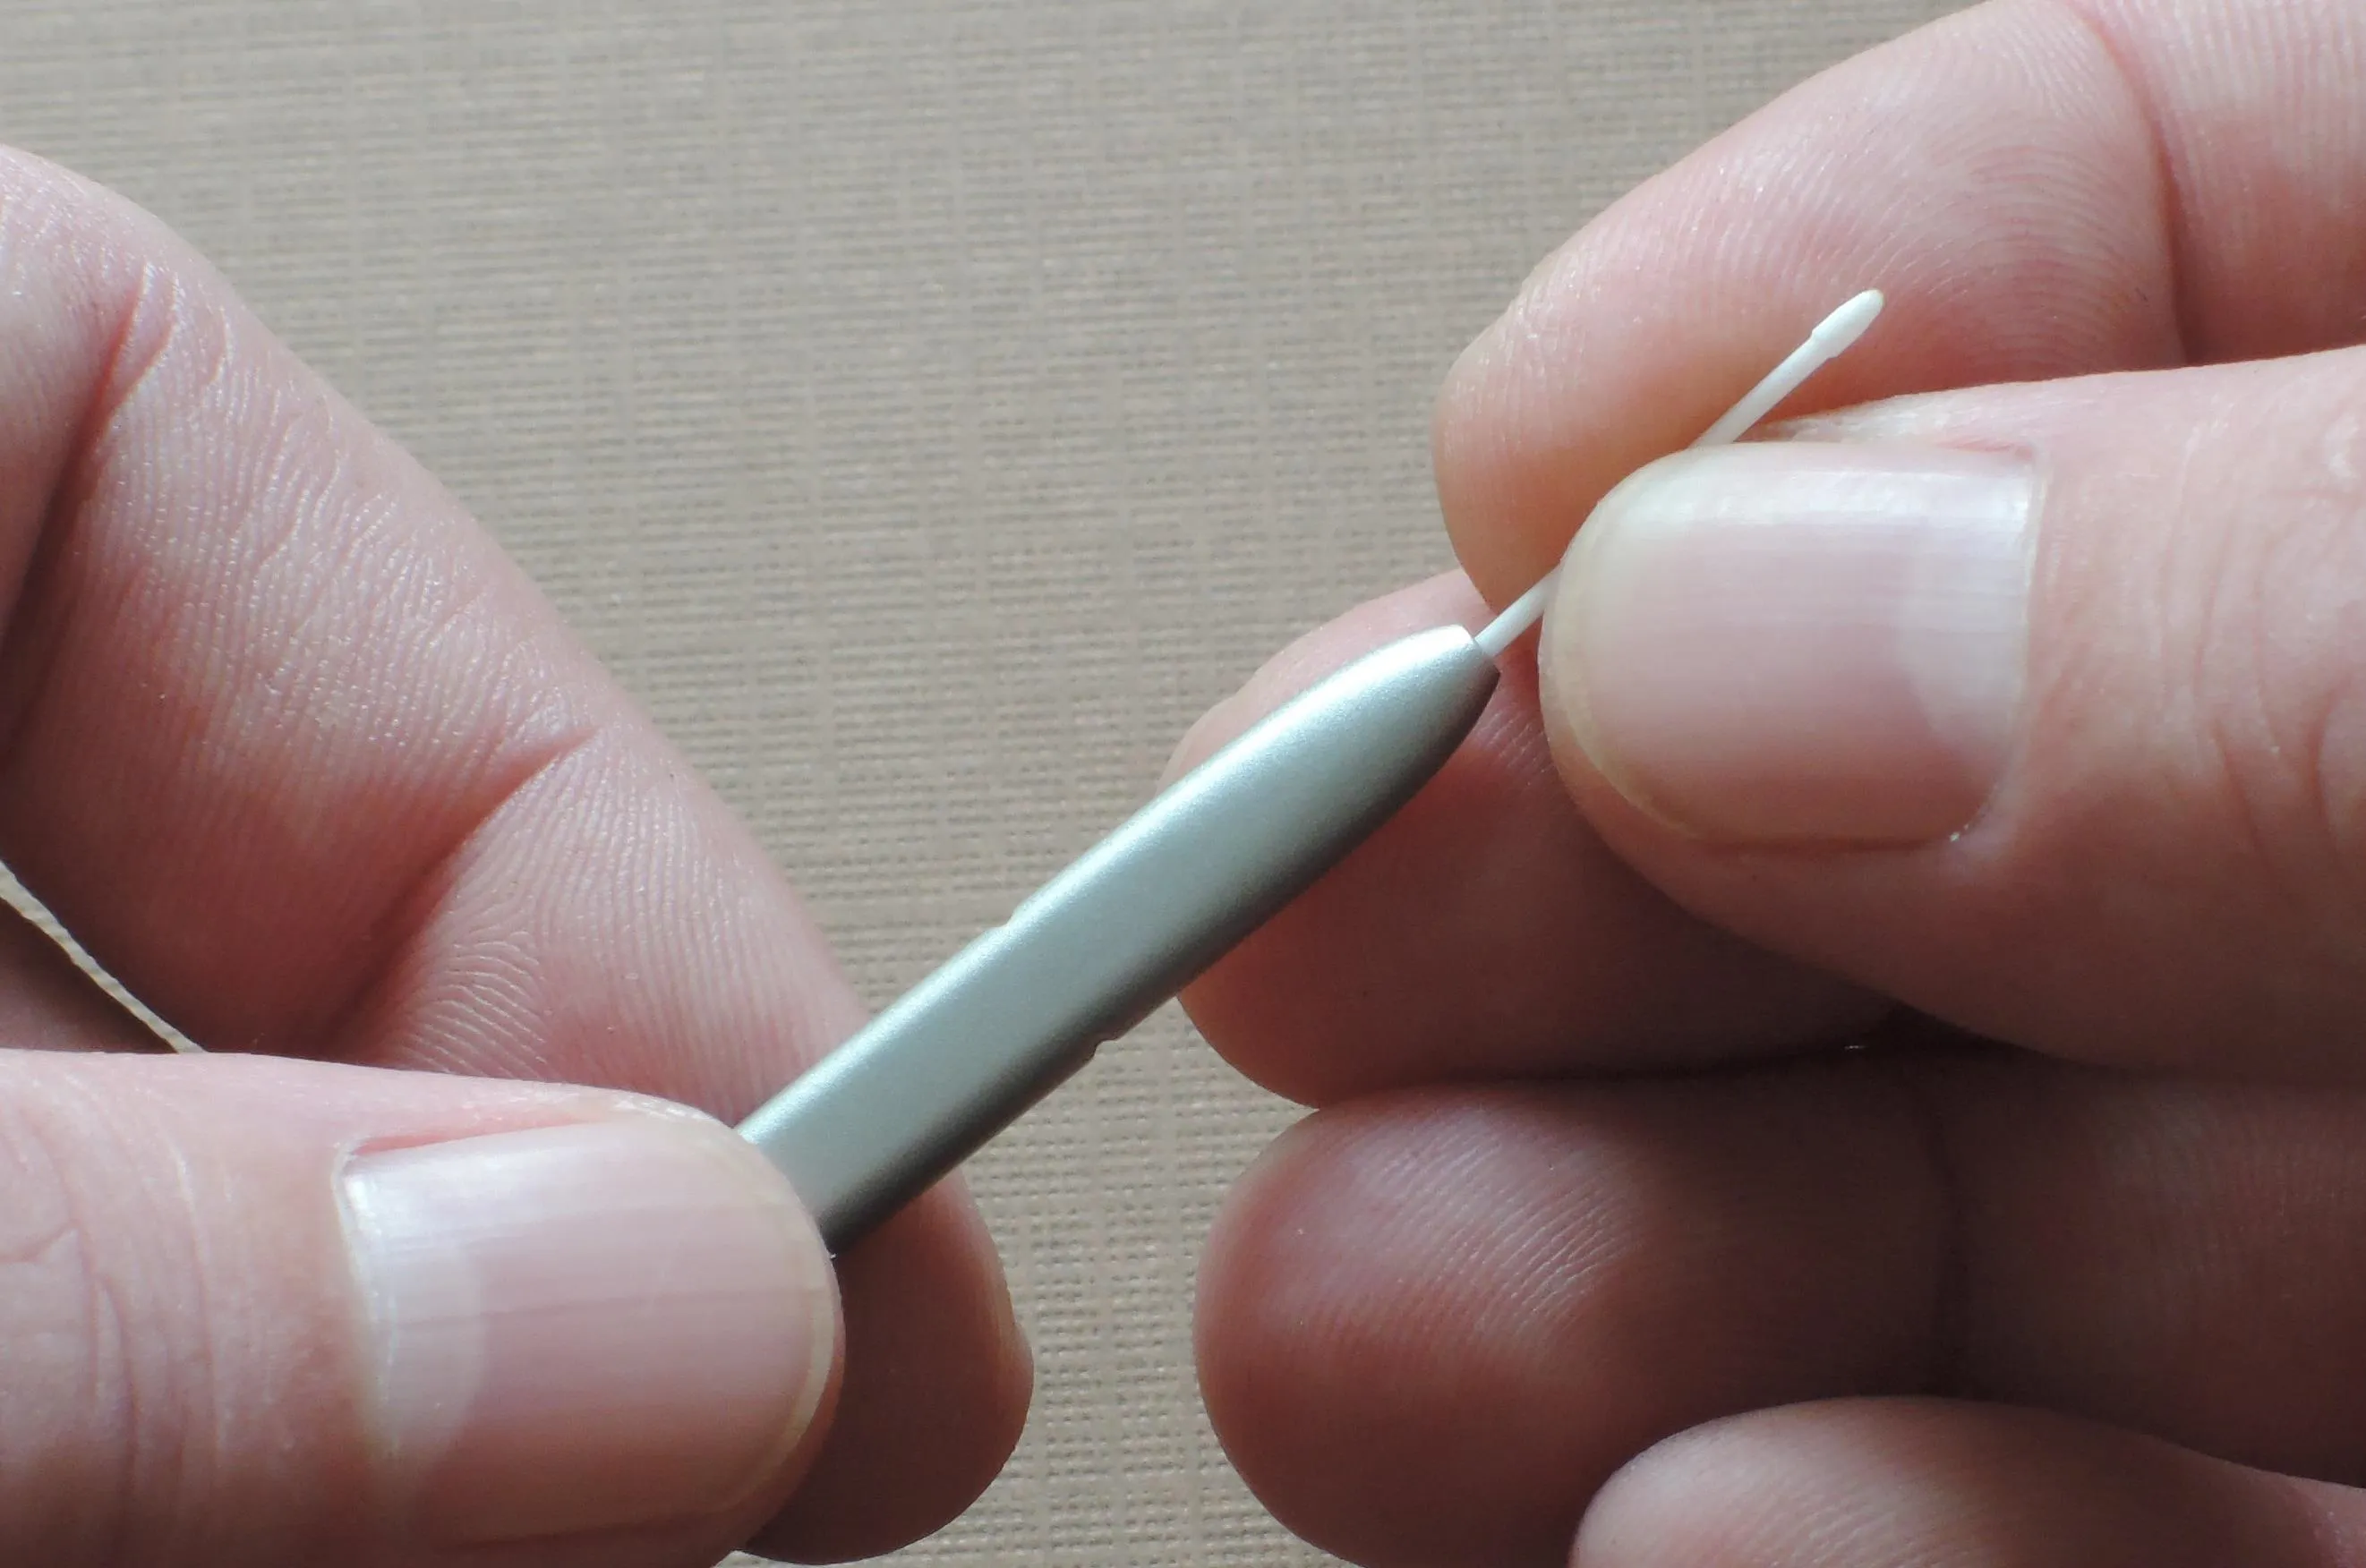
Now that you know which tip to use, grab the S Pen tip removal tool, and look at the point where the claws come together. You'll see a little notch here—this is where you should grab the tip of your S Pen to remove the old nib.
So grip the tip firmly with the removal tool, then pull back with steady and even pressure.
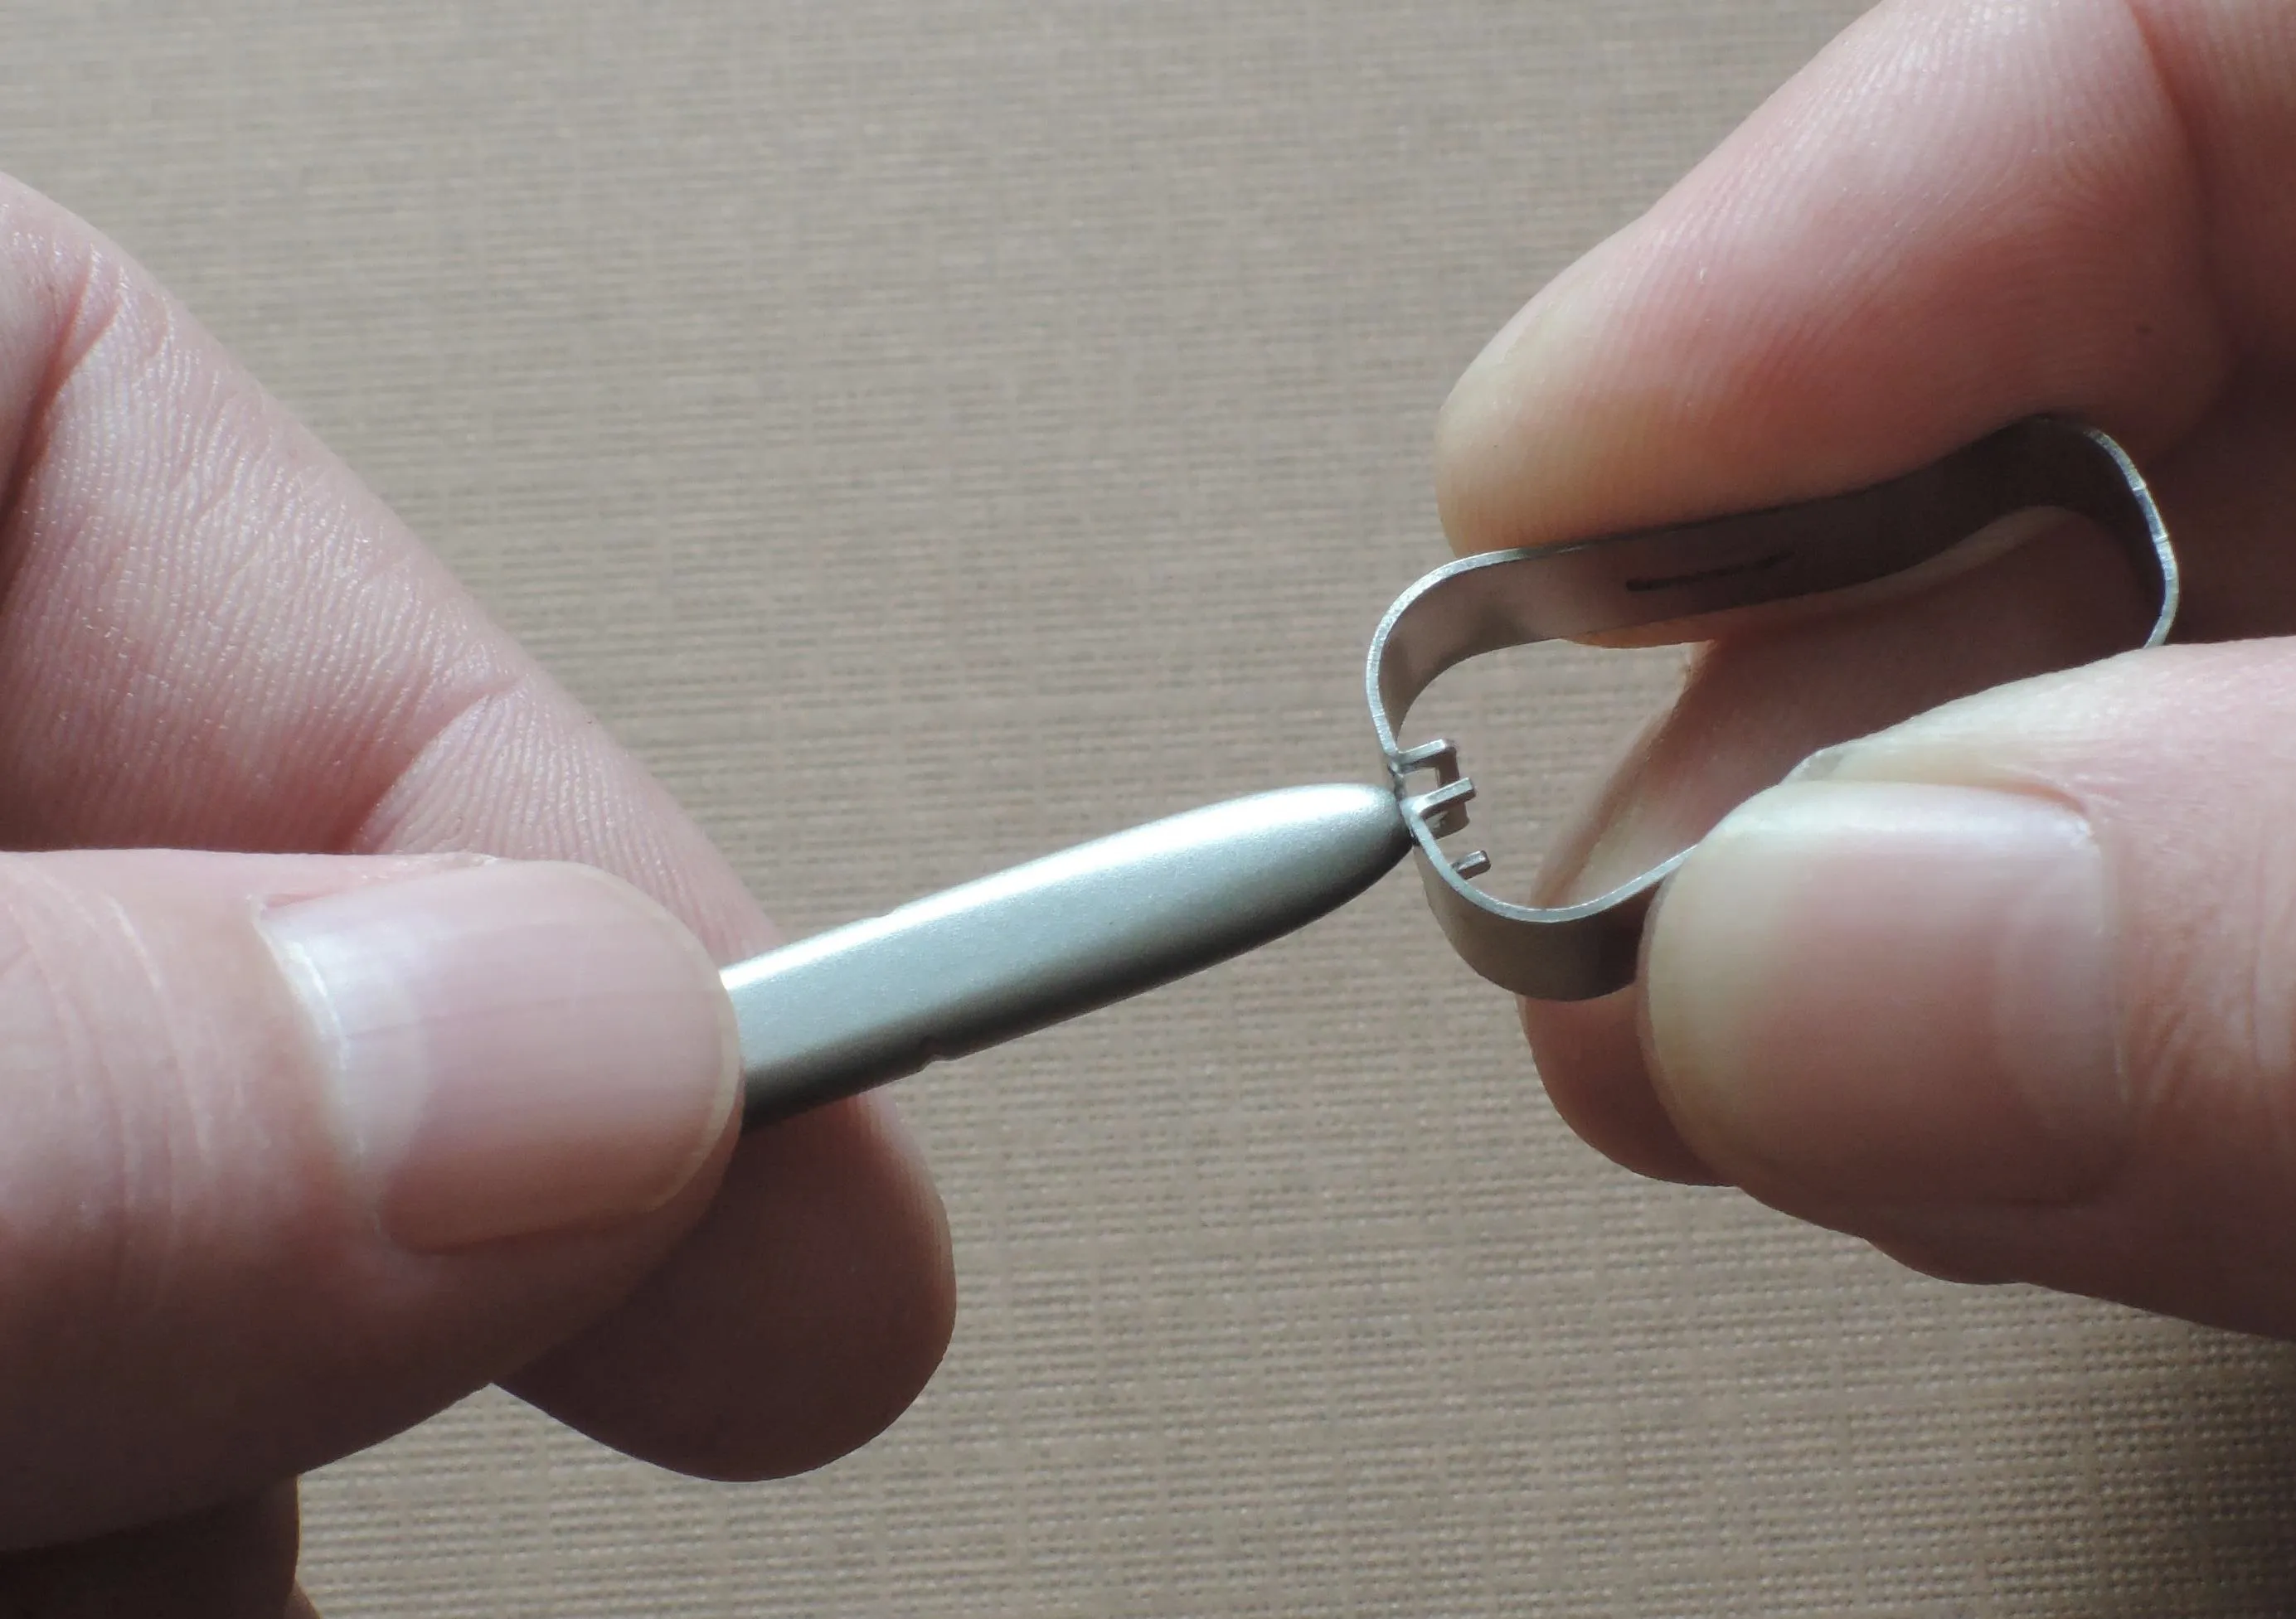
The tip should pop loose with minimal effort, and once it does, you can remove it the rest of the way by hand.
Install the New Tip
Next up, grab the replacement tip, and make sure the pointy side is facing away from your S Pen. From here, just slide the replacement tip into your S Pen until you feel a tiny bit of resistance.
Once the tip is most of the way in, just press firmly with your finger to lock it into place. There won't be any satisfying "click" when it's done, but it only takes a small amount of pressure to lock it in place.

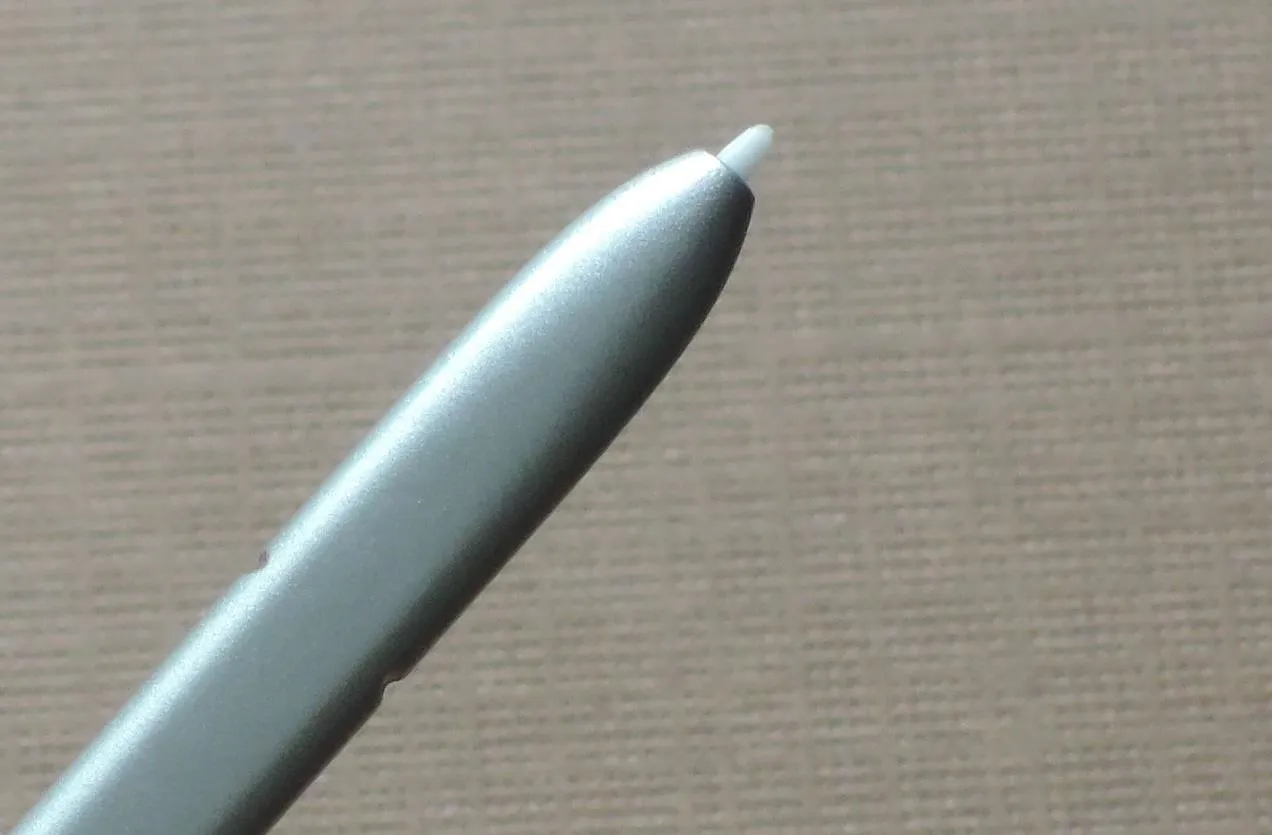
When you're done, the new S Pen tip should only protrude about an eighth of an inch, so if yours looks like the picture below, you're all set to go.
S Pen tips wear down over time, so this is something you'll have to do once every year or so. But it's a pretty simple process, and after you've gone through it once, it will be even easier in the future.
- Follow Gadget Hacks on Facebook, Twitter, Google+, and YouTube
- Follow Android Hacks on Facebook and Twitter
- Follow WonderHowTo on Facebook, Twitter, and Google+
Cover photo and screenshots by Dallas Thomas/Gadget Hacks


Comments
Be the first, drop a comment!