These days, the user experience on stock Android is a lot more refined and polished than manufacturer skins like Samsung's TouchWiz or HTC's Sense. This is mostly due to Material Design, the look and feel that Google implemented back in Android Lollipop, which has finally started to give Android a unified appearance with its sleek icons and abundant use of colors.
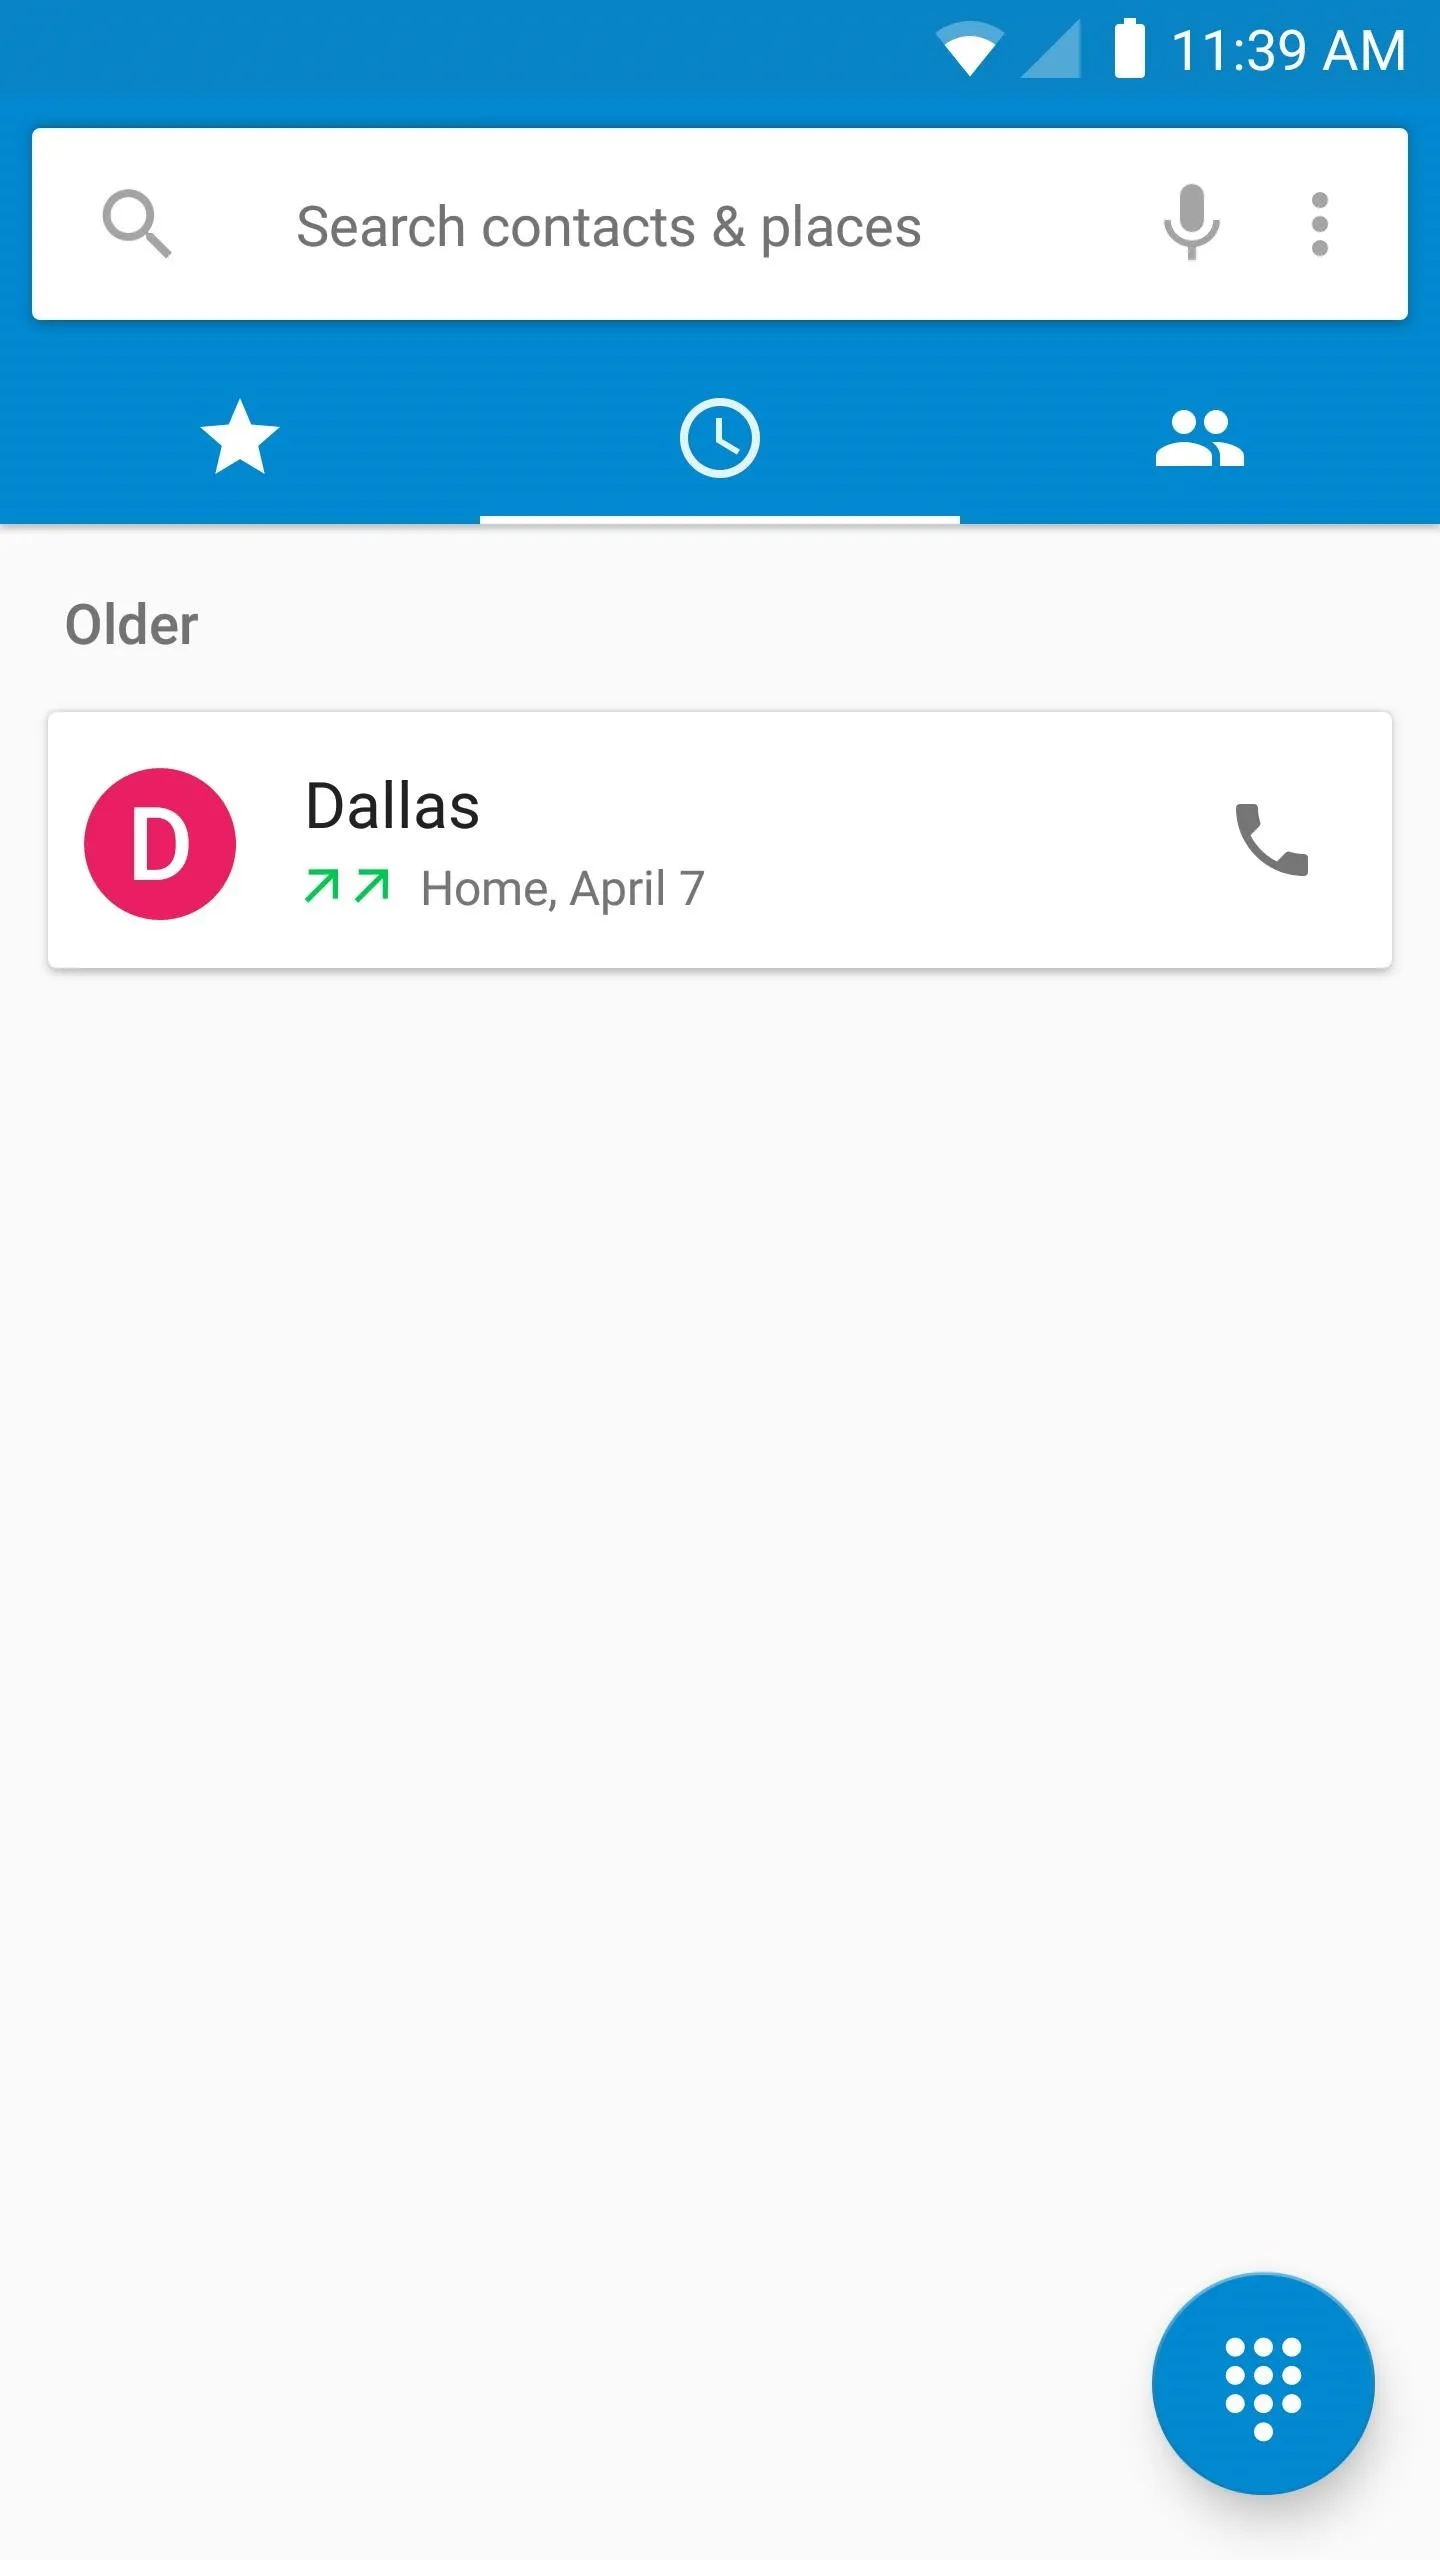
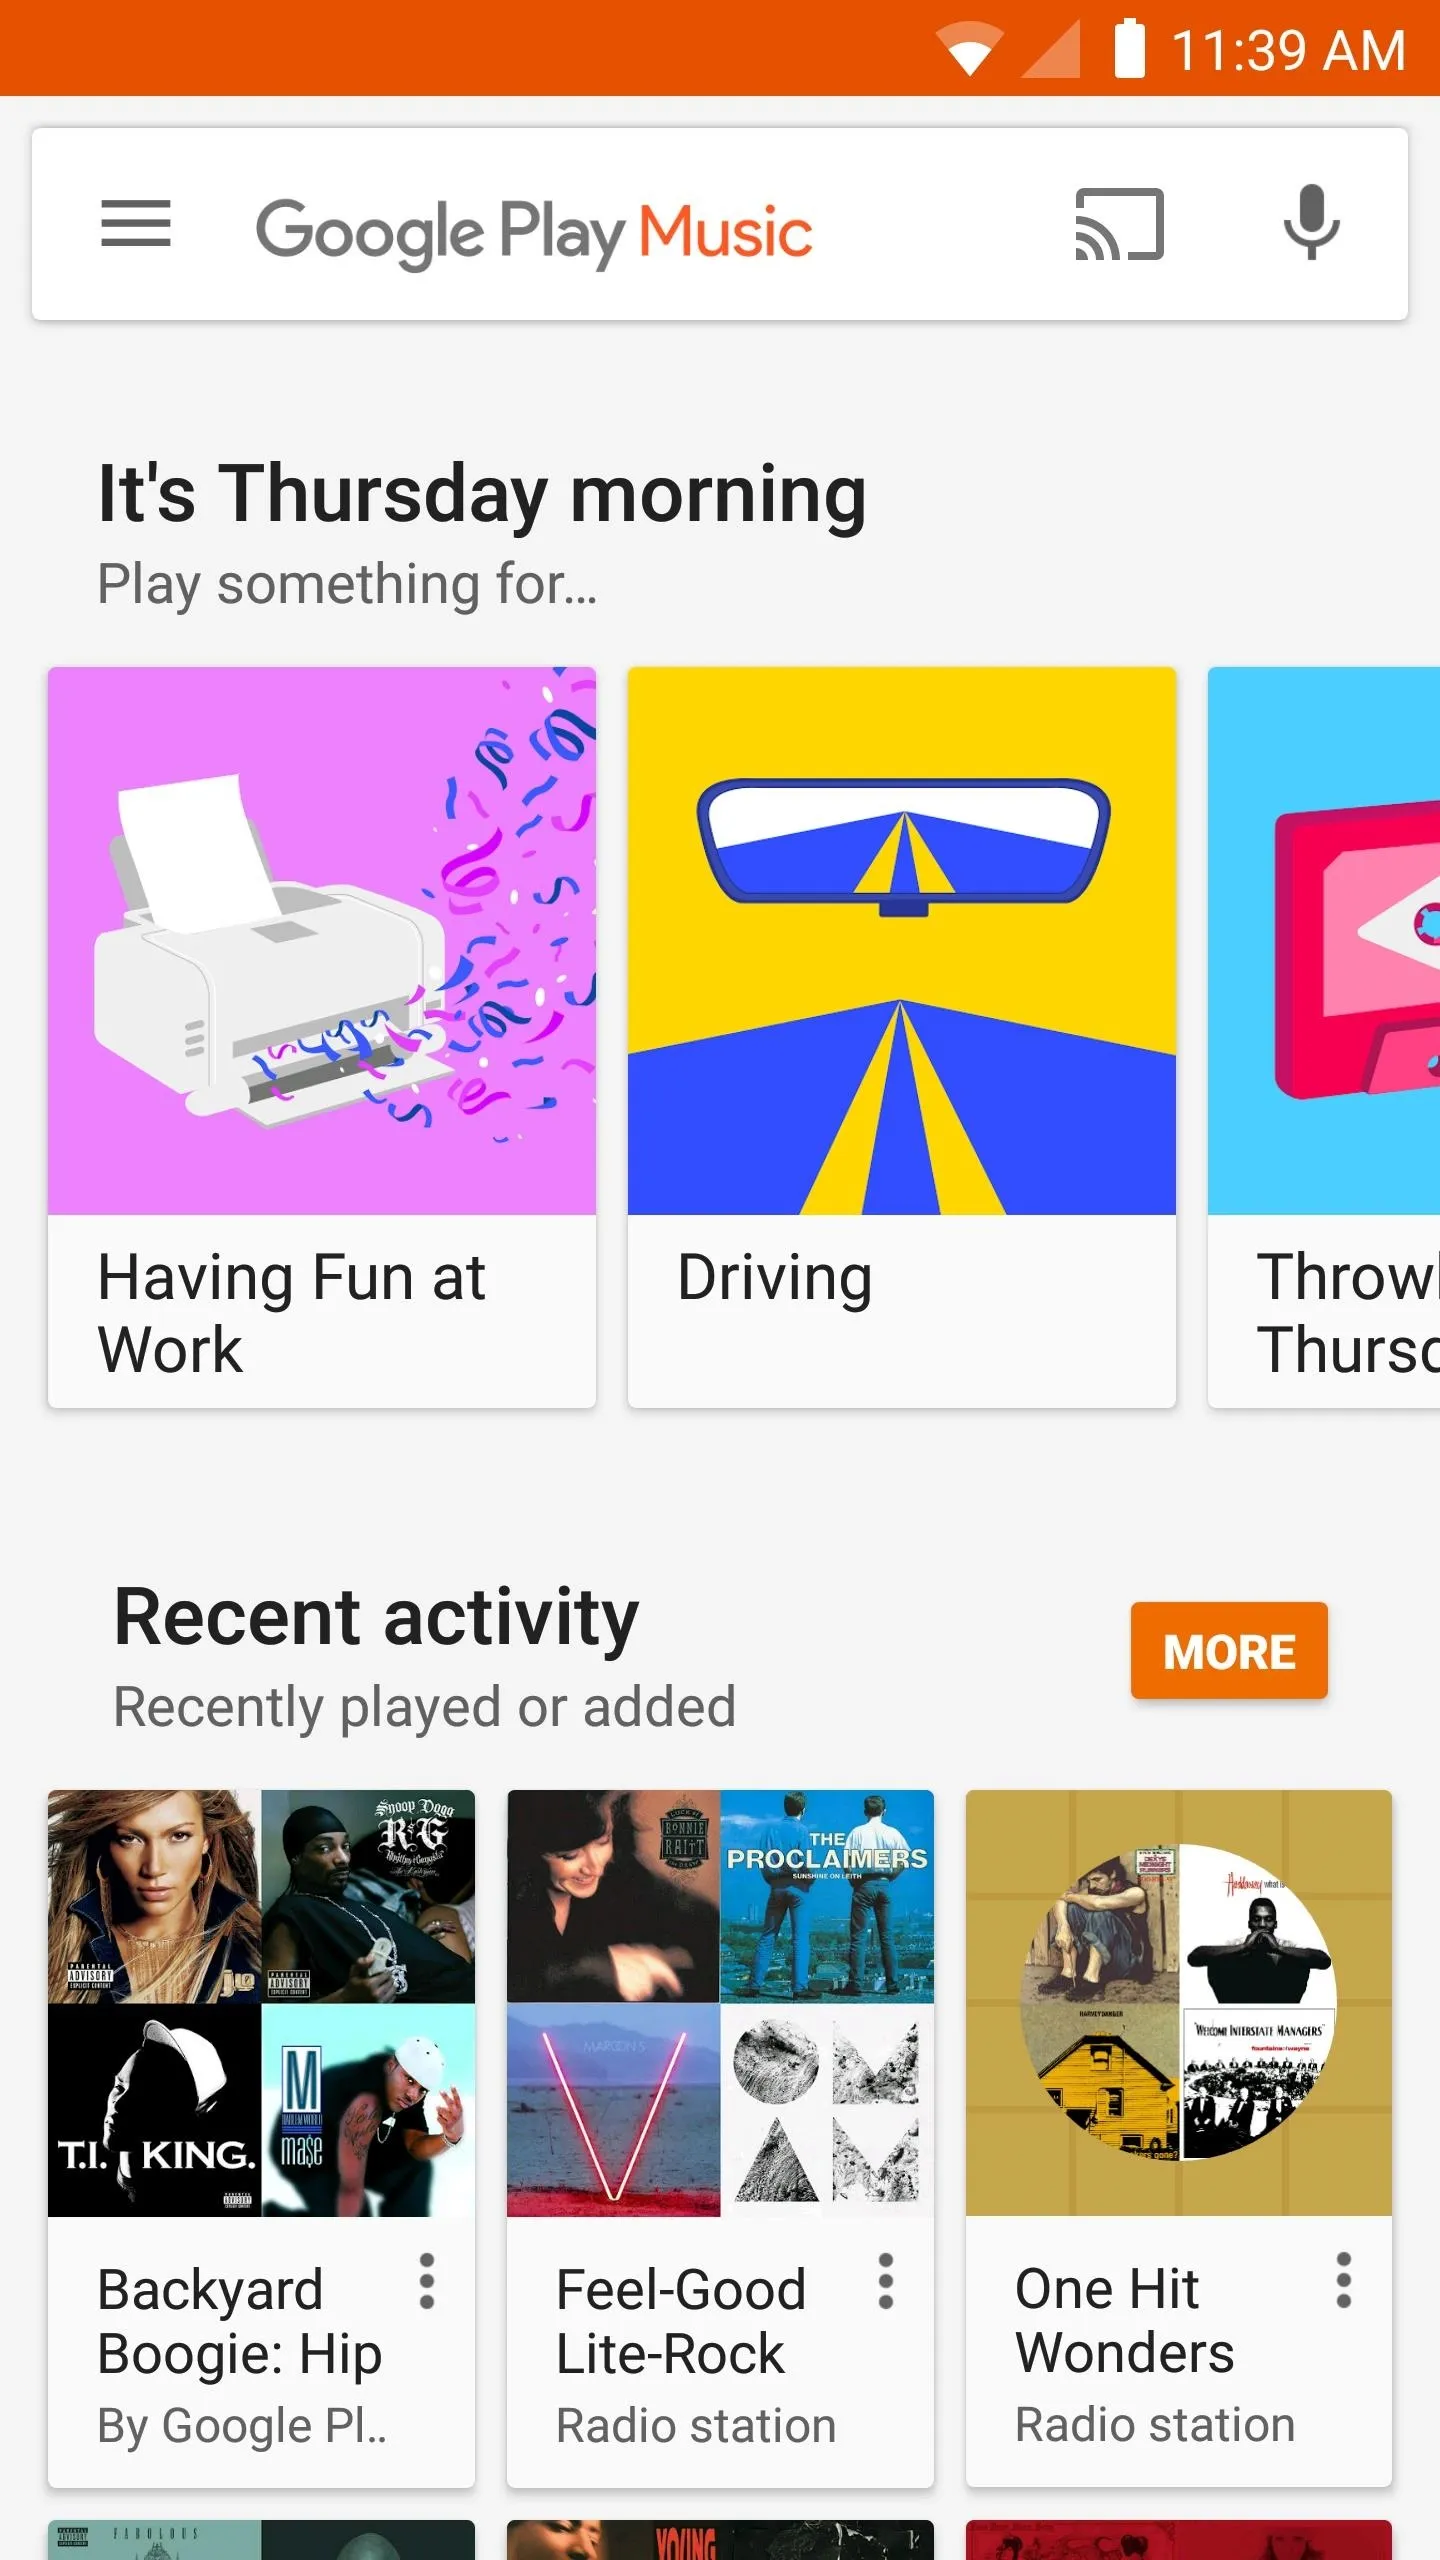
To notice the difference, you needn't look any further than the status bar at the top of your screen. With stock Android, the icons are subtle and understated, while the background of the status bar matches the color of the app you're currently using. Manufacturer-skinned versions of Android, on the other hand, continue to use cartoonish icons here, and the status bar may or may not be color-matching, even if you're running Lollipop or higher.
Luckily, though, developer James Fenn has come up with an ingenious way to get stock Android's status bar on almost any device. His latest app simply overlays a color-matching status bar on top of your existing one, complete with Material Design icons and theming. To top that all off, the app doesn't even require root, so this is one that anybody can try.
Install Status
To update your ugly old status bar with Material Design, start by installing Fenn's app, which is simply called Status.

Grant Permissions
When you first launch Status, there are a handful of additional permissions that you'll have to grant so that the app can overlay your screen, display notification icons, and keep your connectivity indicators accurate. The app has a set-up screen that will walk you through this part, so it's pretty easy.
To start, tap the "Grant Access" button beneath the first permission, then select the "Status Service" entry on the next screen. Next, simply enable the permission with the switch at the top of the screen, then confirm your choice on the popup.
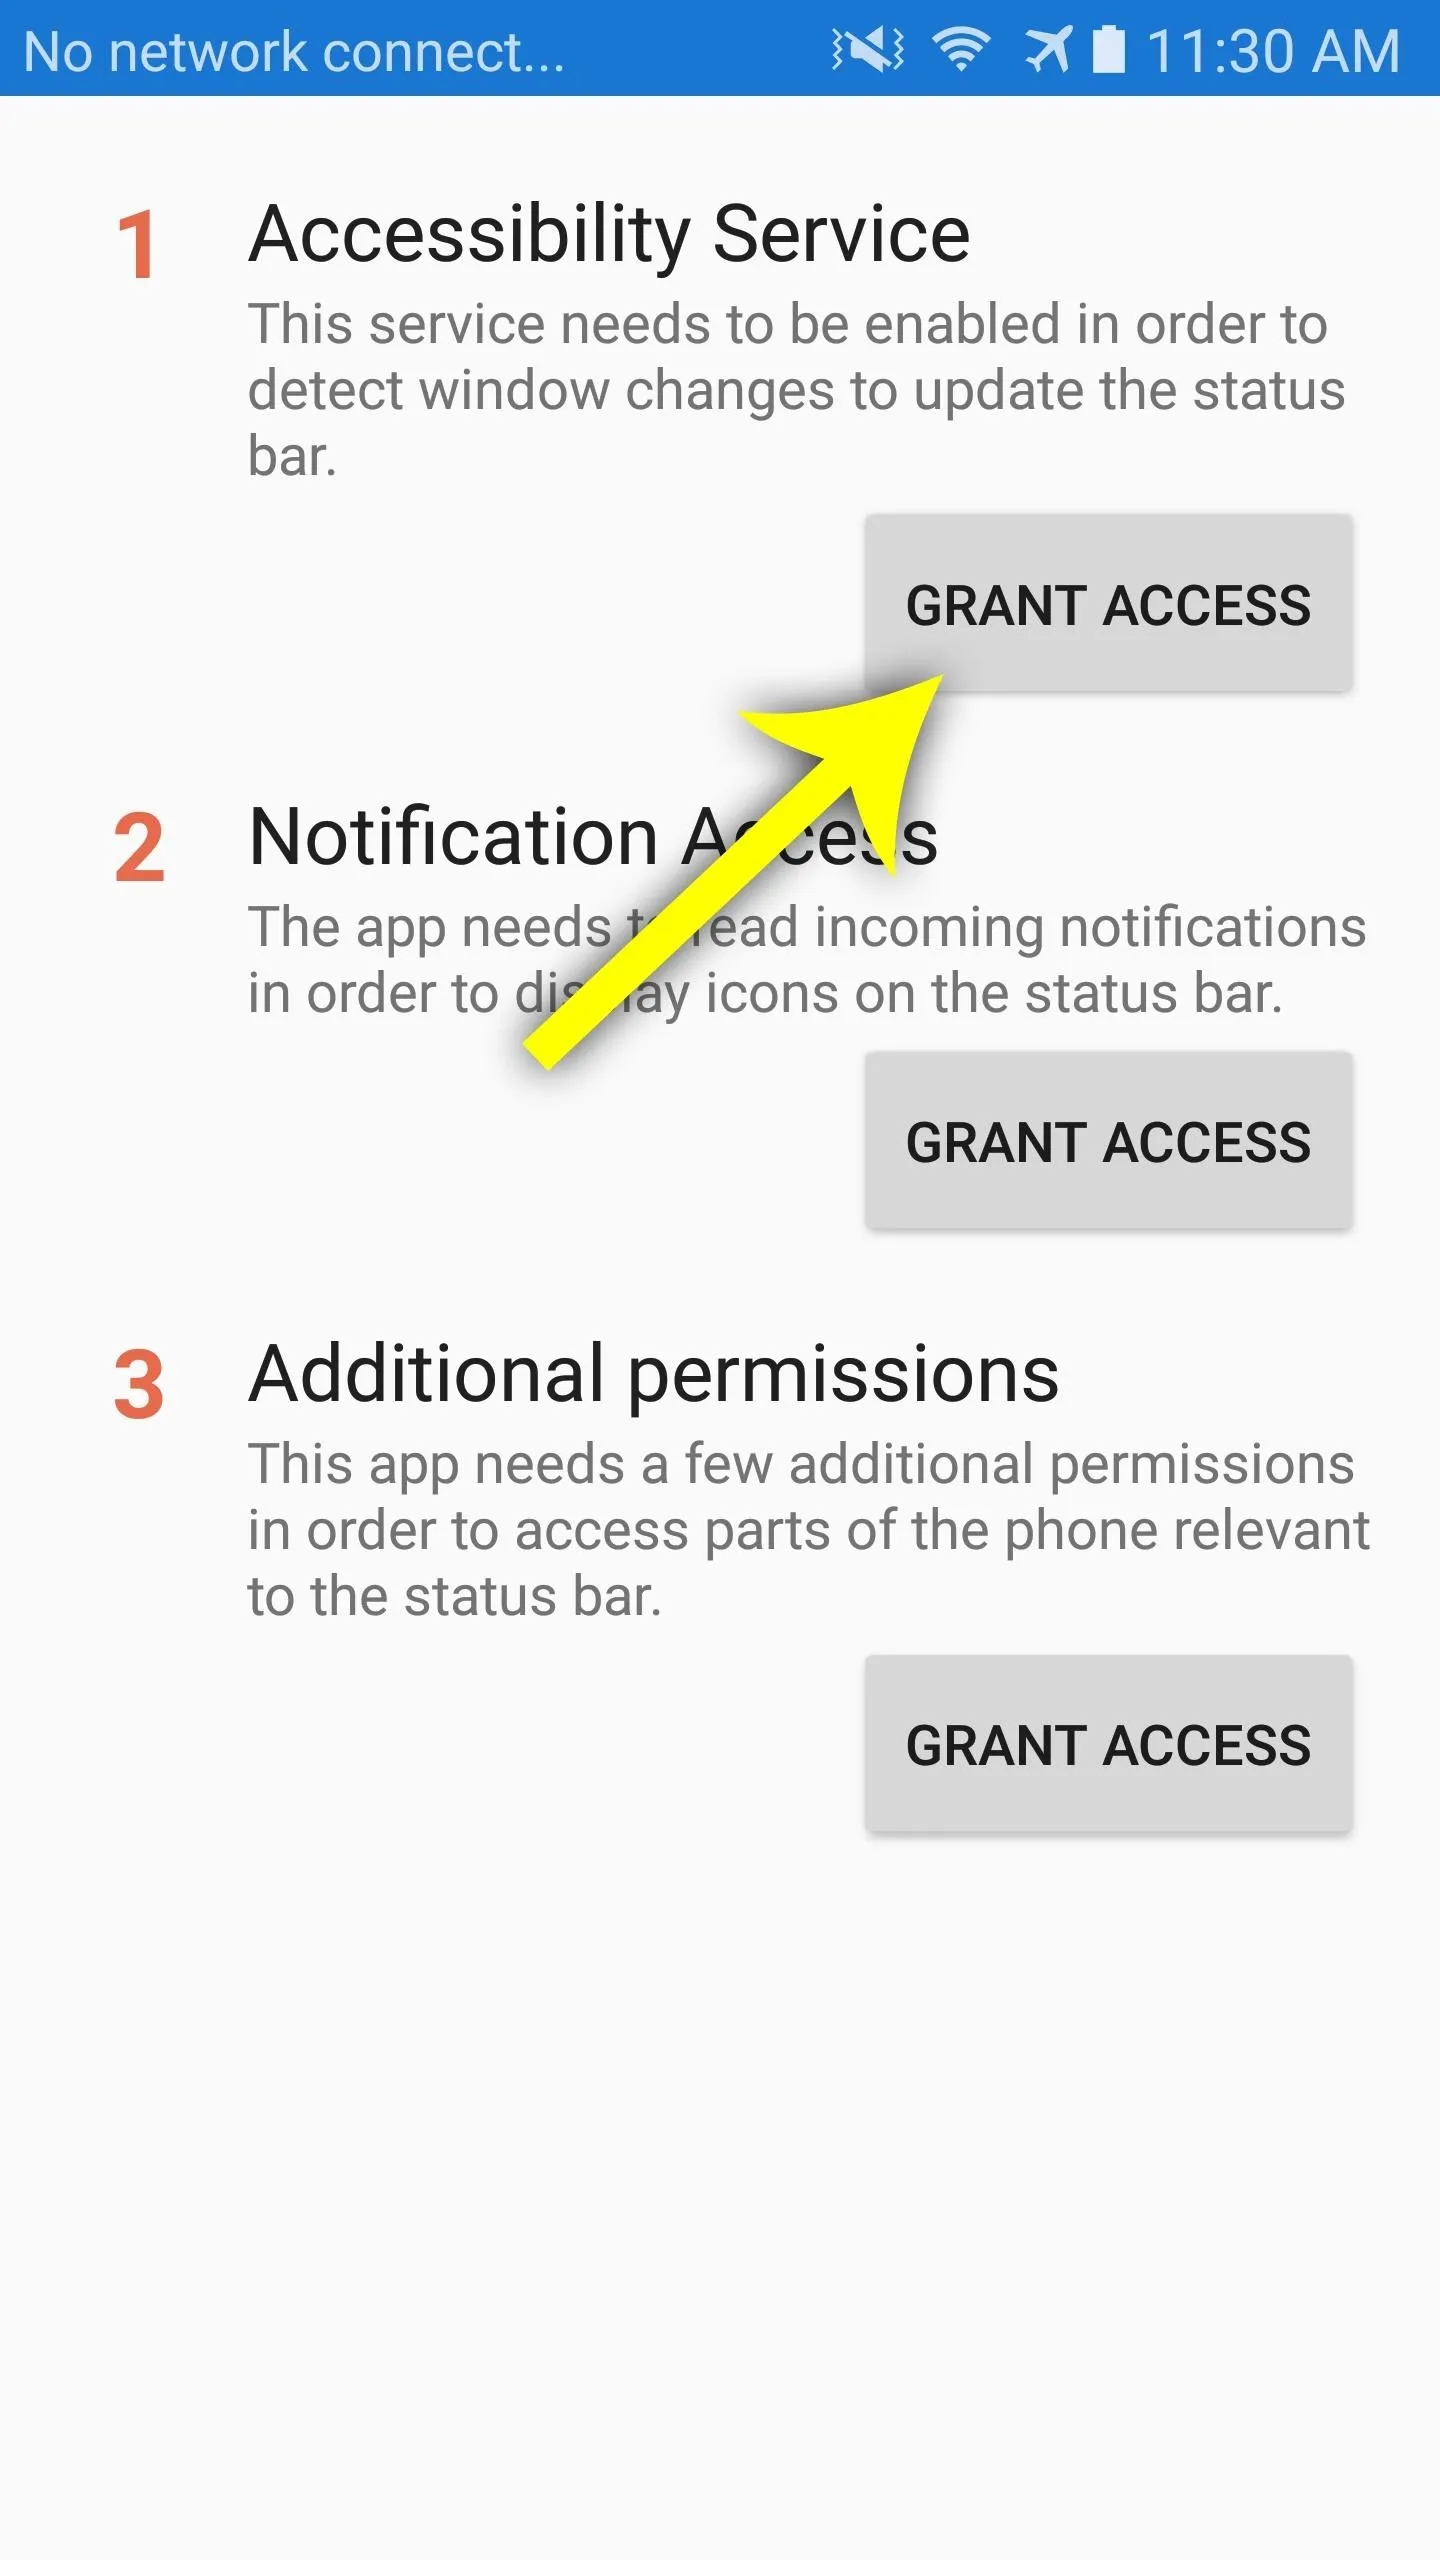
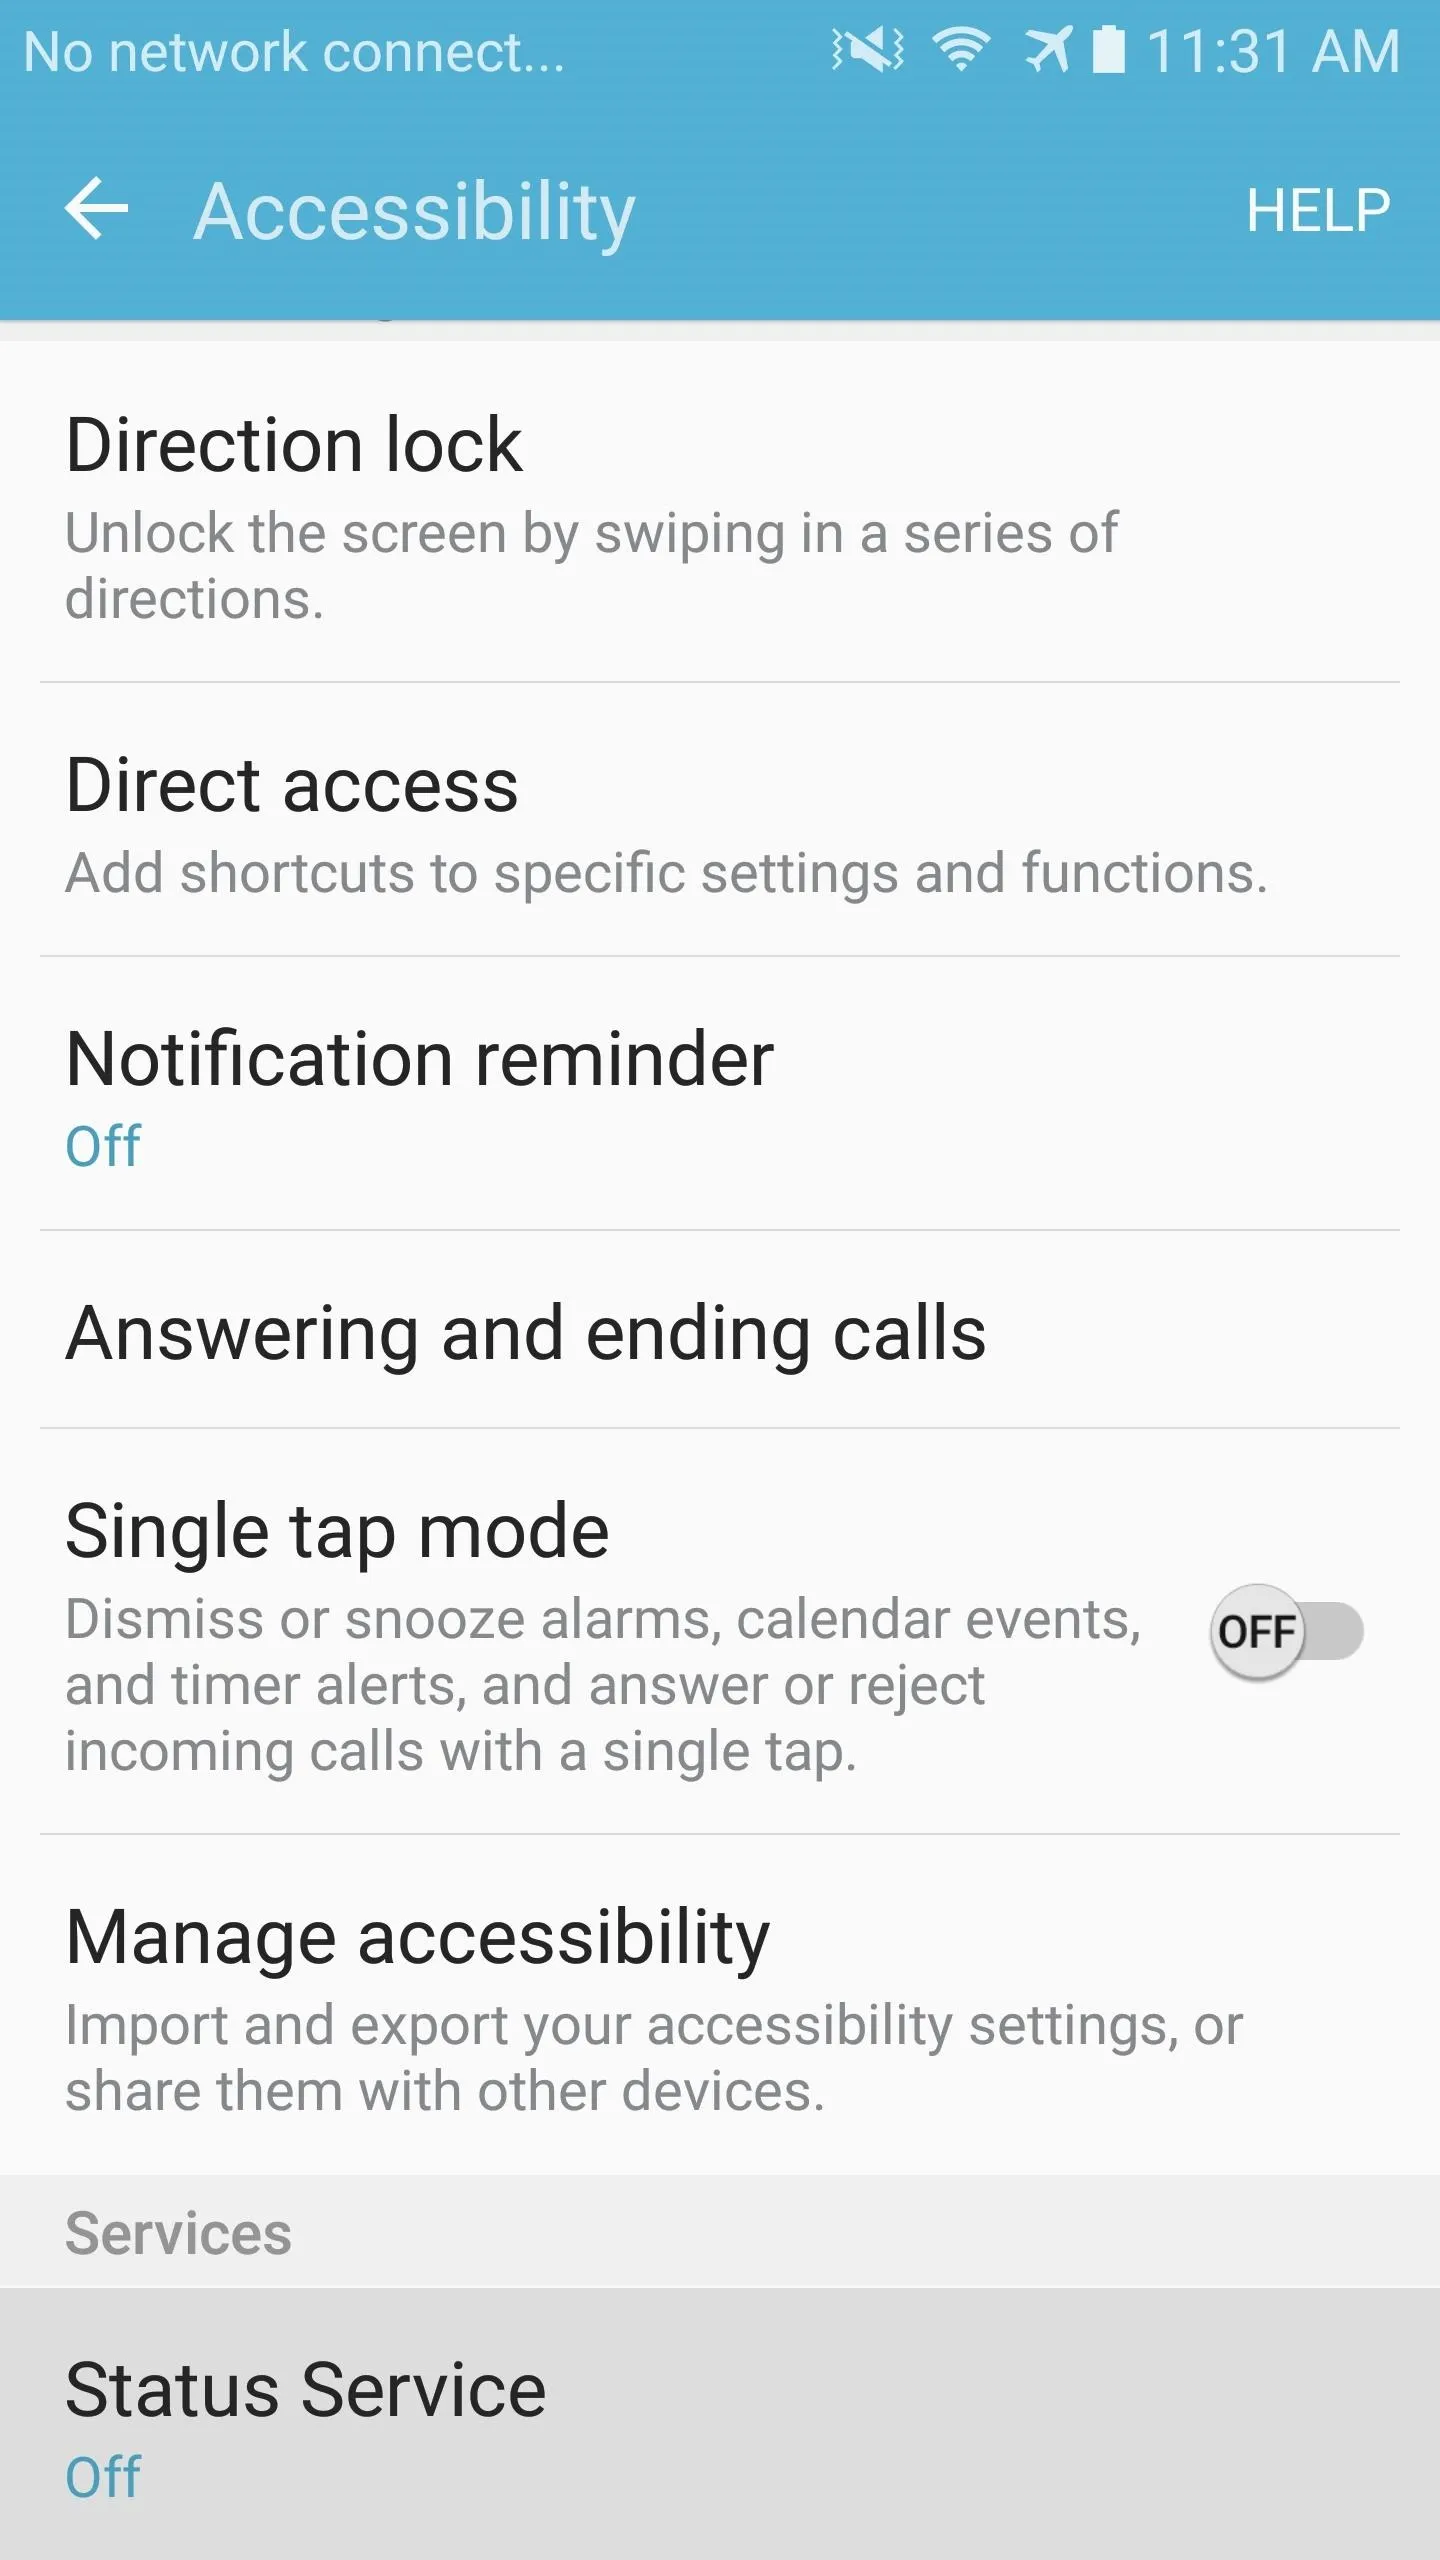
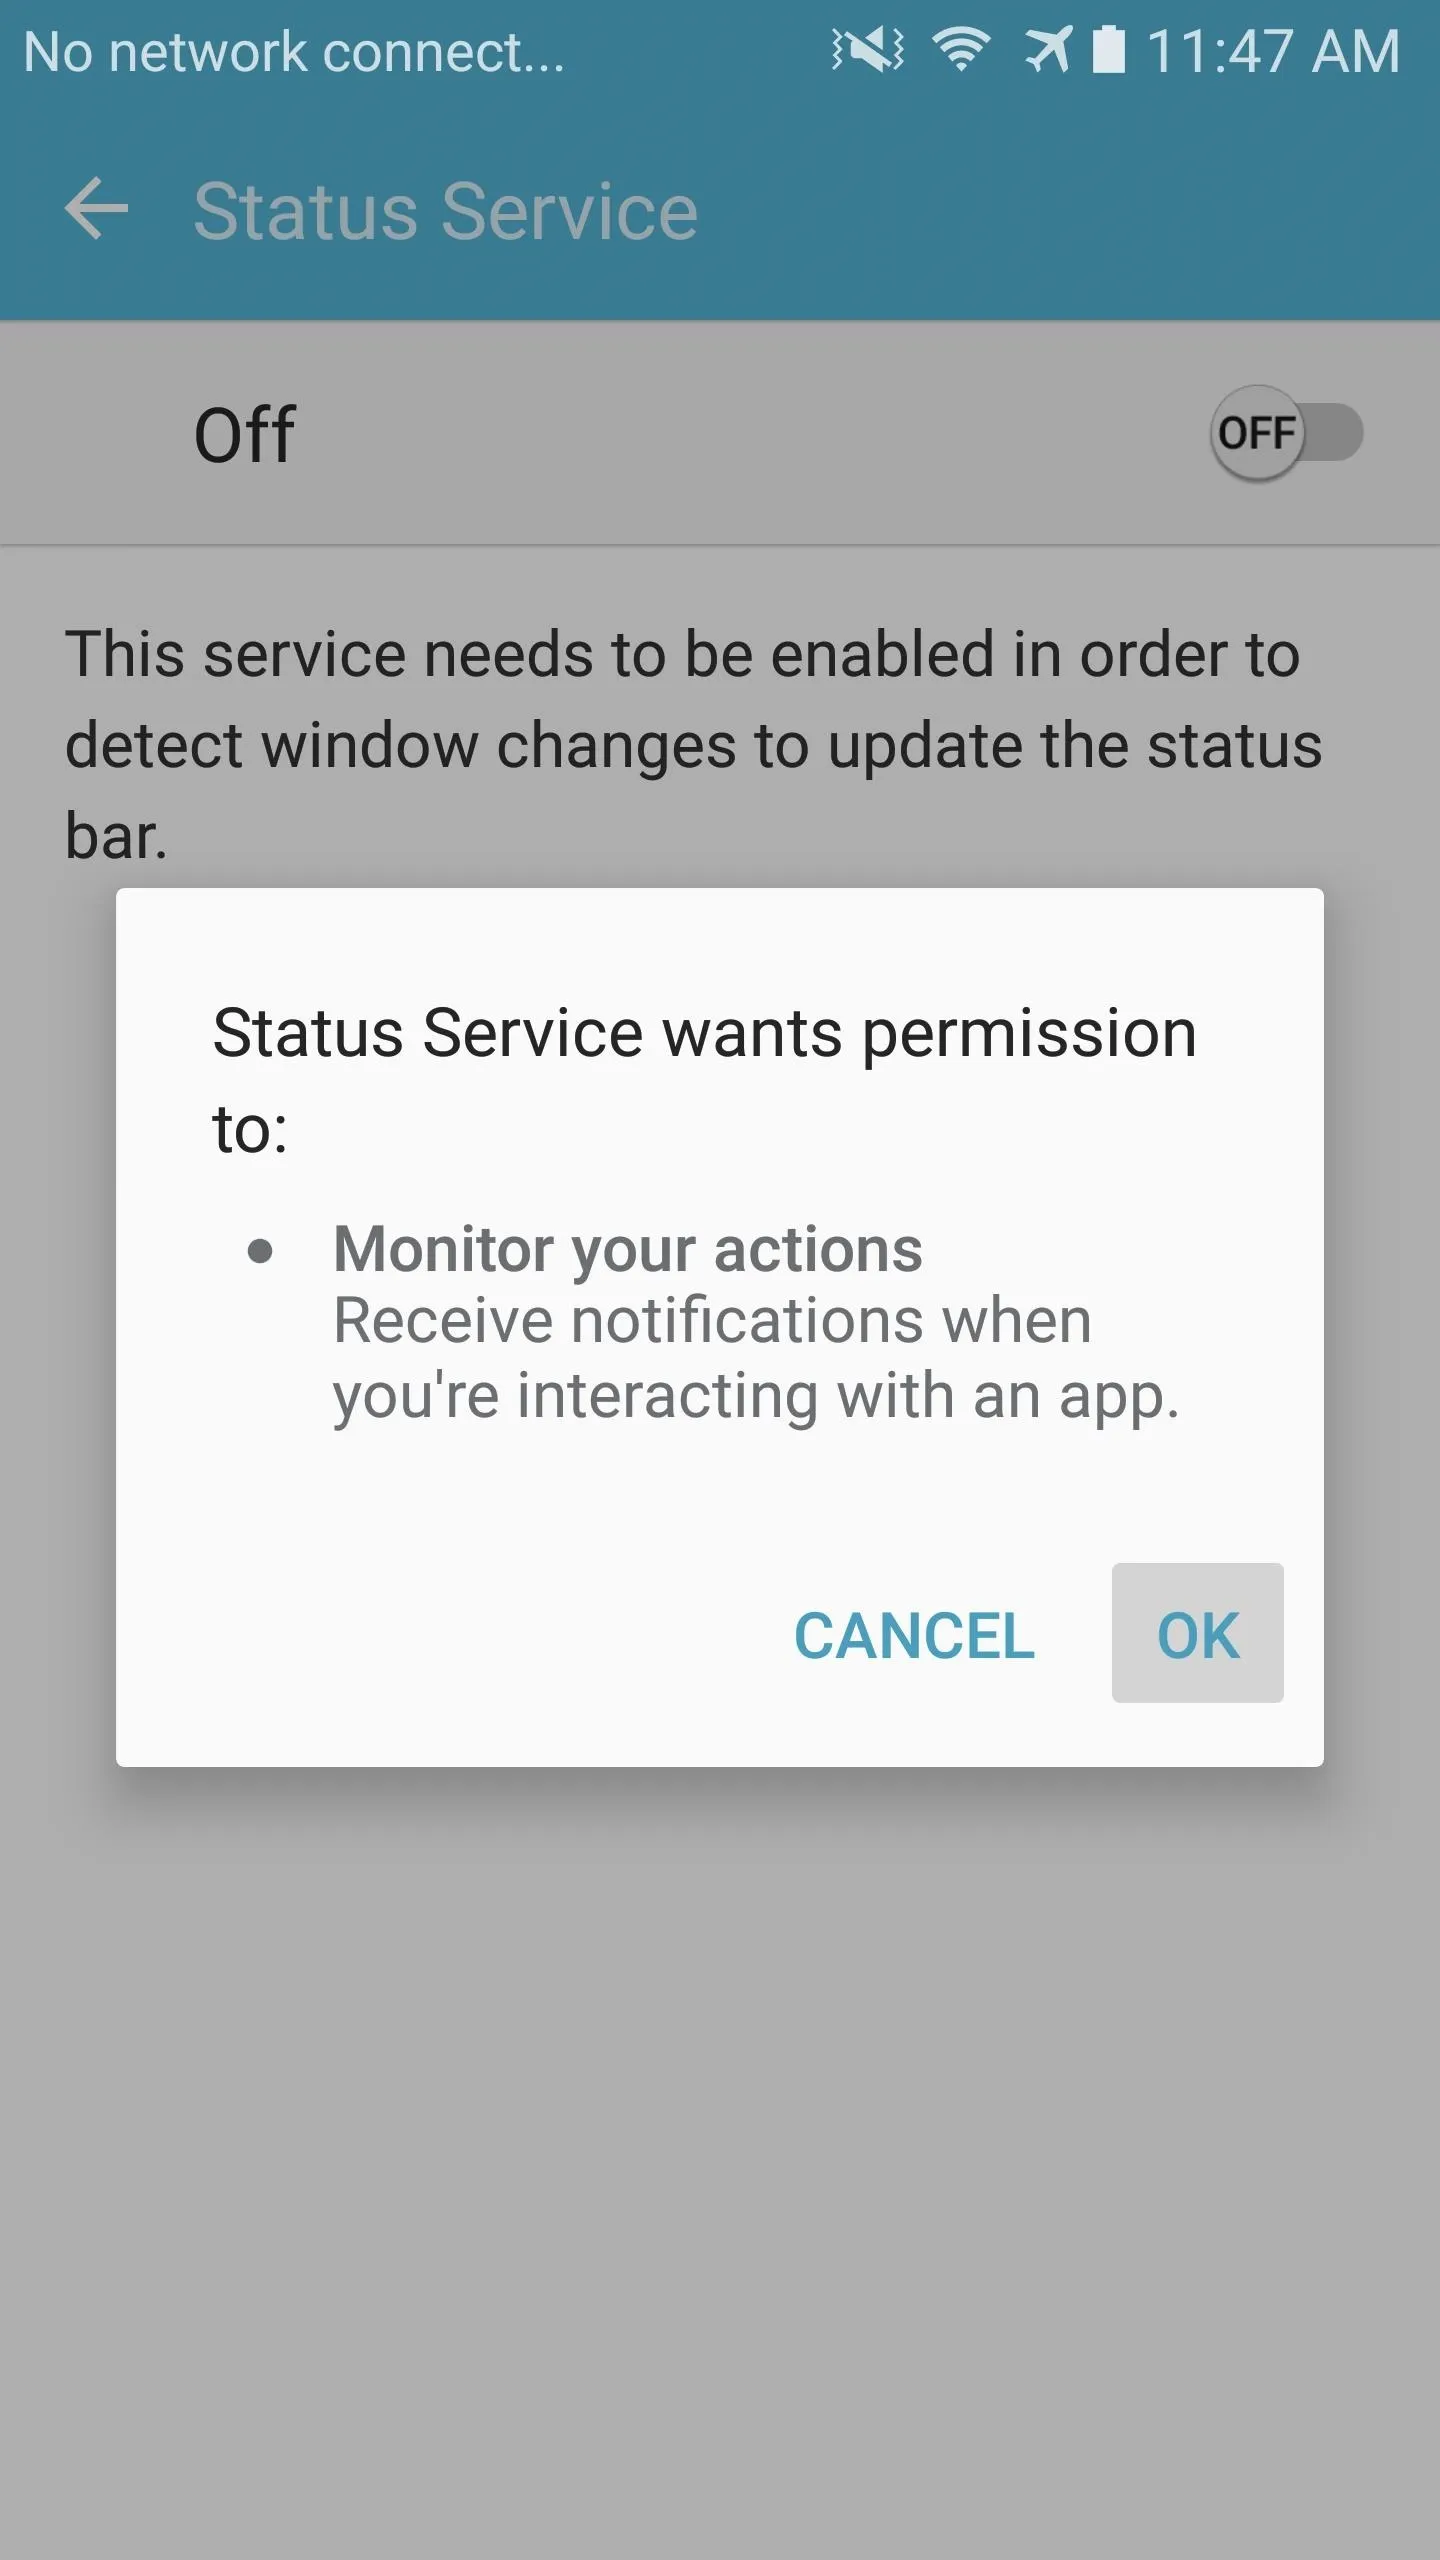


From there, press your device's back button to head back to the Status app. Next, just repeat this same process with the other two permissions, then press the check mark in the bottom-right corner of the screen when you're done.
Adjust Options
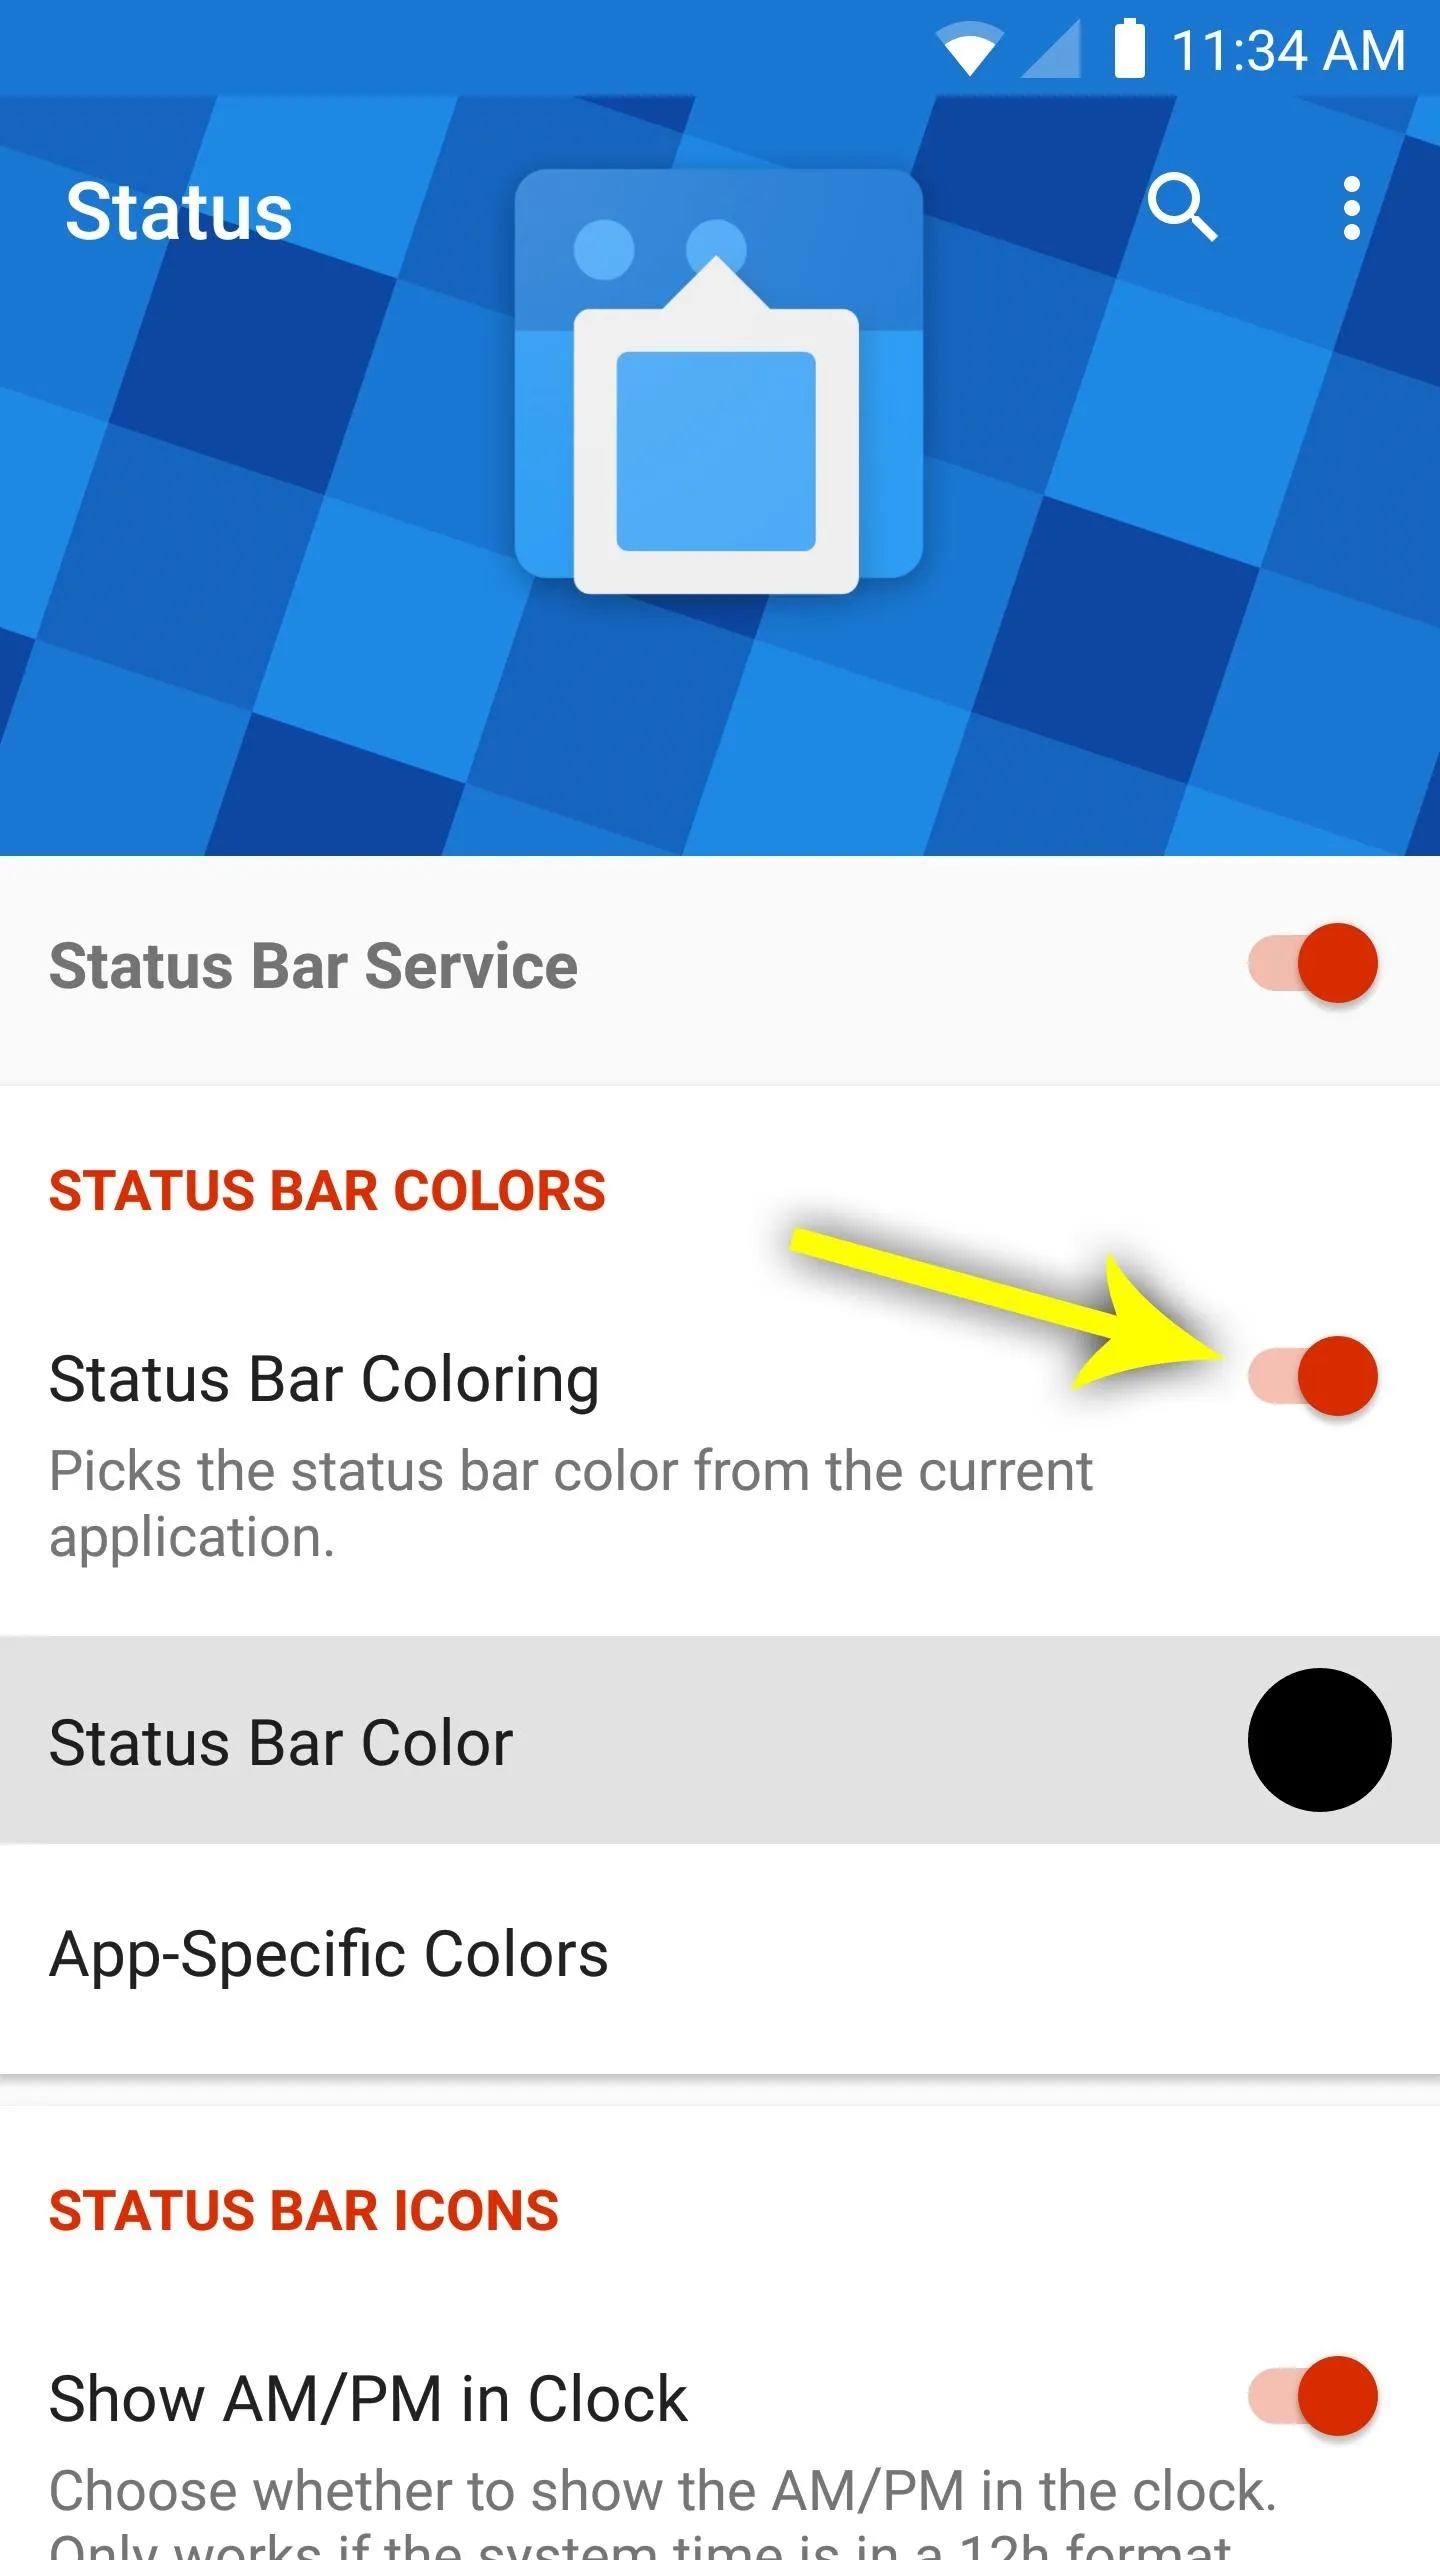
Once you make it to the app's main menu, start by enabling the "Status Bar Service" switch. From here, make sure the "Status Bar Coloring" option is also enabled if you want your new status bar to match the color of the app you're using. In the event that the automatic color-matching fails or the app you're using has no color, you can set a default color with the "Status Bar Color" option, and this will be used as a fallback of sorts.
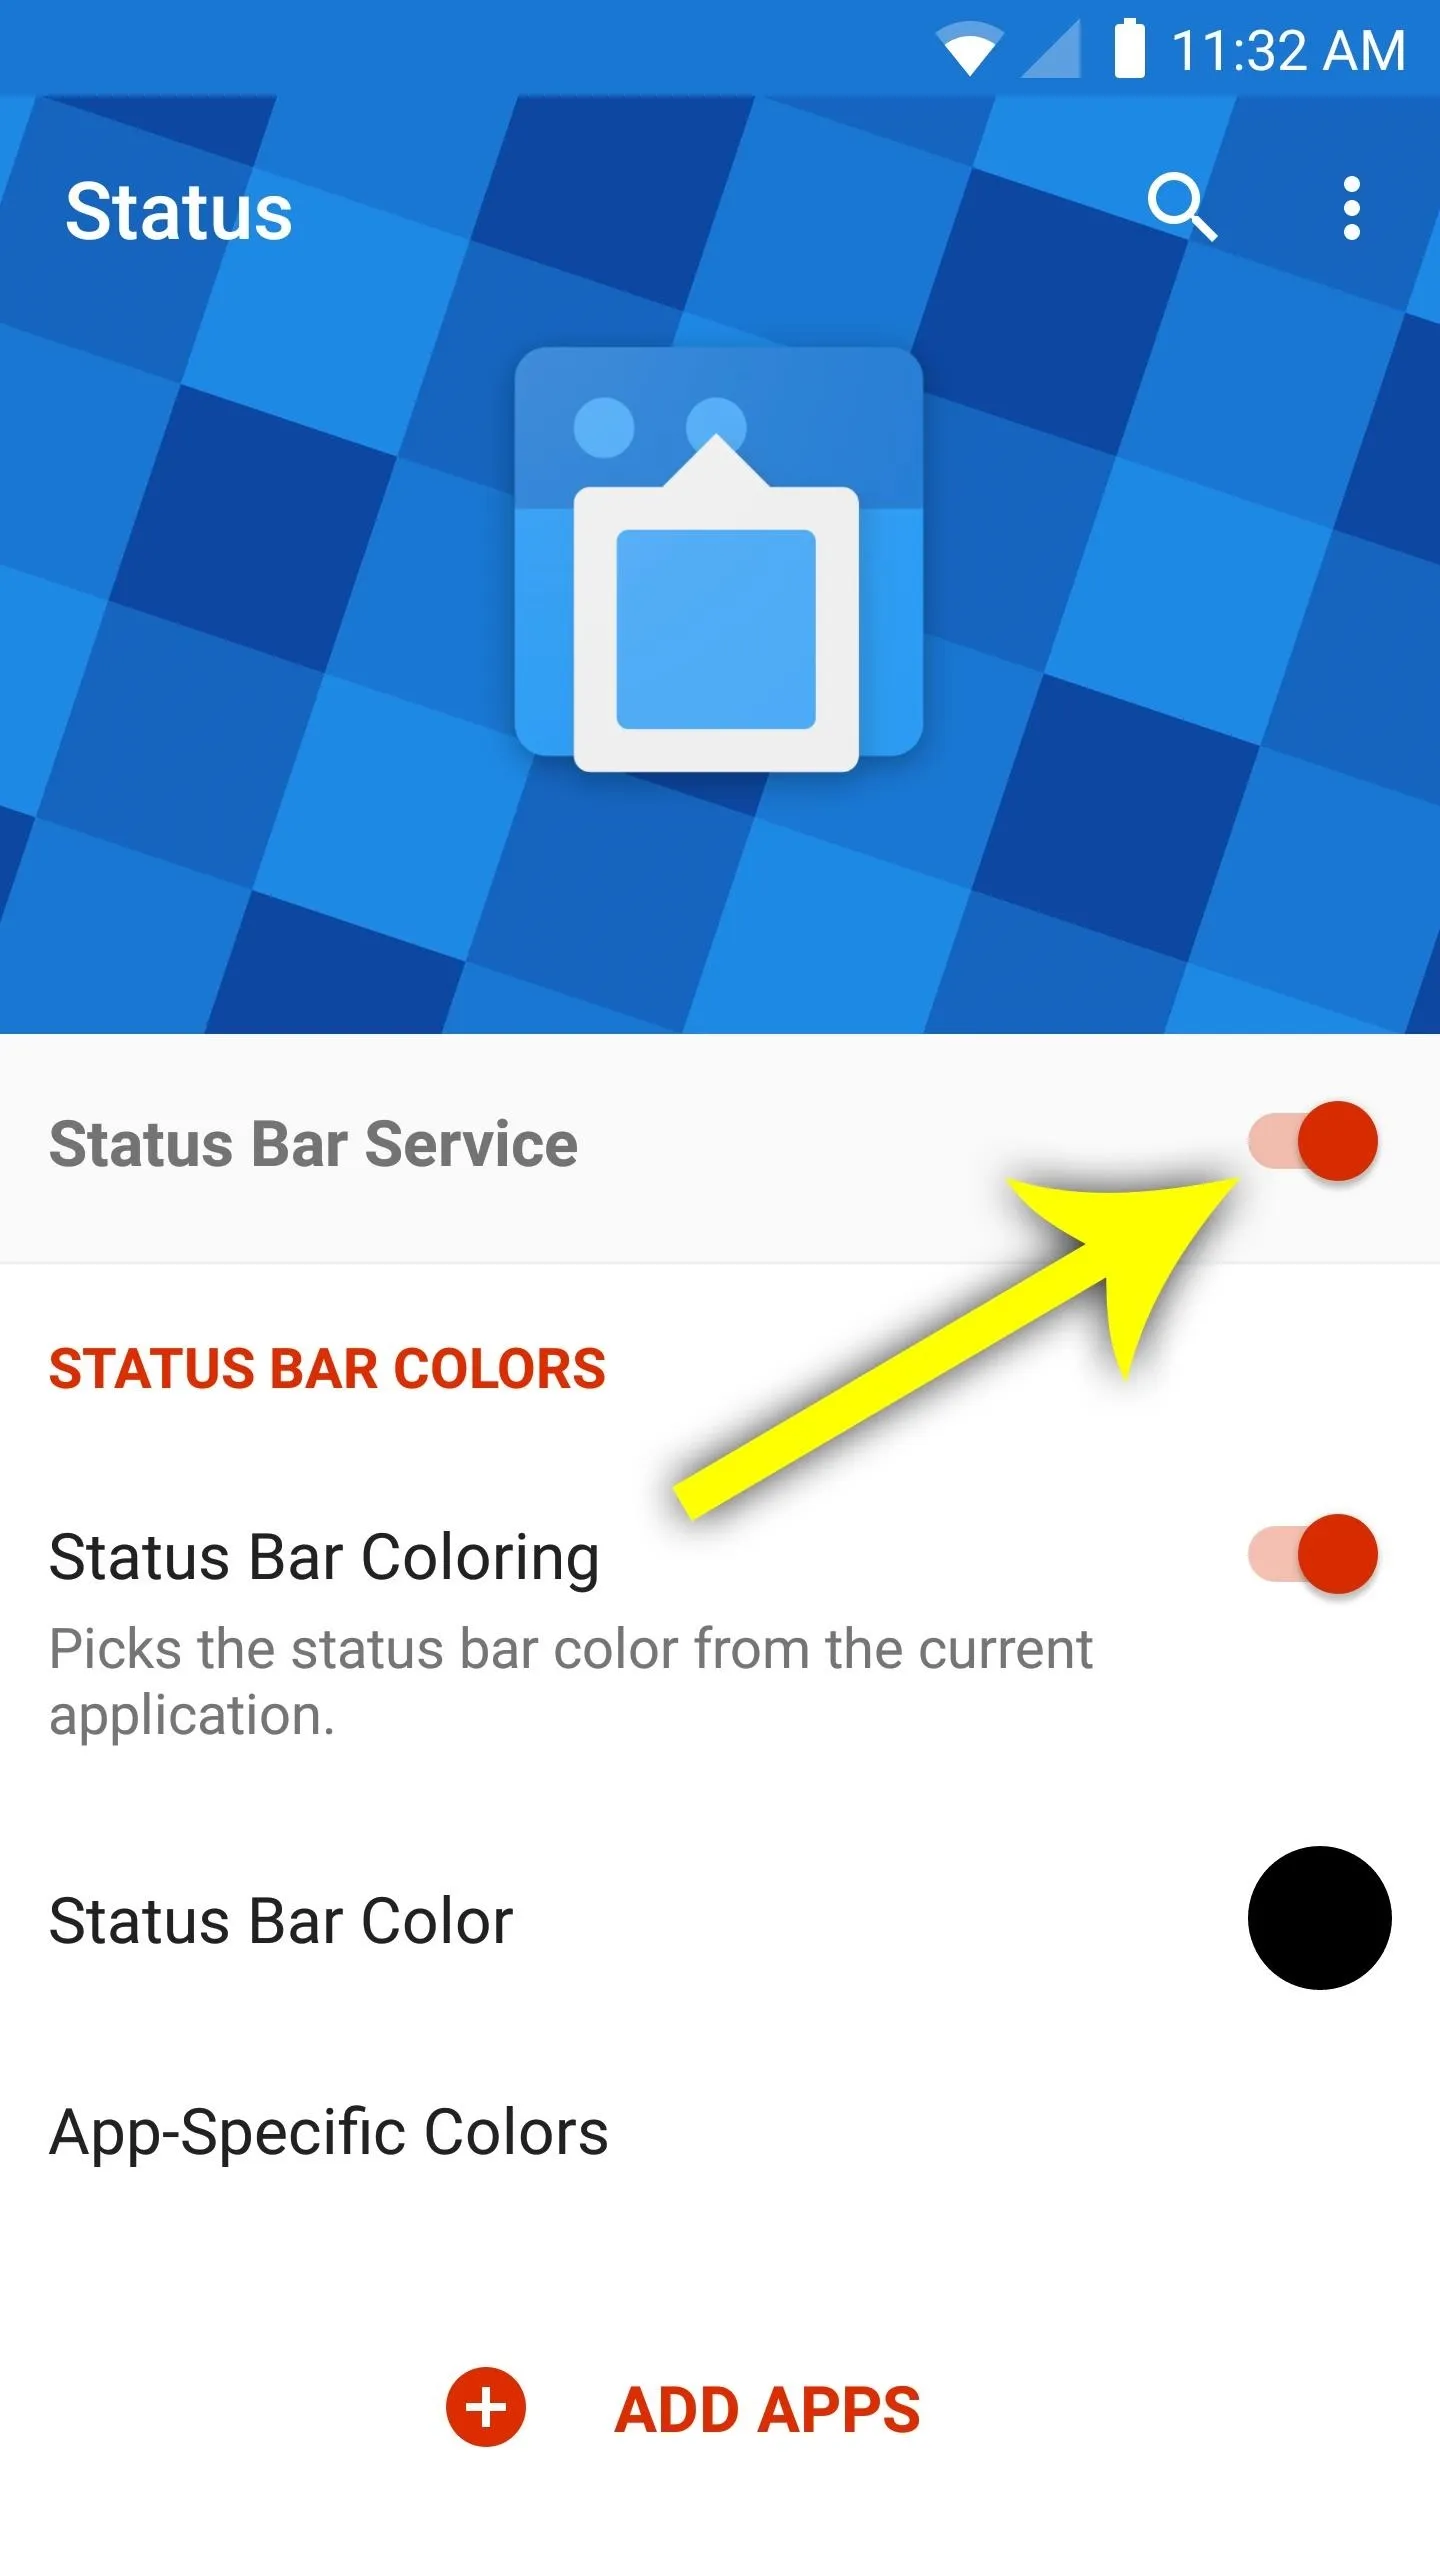


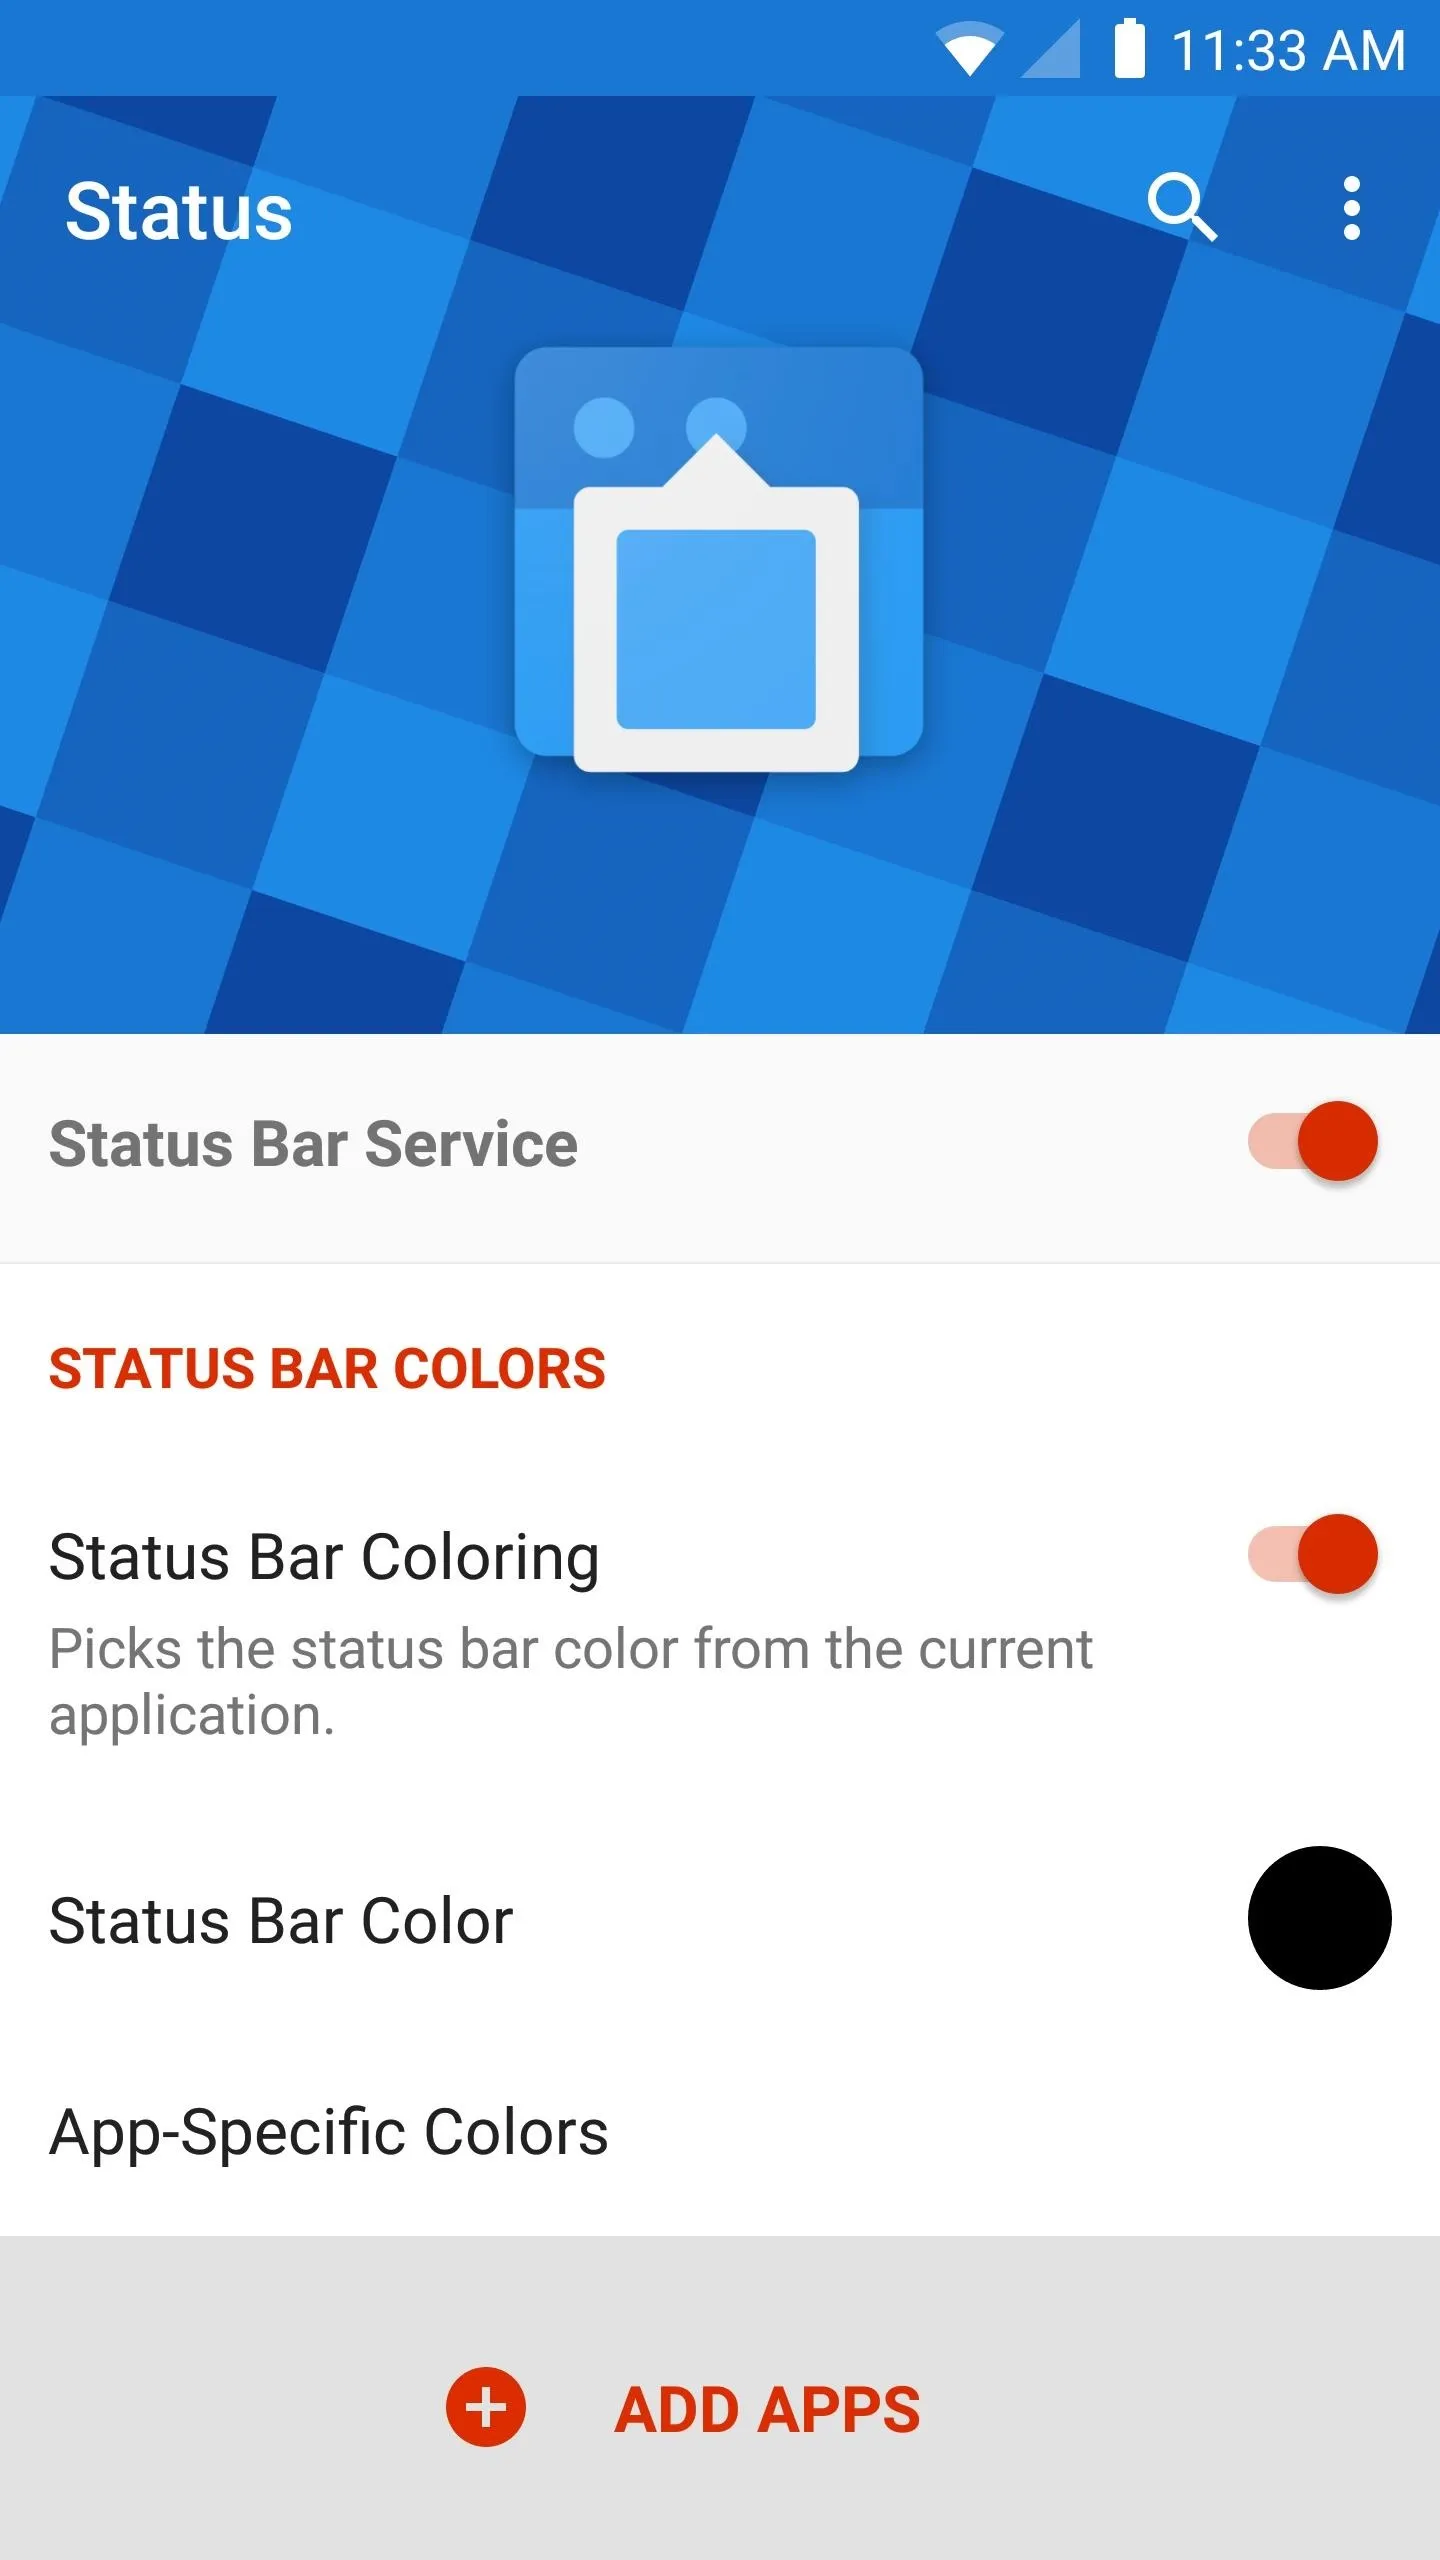
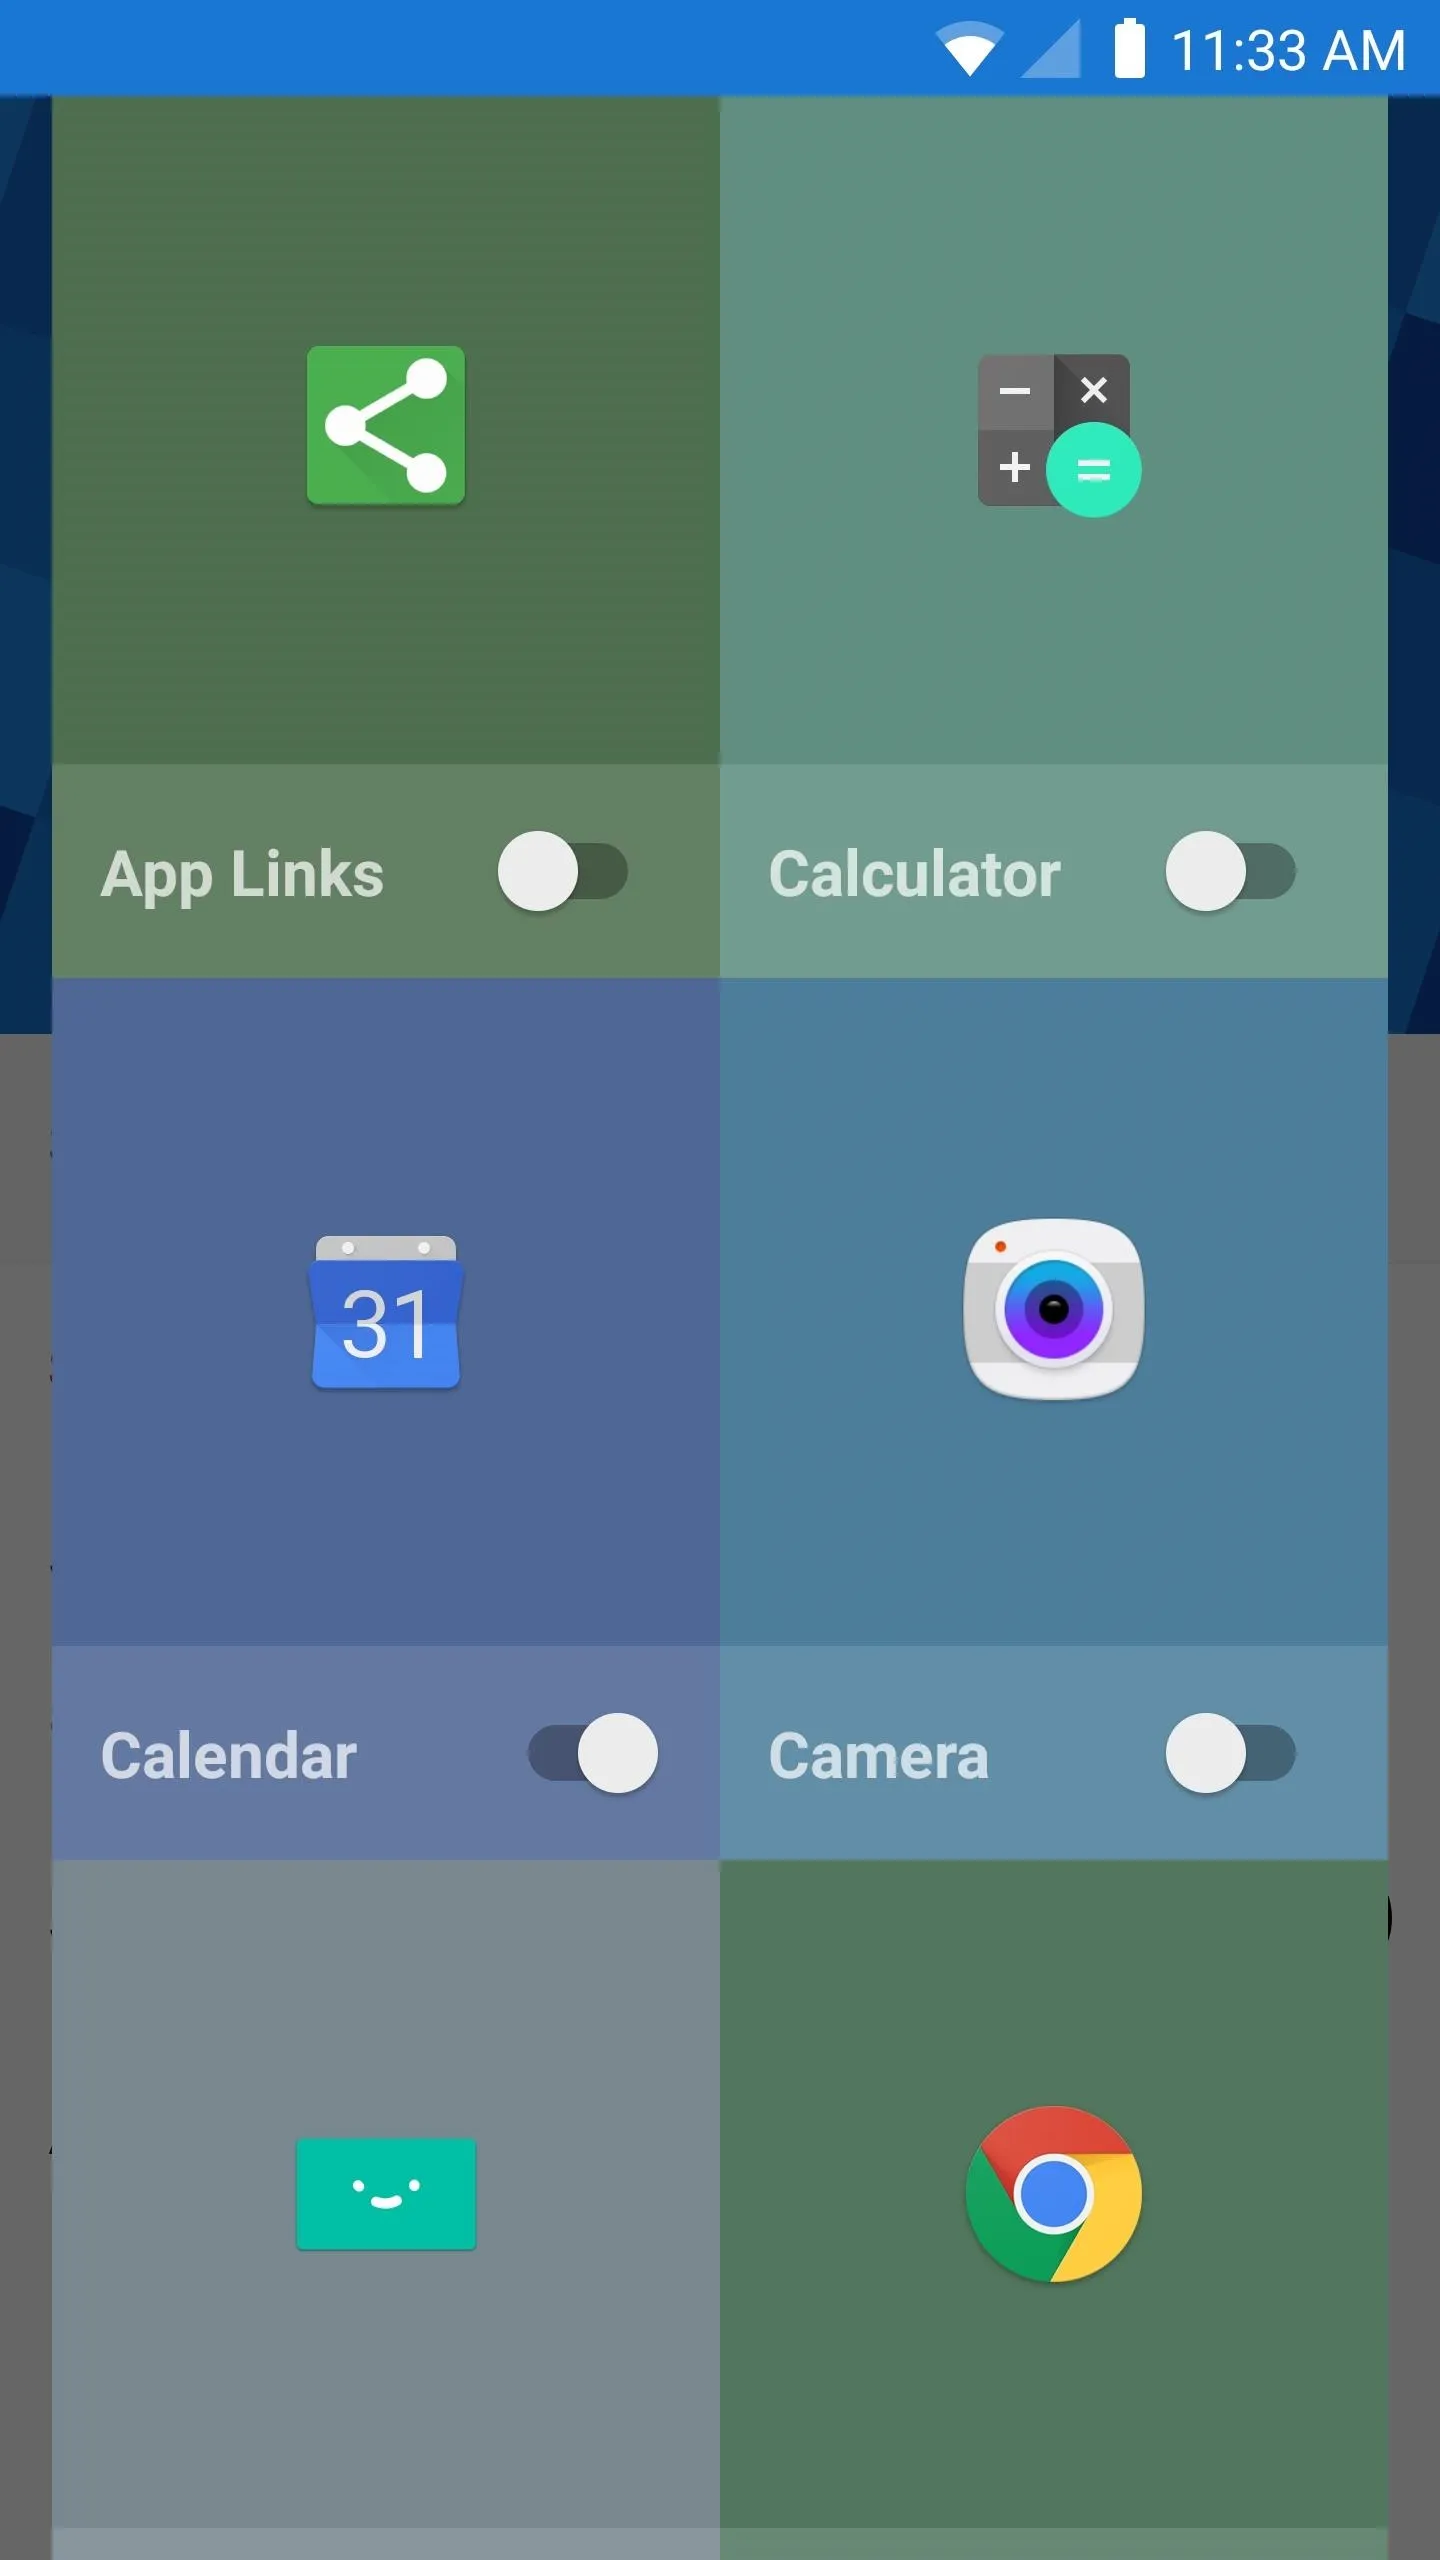
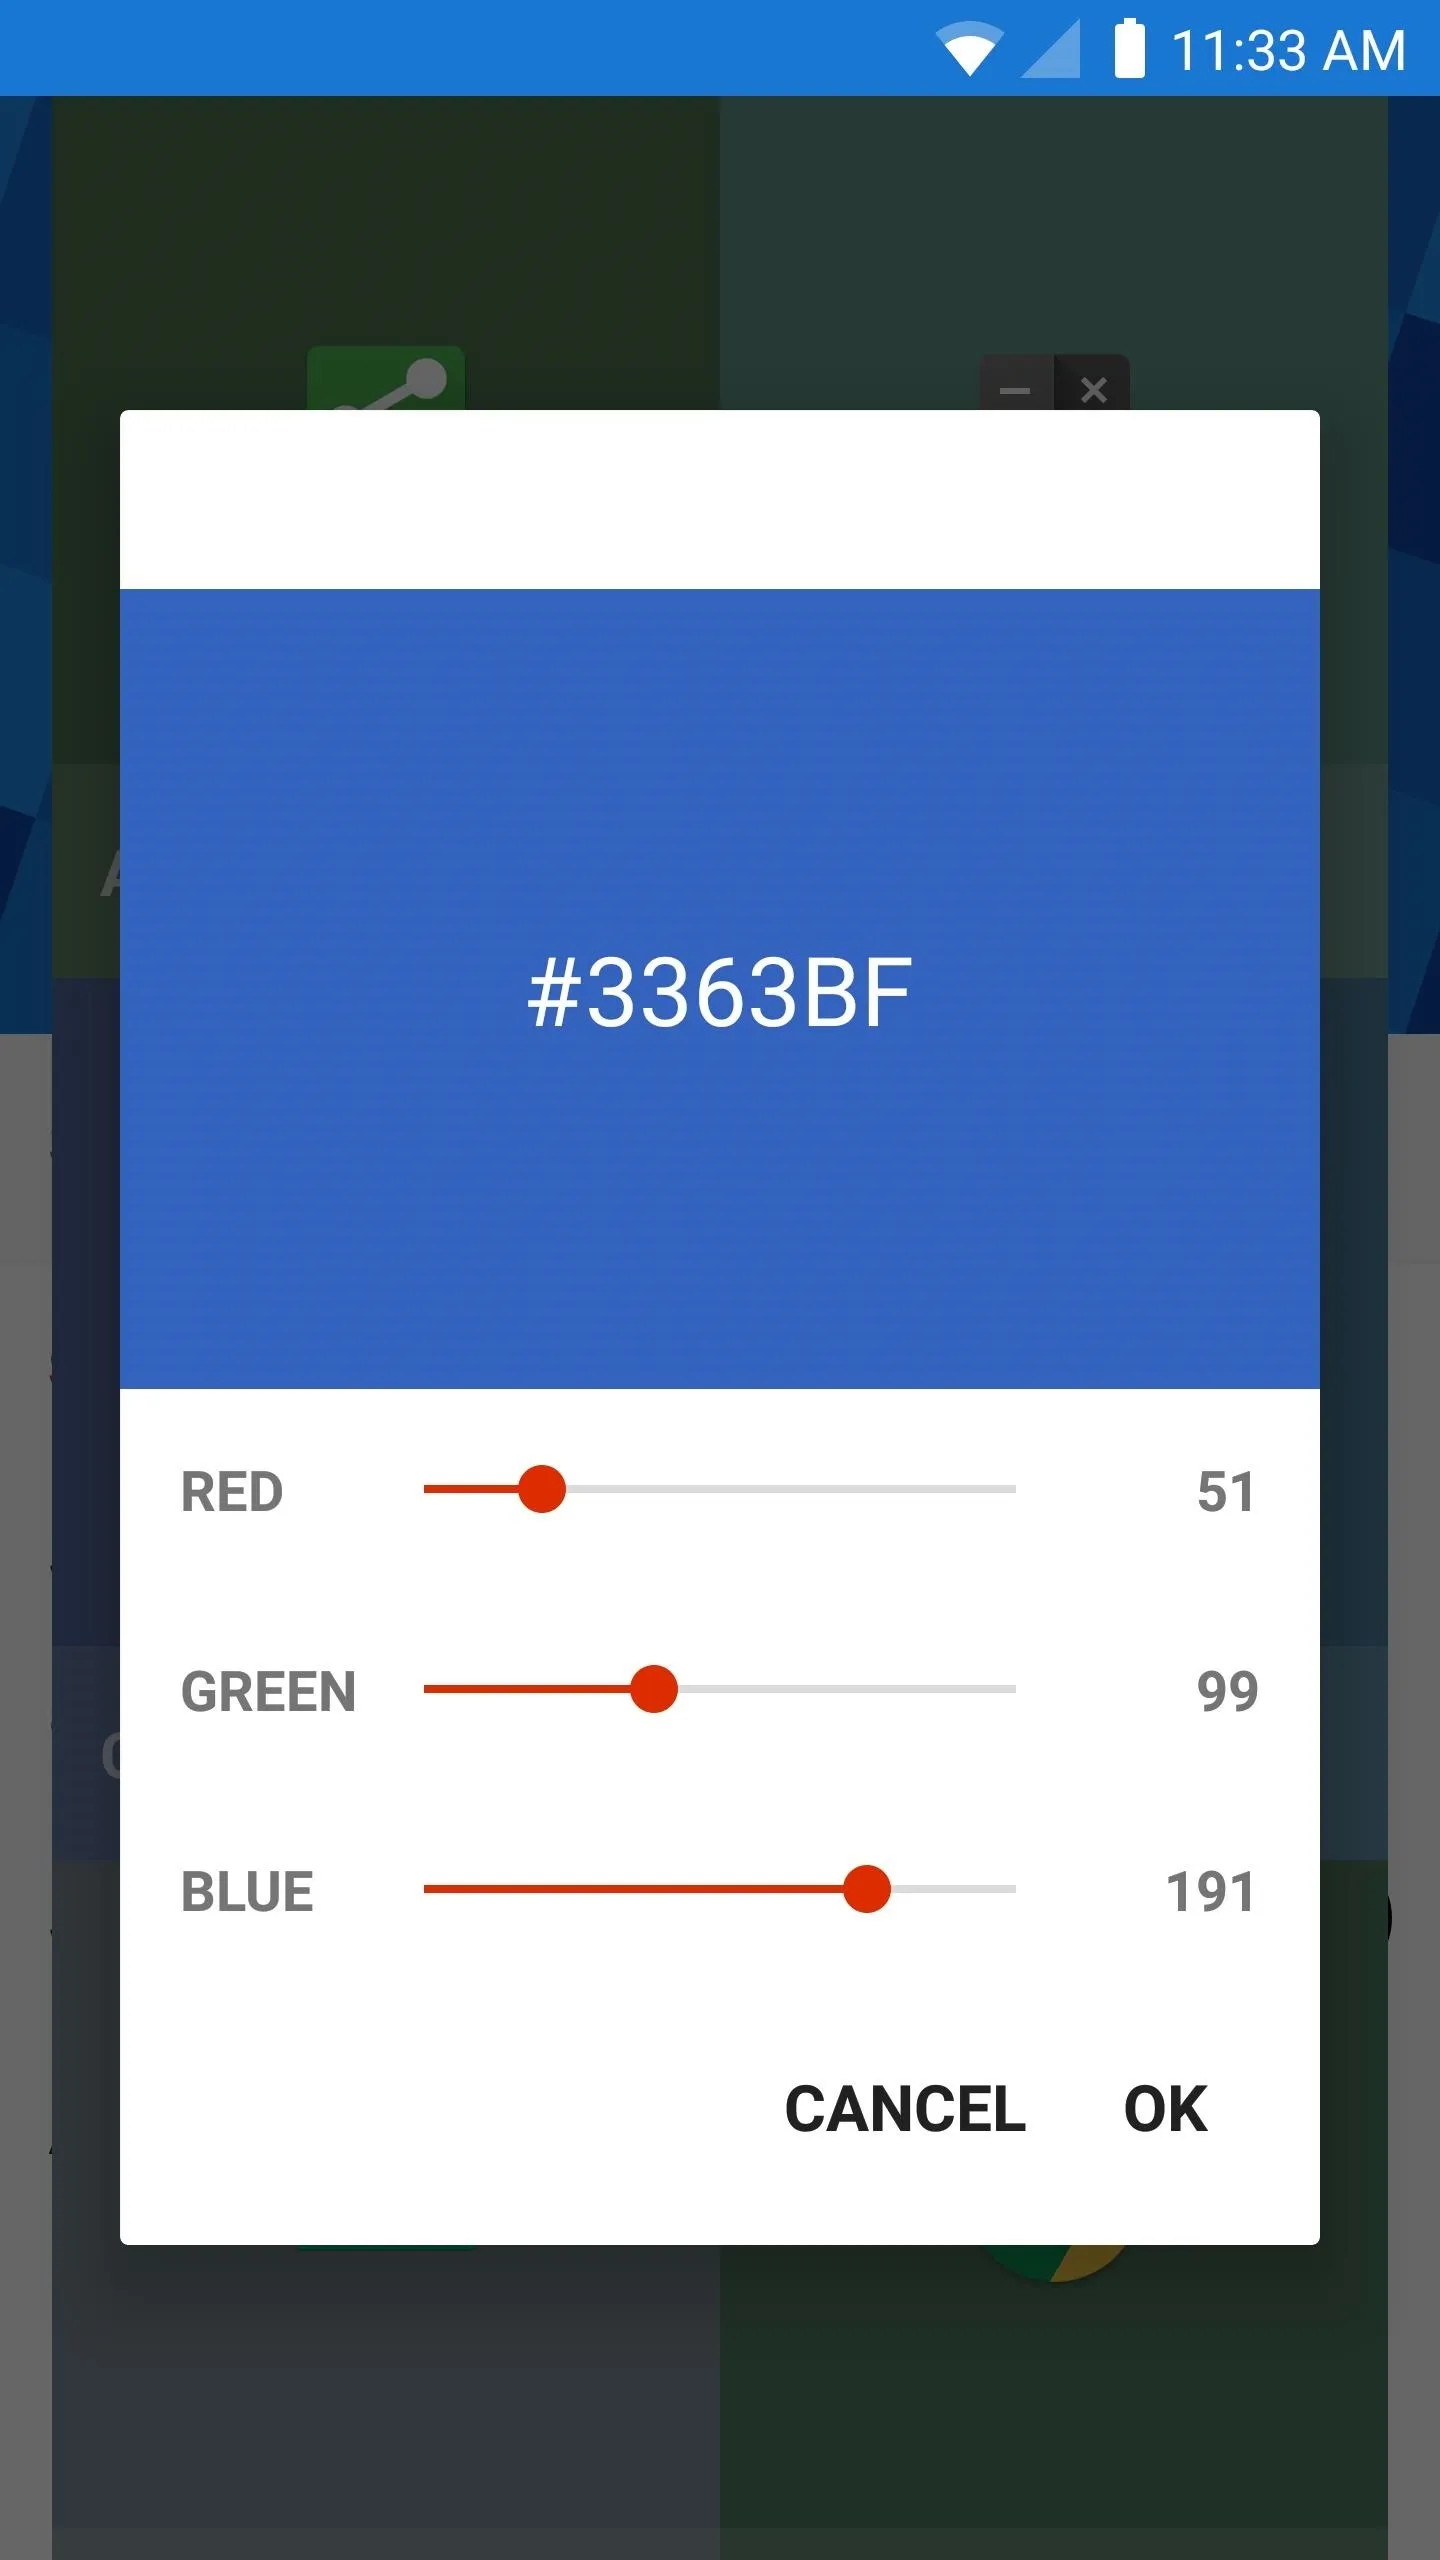
The app does a good job of automatically matching the color of any app you're using, but occasionally, this can be off. If you notice any apps with mismatching status bar colors in the future, come back to the app's main menu, then tap the "Add Apps" button. From here, enable the switch next to any troublesome app, then use the sliders on the popup to manually adjust the status bar coloring for that particular app.


Get a Color-Matching Material Design Status Bar
From now on, your status bar will be using Material Design, so you'll get the sleek icons and indicators, plus the color will match the app you're currently using. This only applies to the status bar itself, so when you expand your notification tray, you'll still see the stock interface—but, at the very least, you've finally gotten rid of that ugly old status bar.



- Follow Gadget Hacks on Facebook, Twitter, Google+, and YouTube
- Follow Android Hacks on Facebook, Twitter, and Pinterest
- Follow WonderHowTo on Facebook, Twitter, Pinterest, and Google+
Cover photo and screenshots by Dallas Thomas/Gadget Hacks






Comments
Be the first, drop a comment!