When it comes to Android automation apps, Tasker has never had much competition. But considering how difficult it can be for a novice user to get the hang of things, and factoring in Tasker's drab and complicated interface, there's definitely room for another developer to step in with a Tasker alternative.
Enter MacroDroid by ArloSoft. With its Material Design UI and step-by-step approach to automating common smartphone tasks, it's the Tasker competitor we've all been waiting for. So if you've always found Tasker to be more trouble than it's worth, I'll take you through the easy process of using MacroDroid below.
Install MacroDroid
First things first, you'll need to install the free app. The free app limits you to five macros, which may be enough depending on what you need, and displays ads, but you can fix both of these with pro version available in the app for $2.99.

Create a Macro & Select a Trigger
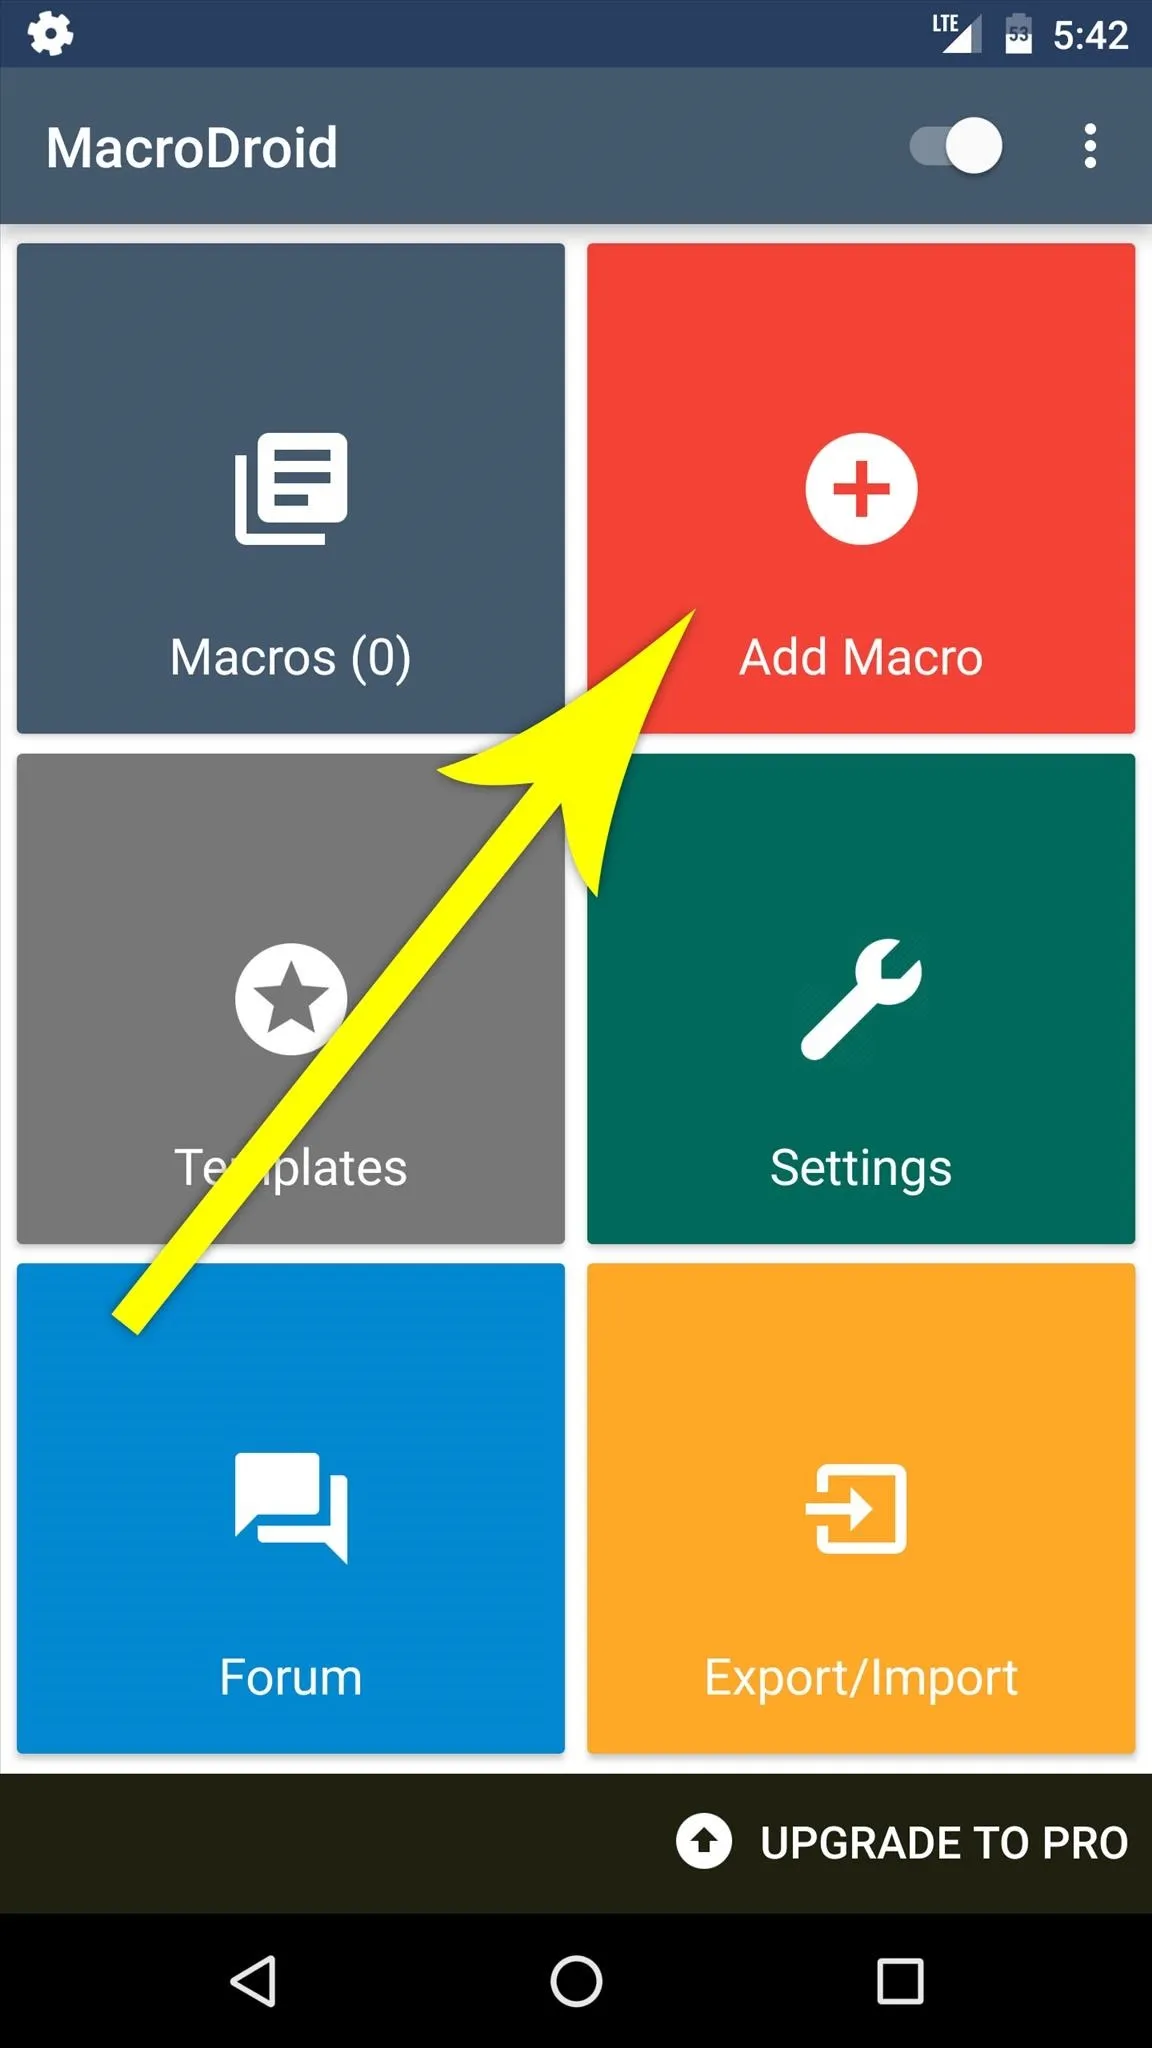
When you first launch the app, you'll be greeted by MacroDroid's simple and intuitive interface. To start automating smartphone tasks, tap the "Add Macro" button here.
Next, you'll be asked to select a trigger for your macro. This is an event that will kick off your automated action when it occurs, and options here range from incoming calls to changes in the weather. Once you've selected a trigger, you may be asked to specify additional options, but this should be self-explanatory.
In this example macro, I've selected "Bluetooth Event" as the trigger, then specified that I want my macro to be triggered when I connect to a particular Bluetooth device.
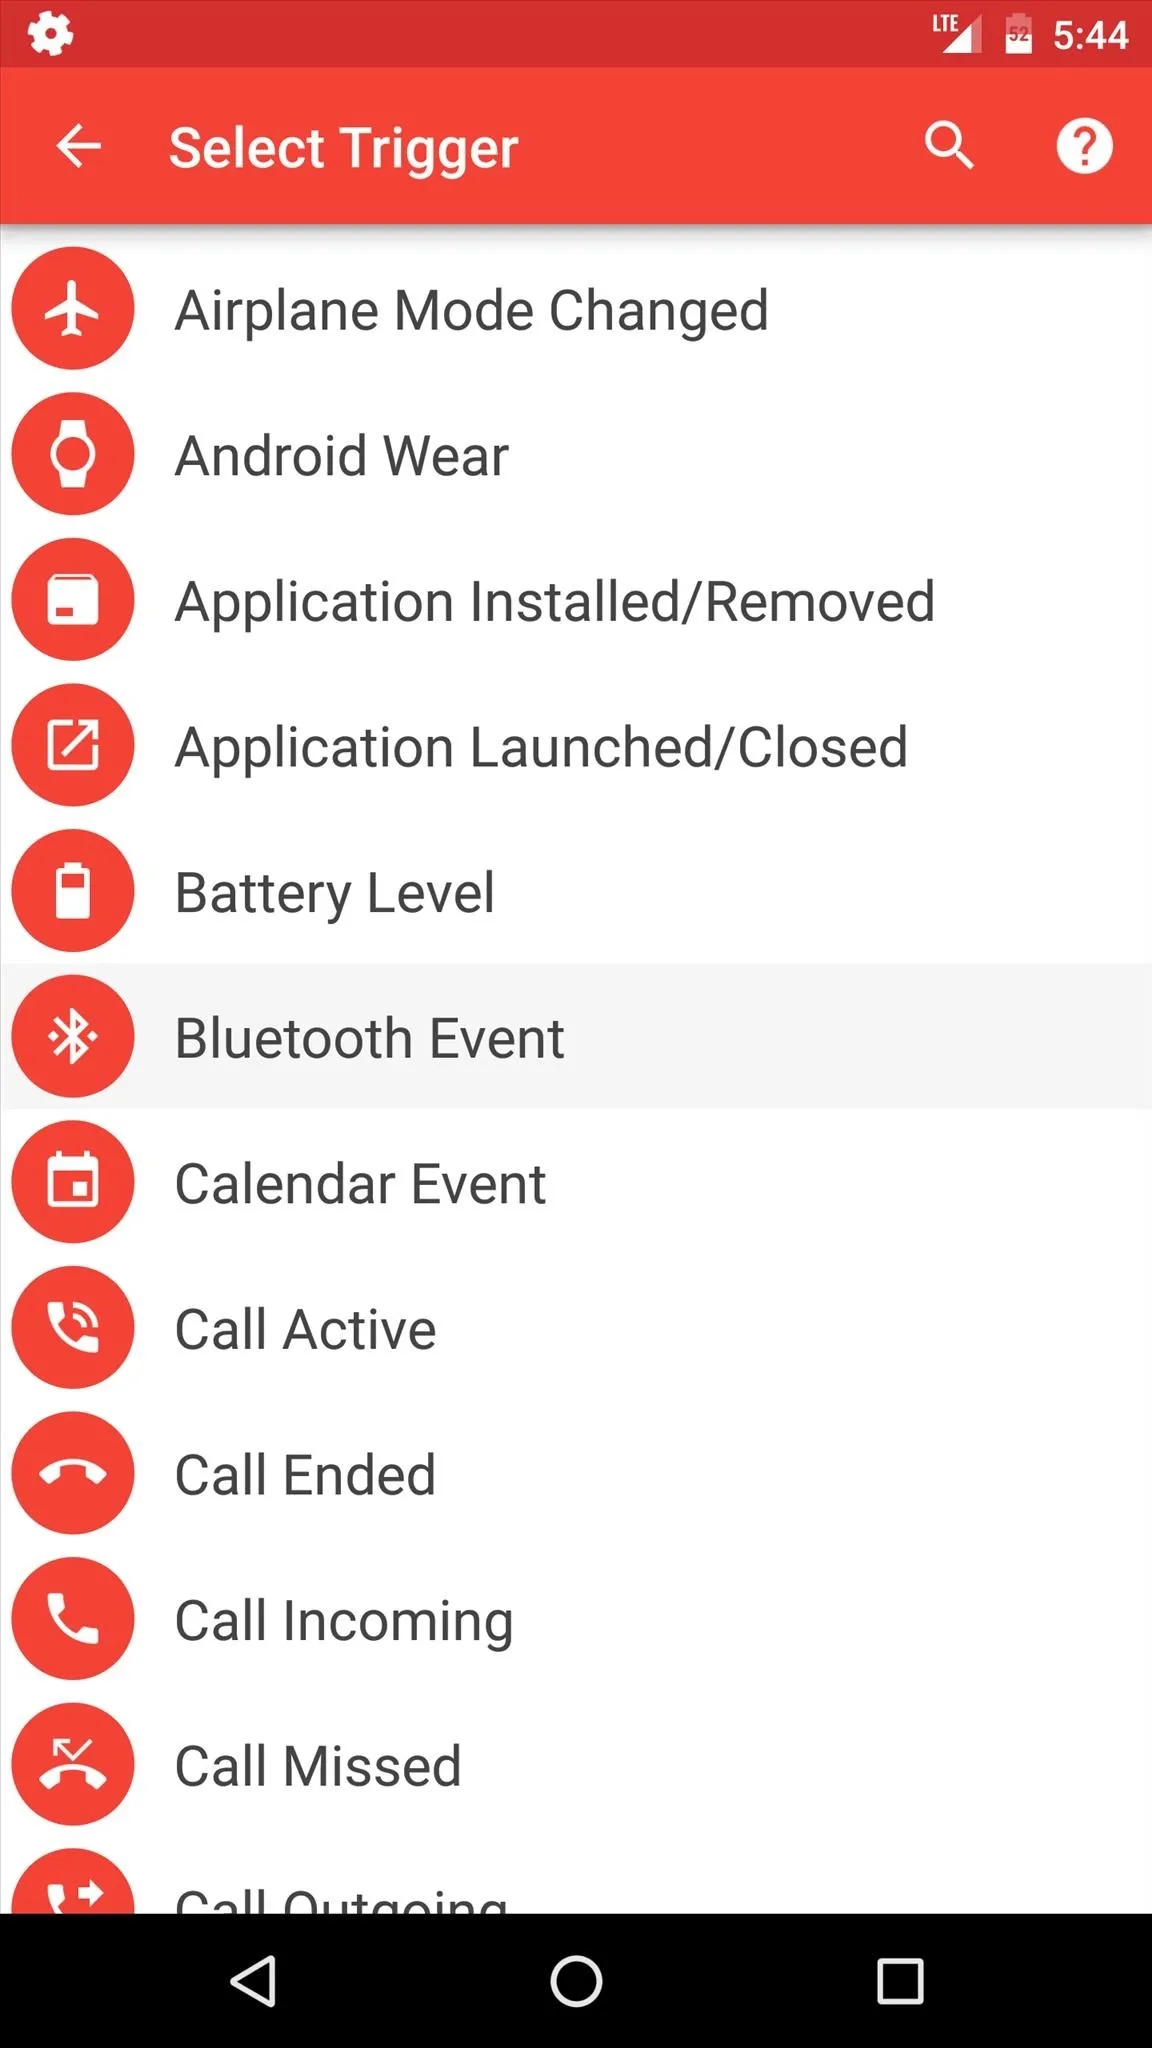
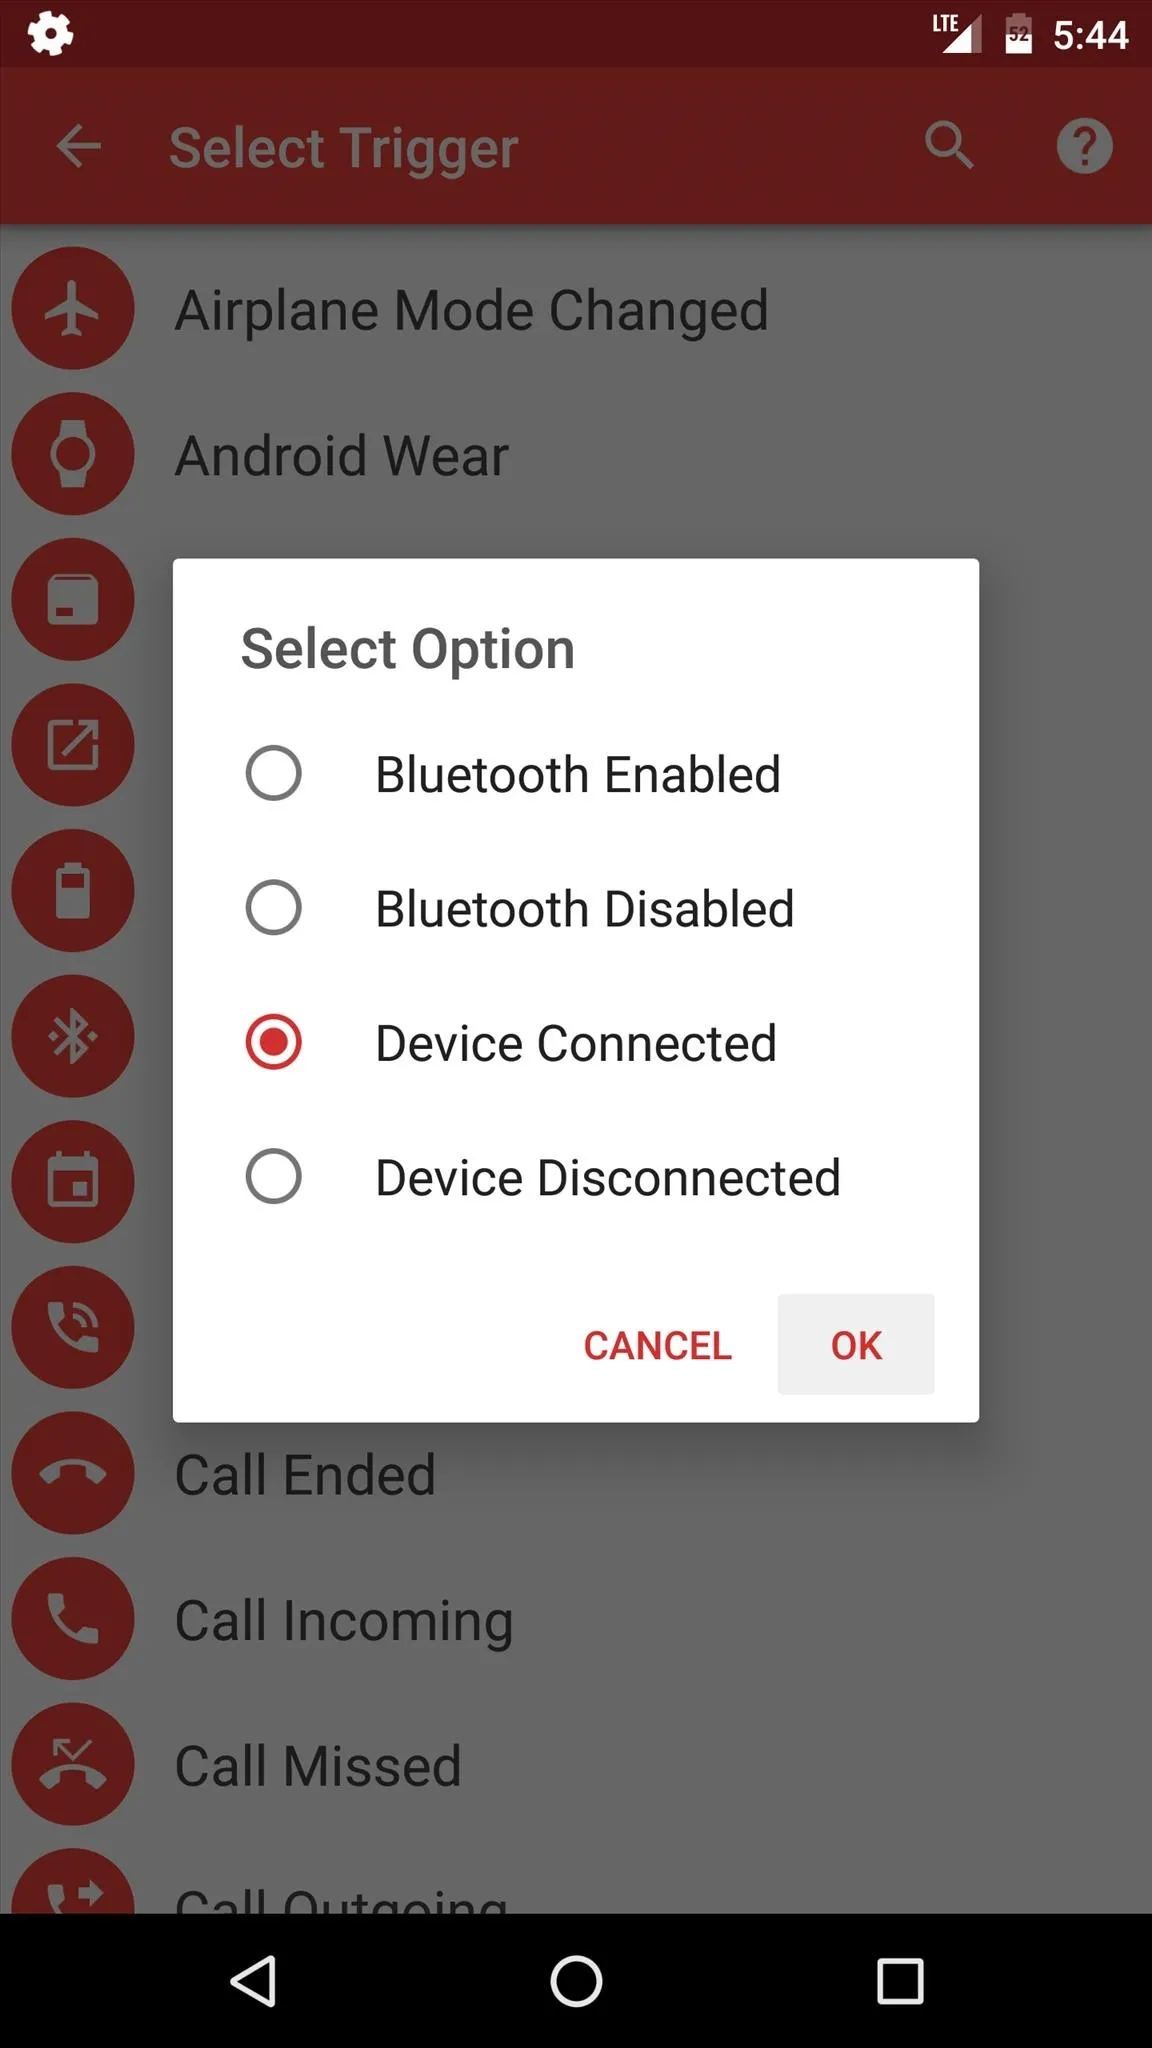

In this example macro, I've selected "Bluetooth Event" as the trigger, then specified that I want my macro to be triggered when I connect to a particular Bluetooth device.


Choose an Action or Set of Actions
After selecting a trigger event, you'll be prompted to add an action or set of actions that will be executed automatically. Simply choose any action from this list, then verify your choice. When you're done there, you can even add more actions if you'd like. Either way, make sure to tap the check mark at the bottom of the screen when you're done adding actions.
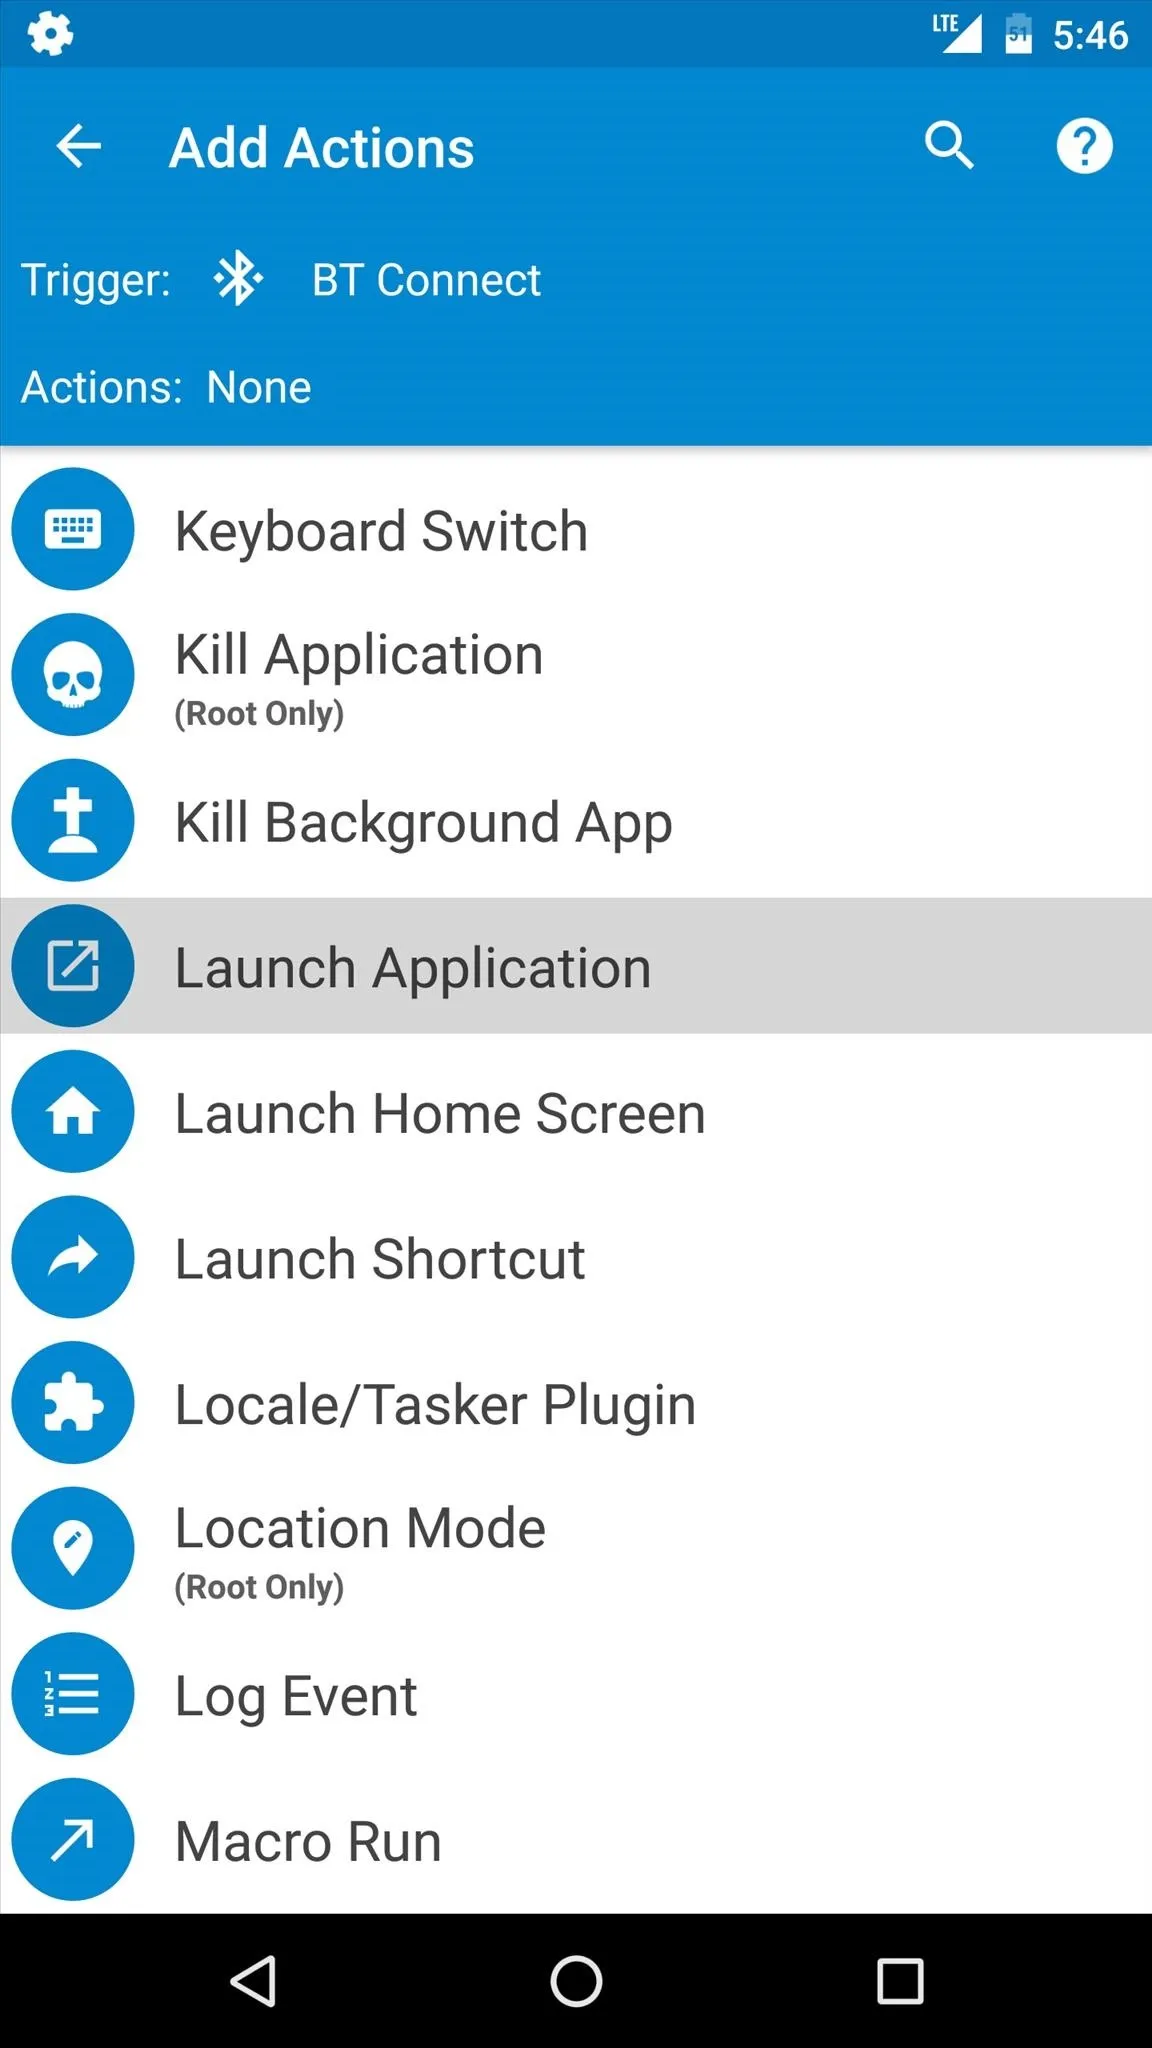
Here, I'm adding "Launch Application" as my action, then selecting the "Play Music" app. This means that when I connect to the aforementioned Bluetooth device, my favorite music player will automatically launch.
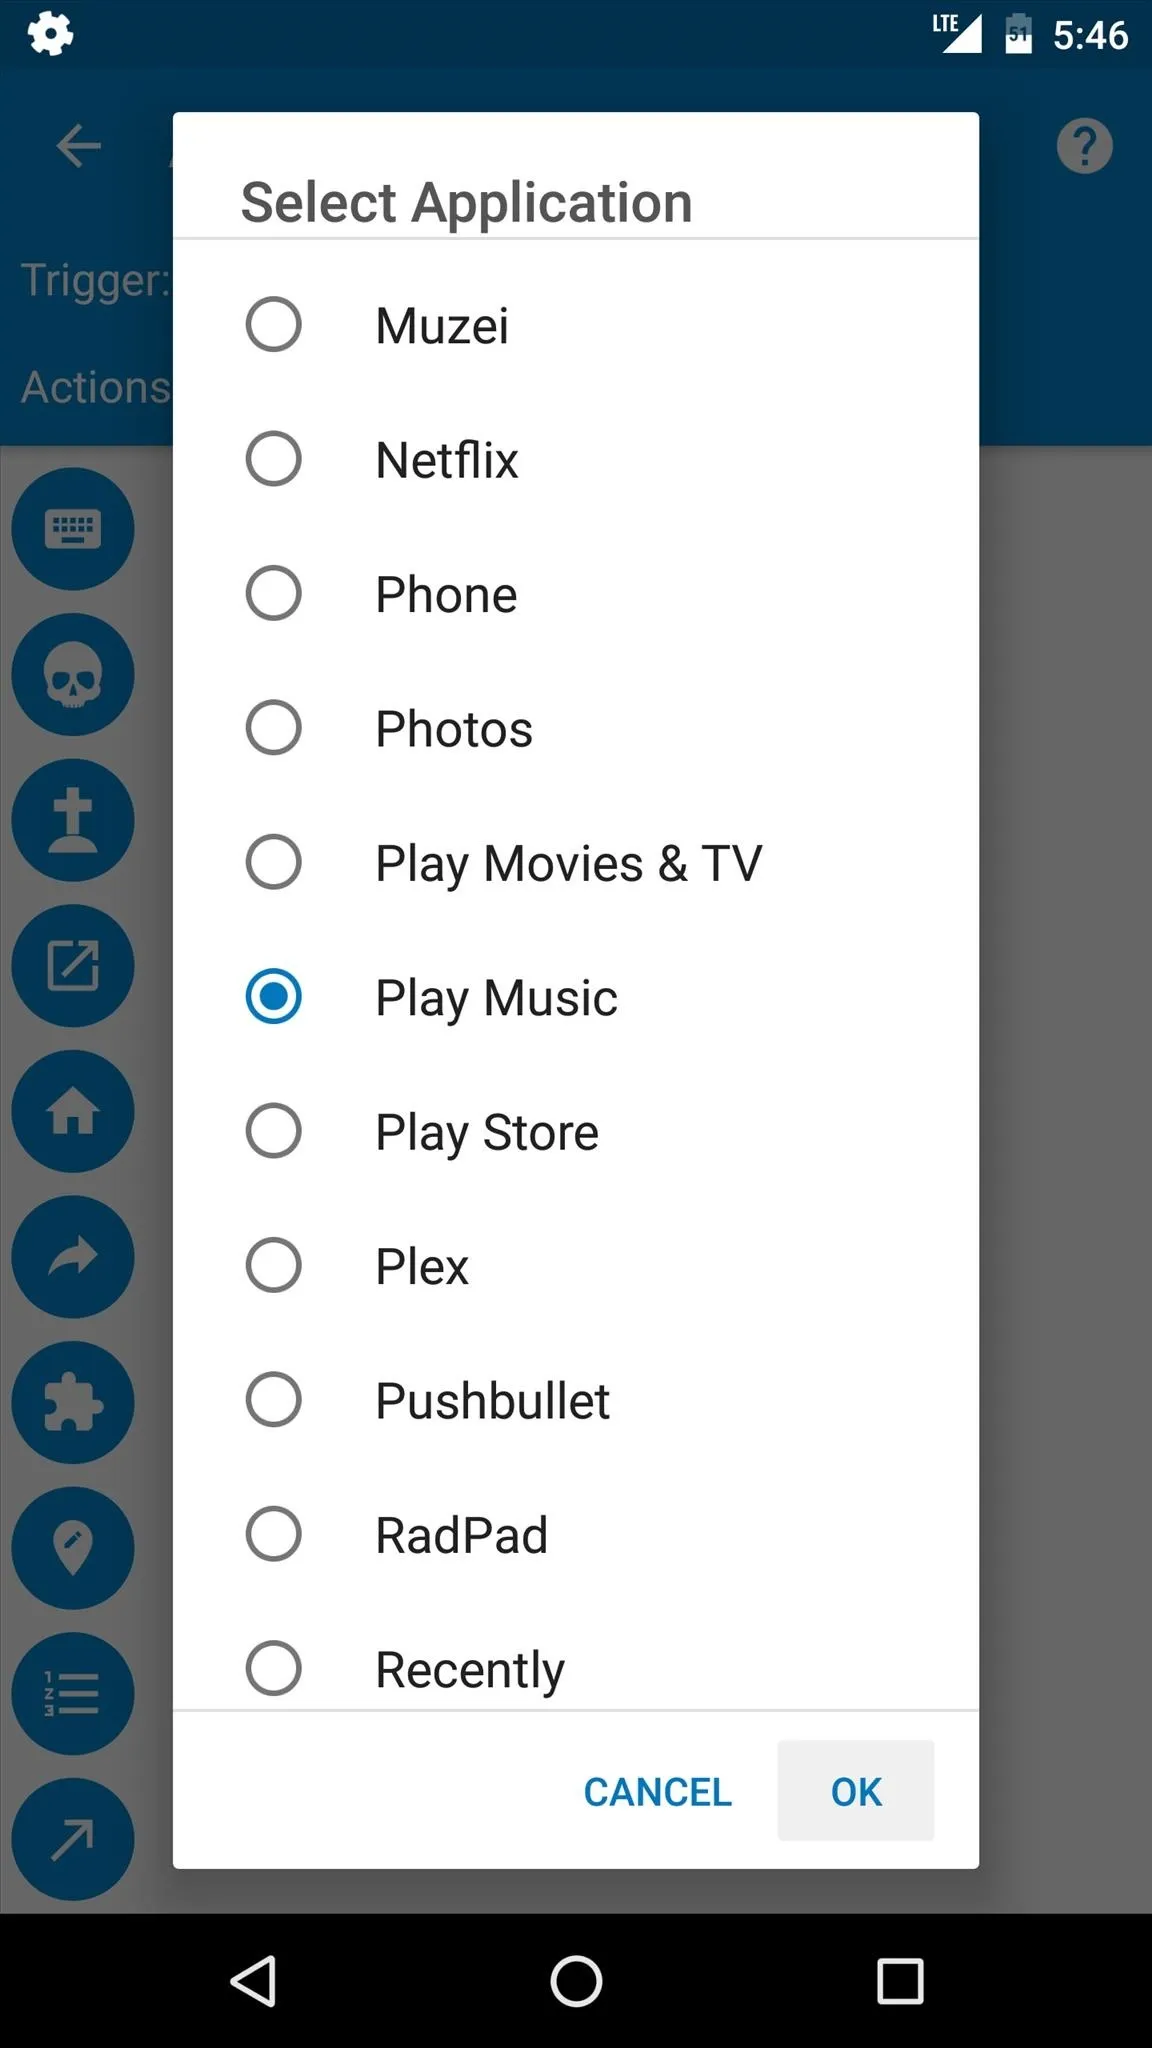

Here, I'm adding "Launch Application" as my action, then selecting the "Play Music" app. This means that when I connect to the aforementioned Bluetooth device, my favorite music player will automatically launch.

Add a Constraint (Optional)
Next, MacroDroid will give you the option of adding a constraint to your macro. These are conditions that can either allow or prevent your macro from running in certain circumstances—for instance, when your battery is running low. This step is purely optional, so if you don't need it, simply tap the check mark at the bottom of the screen.
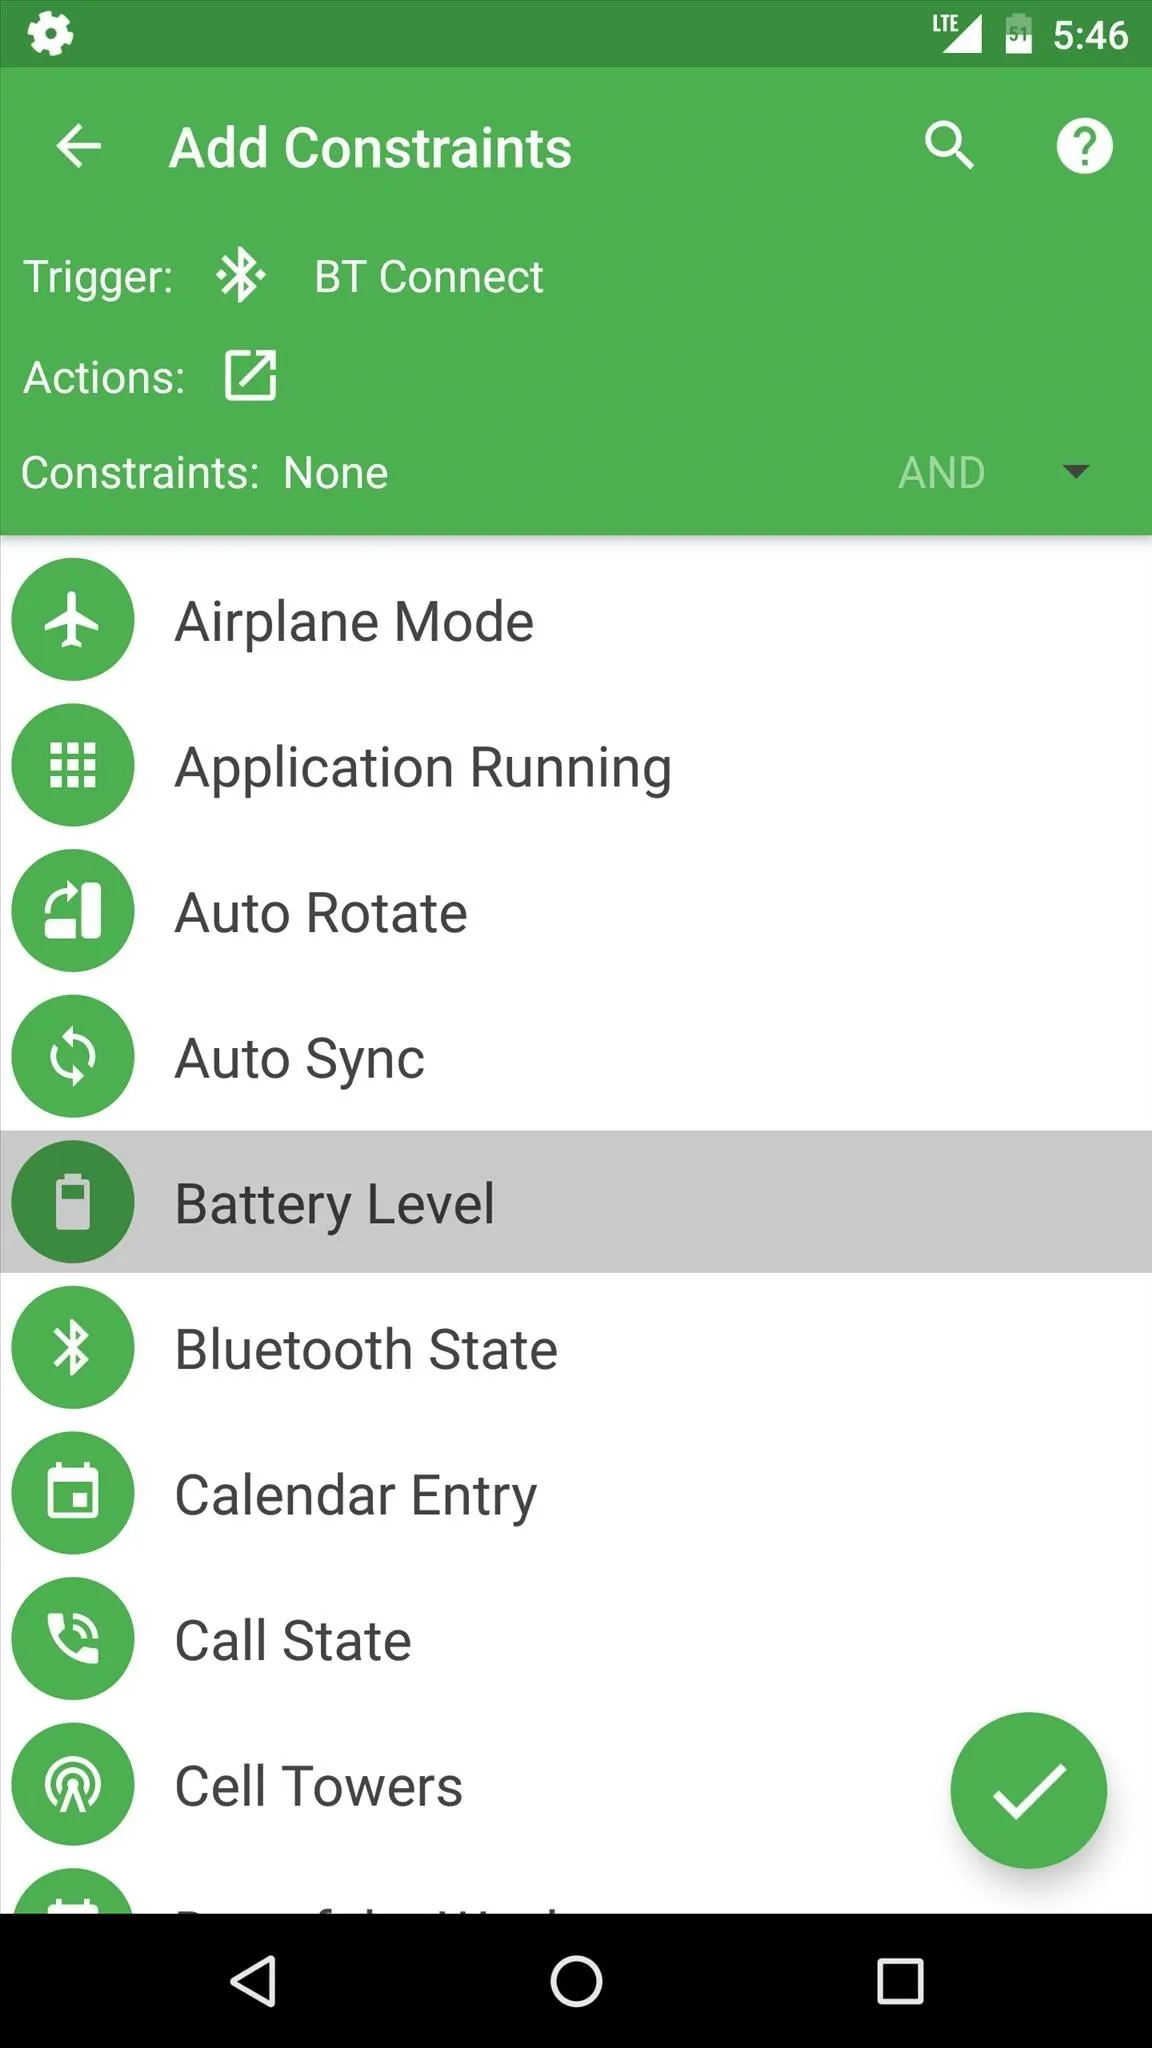
Here, I've added a constraint that will prevent my macro from running if my battery level is below 50% when my phone connects to the Bluetooth device.
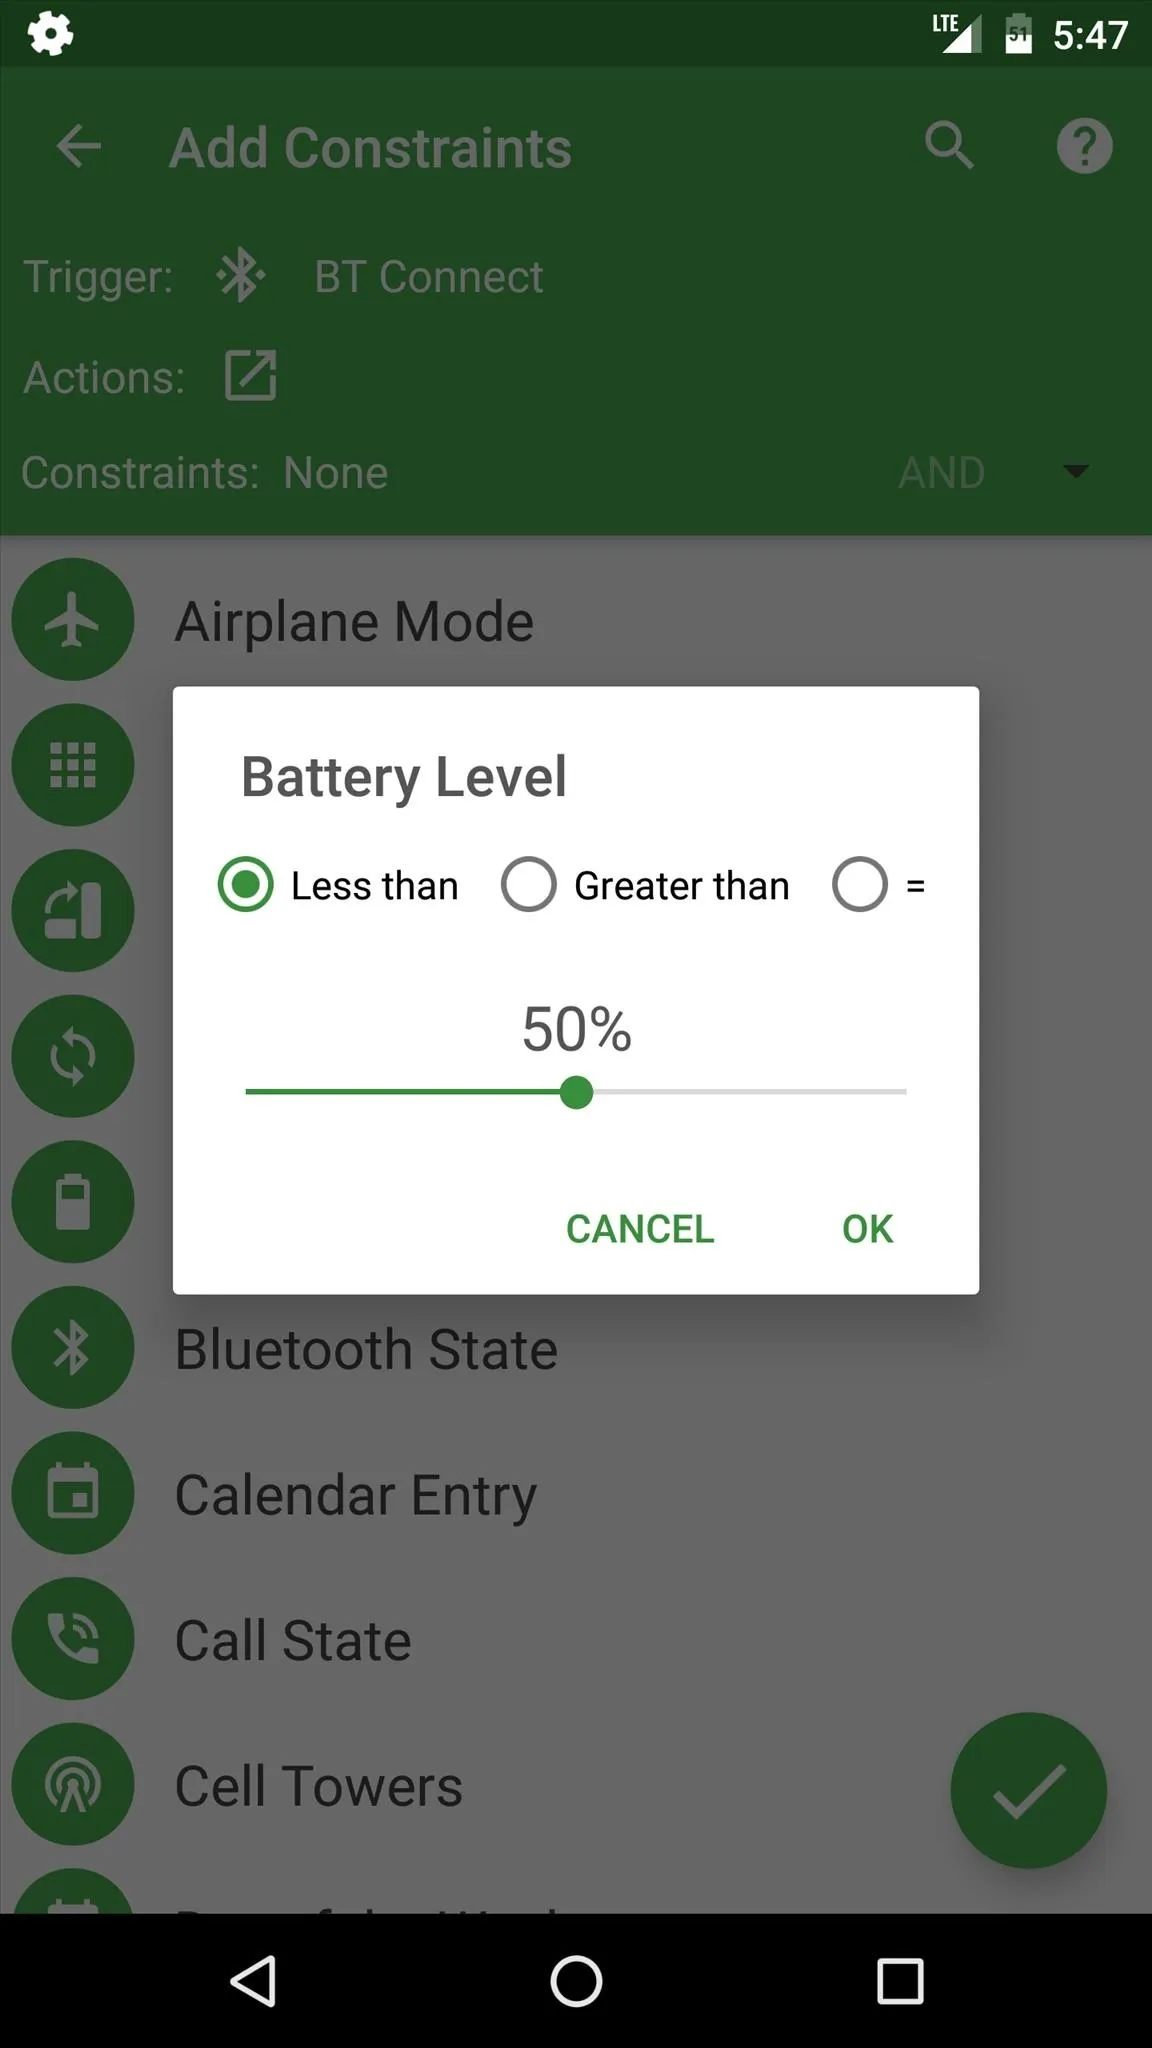

Here, I've added a constraint that will prevent my macro from running if my battery level is below 50% when my phone connects to the Bluetooth device.

Name Your Macro
After you're done with the "Add Constraints" menu, you'll be prompted to name your macro. You can also put your macro into a category to keep things organized, but when you tap "OK" on this popup, you'll be done with your first macro. To view the macro you just created, head to the "Macros" section from the app's main menu, where you can easily turn the macro on or off.
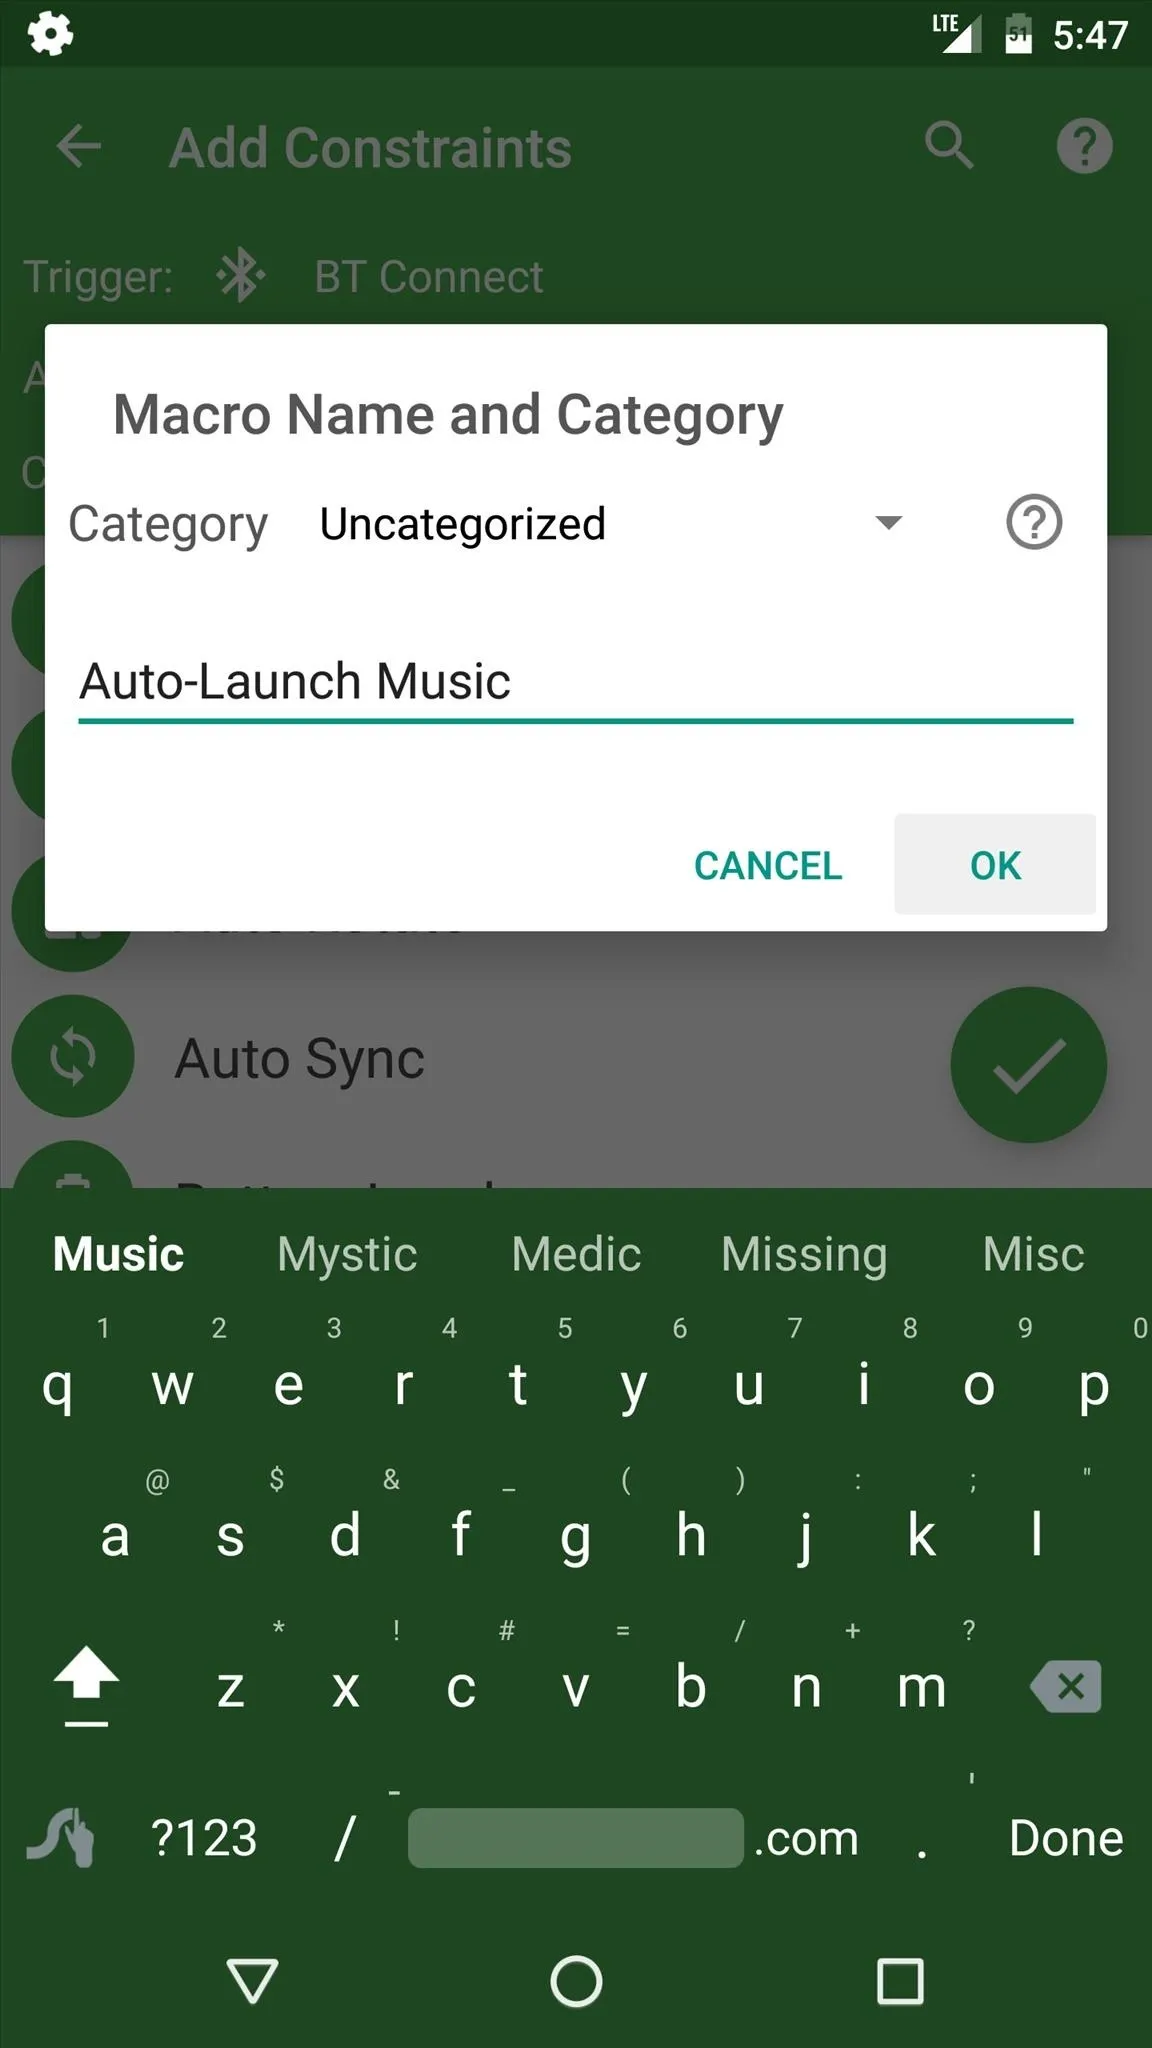
At this point, my macro is all done. I can exit MacroDroid and continue using my phone as I normally would, and my macro will kick in automatically the next time I connect to the specified Bluetooth device.
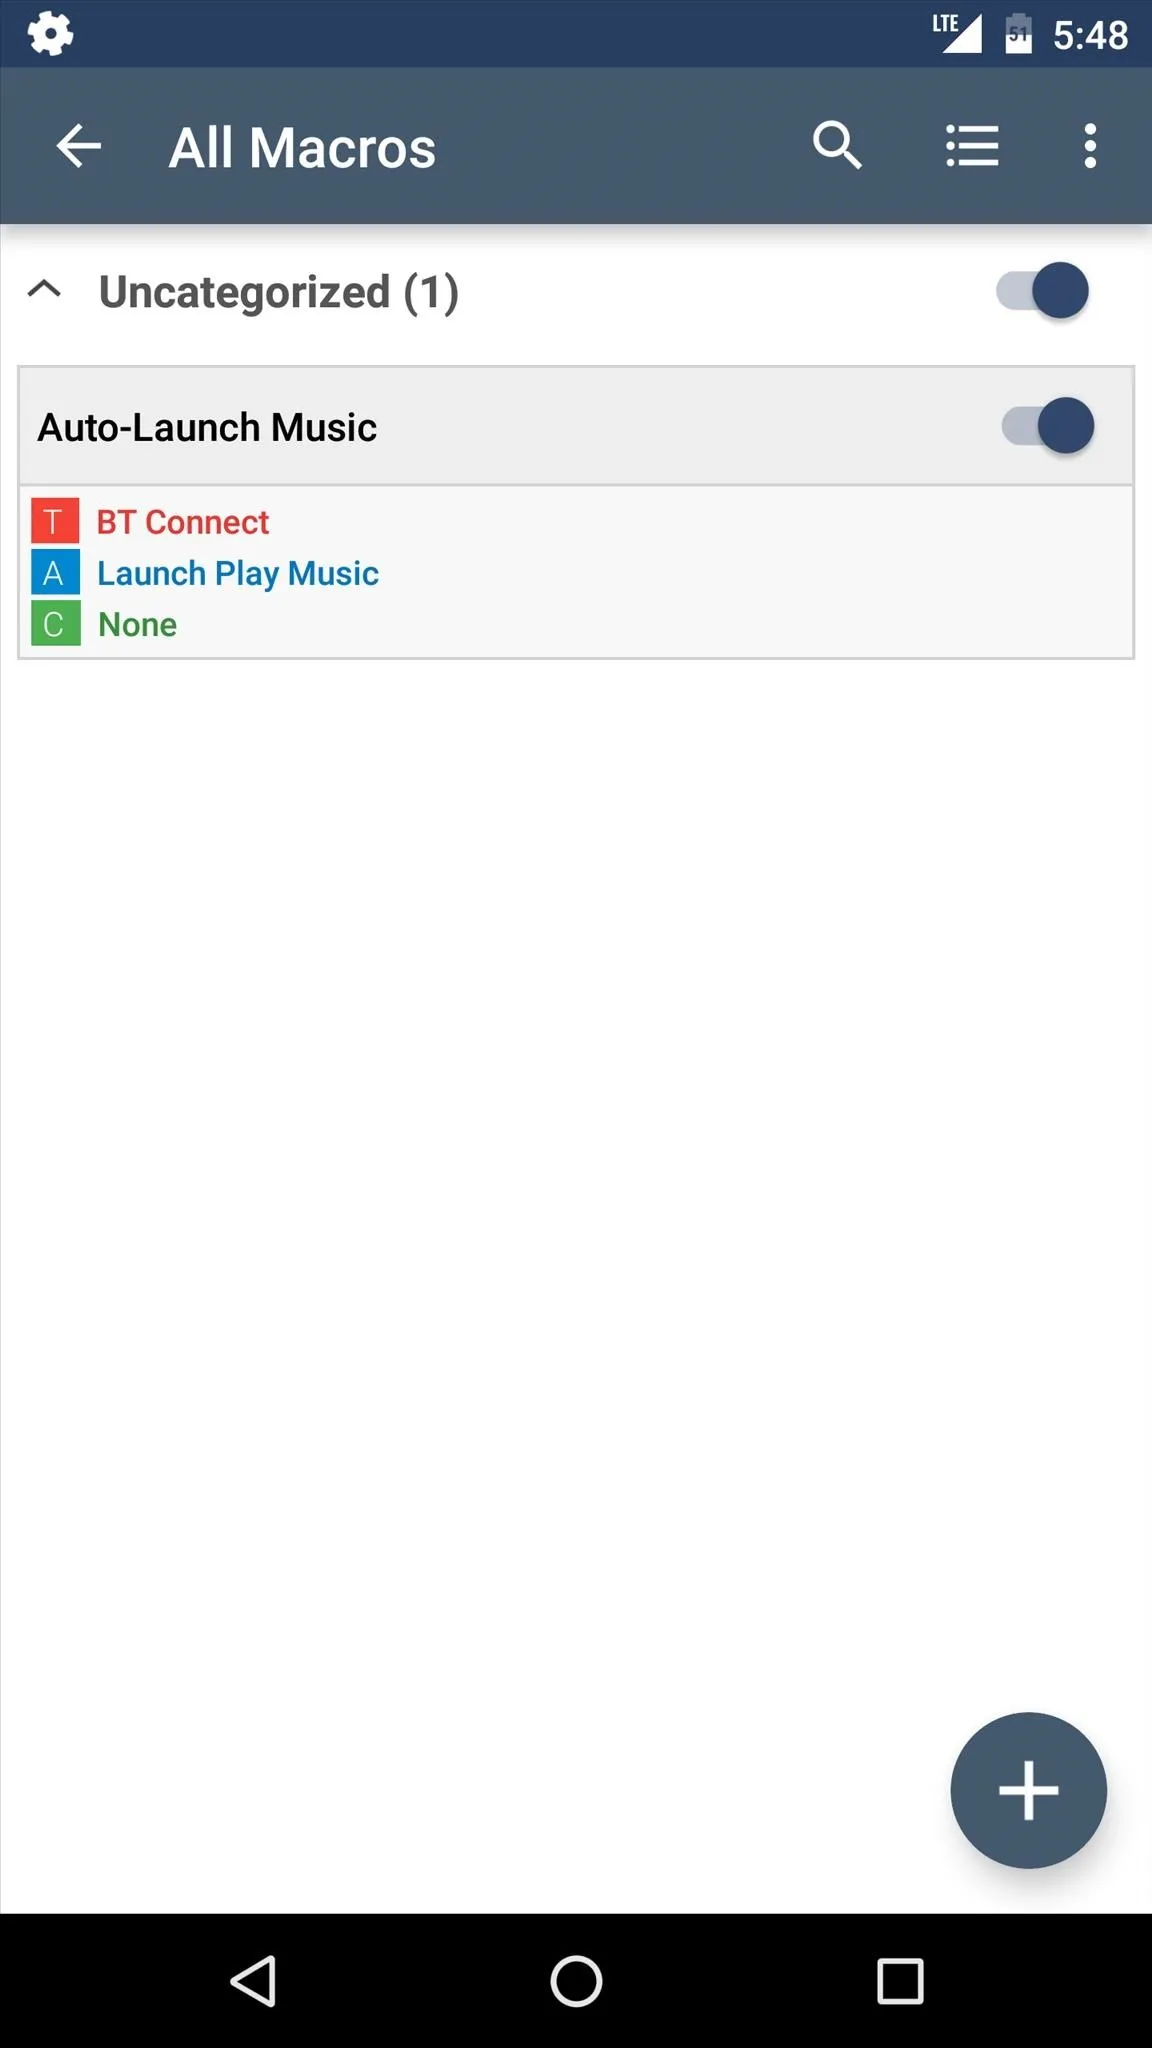

At this point, my macro is all done. I can exit MacroDroid and continue using my phone as I normally would, and my macro will kick in automatically the next time I connect to the specified Bluetooth device.

Use a Macro Template (Optional)
Next, take a moment to browse through the "Templates" section from MacroDroid's main menu. This is a list of user-created macros that are preconfigured to perform many different tasks. If you find one that interests you, simply select it from this list, then MacroDroid will let you make a few tweaks if you'd like before importing it.
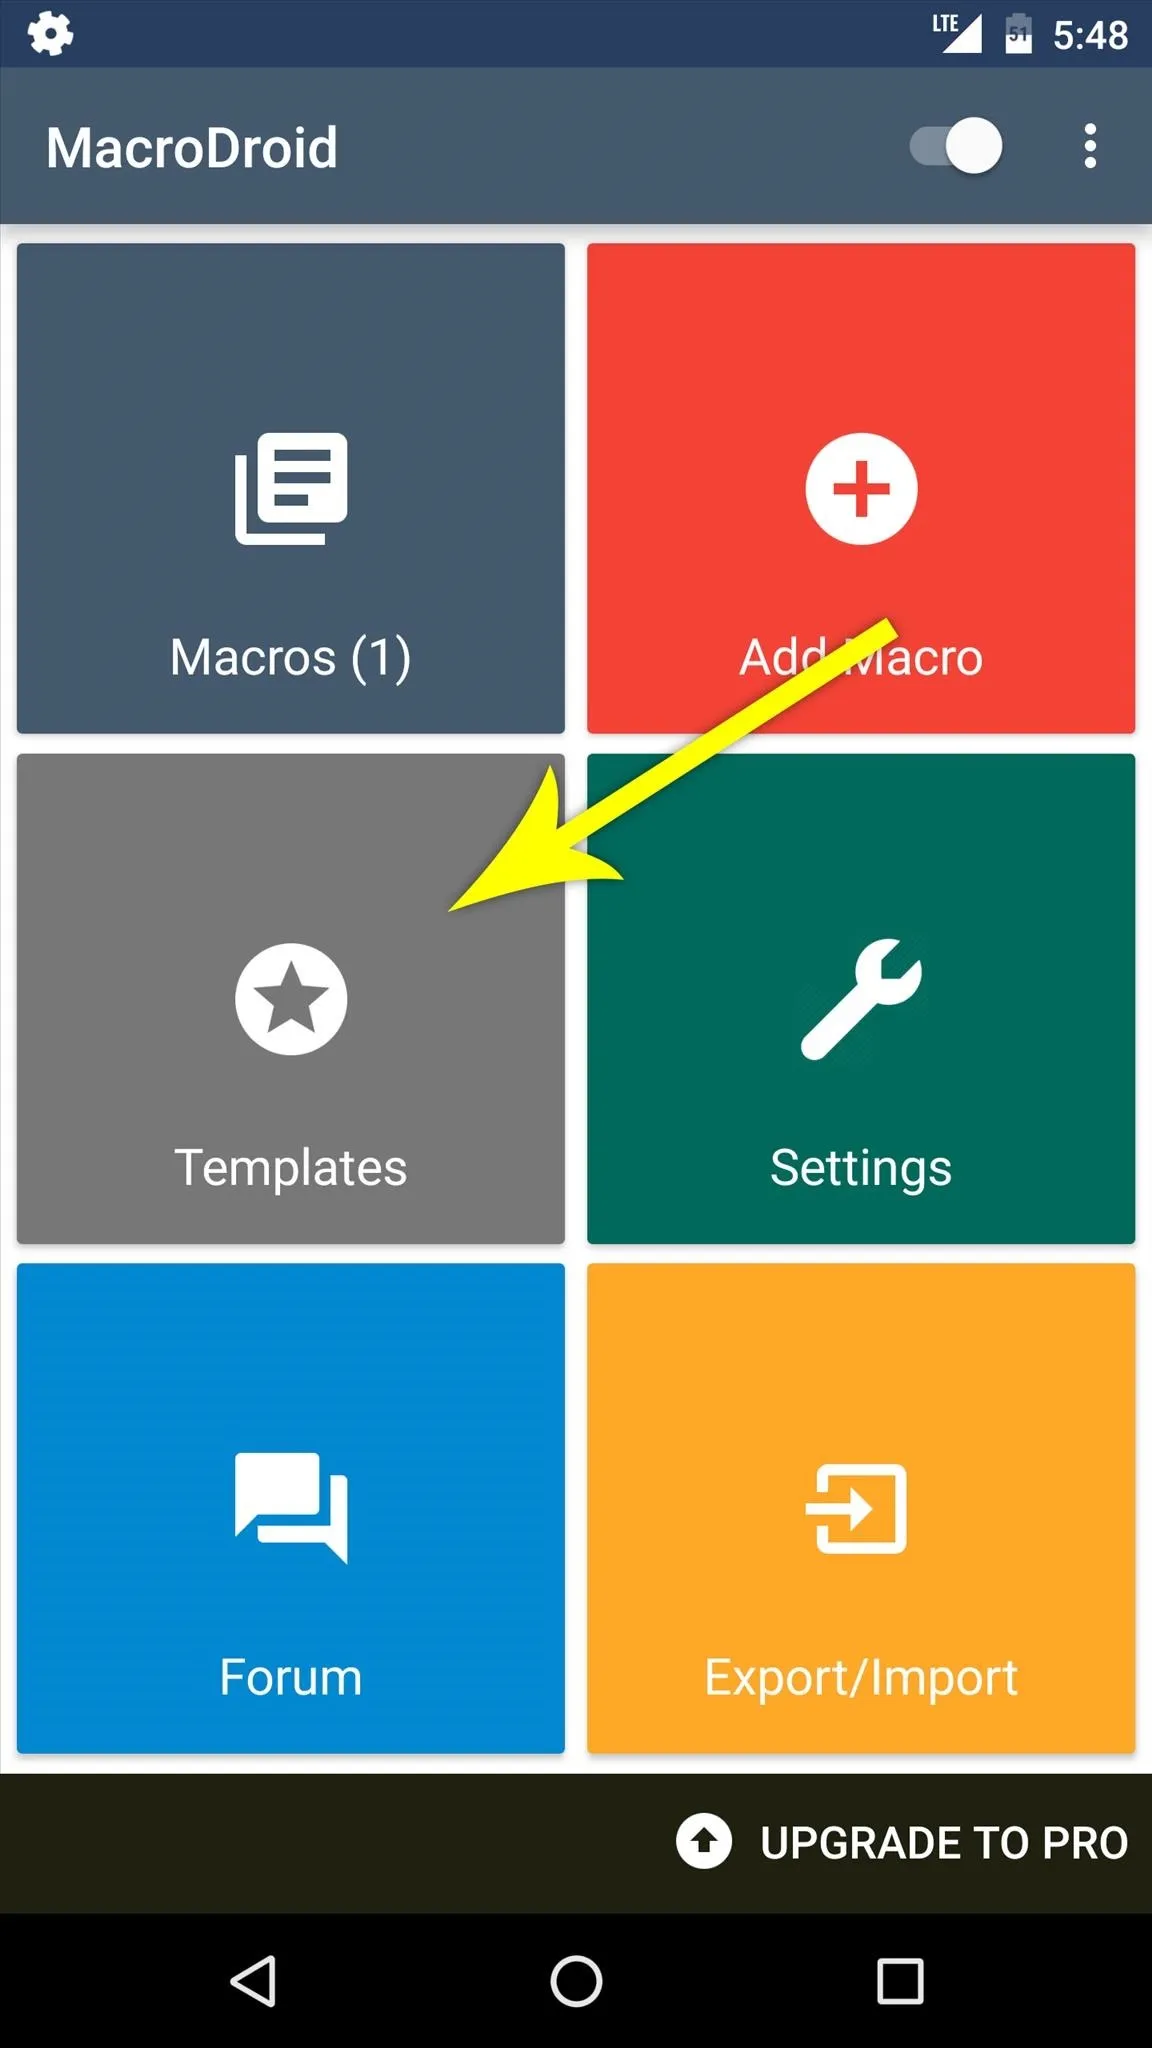
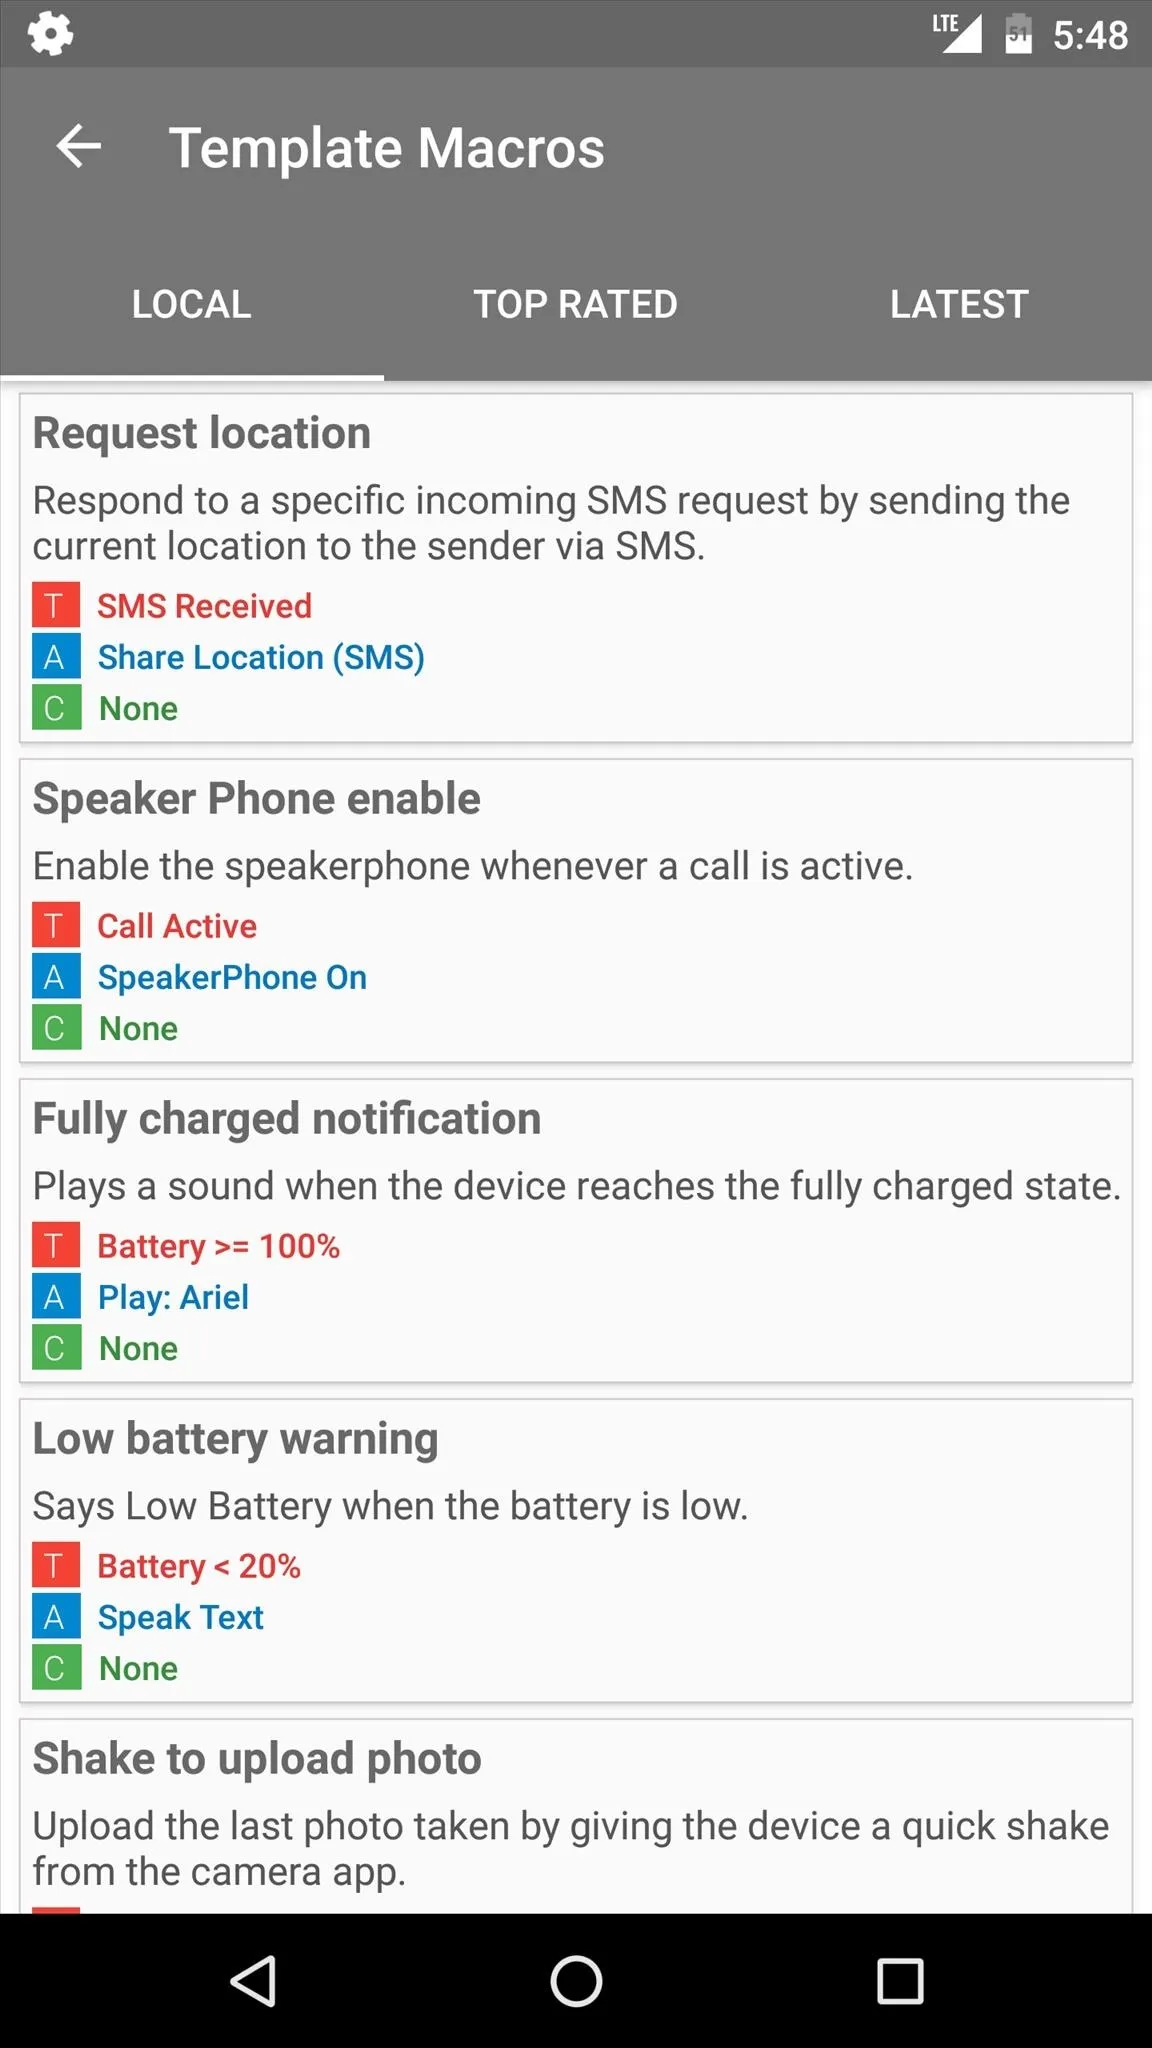


Kick Back & Let Your Phone Do the Work for You
With everything set up, your macro will automatically kick in when the trigger event occurs, and you don't even have to interact with your device when this happens. Ultimately, MacroDroid will automate mundane tasks to make your phone behave exactly how you want it, and it does all of this with an incredibly simple interface.
- Follow Gadget Hacks on Facebook, Twitter, Google+, and YouTube
- Follow Apple Hacks on Facebook and Twitter
- Follow Android Hacks on Facebook and Twitter
- Follow WonderHowTo on Facebook, Twitter, and Google+
Cover photo and screenshots by Dallas Thomas/Gadget Hacks




Comments
Be the first, drop a comment!