One of the only downsides to the Pixel XL is that Google's flagship phone does not have stereo speakers. But if Android's awesome development community has taught us anything over the years, it's that limitations like these can be bypassed with some creative software tinkering.
Developer chdloc has found a way to enable true stereo sound output on the Pixel XL by activating the earpiece as a speaker in addition to the bottom-firing one. It's similar to the setup Apple used in the iPhone 7 models, as well as the mod that enabled stereo sound on the Nexus 5, and it makes the audio experience on your Pixel XL absolutely top-notch.
Requirements
- rooted Pixel XL (regular Pixel not supported)
- Android 7.1 Nougat (future firmware versions not supported)
- root-enabled file browser
Download the Modified File
Chdloc's stereo sound mod originally involved editing a lot of code, but I went ahead and did the legwork for you to make things as easy as possible. As a result, you'll just need to download the modified mixer_paths.xml file I created to begin.
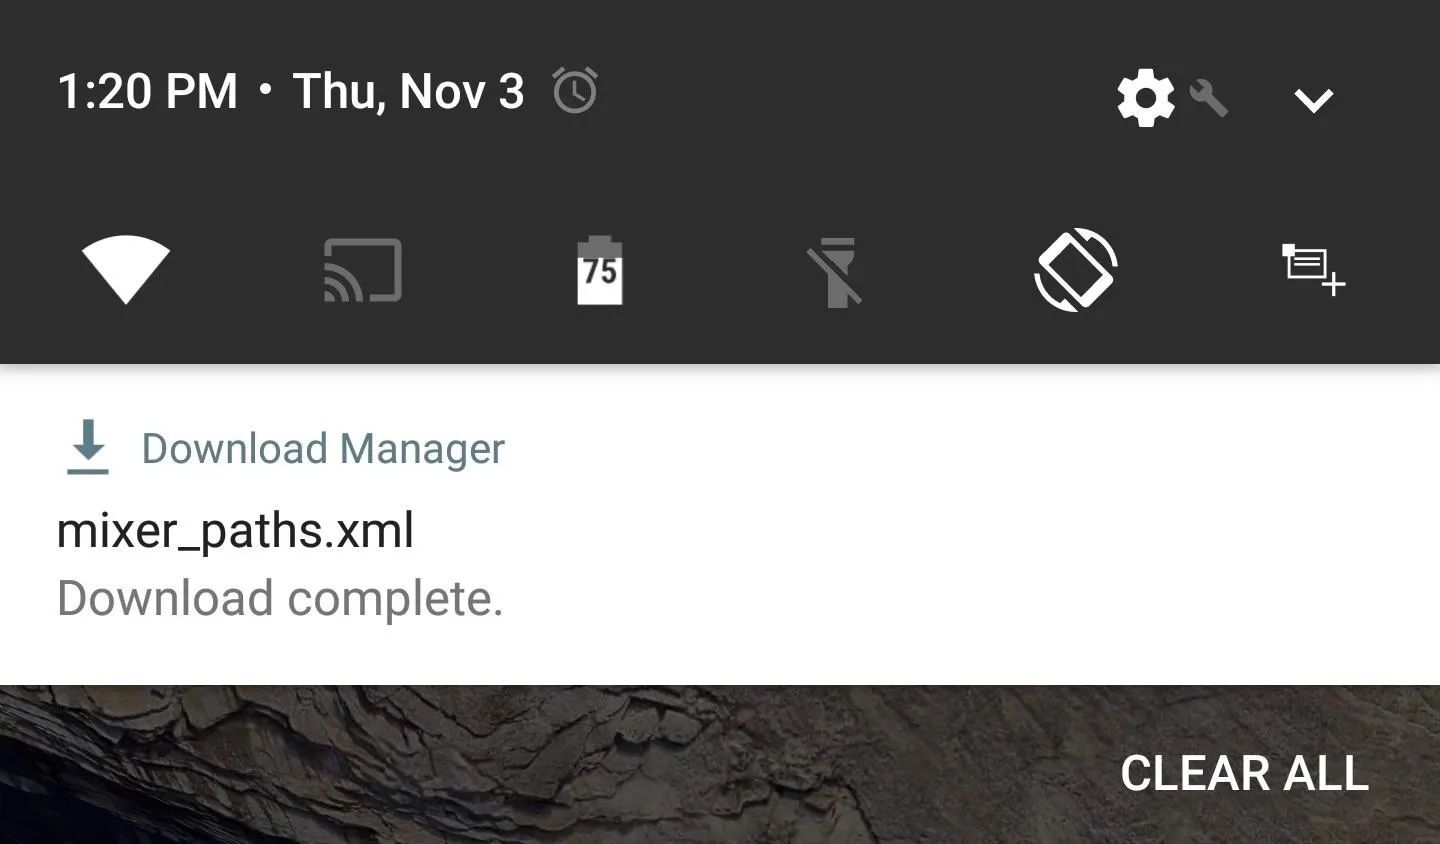
Replace Your Existing File & Reboot
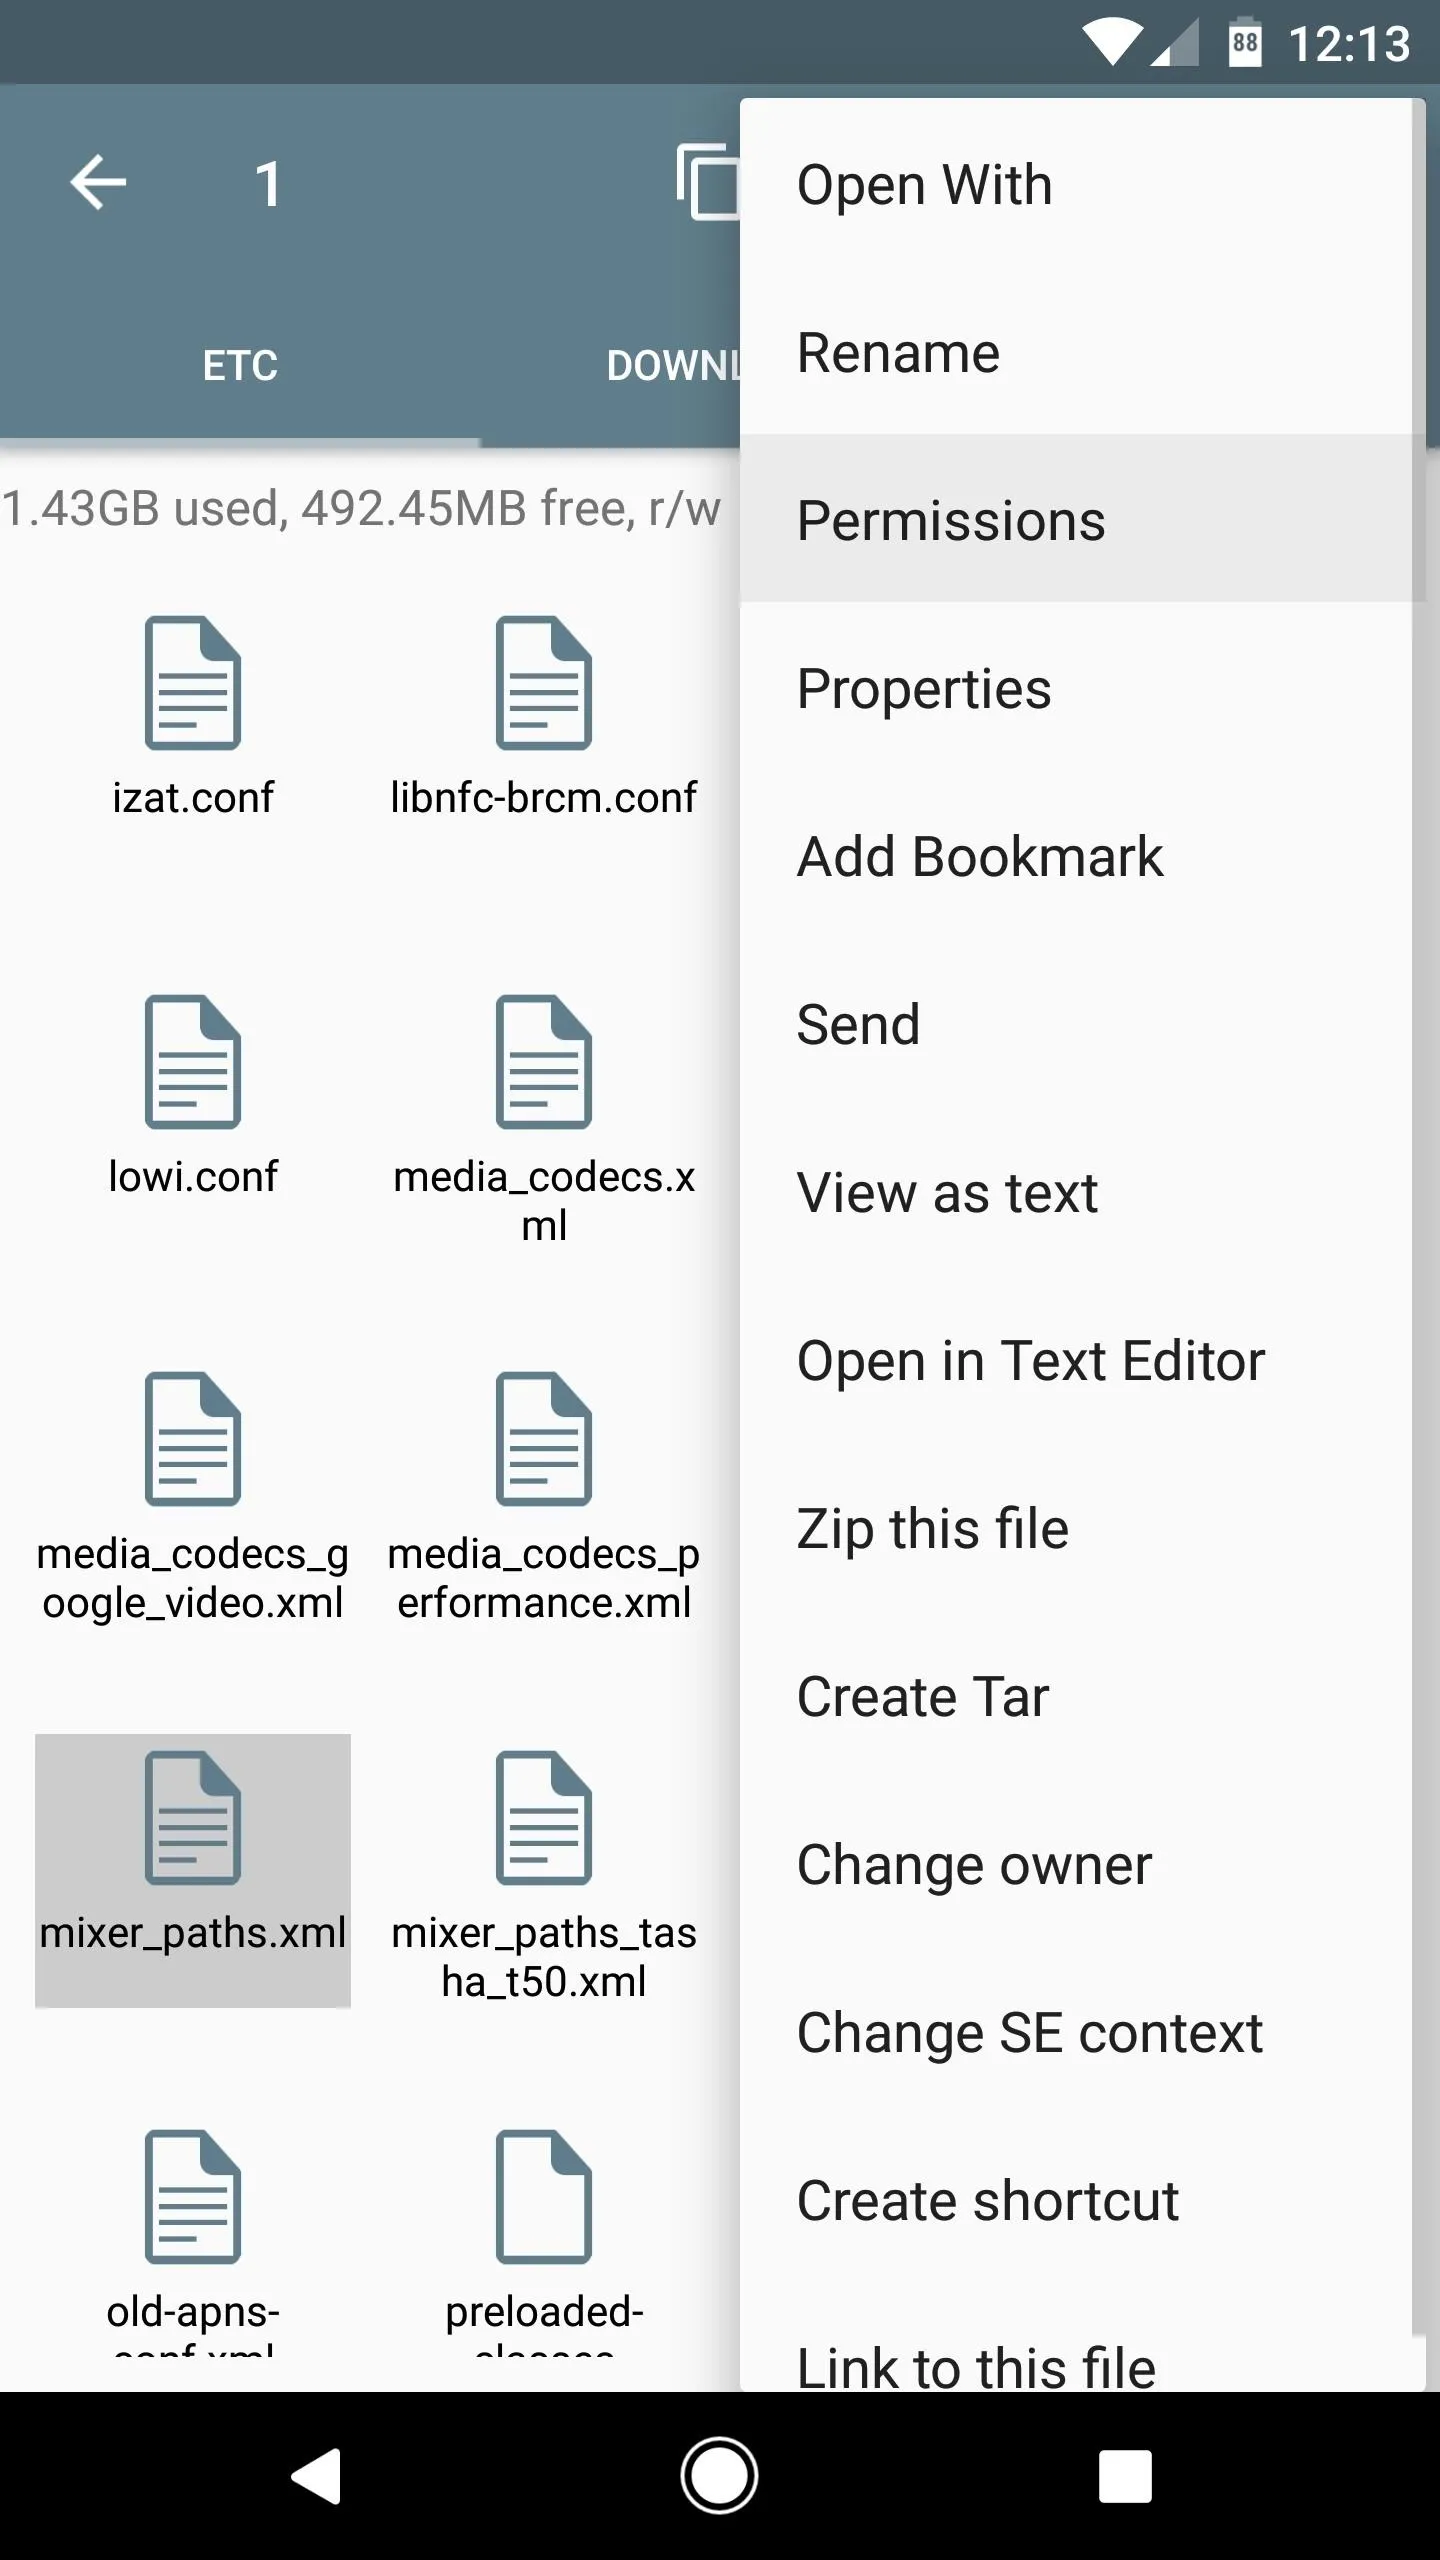
Next up, open your favorite root-enabled file browser, then navigate to the /system/etc/ folder. From here, long-press the existing mixer_paths.xml file, then choose "Rename" from the context menu. After that, add a ".bak" to the end of the file name, then press "OK."
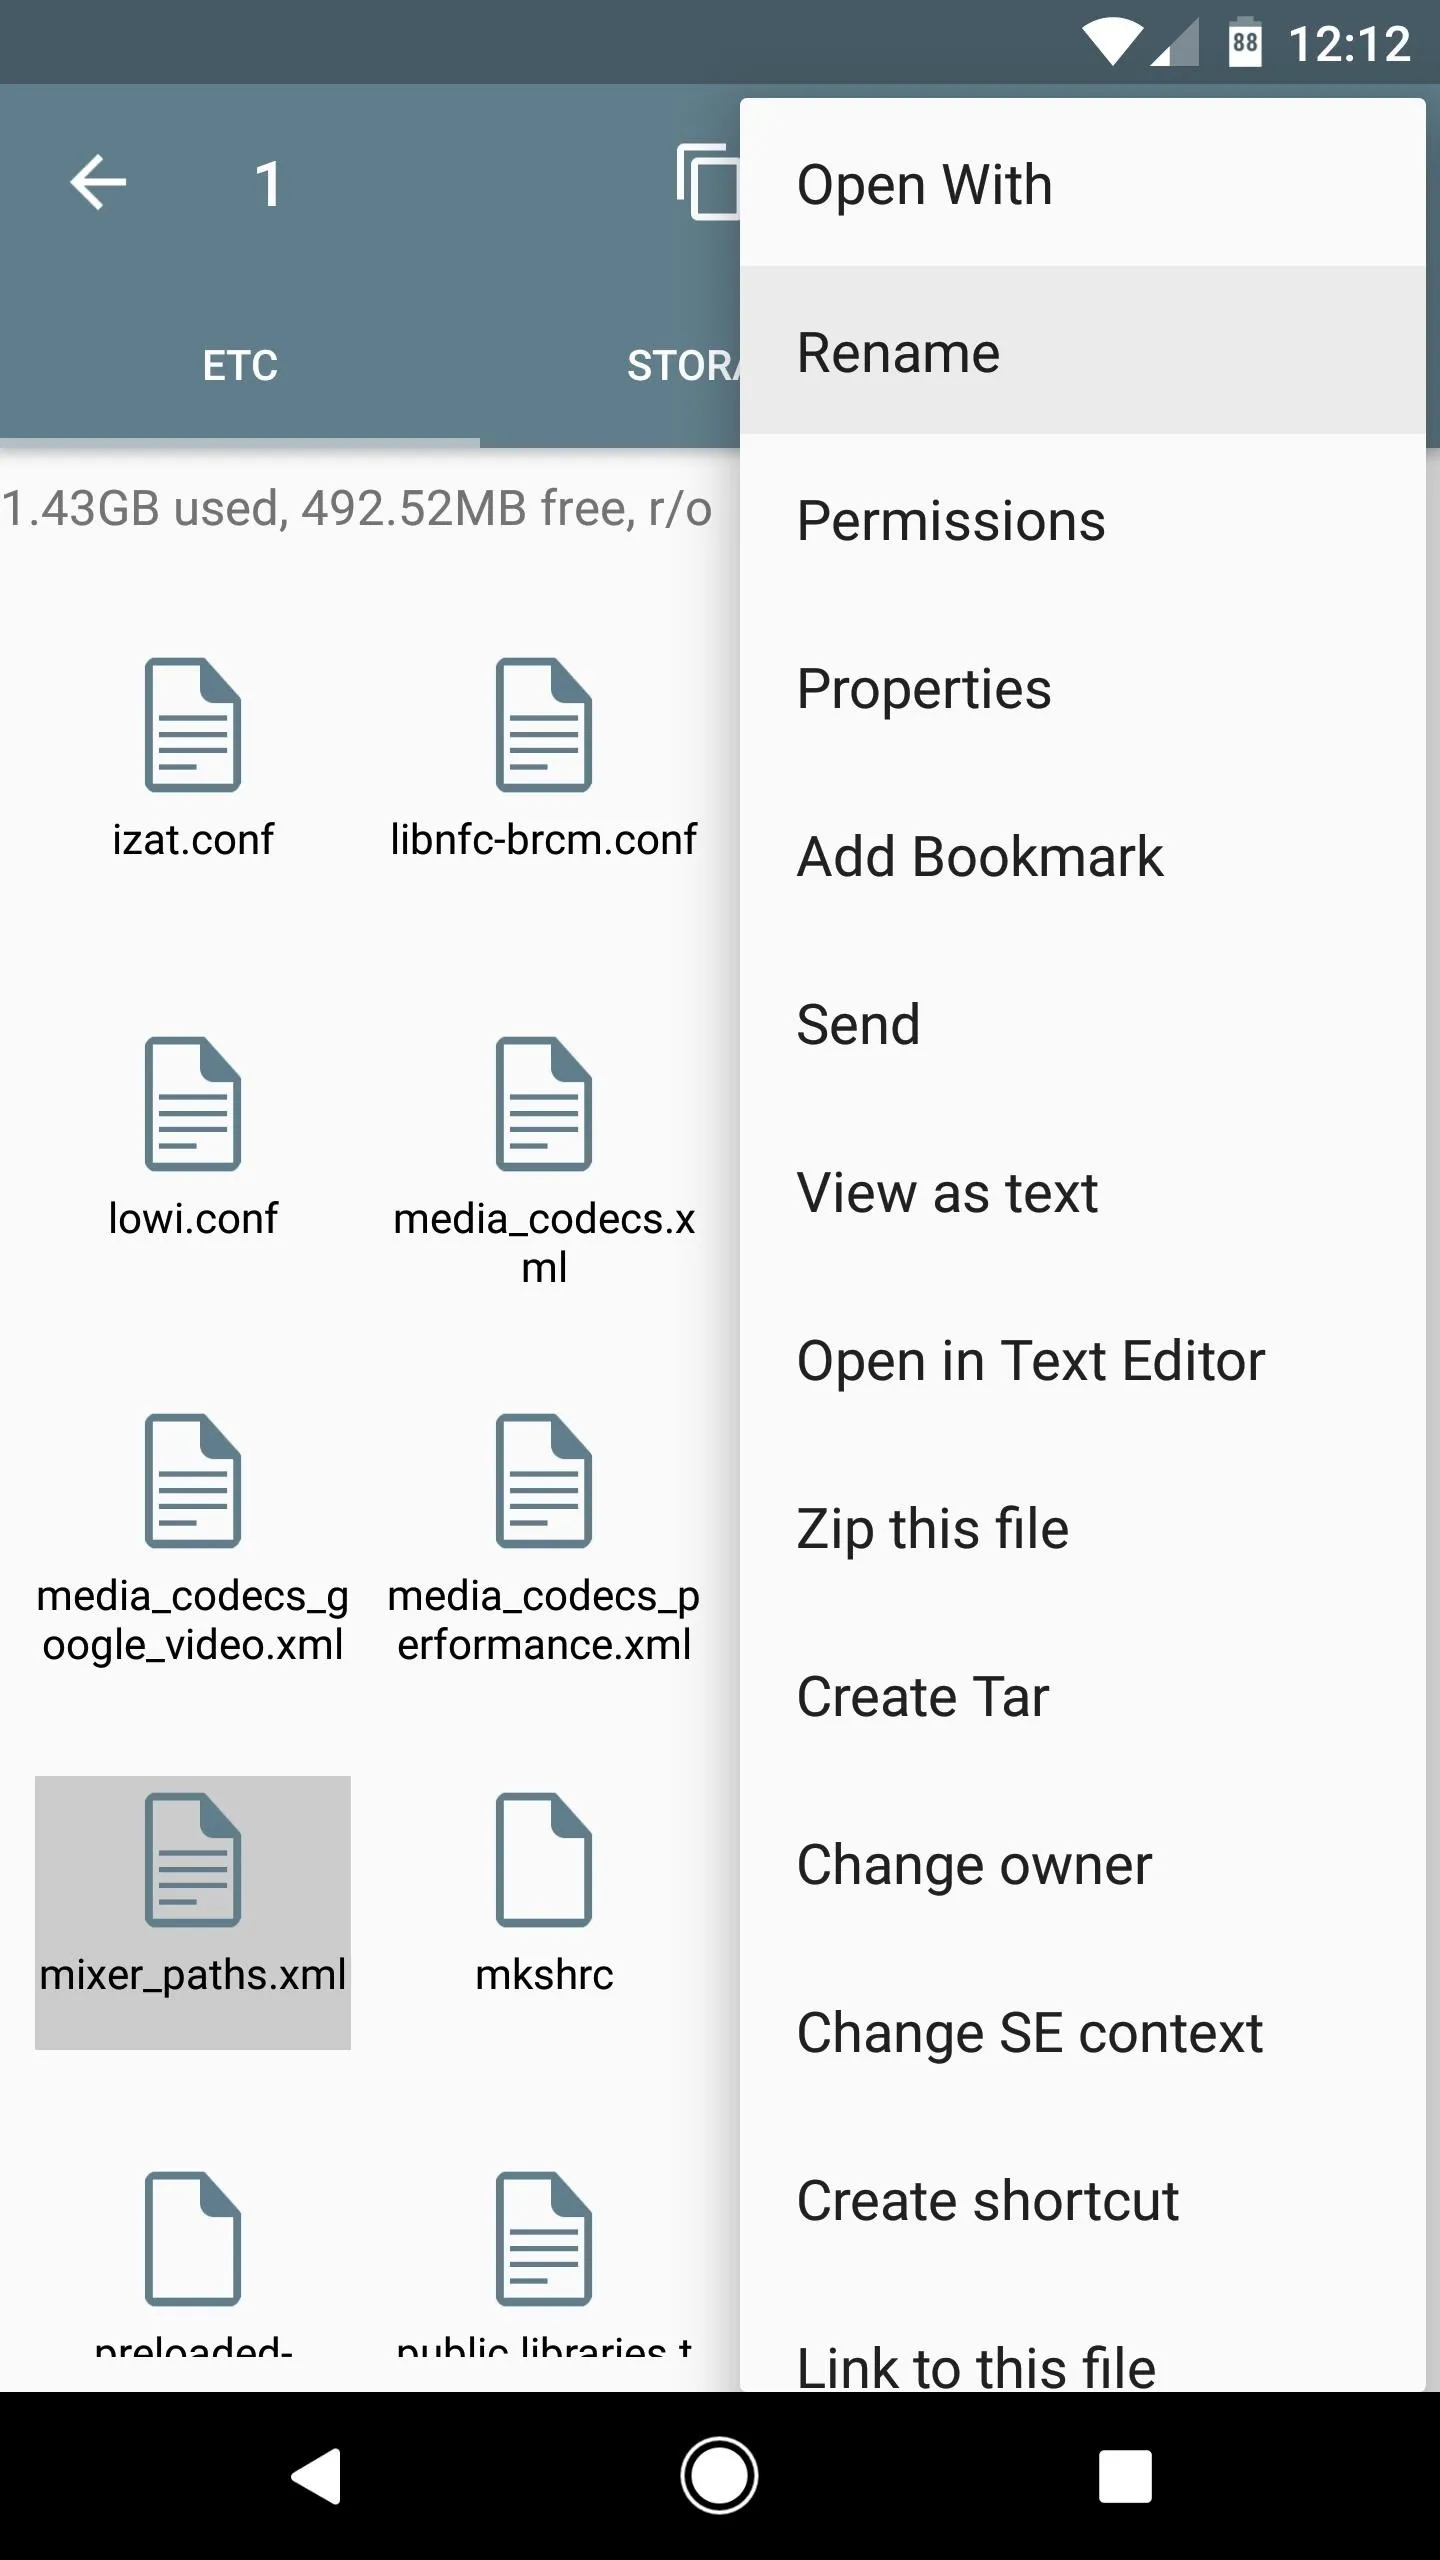
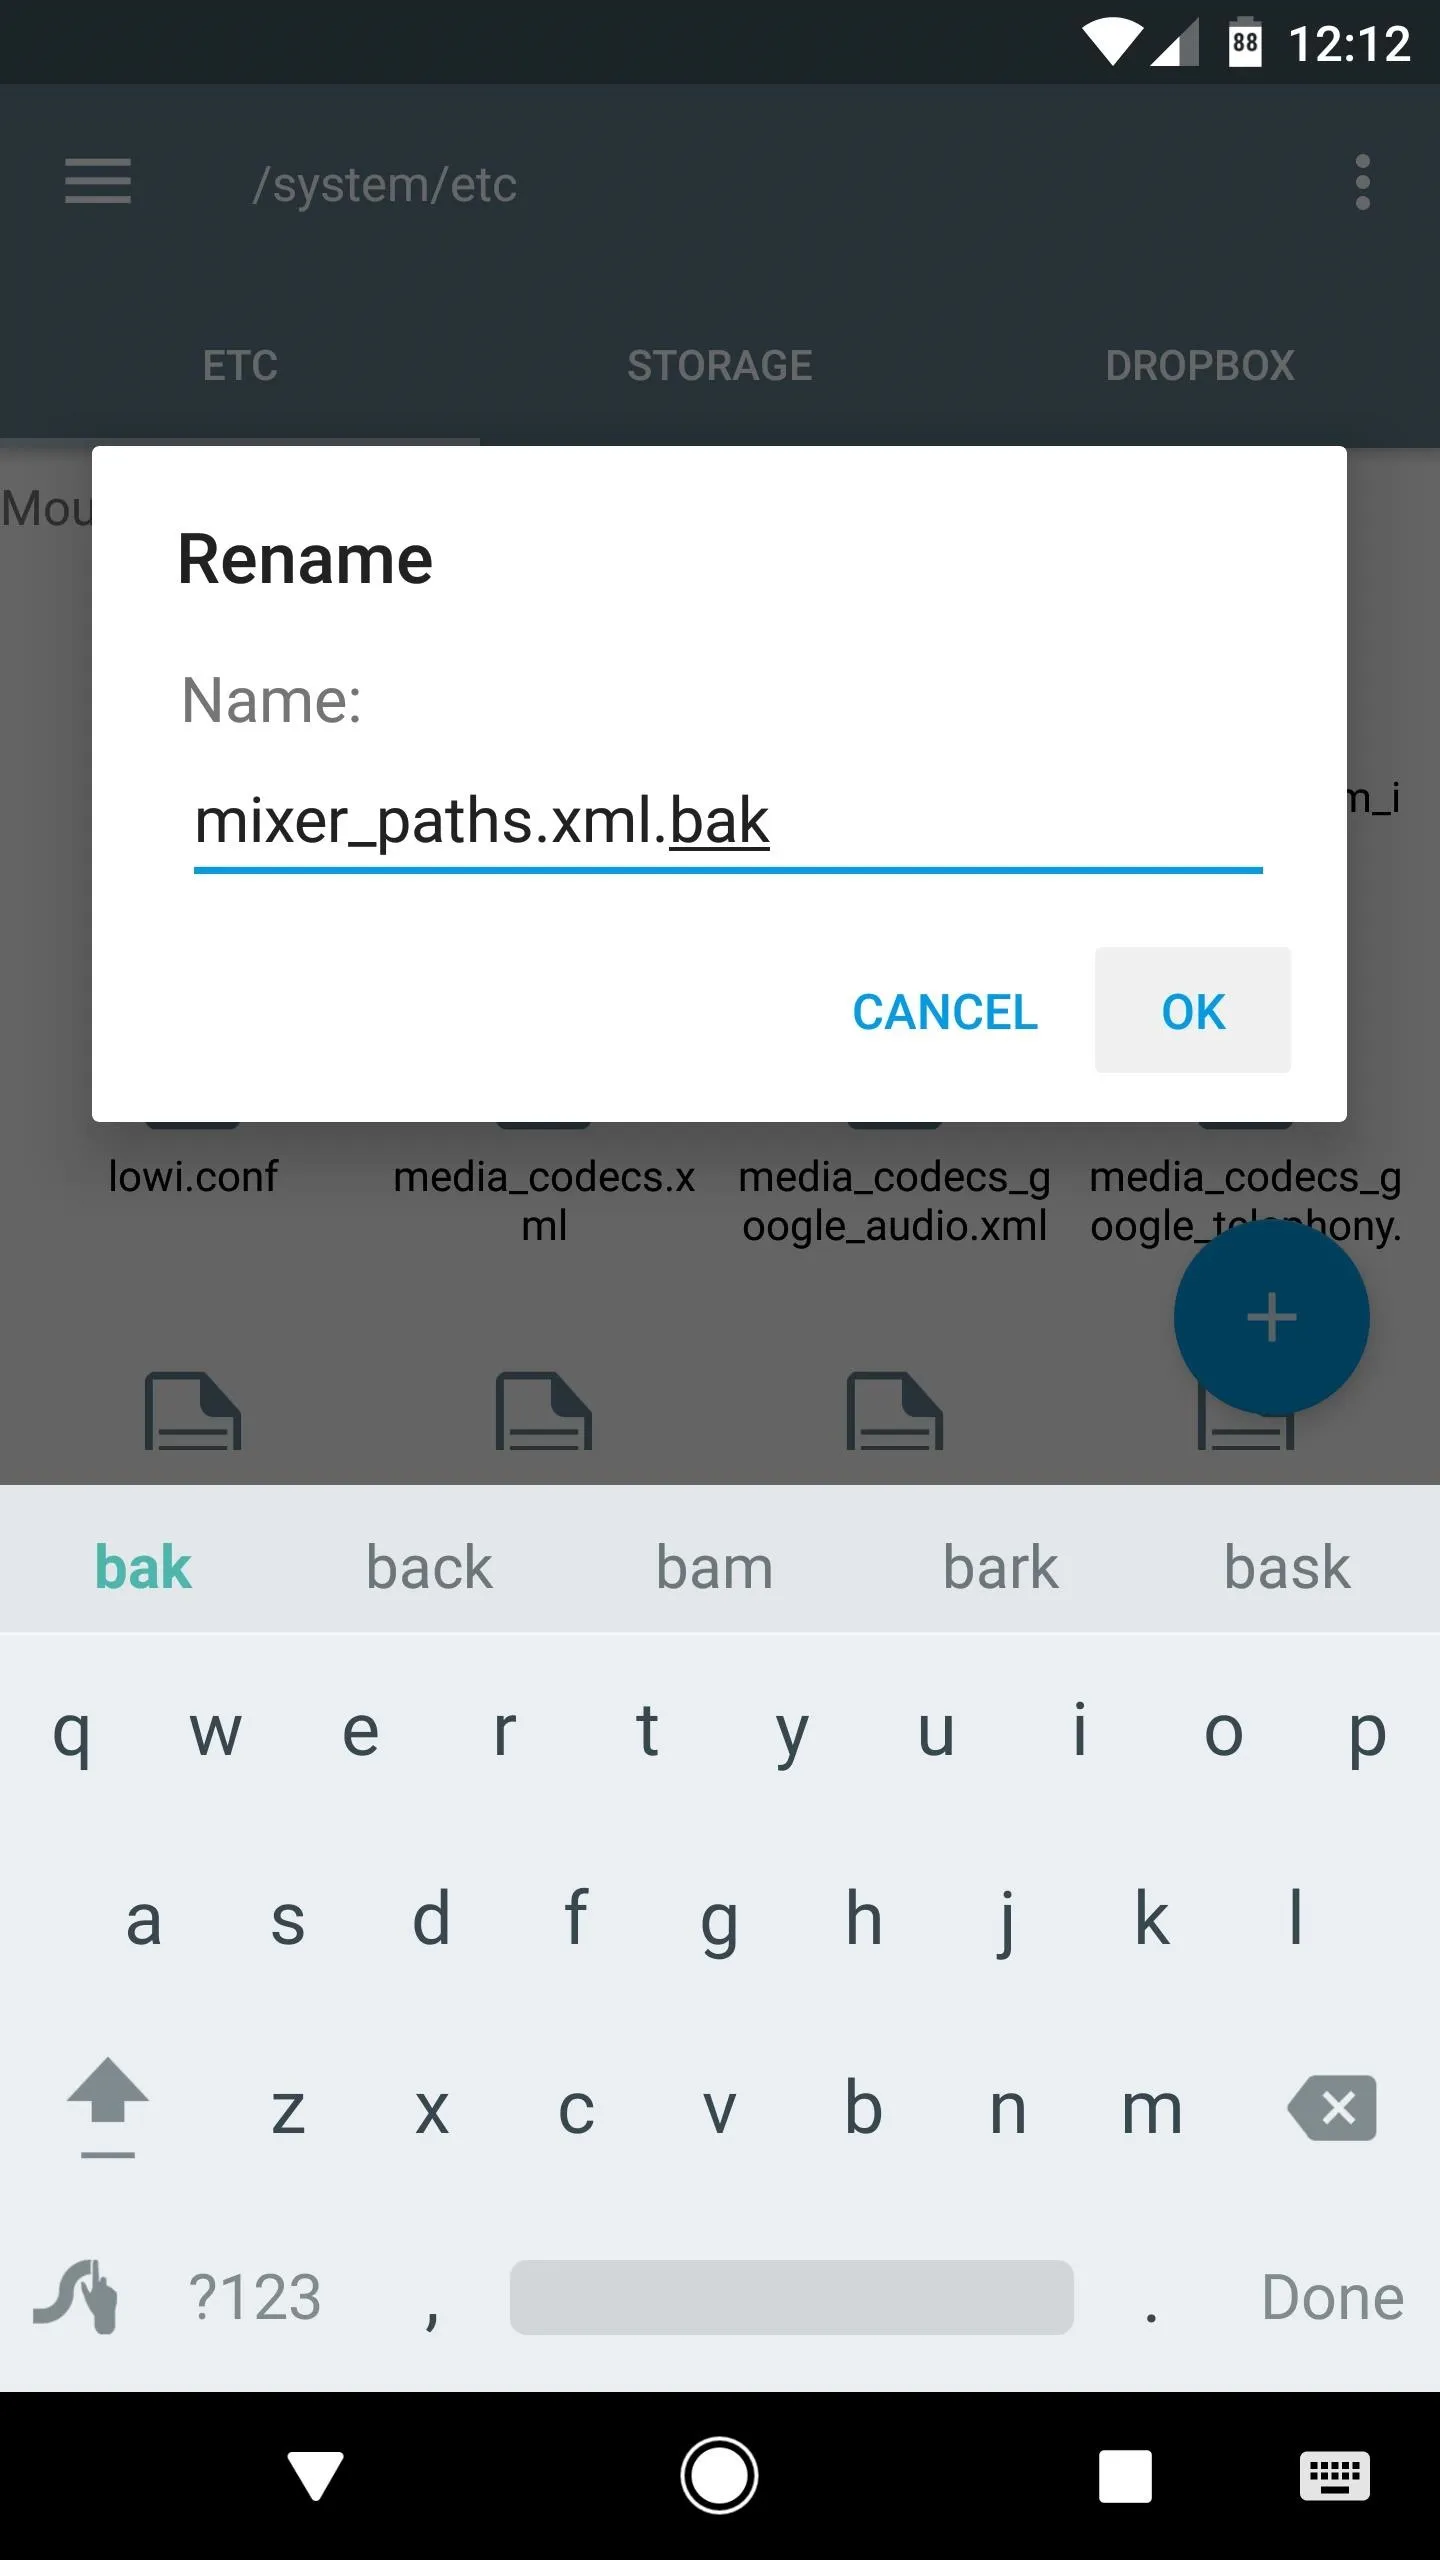


From here, head to your Download folder and copy the modified mixer_paths.xml file that you grabbed from Step 1. Next, head back to /system/ect/, then paste the modded file into this folder.

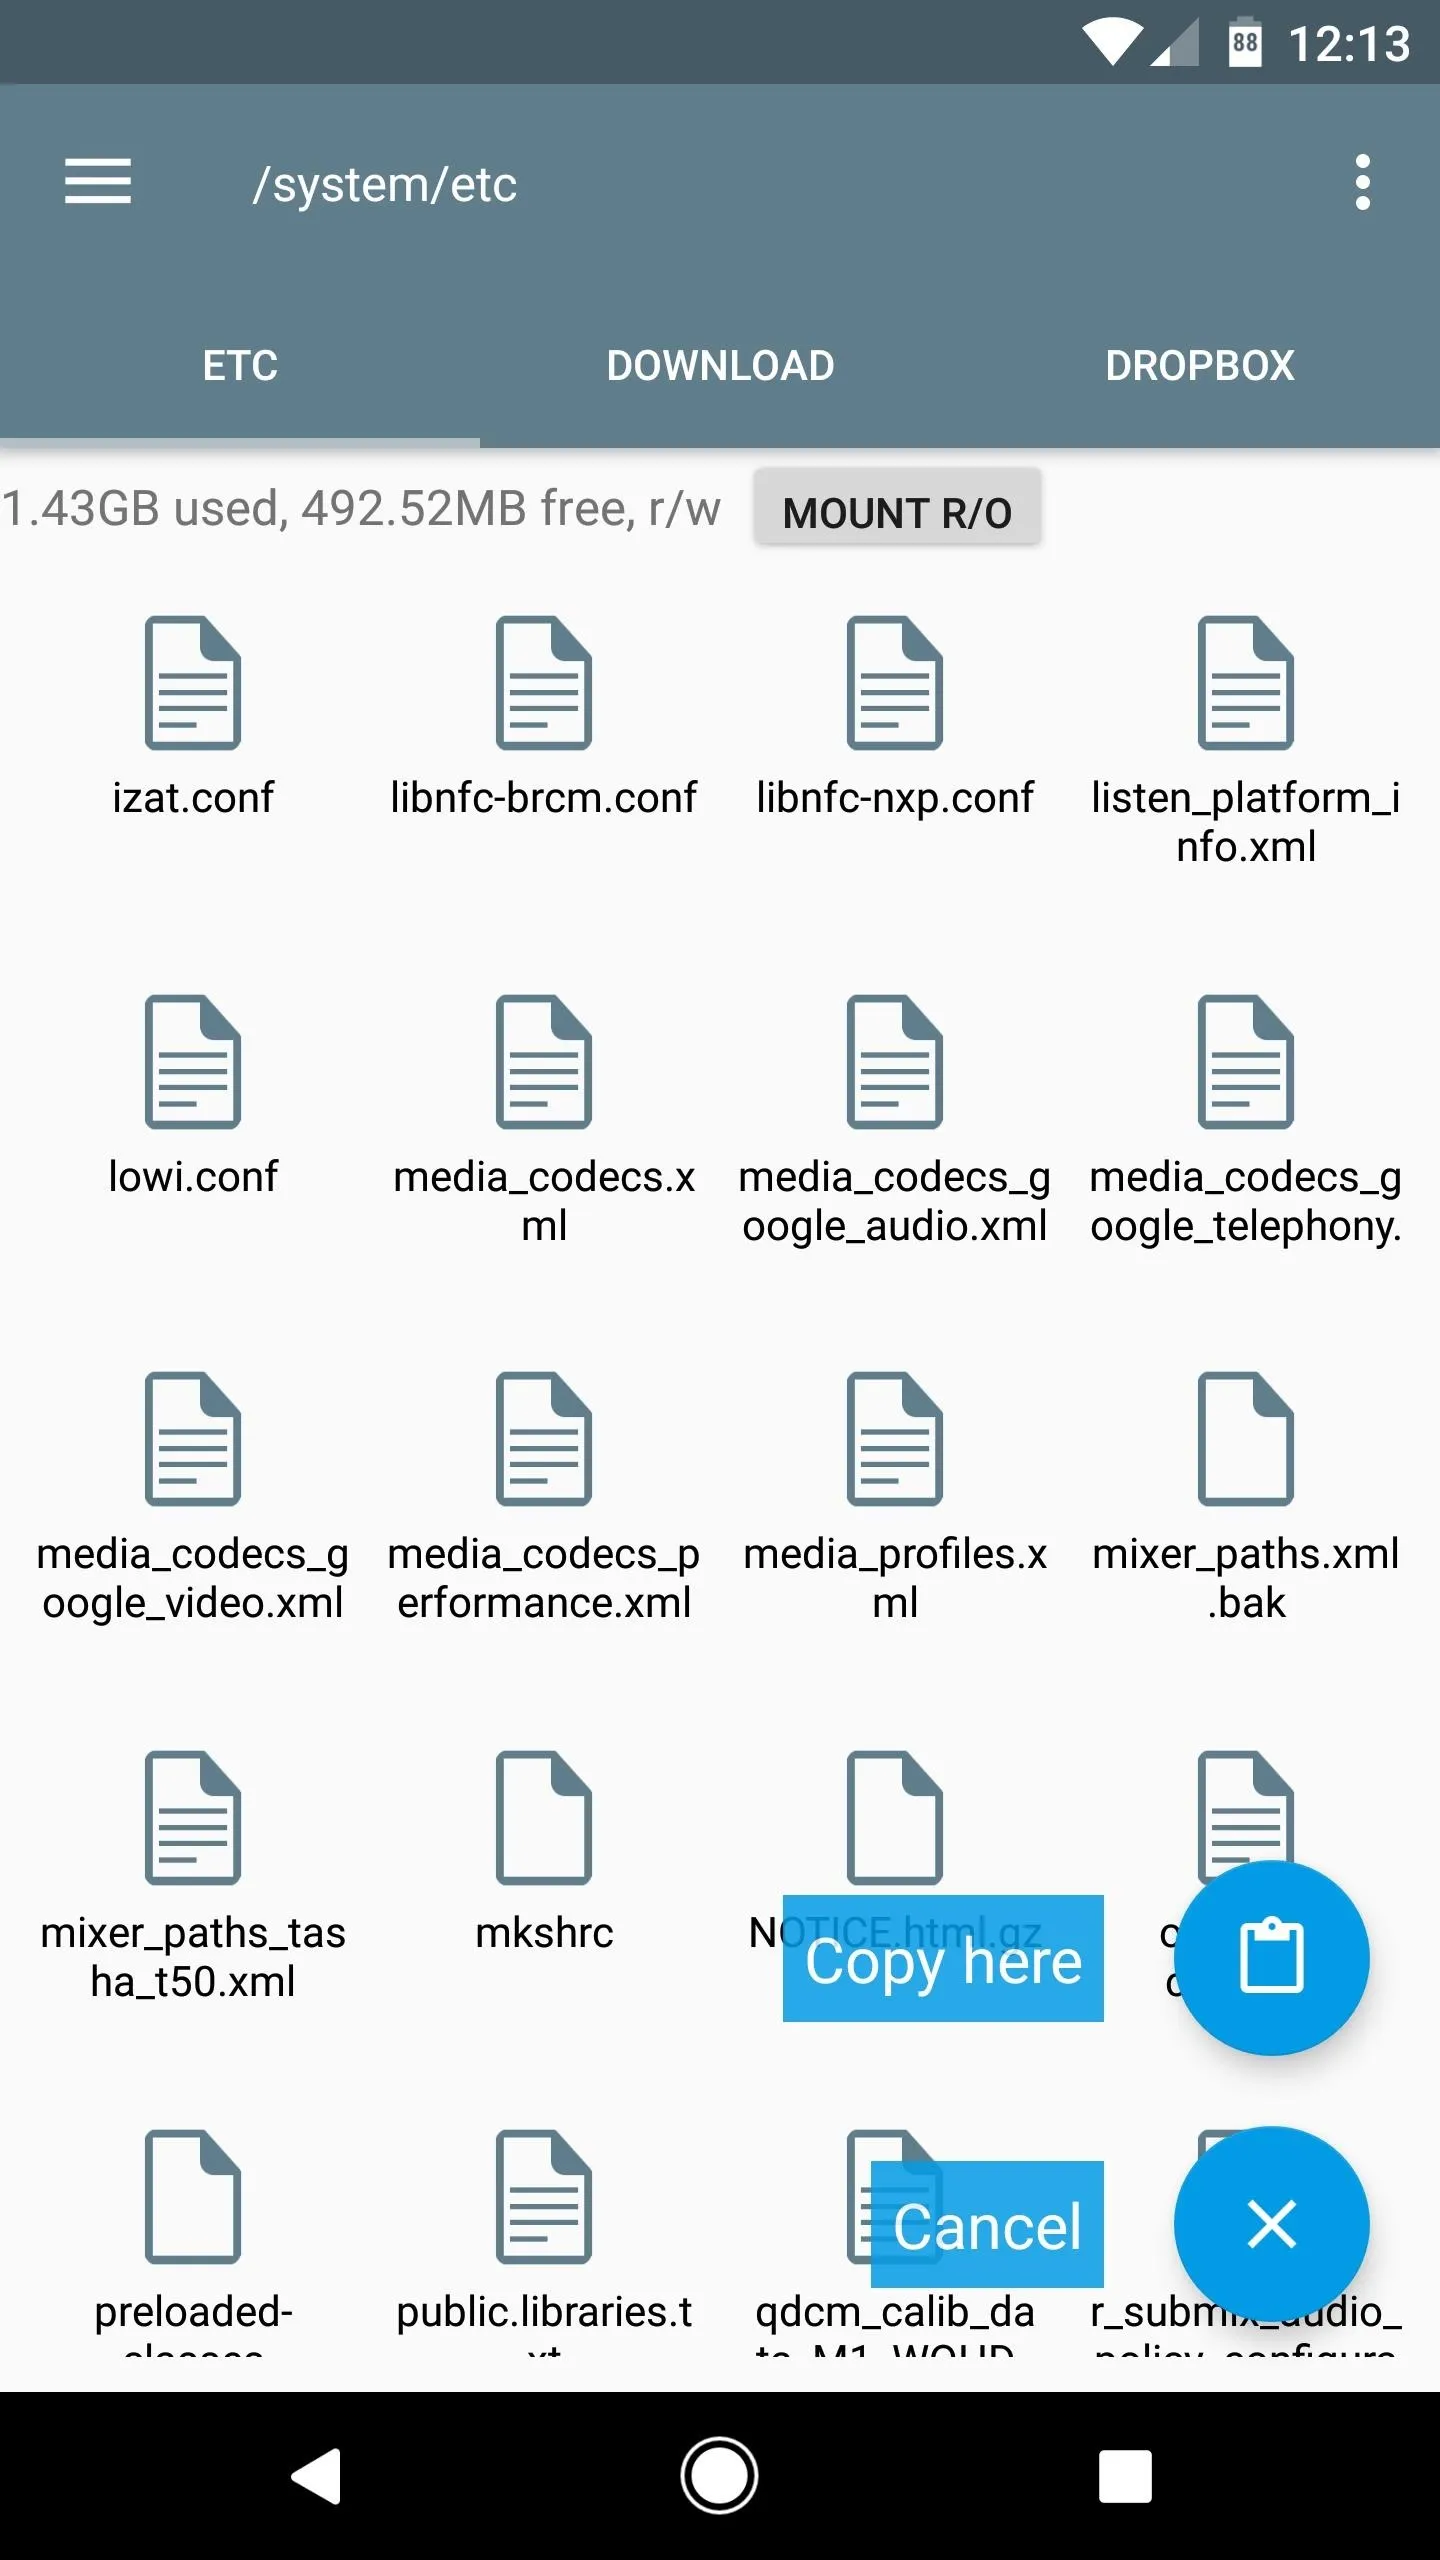


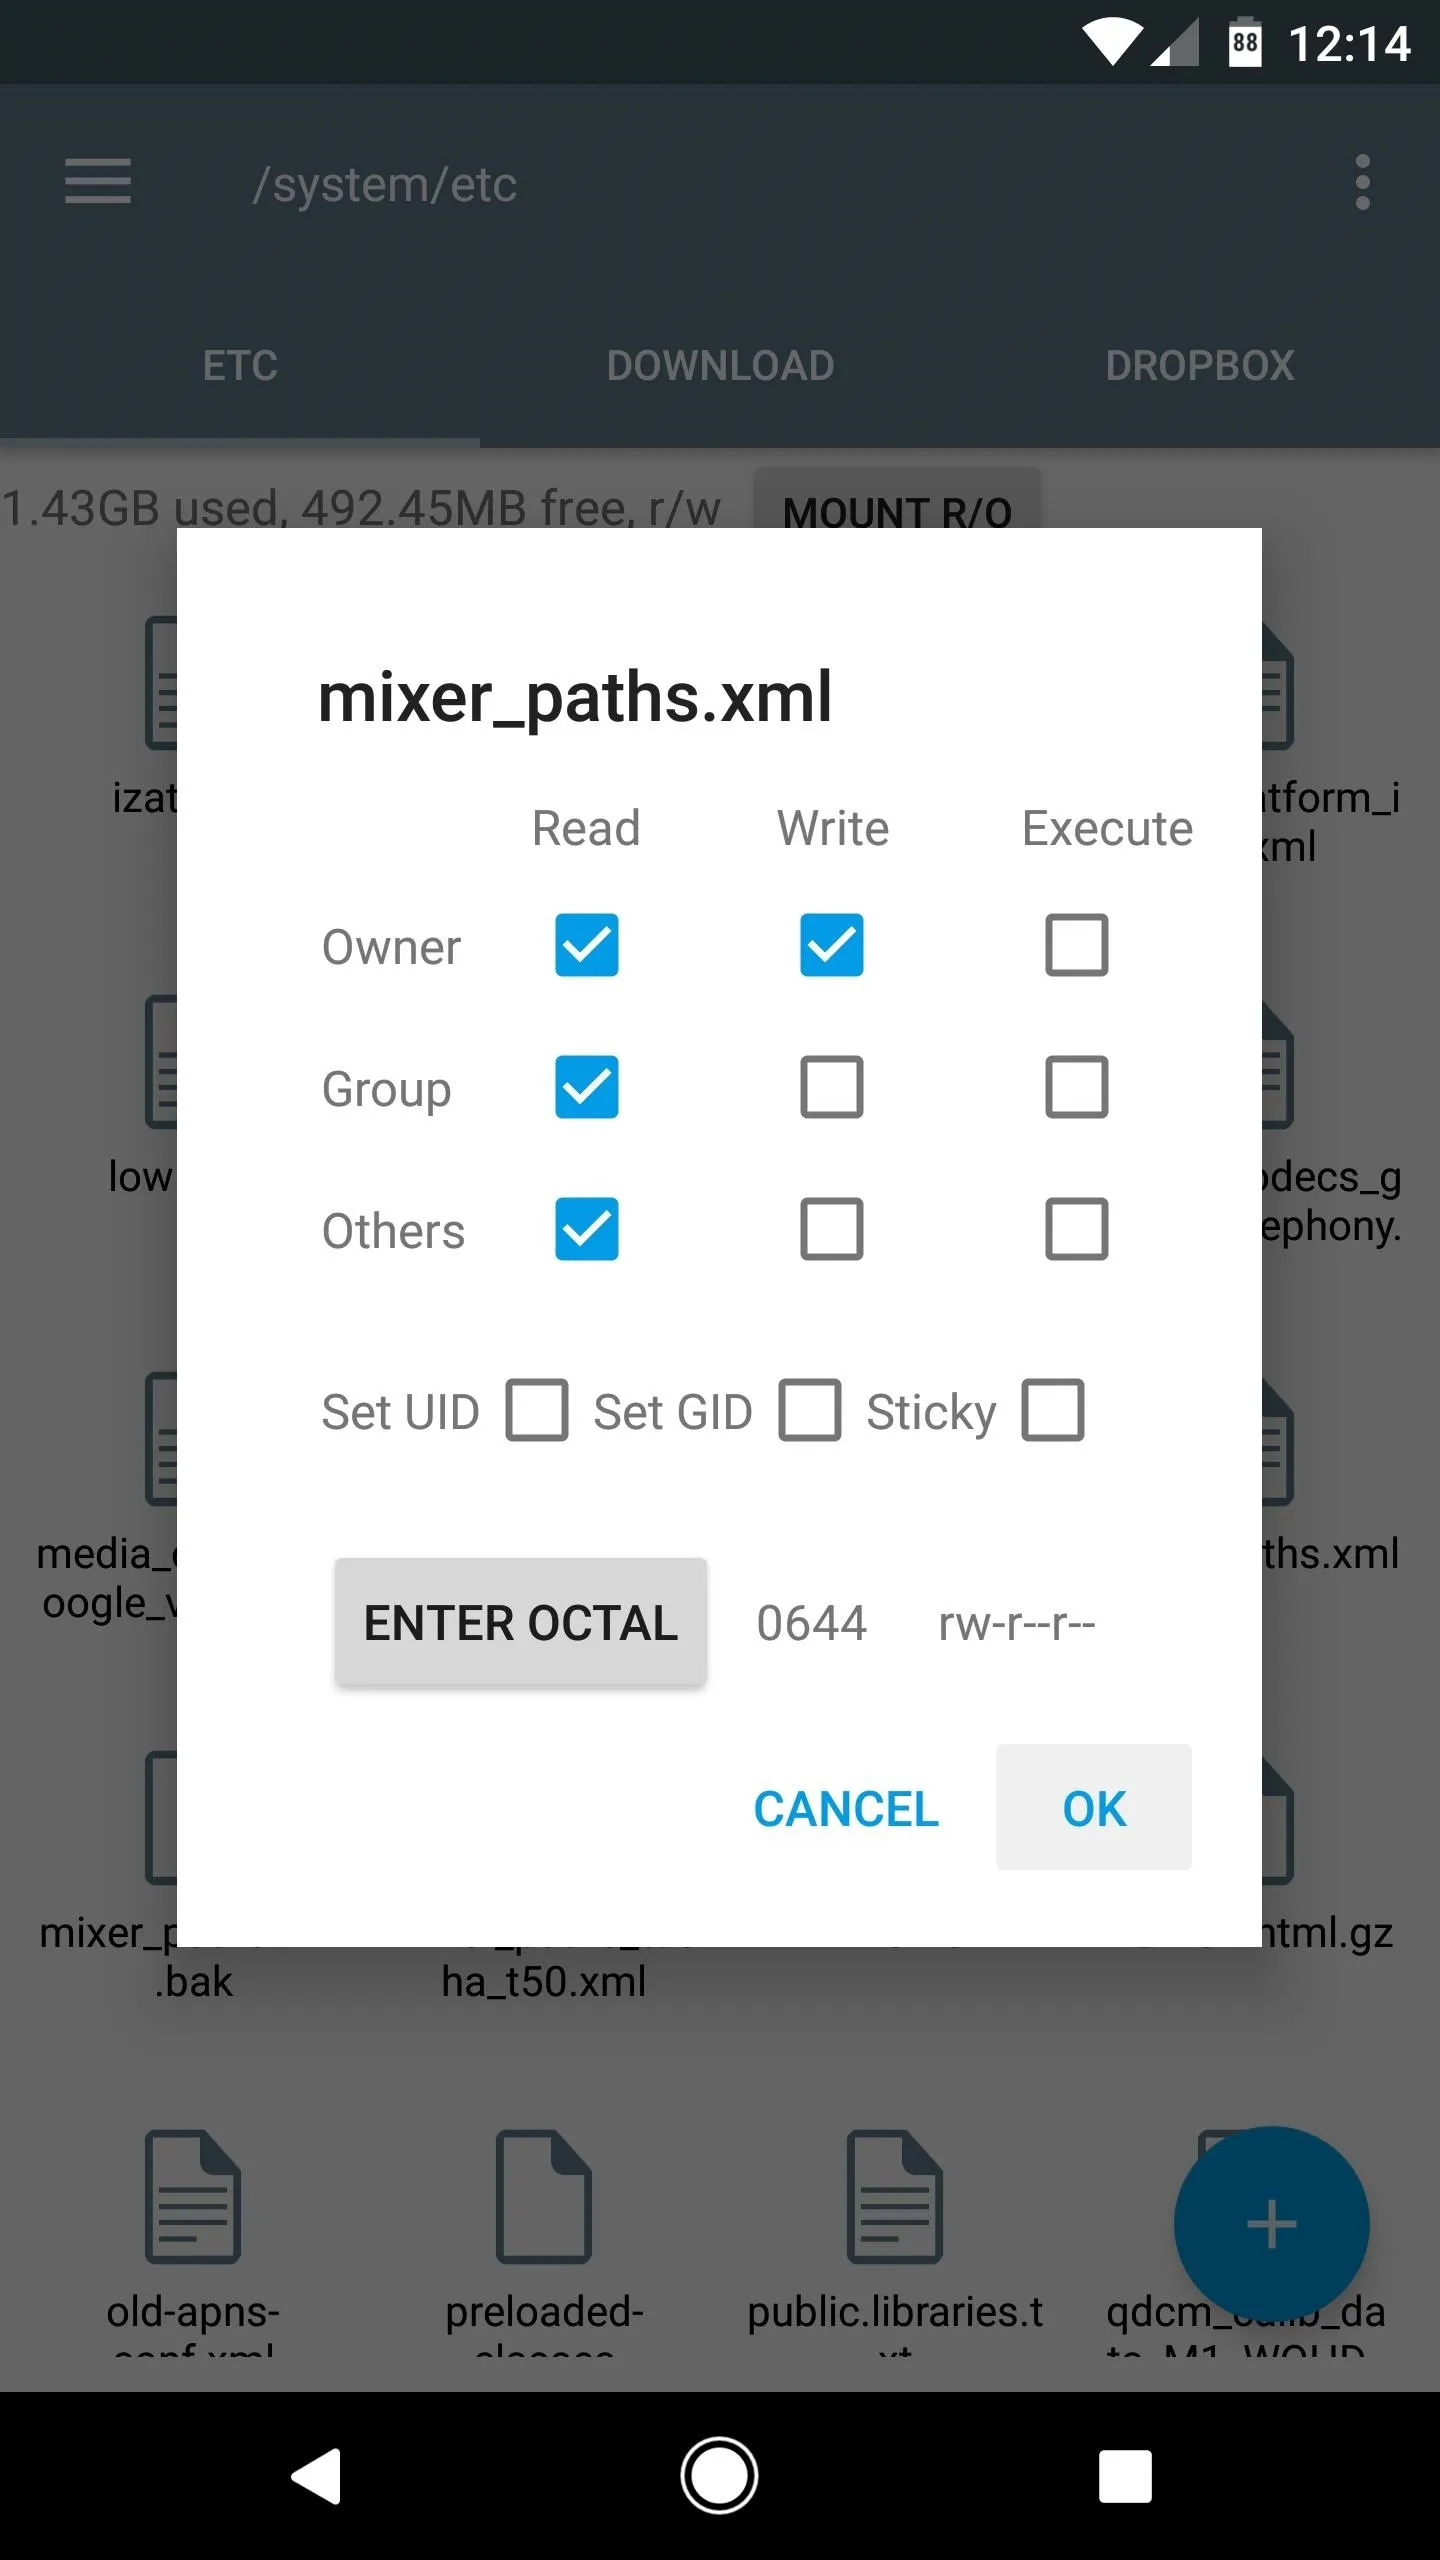
After that, long-press the newly-copied mixer_paths.xml file, then choose "Permissions" from the menu. Make sure that the Owner category is set to "Read" and "Write," while all other categories are set to just "Read." When you're done there, reboot your phone to make the changes take effect.


Balance the Speakers
When you get back up, you'll already notice that your phone is outputting sound through both speakers, but the speakers won't be balanced properly, nor will the sound be split into left and right channels. To fix this, you'll have to run two shell commands.
These commands will need to be executed every time you reboot your phone, and there are two ways of doing this: First, you can simply run the commands in Terminal Emulator after each reboot, and second, you can have Tasker automatically run the commands upon device boot.
Use Terminal Emulator to Balance Them Manually
If you don't own Tasker, or if you're not comfortable with the Android automation app, start by downloading a free app called Terminal Emulator.
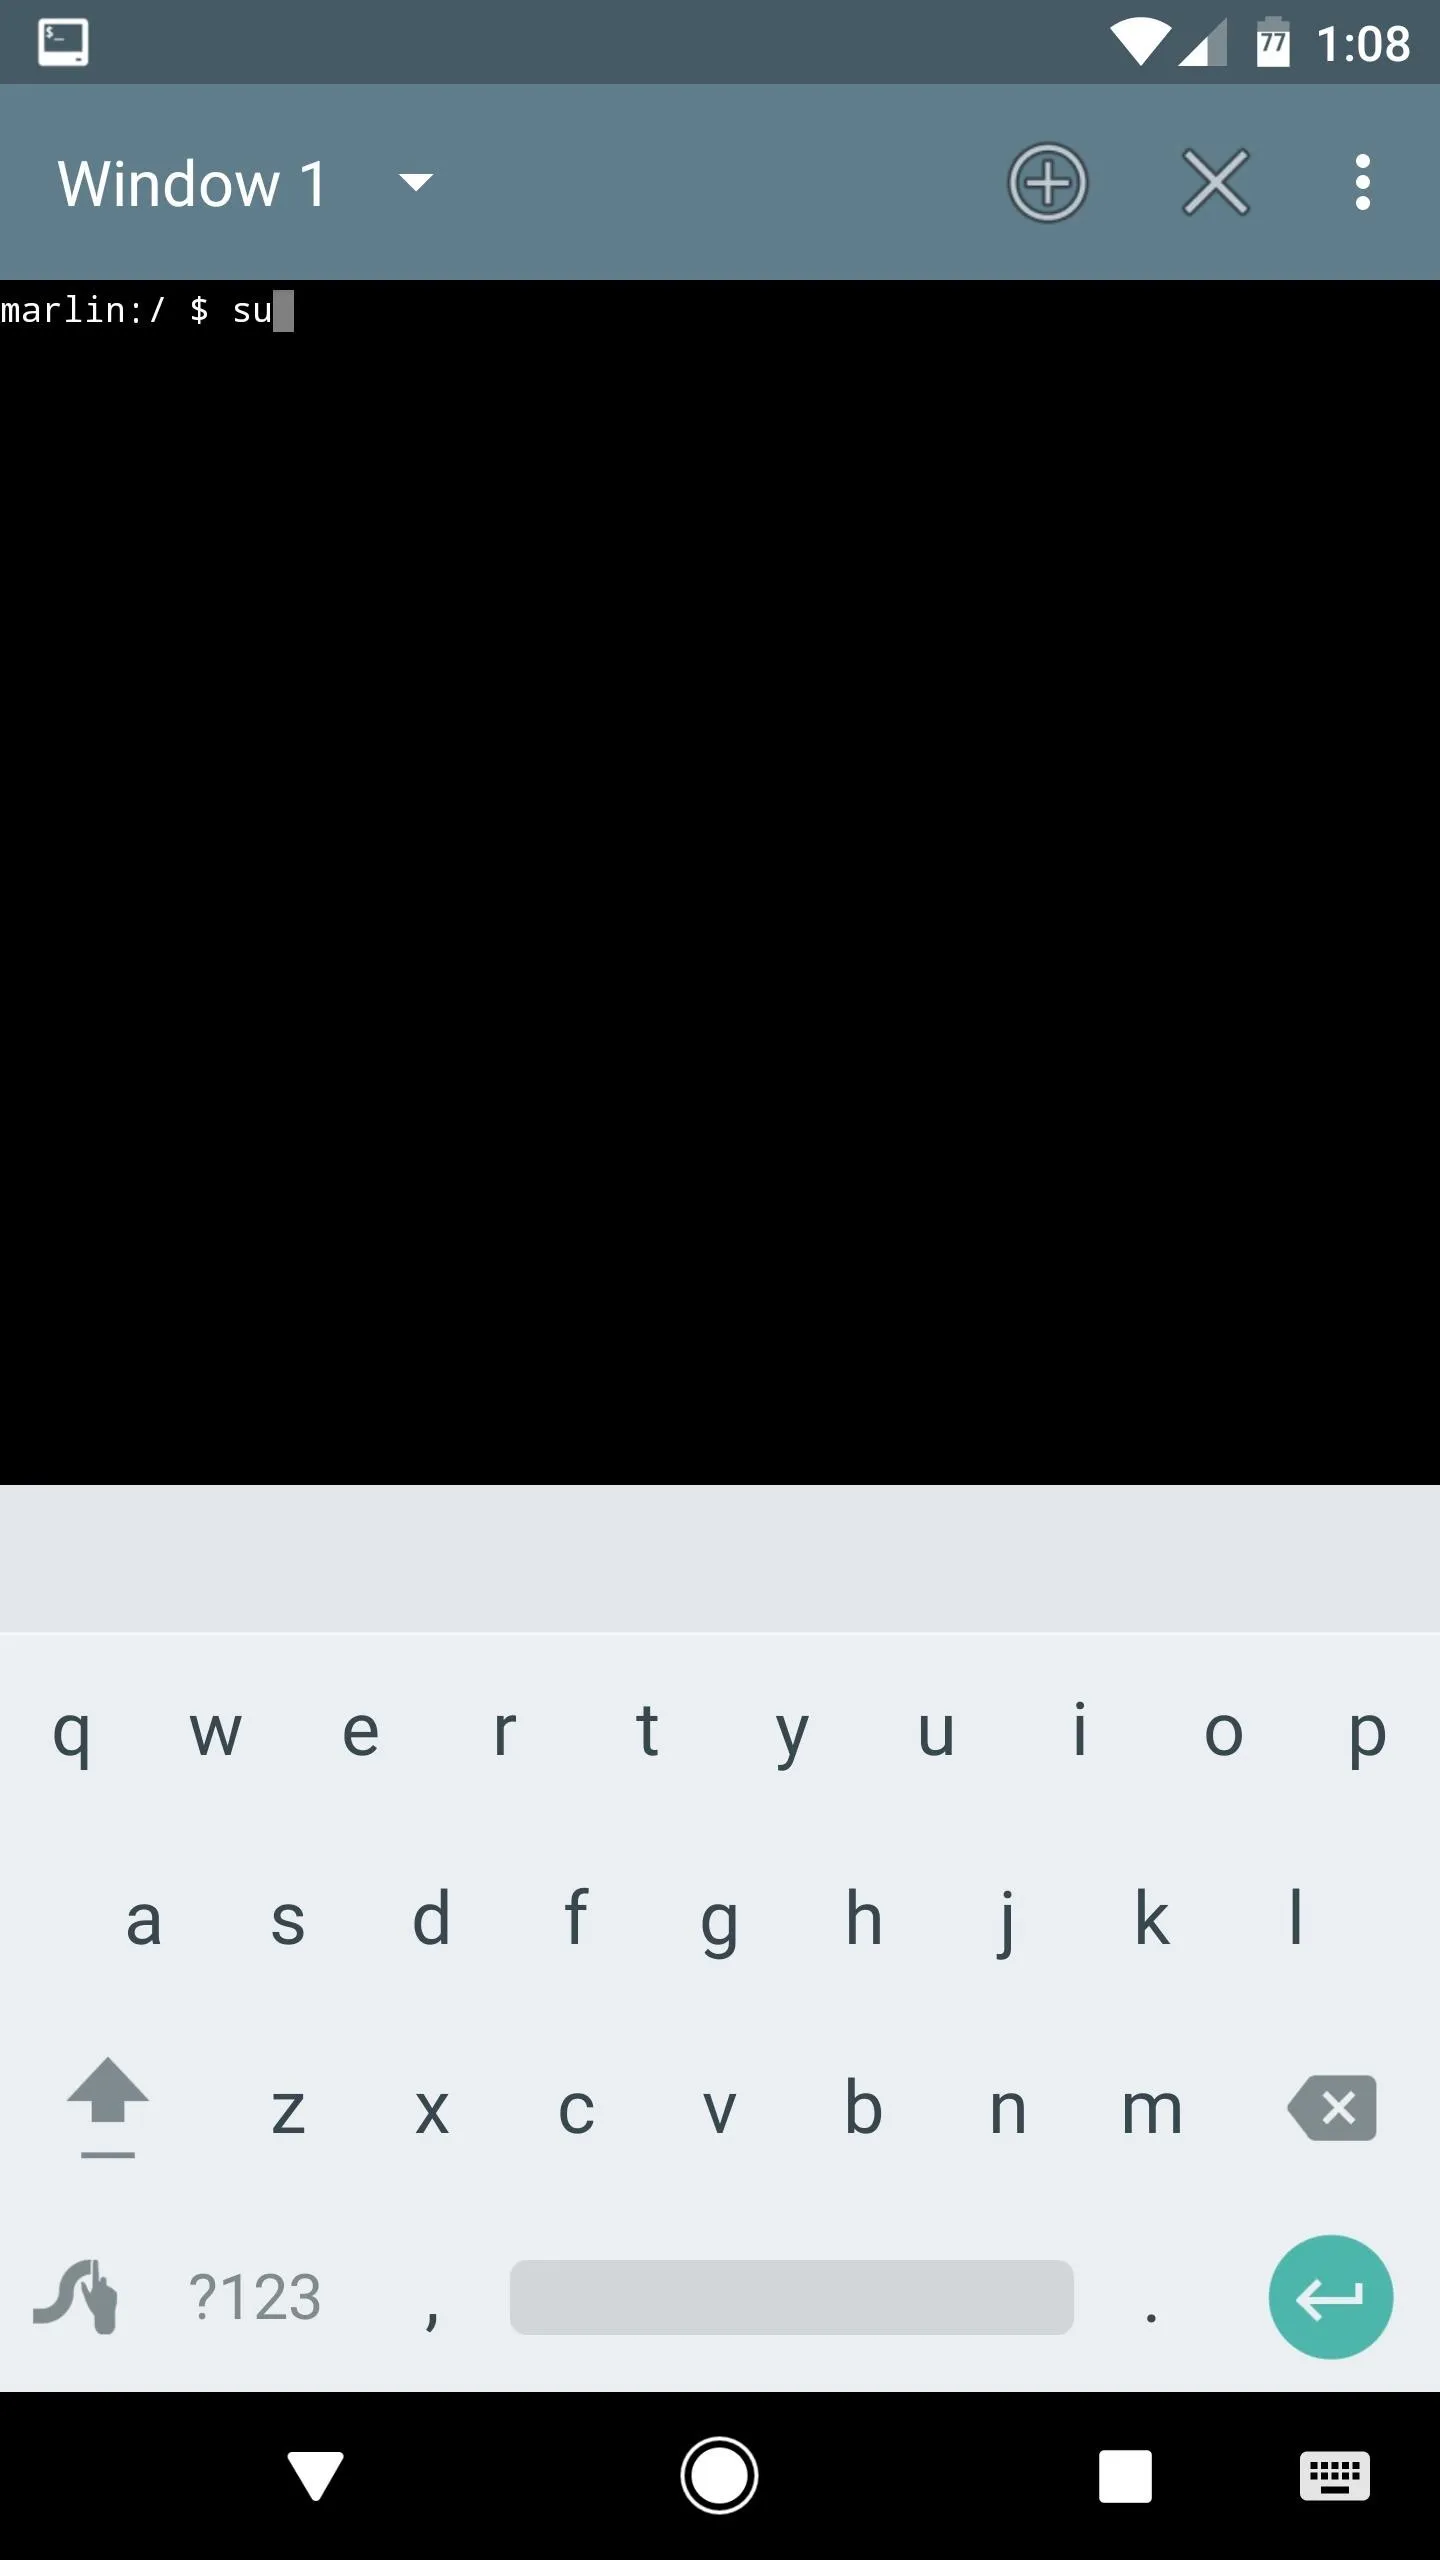
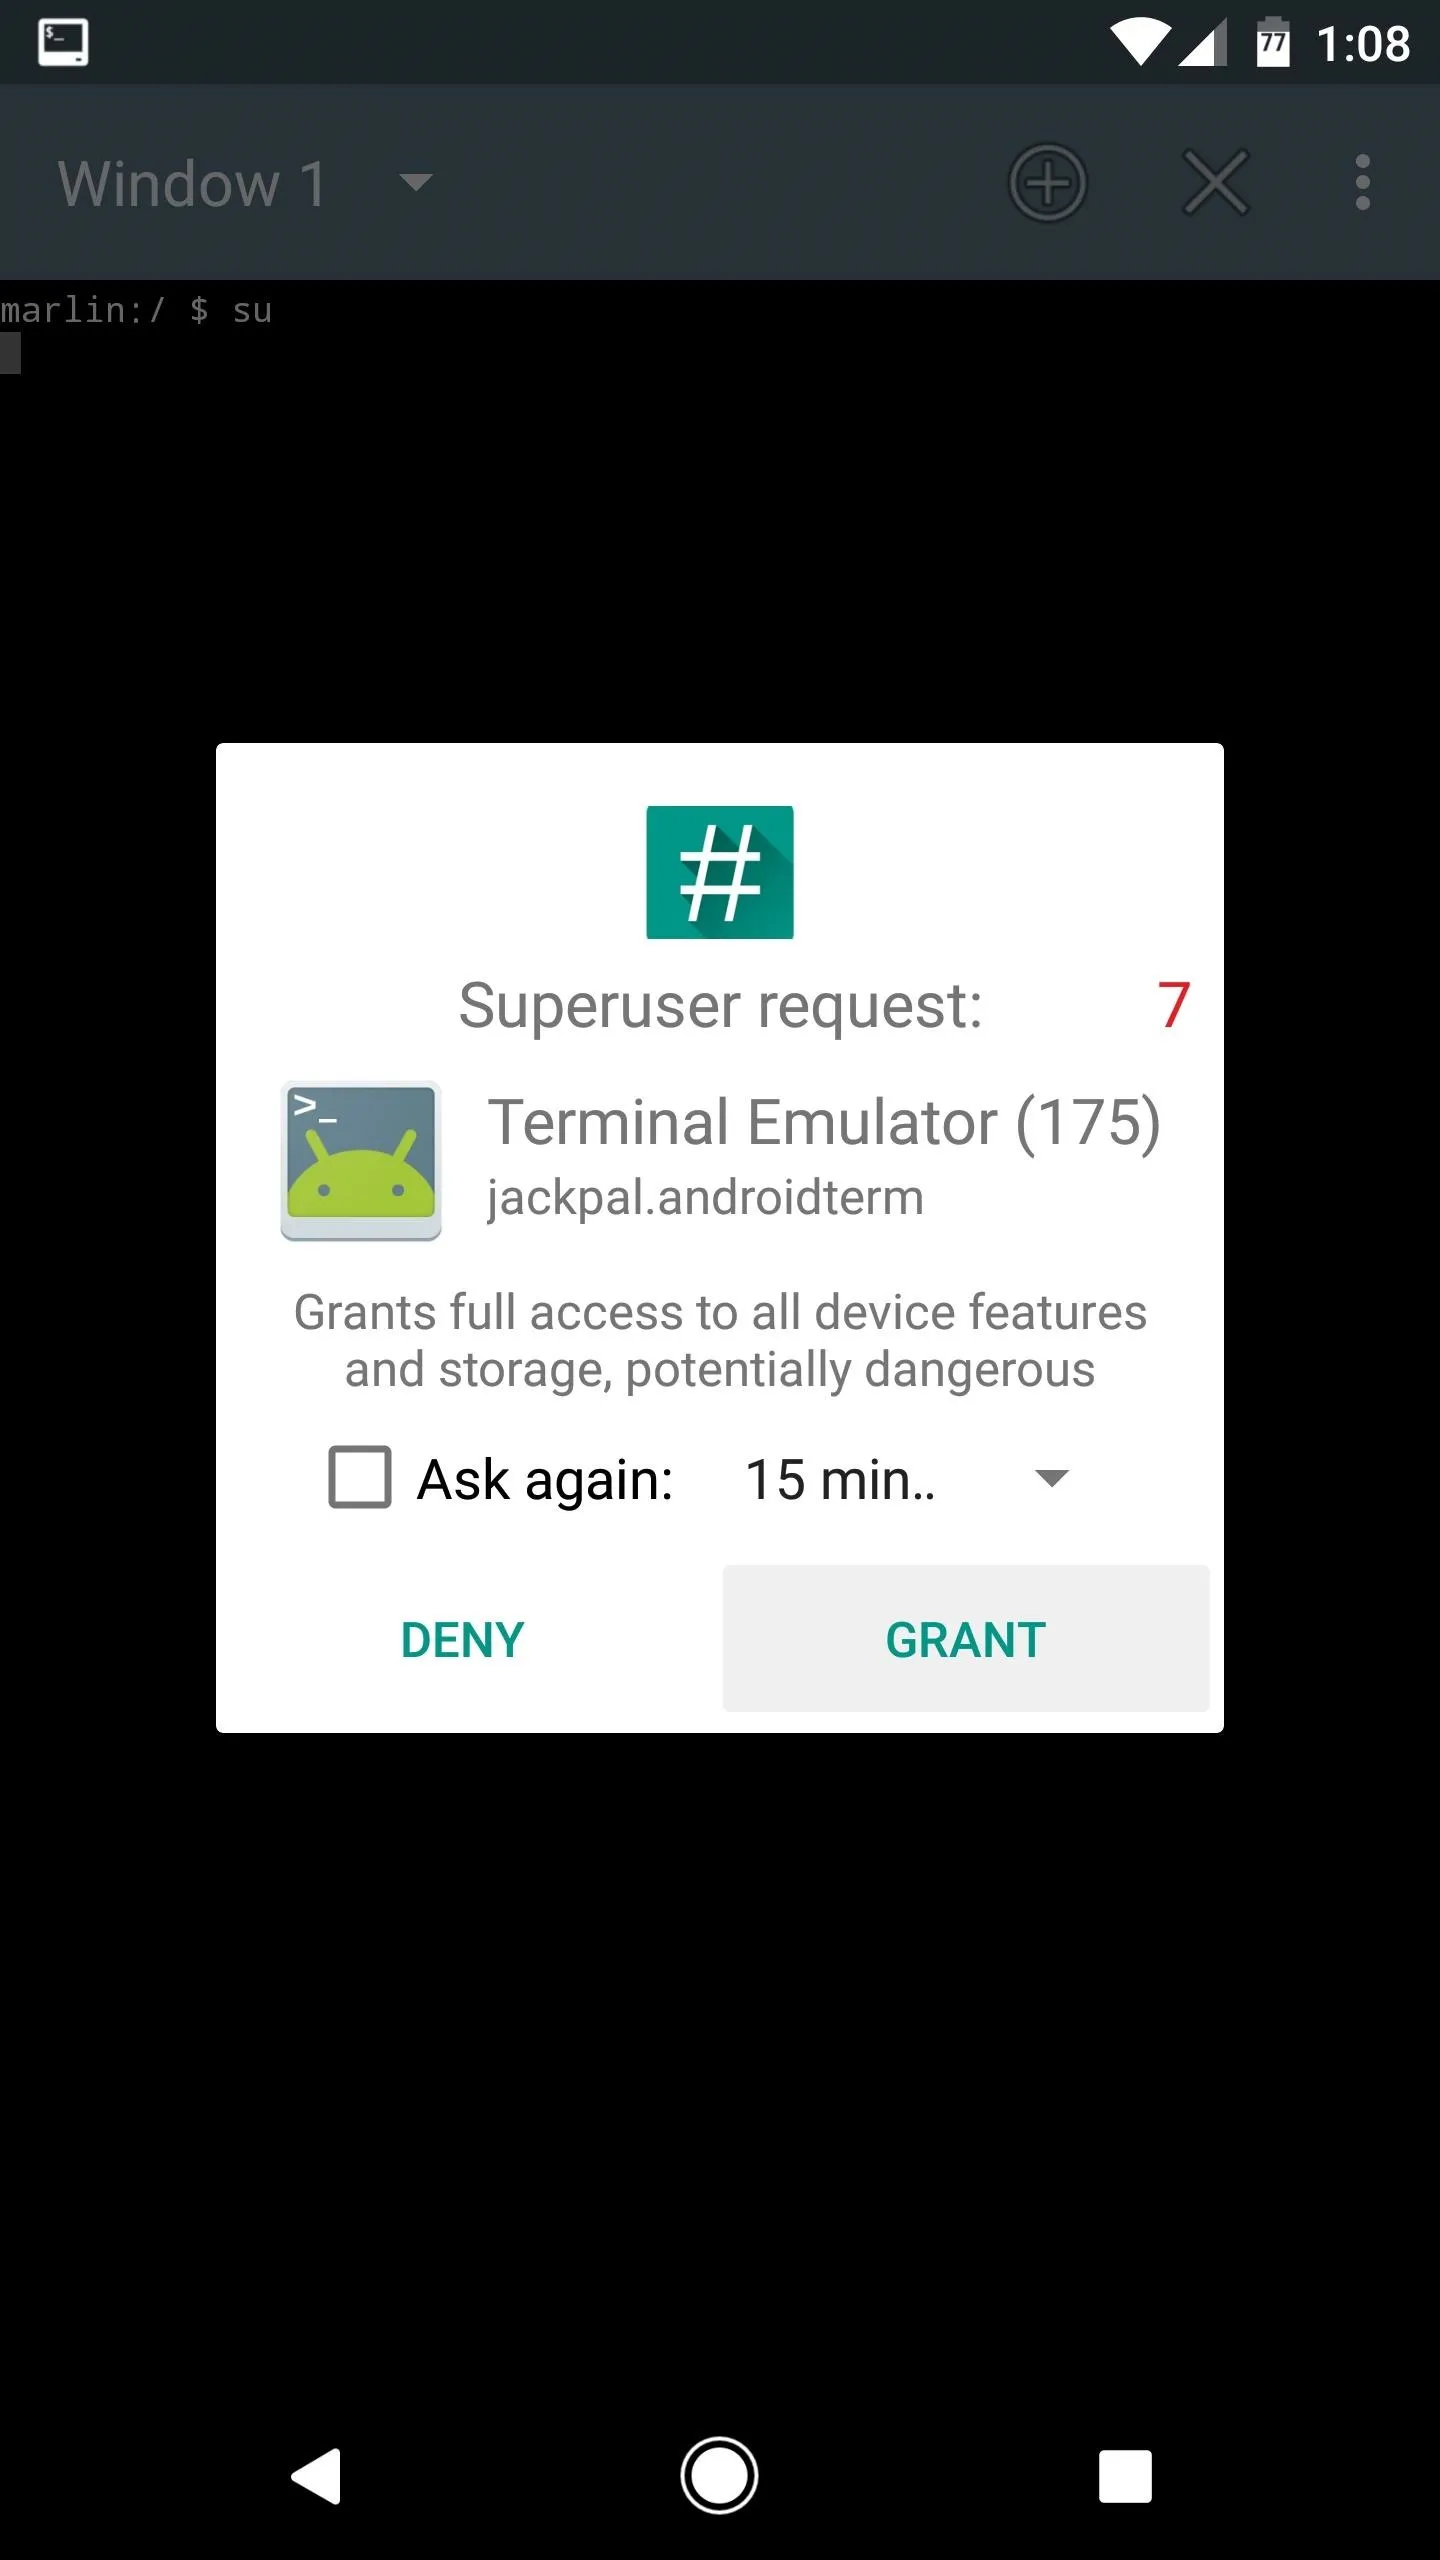
Open the app, then type su and hit enter. From there, tap "Grant" on the Superuser access request, then you'll be ready to send the speaker-balancing commands. Next, just copy the following commands, then paste them into Terminal Emulator one by one, hitting return after each:
- echo 0x210f > /sys/kernel/debug/tfa98xx-34/regs/06-AUDIO_CTR
- echo 0x8093 > /sys/kernel/debug/tfa98xx-34/regs/04-I2SREG # right channel only
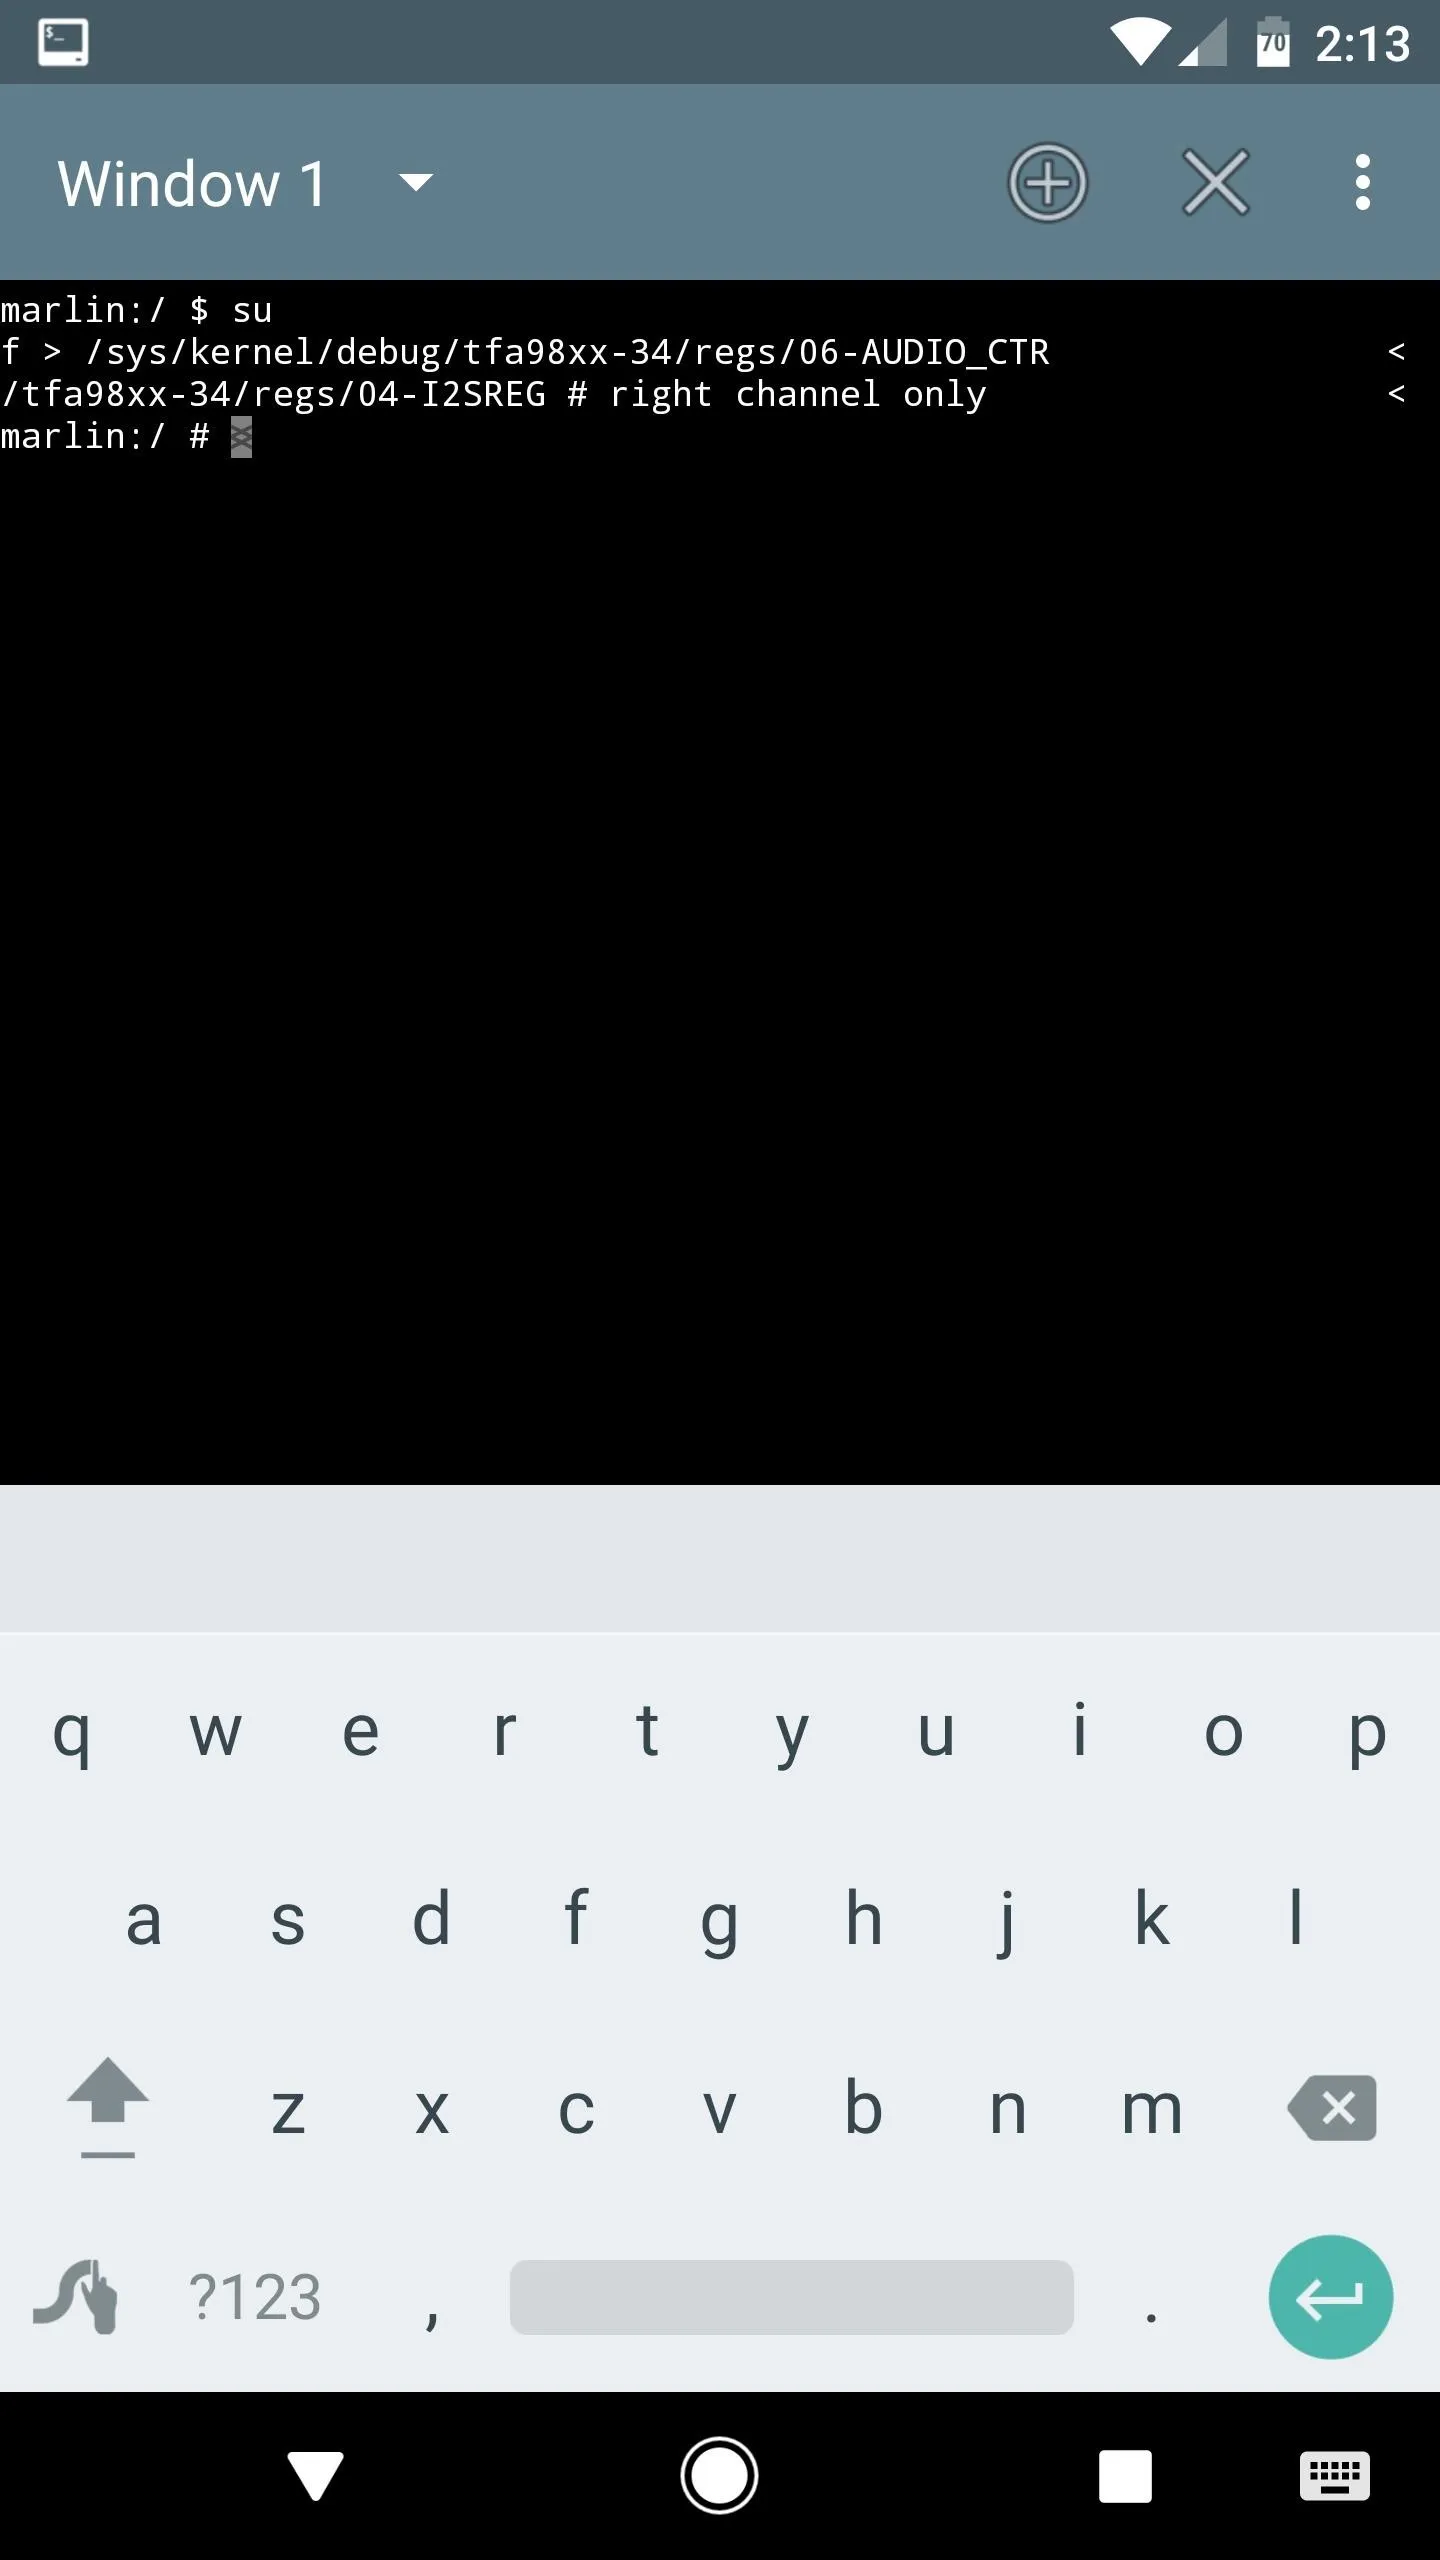


When you're done there, you'll have true stereo sound—but remember, you'll have to run these commands after each reboot to balance out your speakers. So I'd suggest copying the above commands and saving them in your favorite note-taking app.
Use Tasker to Balance Them Automatically
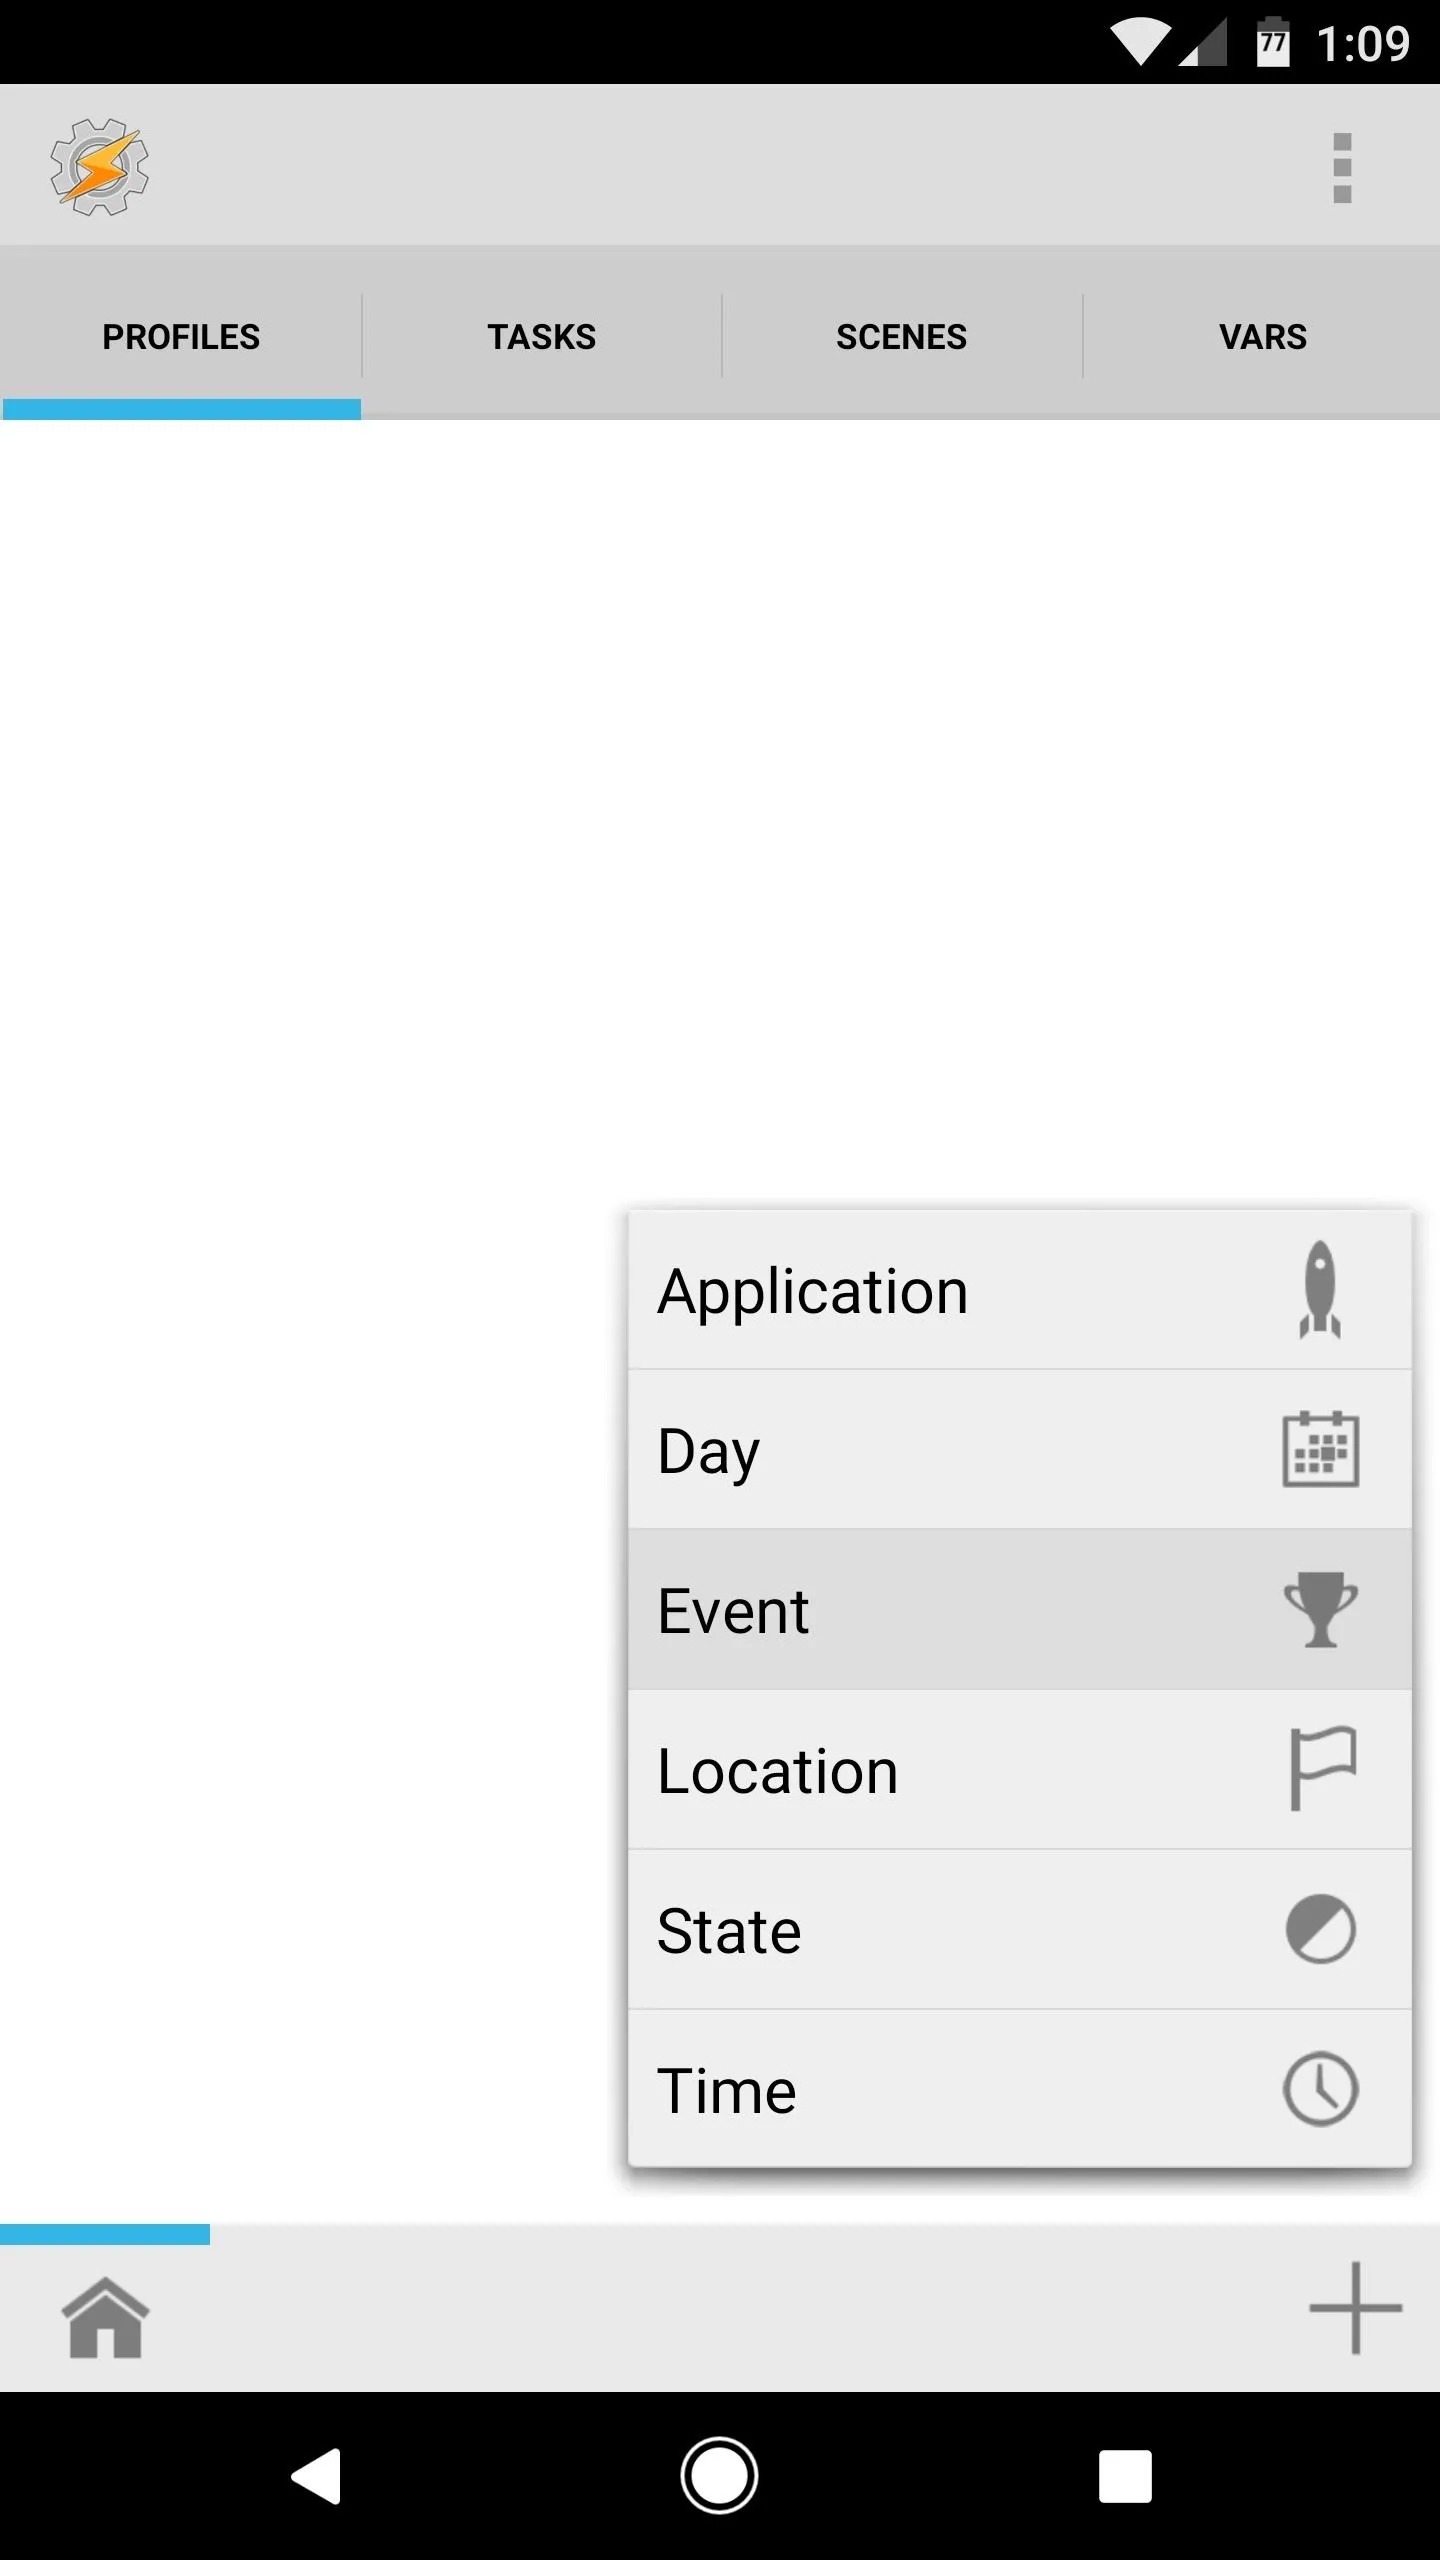
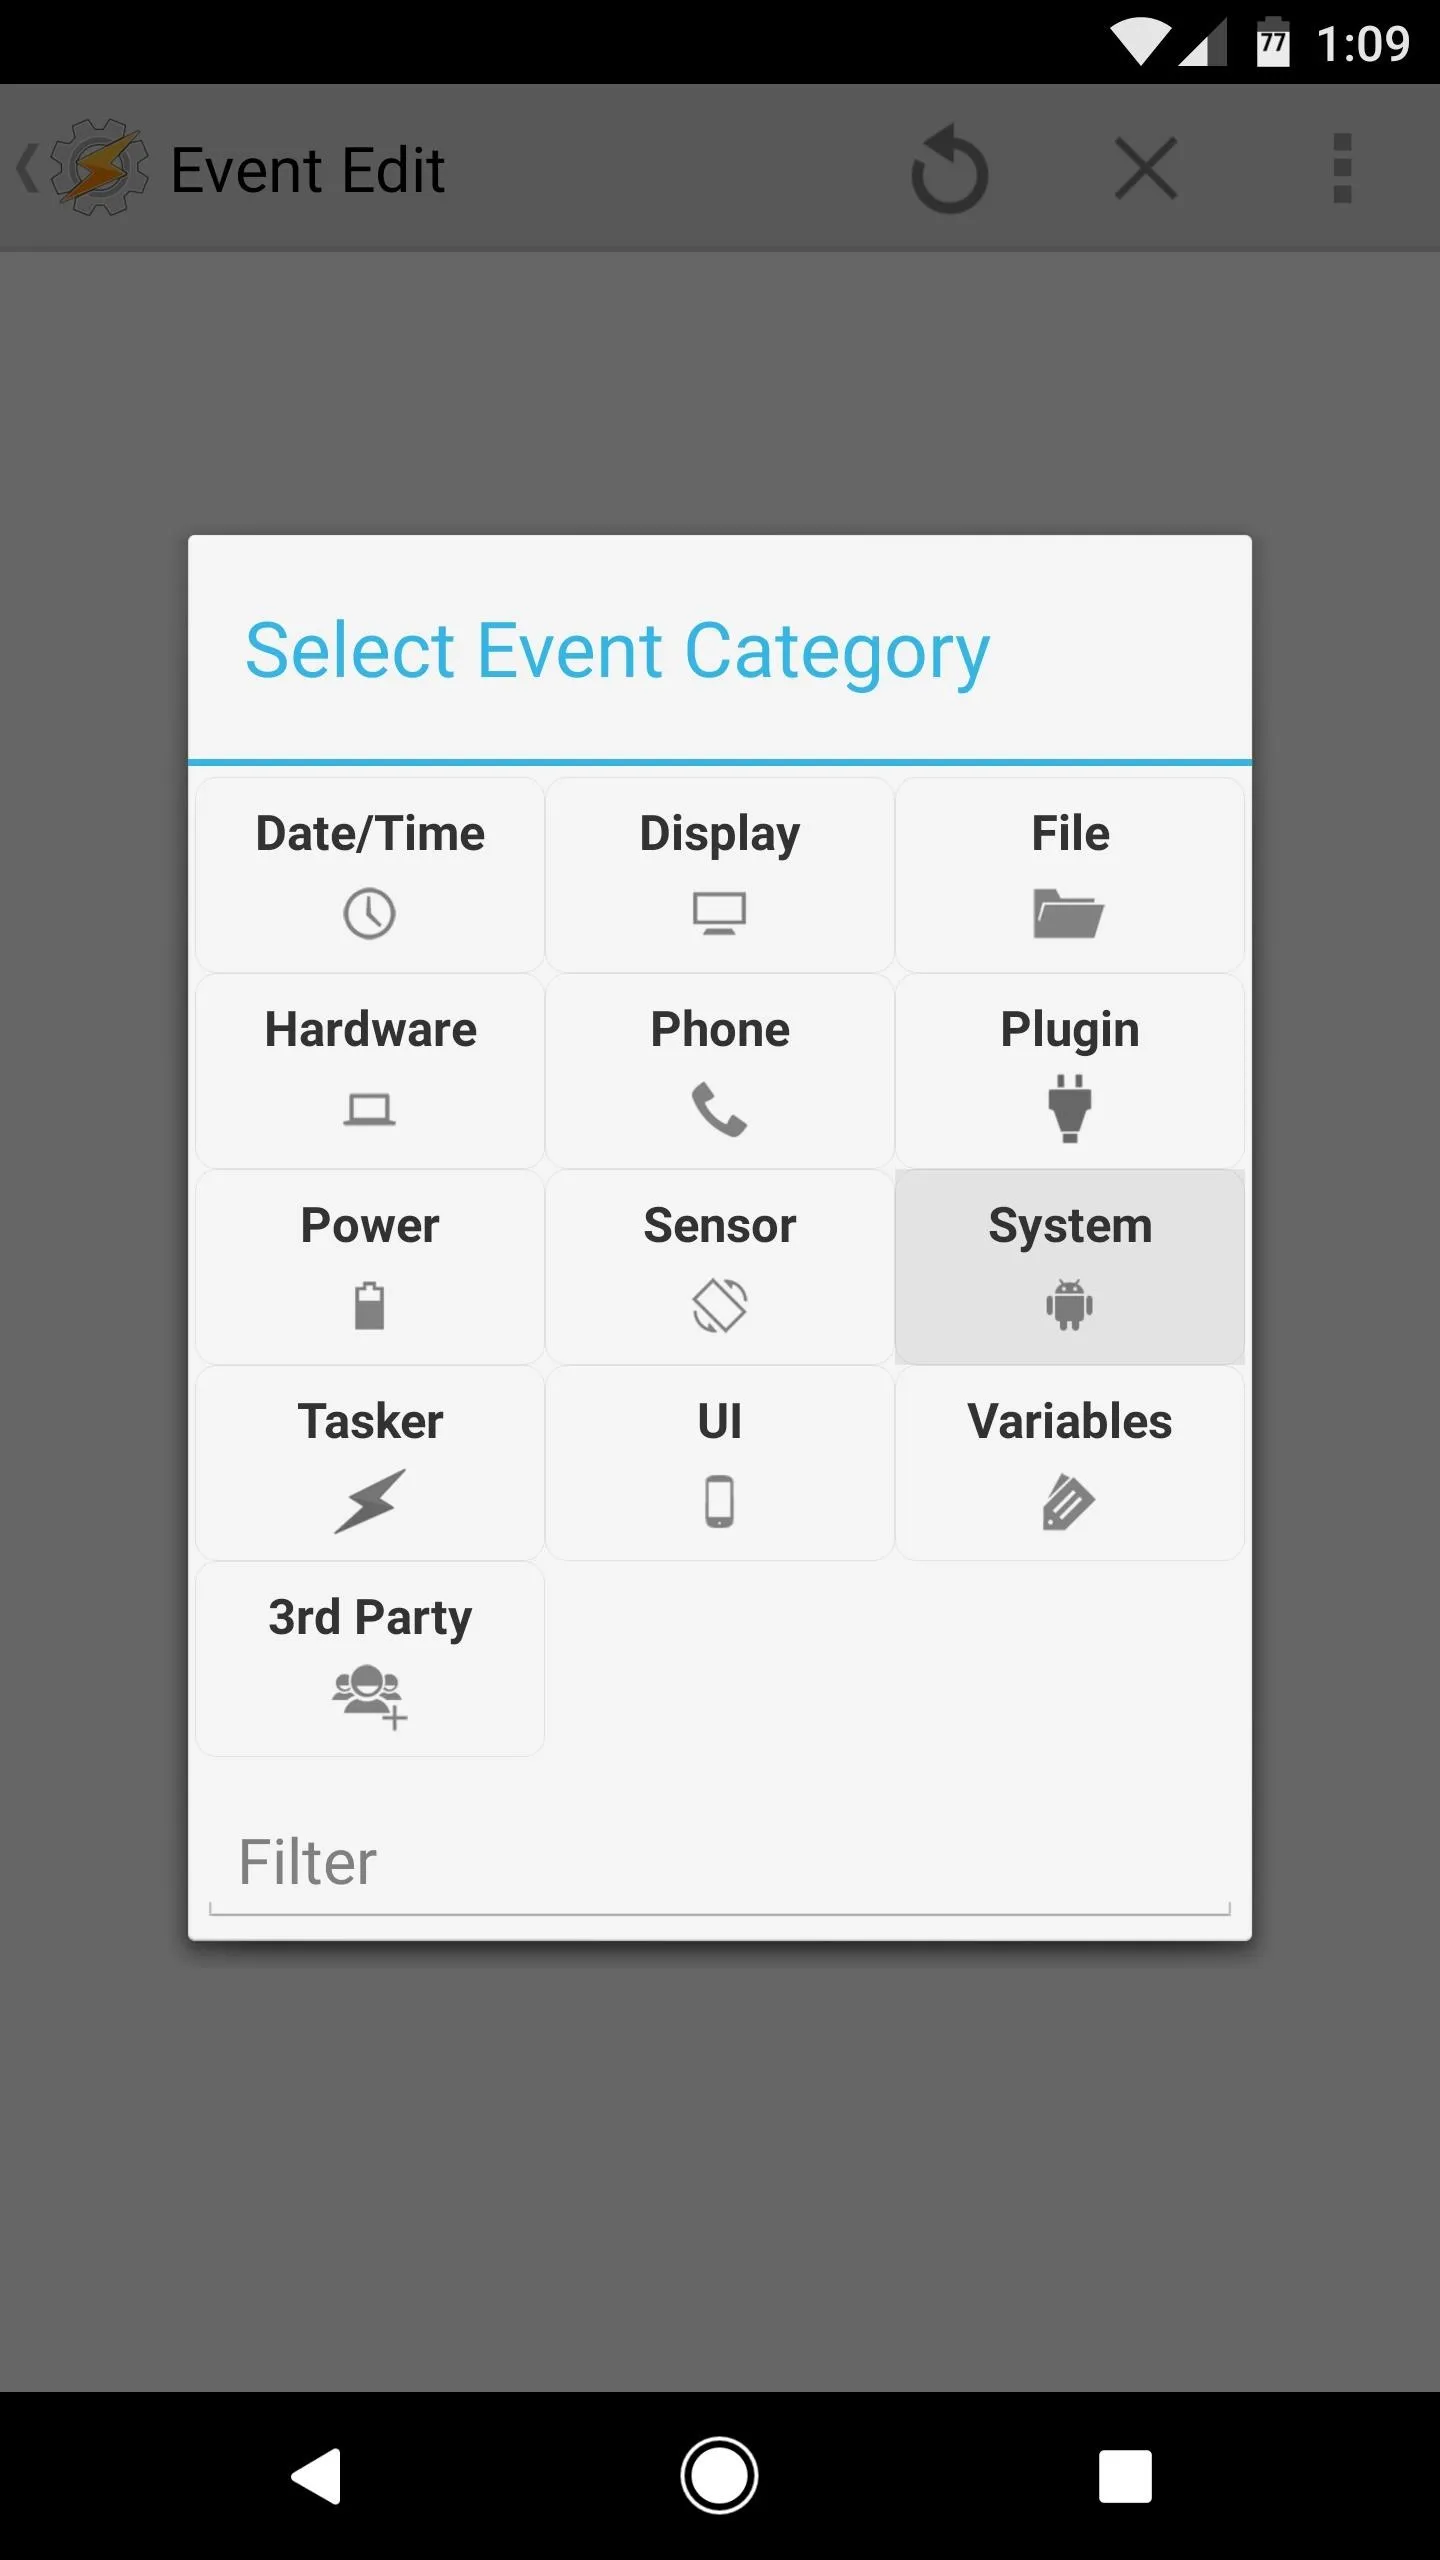
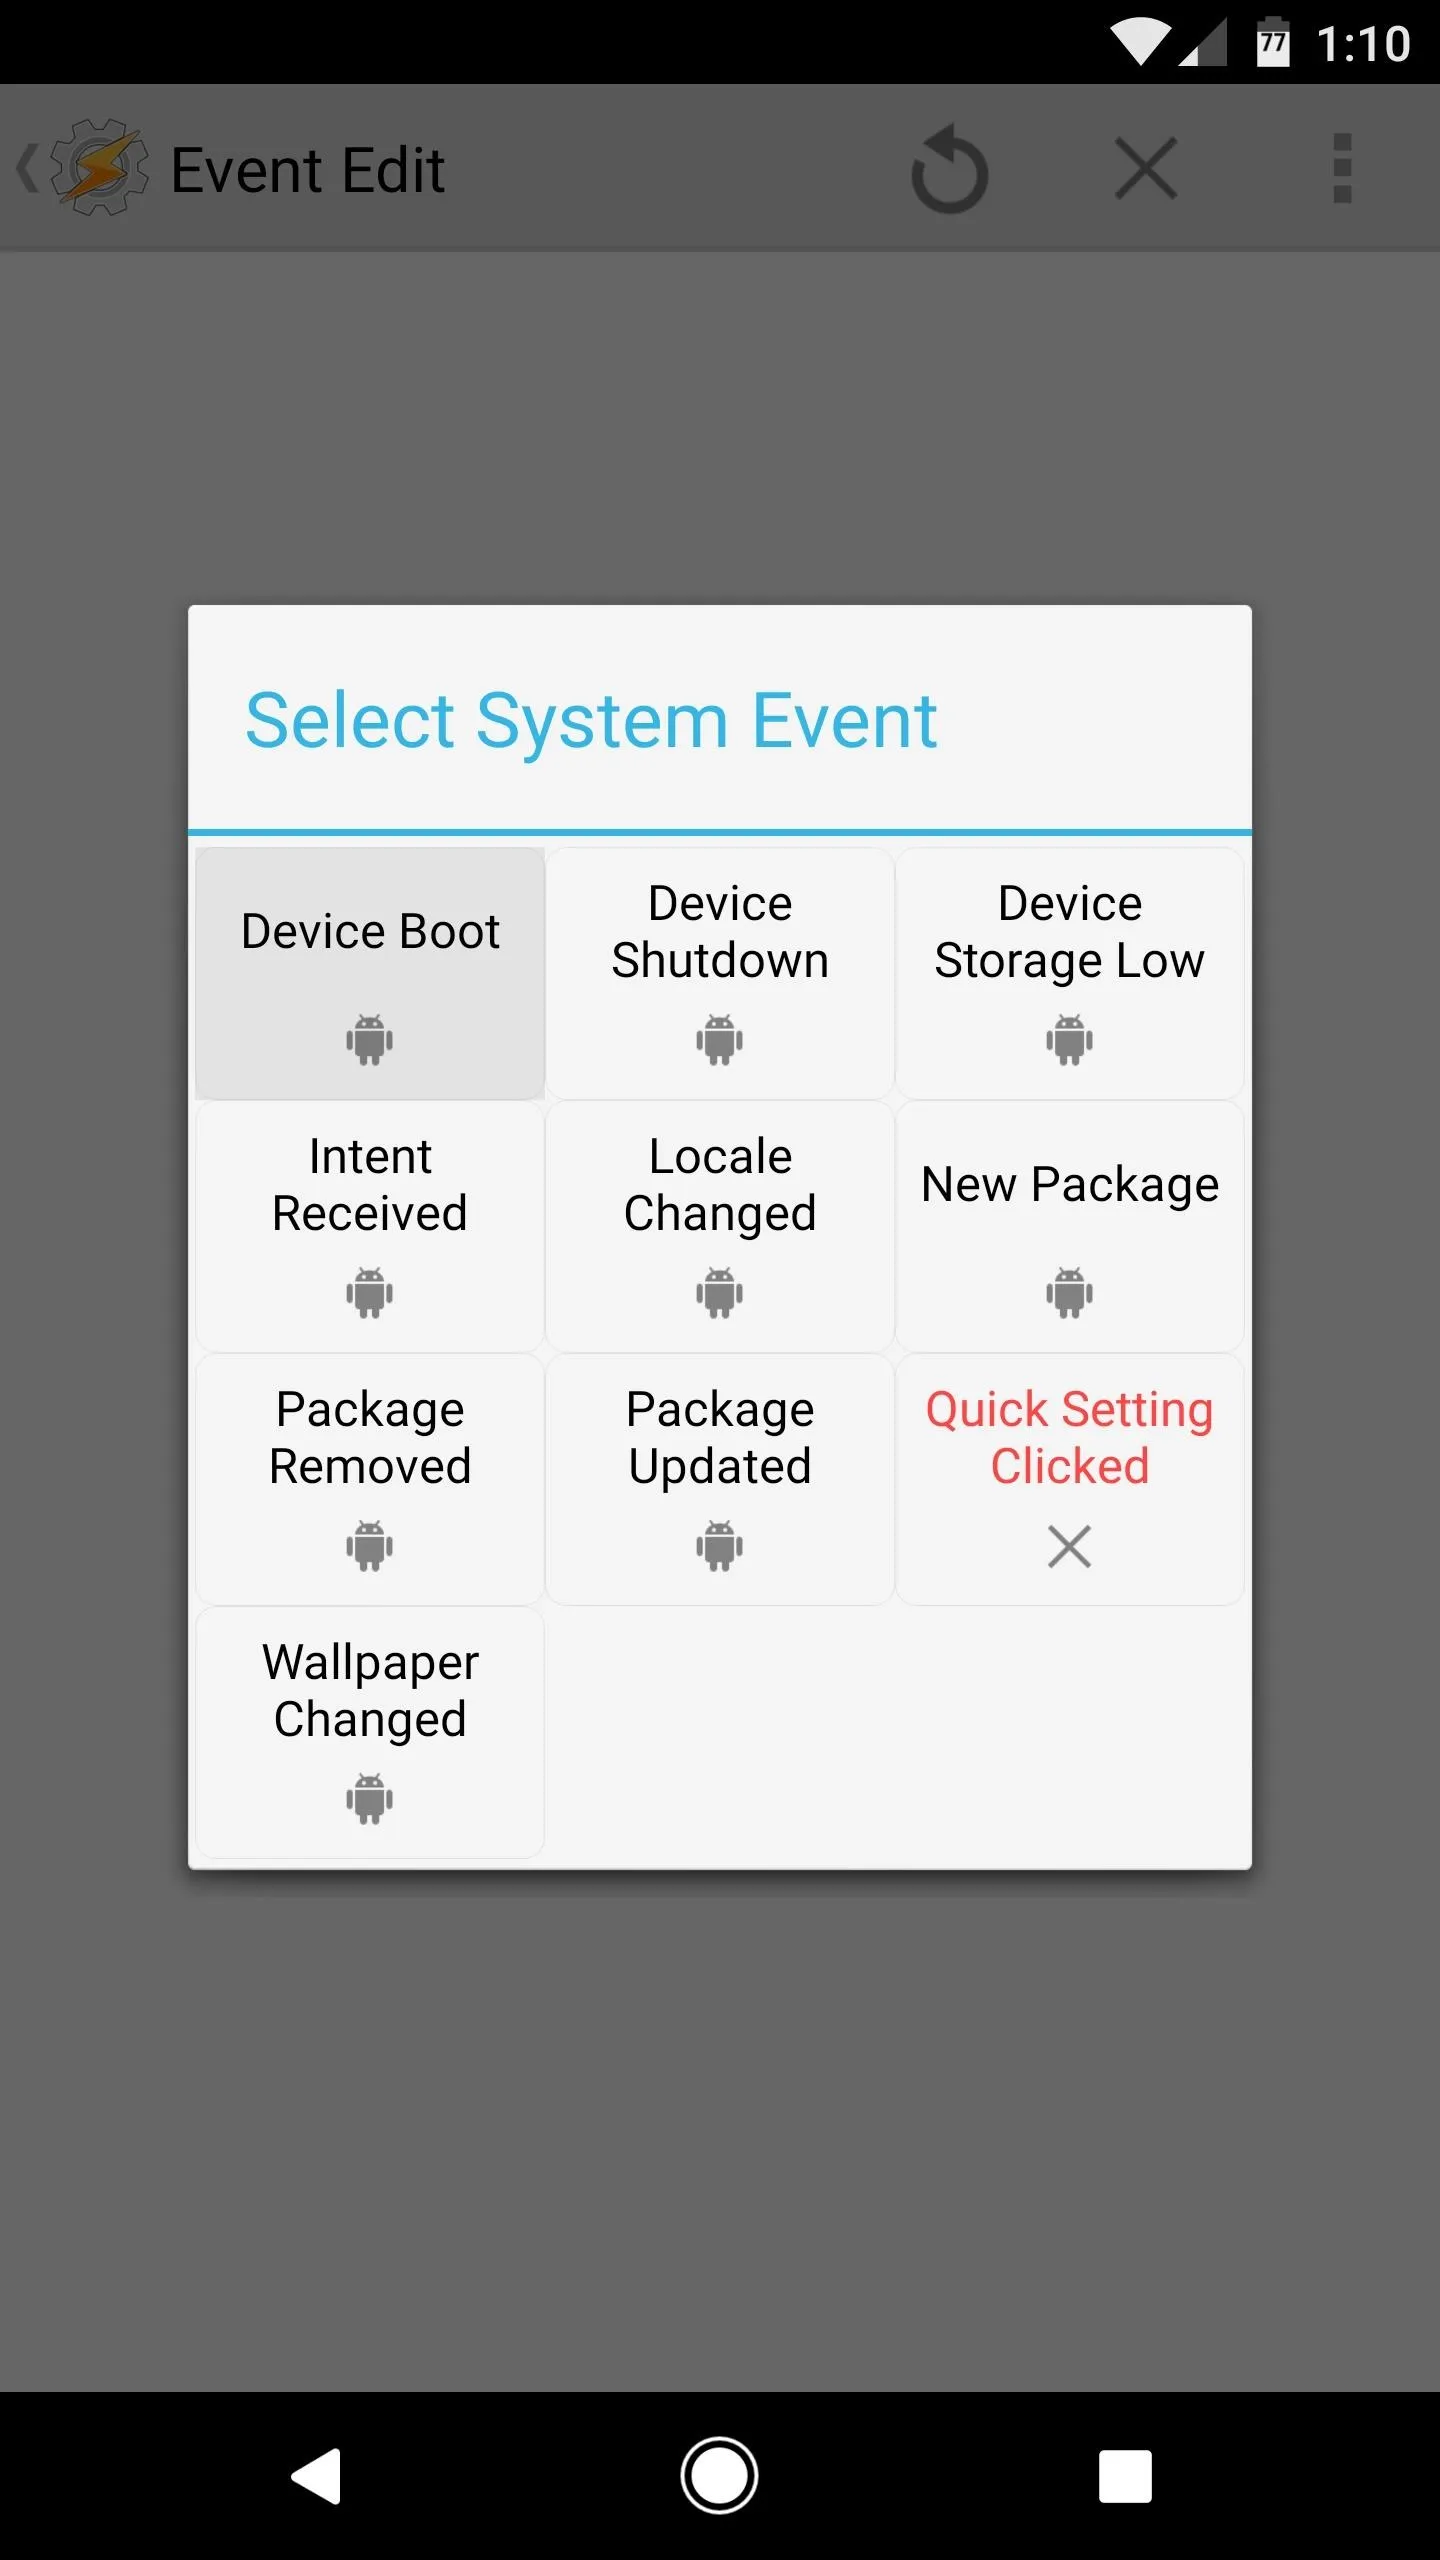
If you already own Tasker, you can automate the process of balancing out your speakers after each reboot. To start, create a new profile, select "Event" as the trigger, then choose "System" and tap "Device boot."


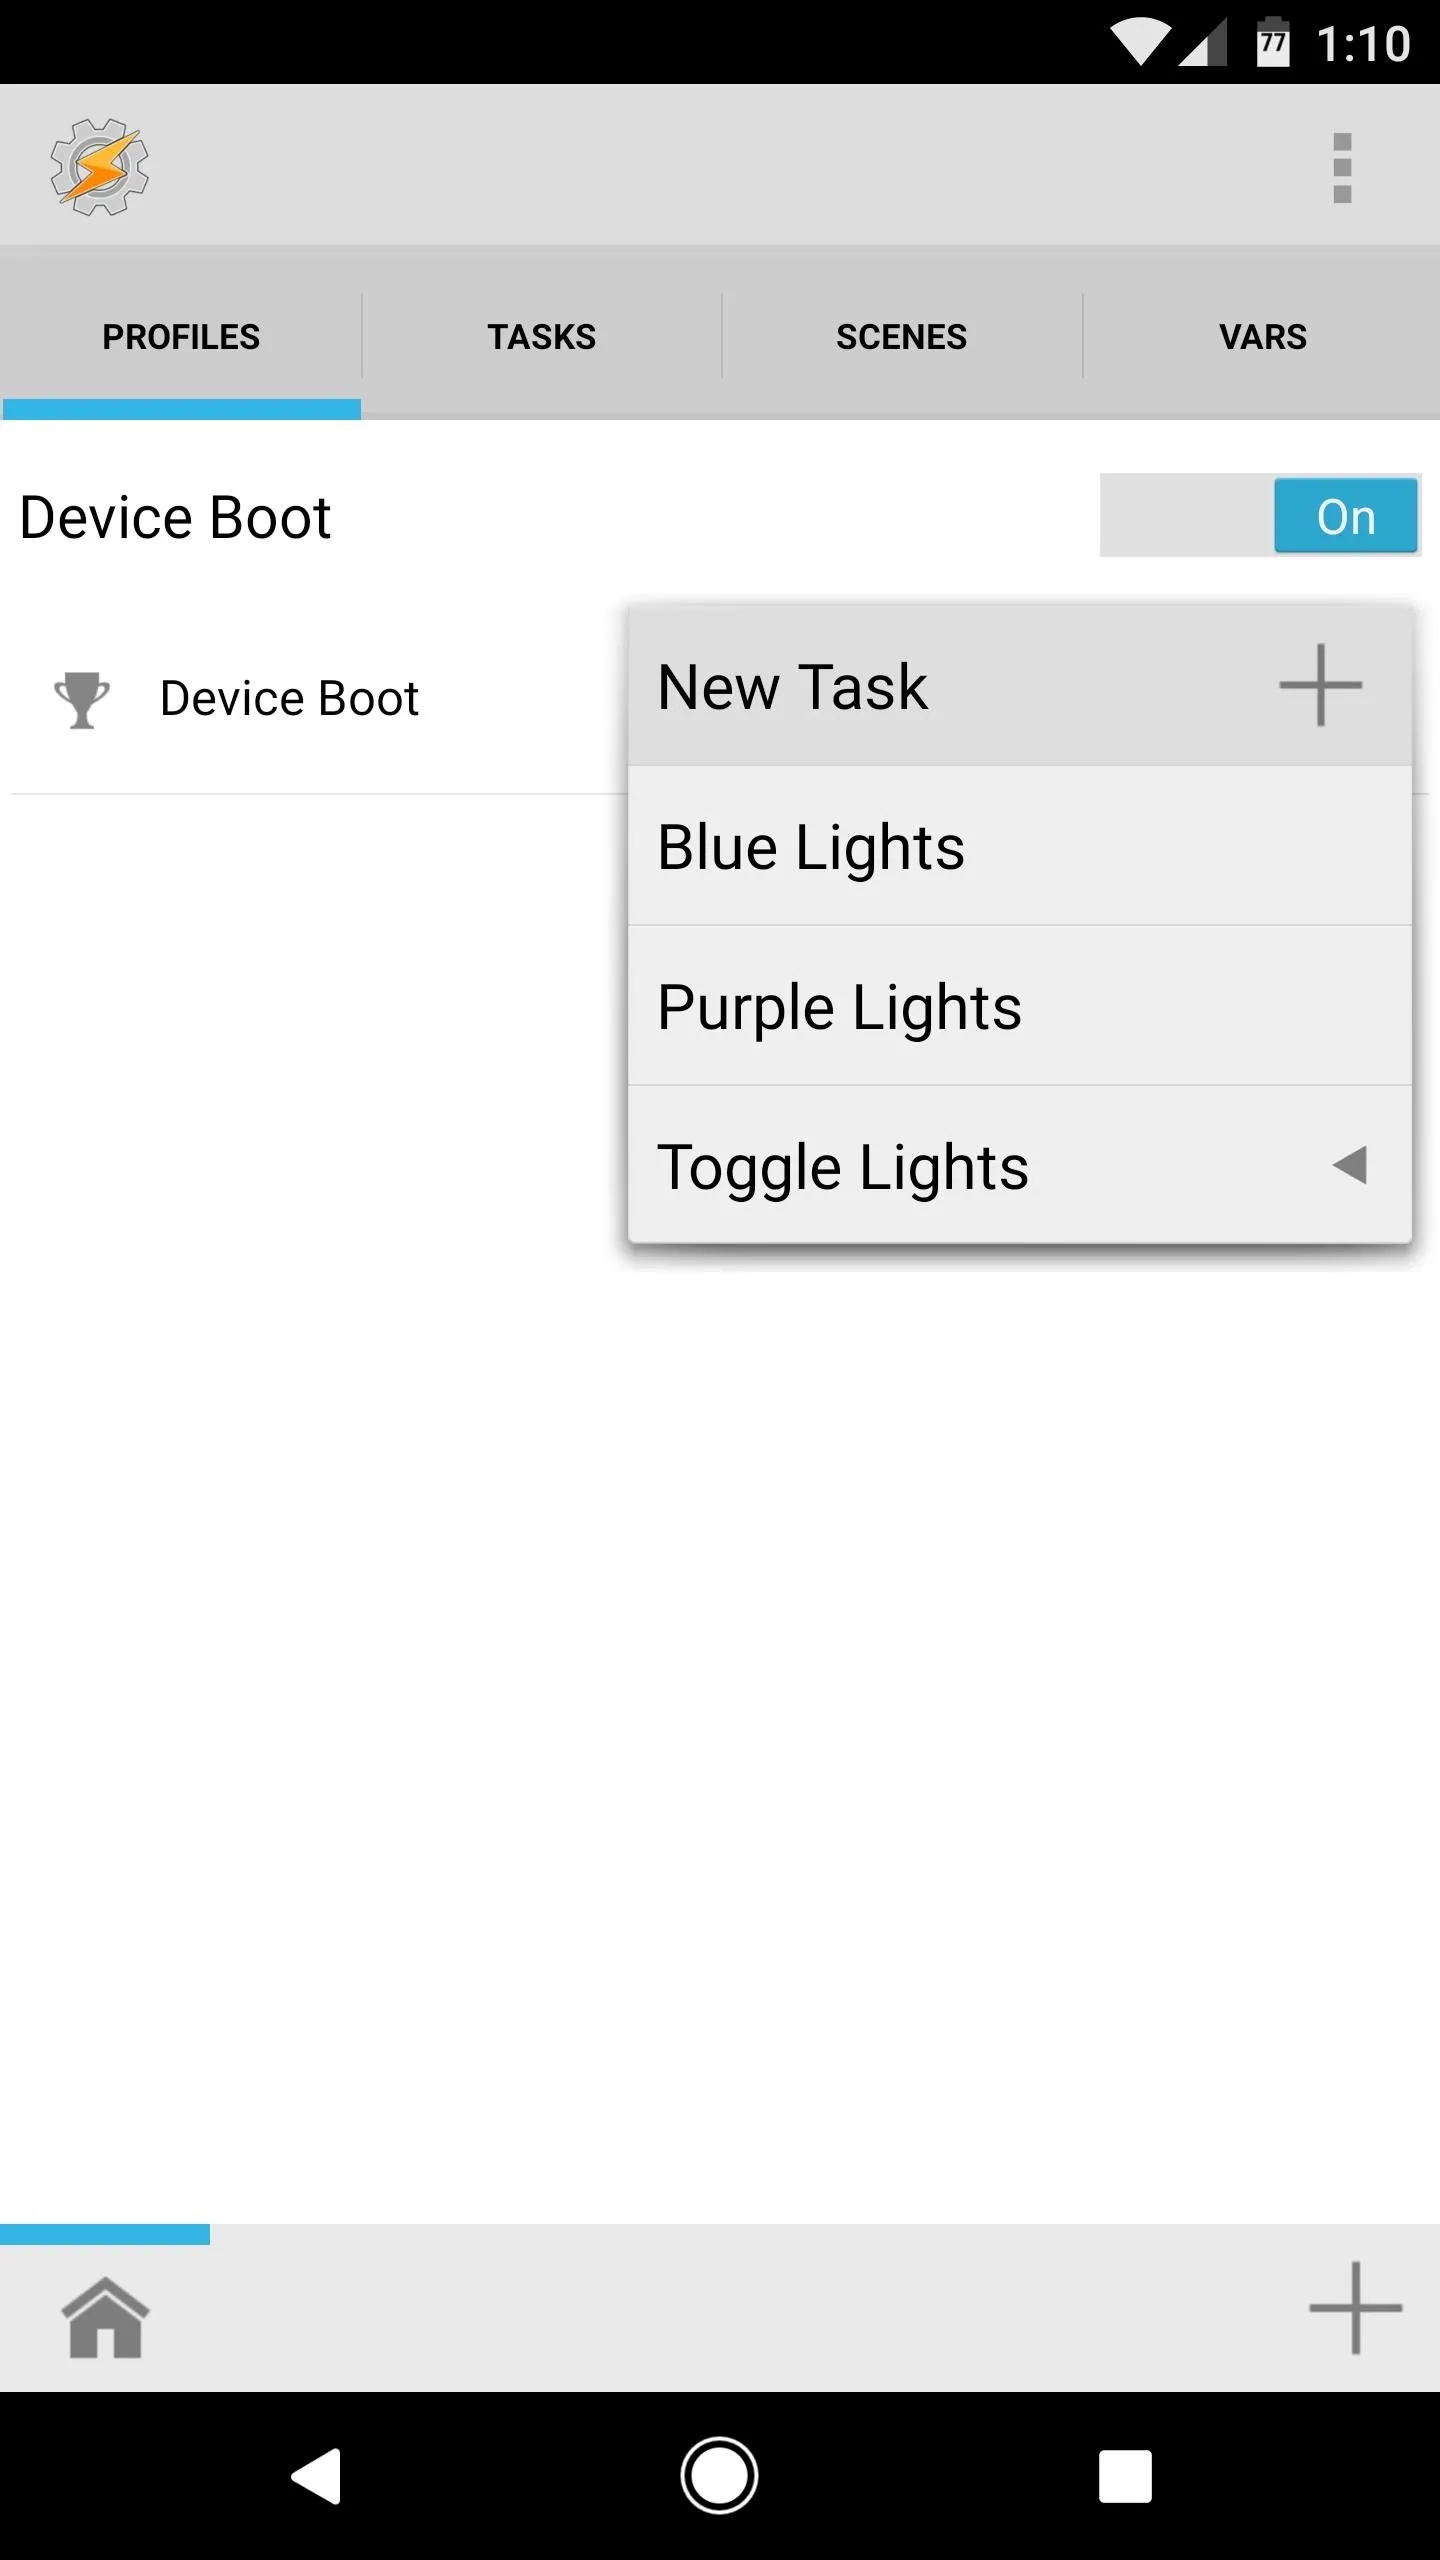
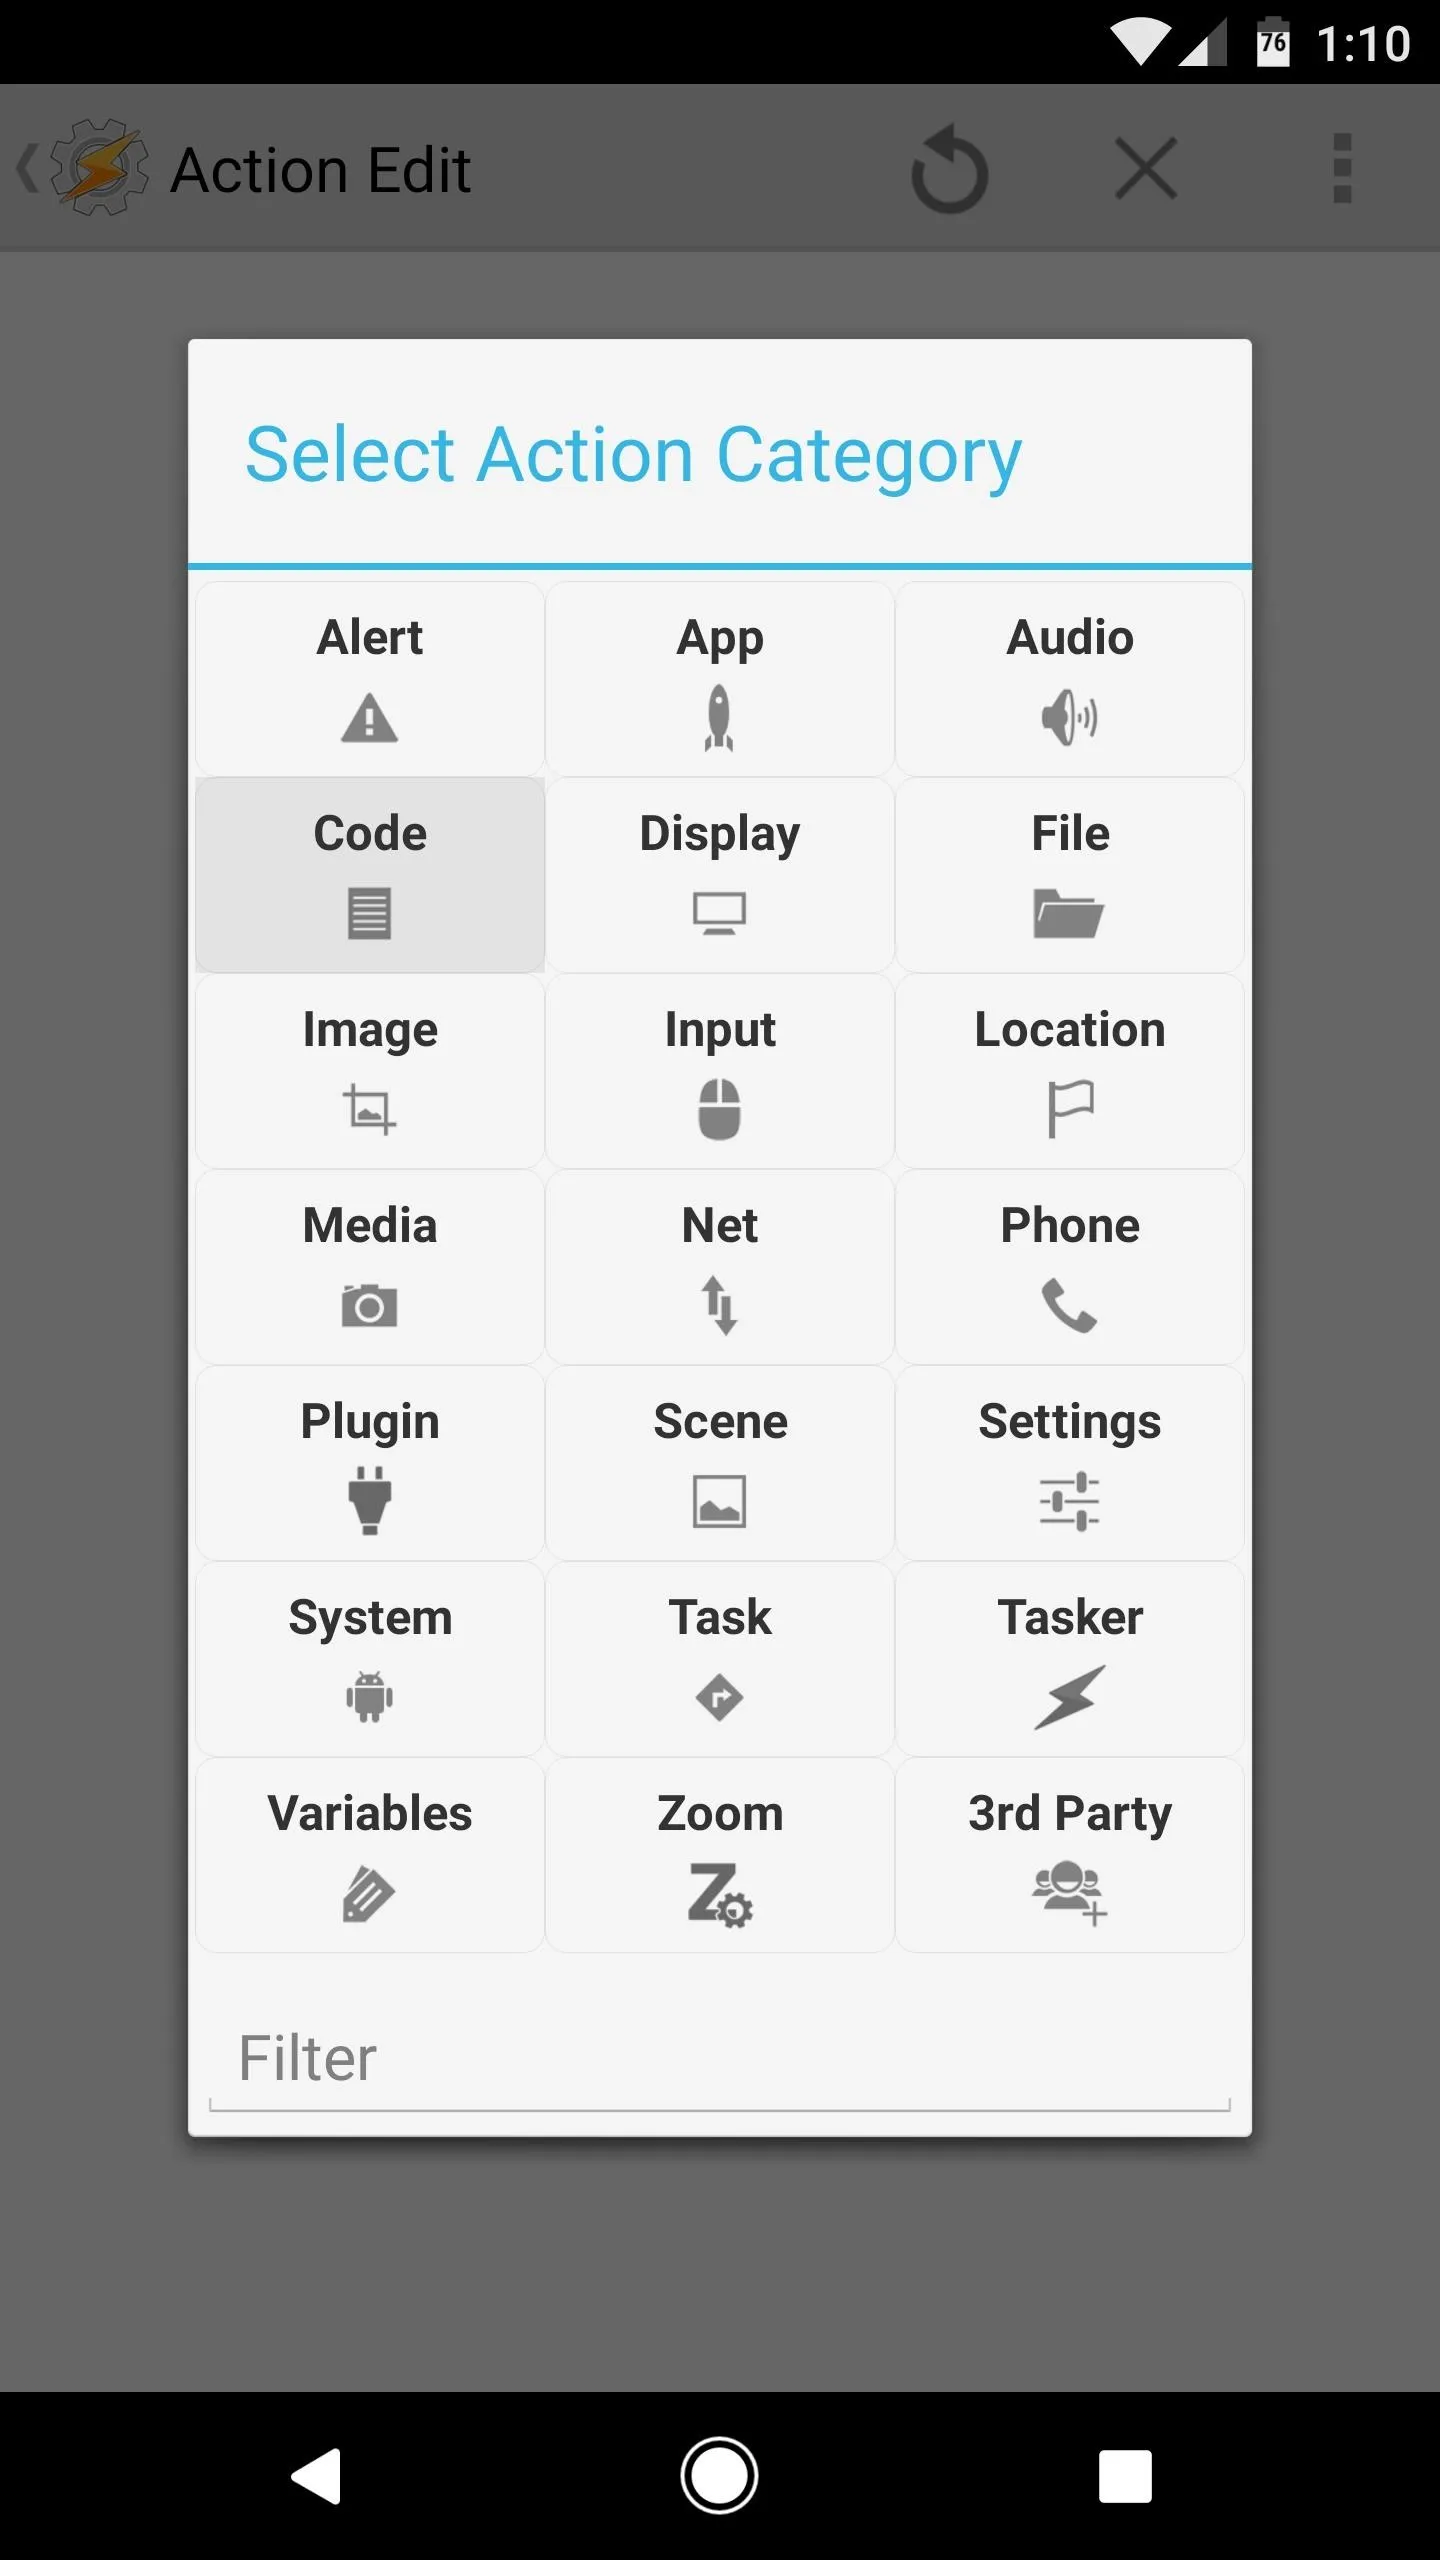
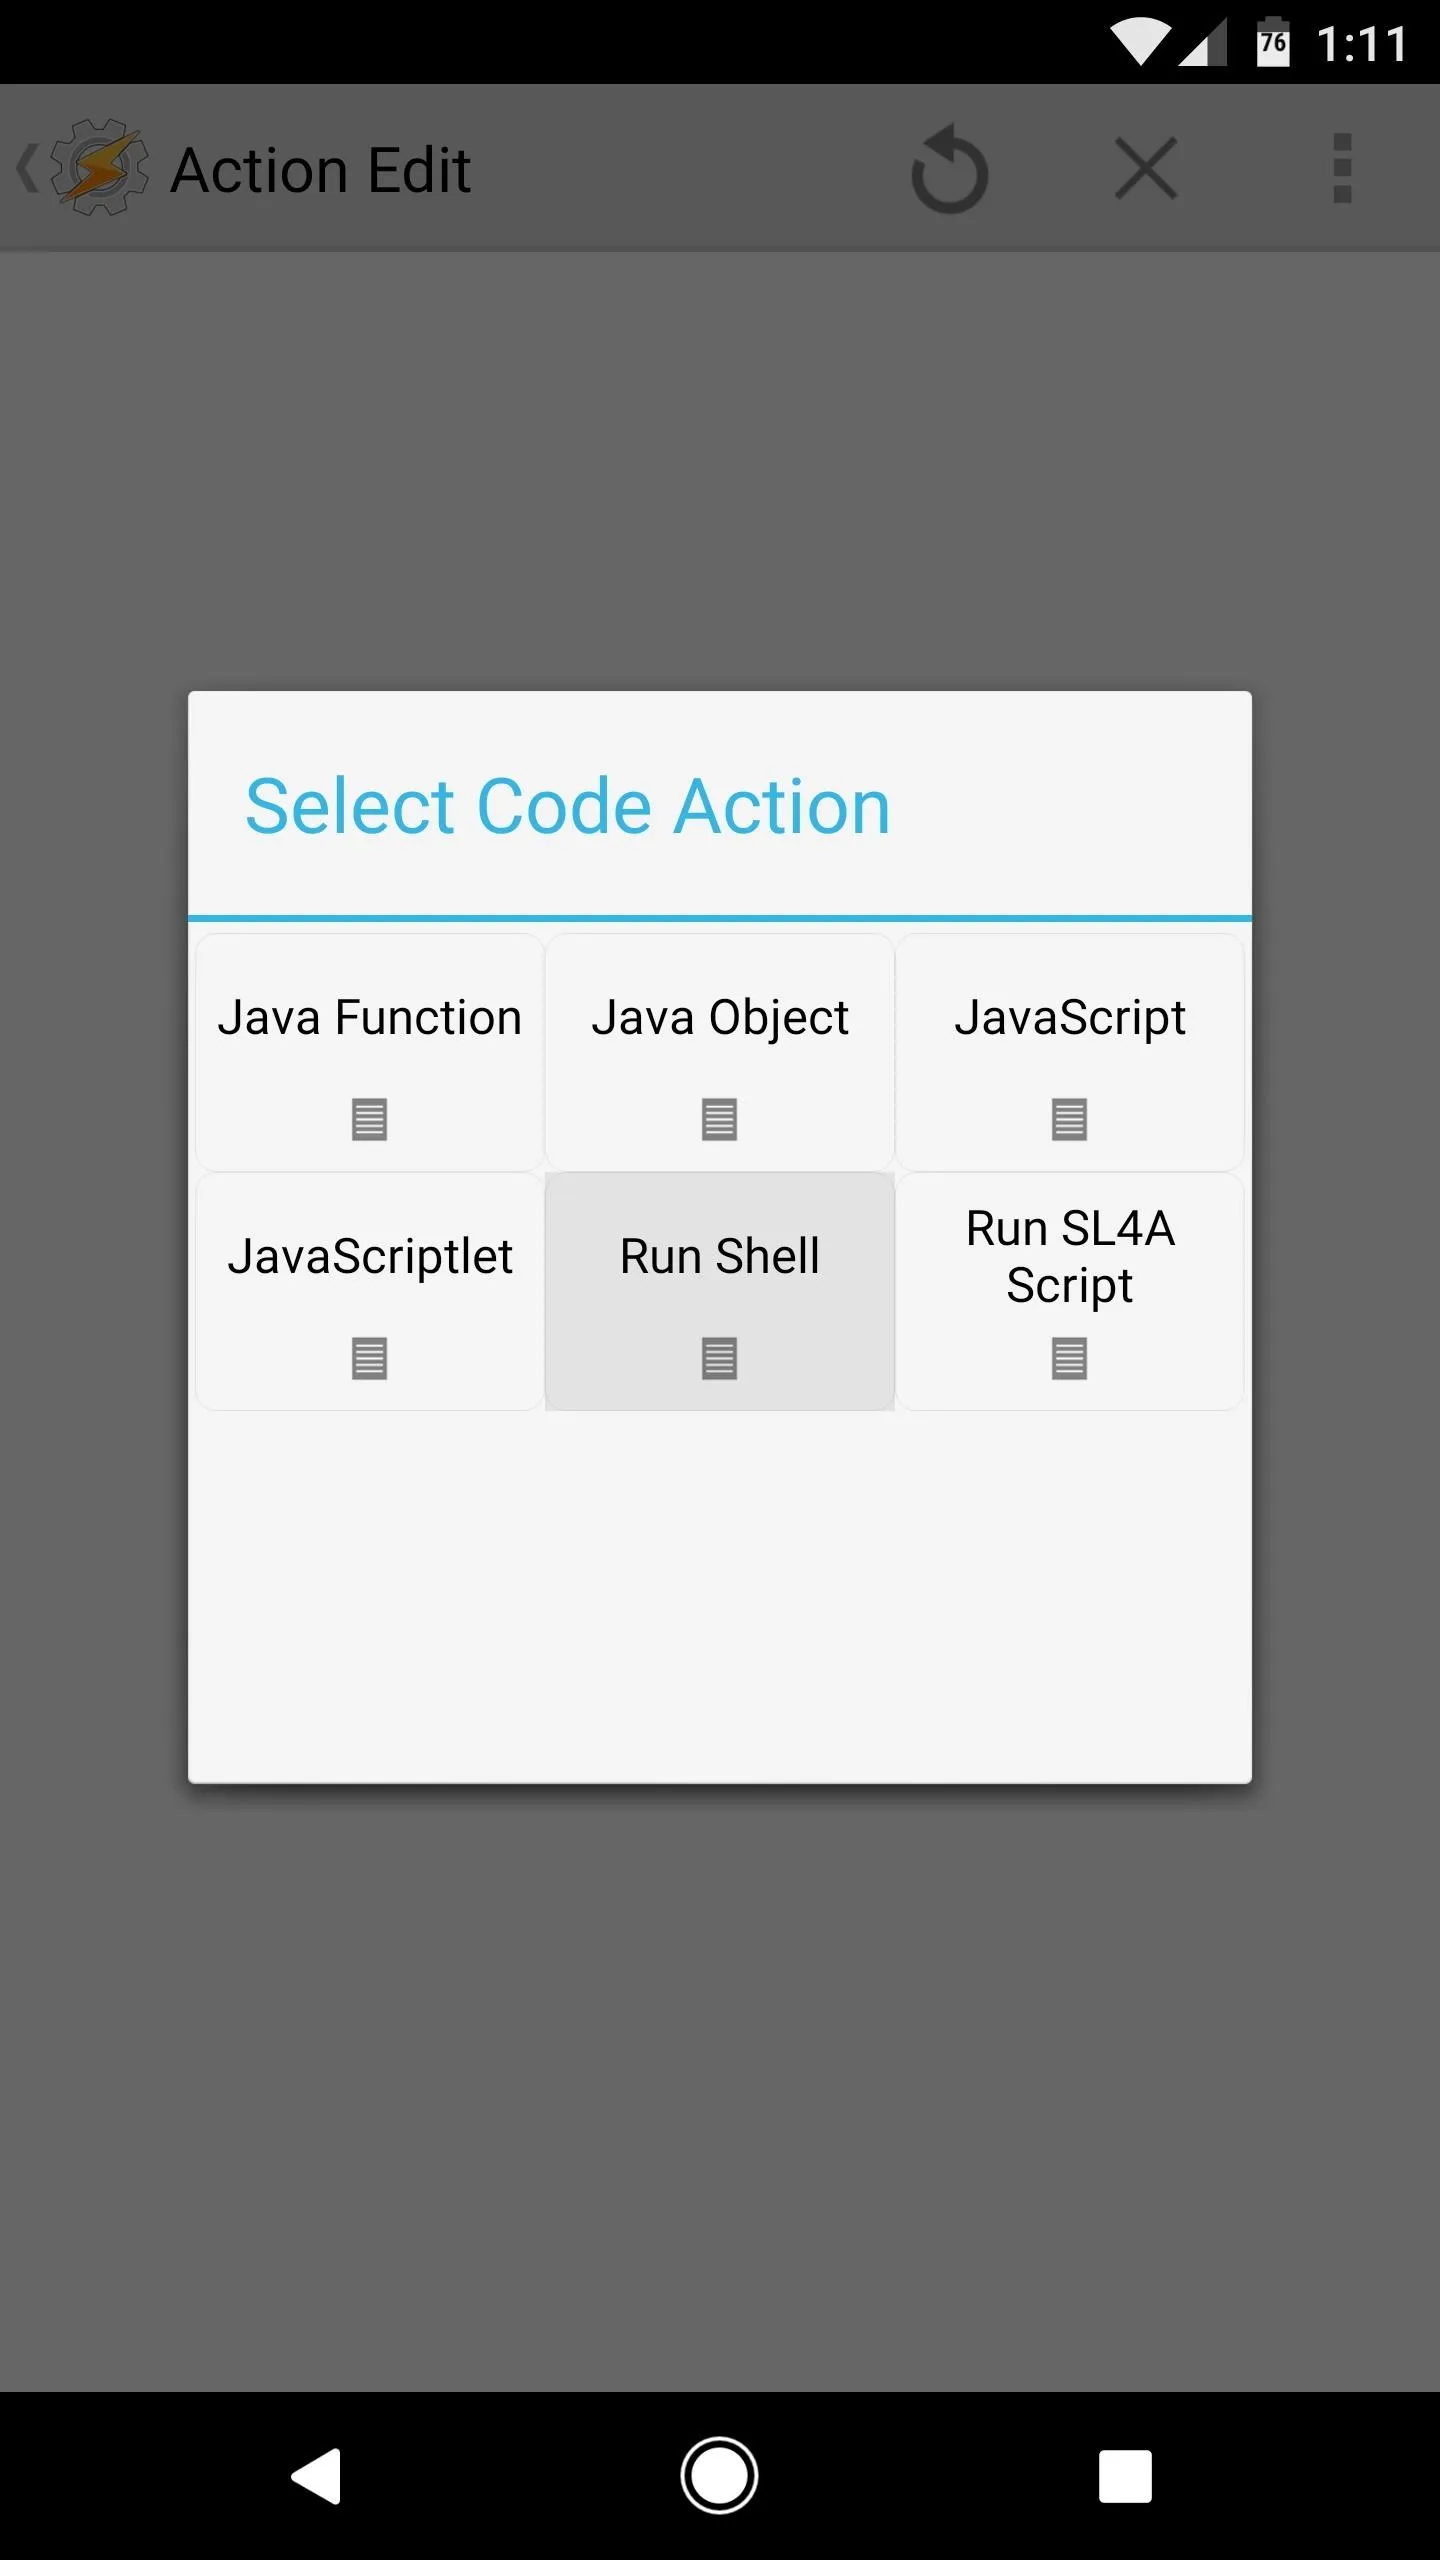
From here, tap your back button, then choose "New Task" when prompted. Next, add an action to this task by tapping the + button, selecting "Code," then choosing "Run Shell."


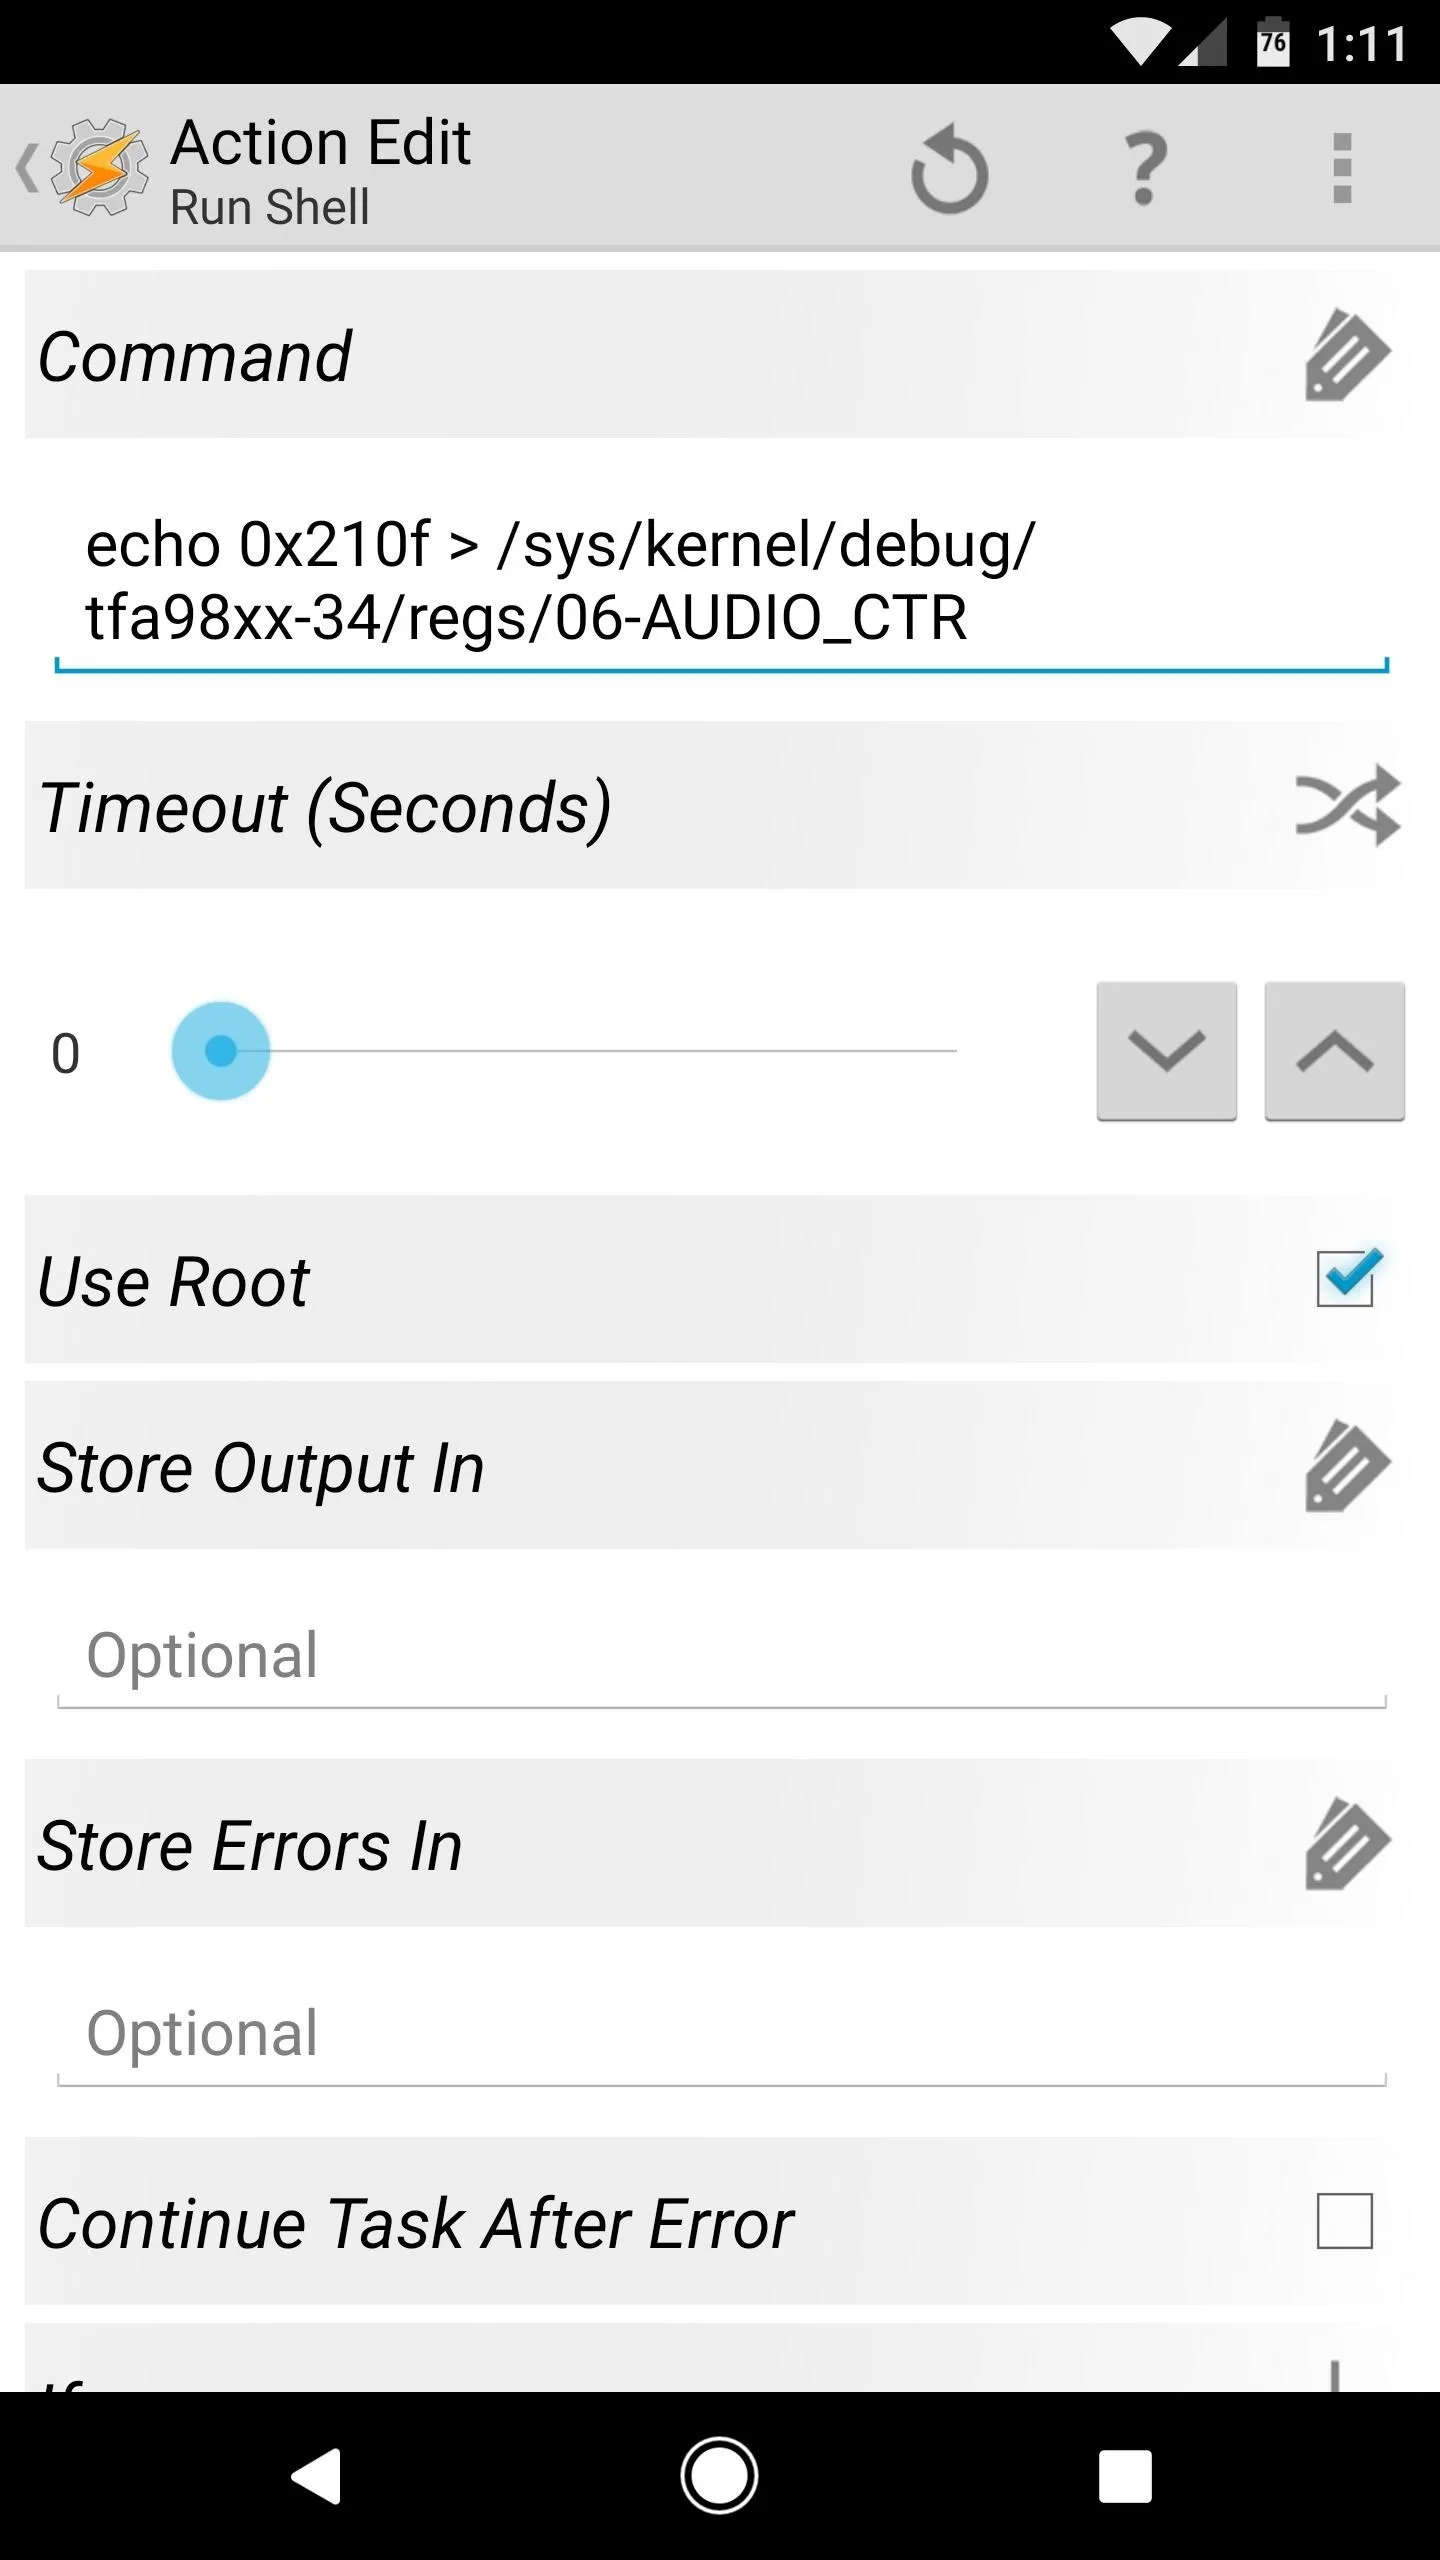
Next, copy the first command from the bullet point list below, then paste it into the Command field, and make sure to tick the box next to "Use Root." After that, add a second action, and repeat this same process with the second command. When you're done there, tap your back button once, then press the play button in the bottom-right corner. Finally, tap "Grant" on the Superuser access request, then back all the way out of Tasker to make your profile become active.
- echo 0x210f > /sys/kernel/debug/tfa98xx-34/regs/06-AUDIO_CTR
- echo 0x8093 > /sys/kernel/debug/tfa98xx-34/regs/04-I2SREG # right channel only


From now on, you'll have true stereo sound with balanced speakers. The earpiece speaker plays the left channel in all media, and the bottom-firing speaker plays the right channel. With just a little bit of work, you've now turned one of the Pixel XL's biggest downsides into a real positive.
- Follow Gadget Hacks on Facebook, Twitter, Google+, and YouTube
- Follow Android Hacks on Facebook, Twitter, and Pinterest
- Follow WonderHowTo on Facebook, Twitter, Pinterest, and Google+
Cover photo and screenshots by Dallas Thomas/Gadget Hacks









Comments
Be the first, drop a comment!