Android 6.0 Marshmallow added a new permissions system that can make your digital life much more secure. Unlike previous versions, apps now have to ask for your consent before they can access certain data, which puts you firmly in the driver's seat.
As if that weren't enough, you can now revoke these app permissions after the fact—meaning if you change your mind about giving a certain app permission to access something, you can go back and change that rather easily.
In an effort to get you more familiar with Android's new permissions system, I'll go over the basic concept of it all, then show you how to manage app permissions from within Android's settings menu.
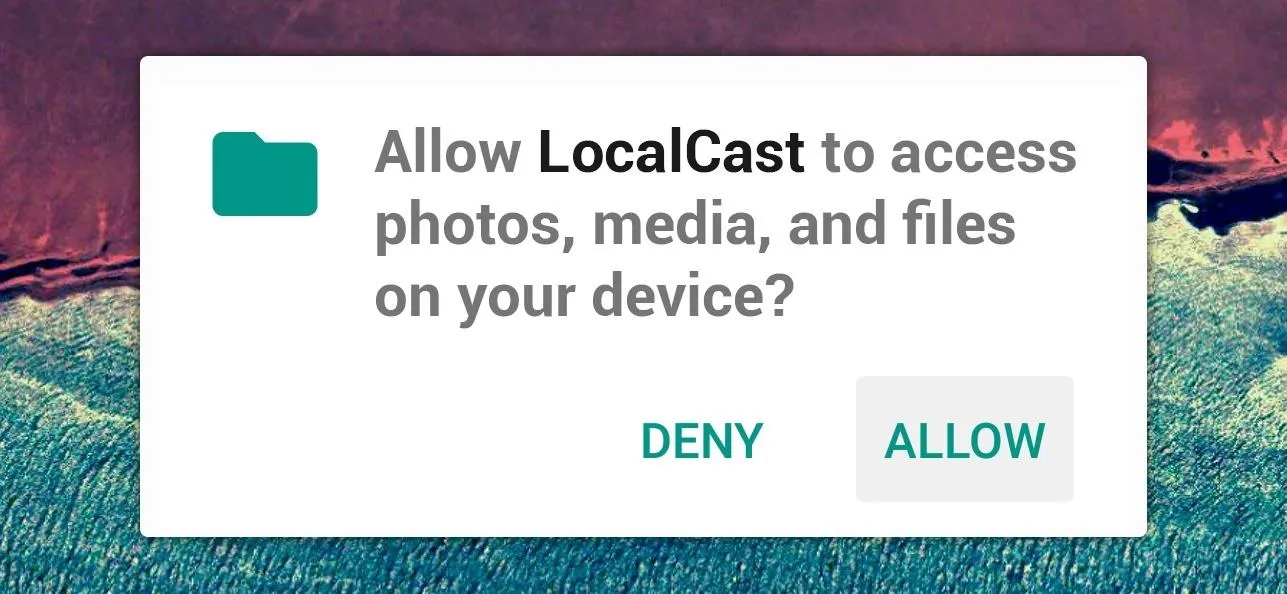
An app permission request on Marshmallow.
App Permissions Explained
All of the sensors and software in your Android device can be used to determine lots of different information. For instance, the GPS chip lets your device know exactly where on earth it is, and the Wi-Fi radio lets your device connect to the internet.
Apps sometimes need access to this information—for instance, Google Maps needs access to your device's GPS status so it can know where to put that little blue dot on the map. Previously, Android would give app developers the benefit of the doubt and simply allow them to access this data any time they asked.
But now, instead of readily handing out permission to access this information, Android requires that apps check with you before they use certain elements. So it's entirely your call—don't want Facebook knowing your location? Just press "Deny" when it asks for permission to access GPS data.
This is the basic premise behind Android app permissions, and as you can imagine, it makes for a much more secure experience. No longer can apps access all of the information your device collects, unless of course you explicitly press "Allow" when prompted.
Managing App Permissions (Method 1)
Deciding whether you want to give an app permission to access certain data in the first place is easy—simply tap "Deny" or "Allow" when prompted by the app. But what if you change your mind after the fact or you accidentally pressed the wrong button on that pop-up?
If that's the case, you've got 2 options. First, if you'd like to manage the permissions for a particular app, start by heading to Android's main Settings menu. From here, choose the "Apps" entry, then find and select the app whose permissions you'd like to manage.
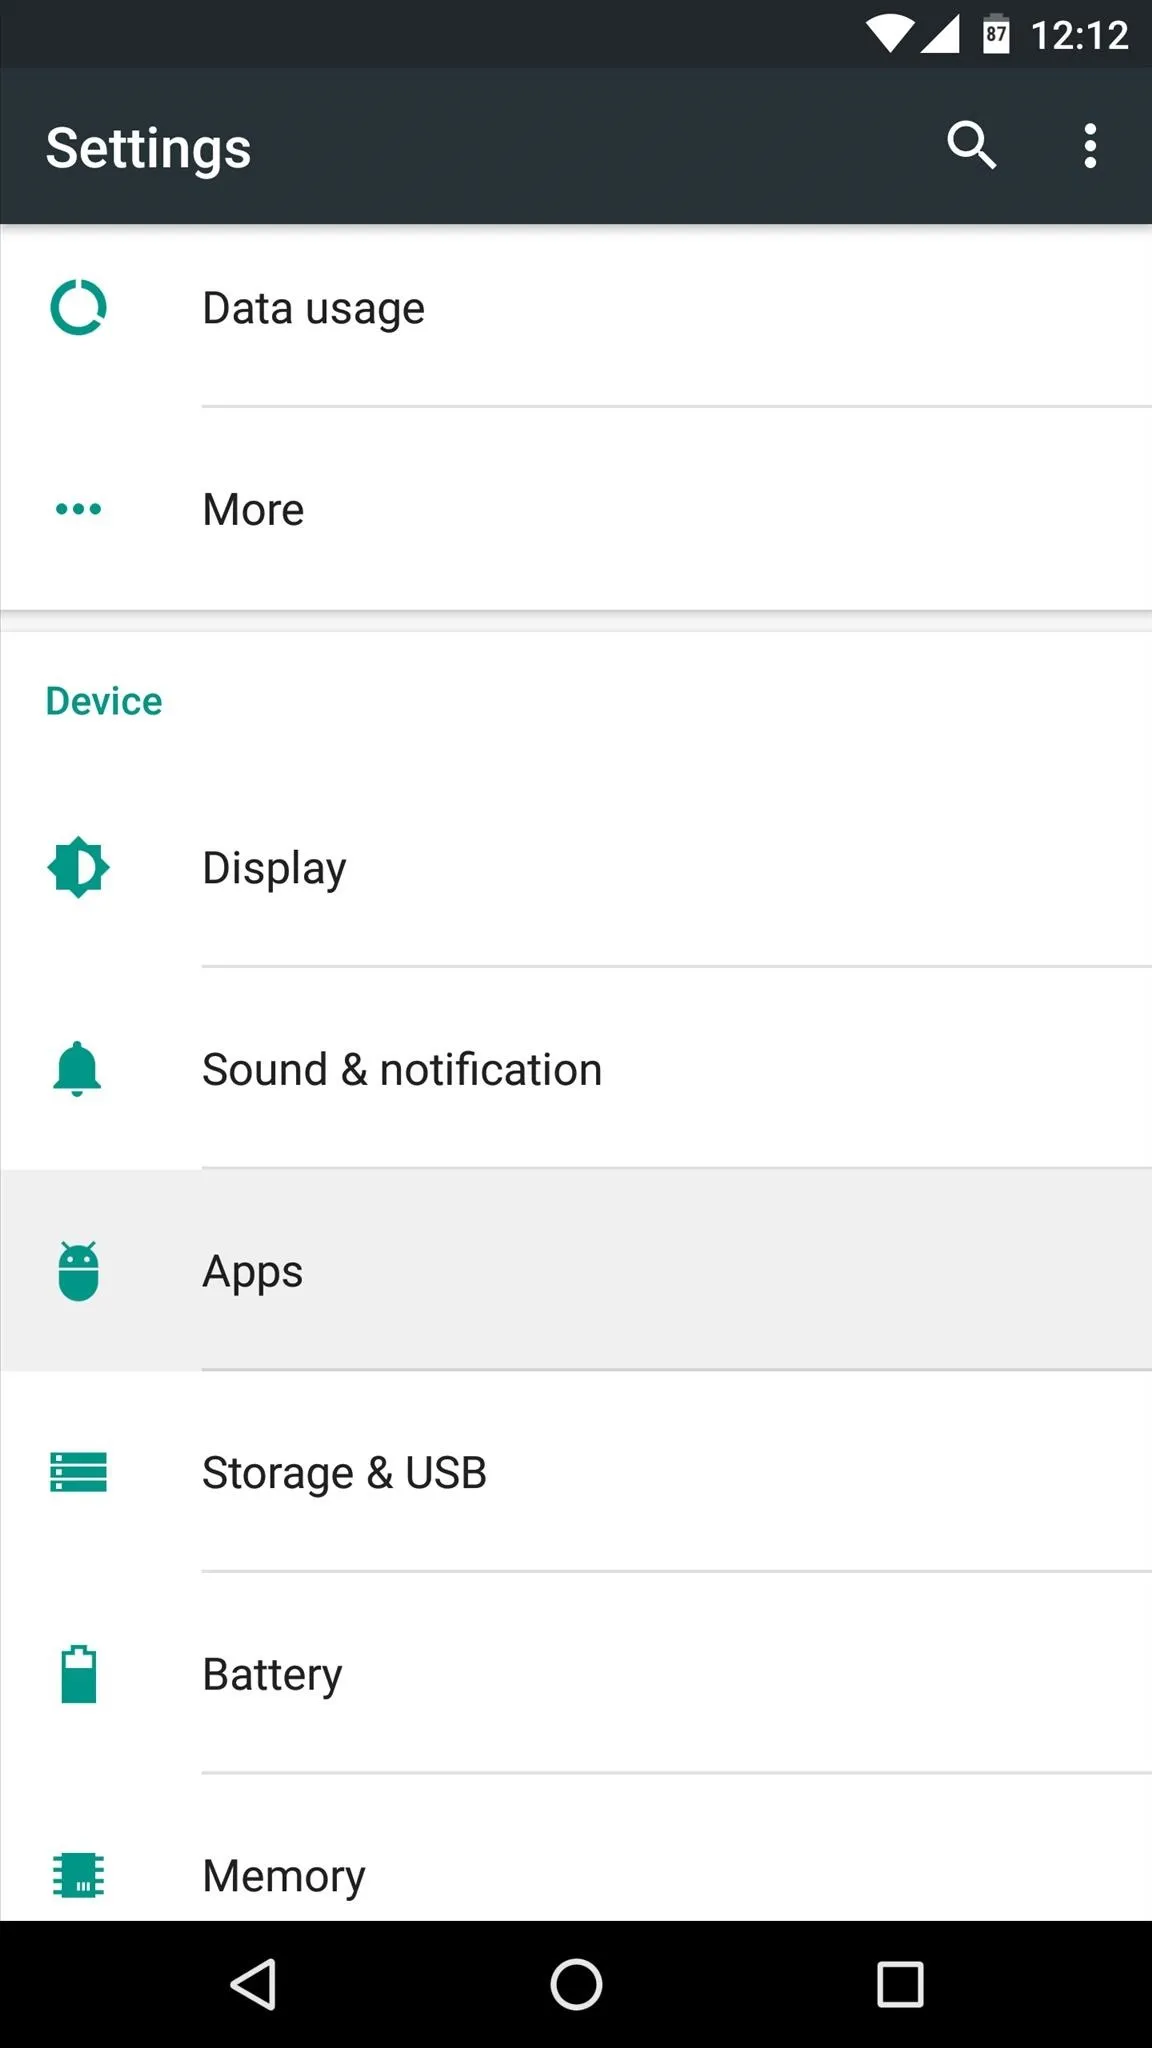
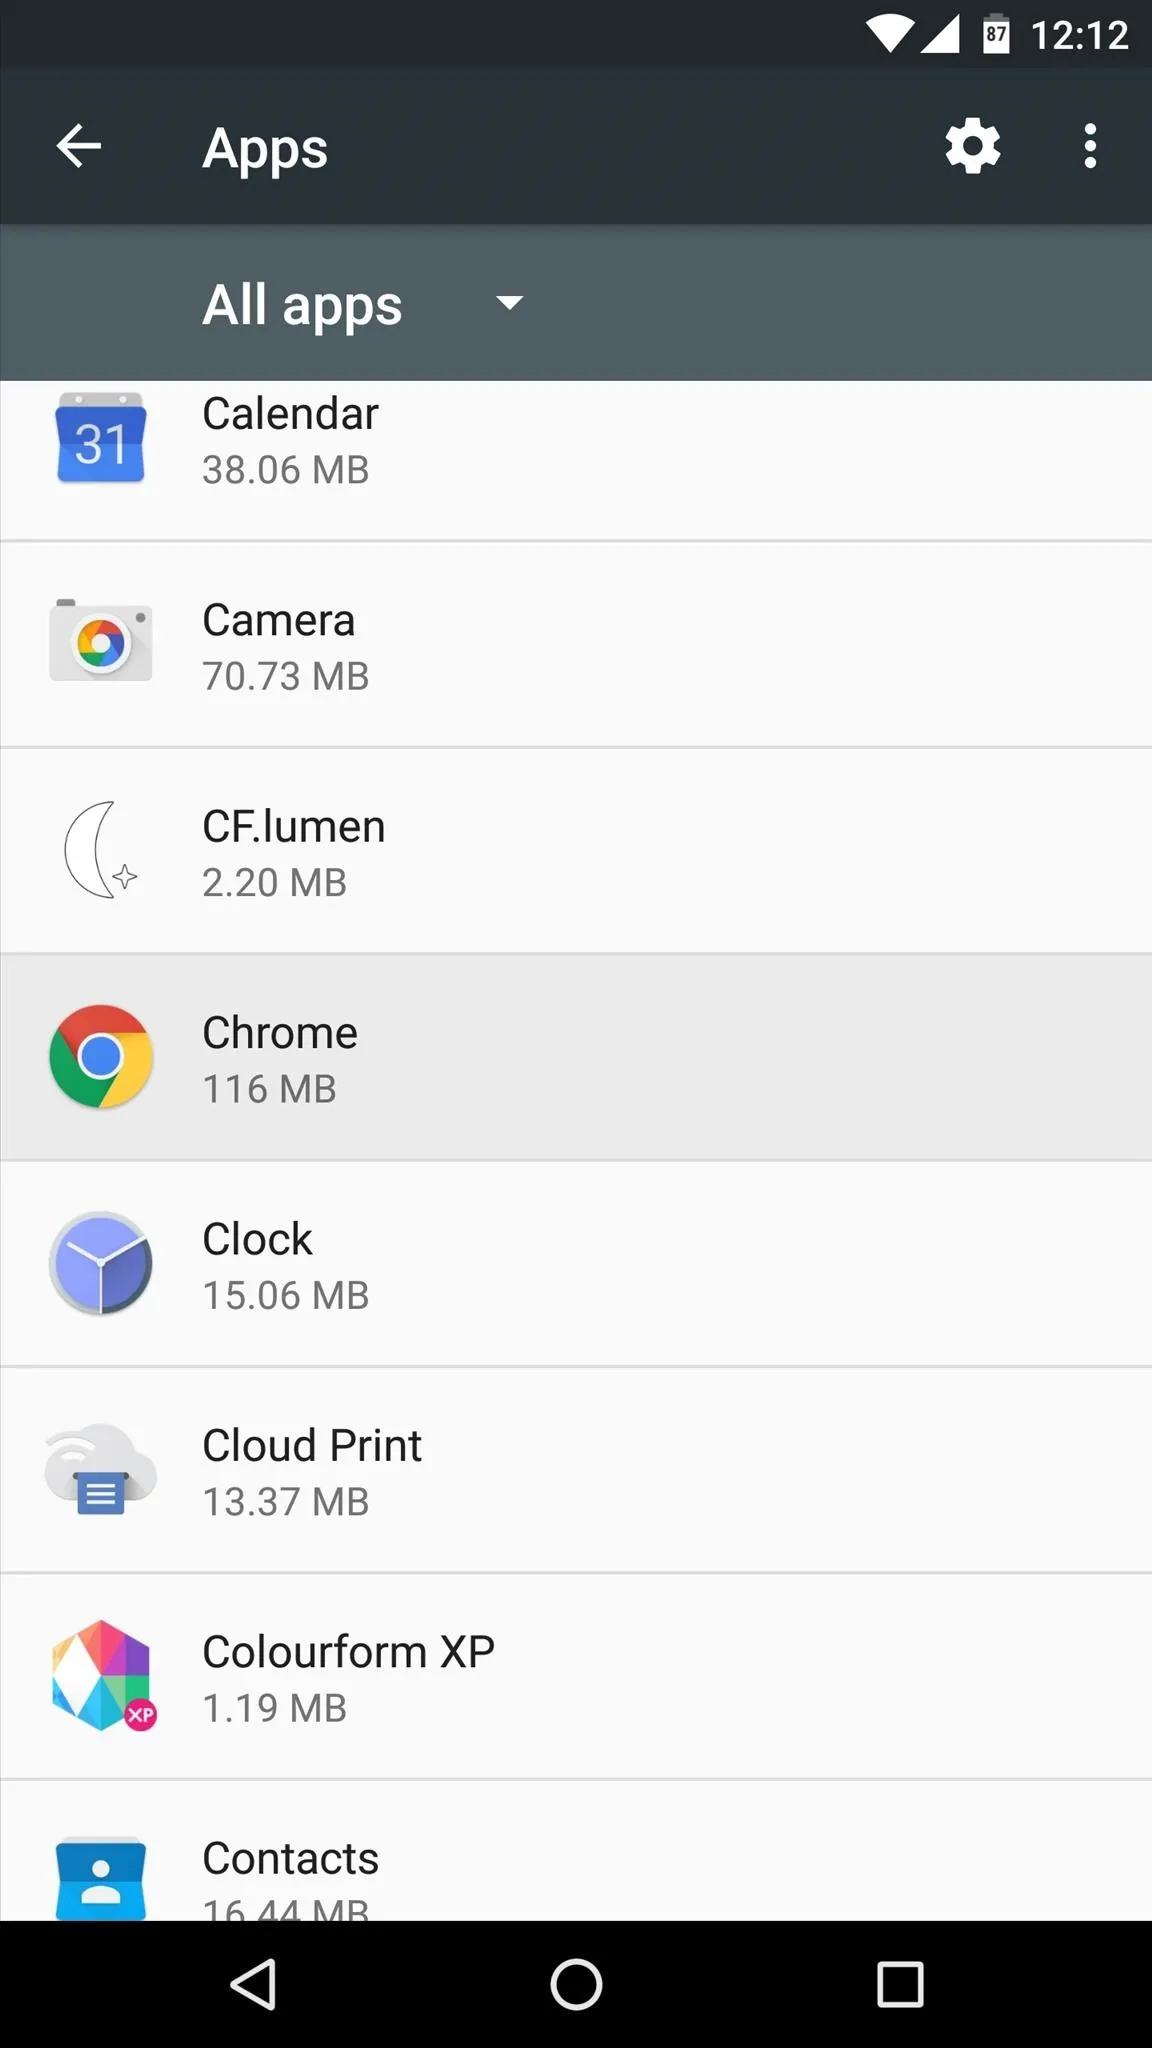


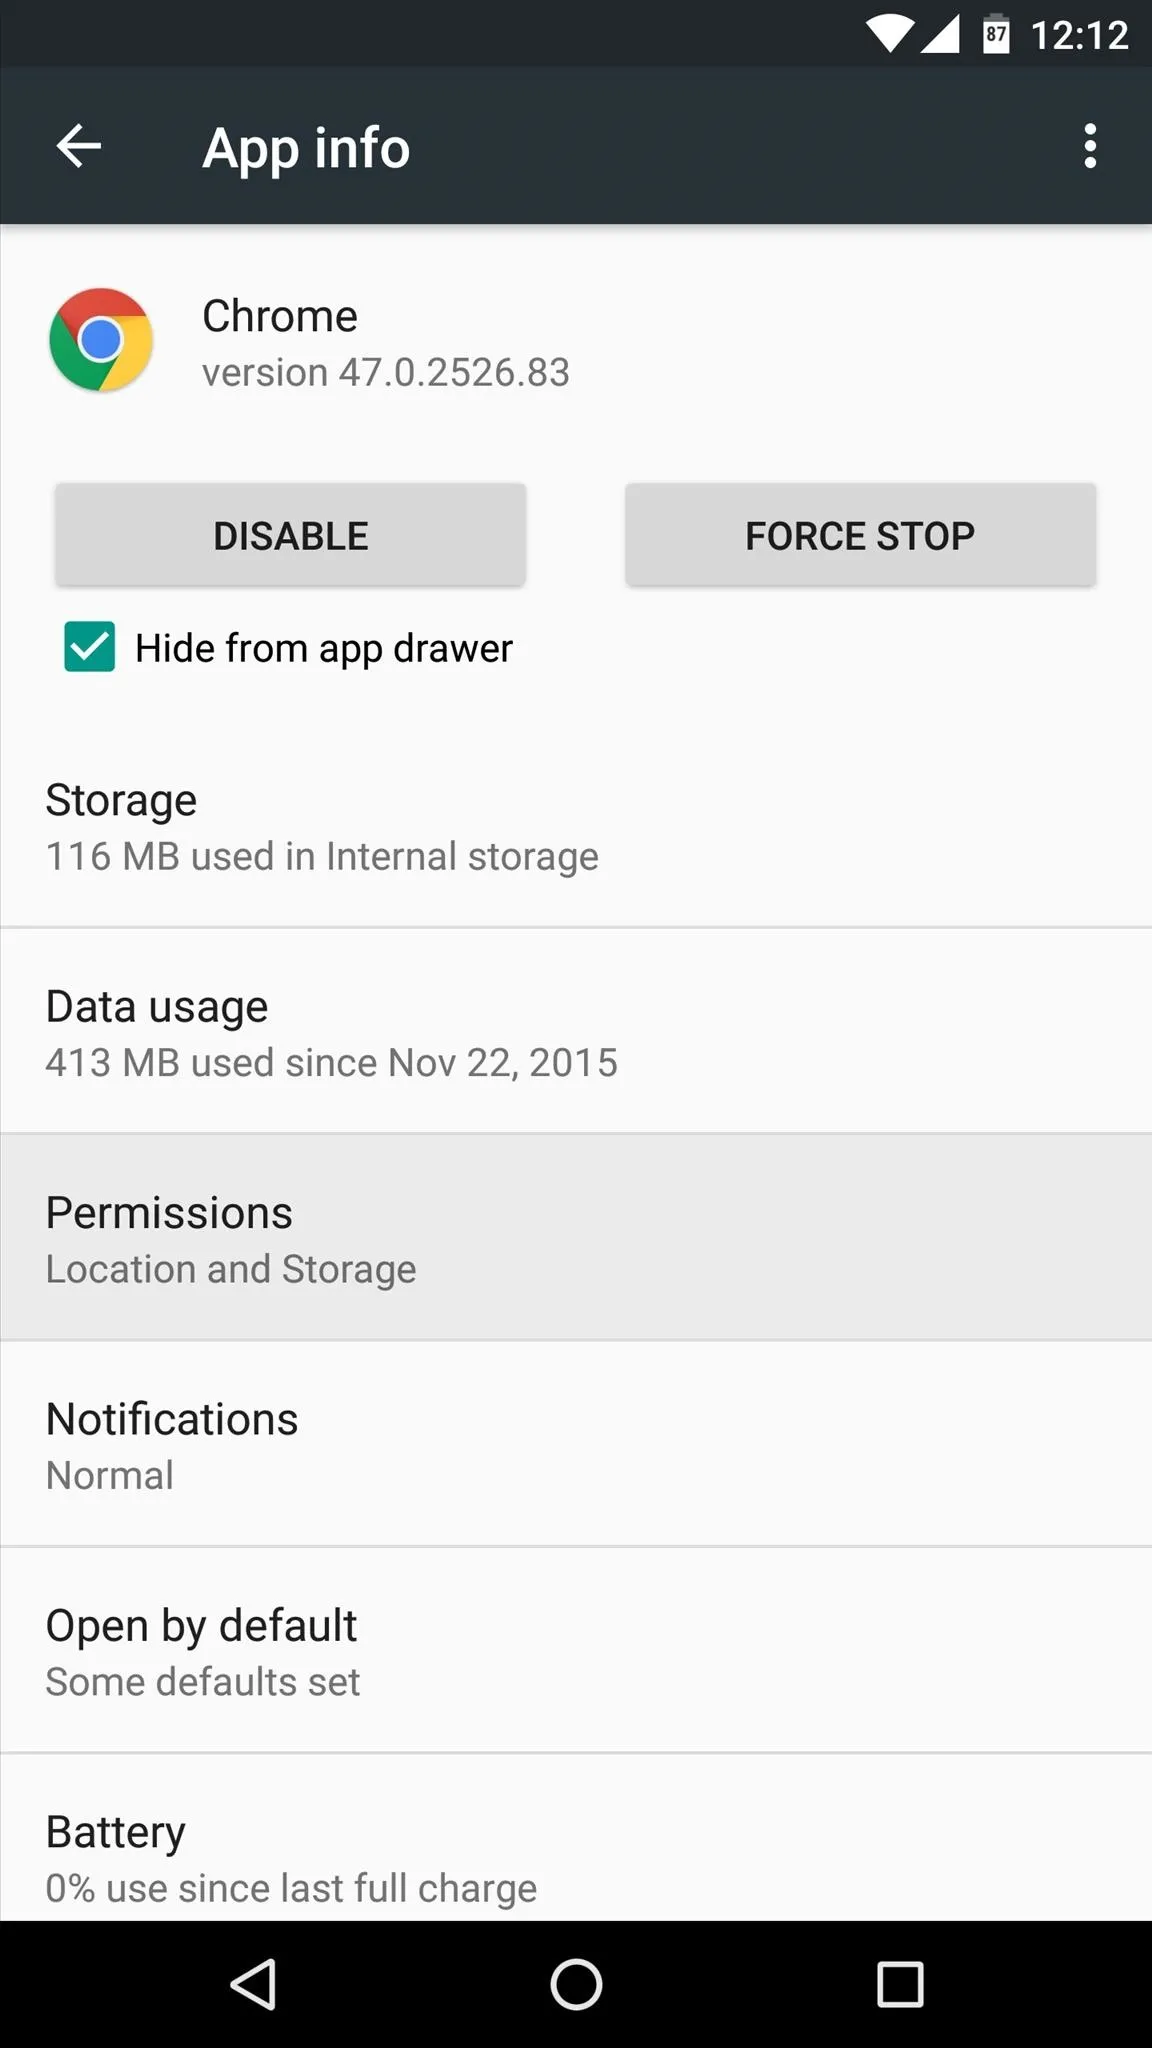
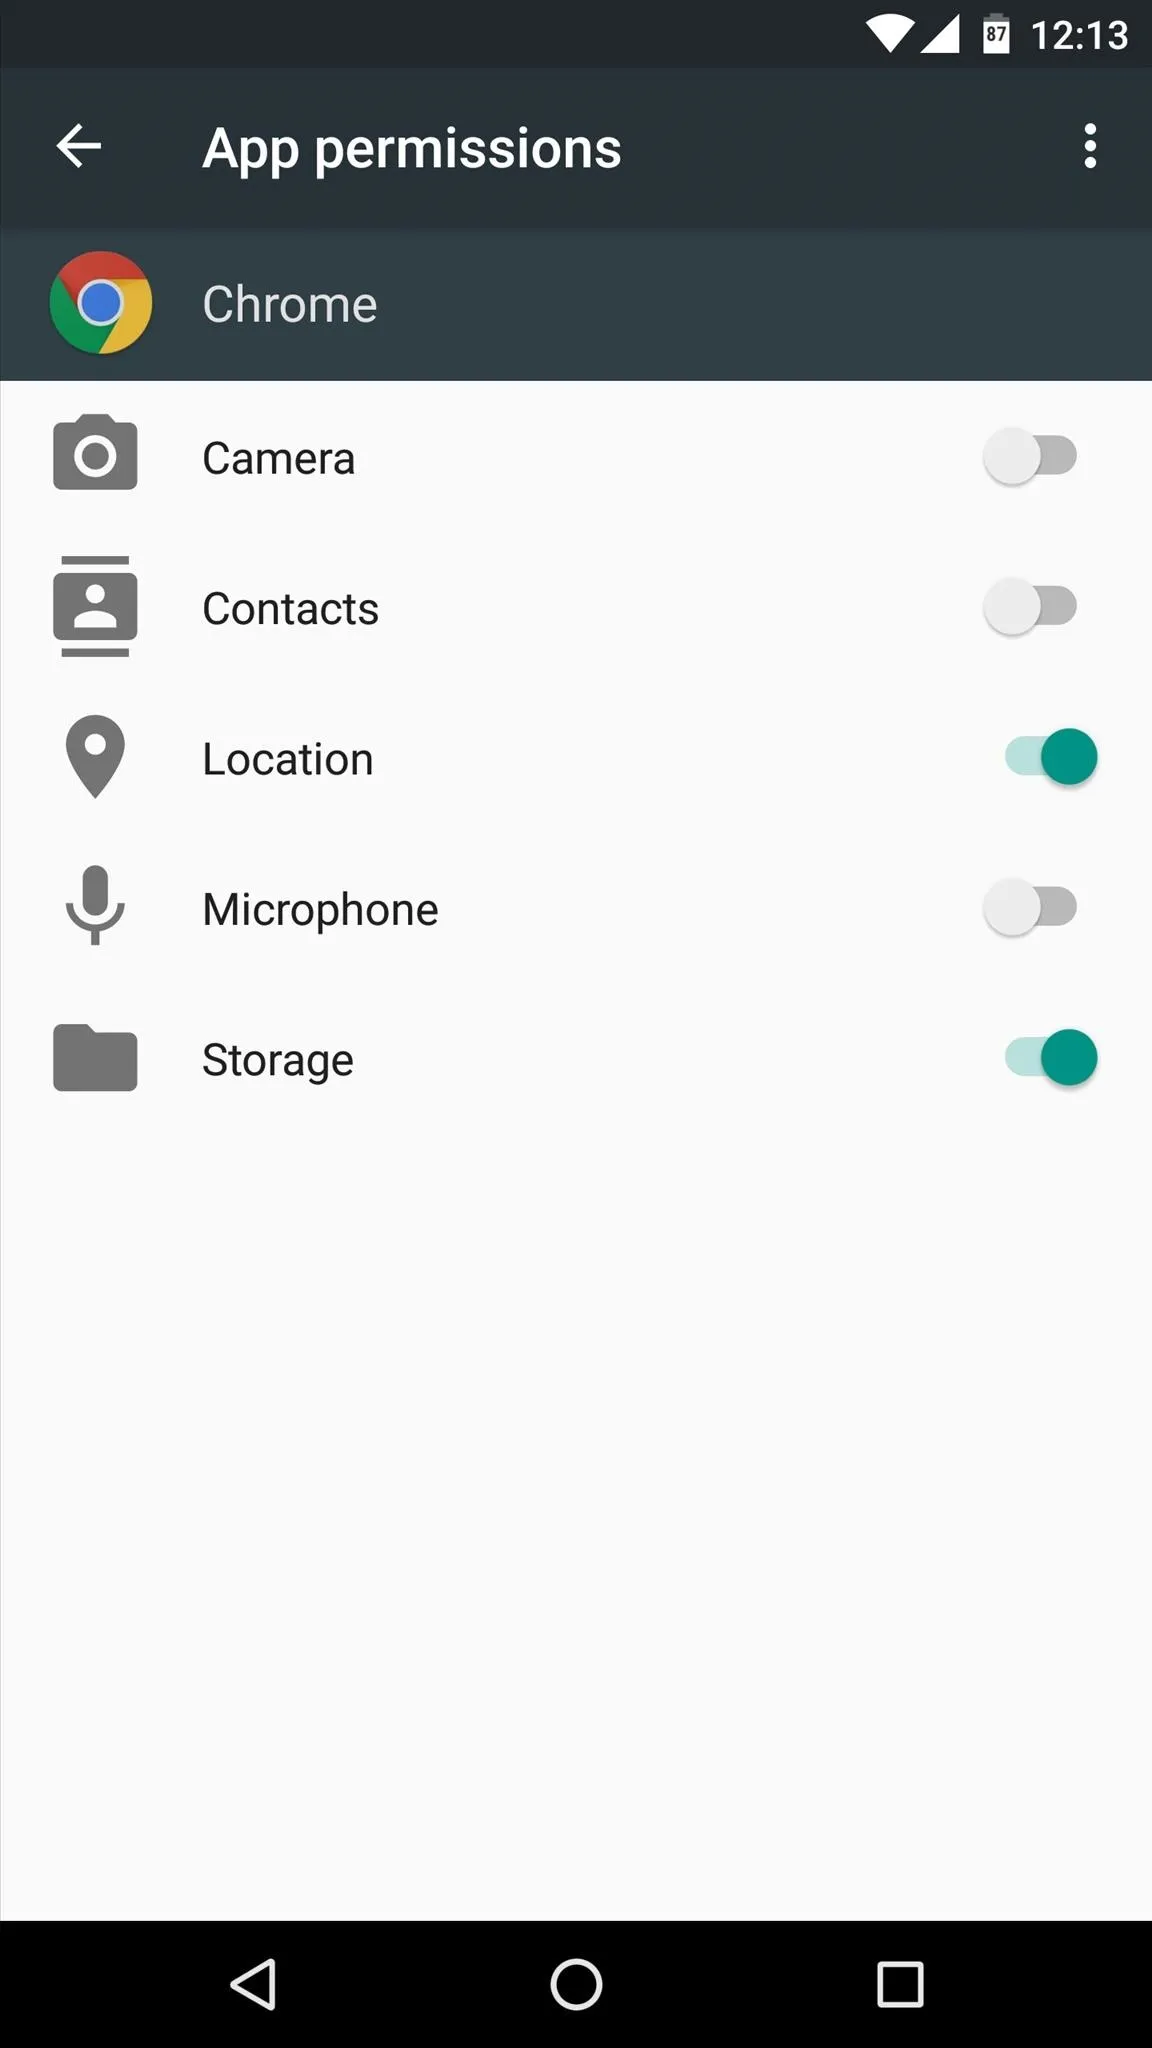
Next, choose "Permissions" from the following screen, then you'll see a list off all the permissions this app can request. From here, simply toggle the switches next to these permissions to adjust them as desired.


Managing App Permissions (Method 2)
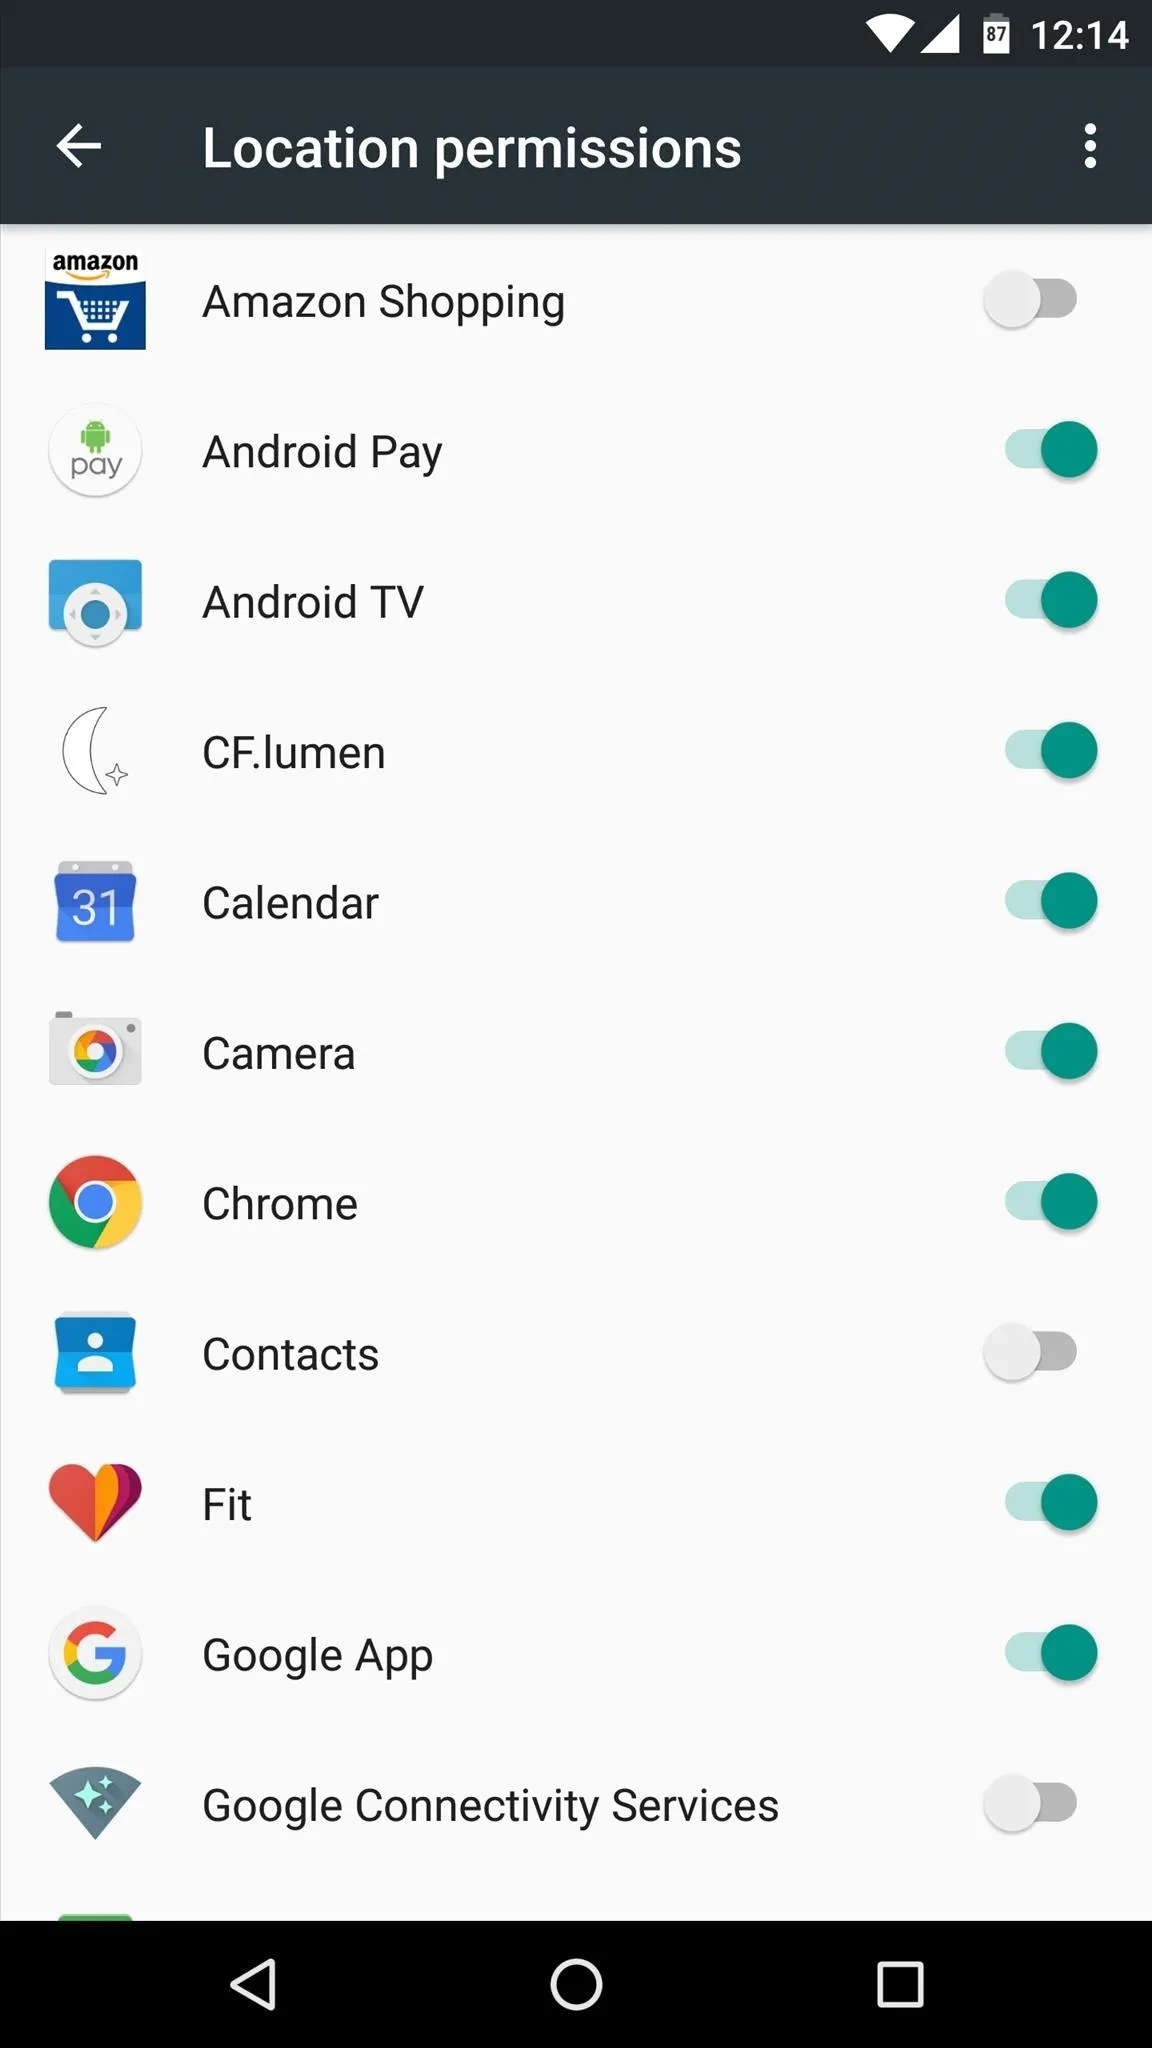
But let's say you're not concerned with any particular app and you just want to be able to manage the actual permissions that are being accessed on your device. For instance, you may want to stop all apps from being able to access your location.
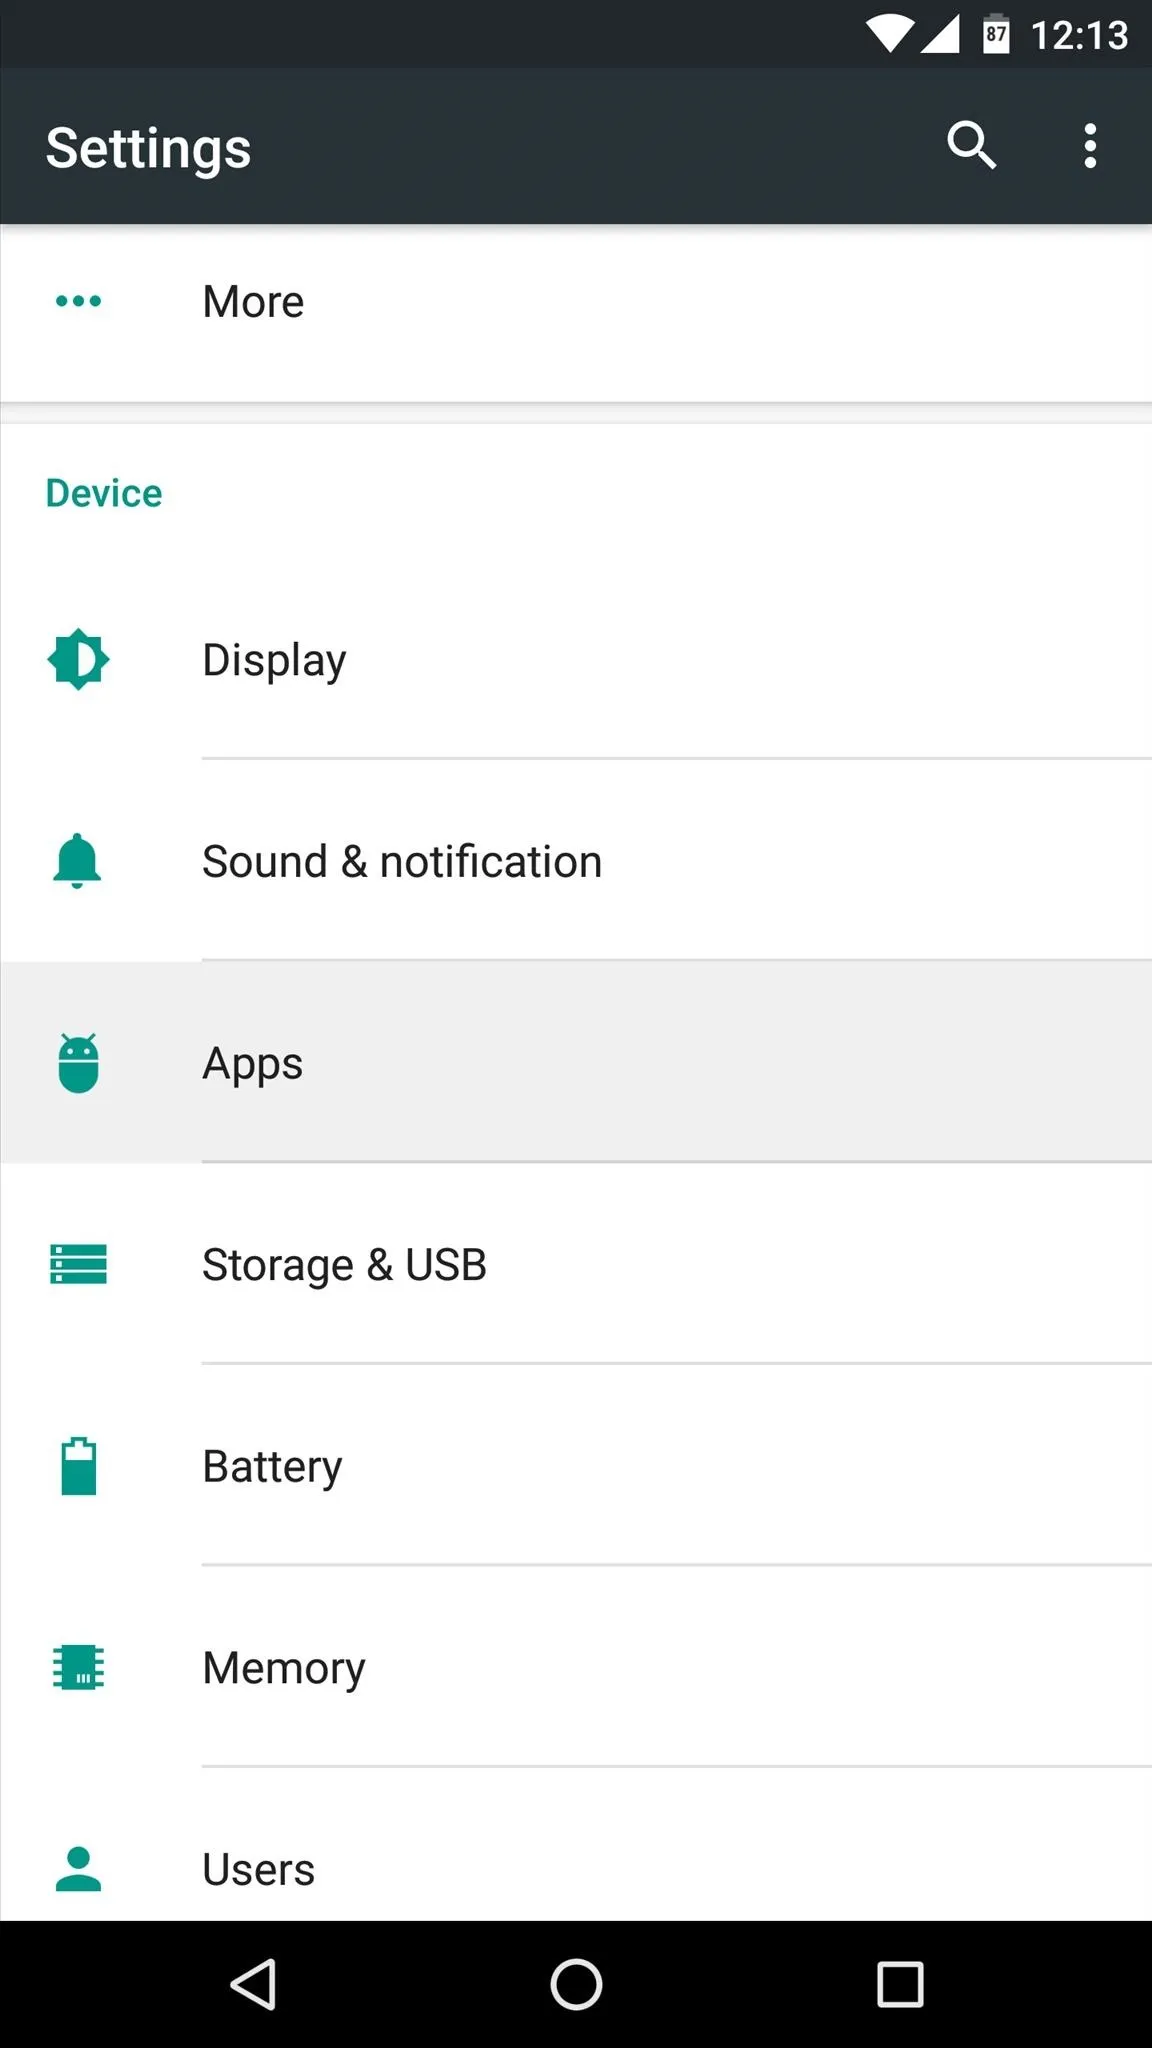
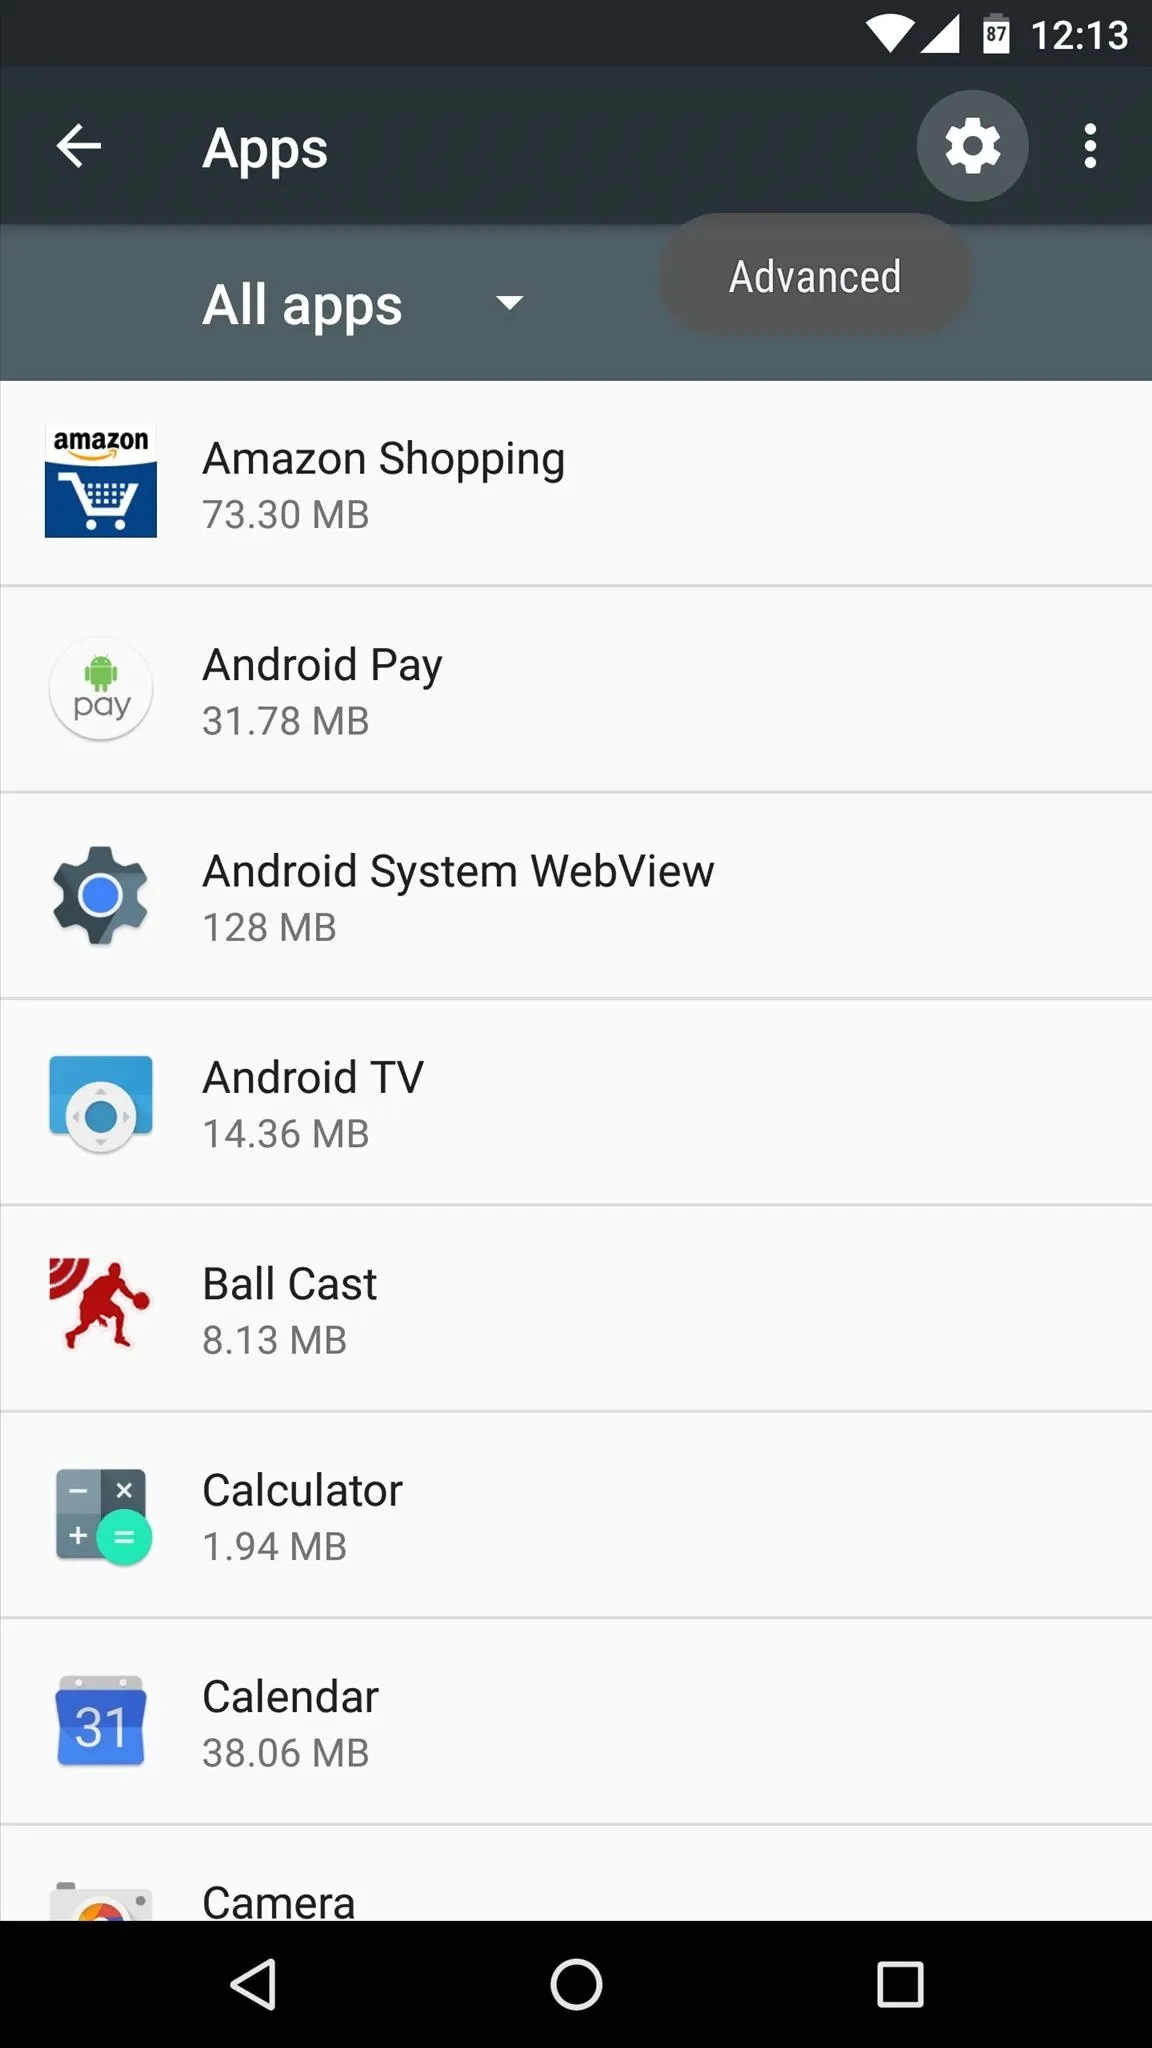
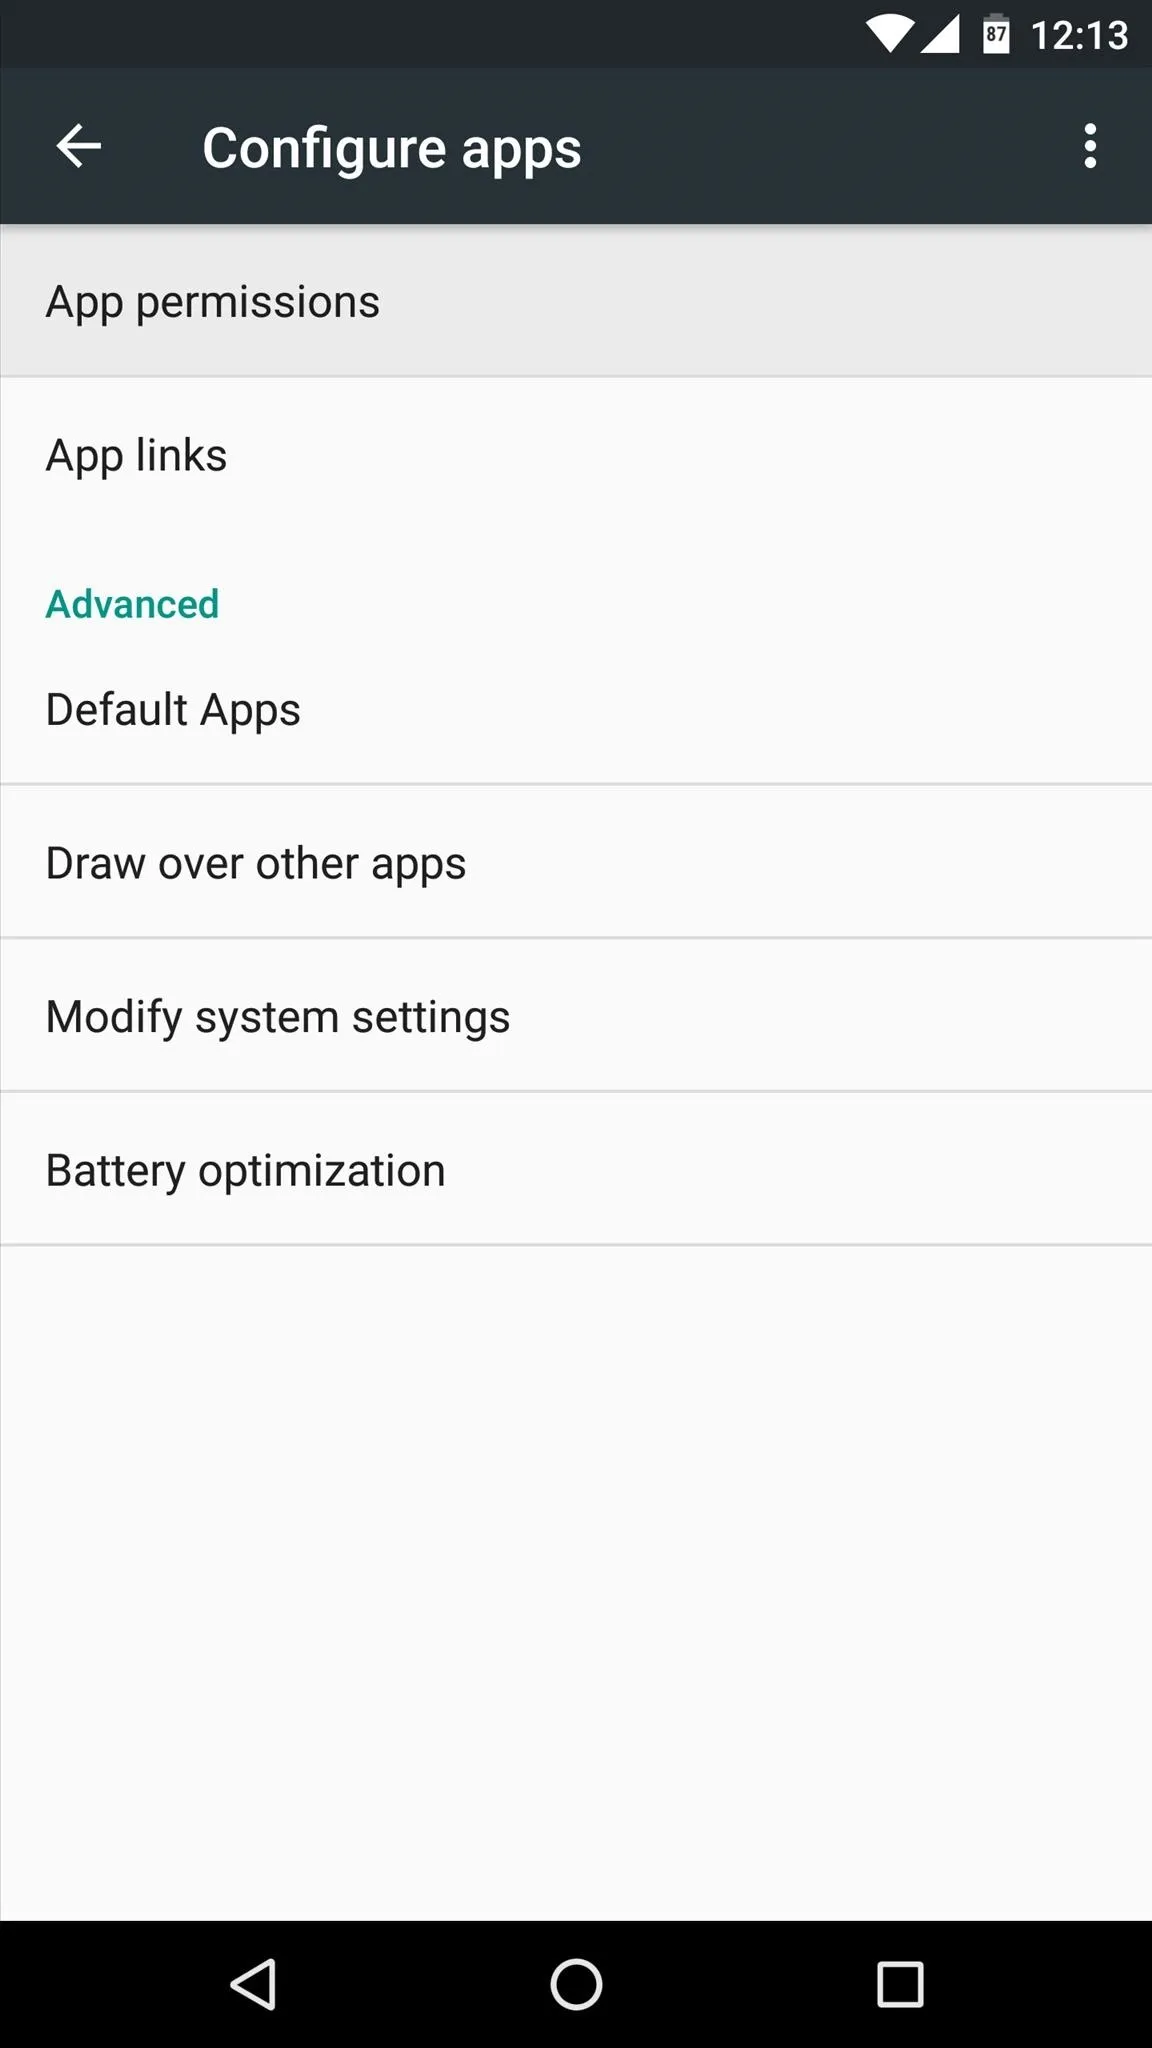
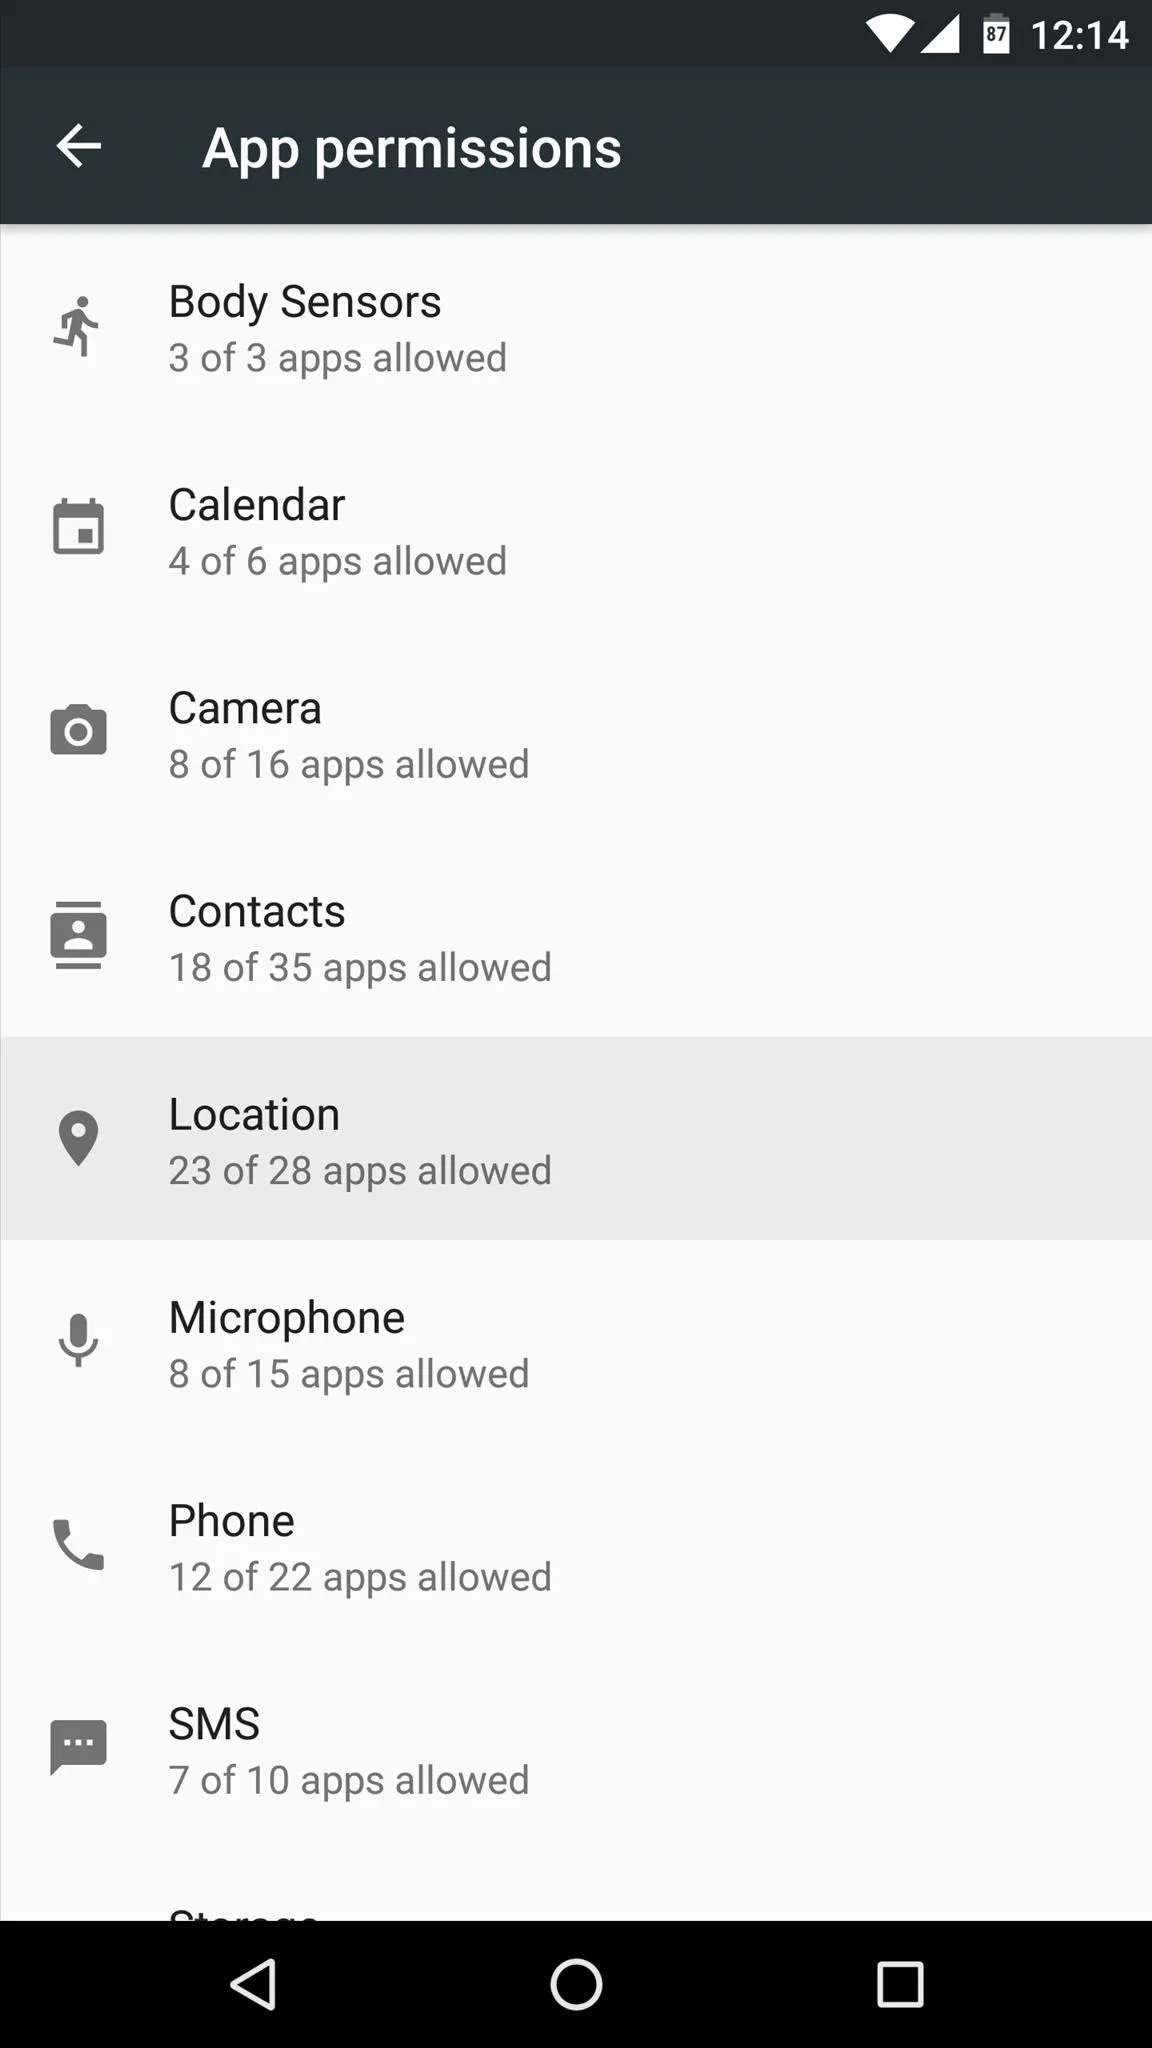
To start with this method, head to the same Apps menu in settings again, but this time, tap the gear icon at the top of the screen. From here, choose the "App permissions" option on the following menu.


Next, select the permission you would like to manage. Once you've done that, you'll see a list of all the apps that are capable of requesting this specific permission—simply toggle the switches next to them to allow or deny access to this permission.


What are your thoughts on Android's new permissions system? Is it a well-rounded method for keeping your personal data safe, or does it still need a bit more work? Let us know in the comment section below, or drop us a line on Android Hacks' Facebook or Twitter, or on Gadget Hacks' Facebook, Google+, or Twitter.
















Comments
Be the first, drop a comment!