
One UI has an exciting privacy feature that lets you lock apps, photos, videos, and files on your Galaxy device behind Samsung's defense-grade Knox security platform. Only you can unlock it using a pattern, PIN, or passcode, or with biometrics like fingerprint and iris locks. It's like having a safe built right into your smartphone, and it couldn't be easier to set up.
Embarrassing photos. Private videos. Bank accounts. Password lists. Dating apps. These are just a few examples of the type of content you may want to stash away from prying eyes and malicious attacks. And they can all go into the encrypted Secure Folder, Samsung's protected vault for Galaxy devices.
What Is Samsung's Secure Folder?
Samsung's Secure Folder feature is a sandboxed environment independent and isolated from the rest of your Galaxy device. You can't access anything you add to it from outside the Knox-protected vault, but you can authenticate yourself to view its contents whenever you like. USB flash drives and other USB-connected devices, as well as Wi-Fi Direct, will not be able to access Secure Folder.
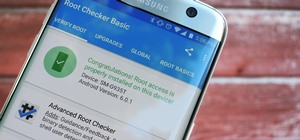
According to Samsung, "If your mobile device detects any rooting or custom ROMs, Secure Folder will automatically lock-up in order to prevent unauthorized access, in which case you will no longer be able to access or use the contents within Secure Folder." That's the one downside to using Secure Folder, but it's to better secure all of your content from outside forces.
Samsung suggests that "you back up any important applications or data elsewhere, such as on your personal computer, before moving them to Secure Folder."
Compatible Devices
Secure Folder is available on but not limited to the phones listed below. Secure Folder can also be downloaded and installed from Google Play or Galaxy Store, and it works with most Samsung phones and tablets running Android N (7.0) or above.
- Samsung Galaxy S6 and newer
- Samsung Galaxy Note 5 and newer
- Samsung Galaxy Z Fold and newer
- Samsung Galaxy Z Flip and newer
- Samsung Galaxy A3 (2016) and newer
- Samsung Galaxy J5 Pro and newer
Step 1: Open the Secure Folder Settings
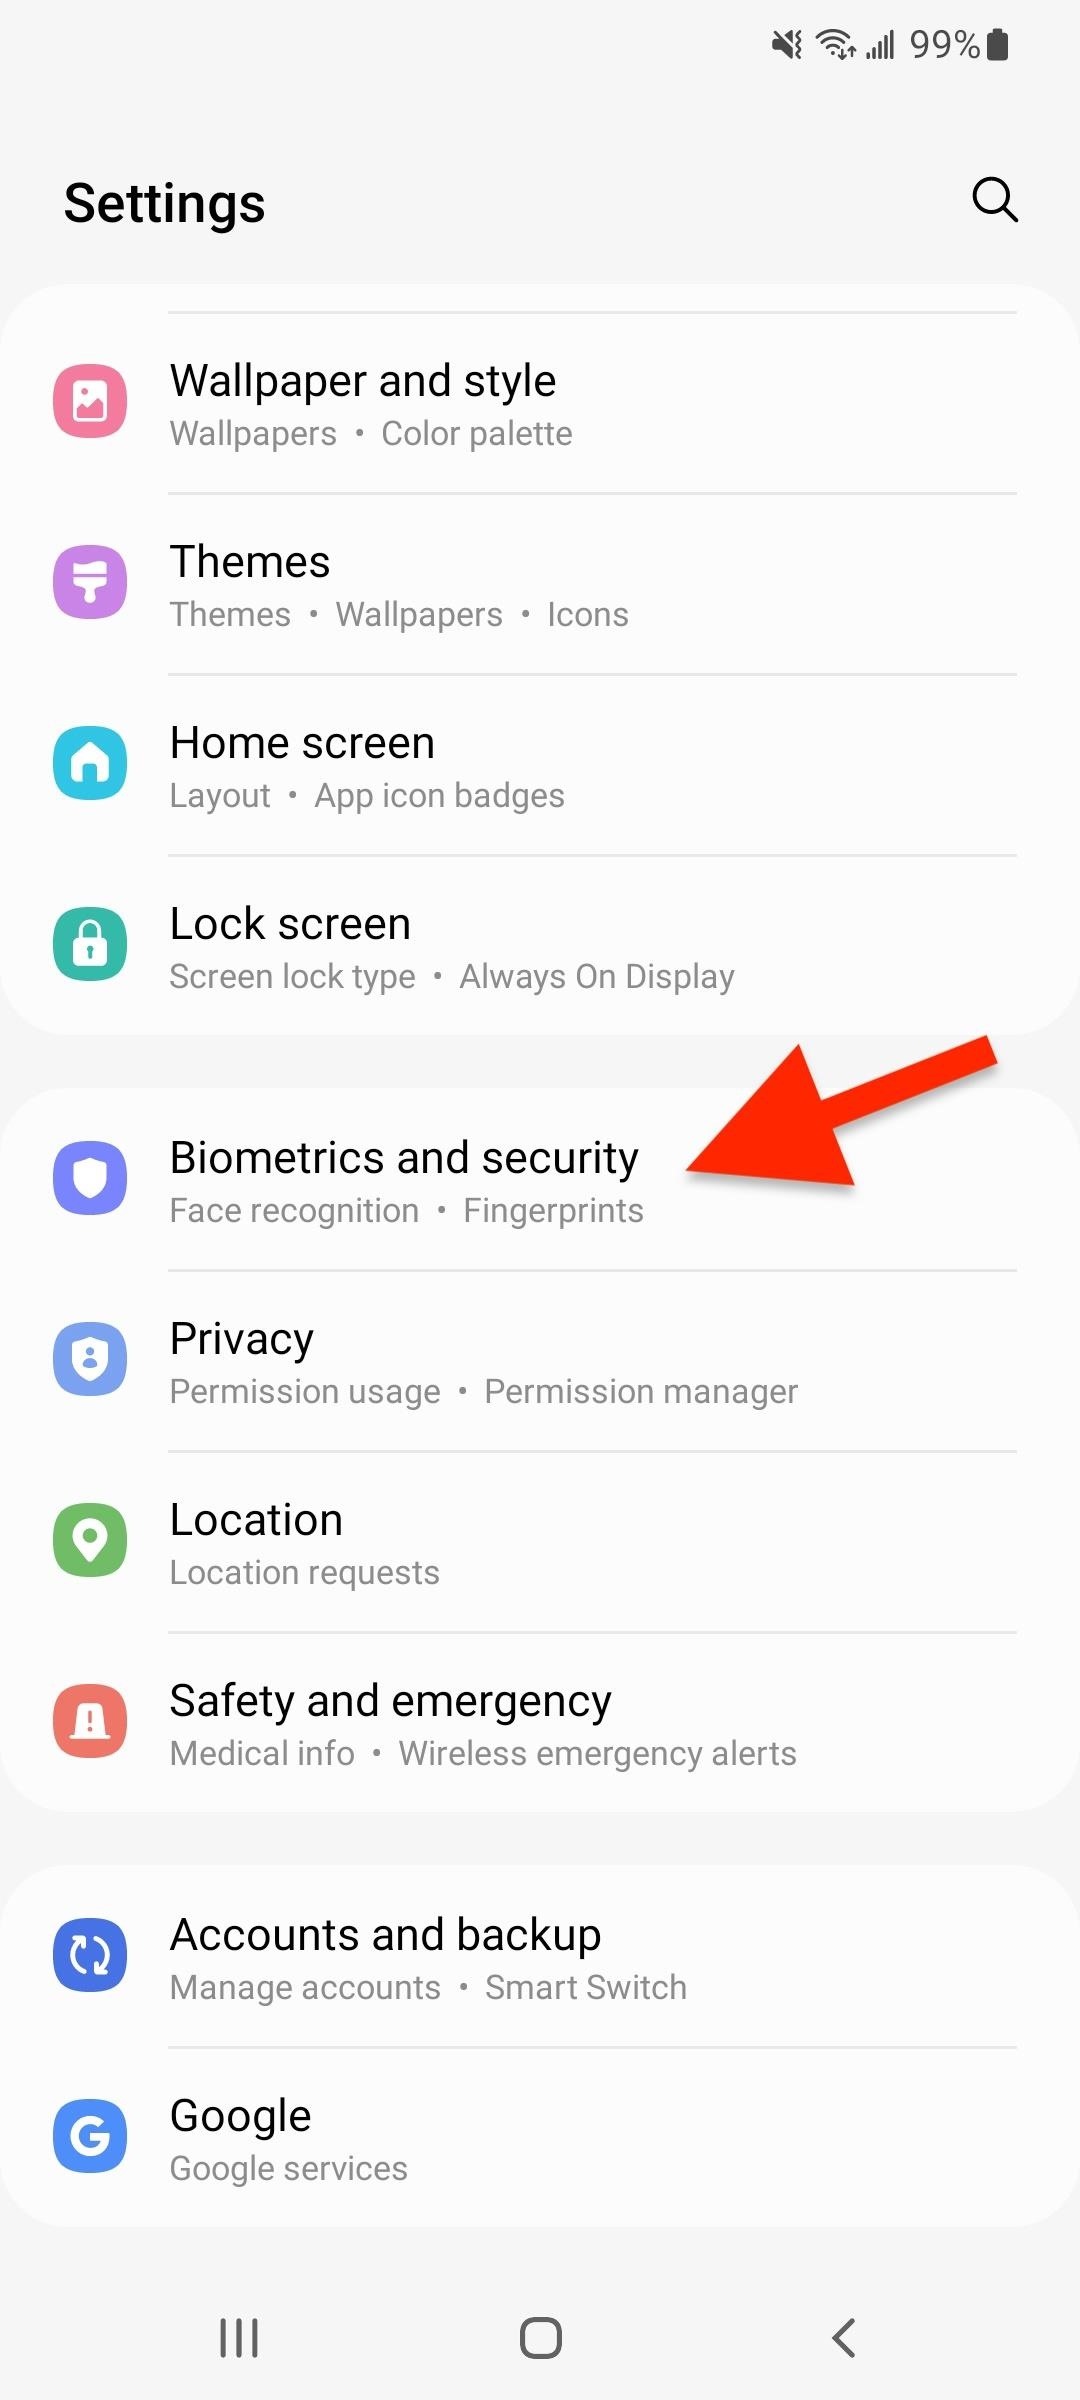
On your Galaxy device, navigate to the Secure Folder settings, which you can find using one of the below paths, depending on your device model.
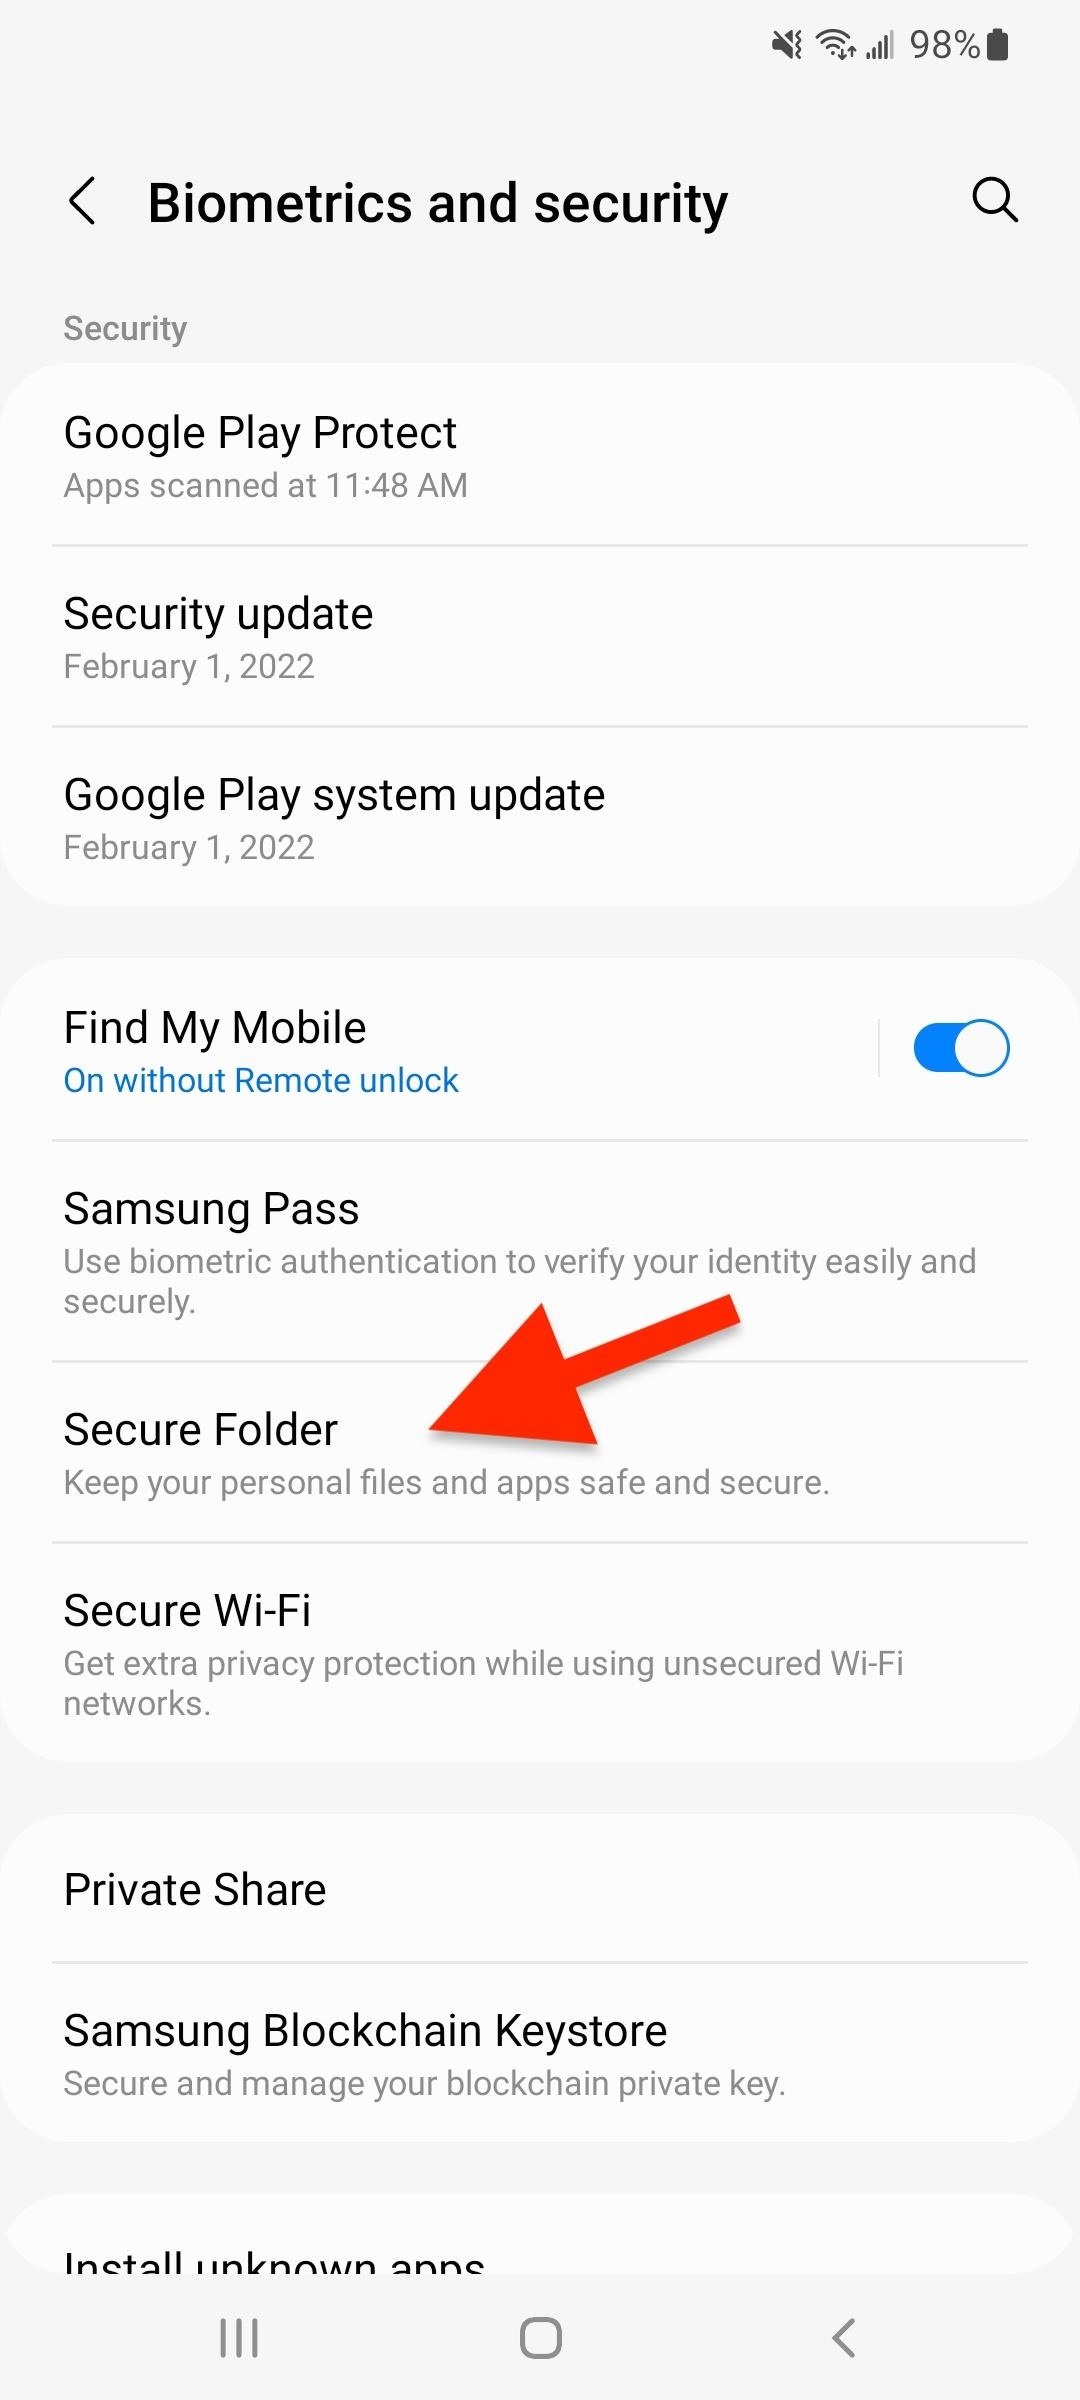
- Settings –> Biometrics and security –> Secure Folder
- Settings –> Lock screen and security –> Secure Folder
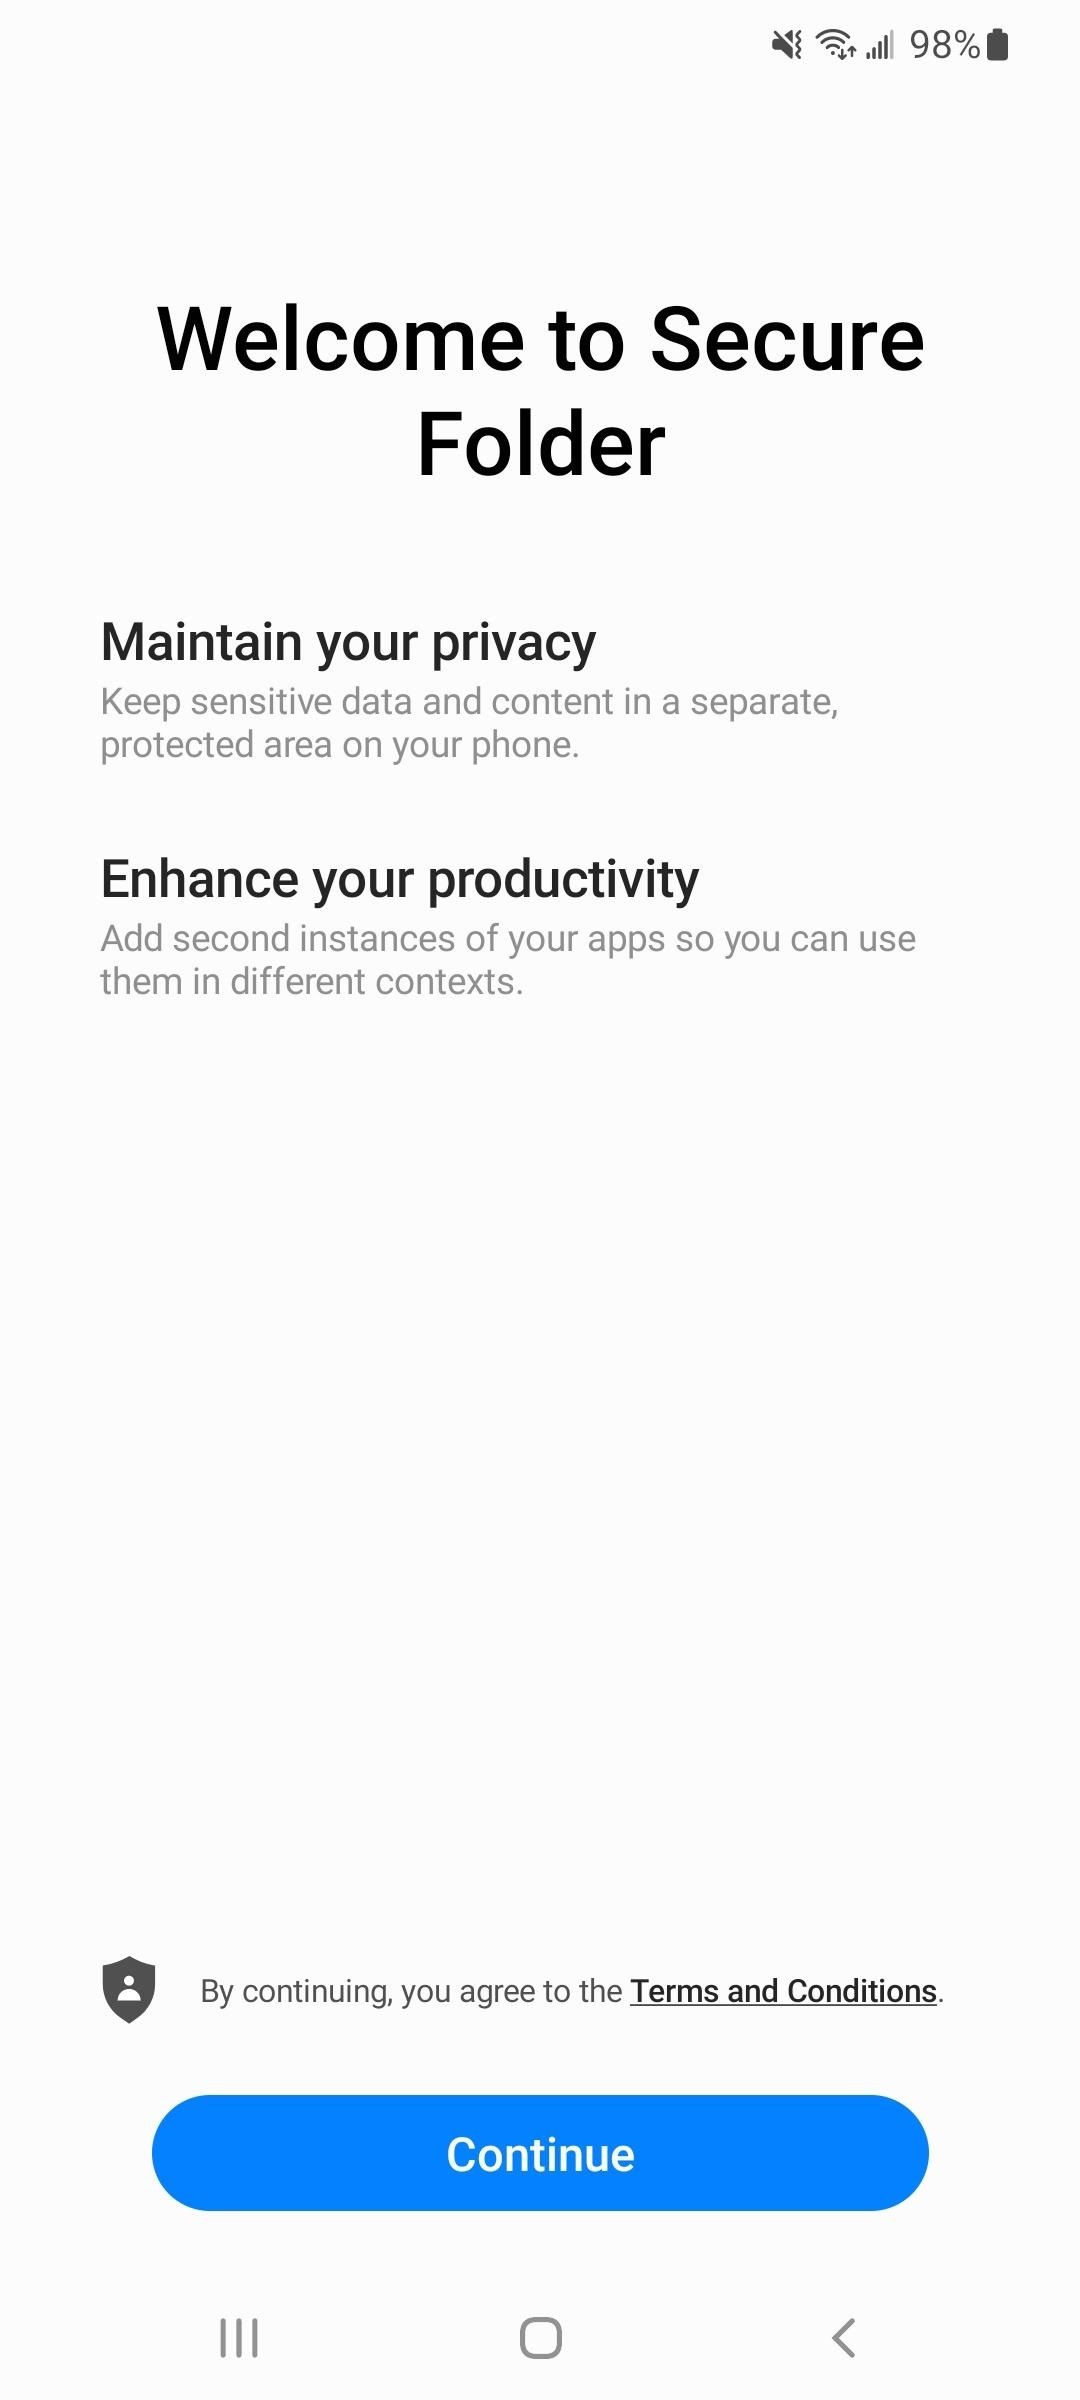
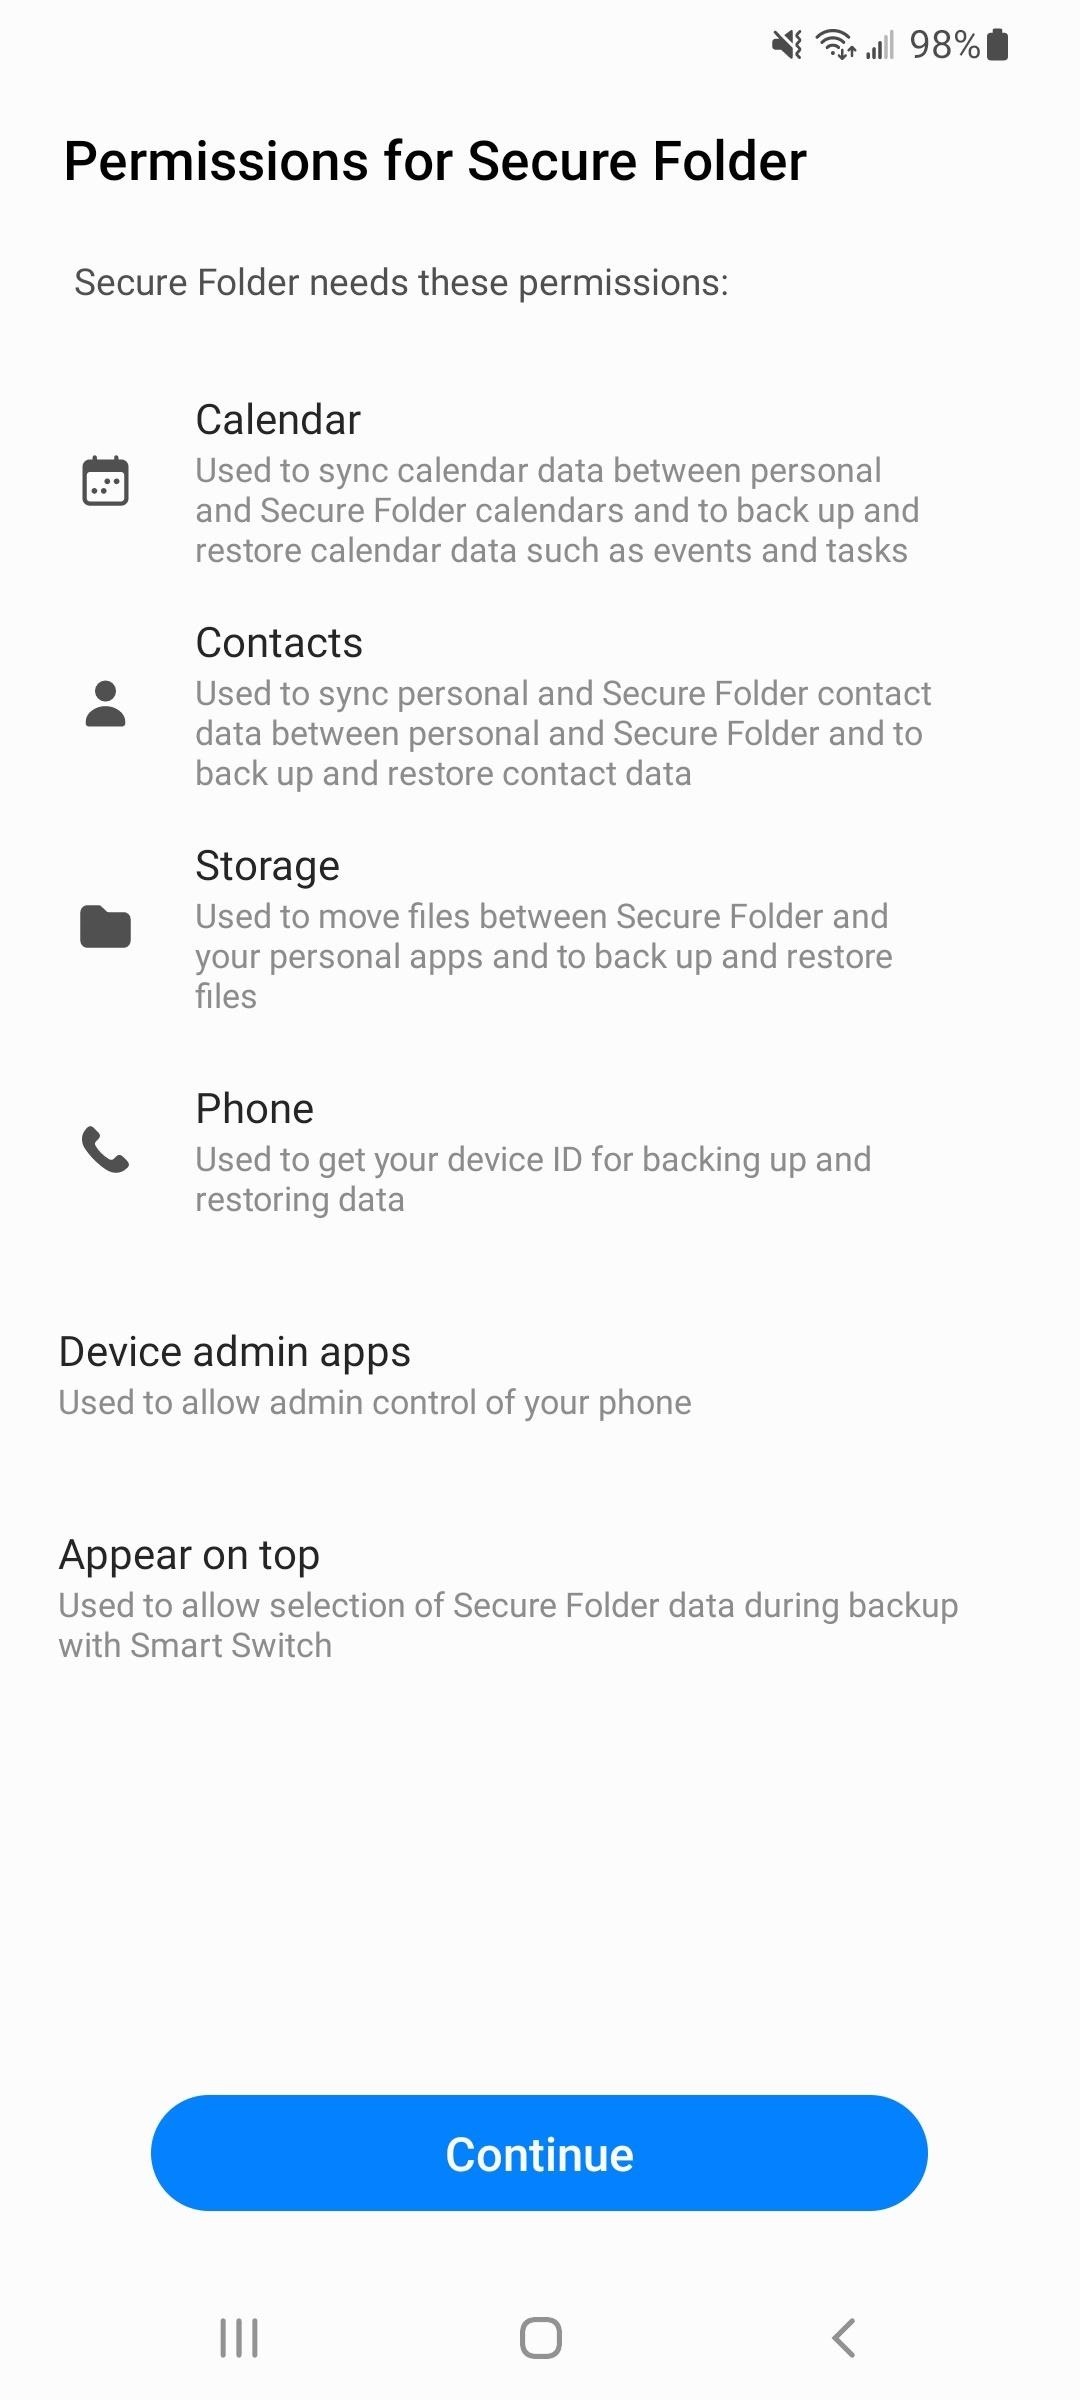
If you see the "Welcome to Secure Folder" information screen, tap "Continue" and give Secure Folder permission to access Calendar, Contacts, Storage, and Phone. Then, wait a few moments while One UI (or Samsung Experience if using an older phone) creates your Secure Folder.
Step 2: Sign in to Your Samsung Account
You can skip this step if you're already logged in to your Samsung account. Otherwise, follow the prompts to either "Create Account" (if you don't have one) or "Sign In" with your Samsung account's username and password. You have to log in to your Samsung account to use Secure Folder.
Step 3: Choose Your Unlock Method
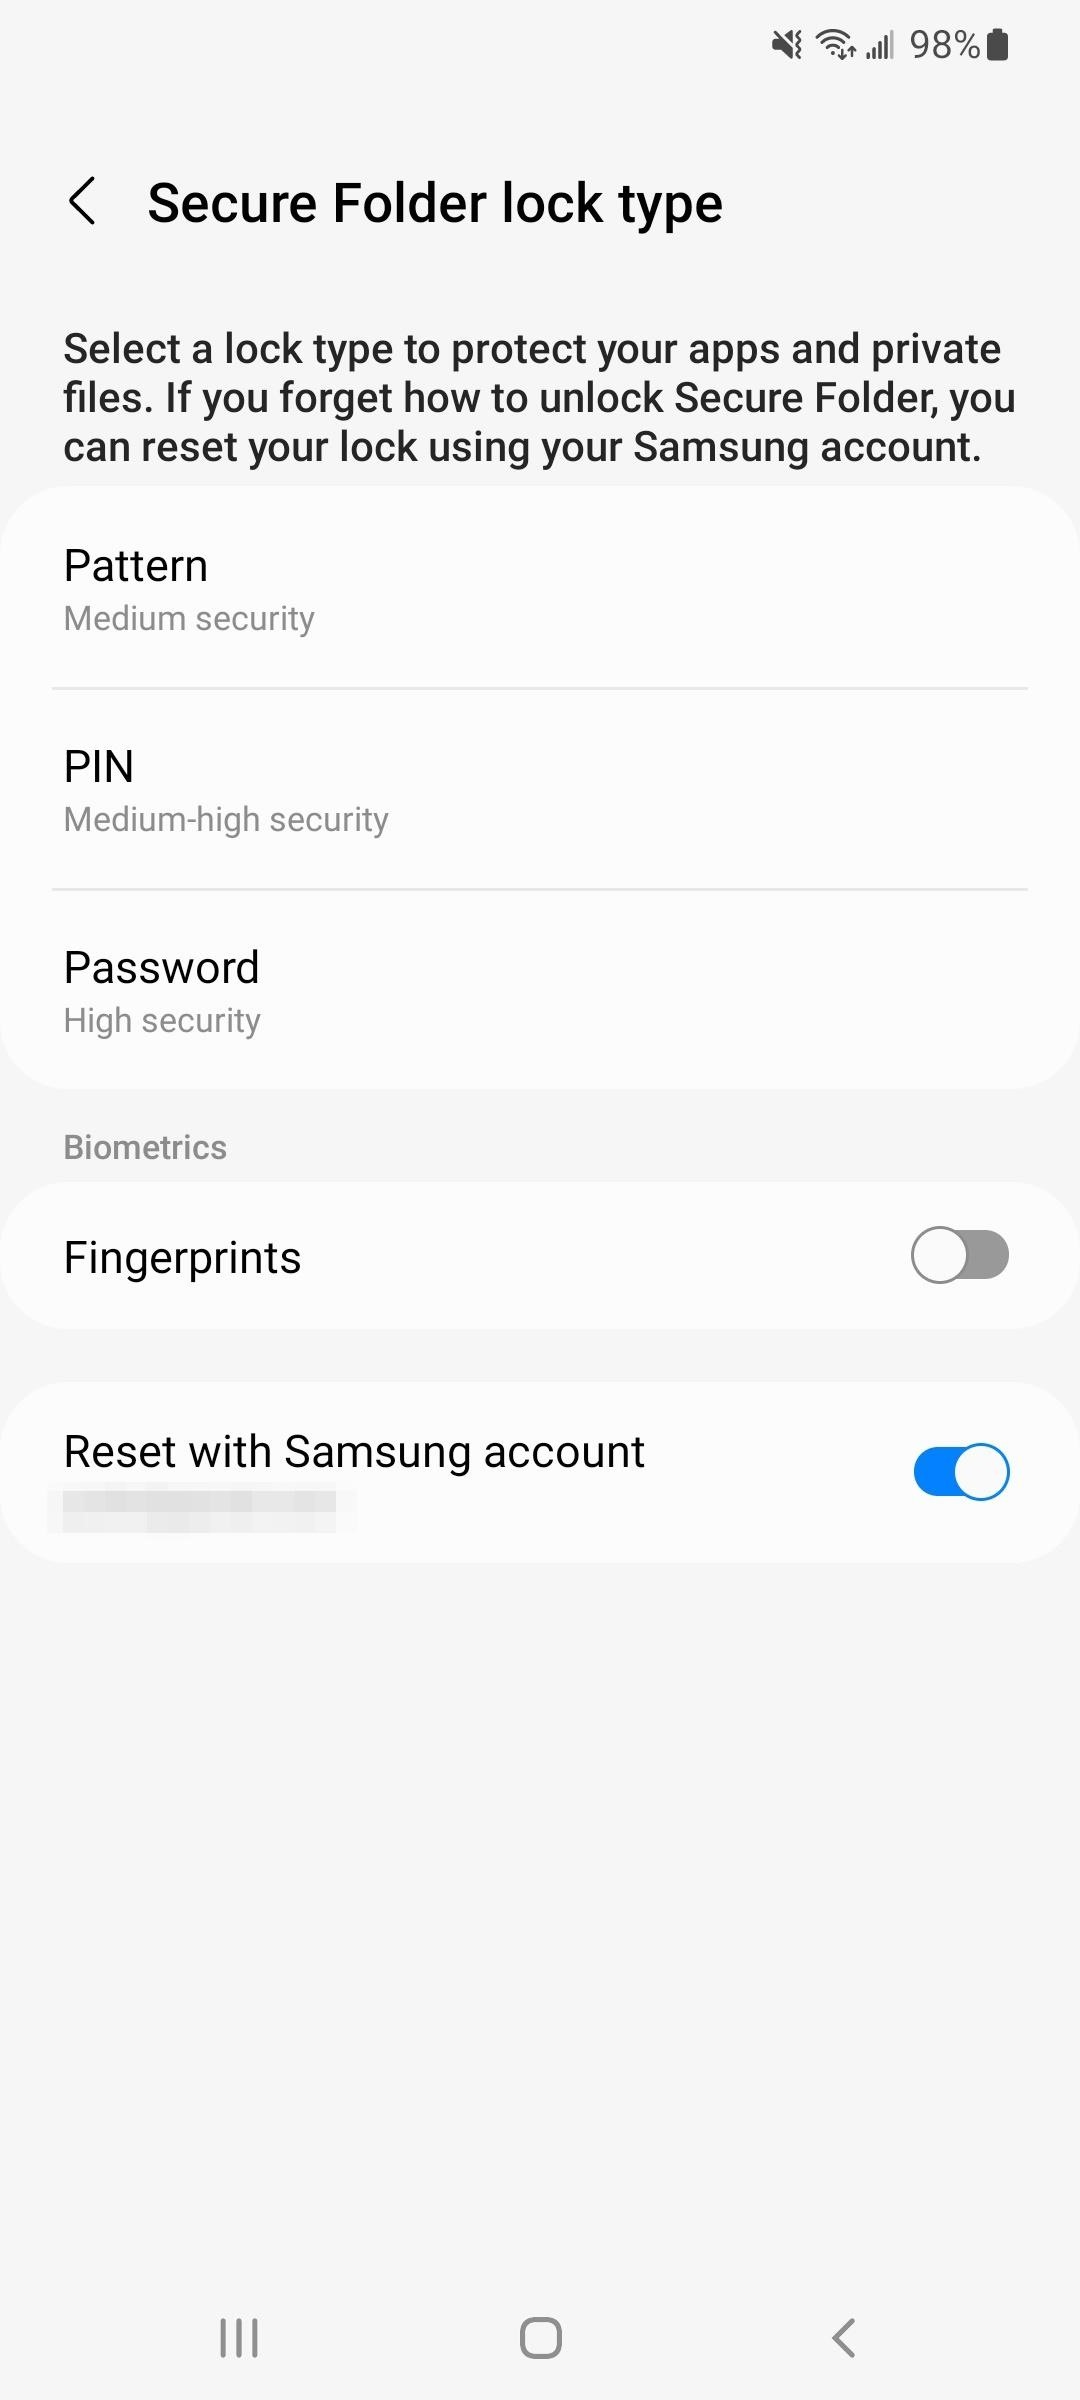
The next page is where you pick the unlock method to use with Secure Folder.
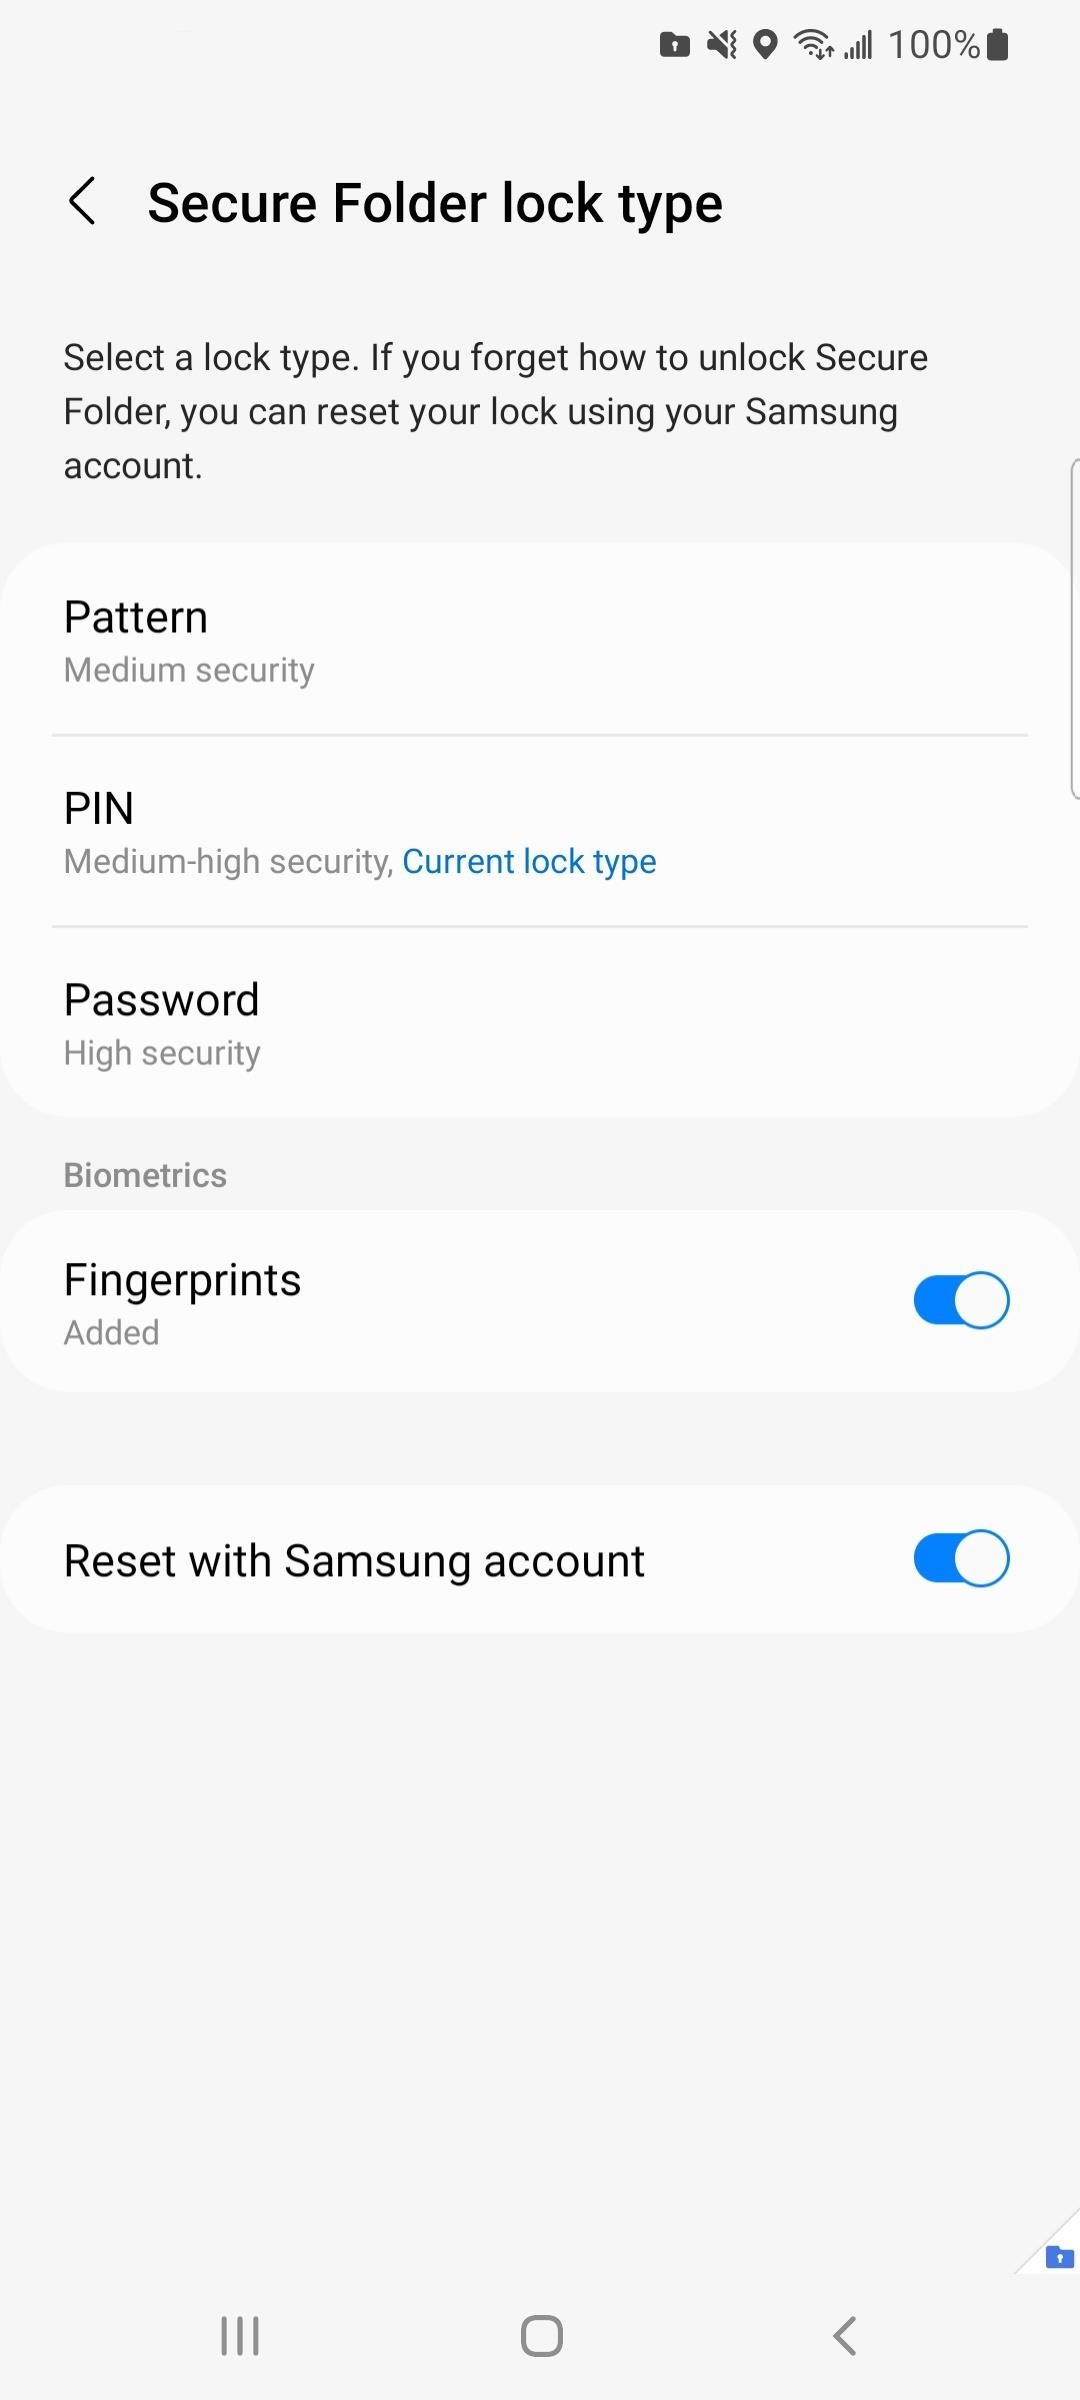
Select a lock type to protect your apps and private files. If you forget how to unlock Secure Folder, you can reset your lock using your Samsung account.
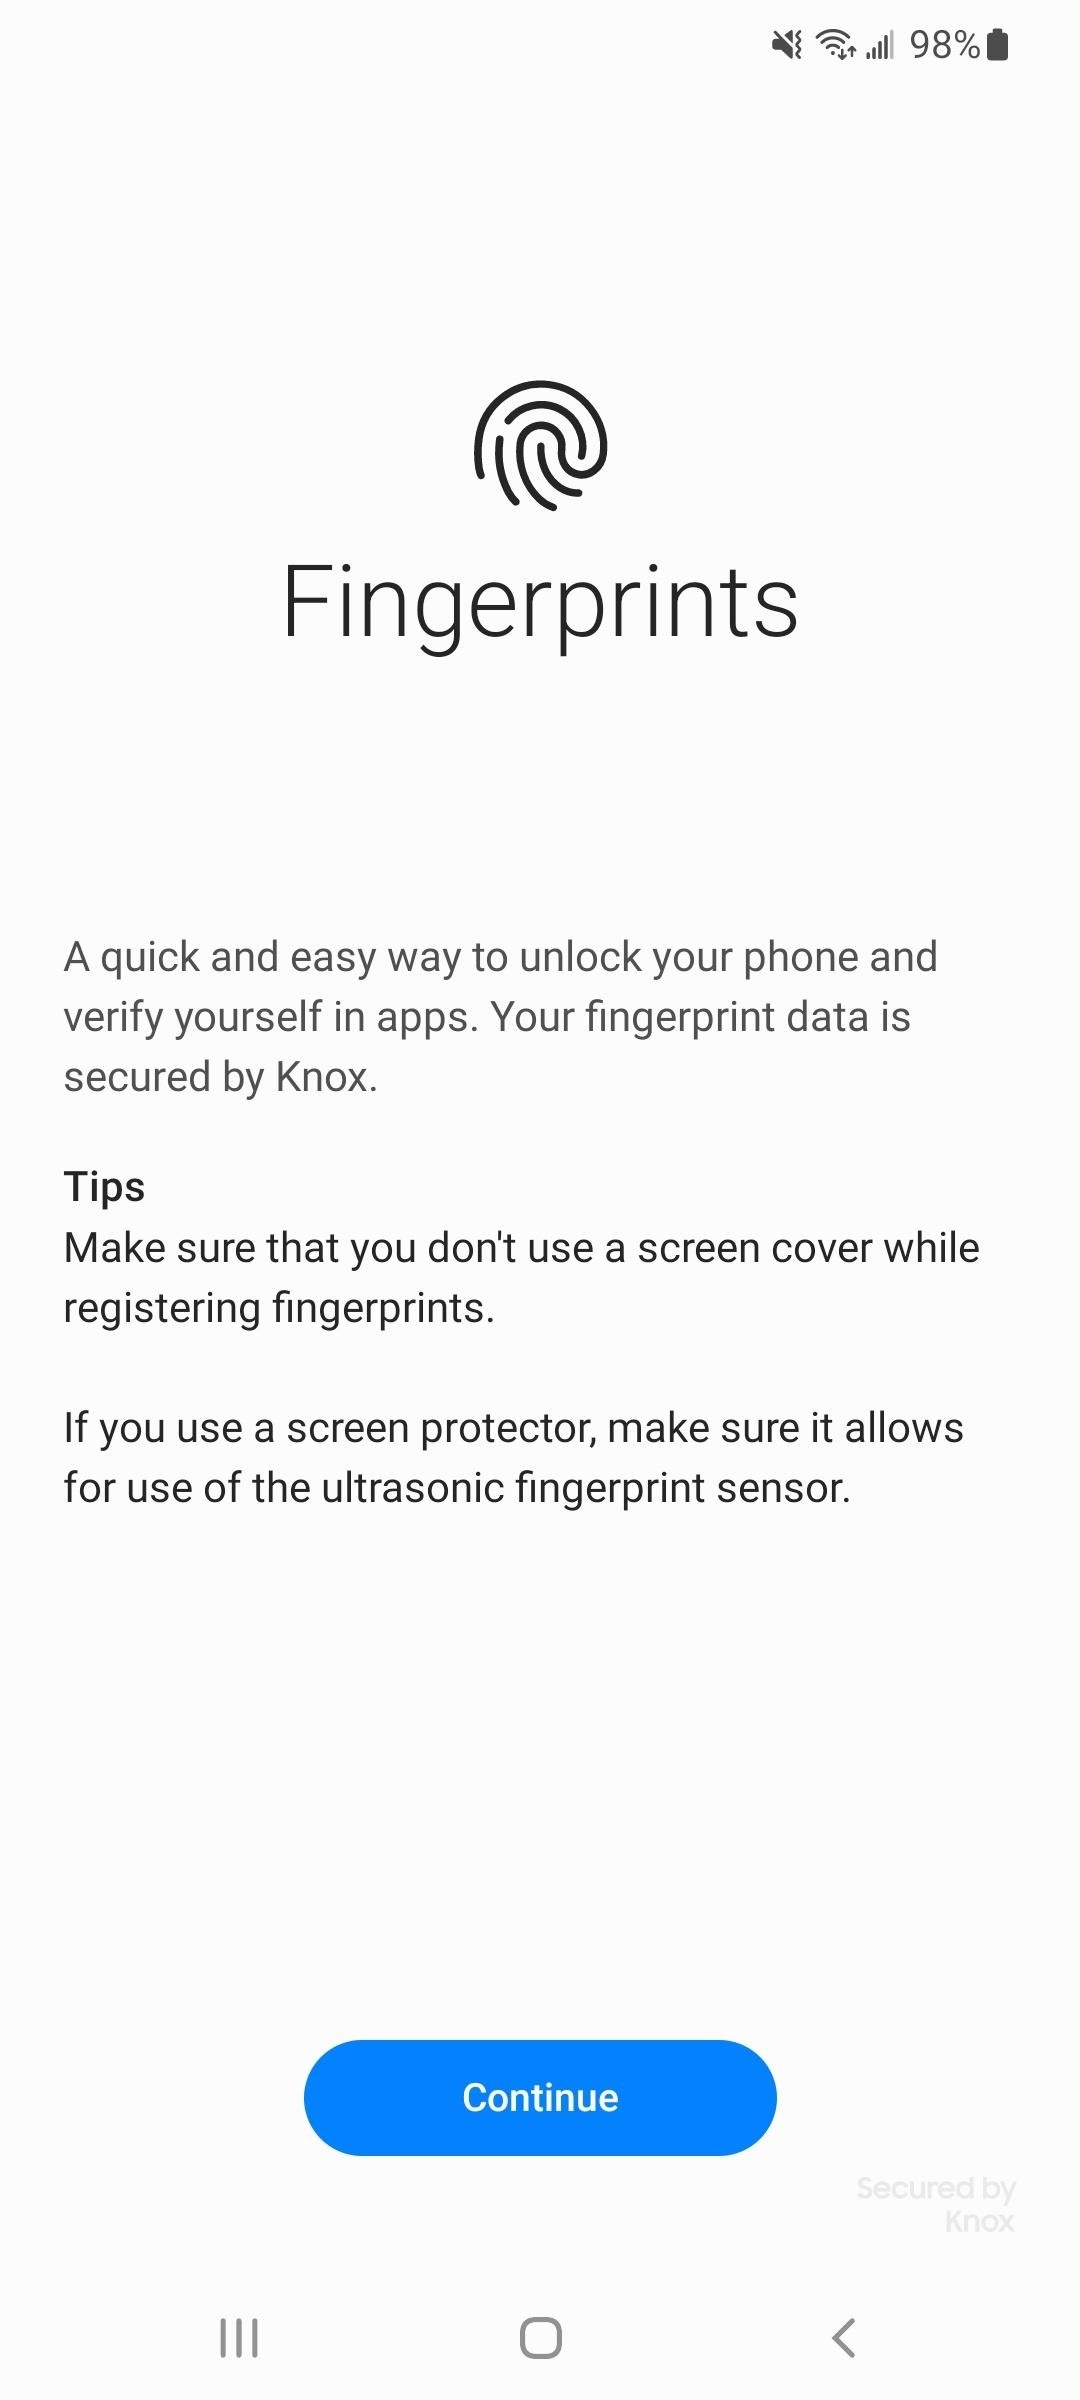
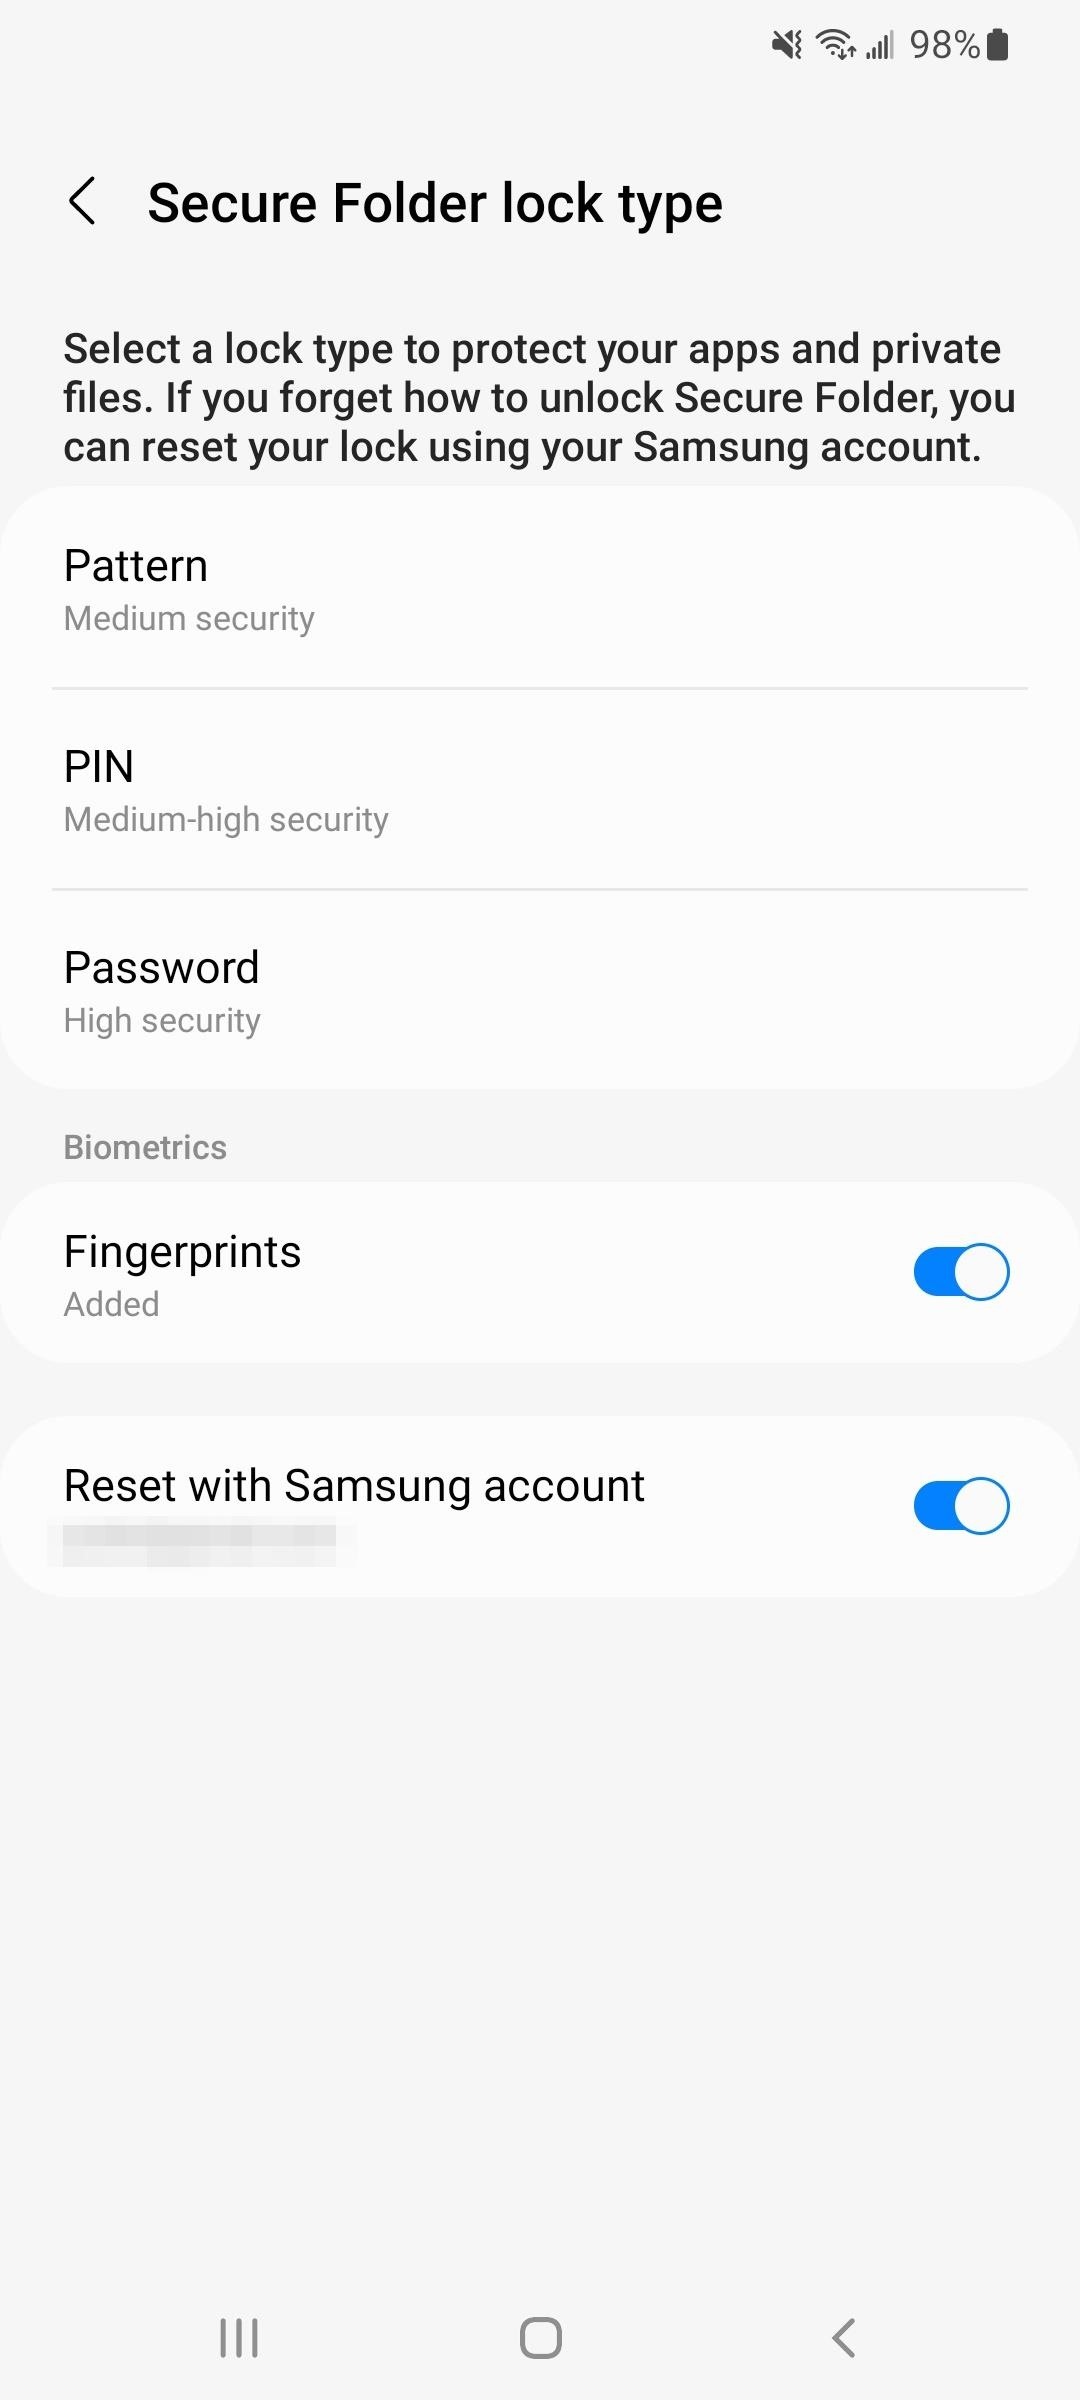
You can choose between "Pattern," "PIN," and "Password," and you can also pick "Fingerprints" or "Iris" as biometric keys to your encrypted Secure Folder. If you choose a biometric method and don't have it already set up on your device, follow the prompts to get everything ready. You can use fingerprint or iris biometrics with one of the regular lock types for two ways to get into your vault.
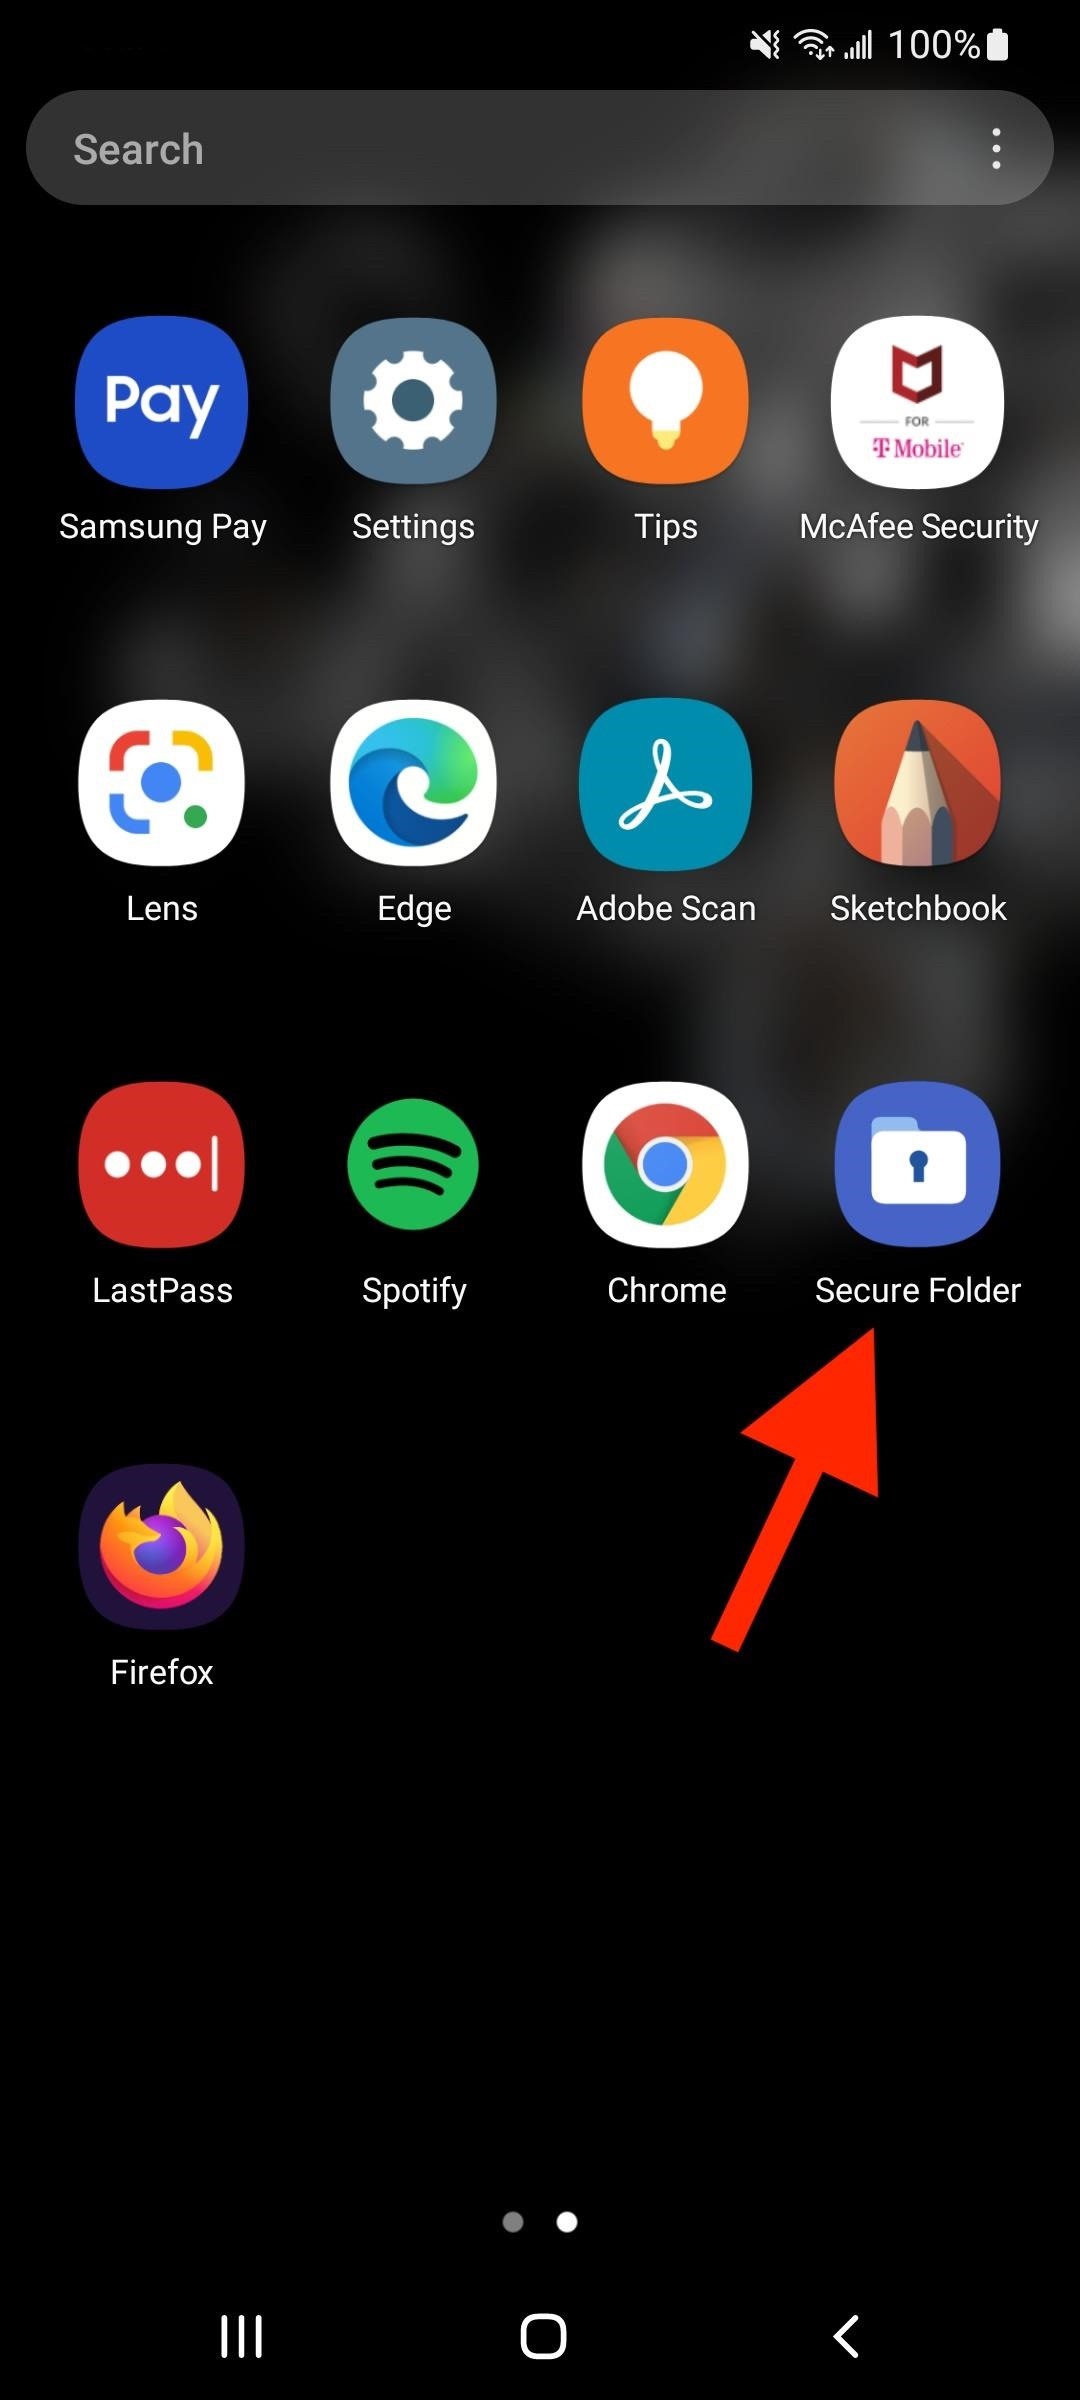
Step 4: Locate Your New Secure Folder
Now that your Secure Folder is created, you can find it on your Apps screen, which you can access by swiping up on the Home screen.
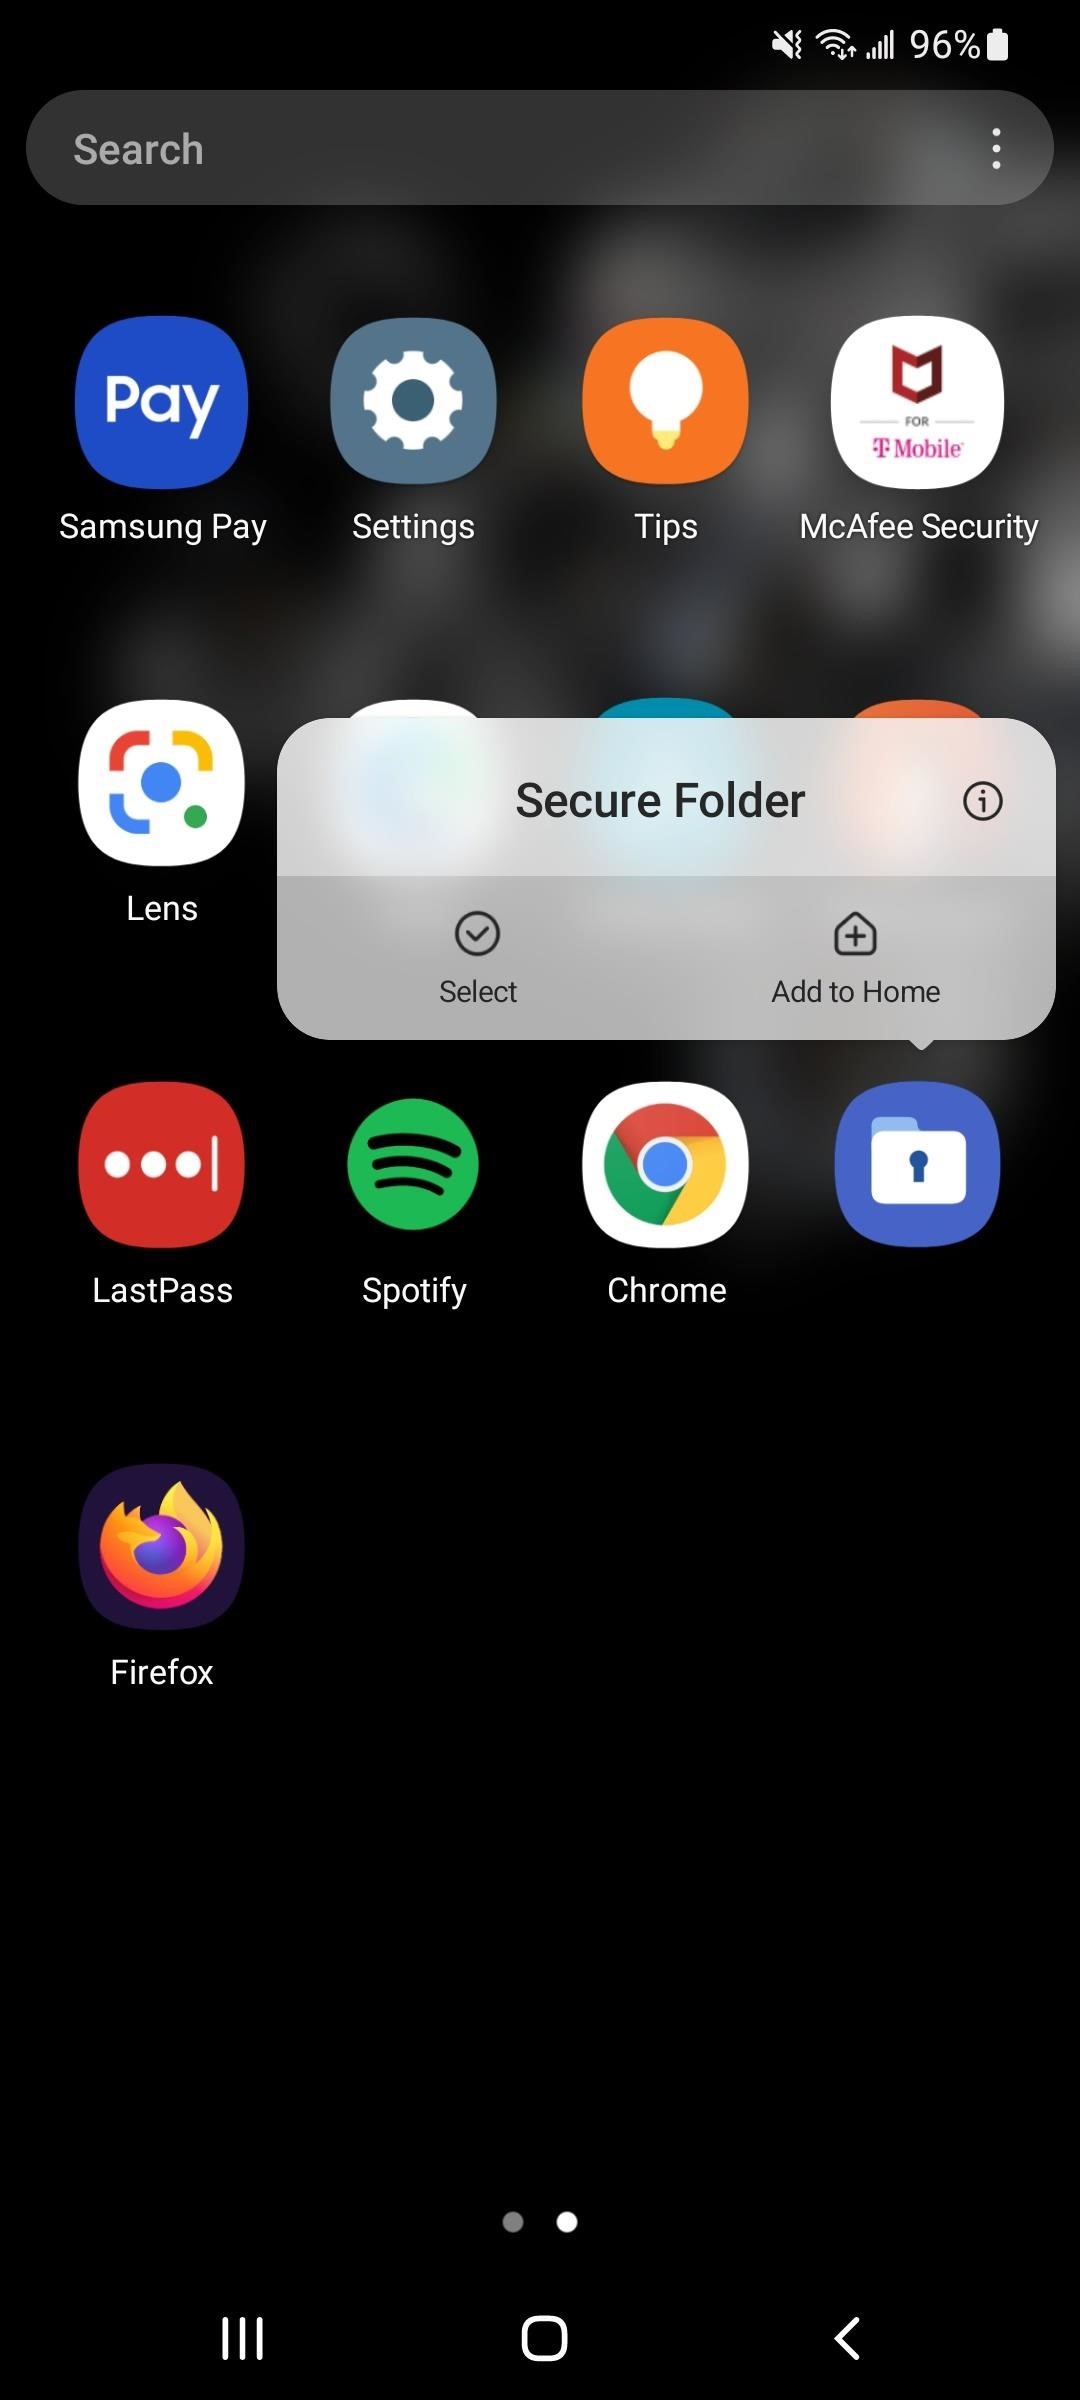
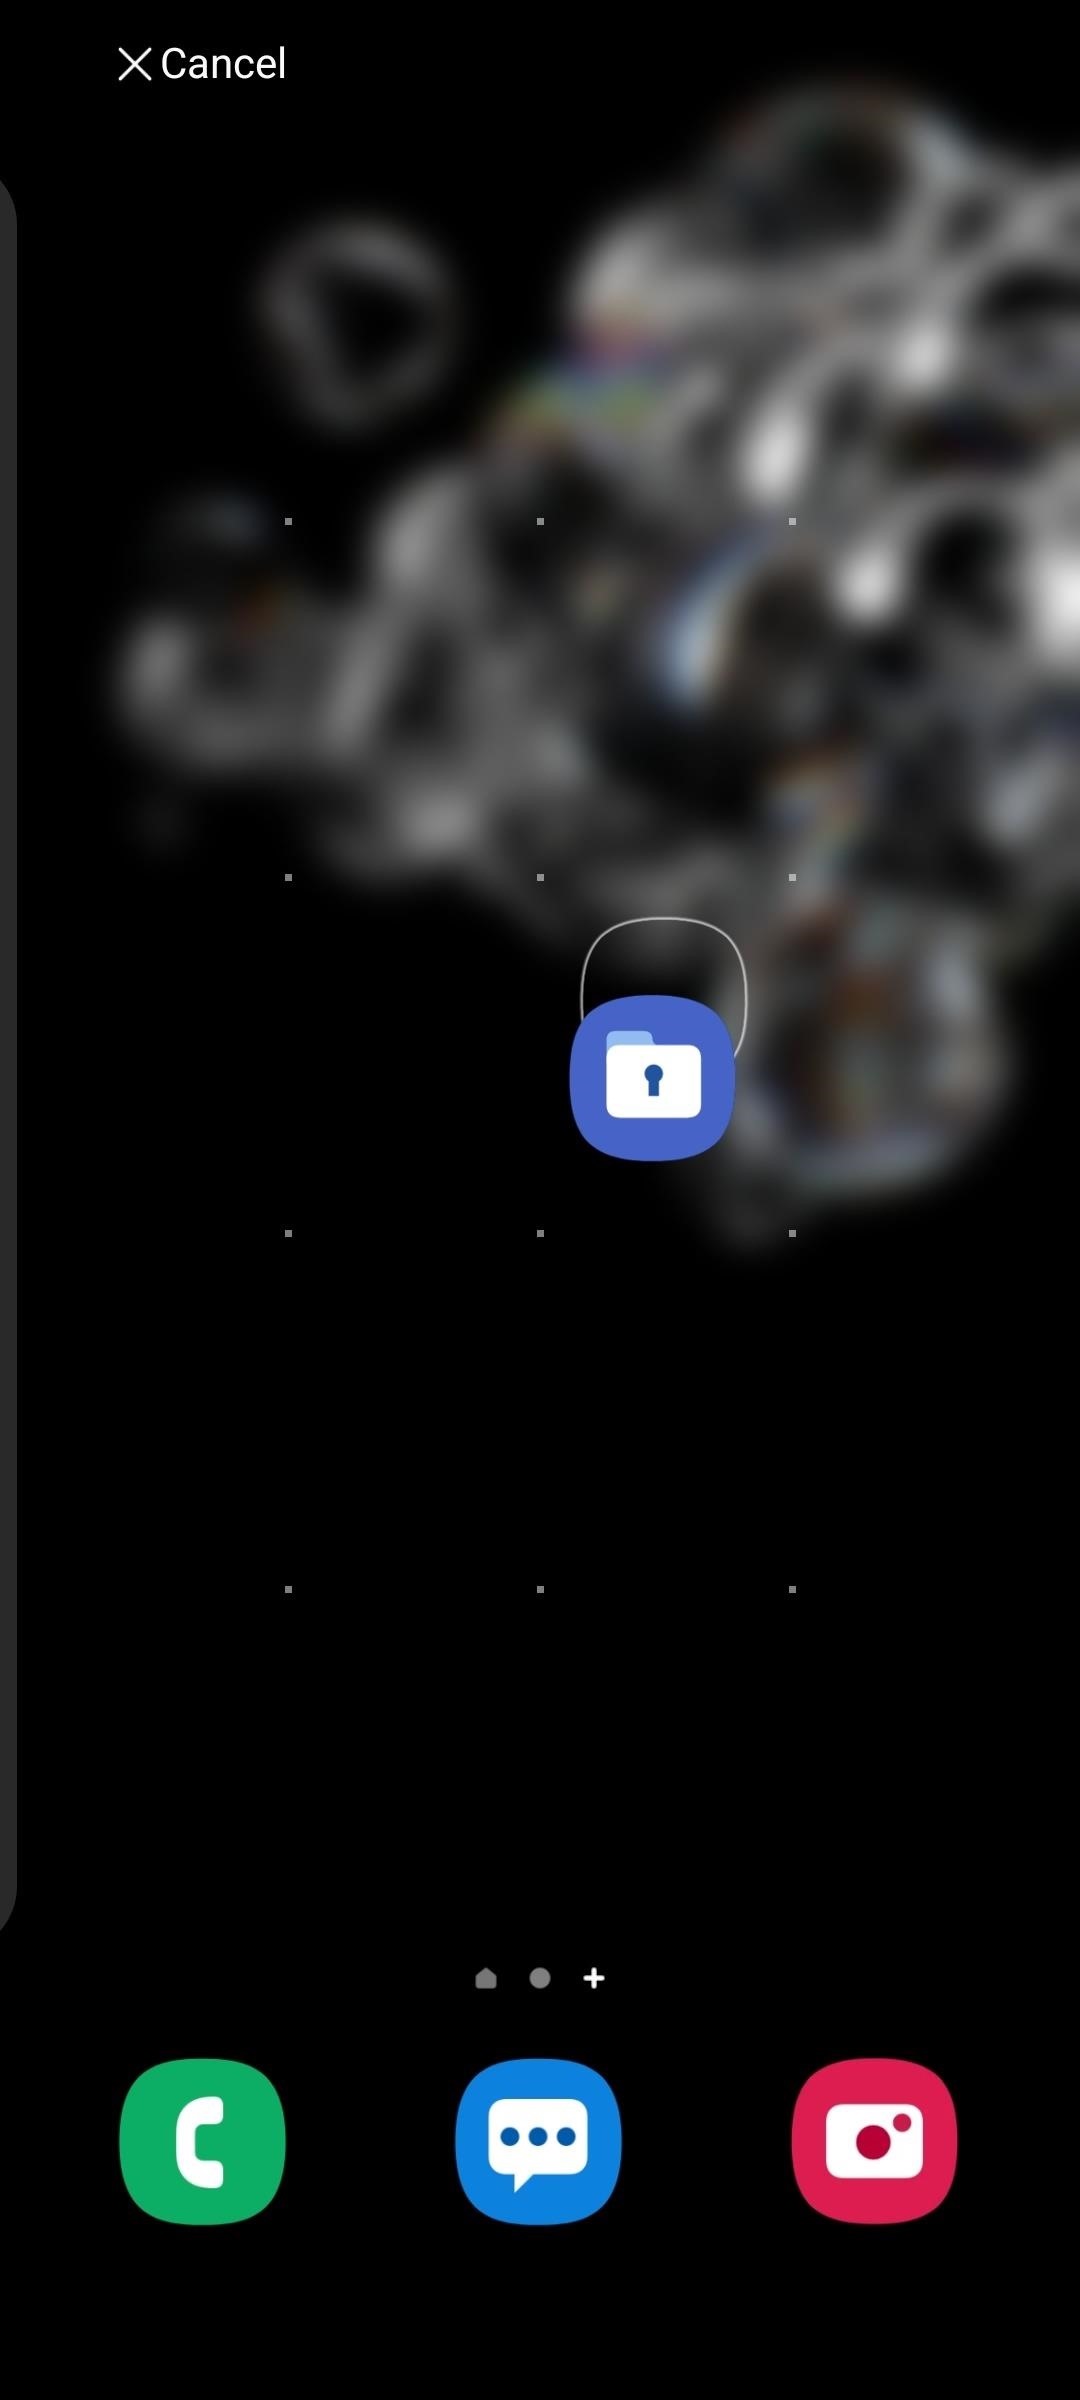
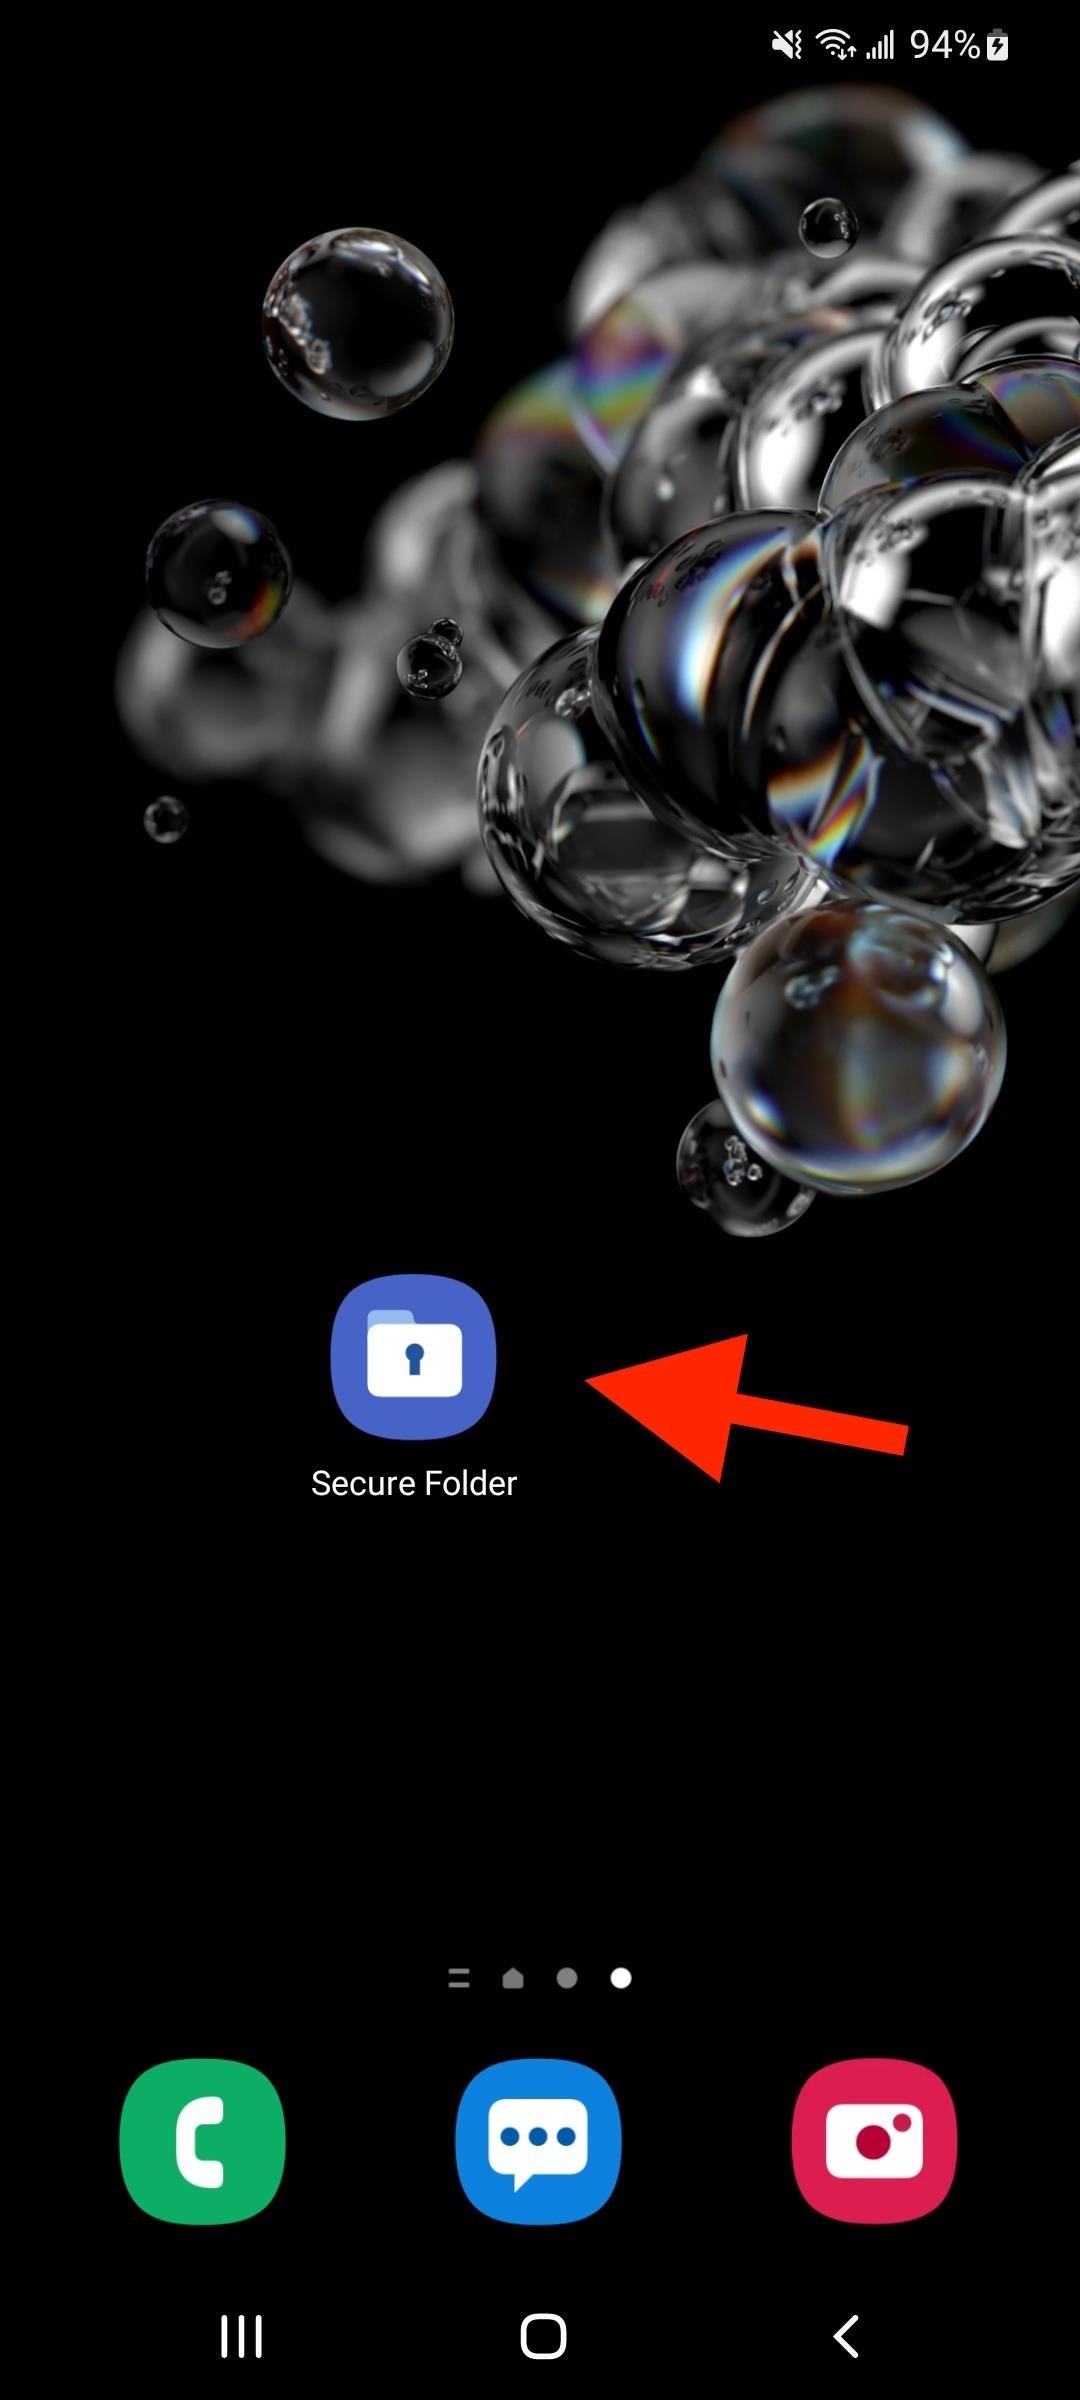
Like any other app or folder on the Apps screen, you can add it to your Home screen for easier access. To do so, long-press Secure Folder and tap "Add to Home," or long-press and drag and drop the Secure Folder icon to the exact place on the Home screen where you want it.
Step 5: Open Your Secure Folder
Tap on the Secure Folder icon to open it, then use biometrics or your pattern, PIN, or password to authenticate yourself.
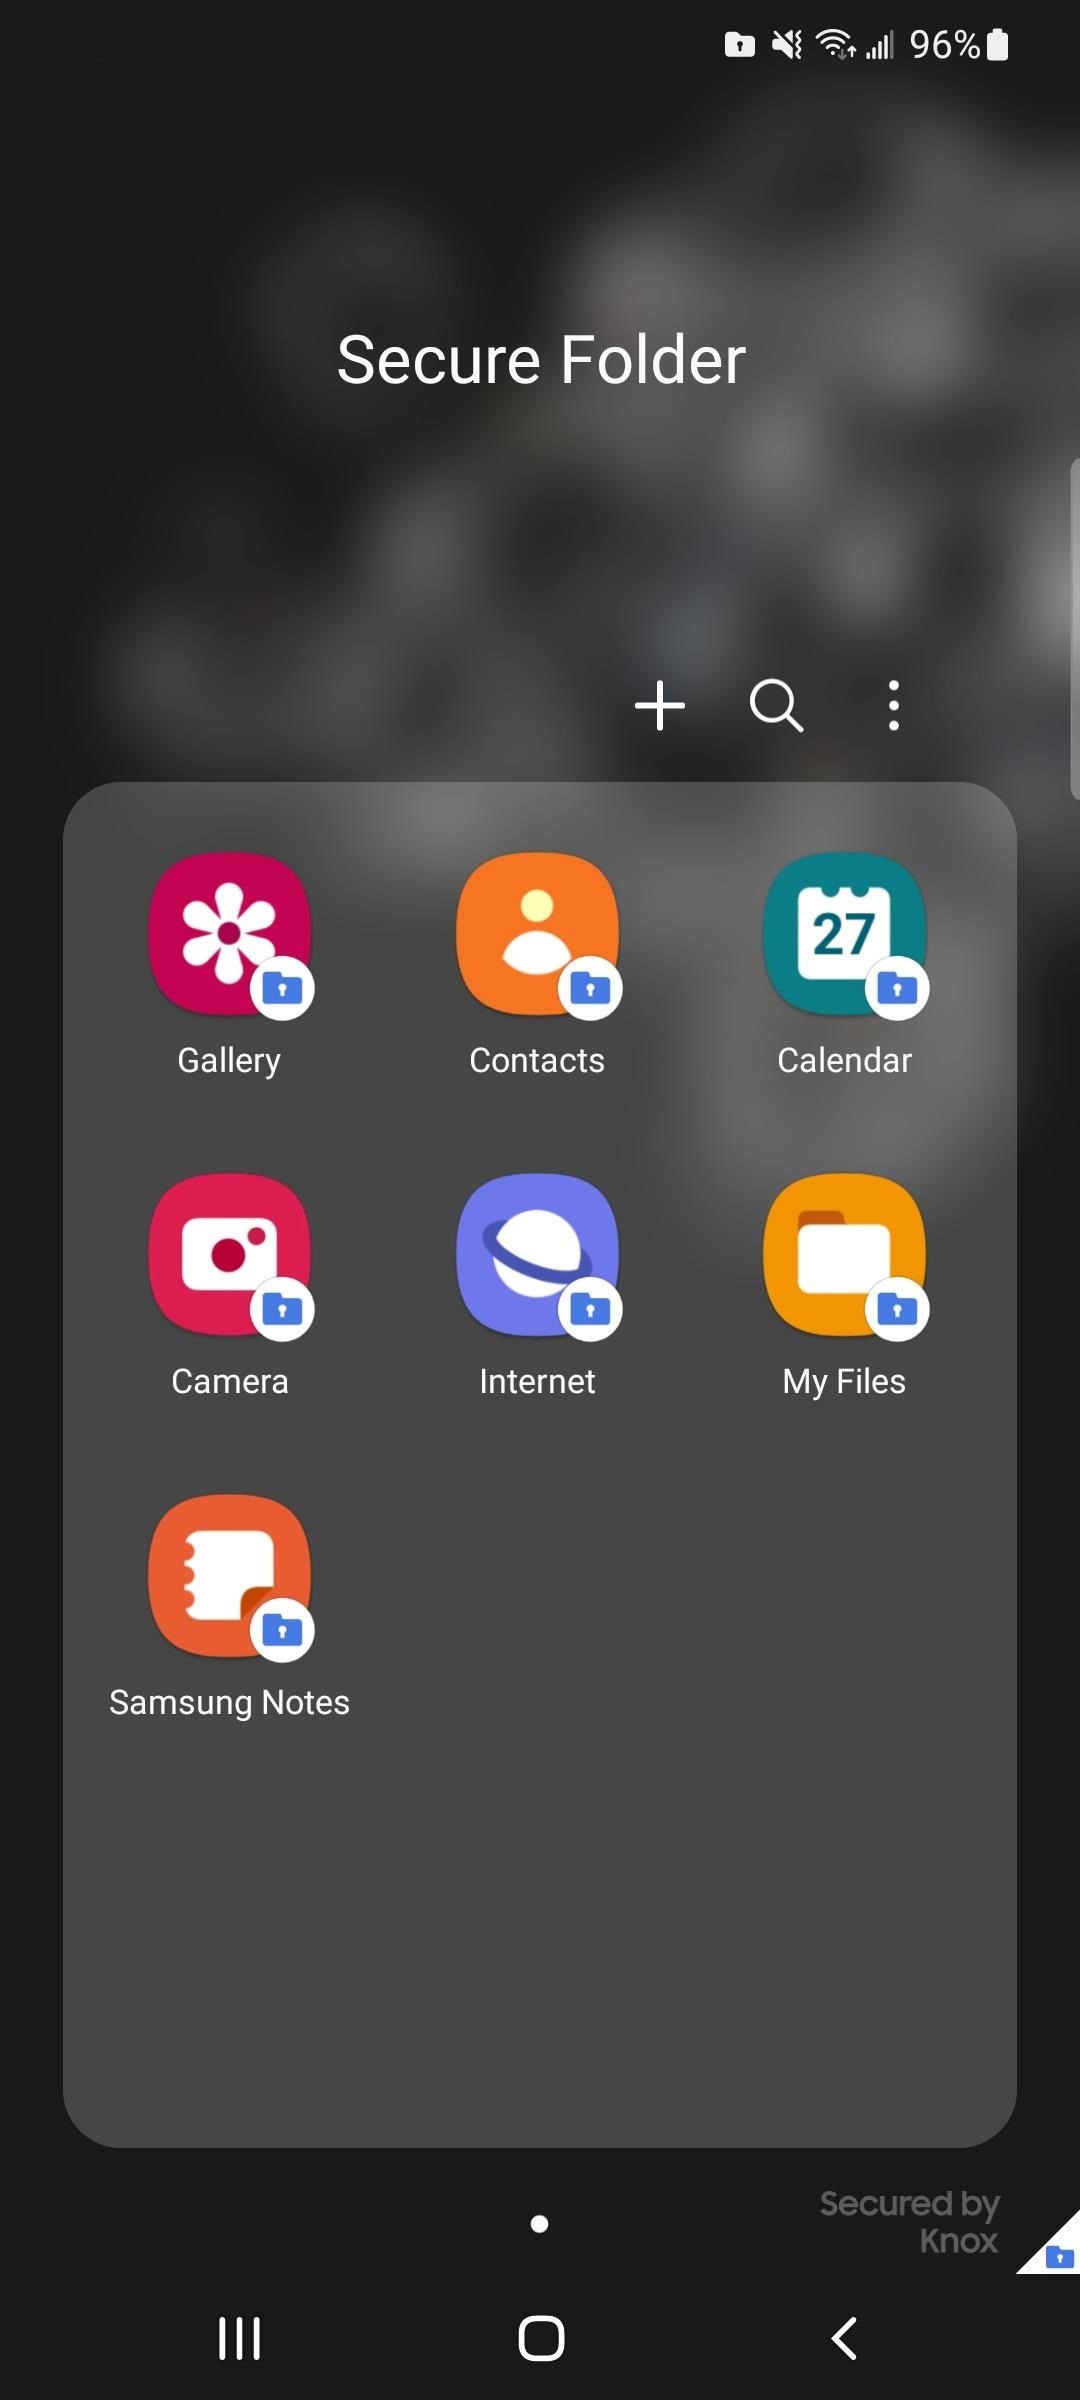
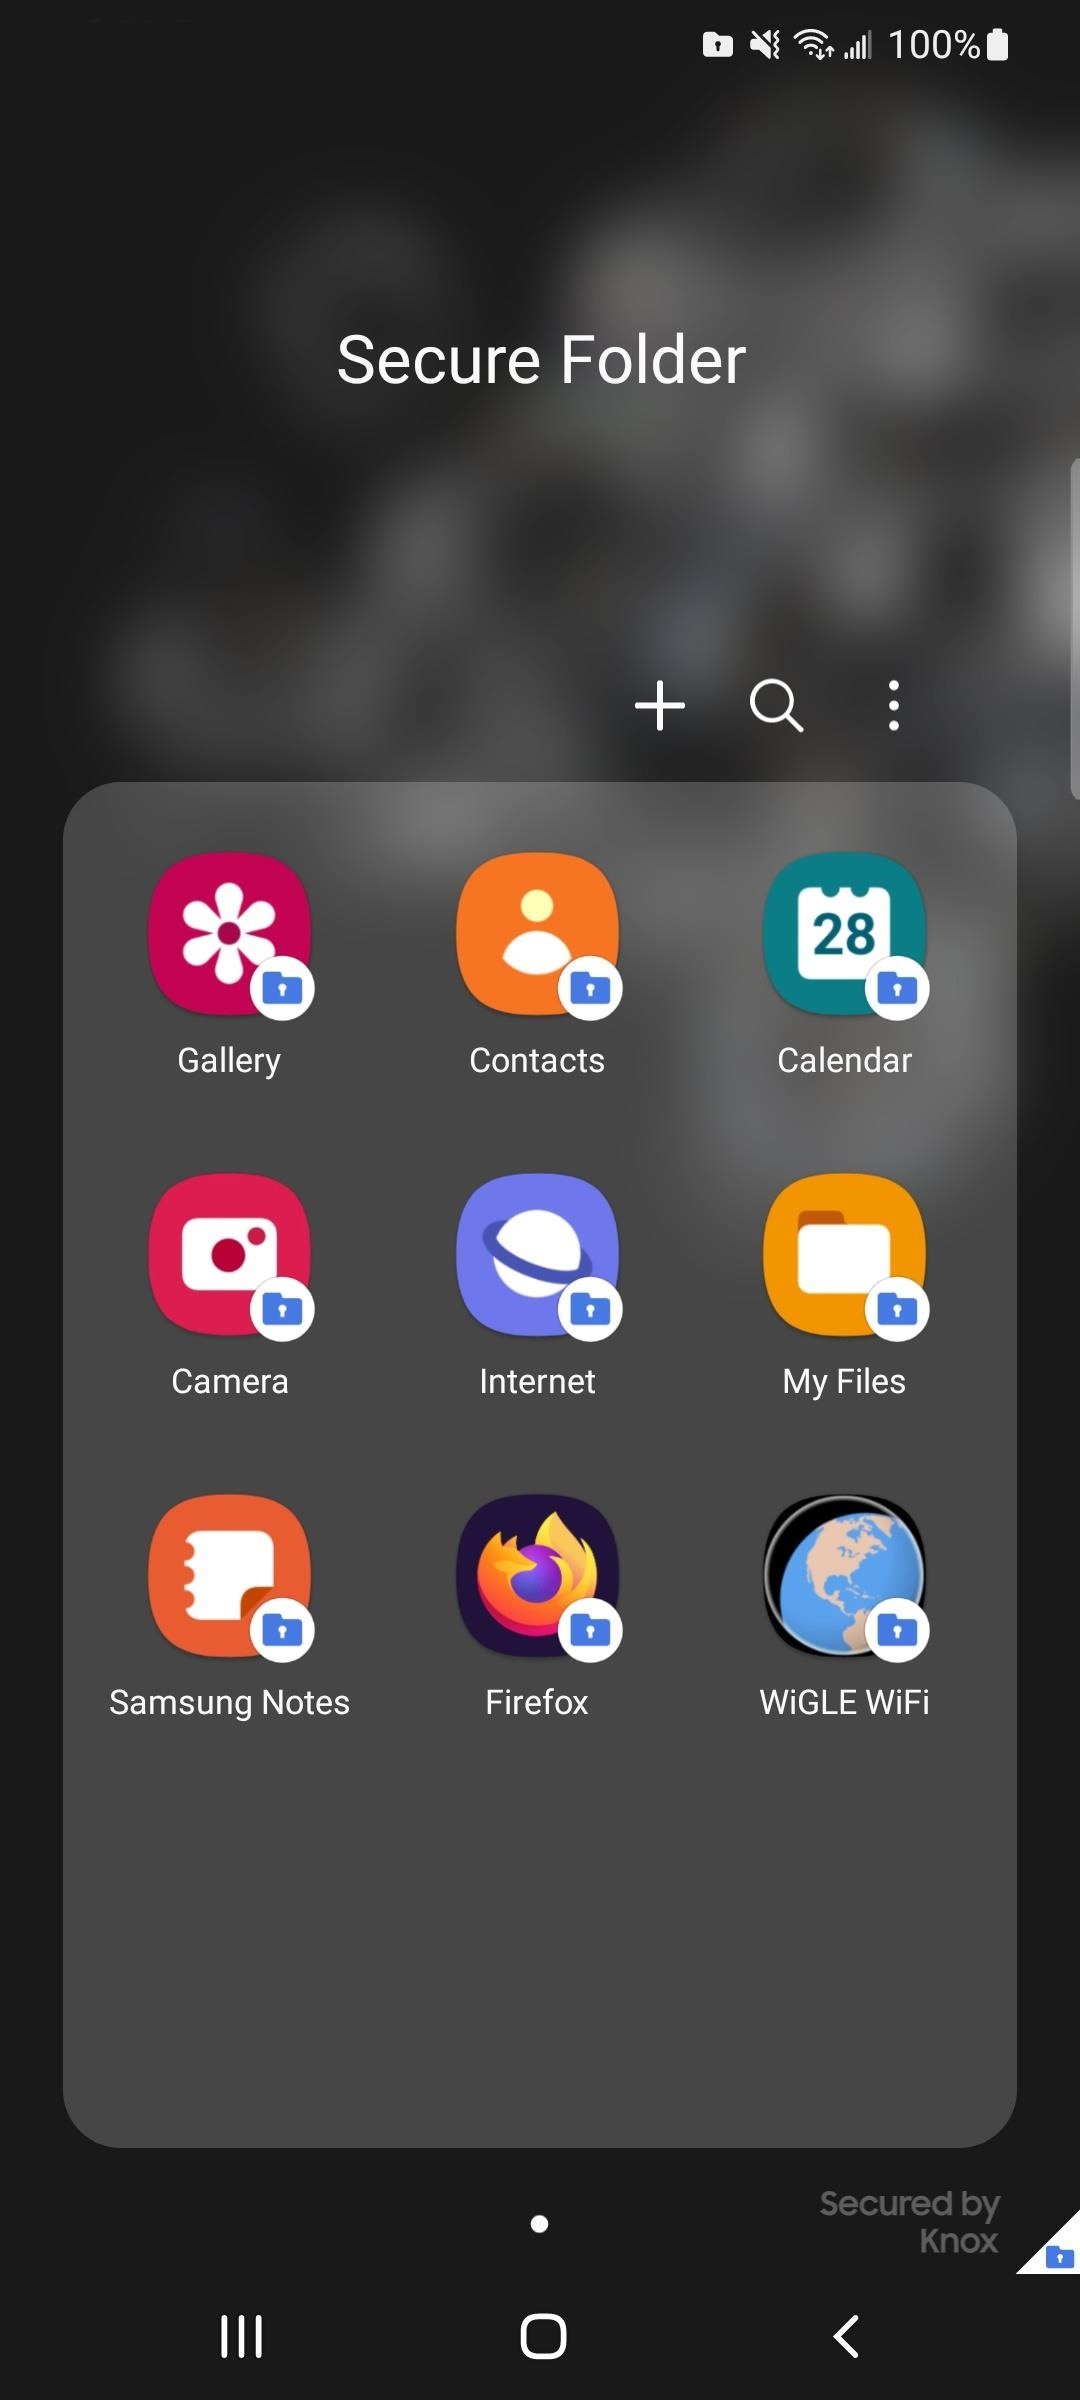
You may see Samsung apps like Gallery, Contacts, Calendar, Camera, Internet, My Files, and Samsung Notes already in your Secure Folder. That's because Samsung thinks you're most likely to need those to lock down private photos and videos, certain contacts, specific files, private events, etc.
Step 6: Add Apps to Secure Folder
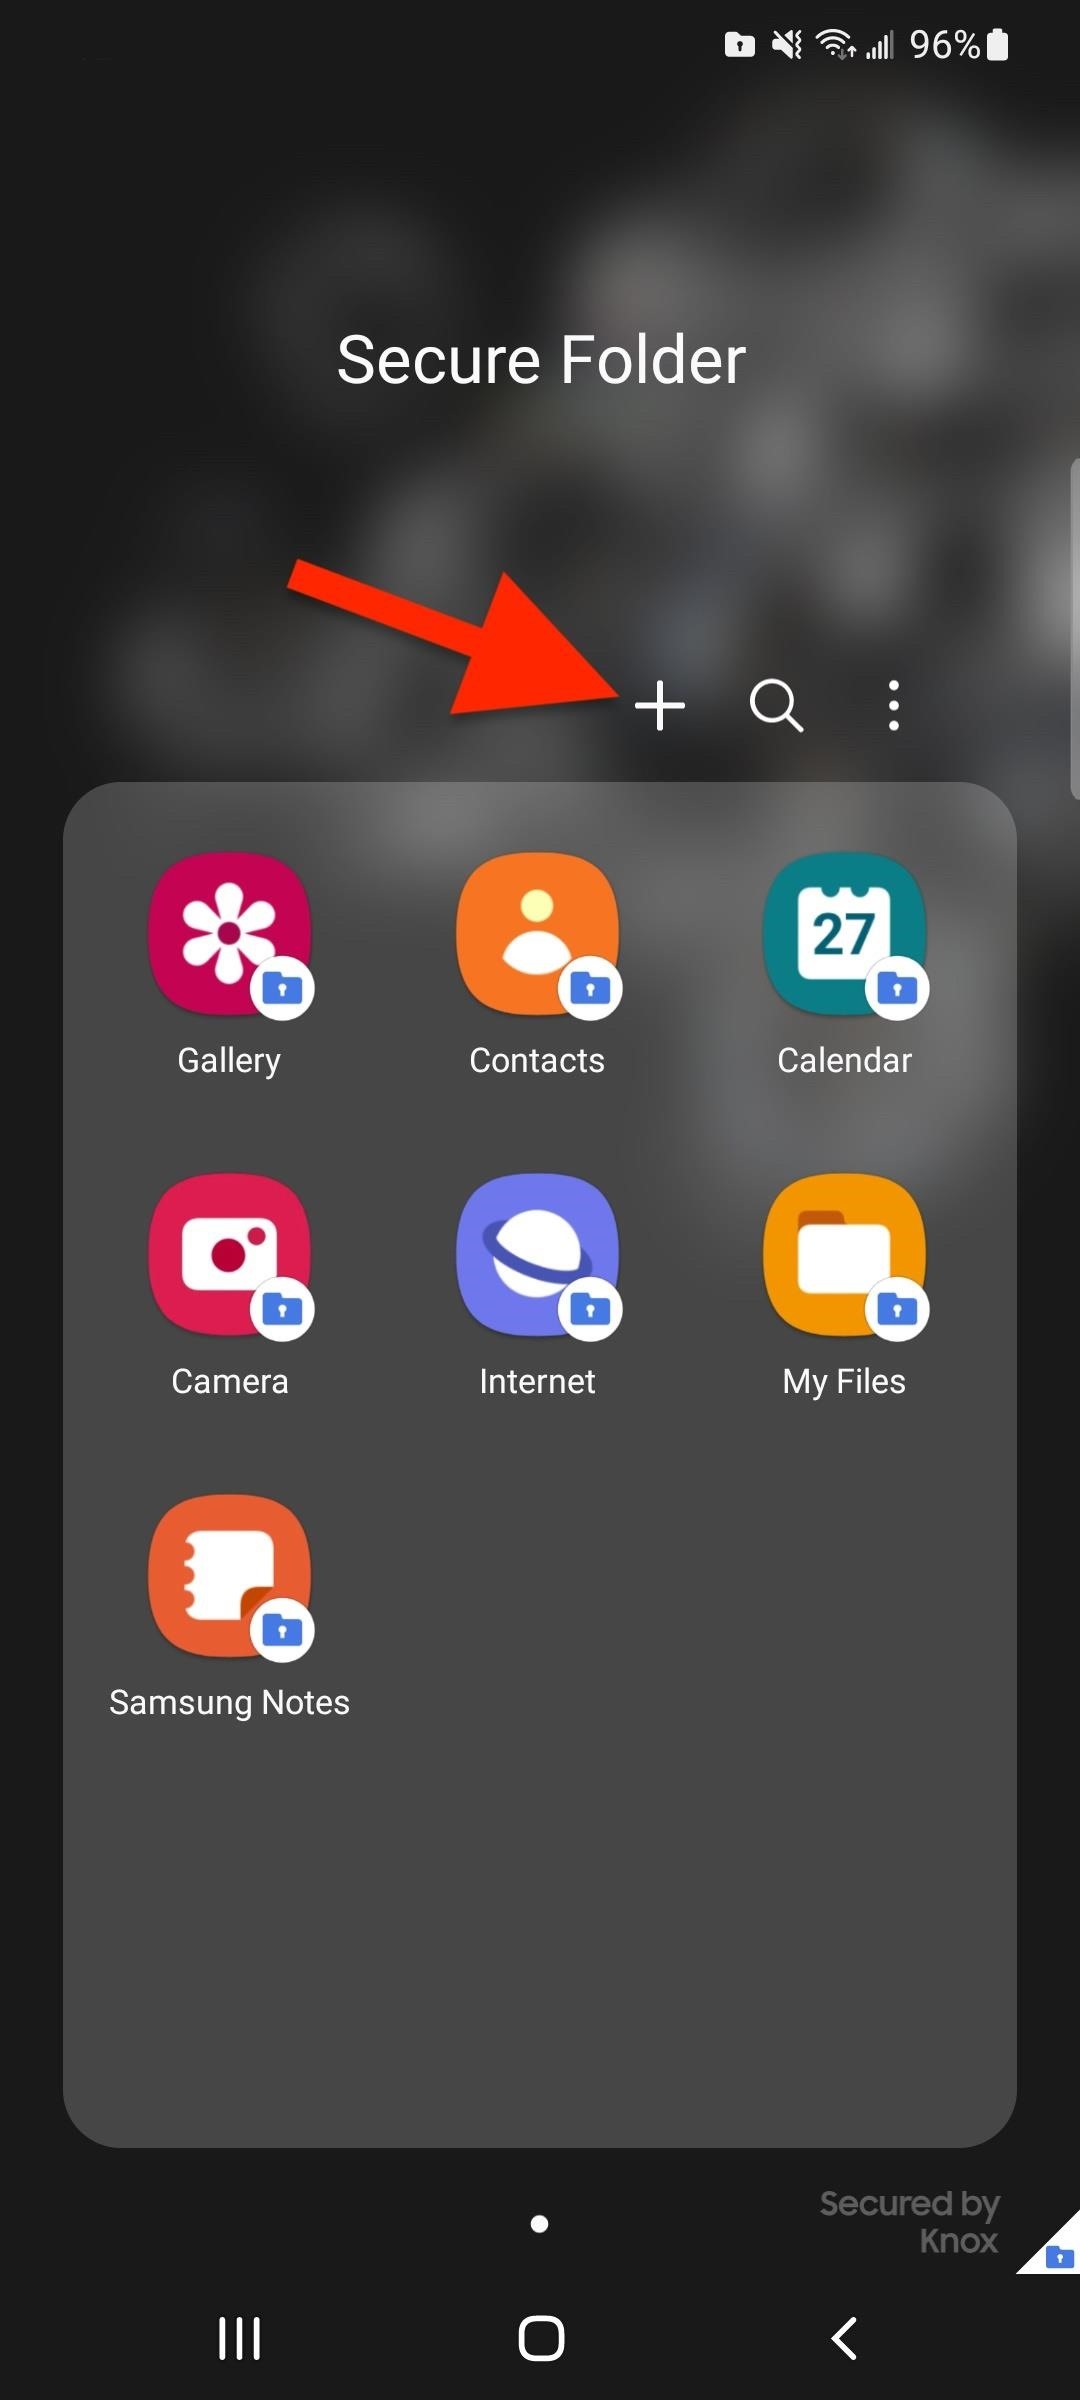
To include more apps in the folder, tap the plus (+) sign, select the app or apps you need from the list, and tap "Add." Any apps you add this way will be copied into Secure Folder, not moved. So instead of hiding the app behind lock and key, you're hiding a copy of the app.
- Don't Miss: How to Clone Any Android App on Your Samsung Galaxy Phone Without Using Any Third-Party Tools
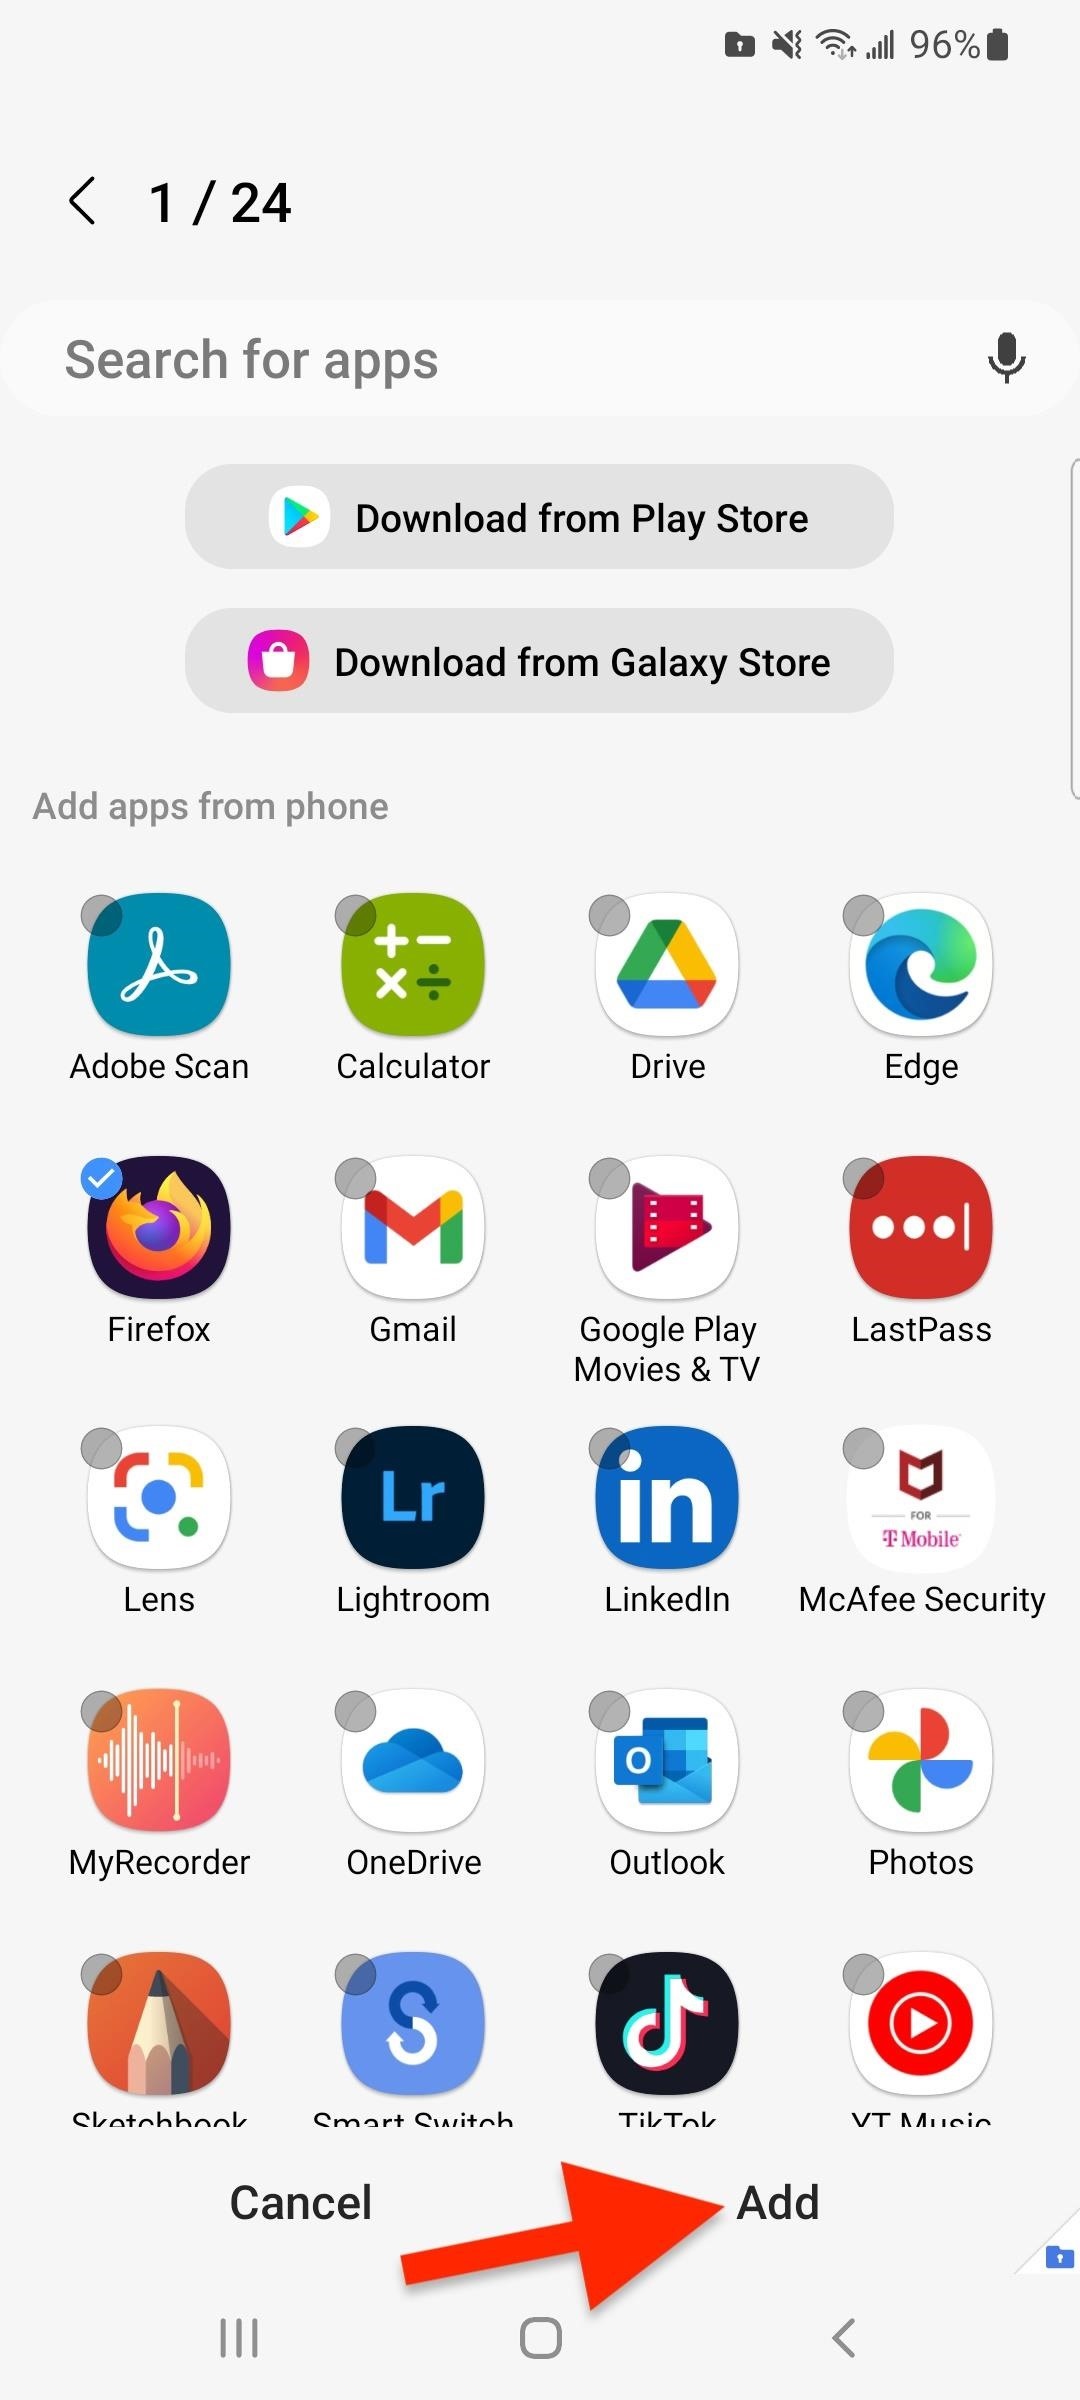
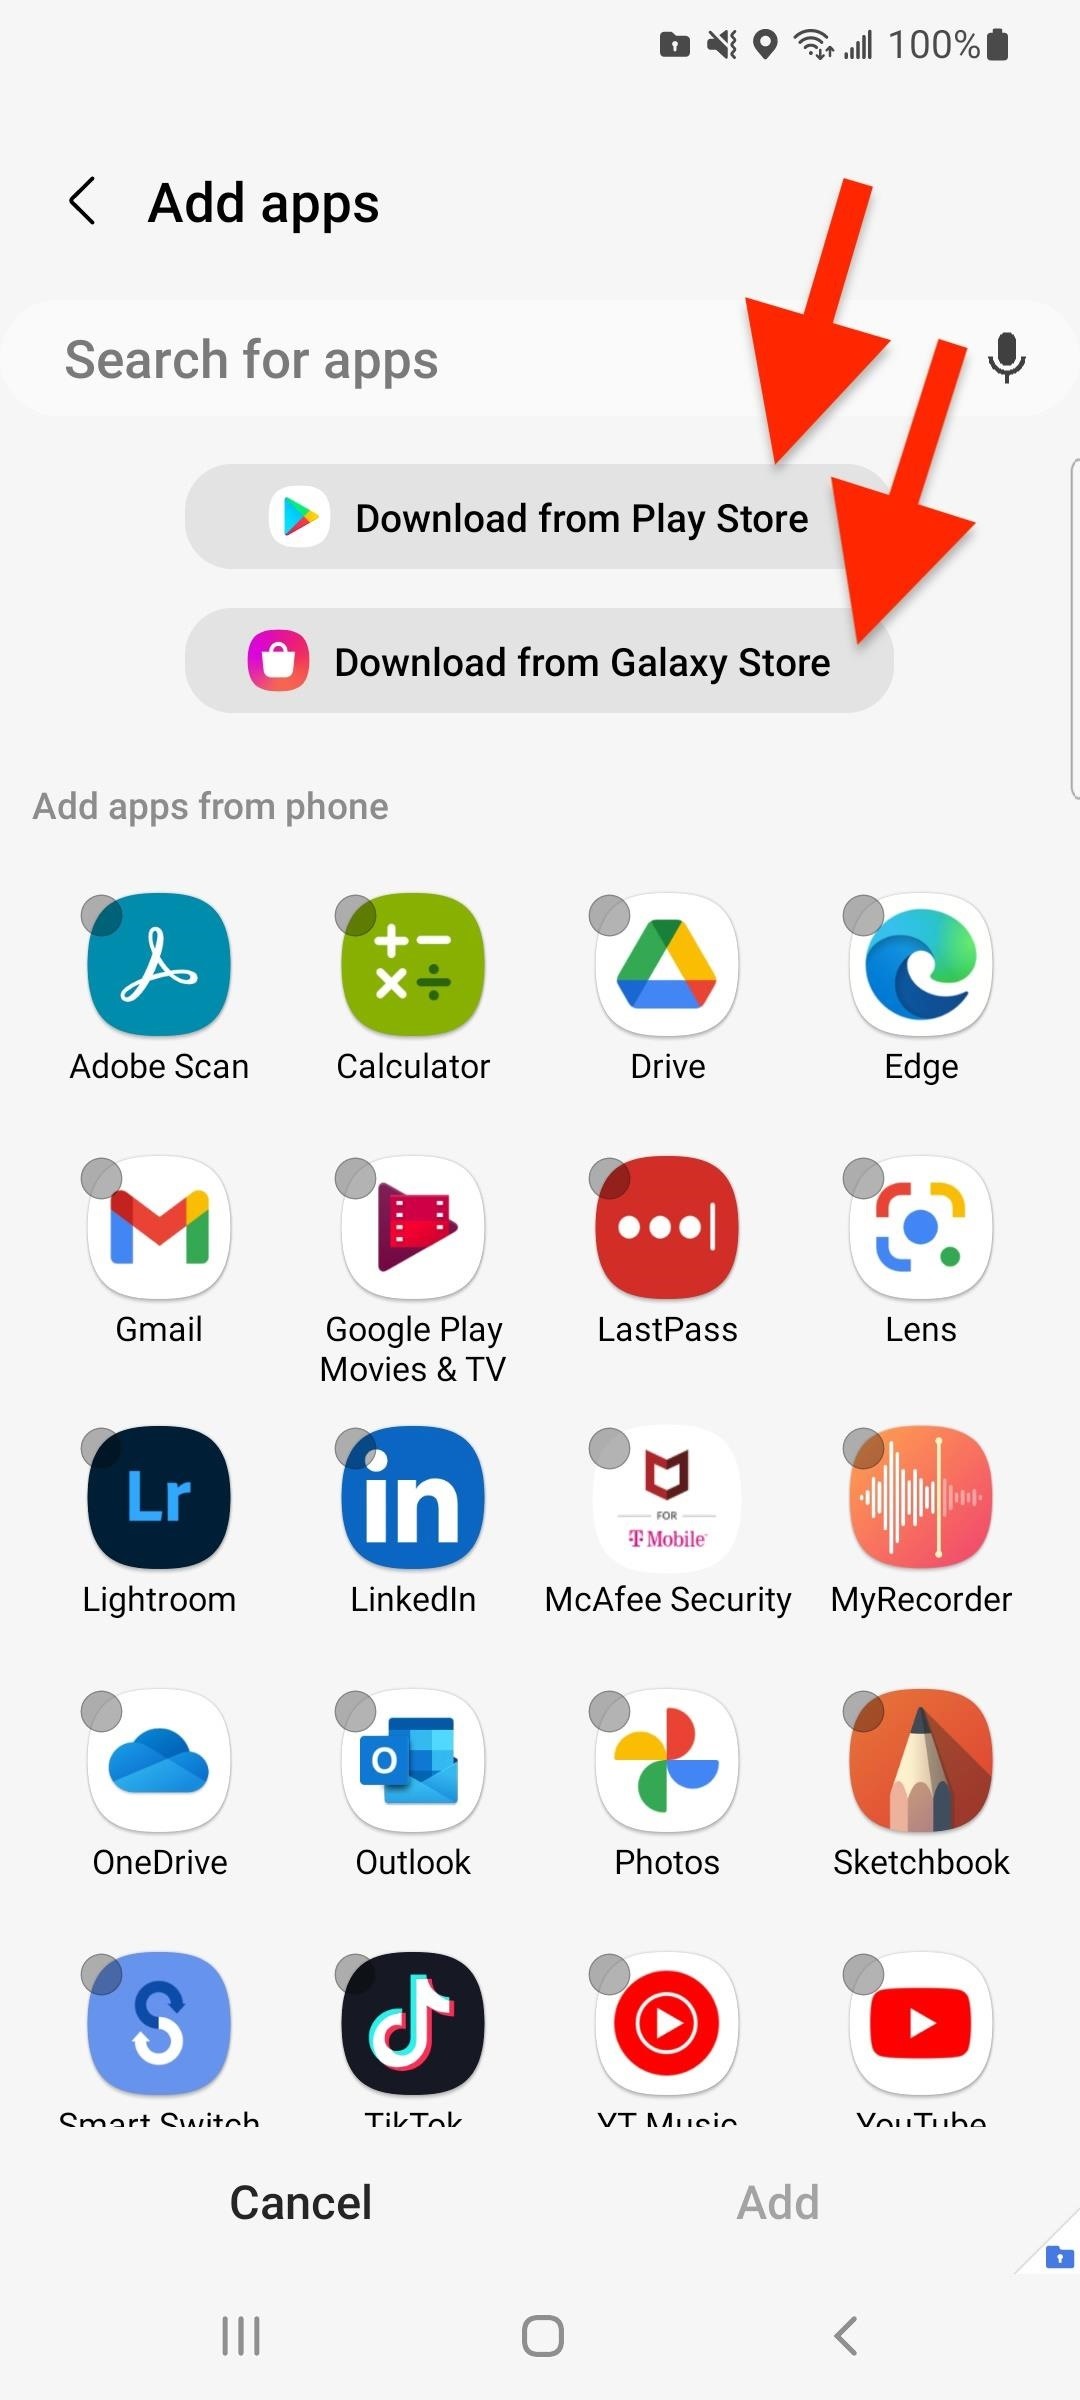
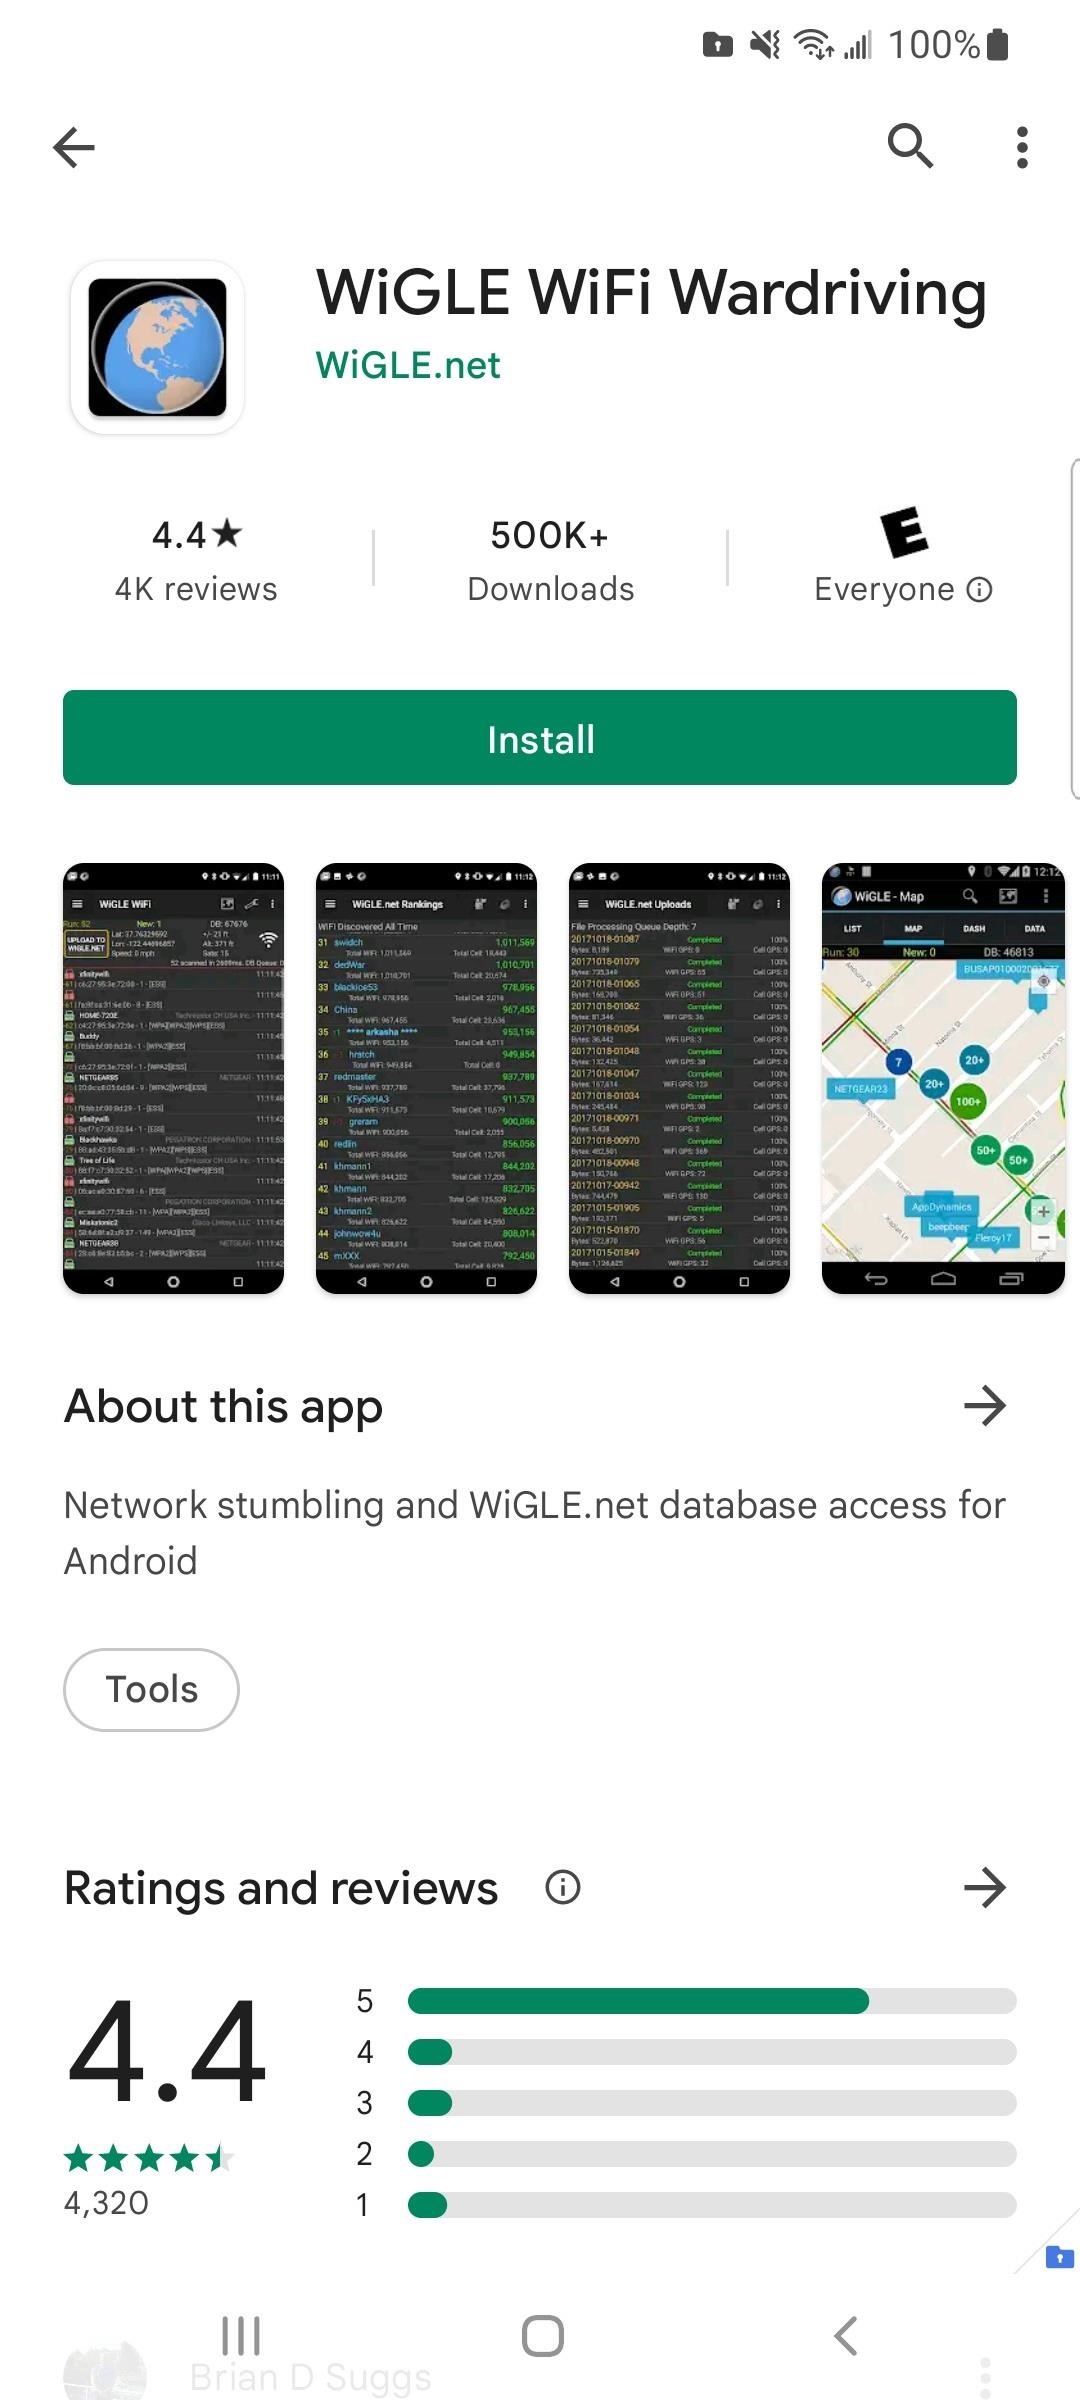
However, you can have an app reside in Secure Folder only. To do so, tap the plus (+) sign, then choose "Download from Play Store" or "Download from Galaxy Store." For Google Play, you may need to sign in to your Google account from within the sandboxed environment. Any apps you install from these app stores via the Secure Folder will only appear in the Secure Folder.
If you add a clone of an app already on your devices, as discussed above, you delete the app on your Apps or Home screen so that only the copy resides in the Secure Folder.
Note that opened apps housed within Secure Folder will have the Secure Folder icon on their own icon in the app switcher. That way, you know which version is which if you have a version of the app in and out of the sandboxed environment.
Step 7: Add Files to Secure Folder
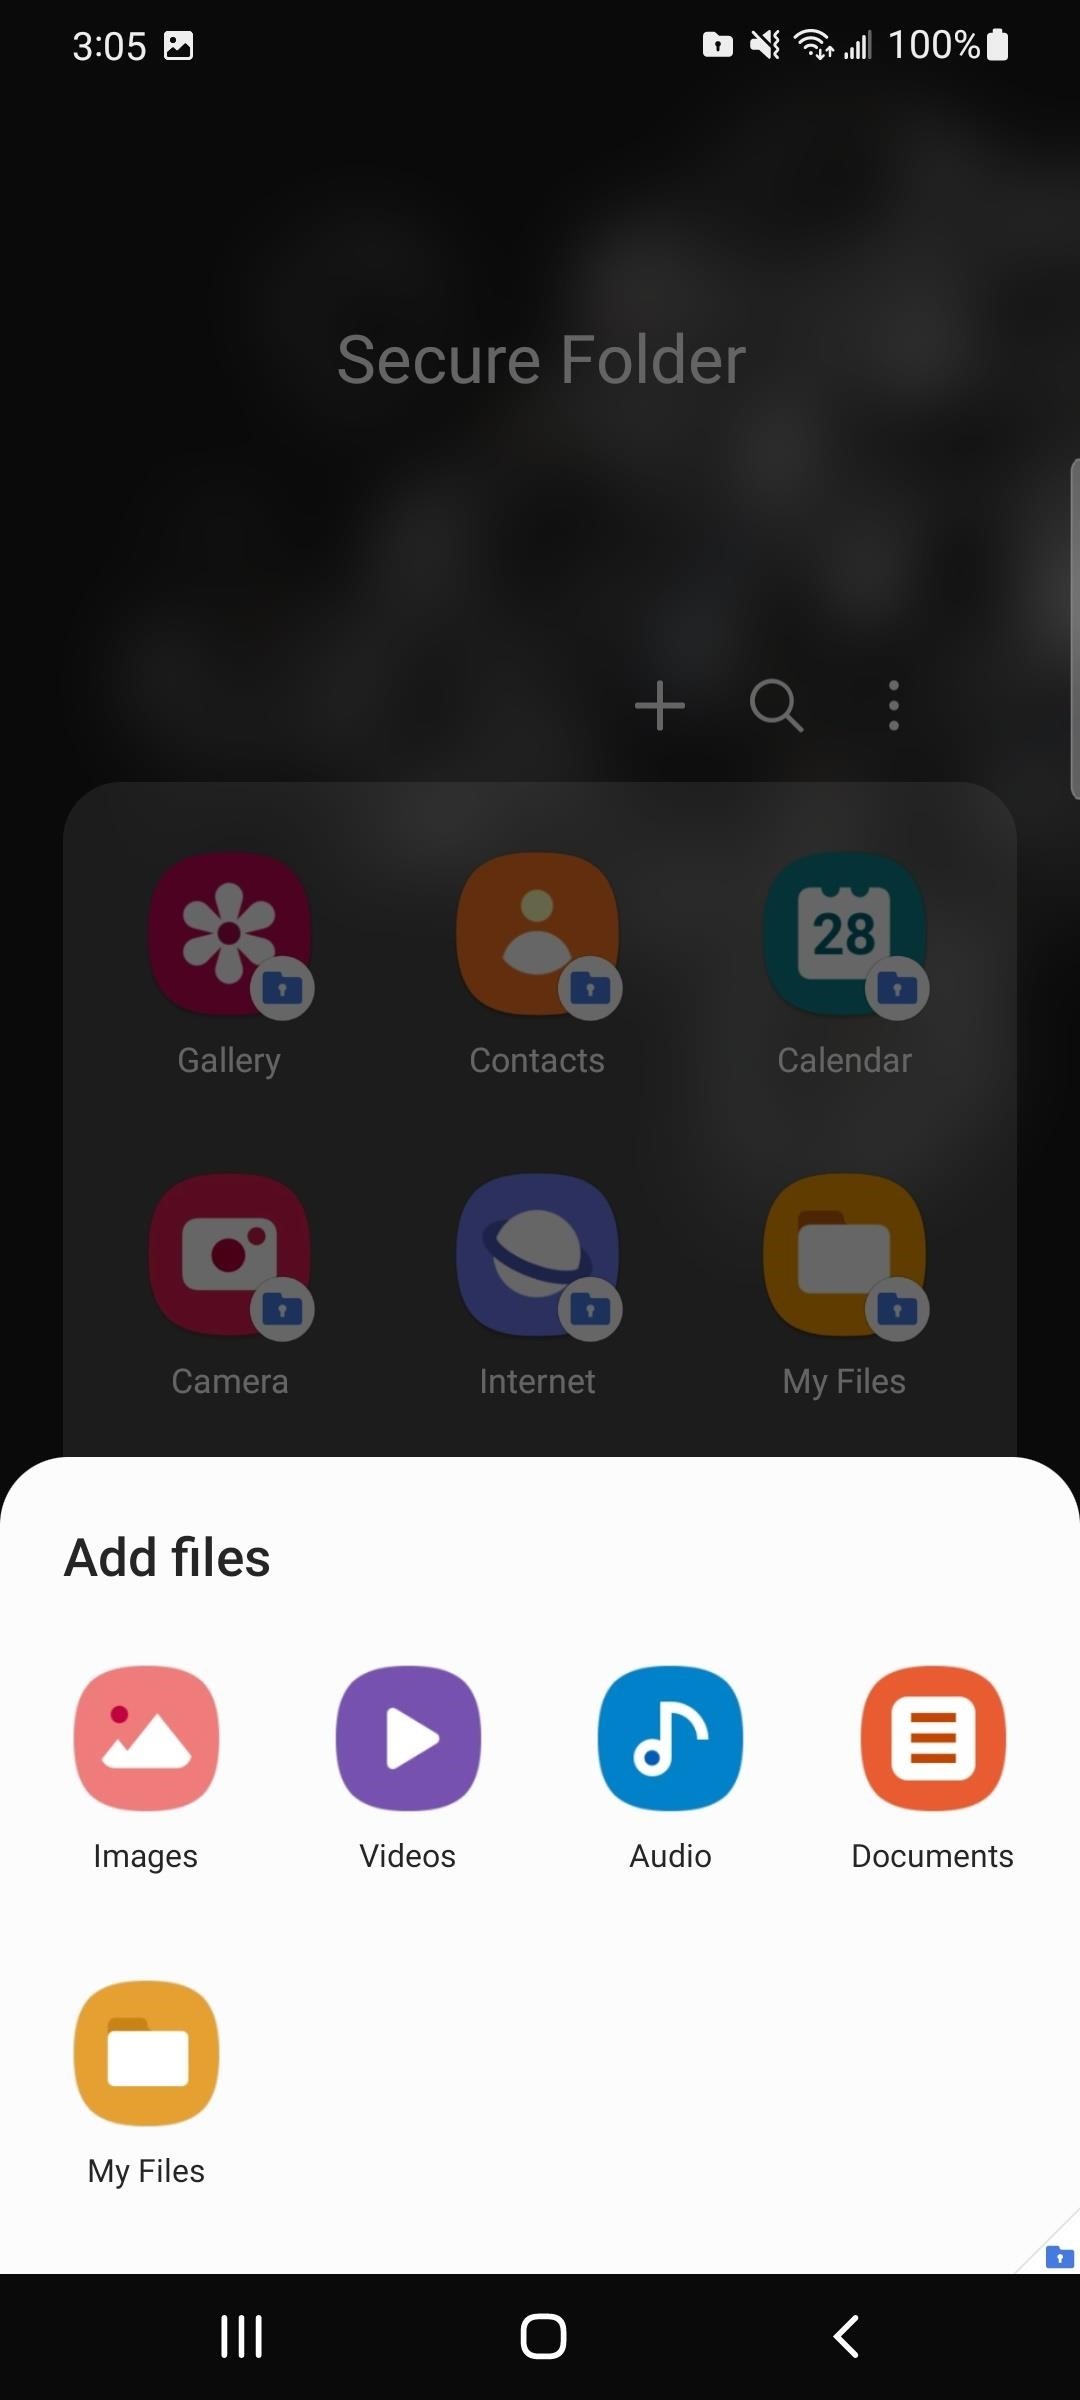
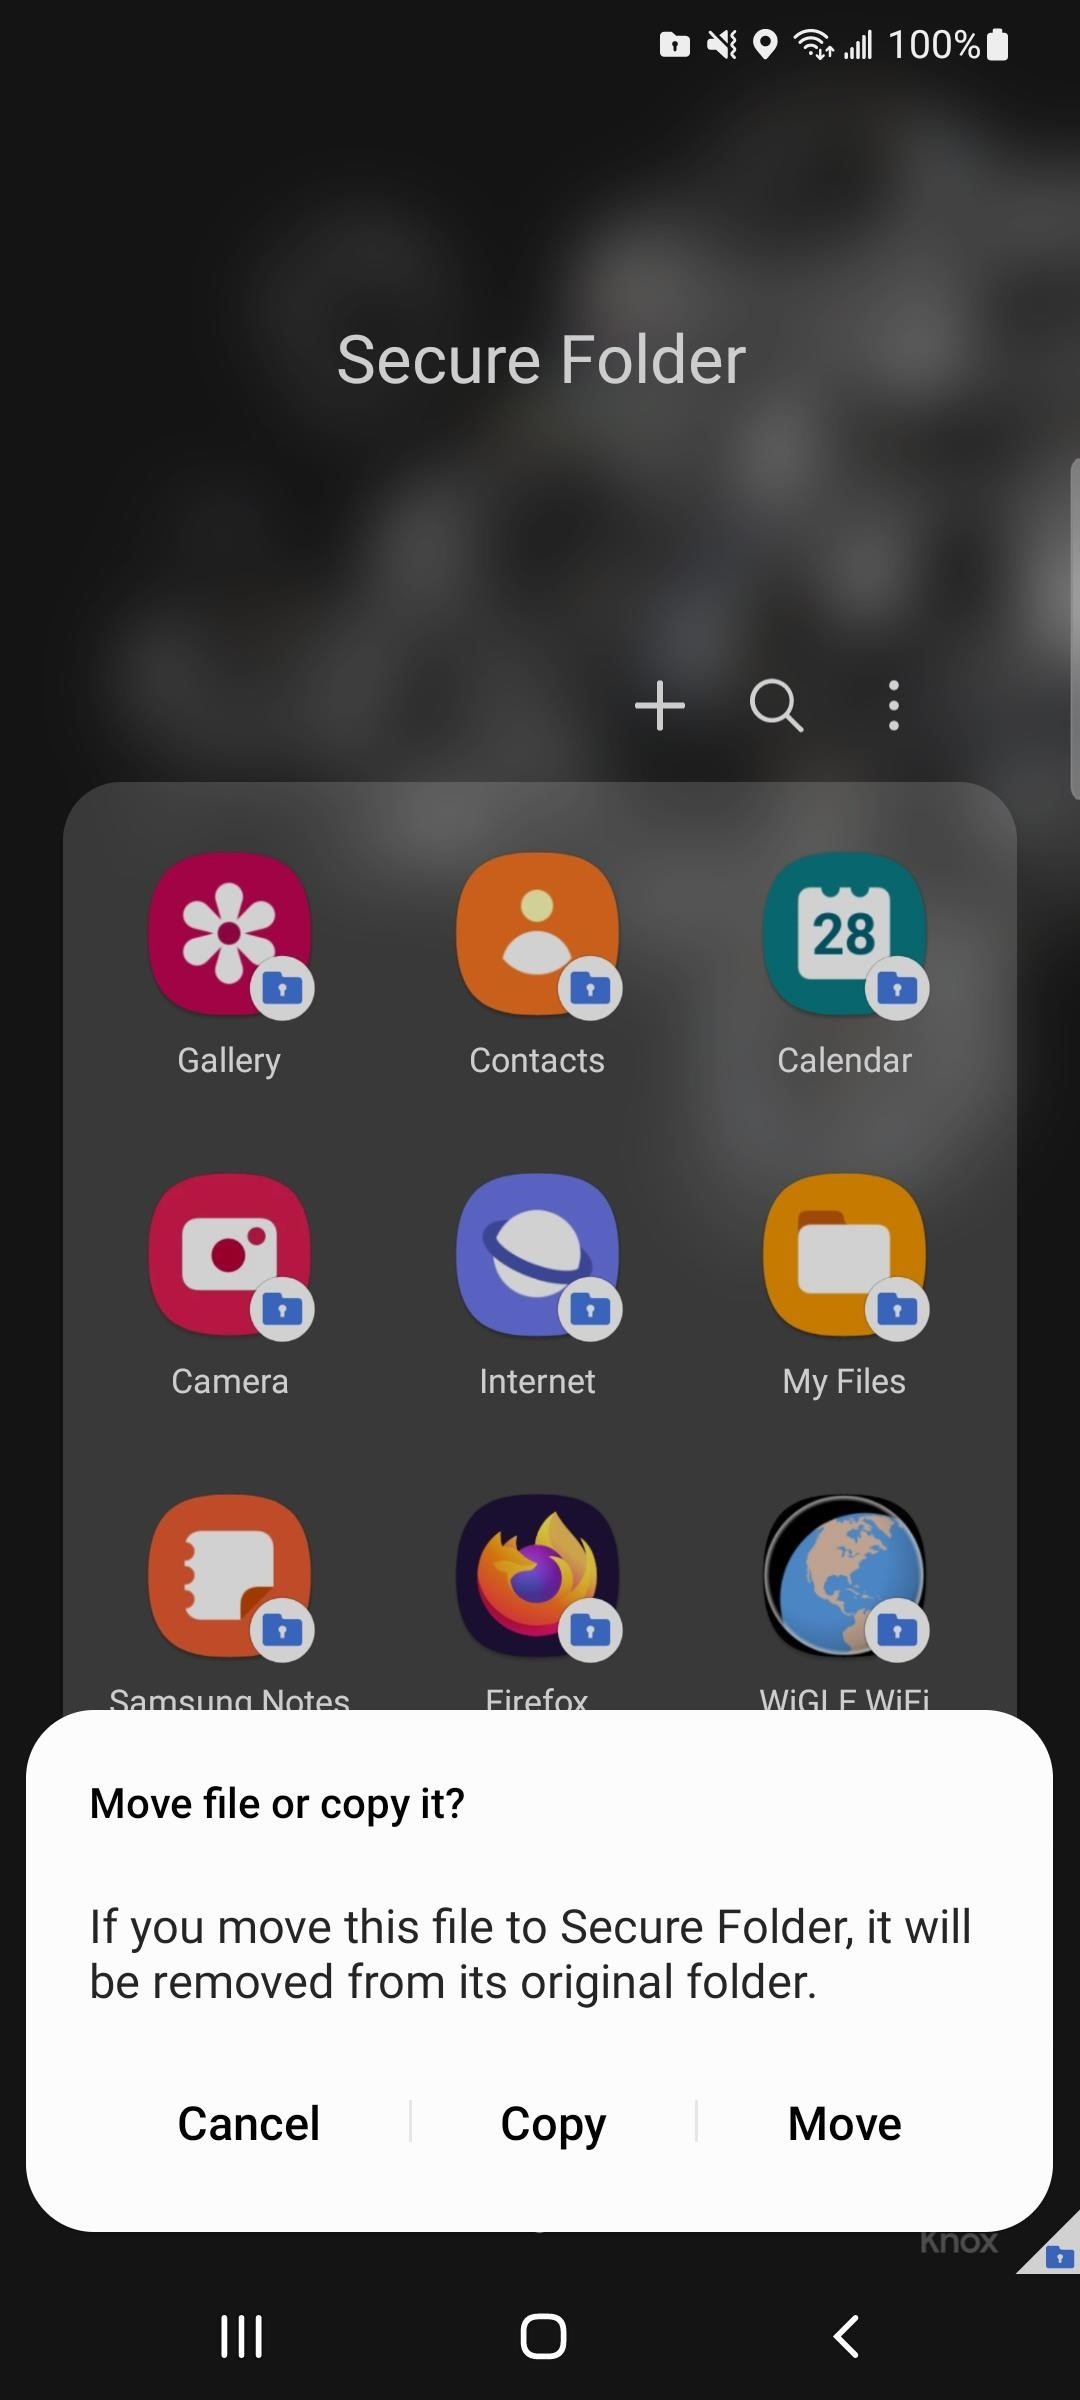
To add files such as documents, images, videos, and audio files, open Secure Folder, tap the vertical ellipsis, then choose "Add files." A pop-up will appear with the apps you can add copy or move content from. Select an app, find and highlight the content you want to copy or move, then hit "Done." Then, choose to "Copy" or "Move" it to Secure Folder.

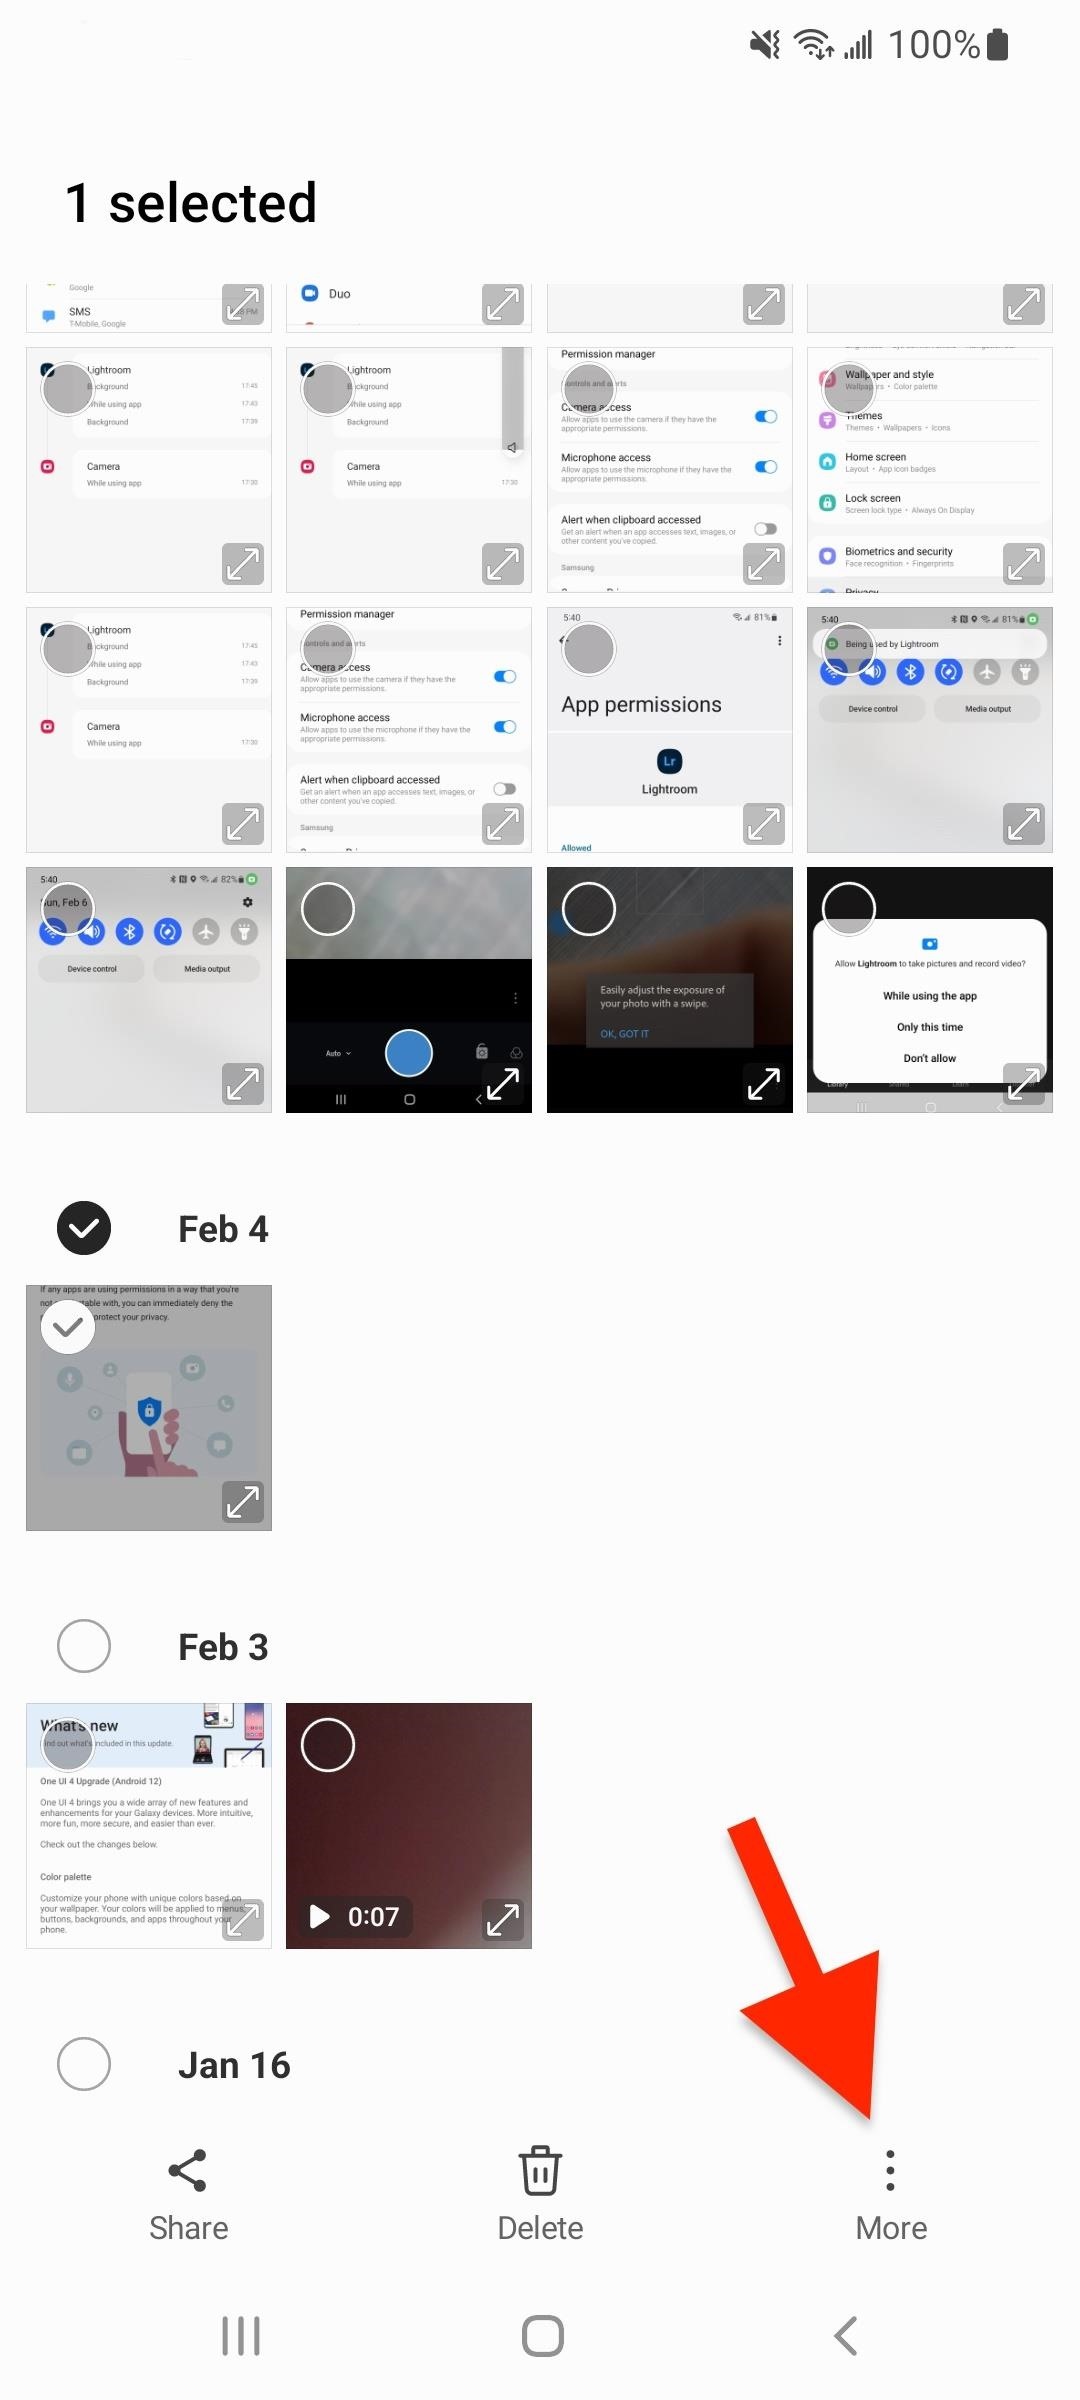
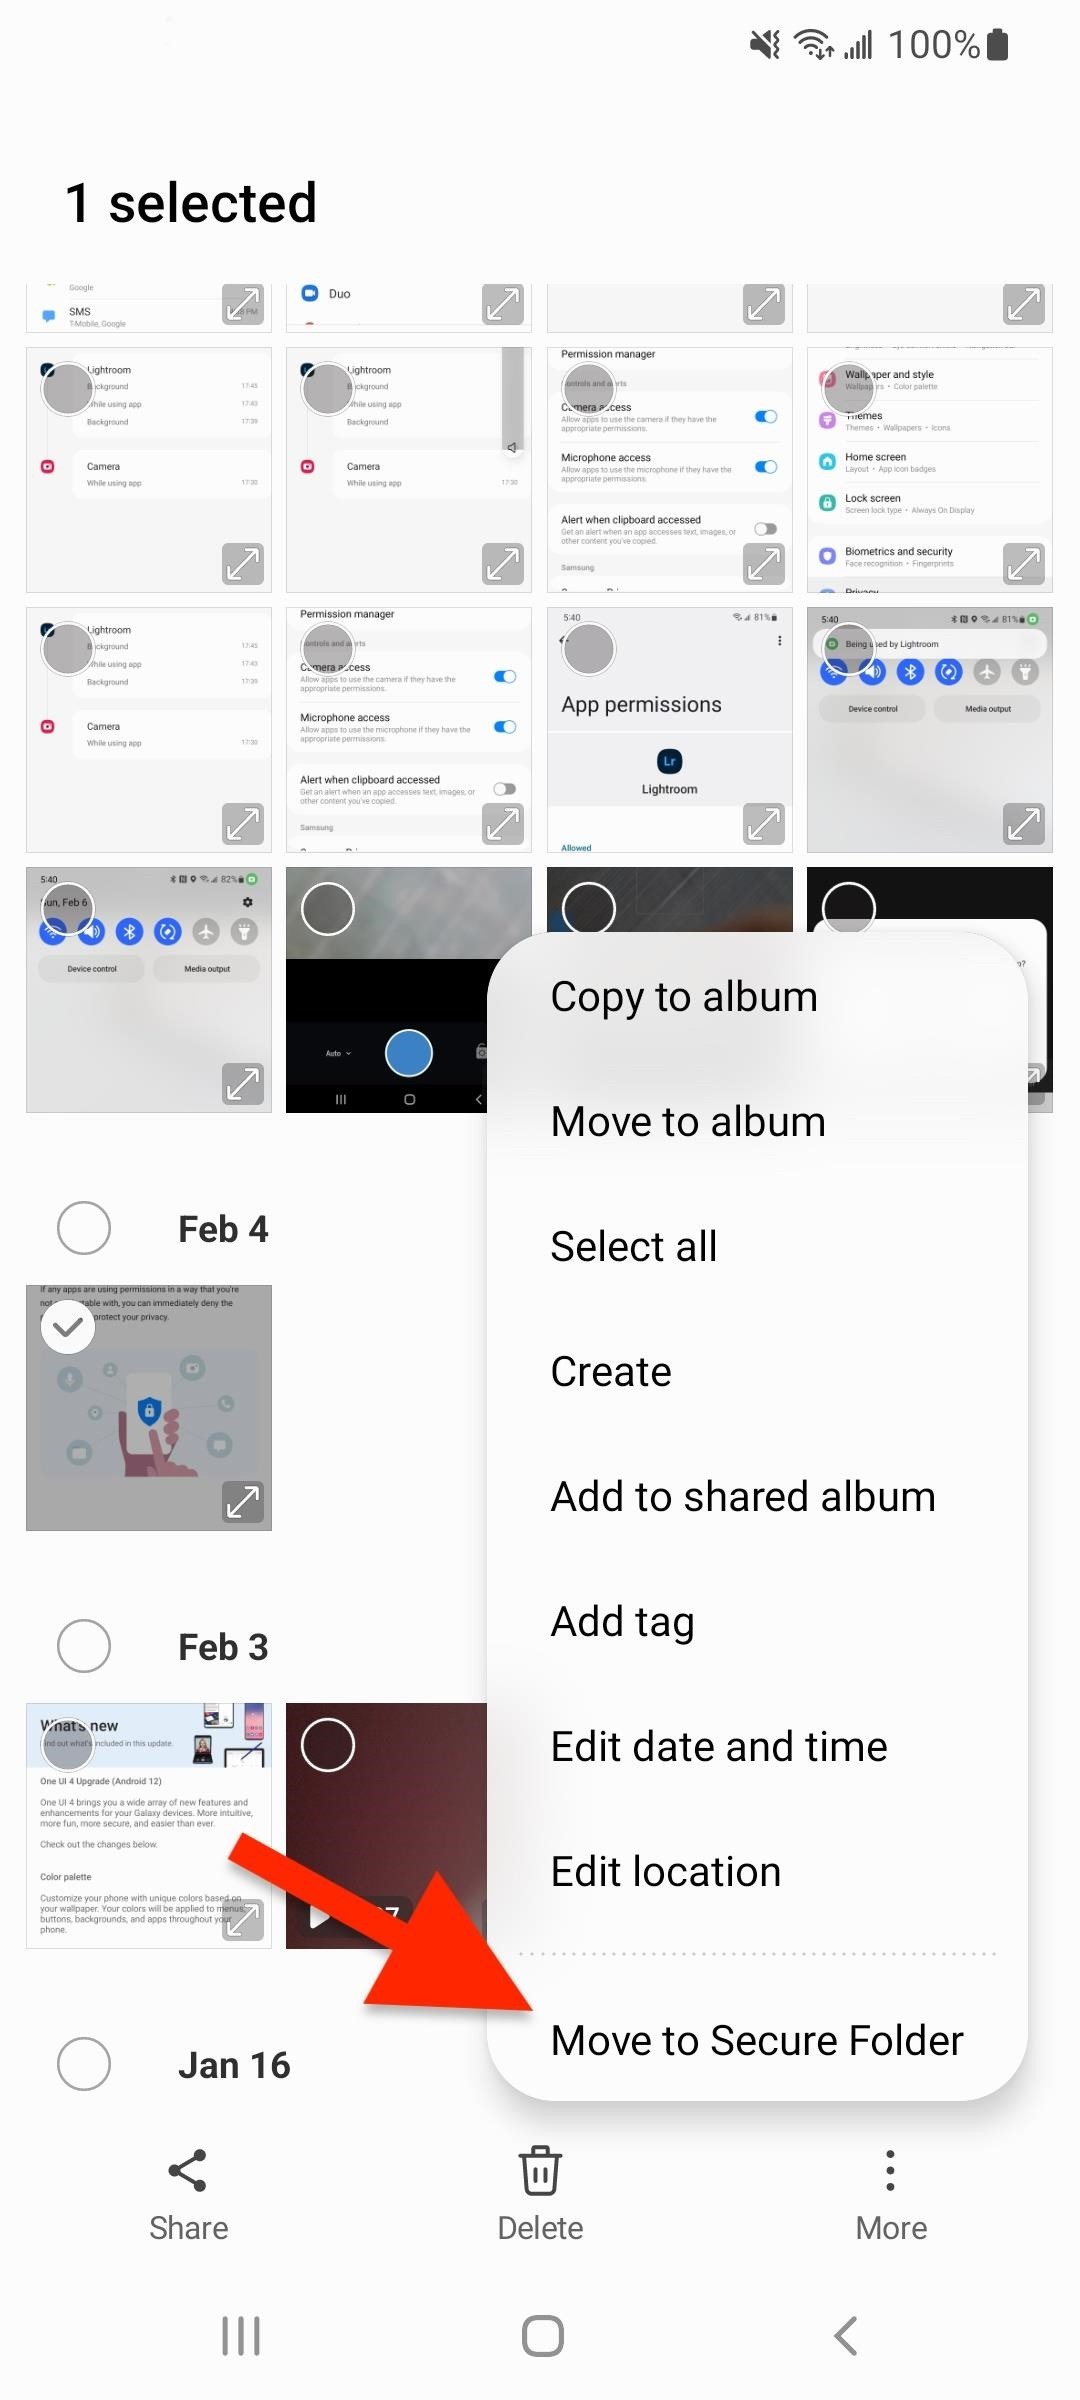
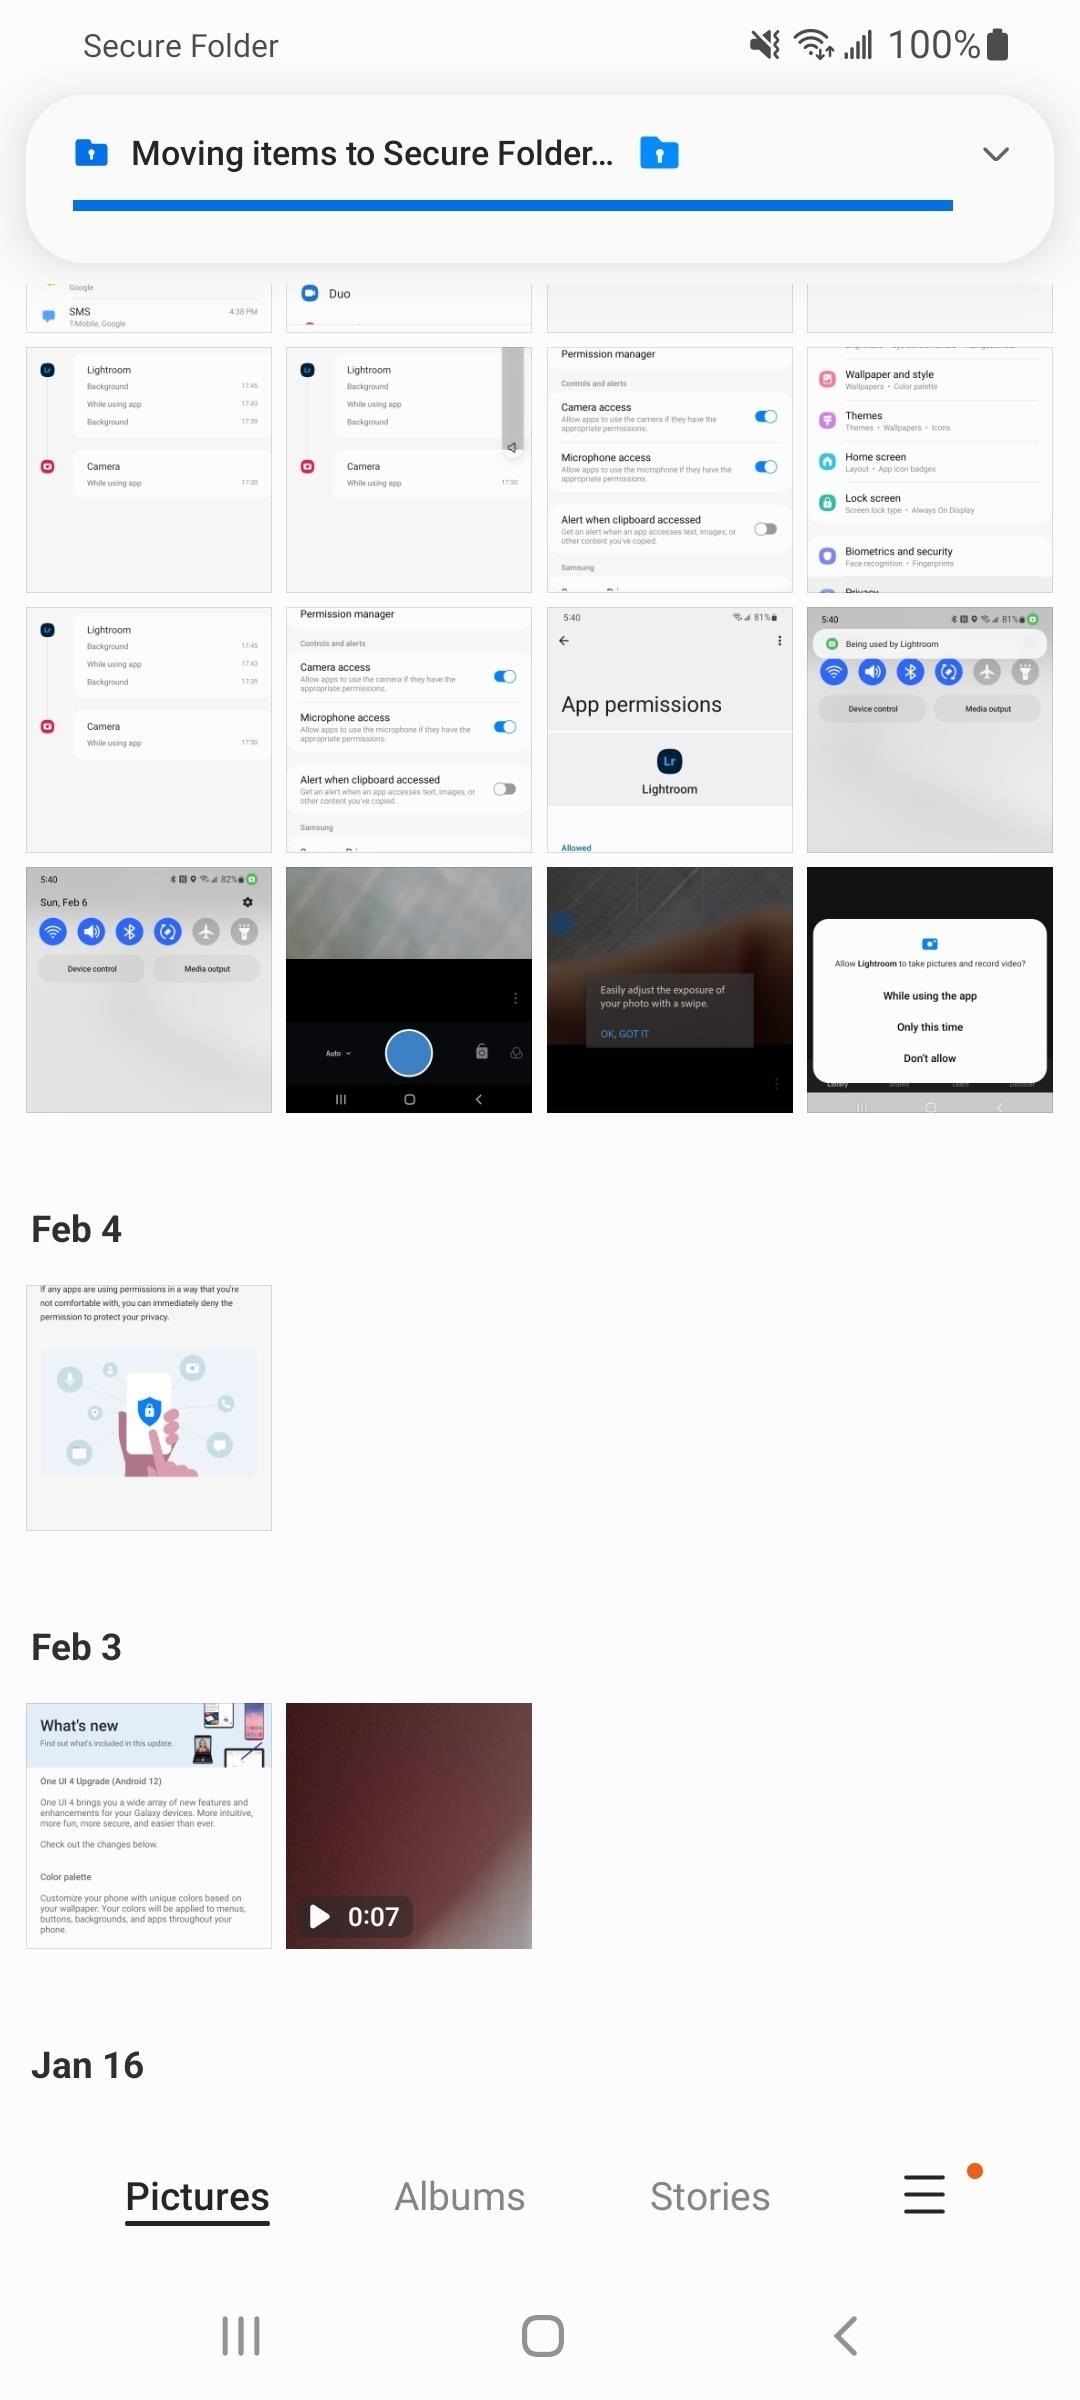
You can also add files to Secure Folder from outside of Secure Folder. For example, to move a photo or video from the Gallery app, select it, tap "More," and choose "Move to Secure Folder." The item will then disappear from the current view.
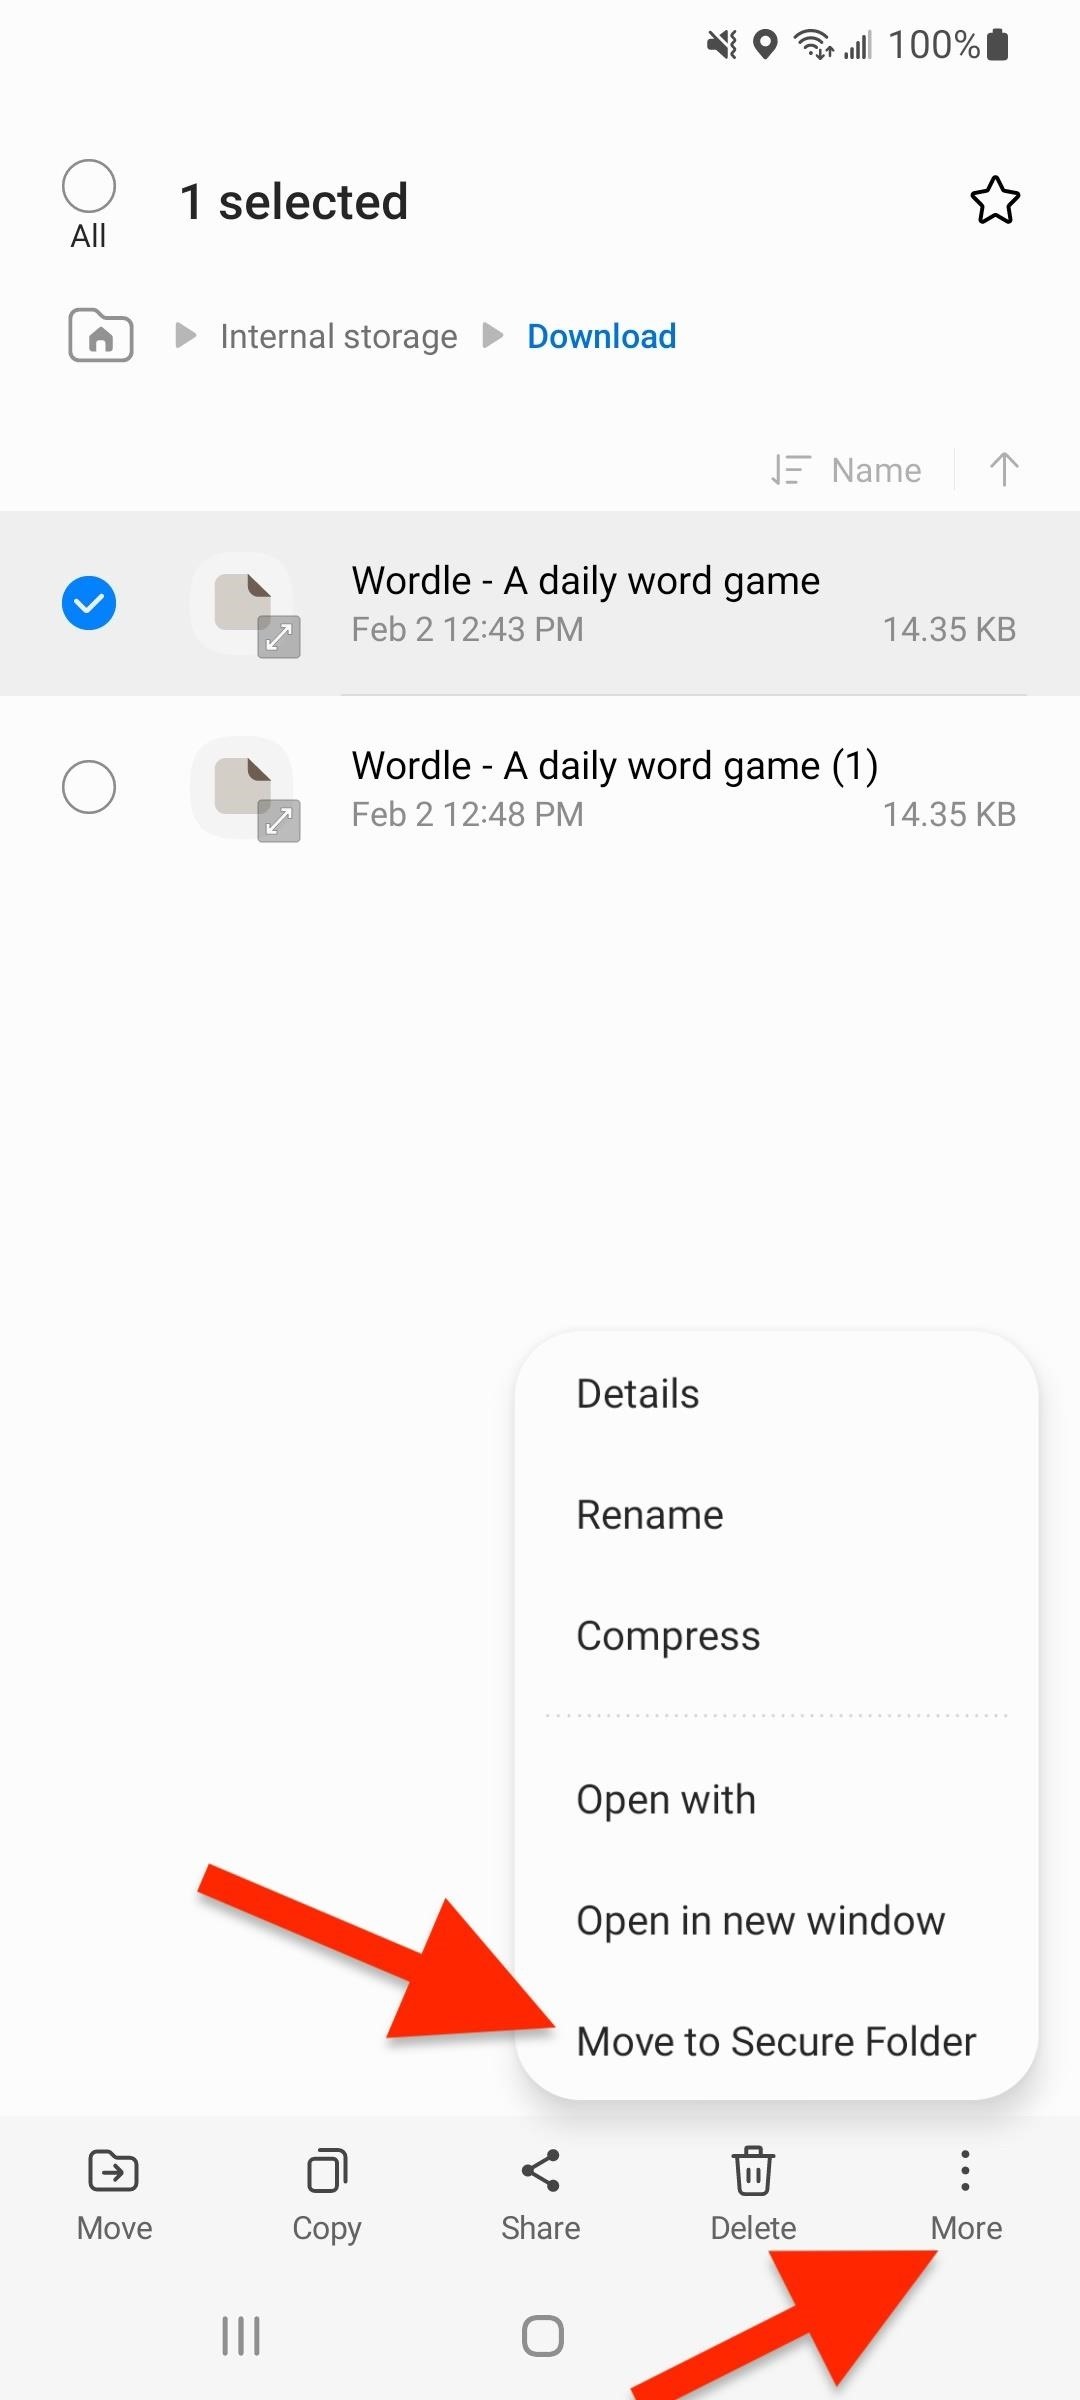
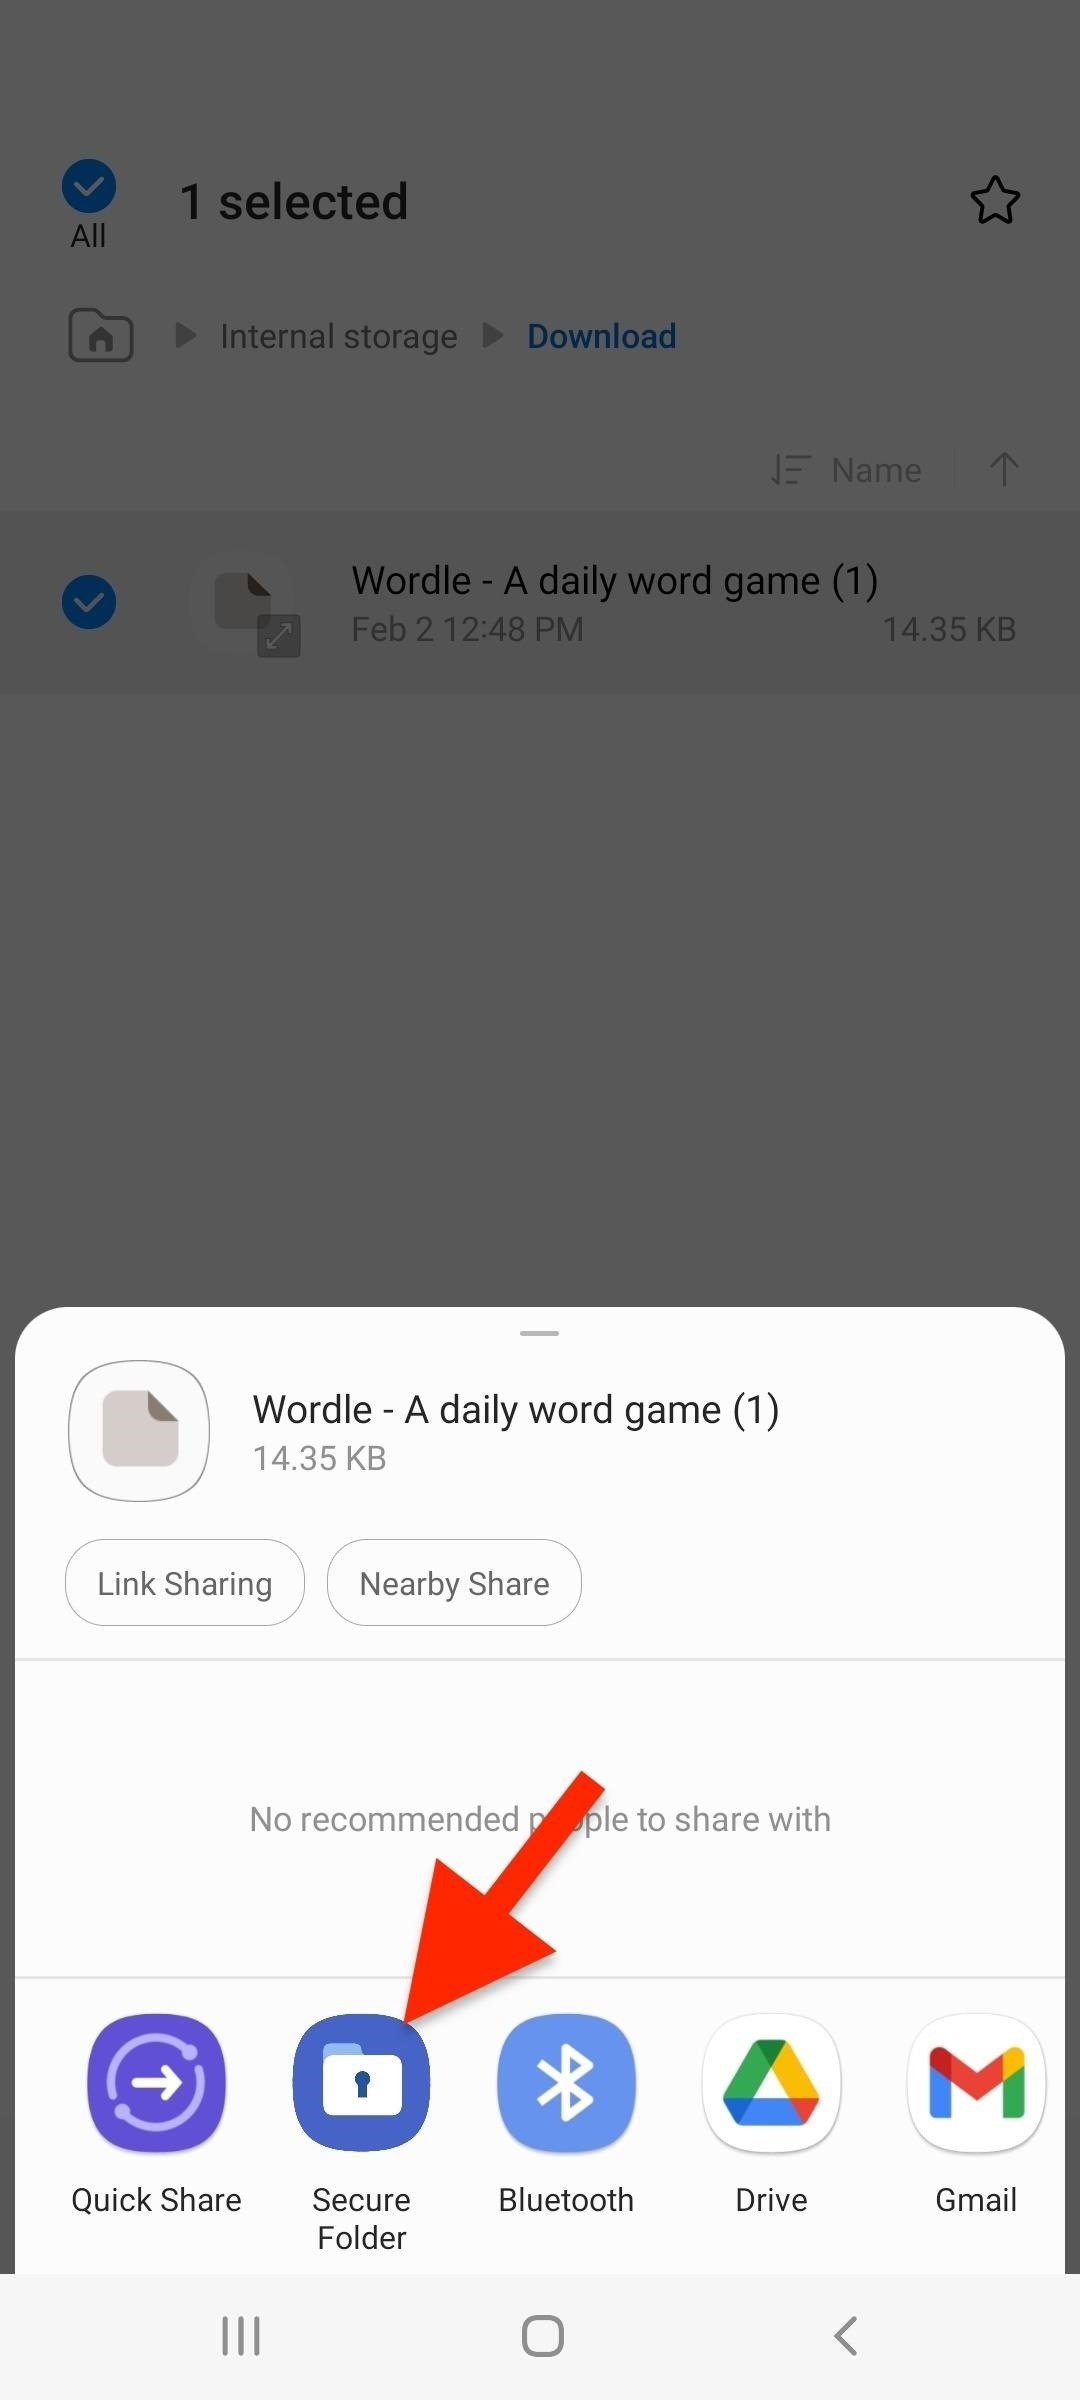
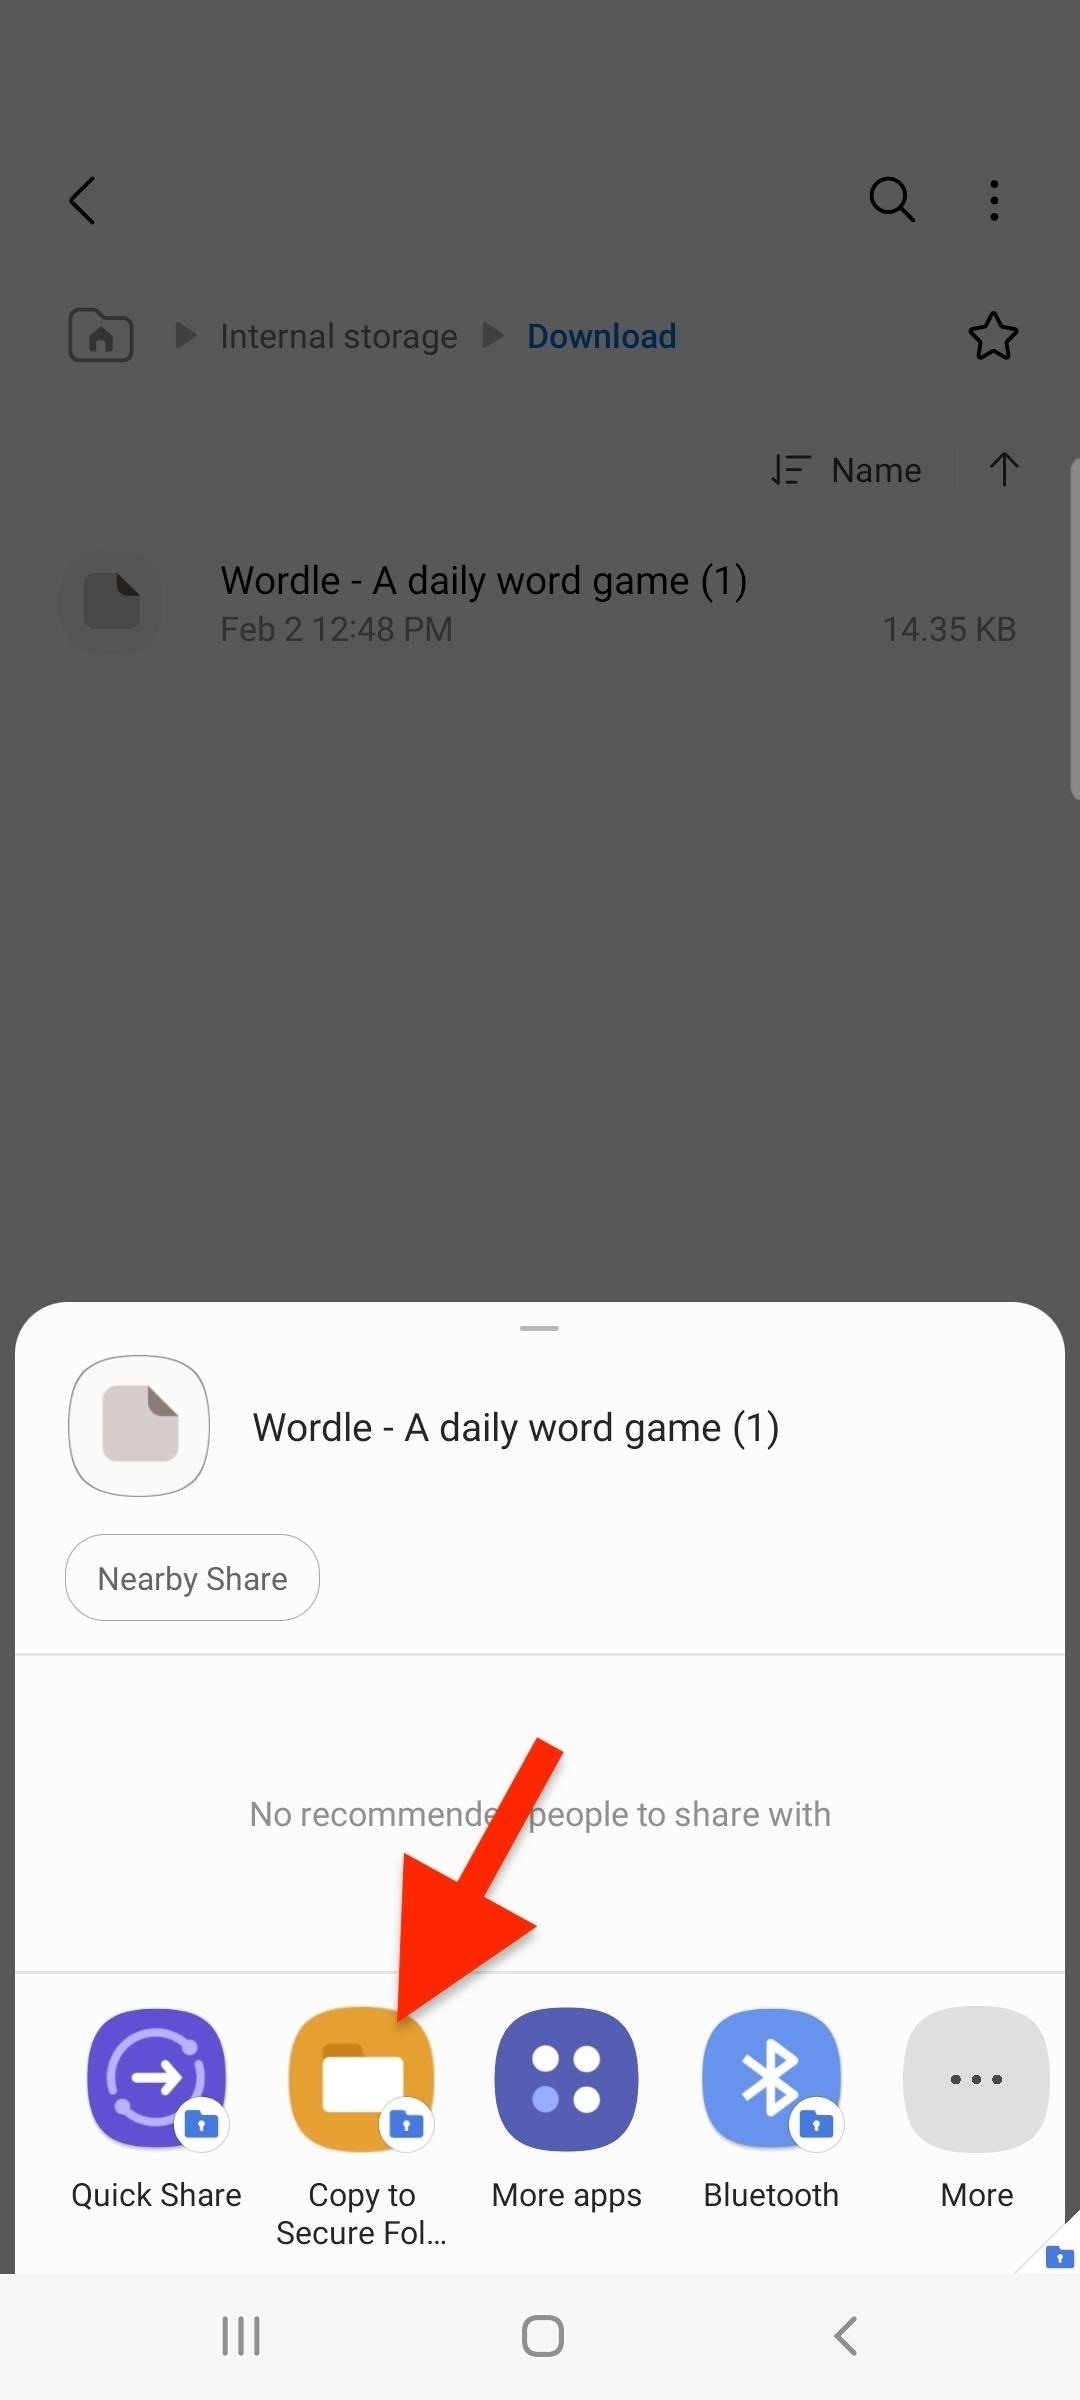
It's similar in My Files; Select the file, tap "More," and choose "Move to Secure Folder." If you don't want to move it, there's a way to copy it instead. To do so, hit the "Share" button, then choose "Secure Folder" from the options, and then "Copy to Secure Folder."
The process above is similar if you want to move files out of Secure Folder, back to their respective unlocked apps. However, if the content was previously located on your SD card before moving it to Secure Folder, moving it back on will move it to your internal storage instead.
Step 8: Customize Secure Folder's Look
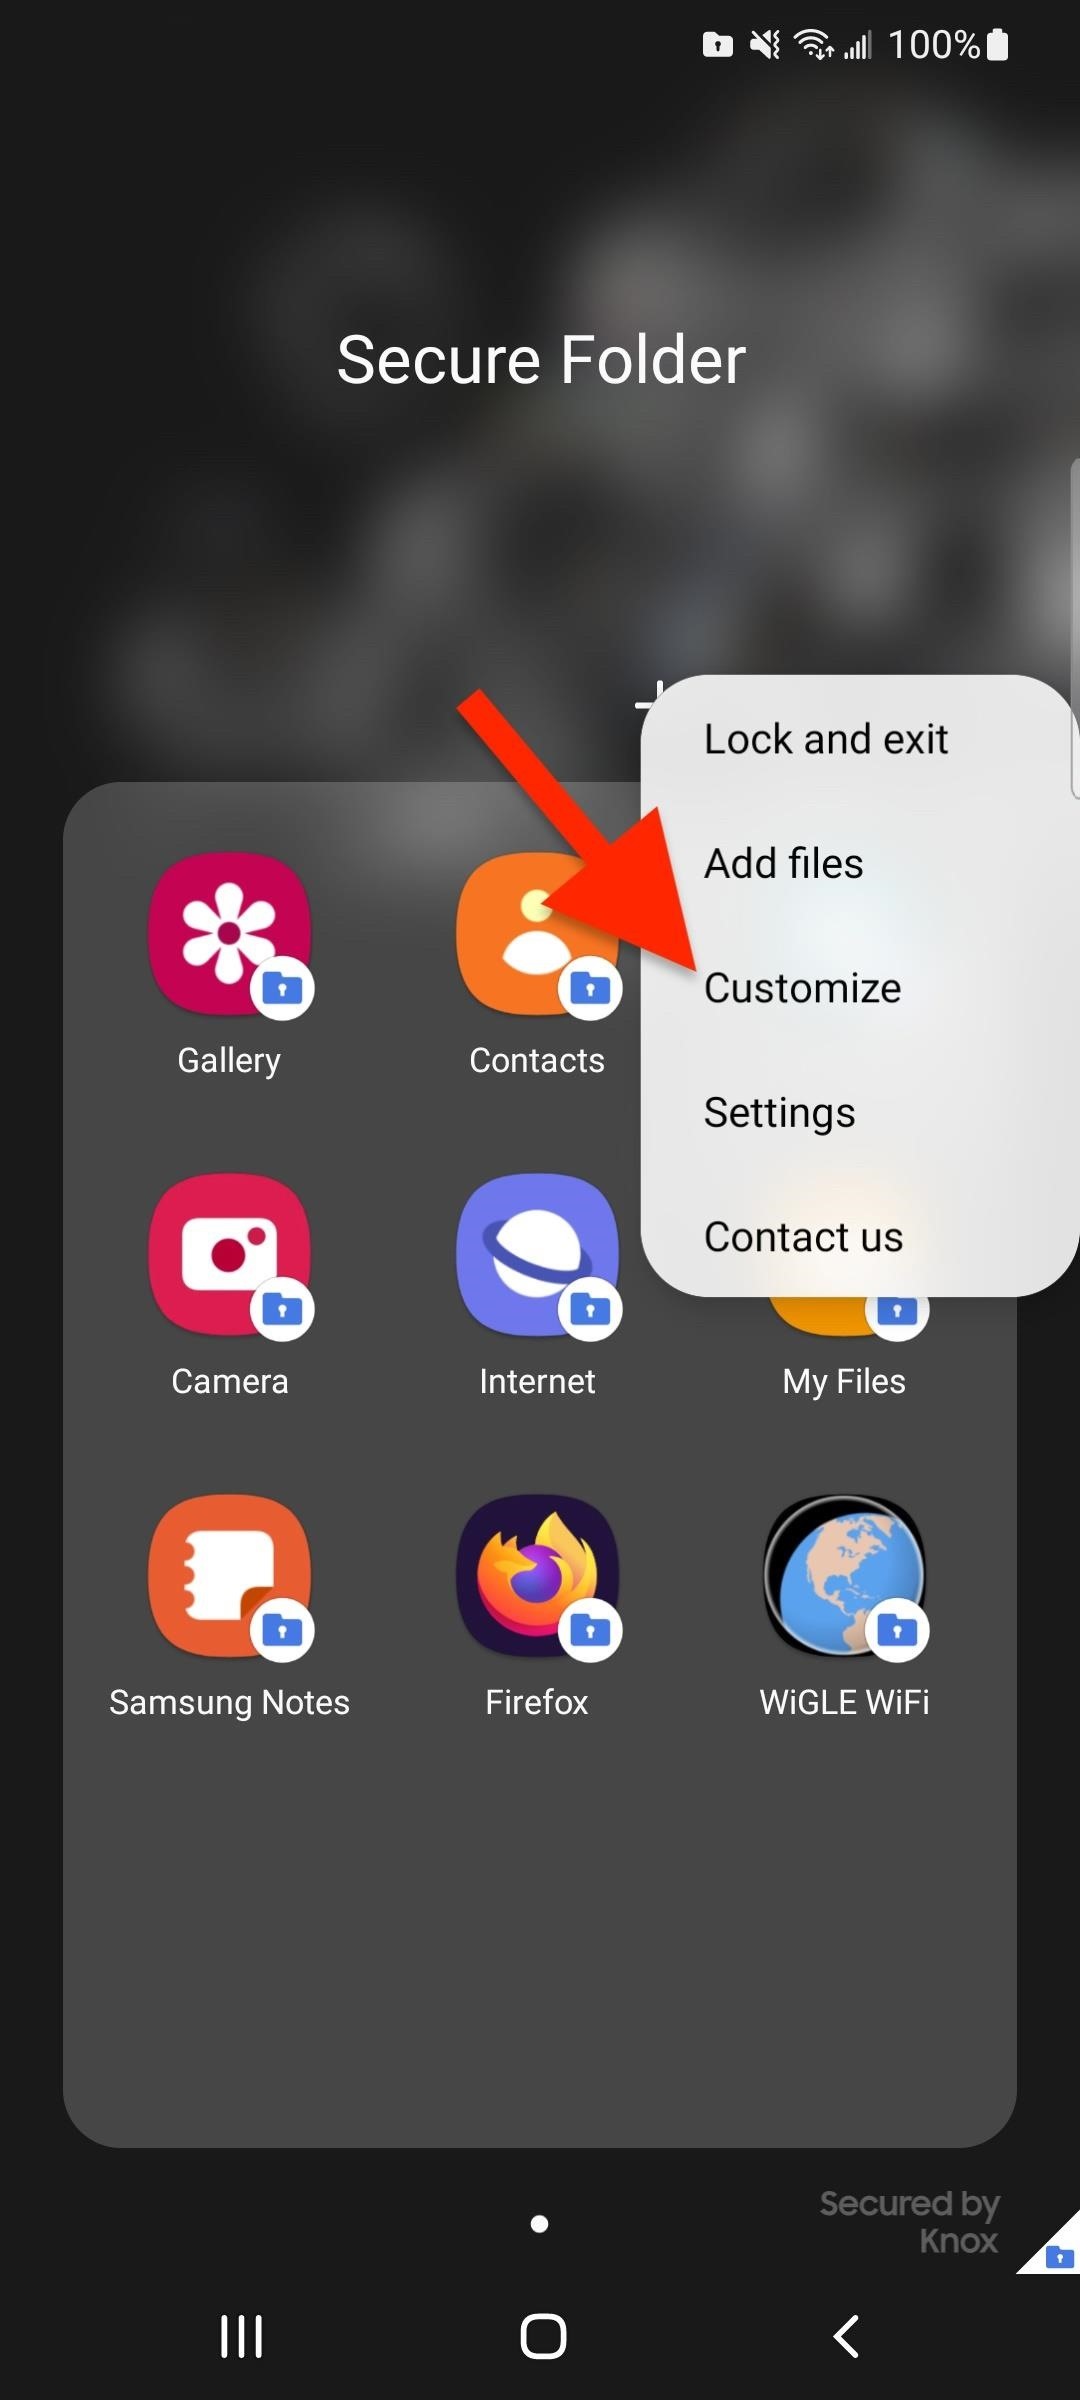
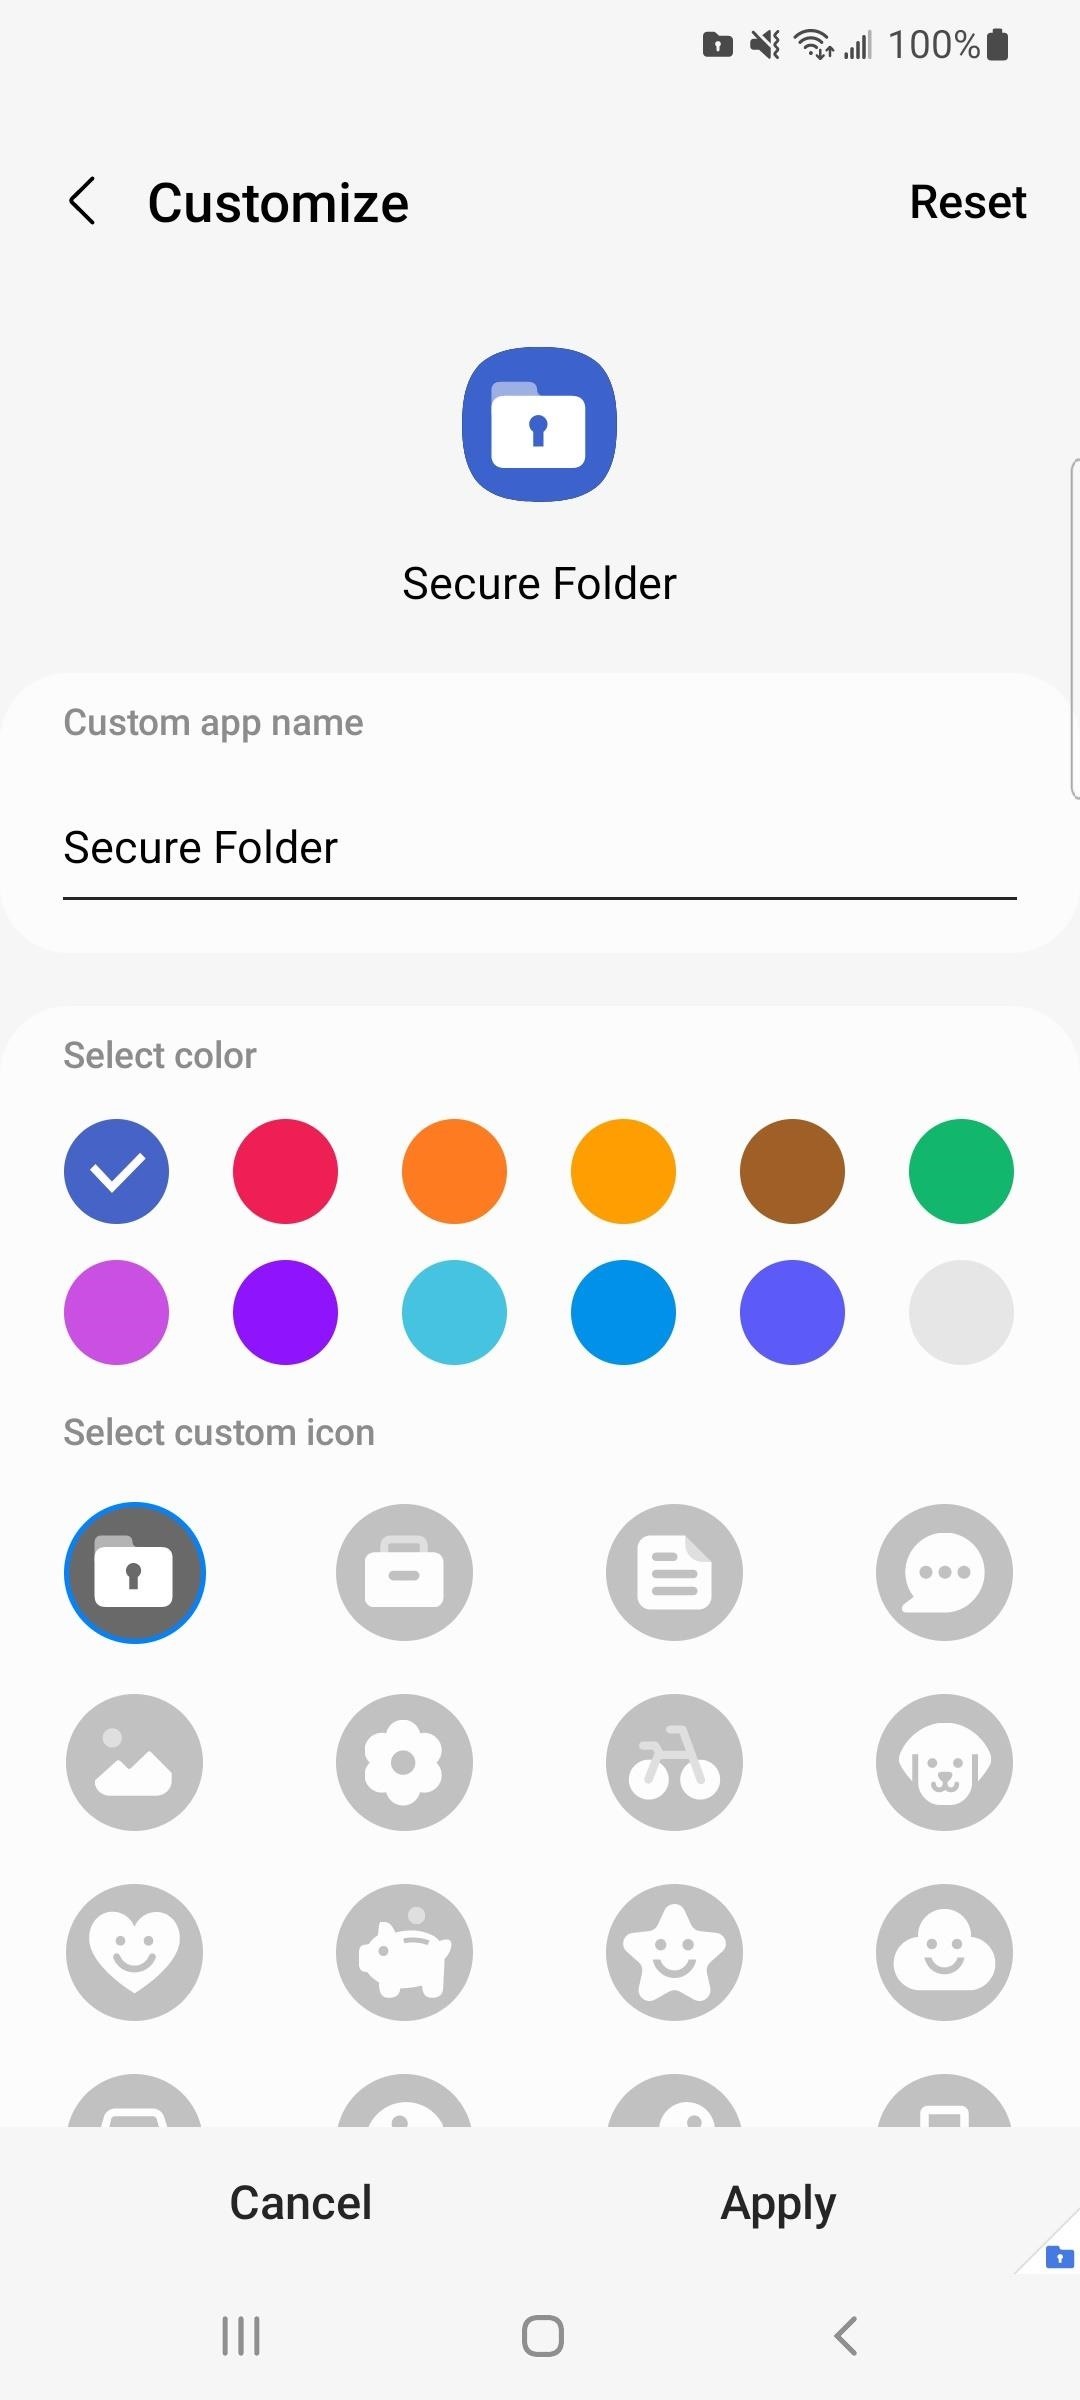
Secure Folder lets you change its app icon glyph, app icon color, and app name. This is helpful if you want other people with access to your Galaxy device from knowing it's the Secure Folder.
To change the look, tap the vertical ellipsis from within Secure Folder, then choose "Customize." Make your changes, then hit "Apply" to save them. To return to the default look, open the customization settings again and hit "Reset."
Step 9: Adjust Secure Folder's Settings
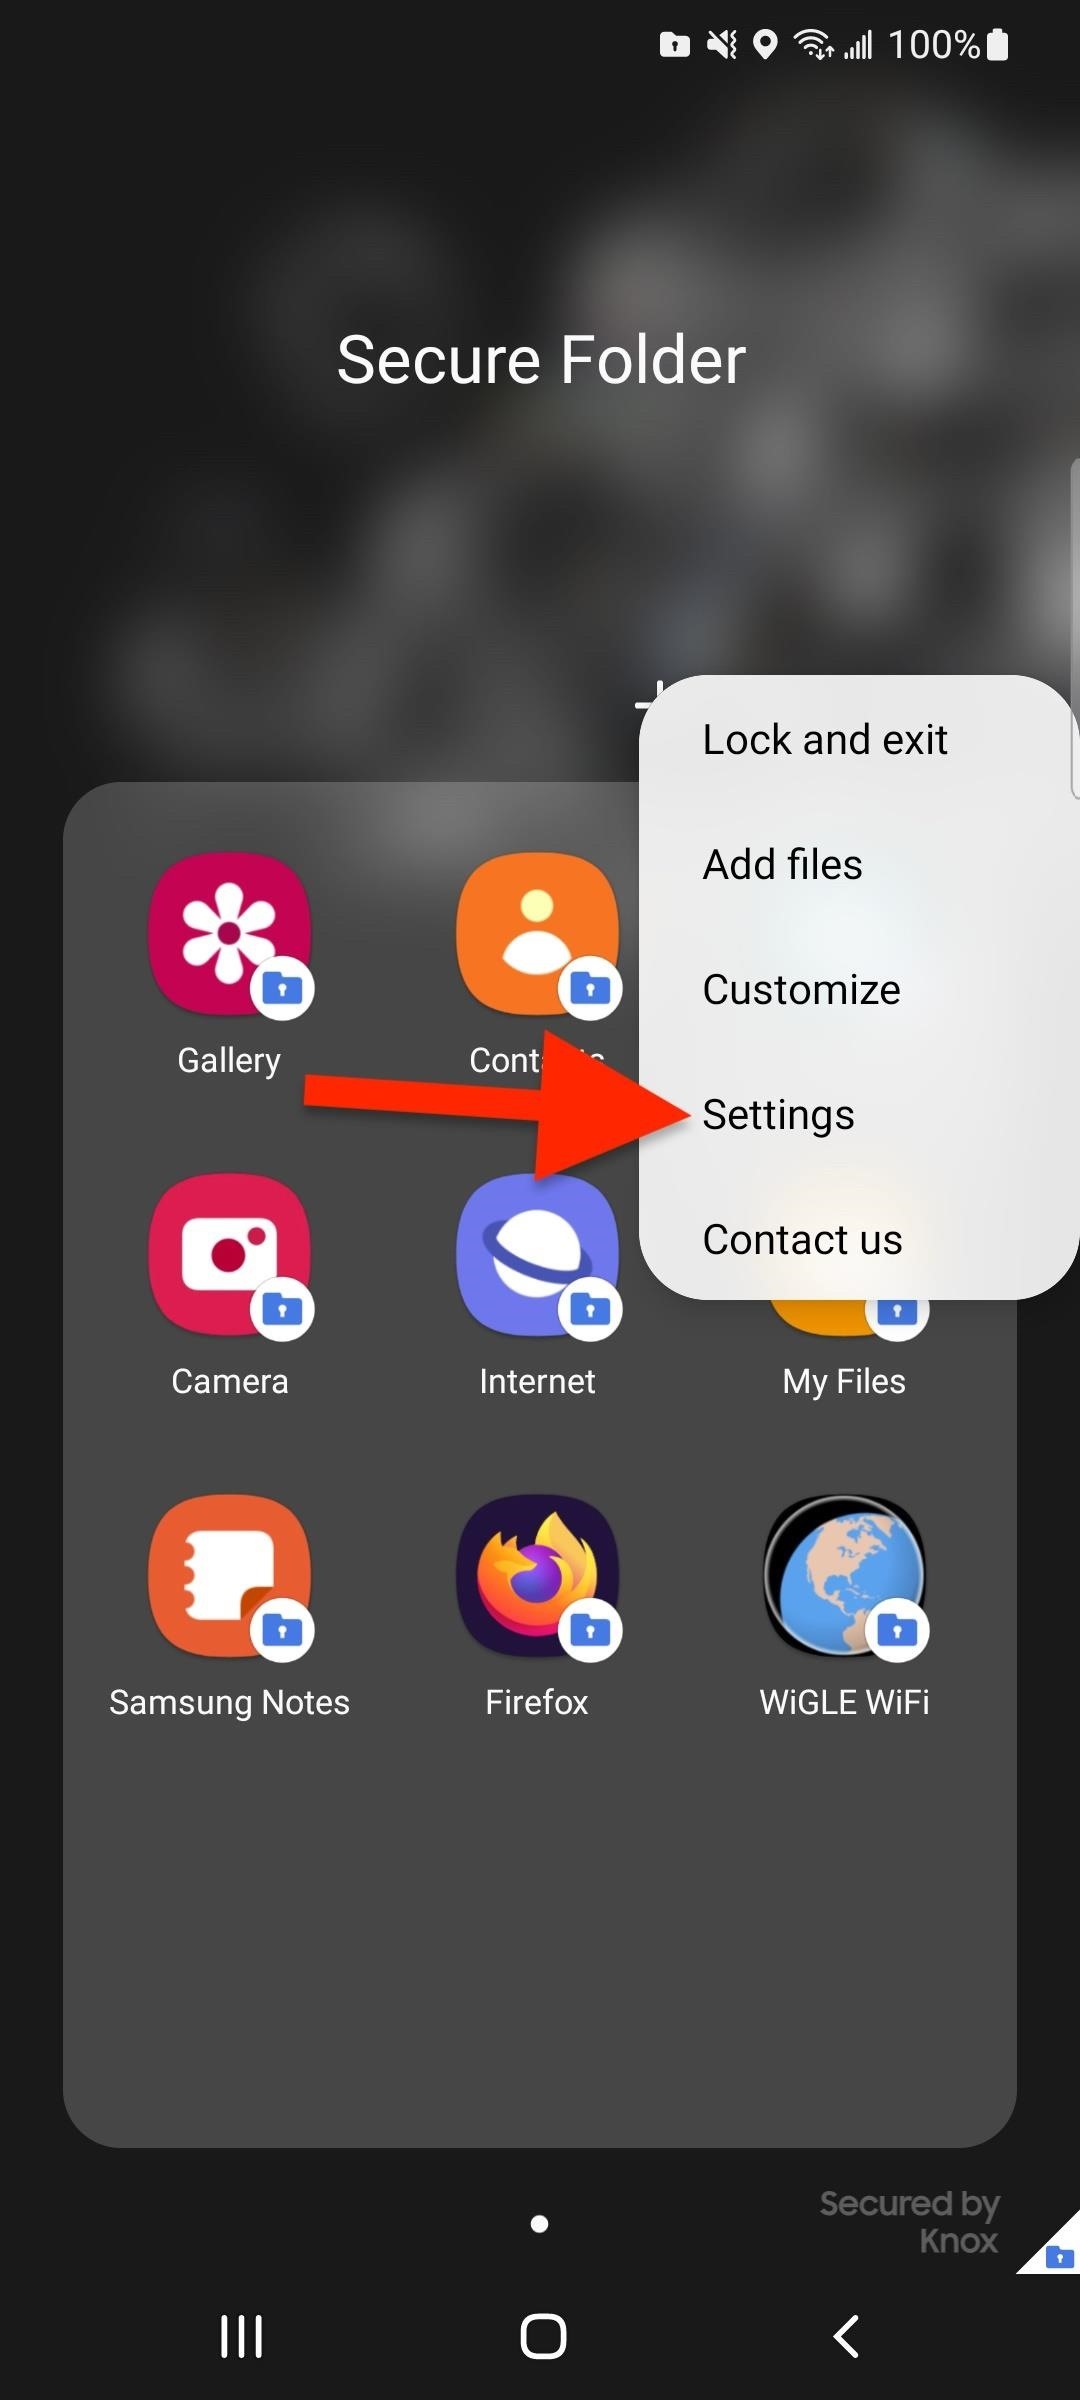
From the Secure Folder, you can select "Settings" from the vertical ellipsis menu to change some of the folder's preferences. You can also navigate to these settings with one of the following paths.
- Settings –> Biometrics and security –> Secure Folder
- Settings –> Lock screen and security –> Secure Folder
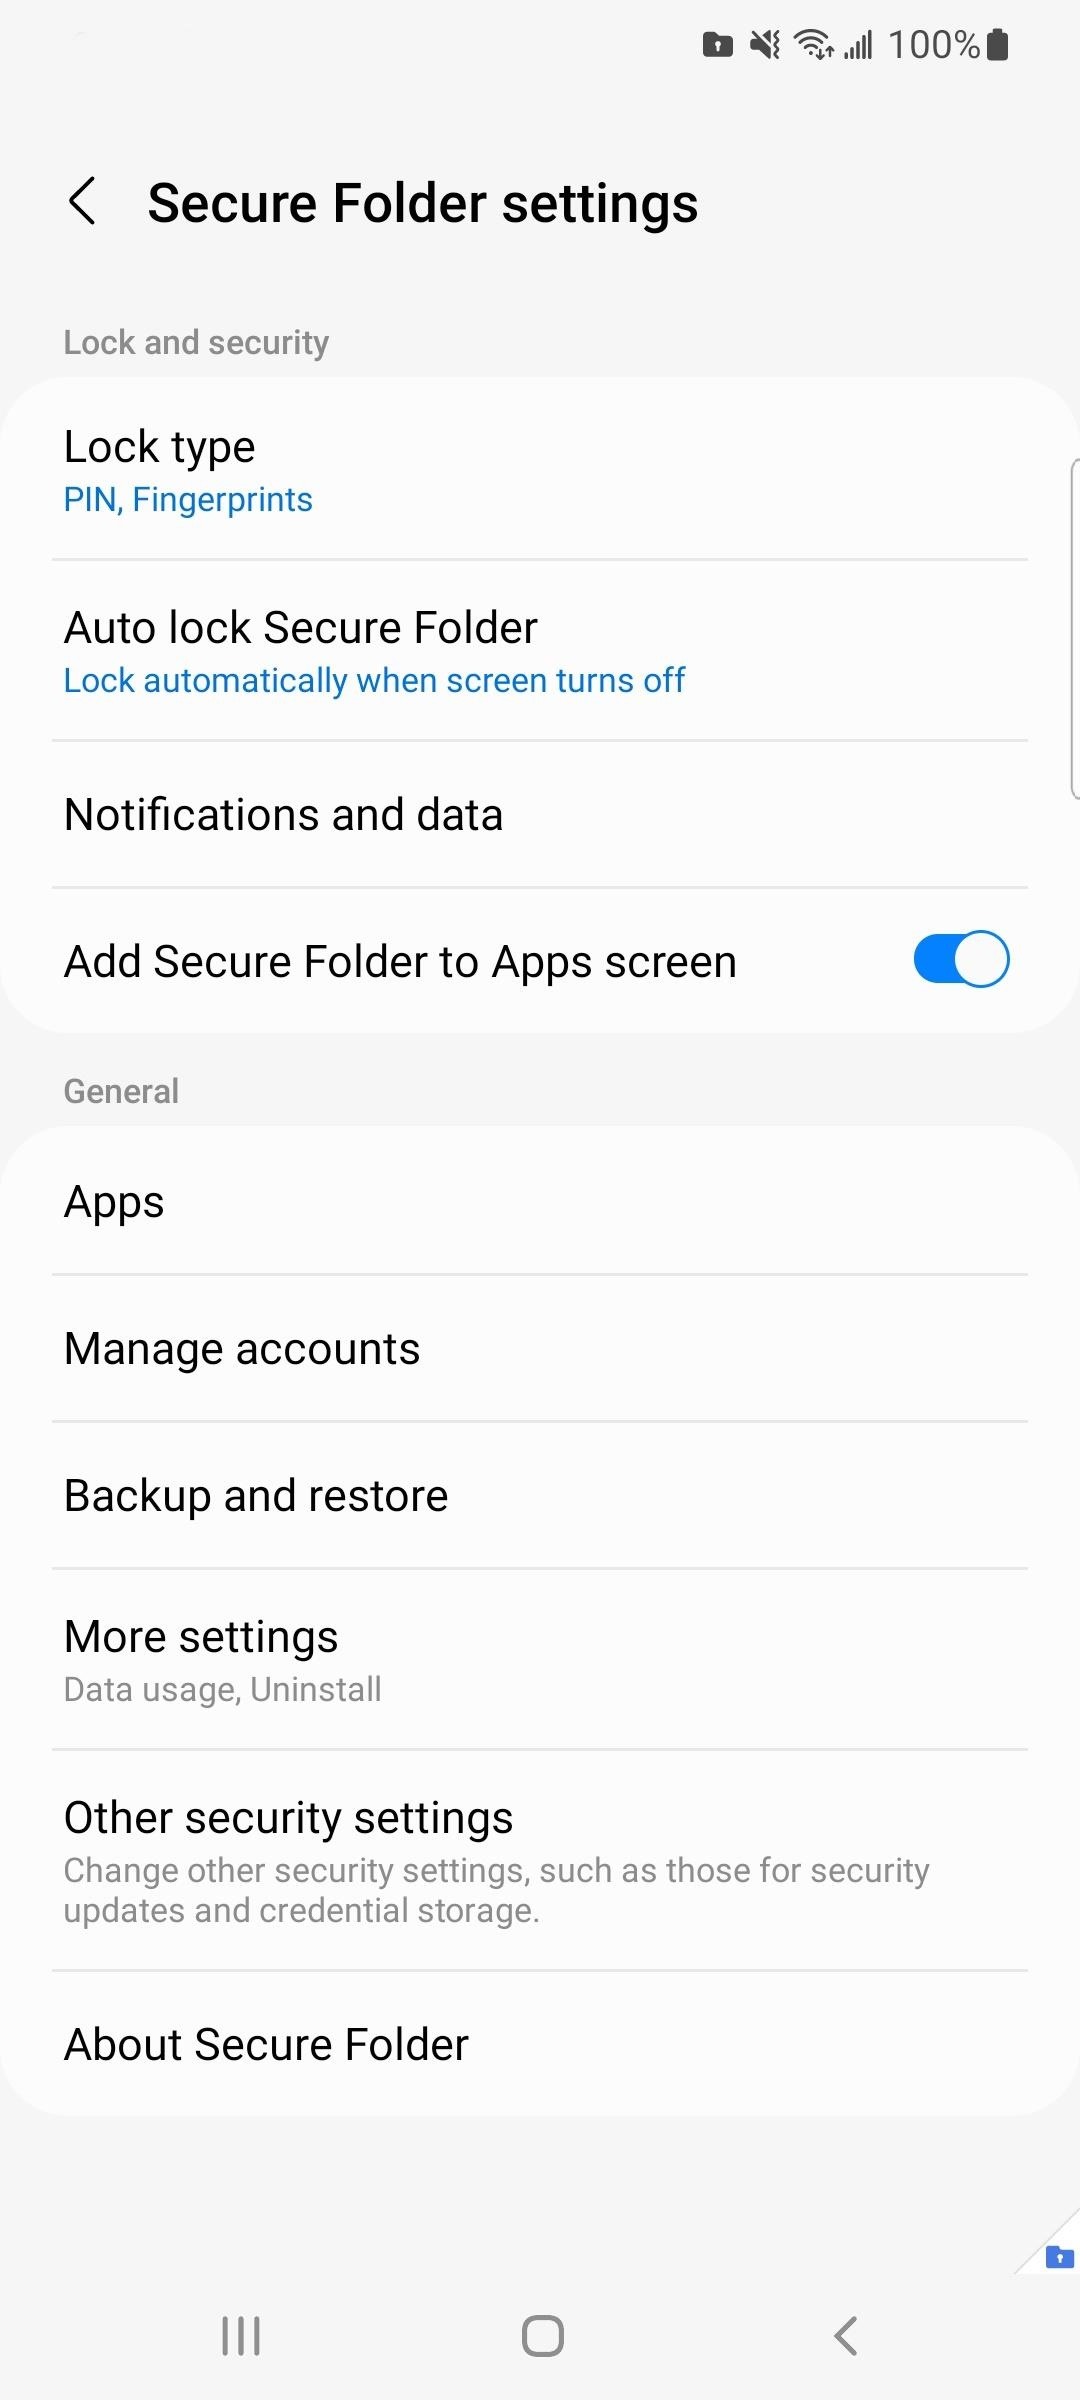
For instance, you can tap "Lock type" to change your current type to a pattern, PIN, or password, or to enable or disable biometric unlocking.
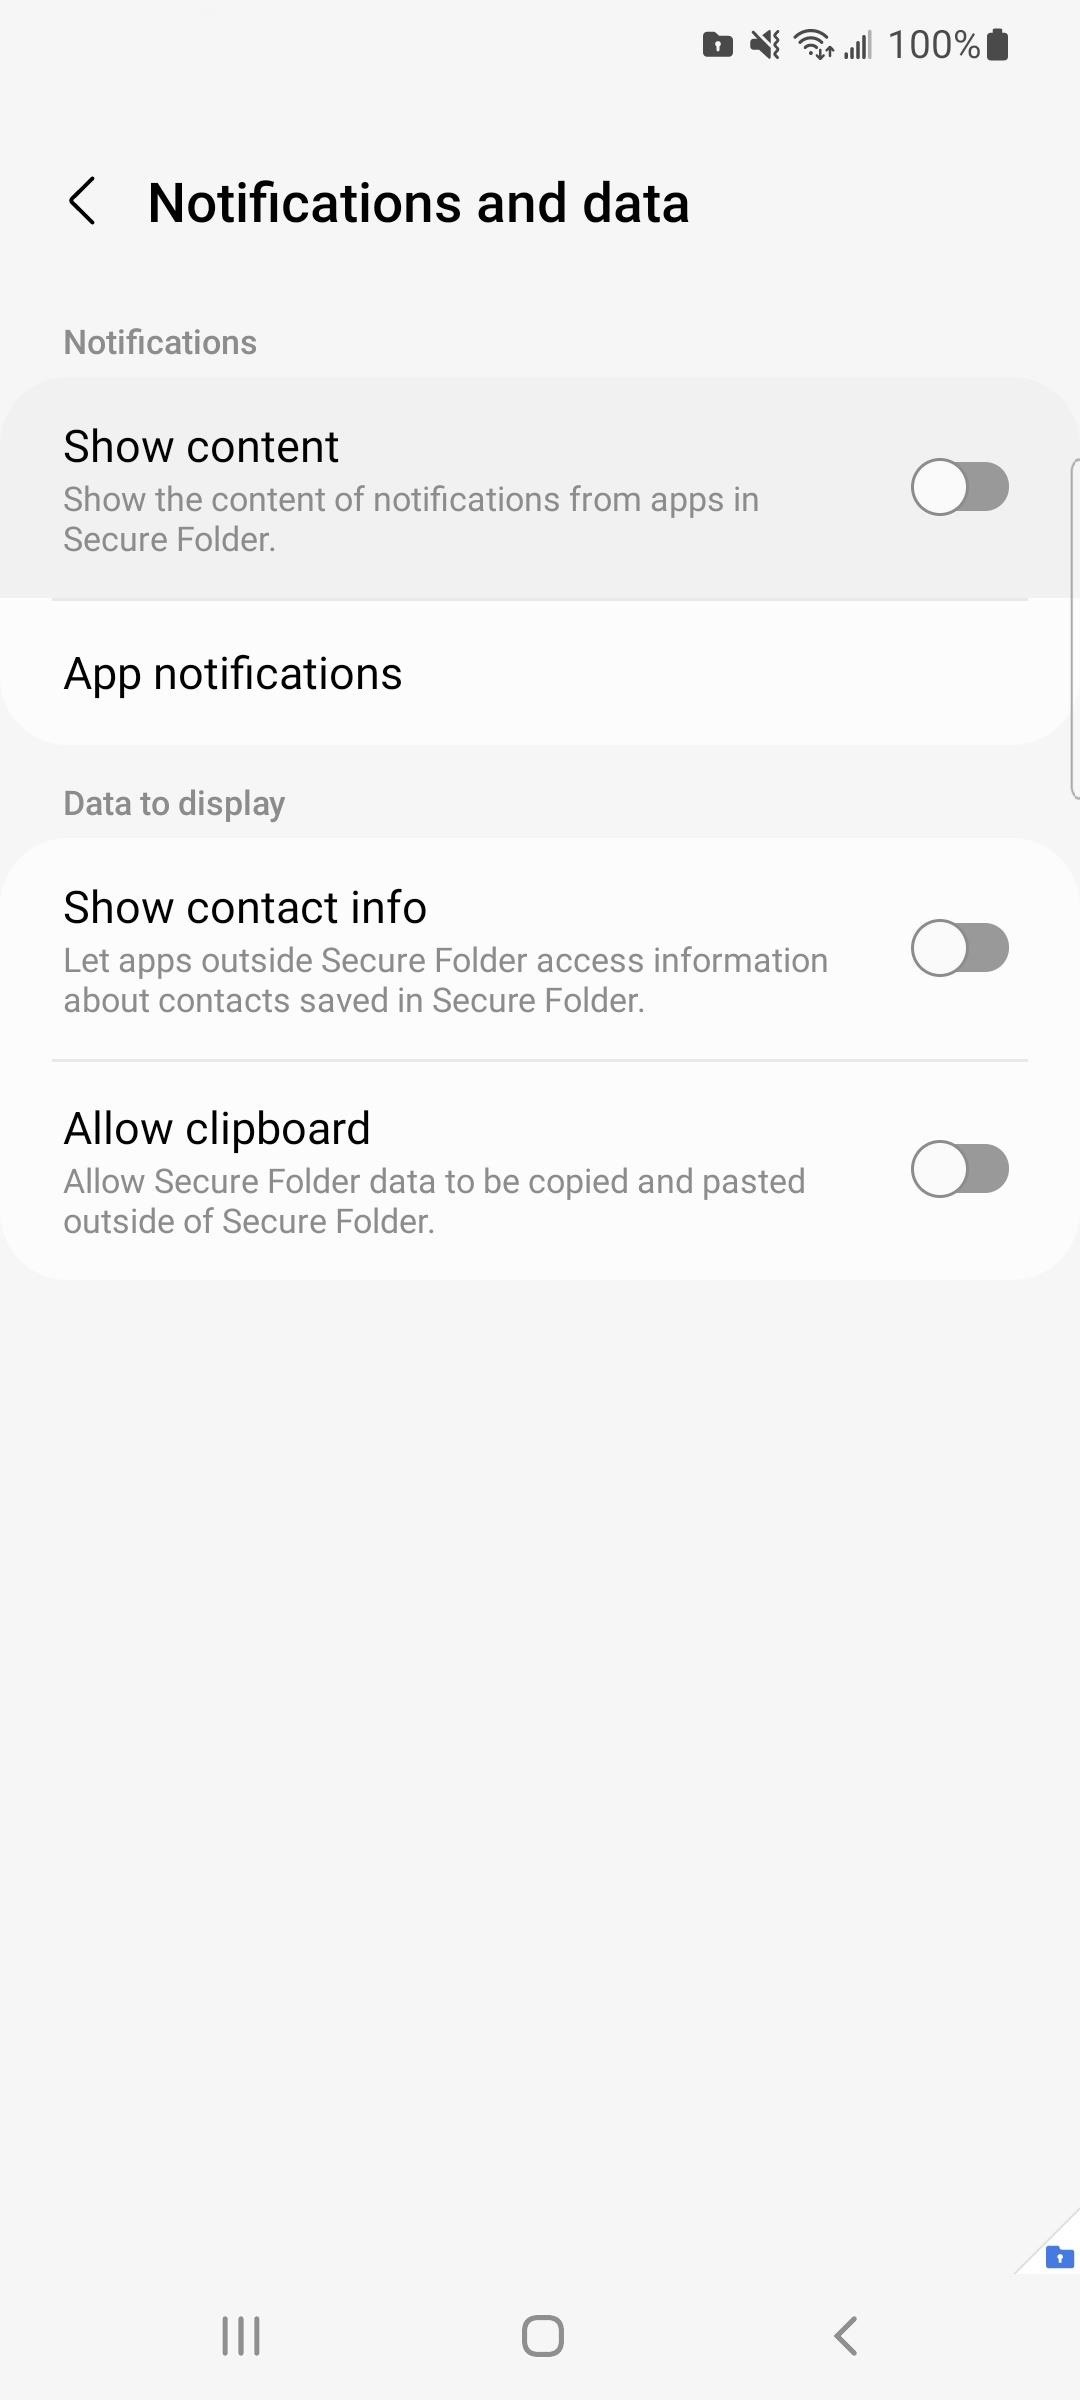
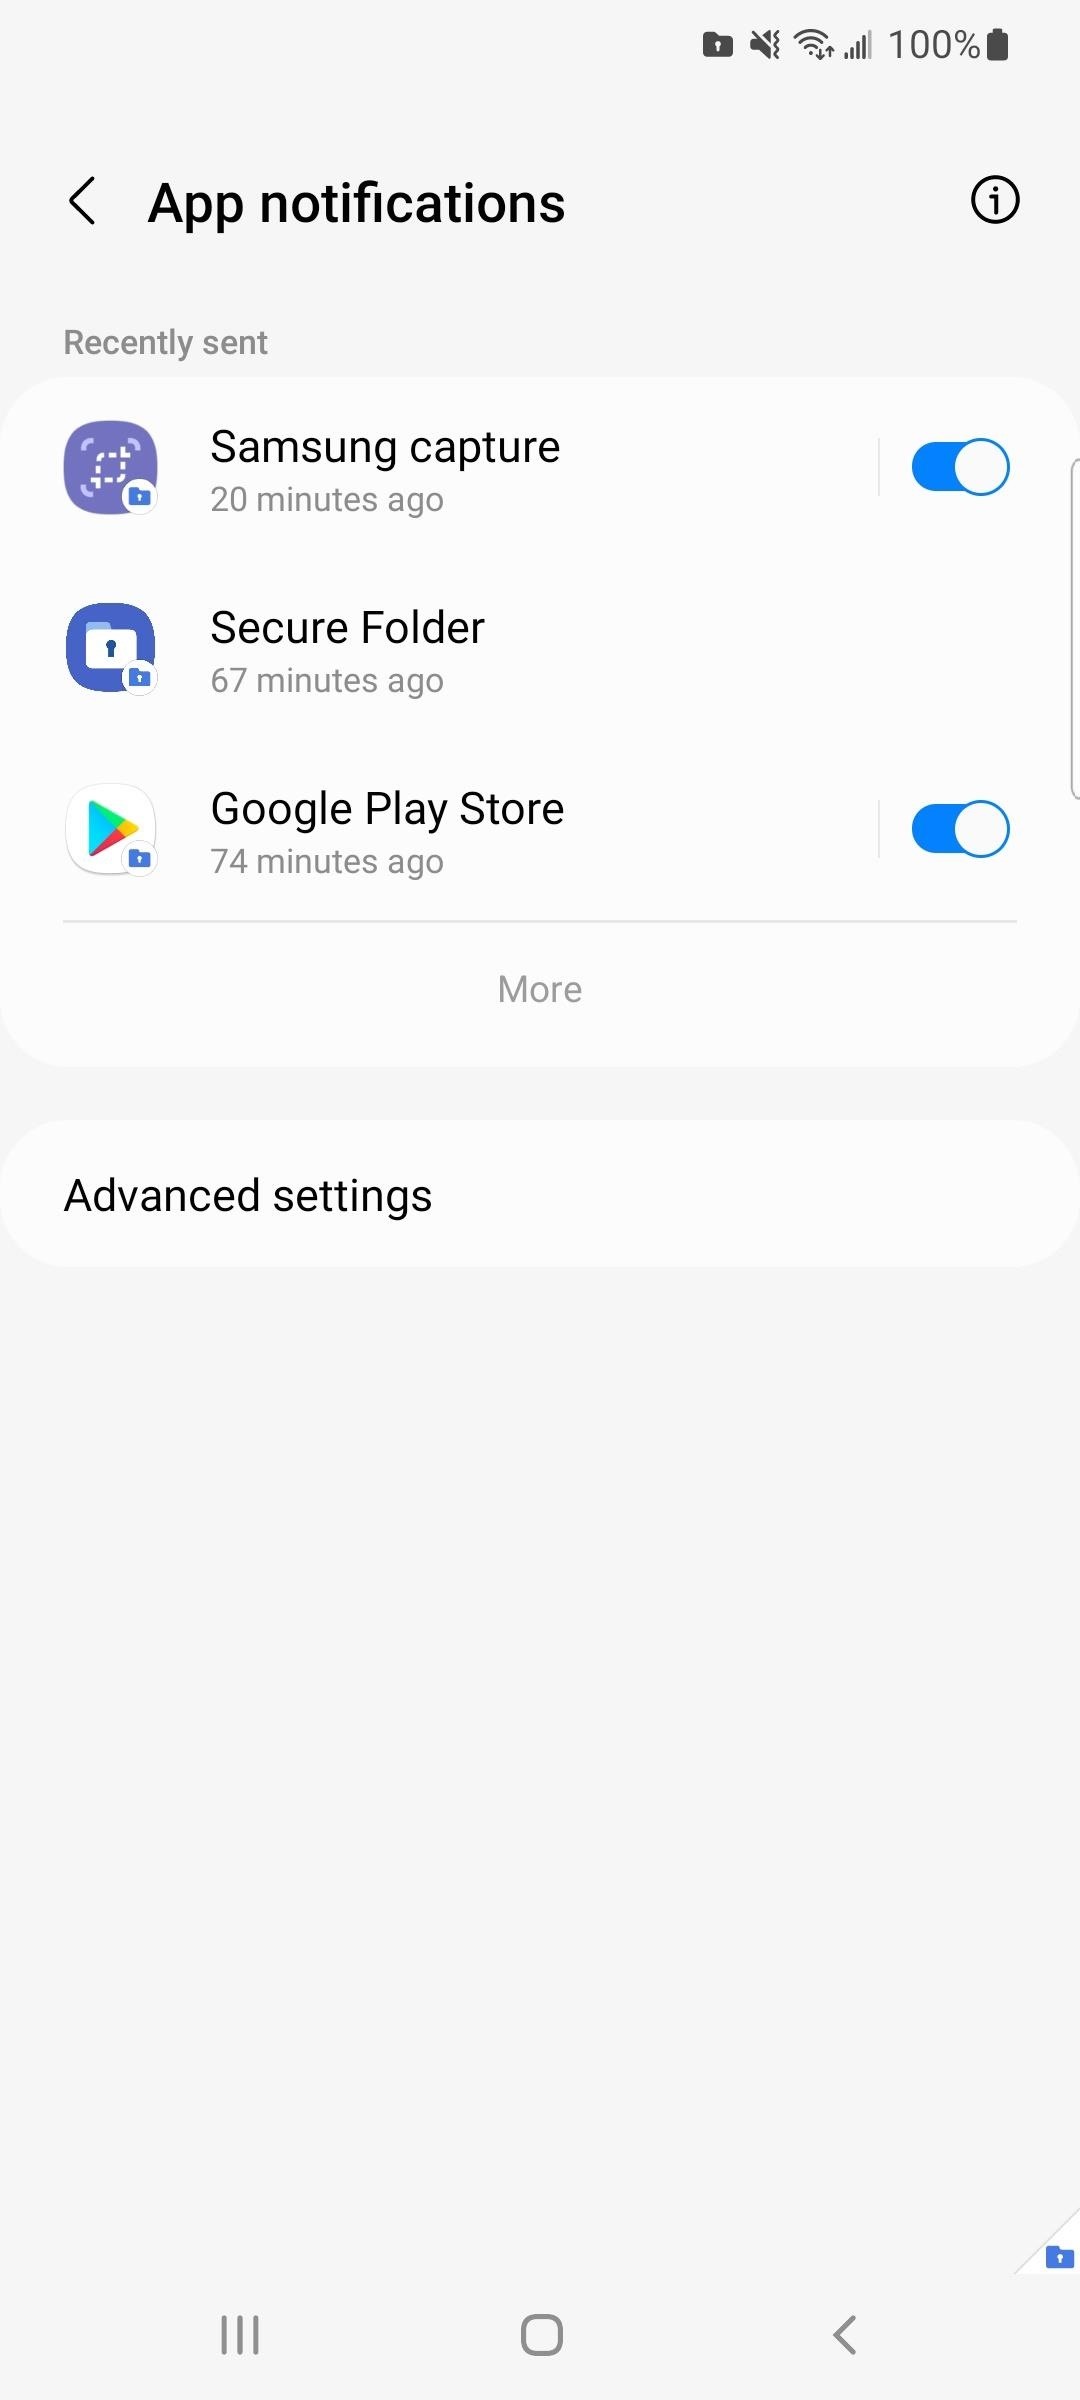
Choosing "Notifications and data" from the preferences will let you show or hide content in notifications for the apps housed in Secure Folder, disable or enable app notifications on a per-app basis, hide or show app icon badges, show or hide the snooze button, and more.
Step 10: Lock Secure Folder from Prying Eyes
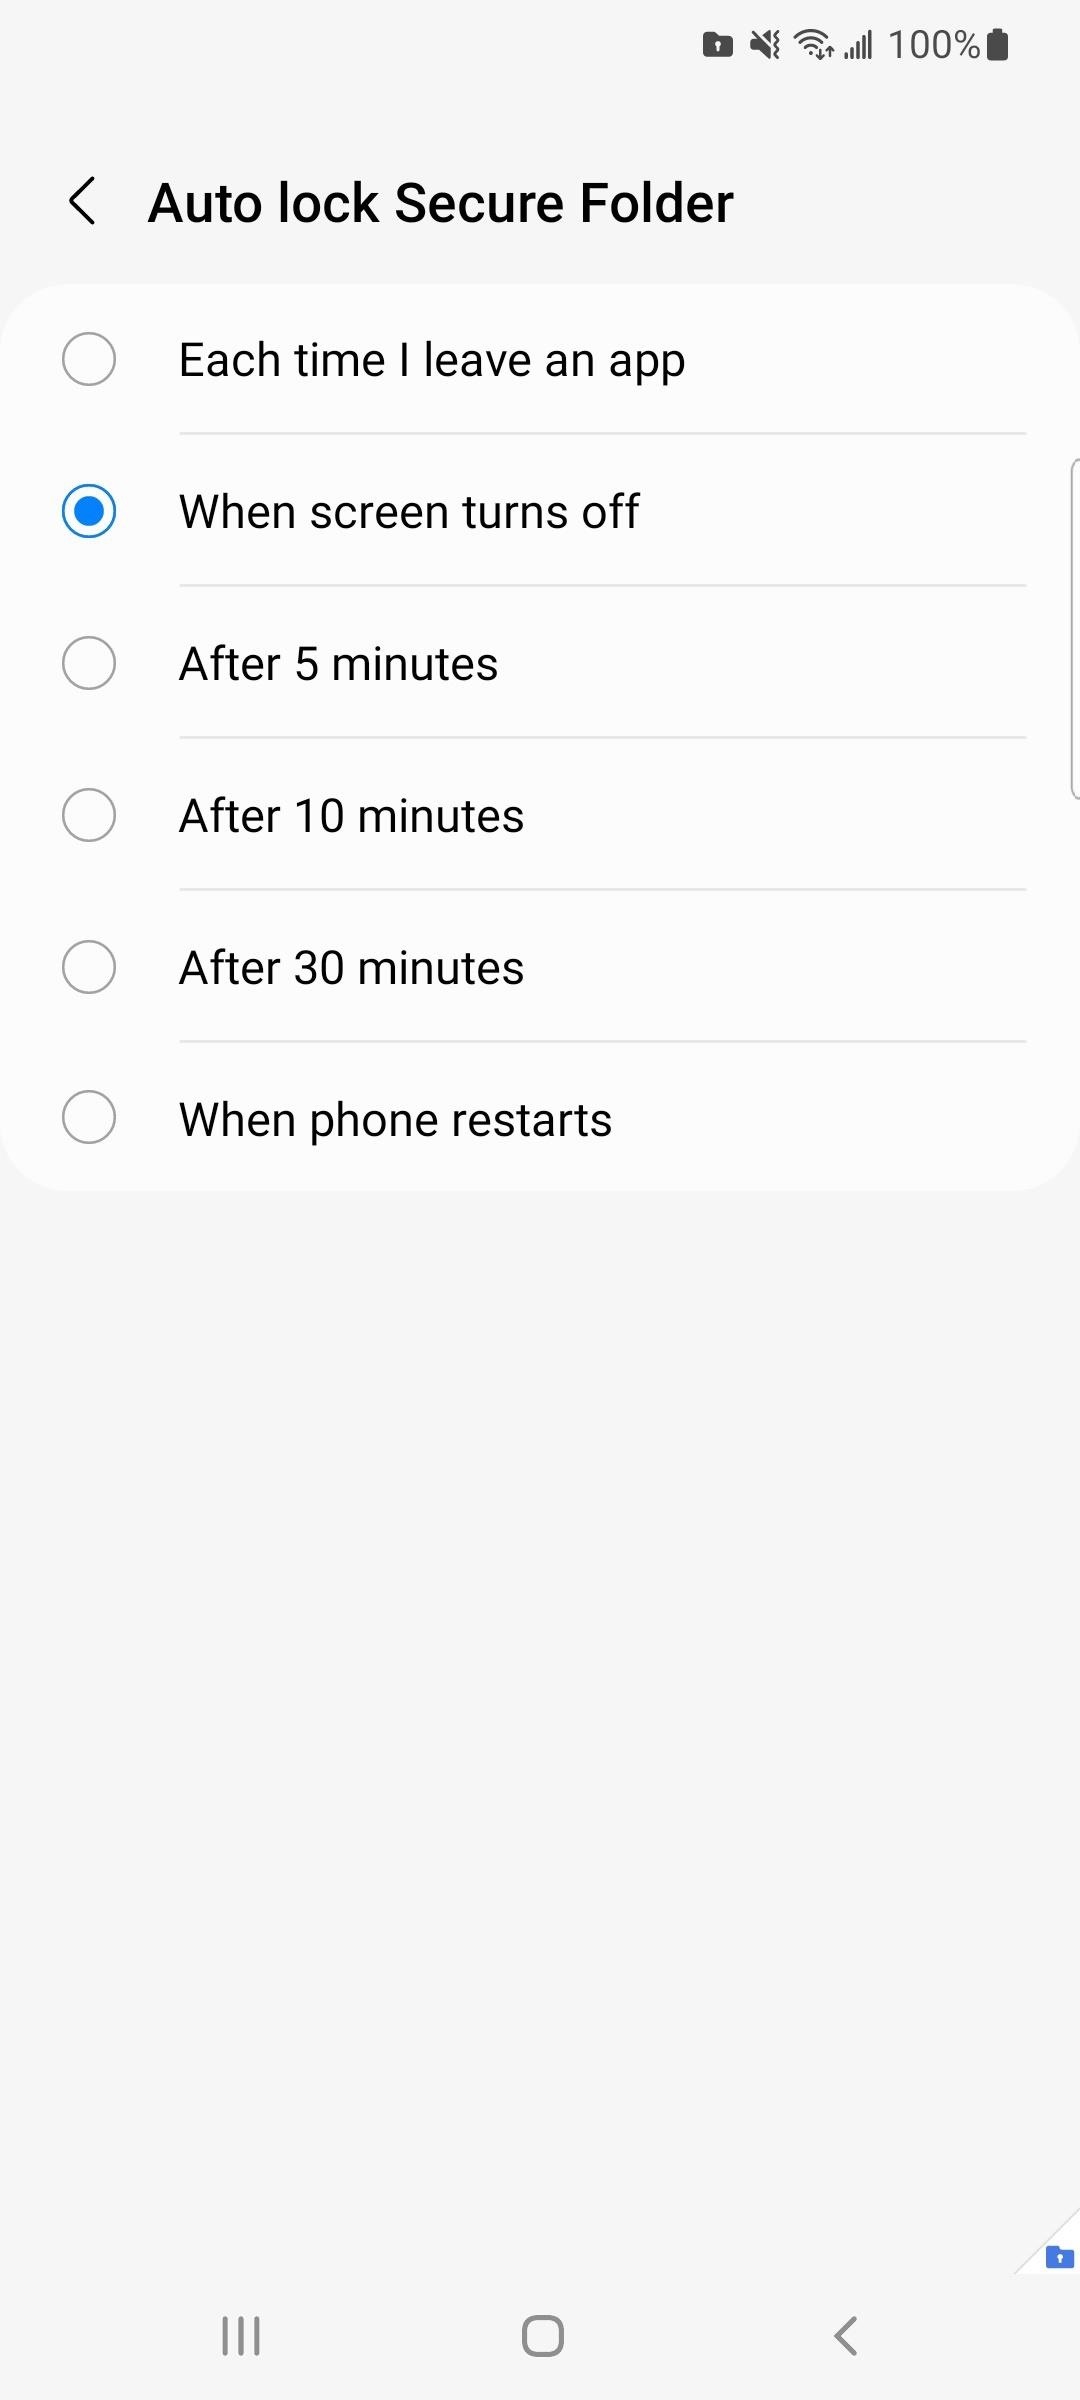
To keep Secure Folder protected, choose "Auto lock Secure Folder" from its settings and select the option that best fits your needs. You can lock it immediately each time you leave an app, whenever the screen turns off, after your phone restarts, or after a set time period.
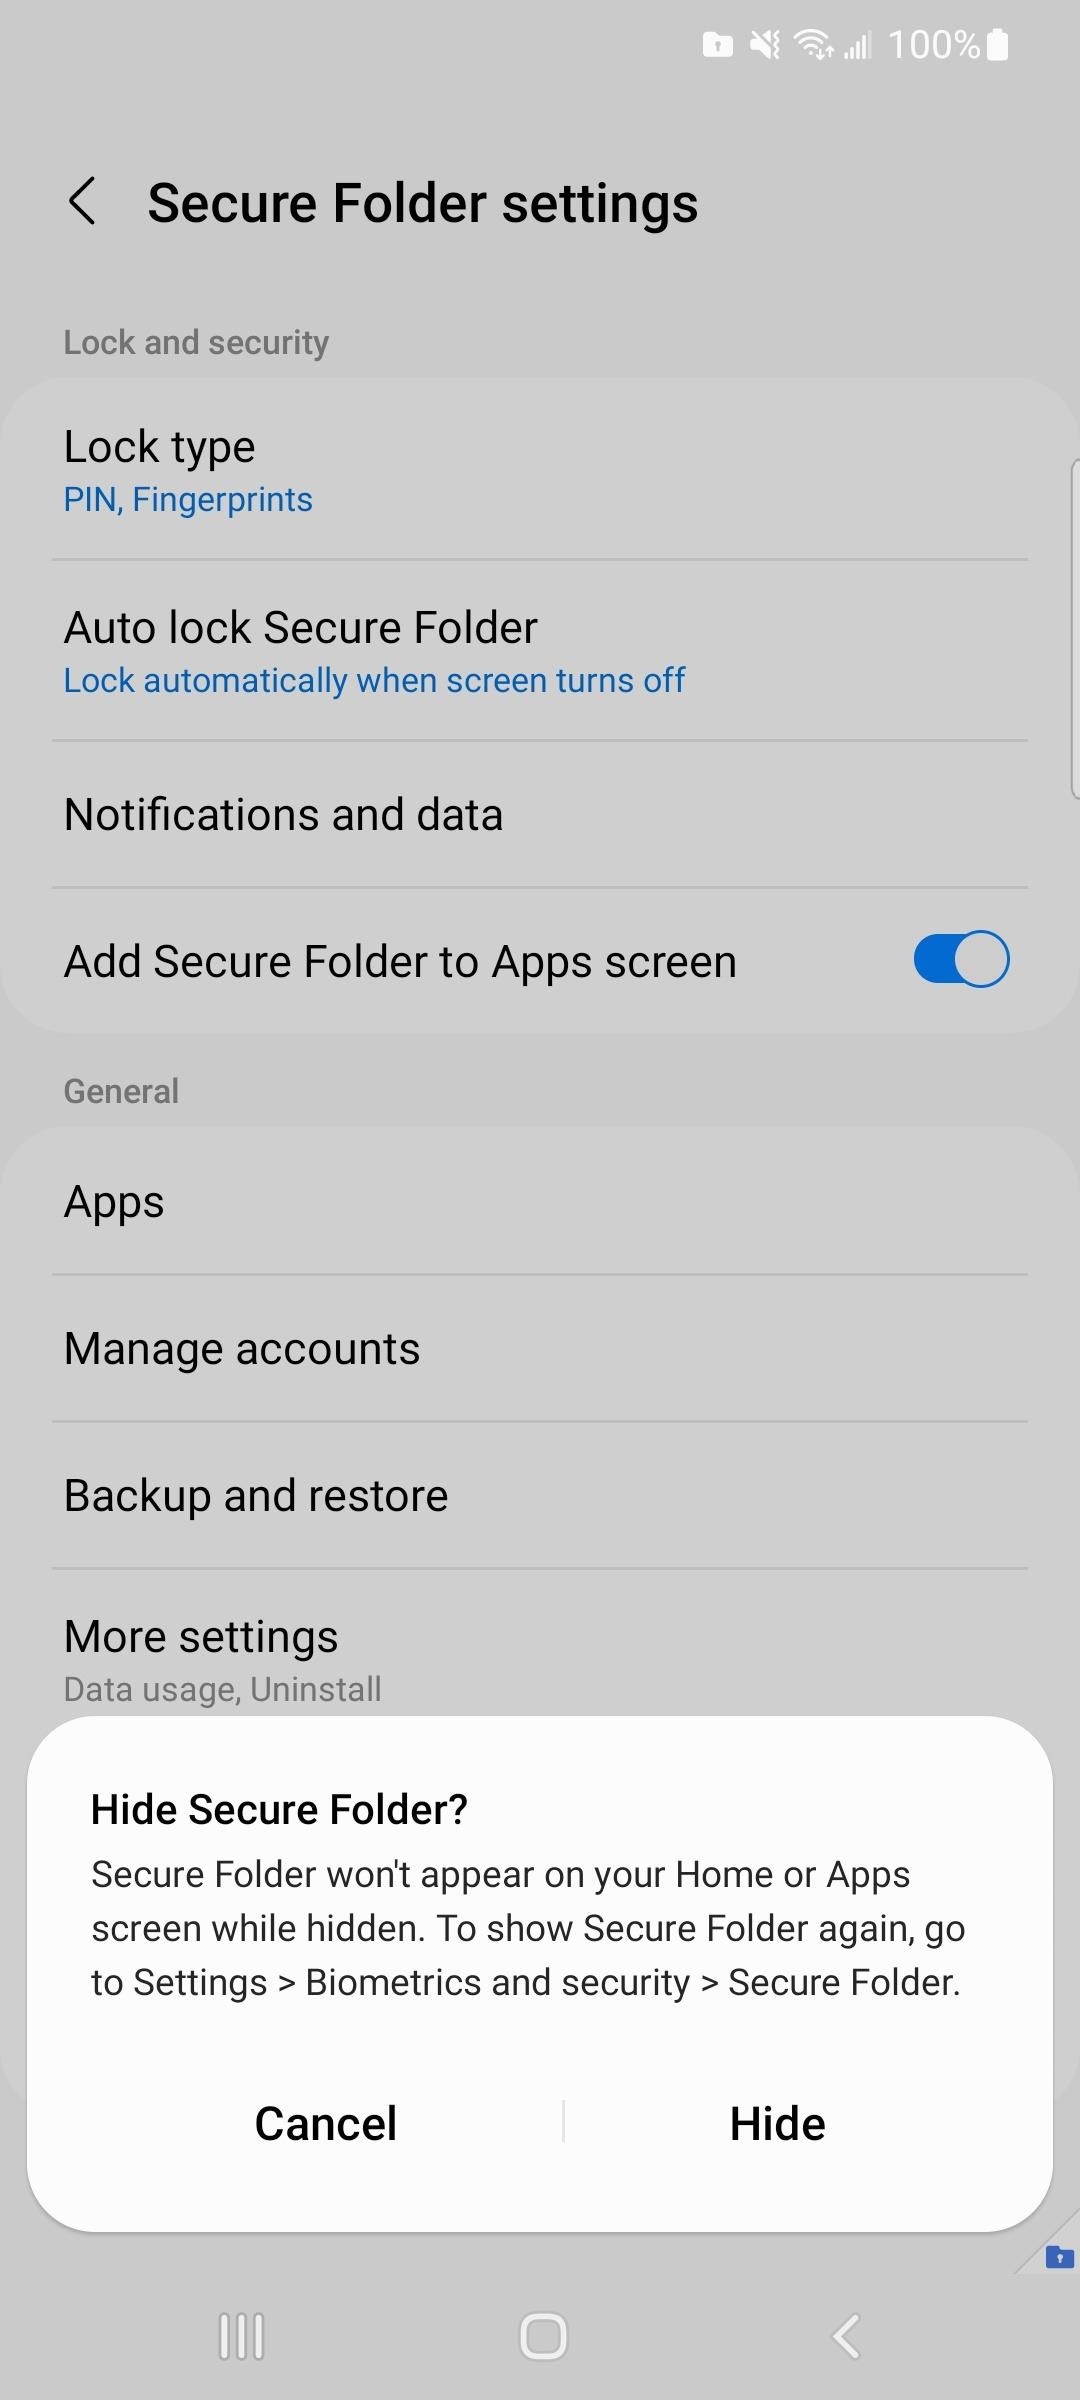
You can also hide Secure Folder from the Apps and Home screens by toggling off the "Add Secure Folder to Apps screen" switch and choosing "Hide." To unhide it, just come back and toggle the switch off. However, you will have to manually add Secure Folder to your Home screen again each time. To get back to the Secure Folder preferences, go to one of the following locations.
- Settings –> Biometrics and security –> Secure Folder
- Settings –> Lock screen and security –> Secure Folder
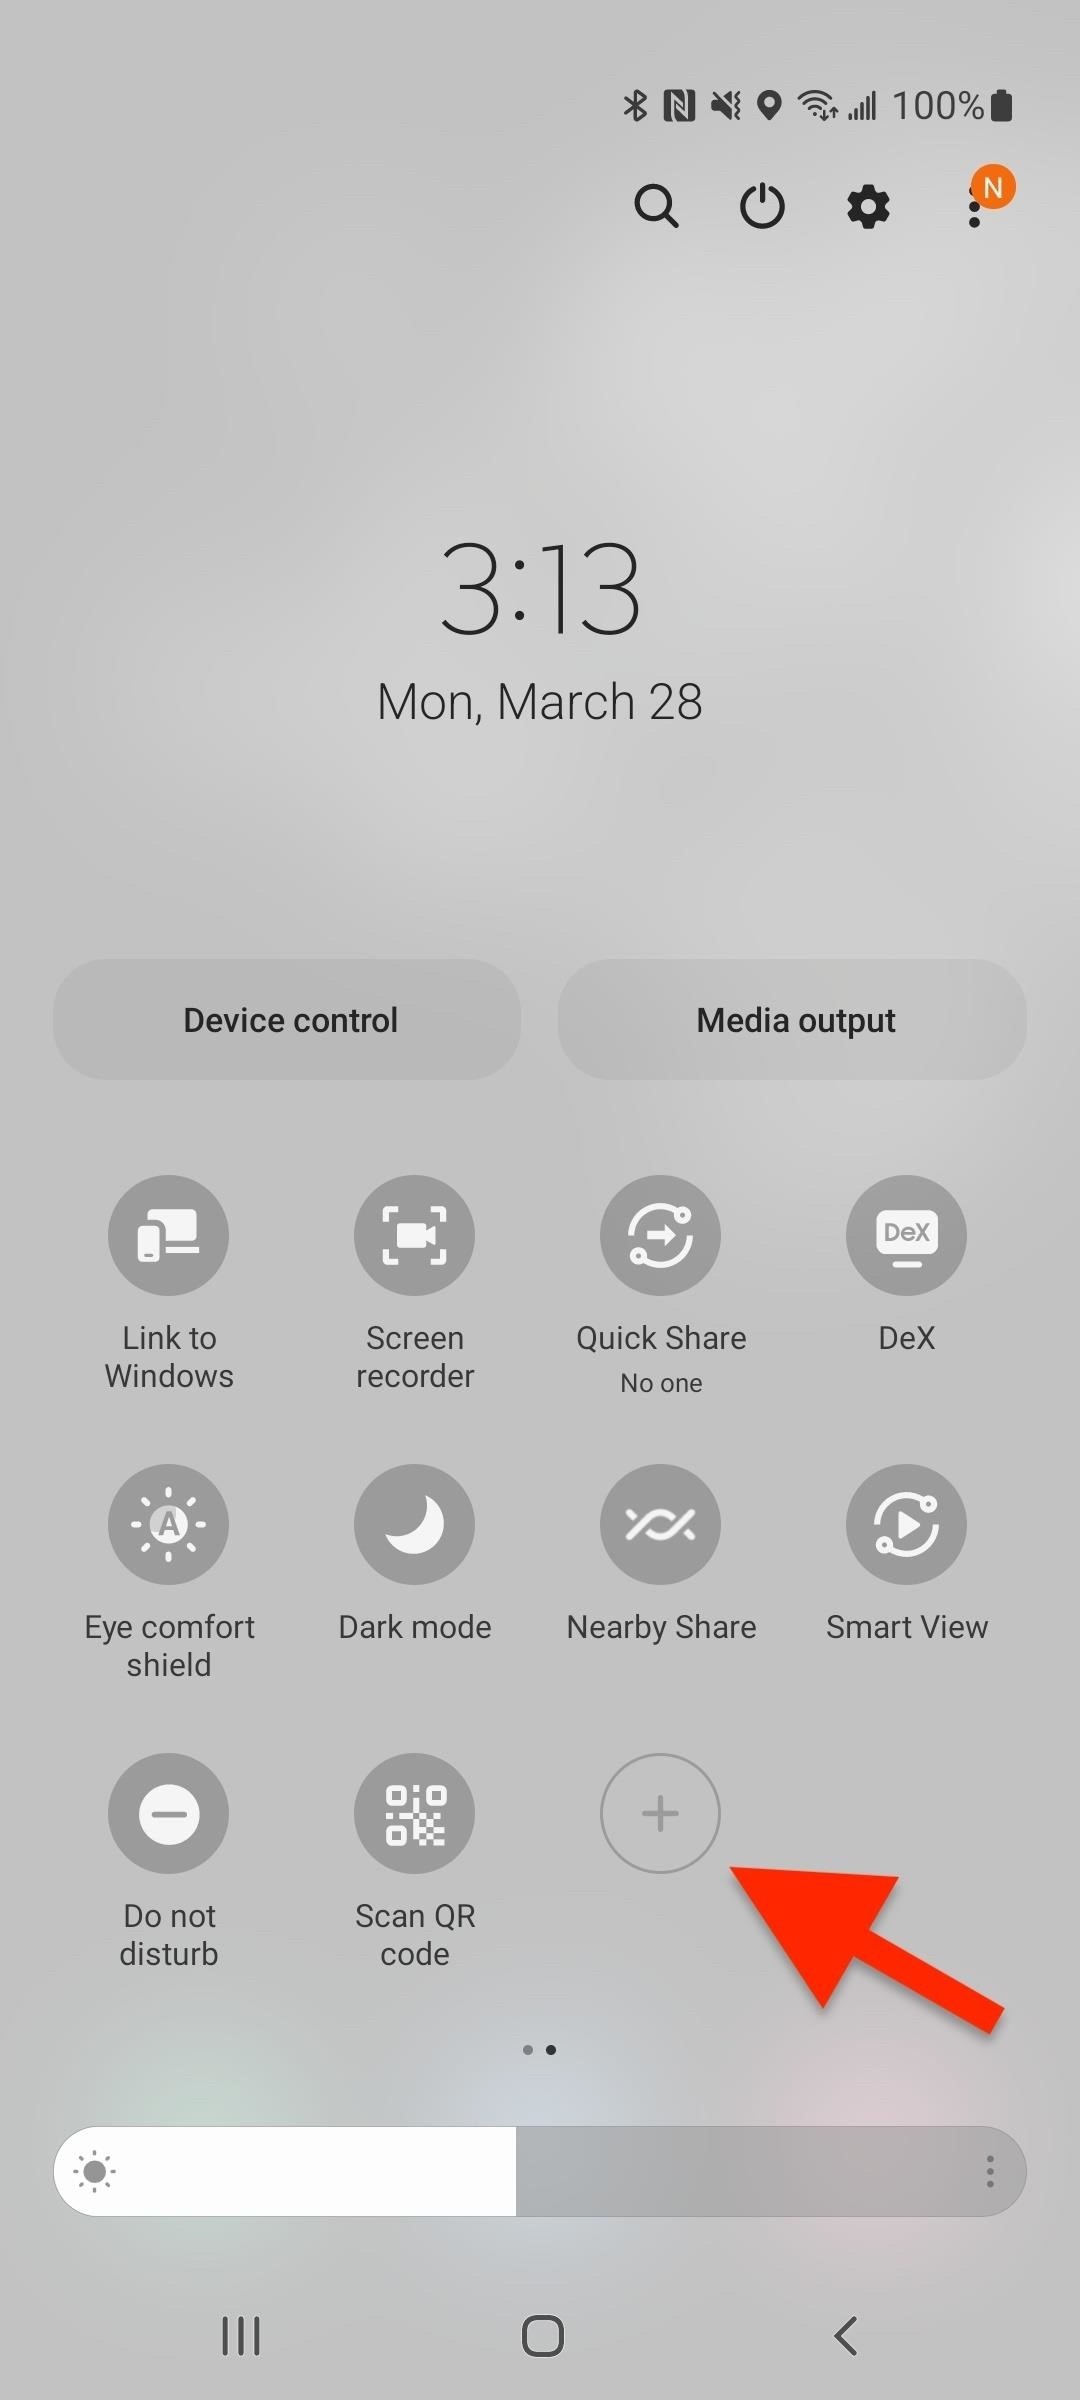
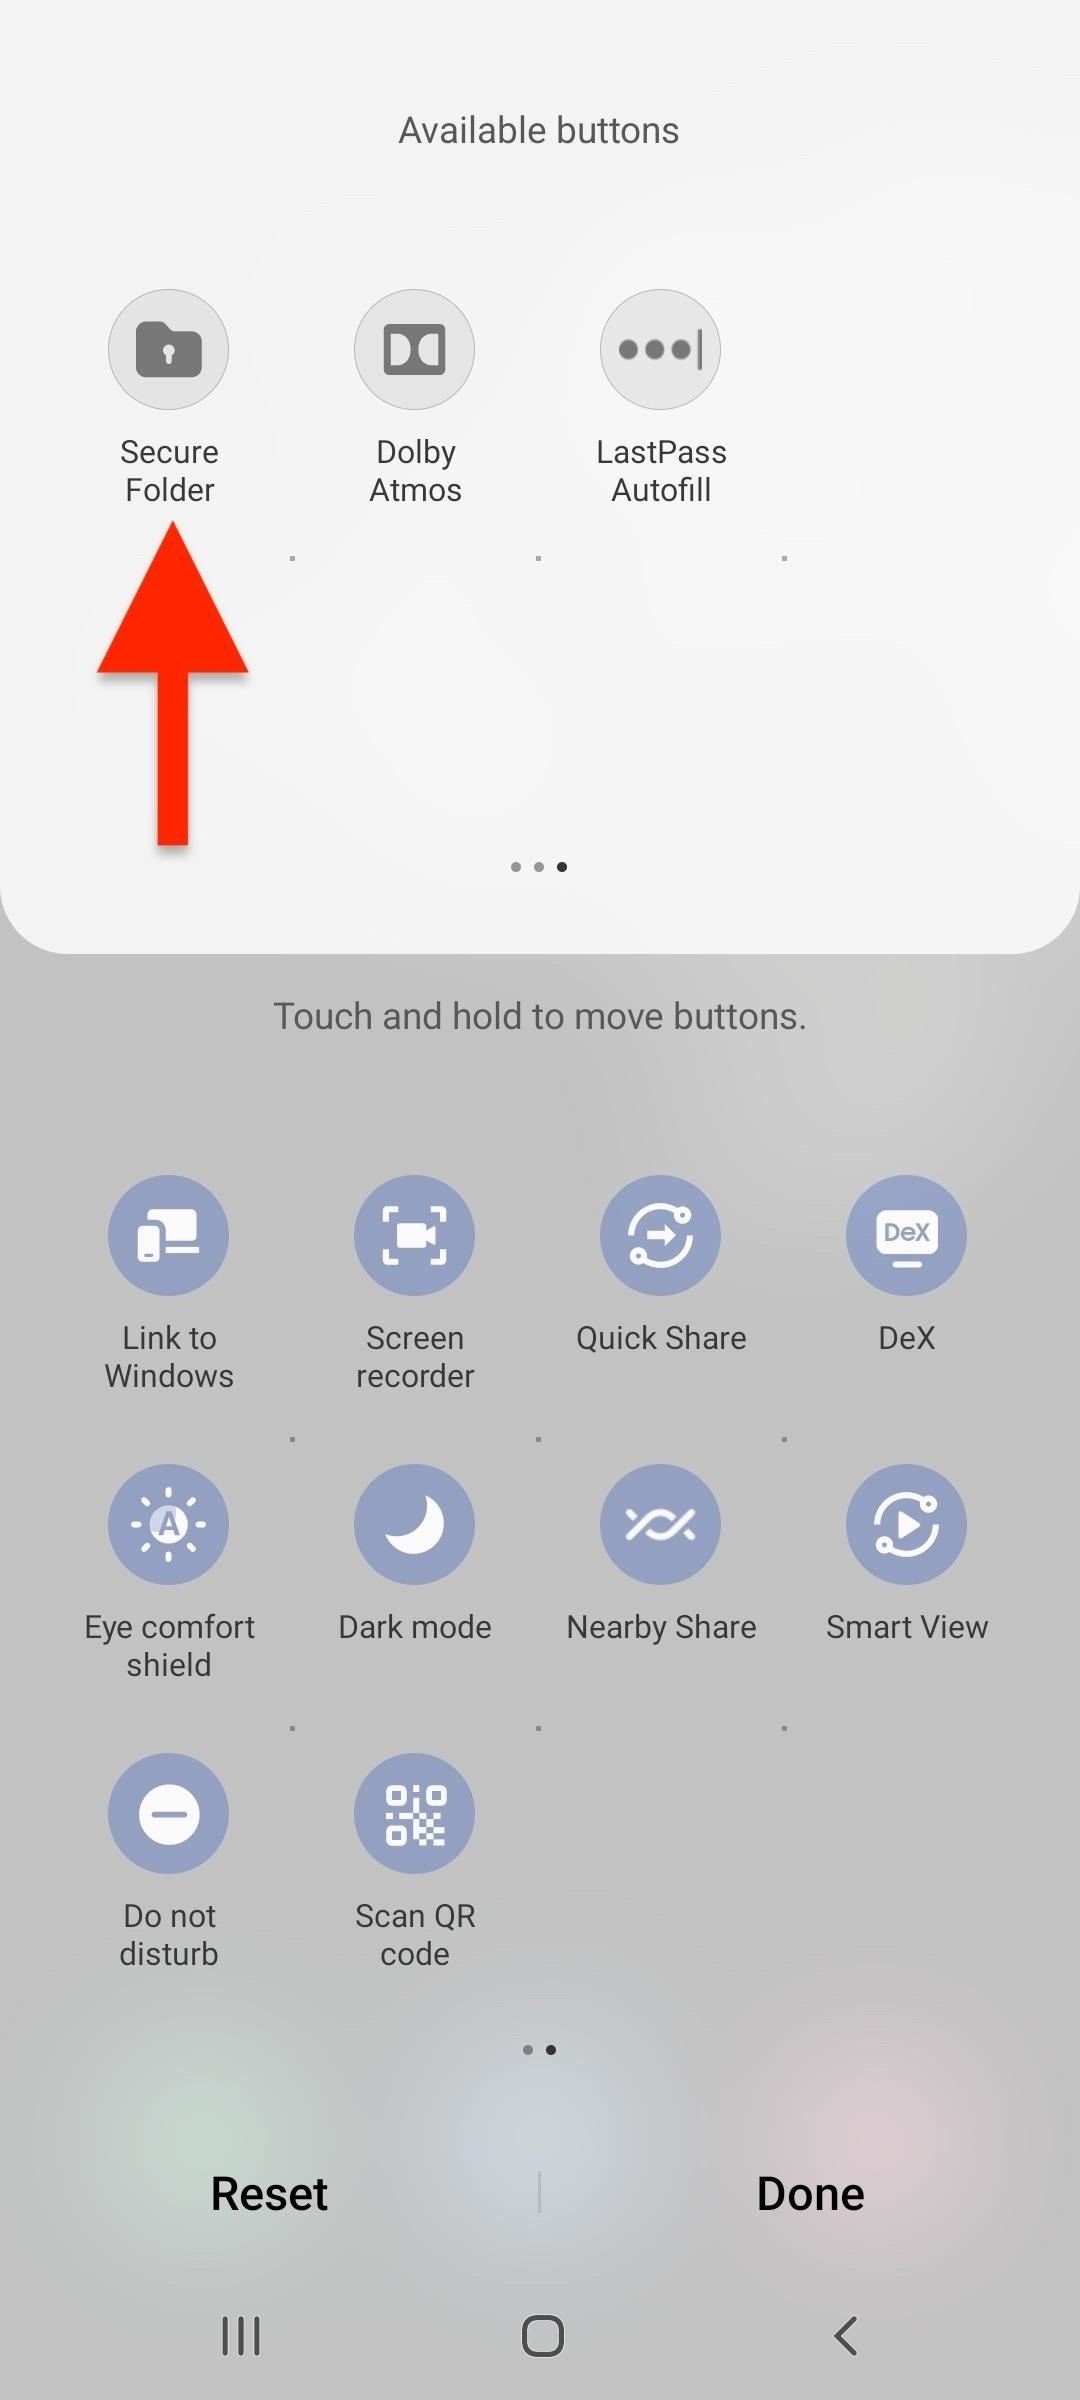
If you want to hide and unhide your Secure Folder frequently, open up your Quick Settings menu. From any screen, swipe down from the top of the display with two fingers. Then, tap the plus (+) button, locate the "Secure Folder" button, and move it to your accessible Quick Settings.
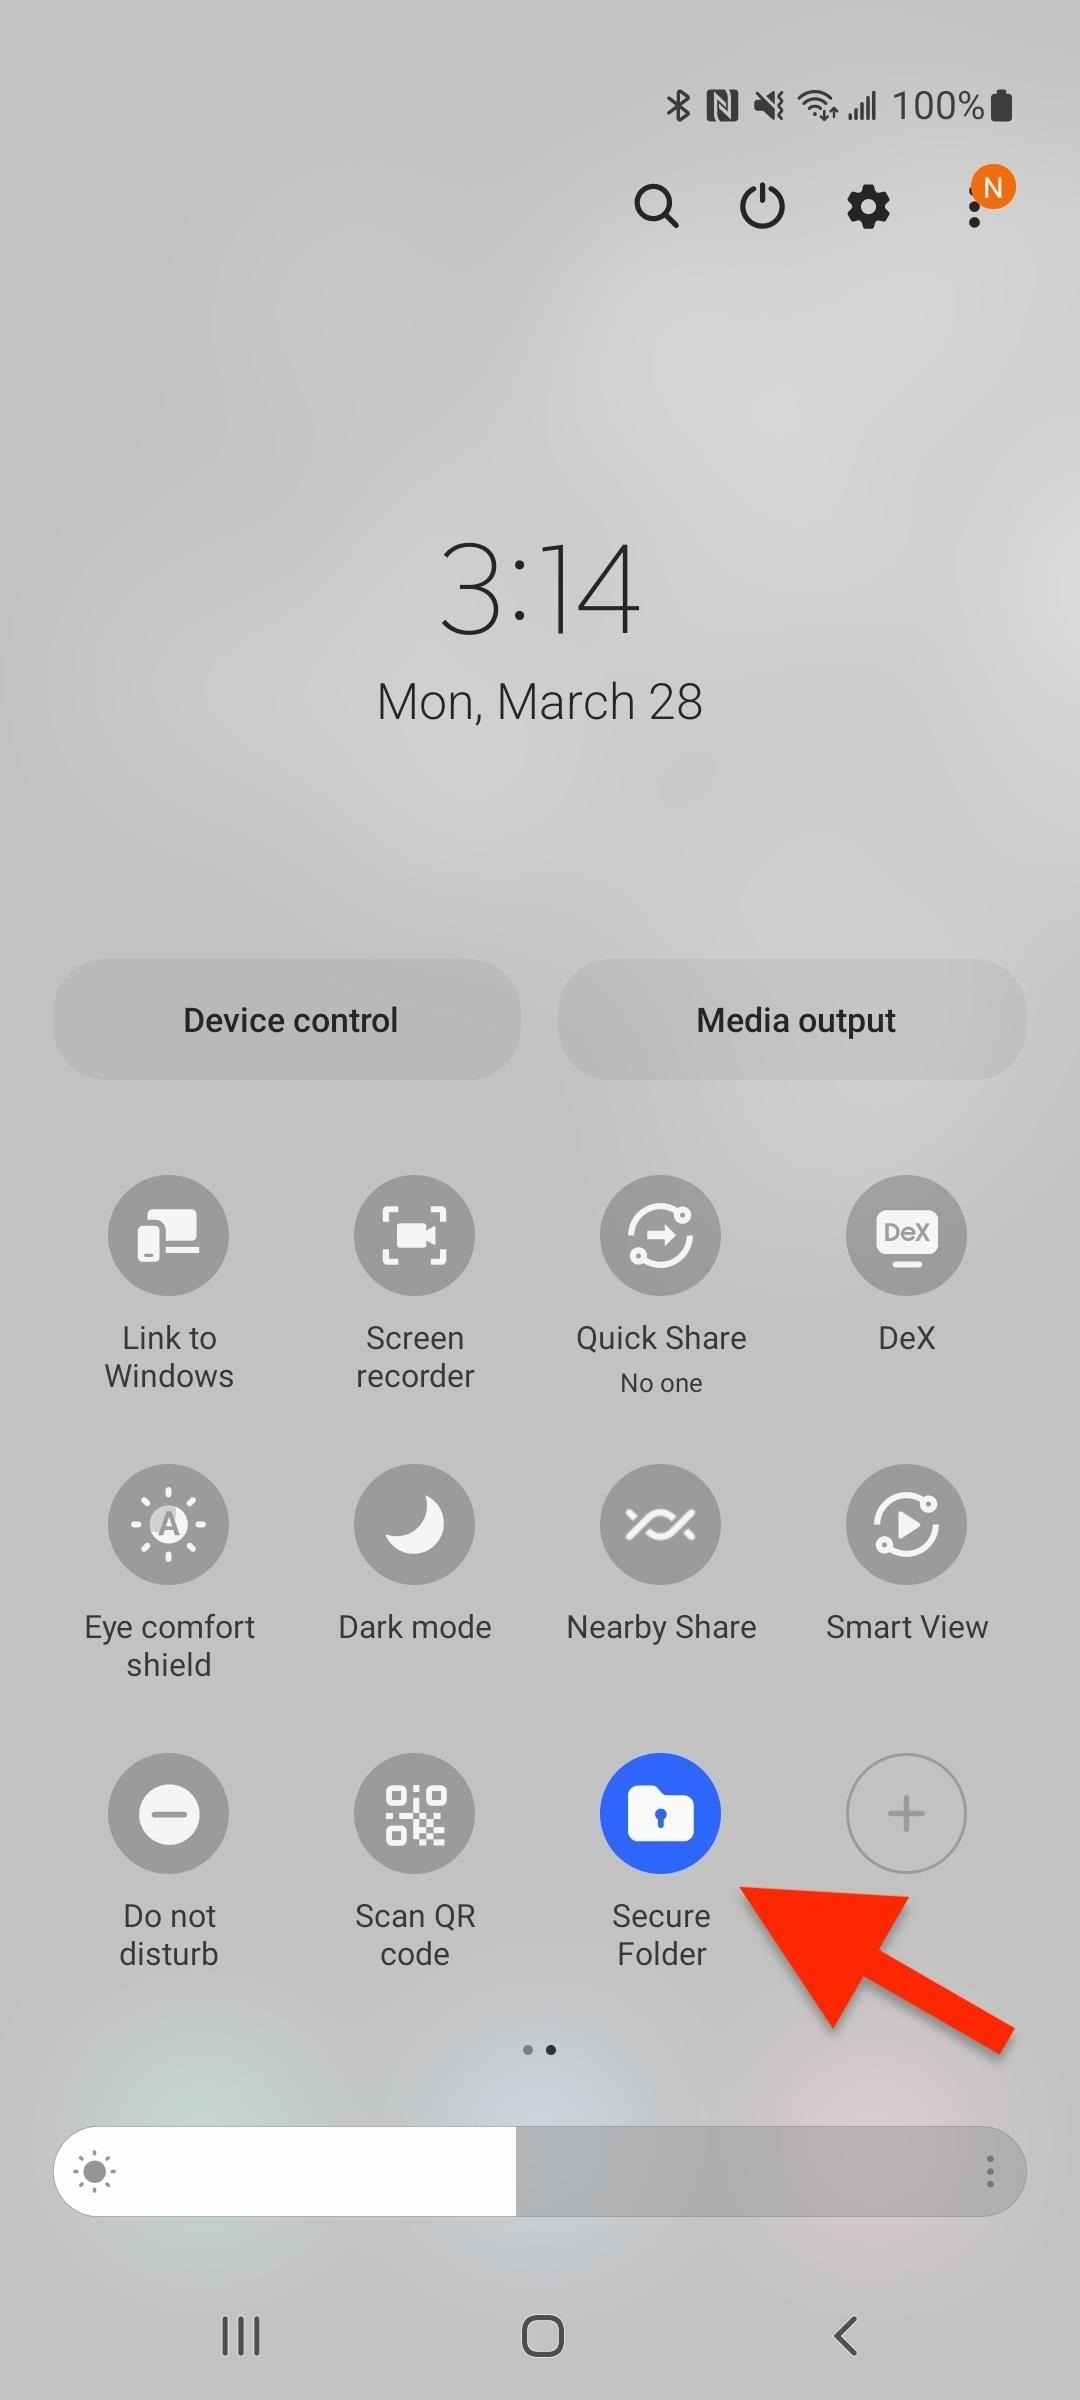
Whenever the icon is colored, it will appear on the Apps screen. When it's grayed out, it's hidden from your Apps and Home screens. Toggling it back on will unhide it in the Apps screen but not the Home screen, as when toggling it on and off directly in the Secure Folder settings menu.
How to Uninstall Secure Folder
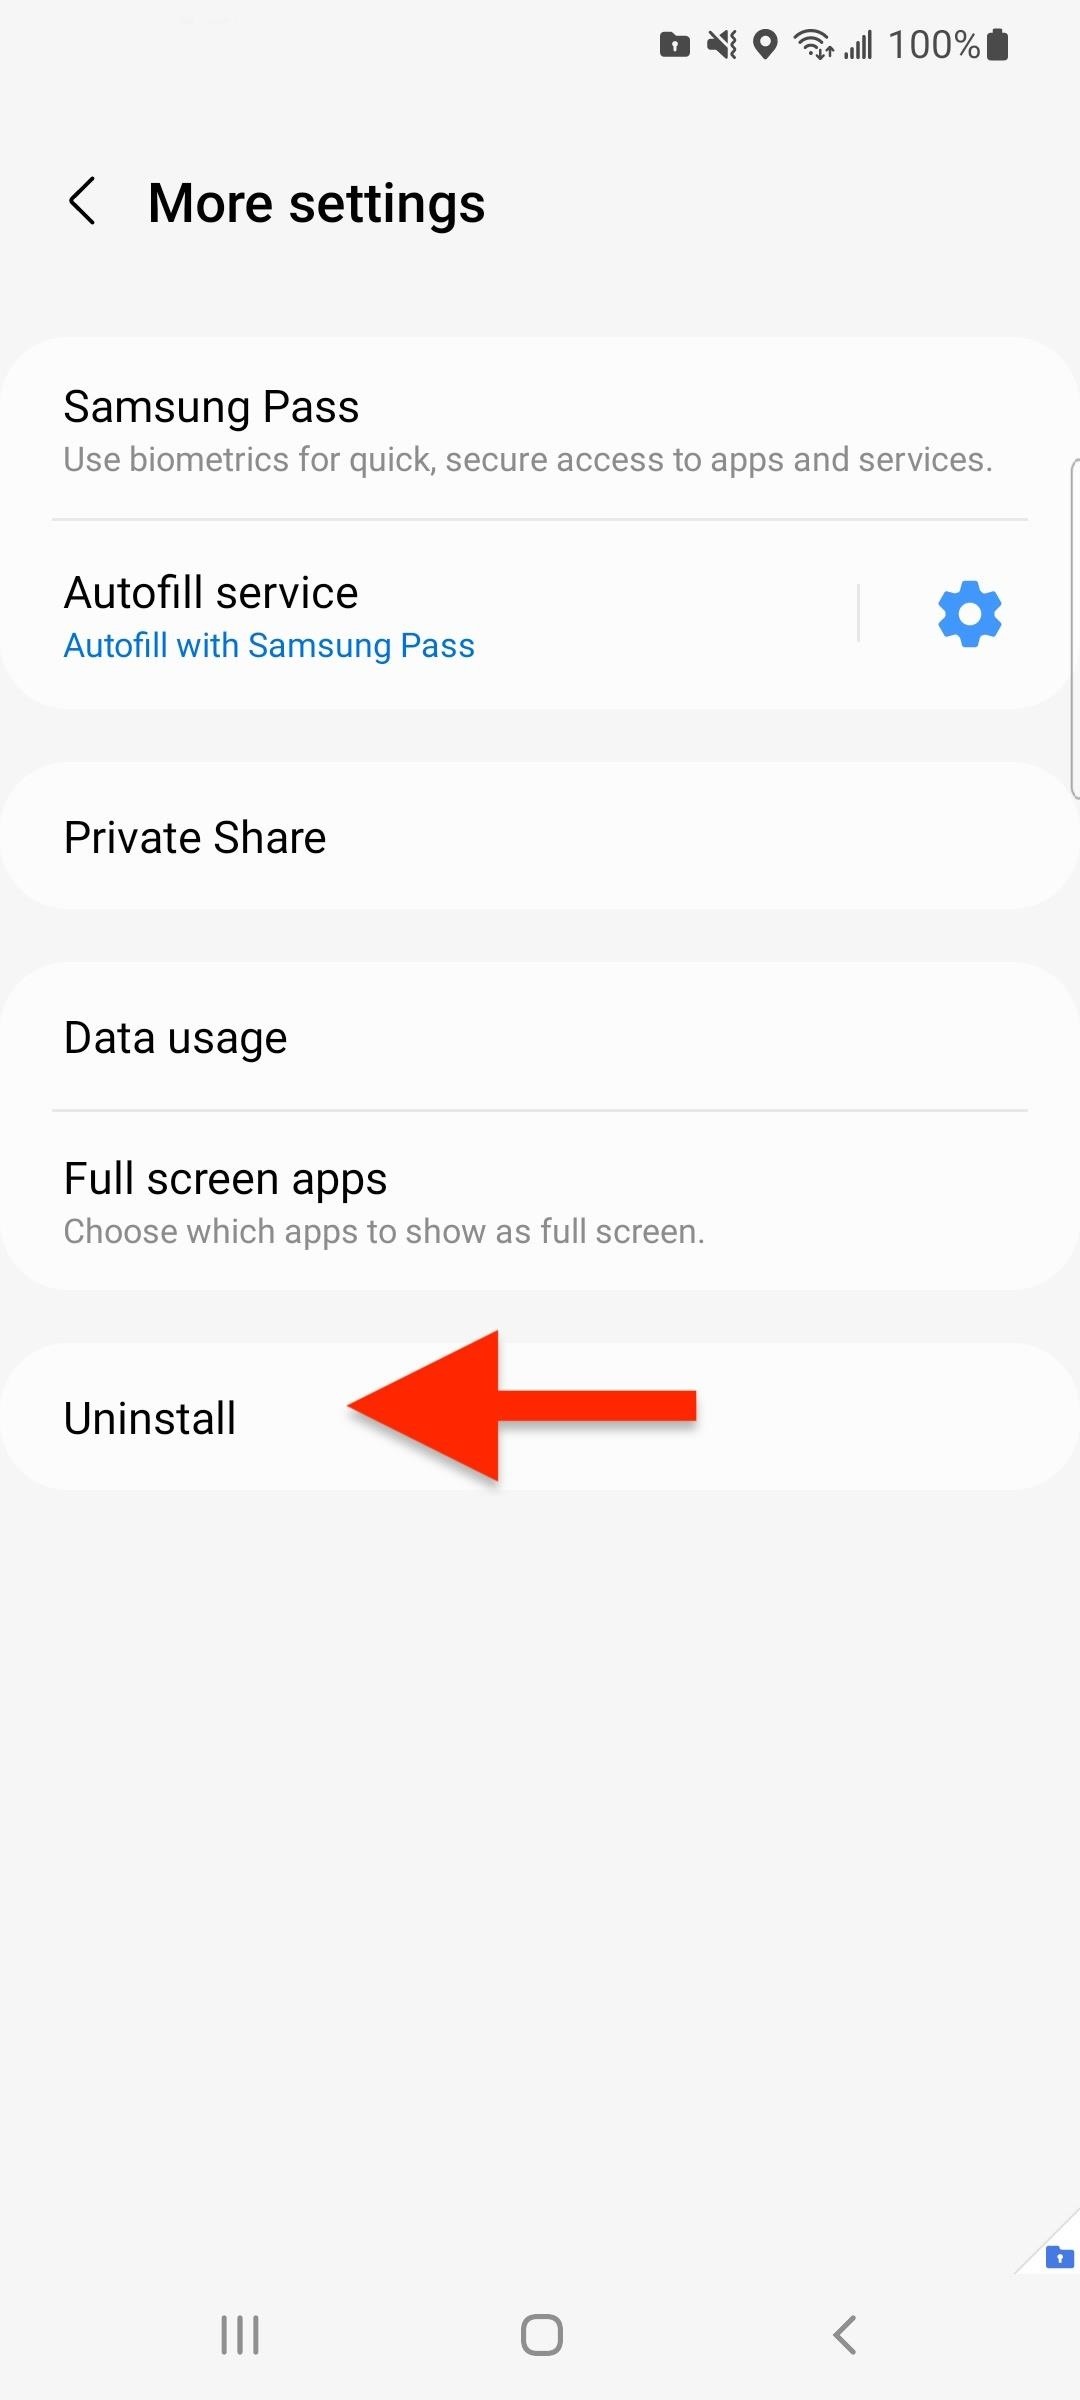
If you no longer need your Secure Folder, you can remove it and everything within. From the Secure Folder settings menu, tap "Menu" or the vertical ellipsis at the top. If you don't see that, tap "More settings." Then, select "Uninstall," followed by "Uninstall" again to confirm. You can move media out of the folder first or wipe everything without saving anything.

Just updated your iPhone? You'll find new emoji, enhanced security, podcast transcripts, Apple Cash virtual numbers, and other useful features. There are even new additions hidden within Safari. Find out what's new and changed on your iPhone with the iOS 17.4 update.


Be the First to Comment
Share Your Thoughts