
Threats to your privacy and security are everywhere, so protecting your data should be the highest priority for anyone with a smartphone. However, one threat many people overlook is the company who supplies the operating system your Android phone runs — Google.
Google offers lots of great software and services for free. But if Google isn't charging for these services, how can they be the world's most valuable brand? The answer is simple: If the product is free, you're the product. Google has found that advertisers are willing to pay more money than consumers.
If Google can get their software into as many hands as possible, they can collect enough data to offer highly targeted ads. Companies are willing to pay big bucks to someone who can ensure that their ads reach the target audience, and Google does just that. However, Google accomplishes this by collecting huge amounts of usage data and other info from folks who use their free software — Android included.
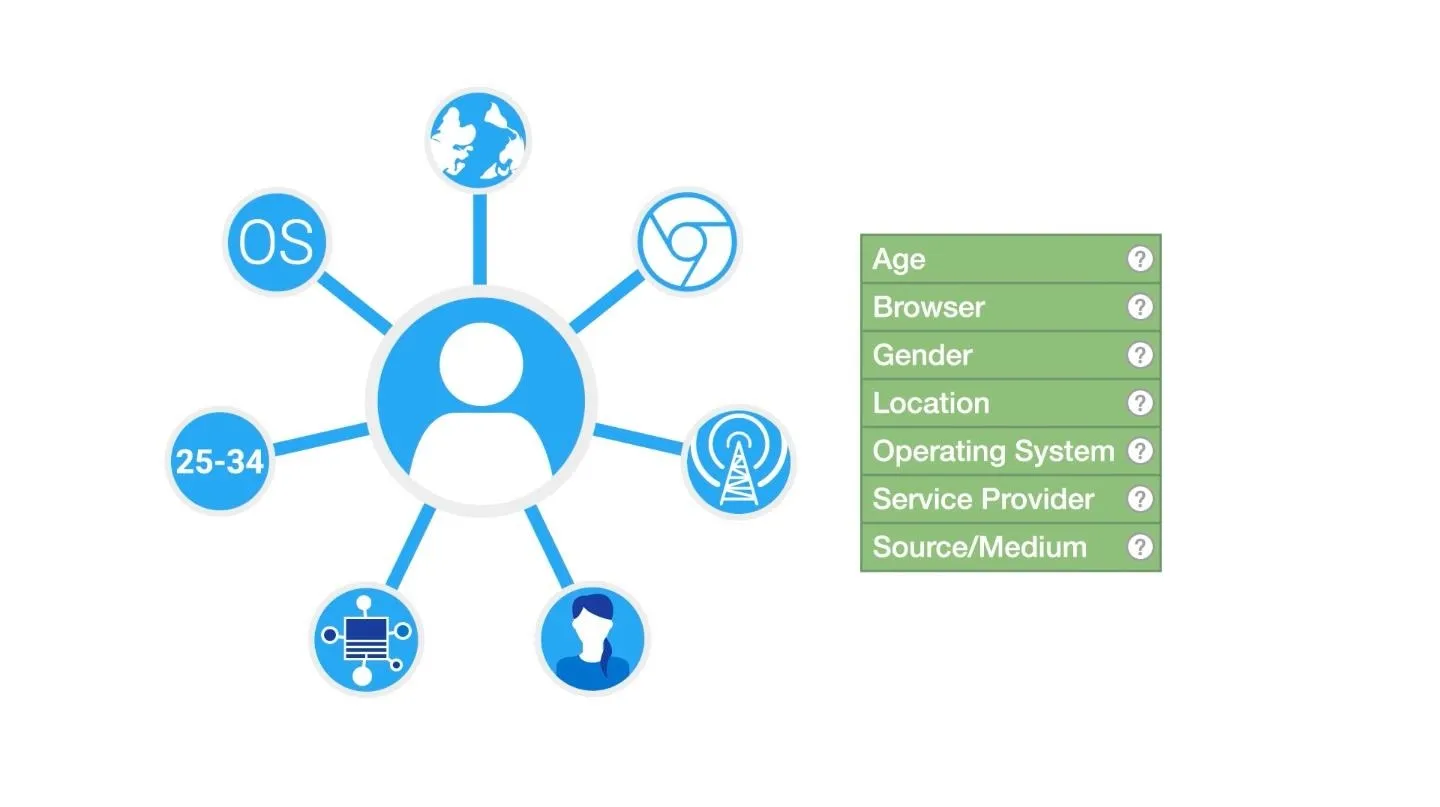
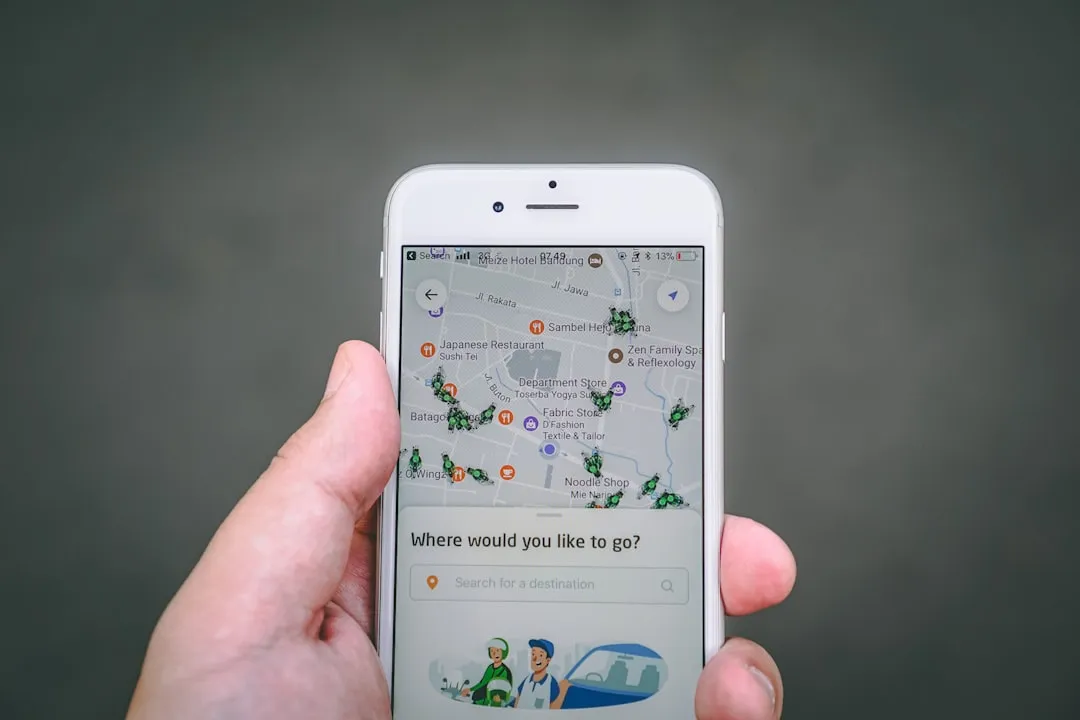
Just some of the information Google collects about you for advertisers.
Smartphones are chock-full of the type of personal information that can match a prospective customer with a perfectly-targeted ad, so Google uses the data located on your device to learn about who you are and what you enjoy. But you don't have to helplessly watch as Google collects your data — you can protect yourself with the following tips.
Tip #1: Opt Out of Ads Personalization
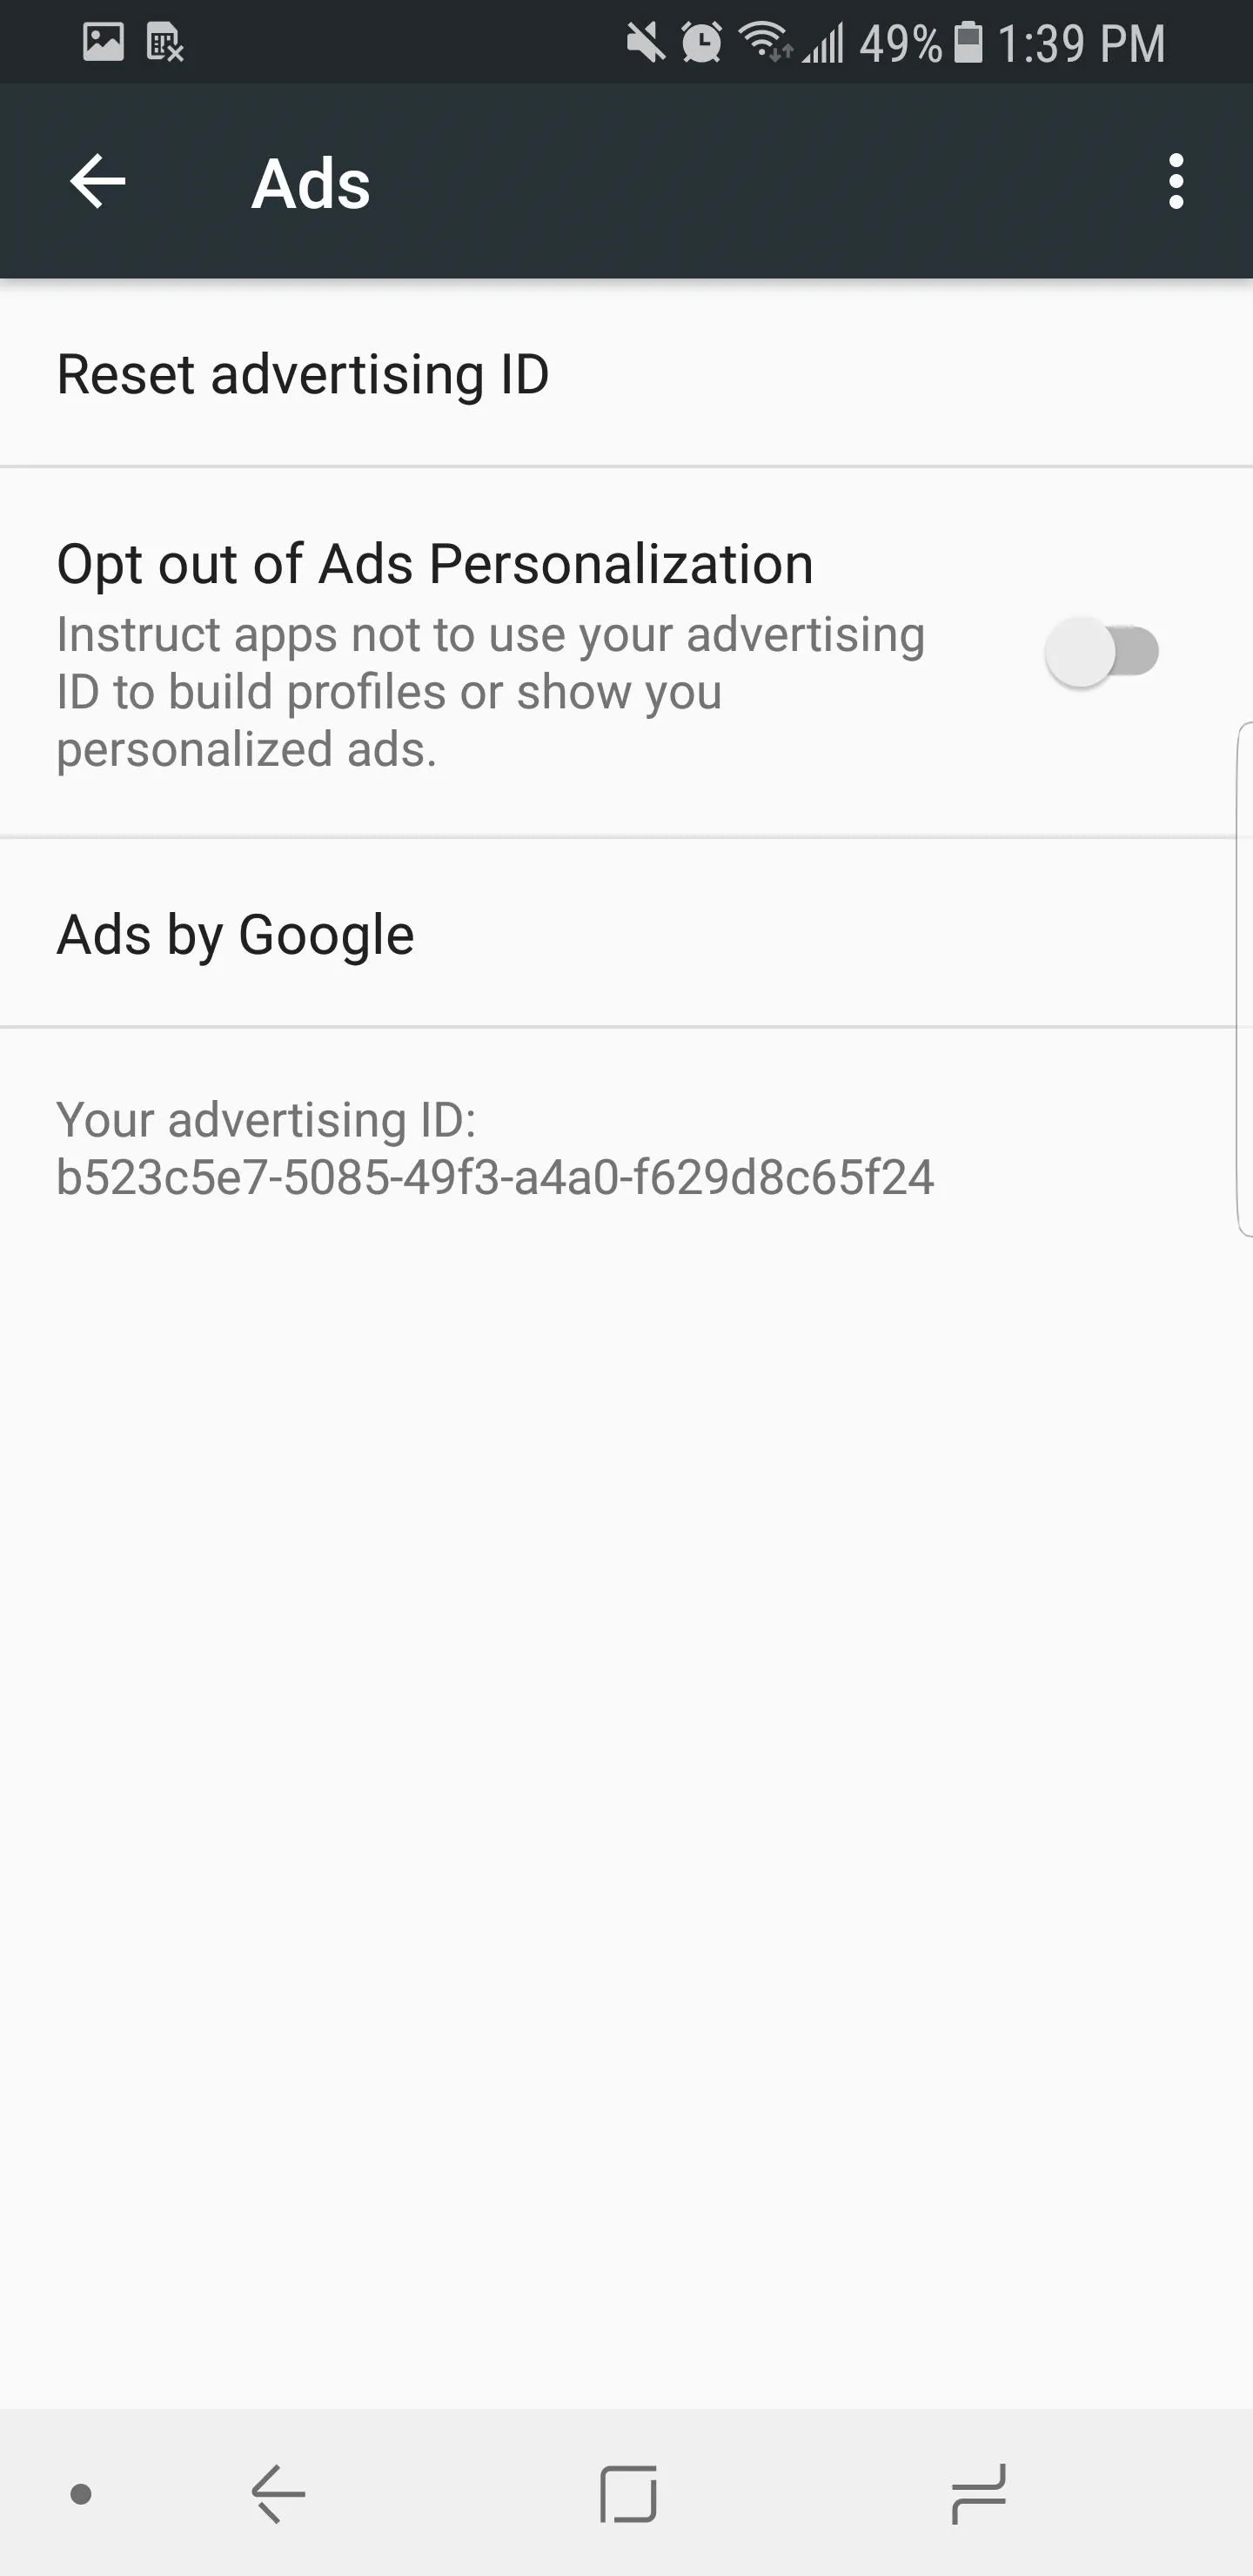
Using what's known as an advertising ID, Google provides advertisers with potentially-identifiable information about you, such as your location and what apps you are using. Wired has an amazing article which shows how this data can be used by any individual (not just corporations).
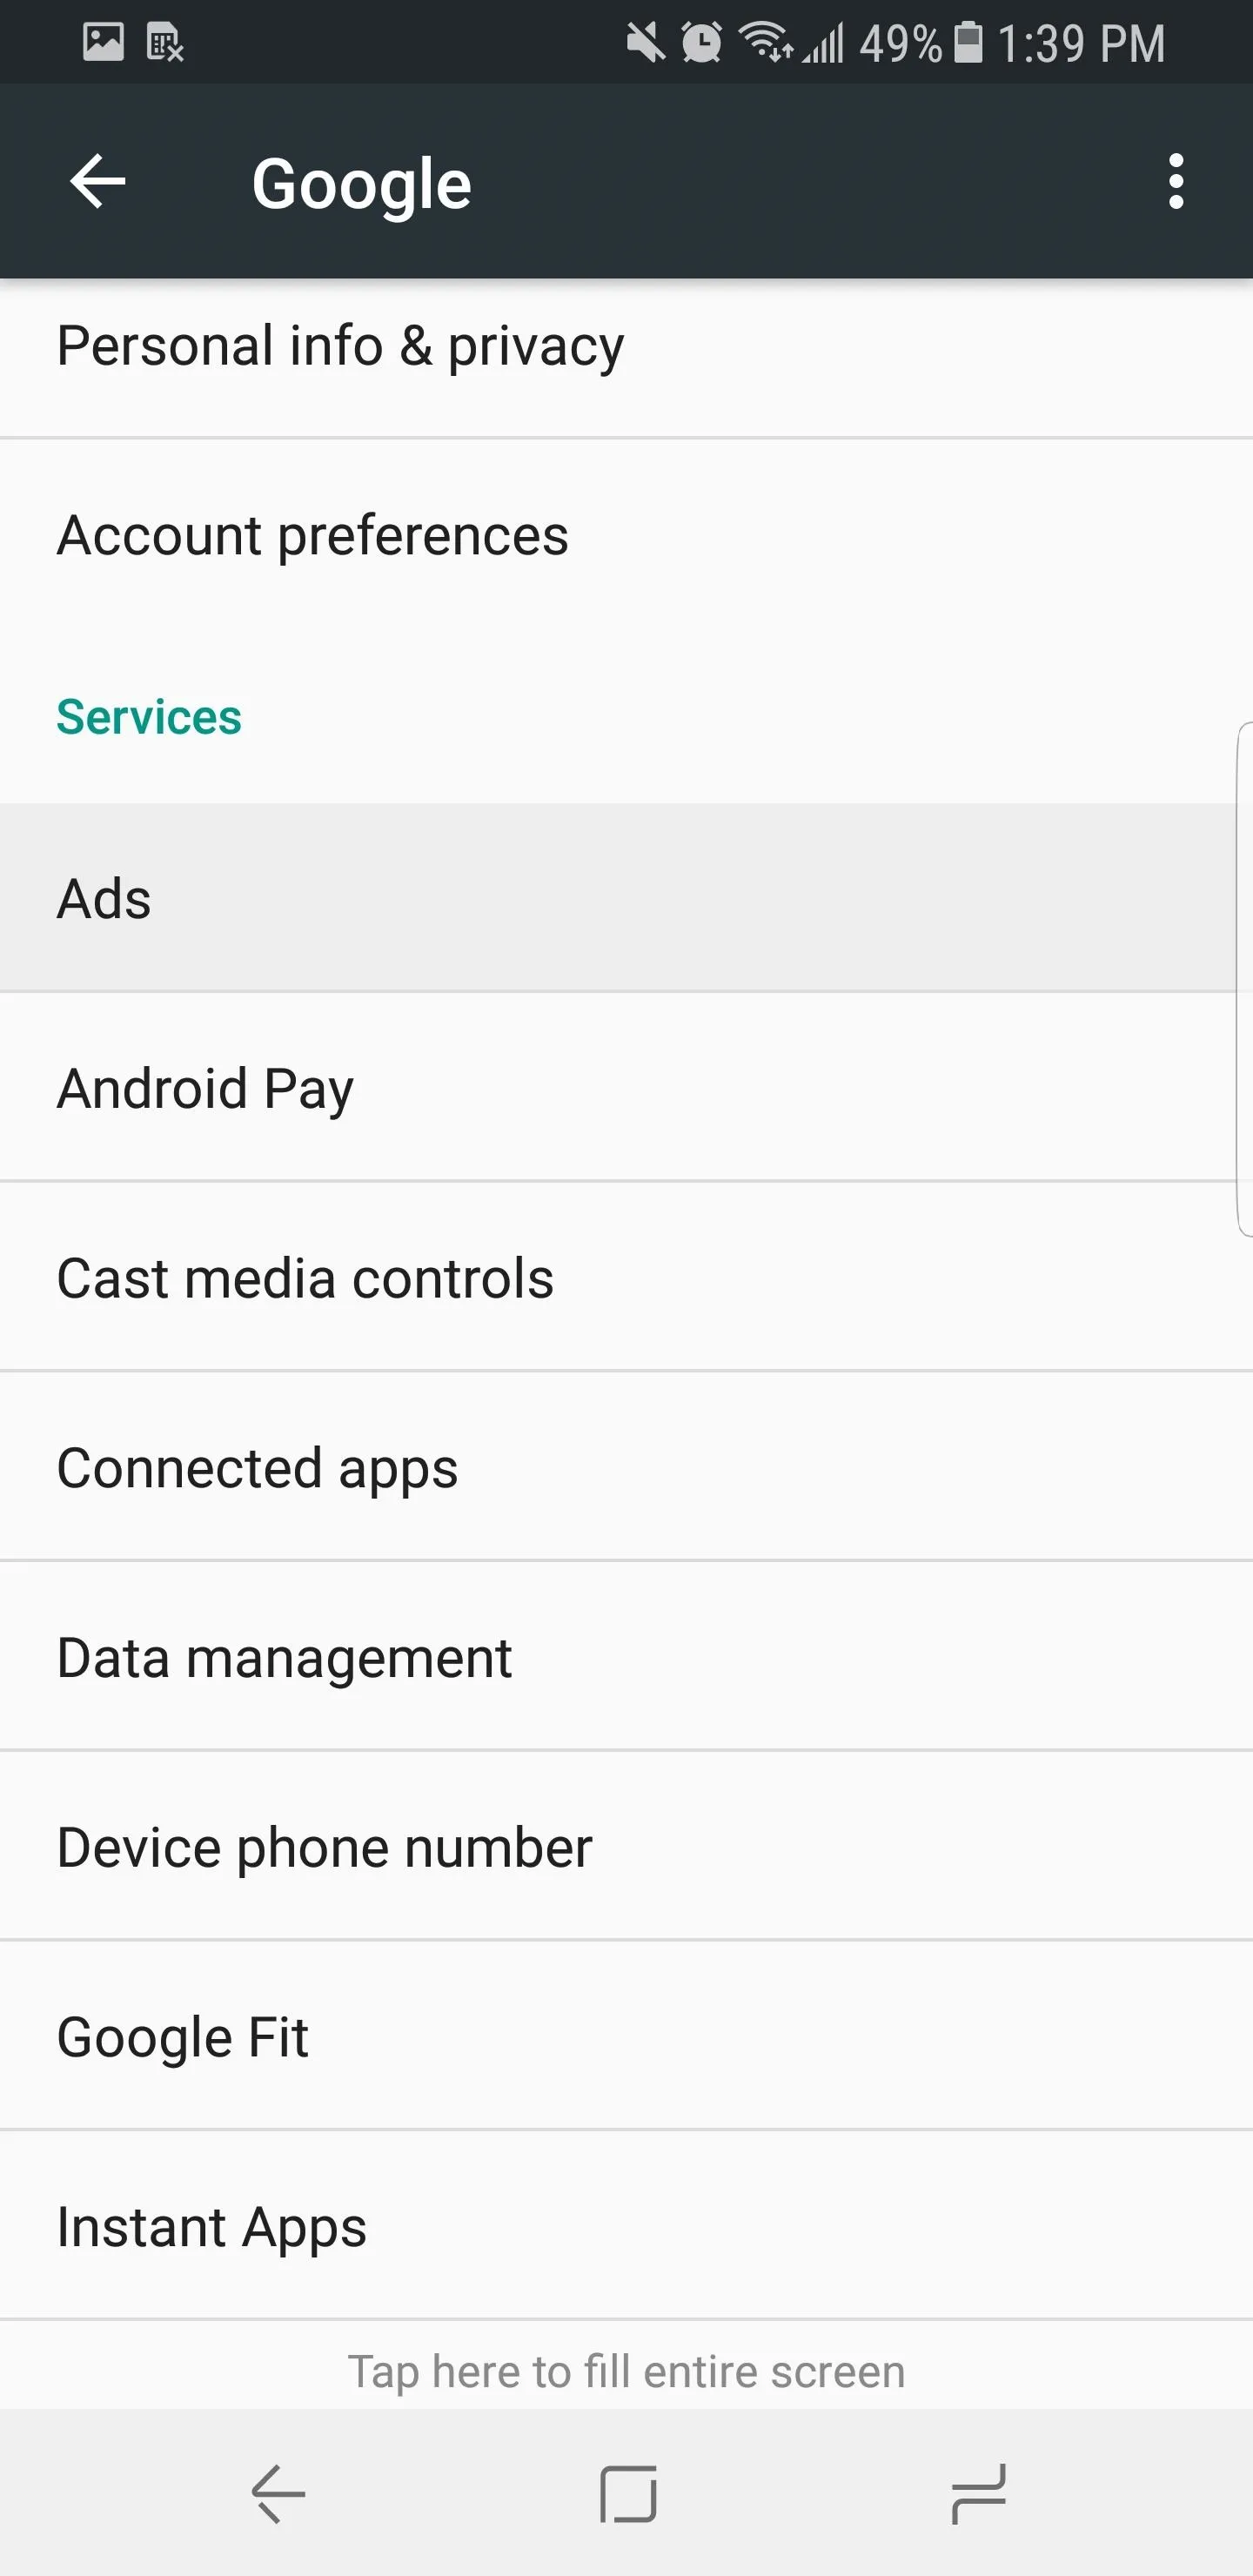
Google does provide some control over this data by allowing you to opt out of personalized ads. By doing so, you will prevent access to your unique advertising ID to apps and advertisers. To opt out, head to your phone's main settings menu and select "Google." From there, choose the "Ads" option and select "Opt out of Ads Personalization" to disable it.


Tip #2: Change Your Default DNS Server
The location of devices and websites on the internet is recorded using IP addresses. IP addresses are a series of numbers which act as a mailing address for these devices.
As you know, when you go to a website, you don't type a series of numbers, but rather the name of the website with its top-level domain (such as .com, .net, or .org). When you type in the site's name, this request is sent to a server which matches what you typed to the site's corresponding IP address, which is then used to direct your traffic to its intended location. This server is the DNS or Domain Name System.
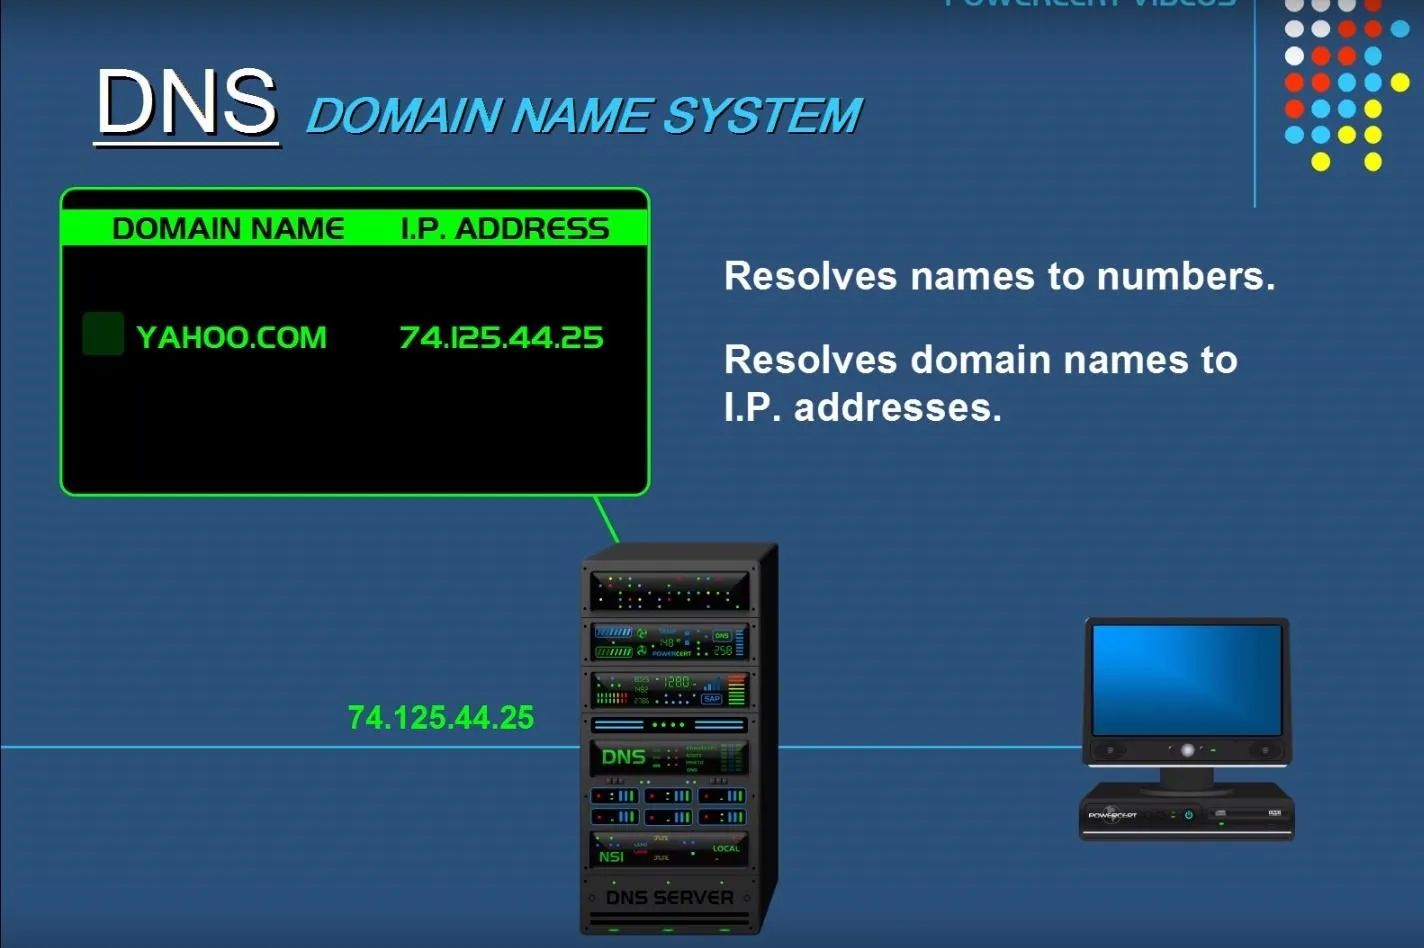
DNS is like an automatic phone book for your internet traffic.
By default, Android's default DNS is provided by your mobile carrier when you are using cellular data. When using your home Wi-Fi, it uses your ISP's DNS. However, there has been a push toward Google's DNS servers since they are typically faster than your ISP. Many people trust Google over Comcast or Spectrum and therefore, switch their DNS servers to Google.
However, Google does the same thing that your ISP does when you use their DNS servers. The reason Google supplies DNS servers is that they can read the requests made to their servers to create an advertisement profile on you to sell ads.
The problem here is that, before Android 9 Pie, it wasn't easy to switch DNS servers. On Android 8.0 Oreo and older — versions that over 90% of Android phones are currently running — there's no option to change the DNS when on cellular, and only limited options when are you using Wi-Fi. However, security-conscious individuals have created an app to correct this problem.
- Play Store Link: DNS Changer (free)

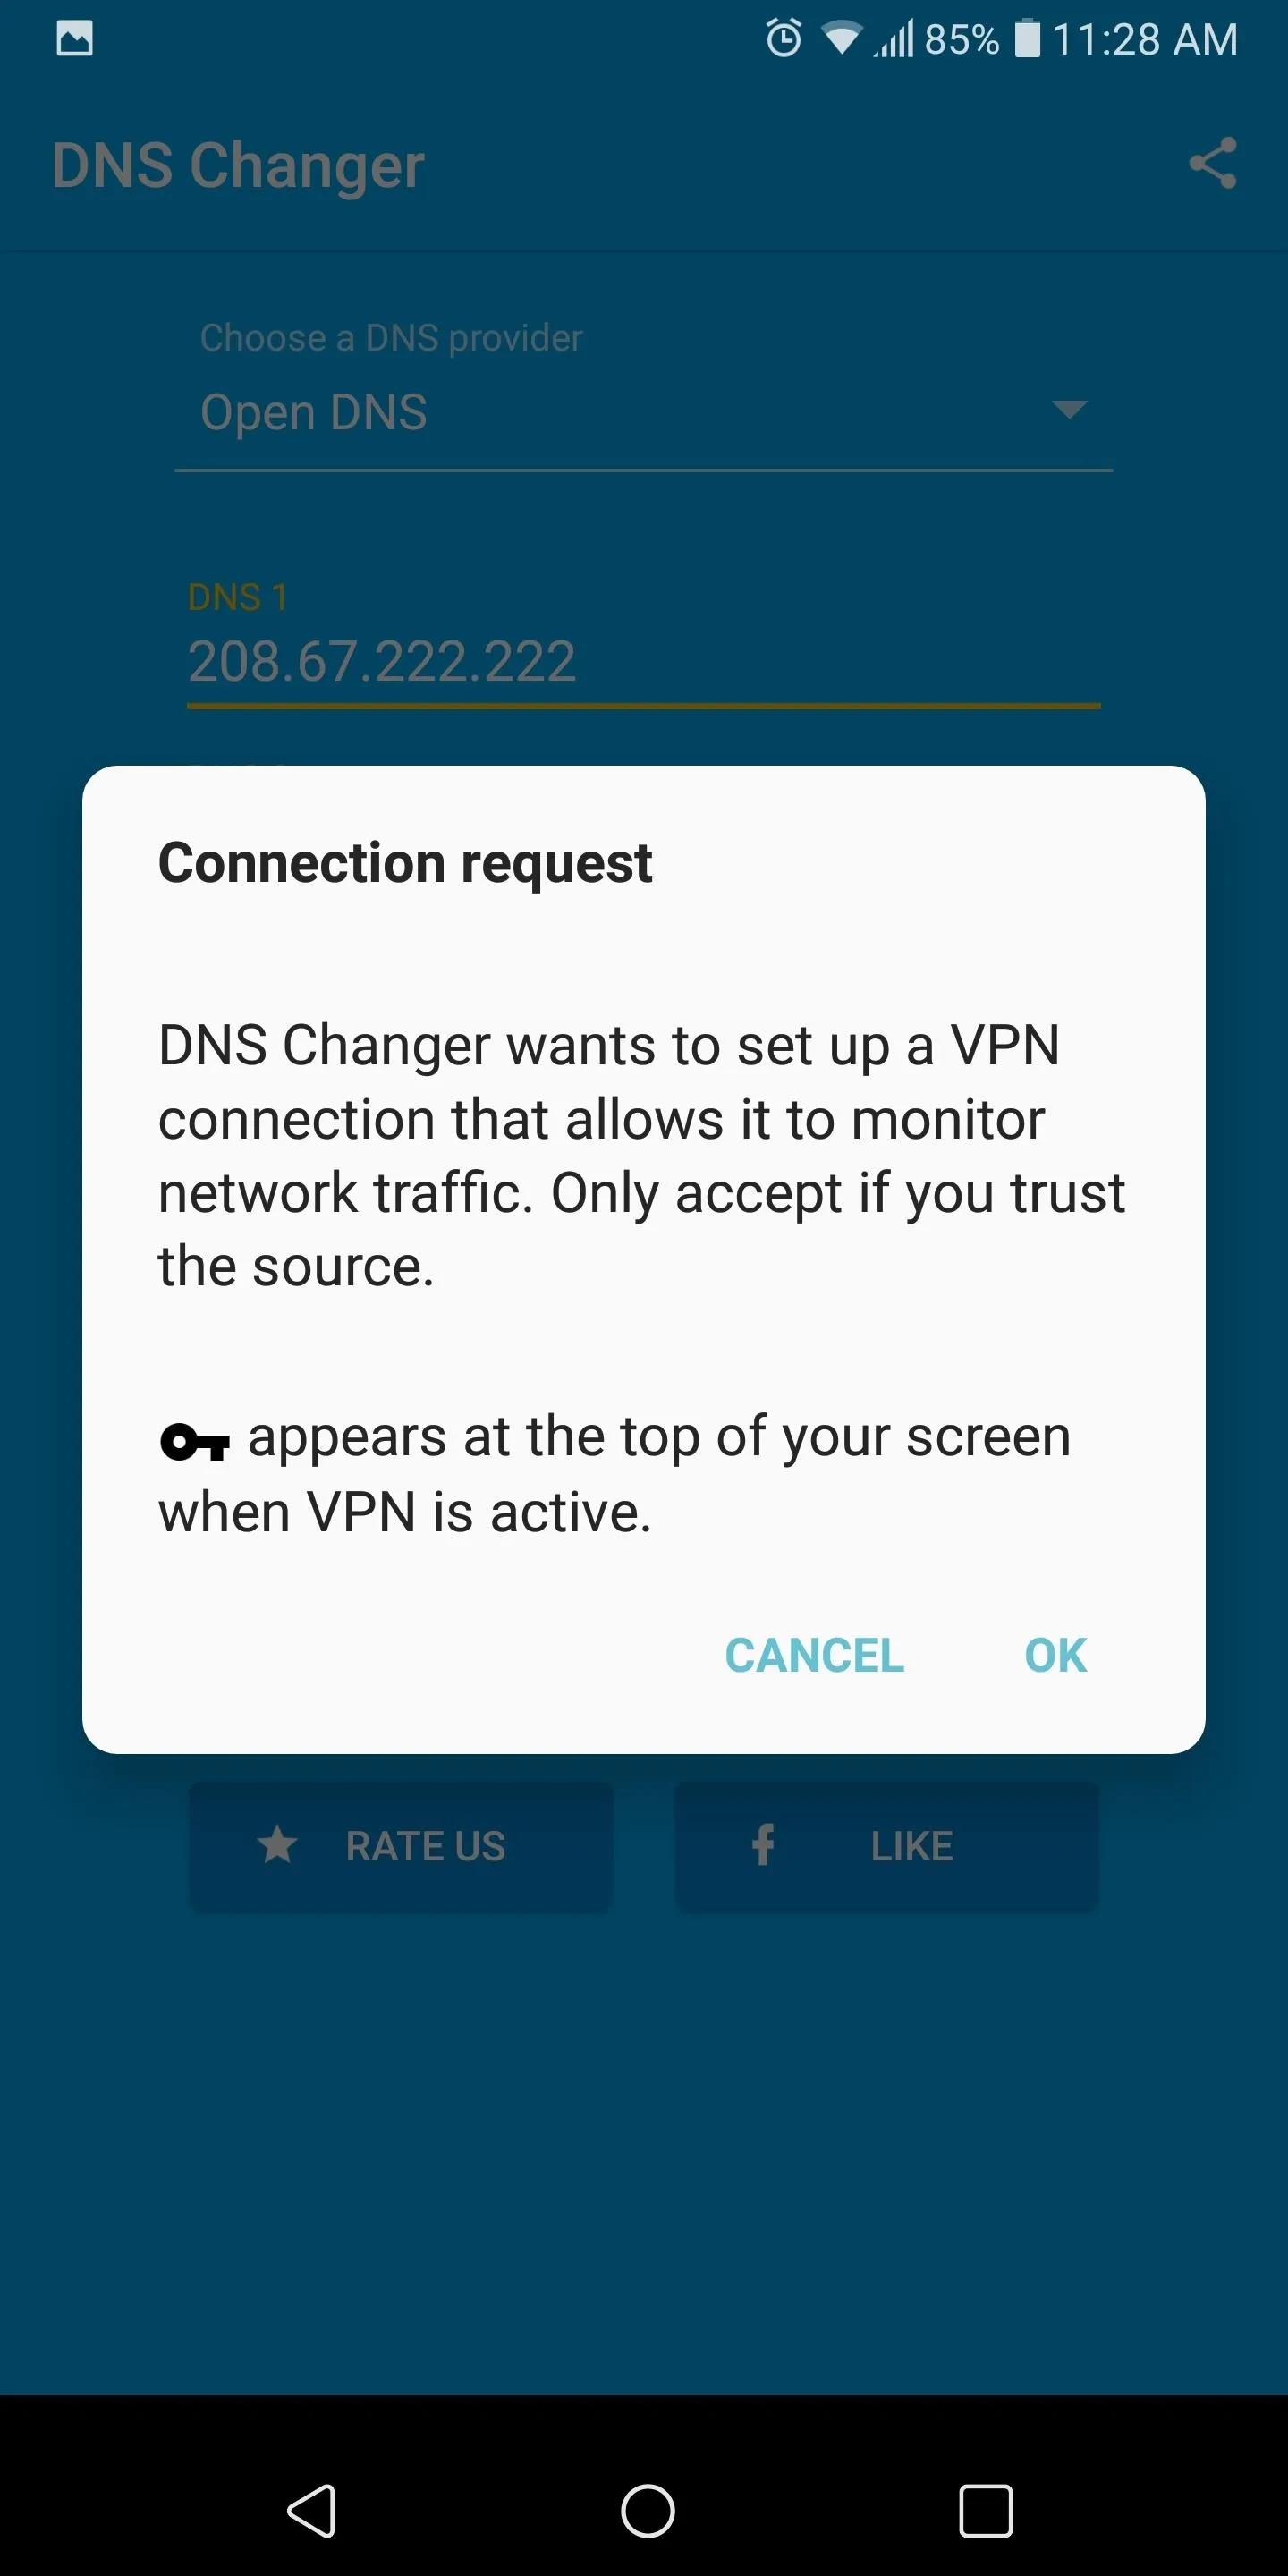
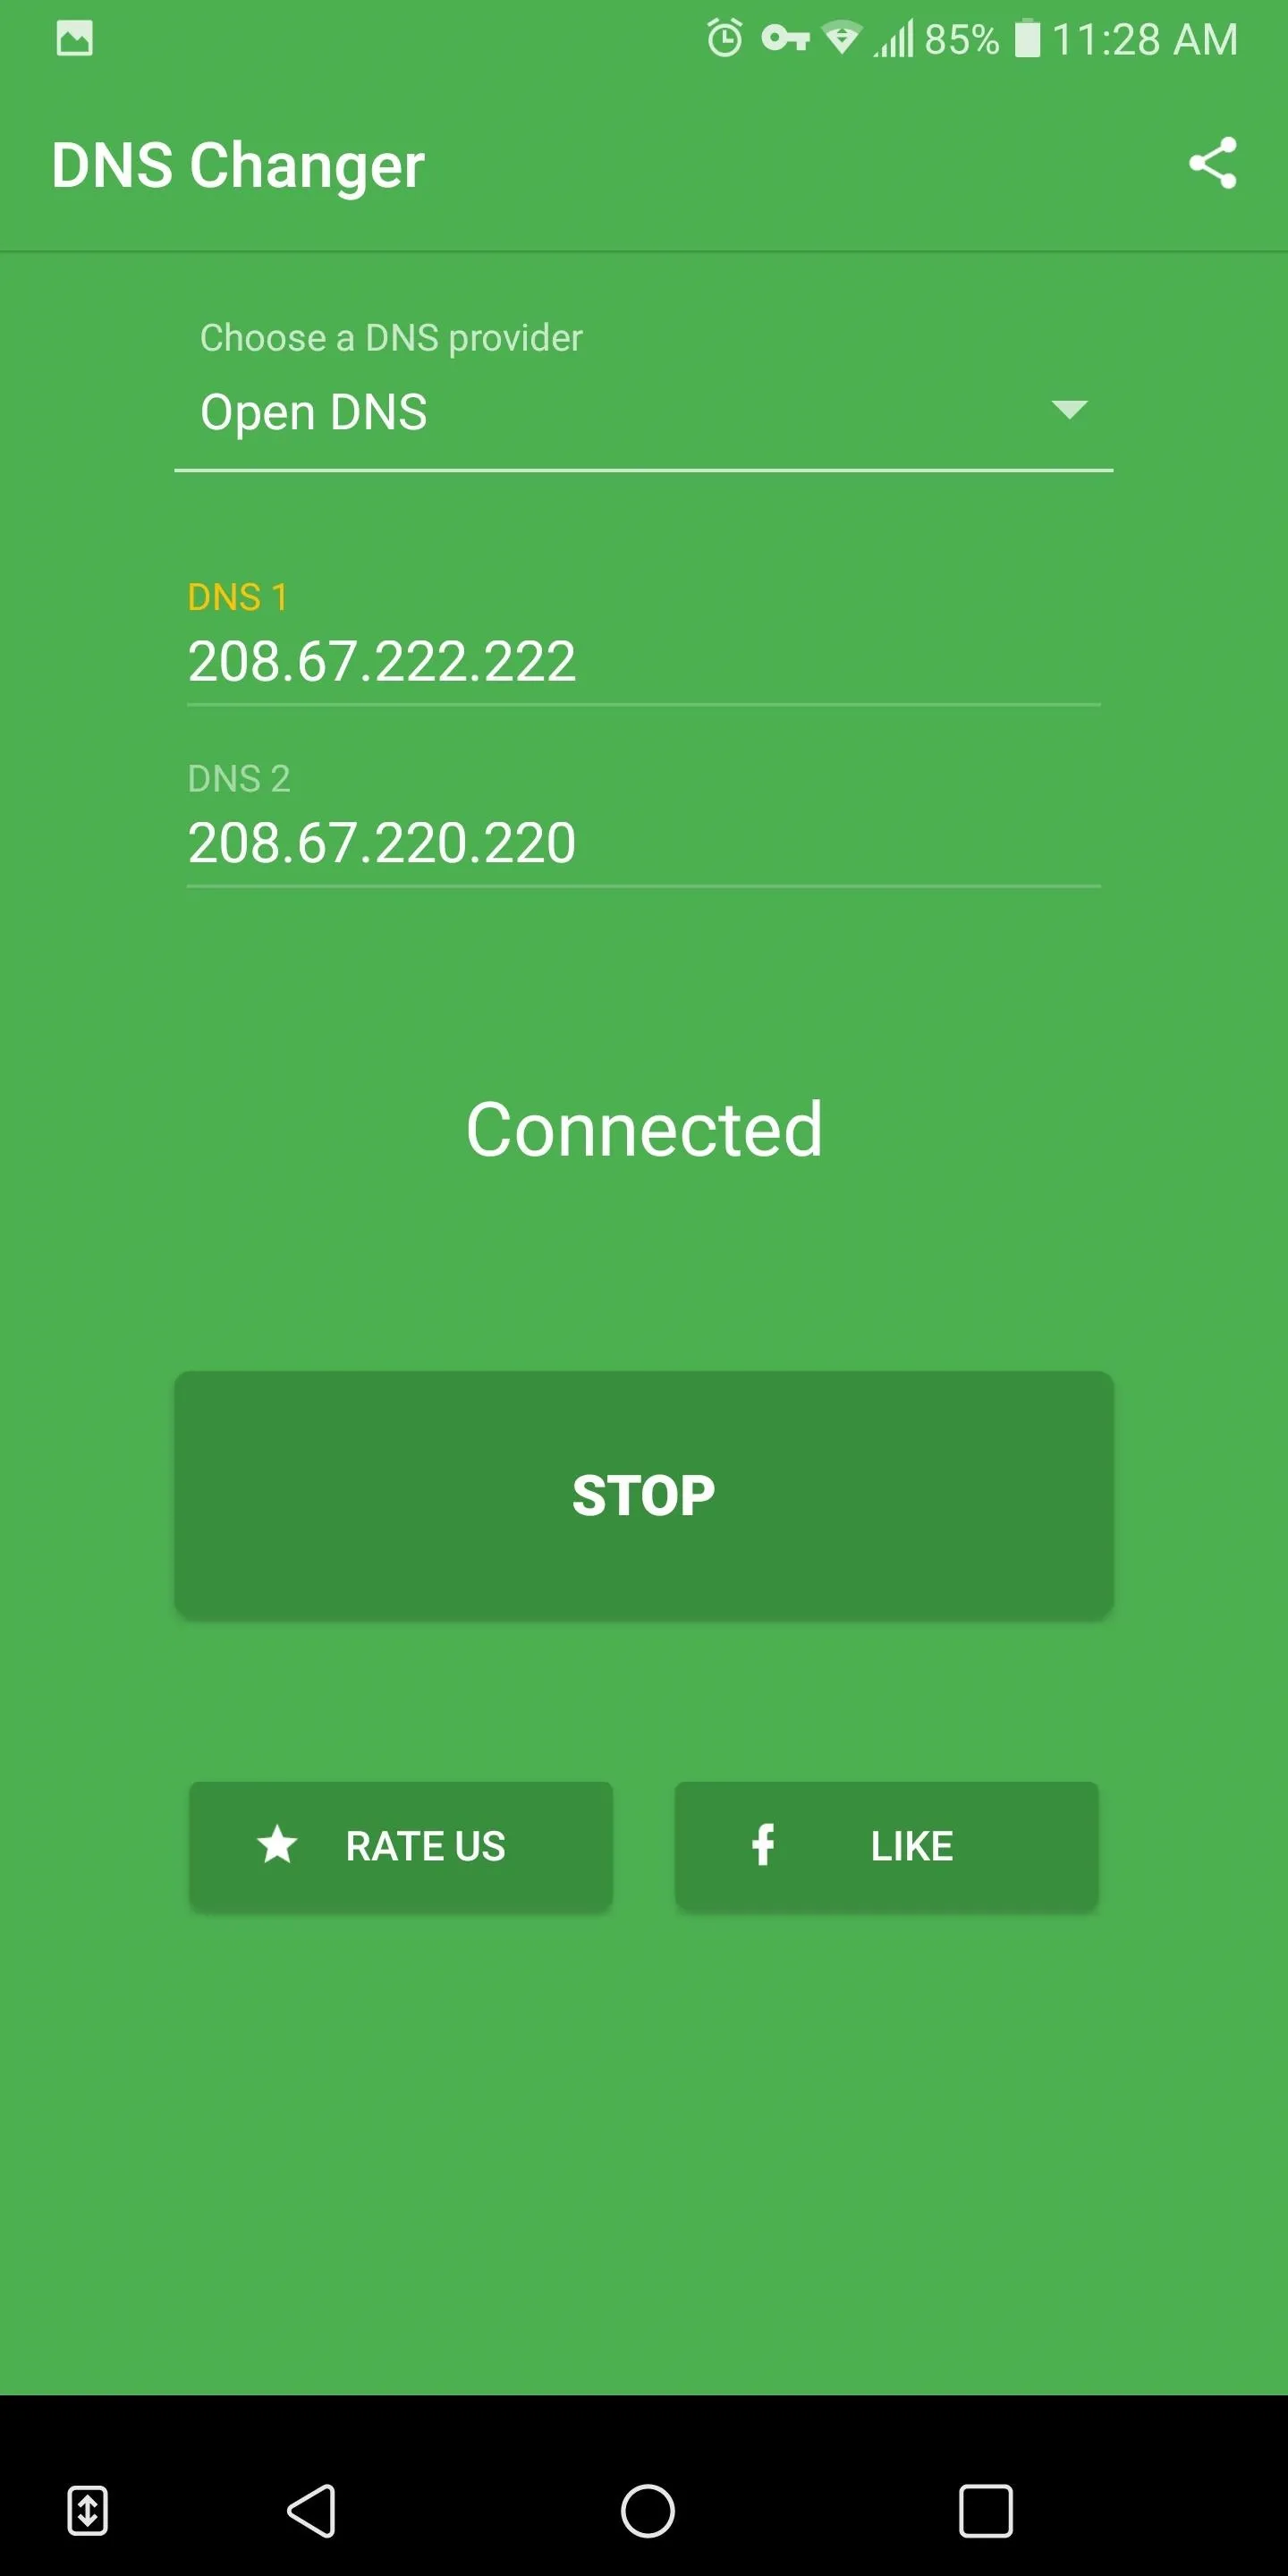
Using the app, select "Open DNS" from the drop-down list and press "Start." A pop-up will emerge informing you that the app will create a VPN connection. Select "OK" on this popup to switch your DNS servers. Now, when you request a website while browsing (or using an app), your request won't be read by Google and logged for ad tracking.


Tip #3: Use a VPN to Encrypt All Traffic
To piggyback off the last step, another way to automatically change your DNS service and to protect your data while in transit is to use a VPN. VPNs, or Virtual Private Networks, protect your data by rerouting all traffic through a secure, usually encrytped server.
Privacy comes in the form of hiding your IP address, which is the equivalent of your mailing address. This address is an identifiable marker used by the internet to transfer data to and from your personal devices. With access to this information, Google (or a hacker, for that matter) can compile quite a bit of information about you.
A VPN will mask your real IP address by directing all traffic from your device to its servers, which acts a buffer between you and the internet. When data is sent from your device, the source IP address (the return mailing address) seen by the recipient will be the VPN server's IP address instead of your own. Therefore, your privacy is secured from potential hackers.
Most VPN services add another layer of security by encrypting all of your data traffic. Encryption is similar to a virtual safe that hides your data from prying eyes. Although many sites provide some form of encryption, not all traffic receives this protection — whereas with the right VPN, all communication will be encrypted.
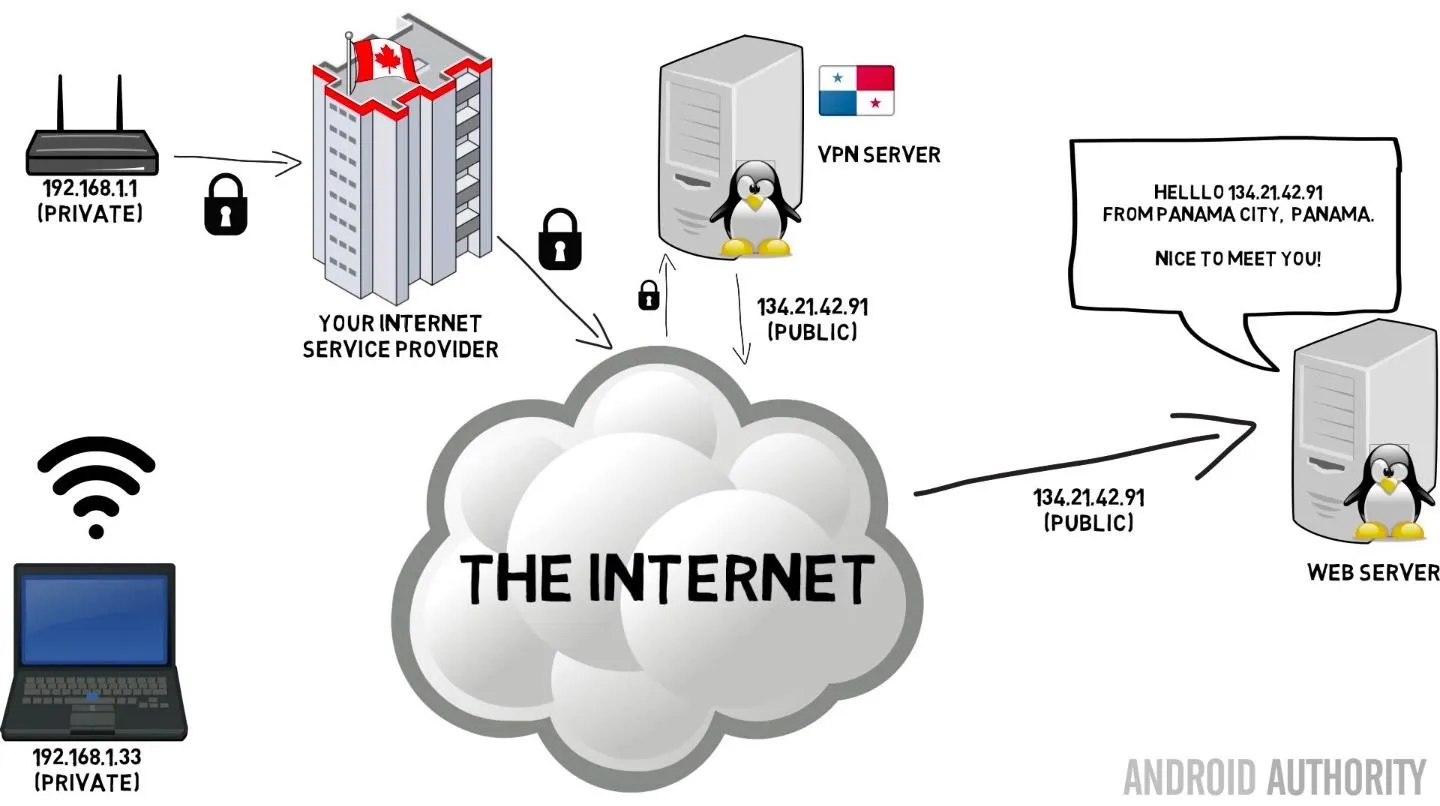
The locks represent encrypted data transfer.
Typically, VPN services have their own DNS servers to increase protection of your privacy from companies such as Google and your ISP. As long as you are using a VPN, the vast majority of your data is safe from Google's prying eyes.
You can't use a VPN and DNS Changer at the same time (since DNS Changer accomplishes its goal using a VPN), so we recommend choosing one based on your needs and finances. A good VPN will have a subscription fee, whereas DNS Changer is free. However, DNS Changer only protects your request to the website when they head to the DNS servers, whereas a VPN service protects your data from the moment you request a website to when it arrives at the website (and vice versa).
If you decide to use a VPN, a great choice is NordVPN. NordVPN provides one of the highest levels of protection in an app that is visually pleasing and easy to use. NordVPN has a seven-day free trial to test the waters and discounts if you buy the service in advance (i.e., pay for the year instead of monthly).
- Play Store Link: NordVPN (free)

Tip #4: Don't Use Google Apps
When you first boot up an Android device, you will find a suite of Google apps preinstalled. These apps include Gmail, Google Calendar, and several others. All of these apps are free and provided to OEMs that use the Android platform. However, like with the DNS servers, Google provides these apps for free to access the data generated by their users.
Whenever you compose an email, make a call, or create a calendar event, the same resources that help make the process as easy as possible are also using the data to build a profile on you. For example, you might write an email about meeting up with friends for a movie and see an advertisement later about movie tickets.
The only way to completely protect this data from Google is to stop using their apps. Therefore, the most privacy-minded users will want to avoid Chrome, Gmail, Google Dialer, Google Calendar, and any other apps created by Google. Many of these might be pre-installed apps which are typically non-removable, but if this is the case, you can go to Settings –> Apps, then select any Google apps and choose "Clear Data" to remove any personal information they may have accumulated.
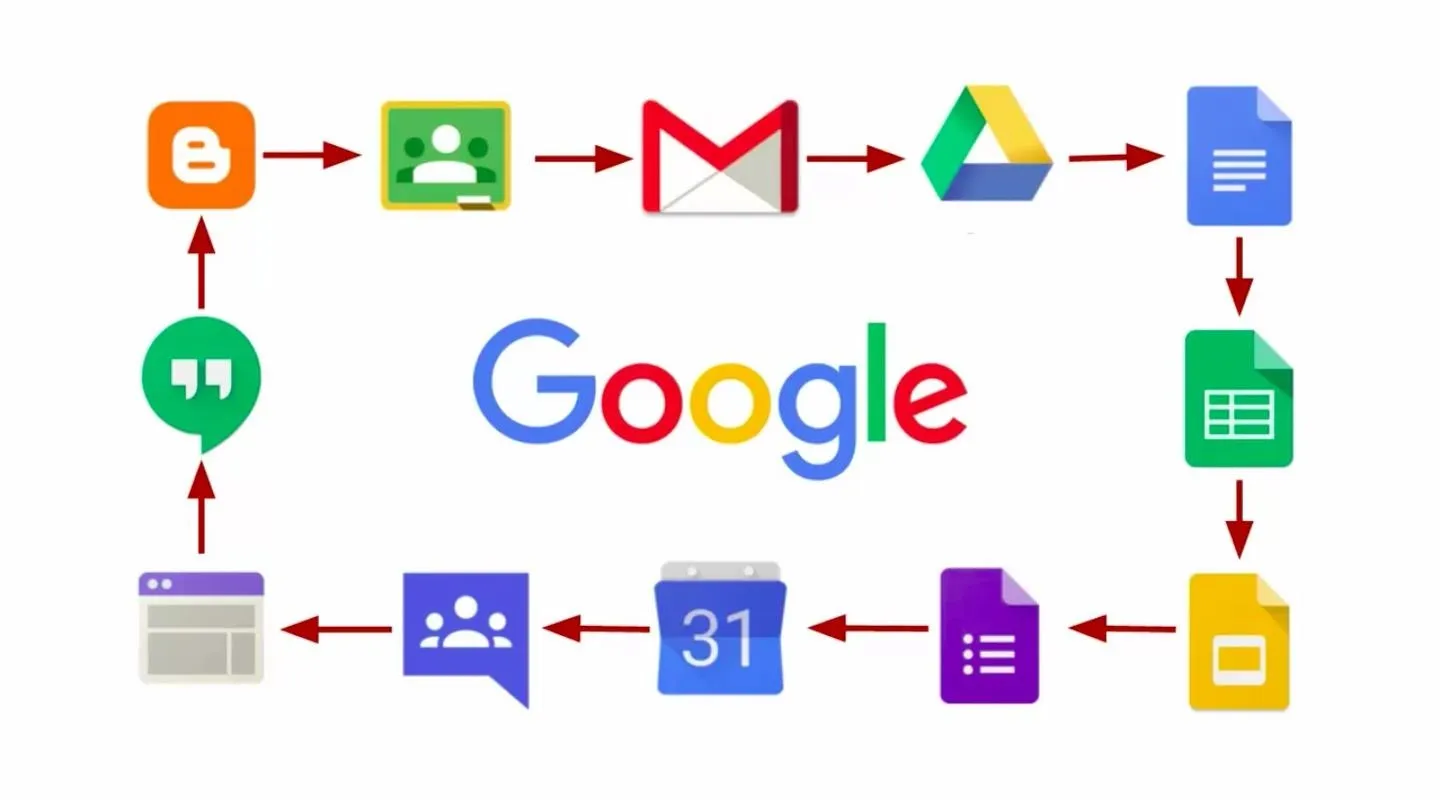
To avoid Google's tracking, don't use Google's suite of apps.
With Android being an open source platform, there are alternatives to each of these apps. For a more secure version of Gmail and Google Dialer, check out our guide on securing your Android communications. For a safe way to browse the web, see our data privacy tutorial. For an alternative to Google Calendar, you can use the app Offline Calendar for a locally stored calendar that isn't accessible via the web. This way, communication can't be read by anyone but you.
- Play Store Link: Offline Calendar (free)

Tip #5: Disable App Backup (Optional)
For more extensive protection from Google, you can opt out of automatic device backups. Google does a good job of protecting this data, but can been forced to forfeit some of the information it contains when the US government asks for it. Normally, the common response by average Americans is that they don't commit crimes, but the idea that Google can give your data to third party should worry you.
To stop the backing up of your data, select "Backup & Restore" from your phone's main Settings menu. Choose the "Back up my data" option, then turn it off.
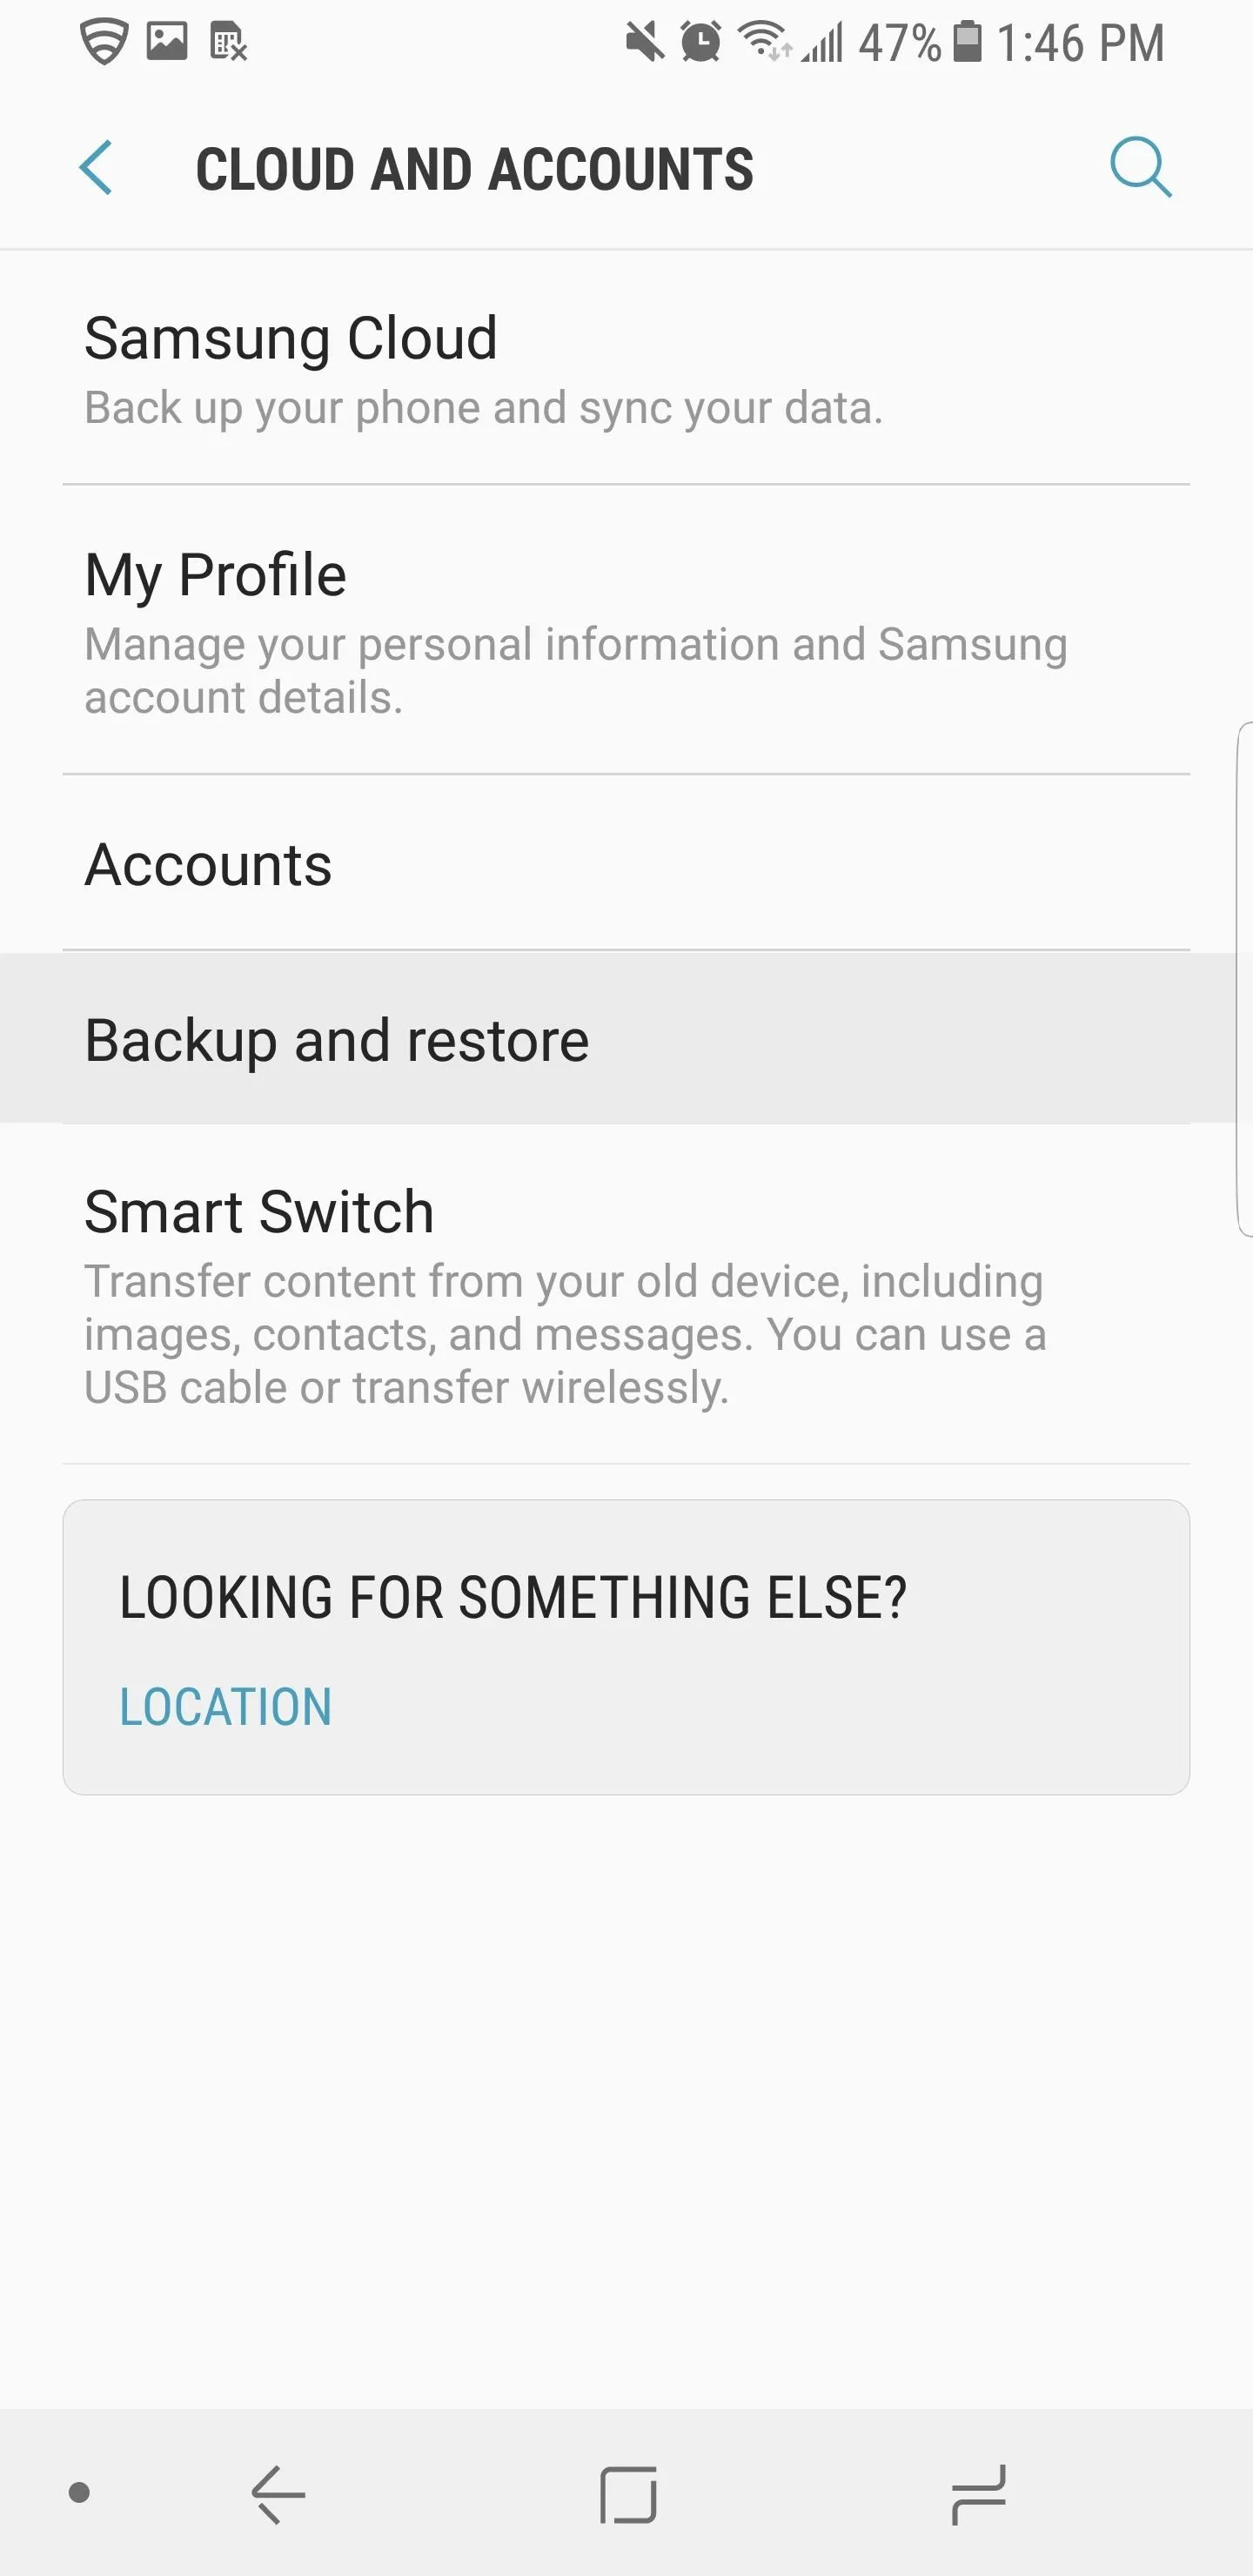
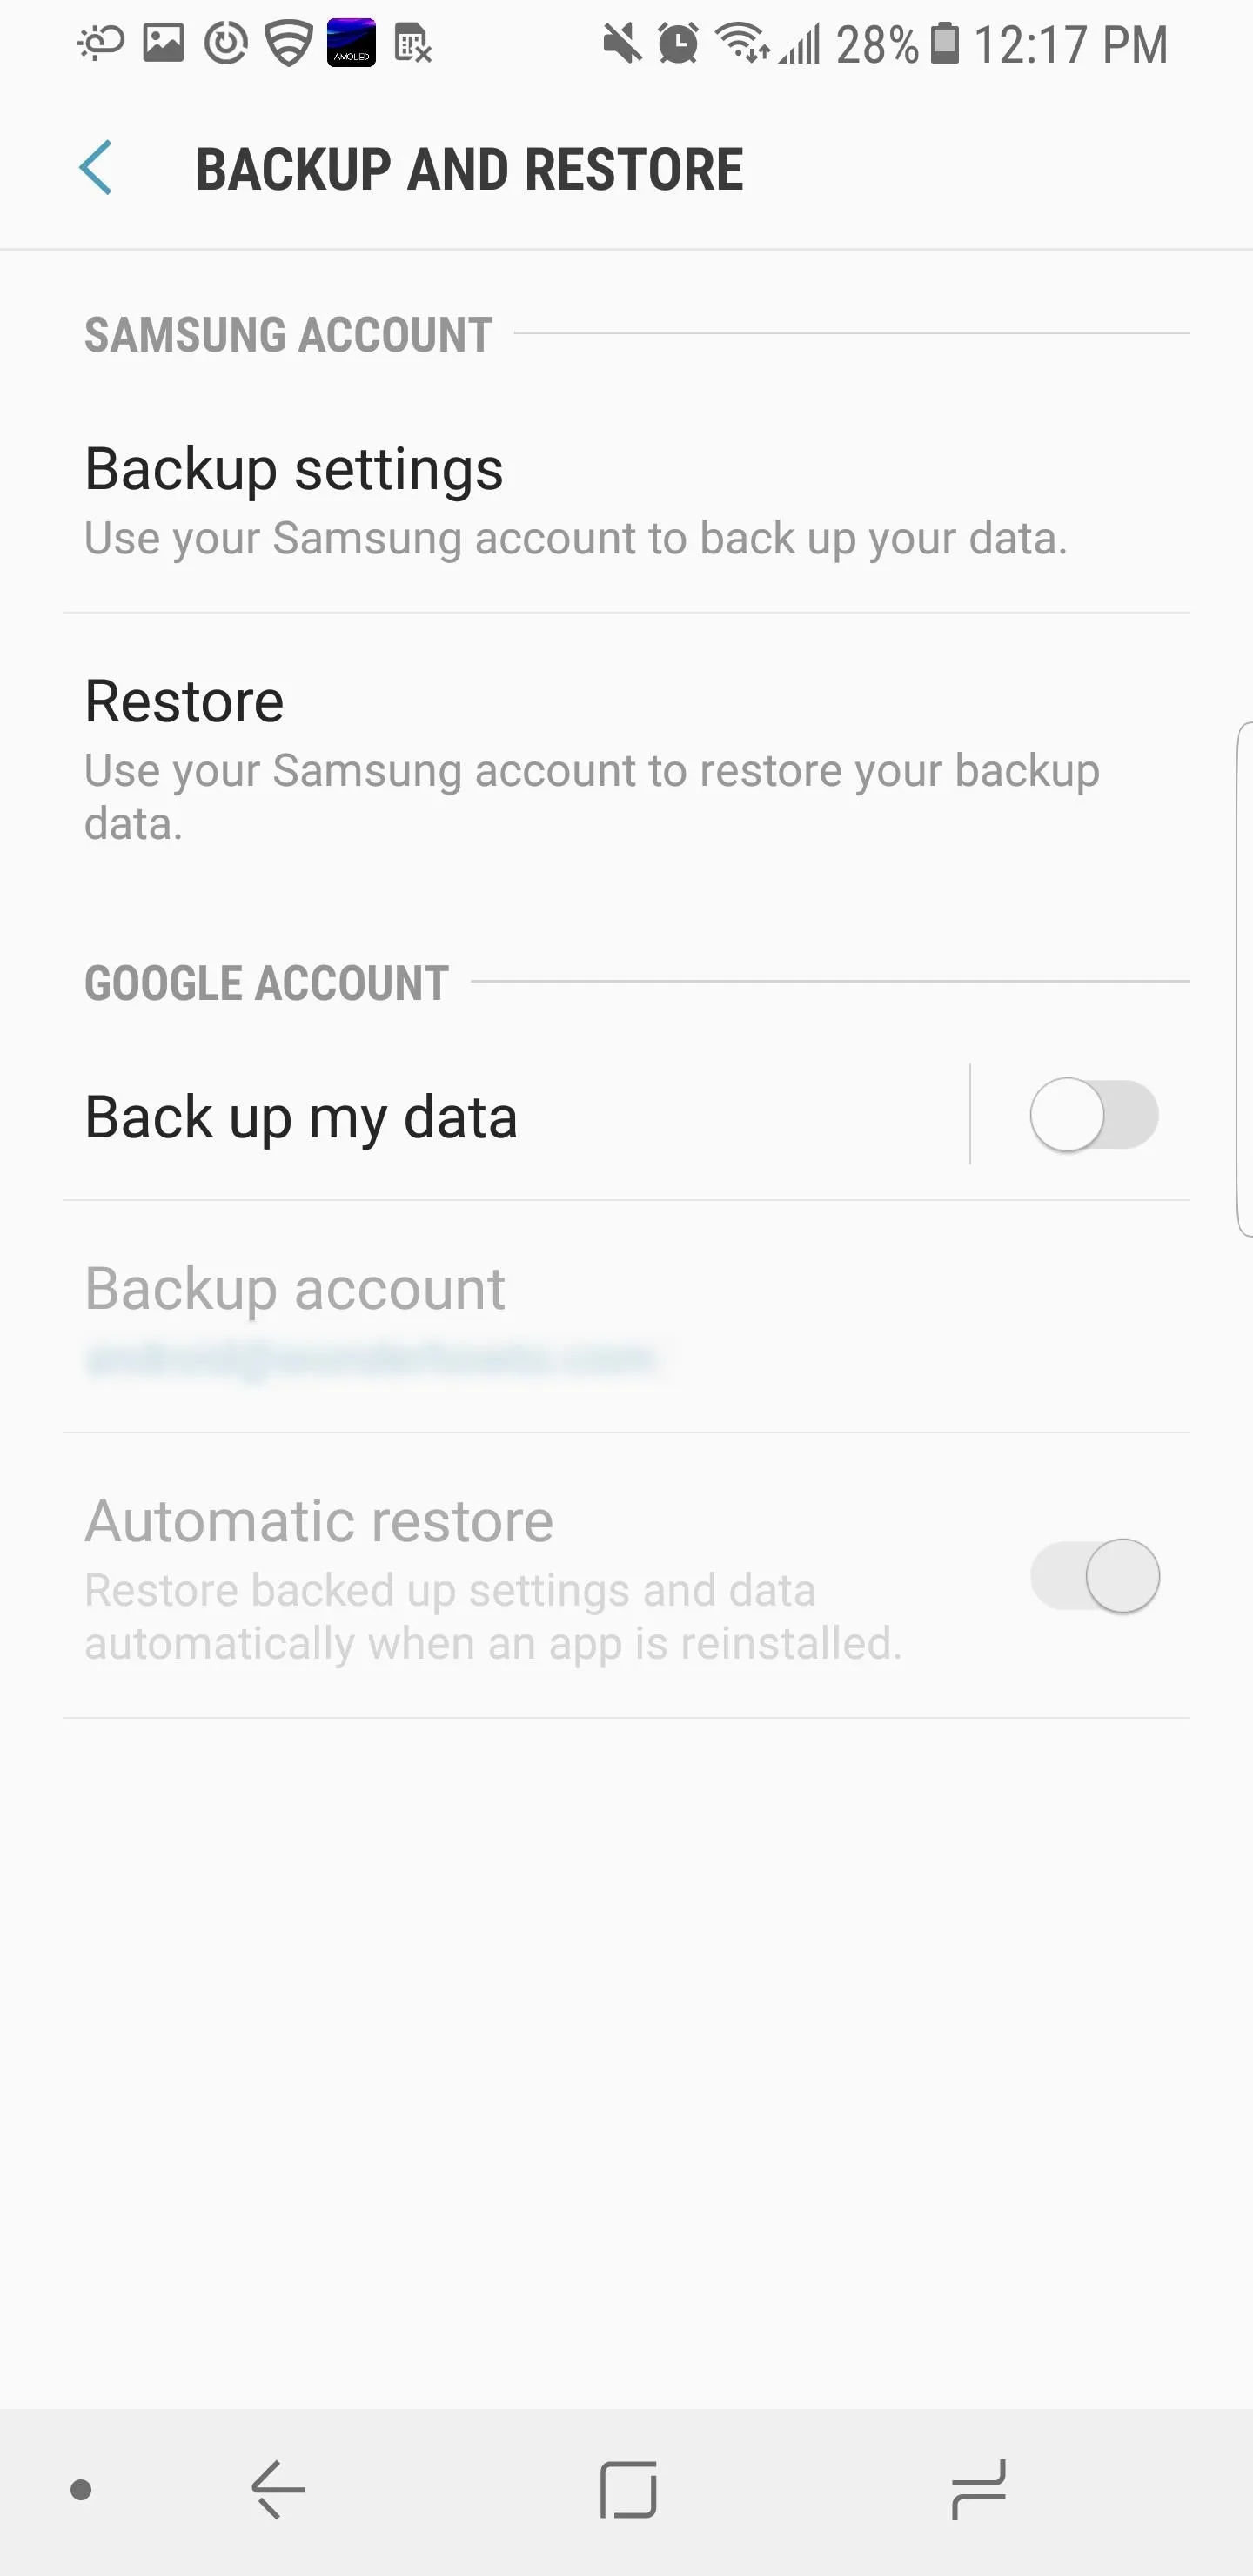


We consider this last tip optional because of the great convenience Google's backup service provides. If you disable this feature, the next time you break this device or switch to another phone, your data won't follow you unless you physically have the previous device. However, it's a judgement call, so you may want to trade in this convenience for a theoretical bump in privacy.
Finally, if you really want to get Google off your phone, there's the nuclear route: Install a custom ROM to replace your phone's Android OS, use microG instead of Google Play Services, then replace the functionality of Google apps with as many open-source alternatives as possible. If you're interested, we've outlined that process in our ultimate guide to using Android without Google.
This article was produced during Gadget Hacks' special coverage on smartphone privacy and security. Check out the whole Privacy and Security series.
- Follow Gadget Hacks on Pinterest, Reddit, Twitter, YouTube, and Flipboard
- Sign up for Gadget Hacks' daily newsletter or weekly Android and iOS updates
- Follow WonderHowTo on Facebook, Twitter, Pinterest, and Flipboard
Cover image and screenshots by Jon Knight/Gadget Hacks









Comments
Be the first, drop a comment!