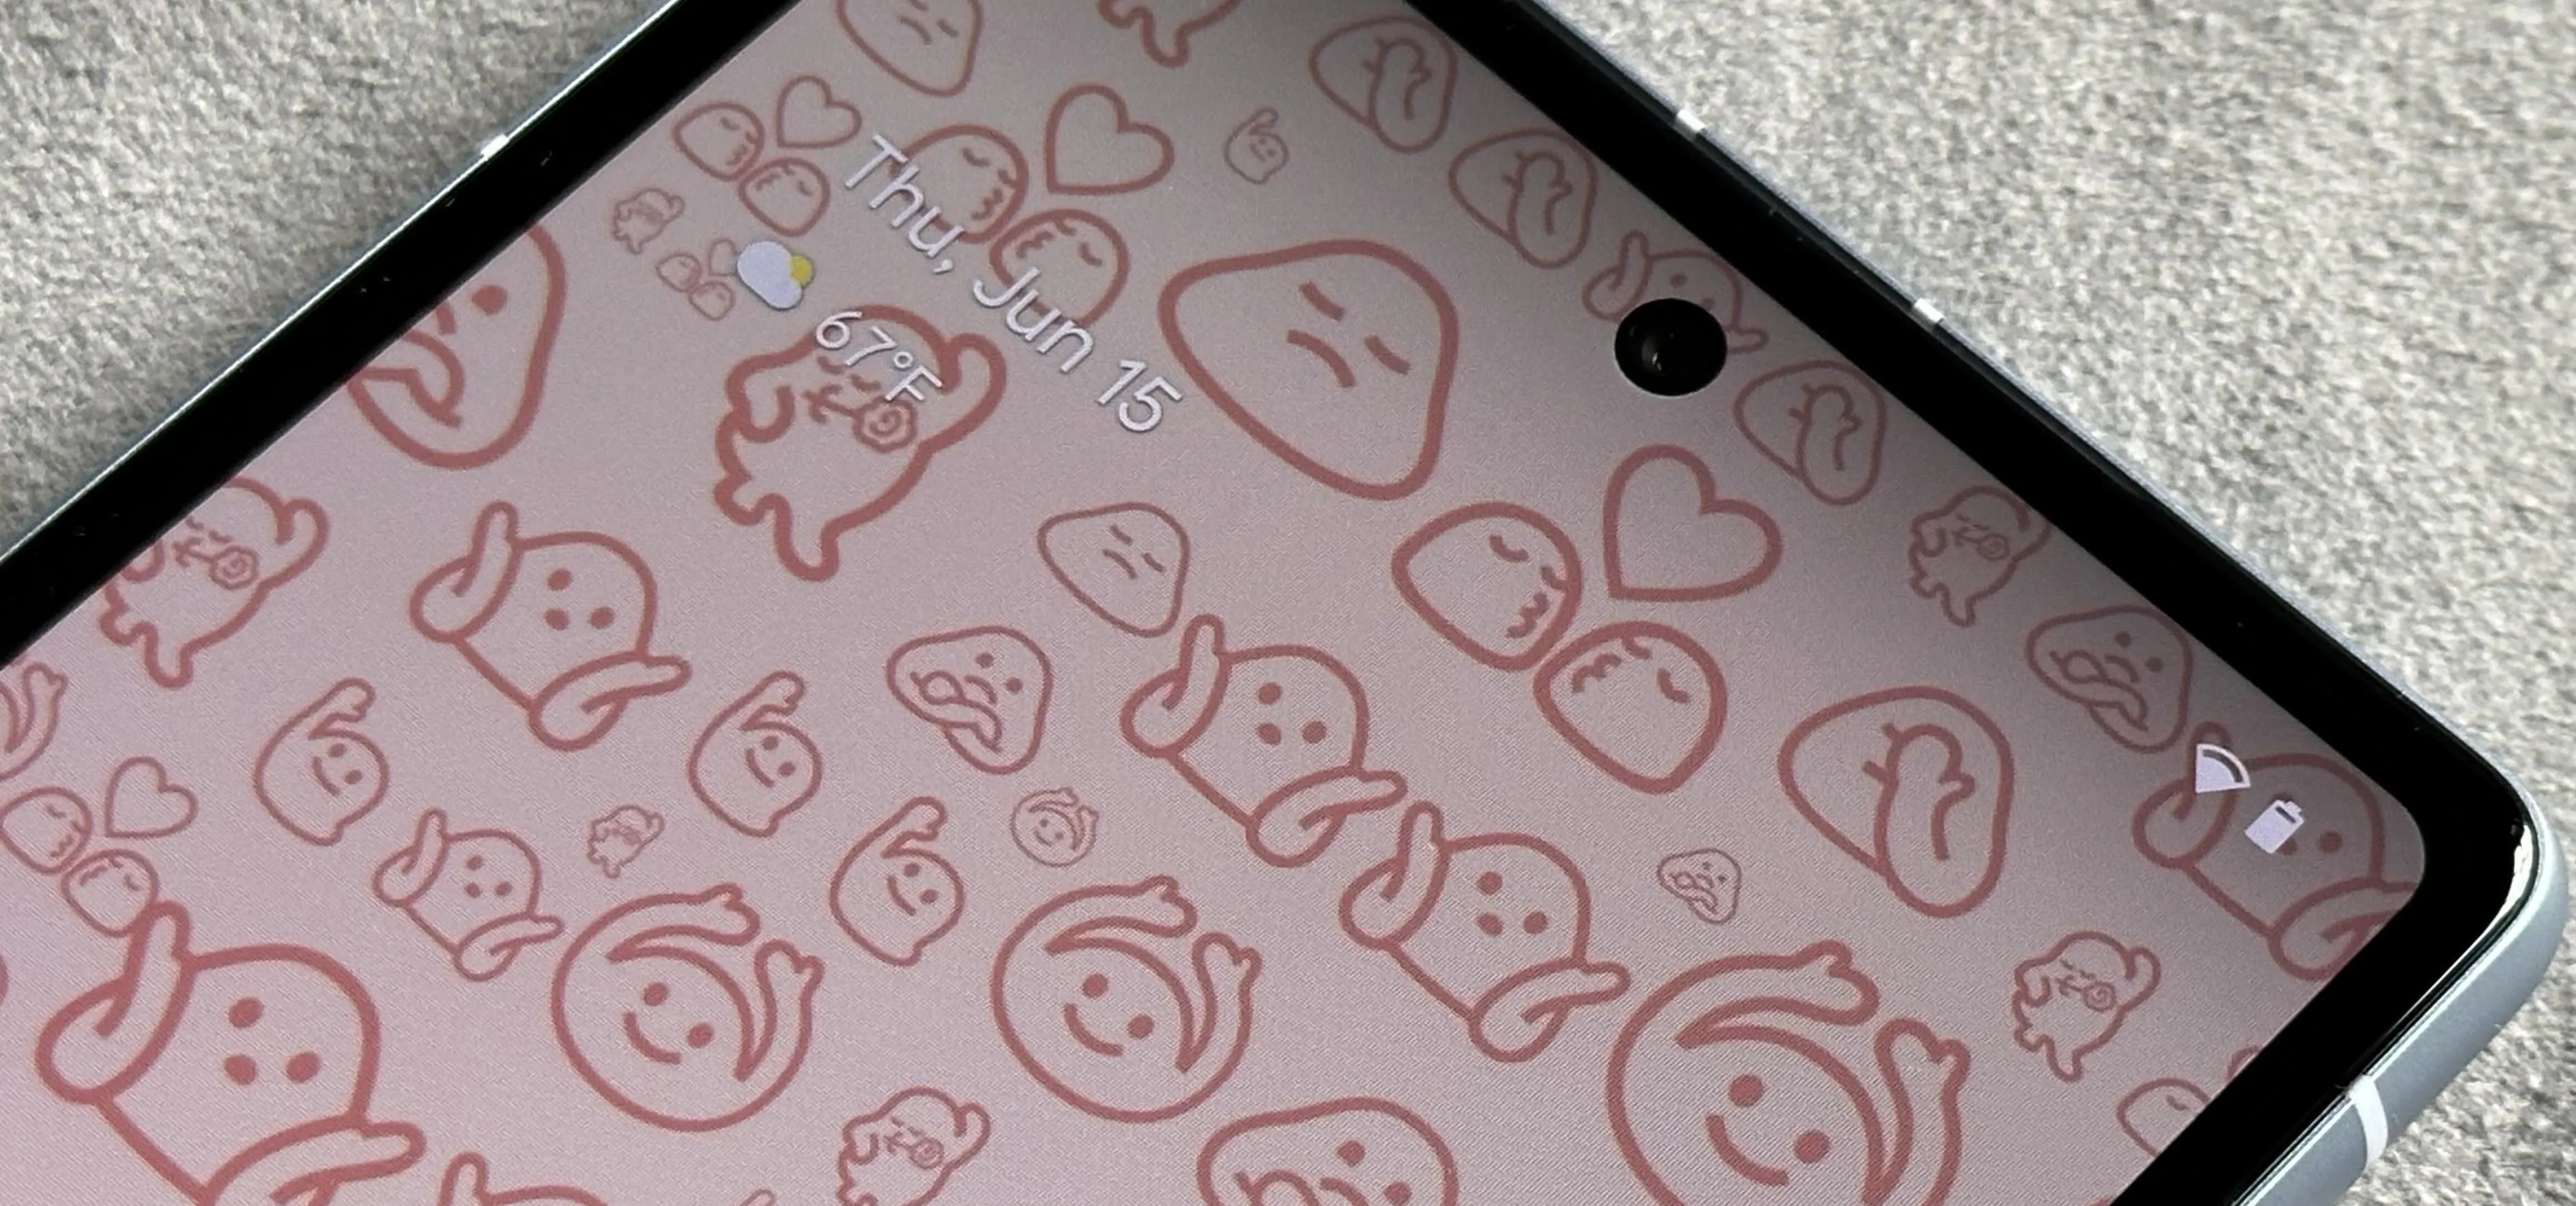
The Pixel 5's beautifully slim and symmetric bezels don't leave much room for extra hardware like a notification LED. But with the Ambient Display feature and an inventive app, you can turn the display cutout for the front-facing camera into an animated notification indicator.
Some people don't like the punch-hole screen, deeming it an eyesore. But why not flaunt what you have? Embrace the cutout by putting a ring around it, all while adding functionality, with this useful little app that I'll outline below.
Install Always On Edge
To get things started, head to the Play Store and install Always on Edge (AOE) by developer Alrbea Ent. If you're having trouble finding it, just tap the link below from your phone.
- Play Store Link: Always On Edge (free)
Enable the Ambient Display
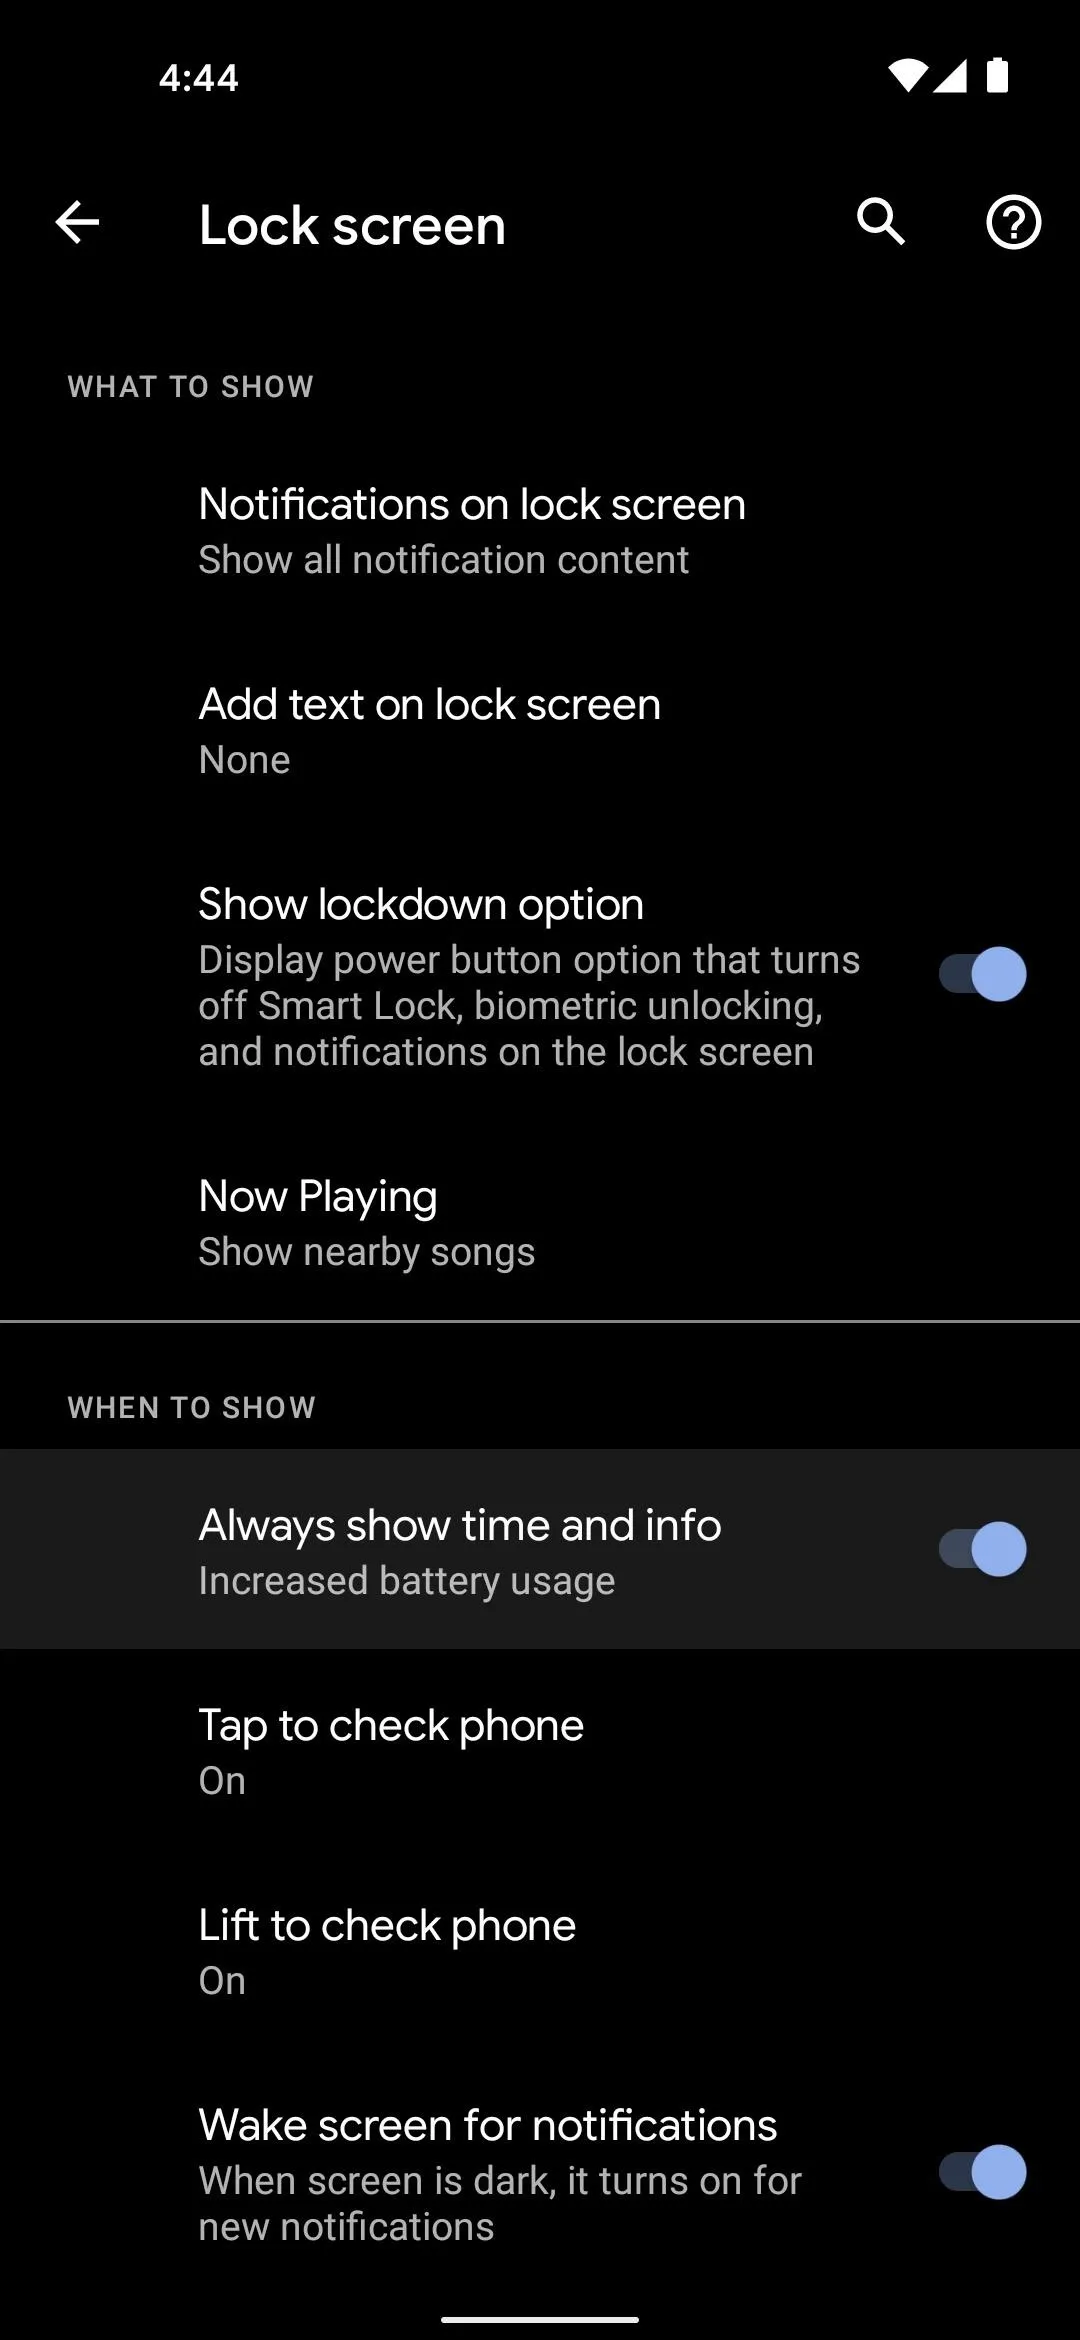
This app works best when it's integrated directly into Google's Ambient Display feature, which is a low power-usage feature that displays relevant info at all times, even when the screen is off.
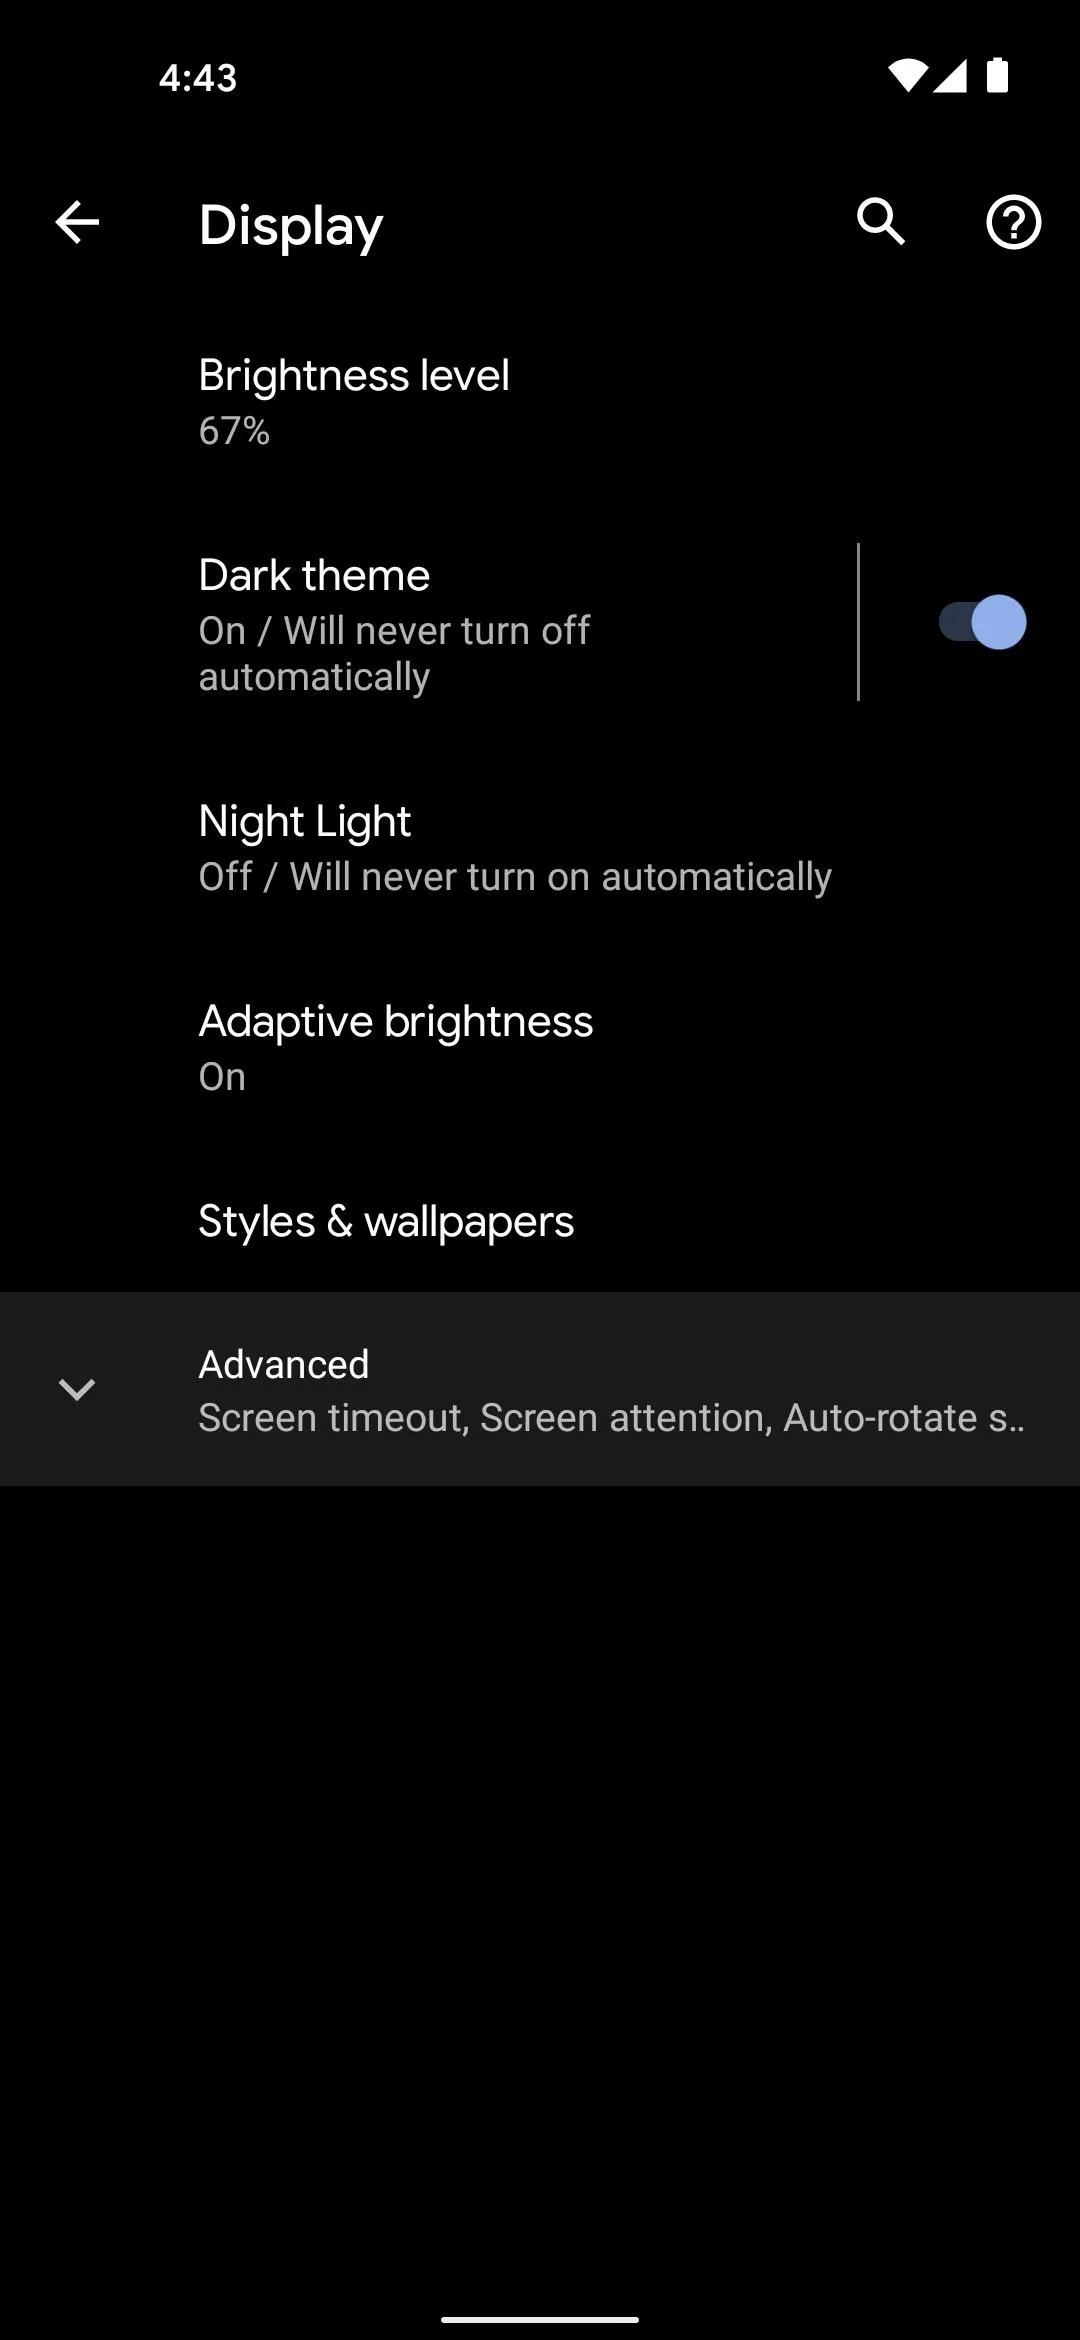
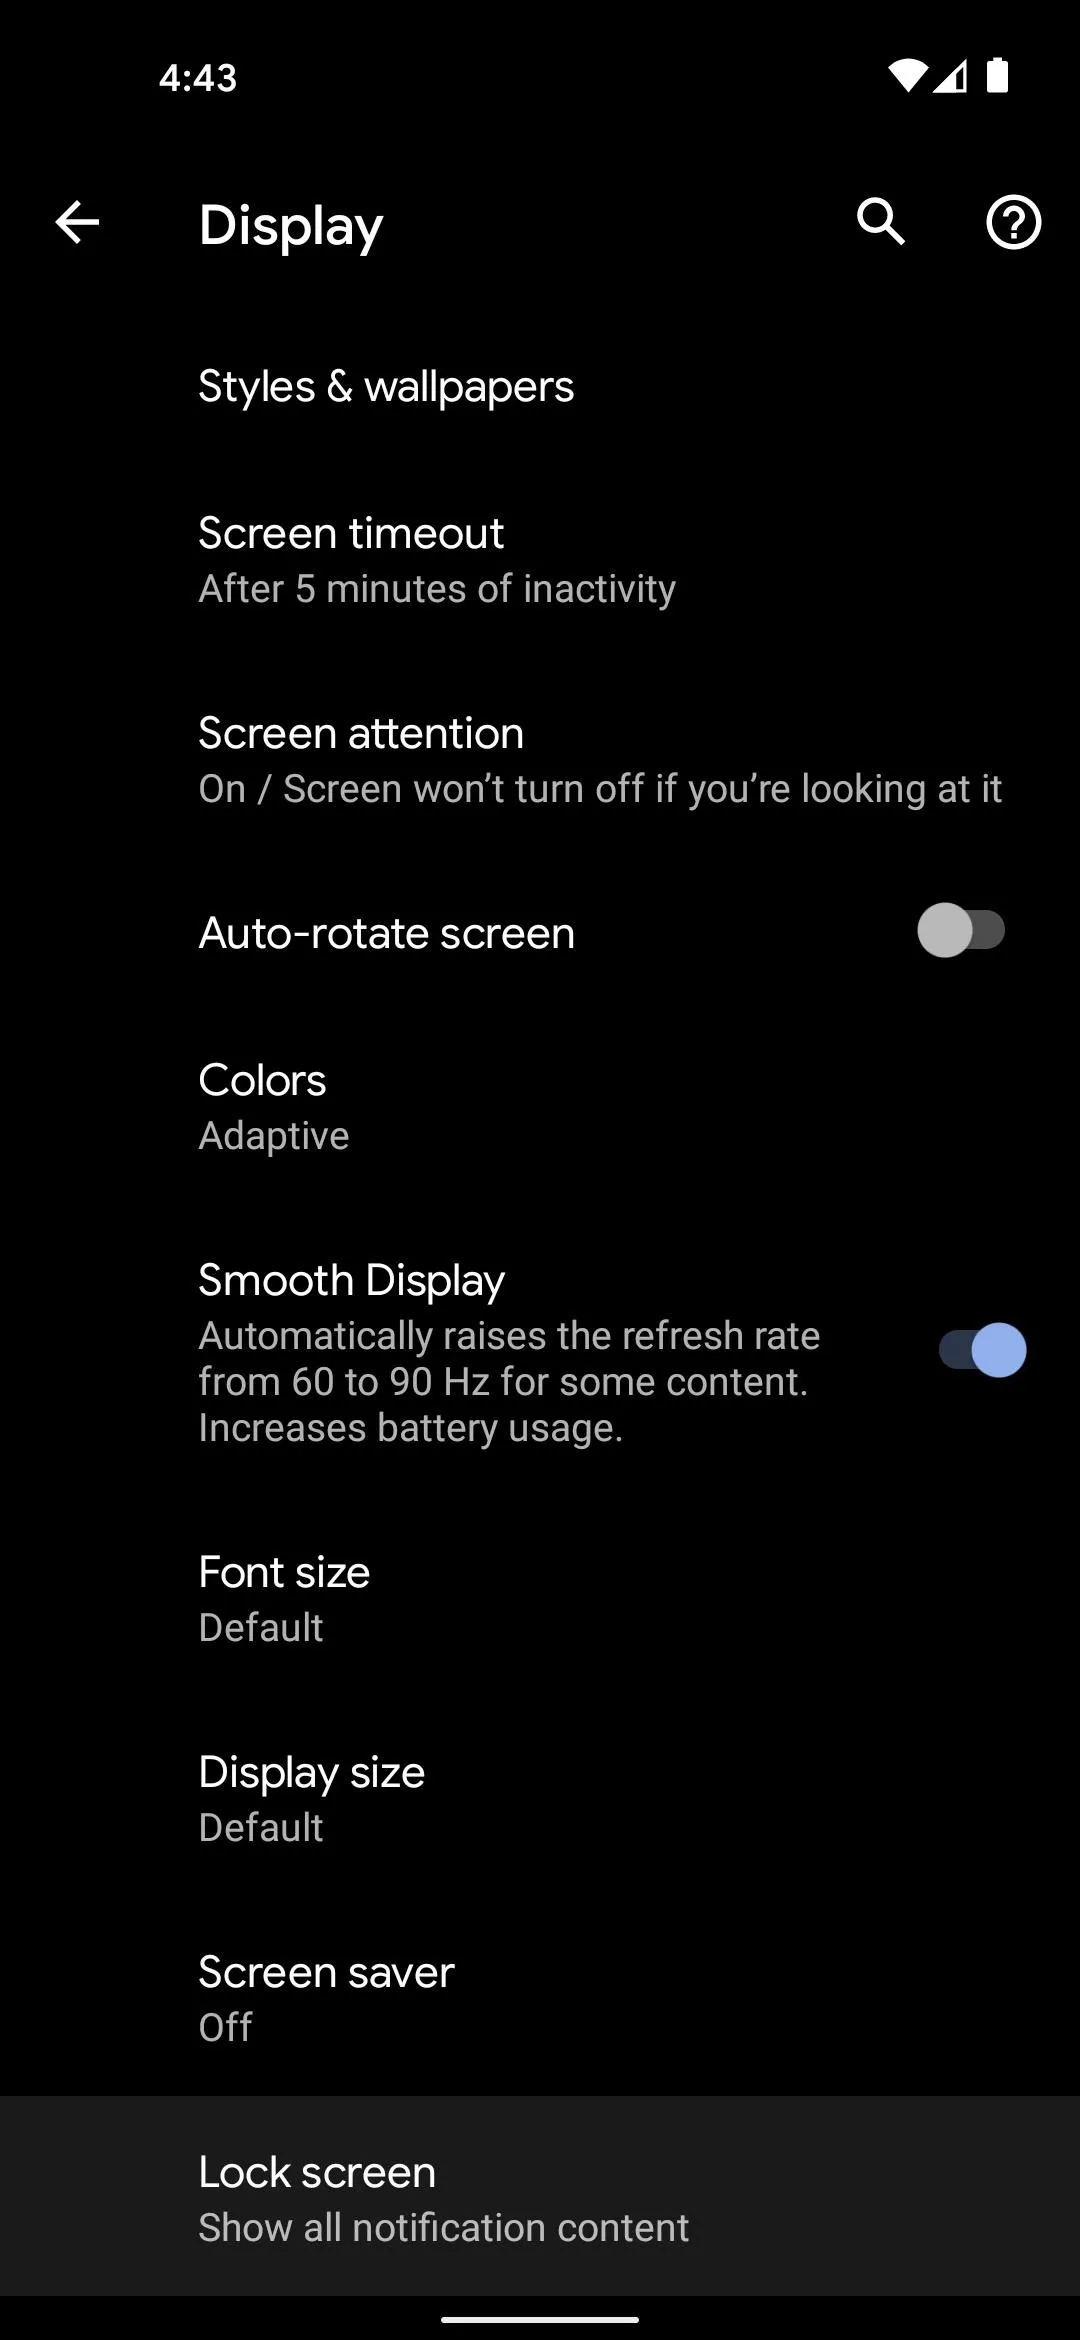
If you haven't already enabled this feature, open the Settings app from your app drawer and select "Display" from the list. From there, tap "Advanced," then scroll down and choose "Lock screen." Finally, enable the switch next to "Always show time and info."


Enable Permissions
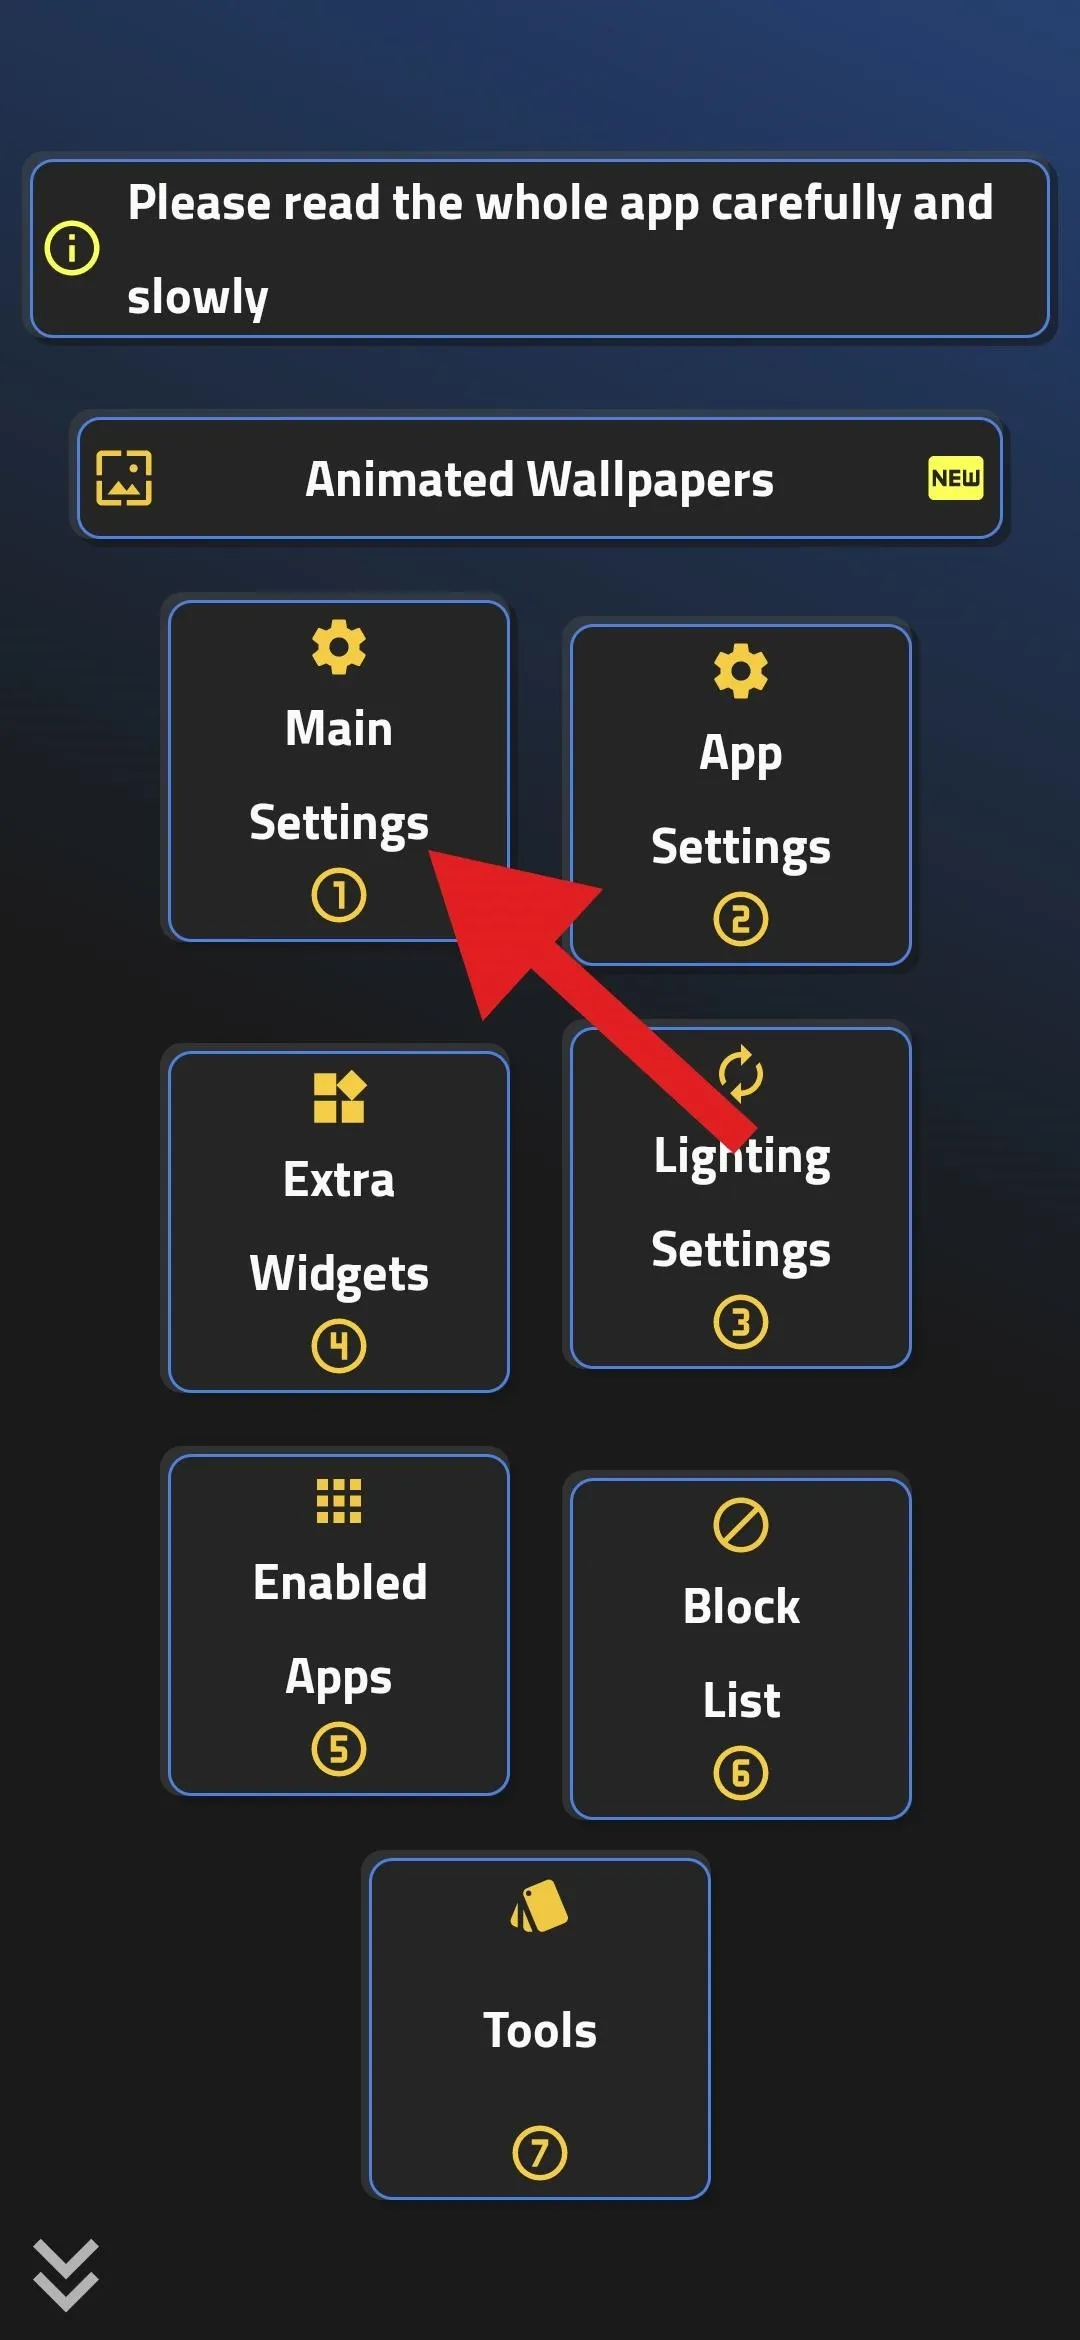
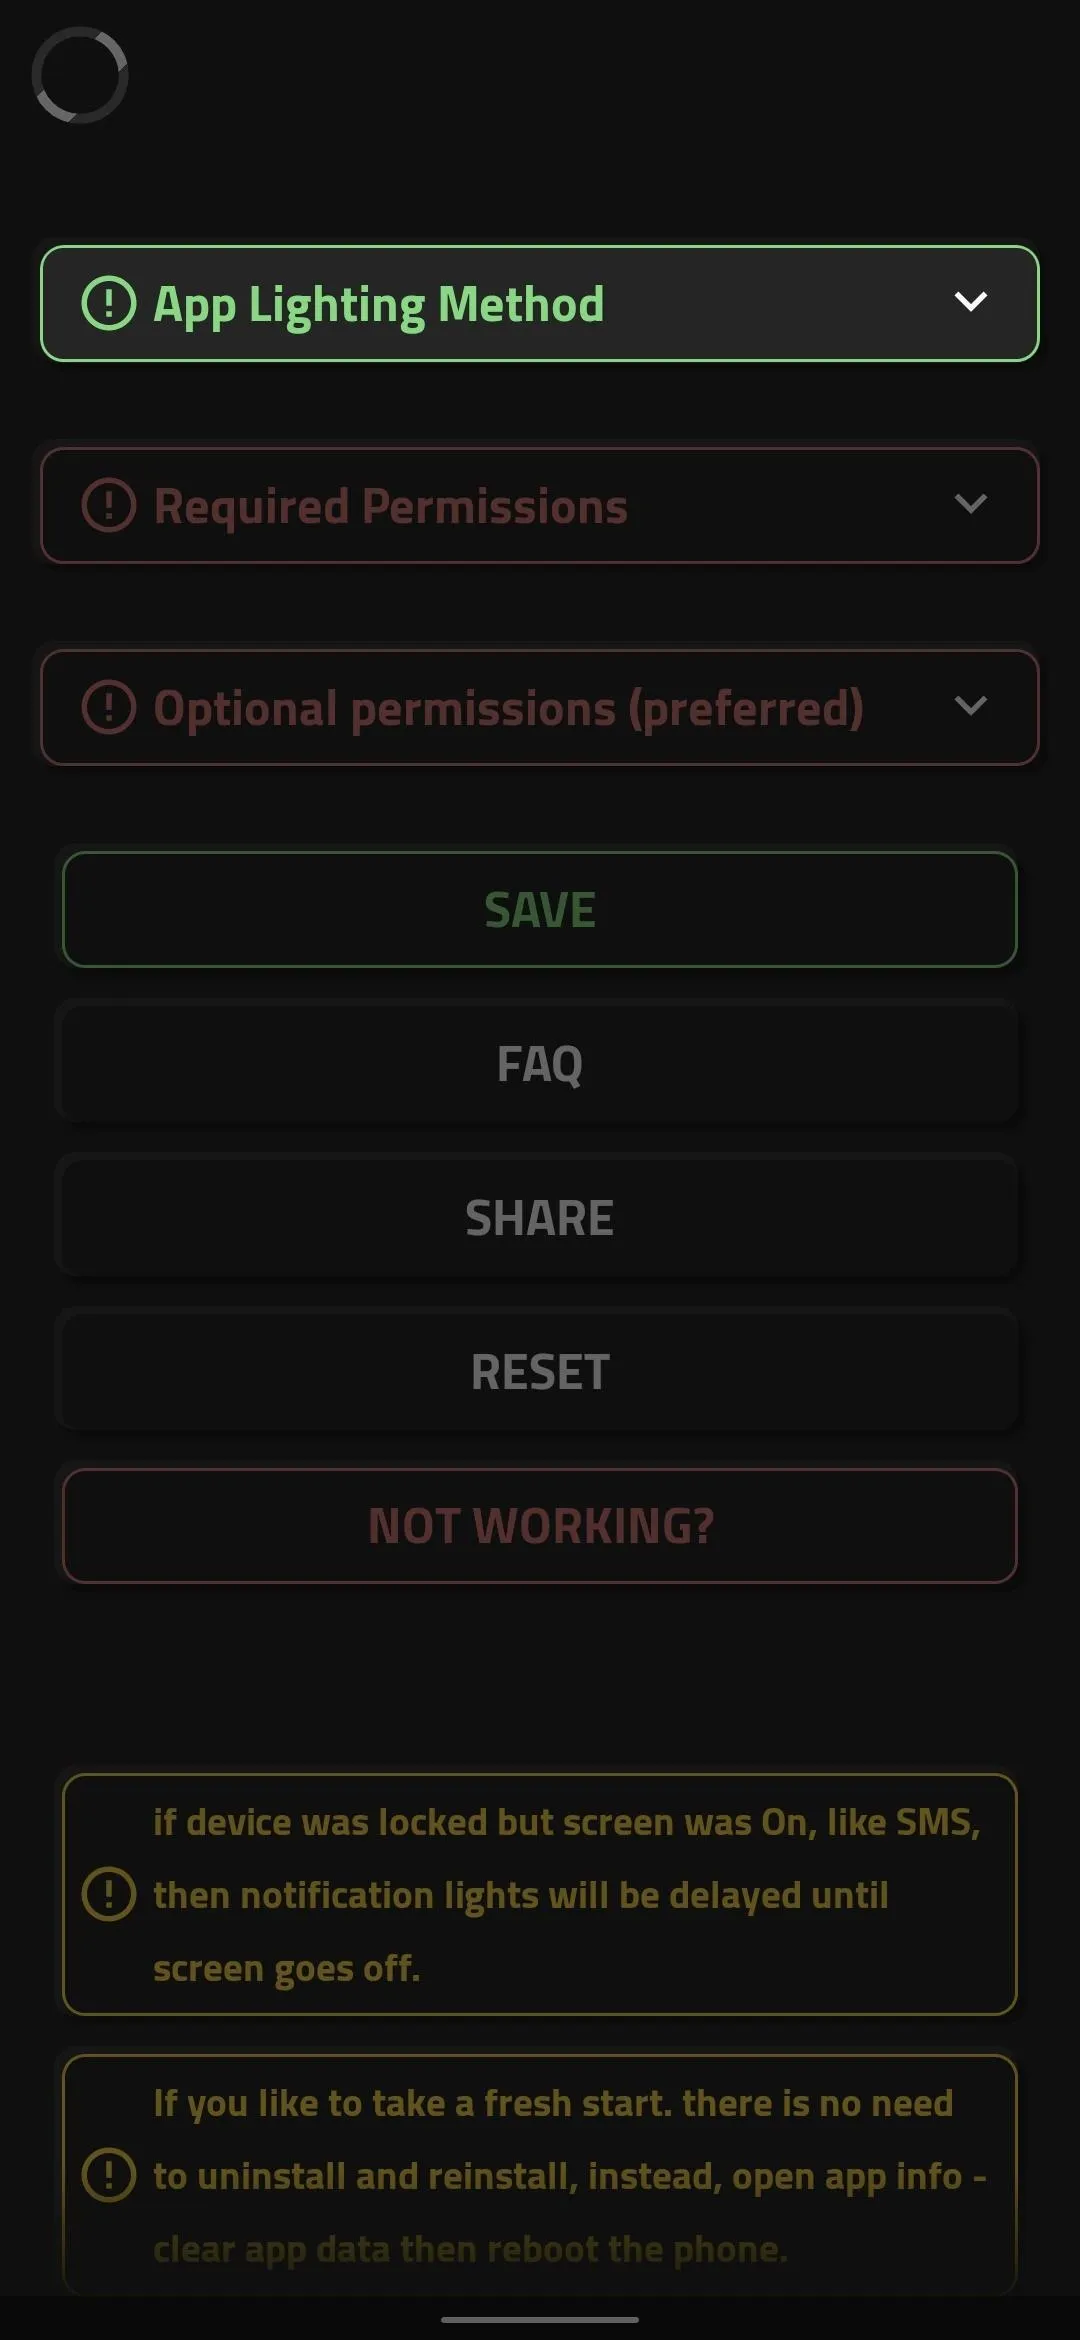
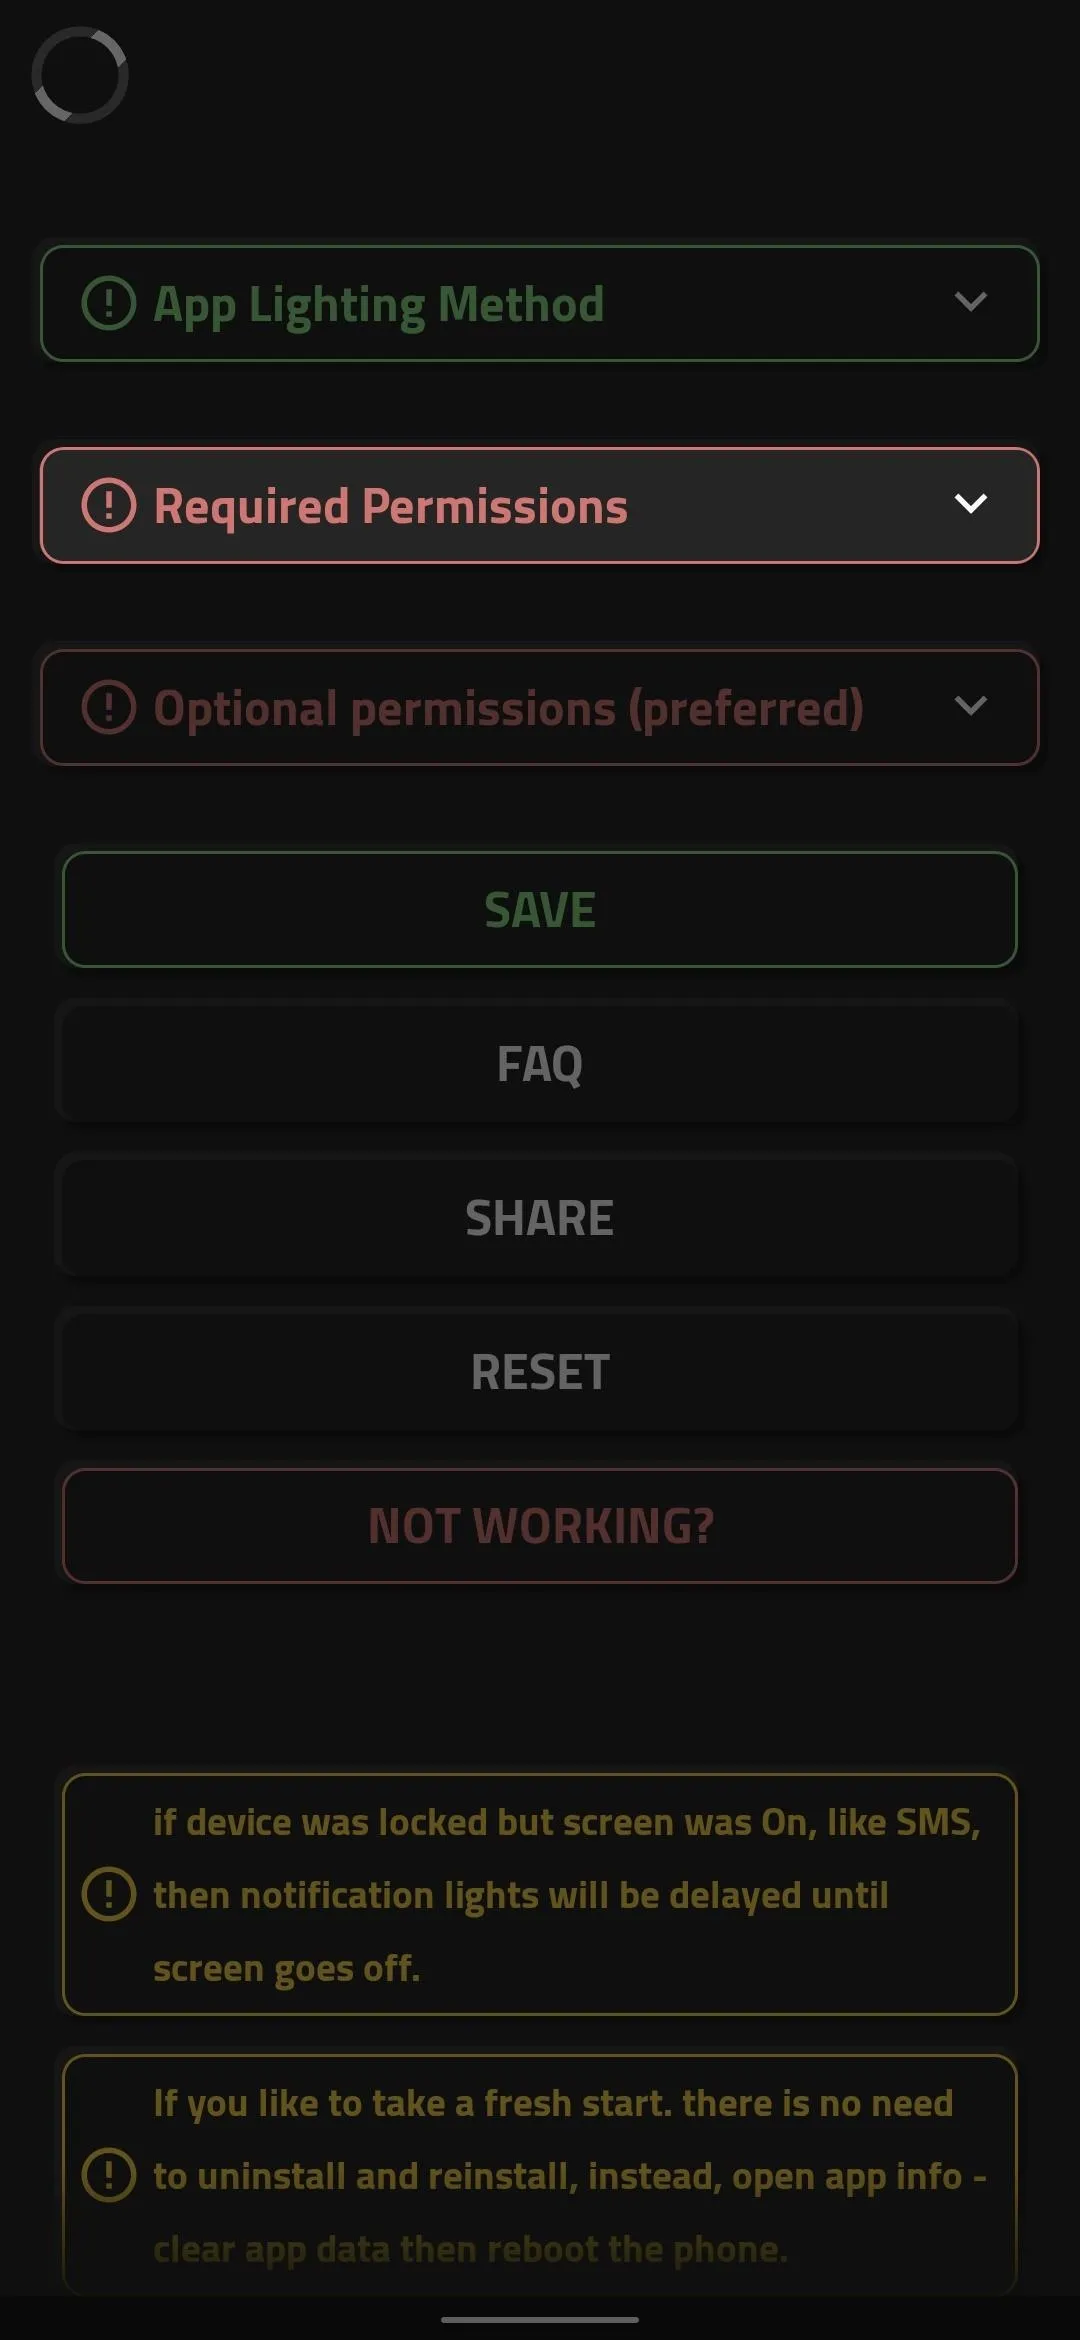
Tap "Agree" on the terms of service prompt when you first launch the app. Once you arrive at the app's main menu, choose "Main Settings." Next, expand the "App Lighting Method" header and choose "AOD."
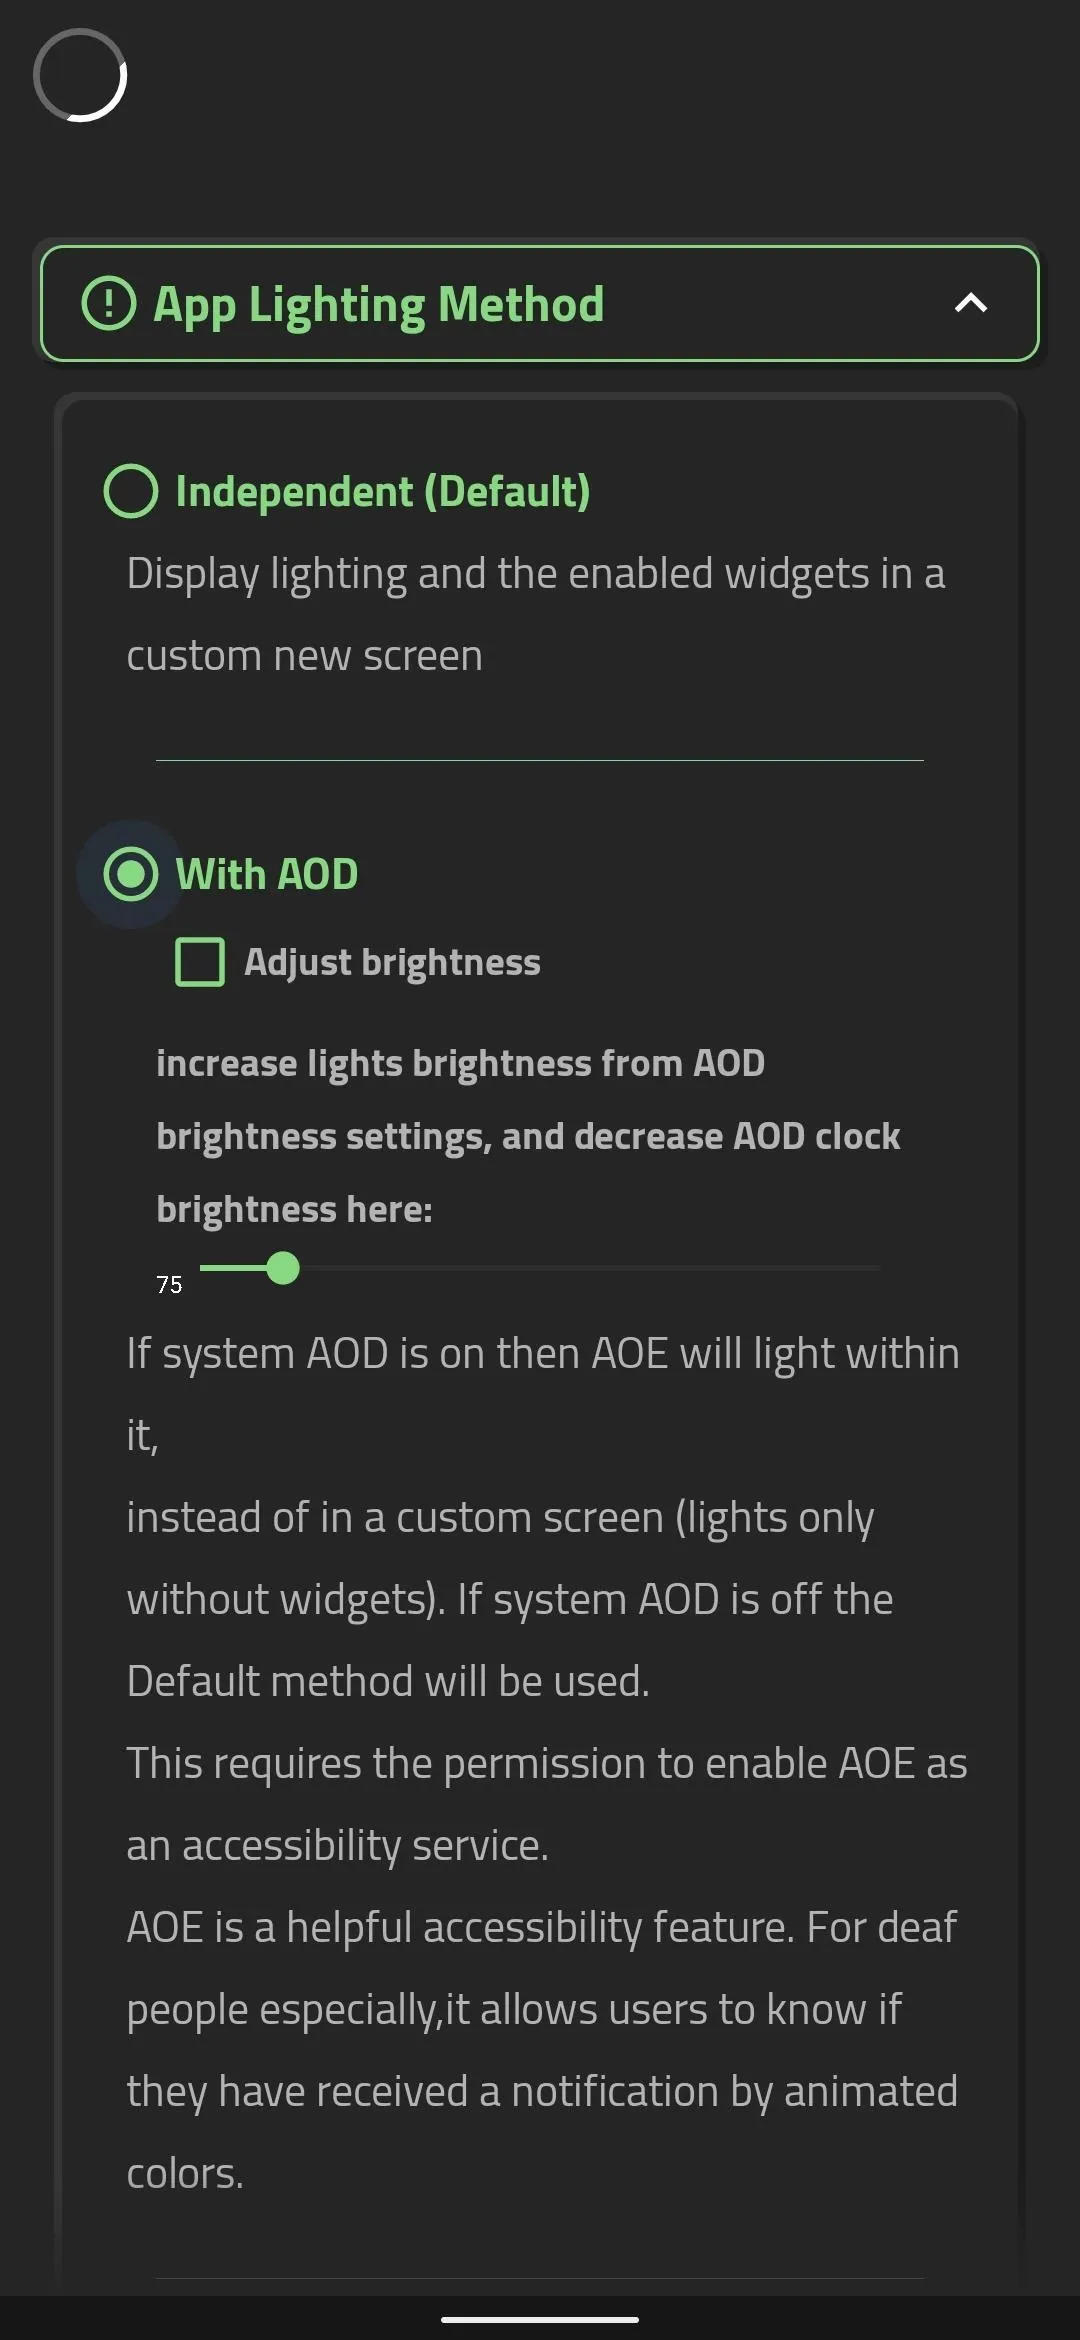


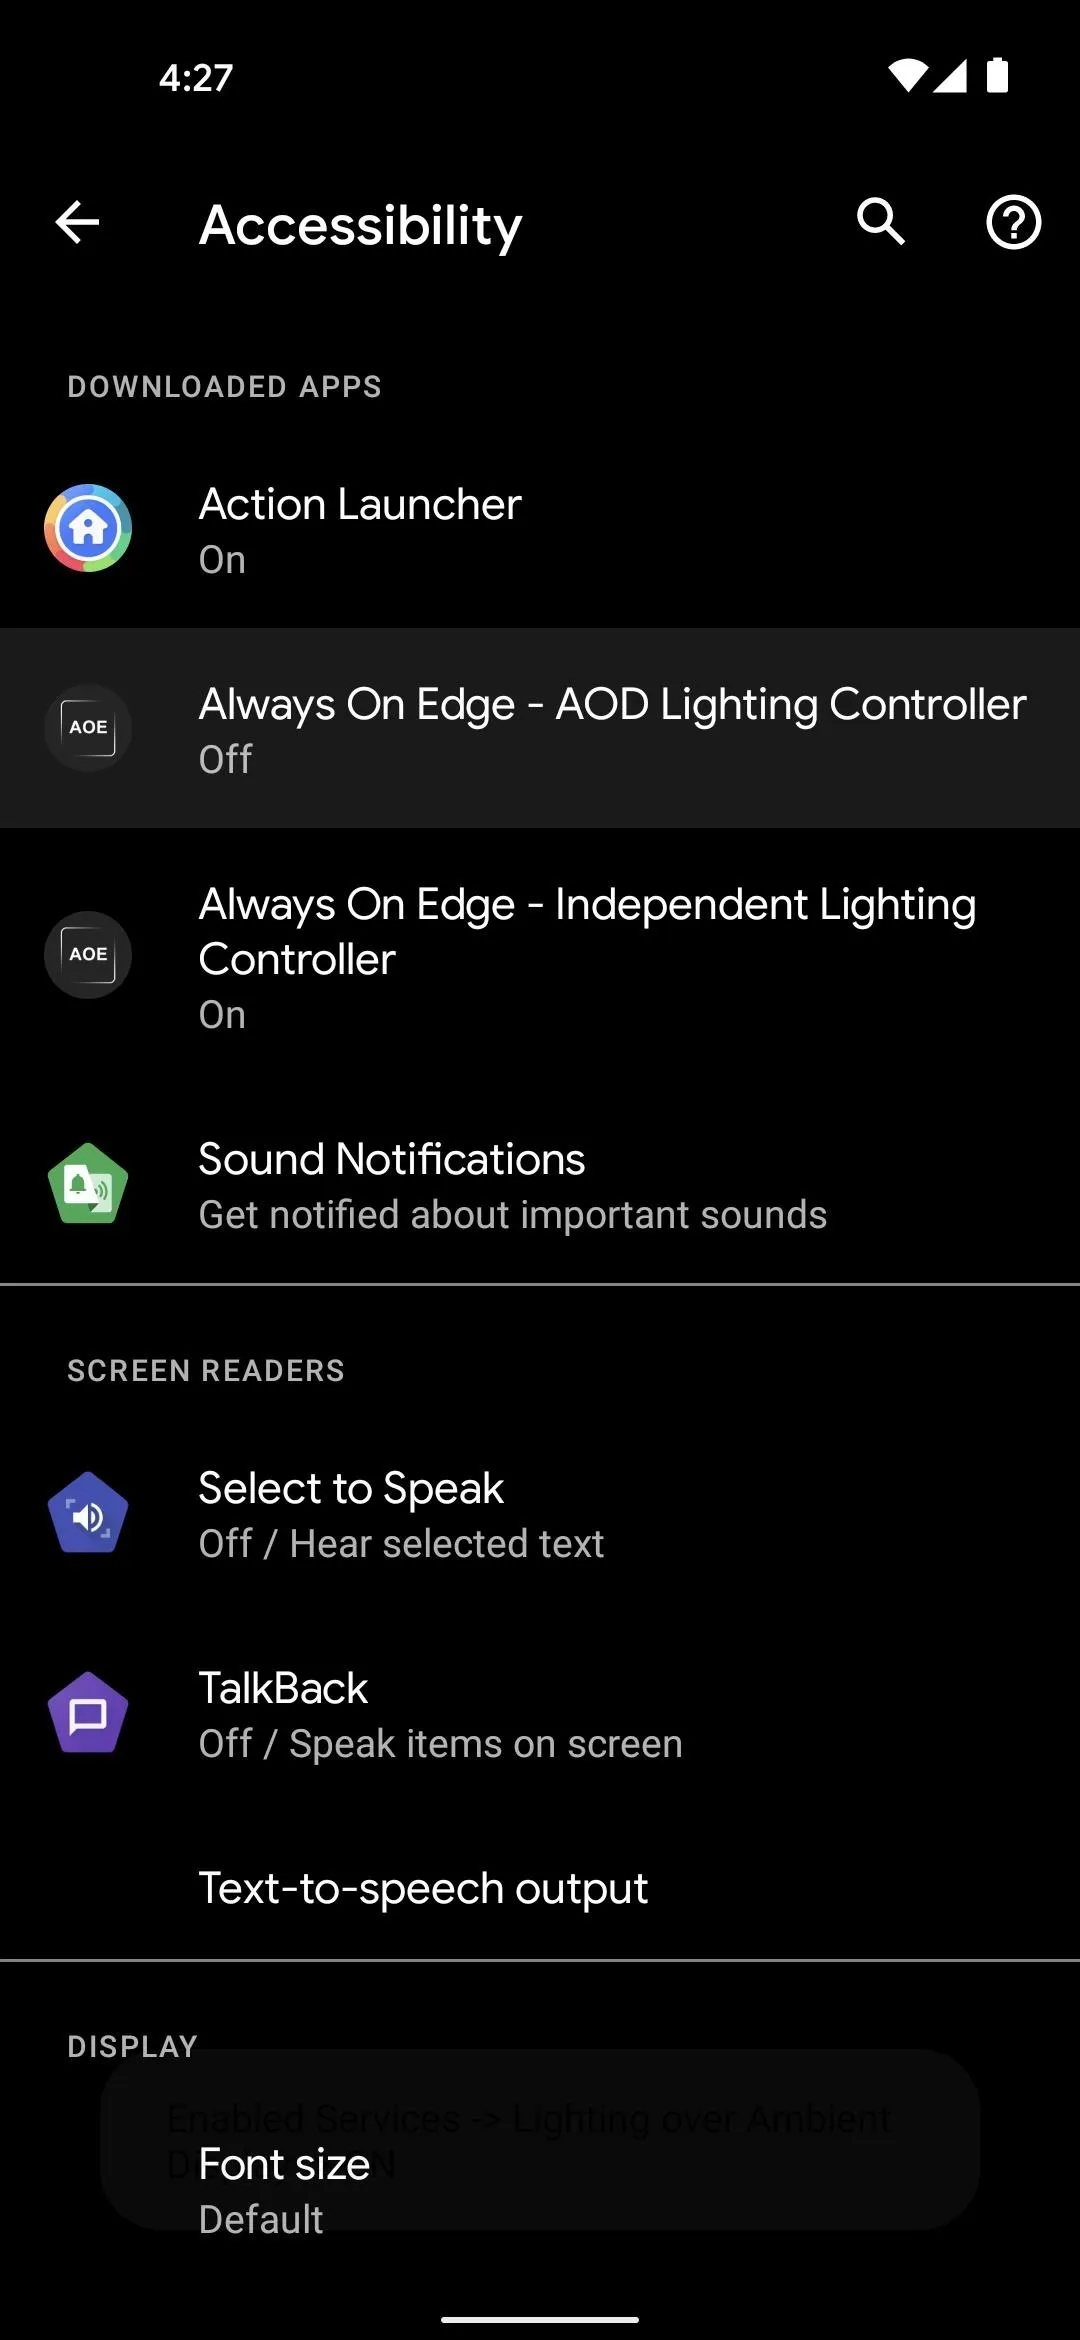
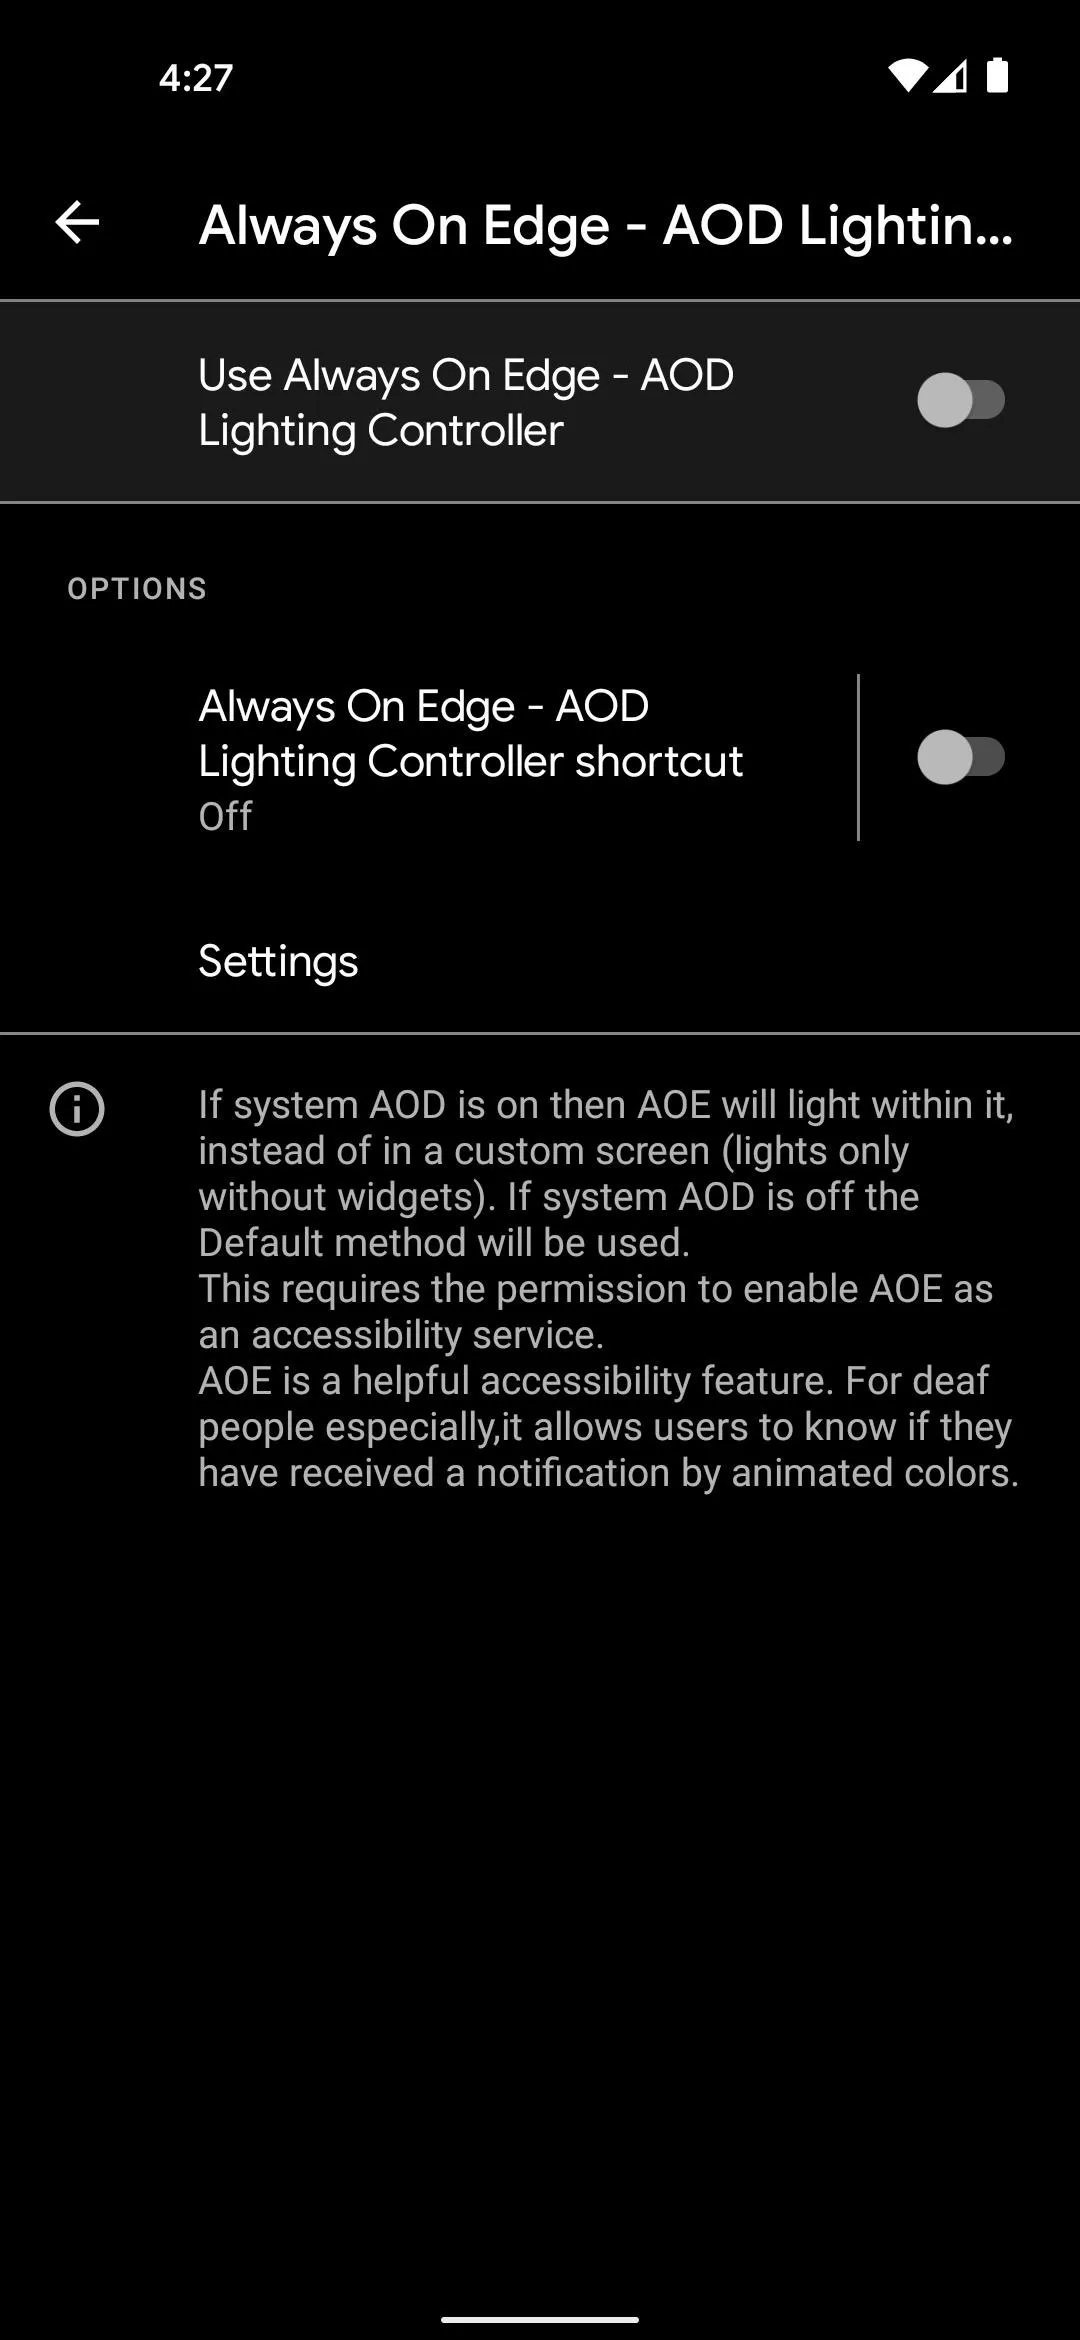
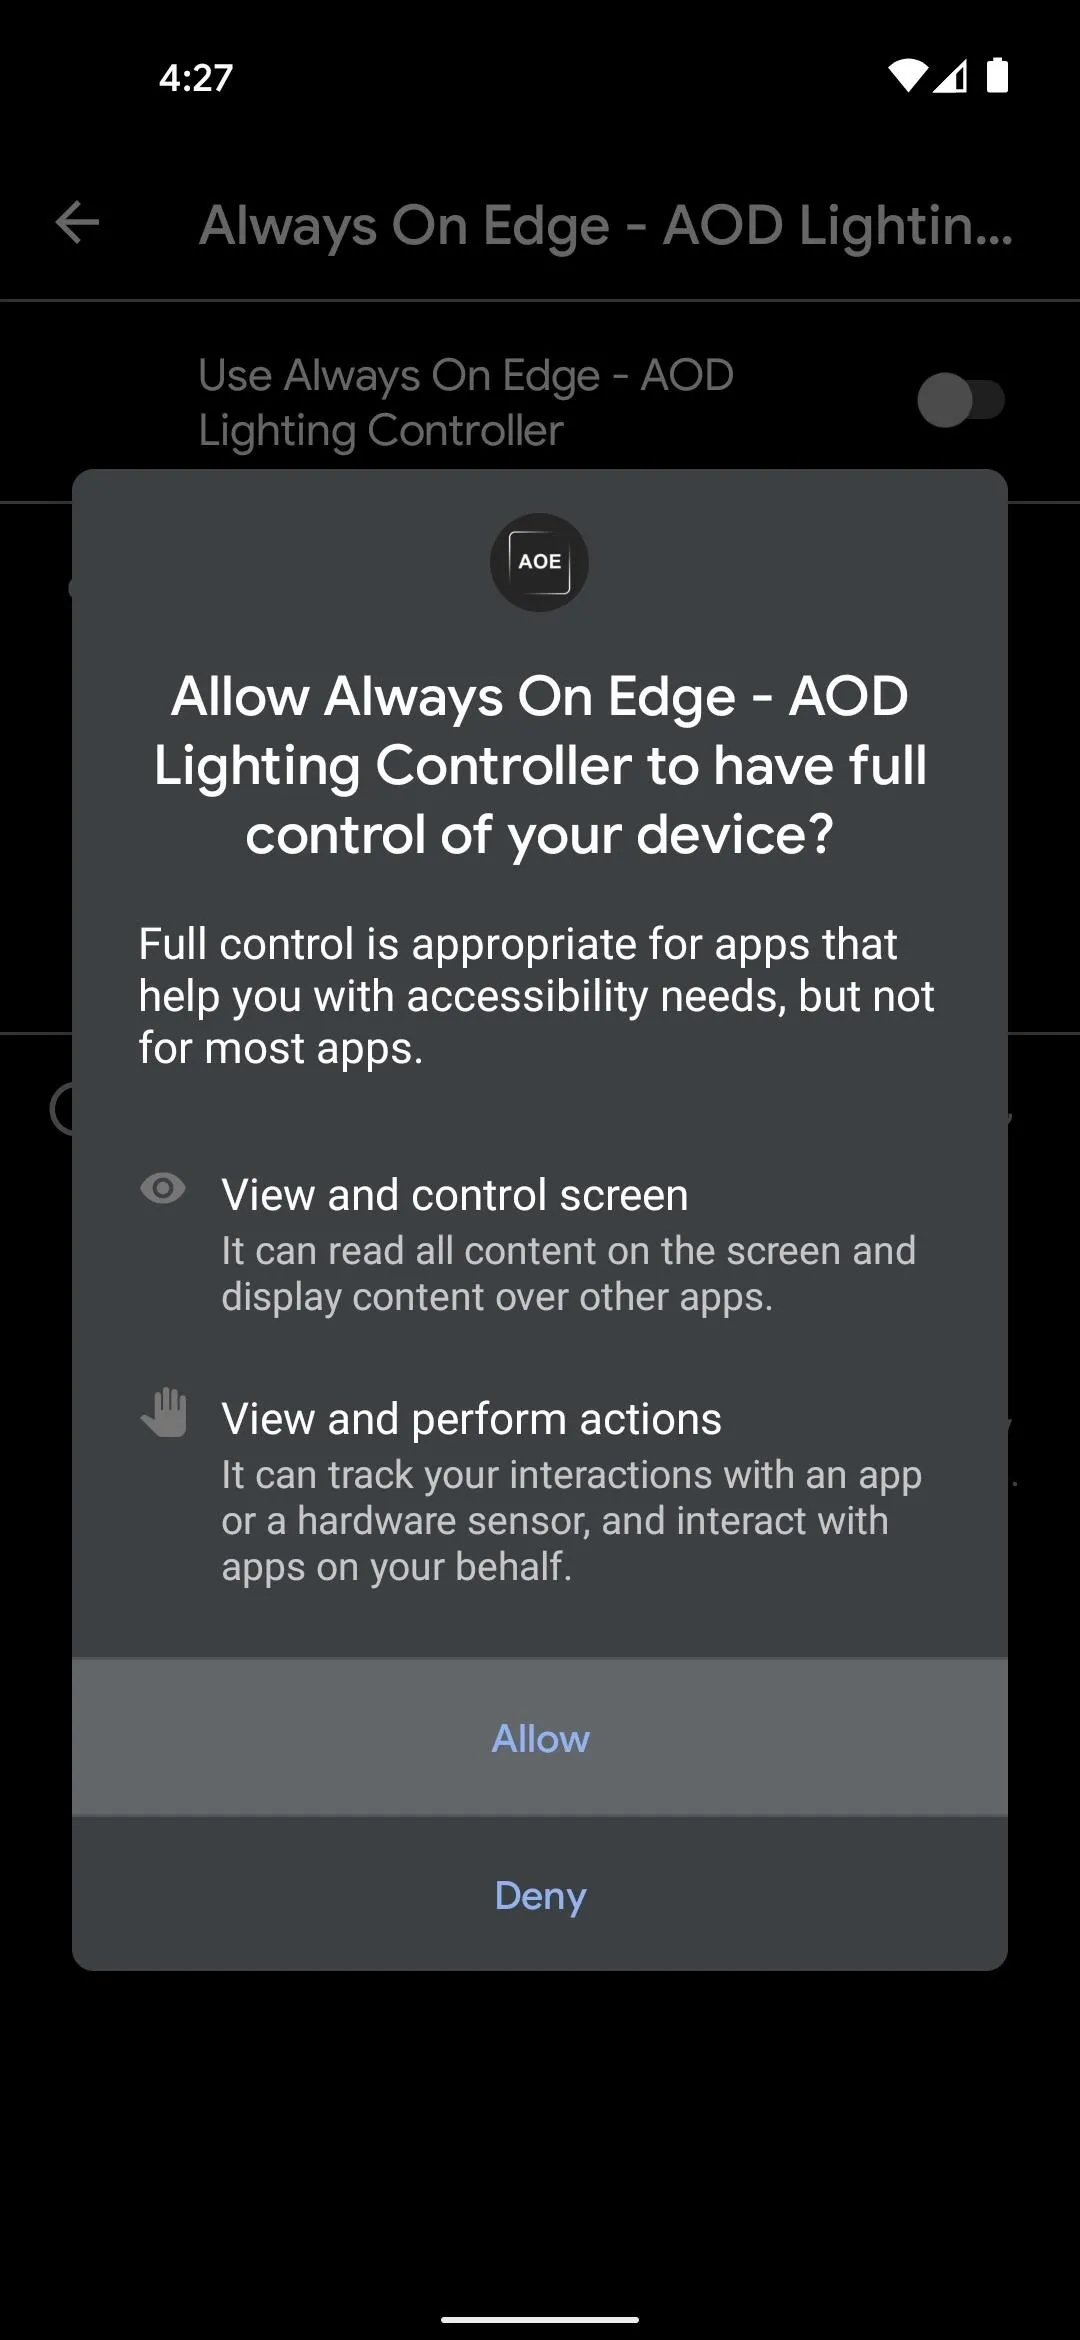
When you do this, you'll be redirected to a system settings menu. Choose "Always On Edge - AOD Lighting Controller" from the list, then enable the switch at the top of the subsequent menu and press "Allow" on the popup. When you're done there, perform the back gesture twice to head back to the app.


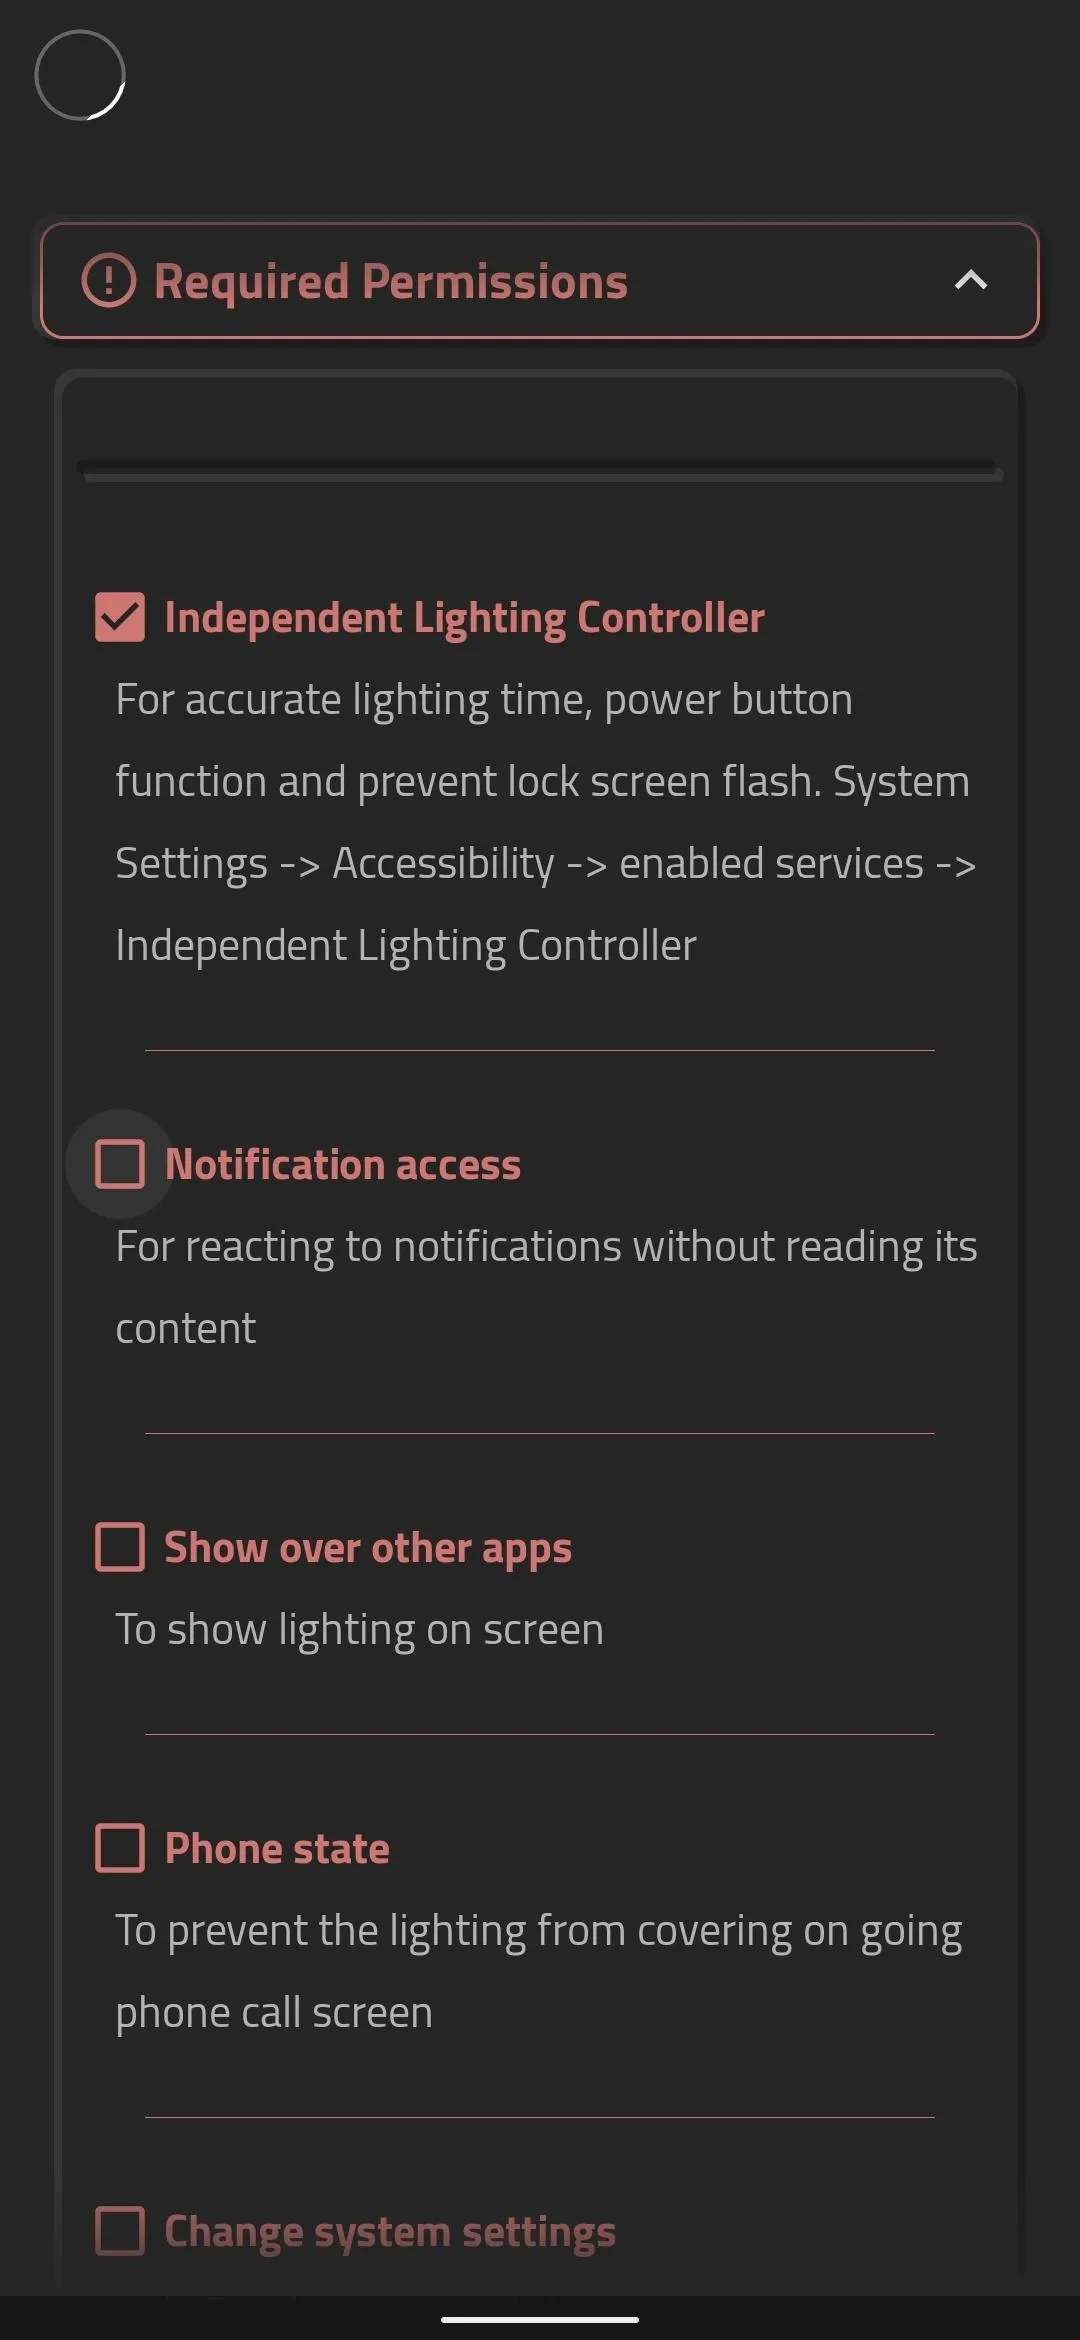
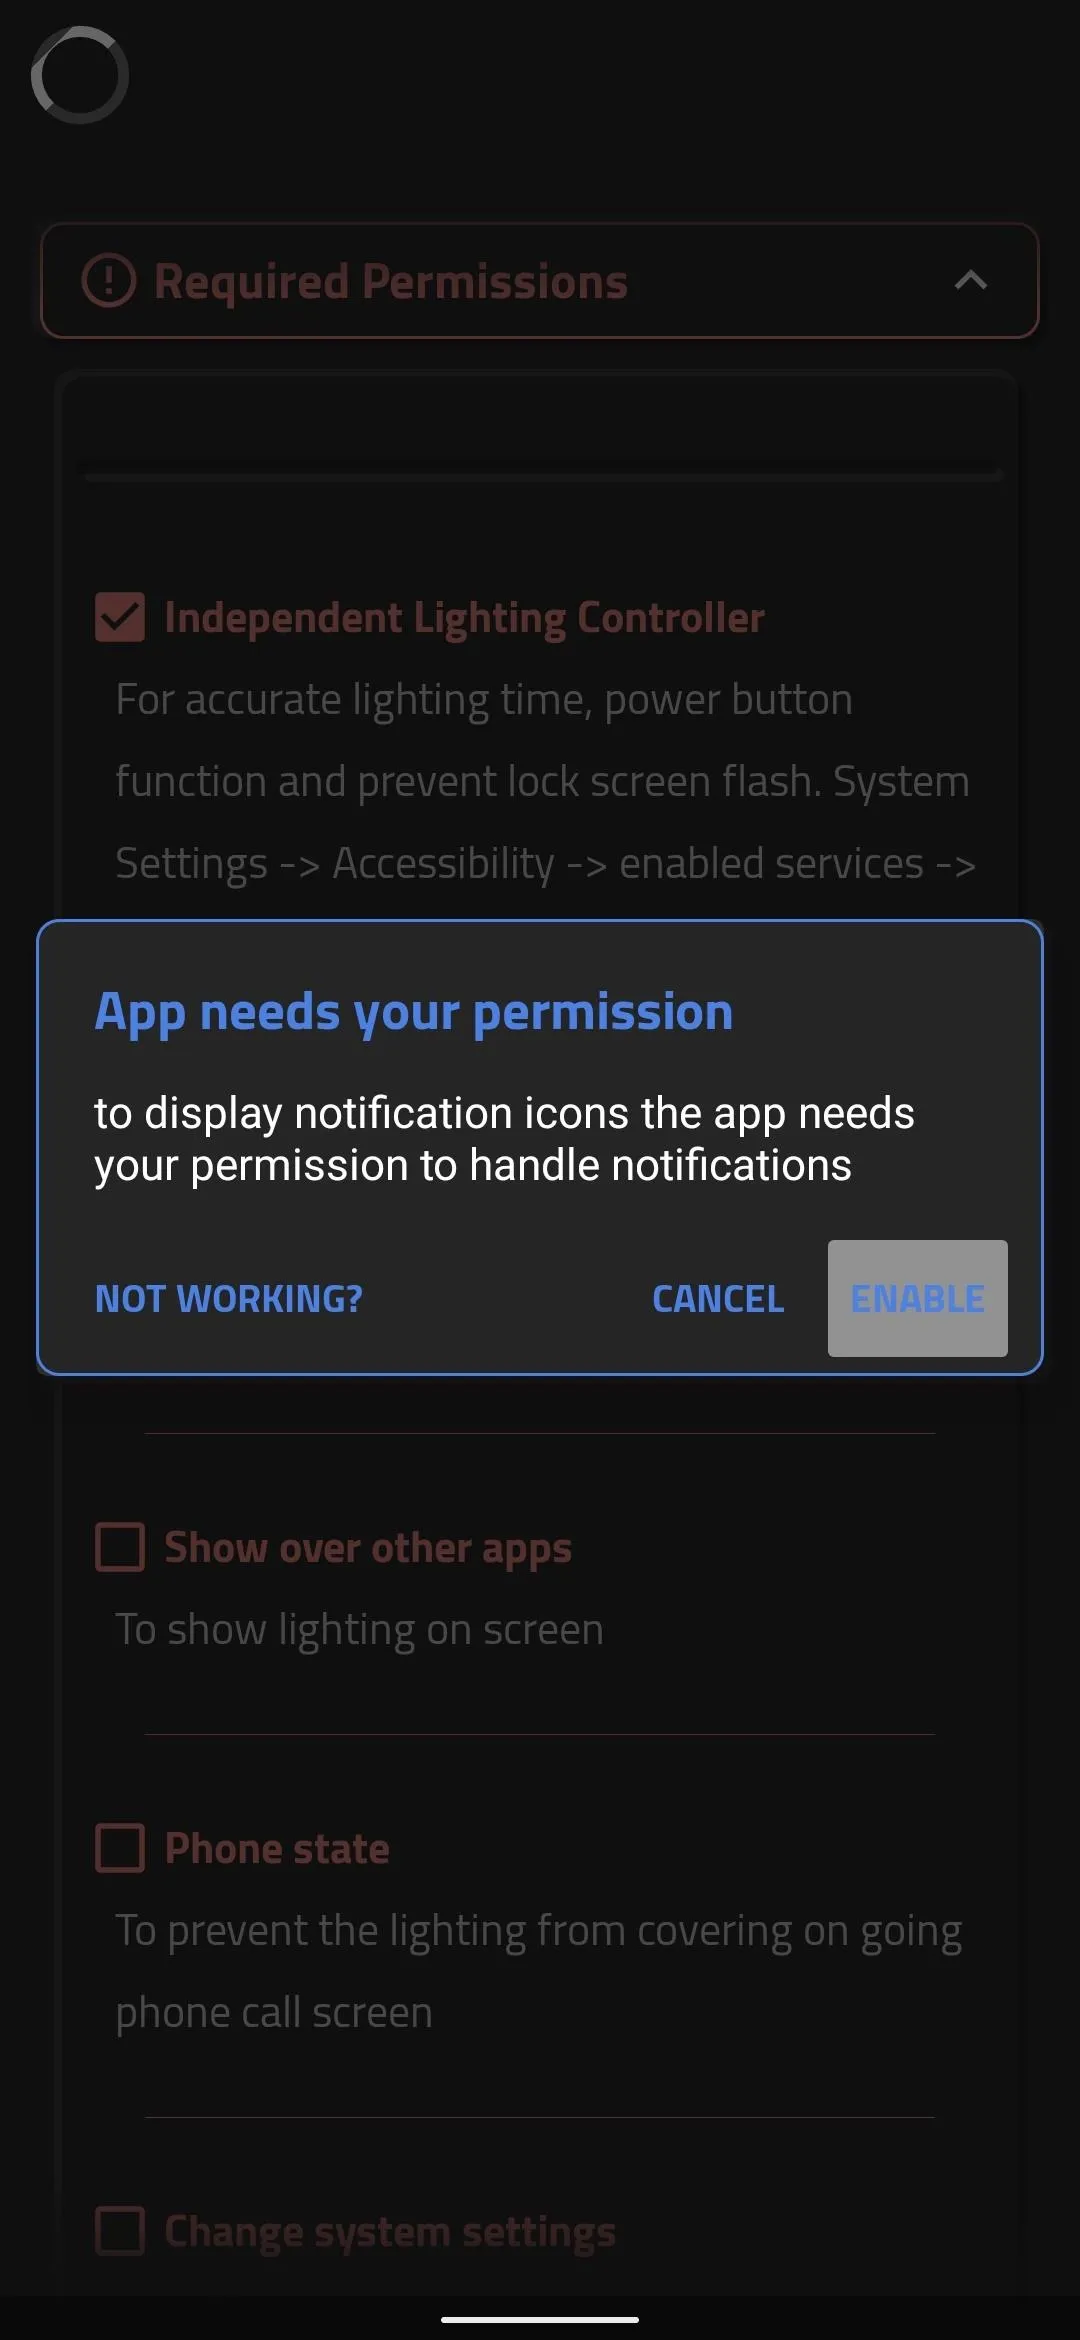
Now, tap the "App Lighting Method" header again to collapse that menu. Beneath it, you'll see another header titled "Required Permissions" — tap this to expand it.
Here, you'll see a list of all the extra permissions the app requires to fully function, and all will have a selection box next to them. Tap the selection box, then the process of enabling each permission will be nearly identical to the first permission you enabled. So find the Always On Edge entry on the system settings menu that appears, then enable the switch and affirm your choice. Repeat this for each entry under "Required Permissions," then tap "Save" at the bottom of this screen.


Enable the Notification Indicator
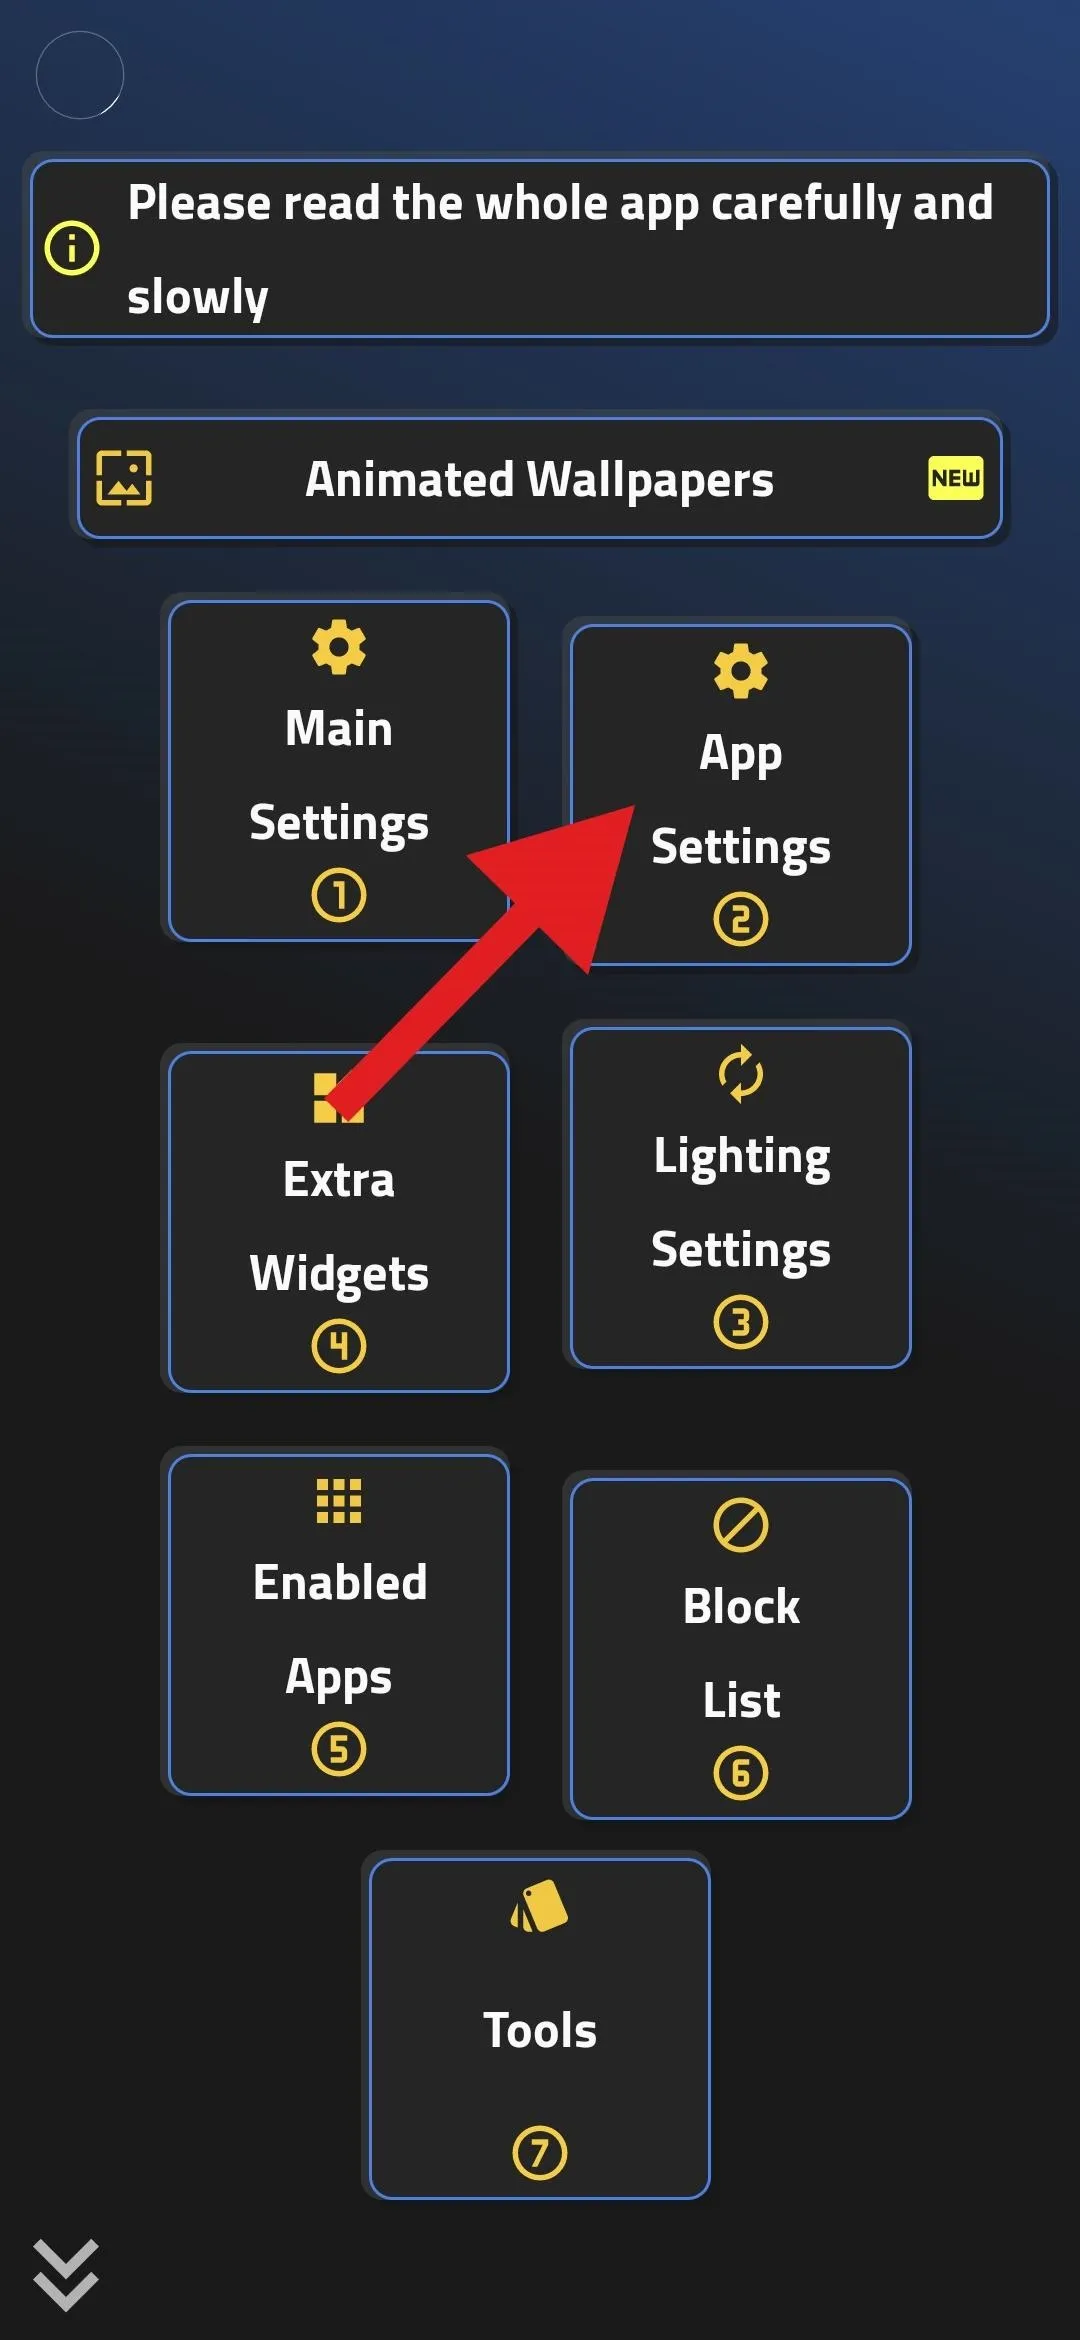
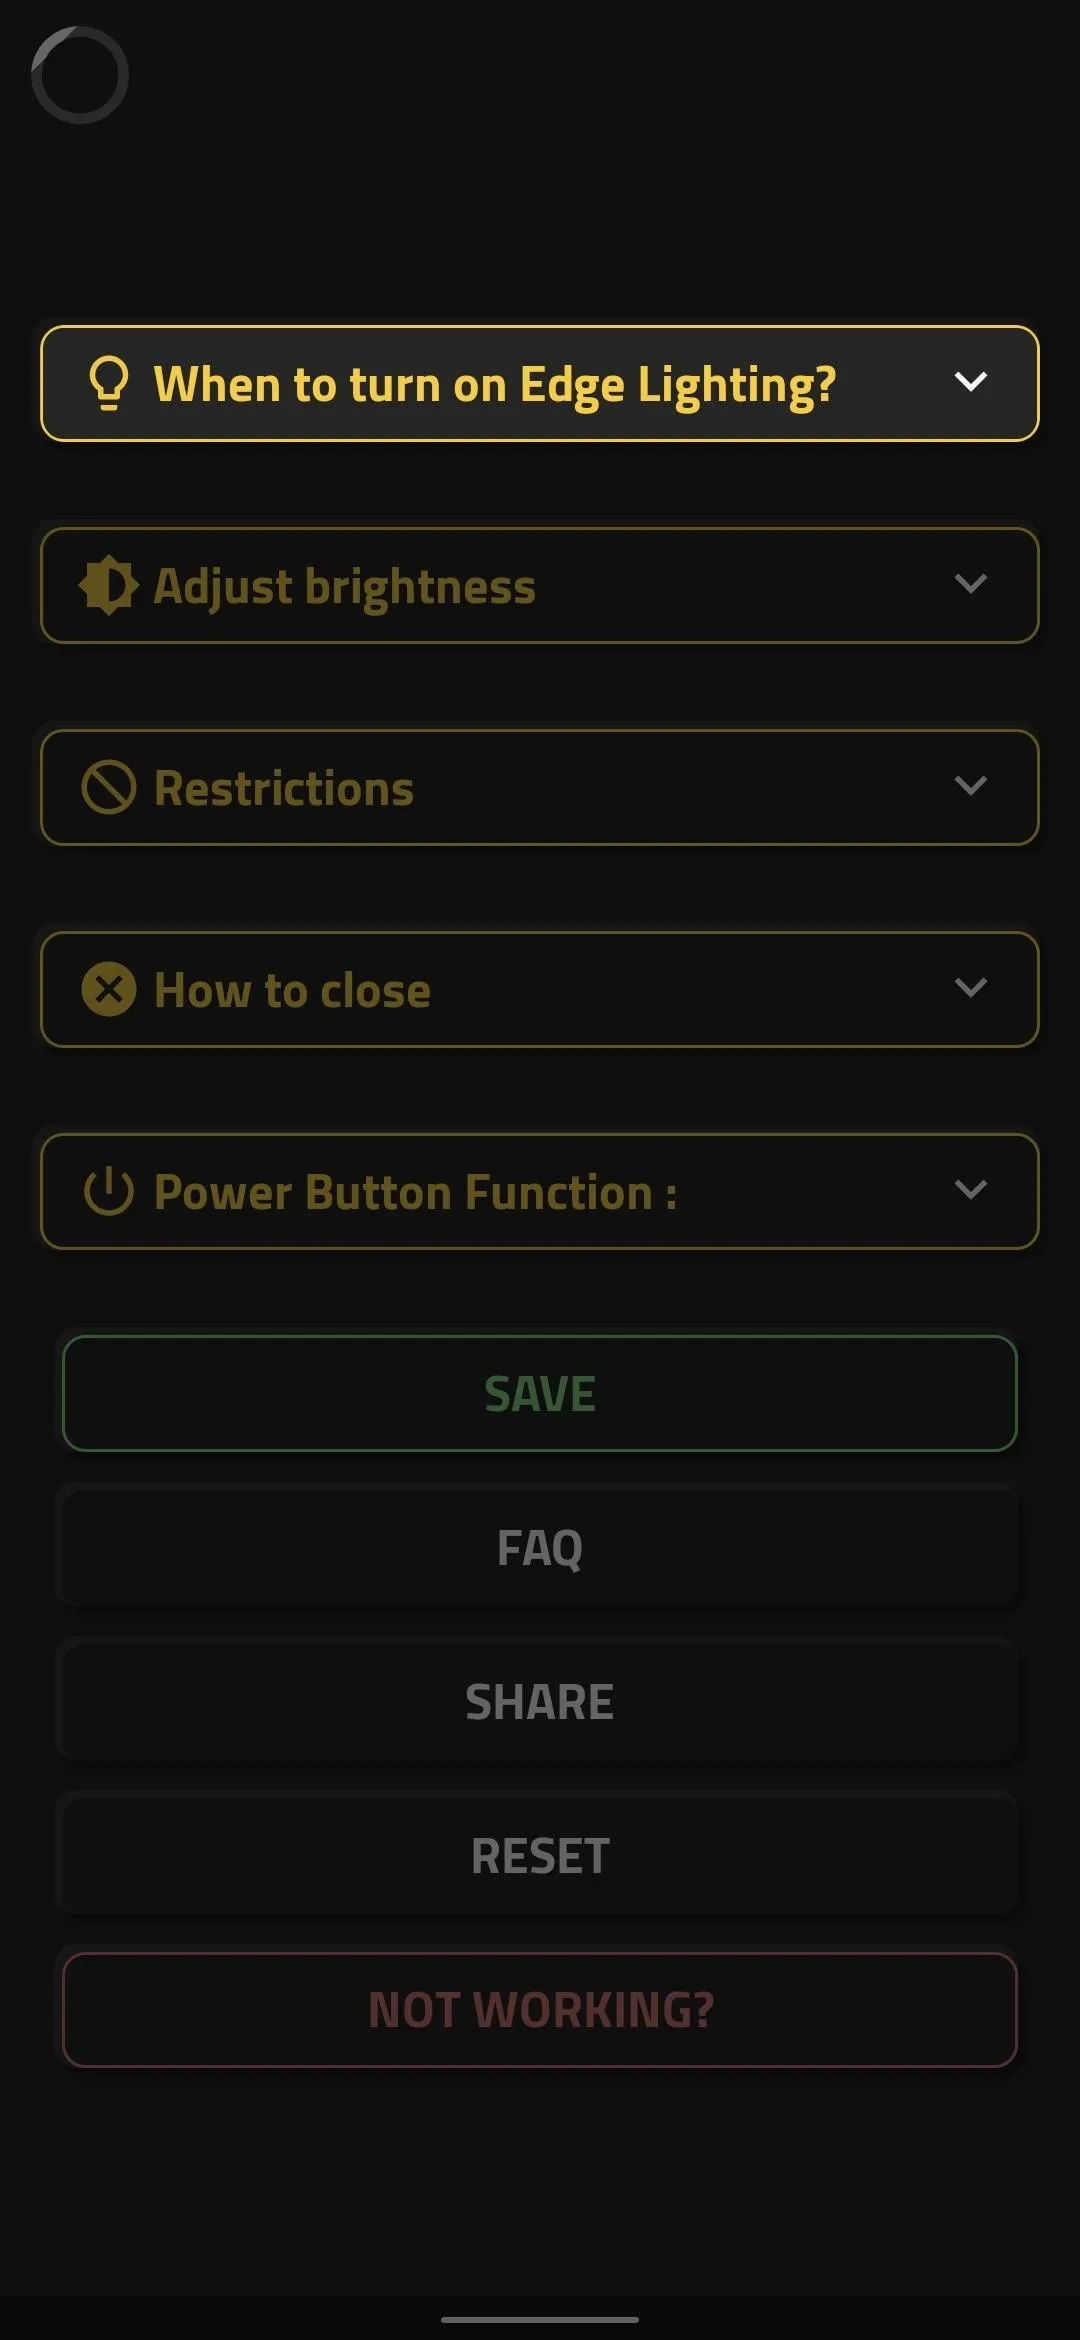
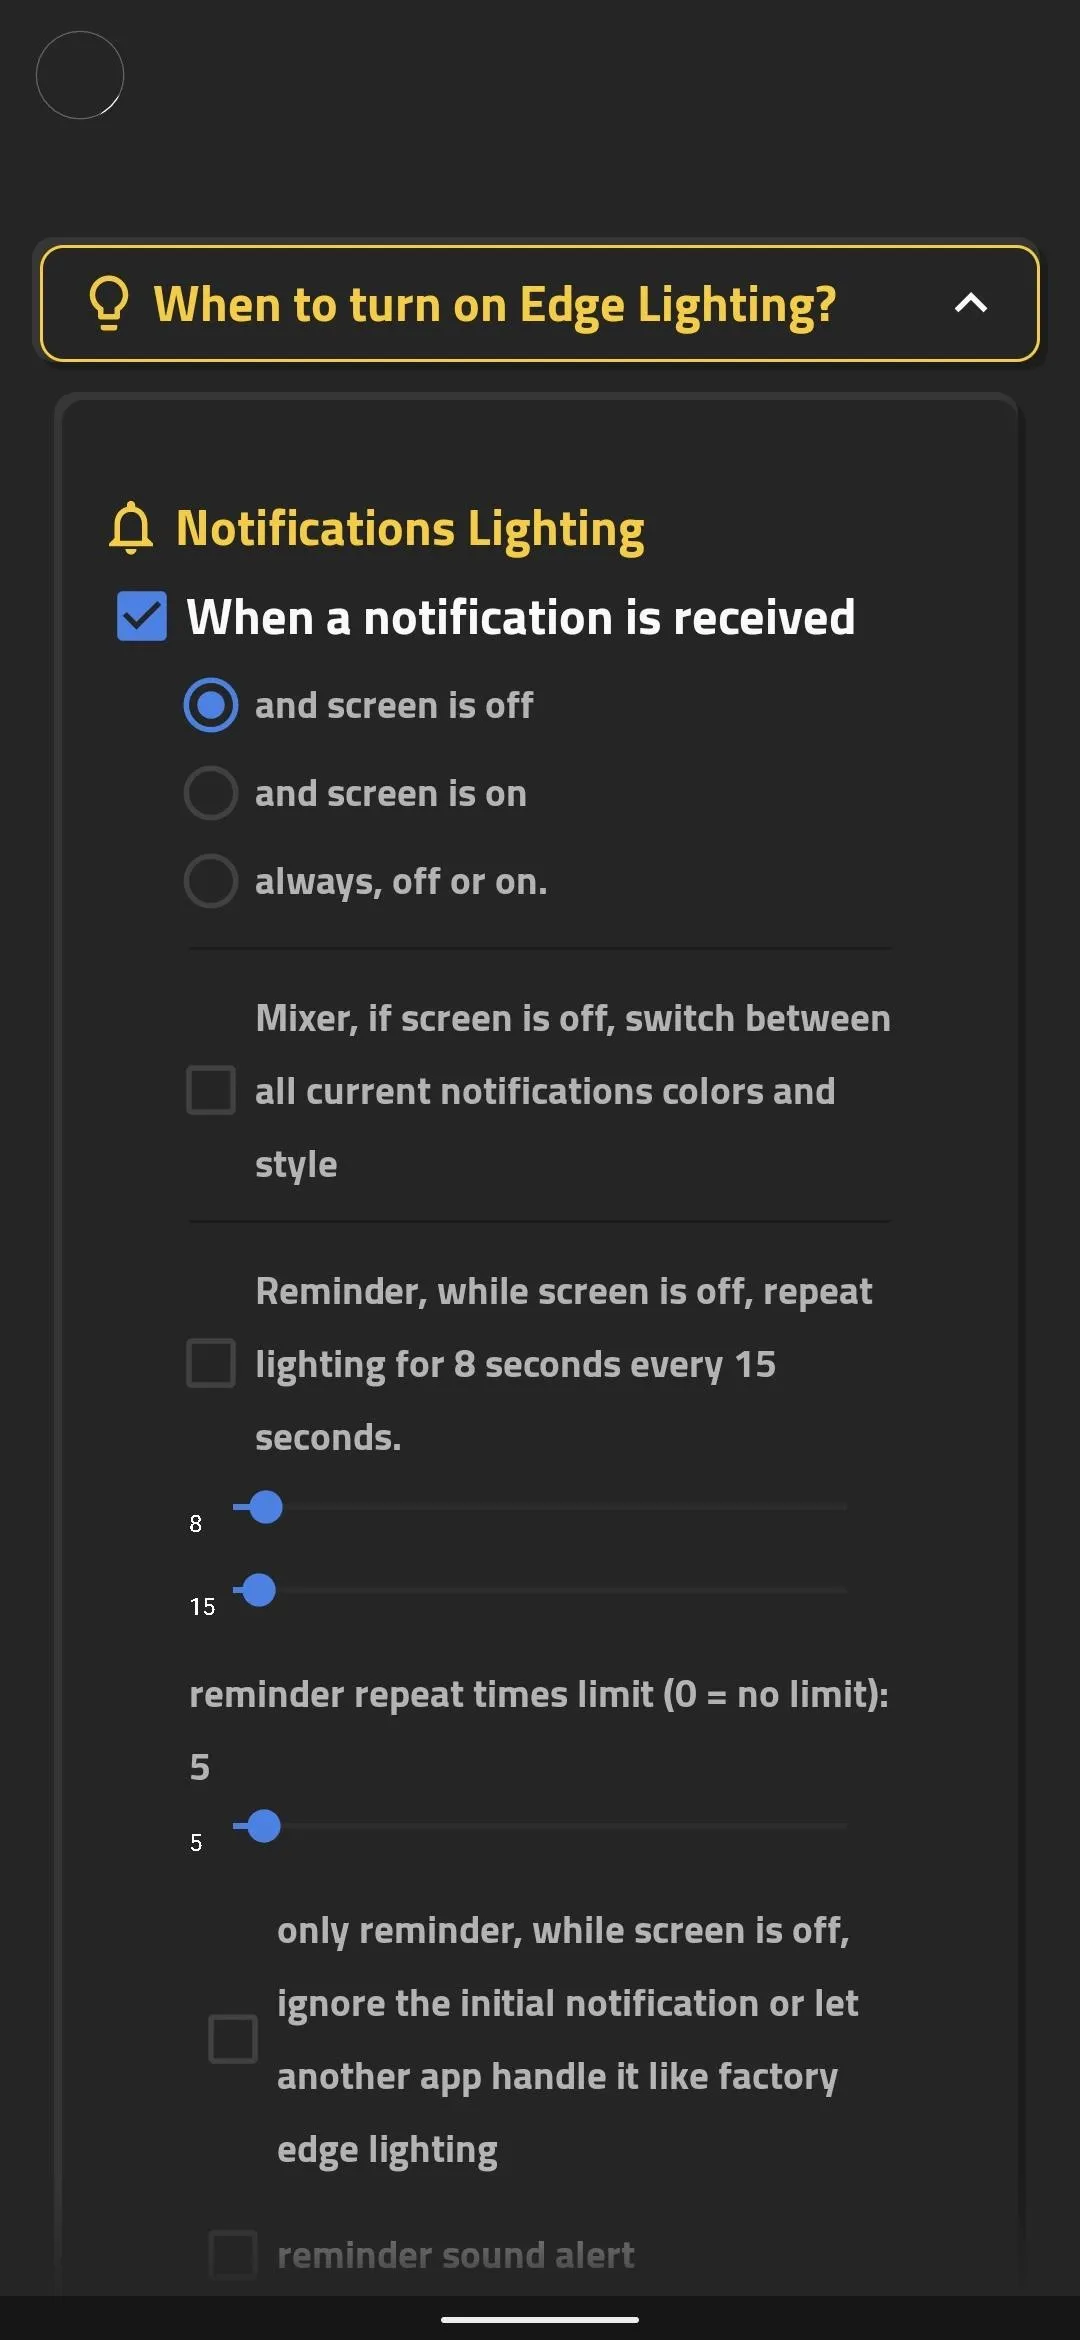
From the app's main menu, tap "App Settings." Here, tap the "When to turn on Edge Lighting" header to expand more options. At a minimum, you'll want to tick the box next to "When a notification is received" and leave the radial selector beneath it set to "and screen is off." When you're done here, make sure to scroll down and tap "Save" at the bottom.


Adjust the Indicator's Theme
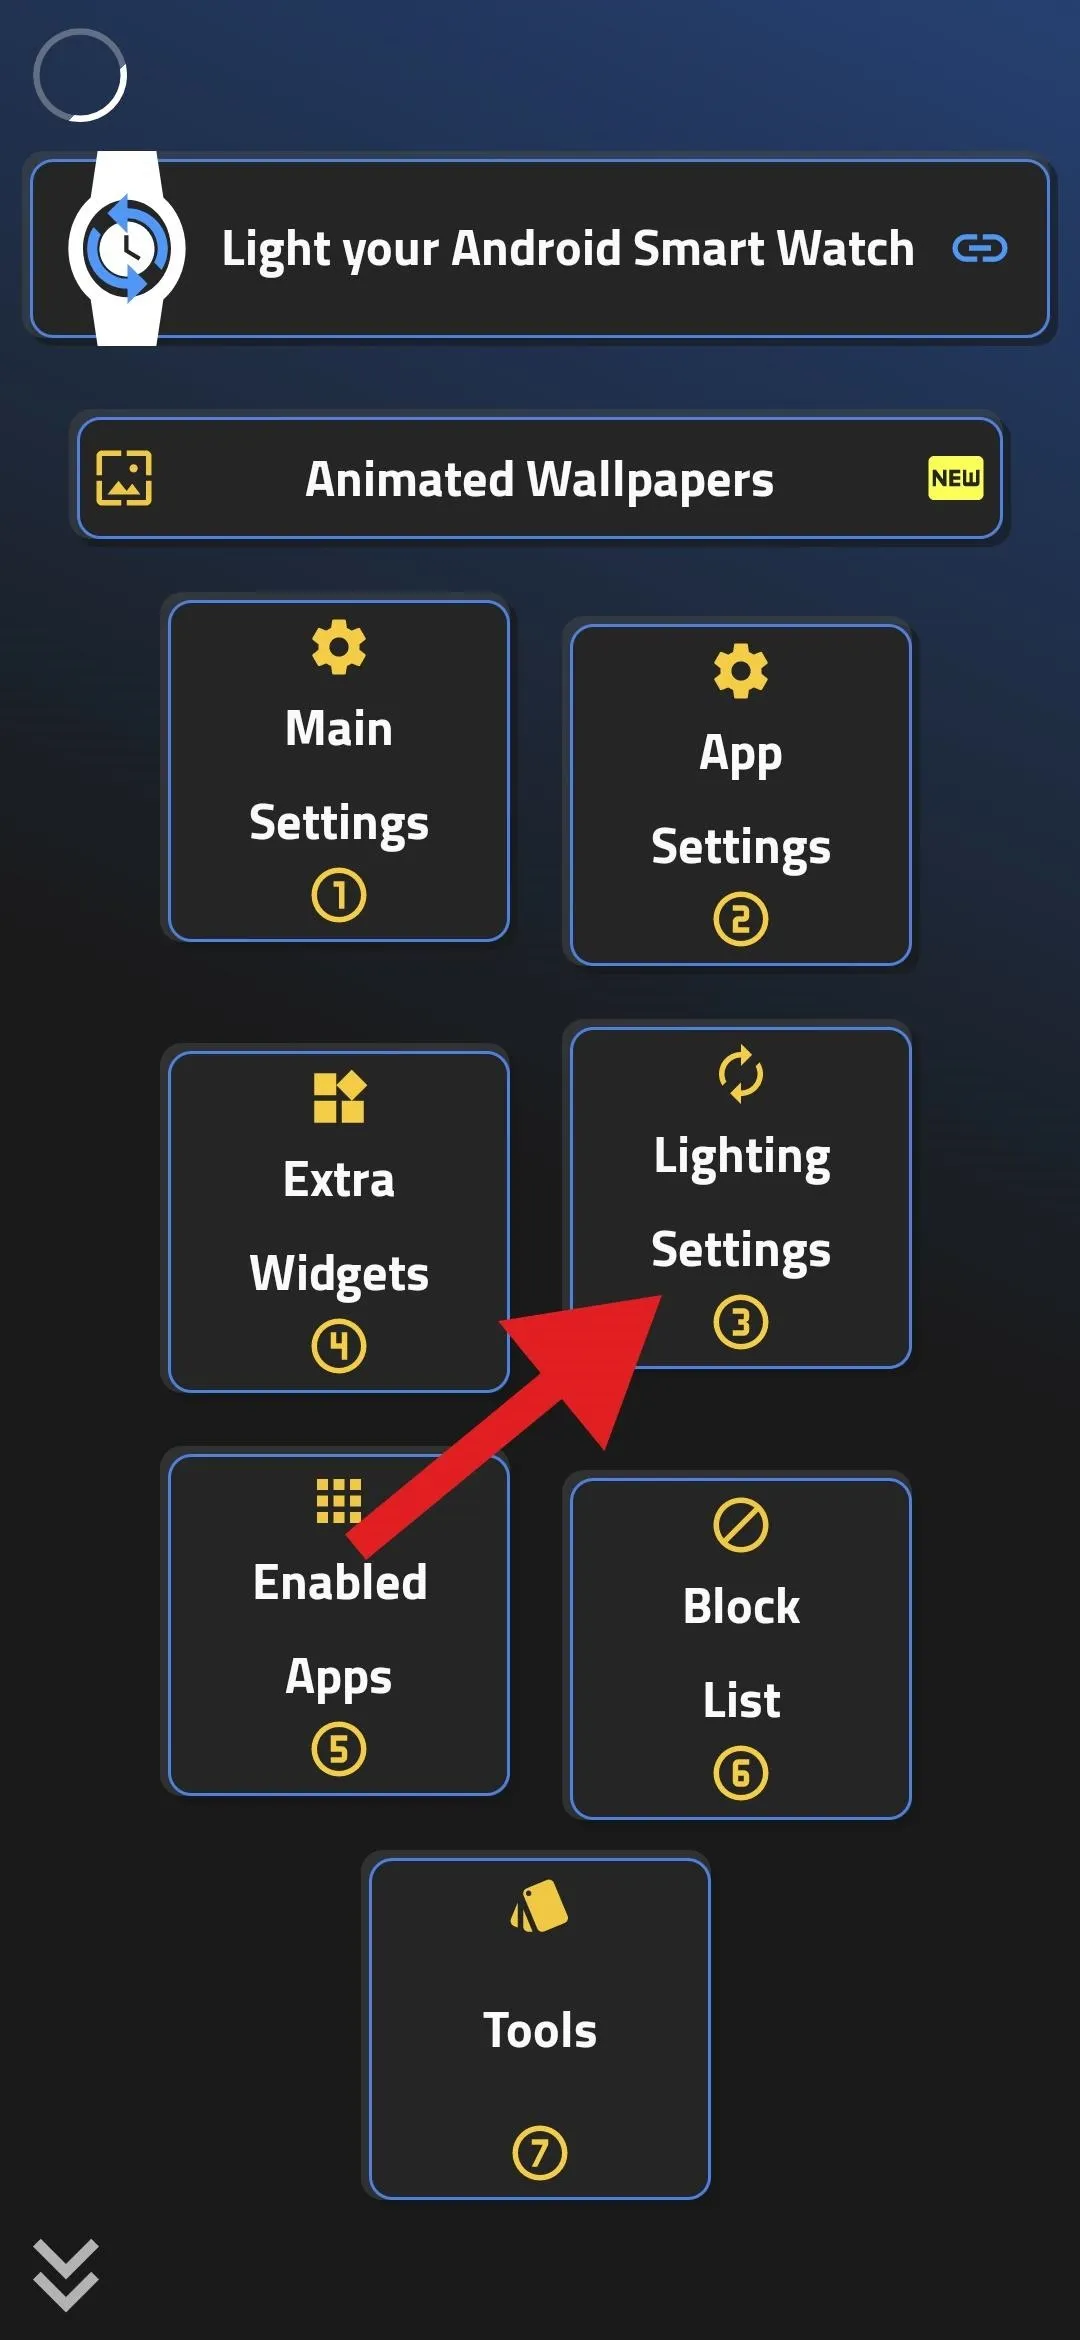
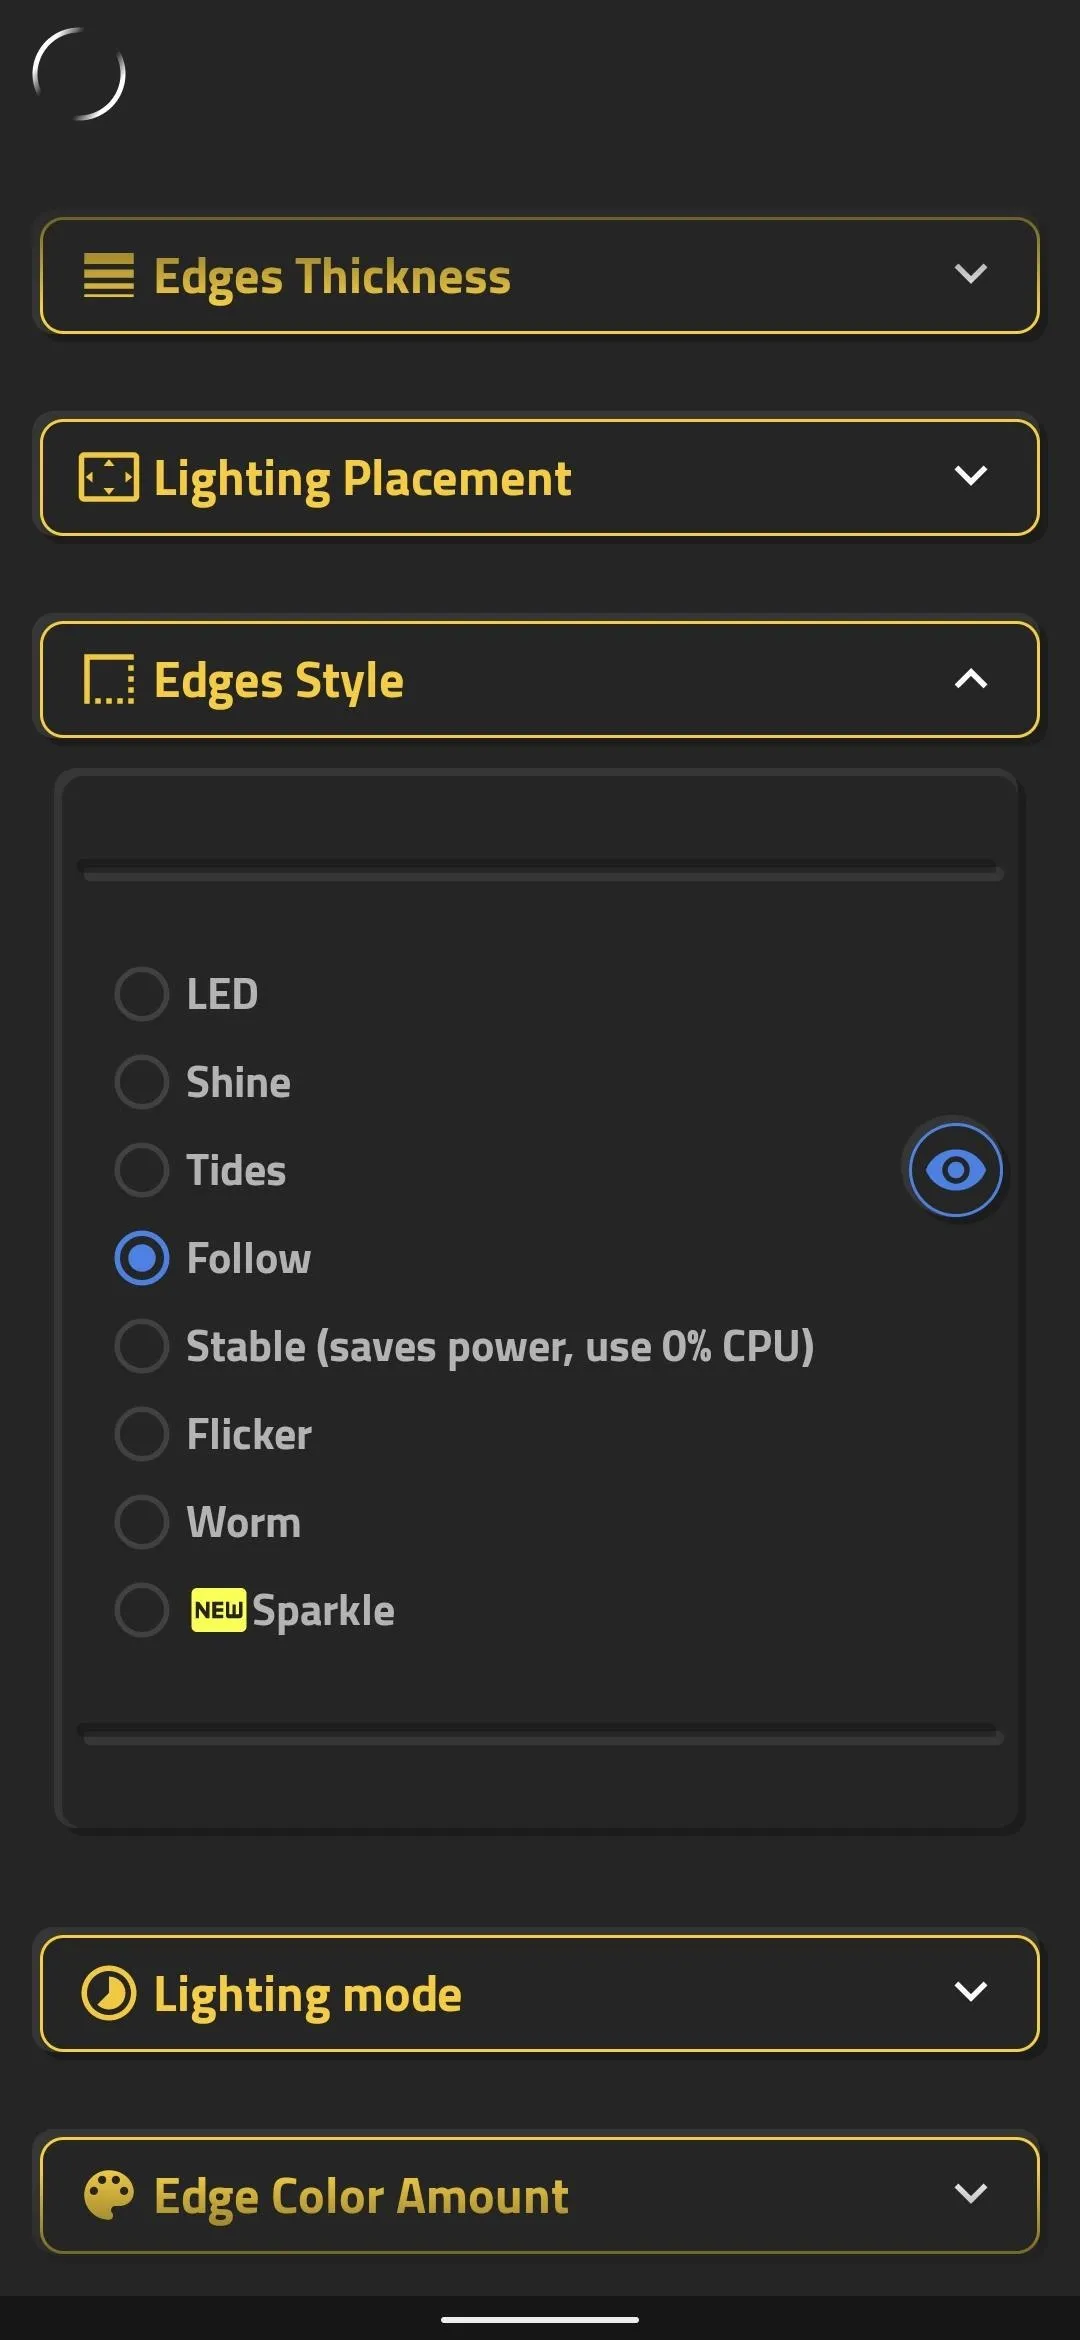
Back at the main menu, tap "Lighting Settings." Here, expand the "Edges Lighting" header and choose an animation you like. When you select one, you'll see a live preview at the top of your screen. I personally like "Follow" and "Sparkle" best, but you do you.
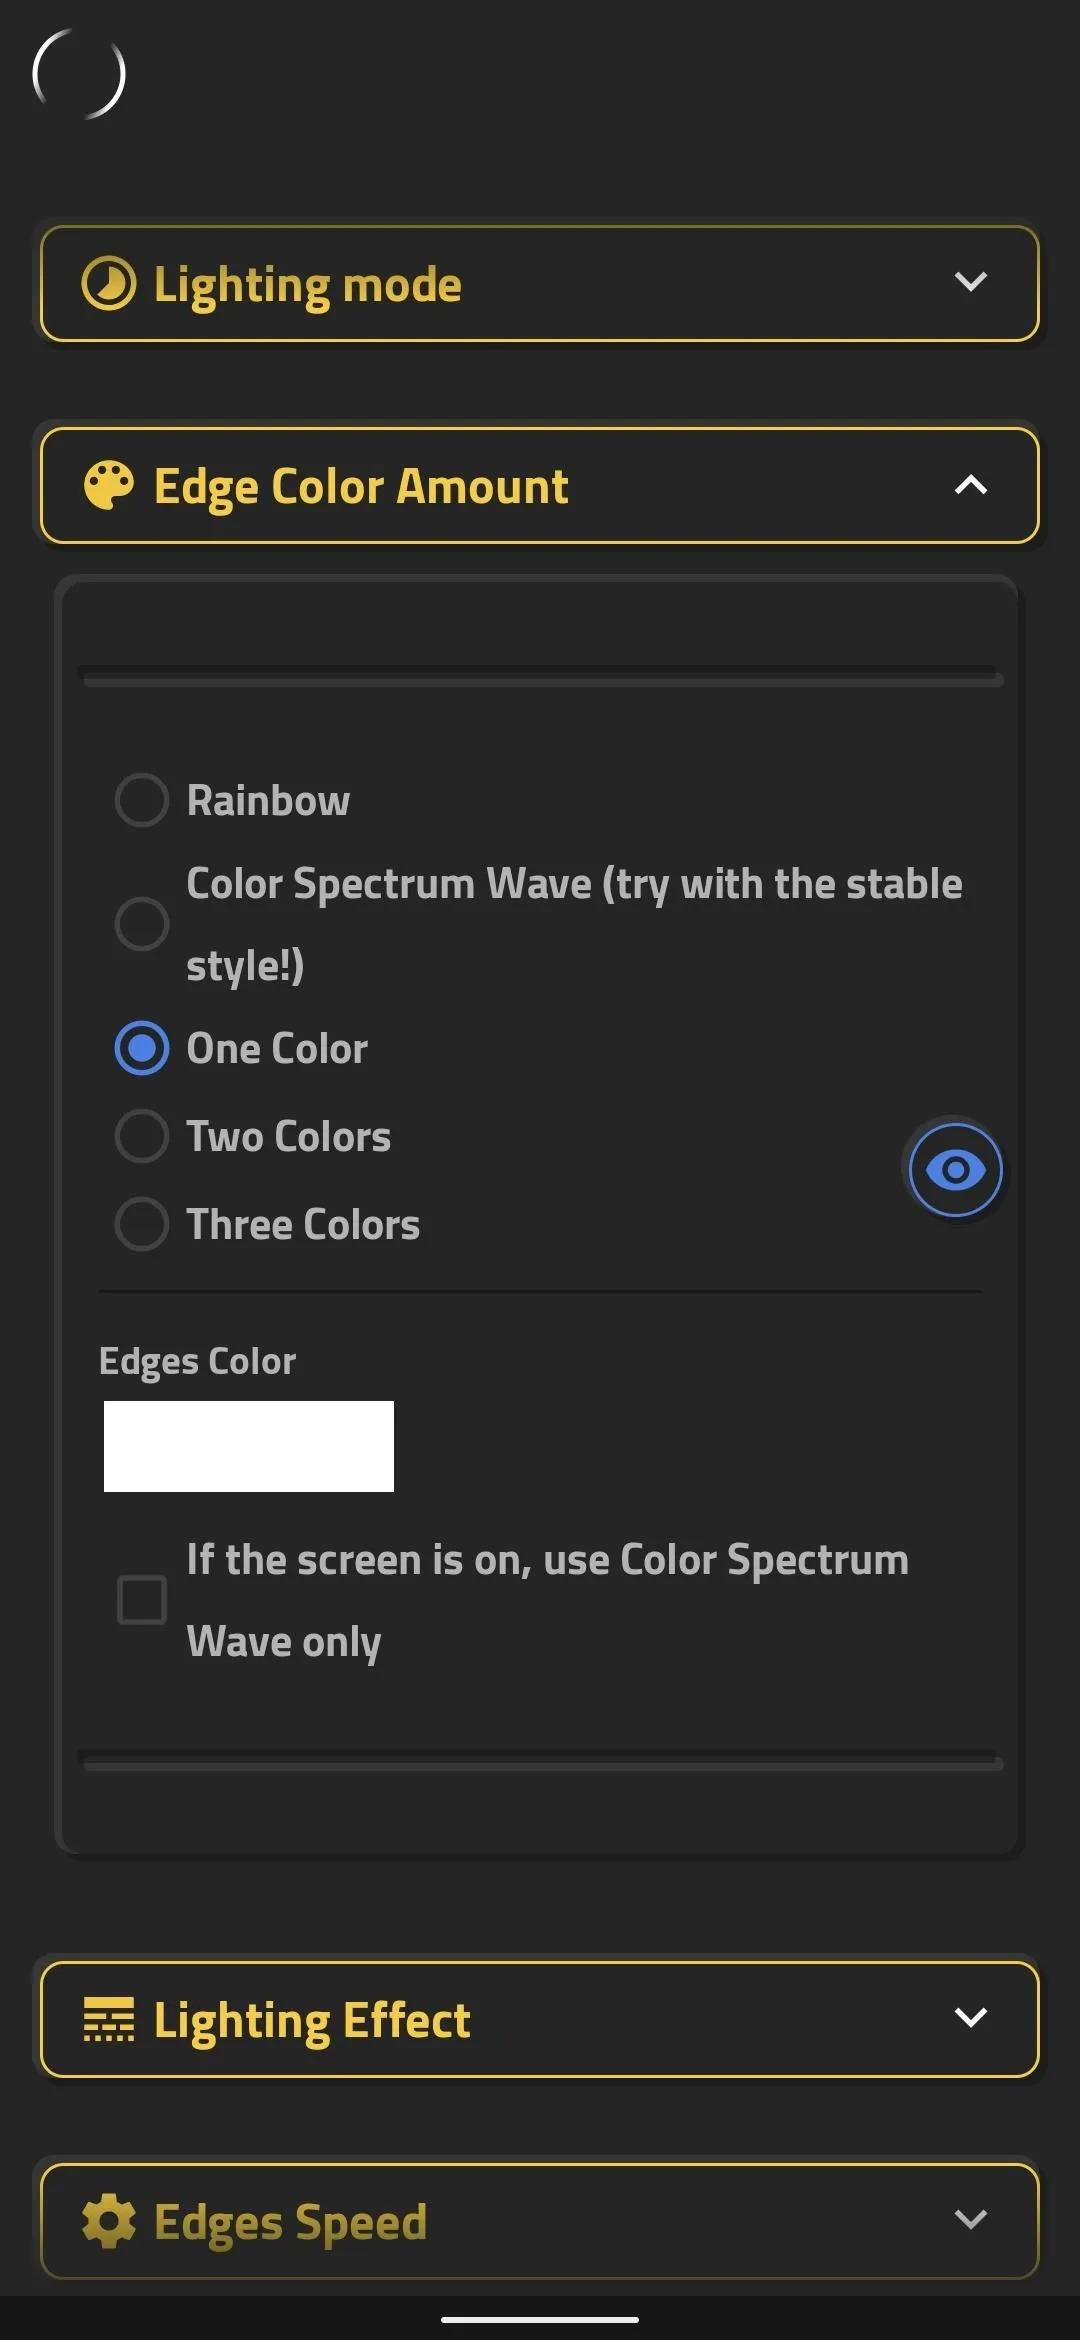
Next, expand the "Edge Color Amount" header and tap the white rectangle beneath "Edges Color" to change the color of your notification indicator. It's a full RGB menu, so you can select any imaginable color. You can also opt for a "Rainbow" indicator or other styles, but these require the pro version for $2.99. When you like your indicator's appearance, scroll down and tap "Save."


Choose Which Apps Will Trigger the Indicator
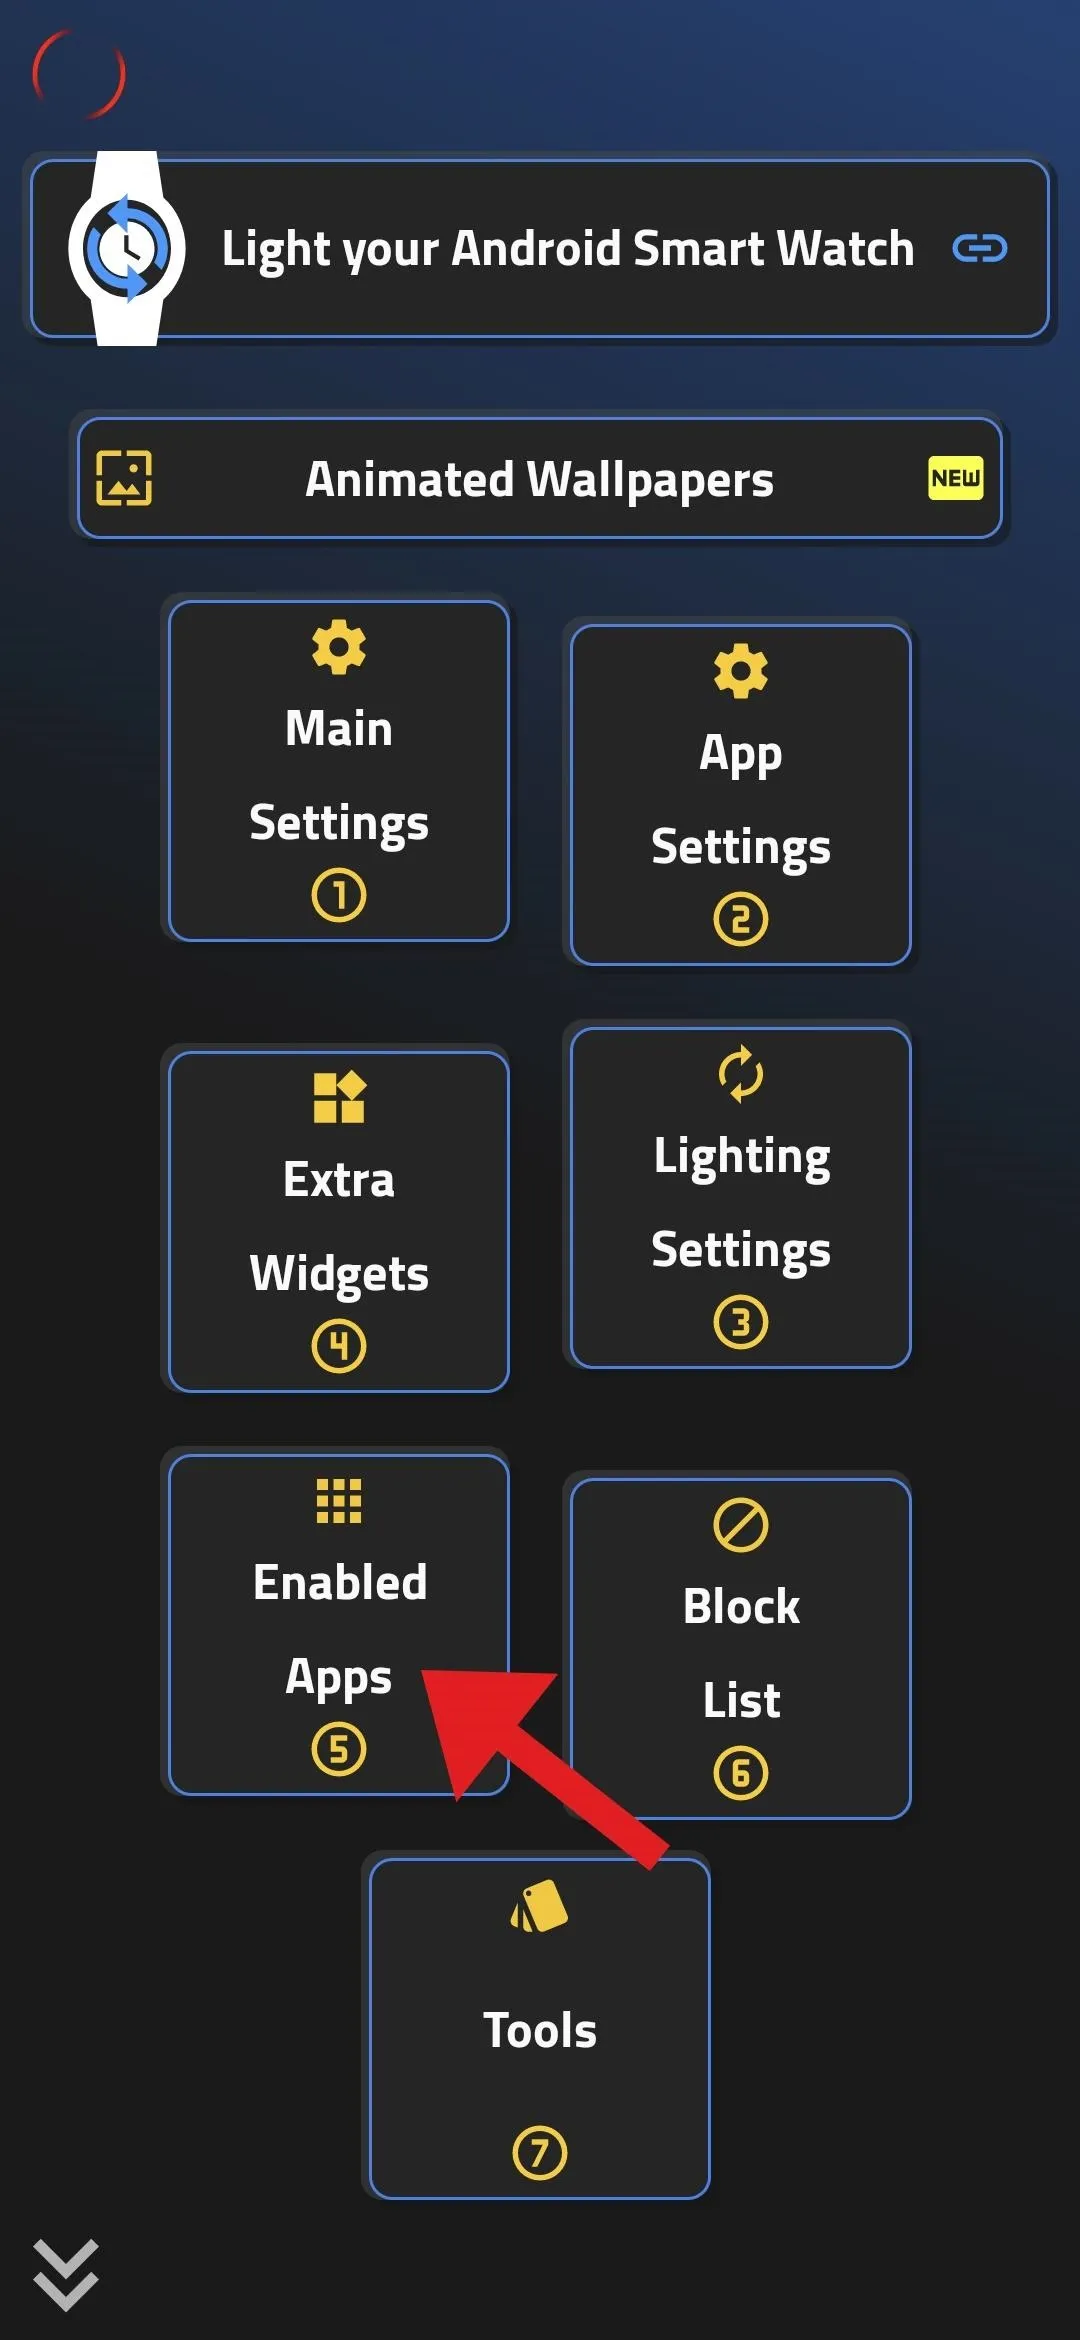
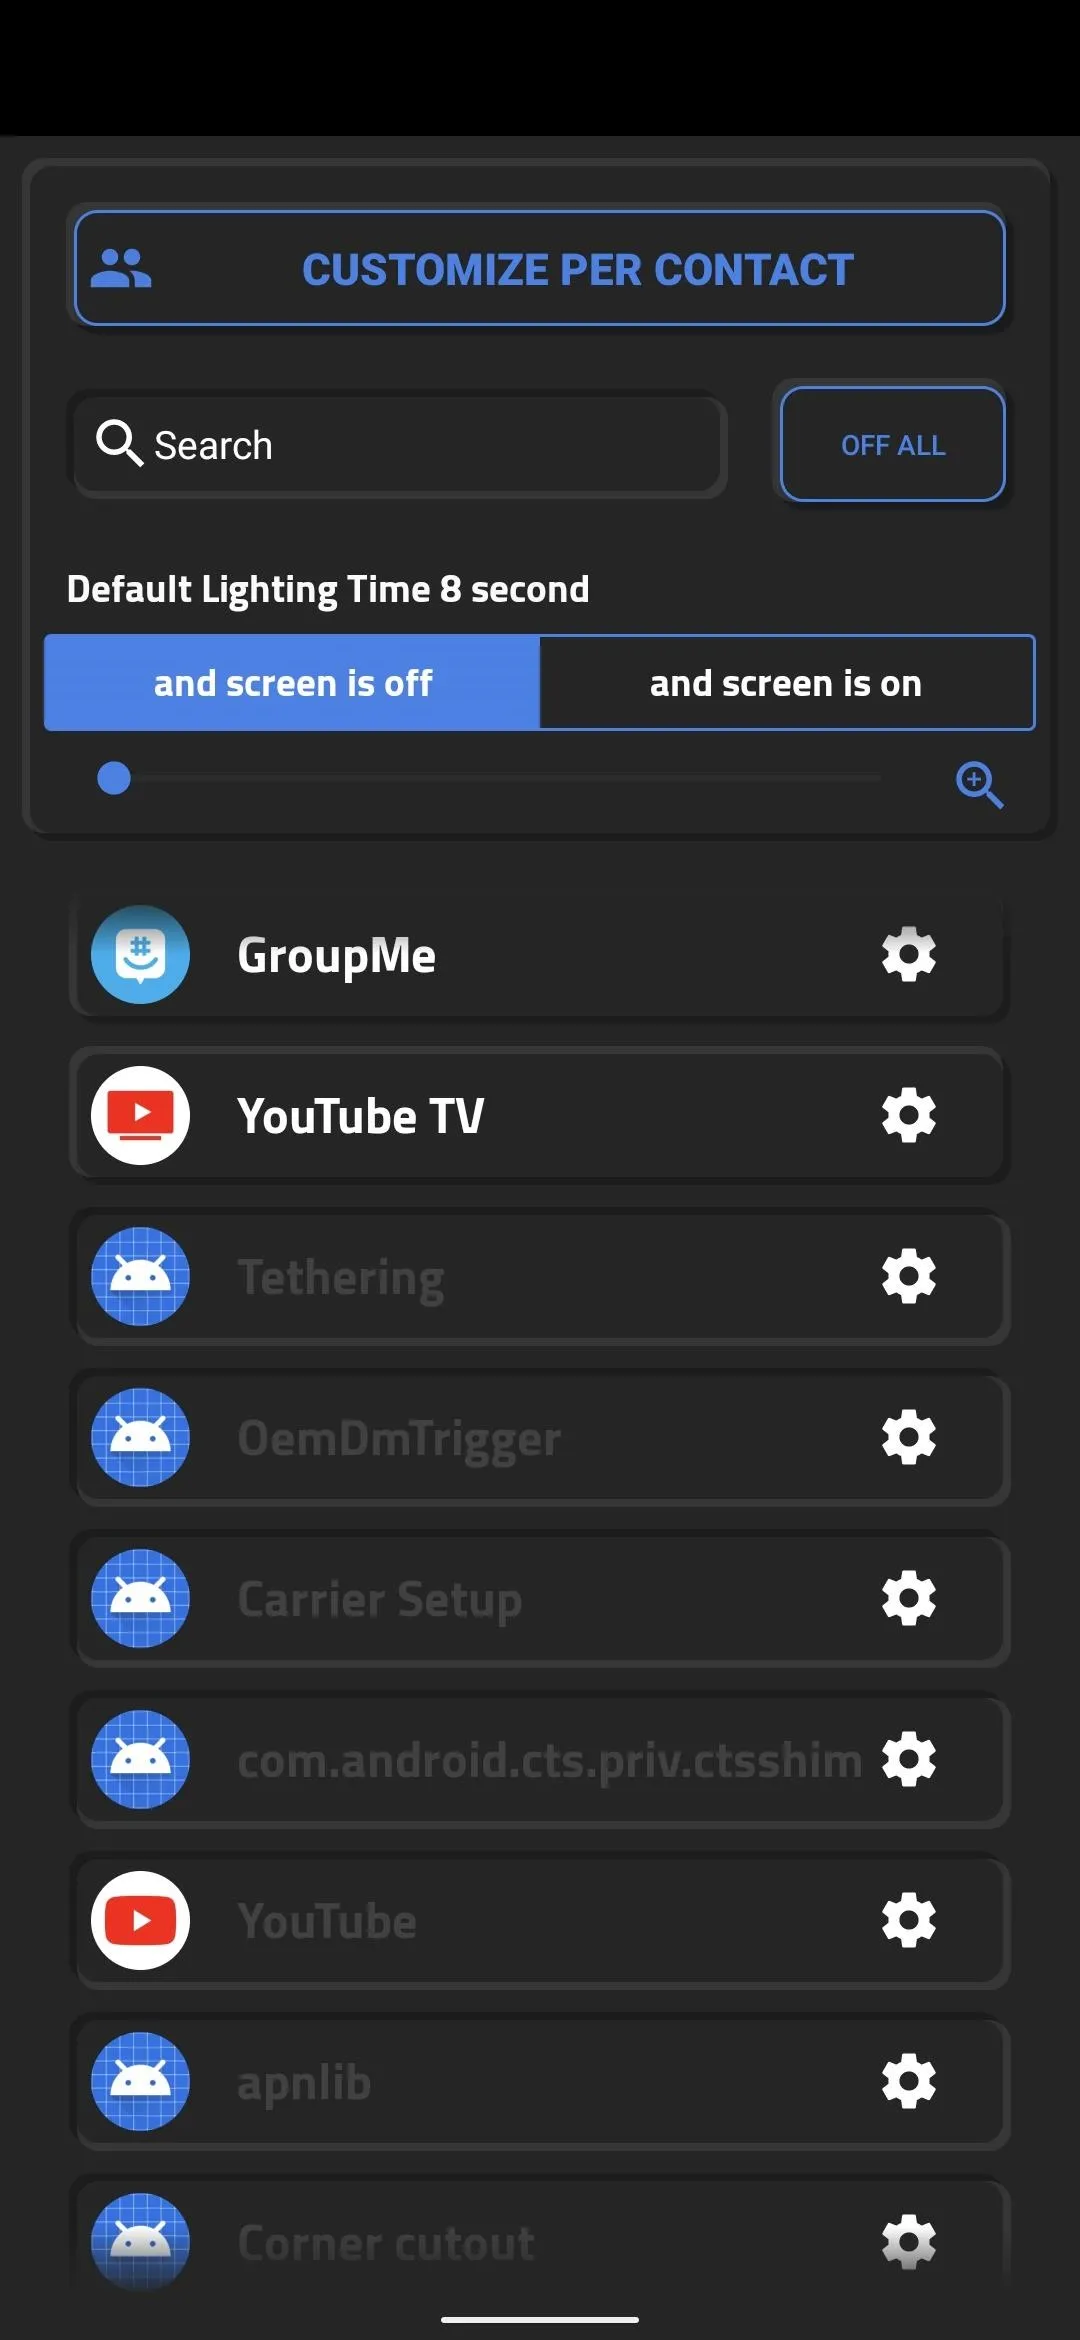
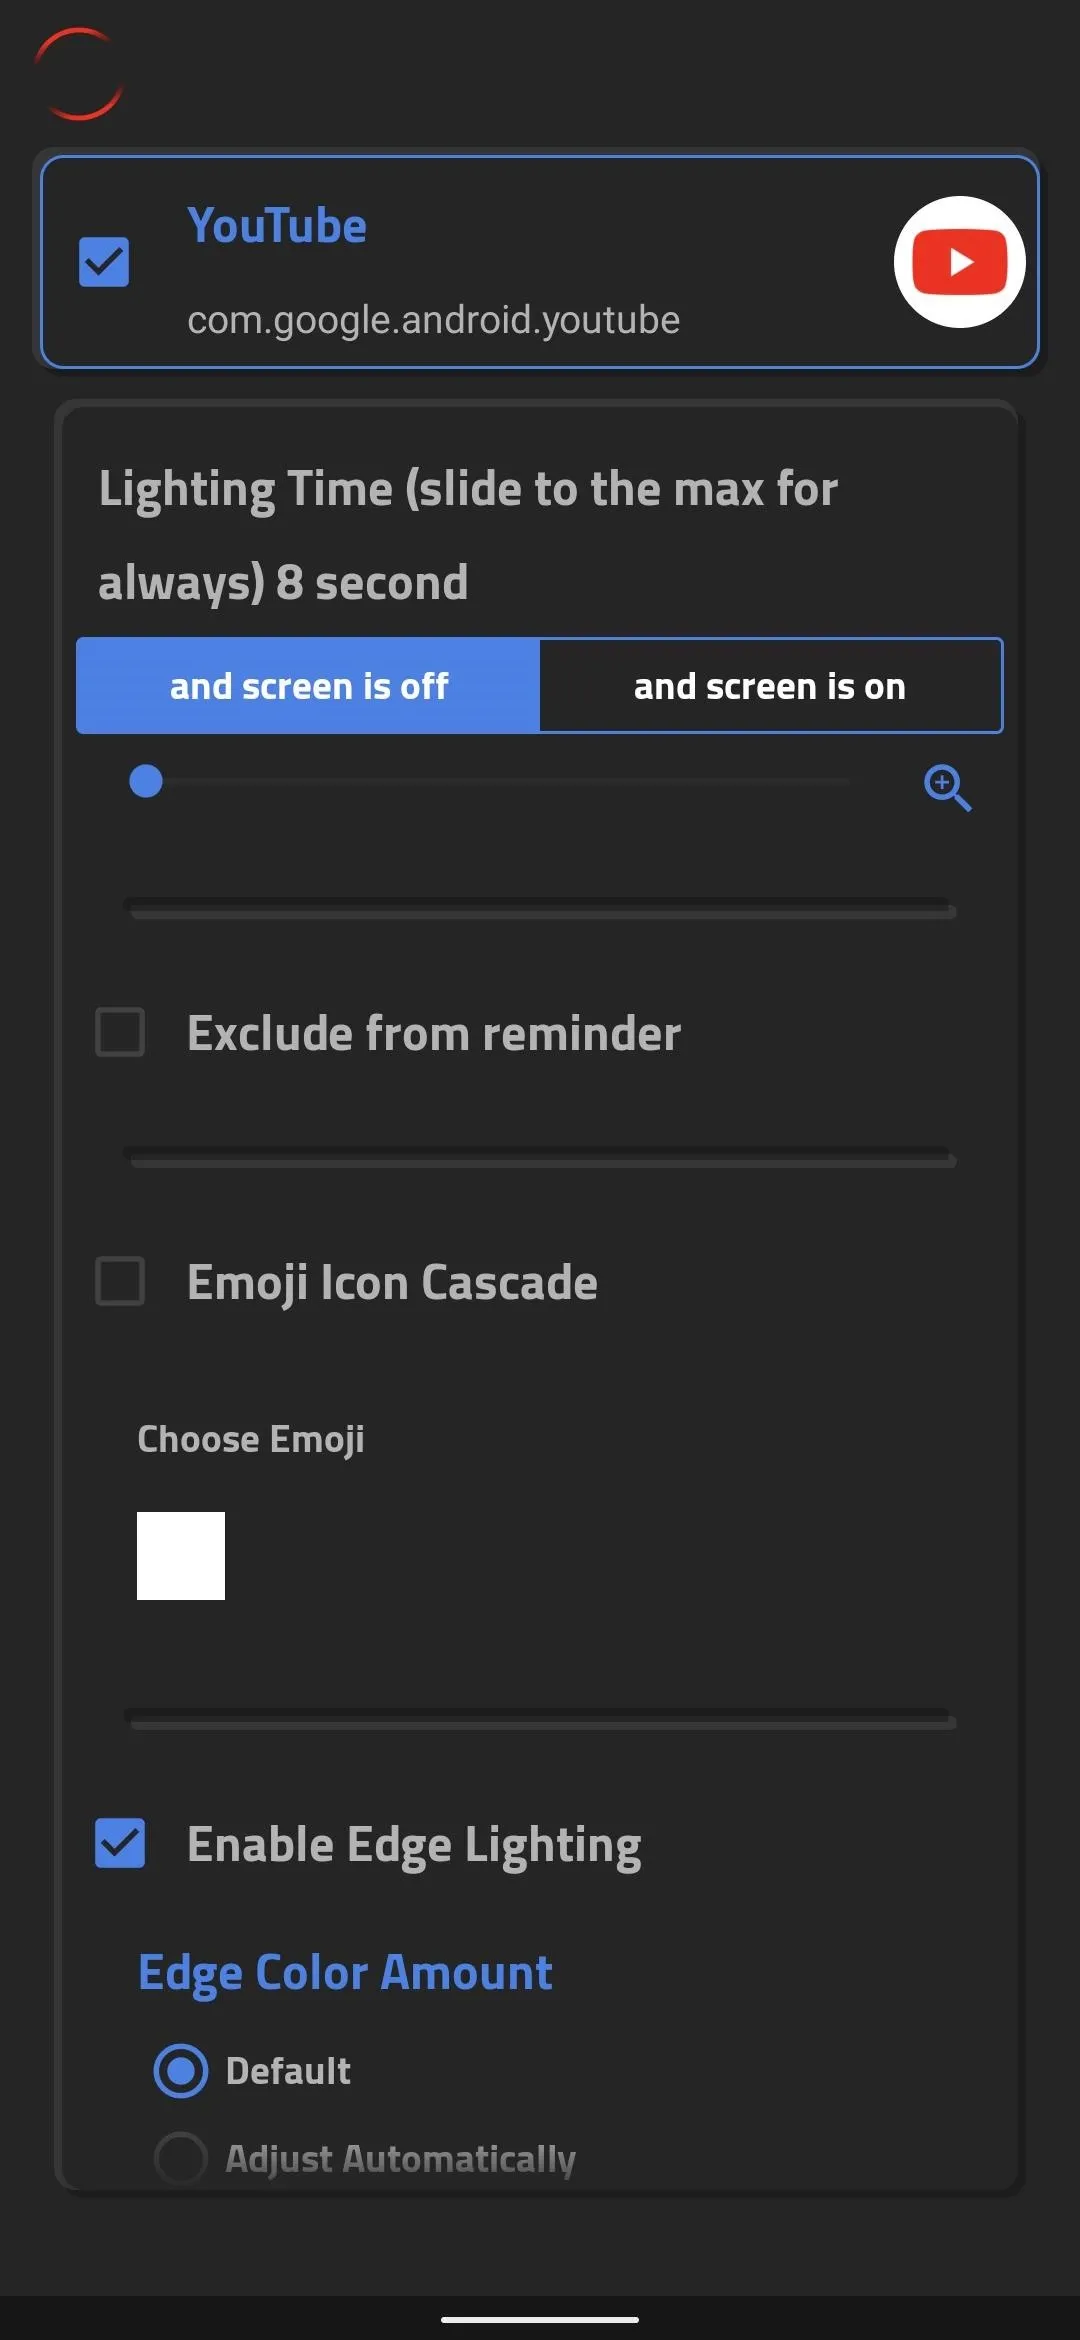
Next, select "Enabled Apps" from the main menu. Here, apps listed with bold, white text will trigger the indicator to appear when they post notifications. Contrarily, the grayed out ones won't. So go through the list, and if an app you want to use this feature with is grayed out, tap the settings cog next to it. There, tick the box at the top of the screen to enable the app.


Enjoy Your New Notification 'LED'
You're all set at this point. Just wait until you get a notification, then you'll see your colorful new indicator encircling the camera cutout with a fluid animation!

Cover image, screenshots, and GIF by Dallas Thomas/Gadget Hacks



Comments
No Comments Exist
Be the first, drop a comment!