
NFC, or near-field communications, is a hardware feature that has been built into most Android phones for the last four years. It's essentially a low-power data connection that can be used to initiate a quick command by bringing your device within range of a compatible receiver, be it tap-and-pay with Google Wallet, a file transfer via Android Beam, or a Tasker profile triggered by a specific NFC tag.
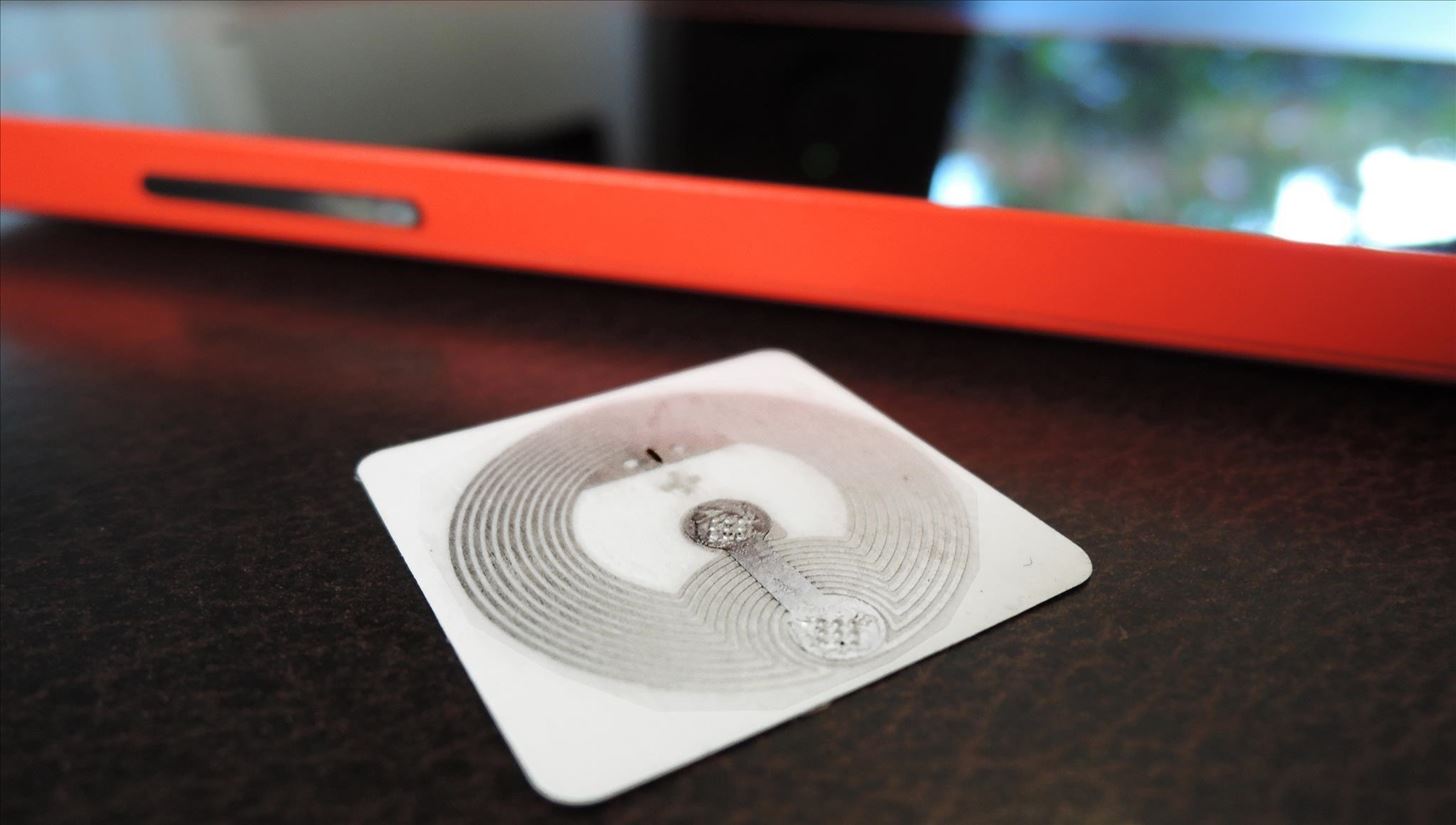
That last example has quite a few practical implementations. NFC tags can be purchased for less than a dollar each, and when combined with an automation app, can trigger a series of events on your phone and even in the real world. All of this occurs by simply placing your phone within range of the NFC-embedded sticker.
With that in mind, the folks over at Rice Or Noodles came up with a rather innovative way to put your phone's NFC reader to good use. After a bit of one-time setup, you'll be able to power on your Windows PC by simply laying your phone down on your desk—I'll outline the process in more detail below.
Requirements
- Any NFC-enabled Android device
- A Windows PC
- One NFC tag (Available on Amazon and other online retailers)
Step 1: Prepare Your PC
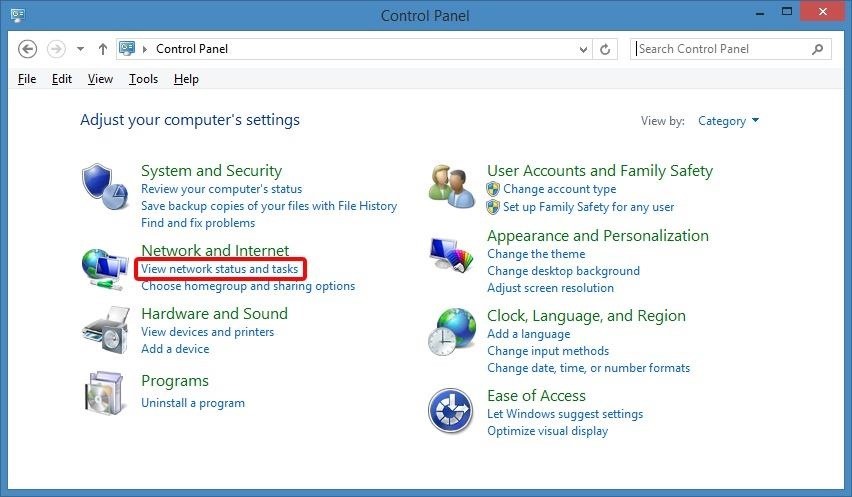
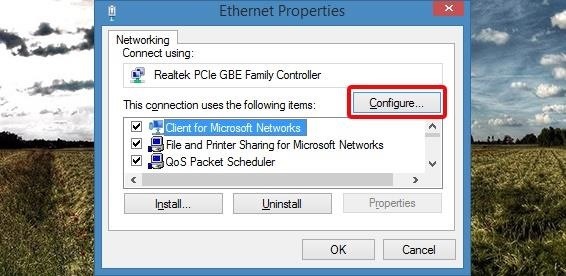
First and foremost, you'll need to make sure your PC is set to allow for "Wake on LAN" commands. Open your Control Panel, then click "View network status and tasks" to begin.
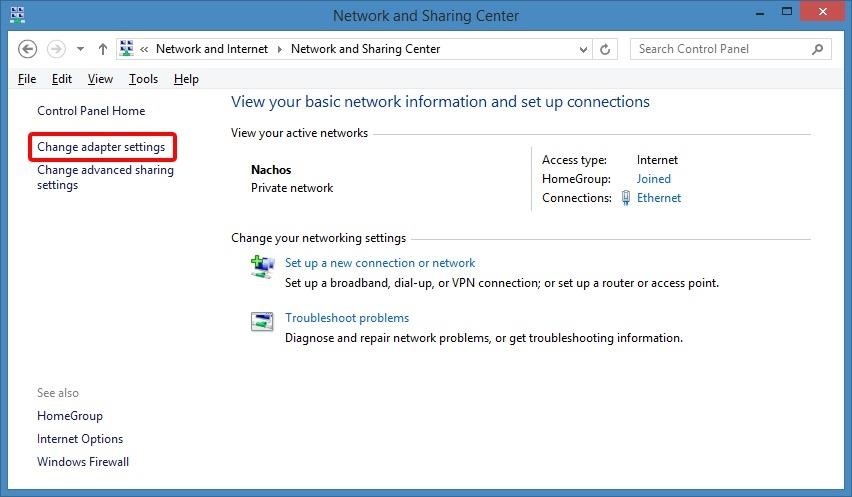
From the next menu, click "Change adapter settings" in the left pane.
After that, right-click your primary internet connection, then select "Properties."

From here, click the "Configure" button near the top of the windows that appears next.
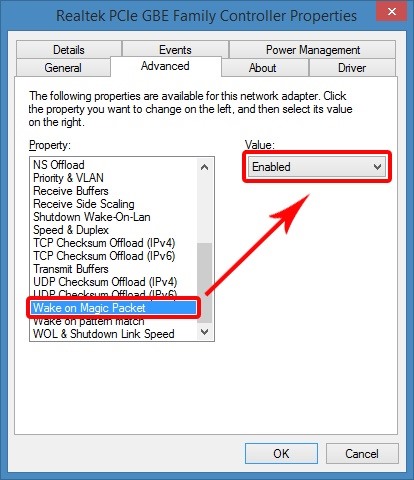
After that, head to the Advanced tab, then make sure the "Wake on magic packet" option is enabled.

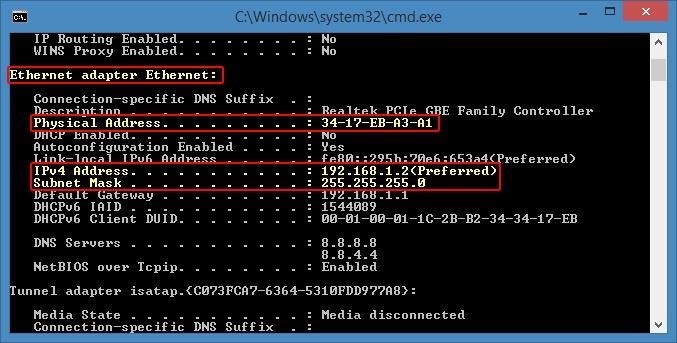
Step 2: Write Down Your IP & MAC Addresses
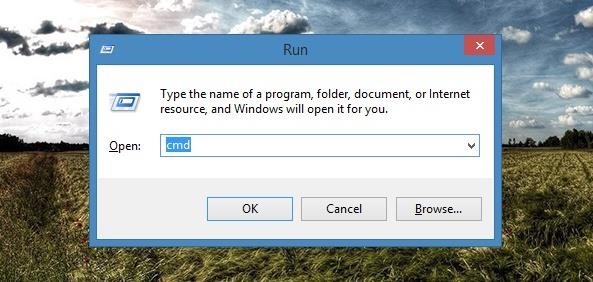
With your computer now set up properly, you'll need to jot down a few numbers in preparation for the setup on your Android device. On your keyboard, hold down the Windows button, then press "R" to open the Run dialog. From here, type "cmd" and click "OK."
In the command prompt window, type the following command, then hit enter:
- ipconfig /all
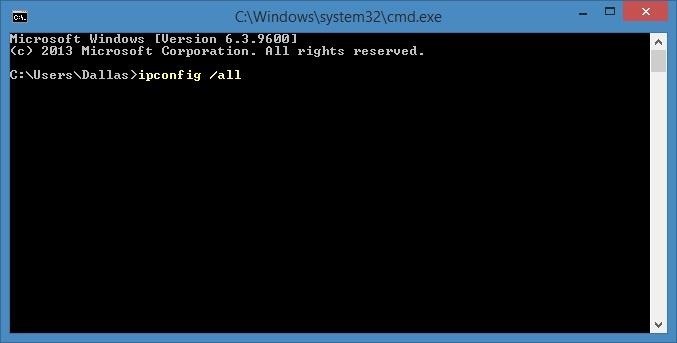
Next, scroll through the list and find the "Ethernet Adapter" section. Write the values for Physical Address, IPV4 Address, and Subnet Mask on a piece of paper.
Step 3: Install Tasker, Trigger, & WoL Wake on Lan Wan
Next, there are a few apps you'll need to install on your Android device to get this going.

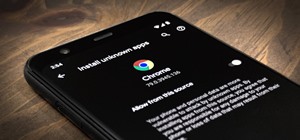
First is Tasker, which is a paid app that runs for $2.99. If you'd rather try before you buy, you can use the 7-day trial version from this link, but make sure that "Unknown Sources" is enabled in your phone's settings under "Security" before you launch the installer file.
After that, install Trigger, which will be used to read your NFC tag.
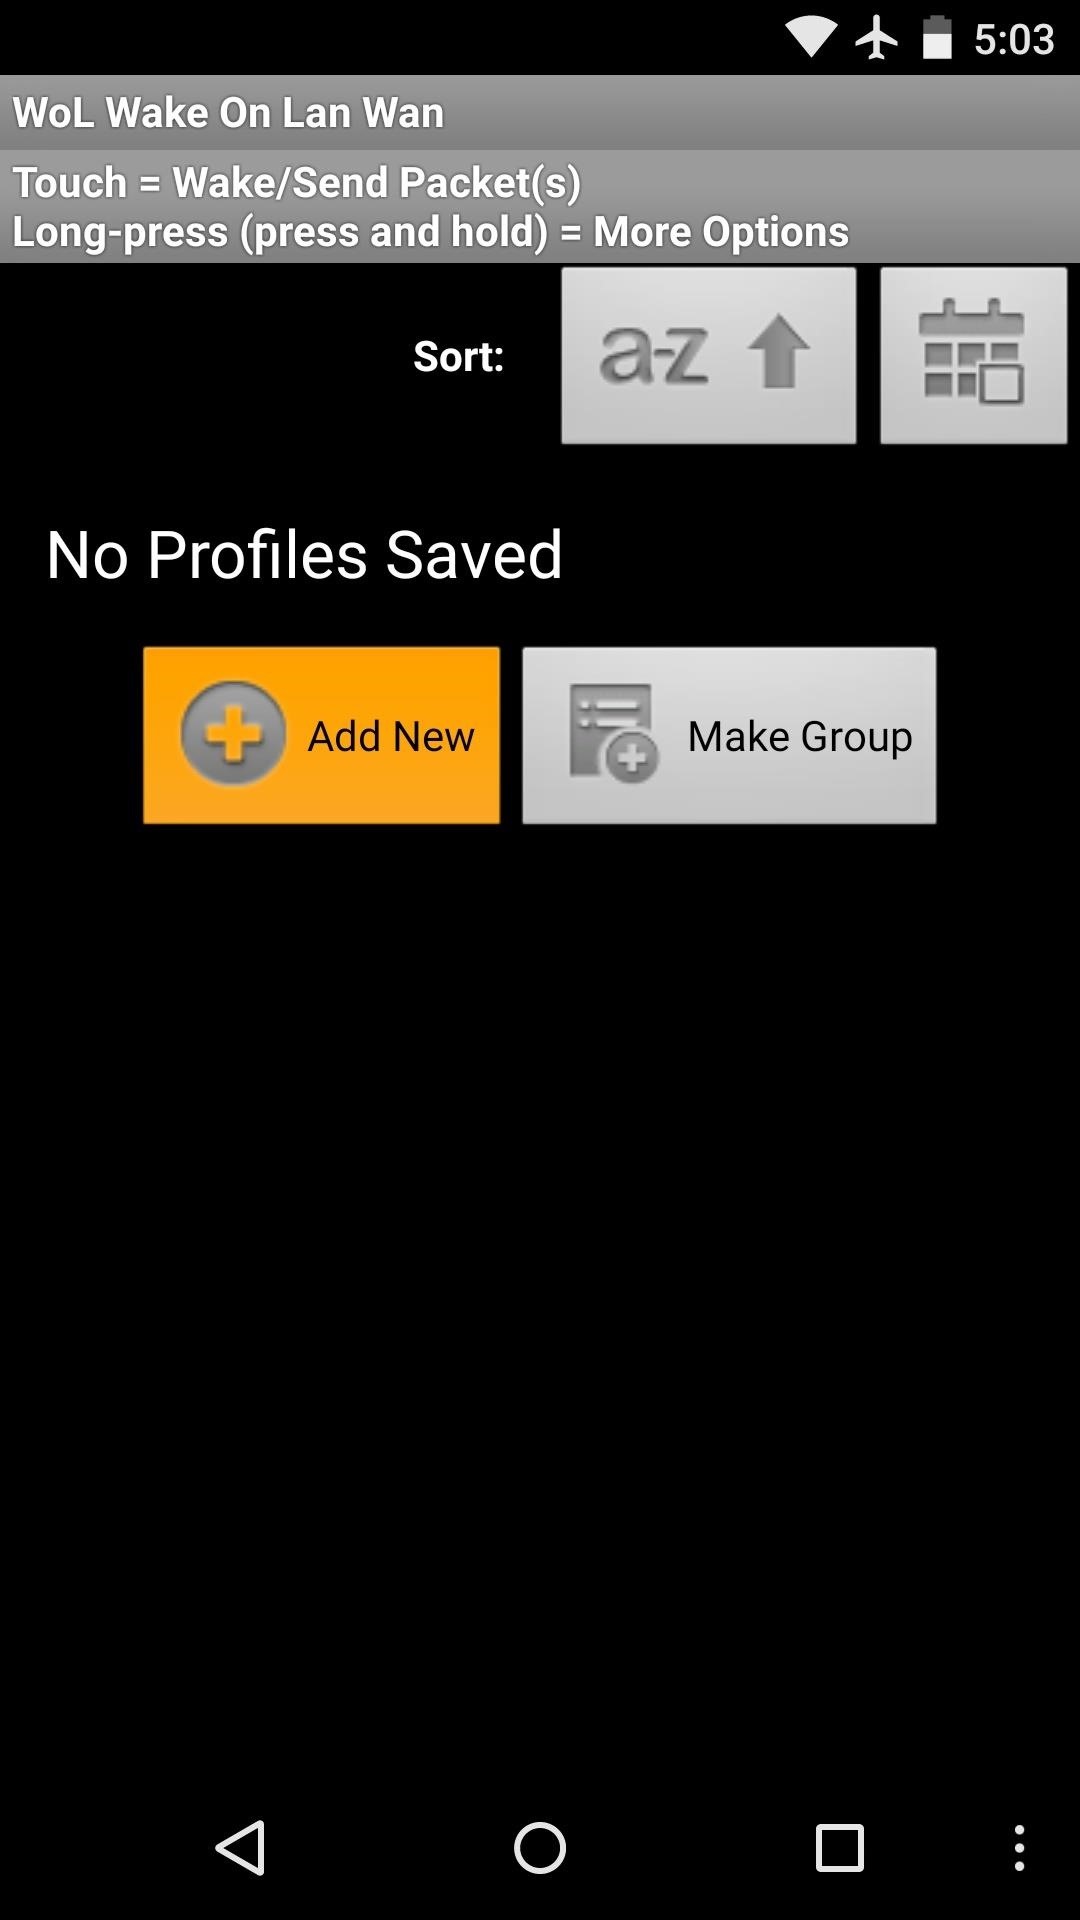
Finally, install WoL Wake On Lan Wan to execute the command that will power your PC on.
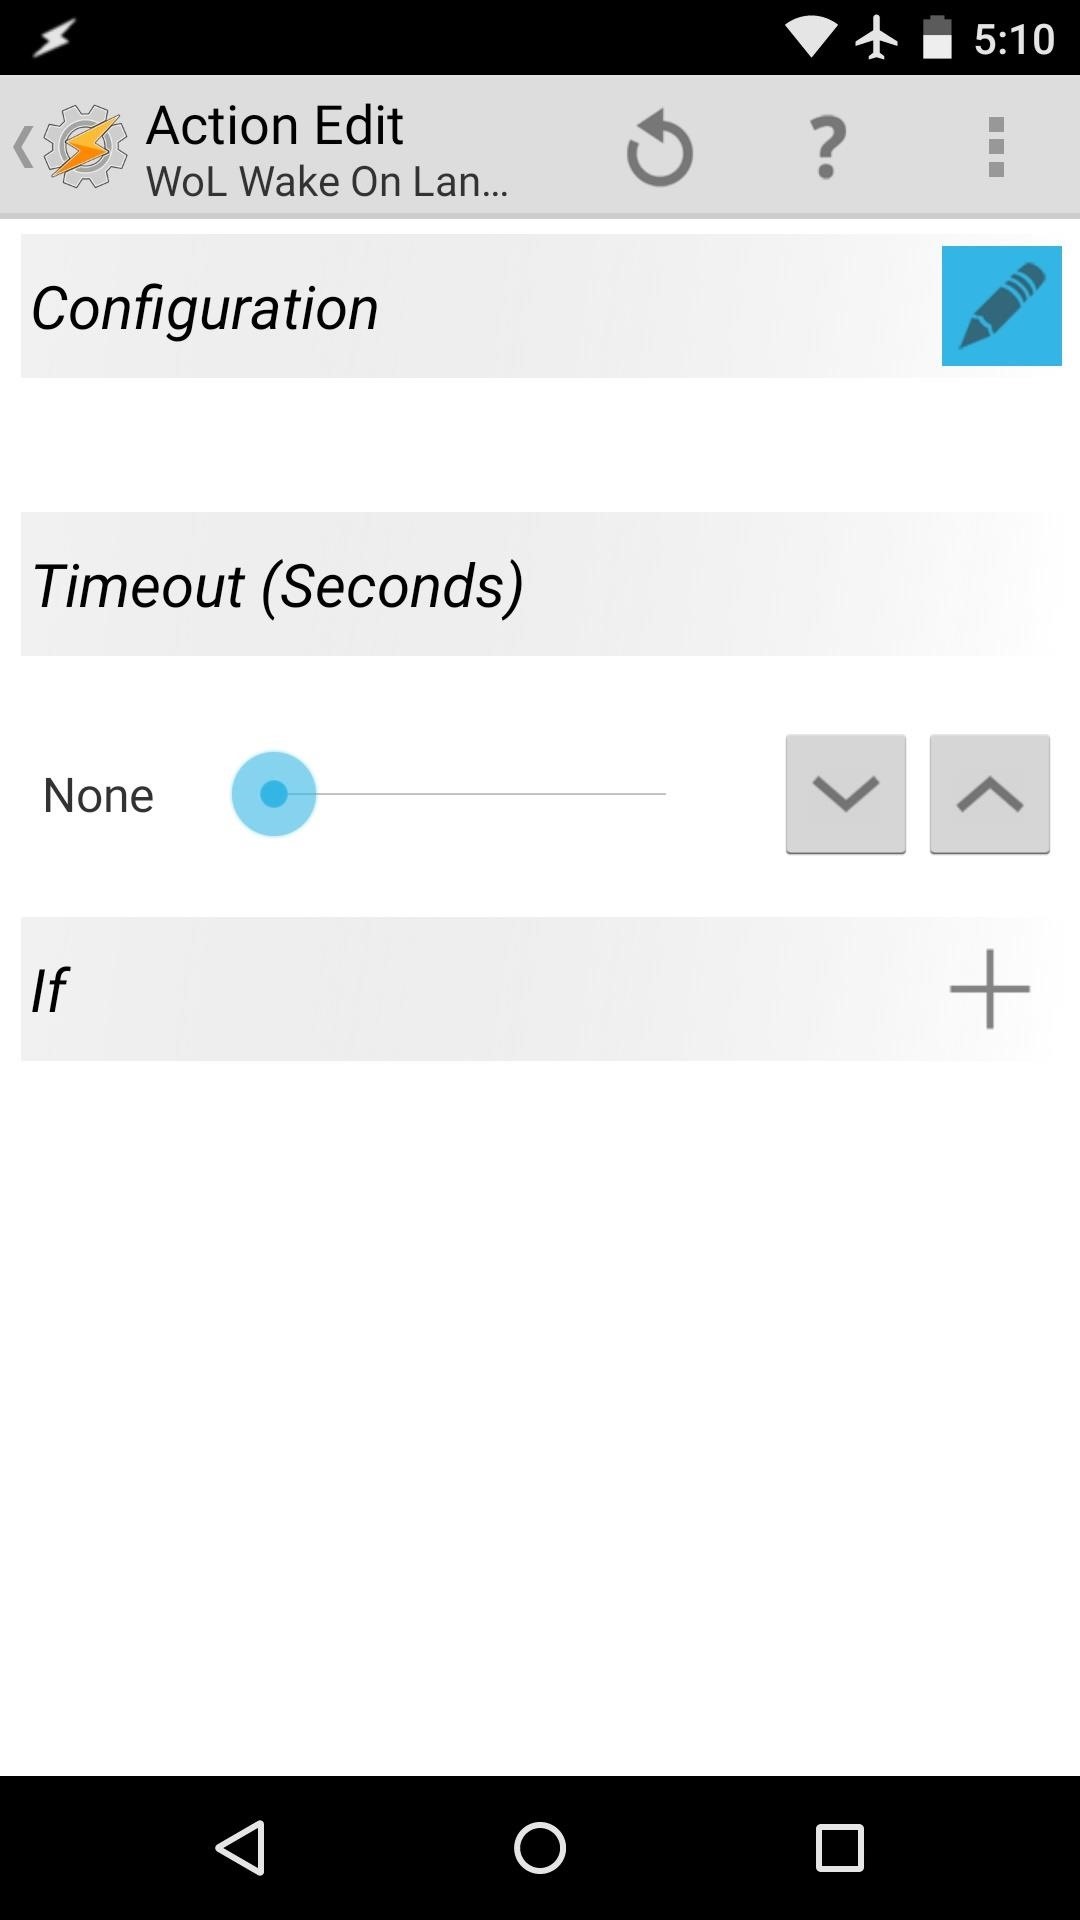
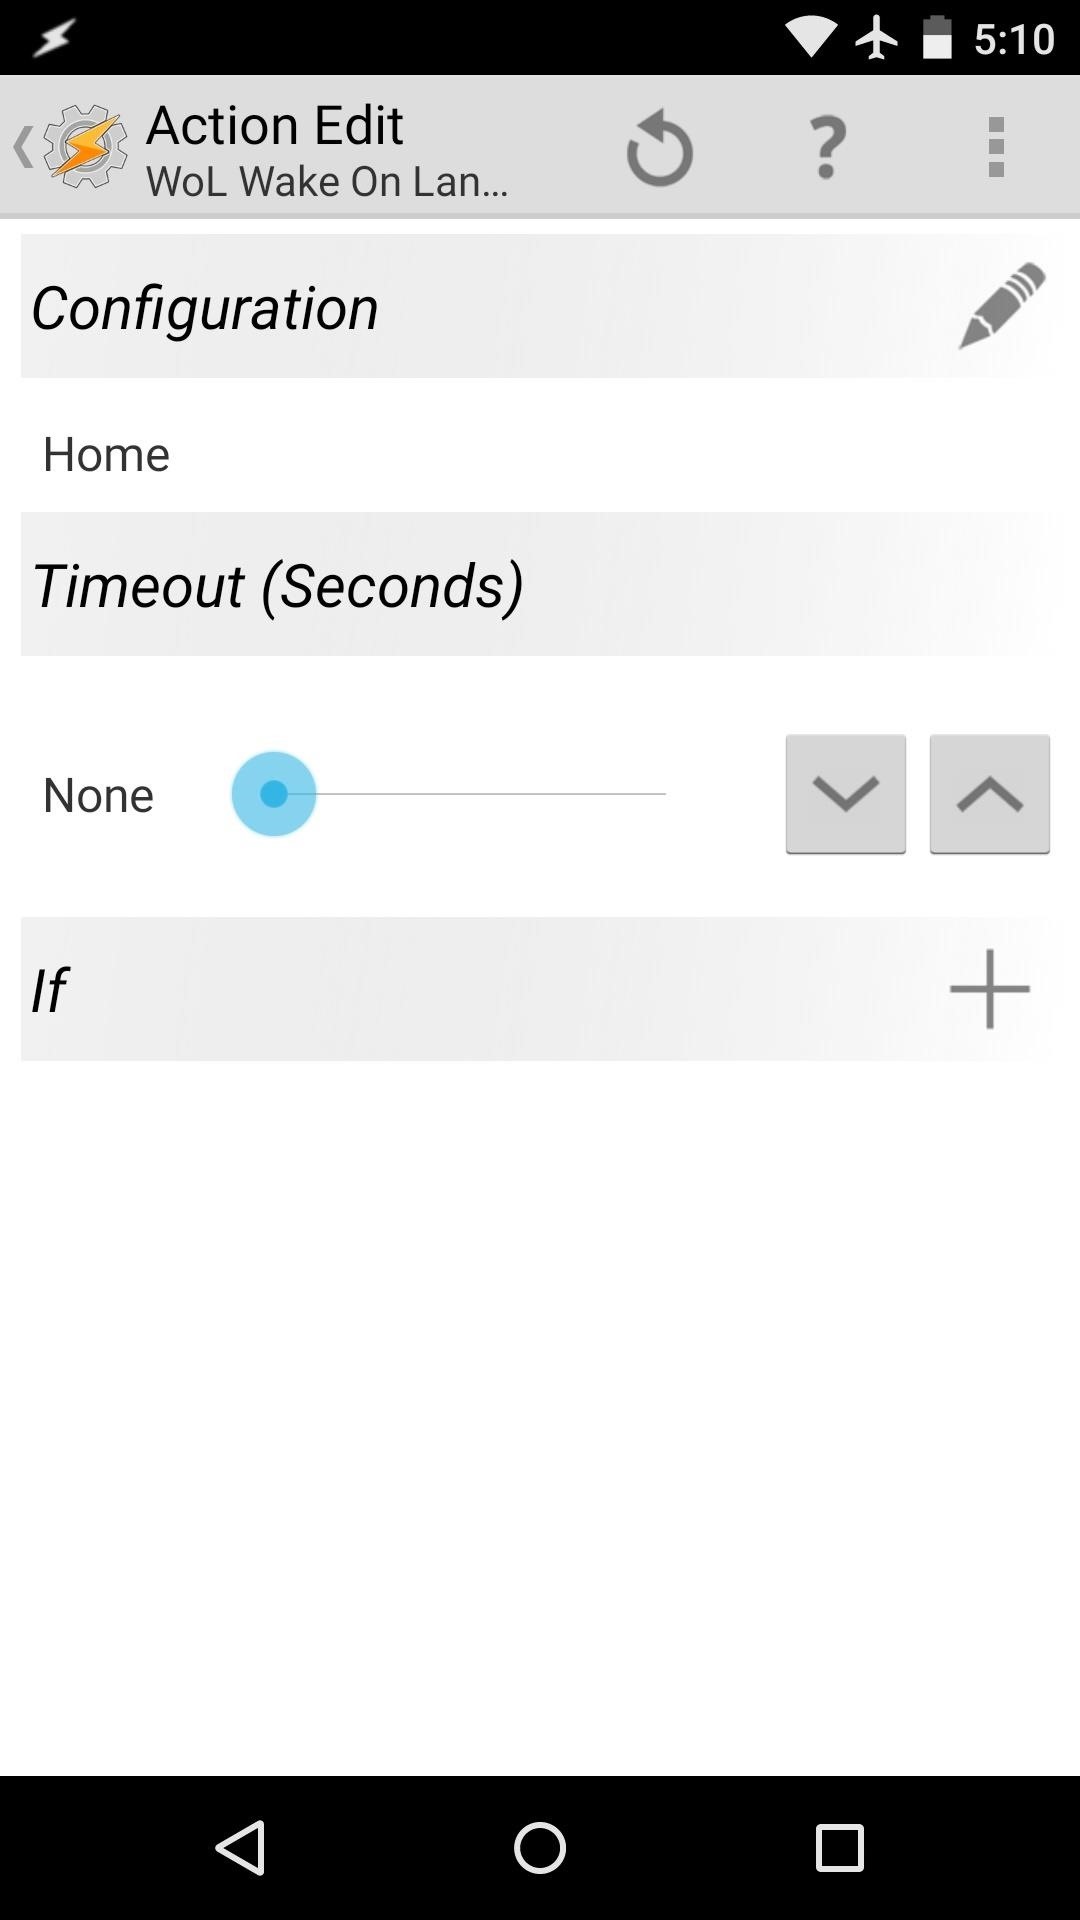
Step 4: Configure WoL Wake on Lan Wan
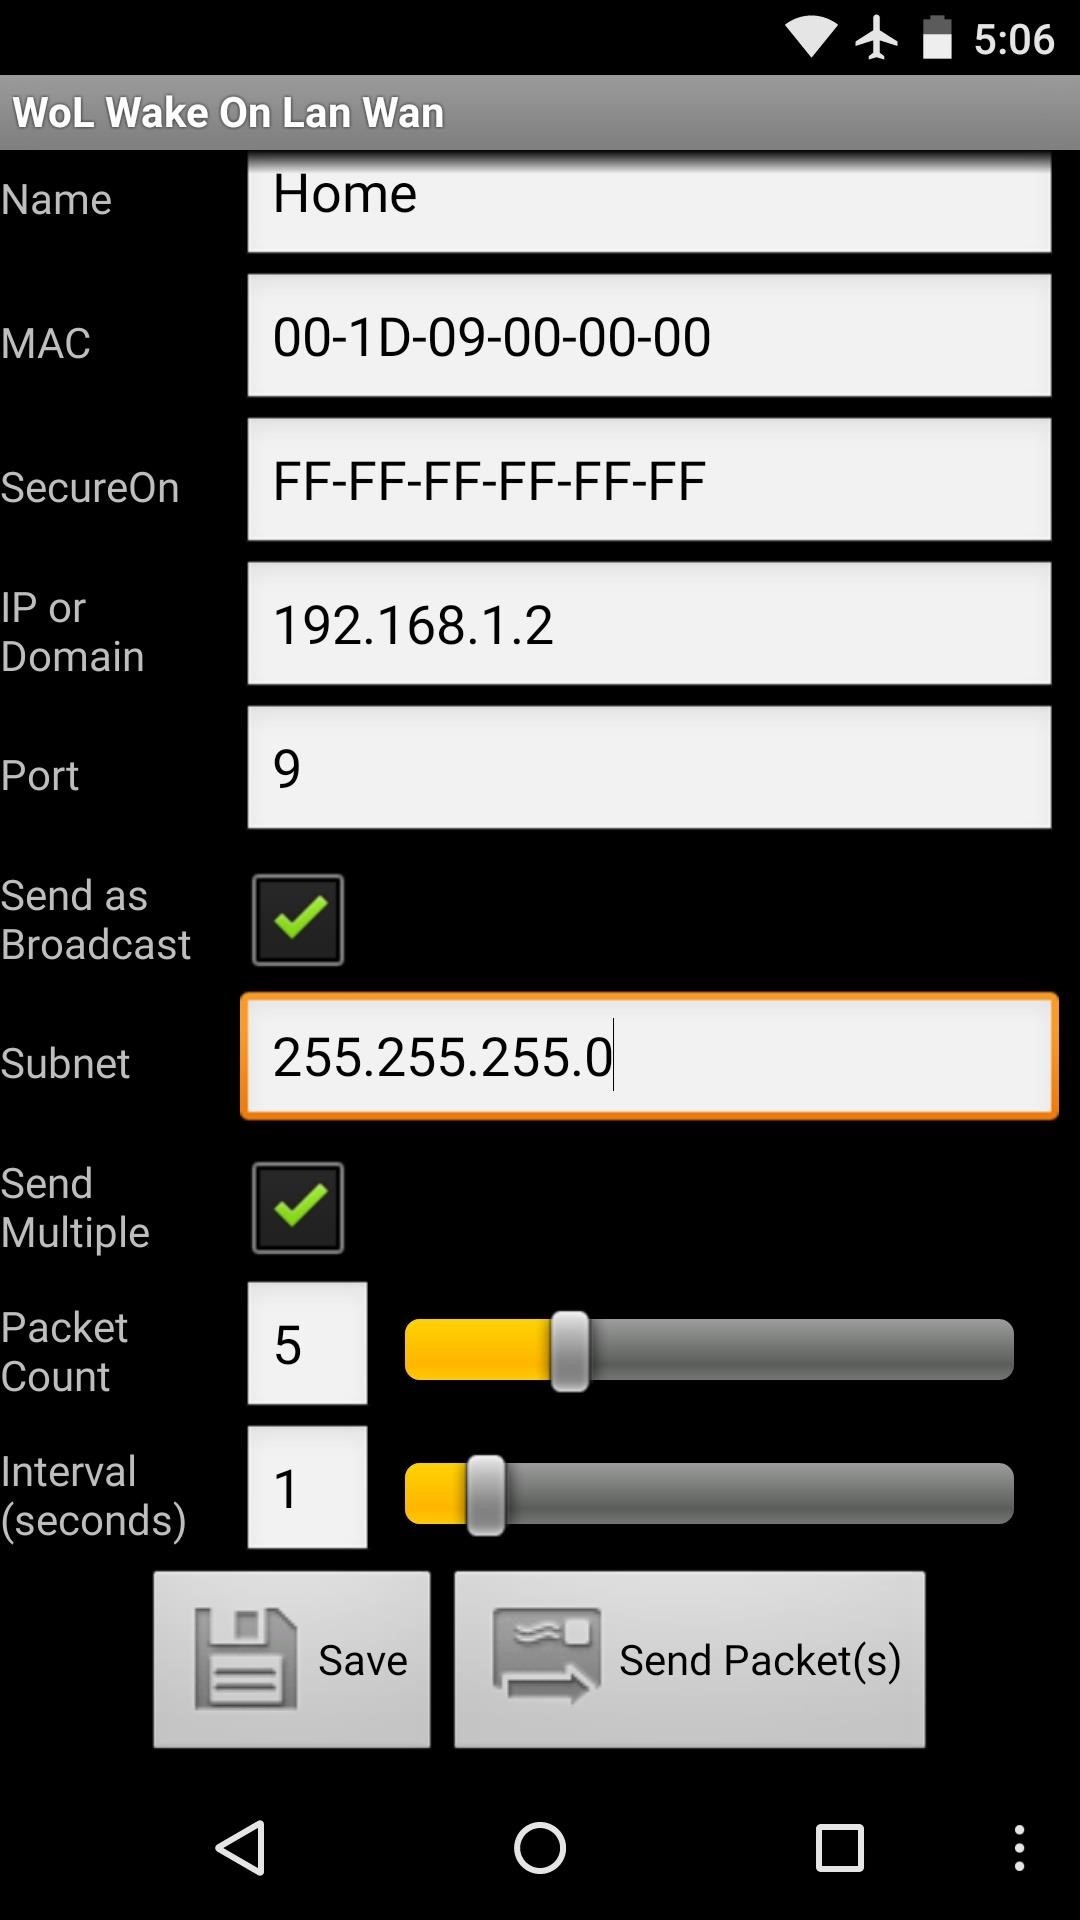
First, you'll need to configure the app that will actually be waking your PC. Open WoL, then tap "Add New." From here, type "Home" as the name, then fill out the "MAC" and "IP or Domain" fields with the information you copied in Step 2.
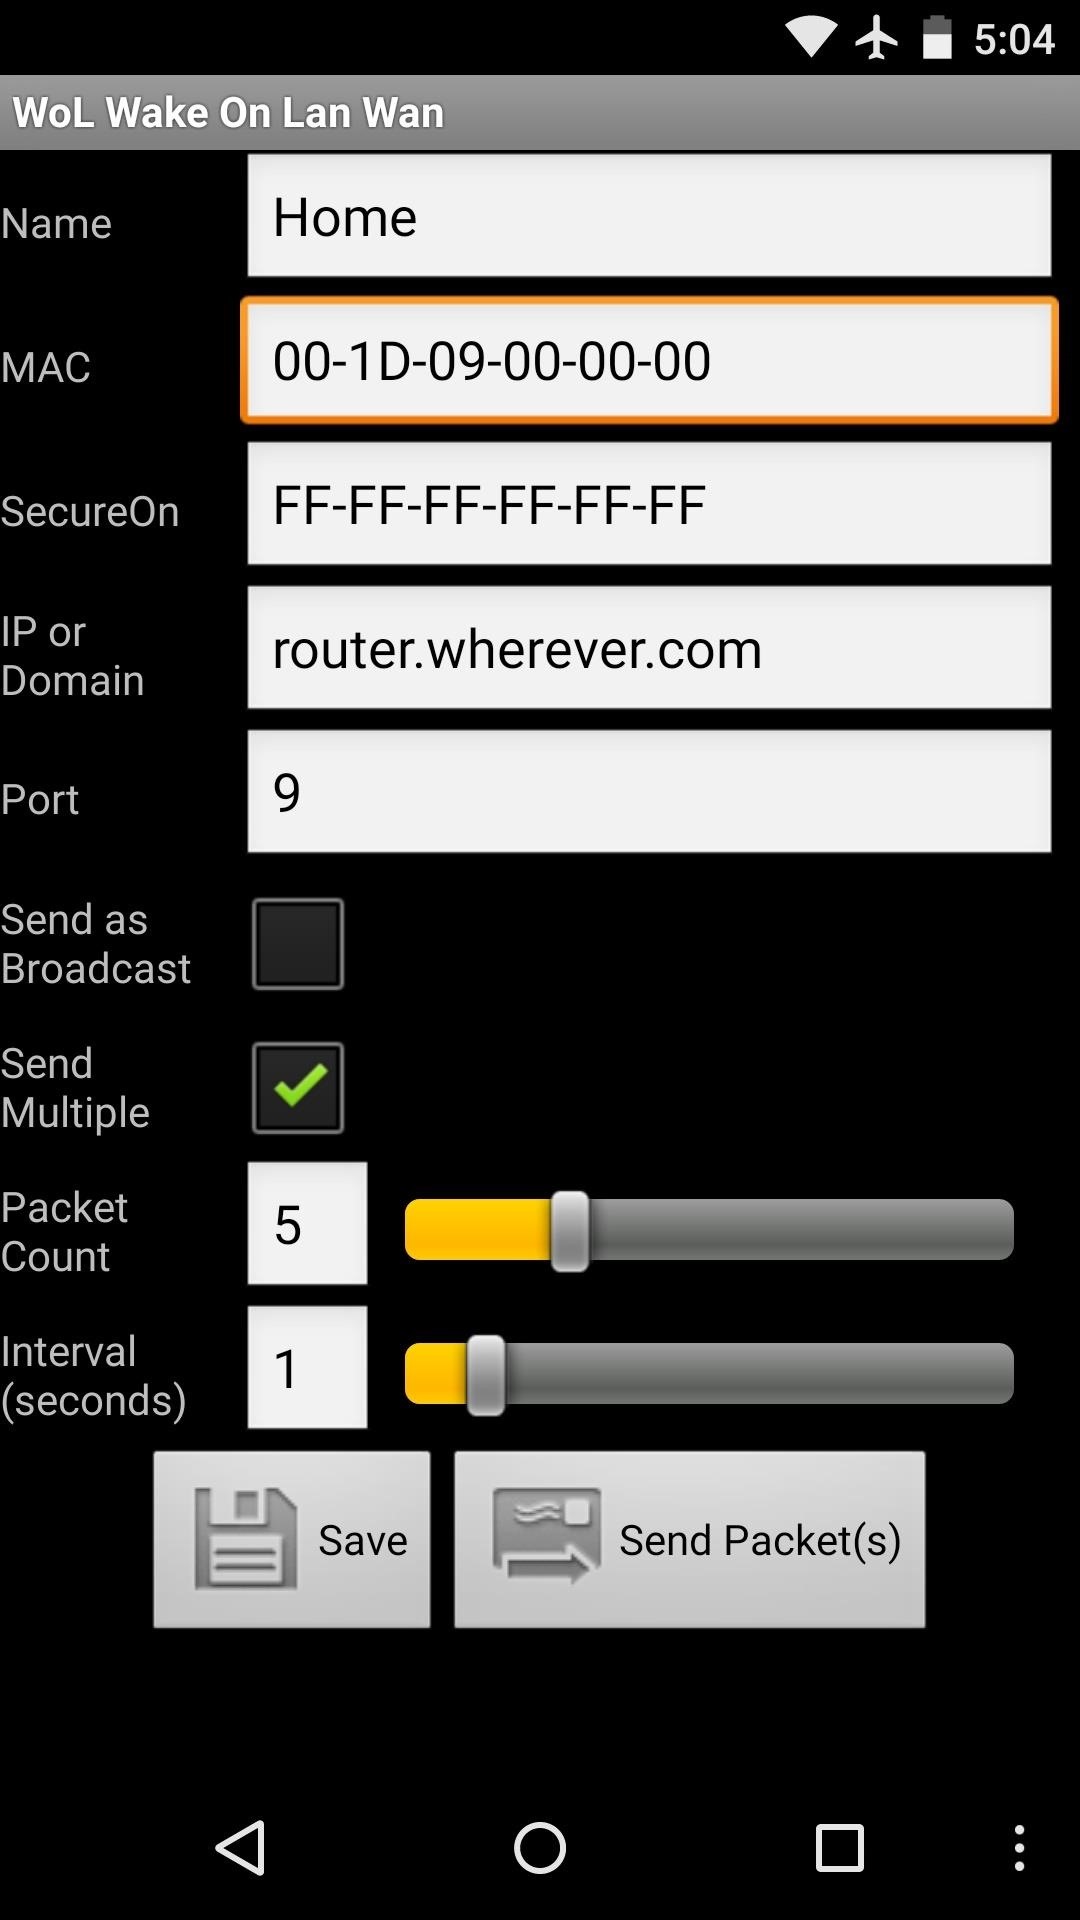
After that, tick the box next to "Send as Broadcast," then enter your Subnet Mask information. When you're done, tap "Save."

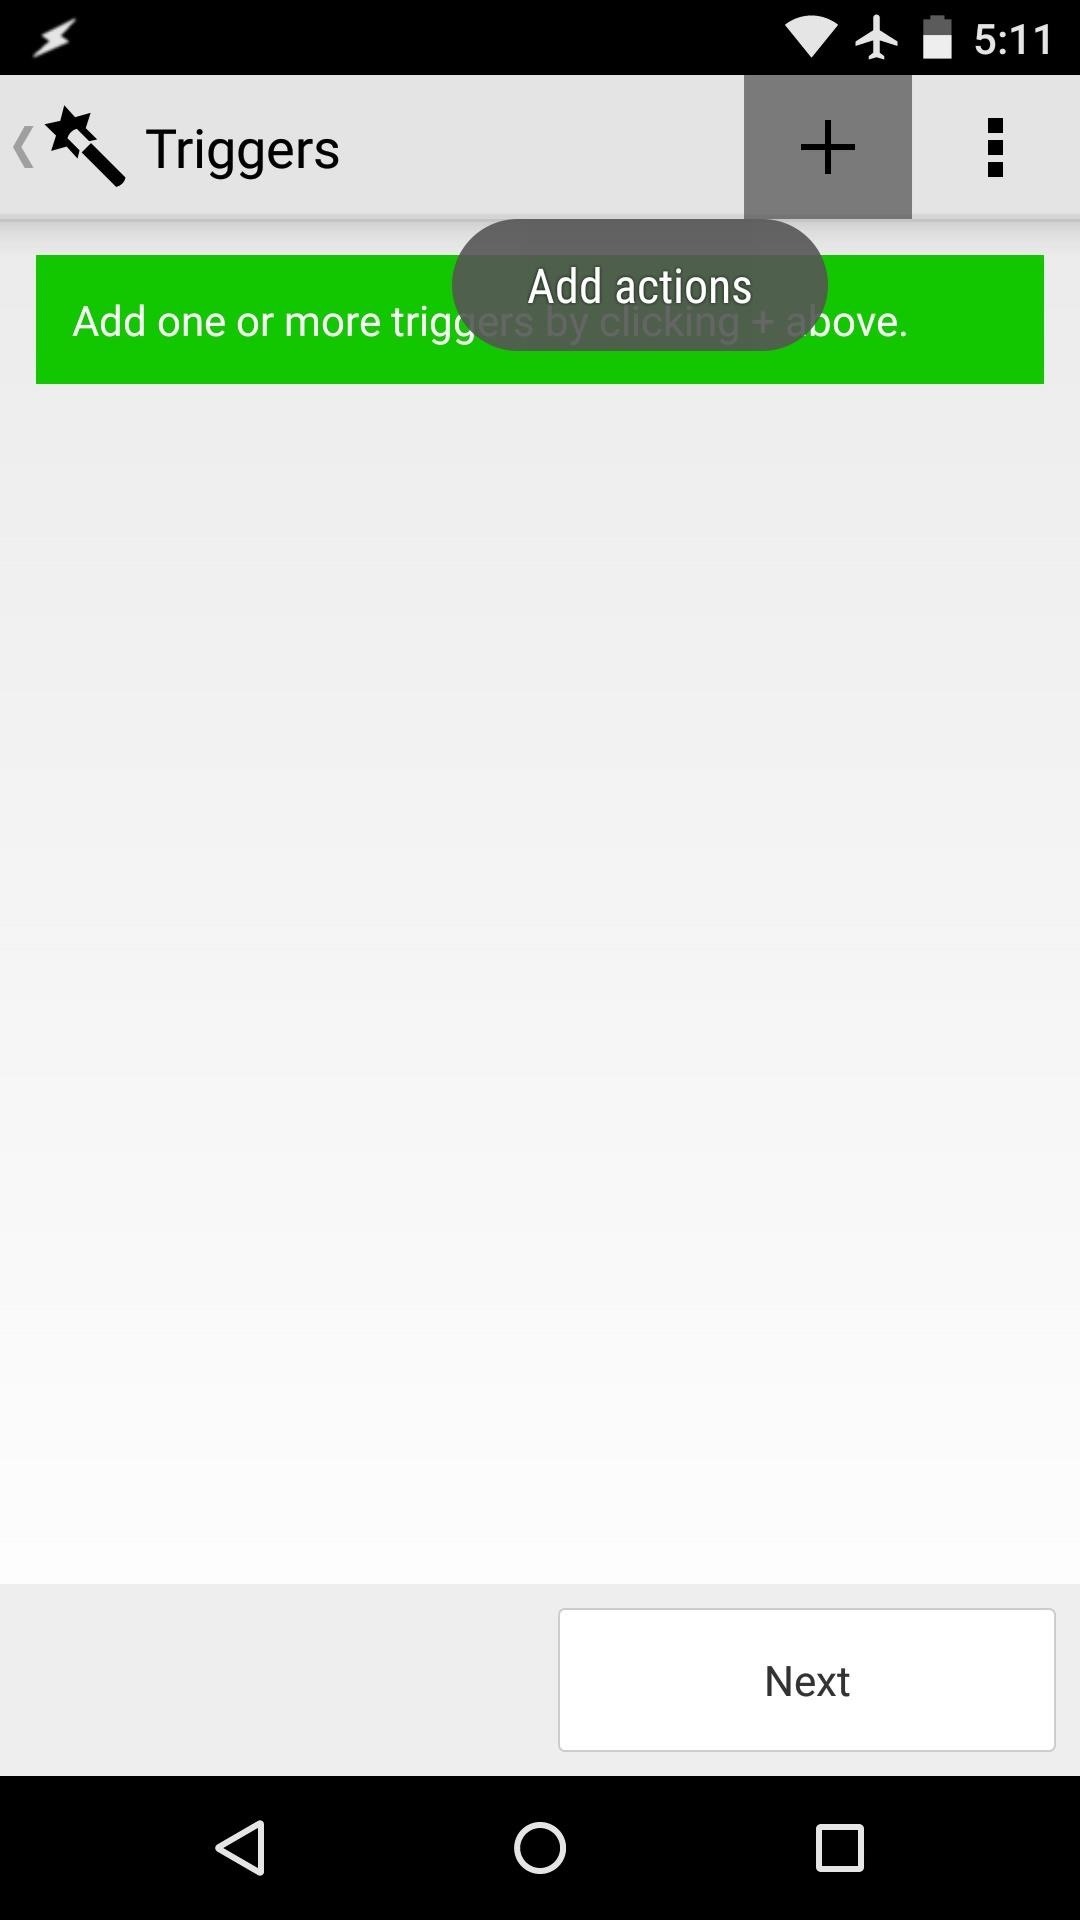
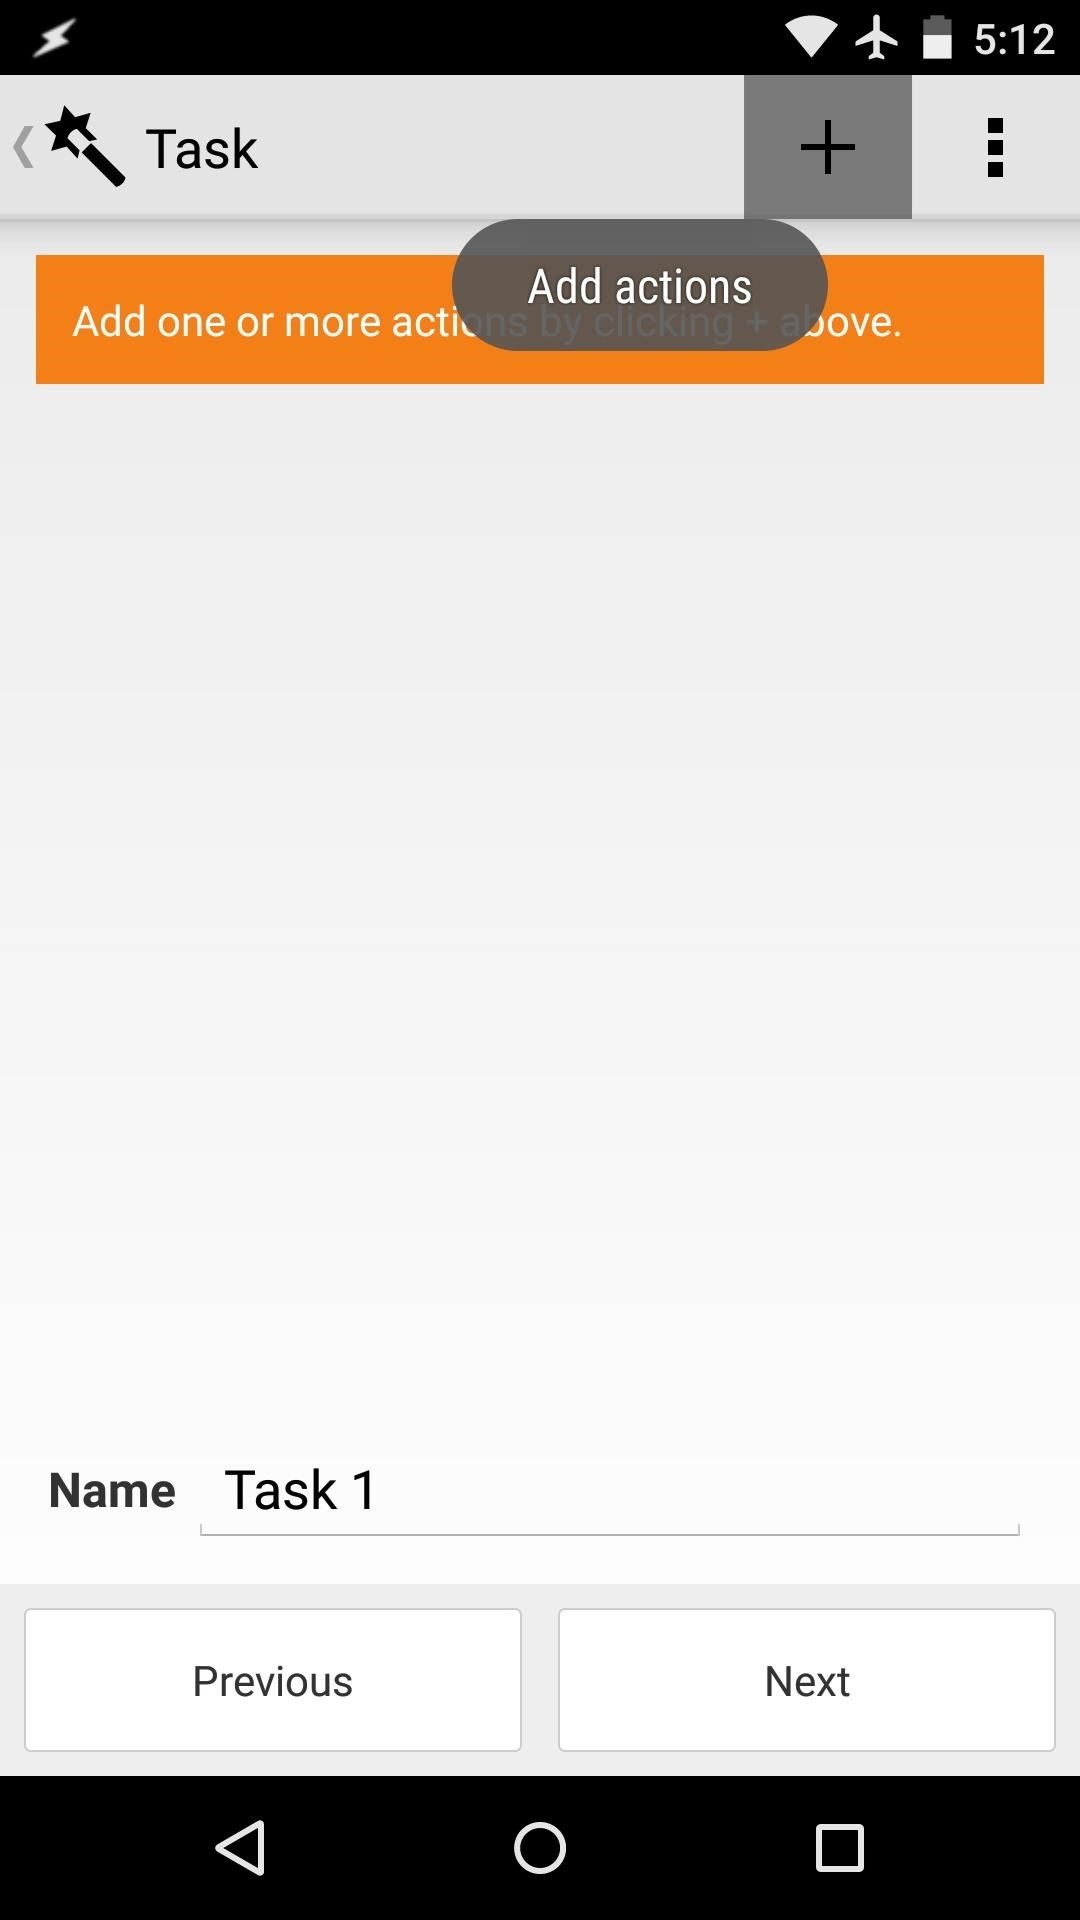
Step 5: Create a Tasker Task
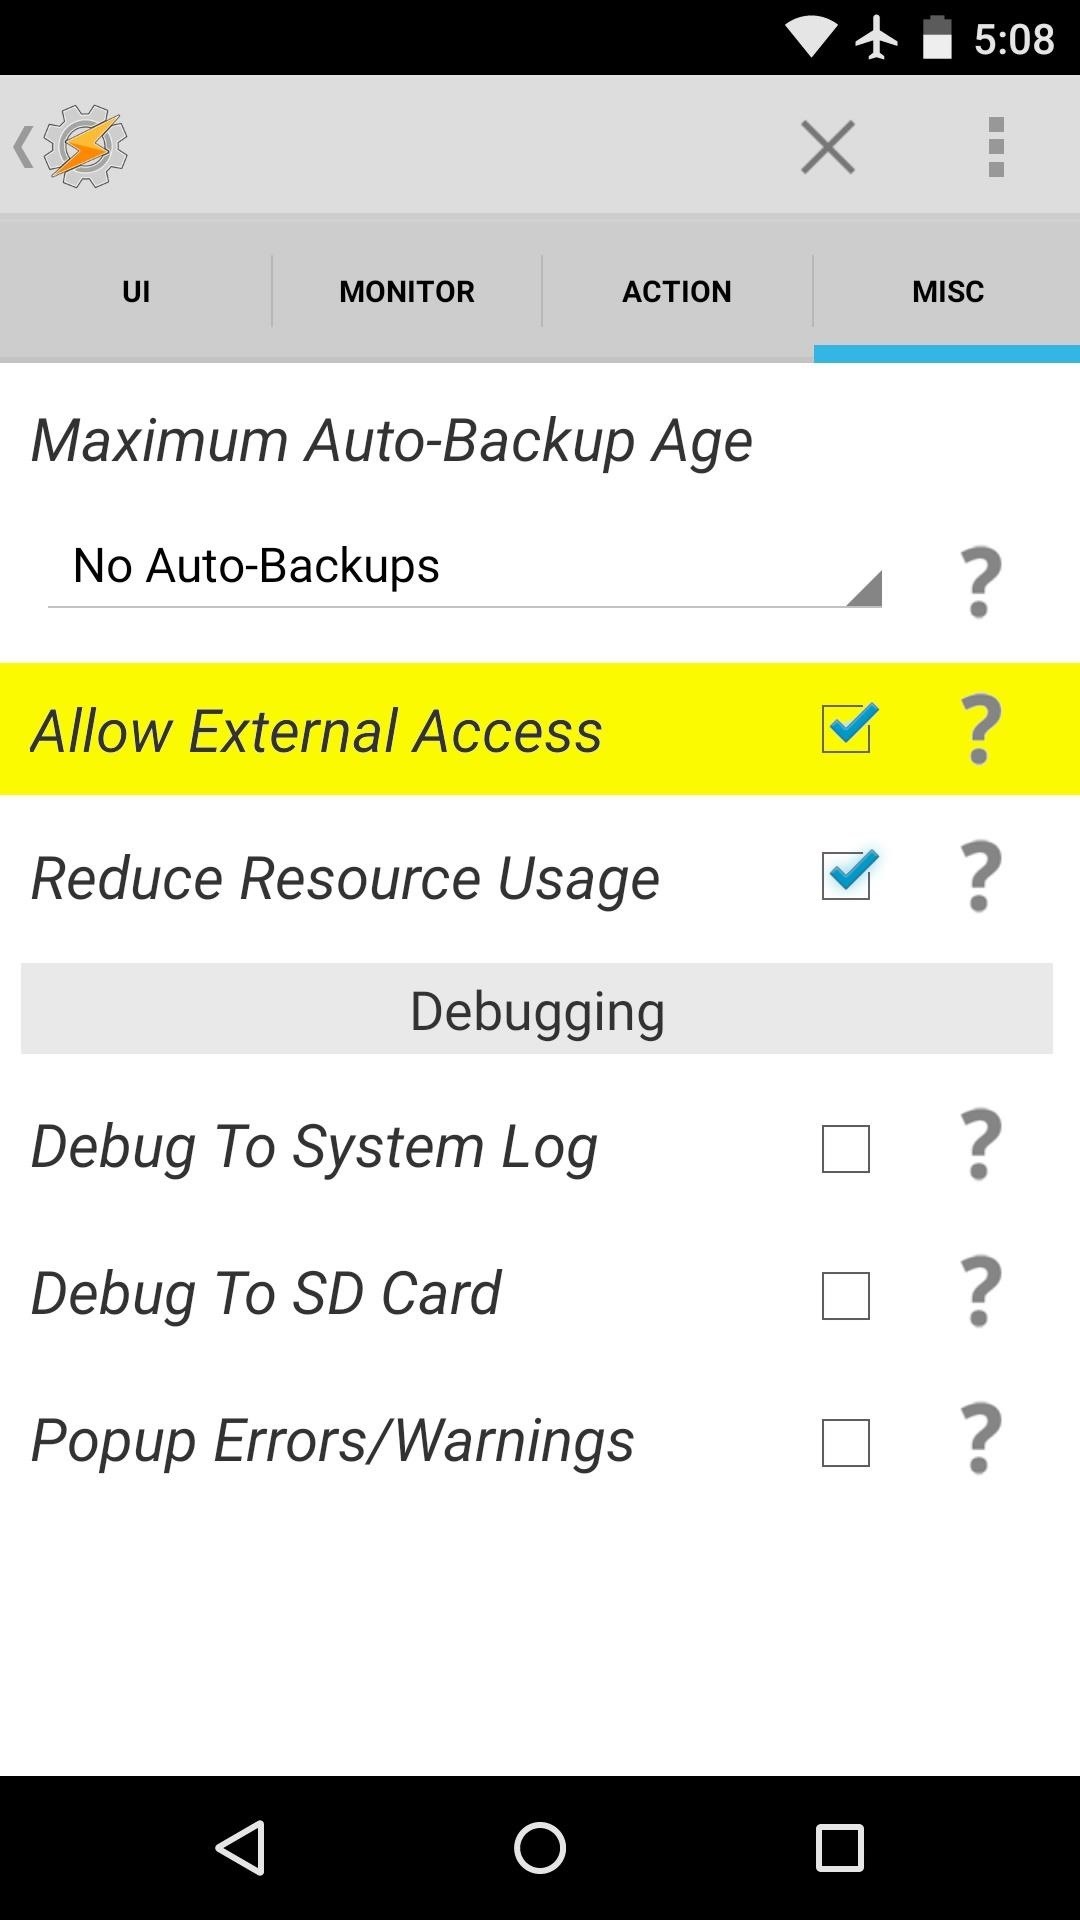
Next, open Tasker and tap the three-dot menu button, then select "Preferences." From here, head to the Misc tab, then tick the box next to "Allow External Access."

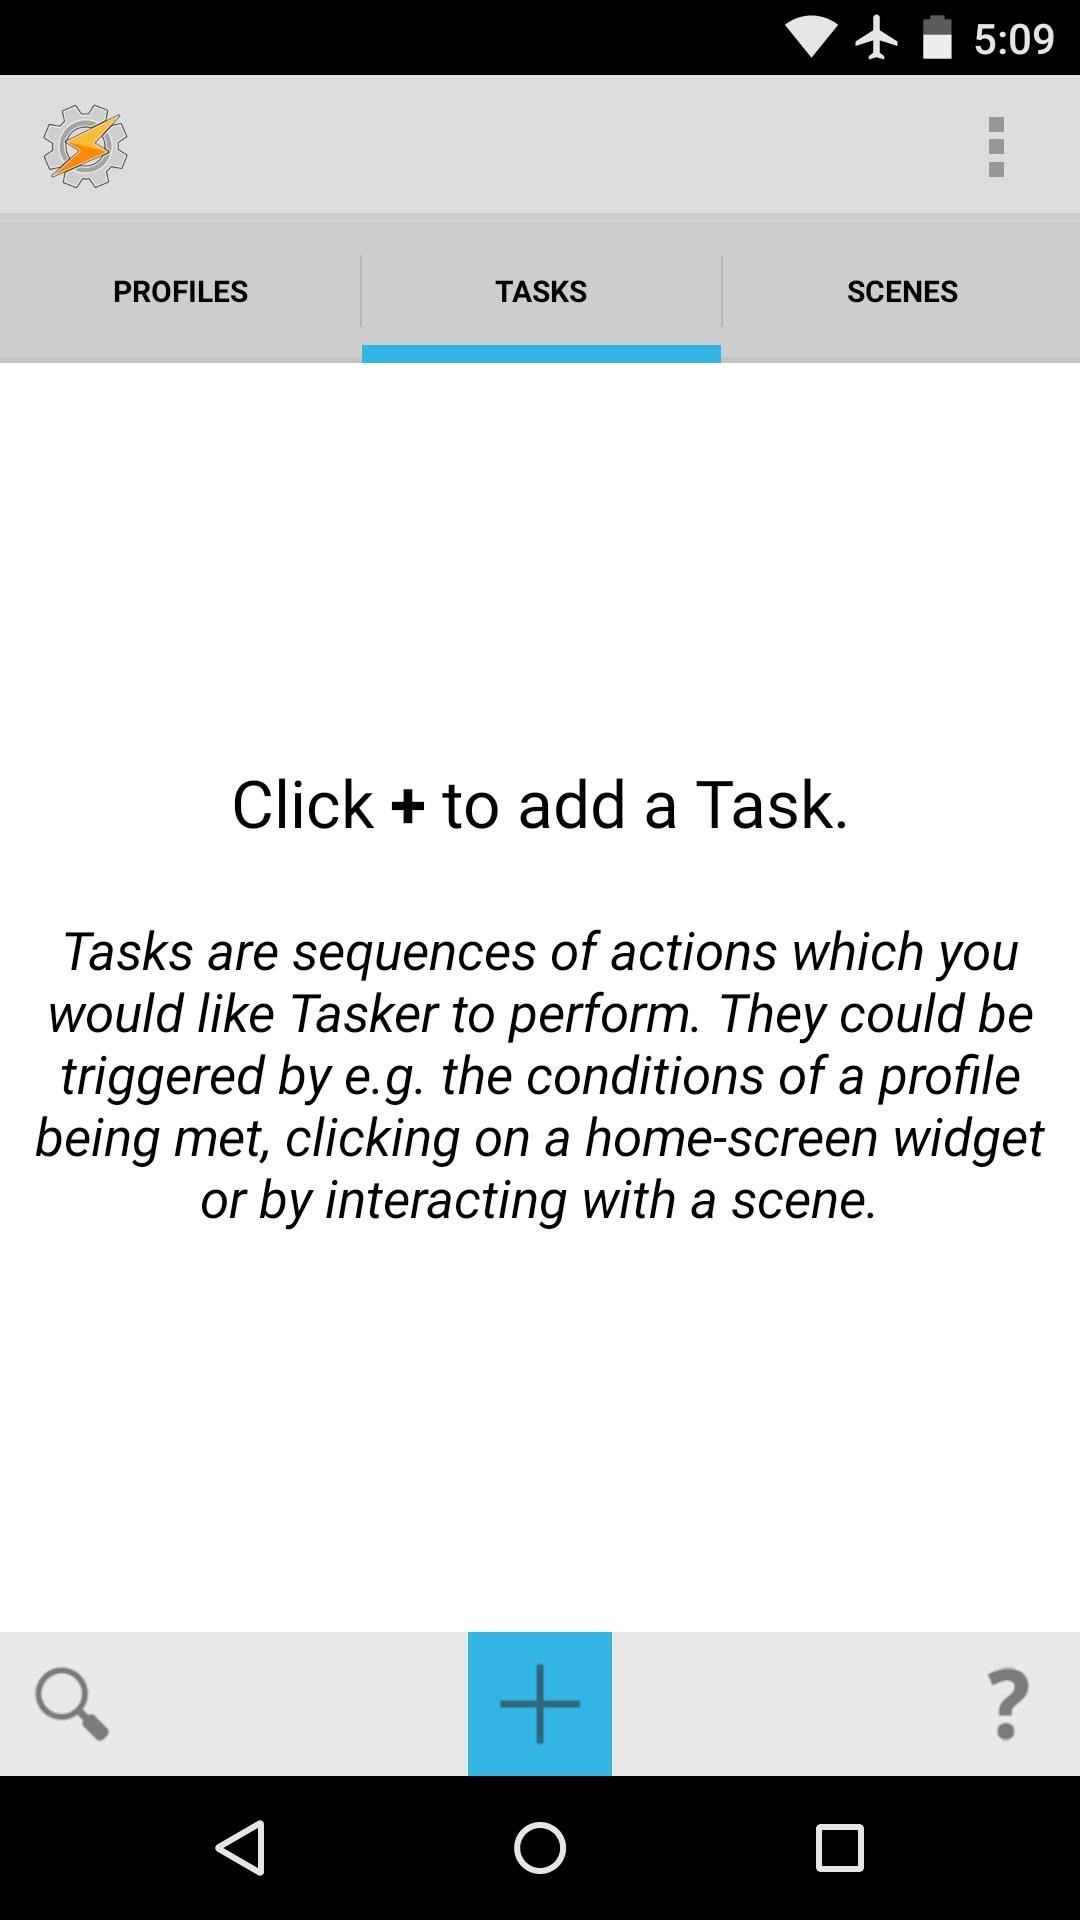
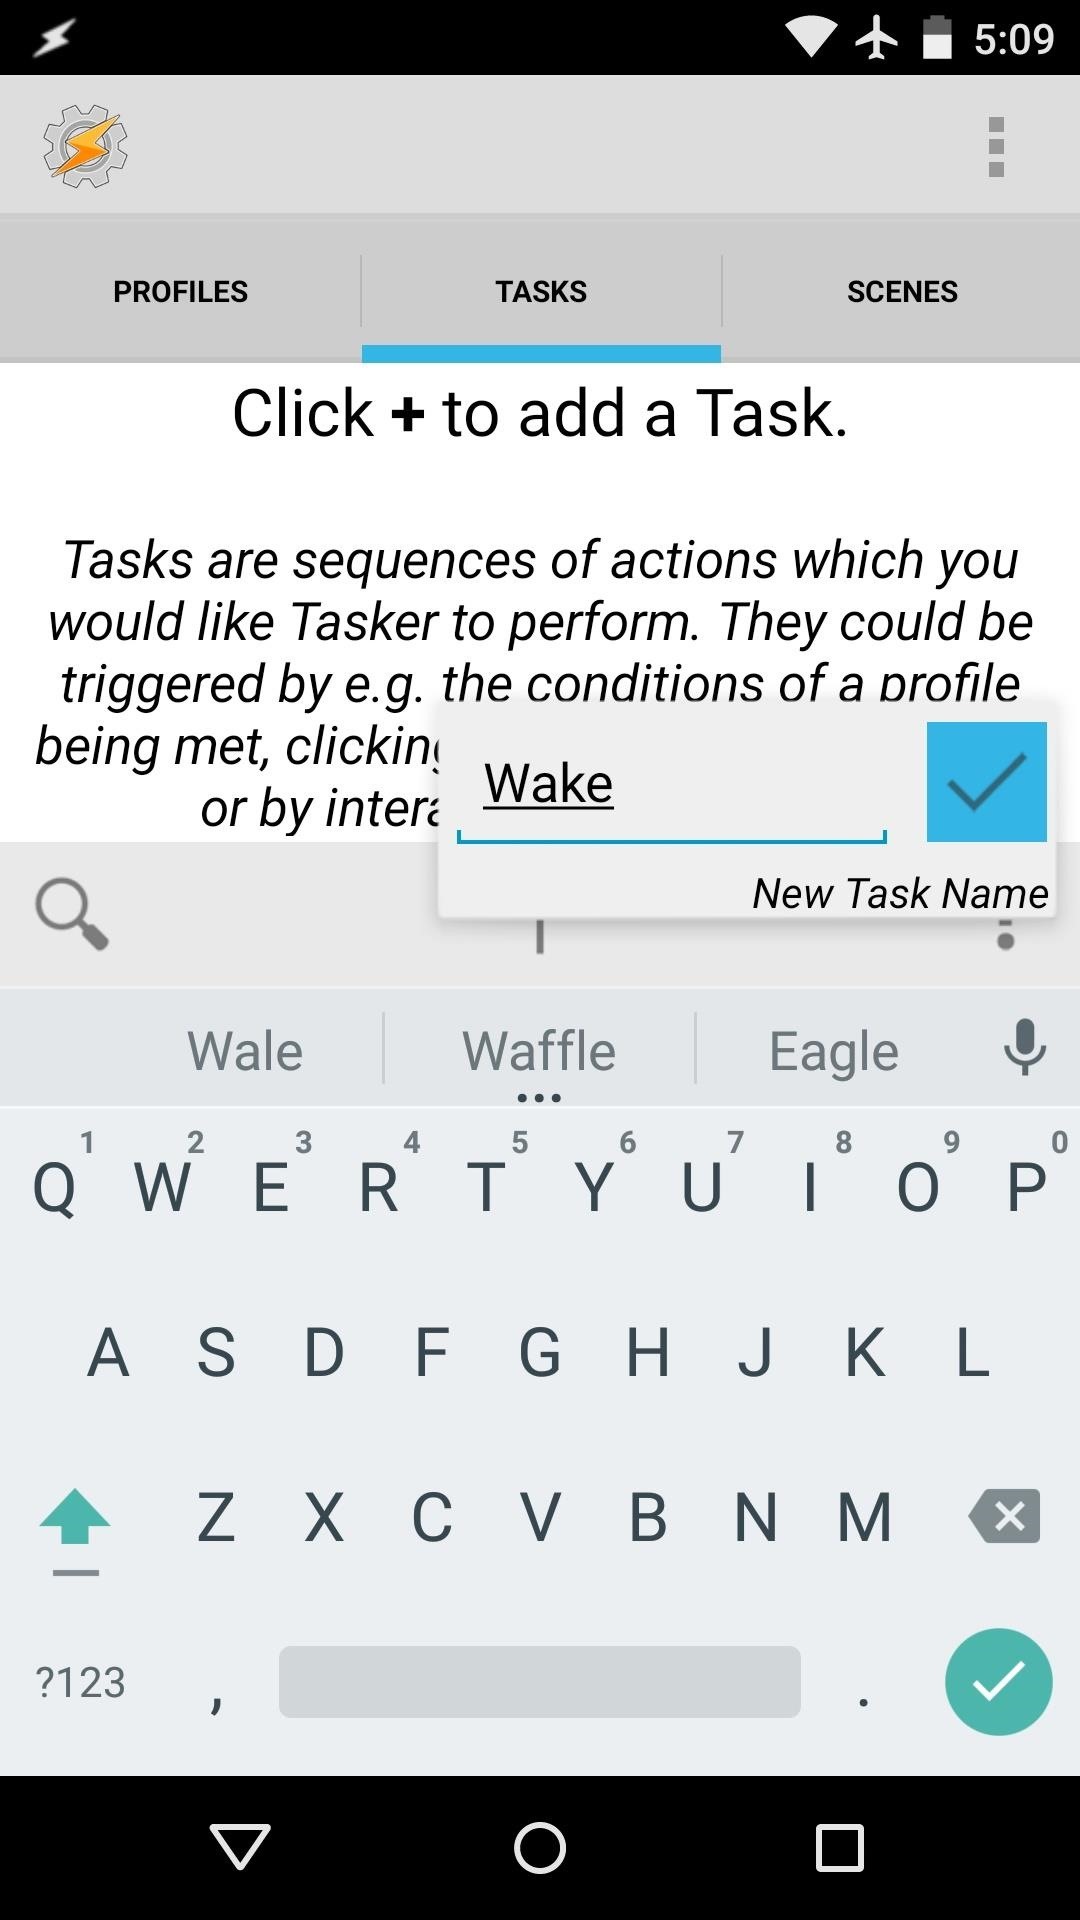
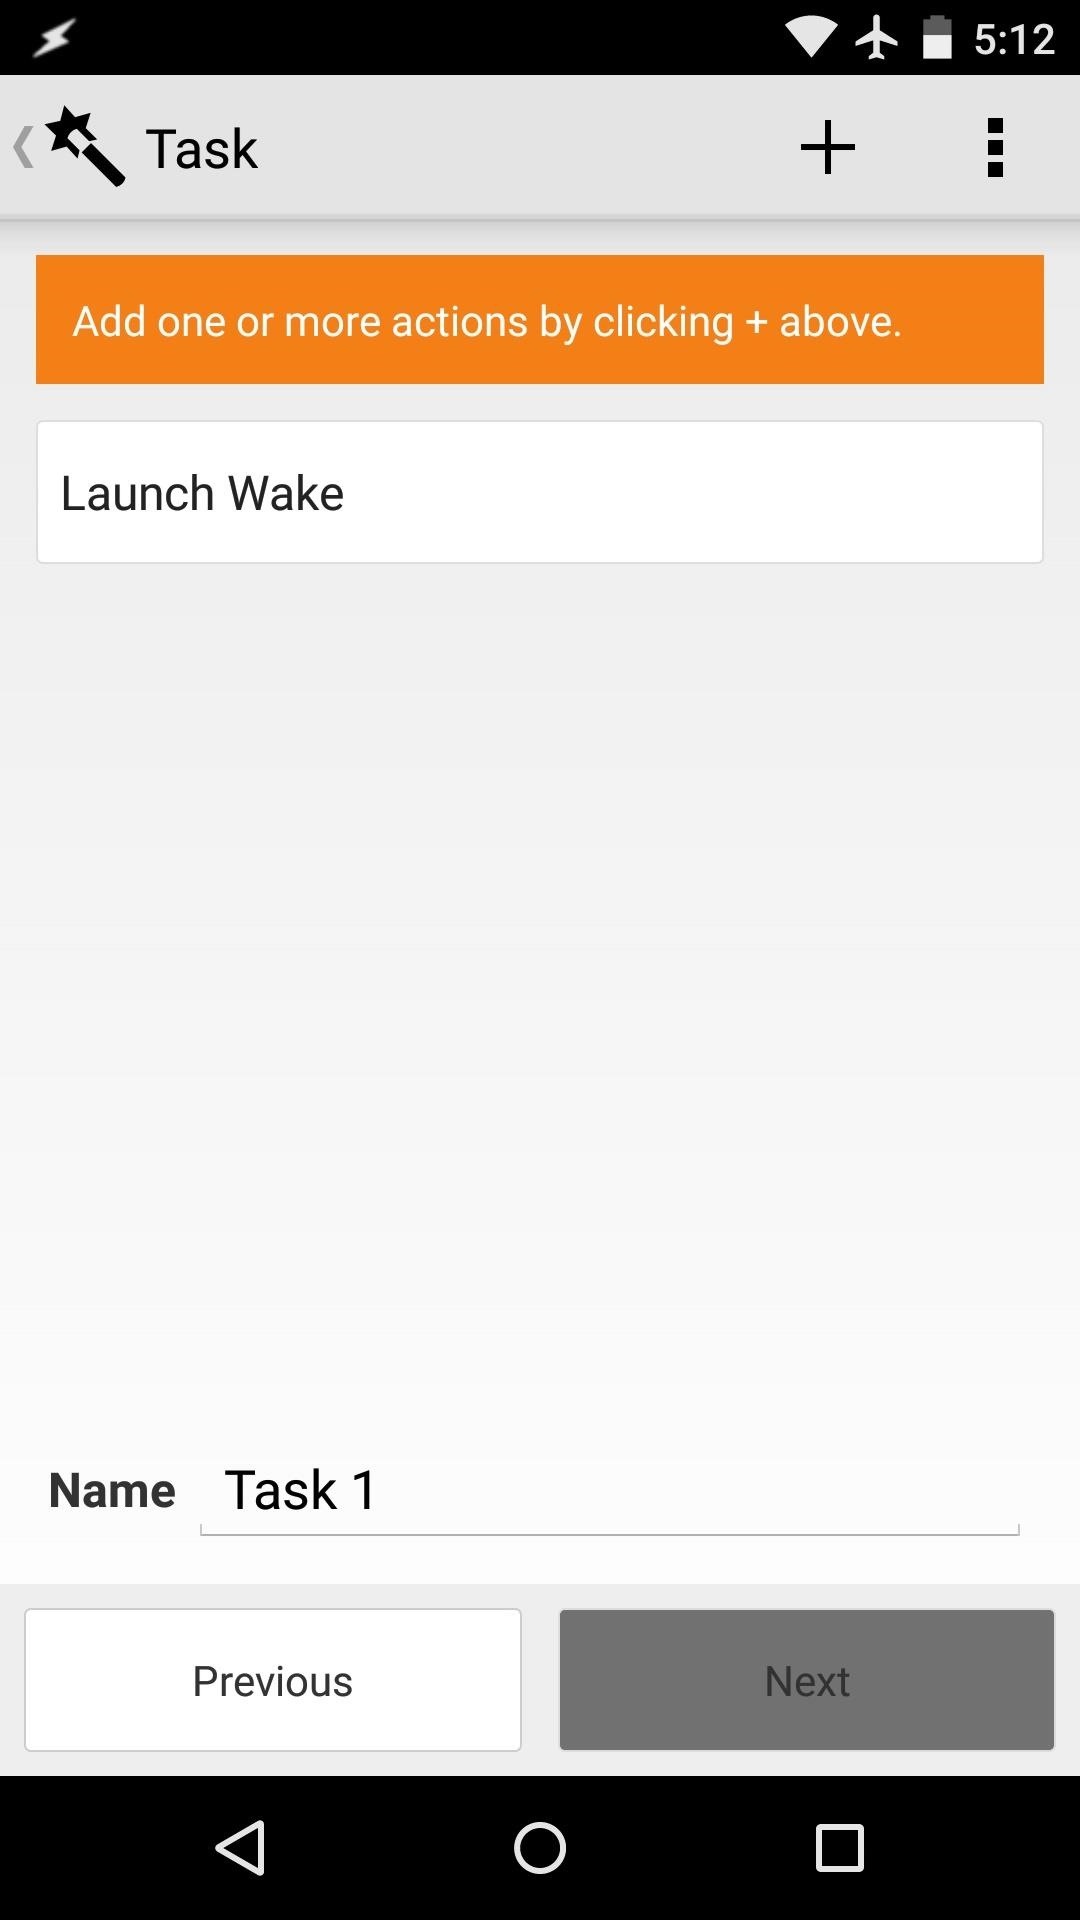
Back at Tasker's main menu, head to the Task tab, then tap the "+" button at the bottom of the screen. Name this task "Wake" and then press the checkmark icon.
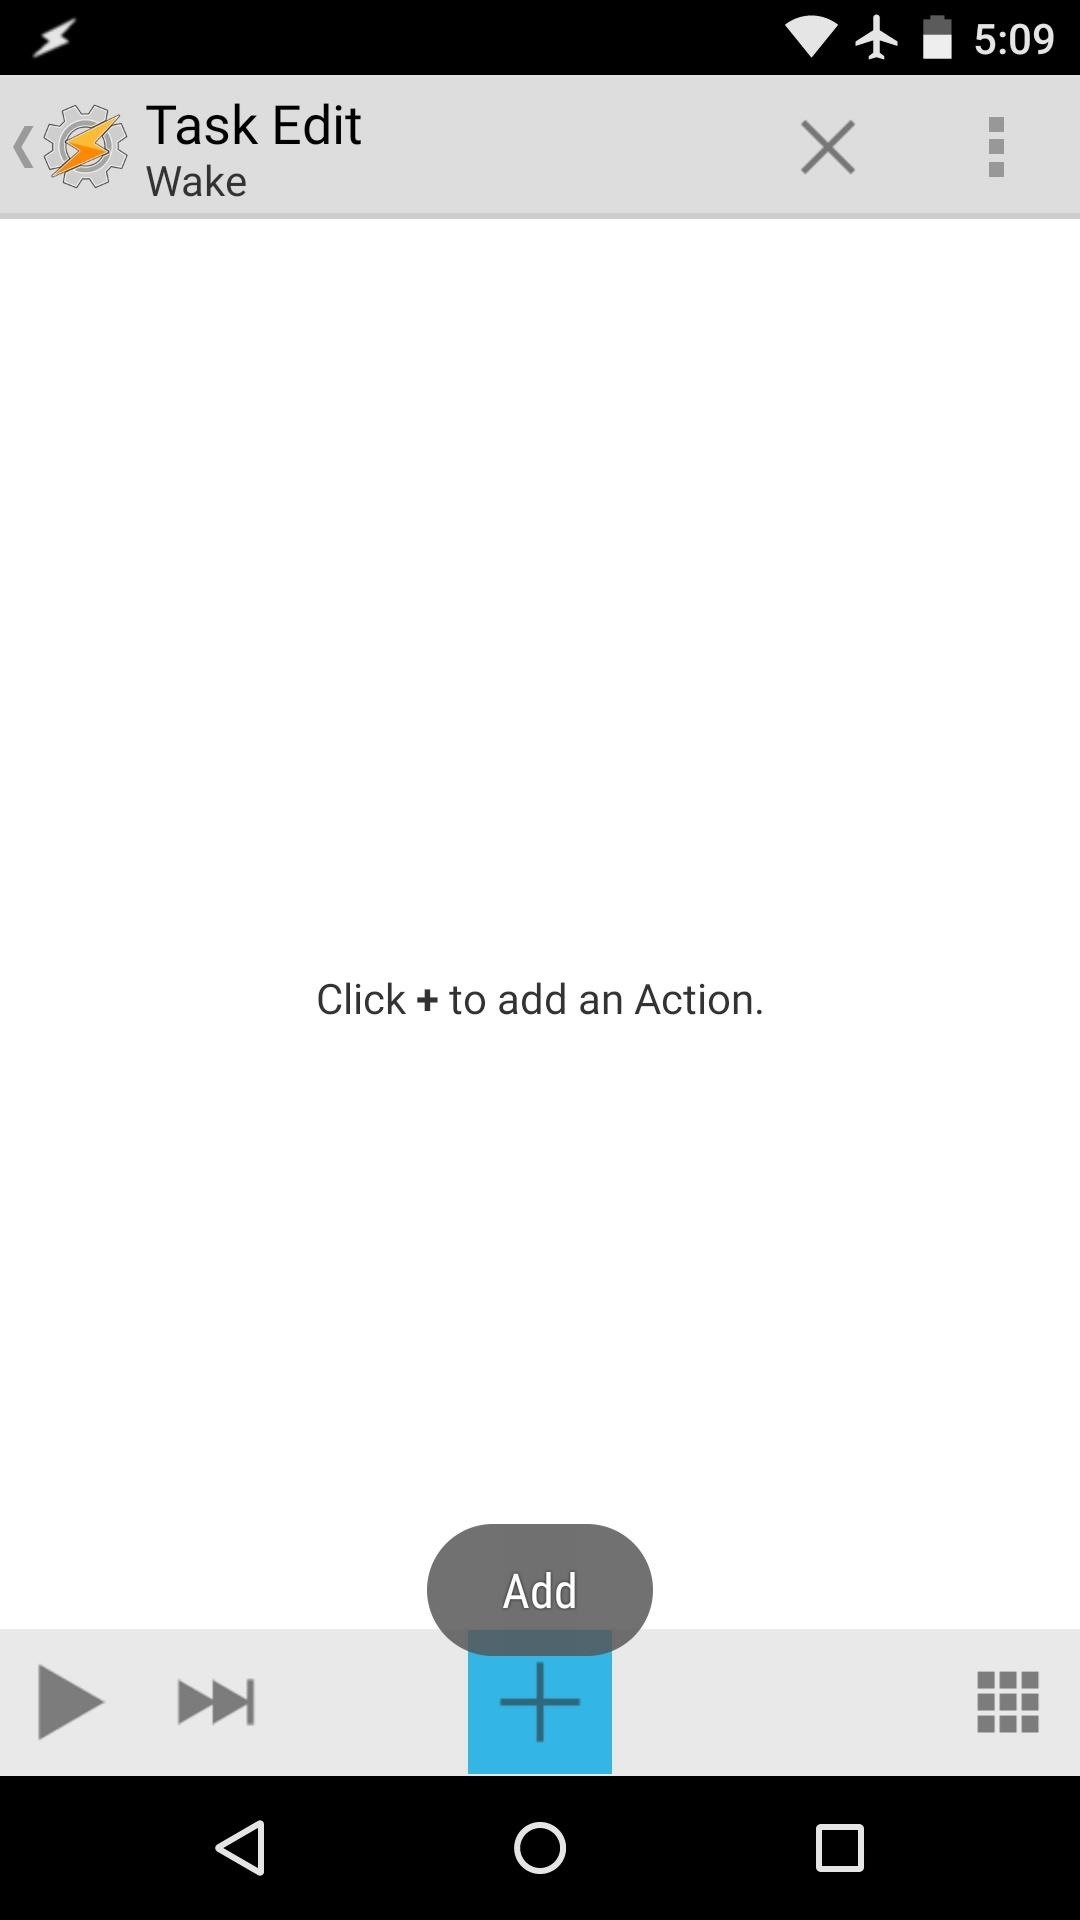
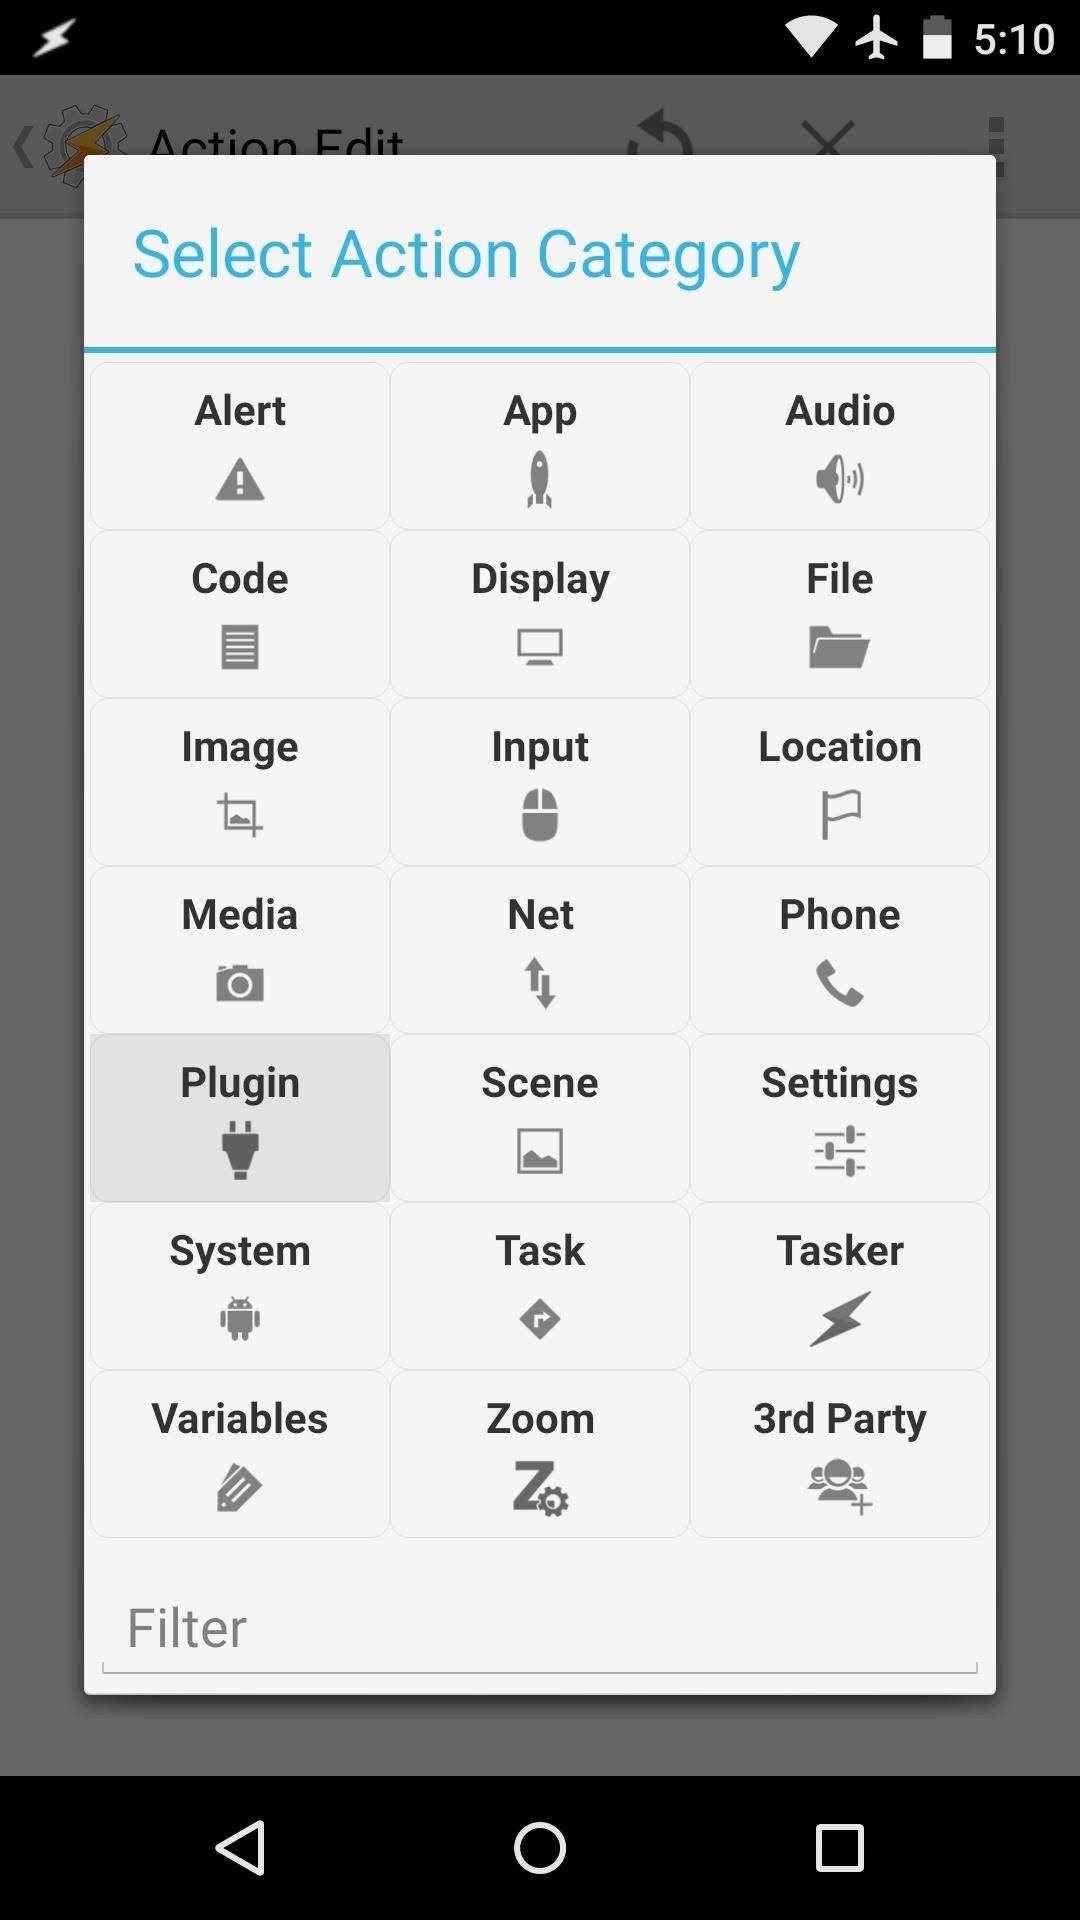
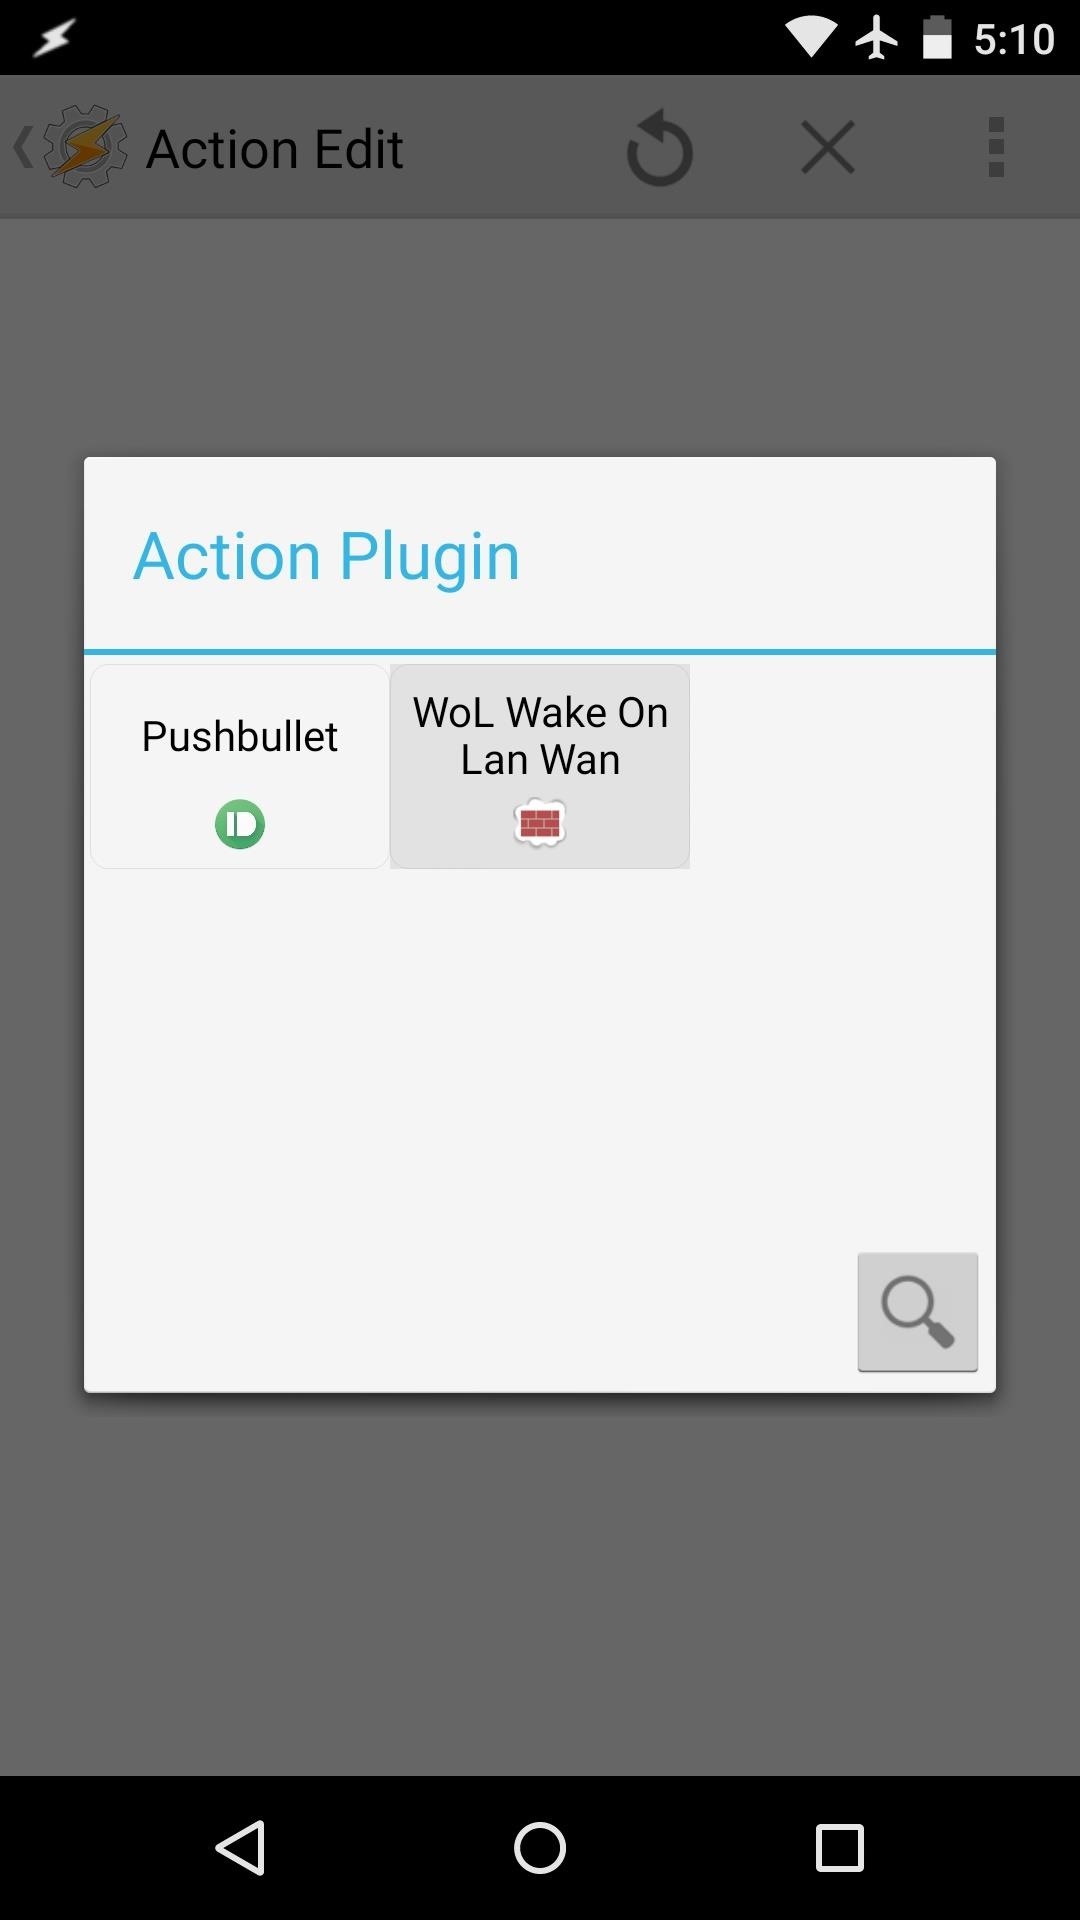
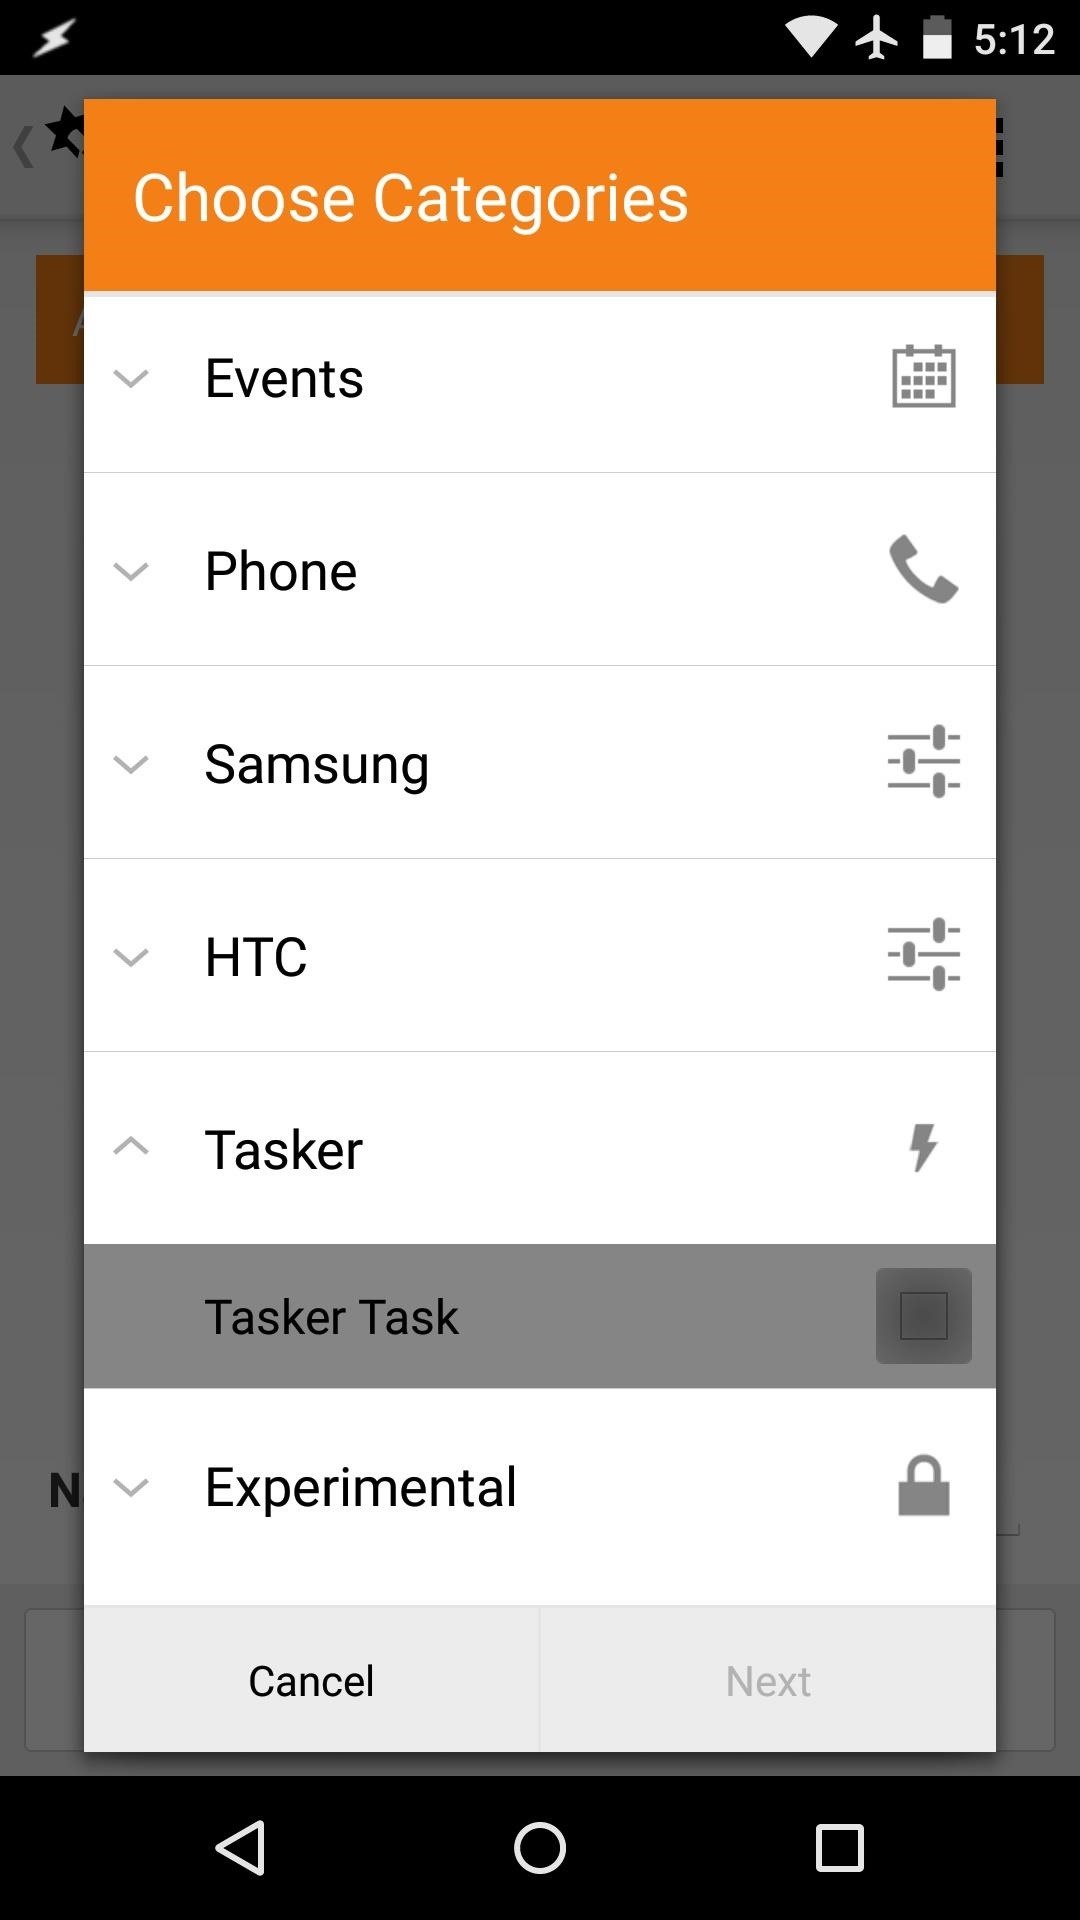
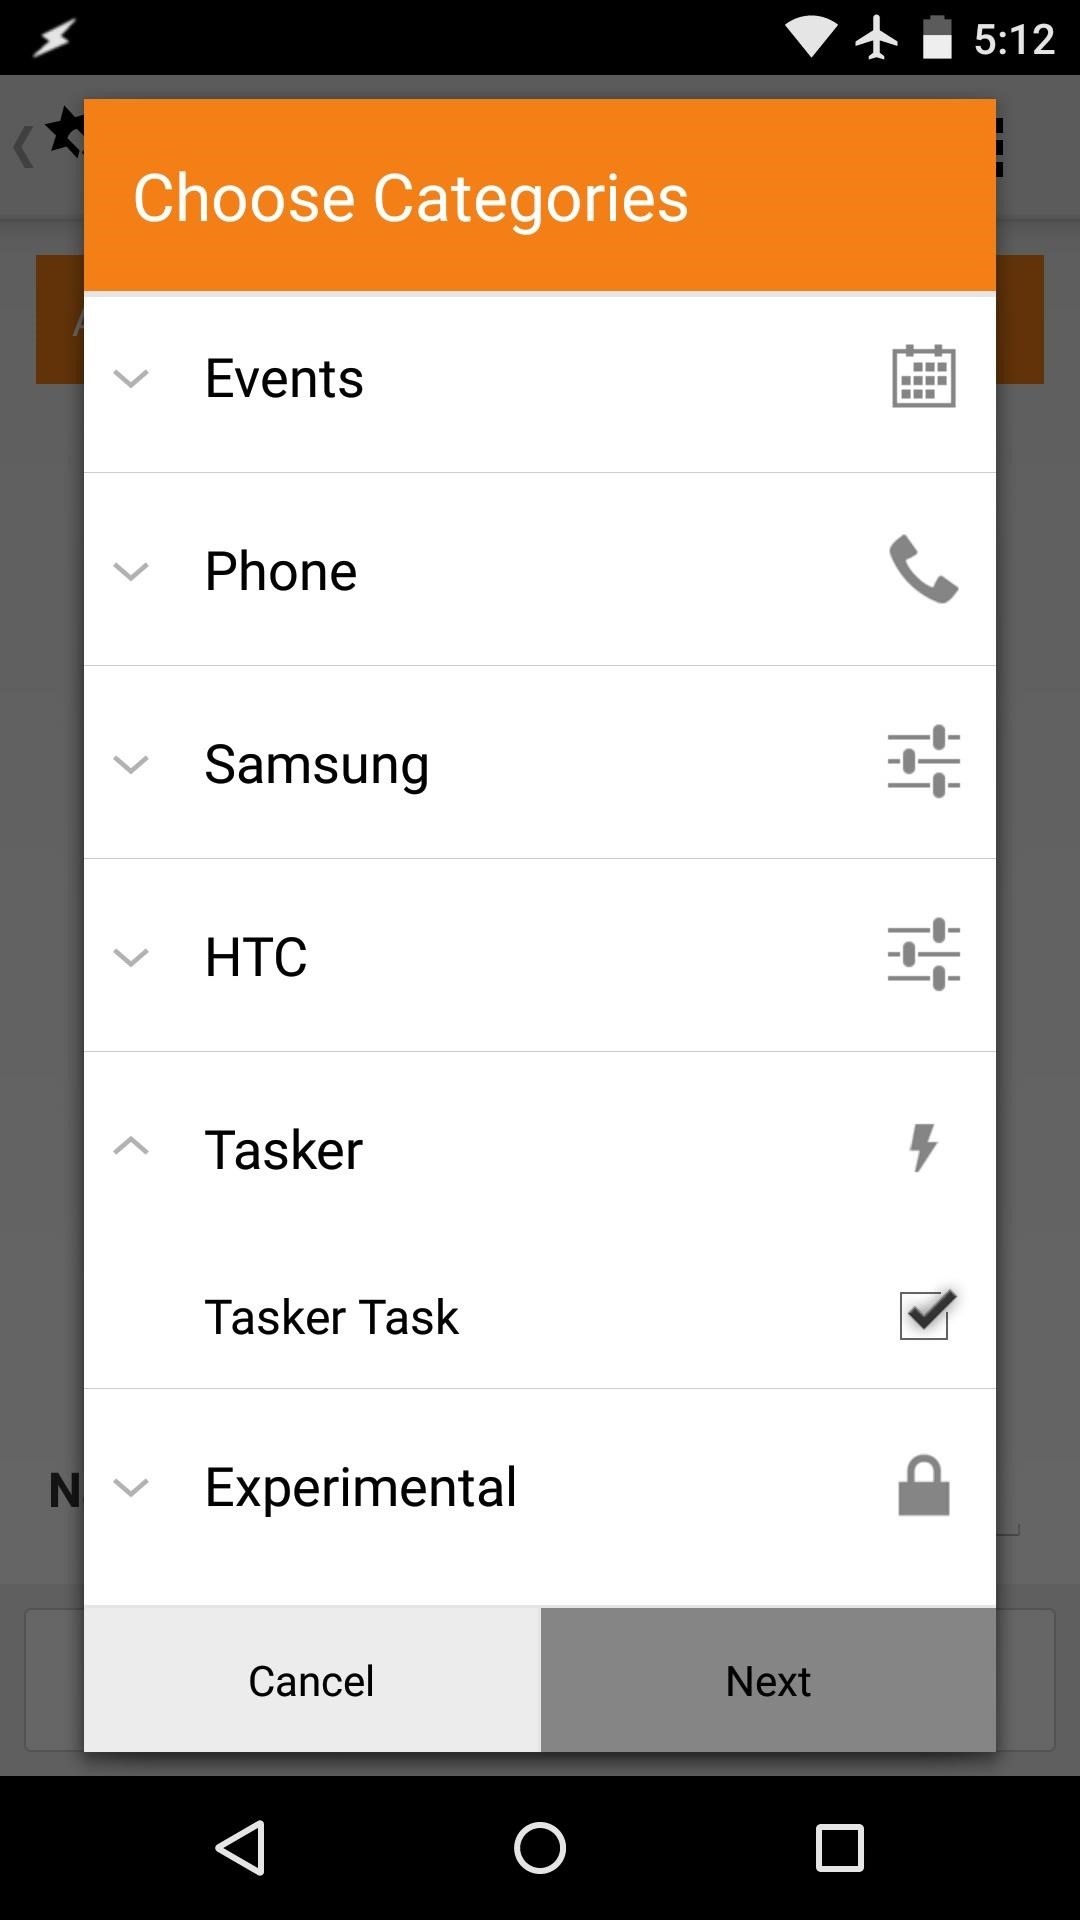
From here, tap the "+" button at the bottom of the screen again, then select "Plugin" and "WoL Wake On Lan Wan" from the two menus that follow.
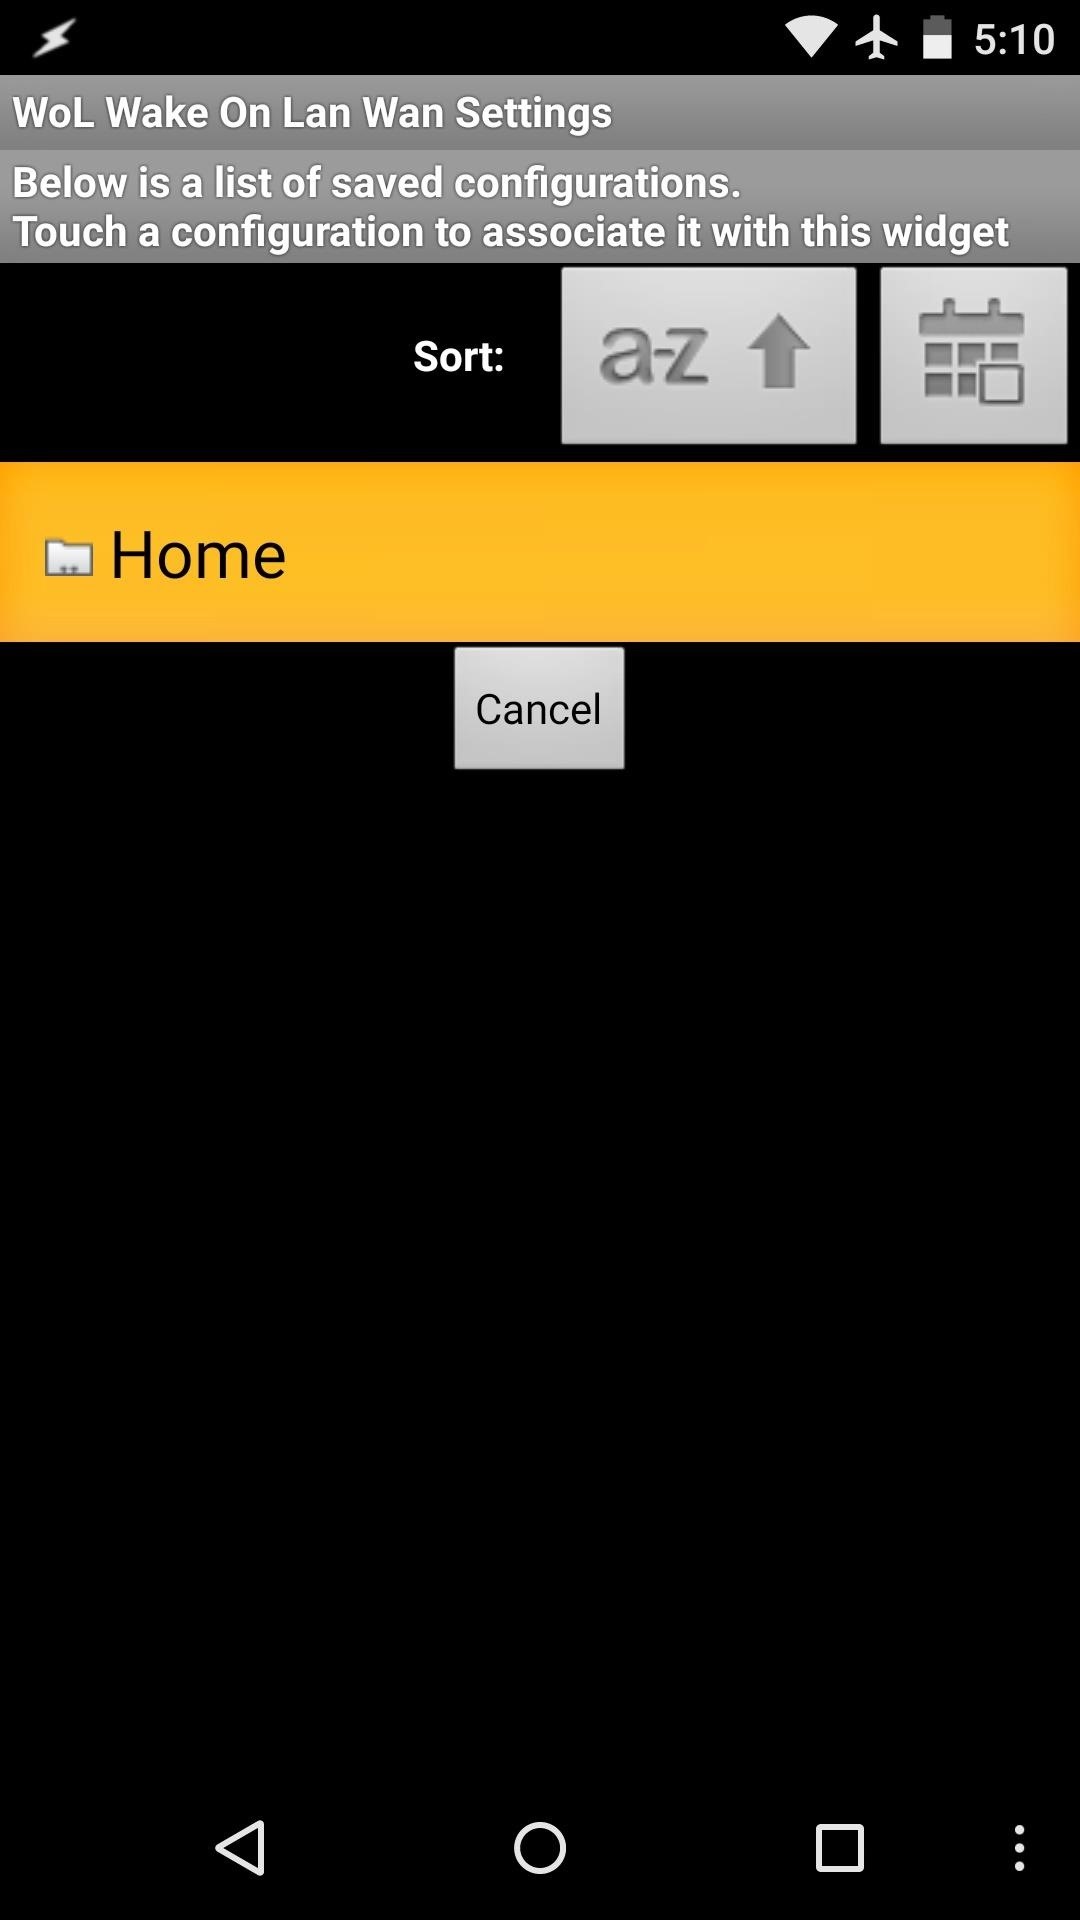
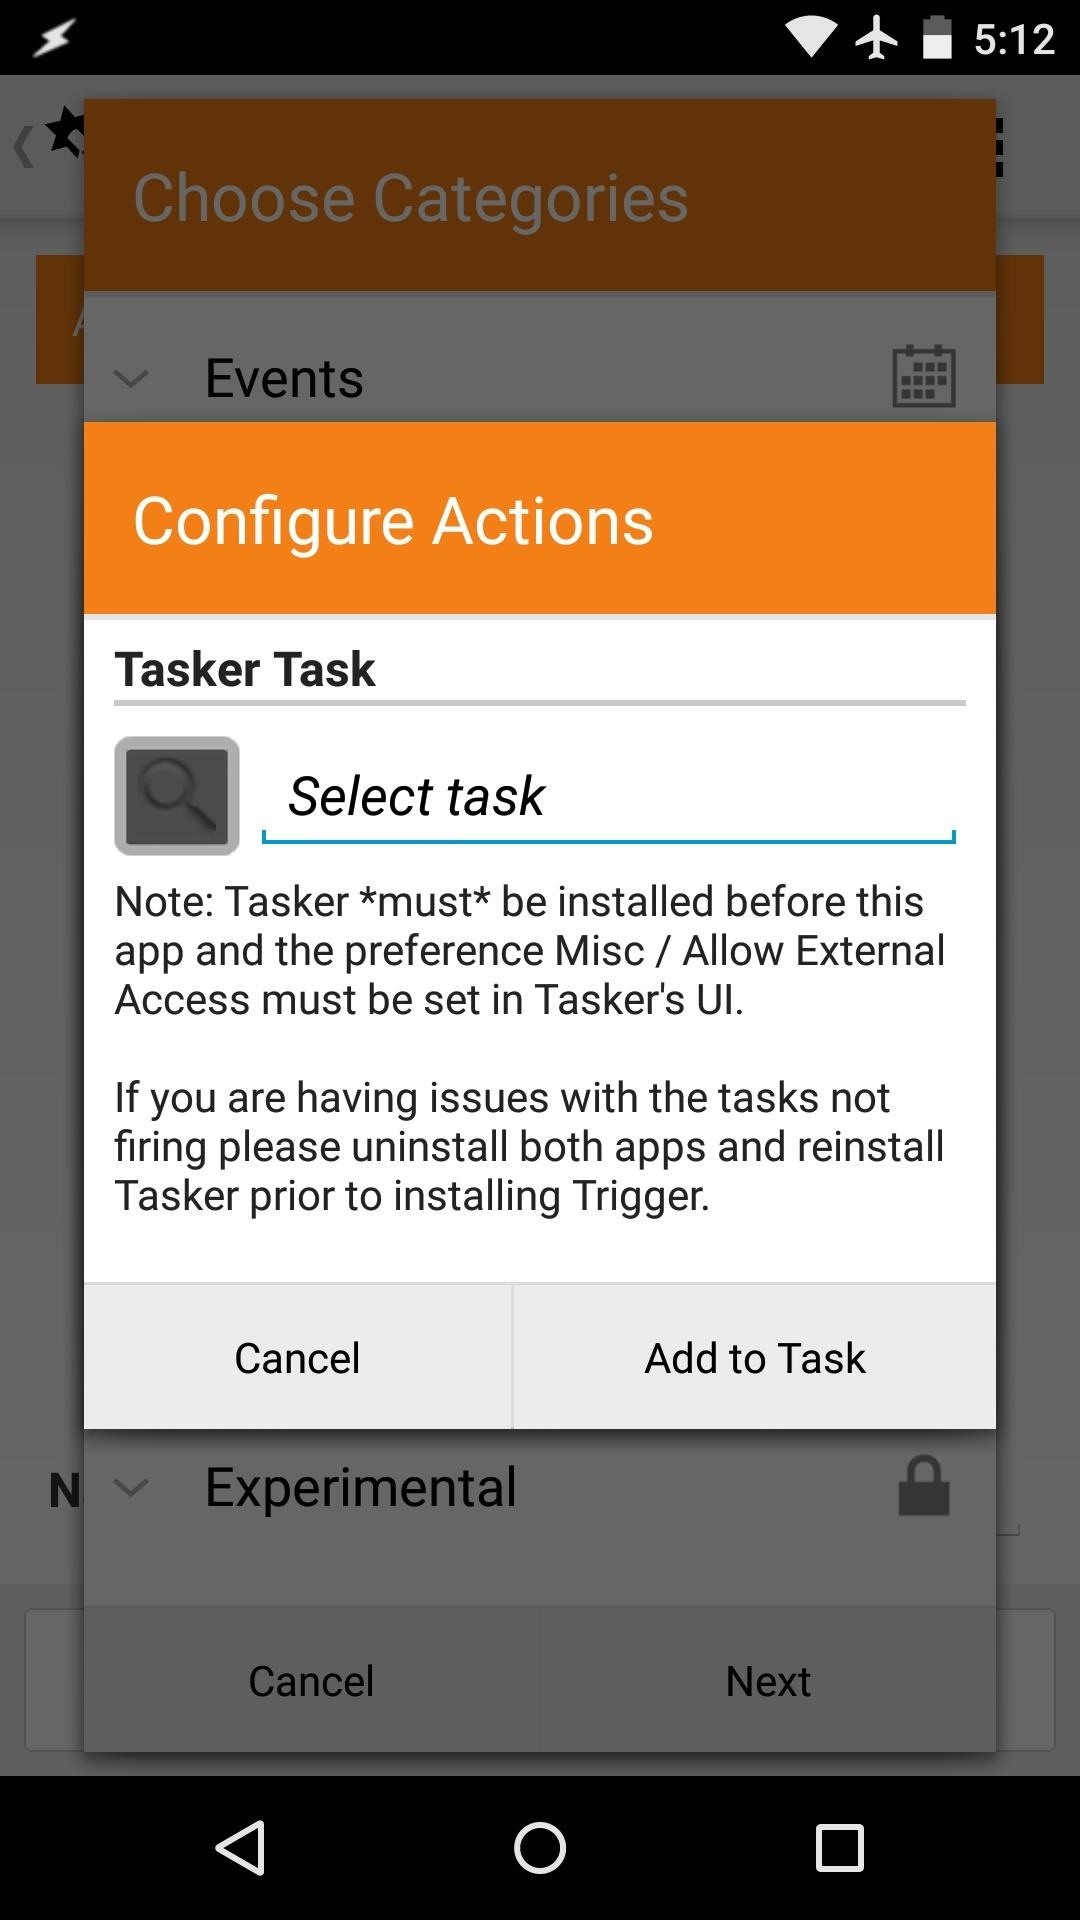
After that, tap the pencil-shaped edit button at the top of the screen, then select your "Home" WoL Wake On Lan Wan profile. When you're done with that, go ahead and back all the way out of Tasker.
Step 6: Associate This Task with an NFC Tag Using Trigger
All that's left to do at this point is to tie your work to an NFC tag. Open the Trigger app, then tap the "+" button at the top of the screen two times.

From here, select "NFC," then tap "Next" and "Done."
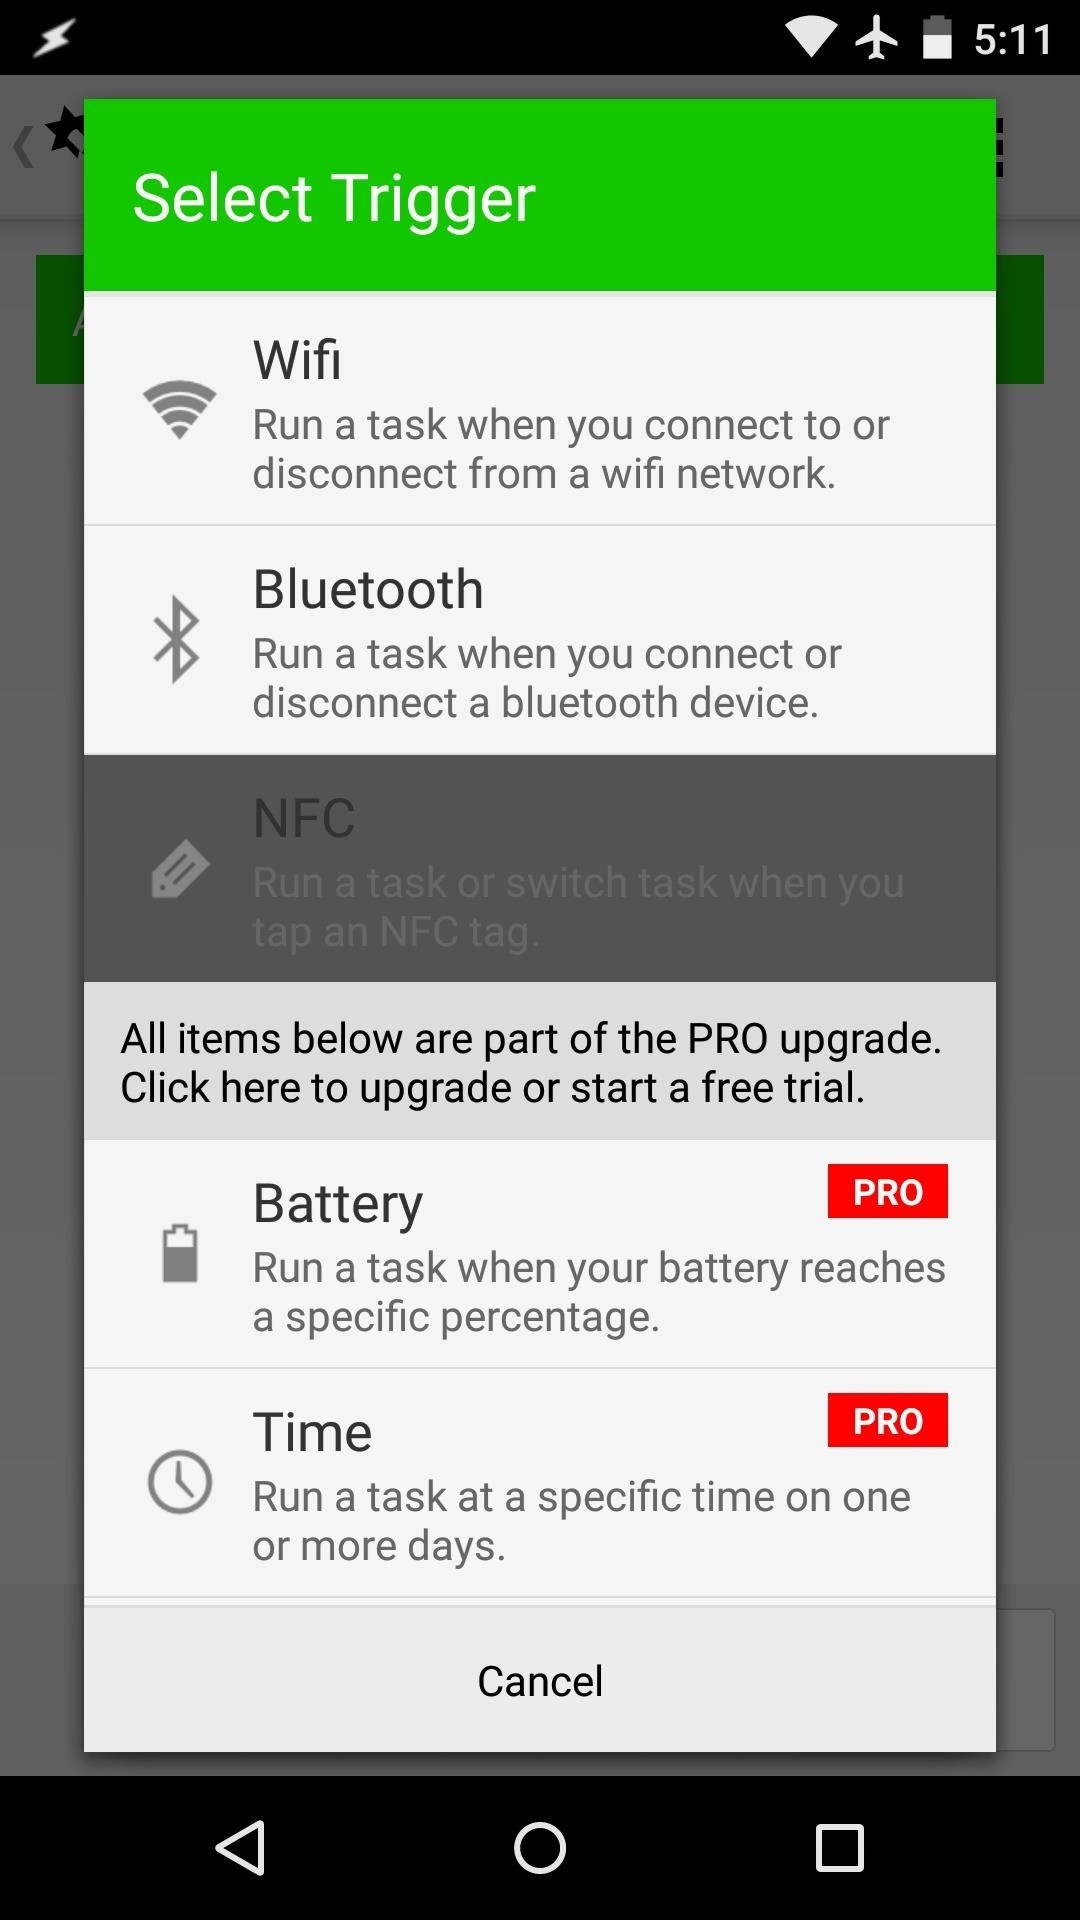
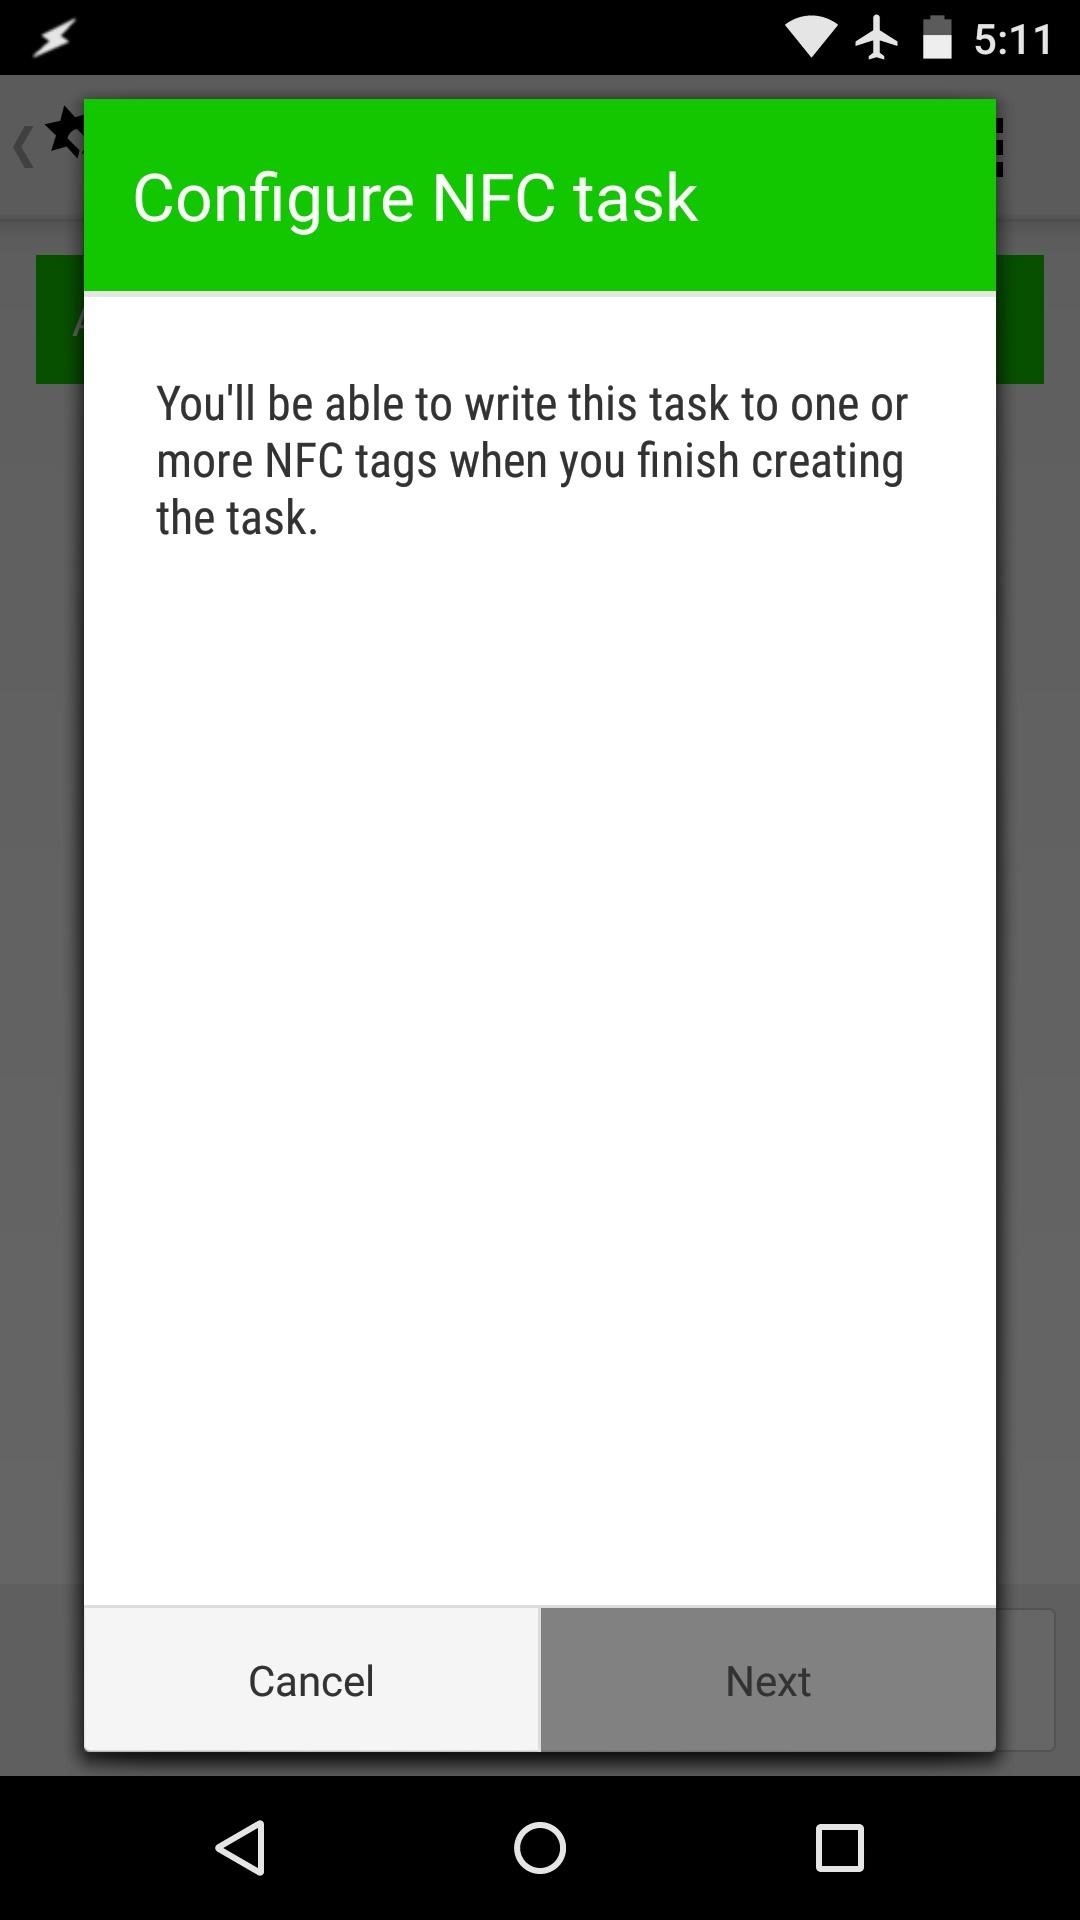
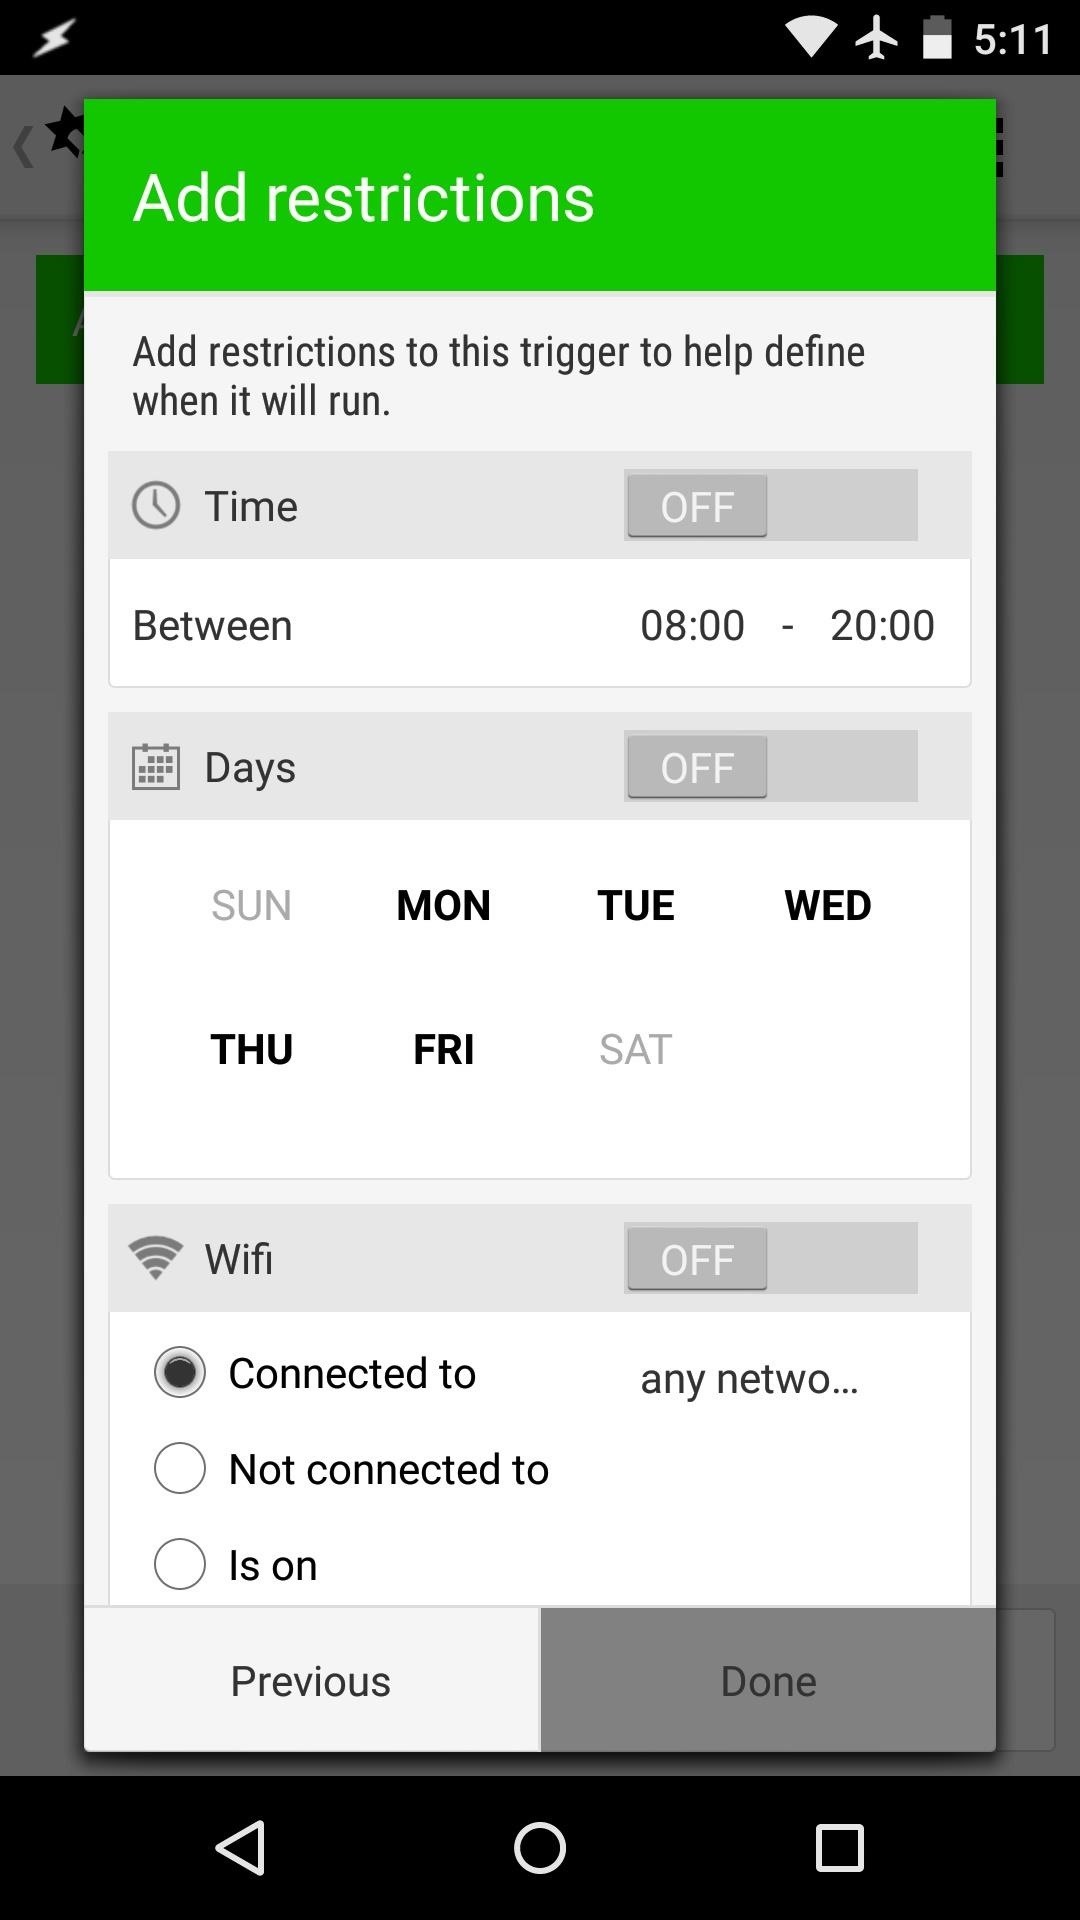
After that, tap "Next," then hit the "+" button at the top of the screen.
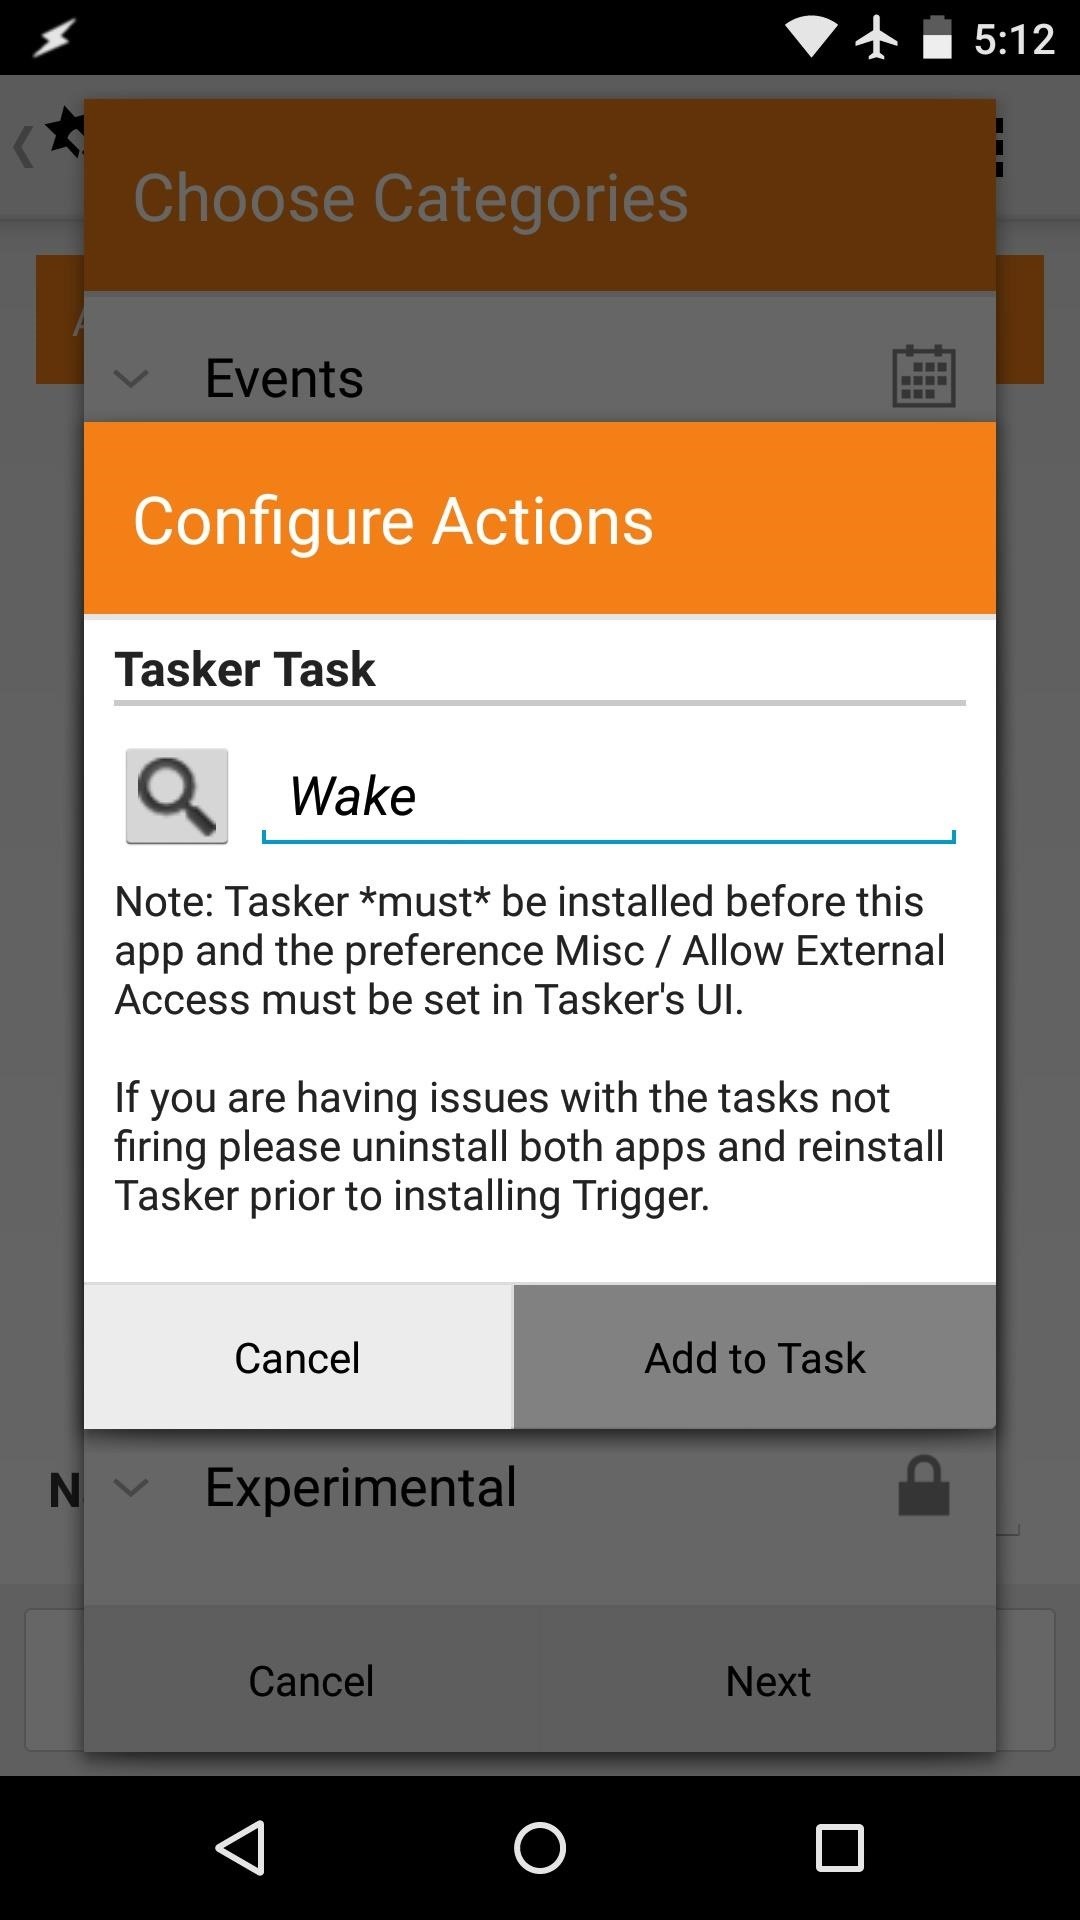
From here, select "Tasker Task," then hit "Next."
On the small popup window, tap the magnifying glass icon, then select the "Wake" task you created in Step 5 and hit "Add to Task."
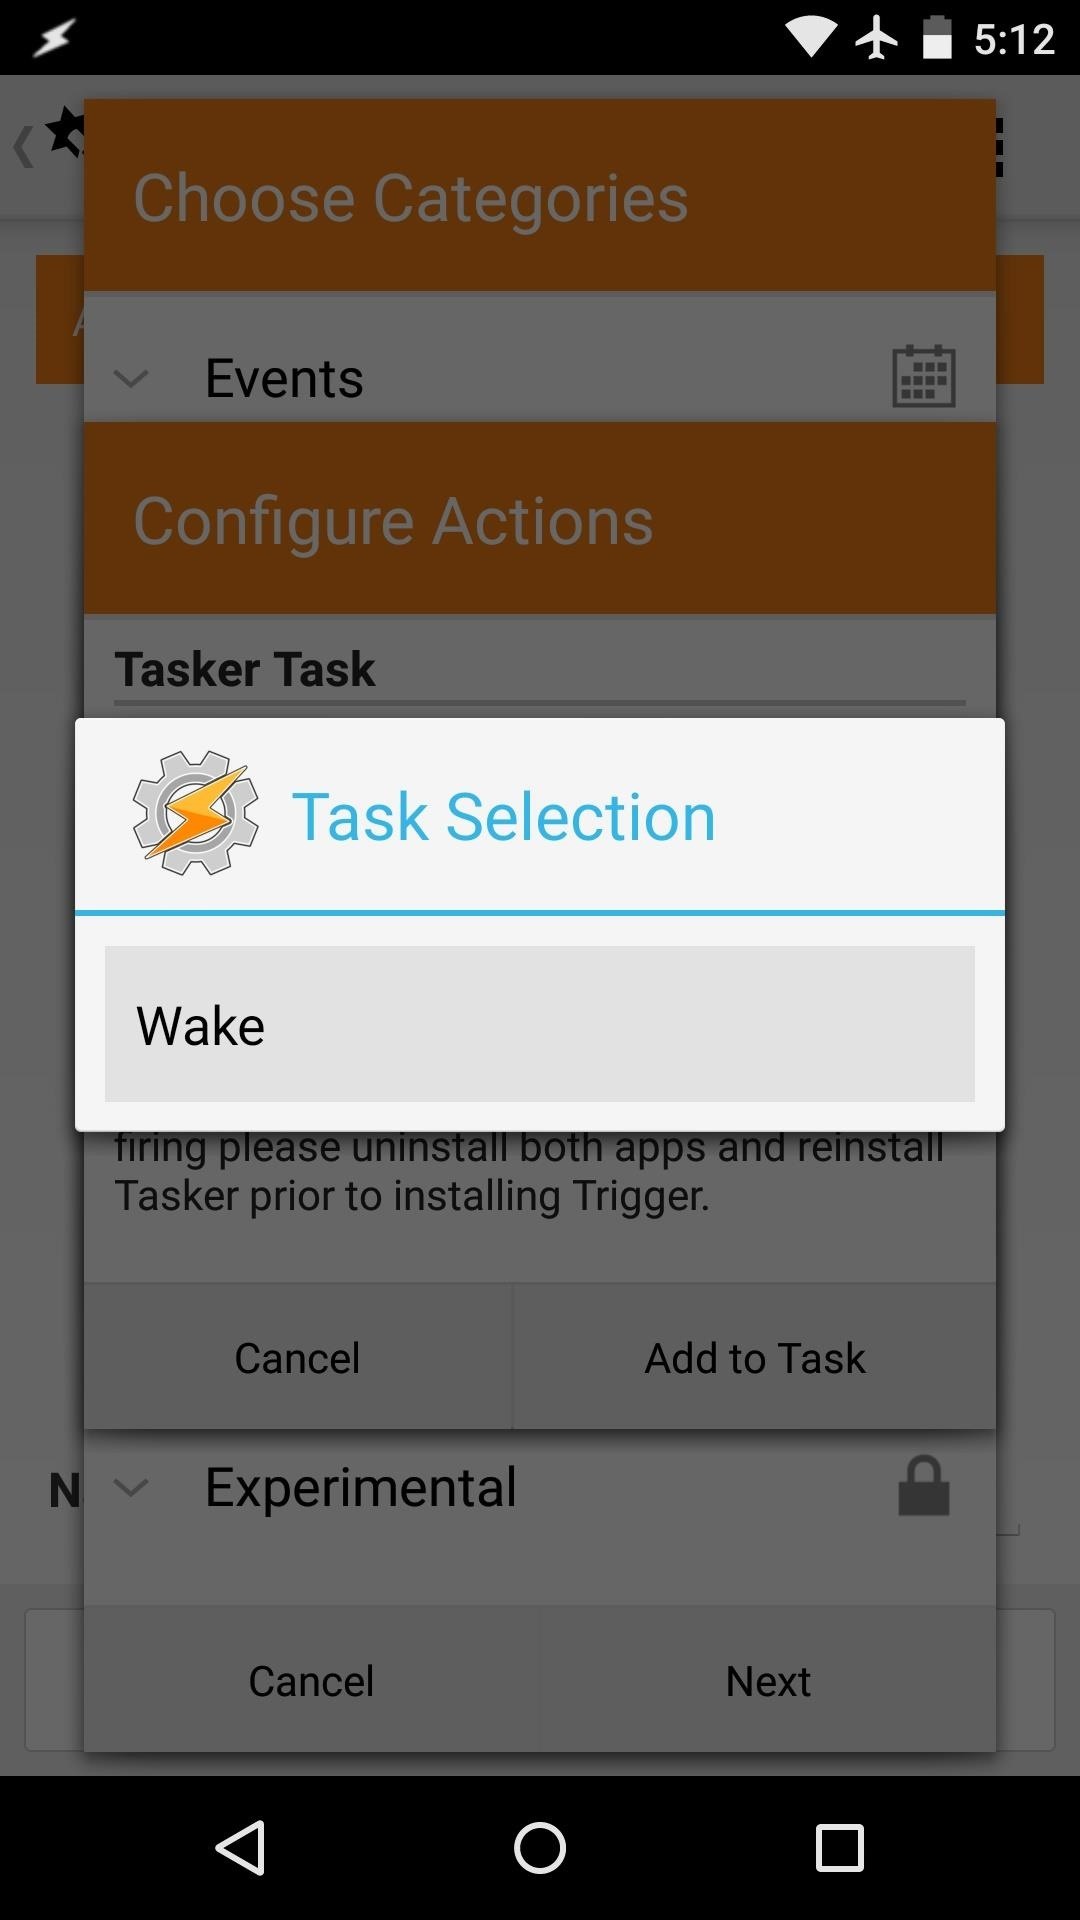
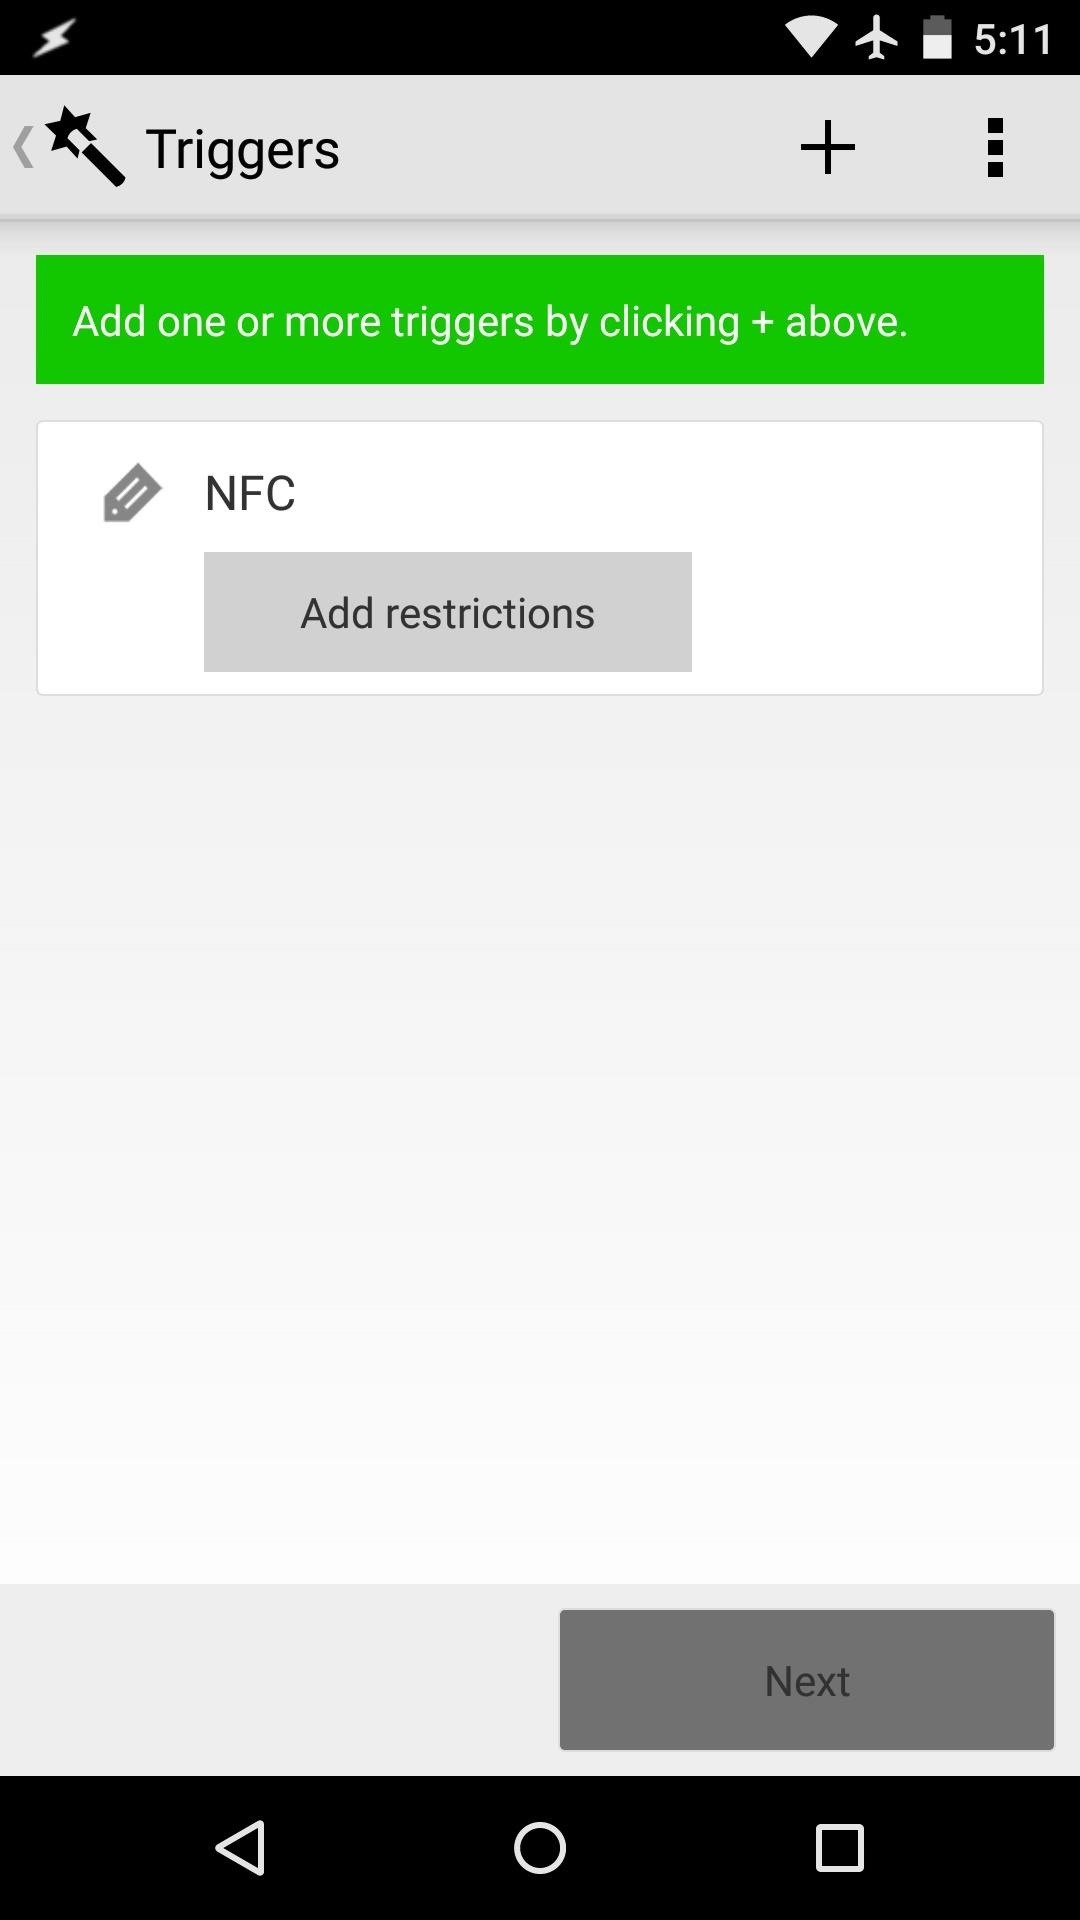
Again, hit "Next" and "Done," then grab your NFC tag.
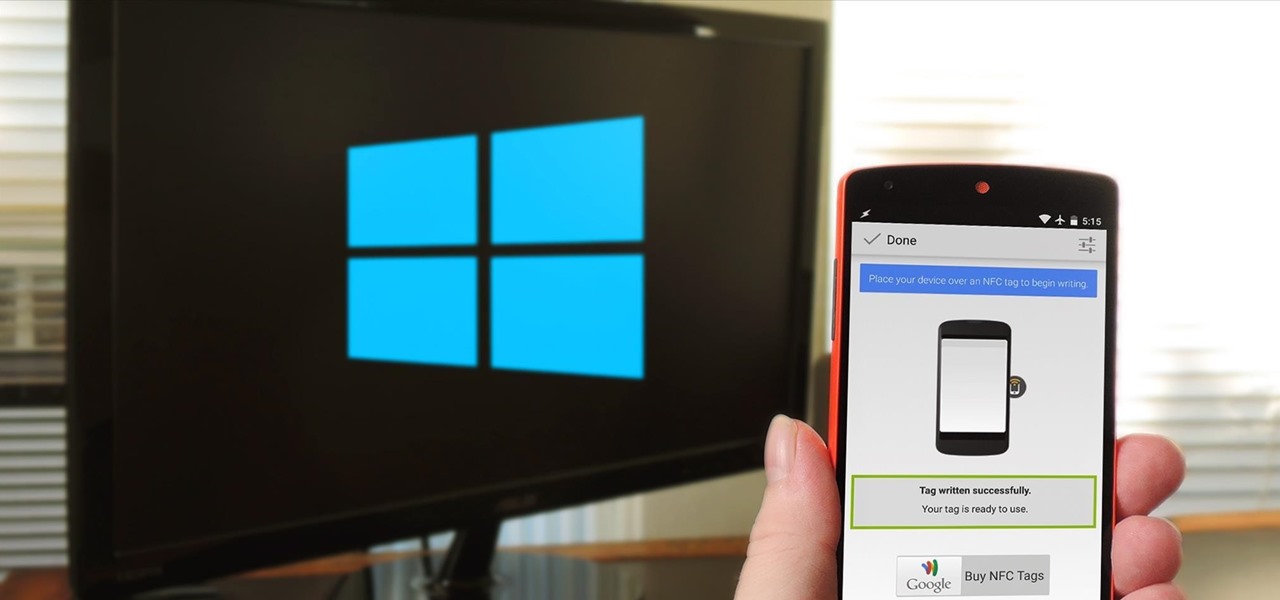
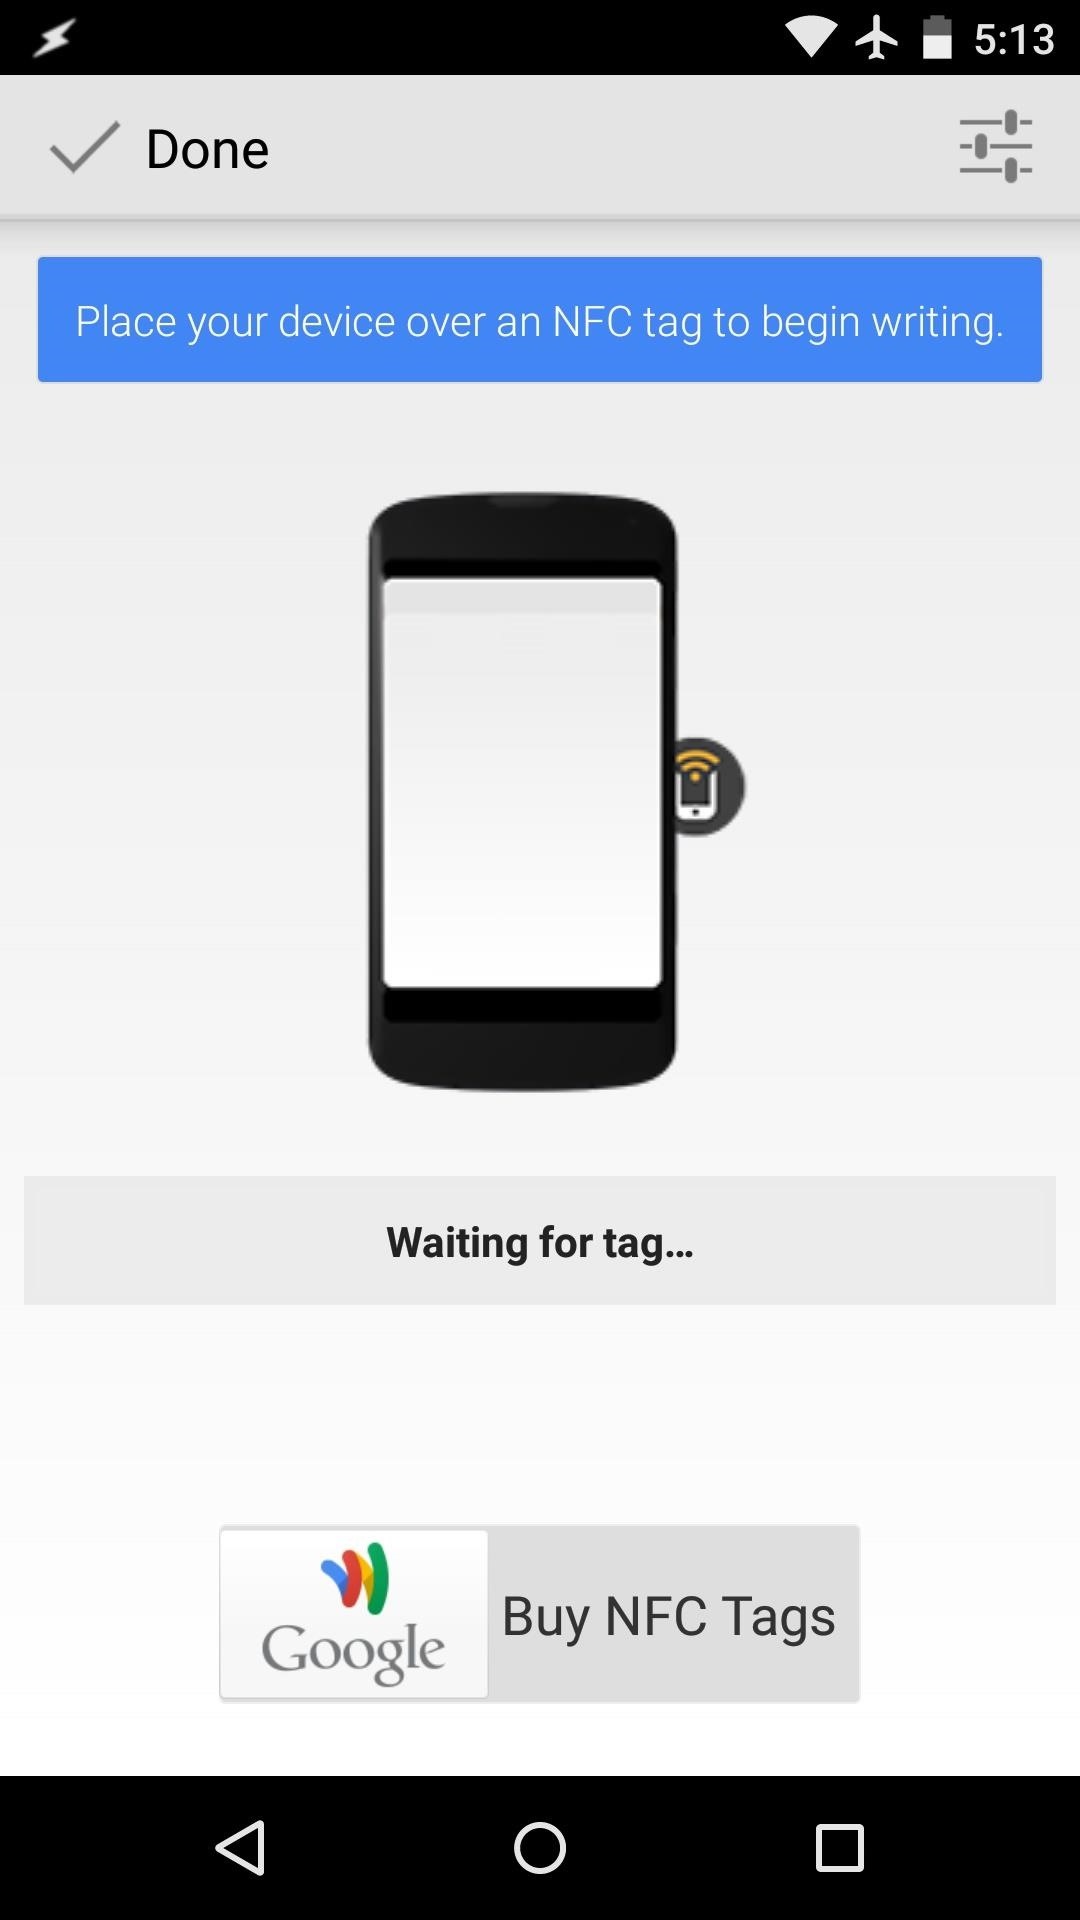
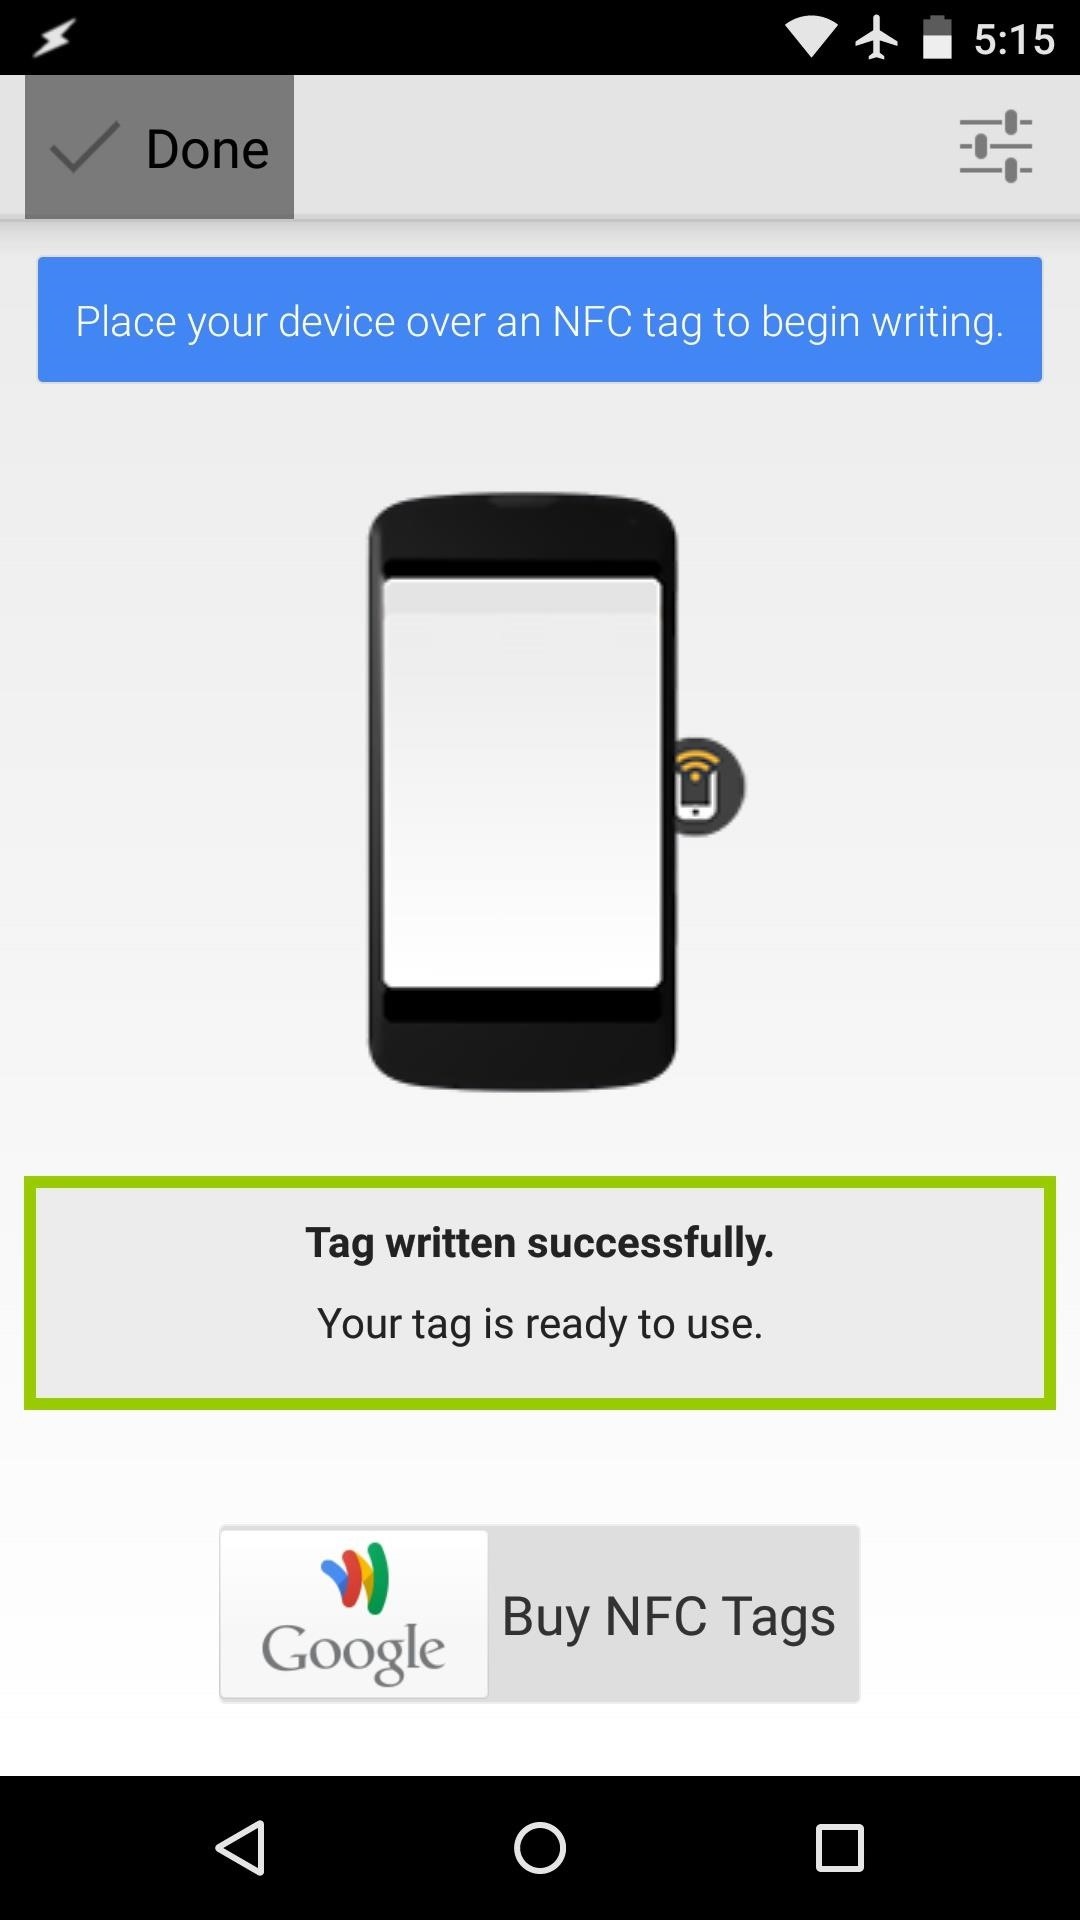
From here, you'll be prompted to write this task to your NFC tag. Place your phone within range of the tag to do so, then tap "Done" when the process has completed.
Step 7: Waking Your PC & Troubleshooting
With everything set up, you should now be able to turn your PC on by simply setting your phone down on top of the NFC tag. Note that most phones will have to be unlocked with the display on before the task will trigger.
If you're experiencing any issues with the tasks you've created, the first troubleshooting step you should take is to run through your computer's BIOS settings. For most models, BIOS can be accessed by pressing the Delete, F2, F8, or F10 buttons on your keyboard during a reboot. From here, make sure that any "Wake on LAN" options are enabled, then save your changes and try again.
In the end, your phone and a simple sticker on your desk now serve as your PC's power button. I have mine stuck to a Qi charger so that I can top off my battery while I'm using my computer. What's your setup like? Let us know in the comments section below, as well as on Facebook, Google+, or Twitter.
Who needs a wand? Unlock your magical powers and transform yourself from a Muggle into a Wizard or Witch just by using your Android phone. See how:


2 Comments
nice idea and practical one !
does it actually boots up the computer or just wakes it up from sleep??
Share Your Thoughts