
As we reported first here on Gadget Hacks, the Google Pixel and Pixel XL have unlockable bootloaders, with the exception of models purchased from Verizon. This means that once the TWRP custom recovery is installed, you can flash ZIPs and even root your device in a few taps—as long as you unlock the bootloader beforehand.
I like to mod my devices, so whenever I get a new phone, the first thing I do is unlock the bootloader—even before I log into my Google account. I do this because unlocking the bootloader wipes the device, so getting it out of the way up front makes sure I don't lose any data. That way, when a working root method becomes available, I'm ready to go.
So if you plan on rooting and modding your Pixel or Pixel XL, you might want to get the bootloader unlock process out of the way right now, as it's almost a requirement for root and ROMs. It's fairly simple, but even still, I'll go over the process in great detail to make it as easy as possible to follow along with, and ensure that all of your bases are covered.
What You'll Need
- Windows, Mac, or Linux computer
- USB data cable
A Note About Data Loss, Warranties & Android Pay
Before you do any of this, you should be aware that the process of unlocking your bootloader will trigger a factory data reset. This is a security measure built into Android to protect your data from thieves, so it's unavoidable. If you're comfortable with that, at least make sure that any important data is backed up beforehand.
Aside from that, unlocking your bootloader may void your warranty. However, these effects can be undone by running through this guide again, then replacing the command in Step 5 with "fastboot flashing lock" to re-lock your bootloader if needed.
Finally, a new Android security measure called SafetyNet is reportedly being triggered by unlocked bootloaders, which means that some apps, like Android Pay and Pokémon GO, may refuse to run if you unlock your bootloader. You'll also see a screen during boot-up that says "Your device software can't be checked for corruption," but this is normal.
To put it simply, proceed at your own risk.
Step 1: Install ADB & Fastboot on Your Computer
First up, you'll need to install ADB and Fastboot on your computer so that you can send the bootloader-unlock command to your Pixel or Pixel XL. The instructions for this part will vary depending on your operating system, but we just updated our detailed ADB and Fastboot installation guide with steps you can follow for Windows, Mac, or Linux.
Step 2: Enable 'OEM Unlocking' on Your Pixel
Next up, you'll need to prepare your Pixel. First things first, enable the hidden "Developer options" menu by heading to About phone in Settings, then tapping the "Build number" entry seven times in rapid succession. For more help with this part, check out our full guide on the subject:
Once you've done that, head to the Developer options menu on your Pixel, then make sure to enable the "OEM unlocking" setting. This will allow you to unlock your bootloader using Fastboot commands.
Step 3: Put Your Phone into Bootloader Mode
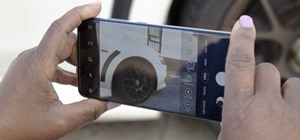
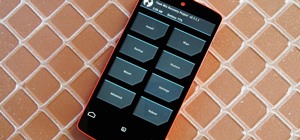
In order to run the commands that will unlock your bootloader, your phone will need to be in Bootloader Mode. So next, power your Pixel completely off. When the screen goes black, press and hold the volume down and power buttons simultaneously. Within a few seconds, you should be greeted by Android's Bootloader menu, which looks like this:
When you see this screen, plug your Pixel into your computer using the USB data cable that came with the device. Aside from that, leave the phone alone, as it's time to do some work on the computer side of things.
Step 4: Open an ADB Shell on Your Computer
Next up, navigate to the ADB and Fastboot installation directory on your computer. For Windows users, this can usually be found at C:\Program Files (x86)\Android\android-sdk\platform-tools. For Mac and Linux users, it depends on where you extracted your ADB folder when you installed the utility.
From here, if you're using a Windows PC, hold down the shift button on your keyboard, then right-click any empty space and choose "Open command window here." For Mac and Linux users, simply open a Terminal window, then change directories to the platform-tools folder inside of your ADB installation directory.
Step 5: Unlock Your Bootloader
Before we get into this part, note that I'll be listing the commands for Windows users. Mac users will have to add a period and a slash (./) before each of these commands, and Linux users will have to add a slash (/) to the front.
So from the ADB shell, type the following command, then hit enter.
- fastboot devices
If that returns a series of letters and numbers followed by the word "fastboot," then your device is connected properly and you're good to go. Otherwise, refer back to Step 1 to check your ADB and Fastboot installation, and ensure that your Pixel is in Bootloader Mode as shown in Step 3.
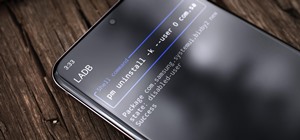
Next up, it's time to unlock your bootloader. So type the following command, then hit enter.
- fastboot flashing unlock
At this point, you'll see a message on your Pixel asking if you're sure you'd like to unlock the bootloader. Make sure the "Yes" option is highlighted, and if it's not, use your volume keys to do so. From there, press the power button, then your bootloader will unlock and your phone will reboot back into Fastboot mode.
Once you've done that, press your power button to reboot the device, and disconnect the USB cable. At this point, your bootloader is officially unlocked! You'll have to run through initial setup again, but most of your apps and data should restore automatically, thanks to the Pixel's cloud backup system.
Who needs a wand? Unlock your magical powers and transform yourself from a Muggle into a Wizard or Witch just by using your Android phone. See how:


Be the First to Comment
Share Your Thoughts