

You've probably connected your Android device to dozens of Wi-Fi networks since you've had it, and your phone or tablet remembers each of them. Whether it's a hotspot at home, school, work, the gym, a coffee shop, a relative's apartment — or even from a friend's phone — each time you type in a Wi-Fi password, your Android device saves it for safekeeping and easy access later.
The trouble comes when you want to actually see the password for one of the networks you've connected to before.
Perhaps you want to connect a second device to a saved wireless access point, or maybe you're with a friend who wants to log in to the same hotspot. If you can't get the password from the source, you might think to check your Android phone or tablet for the credentials — but looking at the stored Wi-Fi network in your settings won't show the password in plain text.
It is possible to get the plain text password for the Wi-Fi network from your device's settings, but it's not apparent at first glance. If you have a phone or tablet with an Android skin, such as any Samsung Galaxy, it will be even less obvious than if you were using stock Android on, say, a Google Pixel model. Either way, it's fairly easy to find saved Wi-Fi passwords on Android, but not as easy as Apple recently made it on iOS 16 and iPadOS 16.
Jump to your instructions:
Method 1: Stock Android 10 to Android 13
Finding the plain text password for a stored Wi-Fi network is easiest on stock Android 10, Android 11, Android 12, and Android 13. No root is needed, and it doesn't even require an extra app.
Google's Pixel devices can run Android 10 or higher, with the Pixel 4 and newer models supporting Android 13, the lastest operating system update.
And while the Android One program is no longer a thing, manufacturers that sold Android One smartphones, such as LG, Nokia, Motorola, and Xiaomi, are still bound by Google's requirements to provide software updates for at least two years following the device's release. Phones like the Nokia X10 and X20 support Android 13, but all the others released in 2020 or 2021 will probably max out at Android 12.
The process below will be very similar for Android phones running a near-stock Android experience. It may also work for other models that don't have customized connection menus.
Quick Steps:
- Open the Wi-Fi or Internet submenu in Settings.
- Tap the current network or select "Saved networks" and choose one.
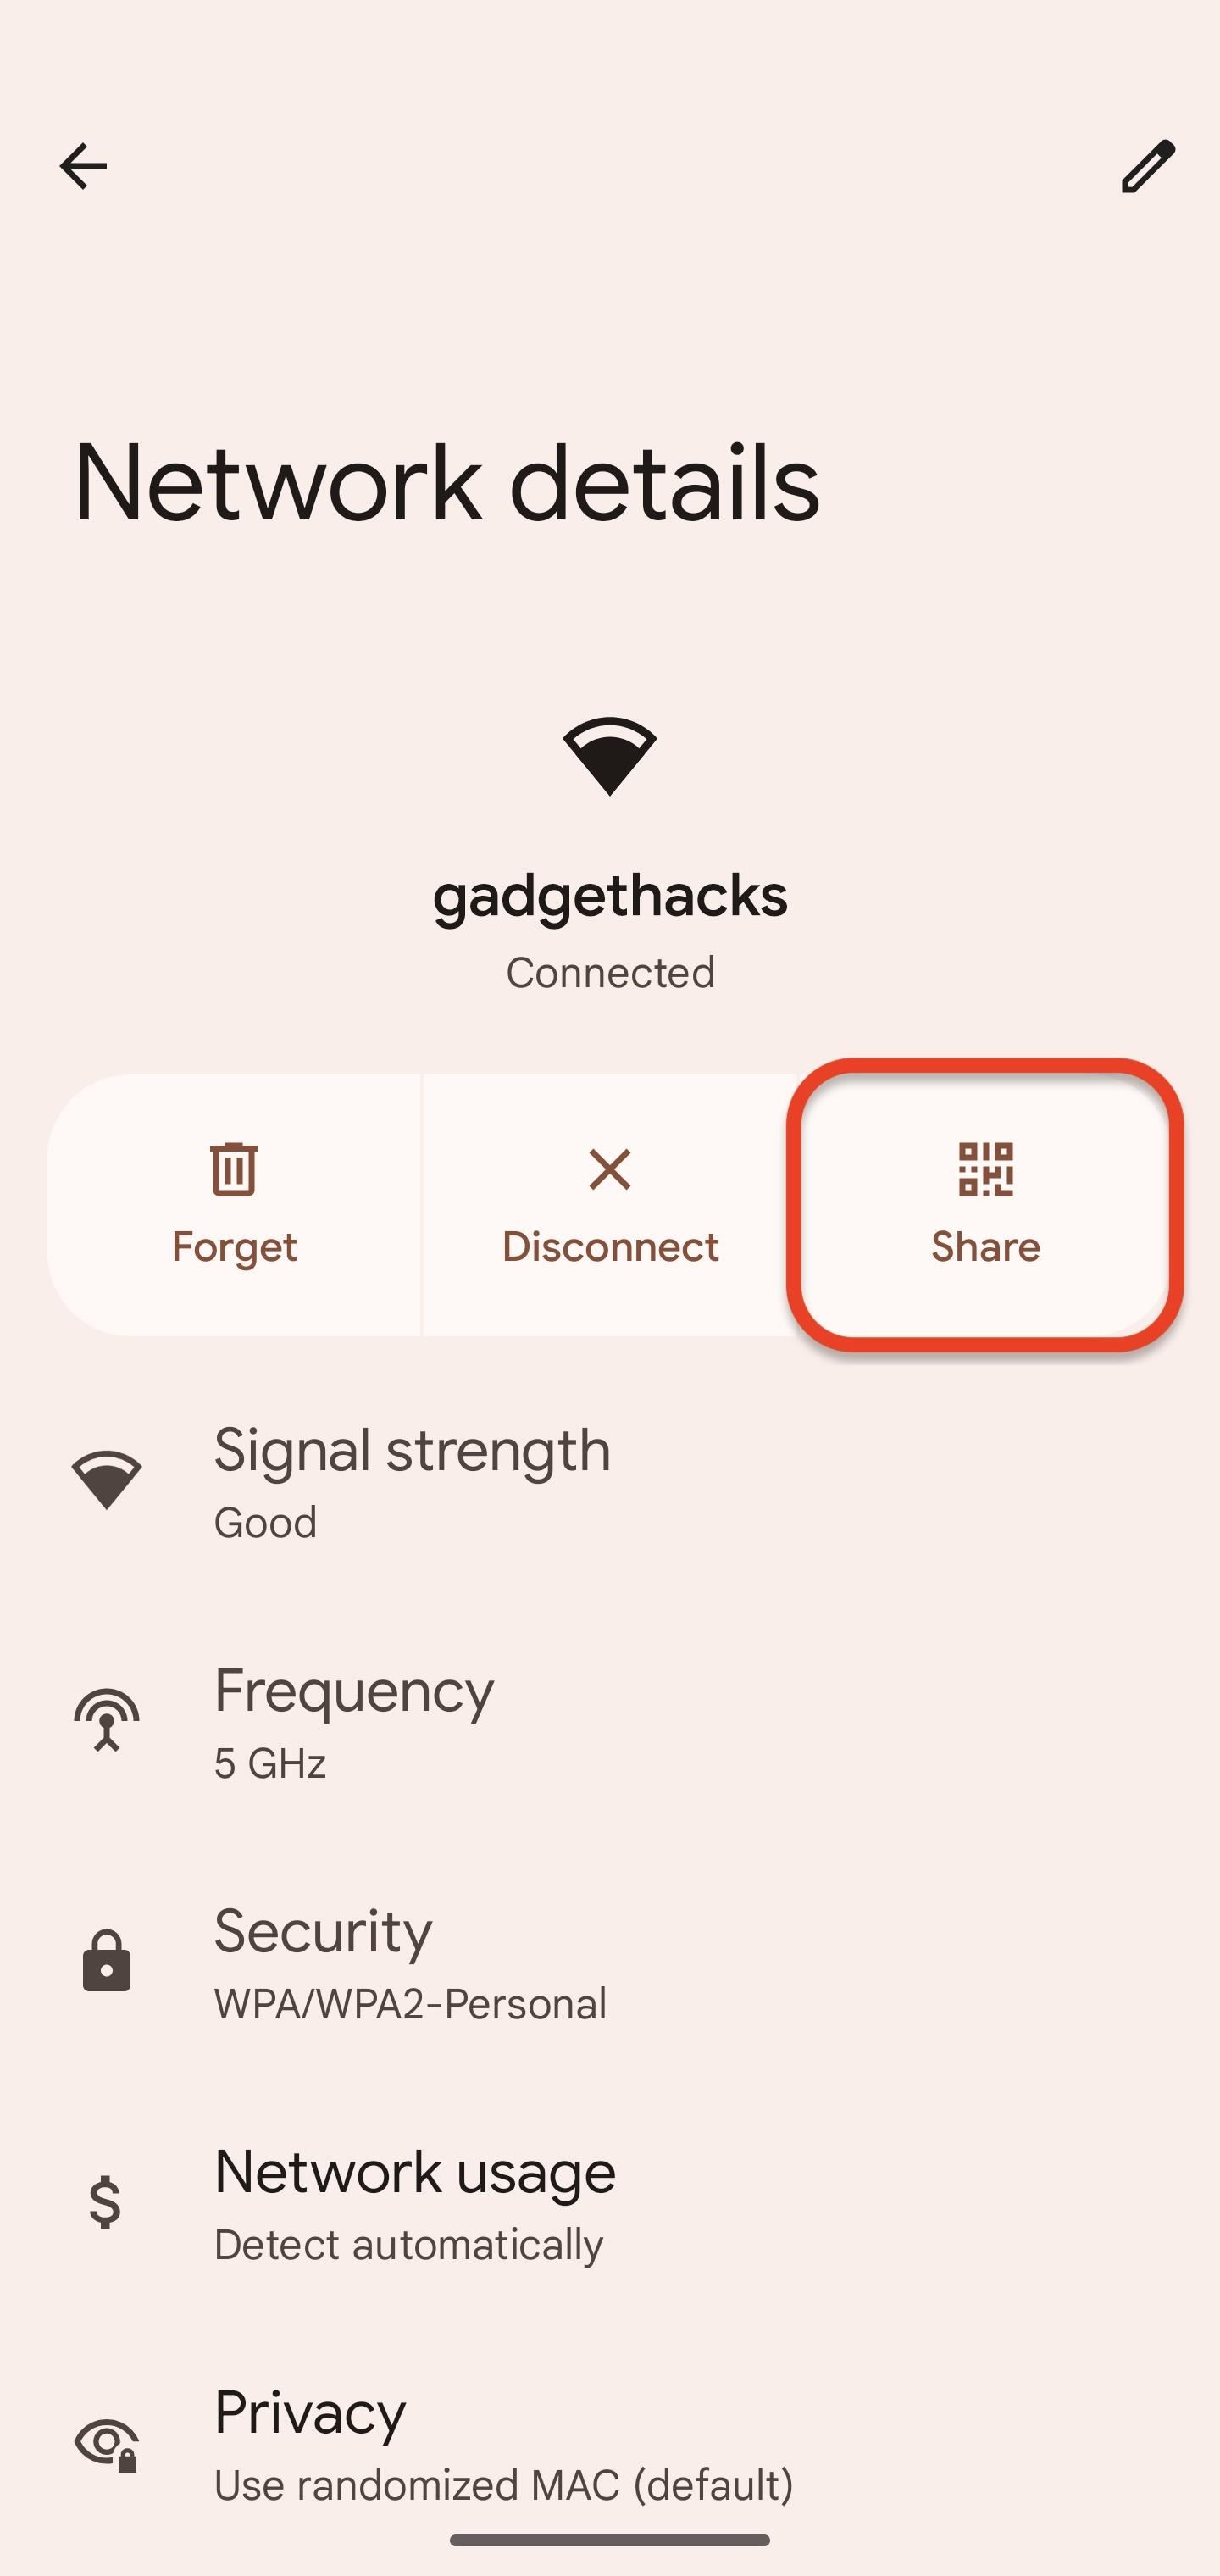
- Tap "Share" below the network's name.
- Authenticate yourself if you have device security set up.
- See the plain text password under the QR code.
Full Instructions:
First, visit the "Wi-Fi" submenu in your Settings app. Depending on your phone model and software, you can find it using one of these ways:
- Search for "wifi" in Settings, then tap the "Wi-Fi" result.
- Ask Google Assistant to "open Wi-Fi settings."
- Long-press the Wi-Fi symbol in the Quick Settings.
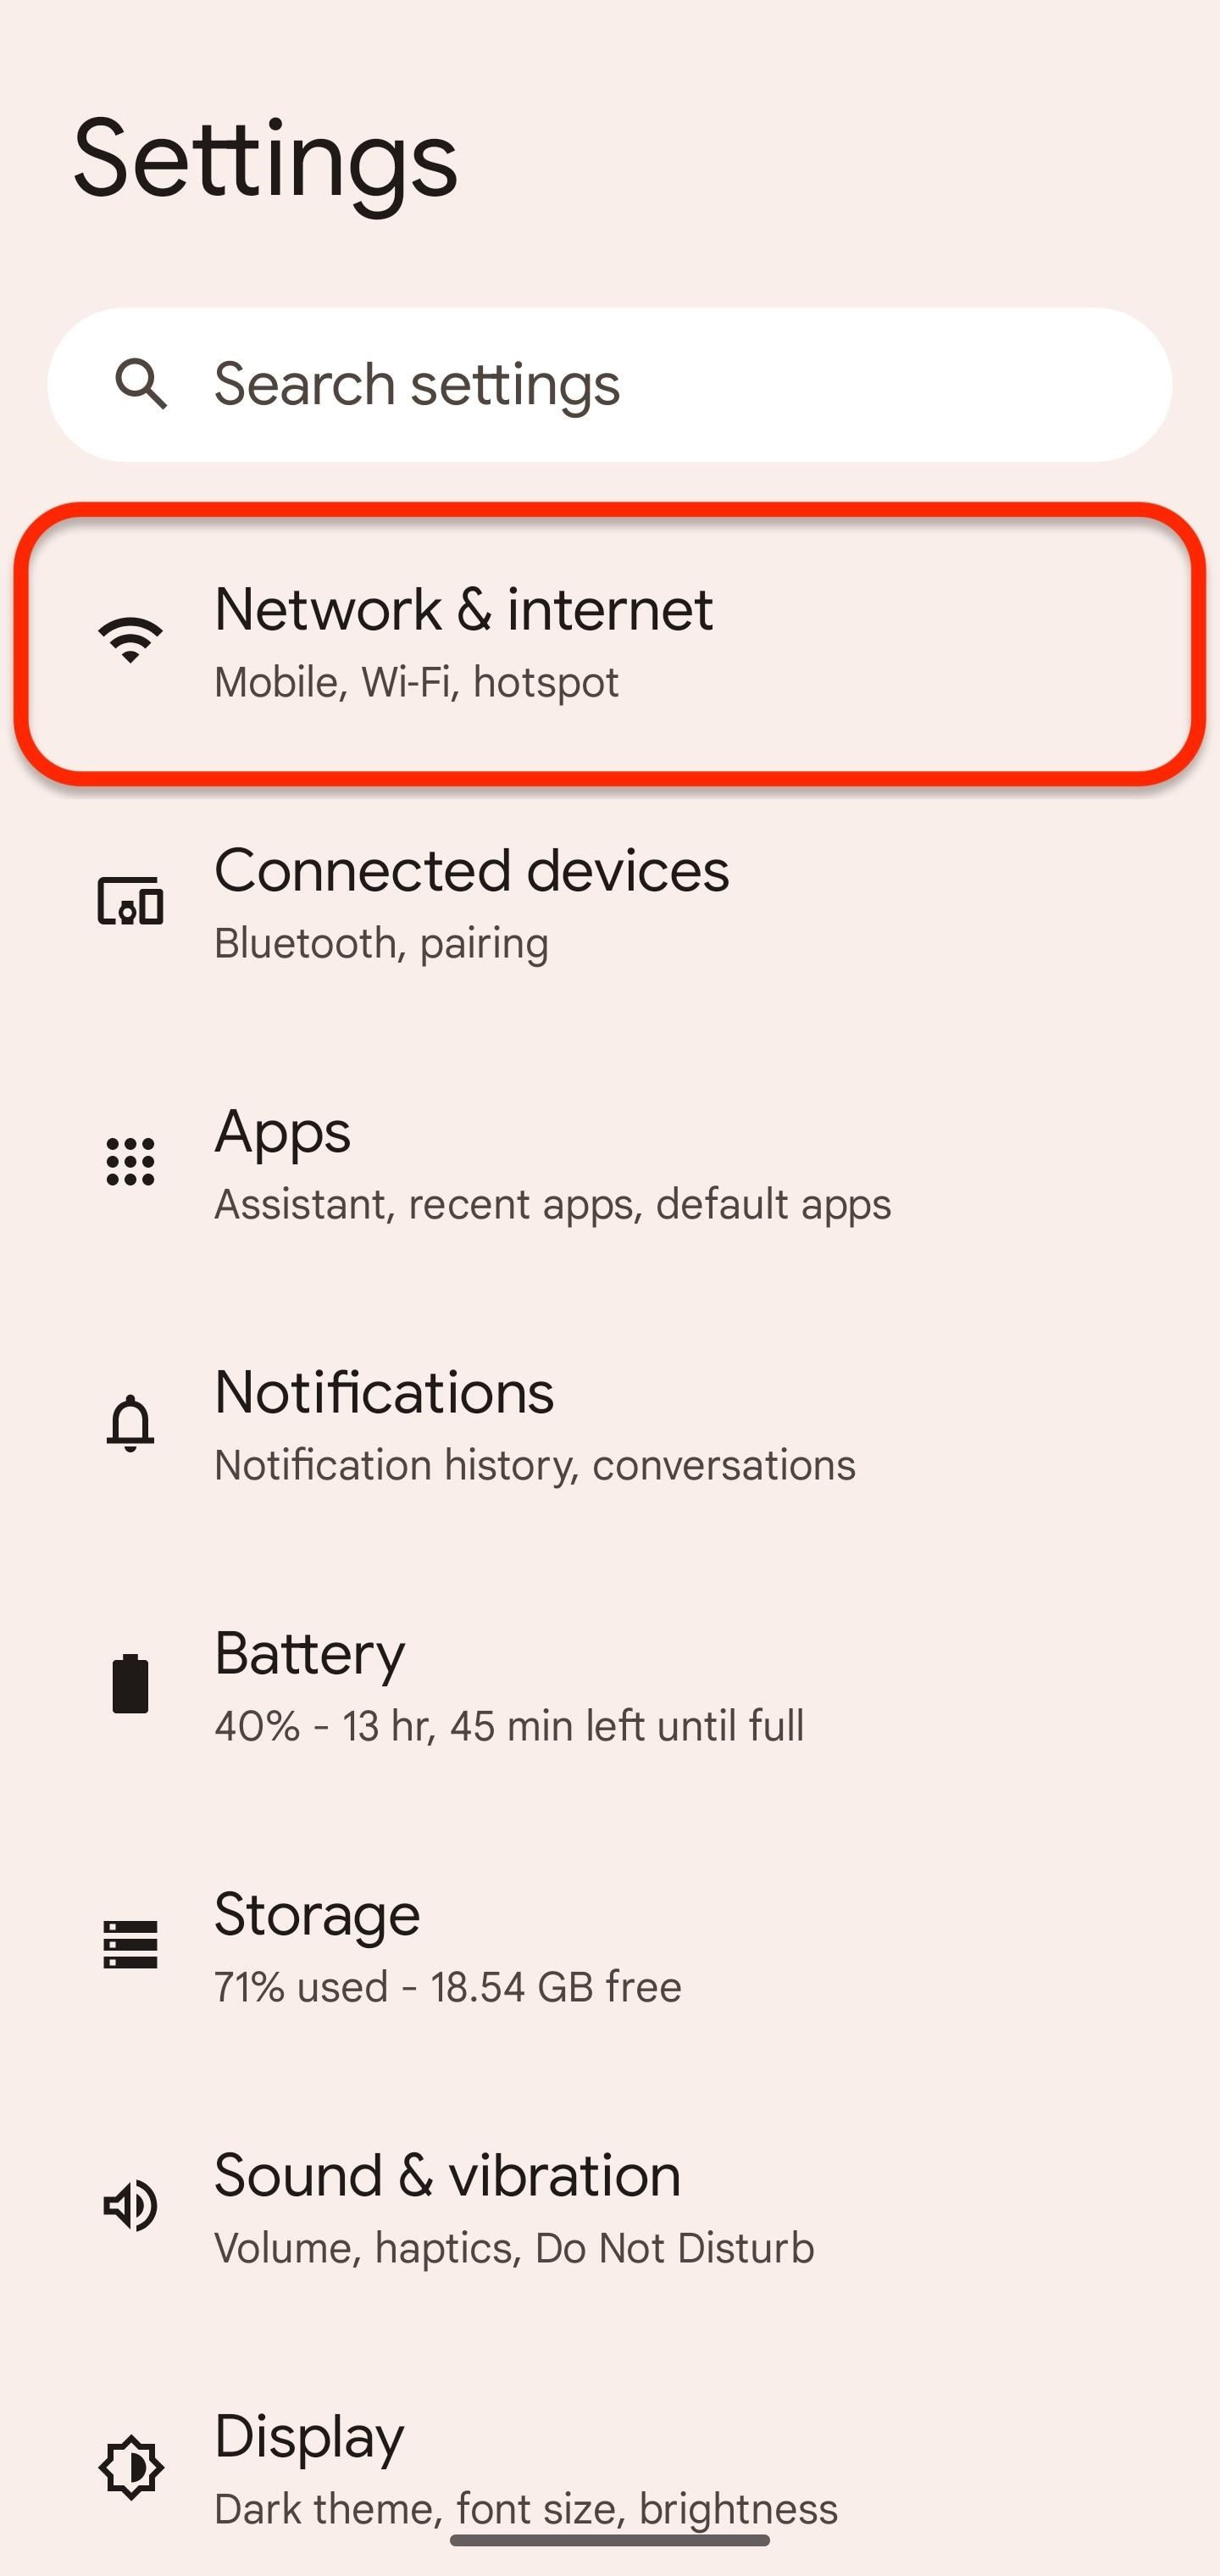
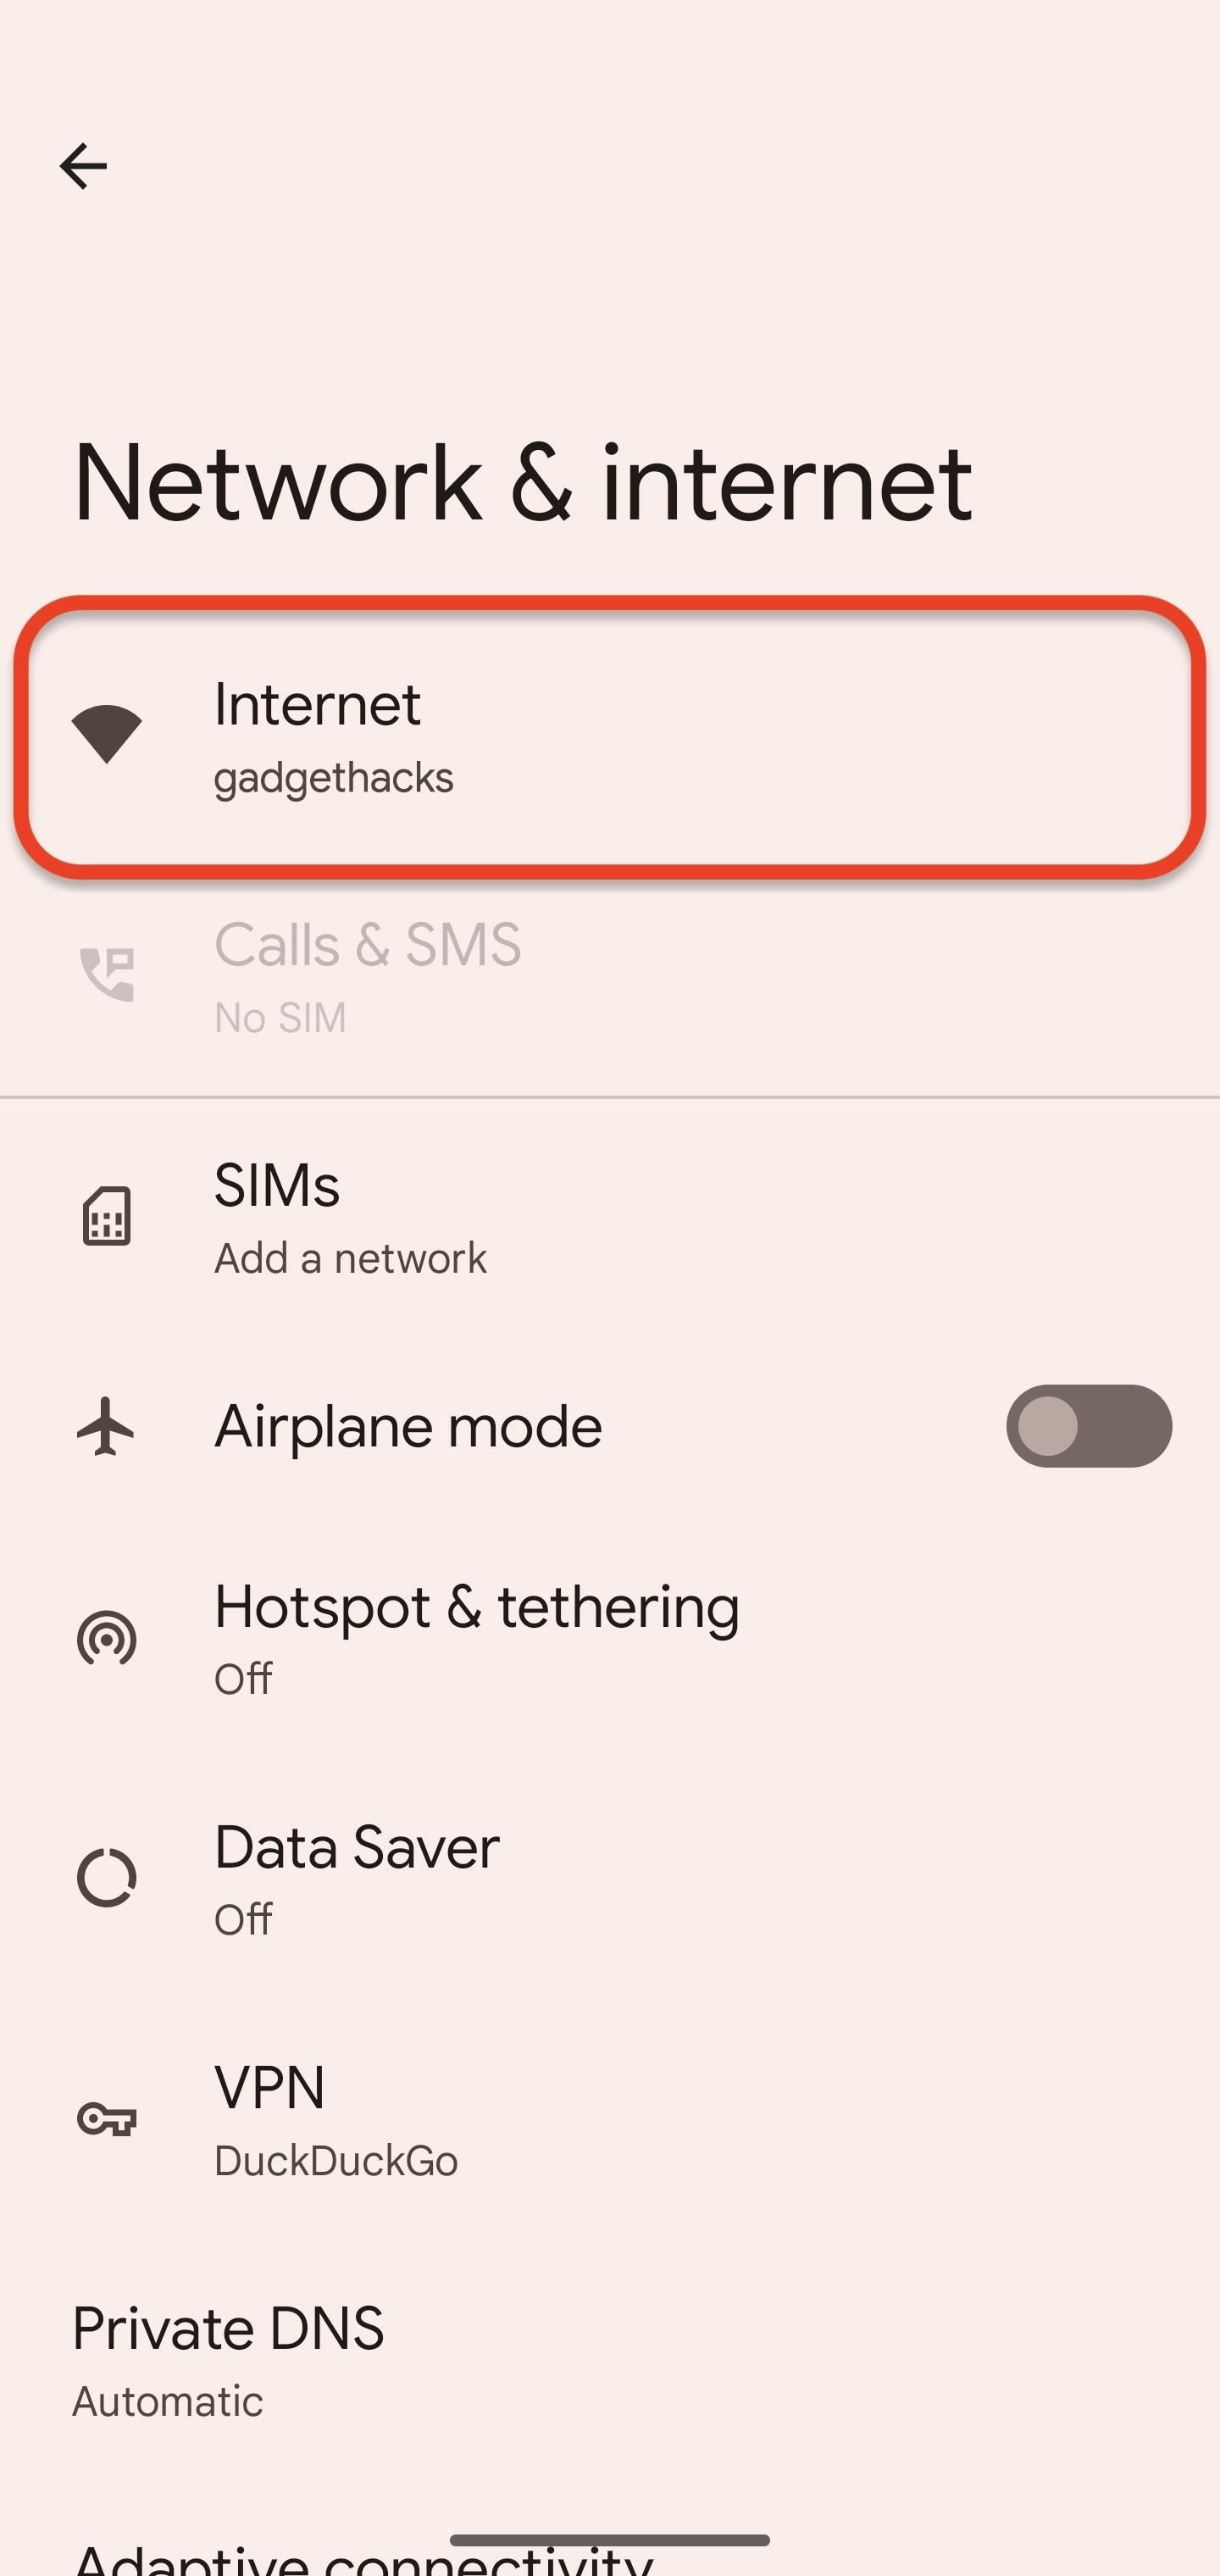
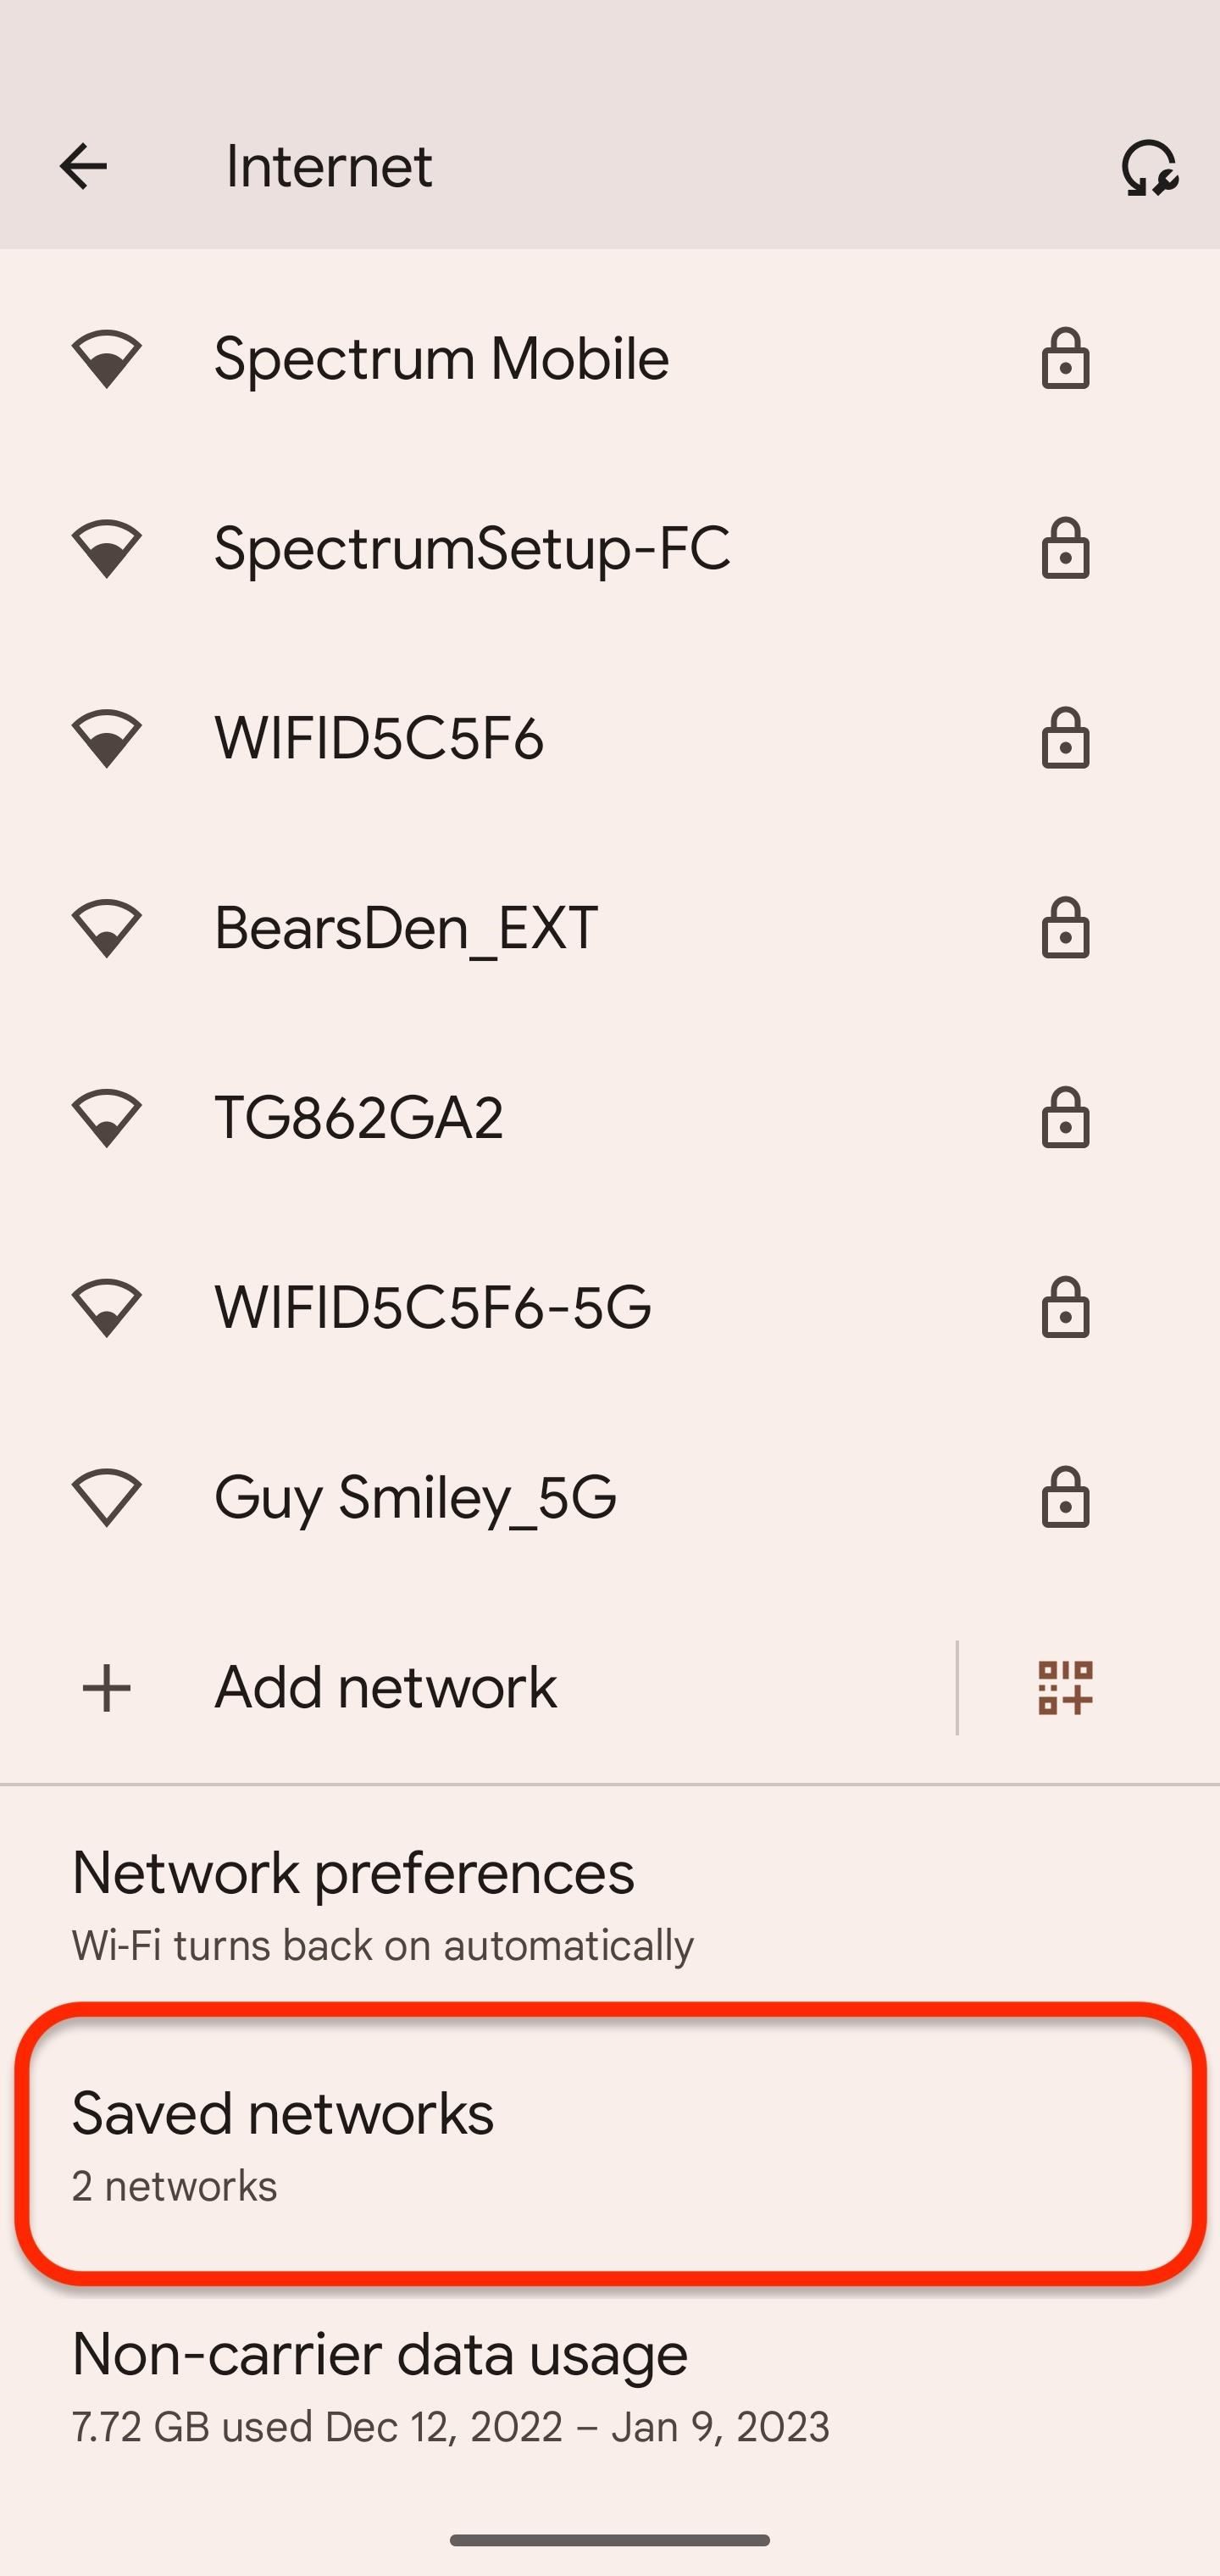
- Go to Settings –> Network & internet –> Internet (pictured below).
- Go to Settings –> Network & internet –> Wi-Fi.
- Go to Settings –> Wi-Fi (on Android 11 only).
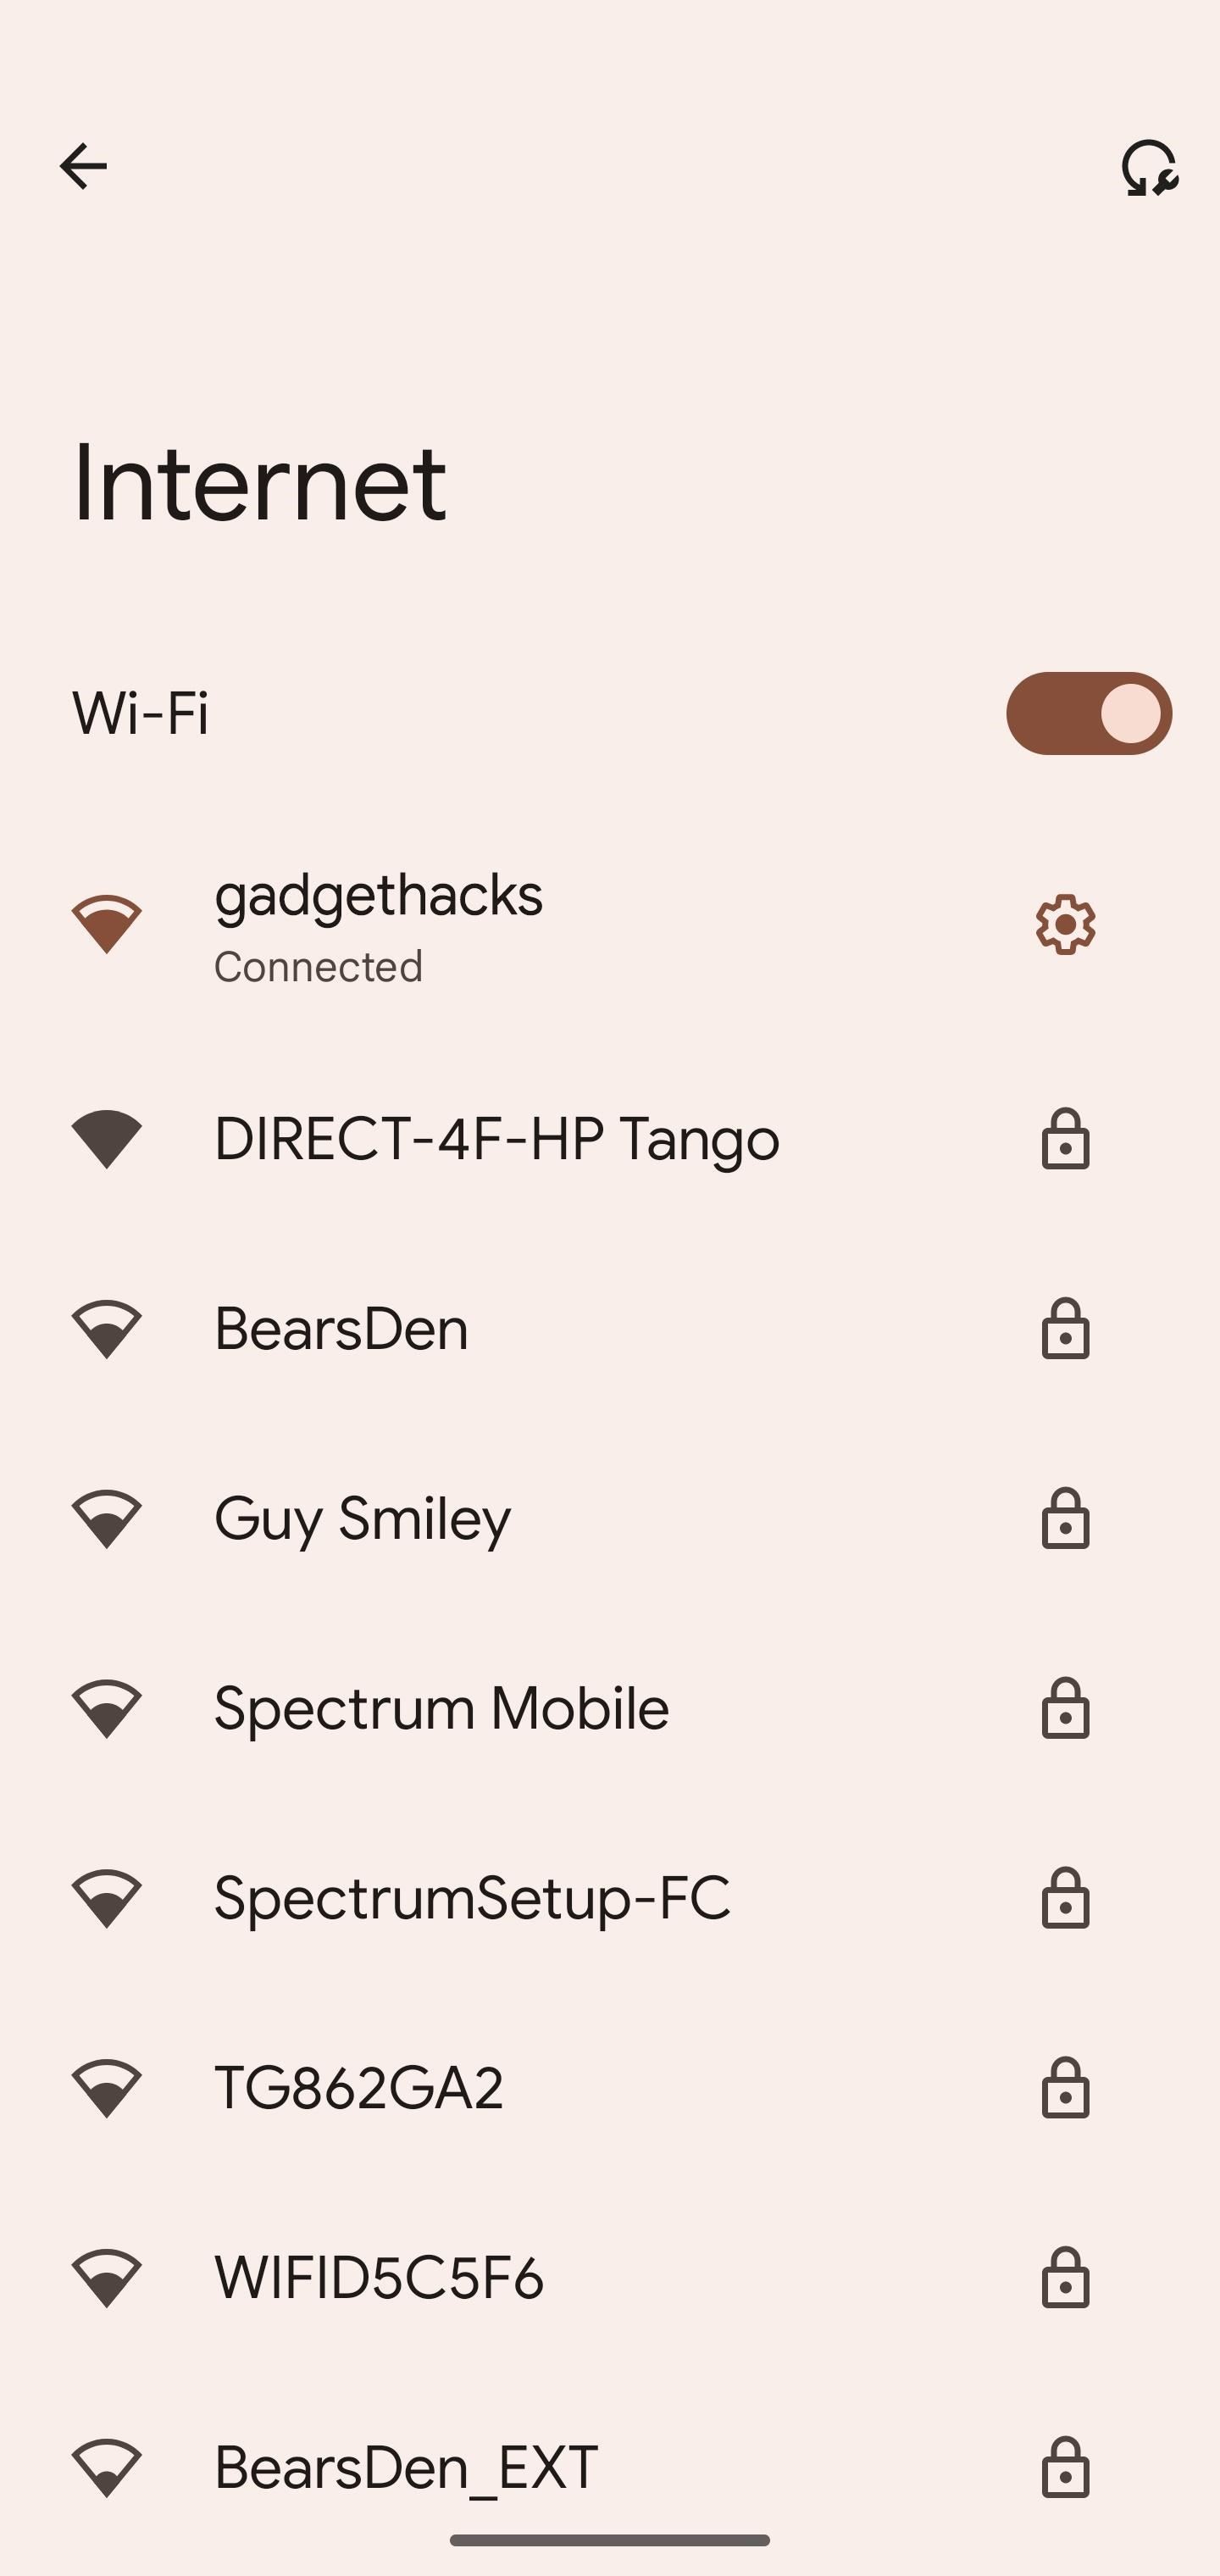
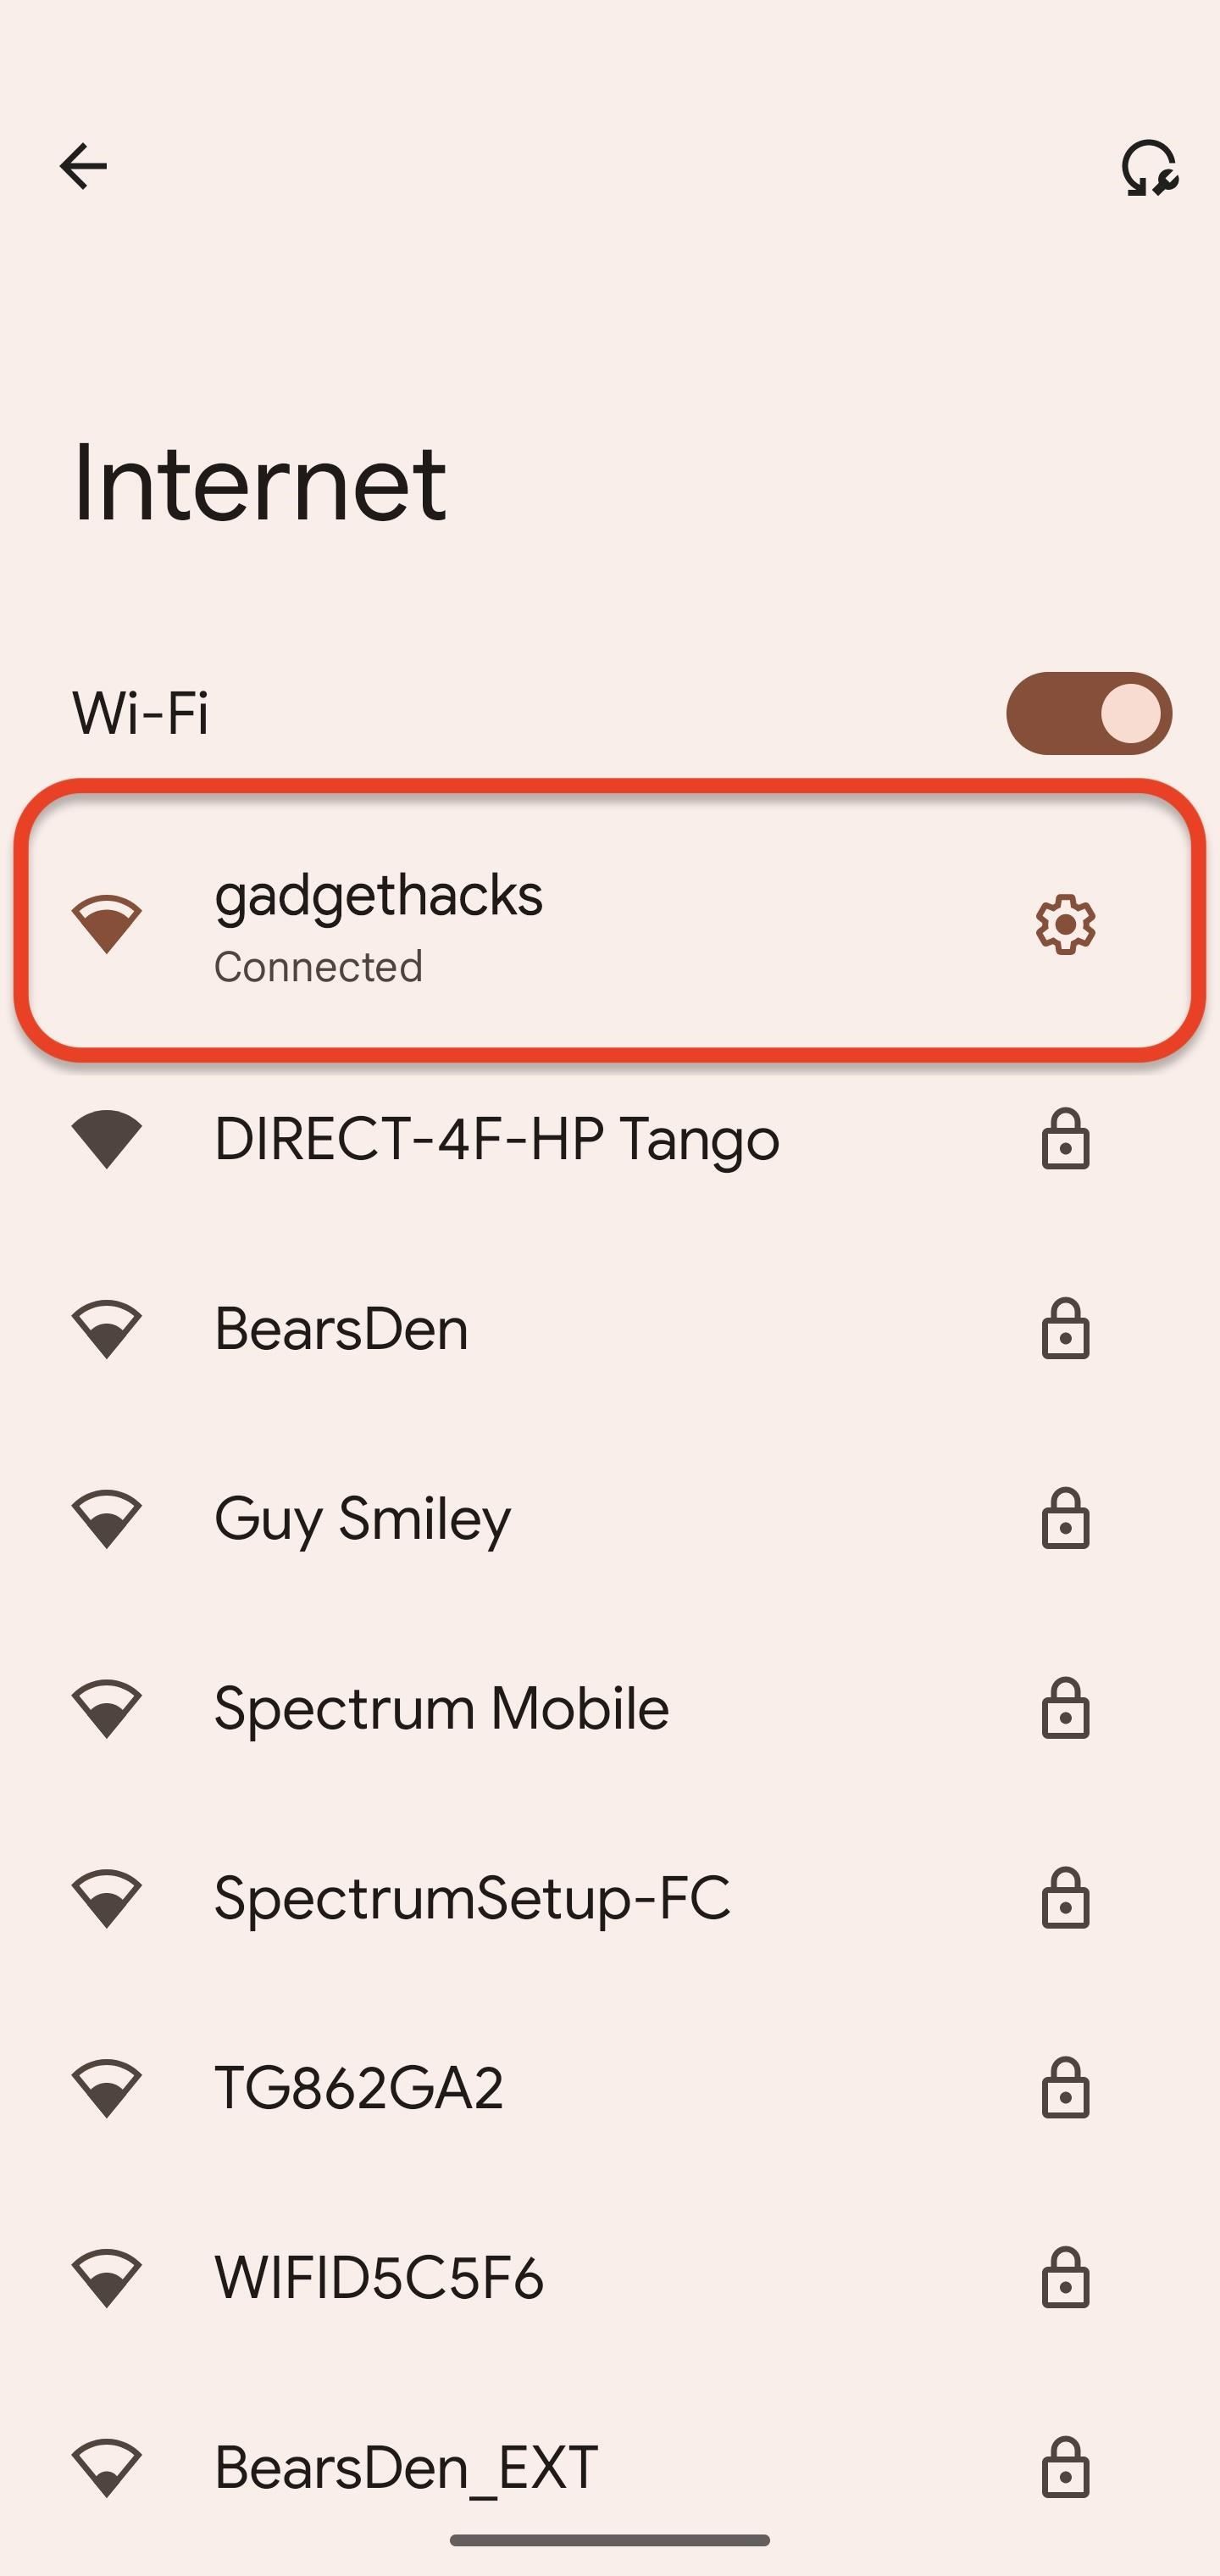
On the Wi-Fi or Internet settings page, tap the network up top that you're currently connected to (left image below) if that's the one you need the password for.
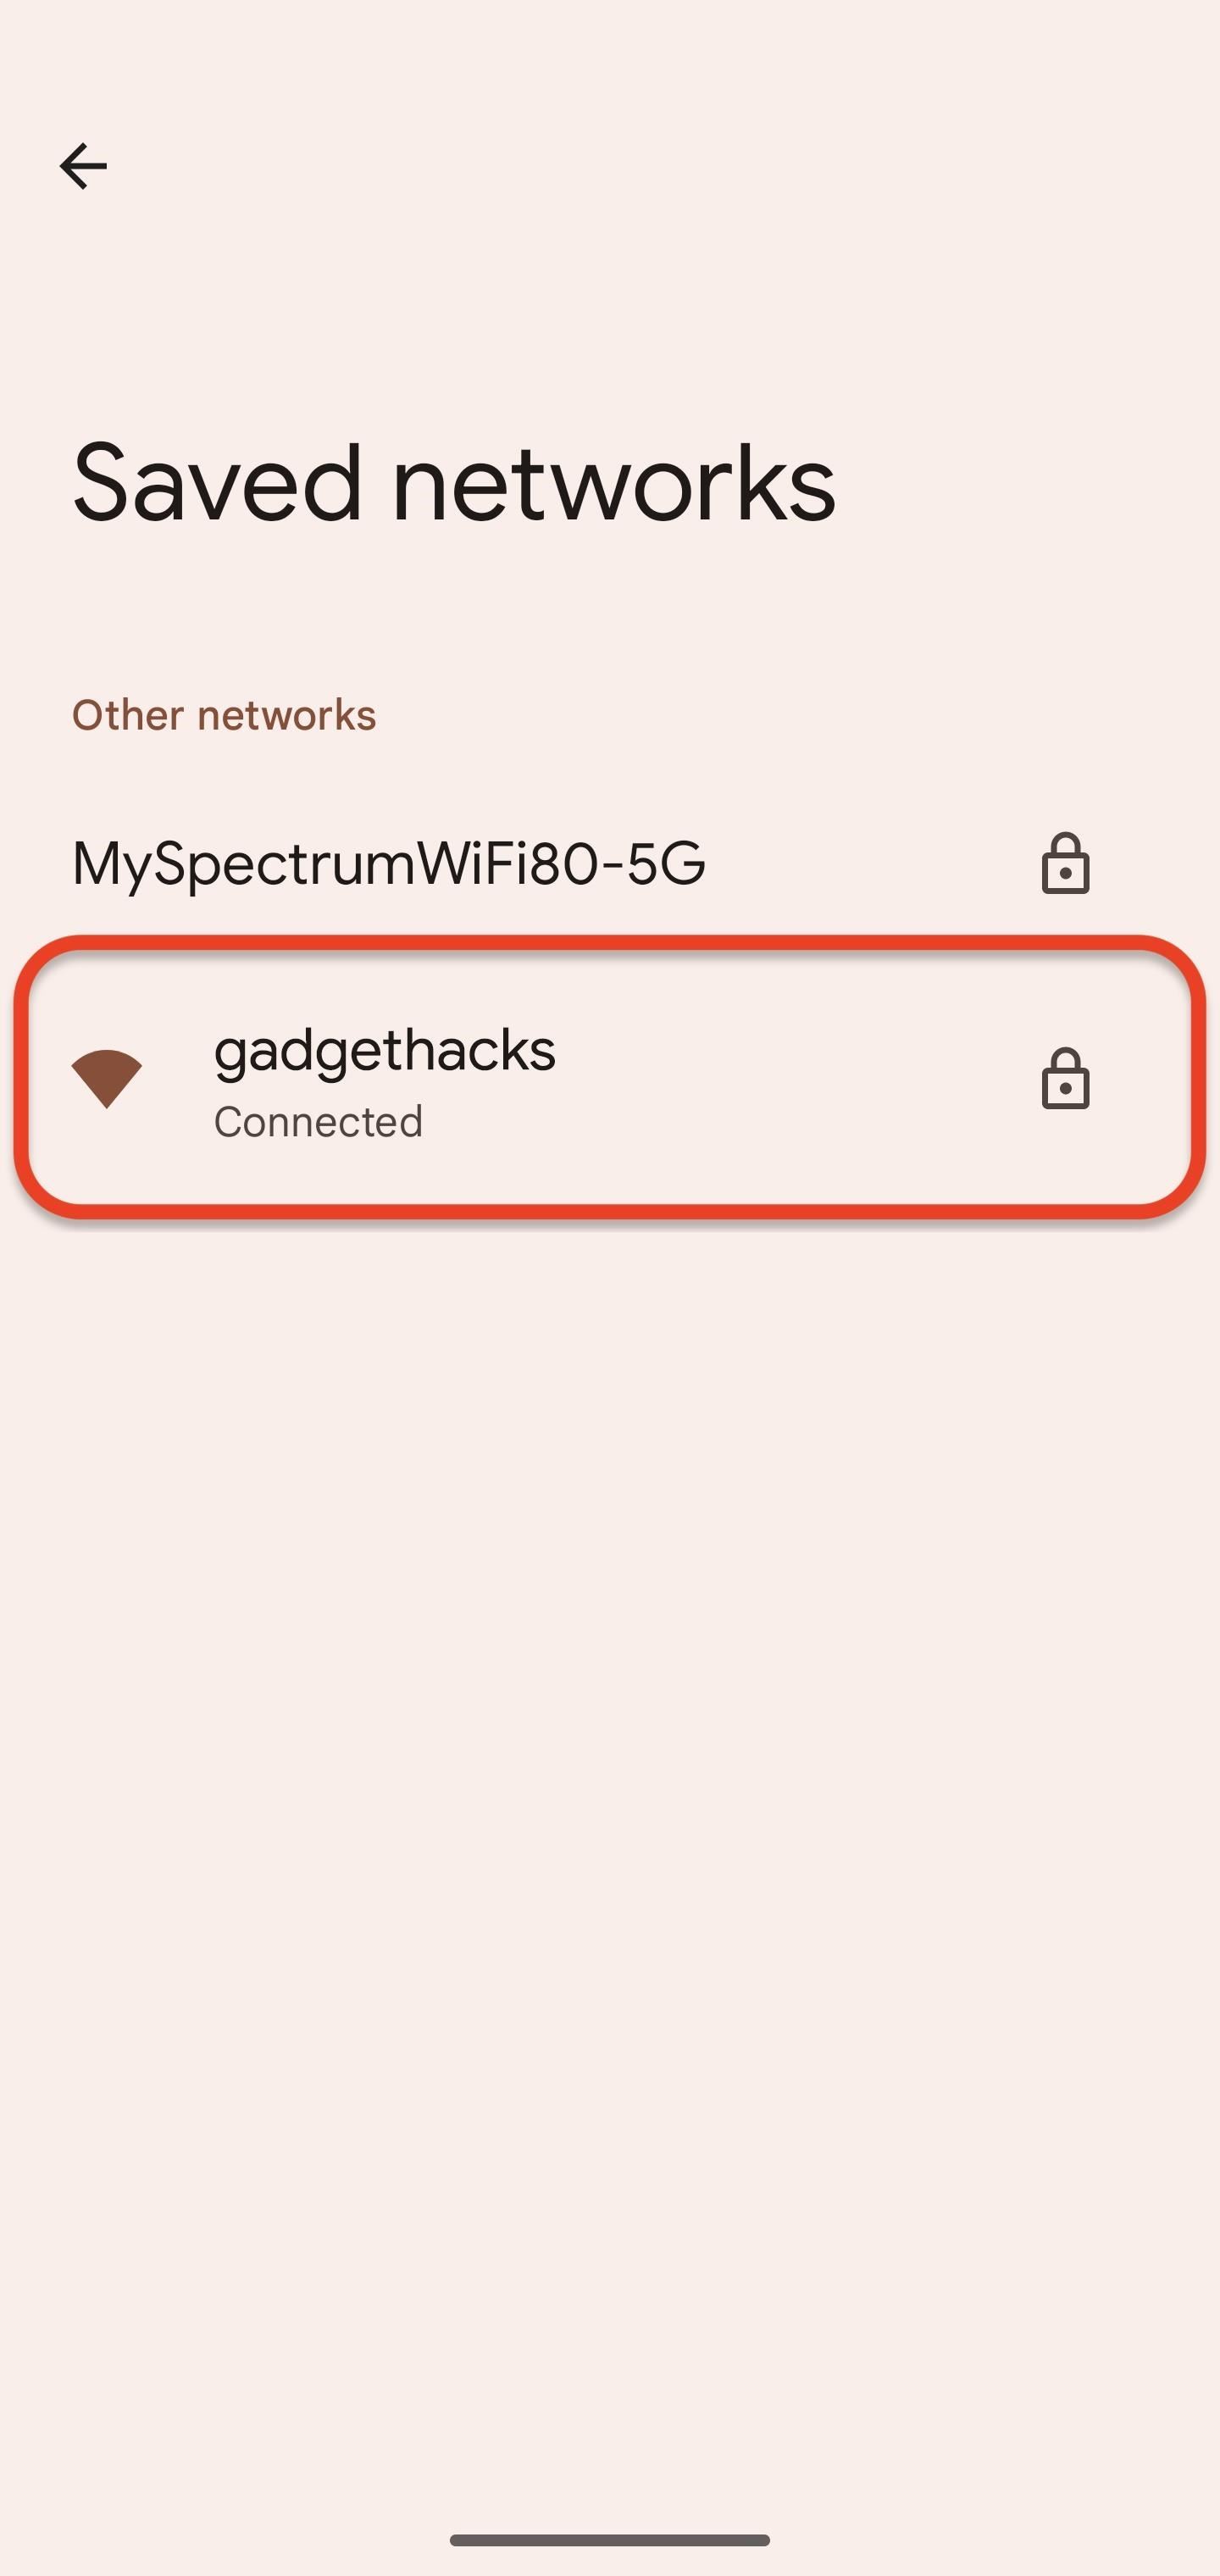
Otherwise, scroll down and select the "Saved networks" option (middle screenshot below). On the saved list, you'll see the SSID, or service set identifier — more commonly referred to as the network name — for each Wi-Fi network your phone or tablet remembers; Choose the one you need (right screenshot below).
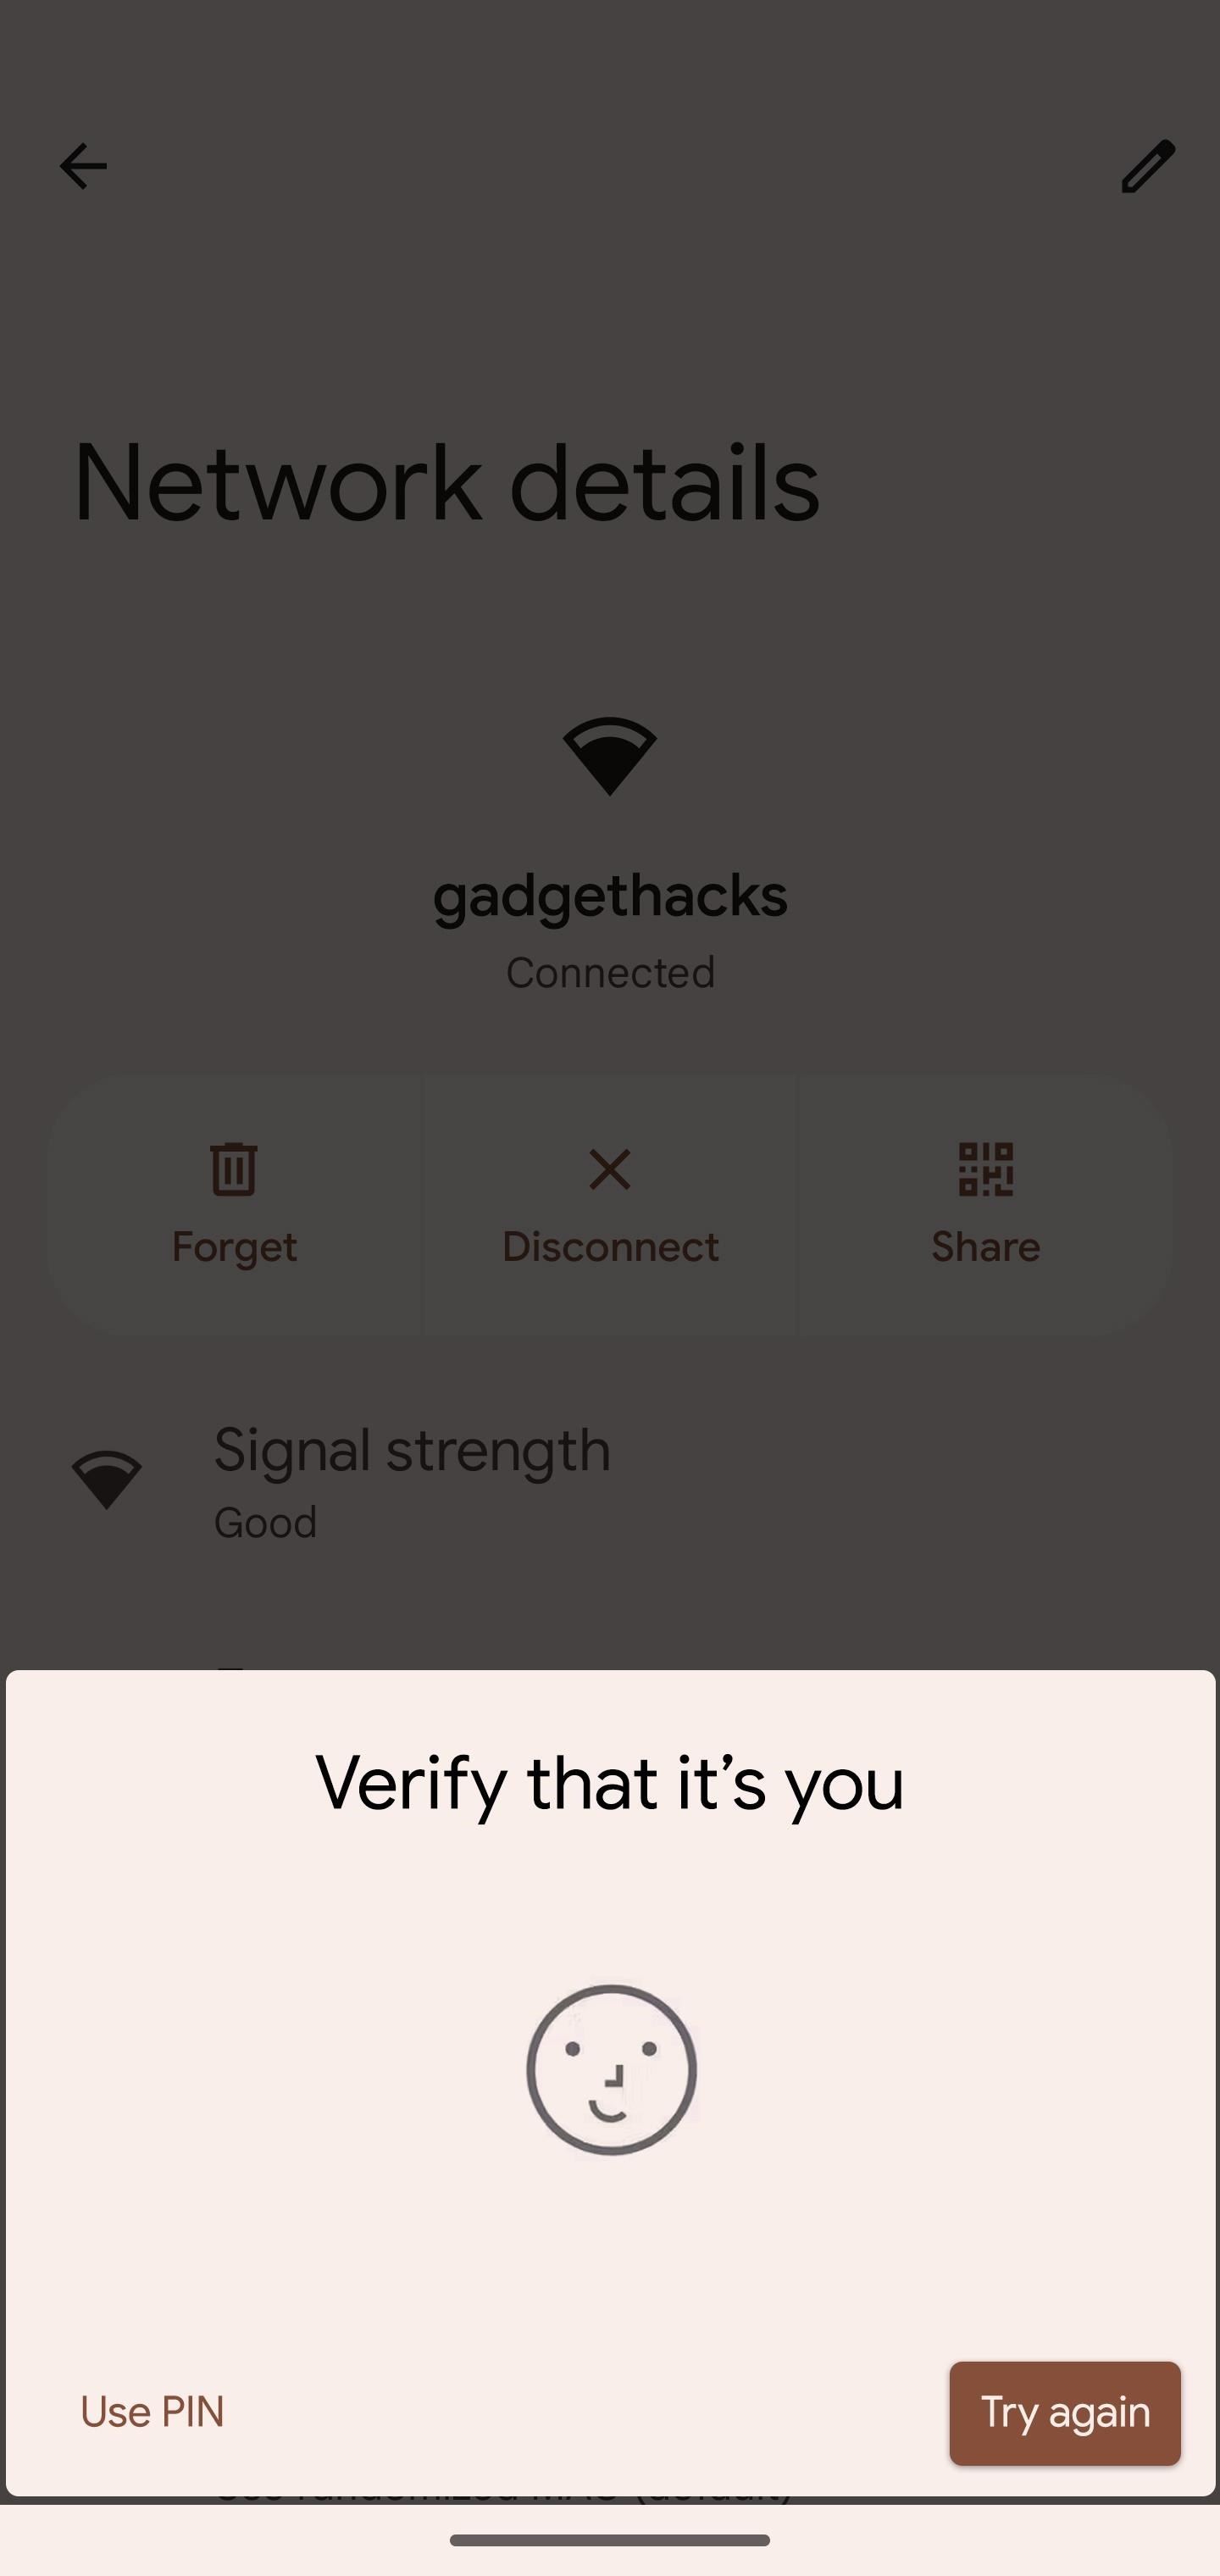
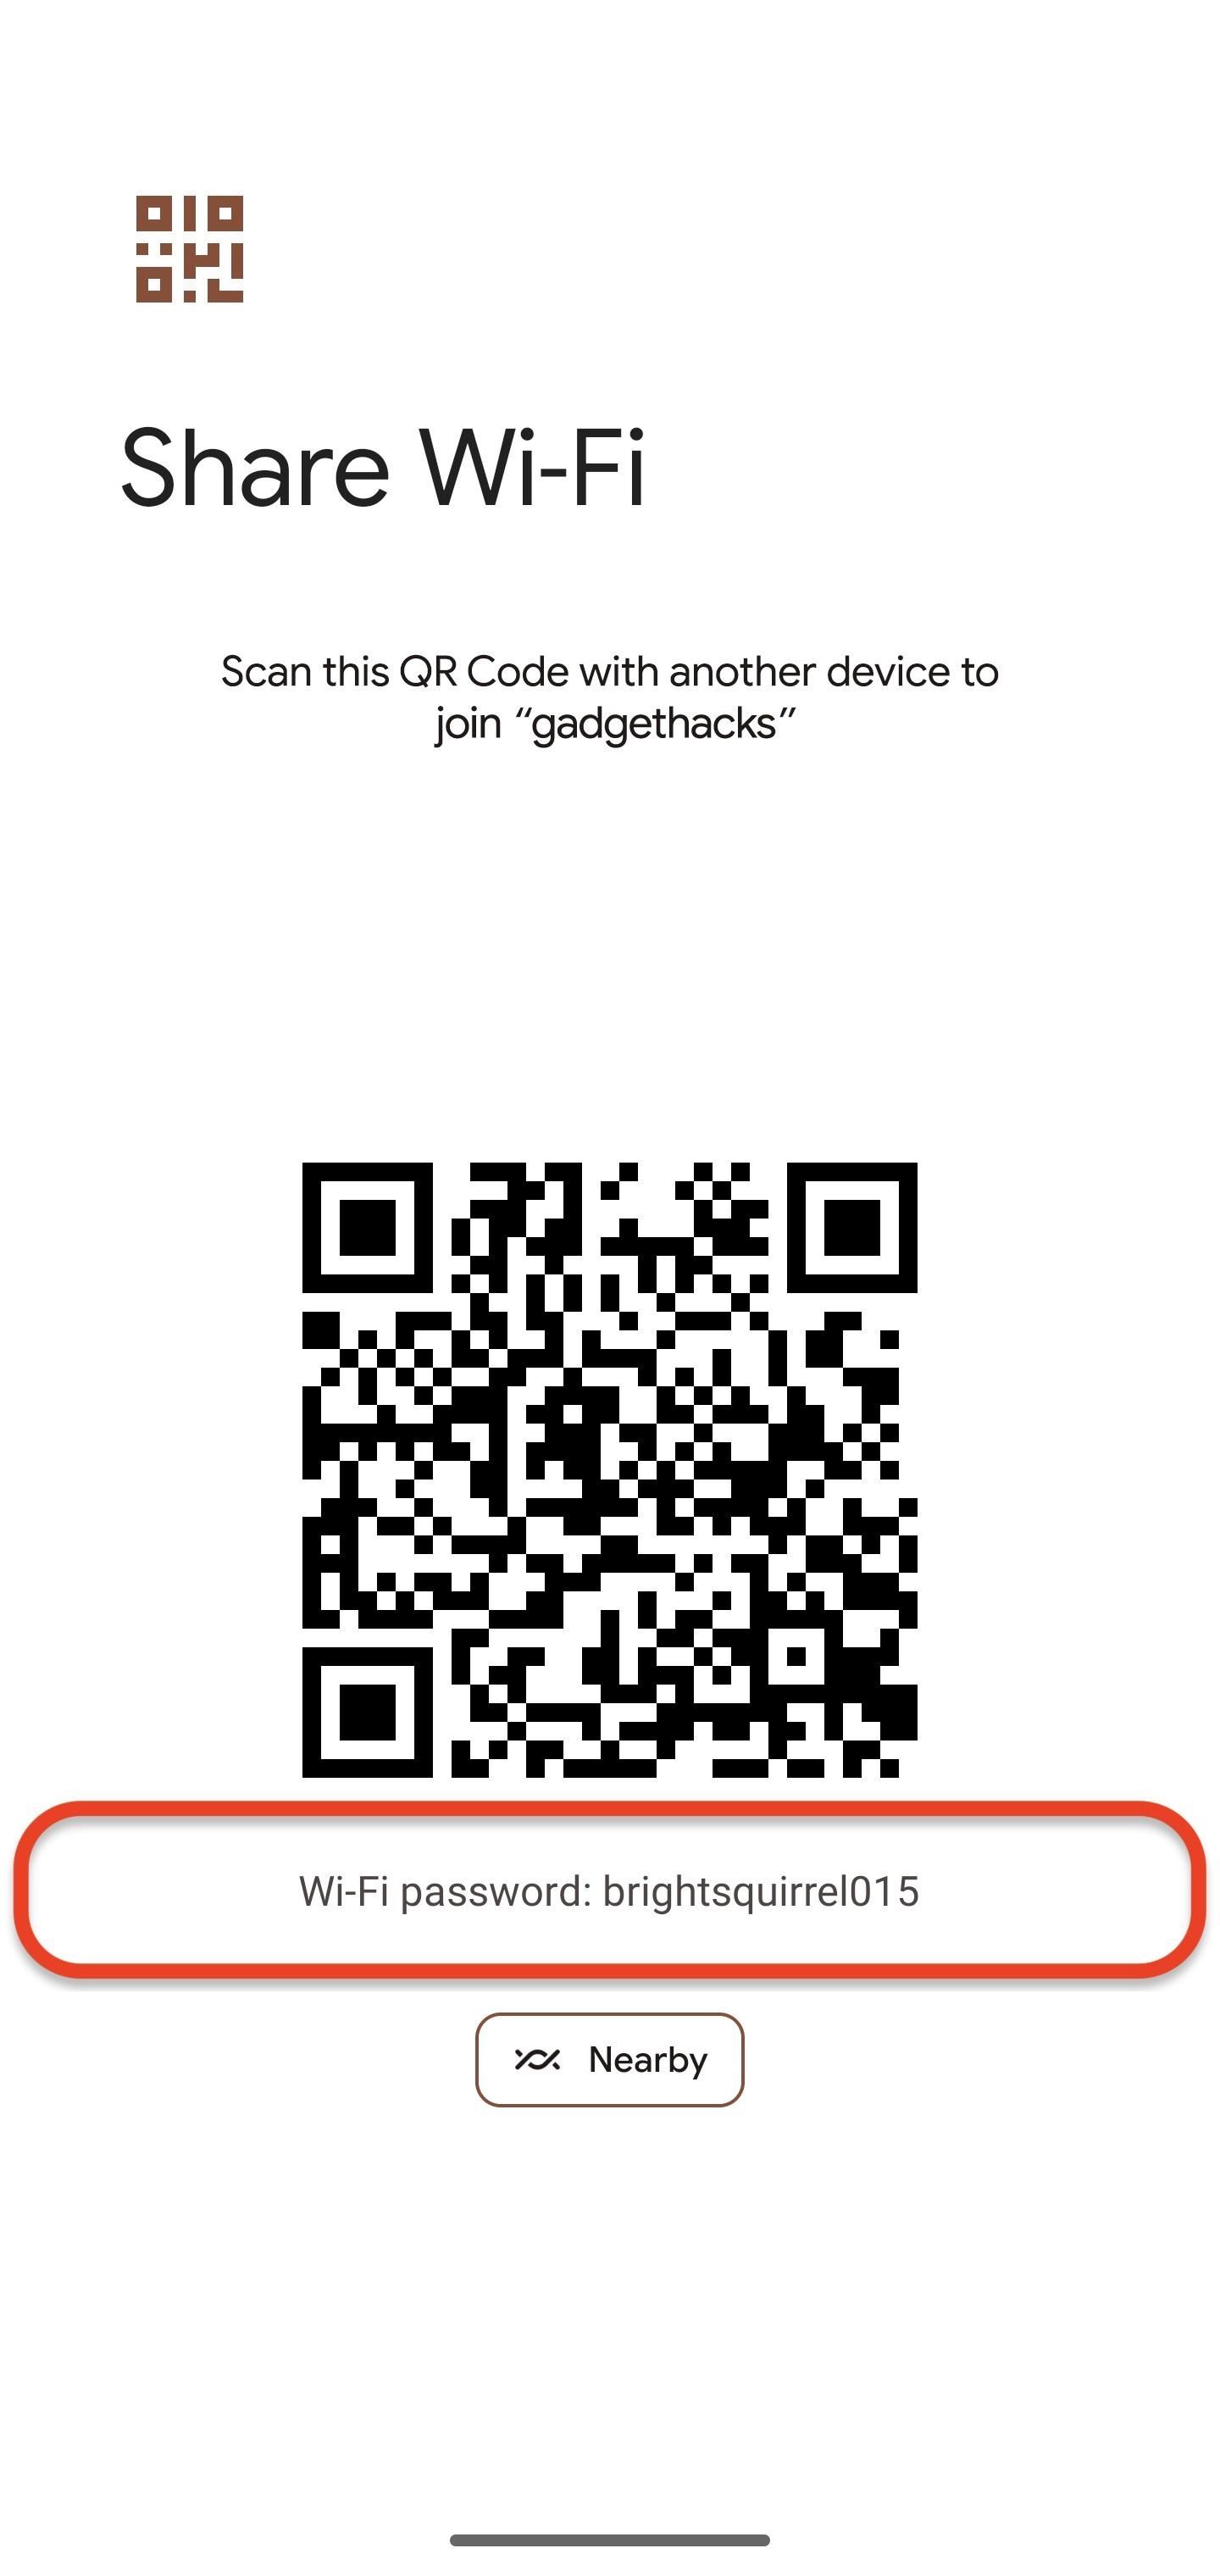
Now, hit the "Share" option below the network name and status. It will ask you to scan your fingerprint, scan your face, enter your PIN, or enter your password if you have security set up. Below the QR code that stores the network's credentials, you'll see the password in plain text.
You can also directly connect the device, whether an Android phone or tablet, iPhone, or iPad, to the access point by using its QR code scanner to scan the code.
Method 2: Android 10 to Android 13 on Samsung Galaxy Devices
Samsung adds a skin called One UI to the basic Android system, with One UI 5.1 for Android 13 being the newest version as of January 2023. So many elements look and behave differently than on a Google Pixel, including getting plain text passwords for saved Wi-Fi networks.
Viewing Wi-Fi passwords on One UI 2 and later isn't as simple as on stock Android, but it's still relatively easy — it's just a bit more work. However, you can only grab the plain text password for the current Wi-Fi network you're connected to since Samsung blocks access to passwords for other saved Wi-Fi networks.
Quick Steps:
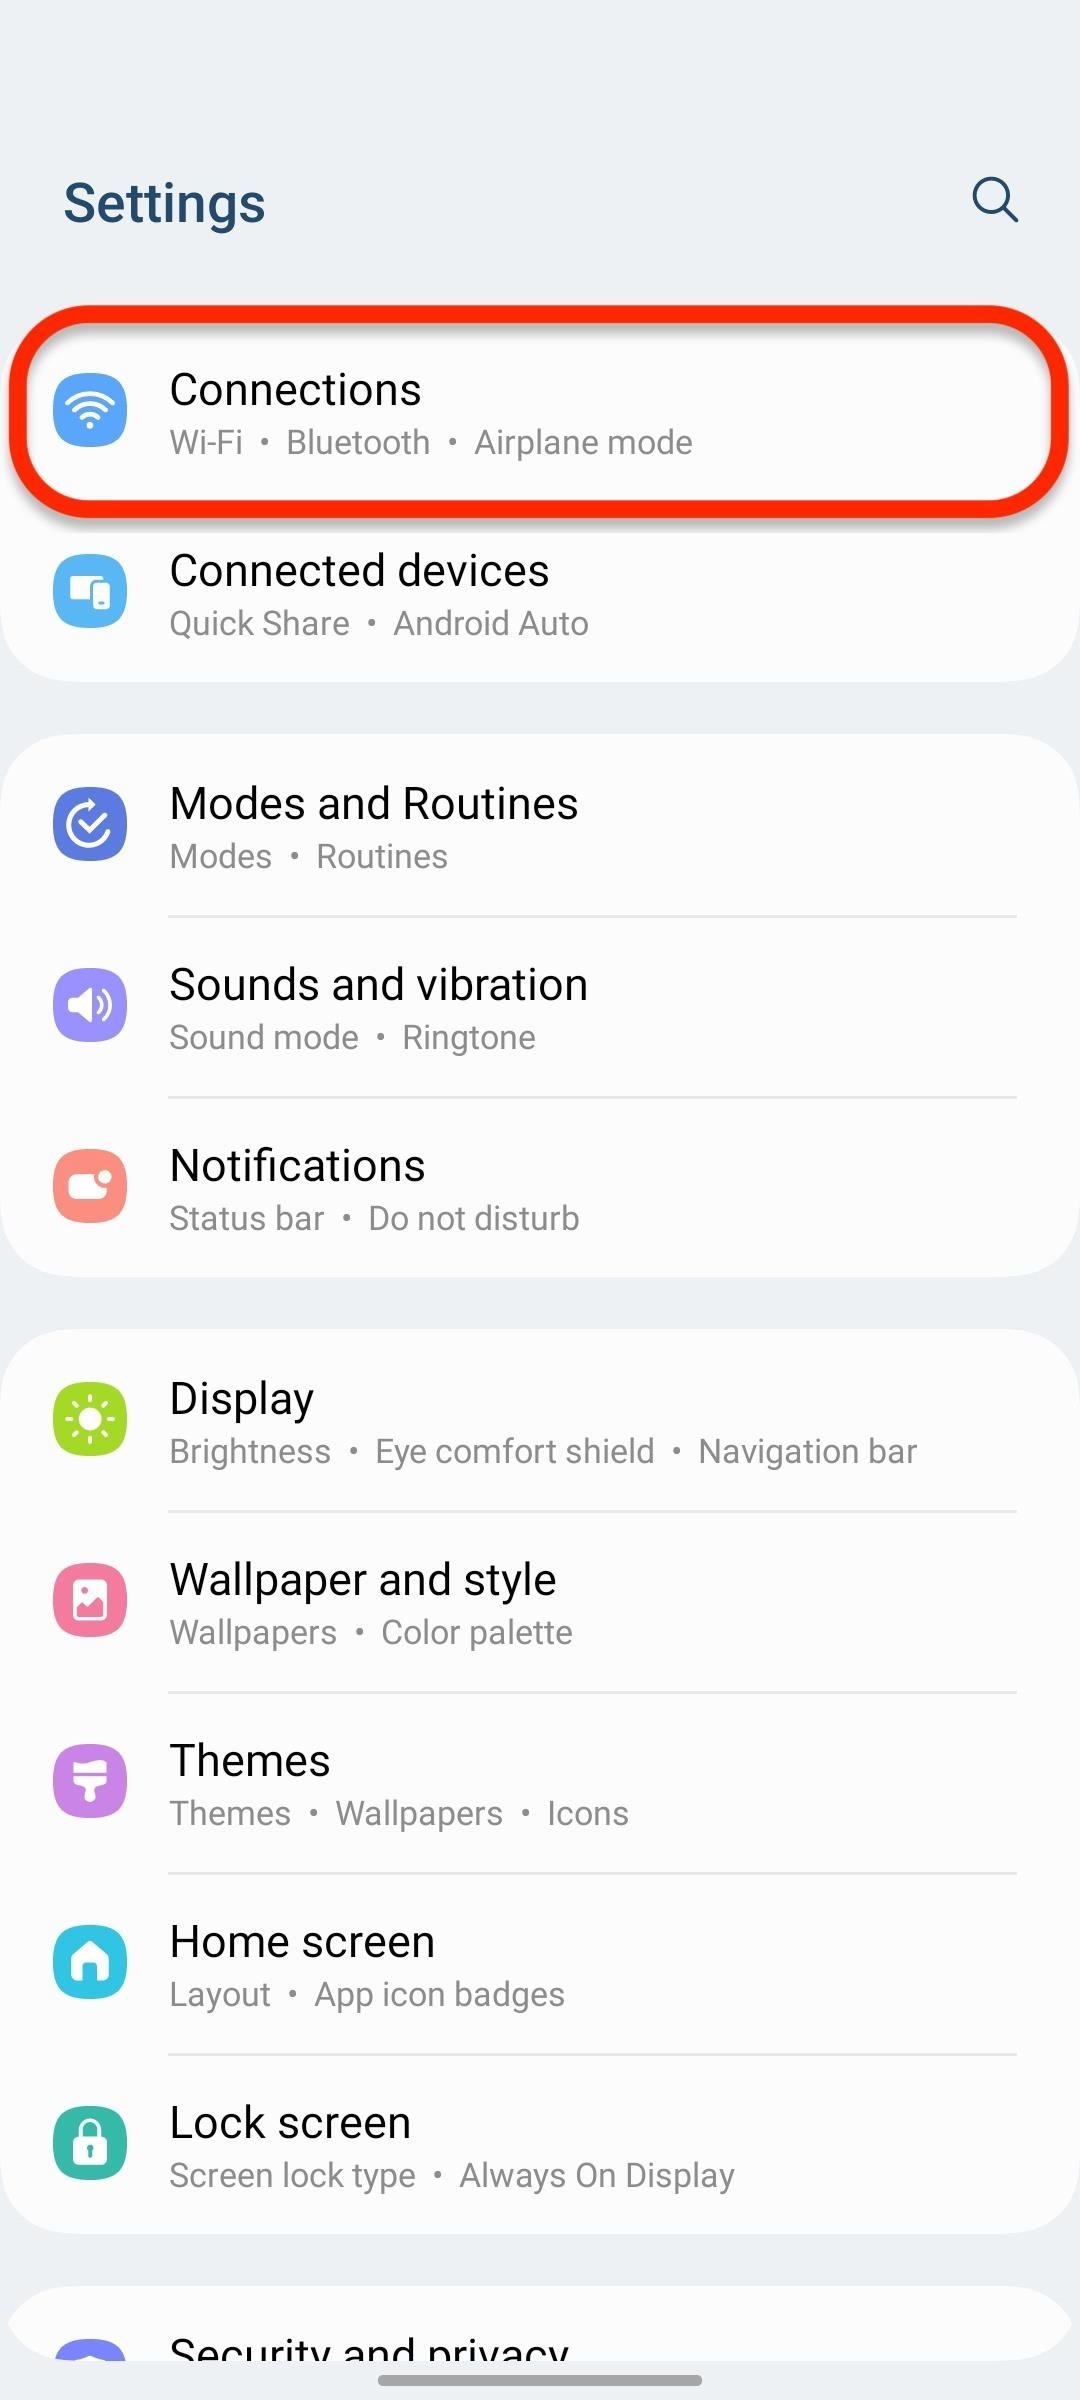
- Open the "Connections" menu in Settings.
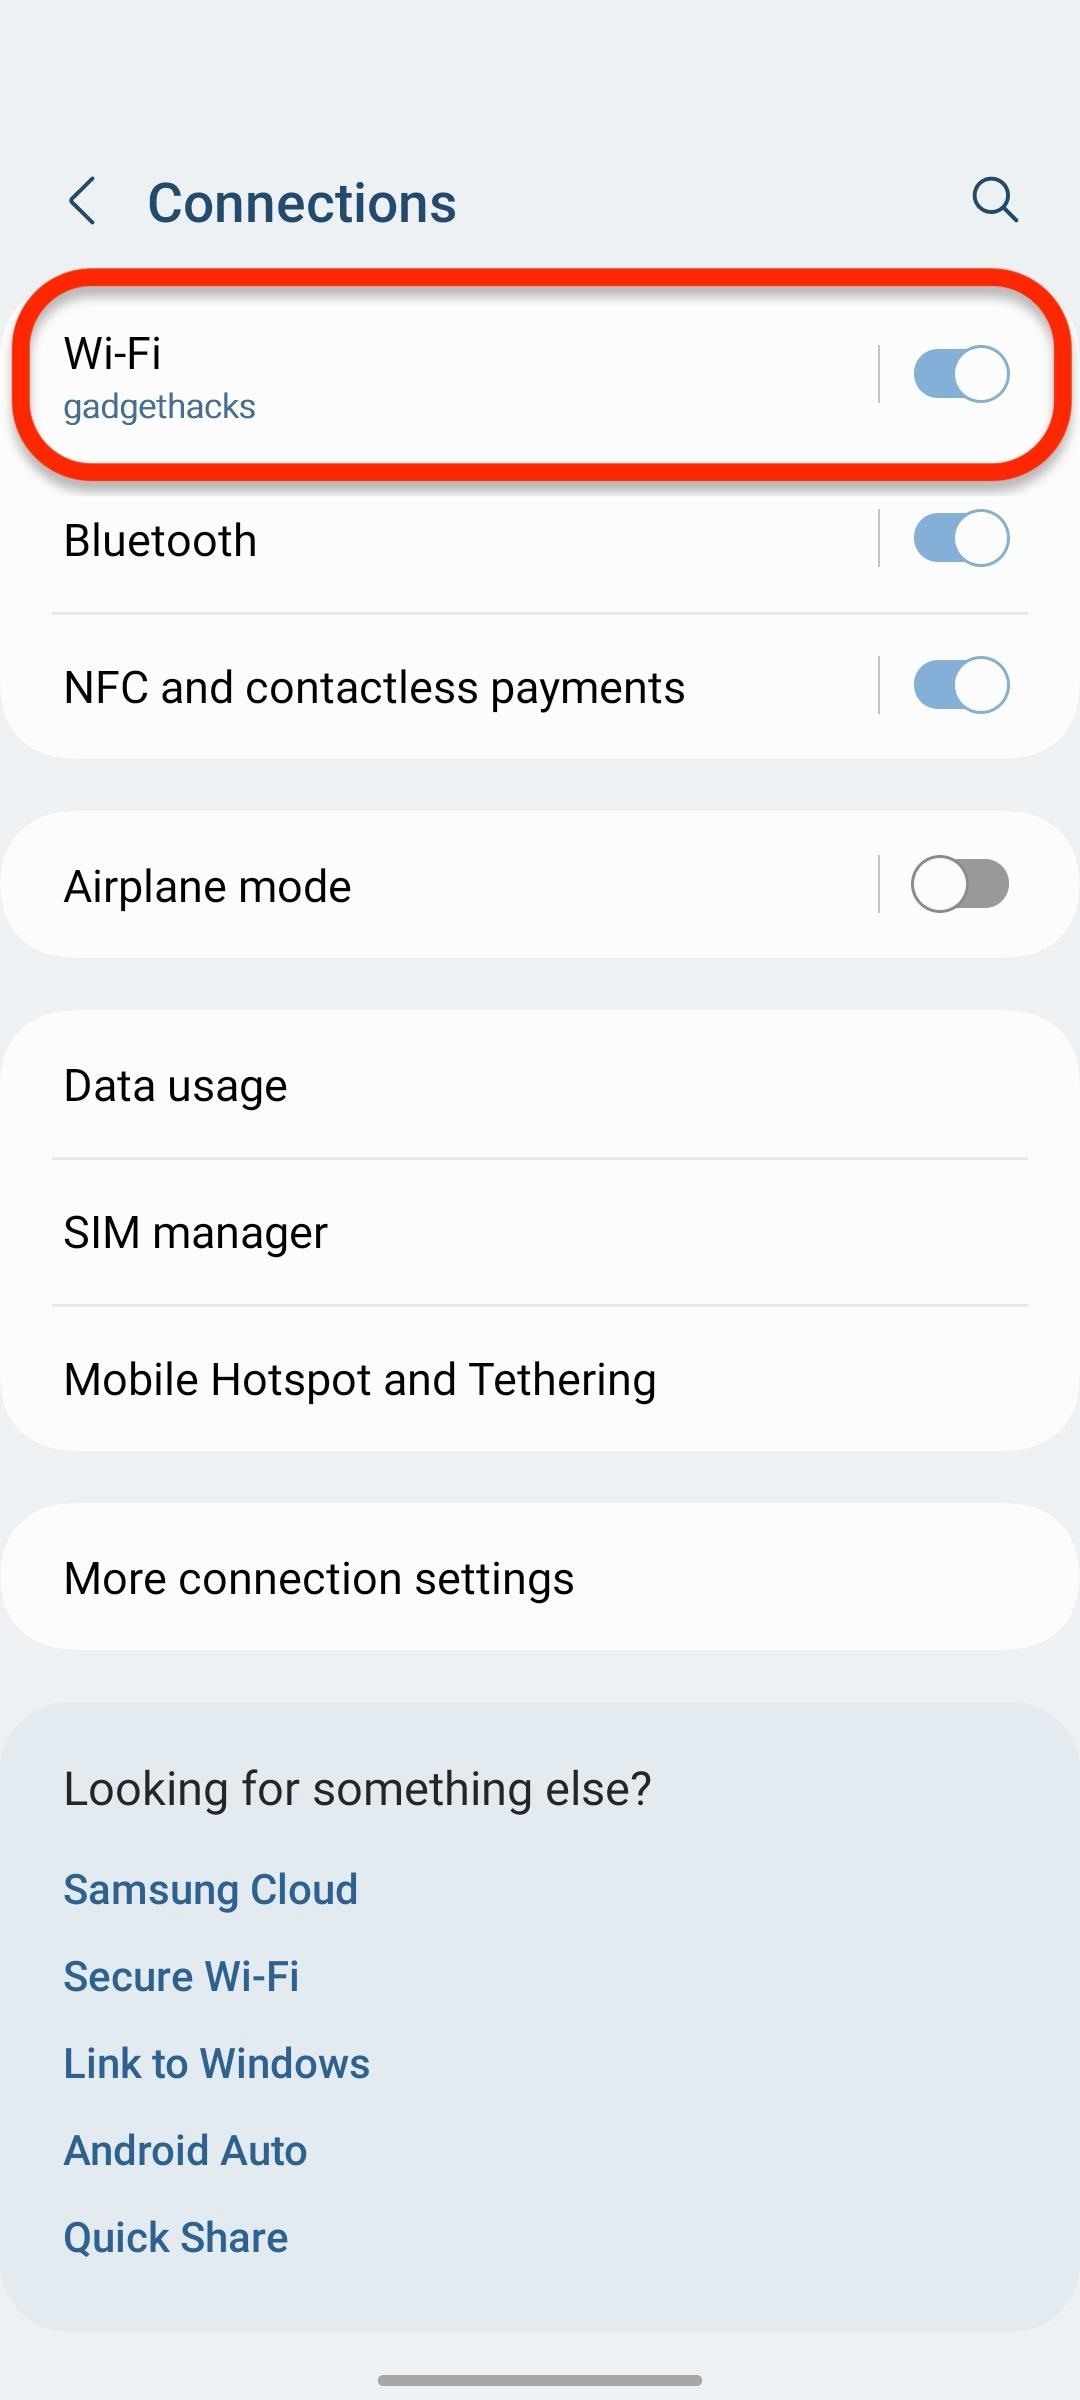
- Tap on the "Wi-Fi" submenu.
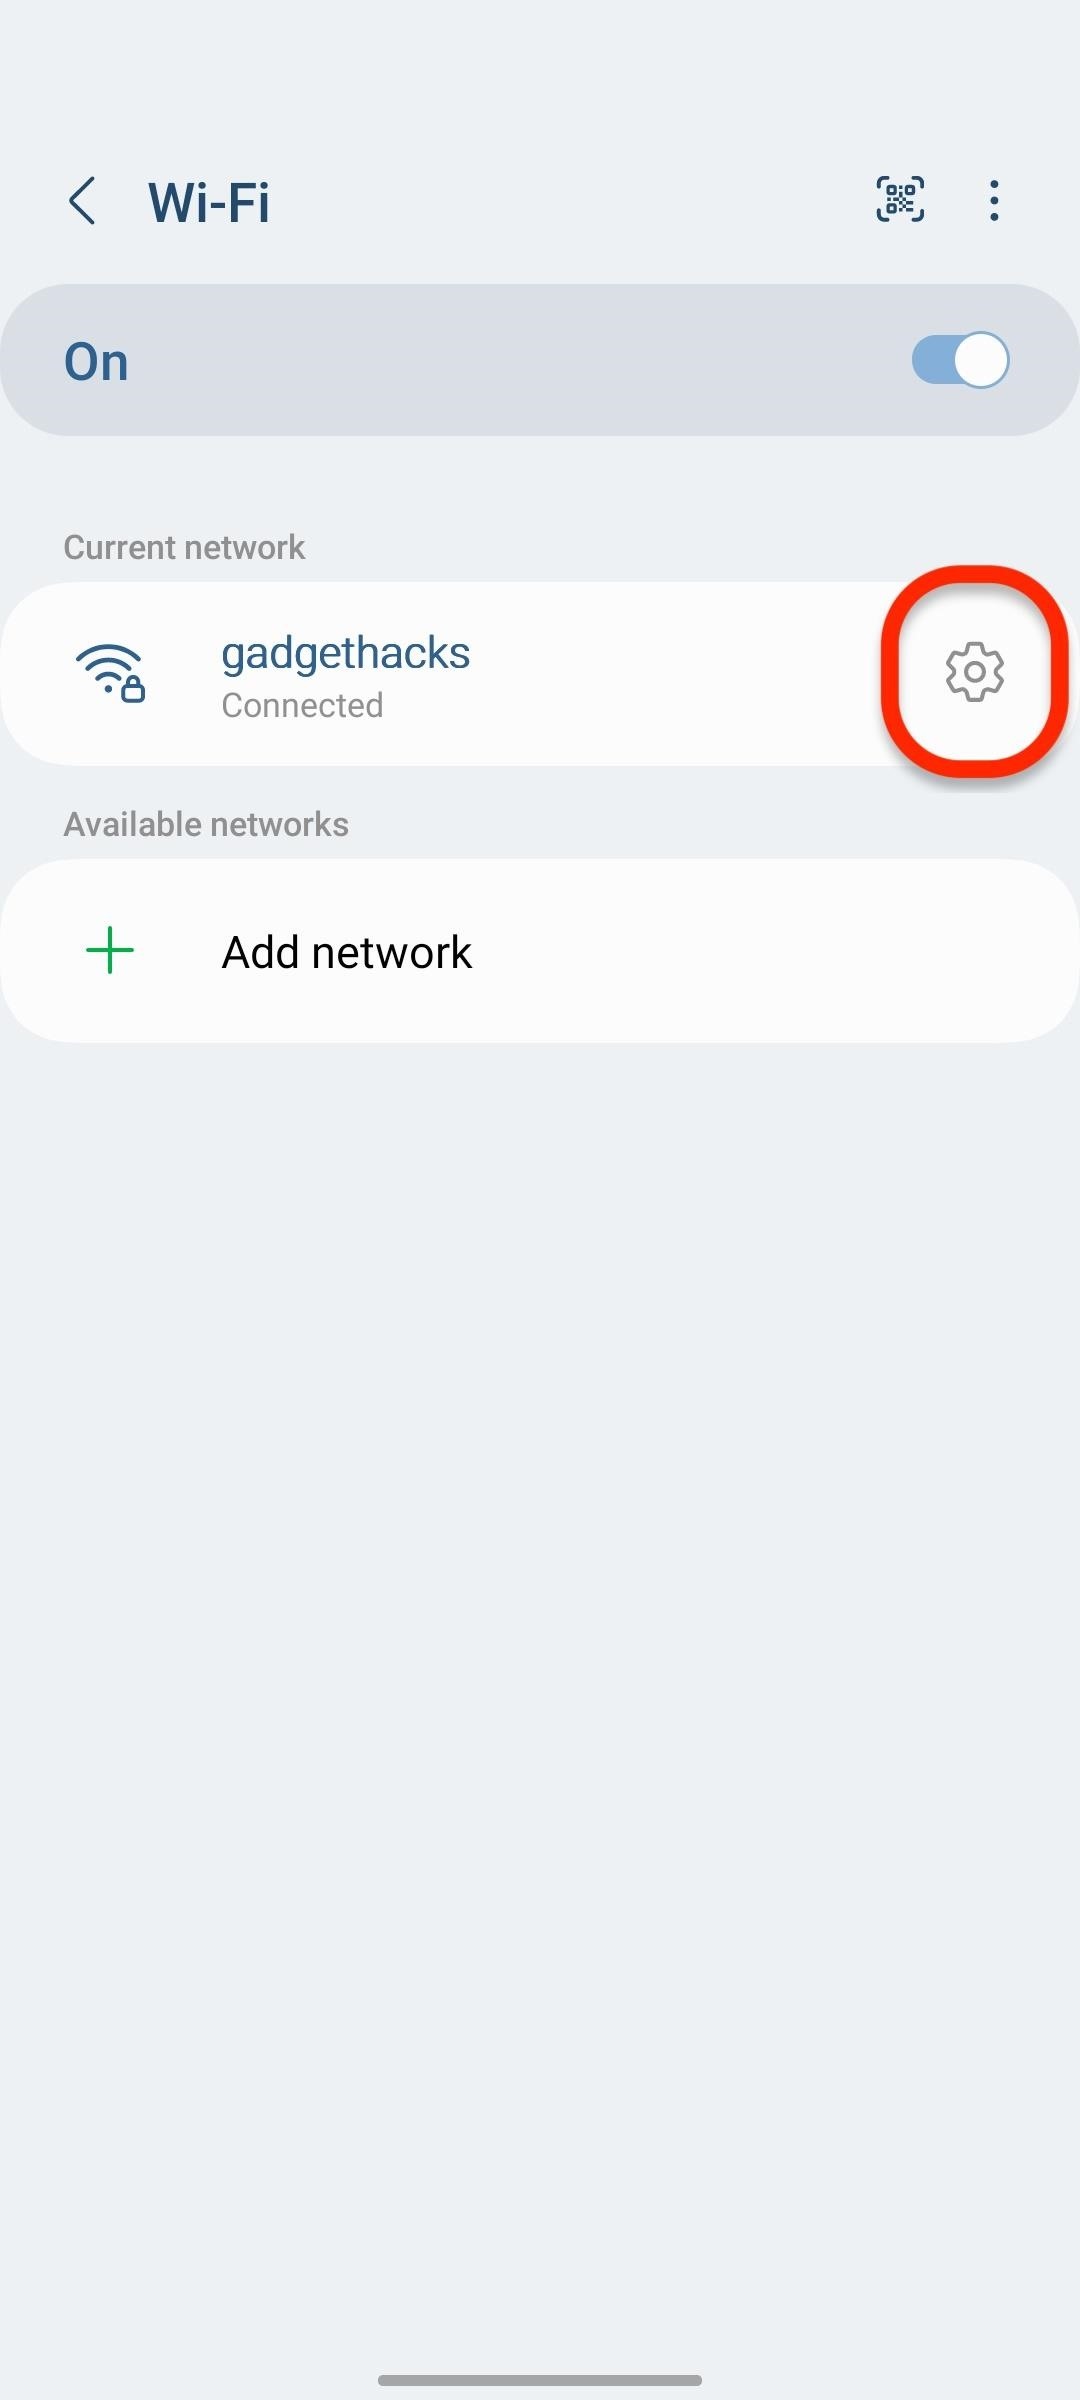
- Tap the cog for the current network.
- Tap "QR code."
- Tap "Save as image" to save it to your gallery.
- Open Google Lens or open the image in Google Photos.
- Open the image in Google Lens or tap the Lens icon in Google Photos.
- Expand the crop beyond the QR code's perimeter if needed.
- See the plain text password in the results.
Full Instructions:
First, visit the "Wi-Fi" submenu in your Settings app. You can:
- Ask Bixby to "open Wi-Fi settings."
- Ask Google Assistant (if installed) to "open Wi-Fi settings."
- Long-press the Wi-Fi symbol in the Quick Settings.
- Search for "wifi" in Settings, then tap the "Wi-Fi" result. If it doesn't take you directly to the Wi-Fi submenu, tap "Wi-Fi" in the Connections menu.
- Go to Settings –> Connections –> Wi-Fi (pictured below).
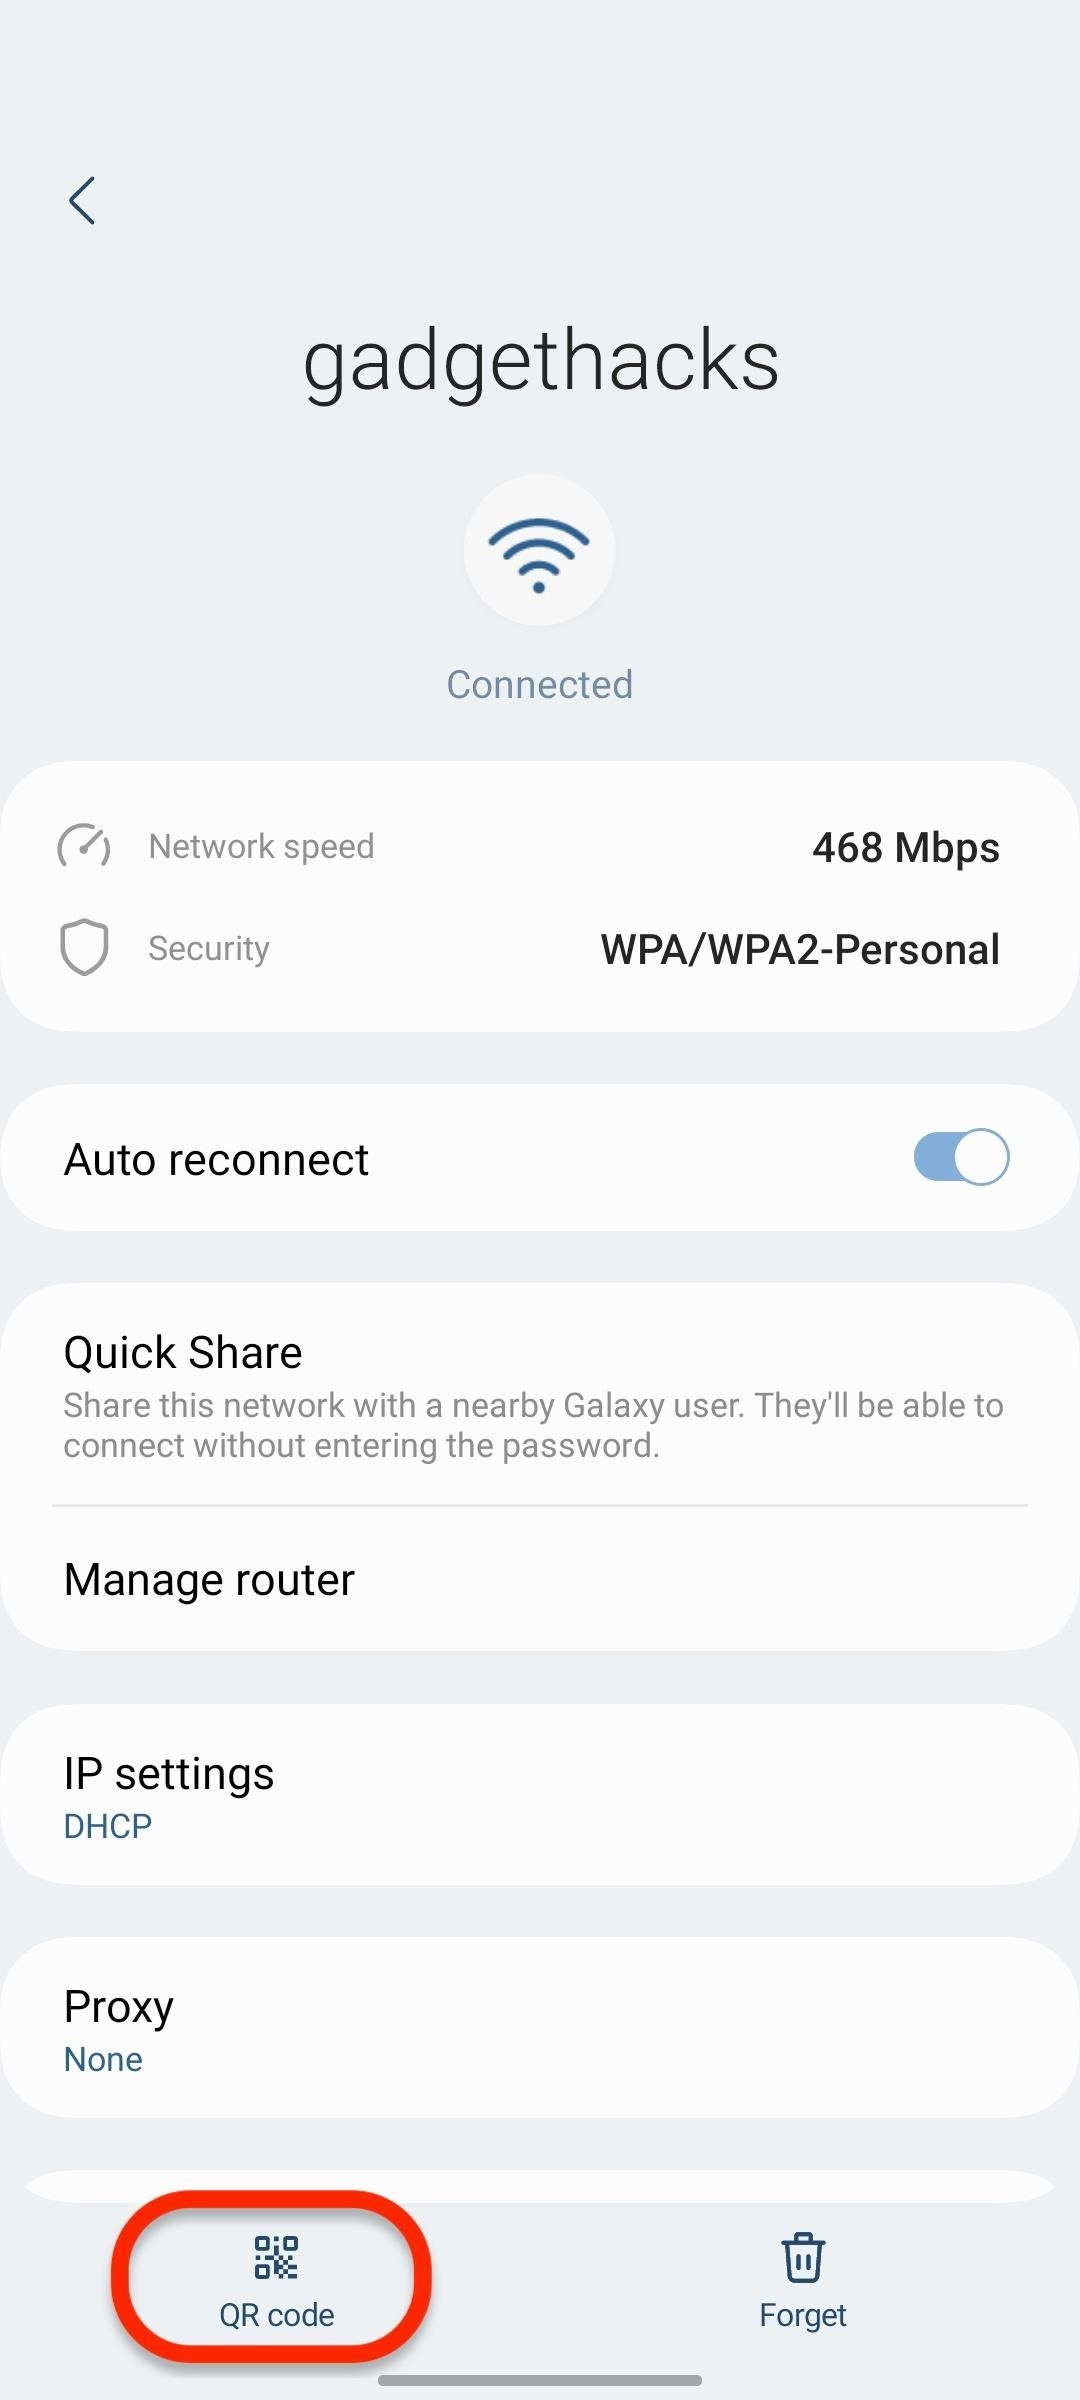
Once in the Wi-Fi submenu, tap the cog next to the network SSID (service set identifier), more commonly referred to as the network name, that you're currently connected to.
Next, select "QR code" at the bottom of the network's information. You can only get the QR code for the network you're connected to, which is the biggest difference between One UI and stock Android. Another significant difference is that you won't see the network's password in plain text. You also can't ask Bixby for it.
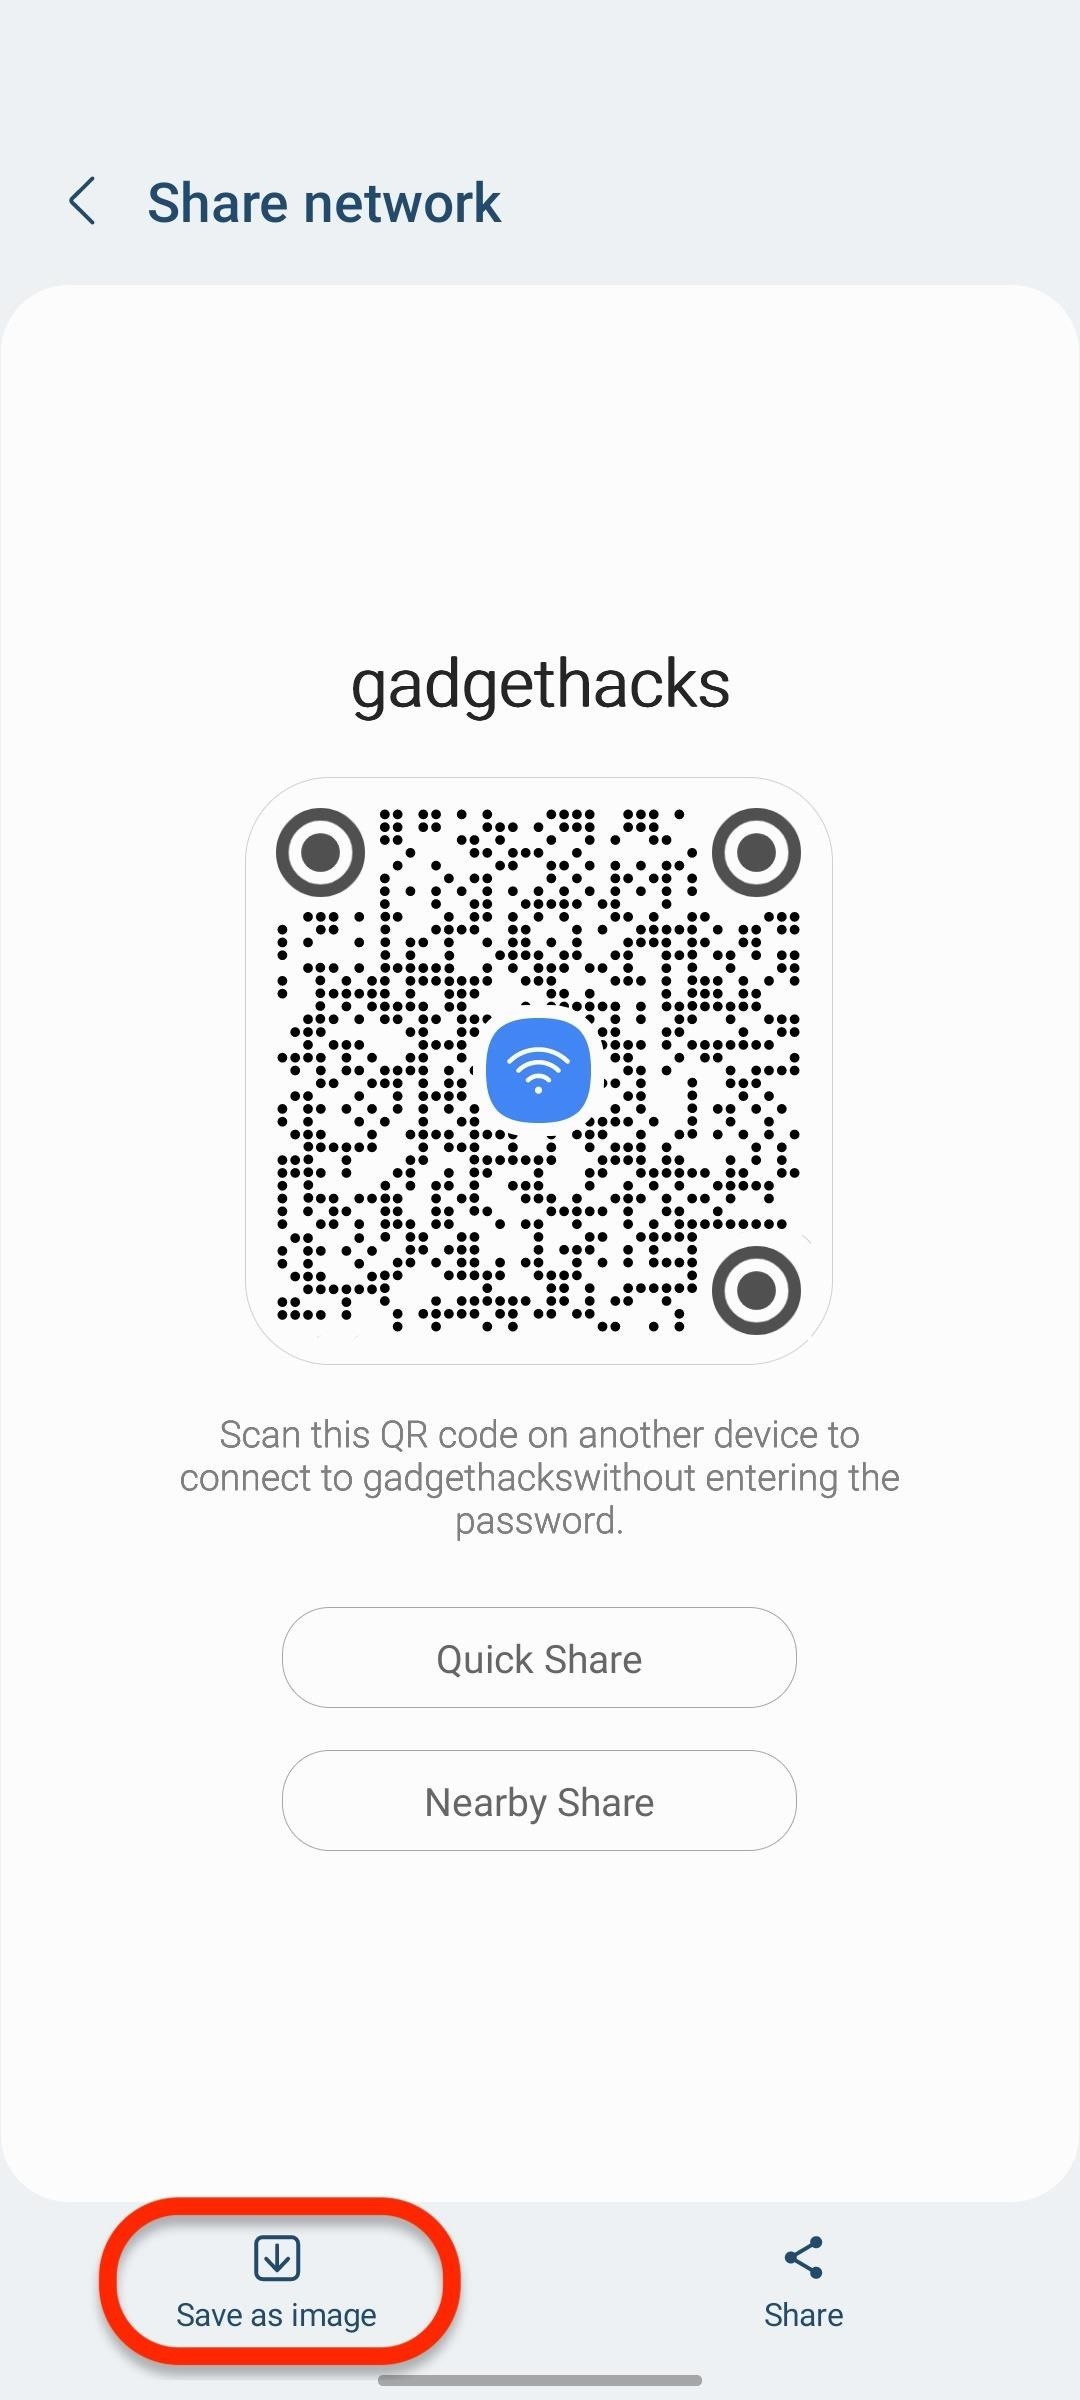
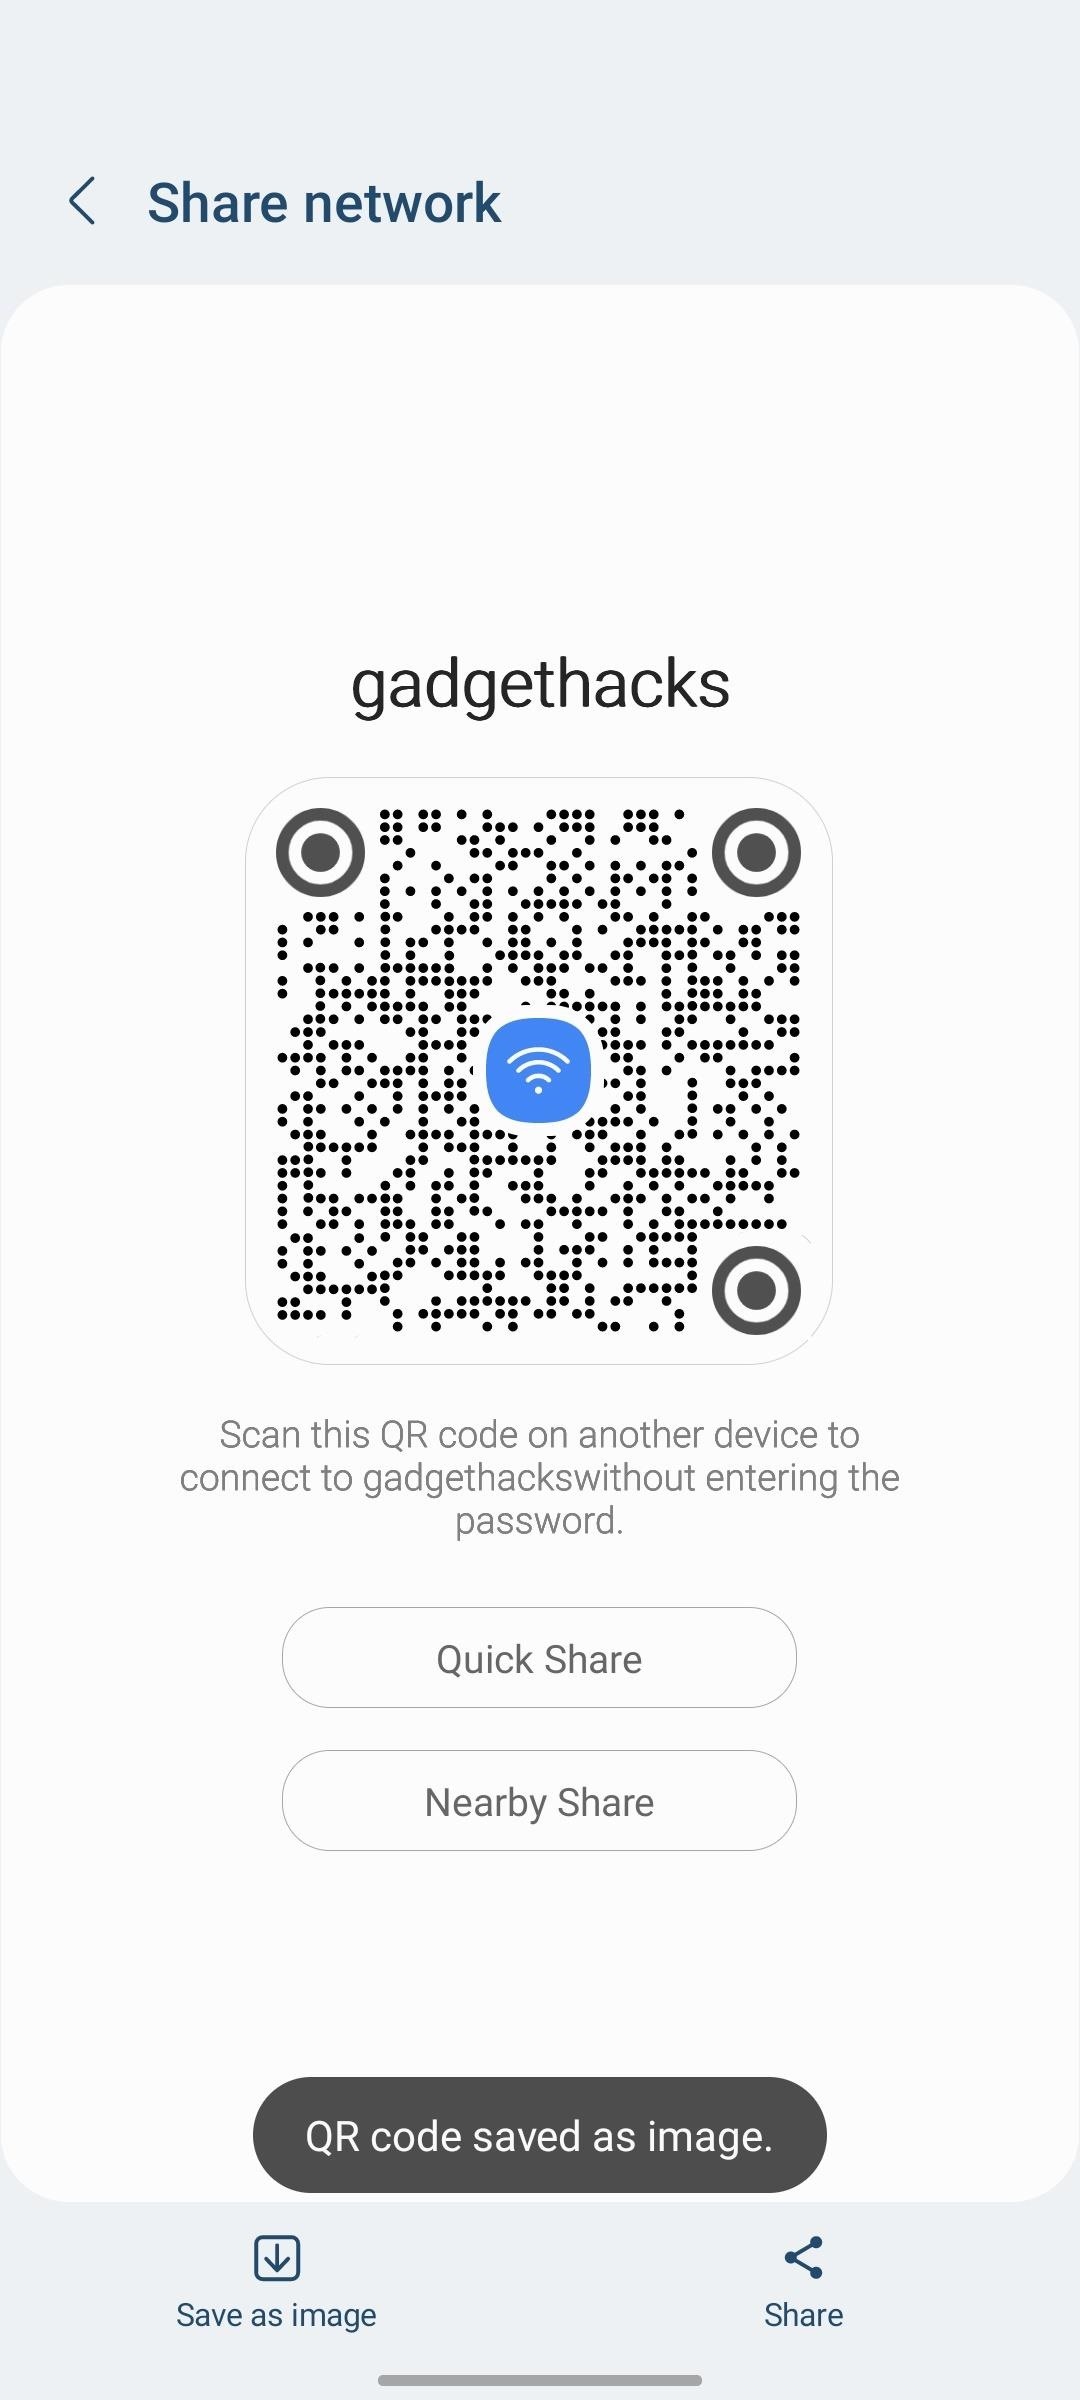
On the QR code page, hit "Save as image" to add it to your gallery.
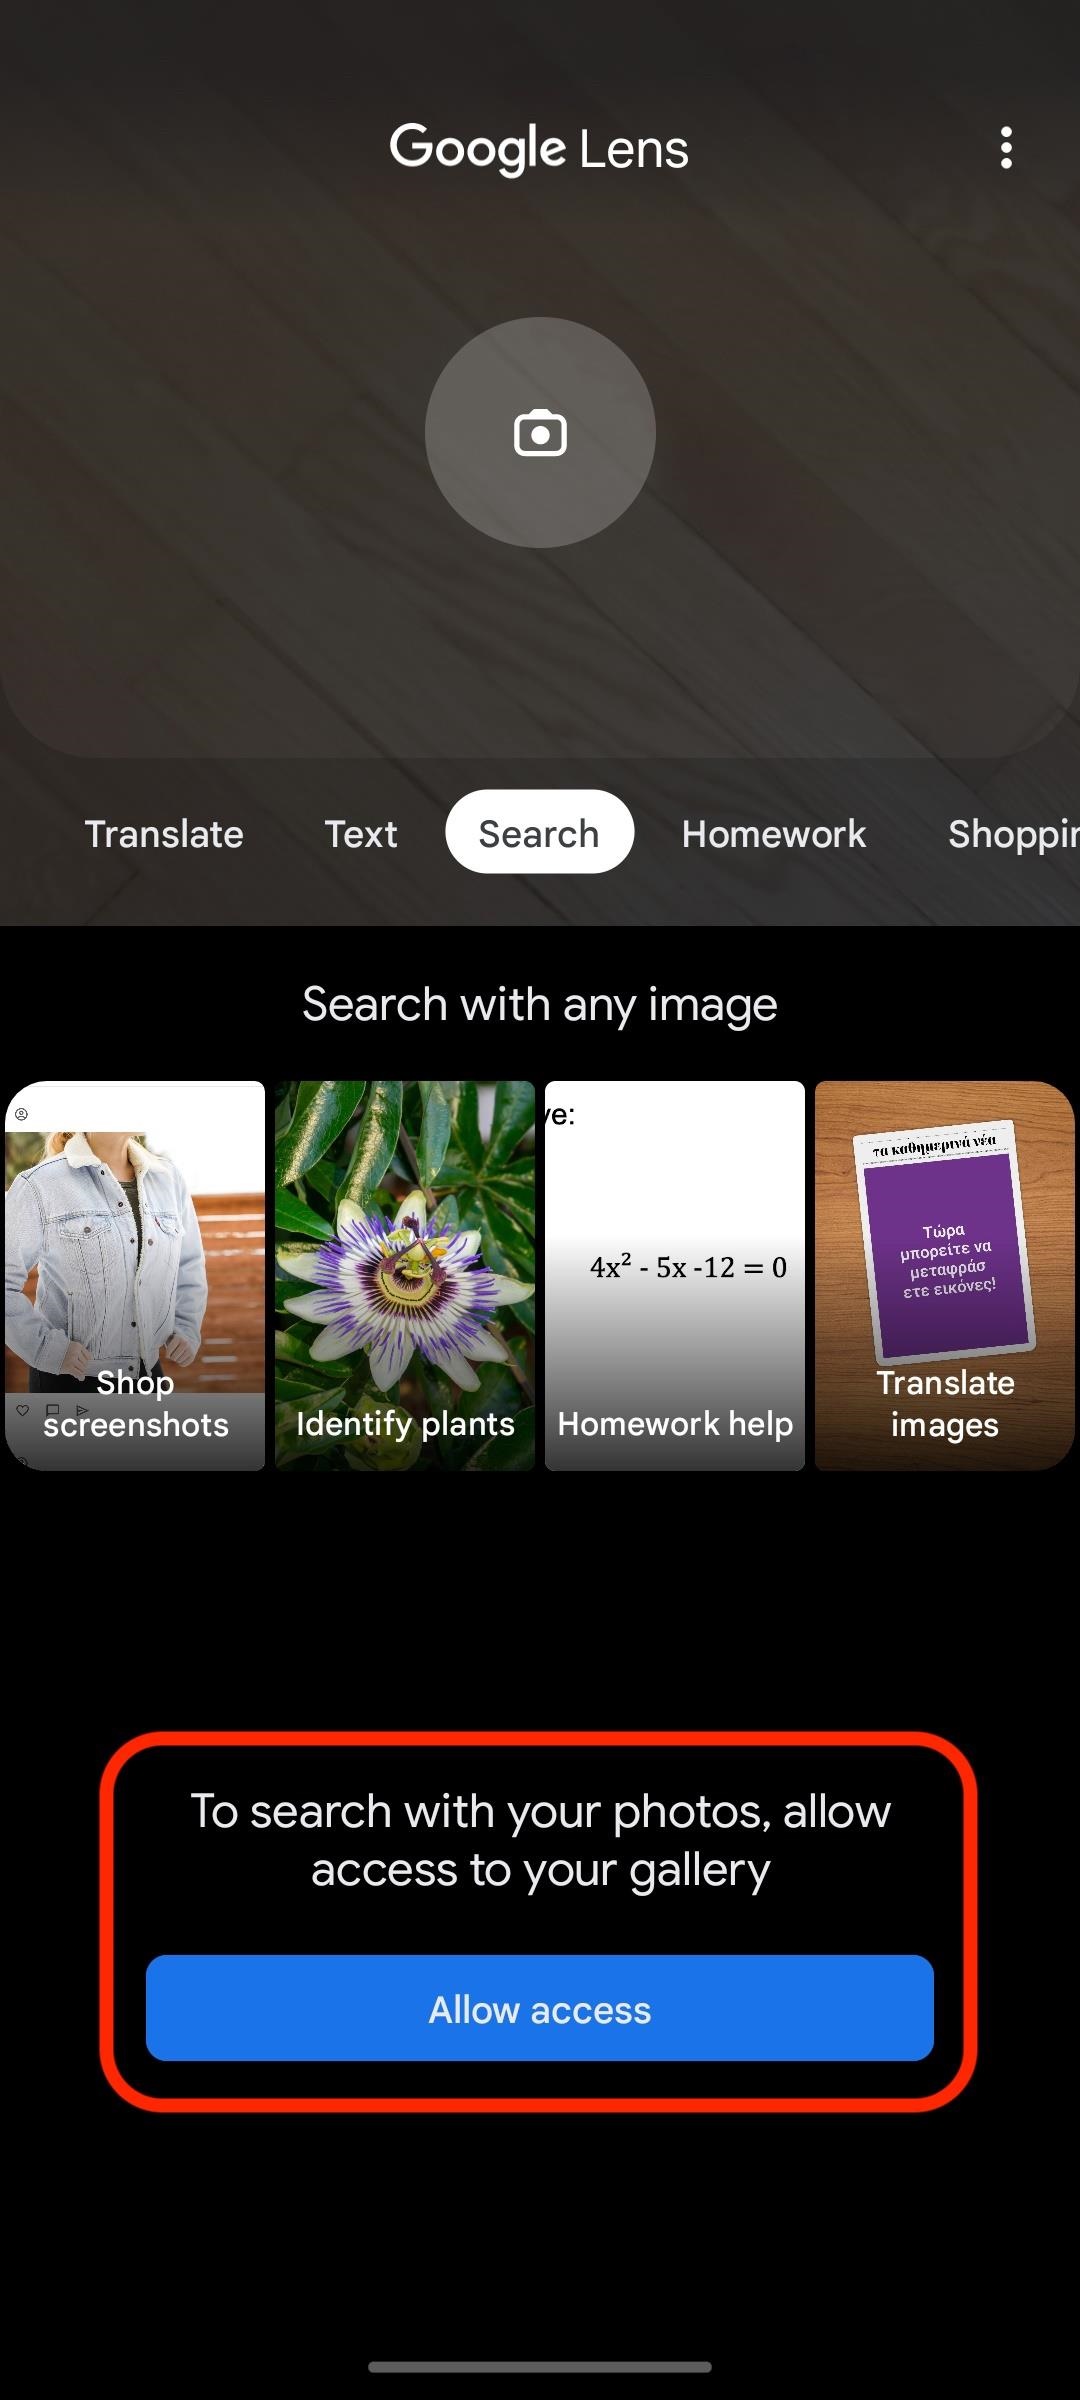
Next, use Google Lens to scan the saved image. You can do this in various ways:
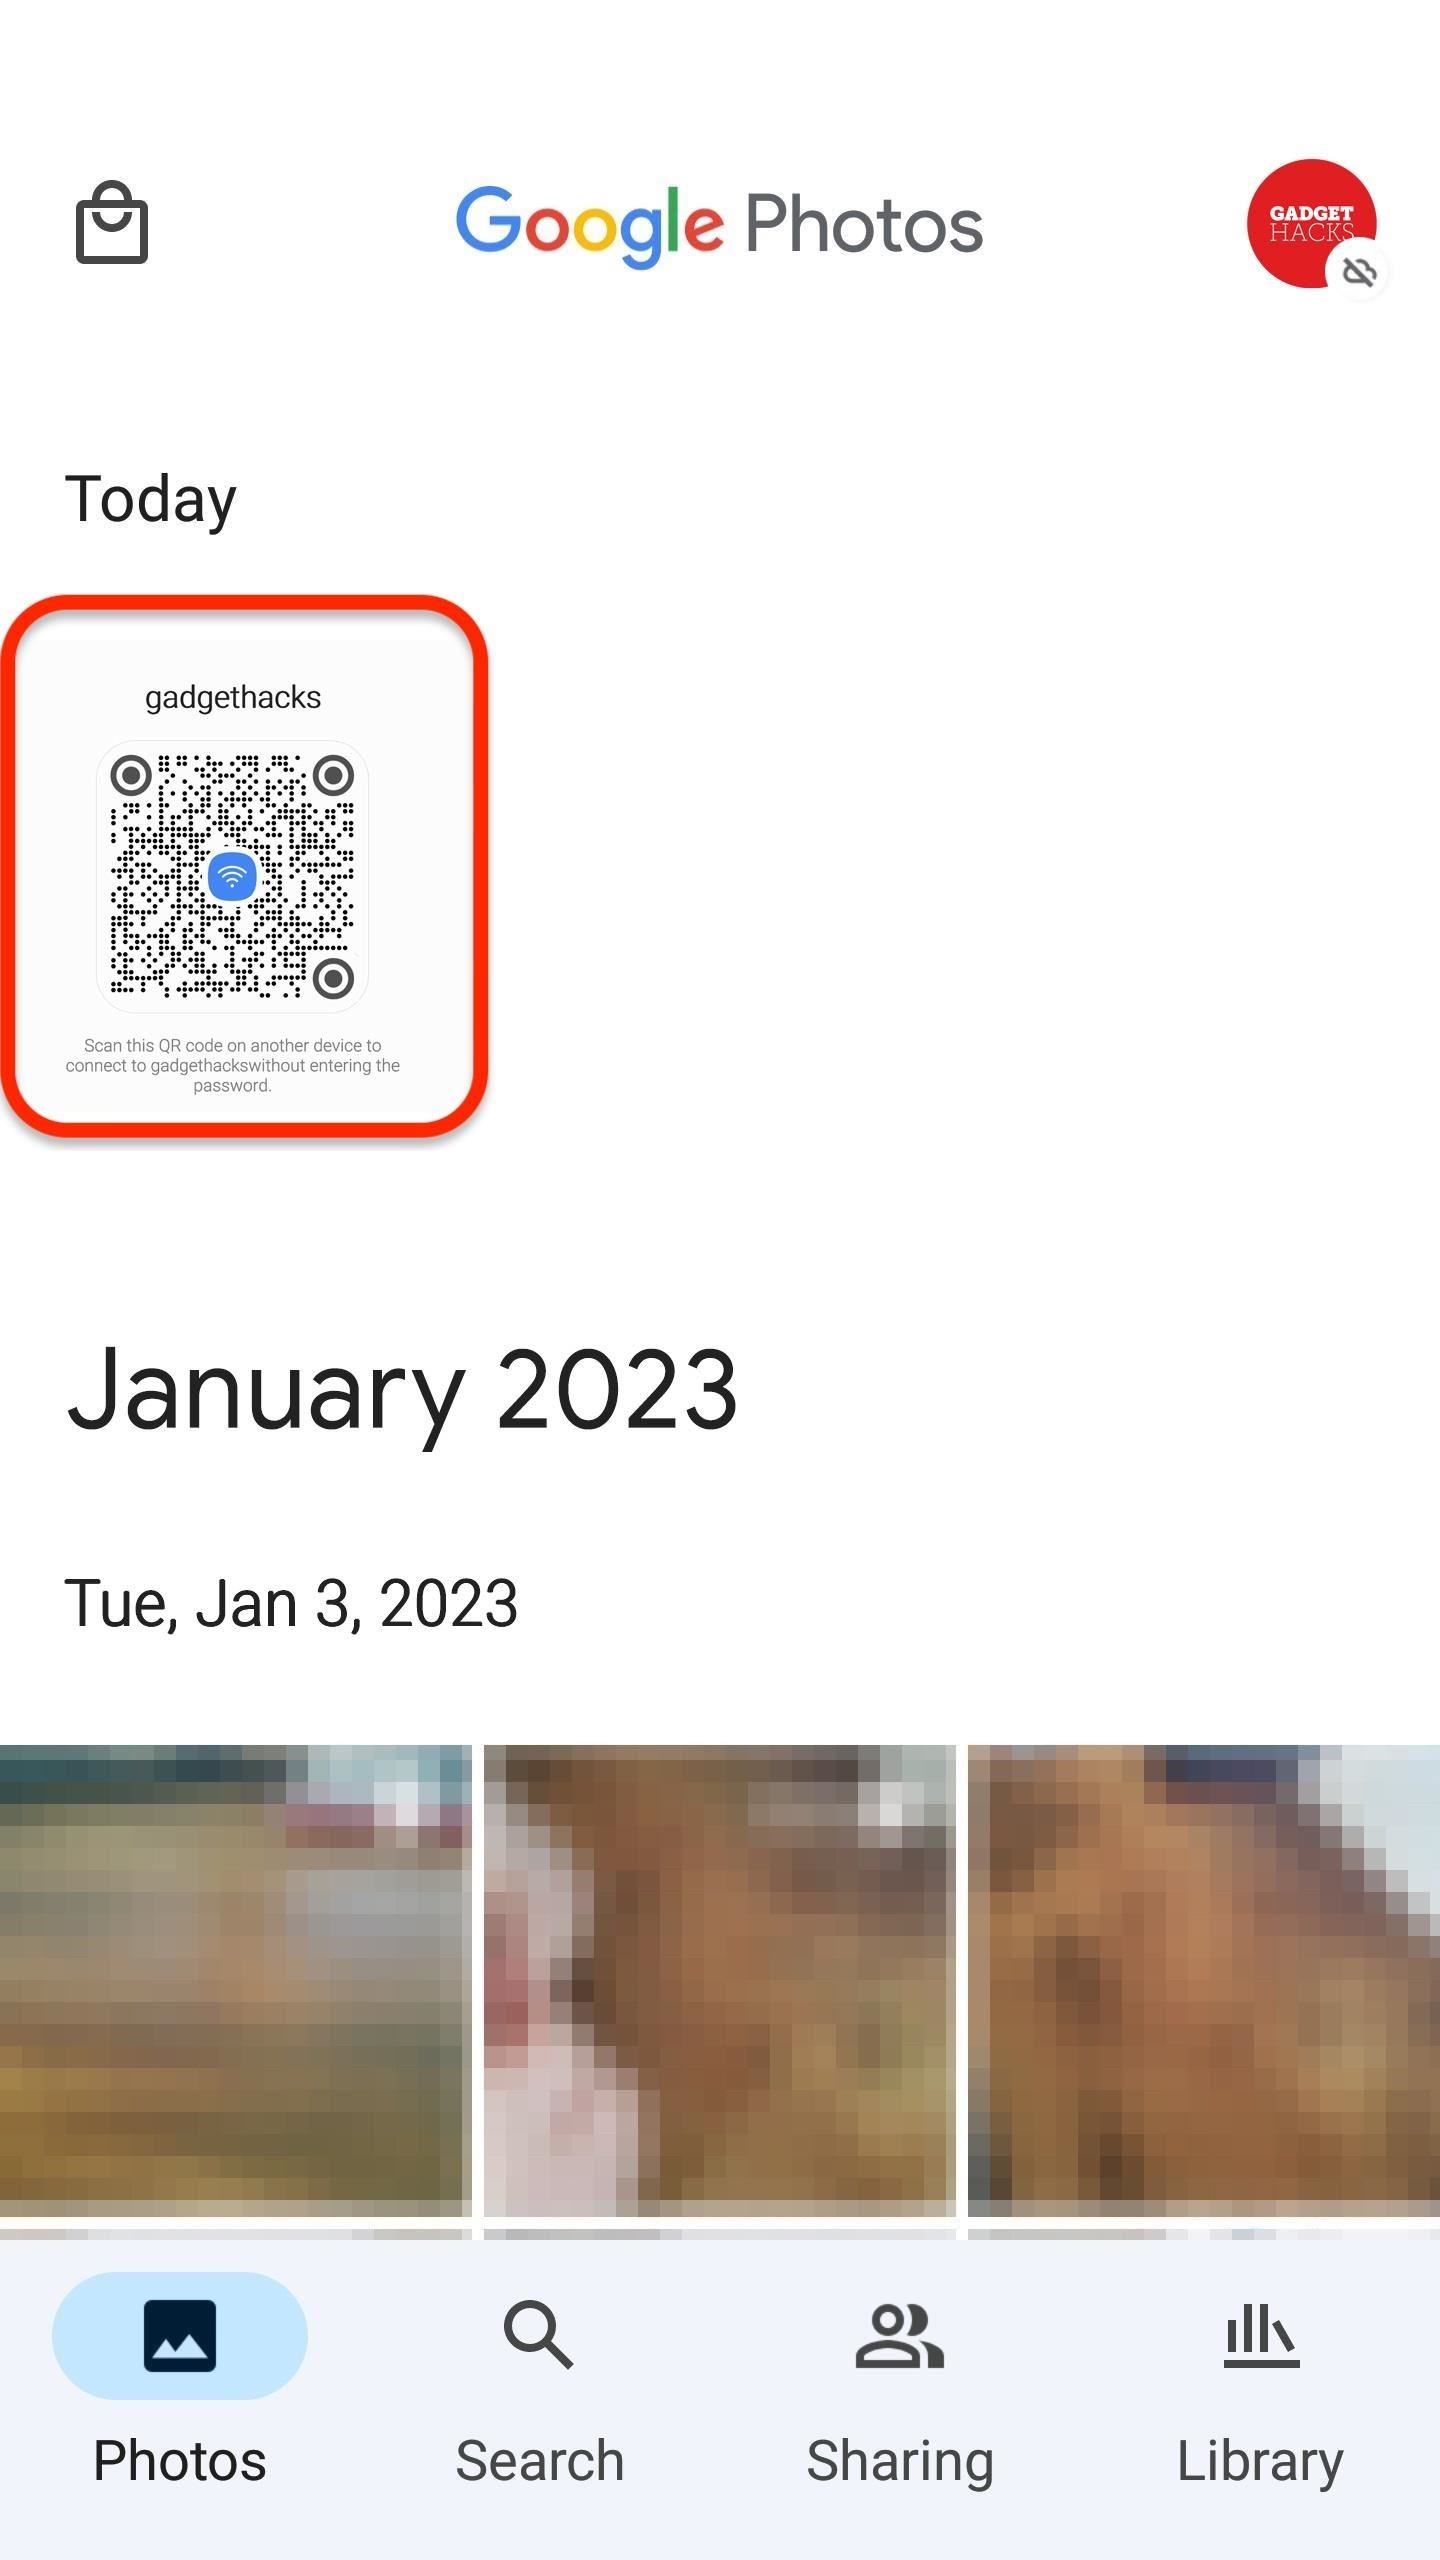
- Open Google Photos (if installed), select the image, and hit the "Lens" button.
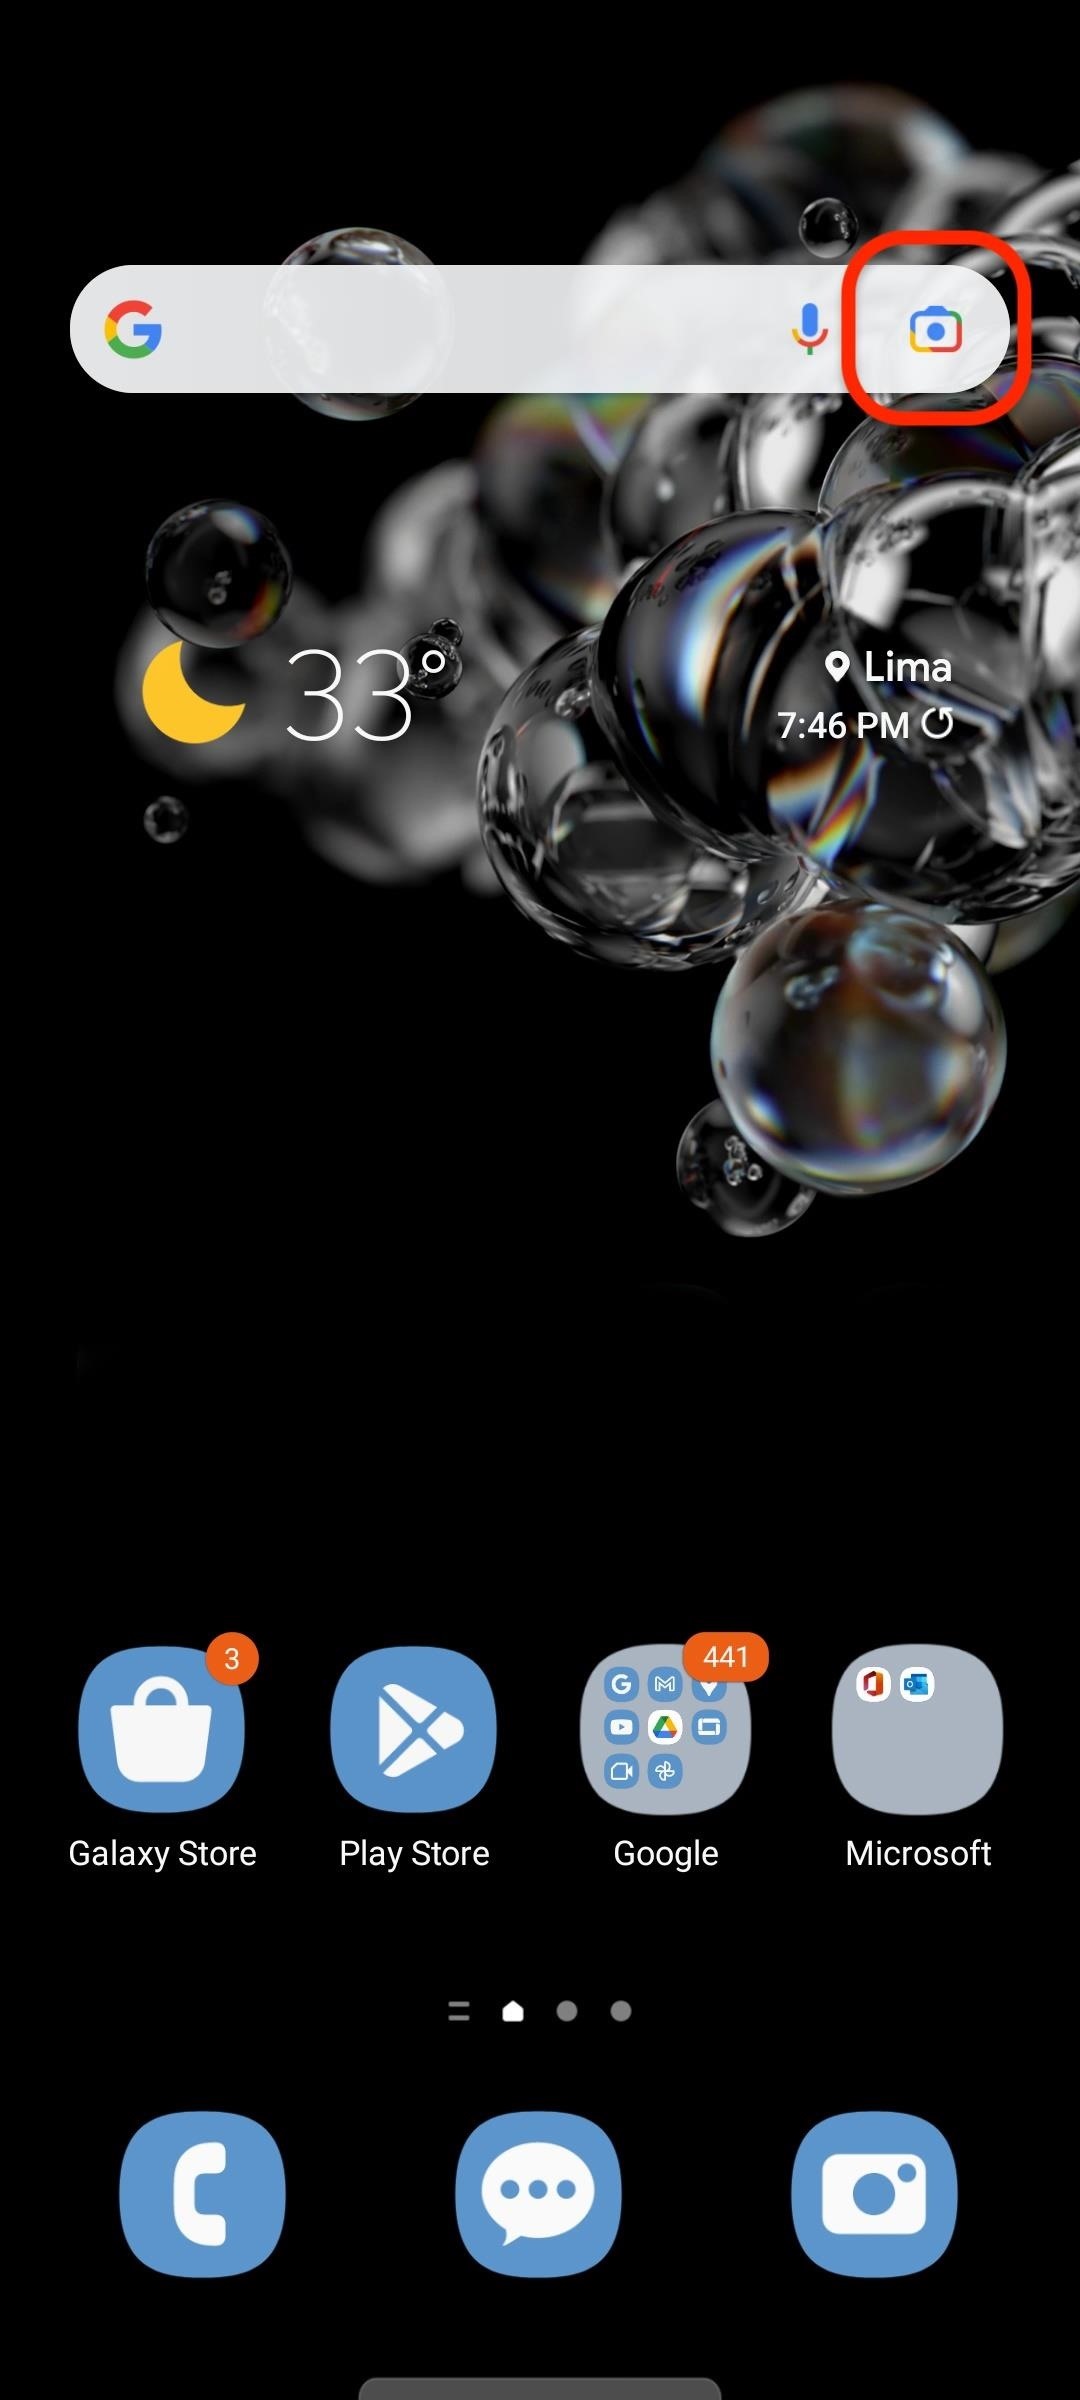
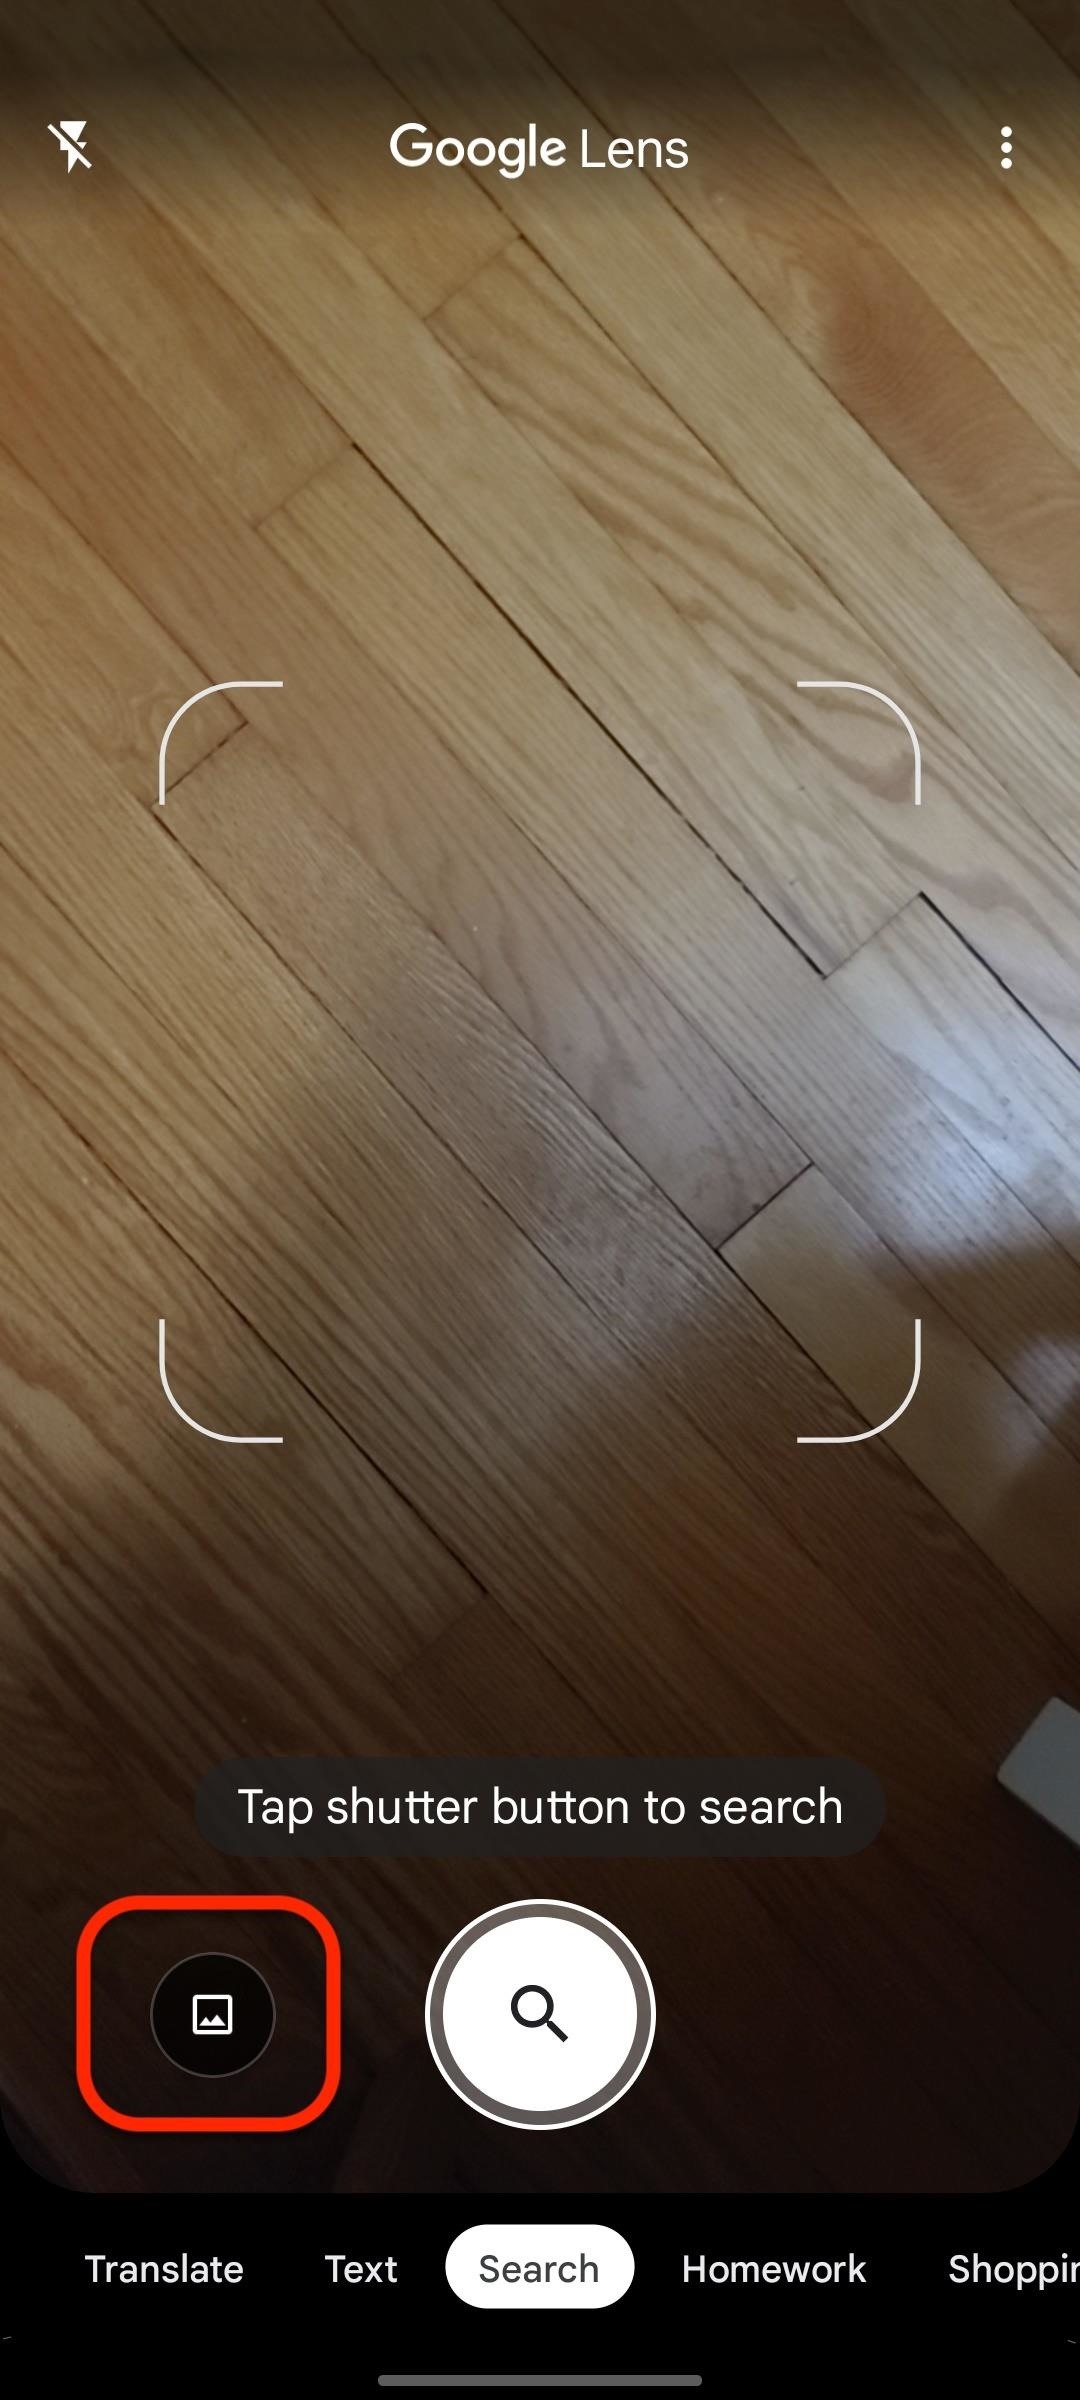
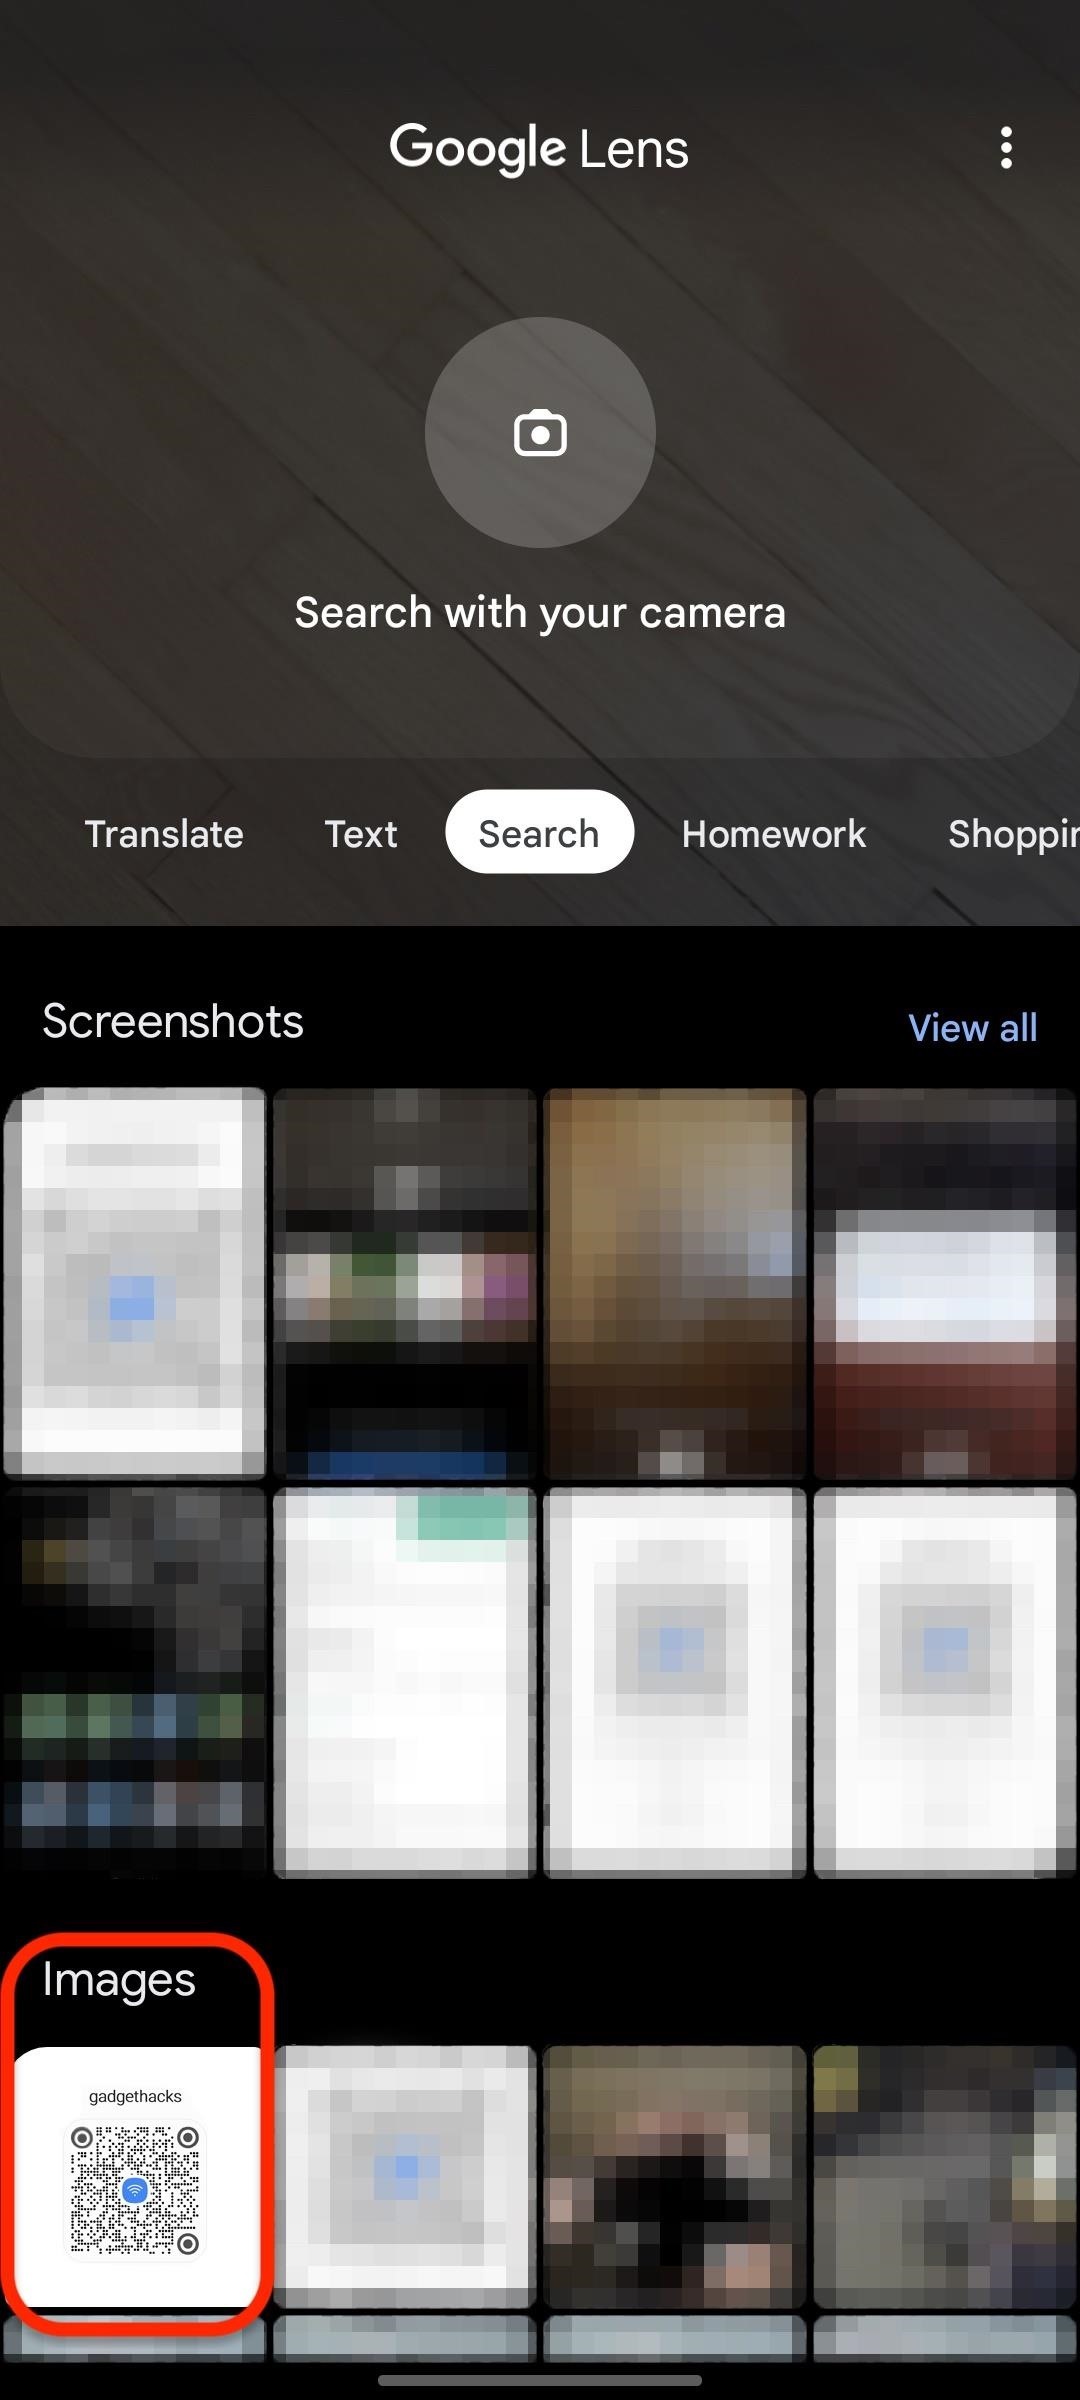
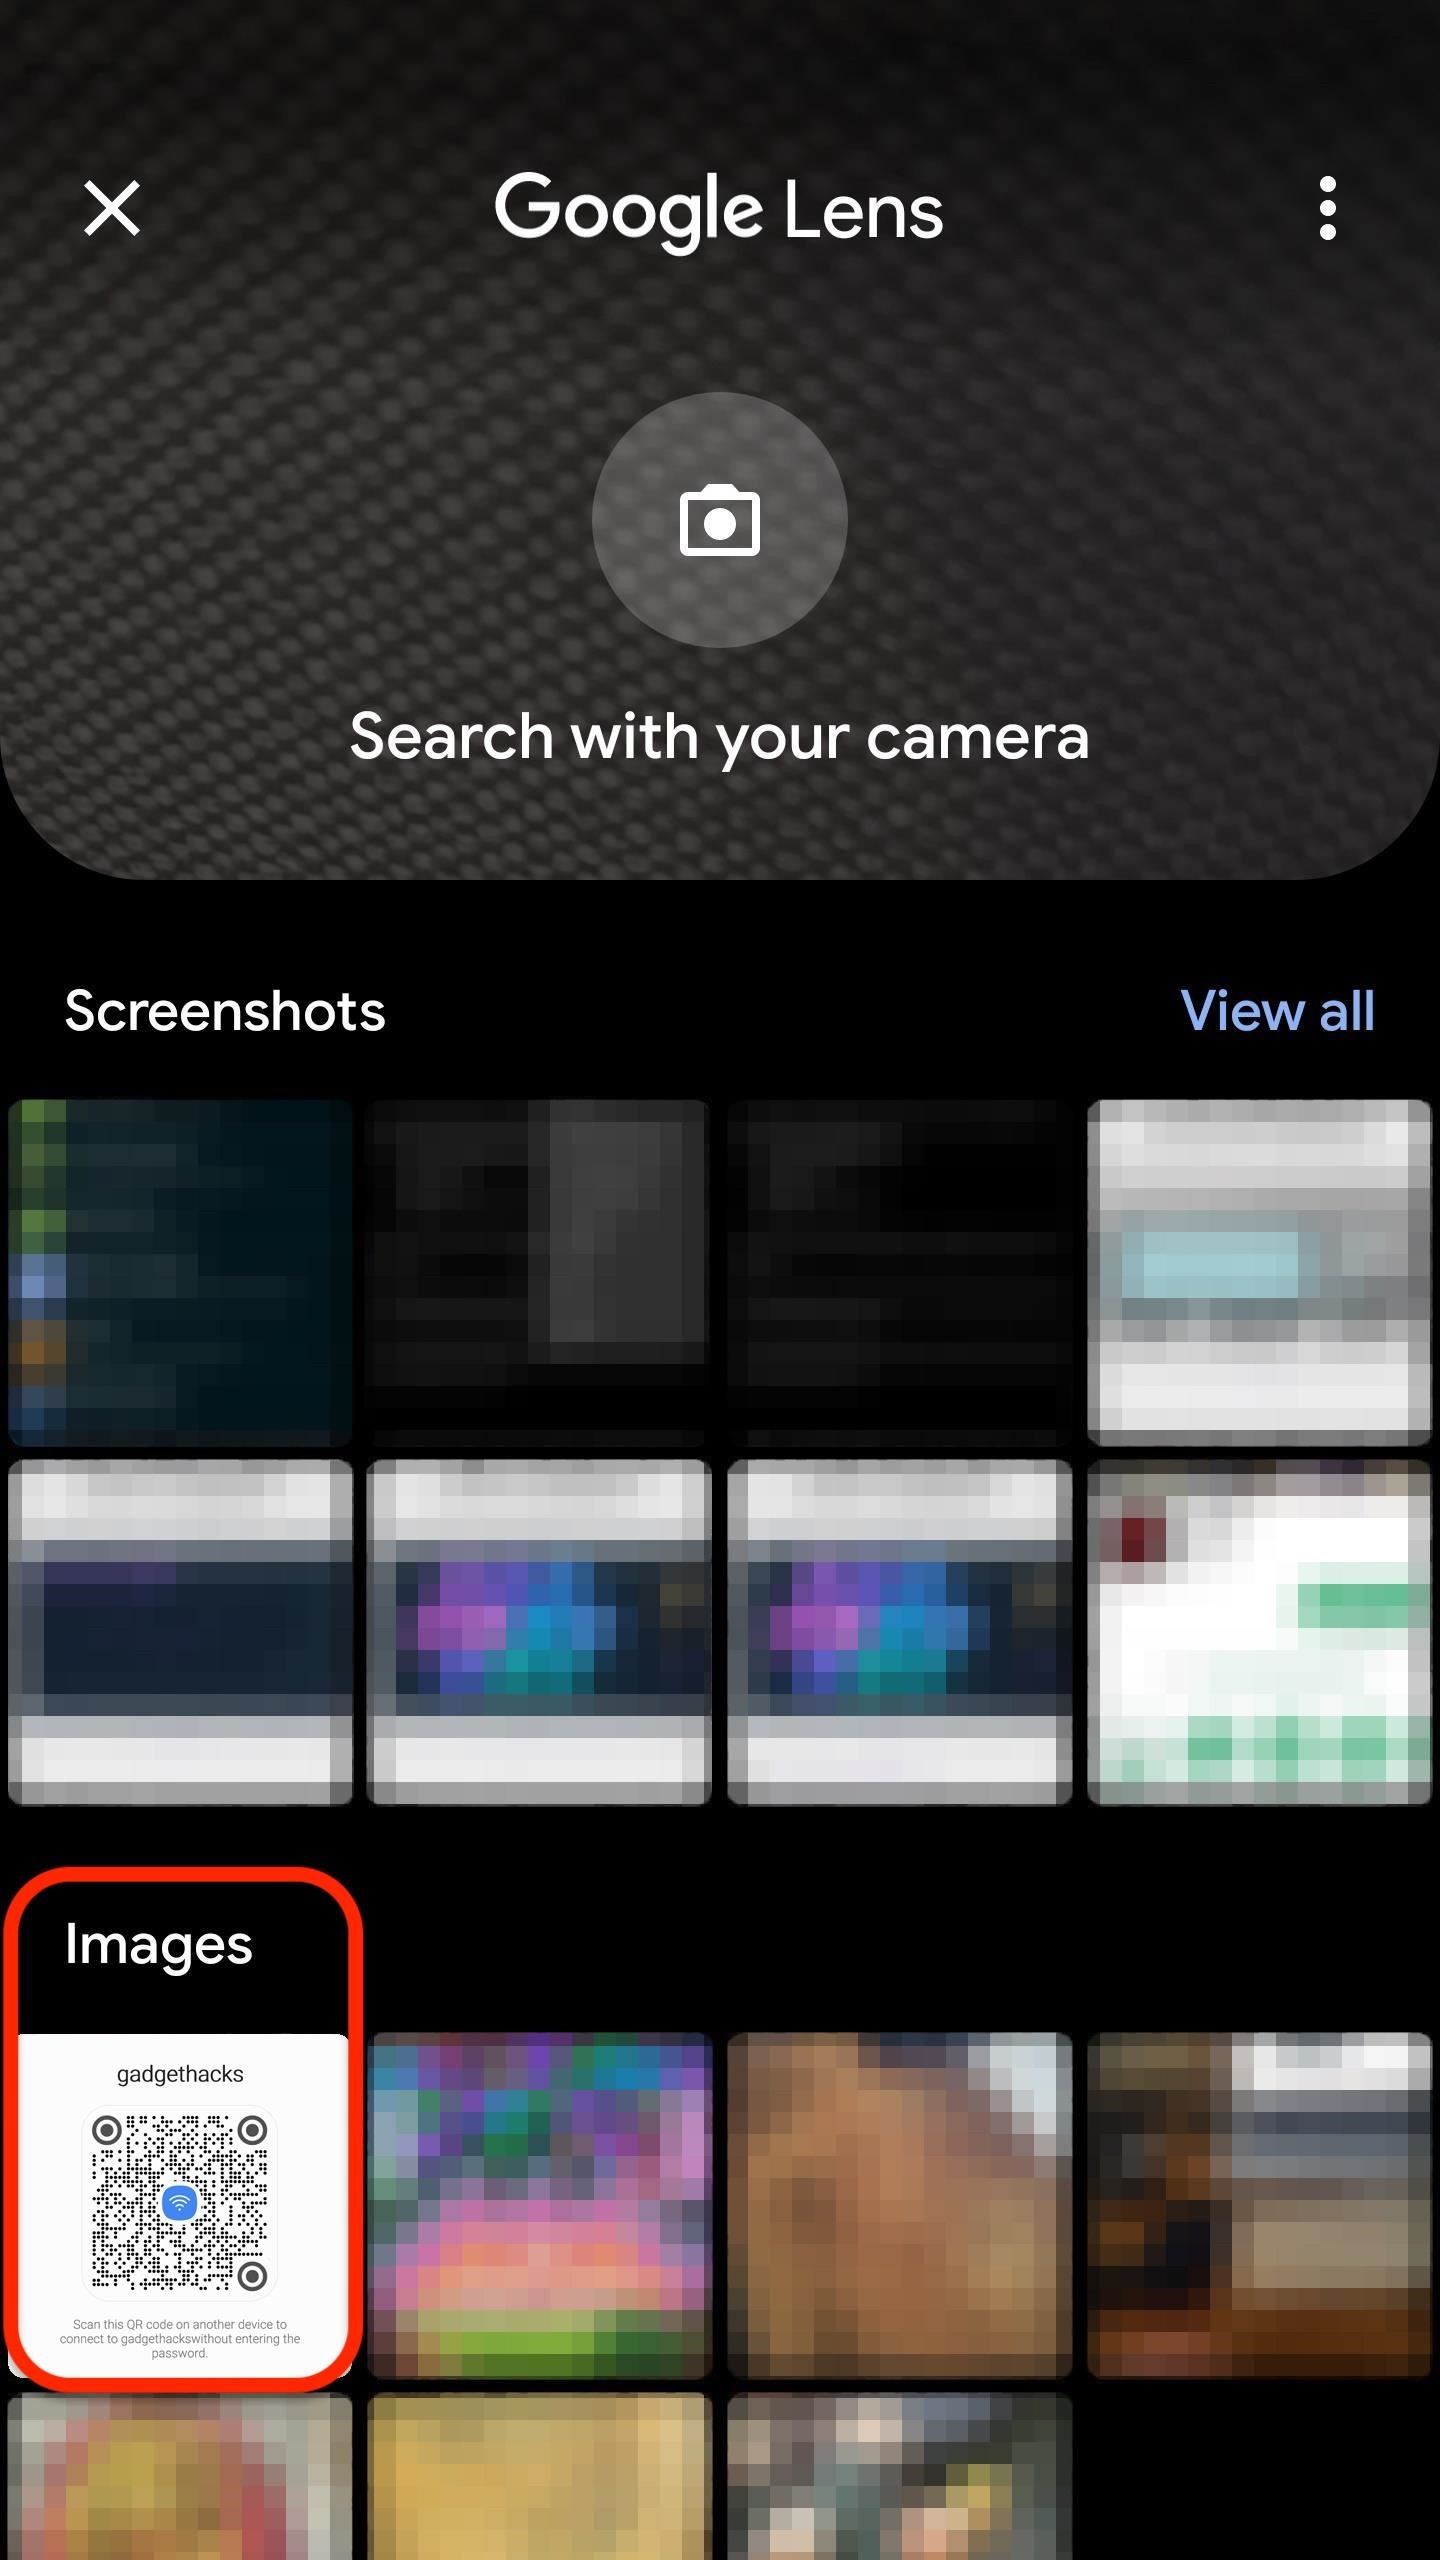
- Tap the camera button on the Google app's home screen widget (if installed), then select the saved image. You may need to tap the gallery icon in the corner before you can select the image (picture below).
- Open the Google app (if installed), tap the camera icon in the search bar, then select the saved image. You may need to tap the gallery icon in the corner before you can select the image.
- Open the Google Lens app (if installed), then select the saved image. You may need to tap the gallery icon in the corner before you can select the image.
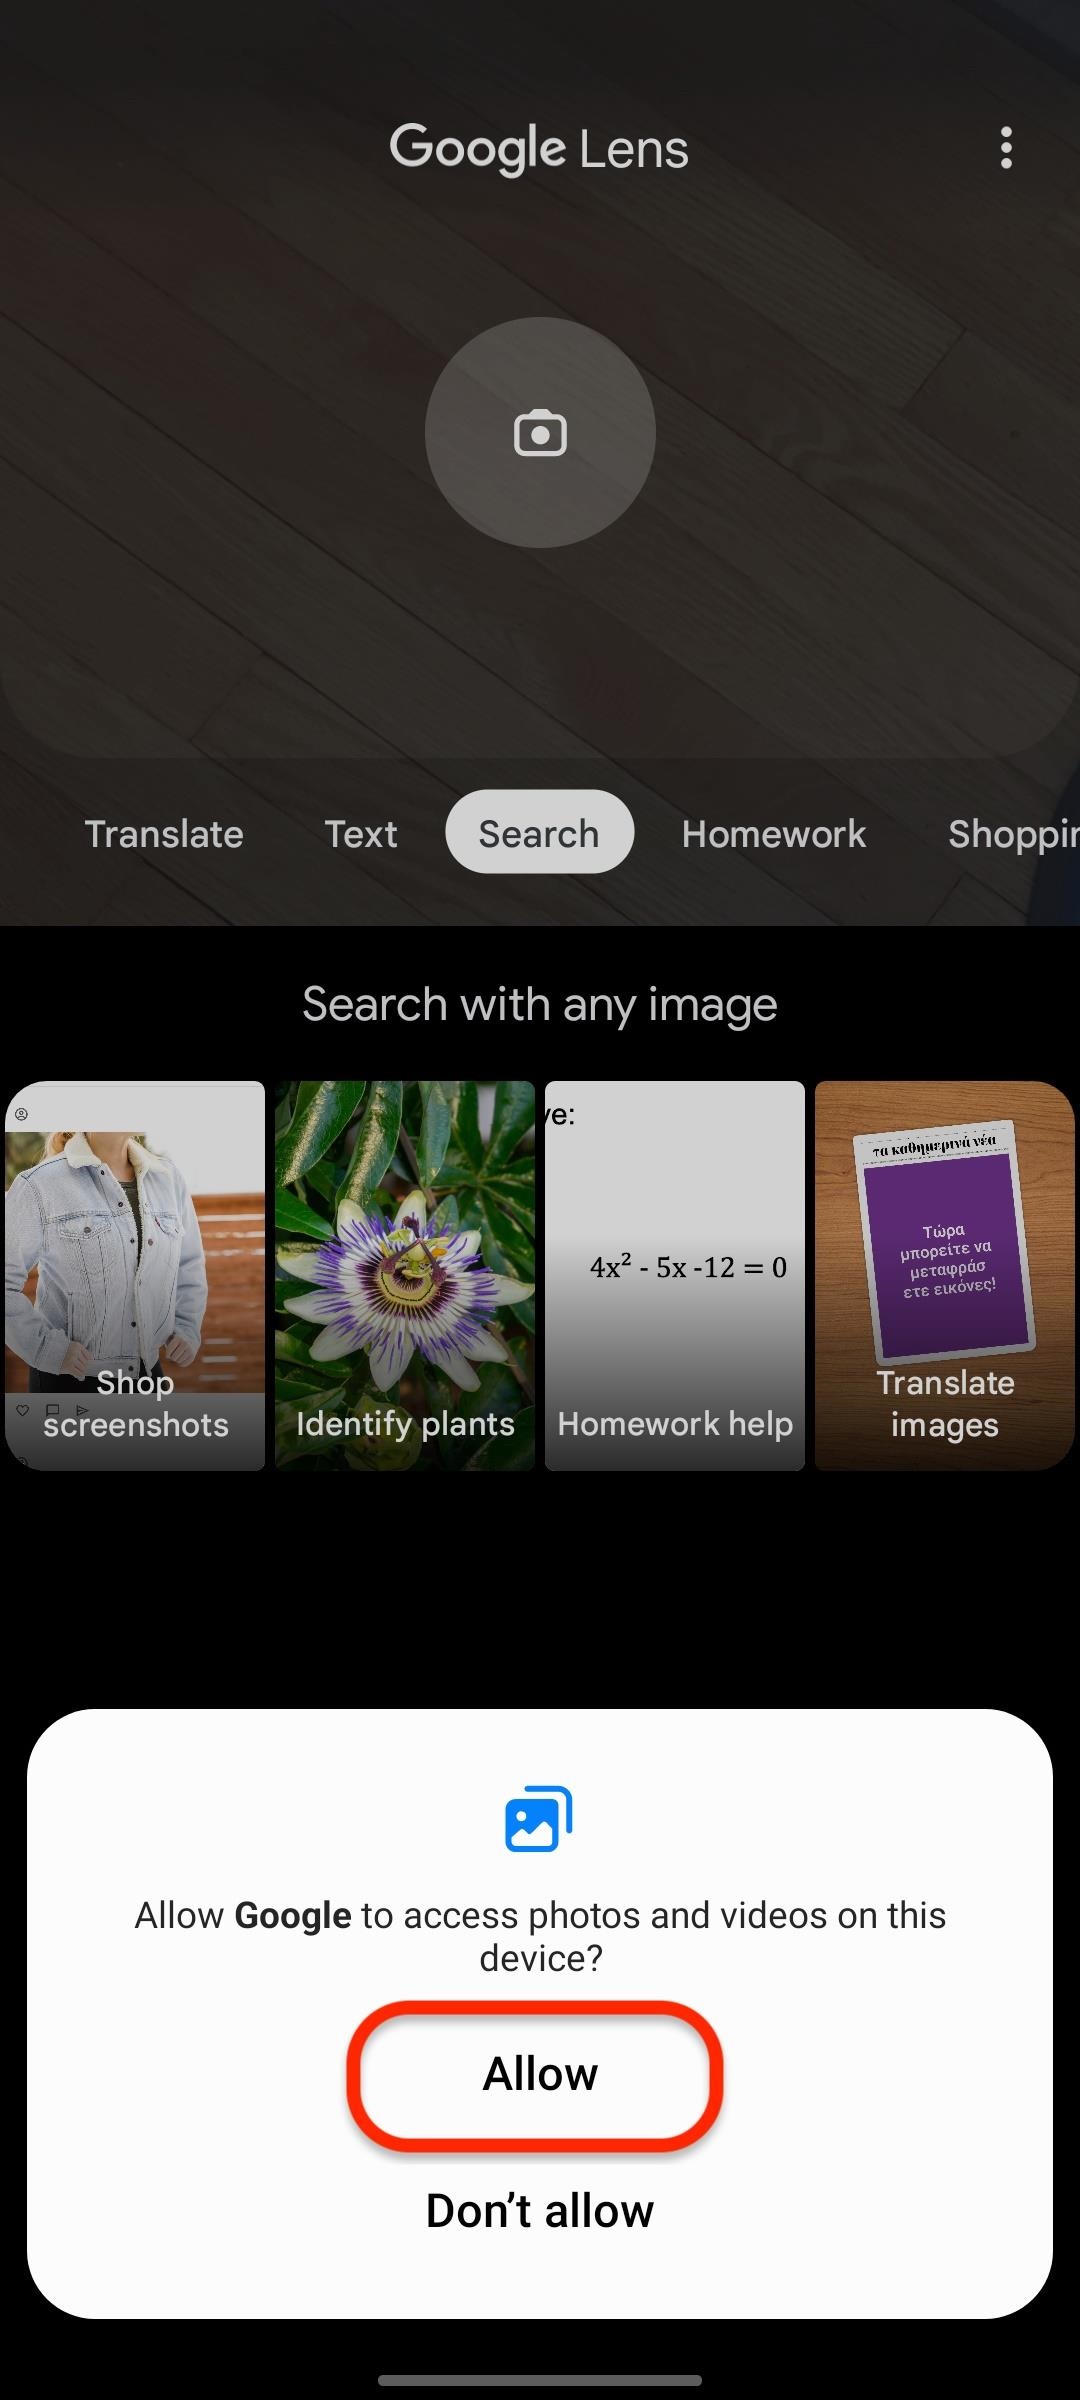
Either way, if it's the first time using Google Lens for photos, you'll have to give it permission to access your gallery; Hit "Allow access," then "Allow" on the next prompt.
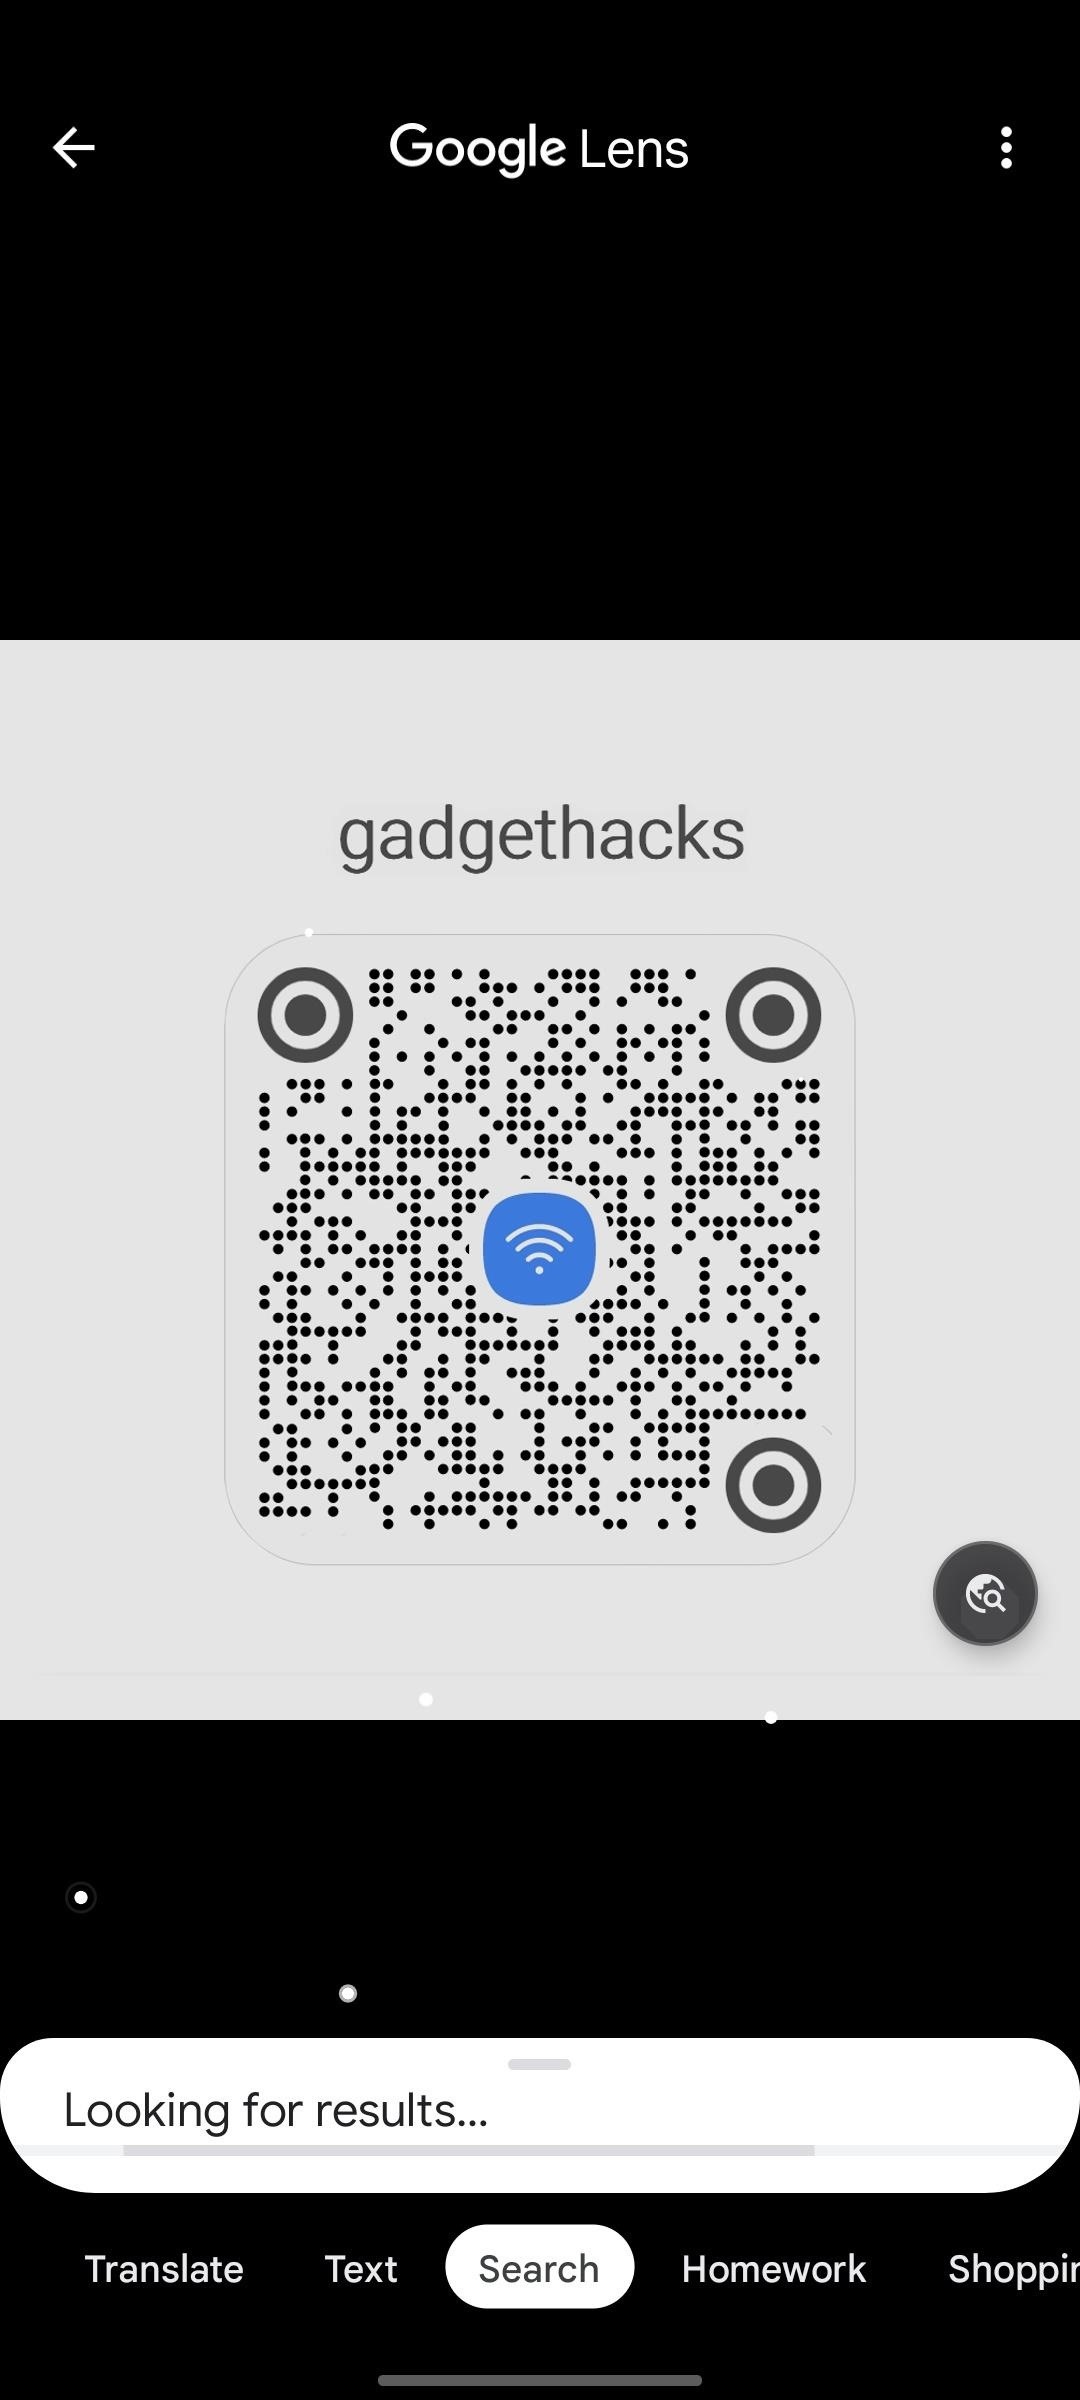
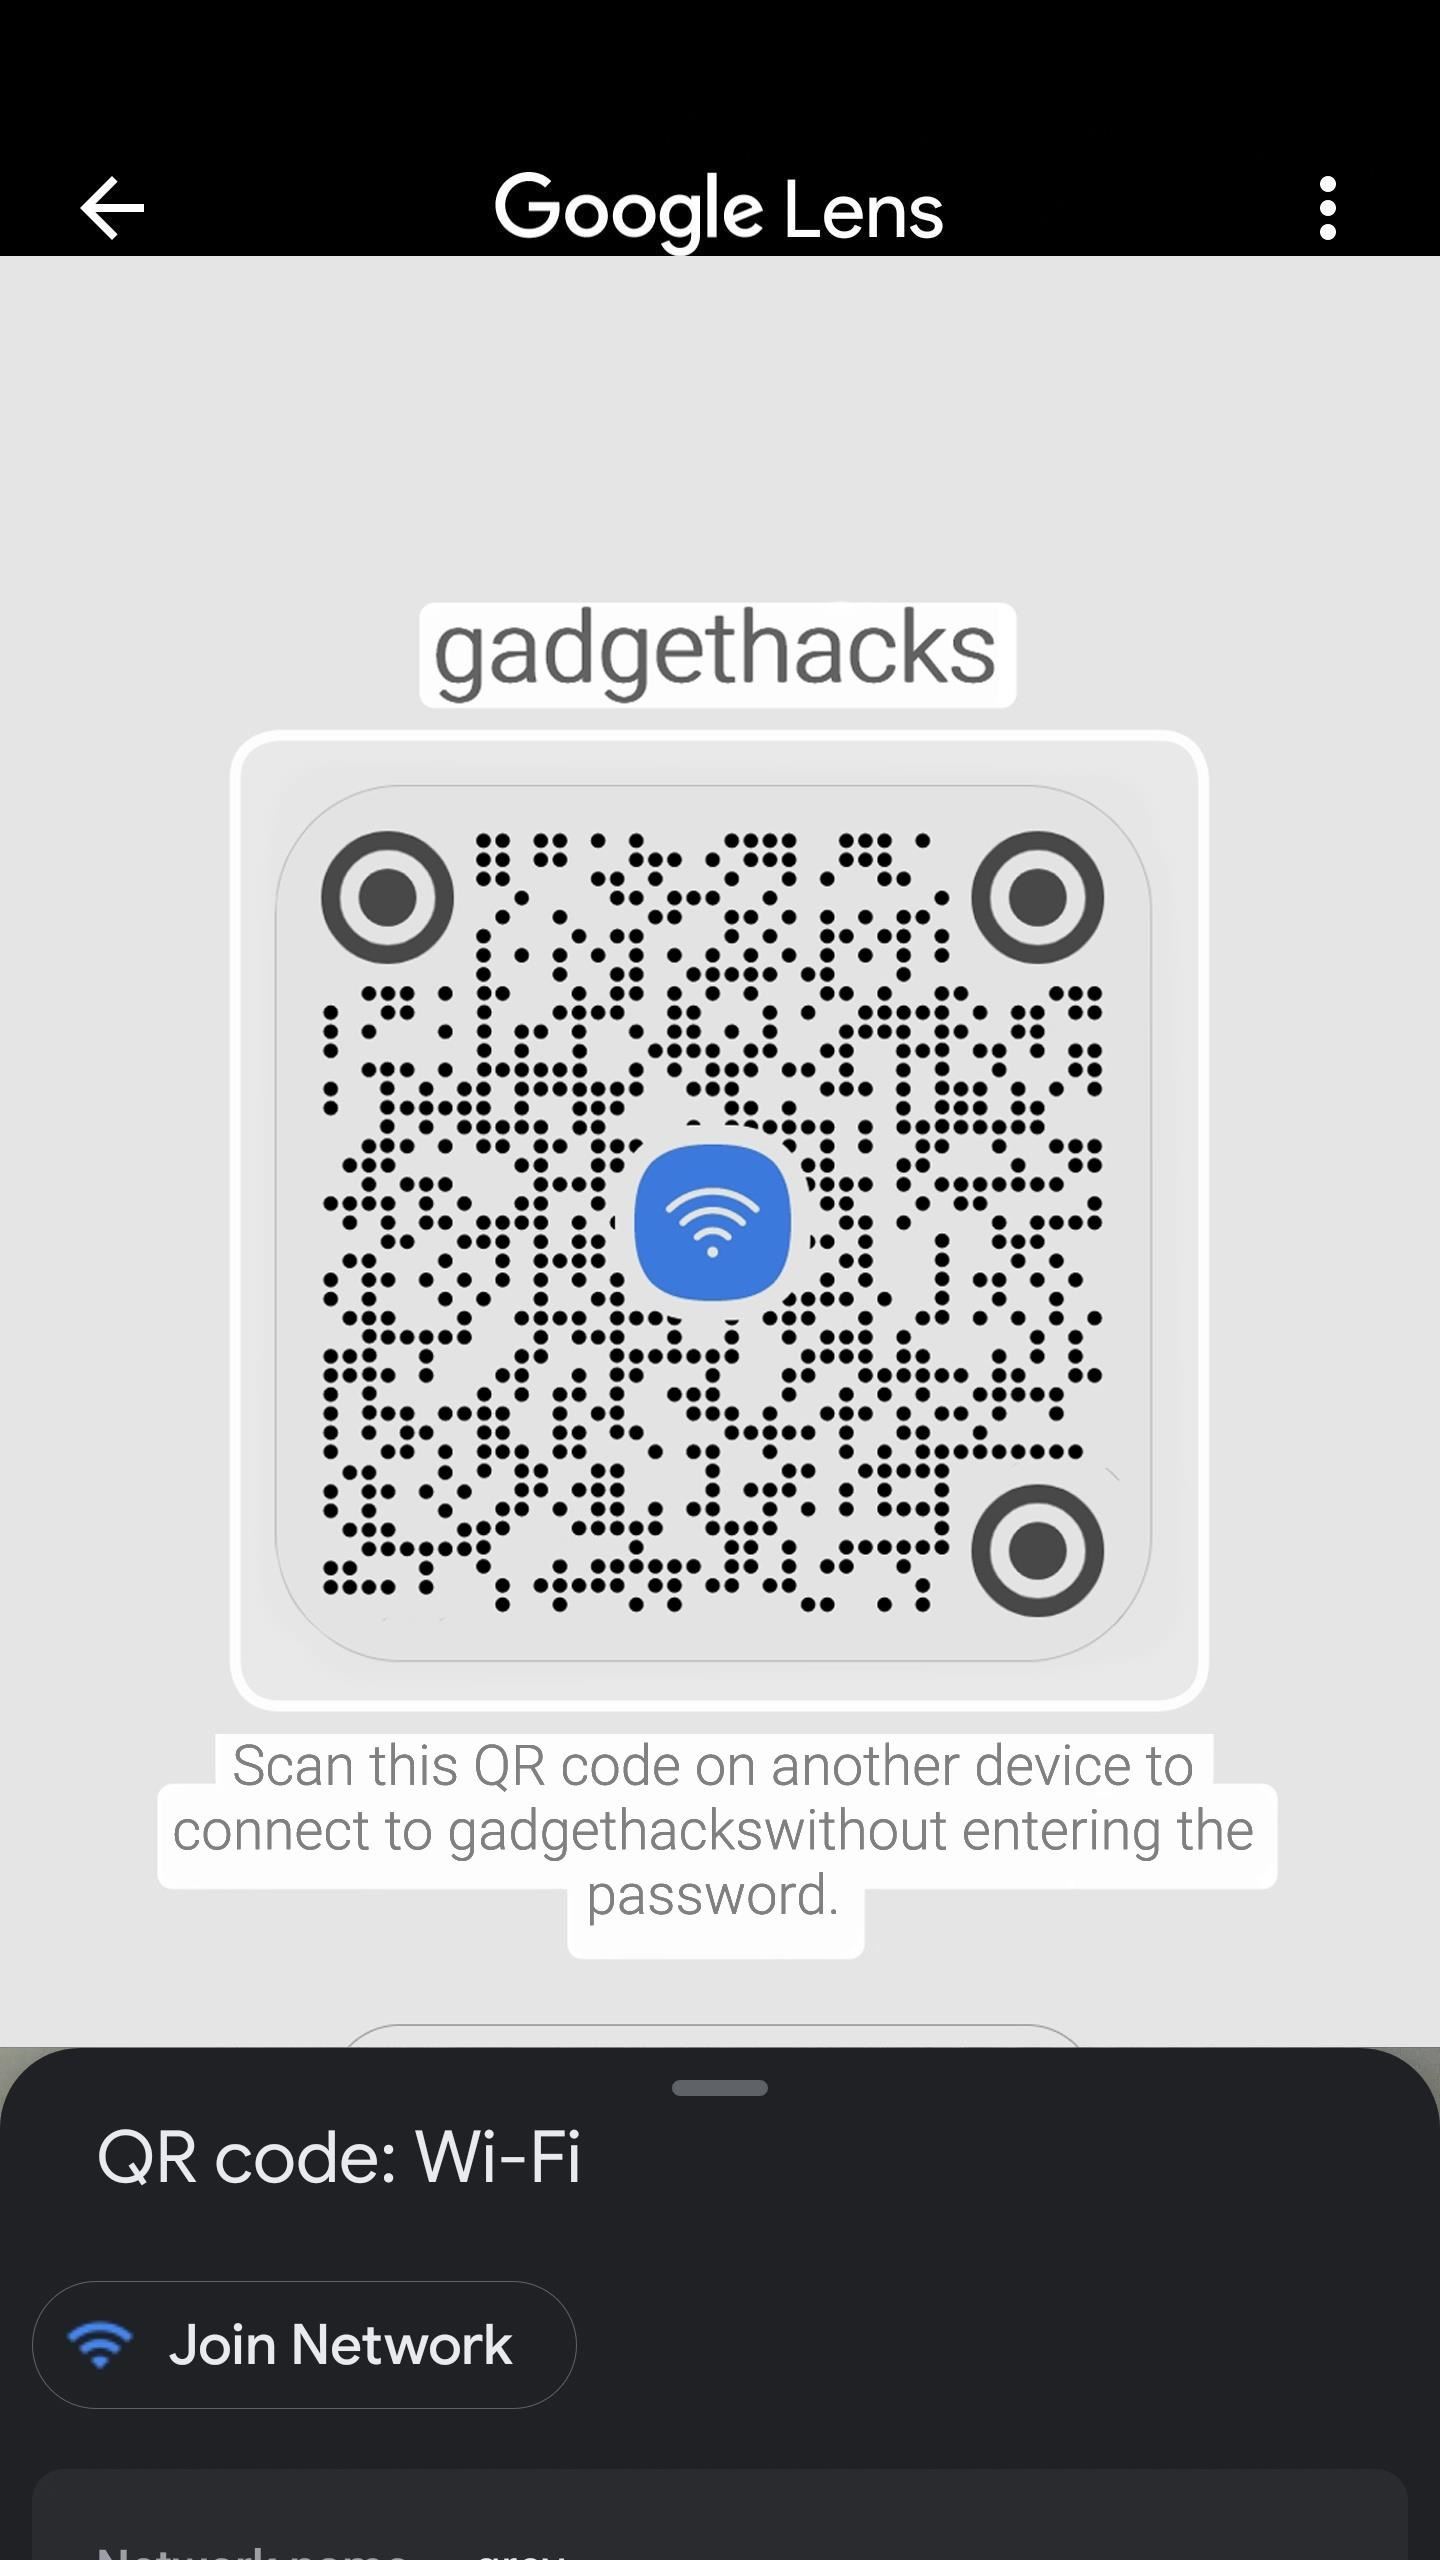
Google Lens will start scanning the image, and it may end up focusing on everything inside the QR code's perimeter, which won't show you what you need. If that's the case, manually expand the crop on the image to go past the QR code's perimeter.
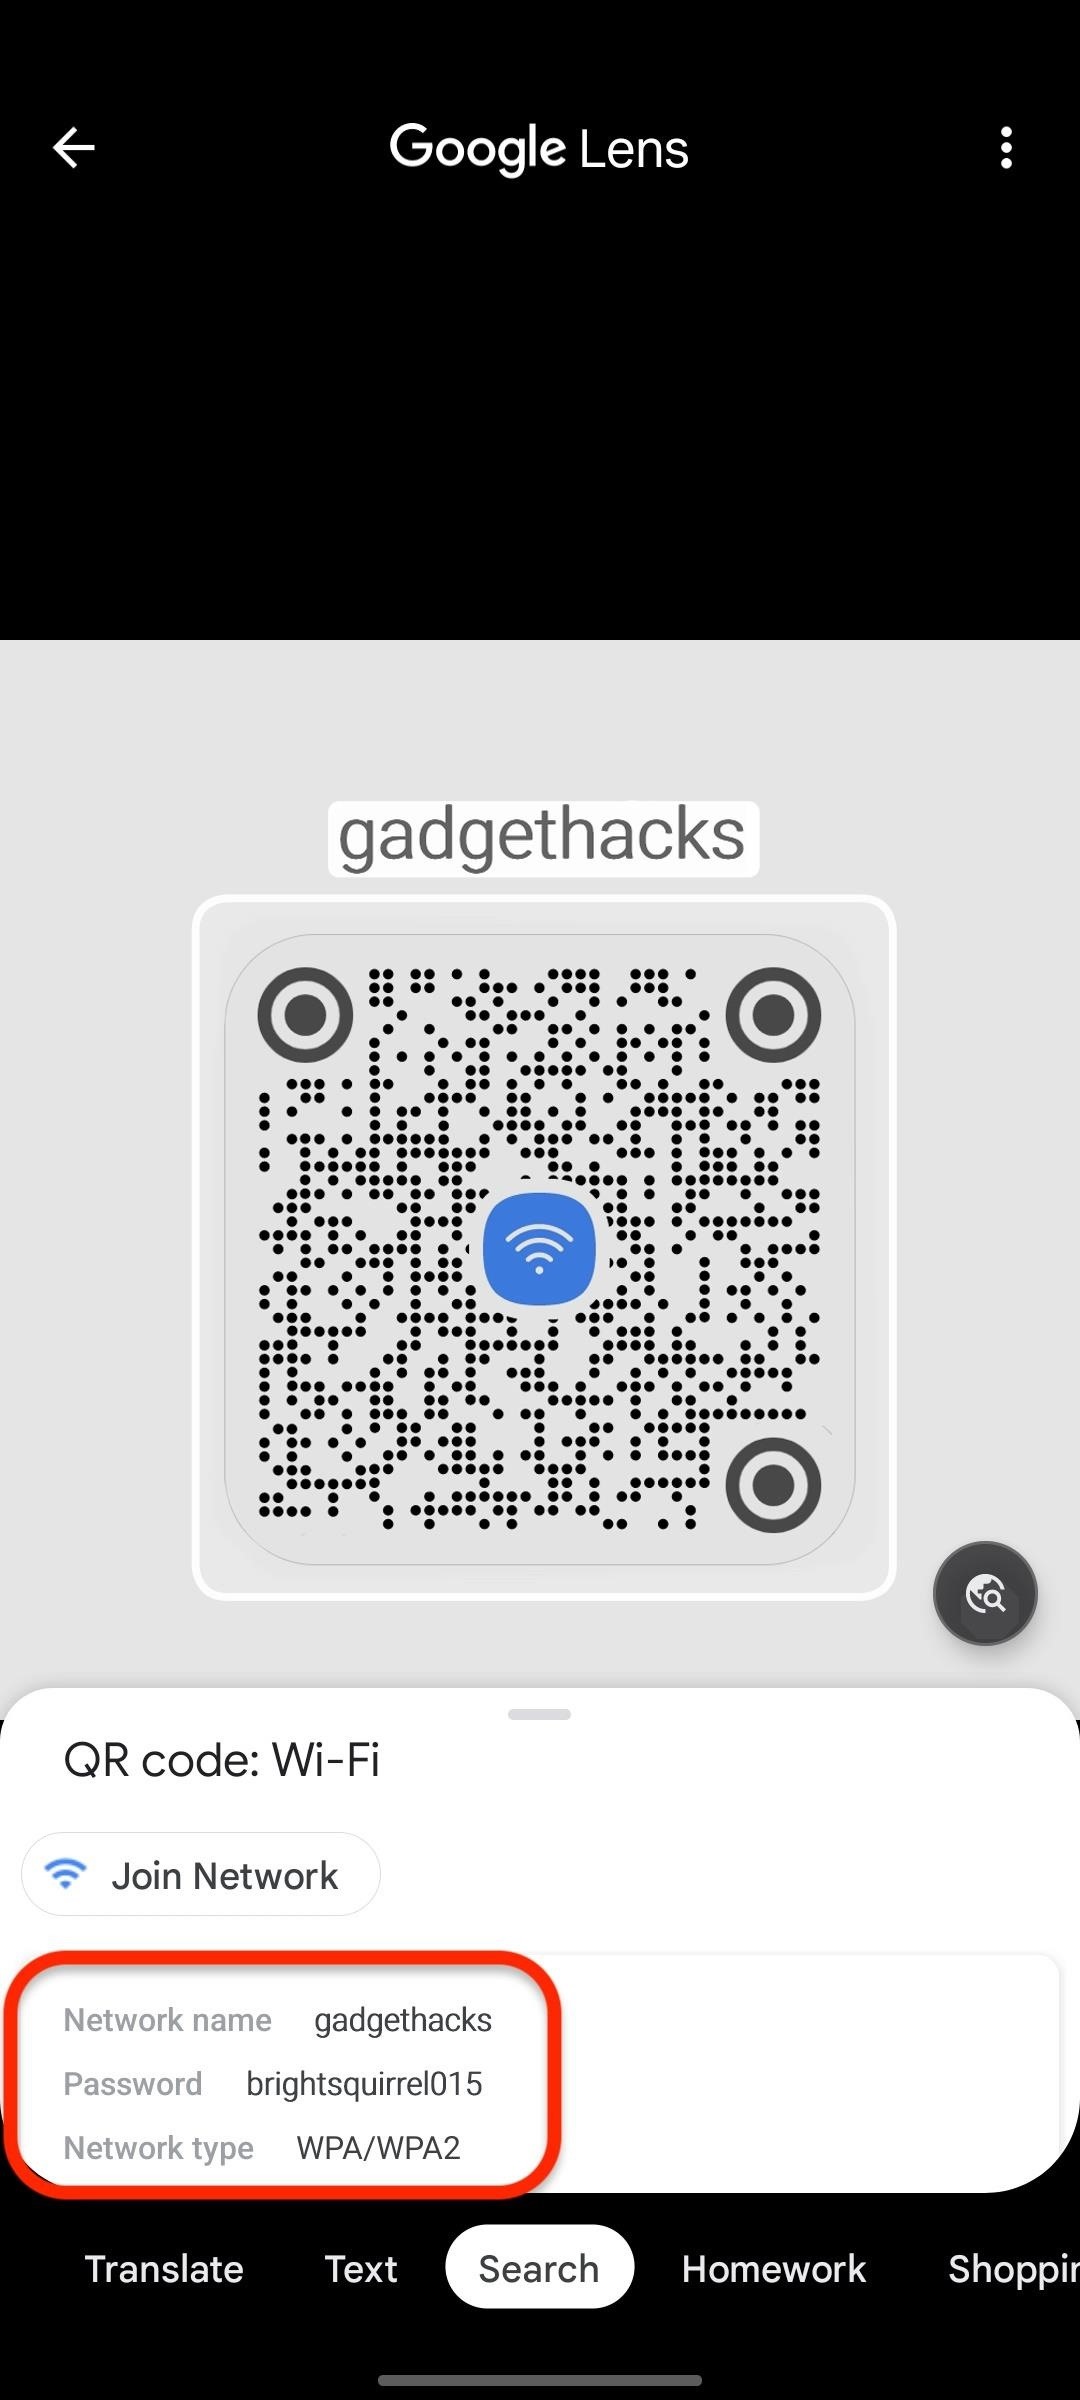
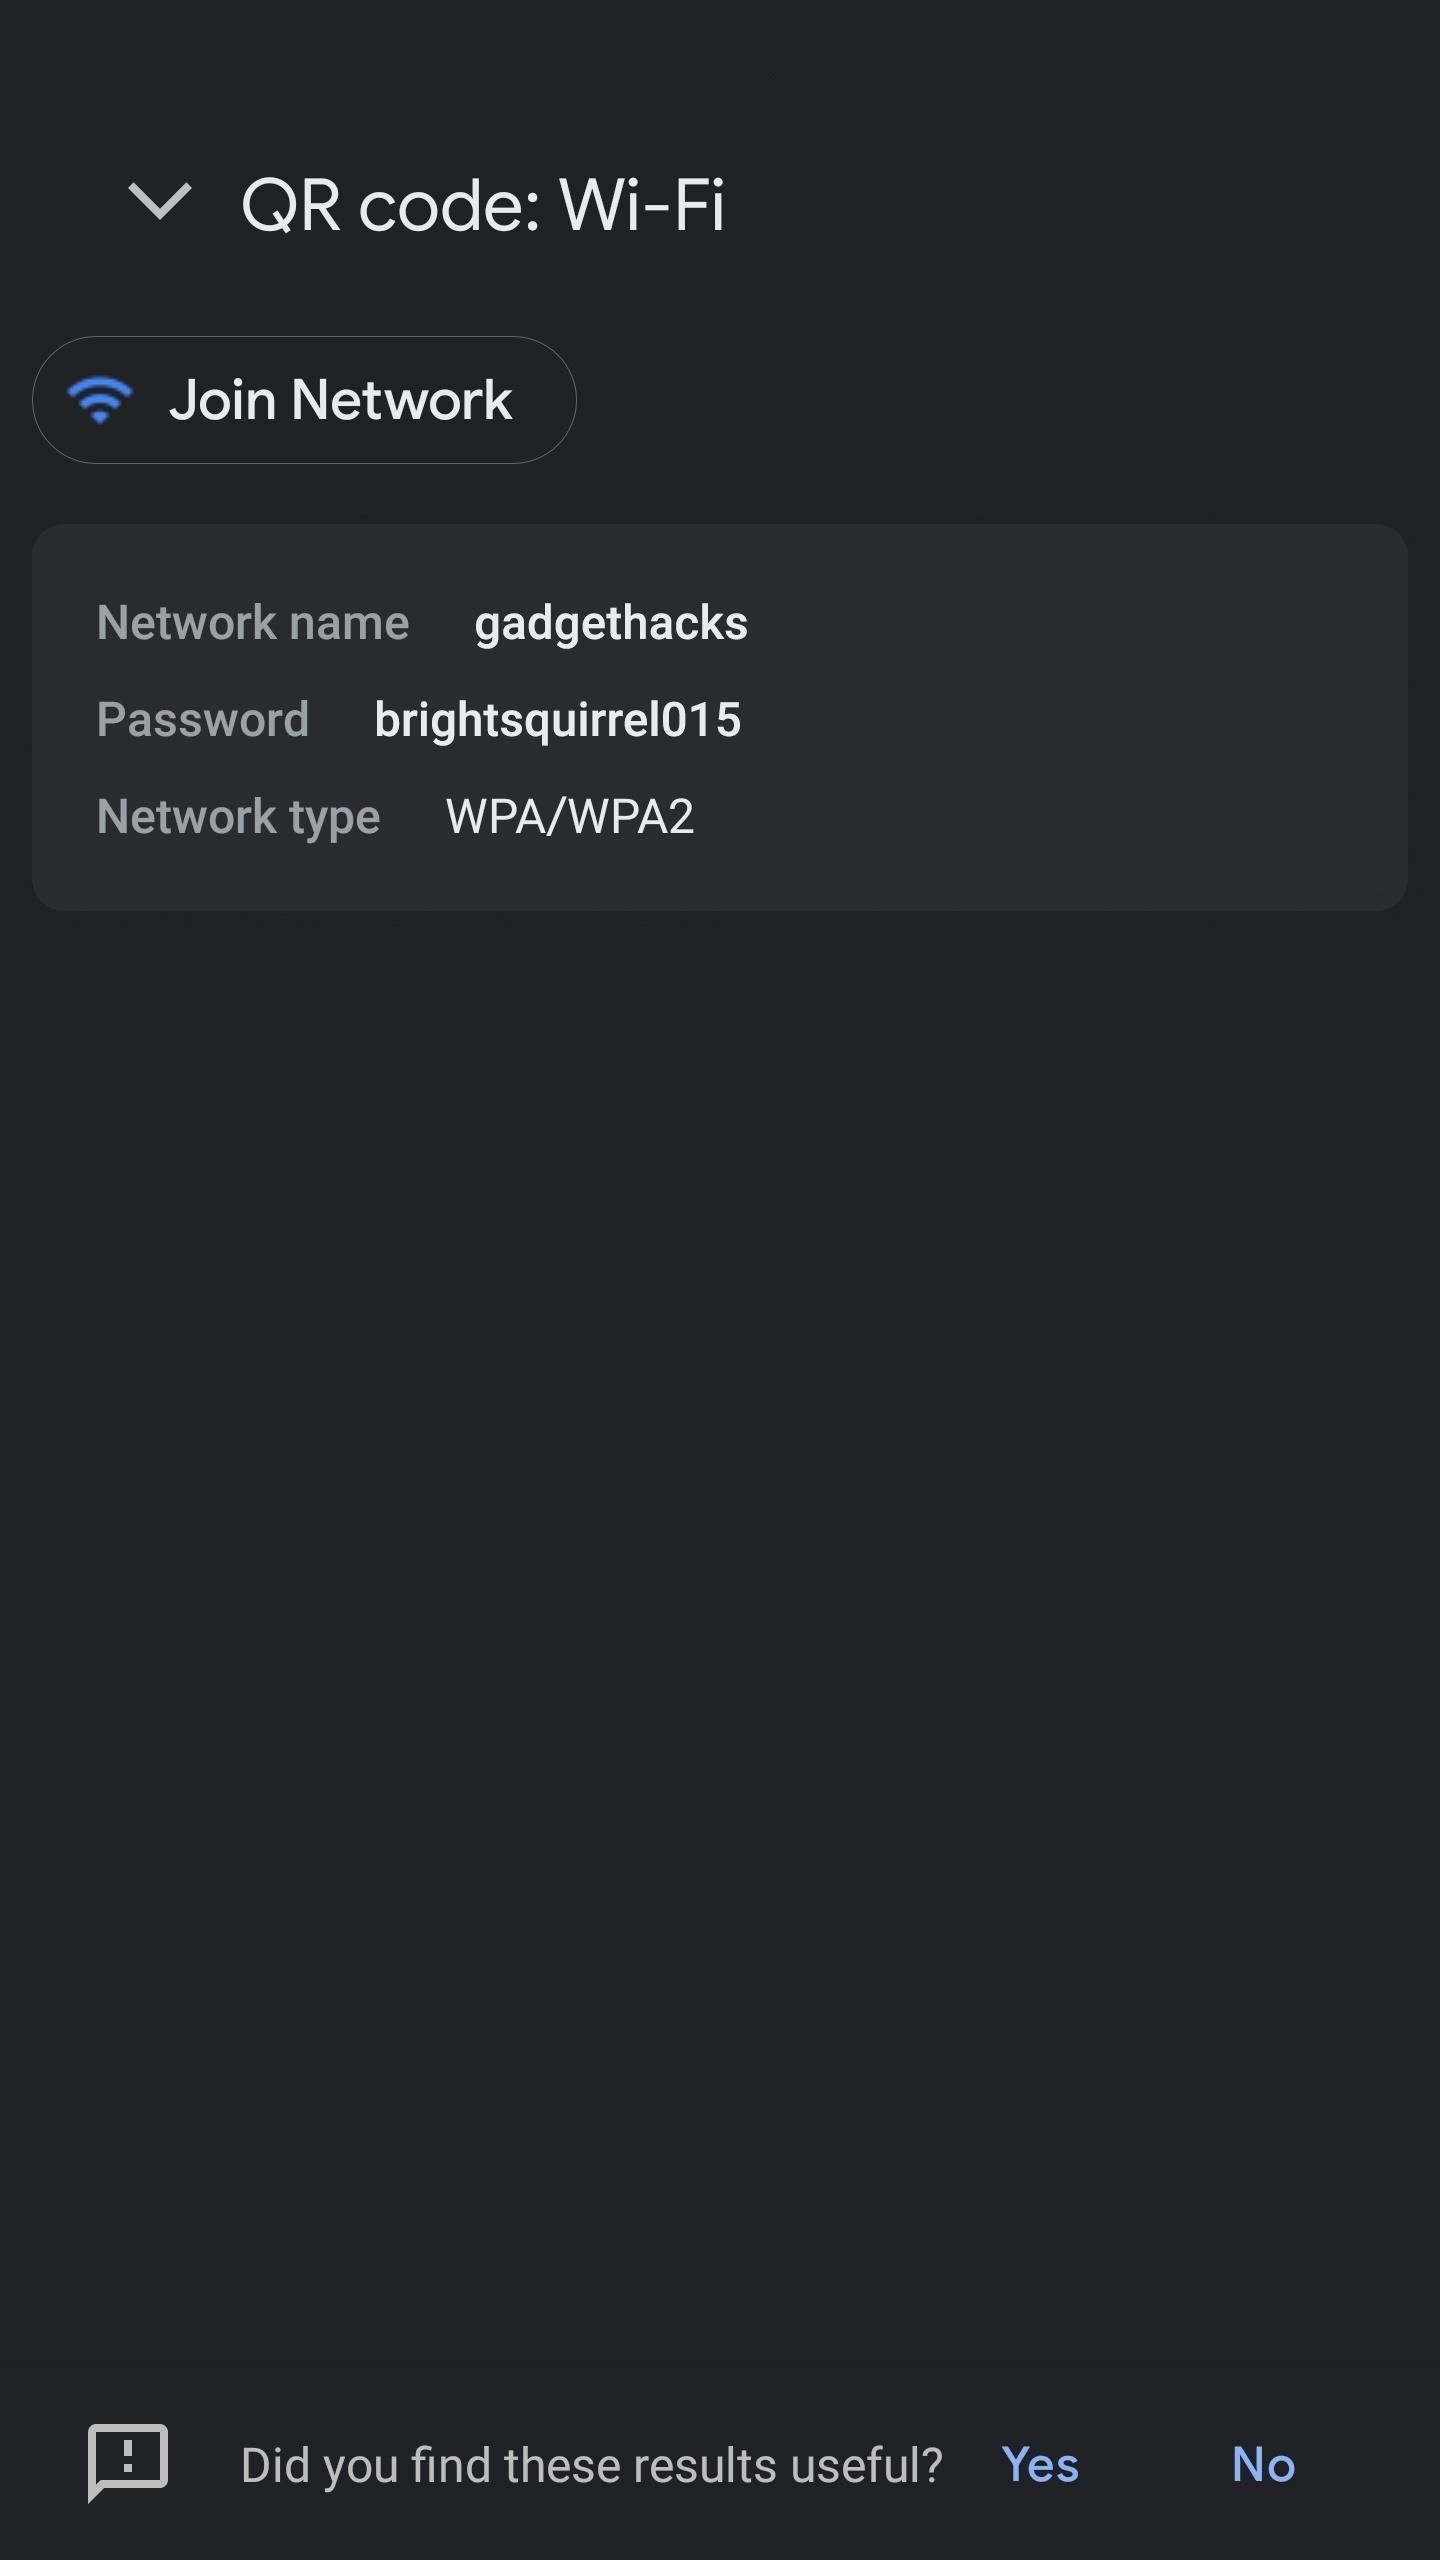
When it successfully reads the QR code, it will show the network credentials in plain text, including the password, below the picture.
Method 3: Android 6 to Android 9 on Non-Rooted Devices
Unlike above, most phones and tablets running stock or skinned Android 9 and earlier cannot generate QR codes with a Wi-Fi network's credentials embedded. There are apps that help you create QR codes for Wi-Fi hotspots, but you need to know the password, which isn't any help if you don't know it.
On Android 9 and earlier, the file containing saved Wi-Fi credentials is in a protected directory, and you can only access it if you're rooted (see Method 4 below). However, if you have received a QR code for a Wi-Fi access point from another device, you can use the Google Lens app or Lens in Google Photos to scan the QR code for the password.
Quick Steps for Google Lens:
- Open the Google Lens app or tap the Lens icon in the Google app or Google app's home screen widget).
- Select the image from your gallery or choose "Search with your camera."
- If using the camera, point it at the QR code and tap the shutter button.
- Expand the crop beyond the QR code's perimeter if needed.
- Pull up the results to see the plain text password.
Quick Steps for Google Photos:
- Open the Google Photos app.
- Select the image from your gallery.
- Tap "Lens" on the image.
- Expand the crop beyond the QR code's perimeter if needed.
- Pull up the results to see the plain text password.
Full Instructions:
First, open either Google Lens (left screenshot below) or Google Photos (right screenshot below). For Google Lens, you can open its app directly or tap the Lens icon on the Google app's home screen widget or from within the Google app itself.
Next, select the image with the QR code from your gallery. In the Google Lens app, you can also choose "Search with your camera" if the QR code is printed out or on another device; if so, scan the code with your camera. On Google Photos, tap the "Lens" button once you load the image.
Google Lens will start scanning the image, and it may end up focusing on everything inside the QR code's perimeter, which won't show you what you need. If that's the case, manually expand the crop on the image to go past the QR code's perimeter.
When it successfully reads the QR code, it will show the network credentials in plain text, including the password, on the card (pull up on it to see the details).
Method 4: Android 4.4 to Android 9 on Rooted Devices
If your phone is running Android 9.0 Pie or lower and you want to view the passwords for your saved Wi-Fi networks, the only way to do so is with a root app. It will work best if you have TWRP installed and used that to install Magisk for root.
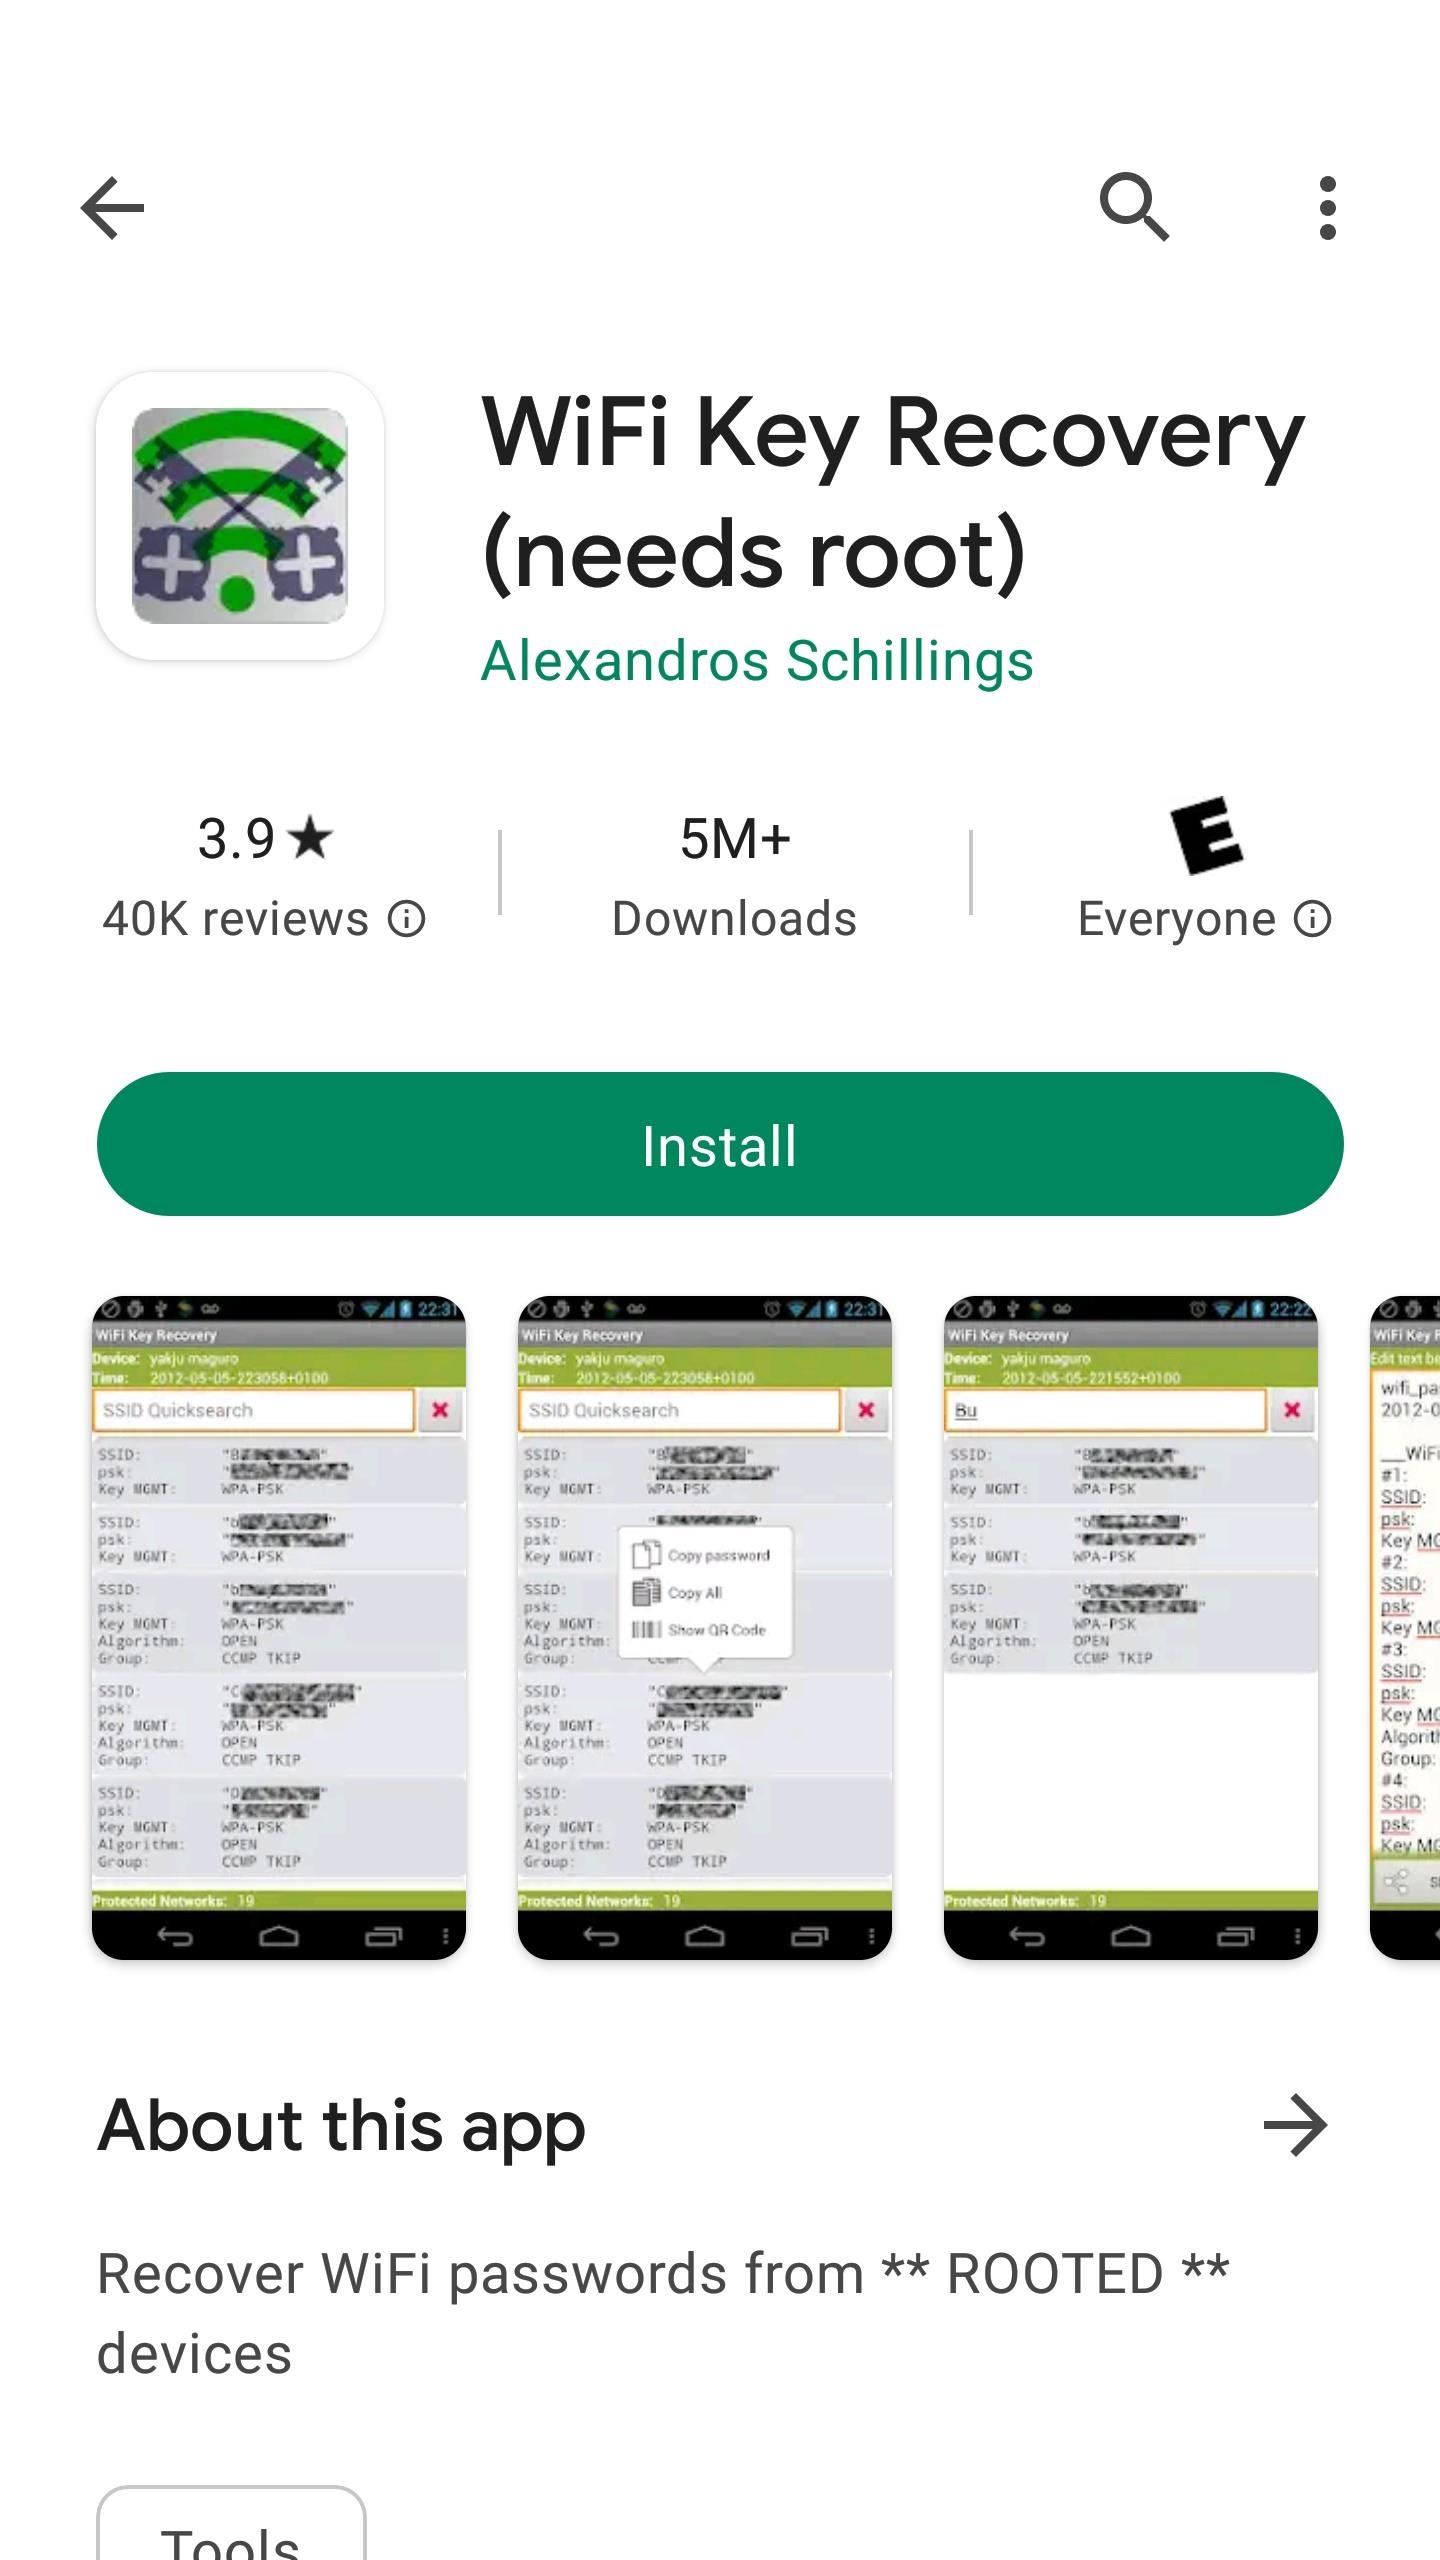
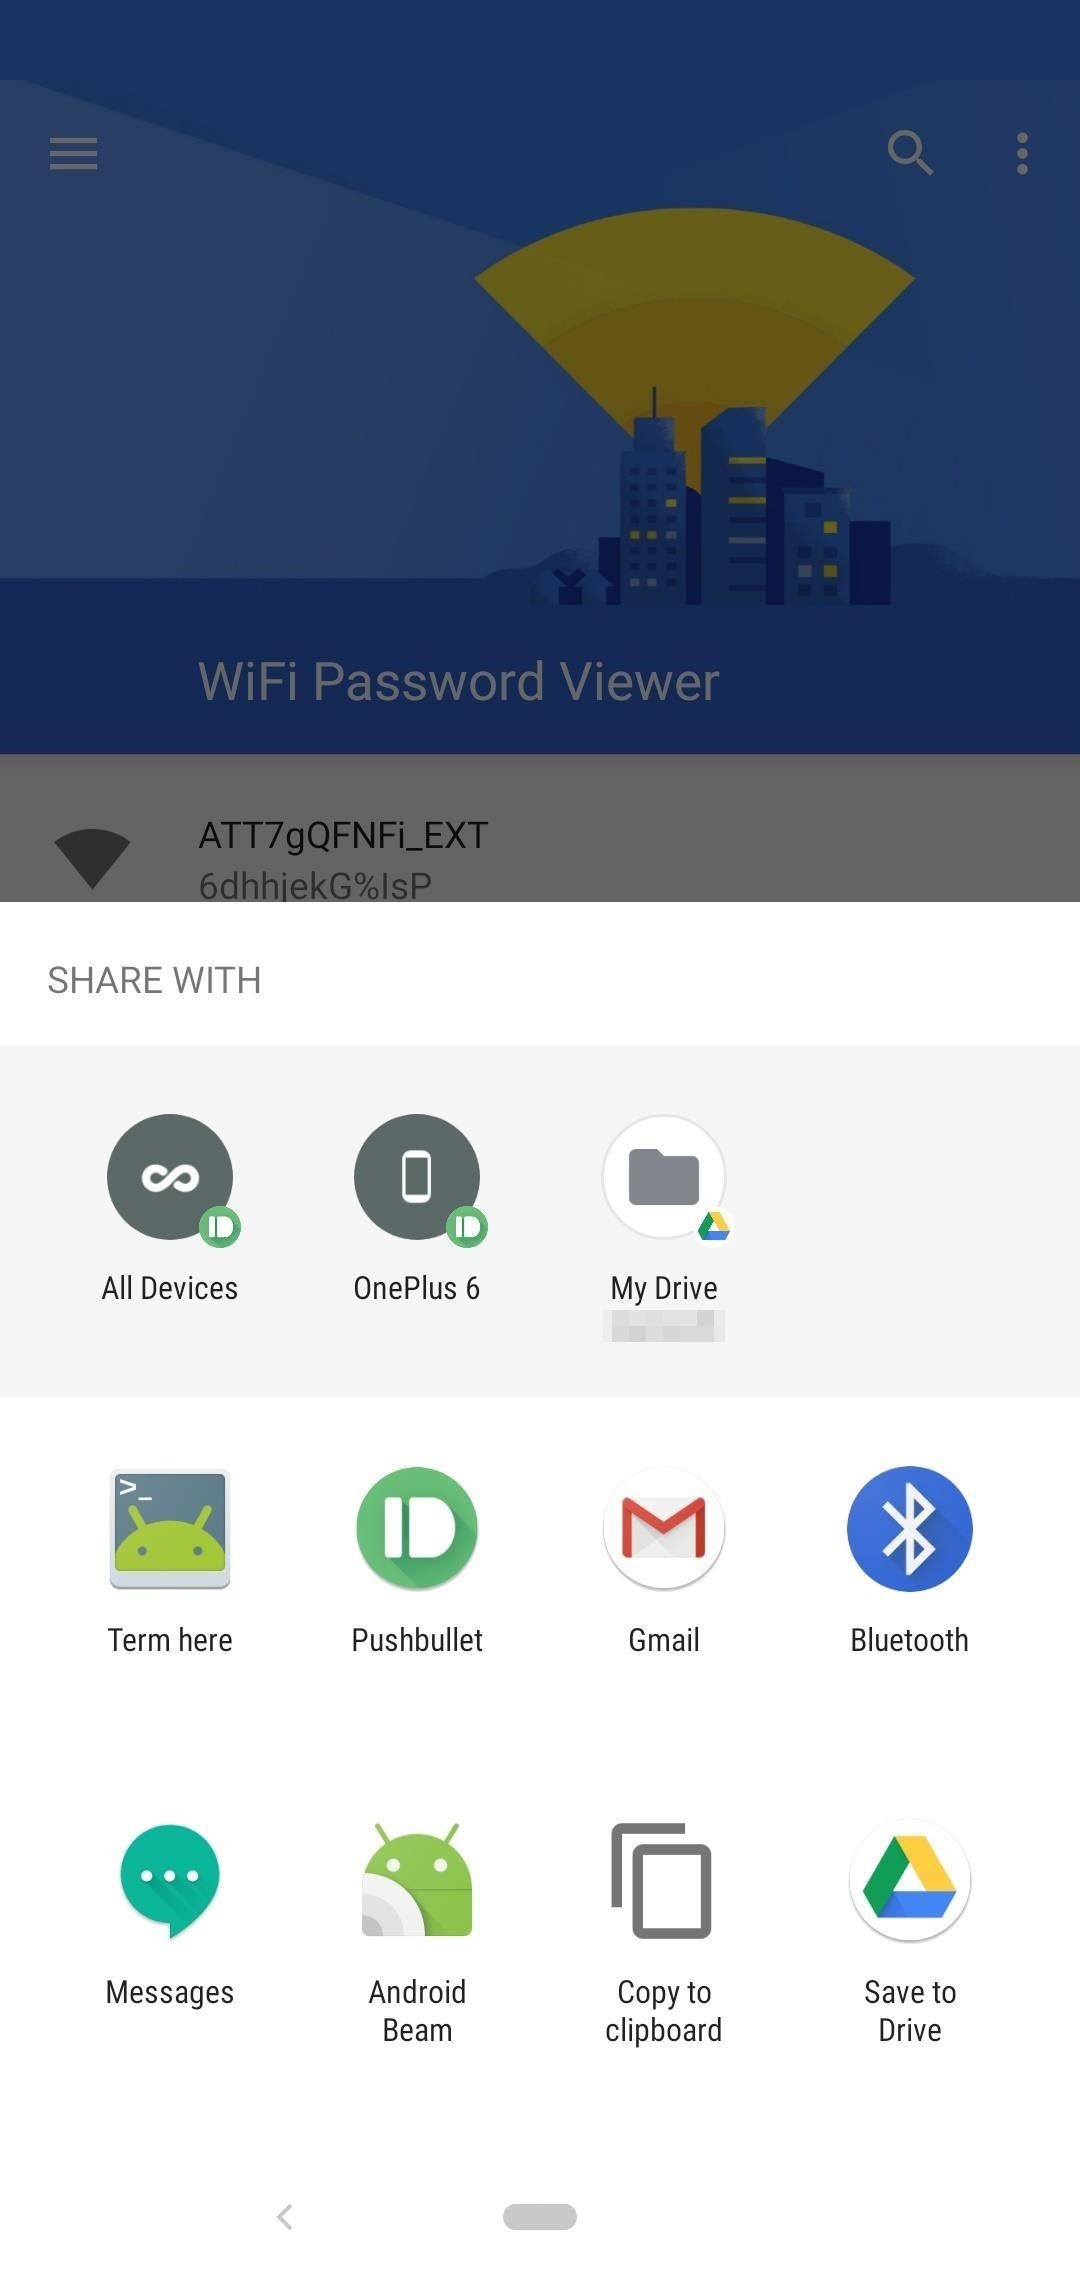
Several apps on the Play Store claim to show your Wi-Fi passwords, but the only one we found to work on all of our devices was WiFi Password Viewer by Alexandros Schillings.
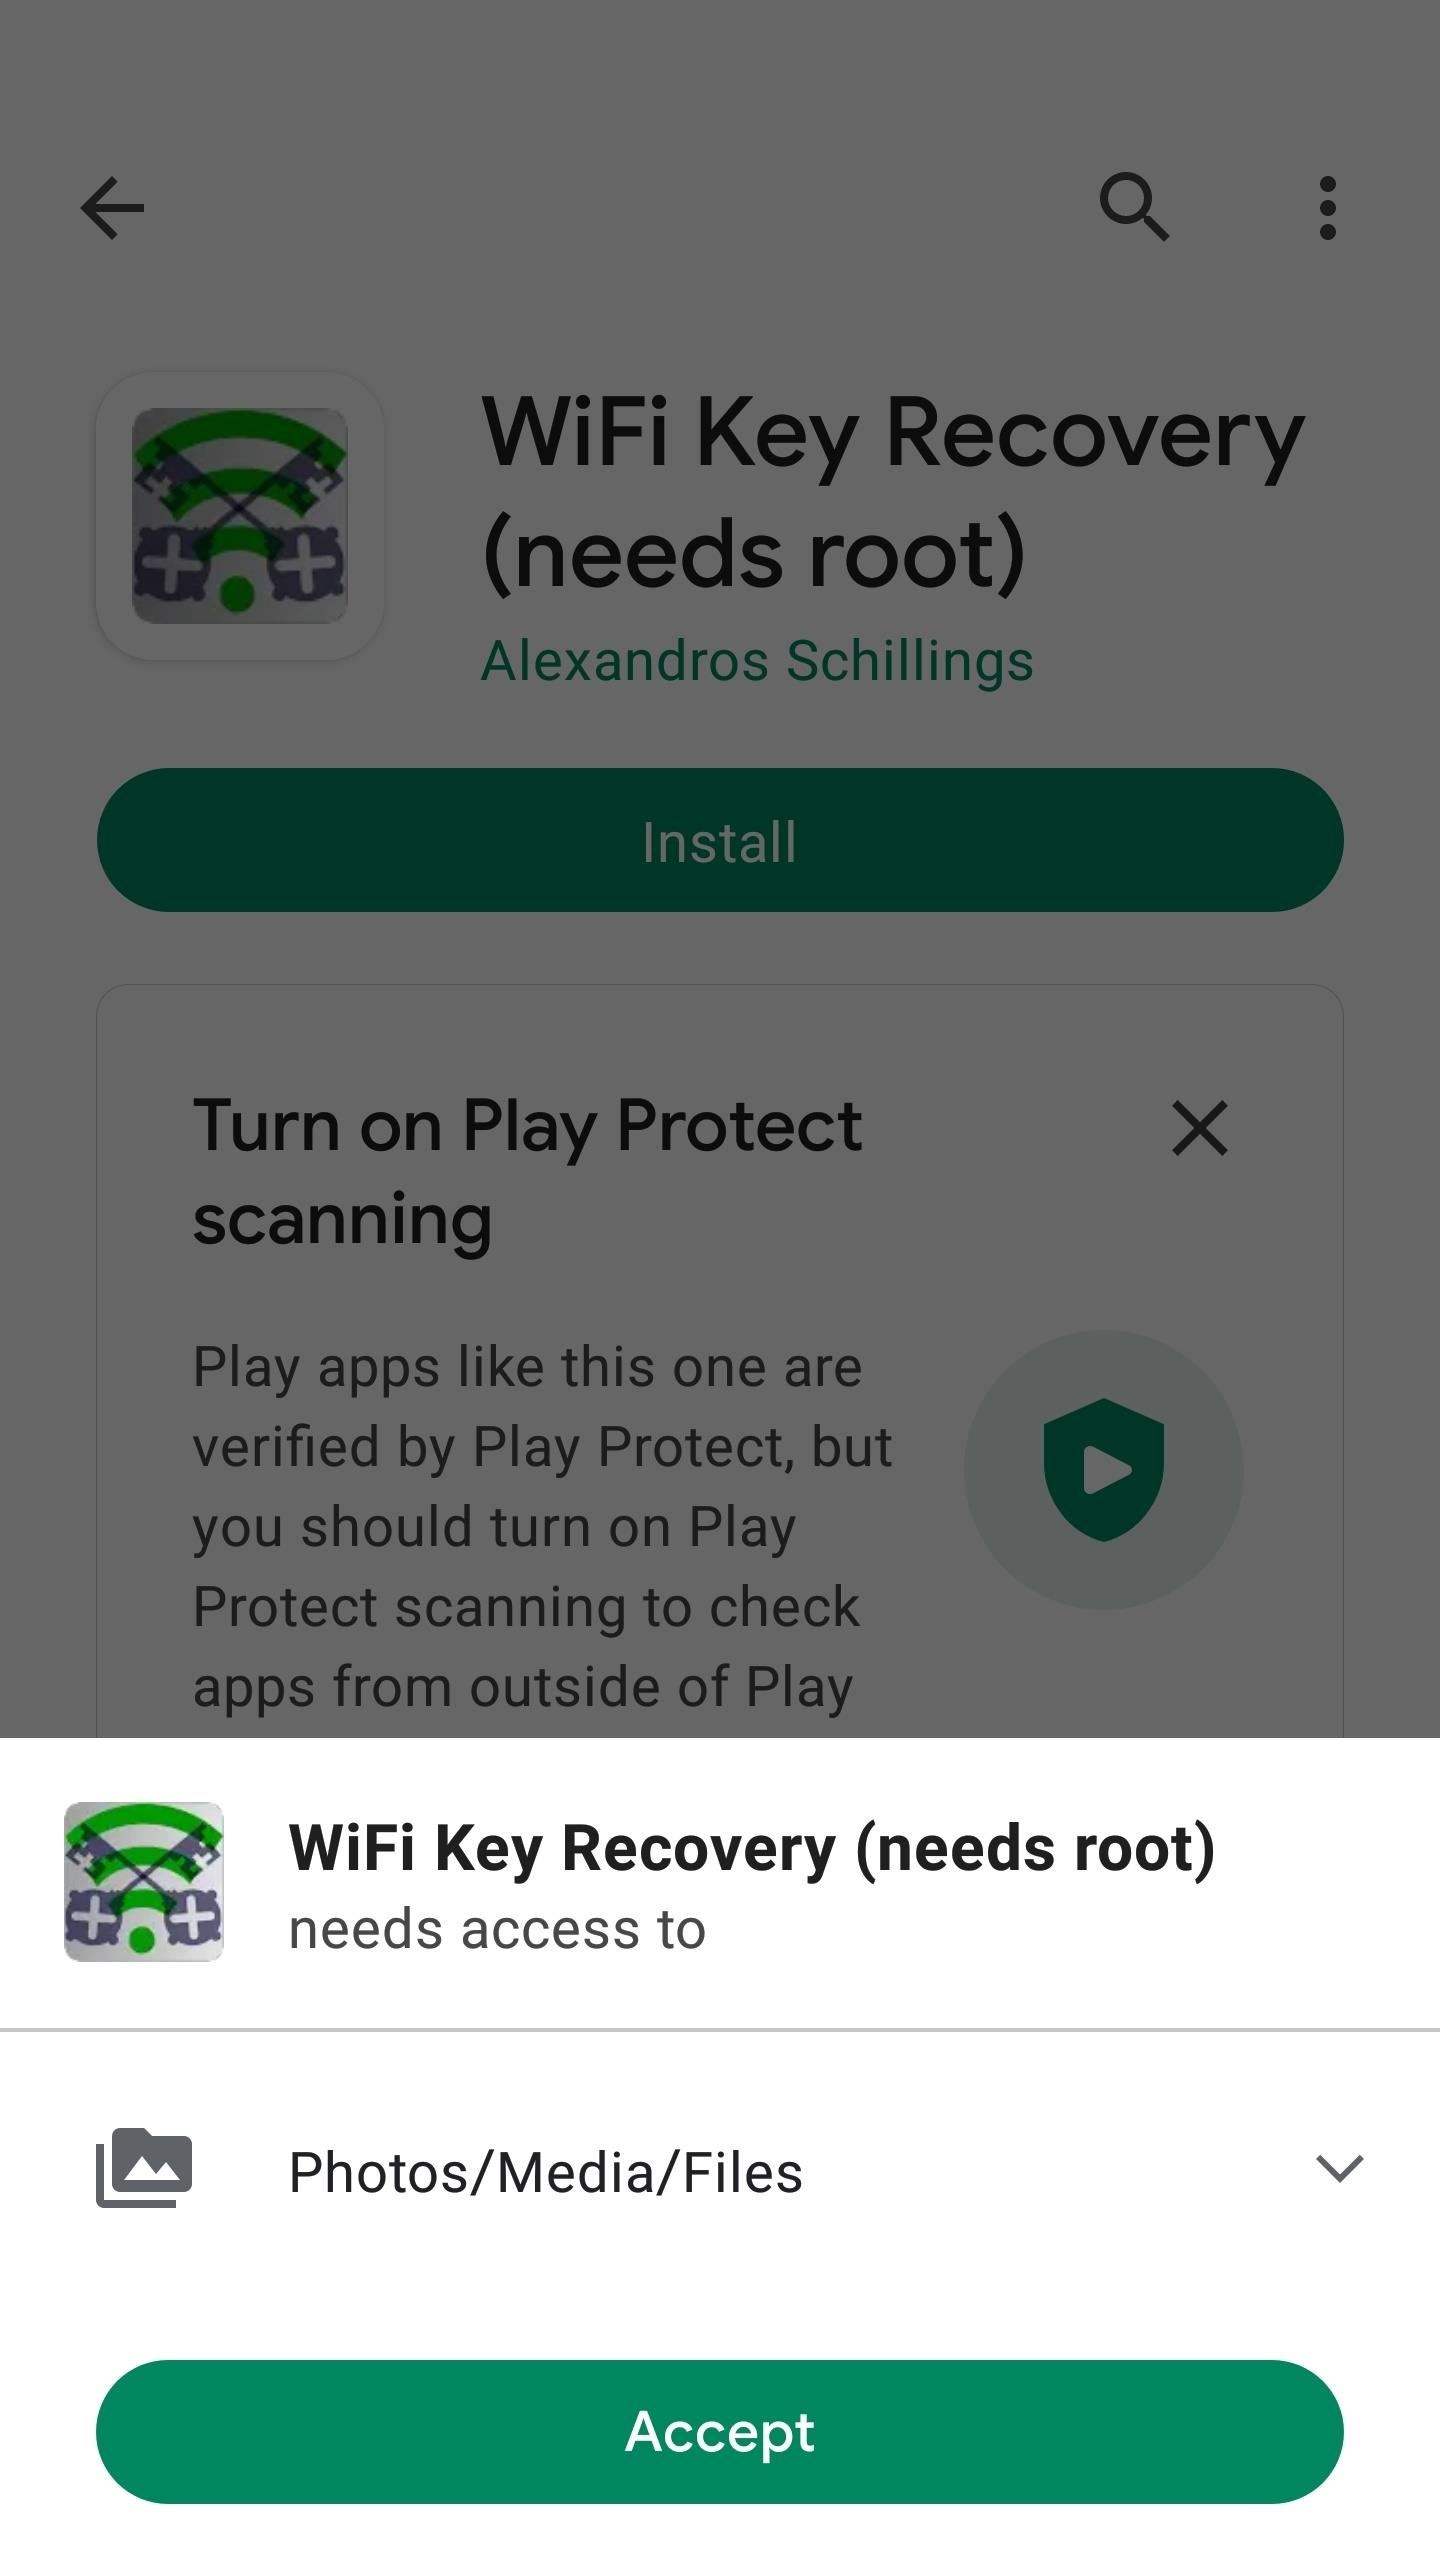
- Play Store Link: WiFi Key Recovery (needs root) (free)
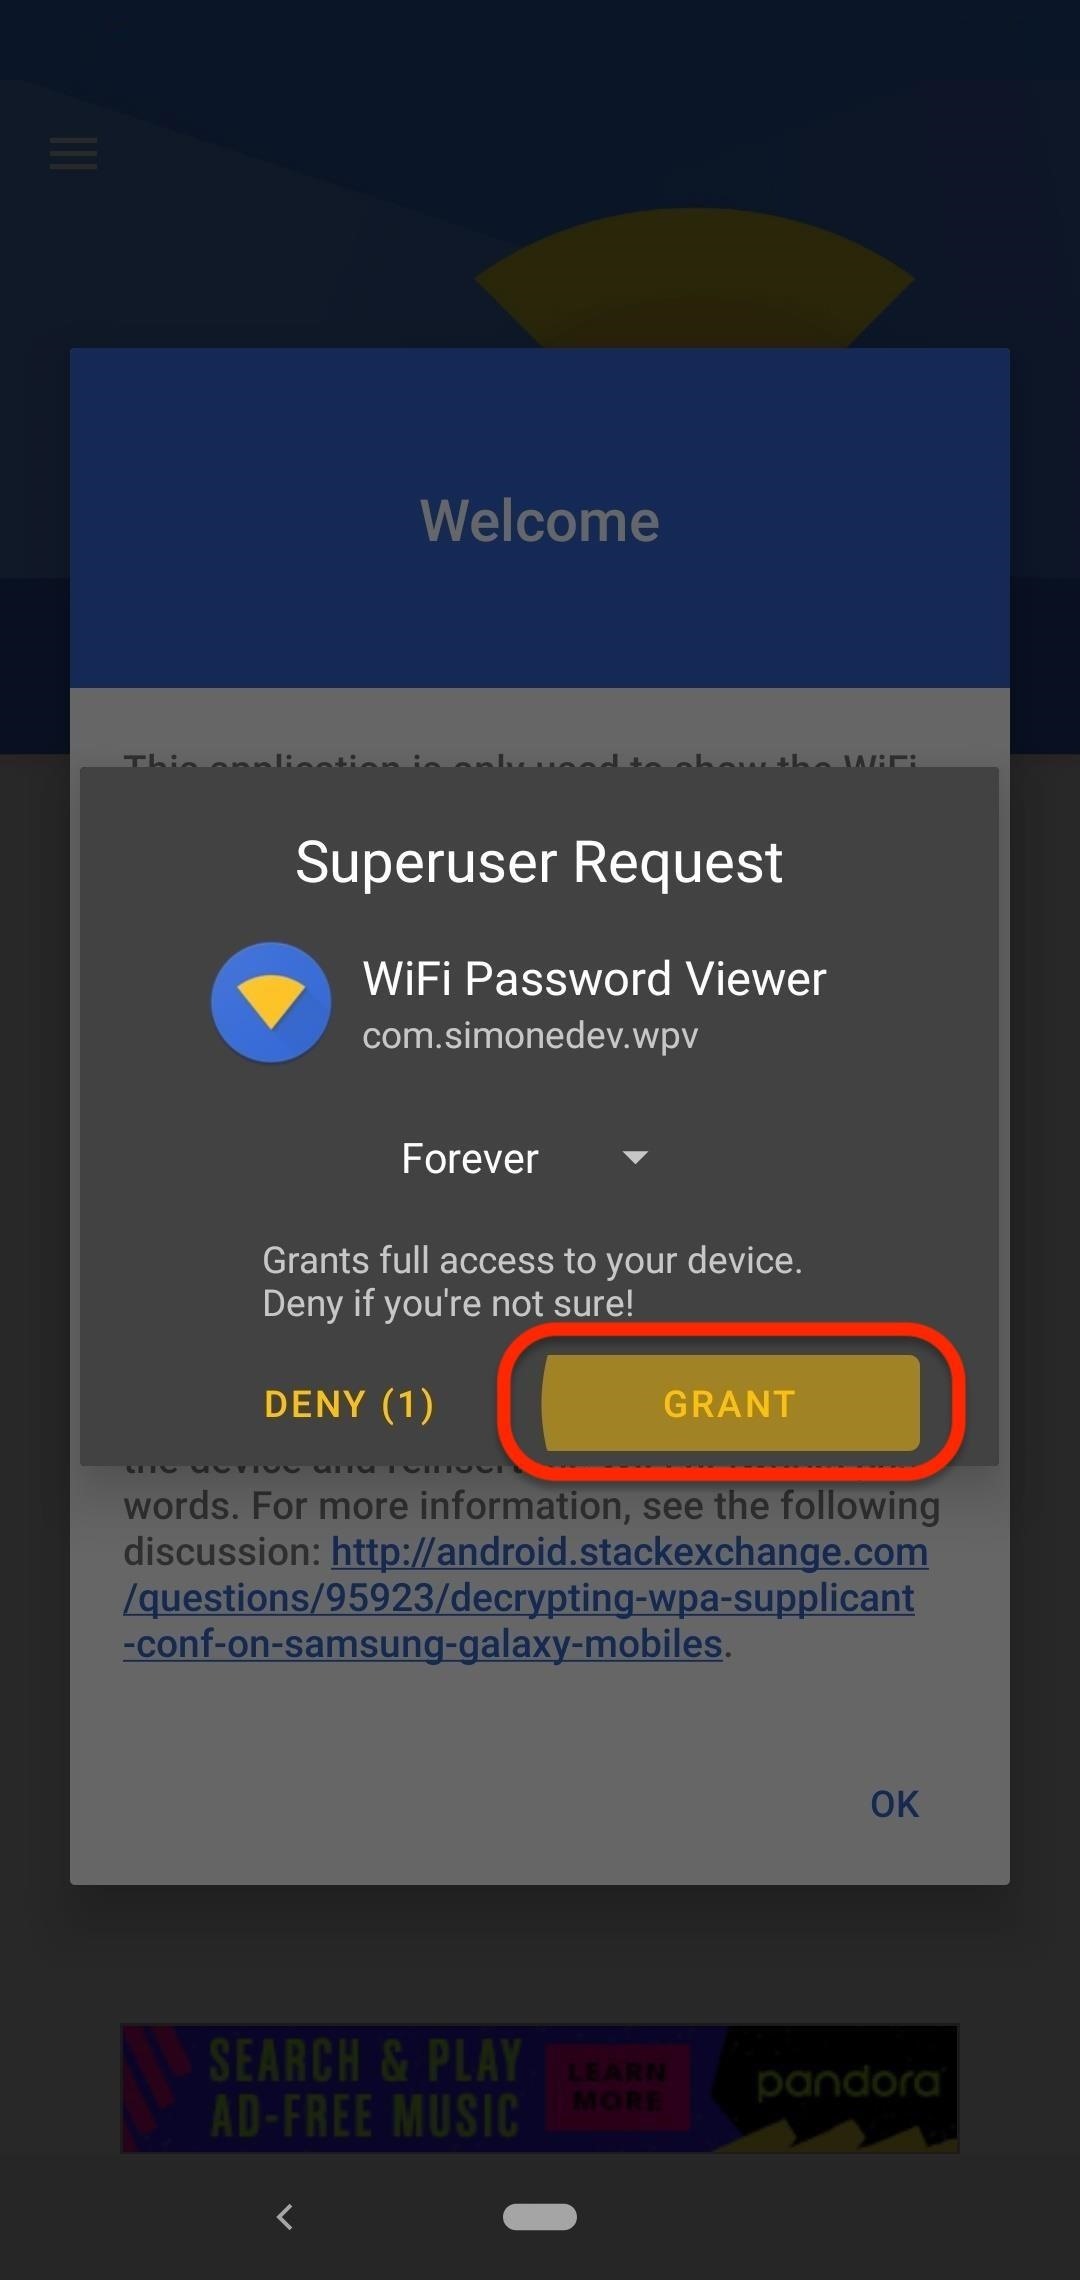
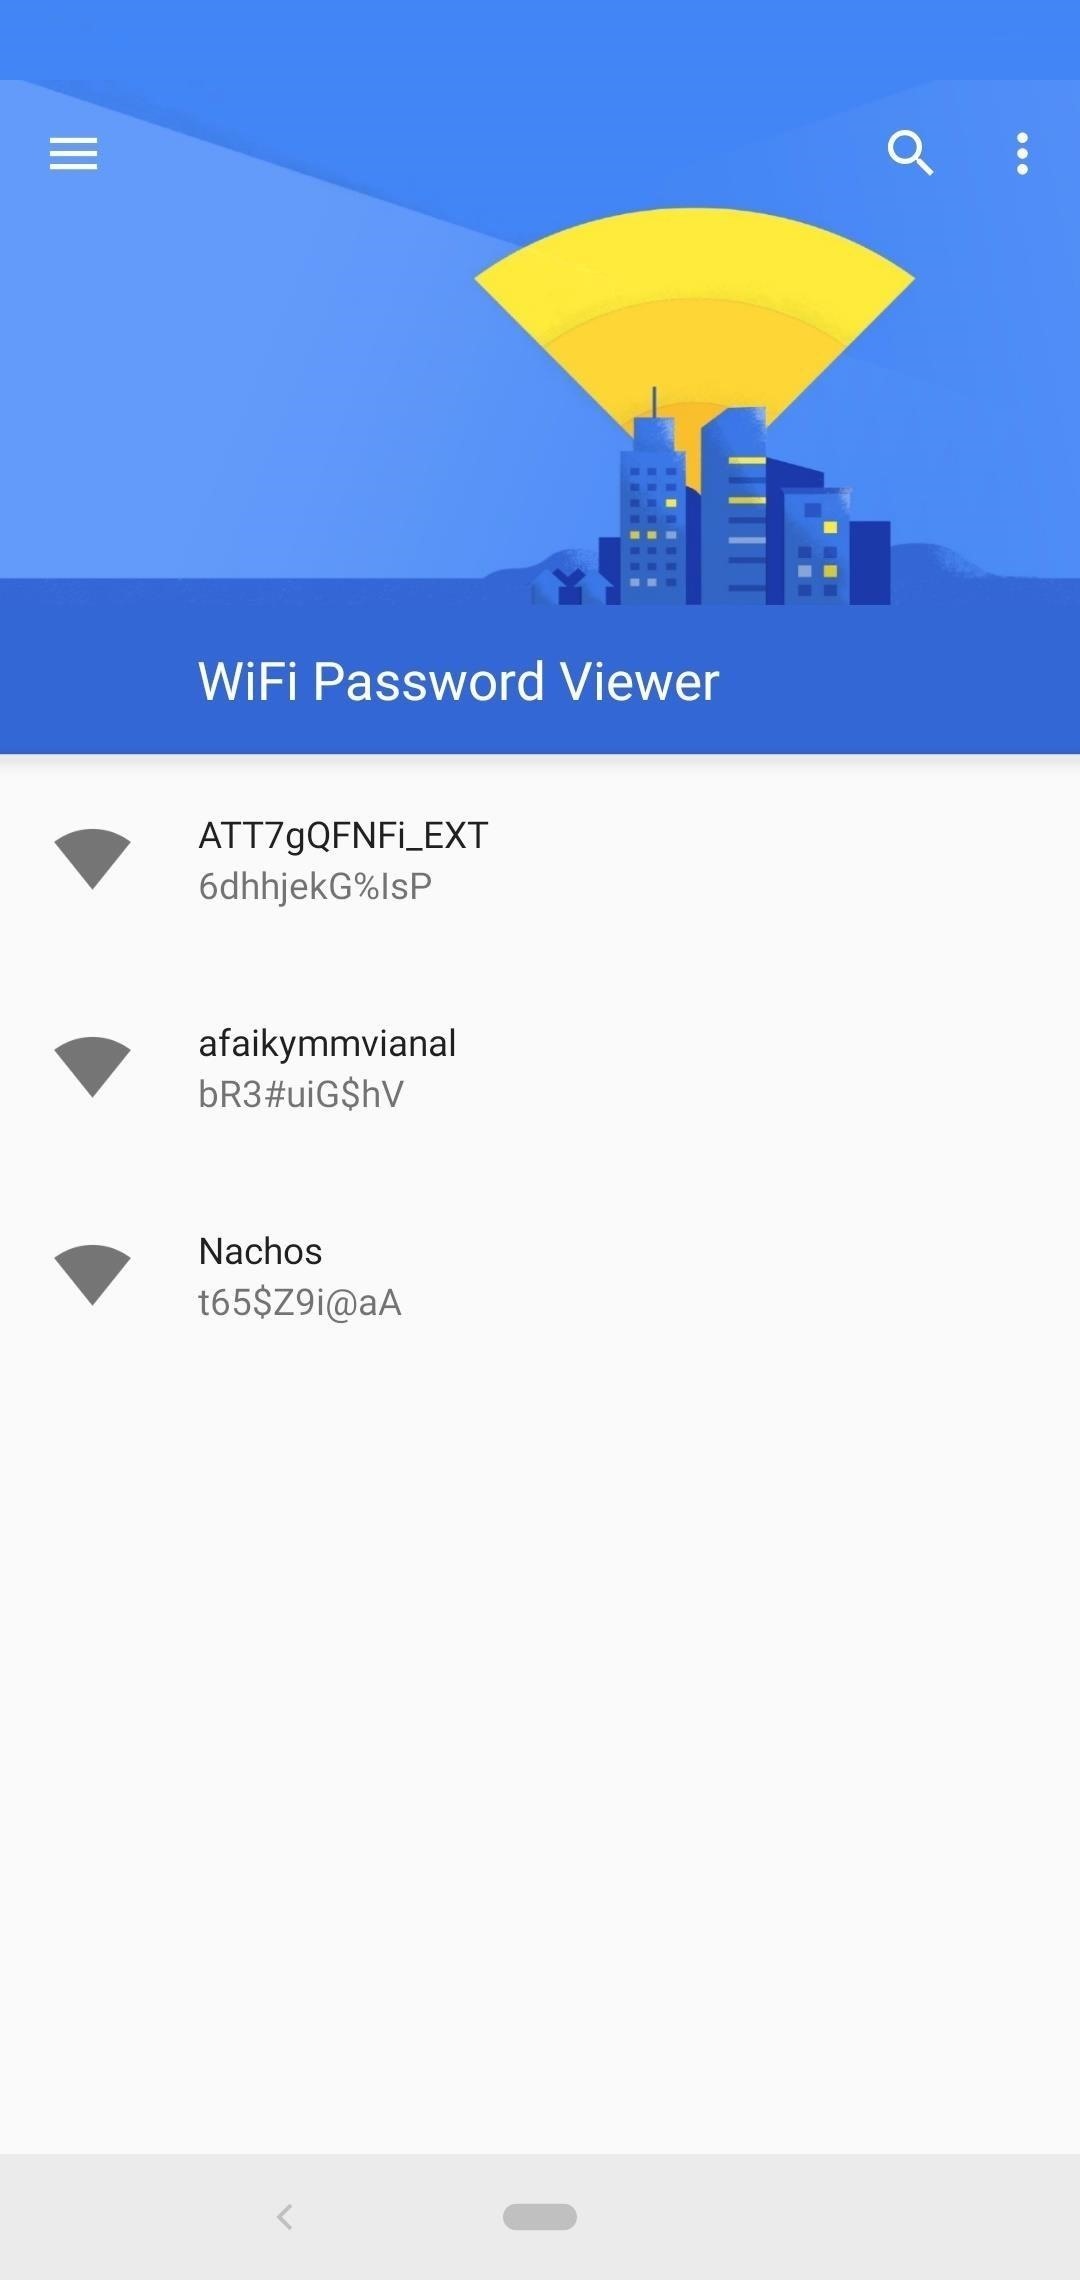
When you first launch WiFi Key Recovery, the app will ask for Superuser access. Tap "Grant" on the pop-up, and it'll take you to a list containing all of the Wi-Fi networks that you've ever connected to. Each entry shows a password beneath it.
If you've connected to many different Wi-Fi networks throughout owning your Android device, your list may be quite long. If that's the case, you can search for a particular Wi-Fi network using the search button in the top-right corner.
If you need to share one of these passwords with another device, you have a few options. Start by tapping any entry in the list, and a small menu will pop up. From here, you can either:
- Tap "Copy password" to copy that network's password to your clipboard, which would make it easy to paste into your favorite texting app and send to the other device.
- Tap "Share," then select your favorite texting app from the menu that appears to send the password.
- Tap "QR" to make the app generate a QR code containing the network info. If the other device has a built-in QR code scanner, open the camera or QR code scanner, point it at the QR code, and tap the pop-up prompt to automatically connect it to the Wi-Fi network.

Who needs a wand? Unlock your magical powers and transform yourself from a Muggle into a Wizard or Witch just by using your Android phone. See how:


22 Comments
Can this work with banks Wifi..?
Very good, this is exactly what I want
I actually tried this out and it worked perfectly
I absolutely love the hacks I've used using gadget hacks. They really work great!
Some phones can make you go extra miles .
Does this work on Samsung Galaxy S10? My screens are different that what you show. I had to open the menu on the Wi-Fi screen and select Advanced > Manage Networks. That's where I found my saved networks. However, there are no options to share. I am running Android 10.
Thanks.
This doesn't work with my Samsung Galaxy Note10+ running Android 10. There is no "share" available. For those who have the same phone, search in Settings for "Manage" then click on "Manage Networks". All your previously connected wi-fi's are listed but there is no way to see the passwords nor the QR code.
Very helpful, this is what I have been looking for all this time.
If you have android 9 and only have a QR code you don't need to root your phone. Take a screenshot and use Google view. It will scan the QR code and give you the password.
I just made an account on this website to say how much I appreciate you for this comment lol. I hope you get an email notification and see this. ??
We've included some steps on using Google Lens on older devices. Thanks for the tip!
probably for each version of android you need to write your own program. So on version 10, few people work!
Spot on!
Very informative, I will know)
Nice one informative
Excellent. This is what I want.
This blog was really helpful for me. I really love the way how precisely you describe every thing. Thank you so much.
So cool to know and so easy. Less than 30 seconds to get password to set up new computer.
It easy to learn and informative
in ios?
This is the iOS version.
many helpful. thanks!
Share Your Thoughts