
Wi-Fi signals have limited range, so if you live in a two-story house or work in a larger office, you may have set up multiple routers or repeaters to ensure full wireless coverage. Sadly, Android handles the transition between networks pretty poorly.
The main issue here is that Android won't disconnect from the first Wi-Fi network until the signal strength drops all the way to zero. When this happens, your device won't switch to another network, even if it's stronger and closer than your original network.
Well, thank the developer gods, because the Cloudie Development team created an app to fix all of this. For starters, it lets you set preferred Wi-Fi networks—but then, it even lets you choose the lowest signal strength you're willing to put up with before switching to the next preferred network. It does all of this without requiring root access, and it works on 2.4 and 5 GhZ networks just the same, so you'll always stay connected to the best Wi-Fi network available.
Step 1: Install Wifi Switcher
To put an end to your Android Wi-Fi woes, start by installing an app called Wifi Switcher. Make sure it's the one by Cloudie Development, as there are other apps with the same name.

Then, if you're running Android Marshmallow or higher, you'll have to grant Wifi Switcher permission to access your location on first-run. There's a bug in Marshmallow that won't allow apps to scan for Wi-Fi networks without this permission, so make sure to tap "Allow" when prompted.
Step 2: Set Preferred Networks
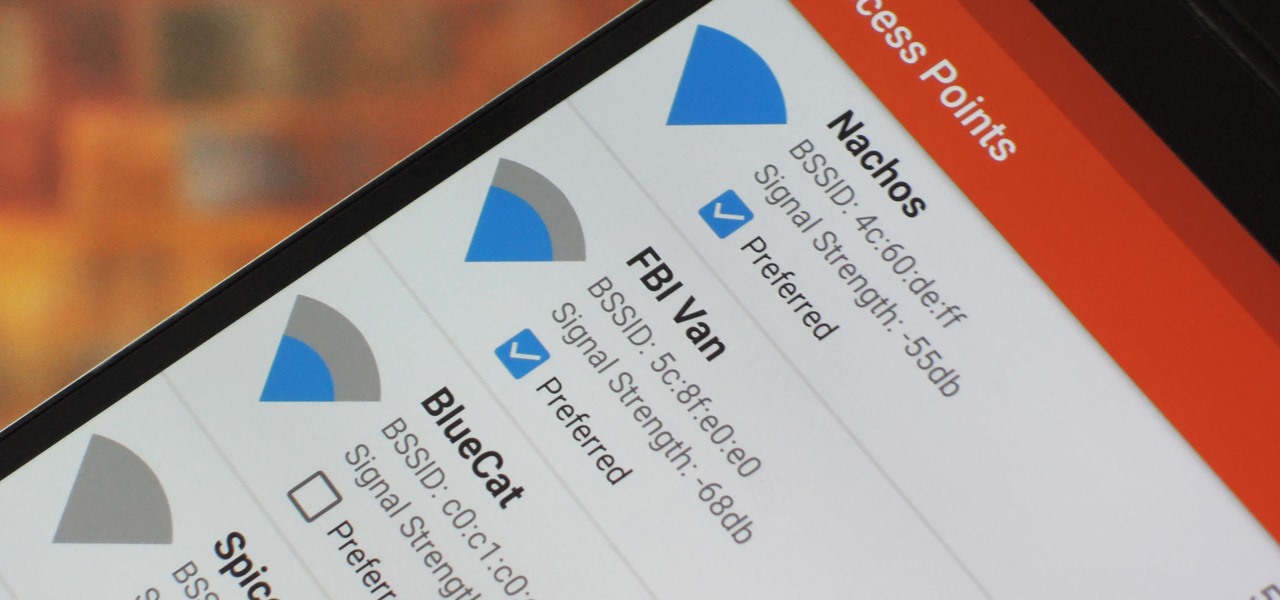
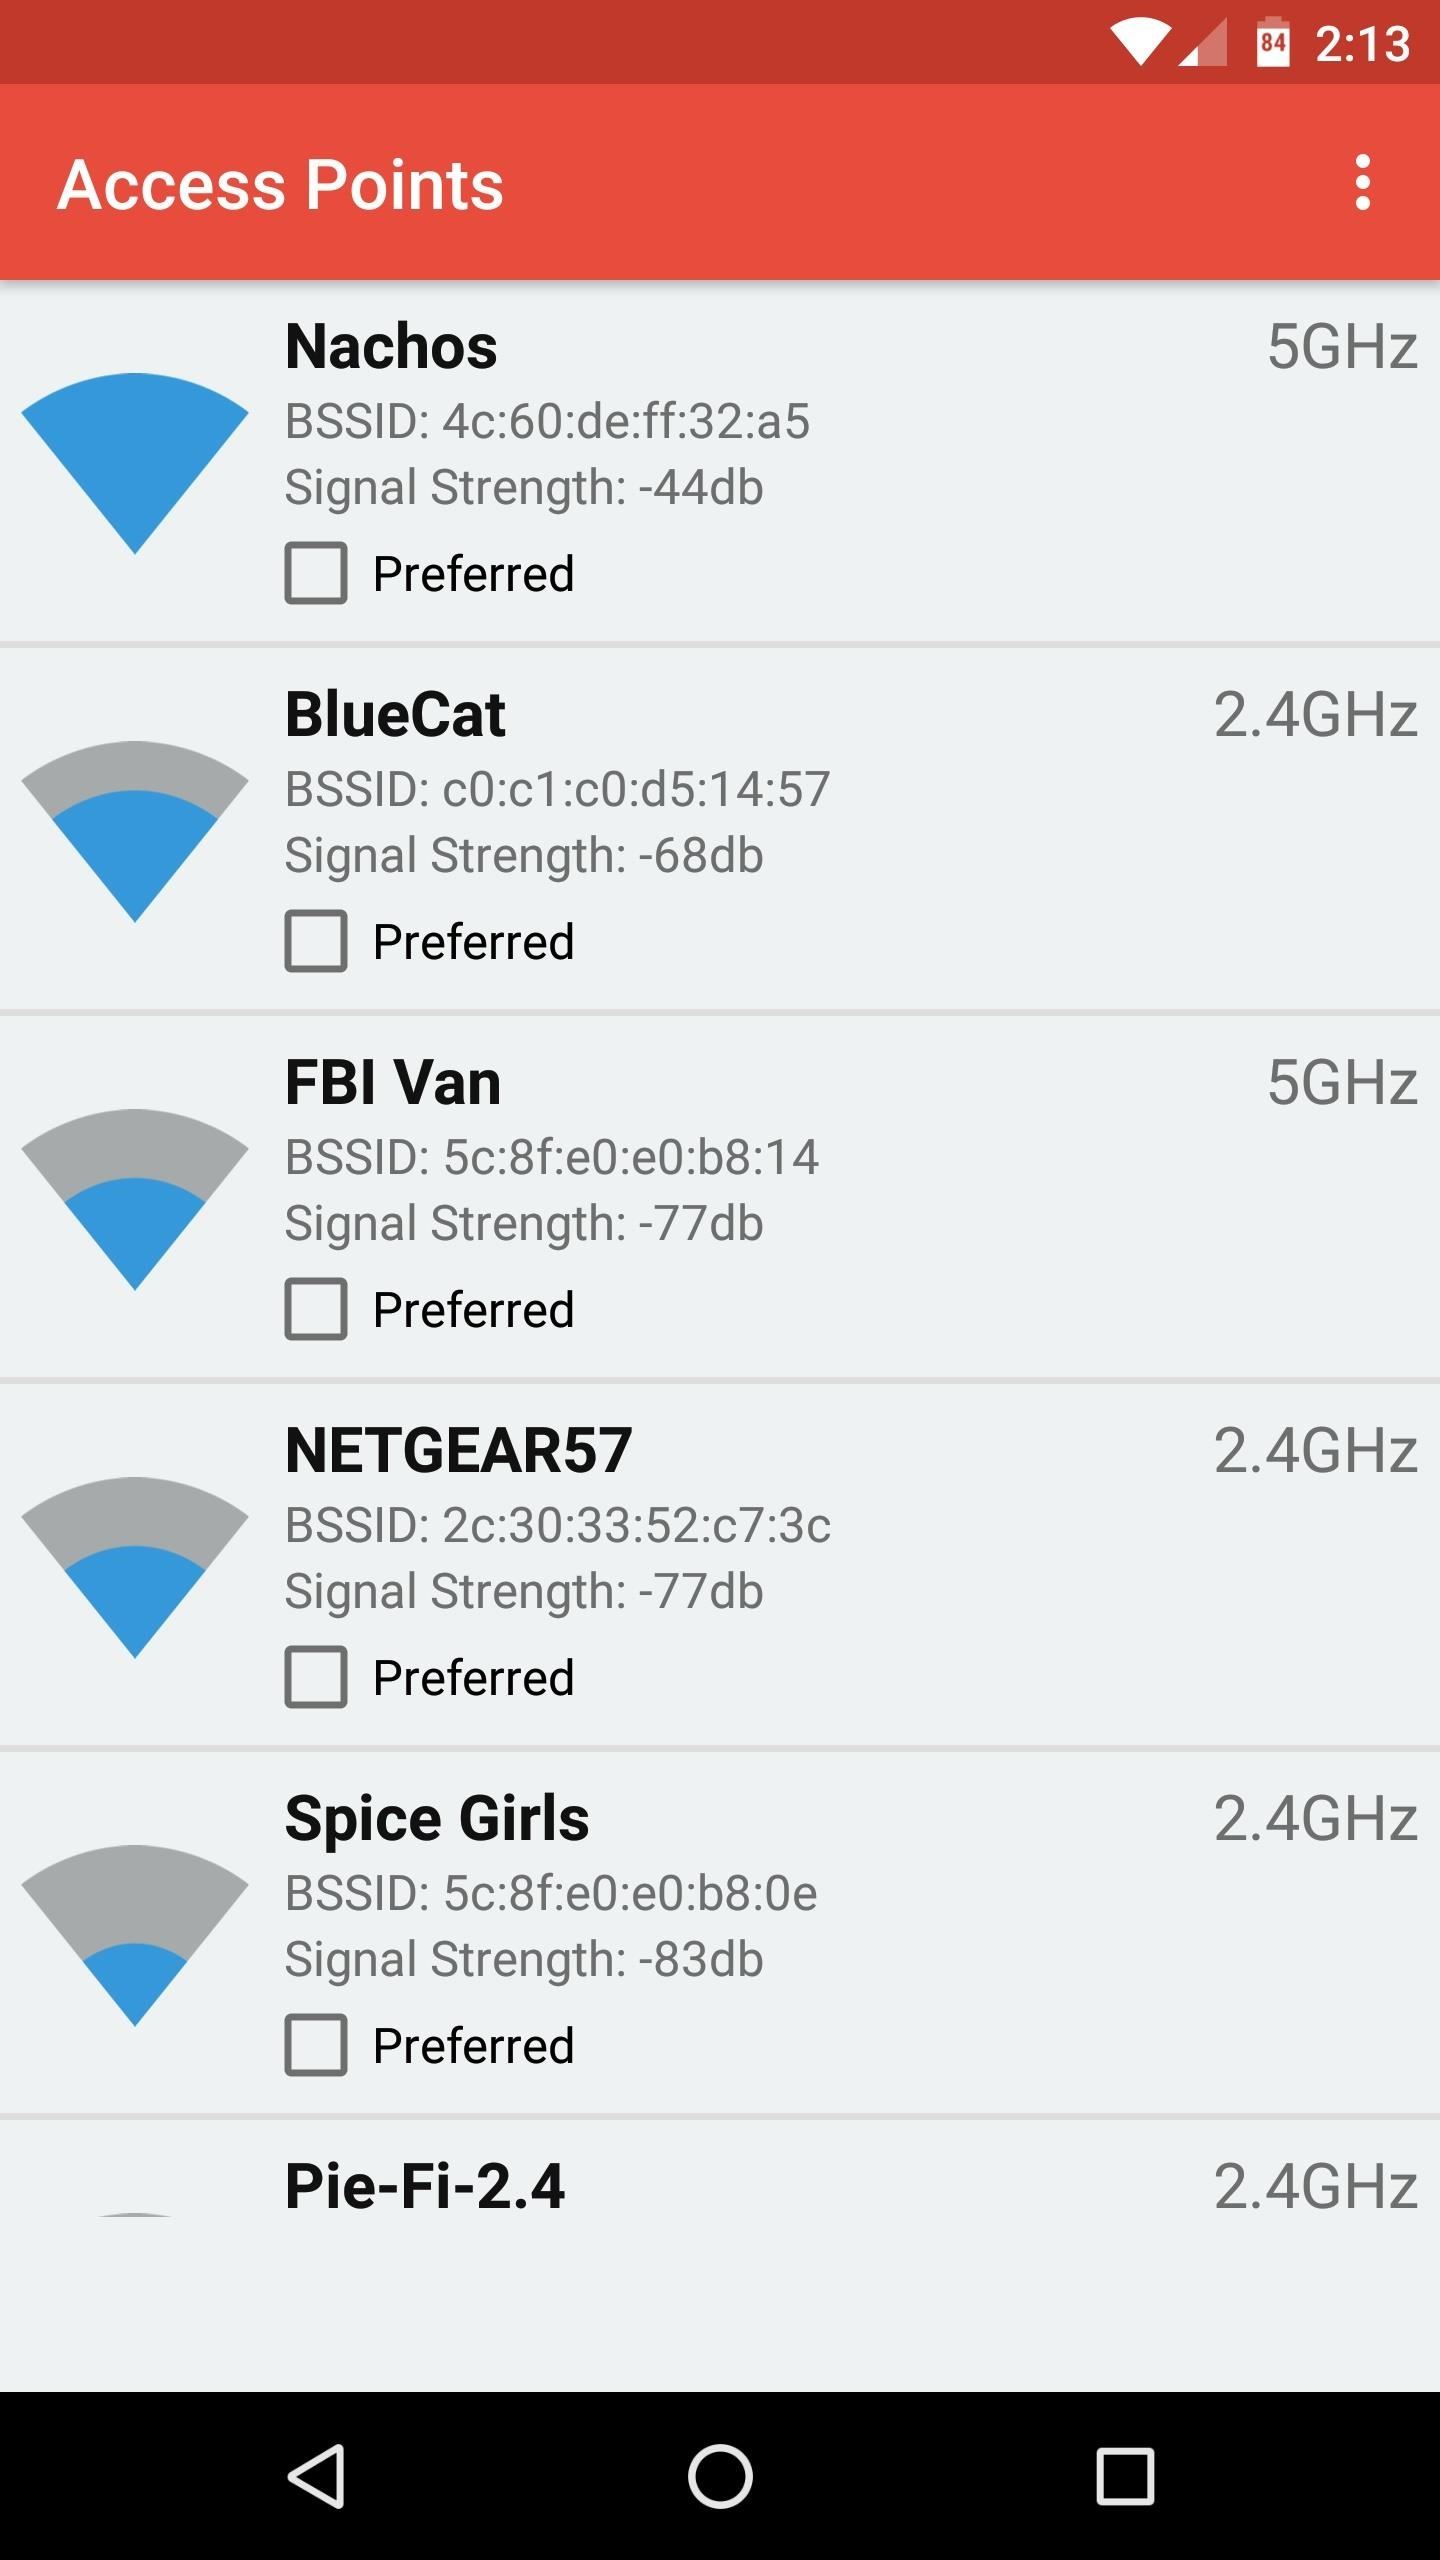
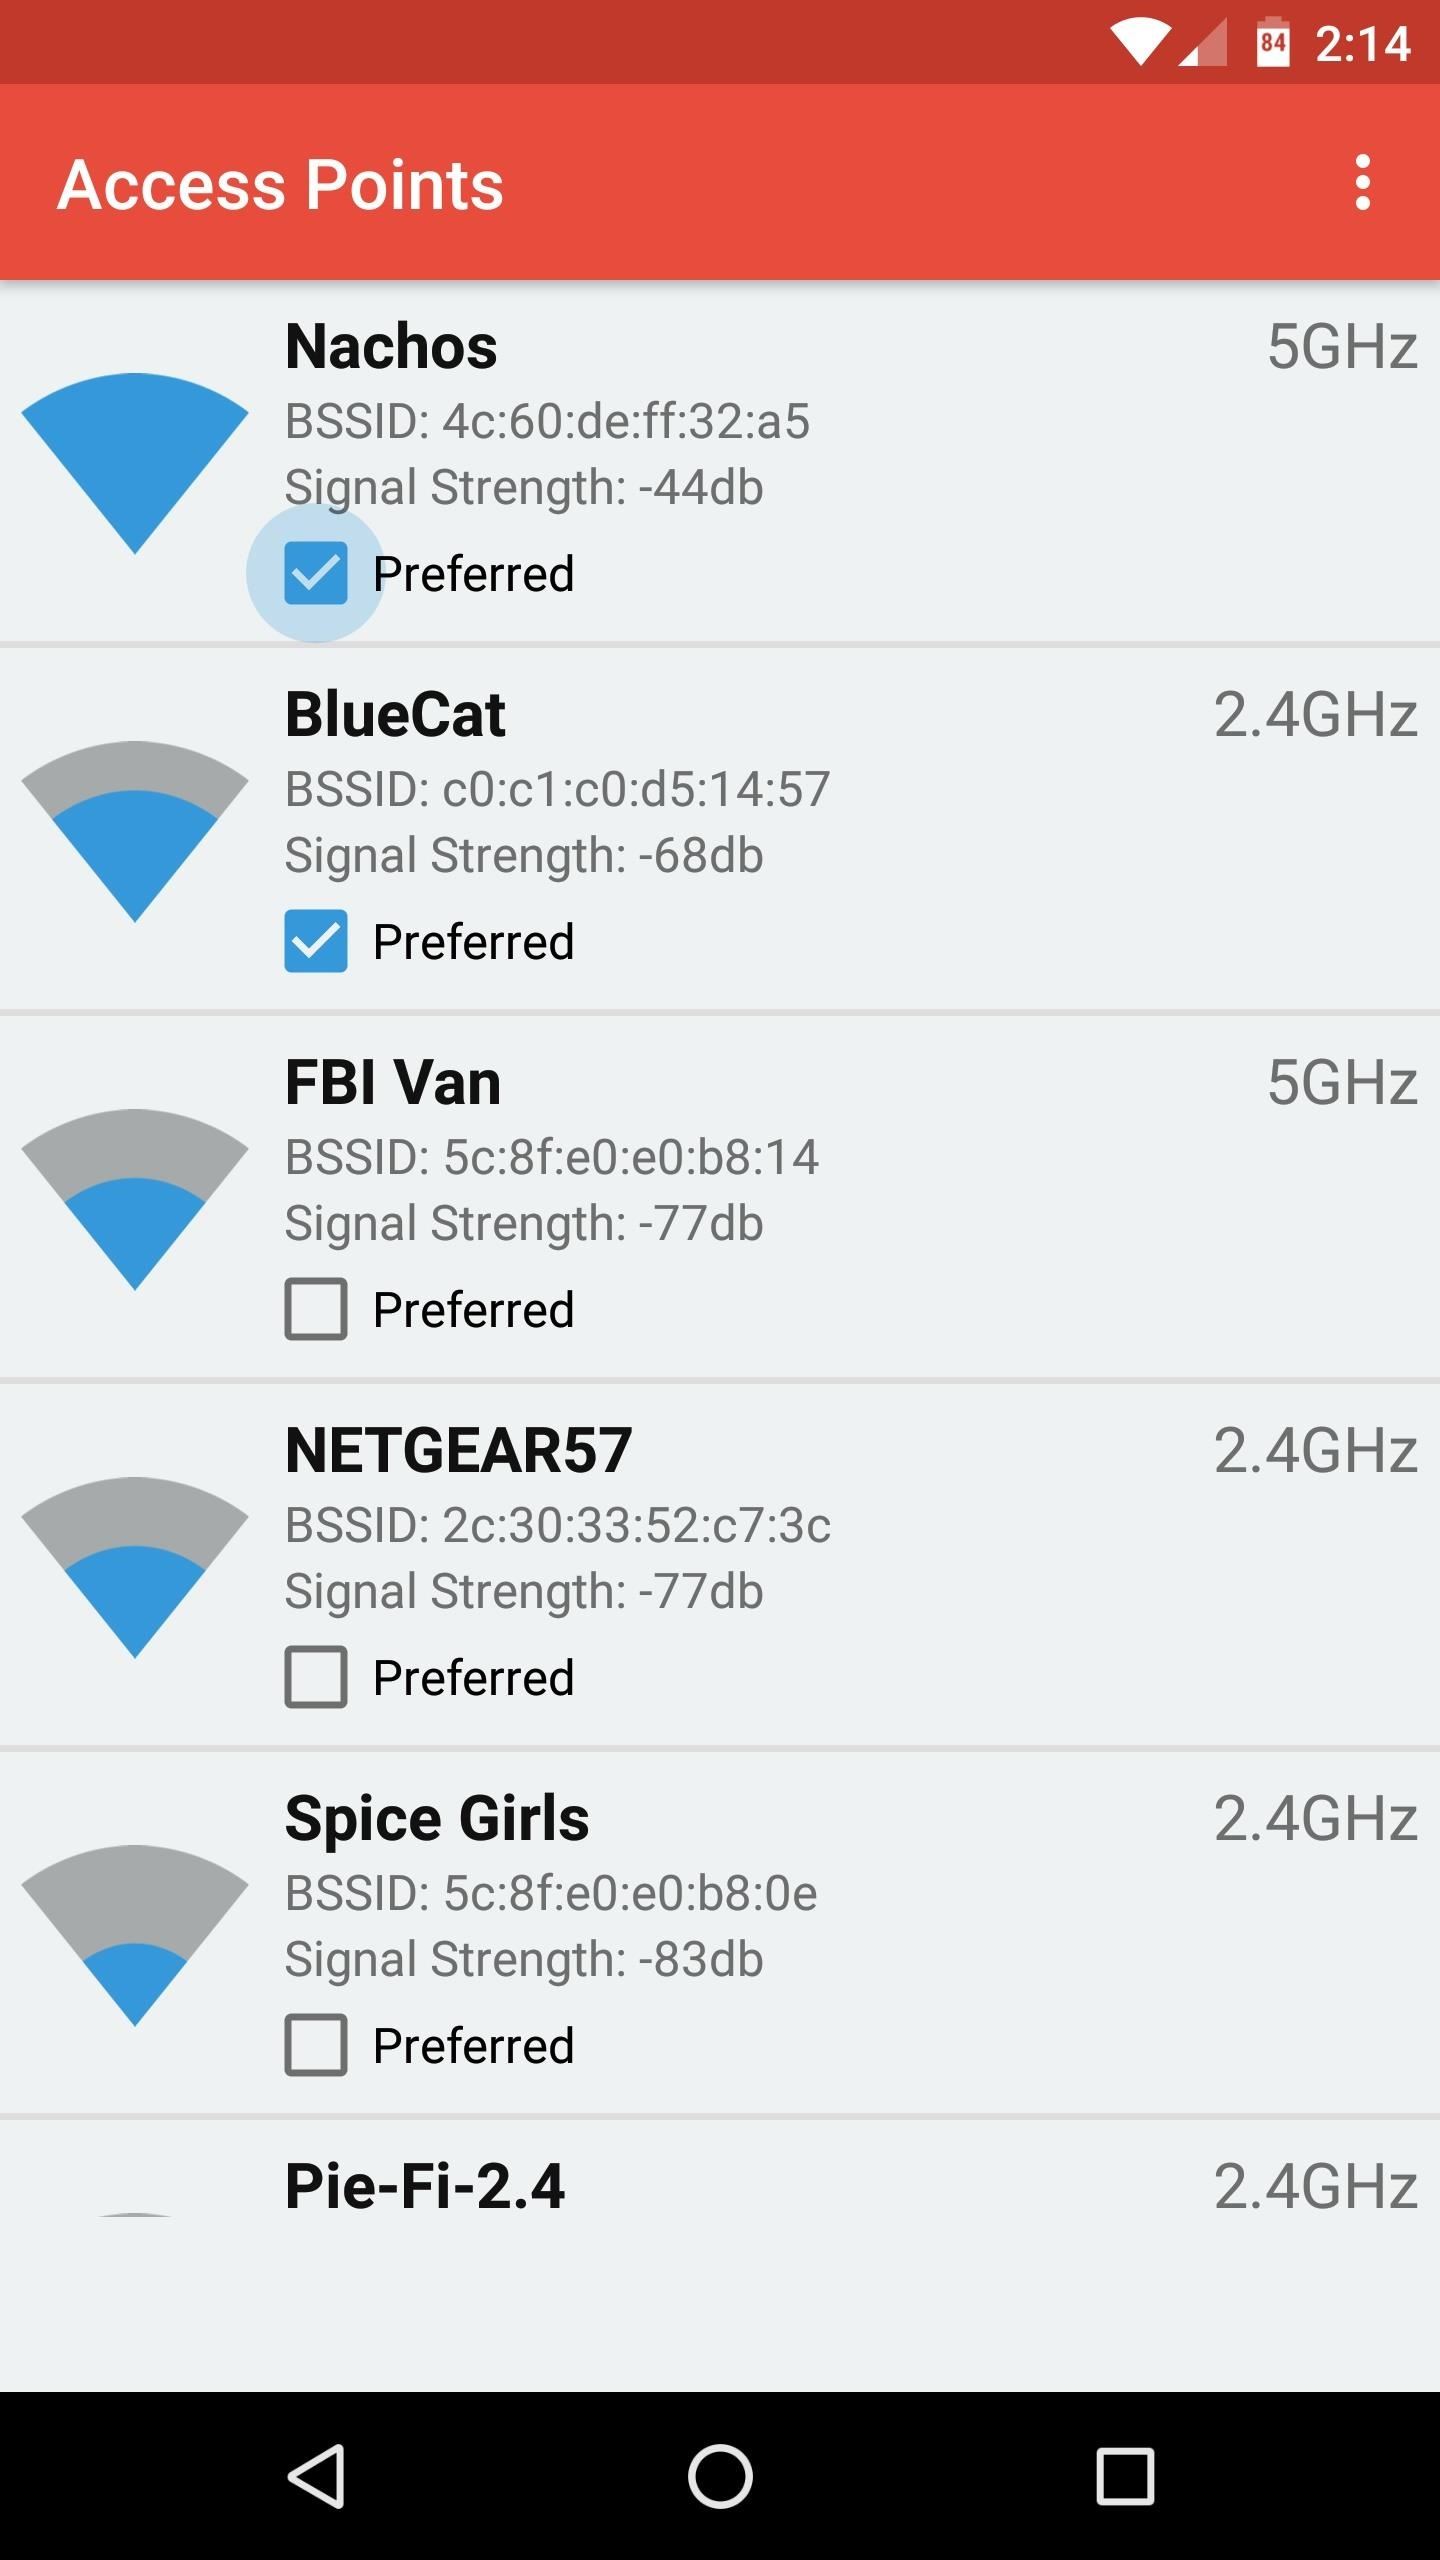
After you make it to the main menu, Wifi Switcher should show you a list of all the nearby Wi-Fi networks—if it doesn't, just pull down to refresh.
From here, just scroll through the list, find all of the networks you would like to connect to (this part may require that you move around your home or office a bit if you're out of range) and tick the boxes next to the "Preferred" option. Wifi Switcher will ensure that your device only connects to the networks marked as "Preferred" from now on.
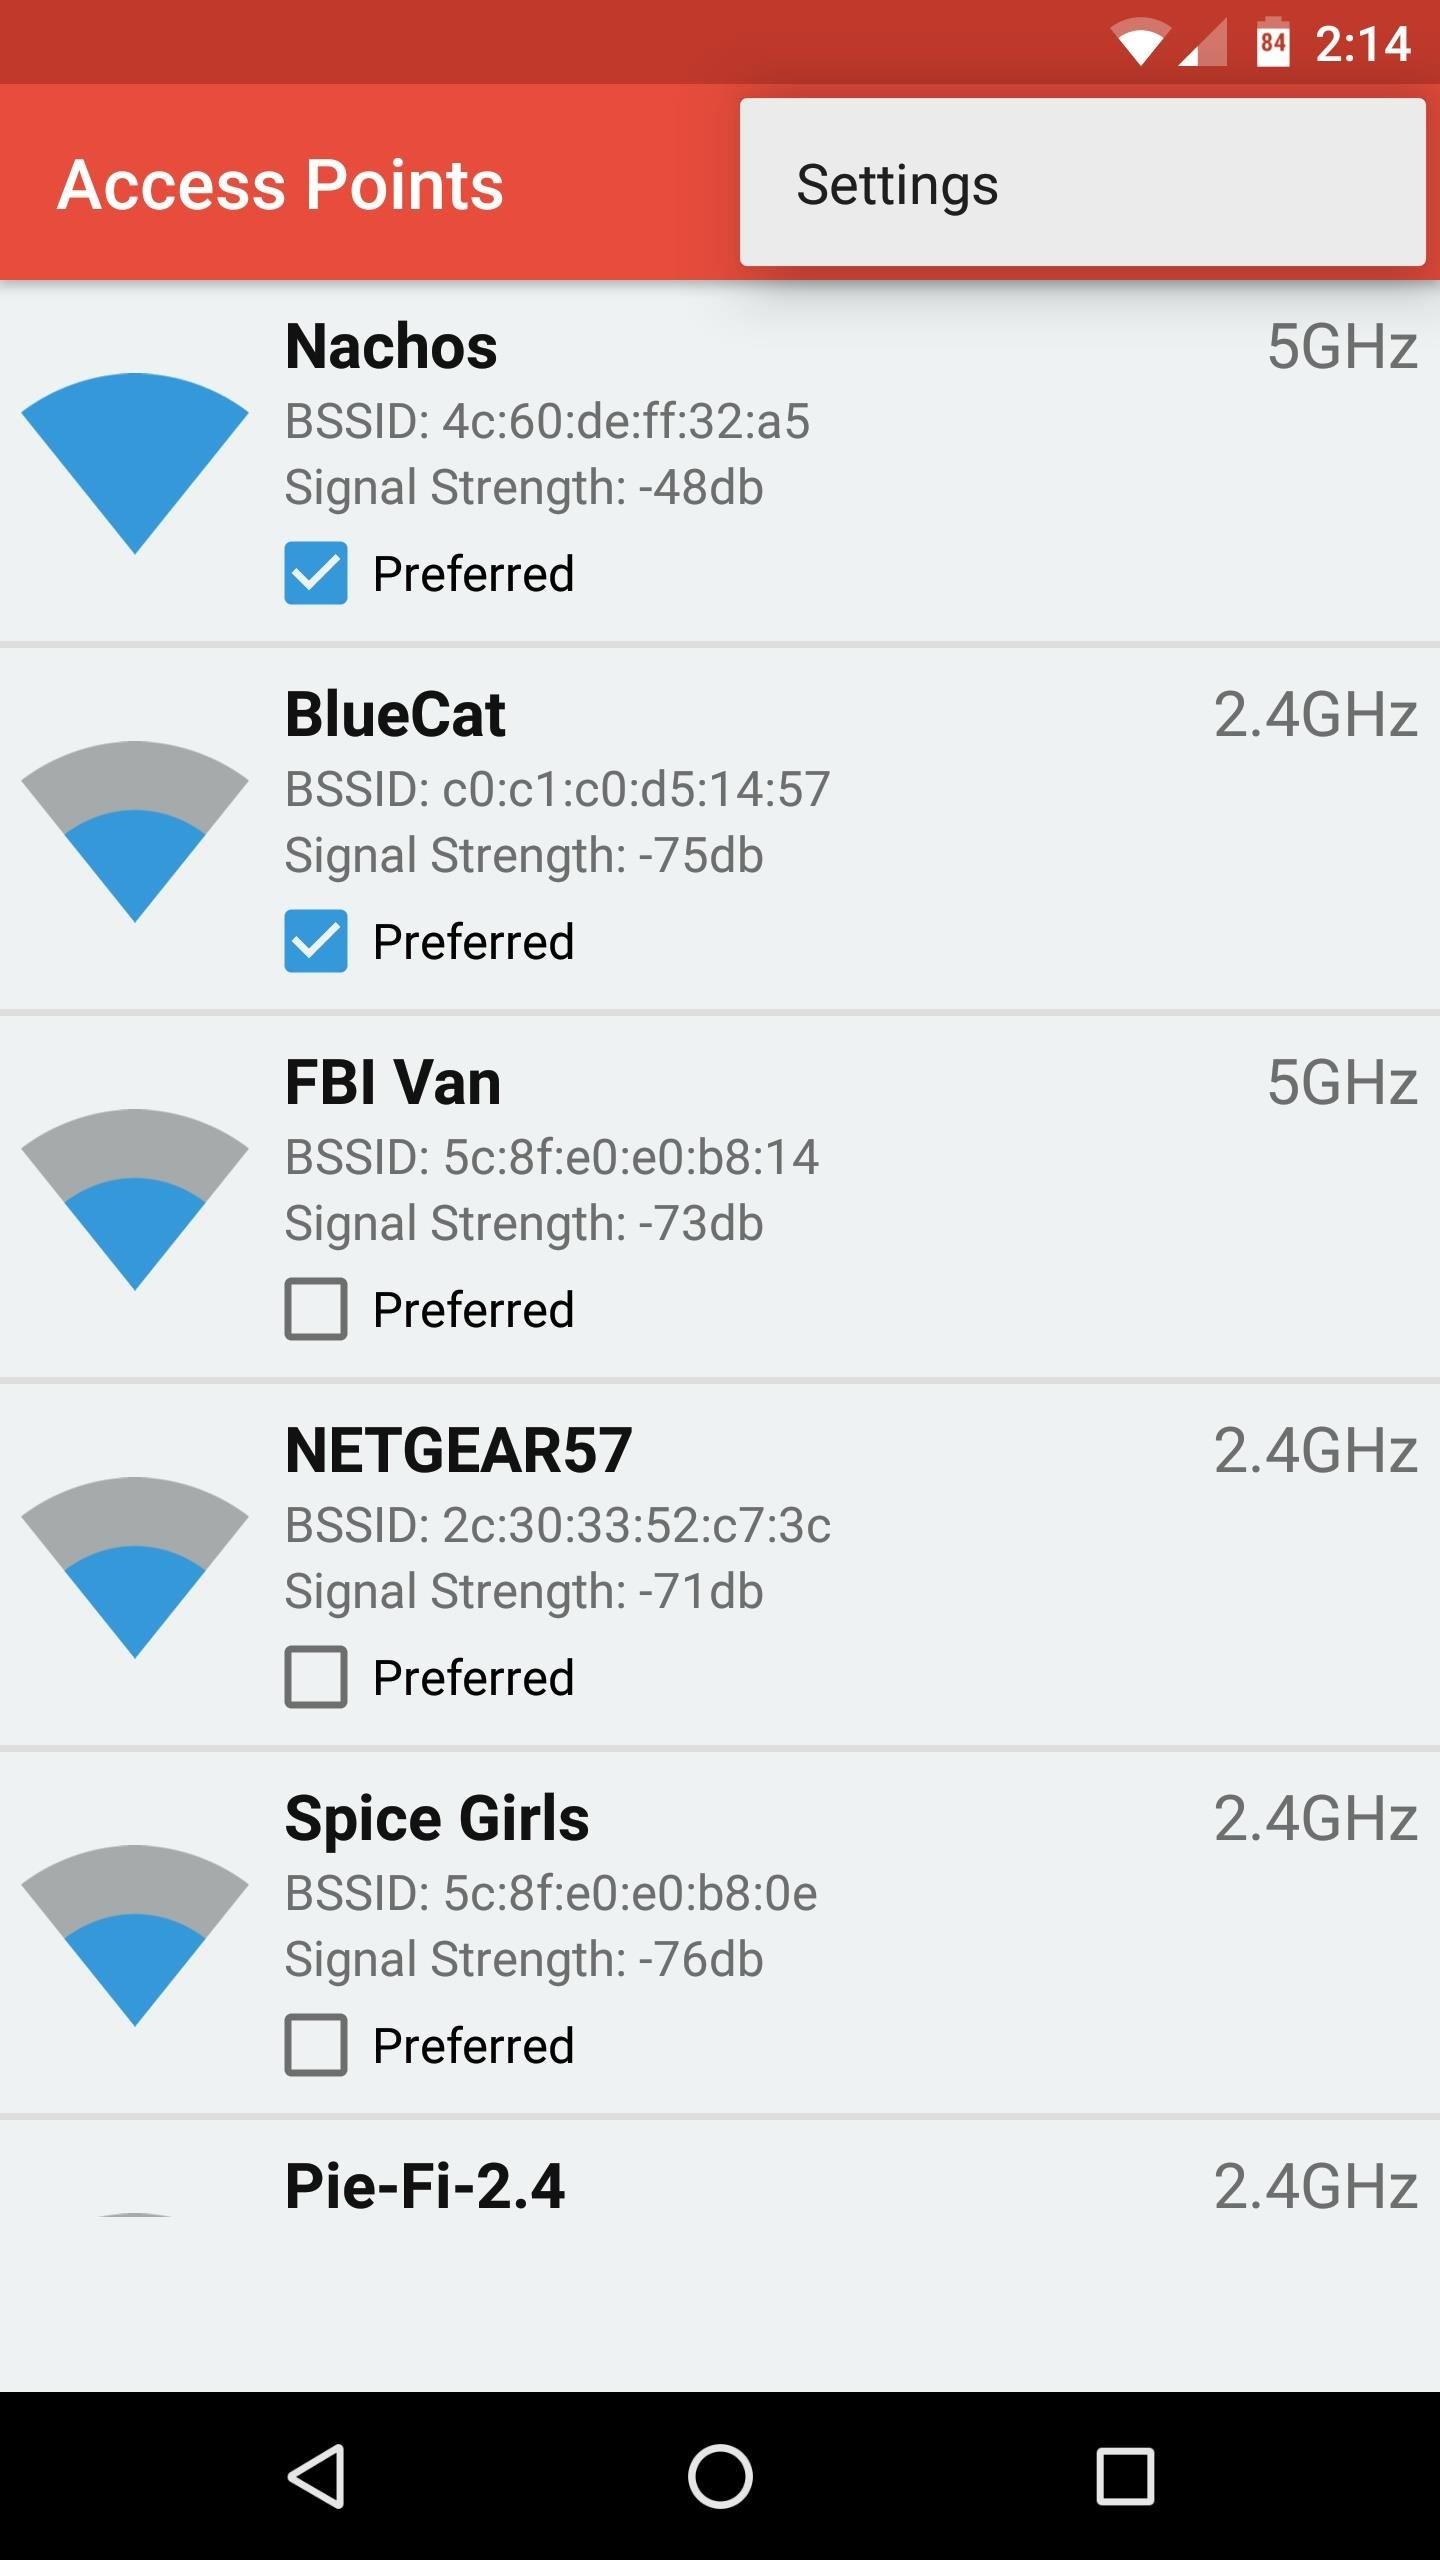
Step 3: Set a Signal Strength Threshold
Now that you've created a group of preferred networks, the only thing left to do is to choose a signal strength threshold, or "Switch Range." Think of this as the farthest you're willing to move away from one preferred router or repeater before your device connects to the next-strongest one.
So tap the three-dot menu button in the top-right corner, then open the "Settings" menu. From here, use the slider next to the Switch Range entry to set a signal strength threshold. Setting this anywhere above zero (Android's default switch) will push you off the fading network and onto a stronger one earlier.
Setting this to one or two bars should do the trick, but you might need to experiment here to find the best fit for your particular setup.
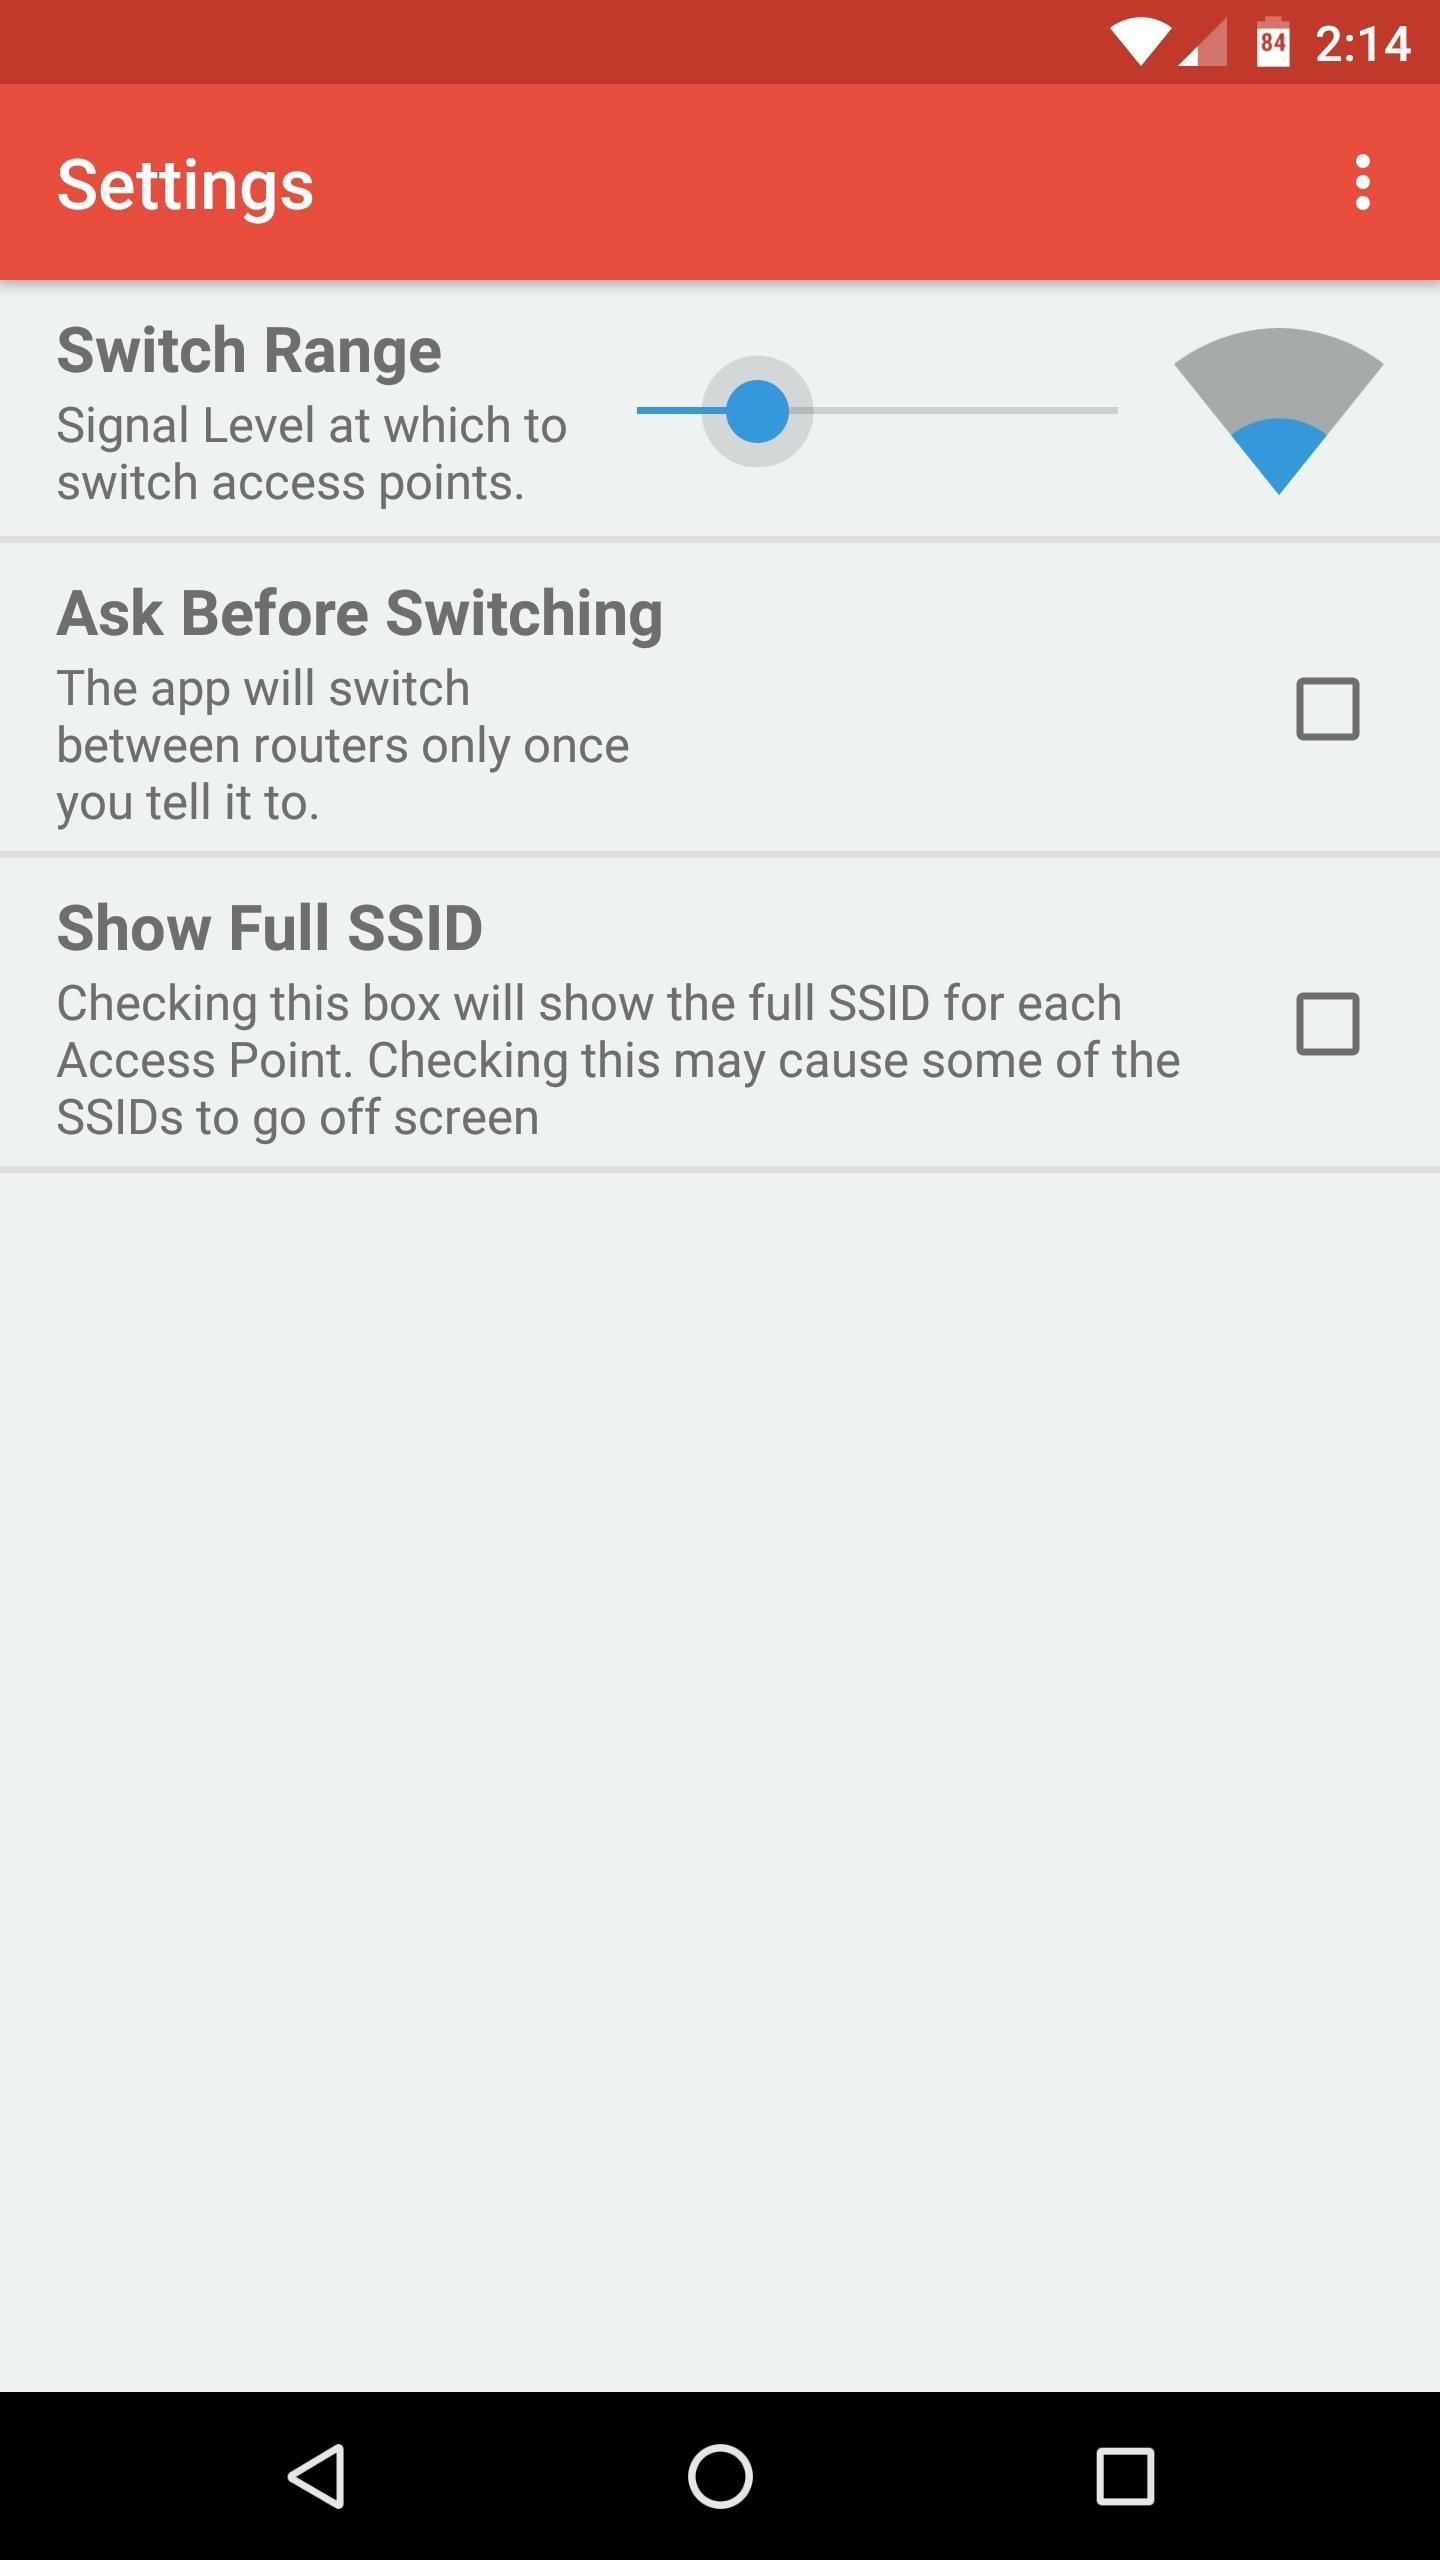
Beyond that, you can enable the "Ask Before Switching" option to get a notification with the option to switch or not when your phone finds another network, but this will disable the automatic switching. Also, the "Show Full SSID" option should be helpful if your routers have really long names and are truncated in the list of networks.
Step 4: Enjoy Better WiFi Signals
From now on, your phone or tablet will only connect to your group of preferred networks, so long as you've saved the Wi-Fi password for each network in Android's Settings menu. This makes sure that your device doesn't struggle to connect to a nearby learned network that never has decent signal strength.
But the best part about all of this is that Wifi Switcher will start looking for a better network as soon as your signal strength drops below the threshold you set in Step 3. When that happens, your device should automatically switch over to the best available network—a far cry from the annoying behavior that Android exhibits by default.
Who needs a wand? Unlock your magical powers and transform yourself from a Muggle into a Wizard or Witch just by using your Android phone. See how:


3 Comments
Wouldn't this make a Karma/Evil Twin attack substantially easier to do?
If you have a Samsung Galaxy phone, you should have the Samsung app Routines installed. Create a new routine consisting of only the condition "wifi signal strength". Once this condition is selected and appears on the box, tap on it and choose the signal strength. It starts suggesting 40%. For me, the 50% worked best. Adjust this level on the slider. Next, under Actions, choose the following actions, in sequence: "Turn Wifi off"; and then add "Turn Wifi on". It worked flawlessly for me. Test it on the various rooms of your place, and if it does not works, adjust the signal strength level on the slider described above.
I made a throw-away-account just to thank you for sharing your solution, it works like a charm. Thanks!
Share Your Thoughts