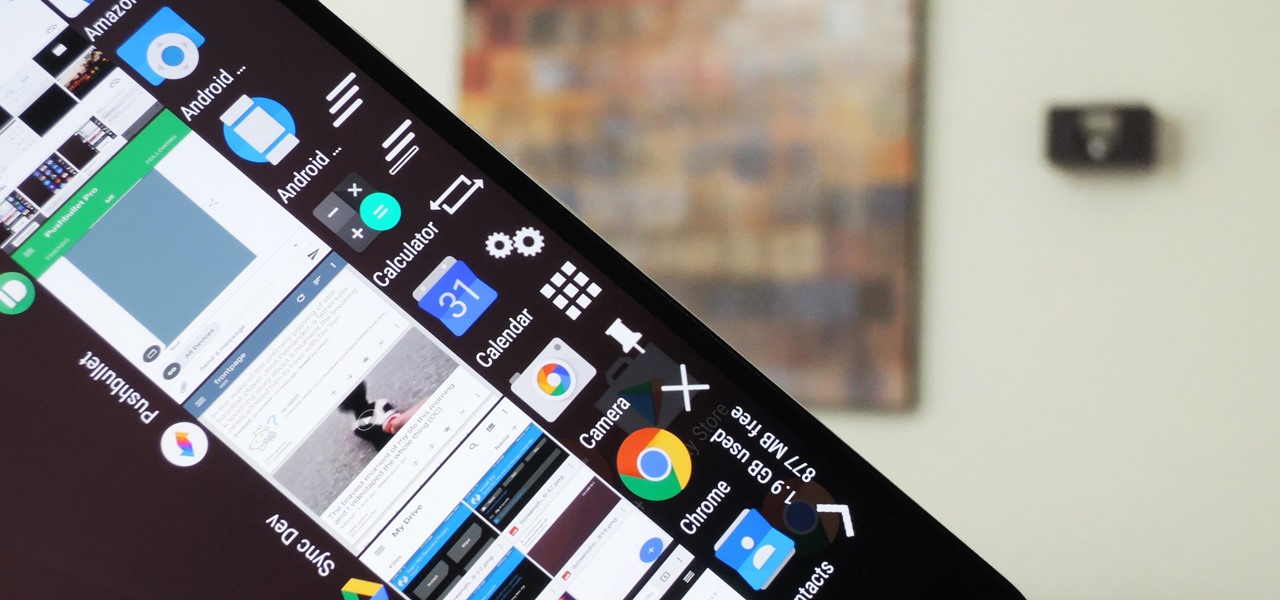

One of the main reasons for installing a custom ROM on an Android device is all of the added features. For instance, OmniROM offers a souped-up multitasking mod called OmniSwitch, so instead of the regular app switcher, you get an interface that lets you pin your favorite apps, access settings, view memory usage, and more.
Luckily, though, you don't have to install an entire custom ROM to get this one awesome feature. In the past, we've covered a method for getting OmniSwitch on older Android versions, and now, thanks to developer wrongway213, we can finally install it on Android 7.0 Nougat. Even better, the same flashable ZIP should work for most devices, including many older Android versions.
Requirements
Step 1: Download the ZIP
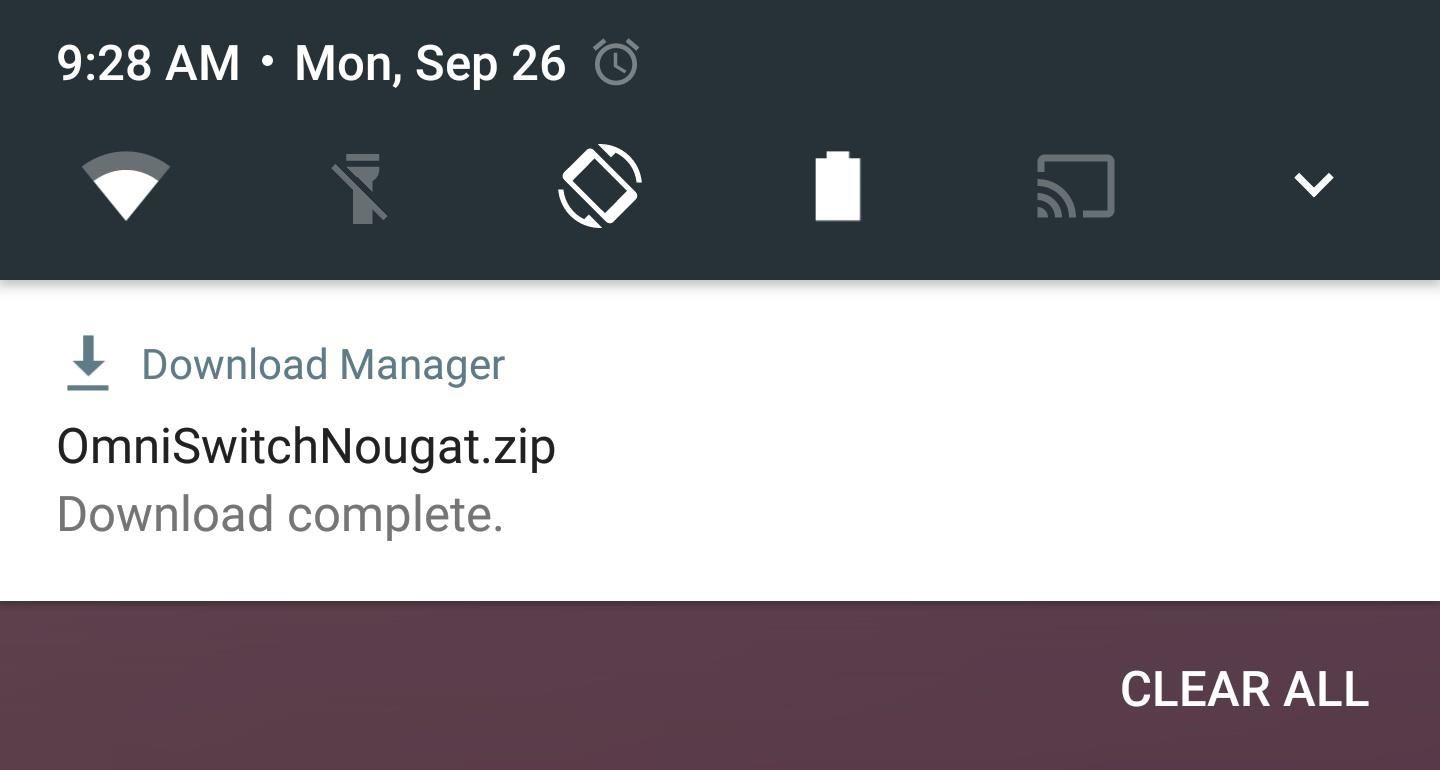
To get started, head to the following link from your Android device, and the flashable ZIP that installs OmniSwitch will begin downloading immediately. When it's finished, go ahead and boot your phone into custom recovery.
Step 2: Flash the ZIP in Custom Recovery
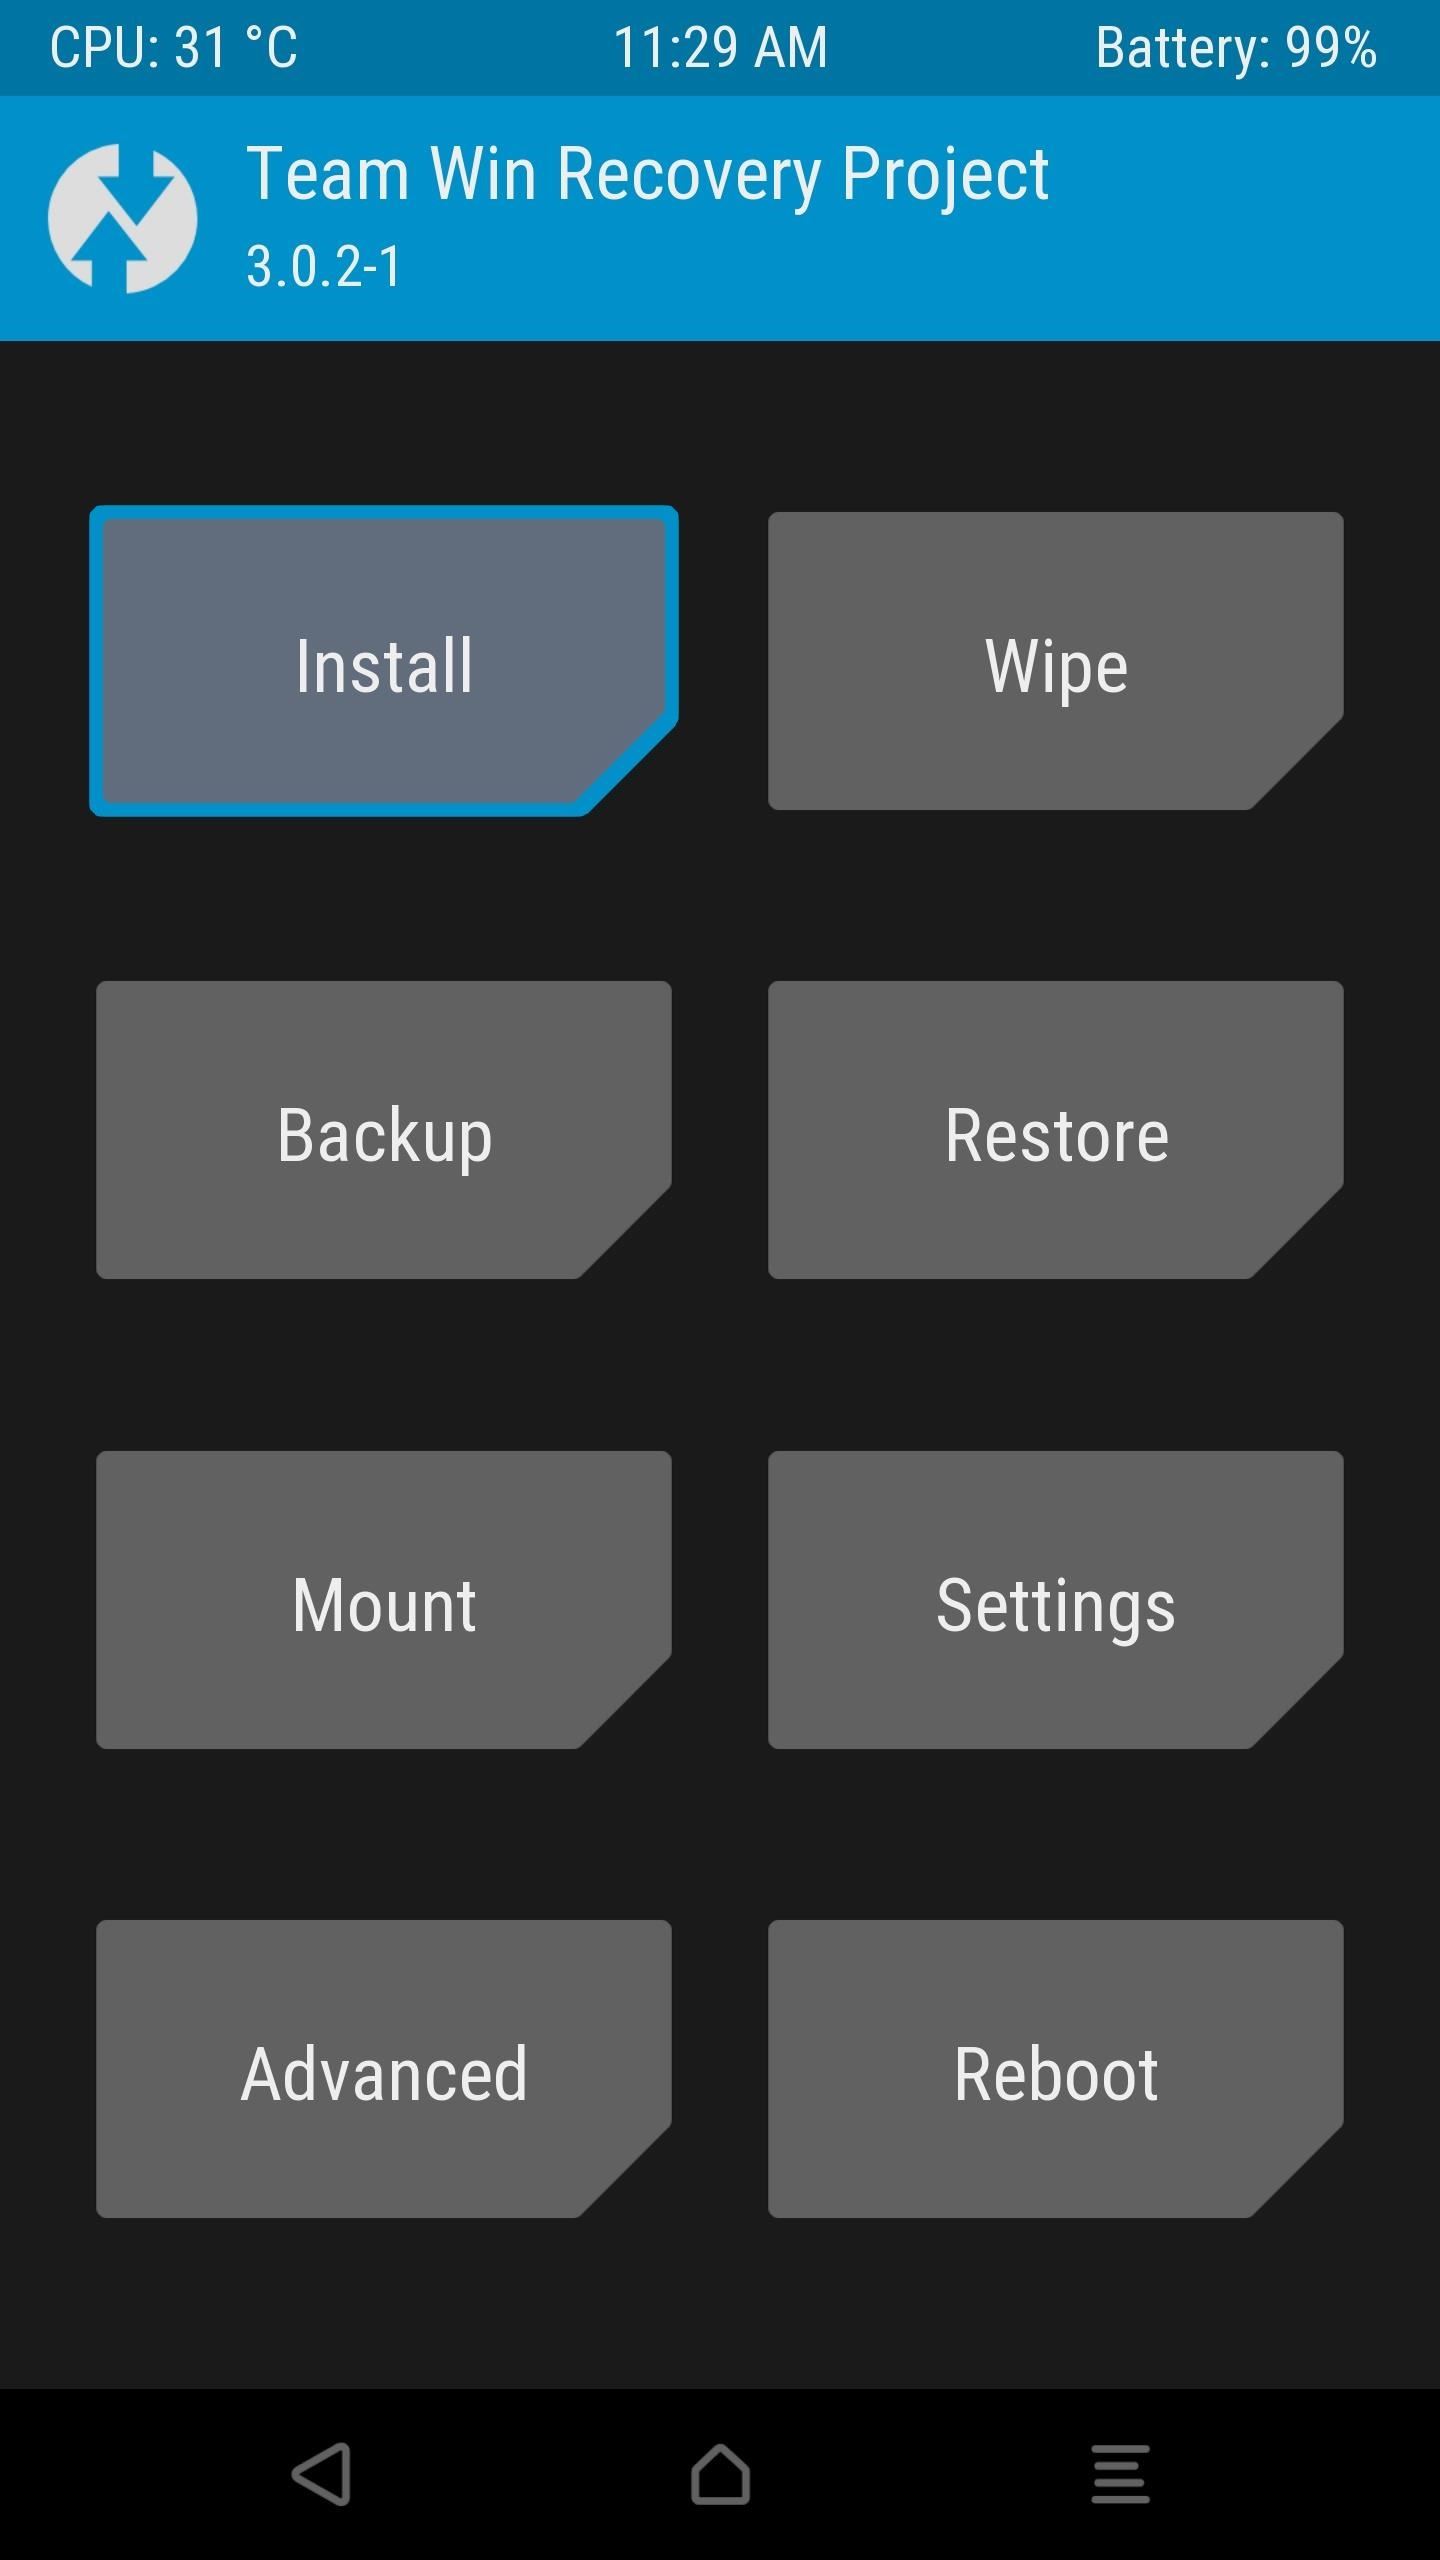
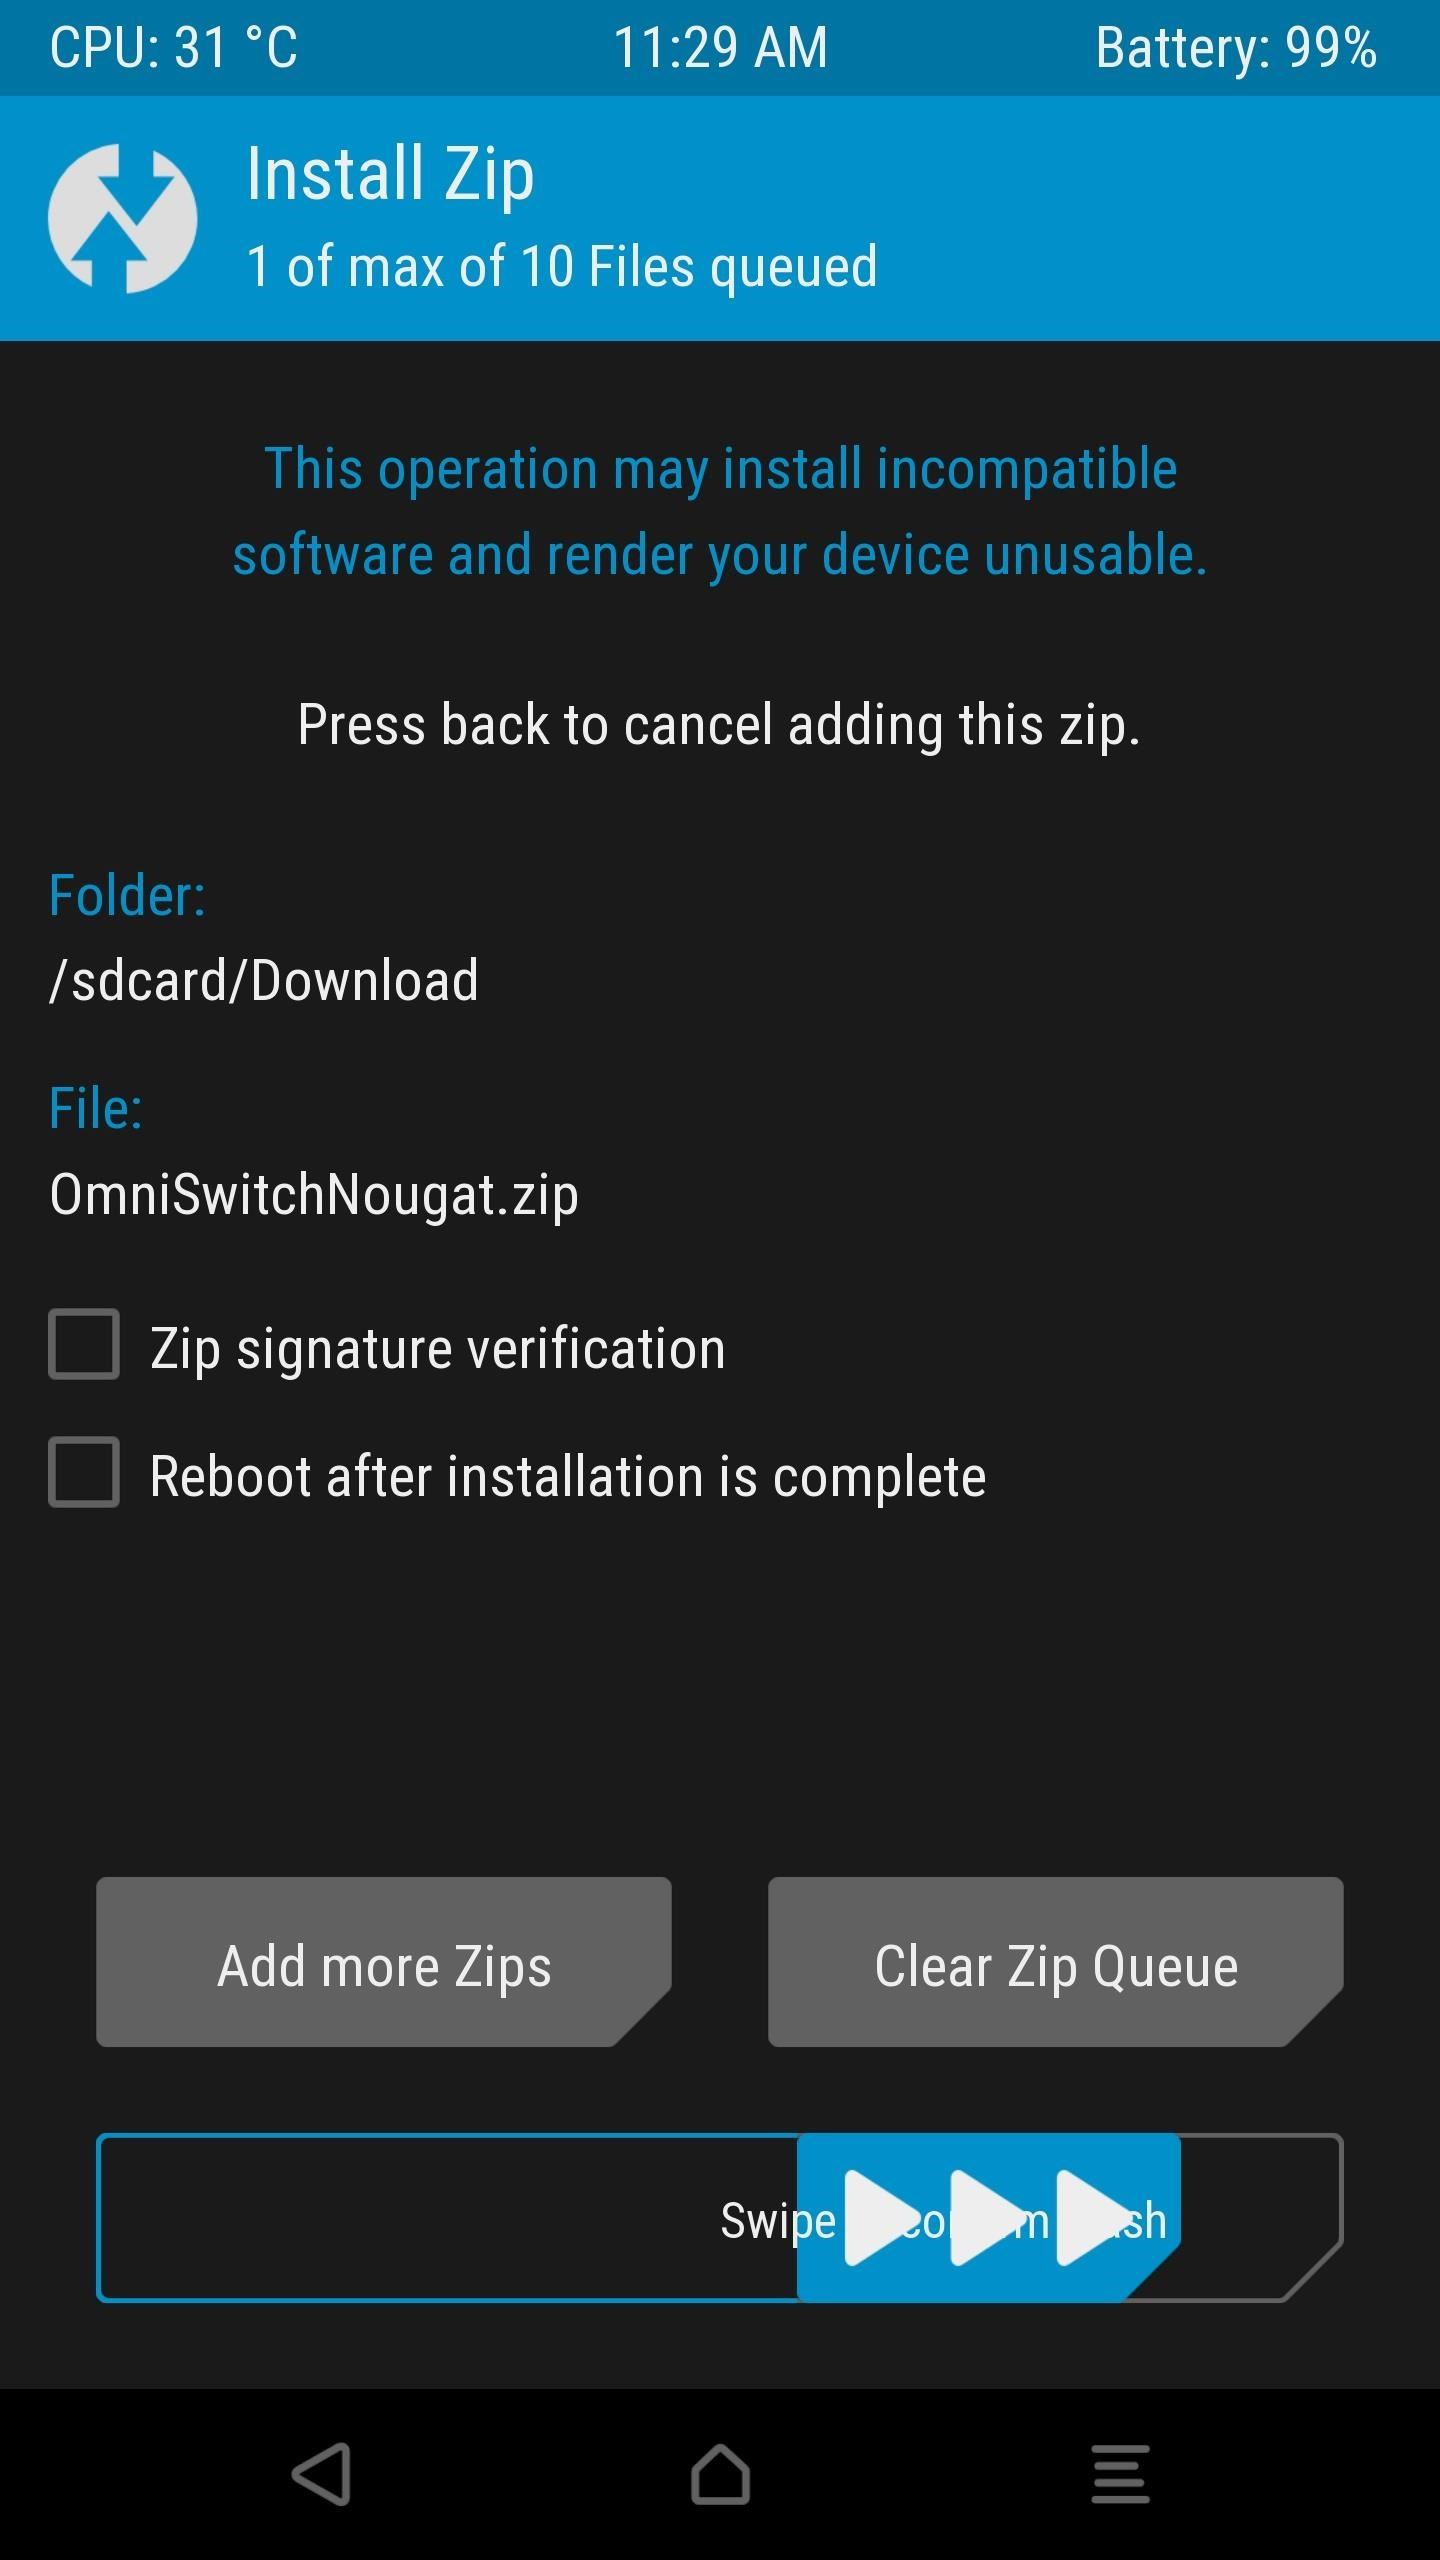
Once you make it into custom recovery, start by creating a full NANDroid backup. That's as simple as tapping the "Backup" button in TWRP's main menu, then swiping the slider at the bottom of the screen.
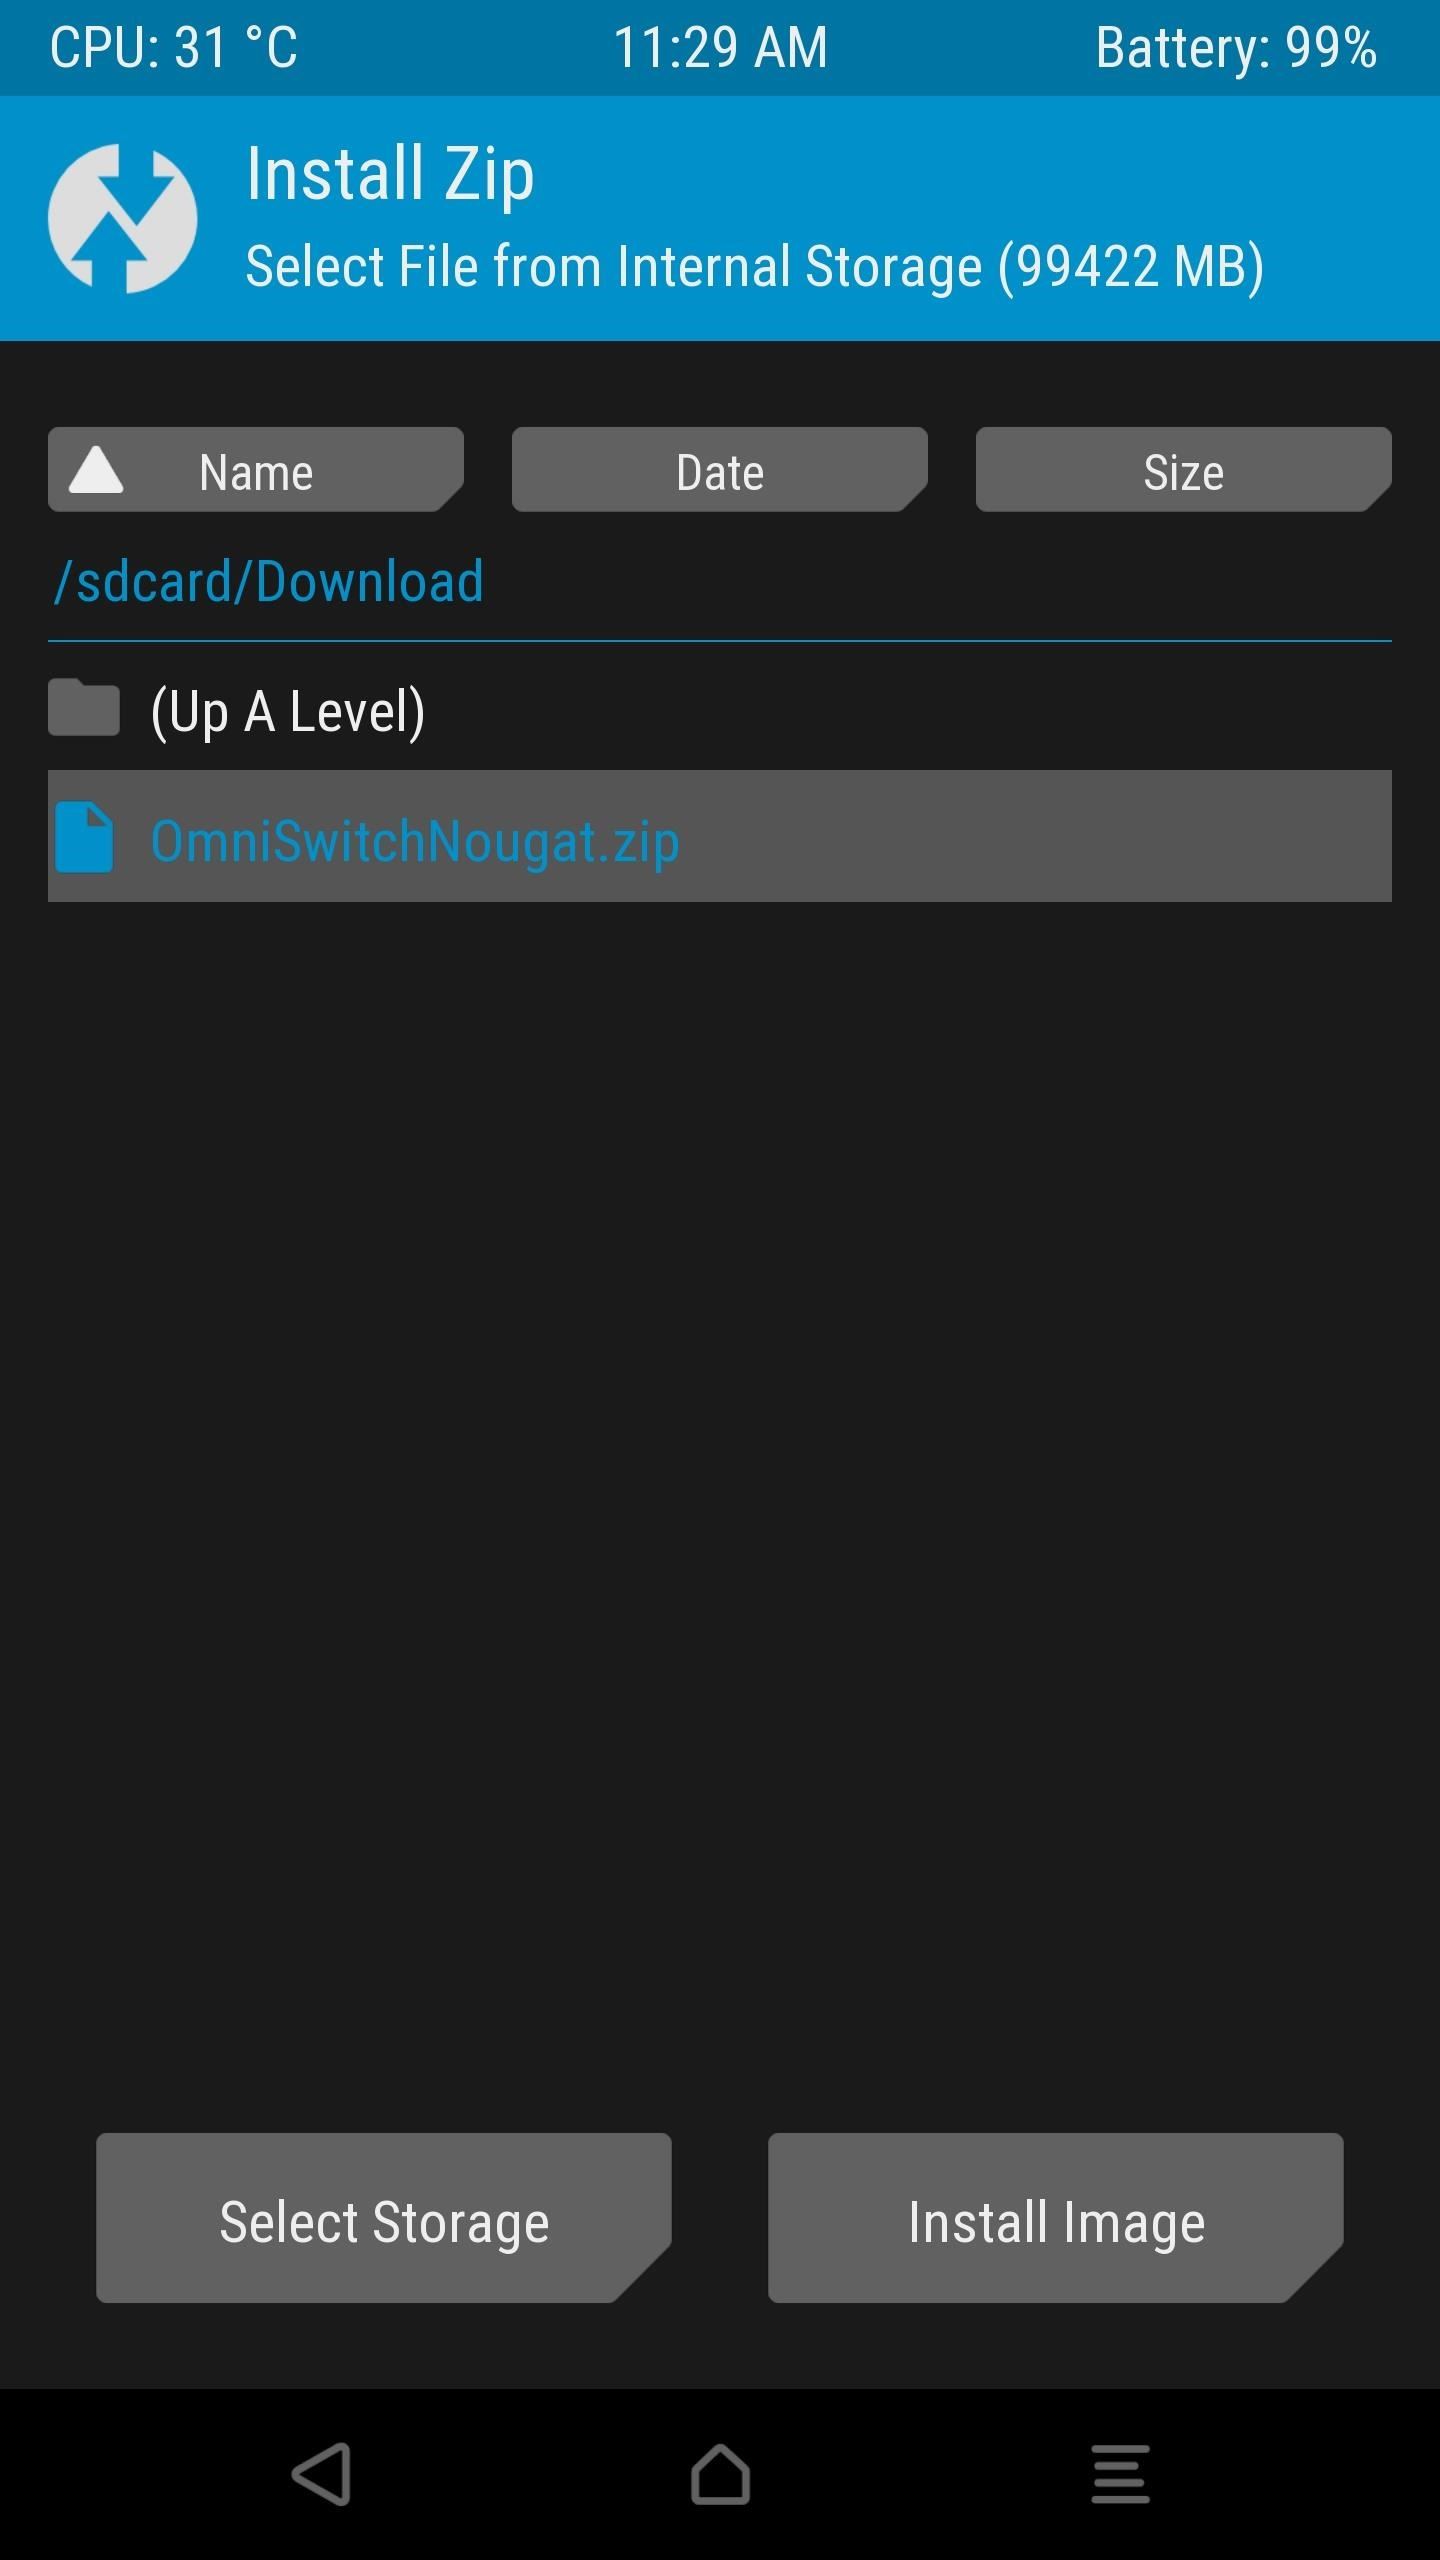
With that taken care of, head back to TWRP's main menu, and select the "Install" option. From here, navigate to your device's Download folder, then select the OmniSwitchNougat.zip file. After that, swipe the slider at the bottom of the screen to install the mod, and when that's finished, tap "Reboot System."
Step 3: Customize OmniSwitch
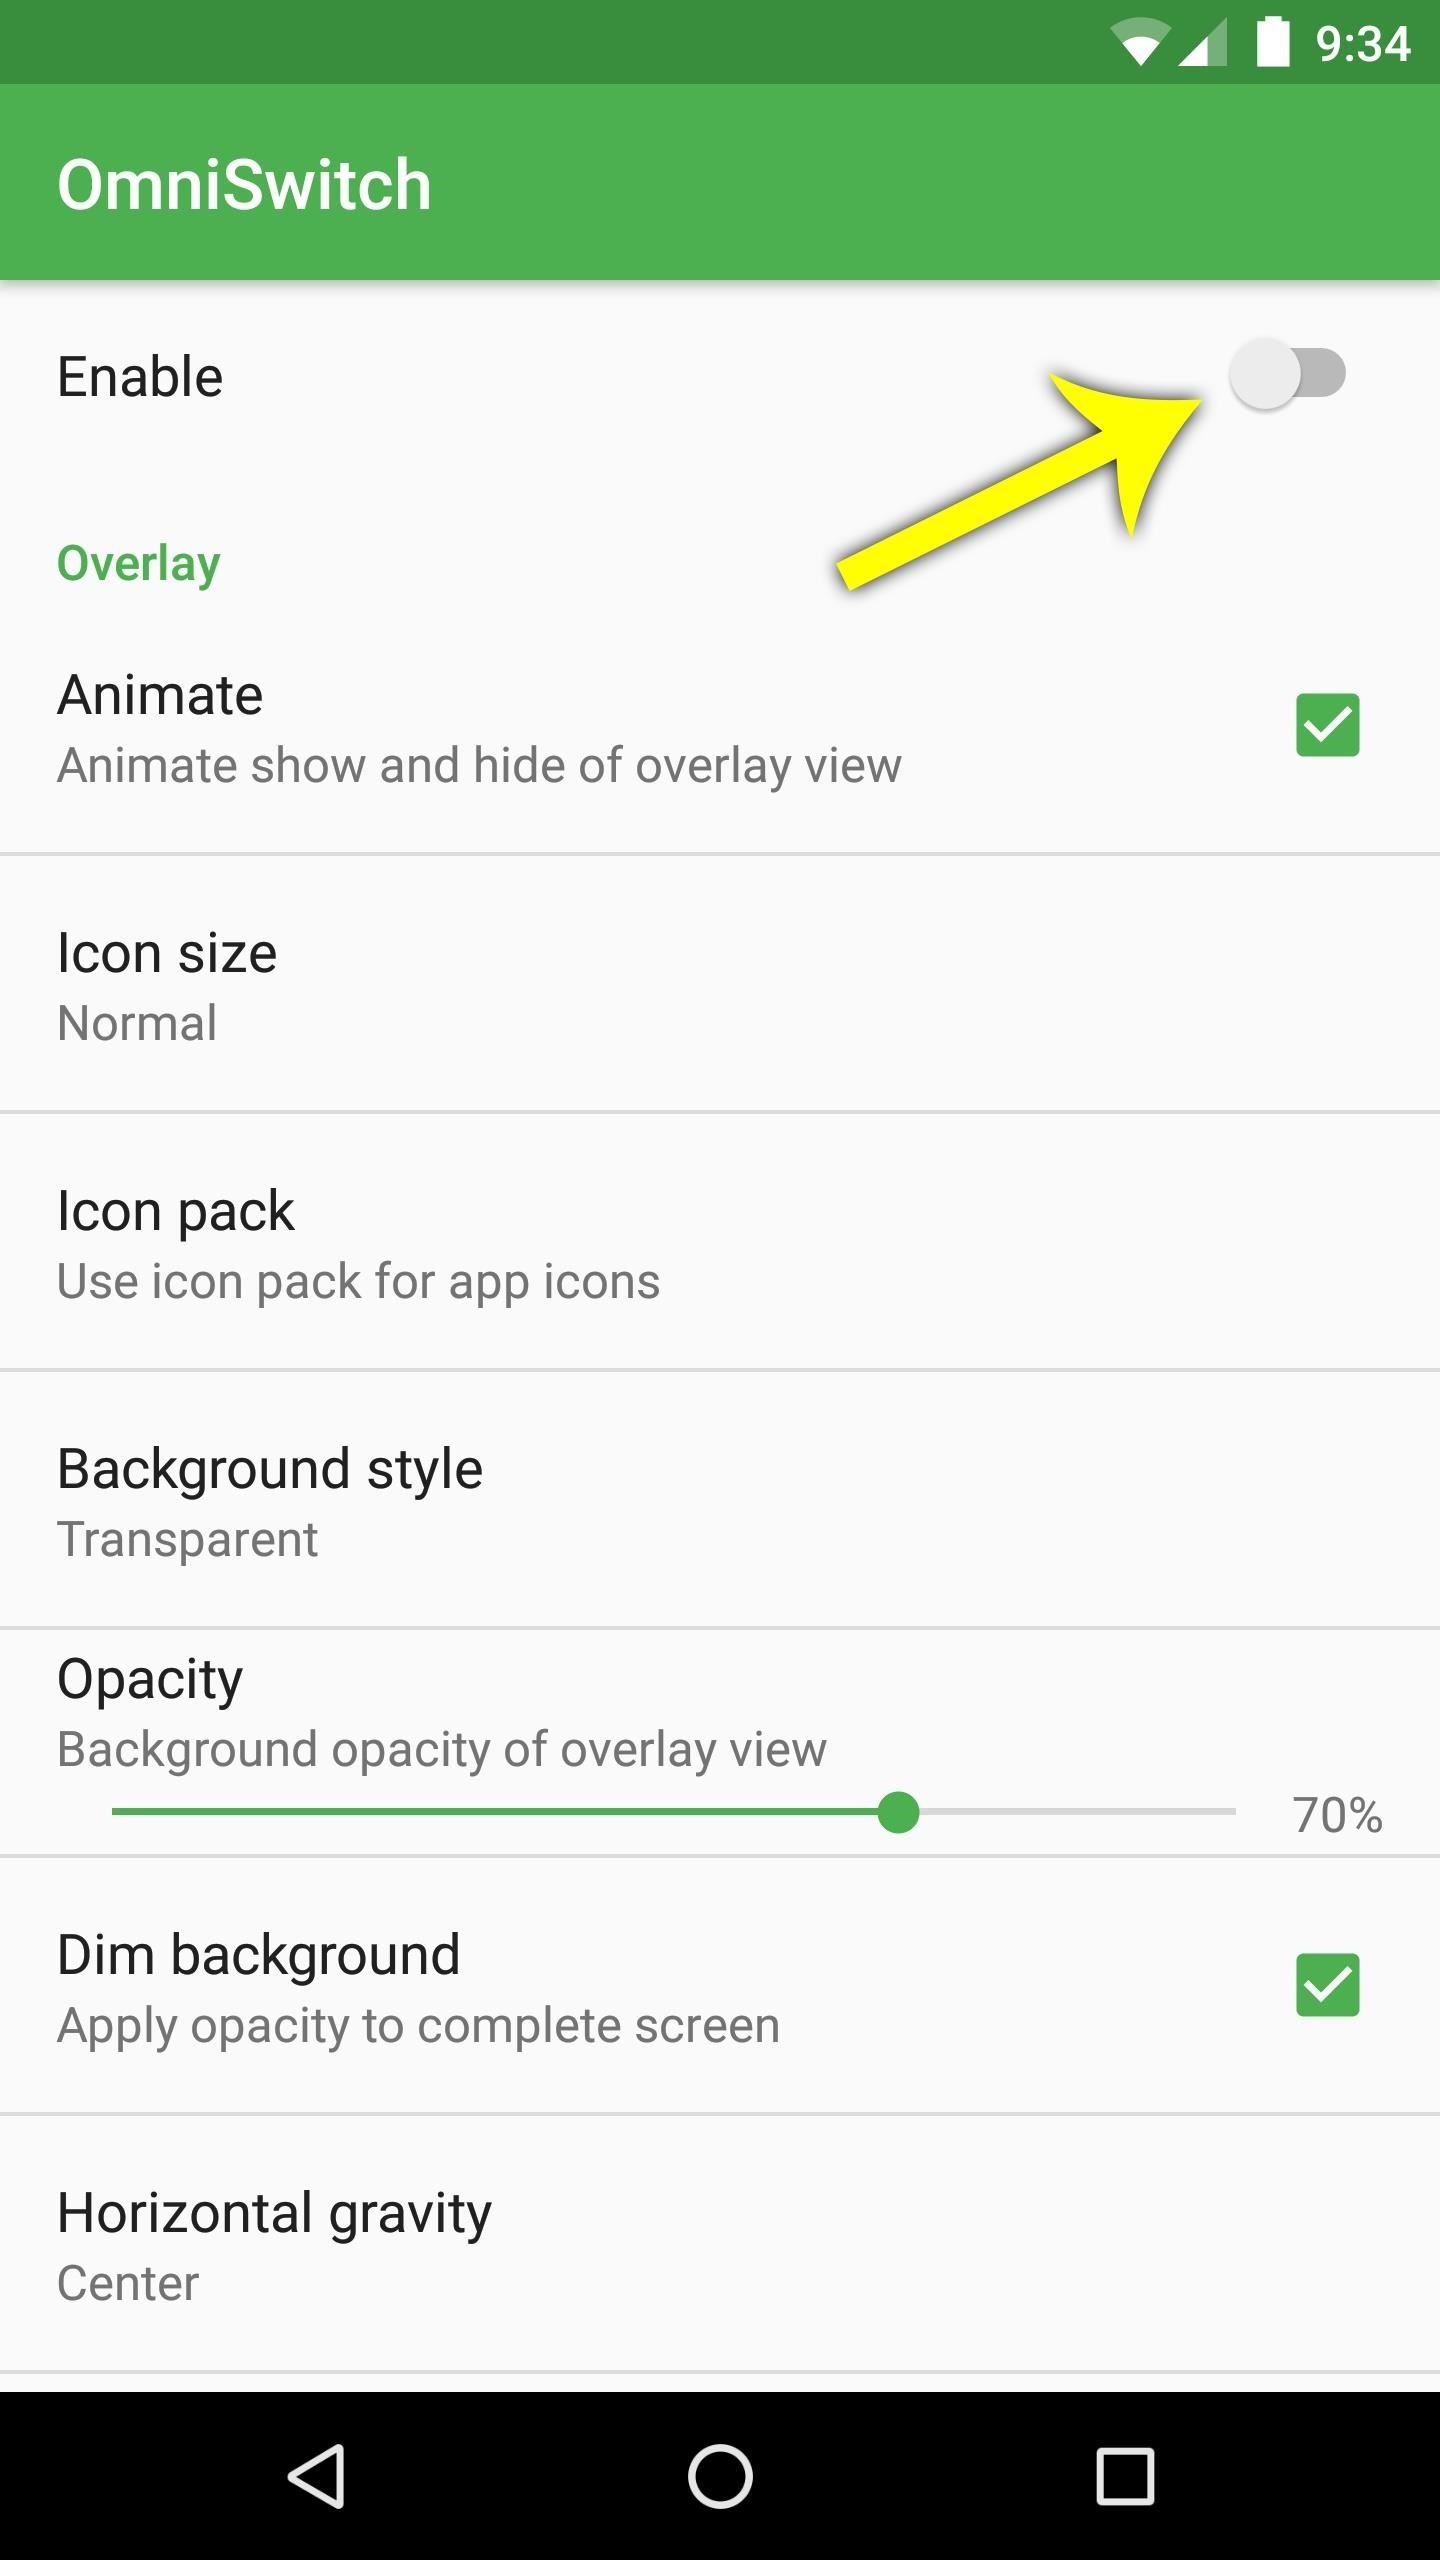
When you get back up, open the OmniSwitch app that you'll now find in your app drawer. From here, enable the switch at the top of the screen to start up the service. At this point, you may see a notification saying "OmniSwitch Restricted Mode"—if you see that, I'll cover a fix at the bottom of this article.
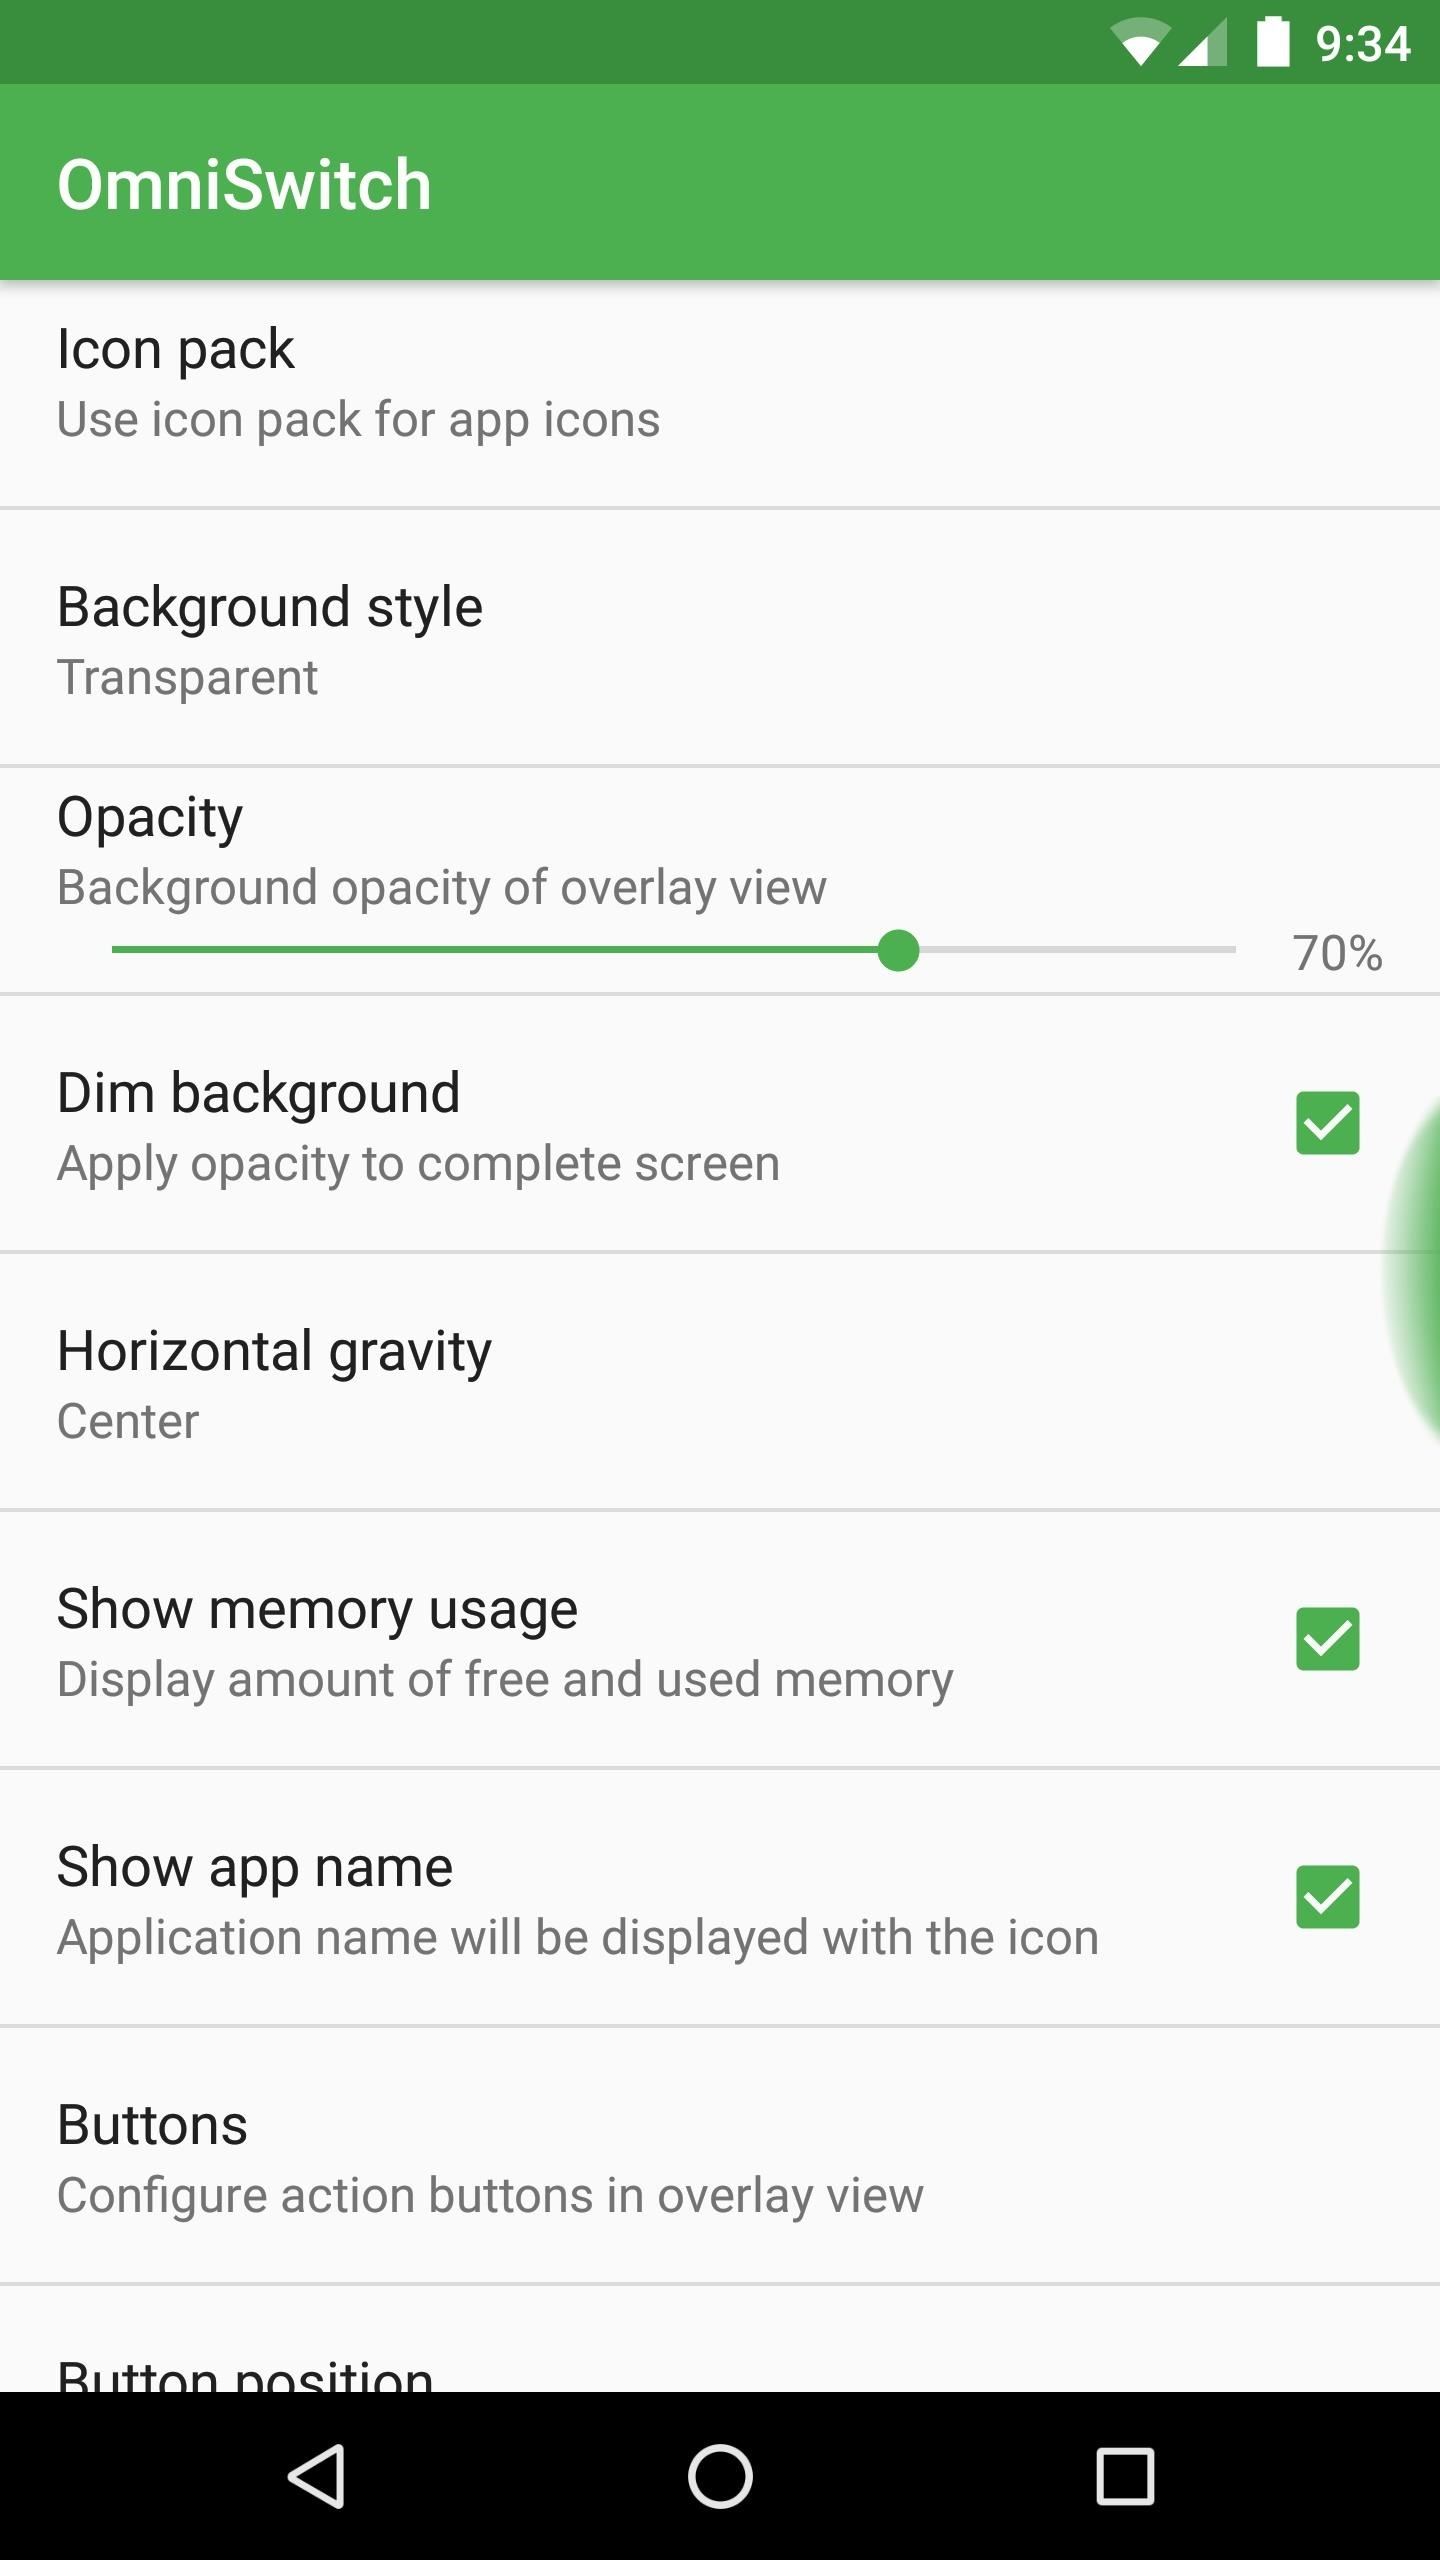
Beyond that, there are tons of customization options for your new multitasking UI. You can change transparency, apply icon packs, reorder or add buttons, and opt to show memory usage, among other things. Most of these options are a matter of personal preference, so you'll have to do a bit of exploring to find what's right for you.
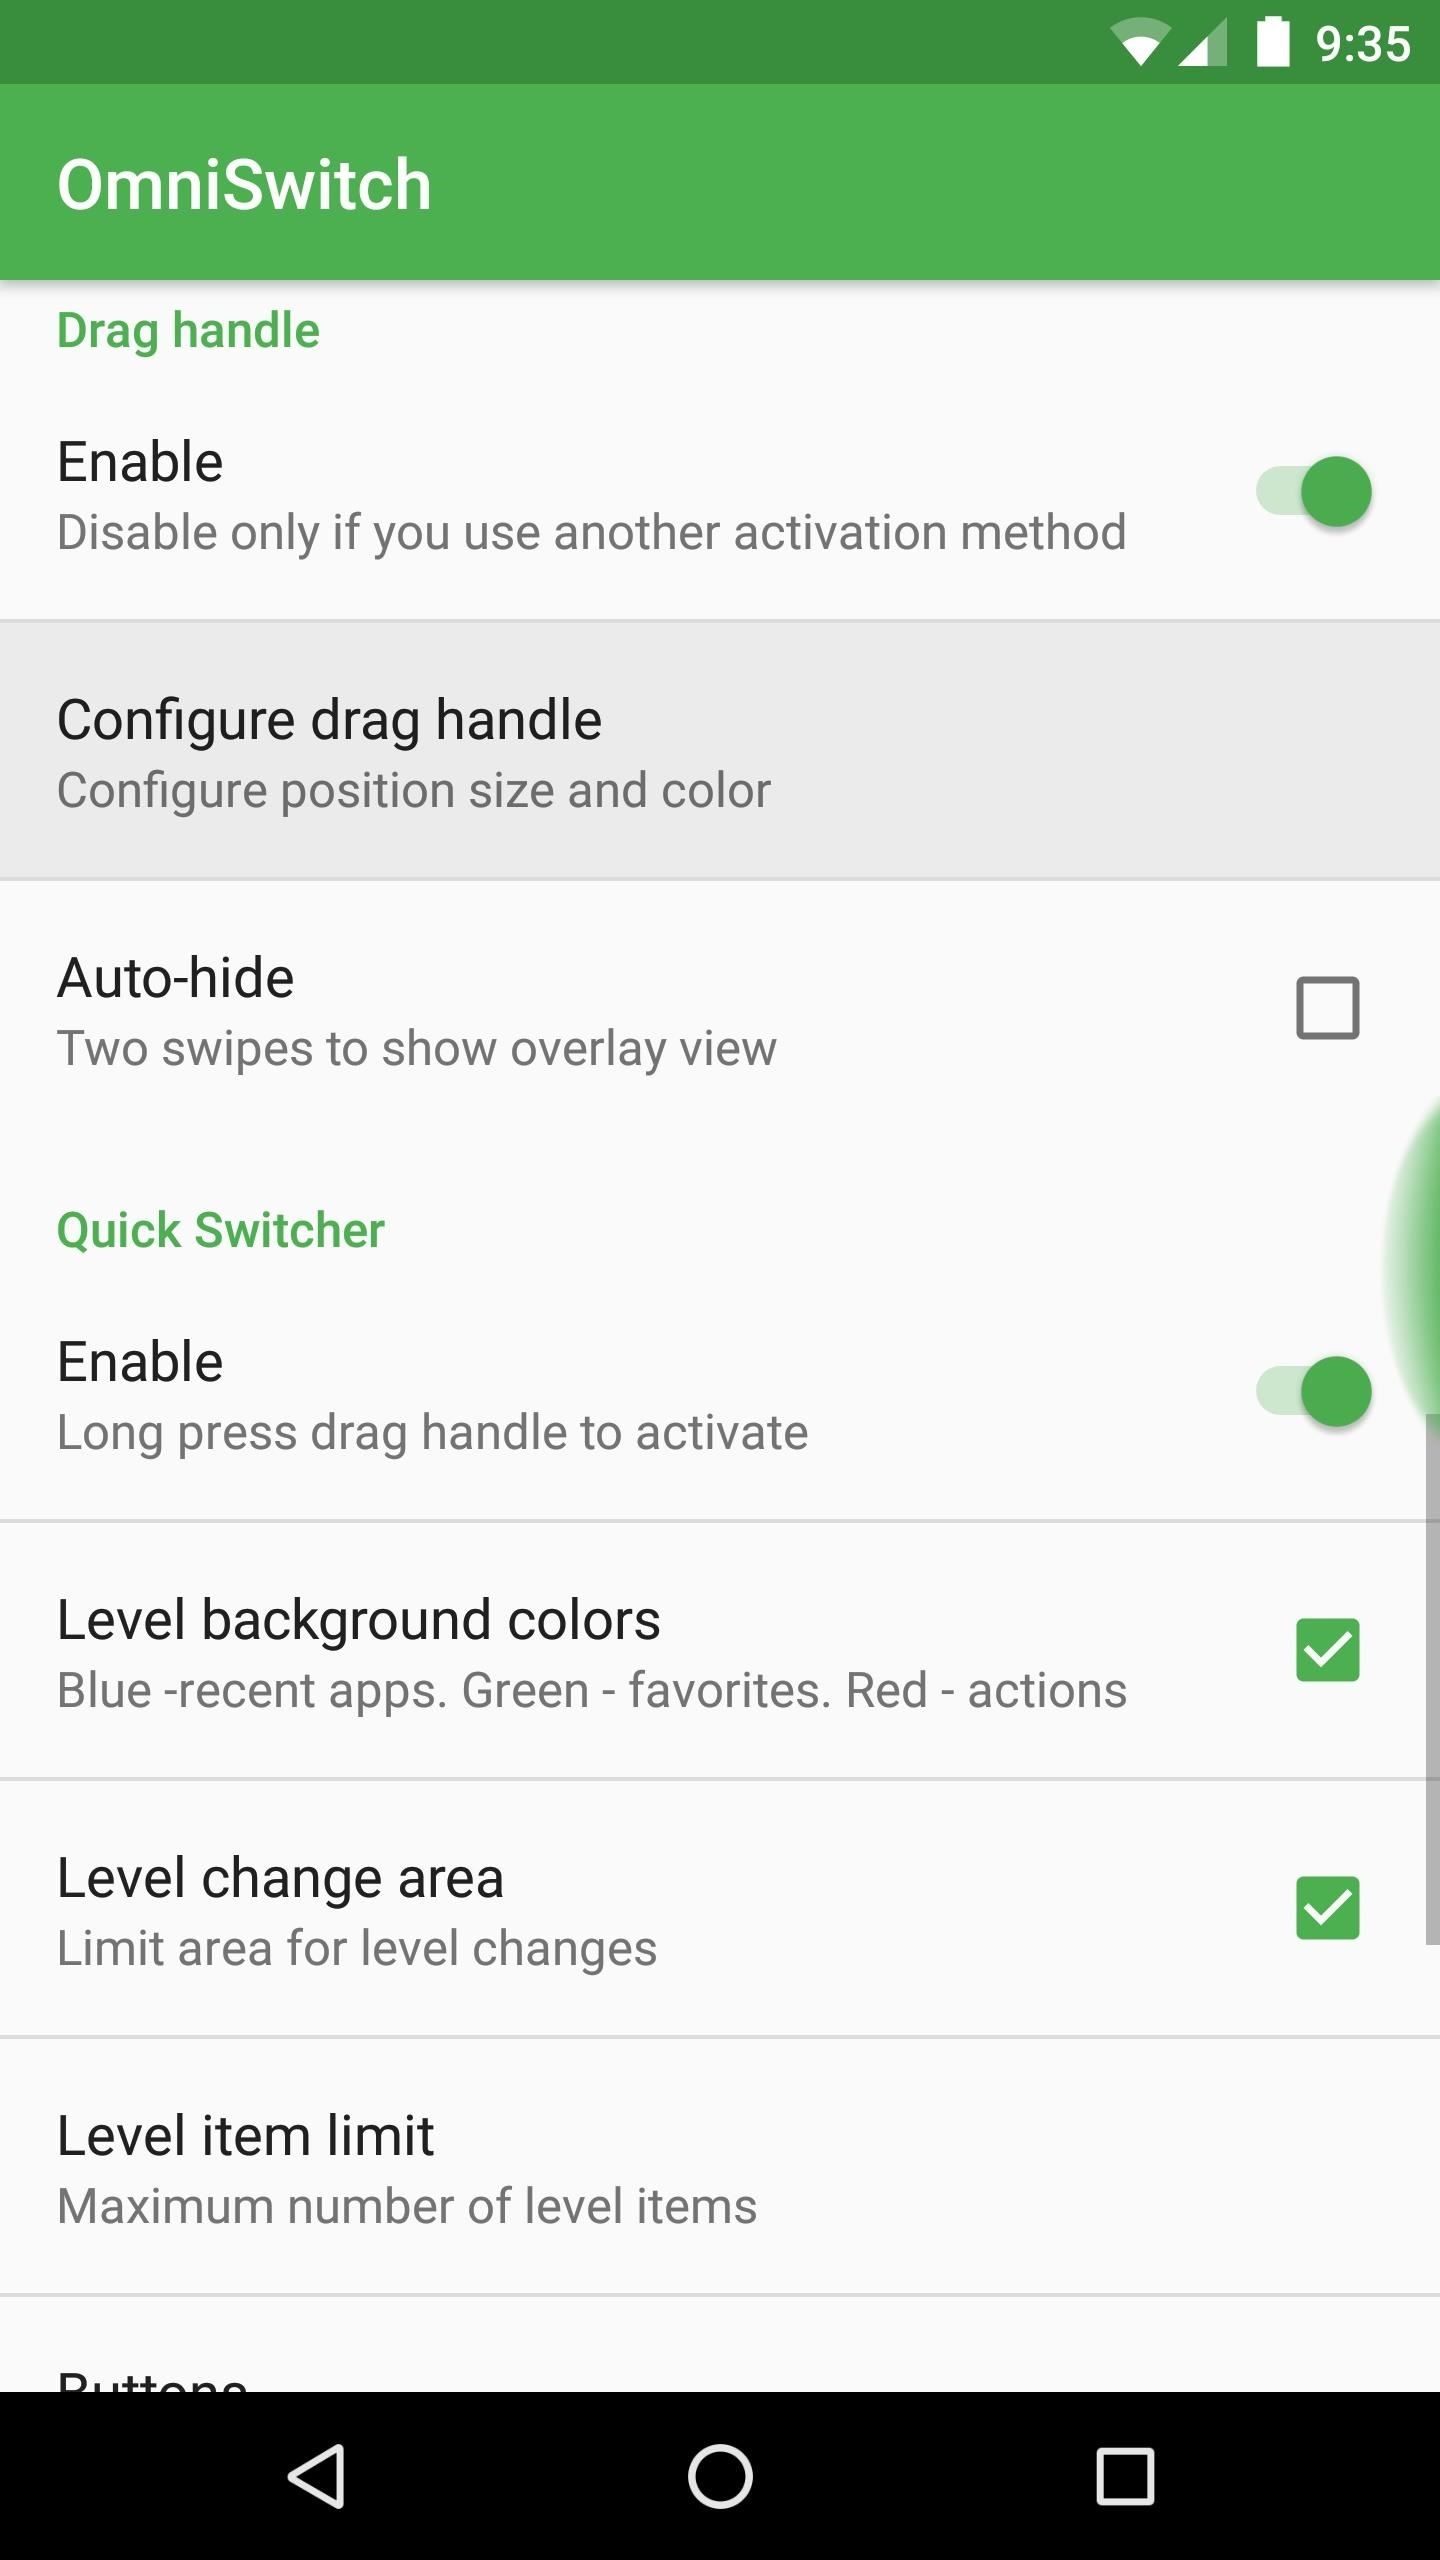
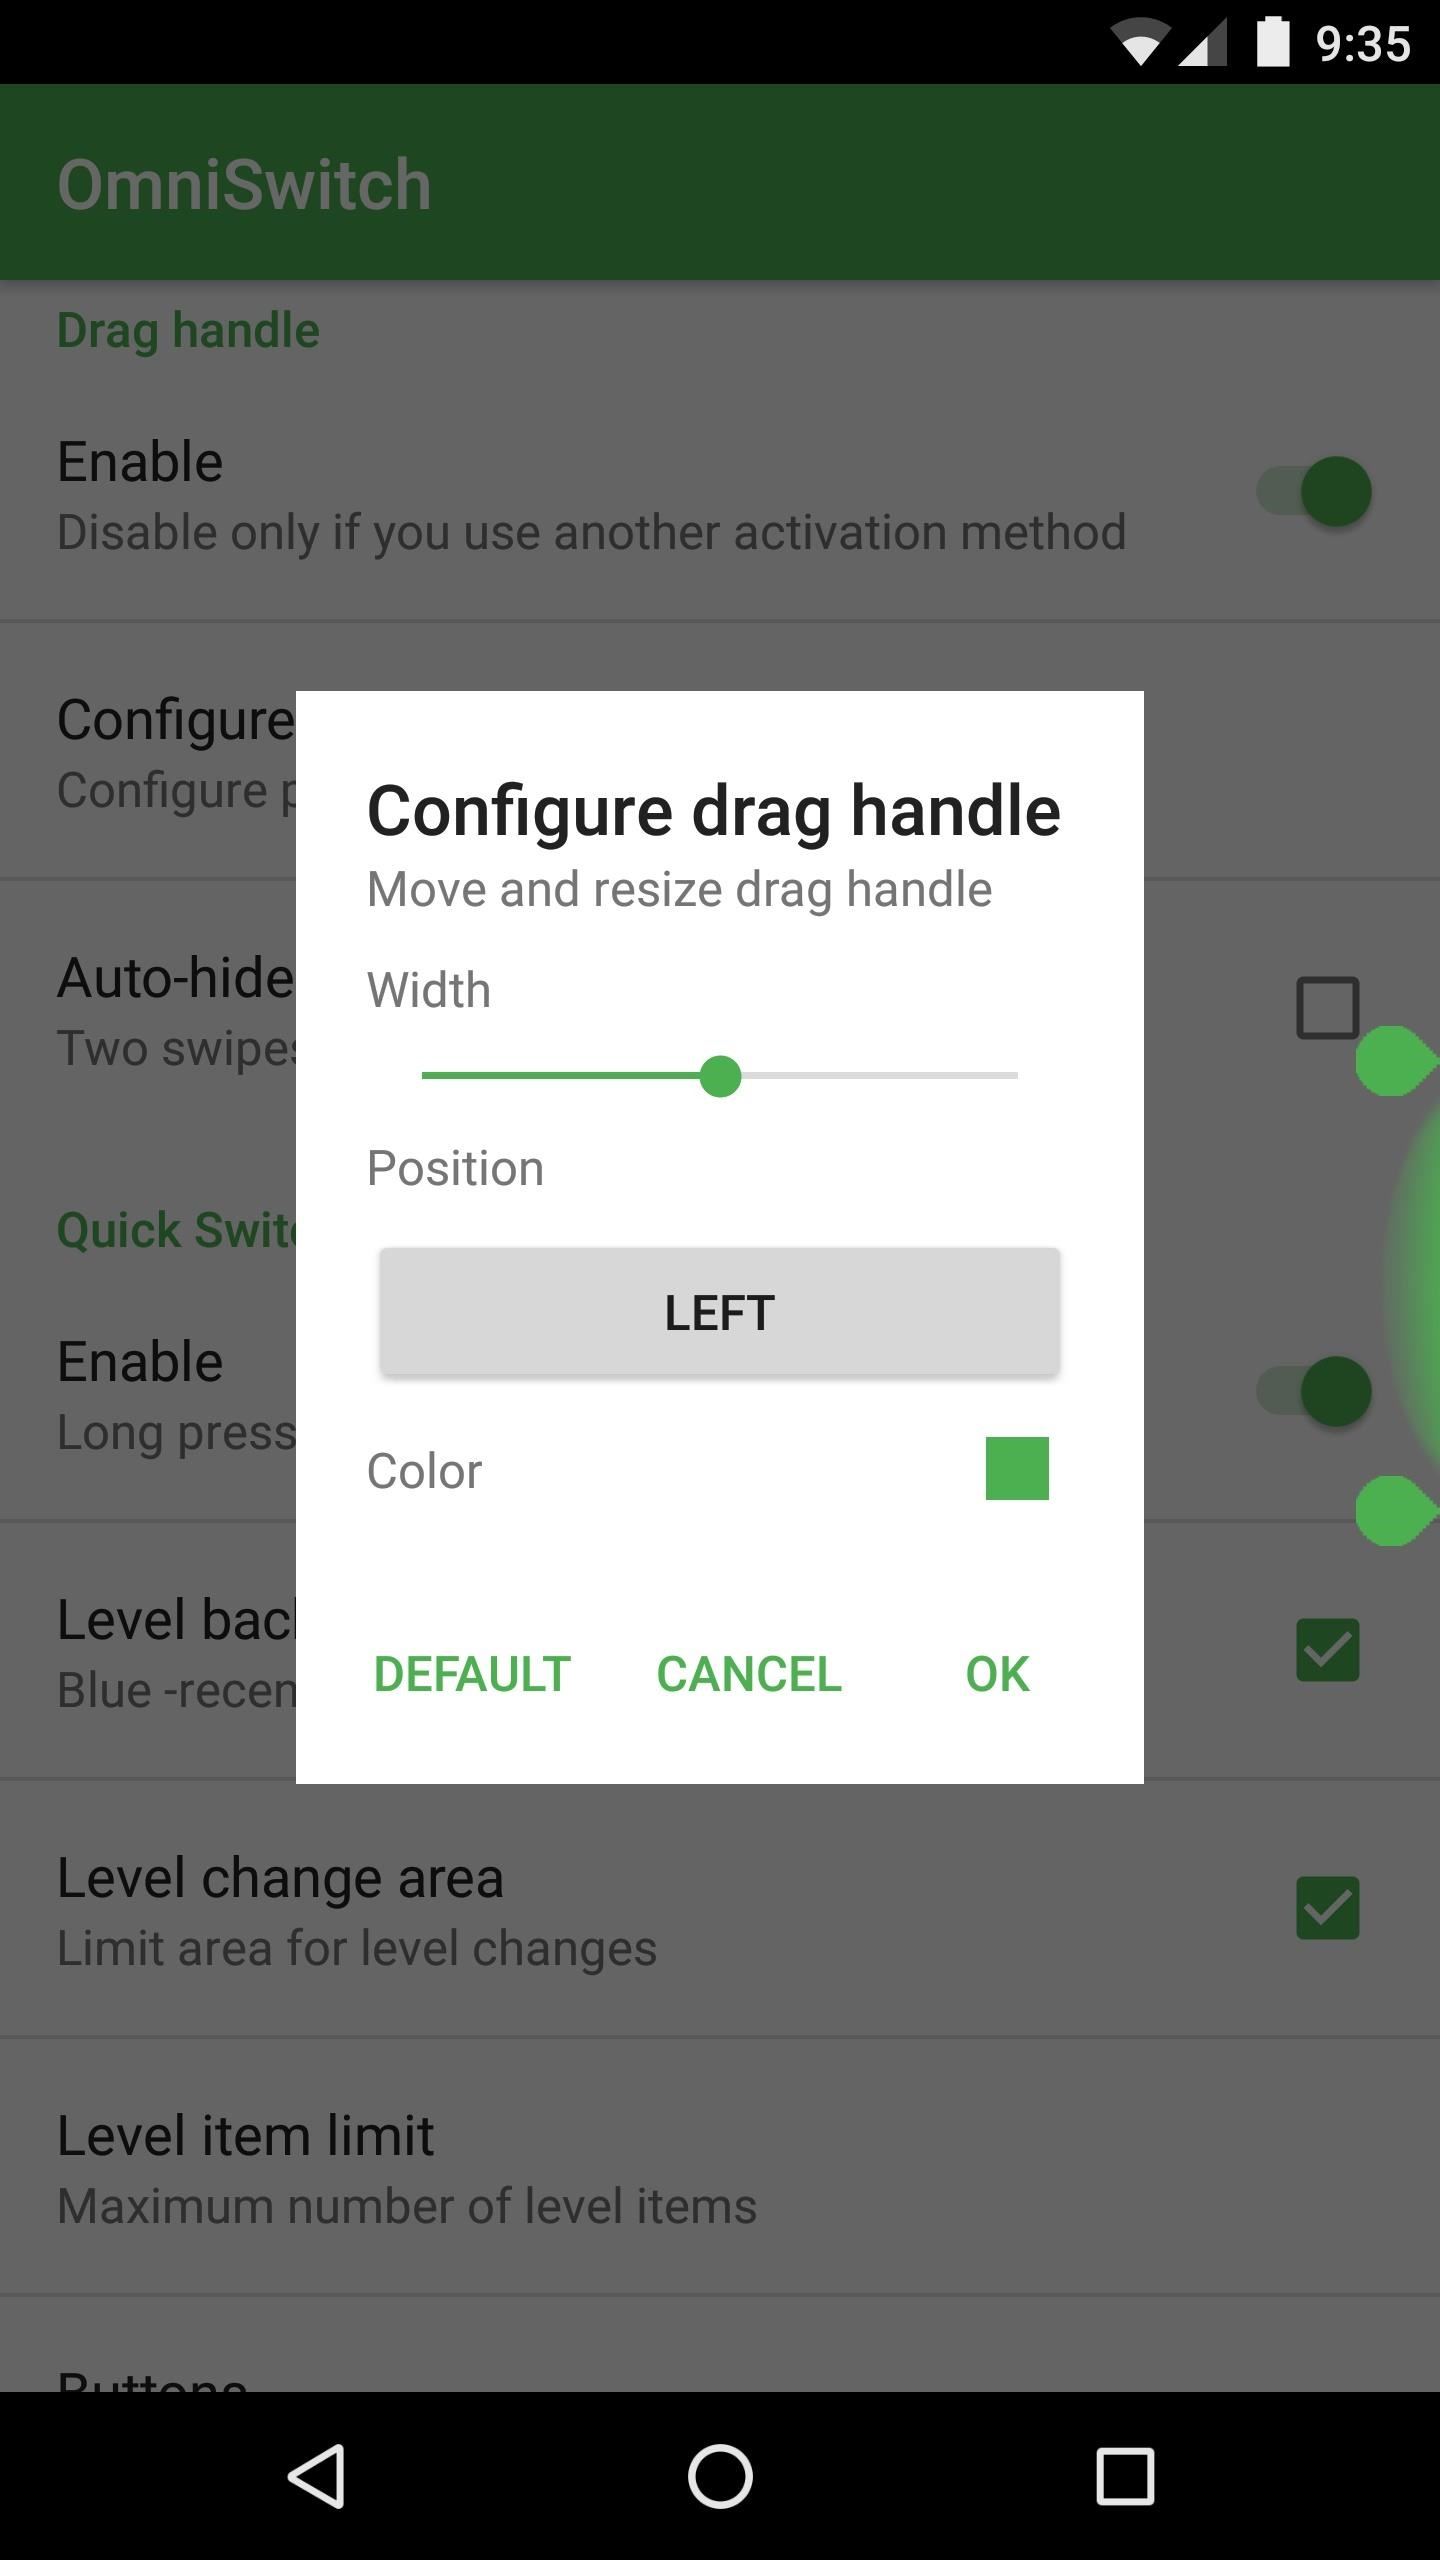
But there is one option in particular that you should be aware of. Tap the "Configure drag handle" entry, then you'll be able to adjust the size and position of the trigger area that will be used to launch OmniSwitch. From here, if you tap the "Color" option, you can use the "Transparency" slider on the following menu to make the OmniSwitch trigger area completely invisible.
Step 4: Get a Better Multitasking Experience
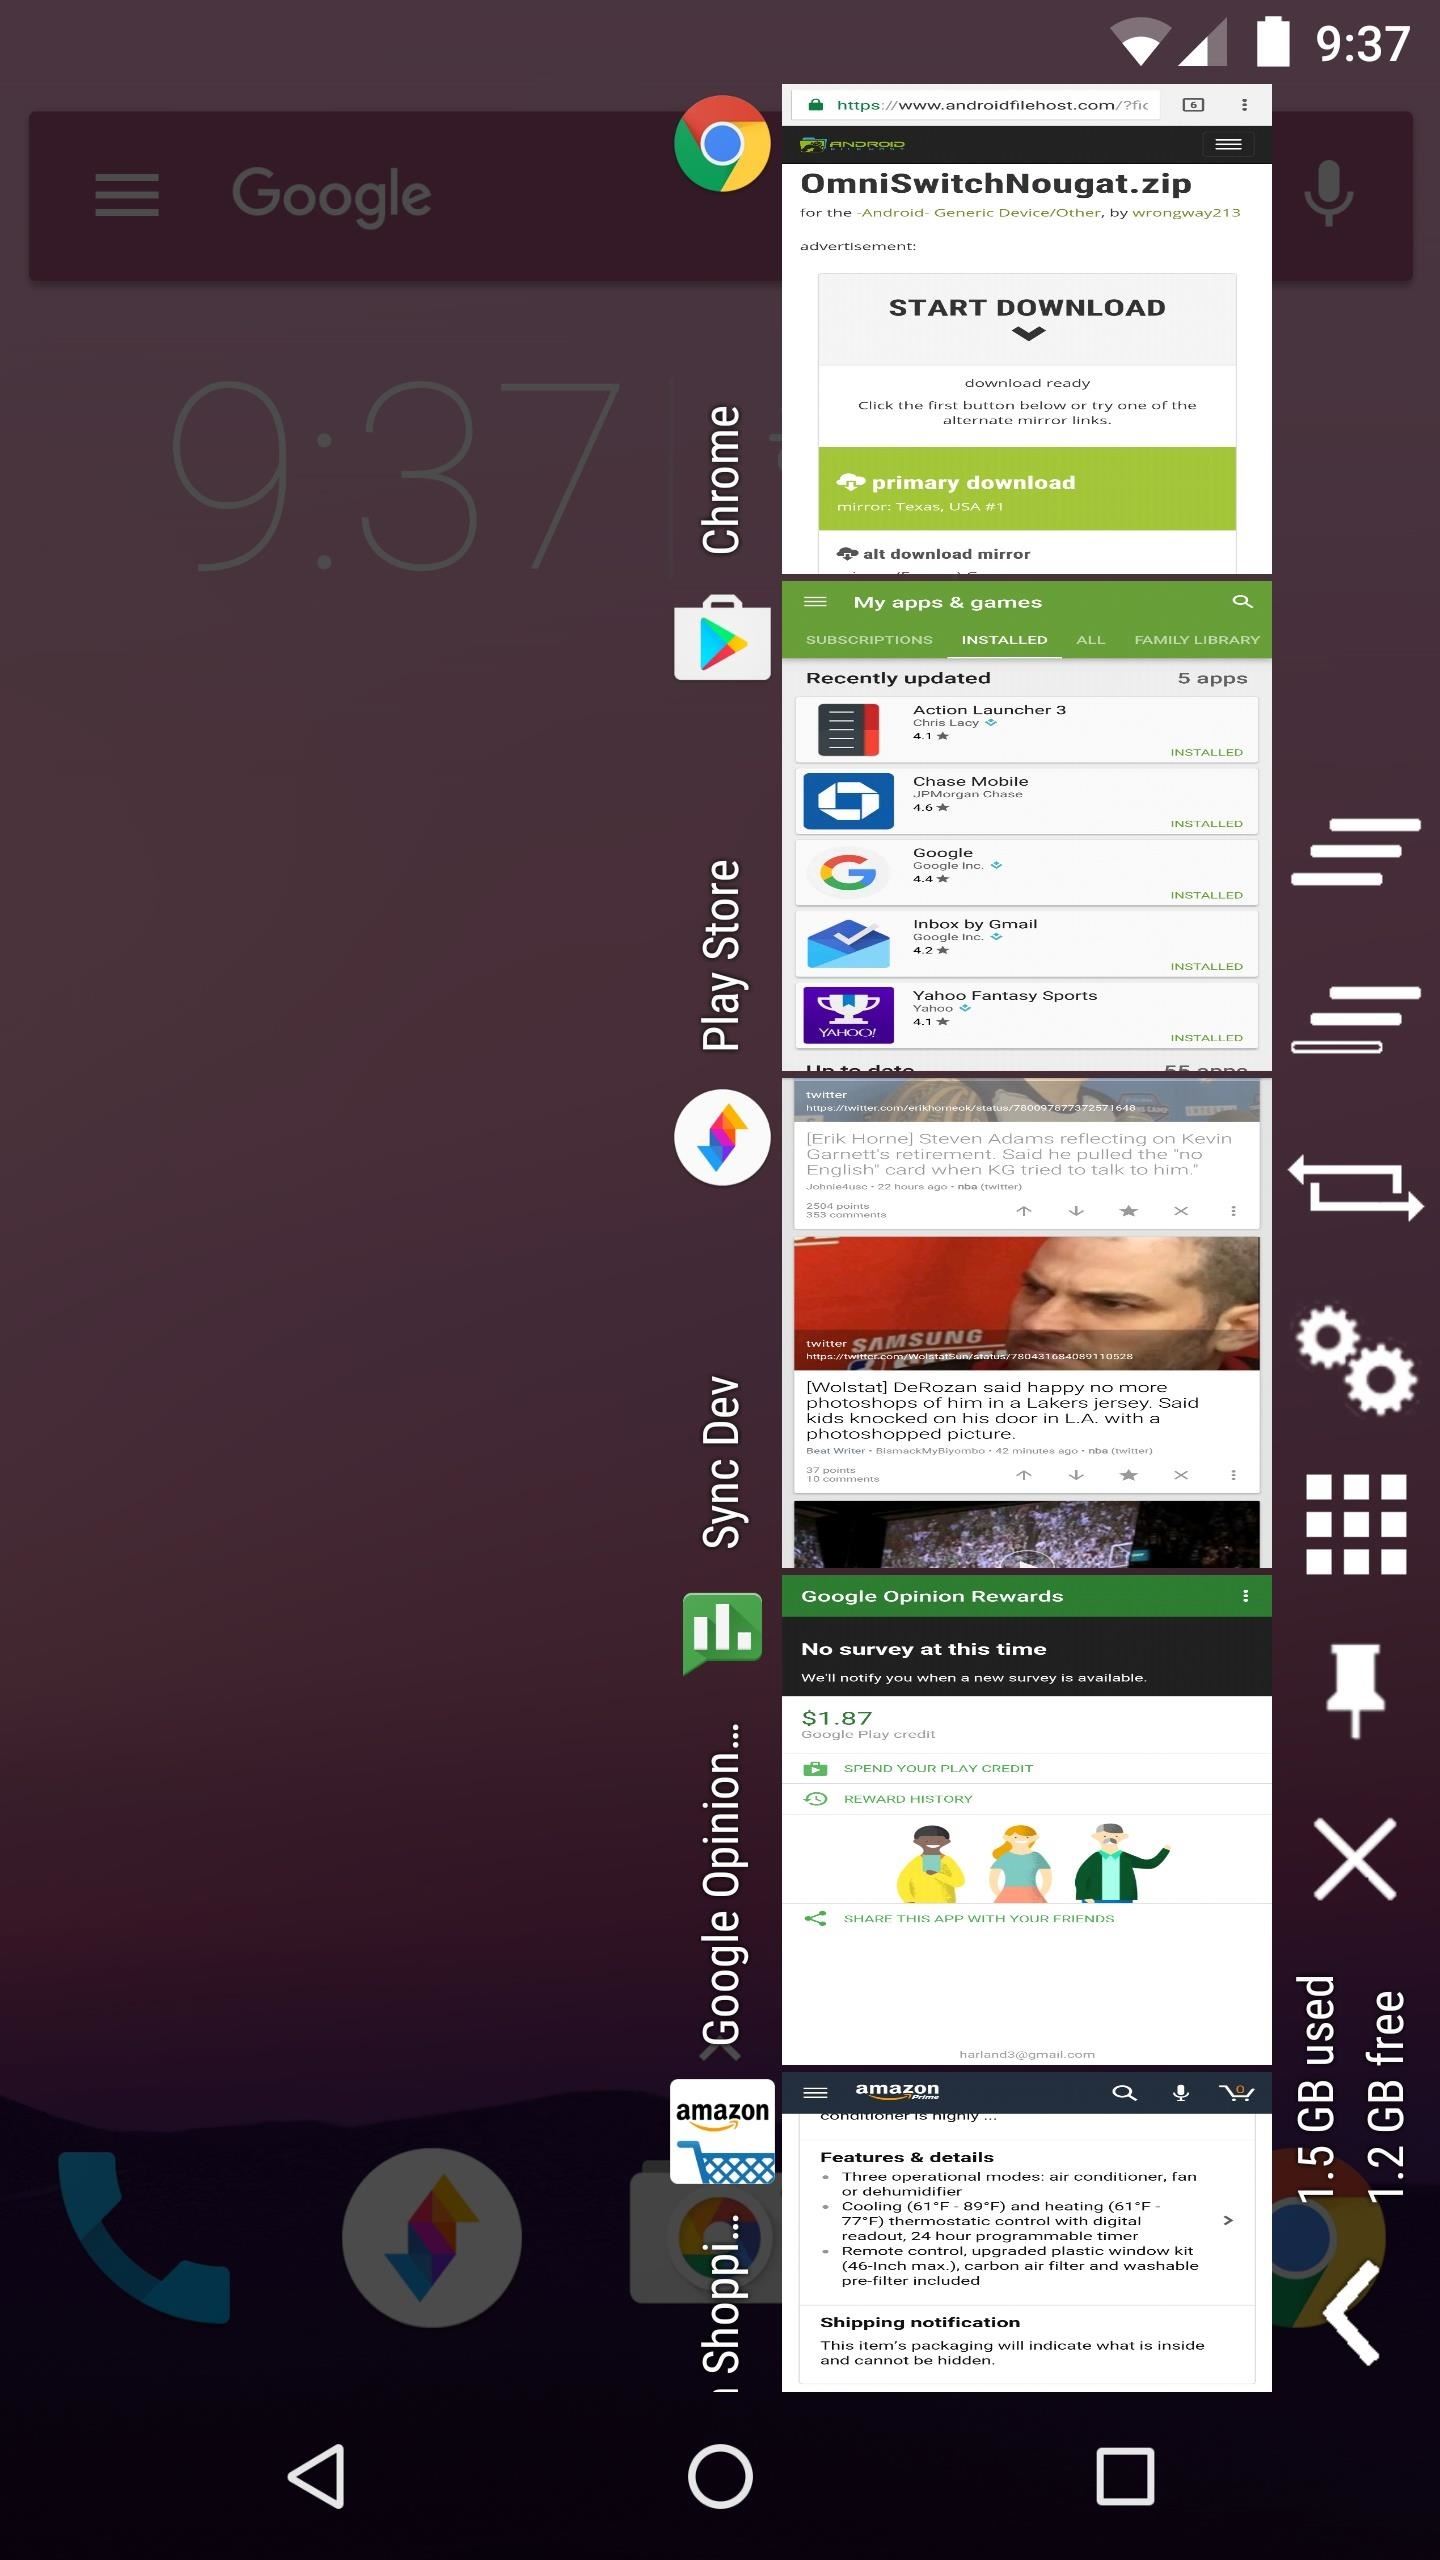
Once you've got everything set up to your liking, using OmniSwitch is an awesome experience. To start, simply swipe in from the trigger area on the side of your screen, then you'll see the multitasking UI.
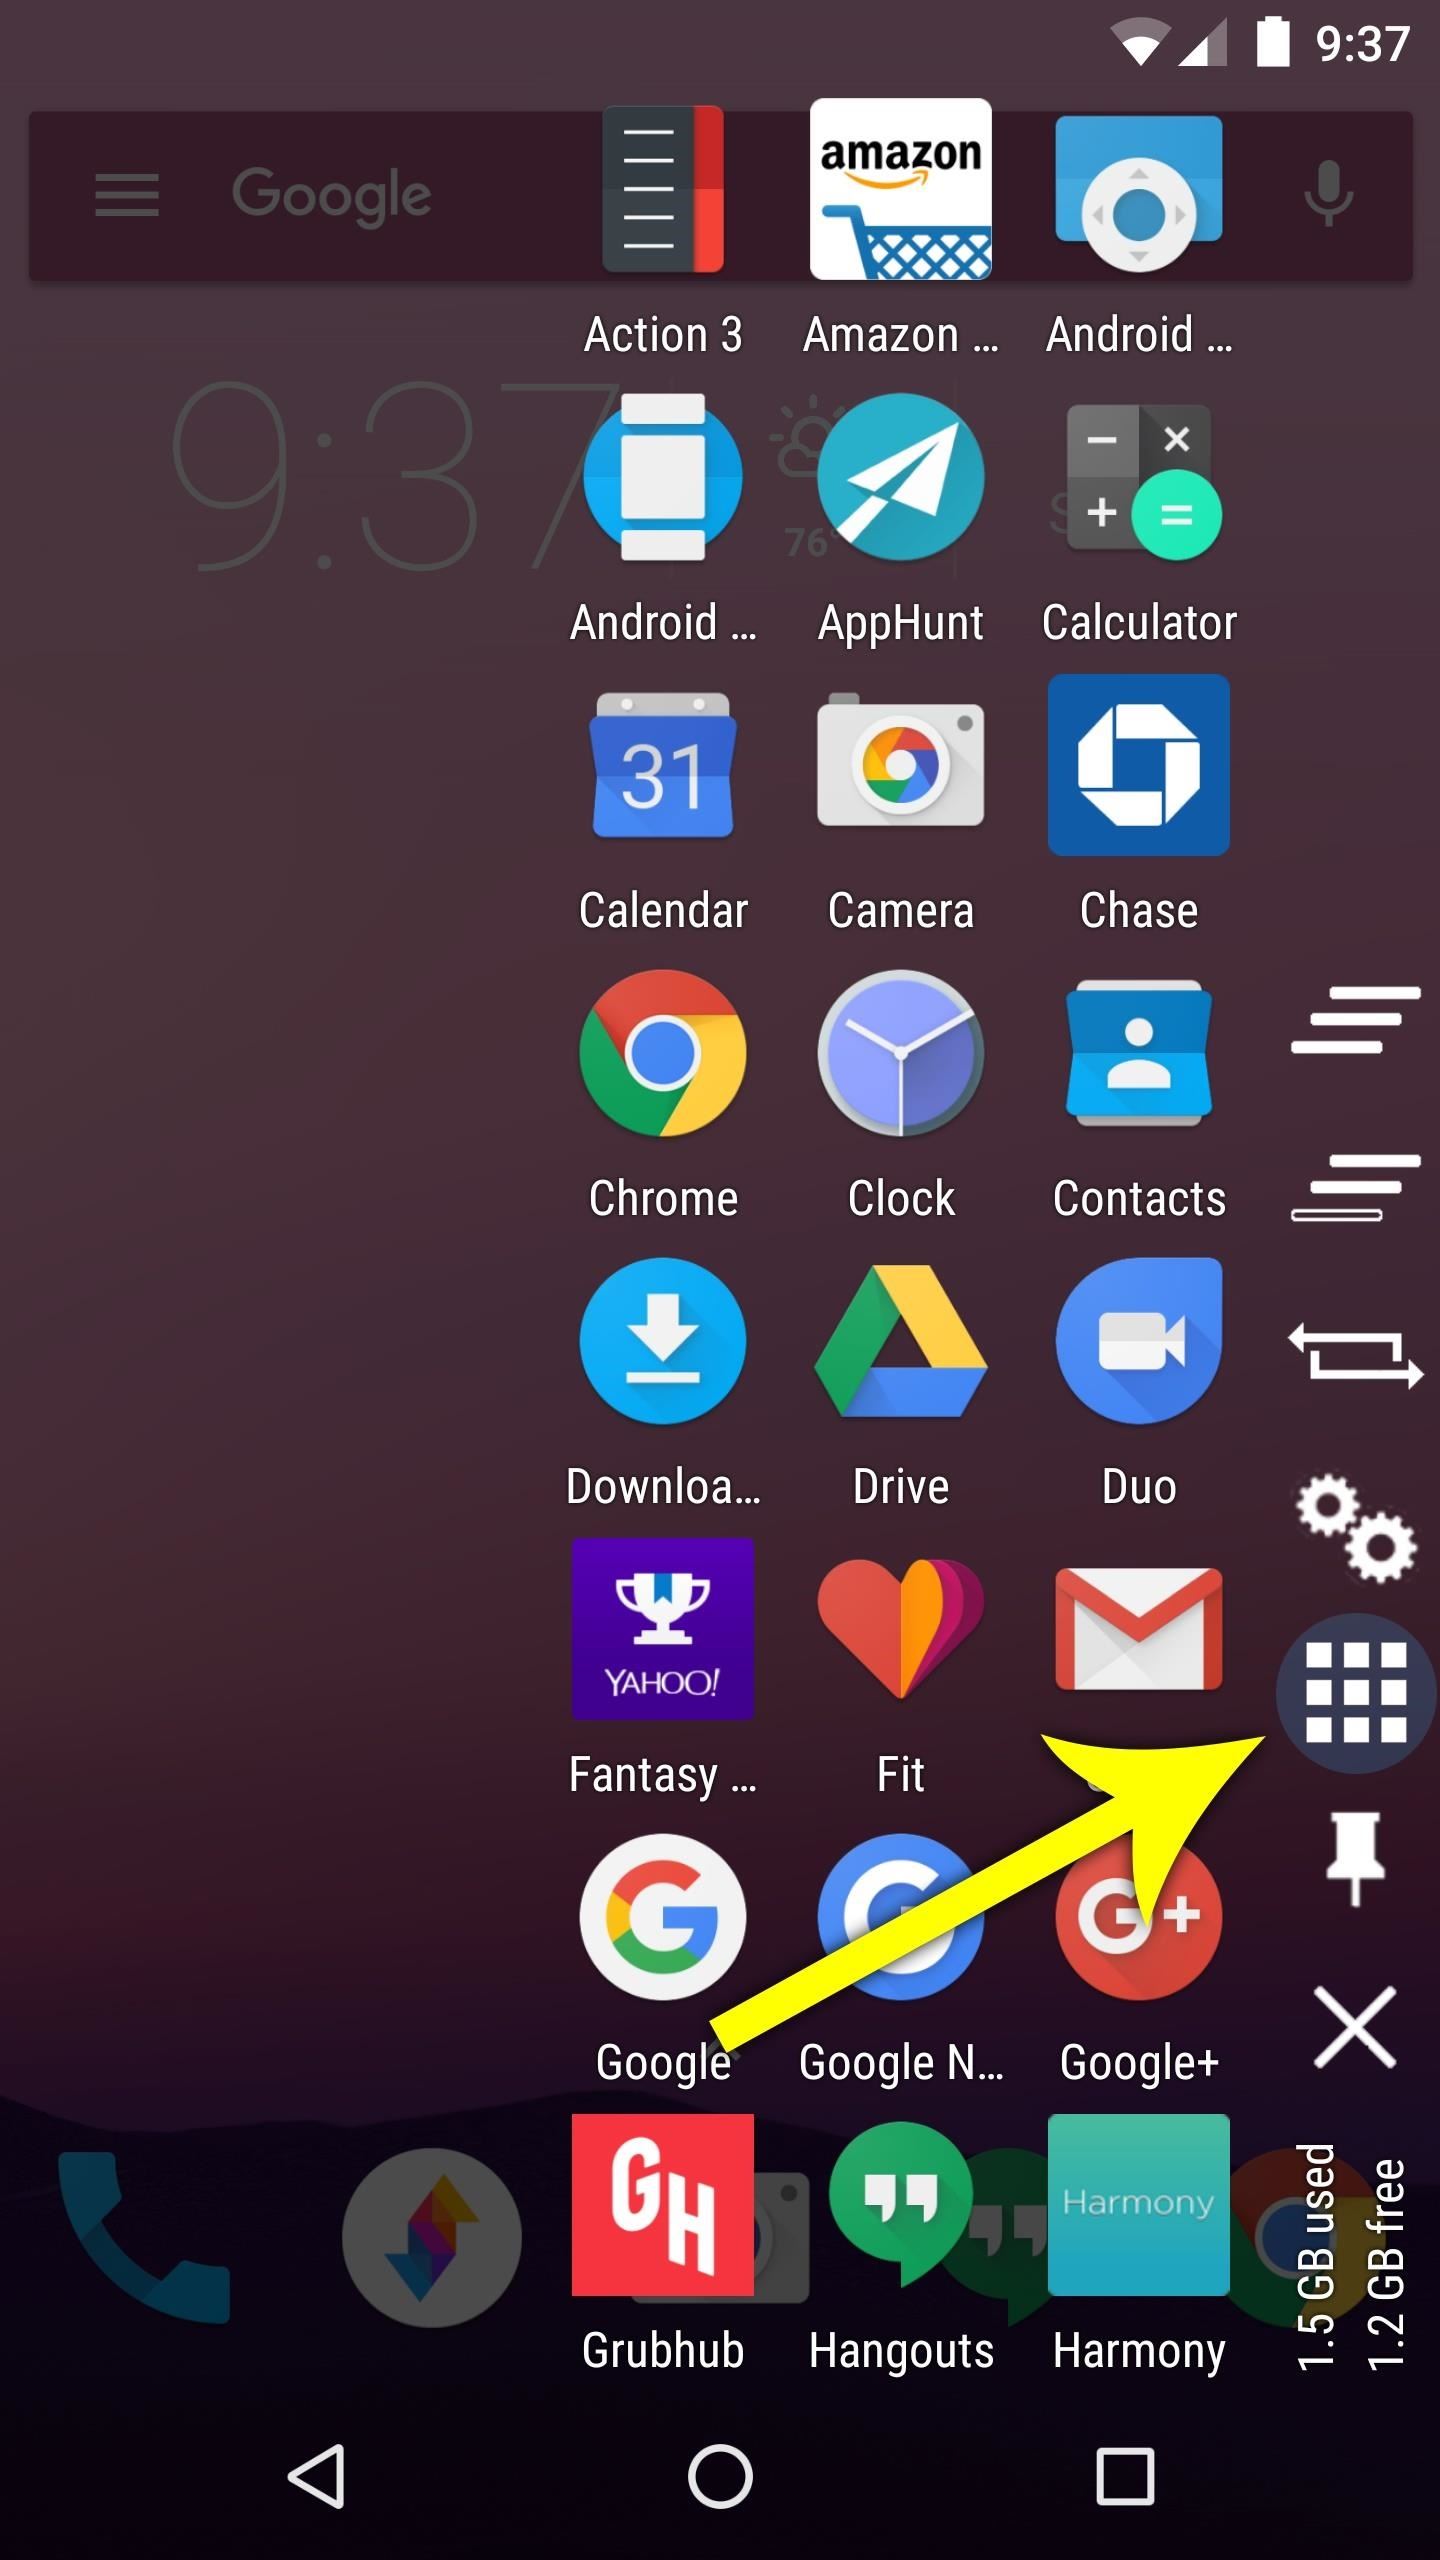
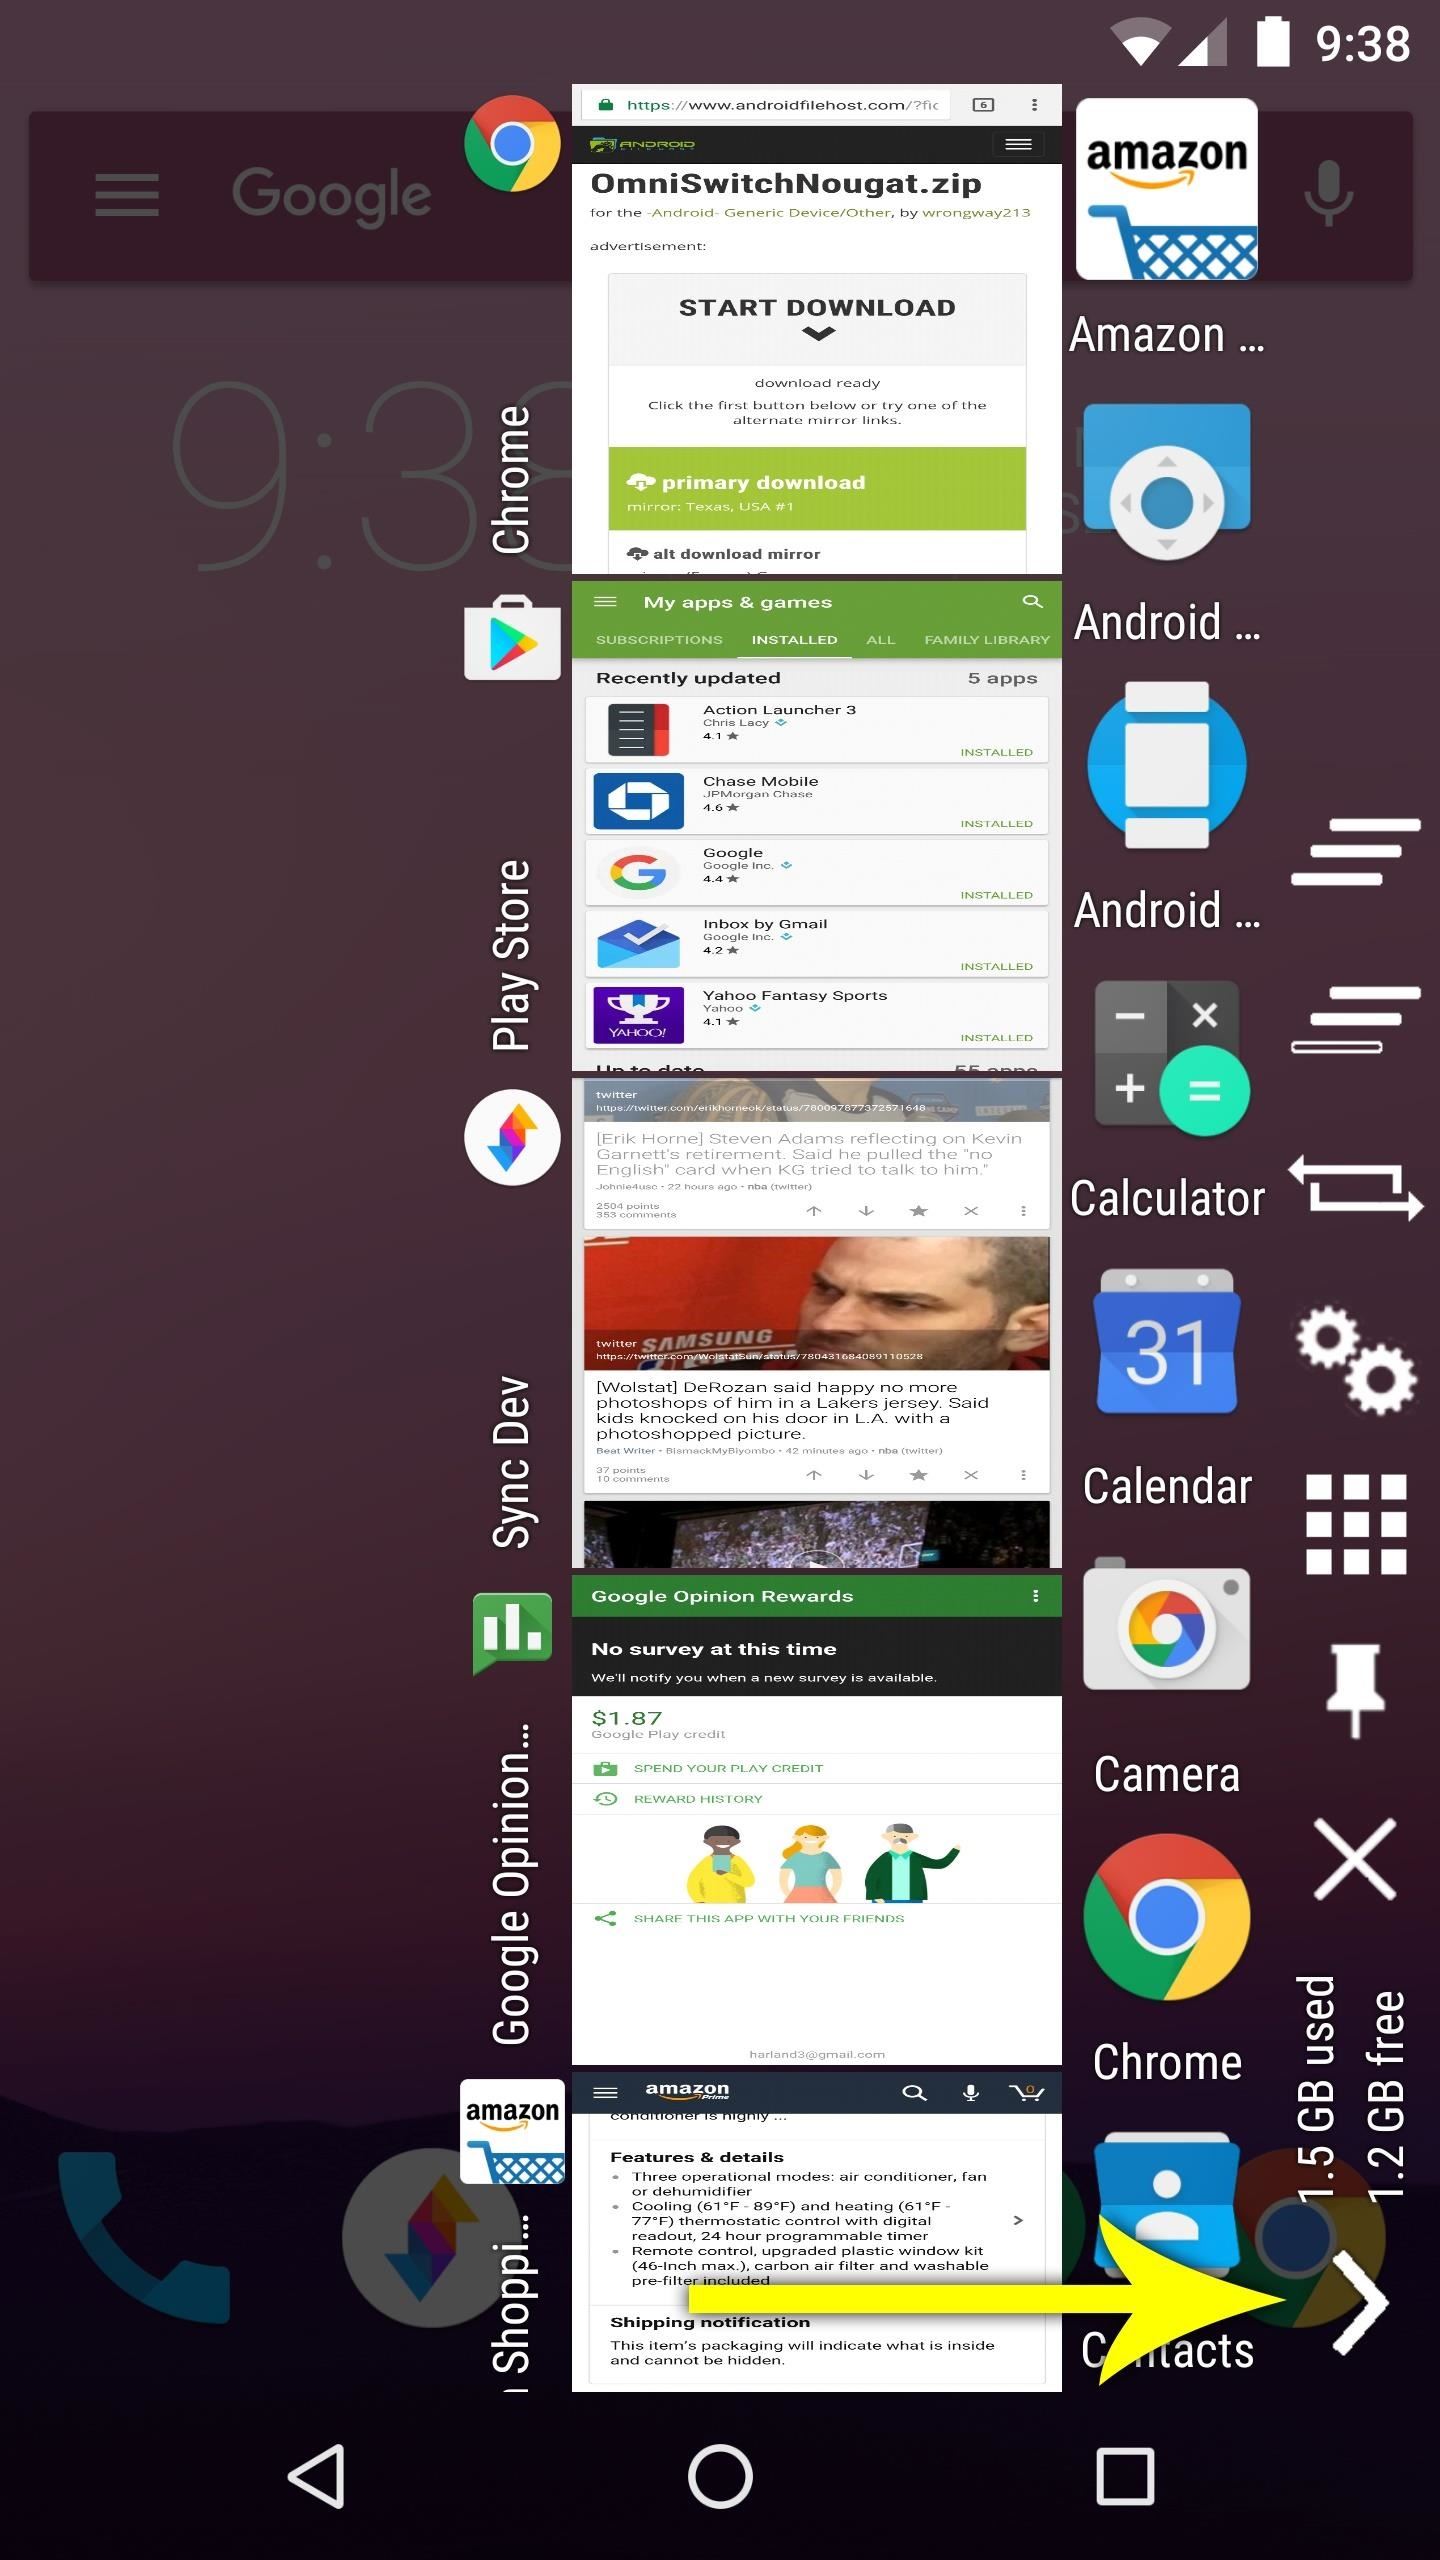
From here, you can flip back and forth between your recent apps, and you can swipe entries away to dismiss them. You'll also notice quick links to common functions, and a grid icon that displays all of your installed apps when tapped. Then, if you opted to add any favorite apps to OmniSwitch, you can access those by tapping the right arrow towards the bottom of this menu.
Fix for 'Restricted Mode'
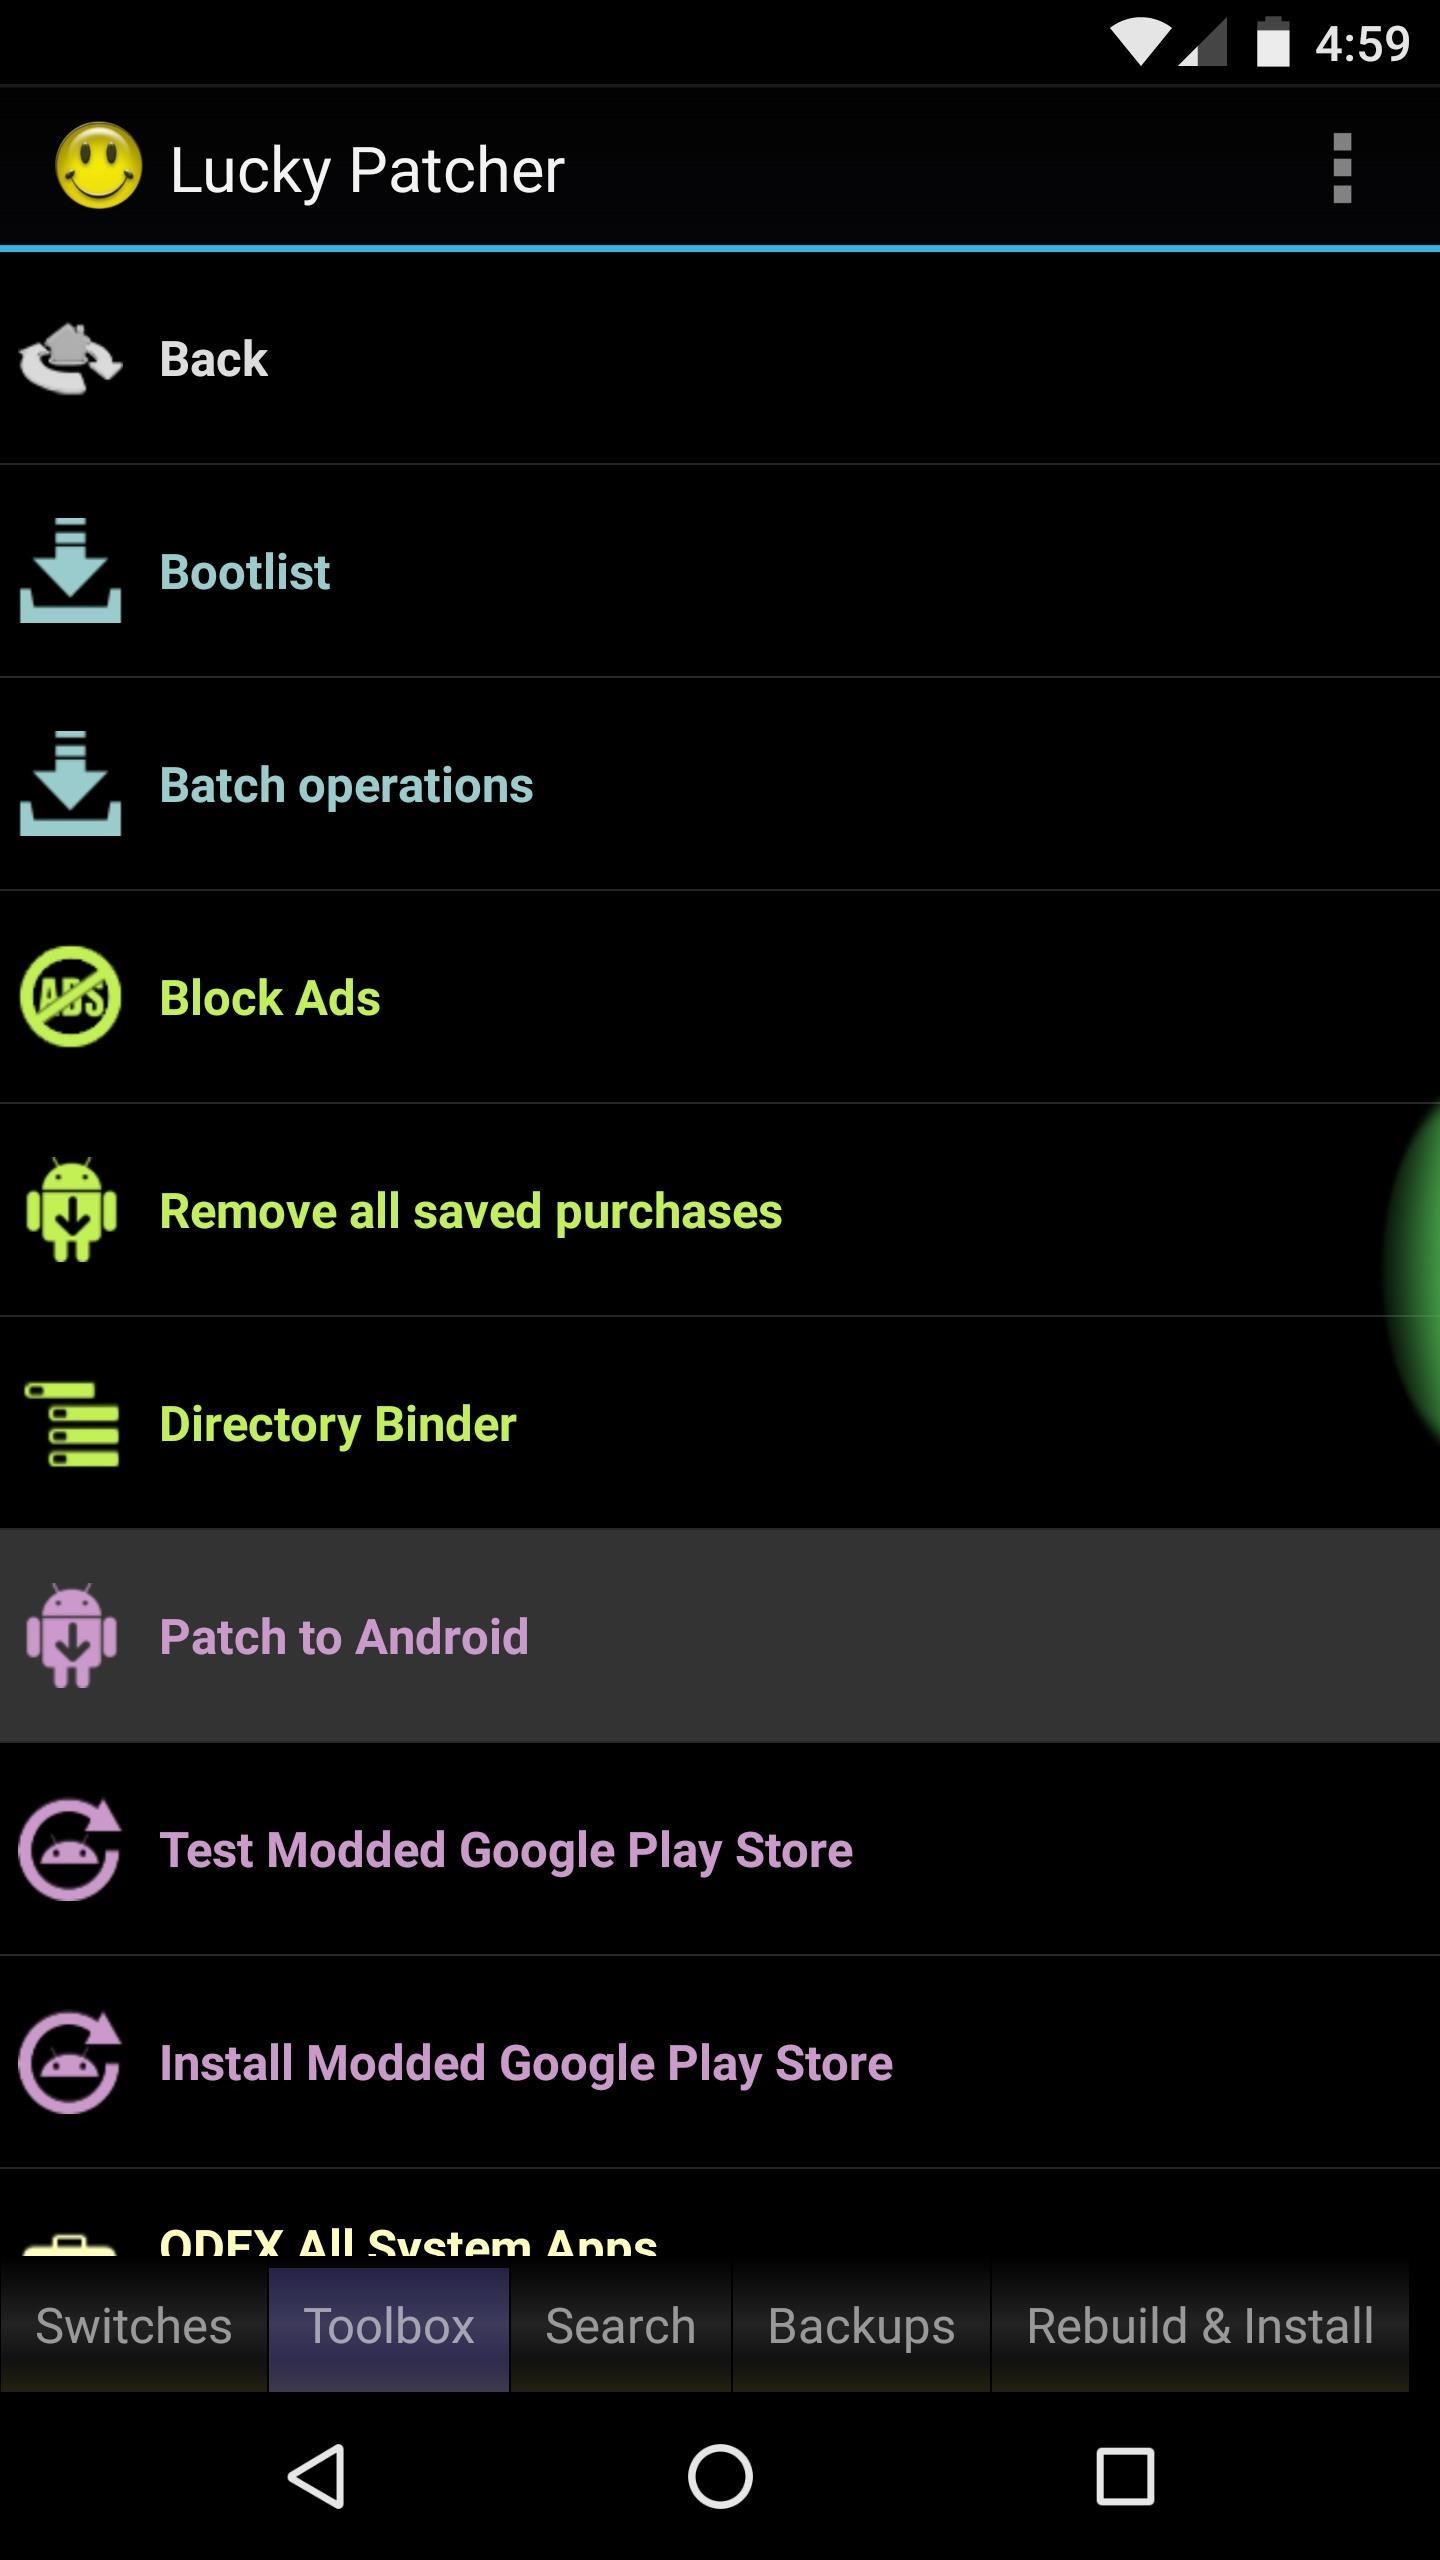
If you see the "OmniSwitch Restricted Mode" notification after enabling OmniSwitch, there's a fairly simple workaround. First, download and install Lucky Patcher from this link, then open the app and grant it Superuser access when prompted.
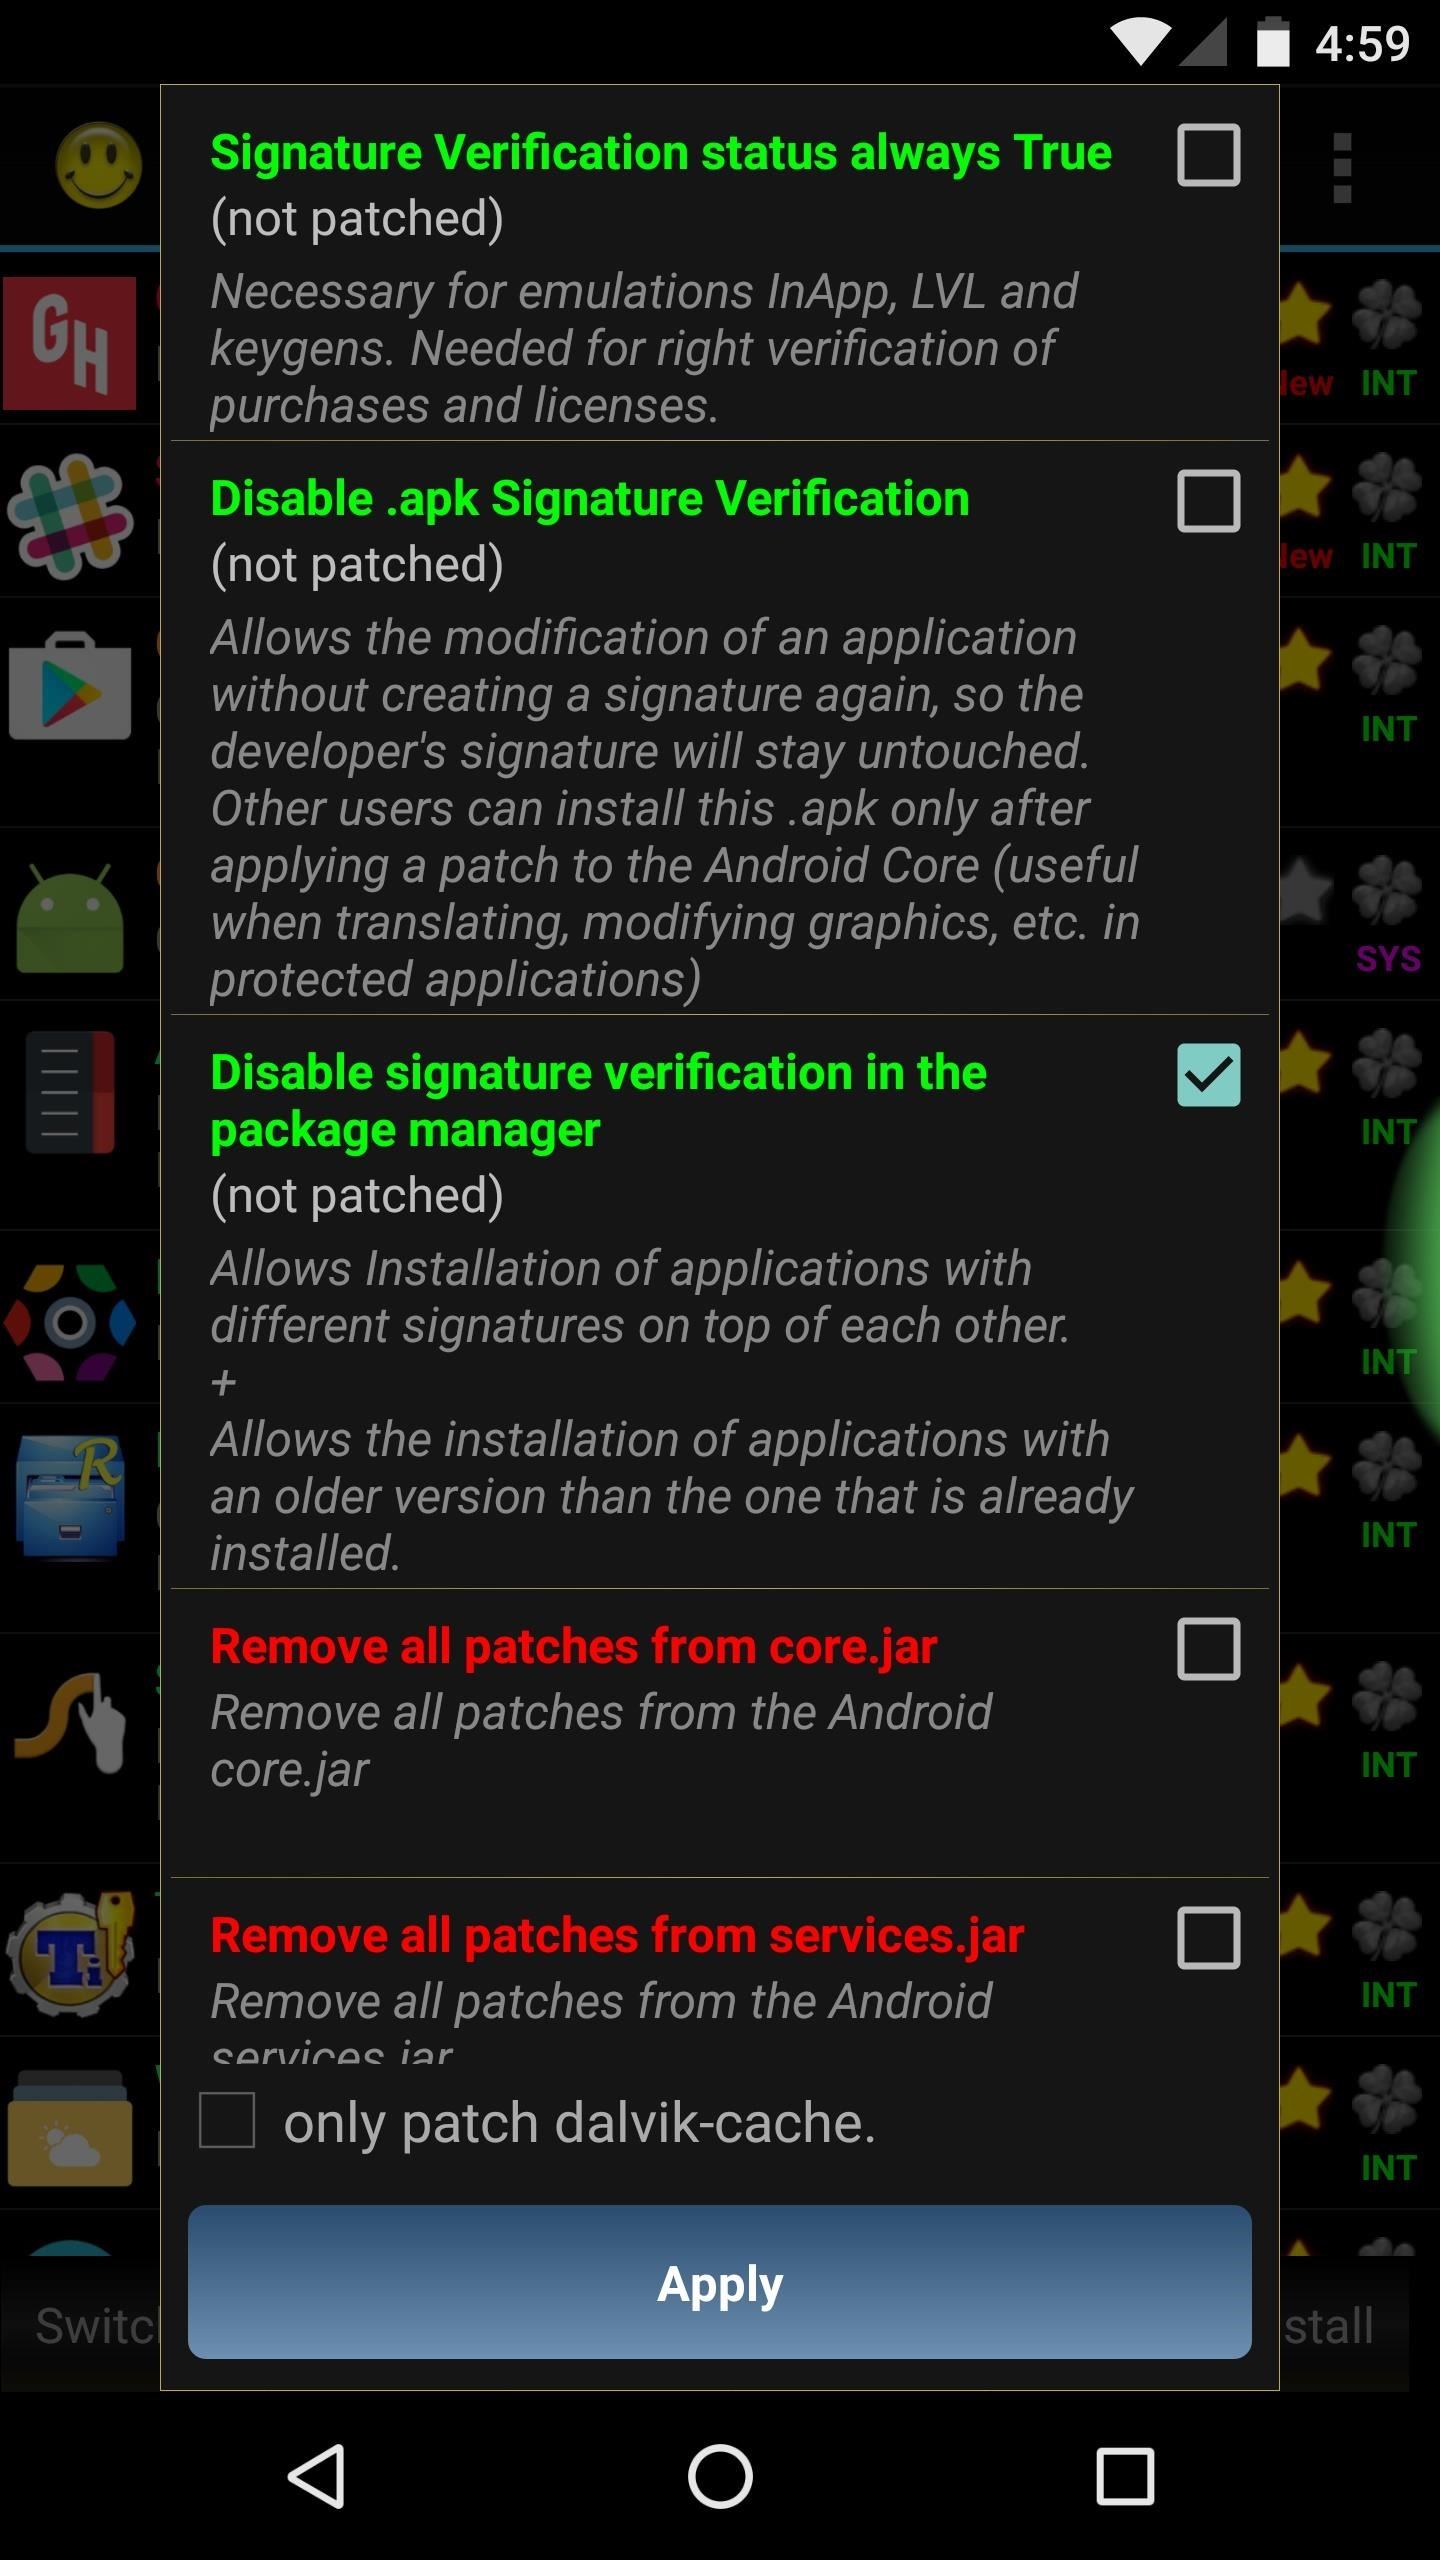
Next, head to the Toolbox tab at the bottom of the screen, then select the "Patch to Android" entry. From here, tick the box next to "Disable signature verification in the package manager," then hit "Apply." Your phone will reboot automatically, and when you get back up, OmniSwitch will no longer be running in restricted mode.
Who needs a wand? Unlock your magical powers and transform yourself from a Muggle into a Wizard or Witch just by using your Android phone. See how:


Be the First to Comment
Share Your Thoughts