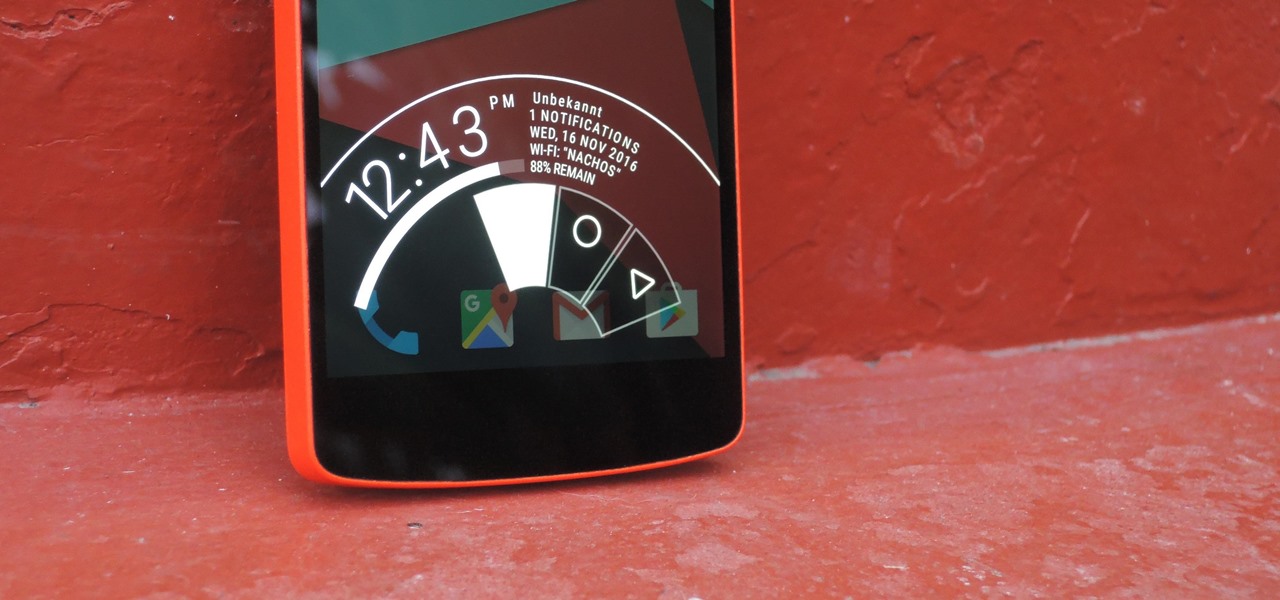

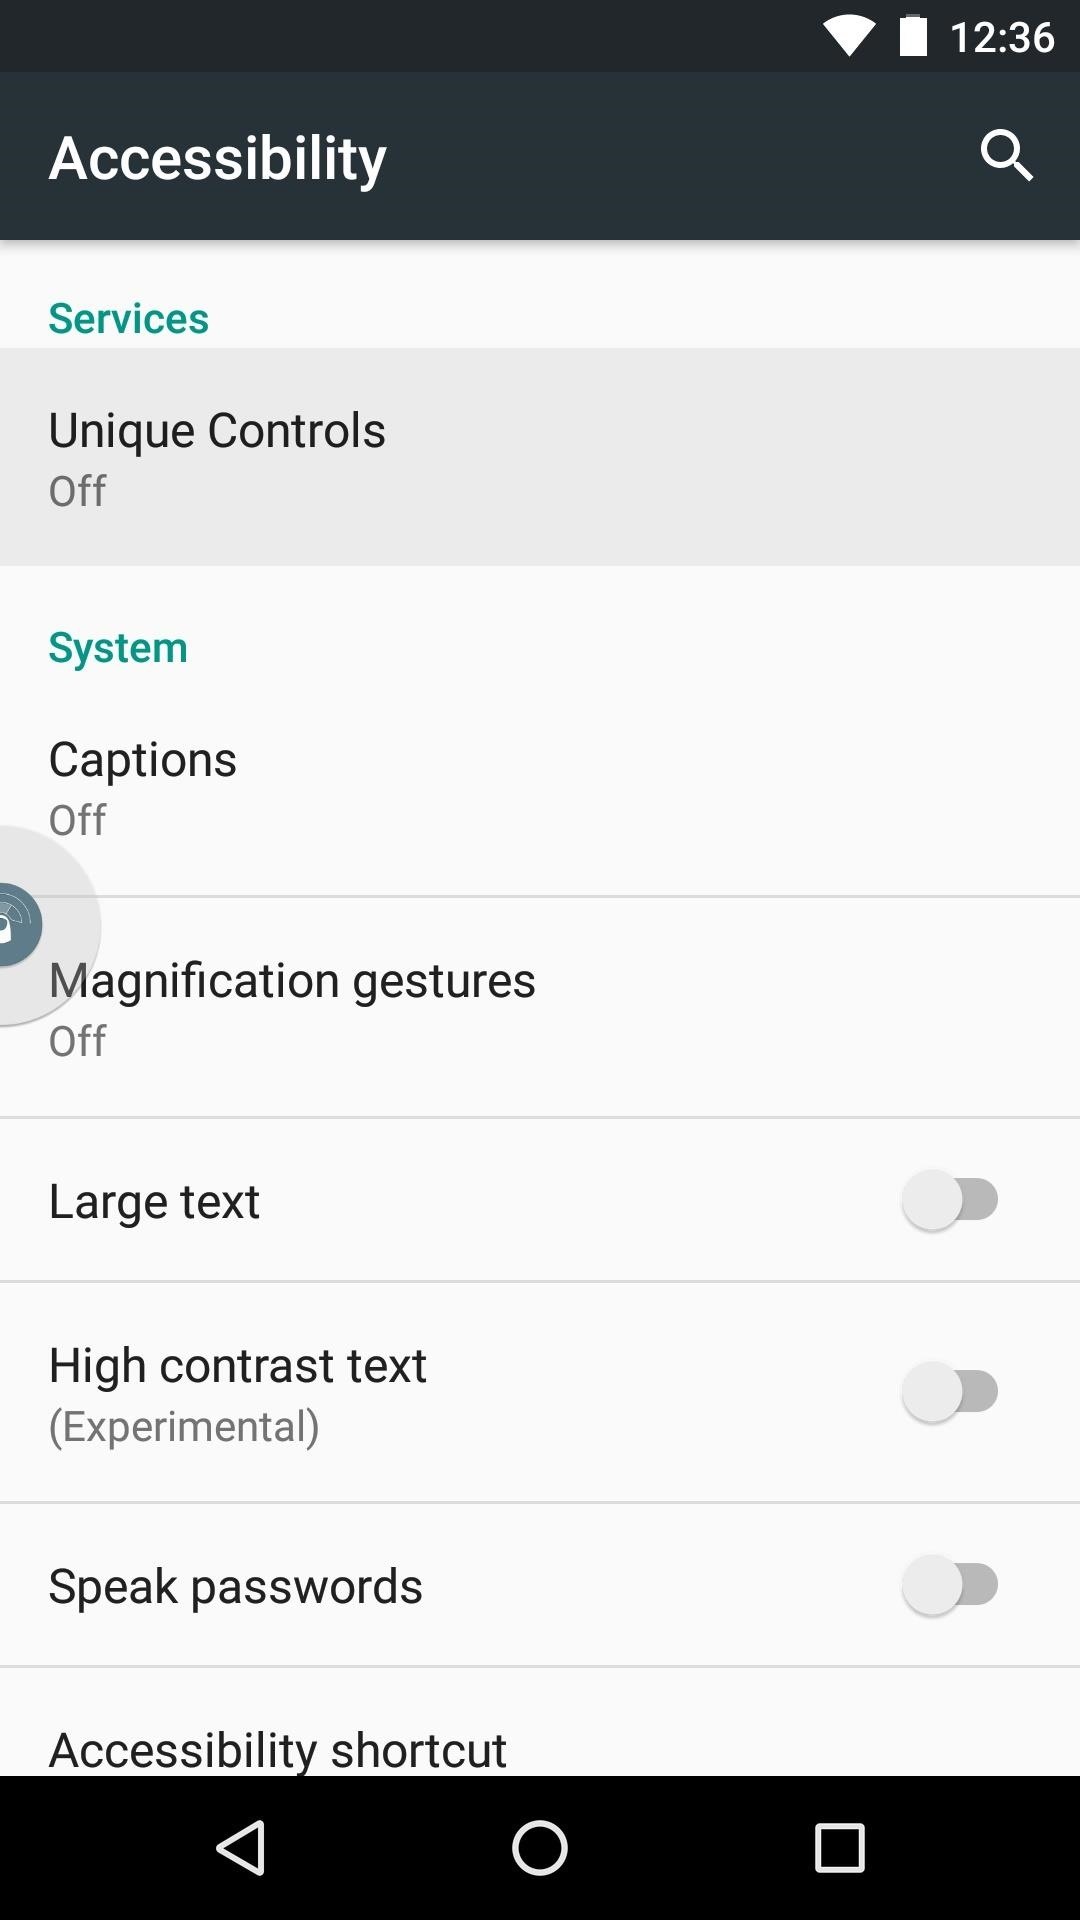
Paranoid Android has always been one of the most popular custom ROMs because of the inventive features its developers add to Android. Two of the biggest draws in particular have to be the "Halo" notification bubble, and the "Pie" navigation buttons, which can both fundamentally change the way you interact with your device.
Pie can replace your on-screen navigation buttons to reclaim some extra screen real estate, while its simple swipe gesture makes sure it's still easy to move throughout your phone's interface. Halo, on the other hand, replaces your notification system with Facebook Chathead-style bubbles that let you respond from any screen. And now, both of these awesome features can be added to almost any phone with either a simple app on Google Plays or an Xposed module, so I'll show you how it works below.
Requirements
If you plan on using the non-root version of the app on Google Play, just make sure you have Android 4.4 or higher installed. However, note that this version will not let you see floating windows with the Halo option. For that, you will need to also be rooted with the Xposed Framework installed and "Unknown sources" enabled.
Step 1: Install Unique Controls
To use the non-root version, simply install the Unique Controls app for free from the Google Play Store, then skip to Step 2. Below, I'll cover the process for installing the Xposed version, which will let you see floating windows with the Halo feature.
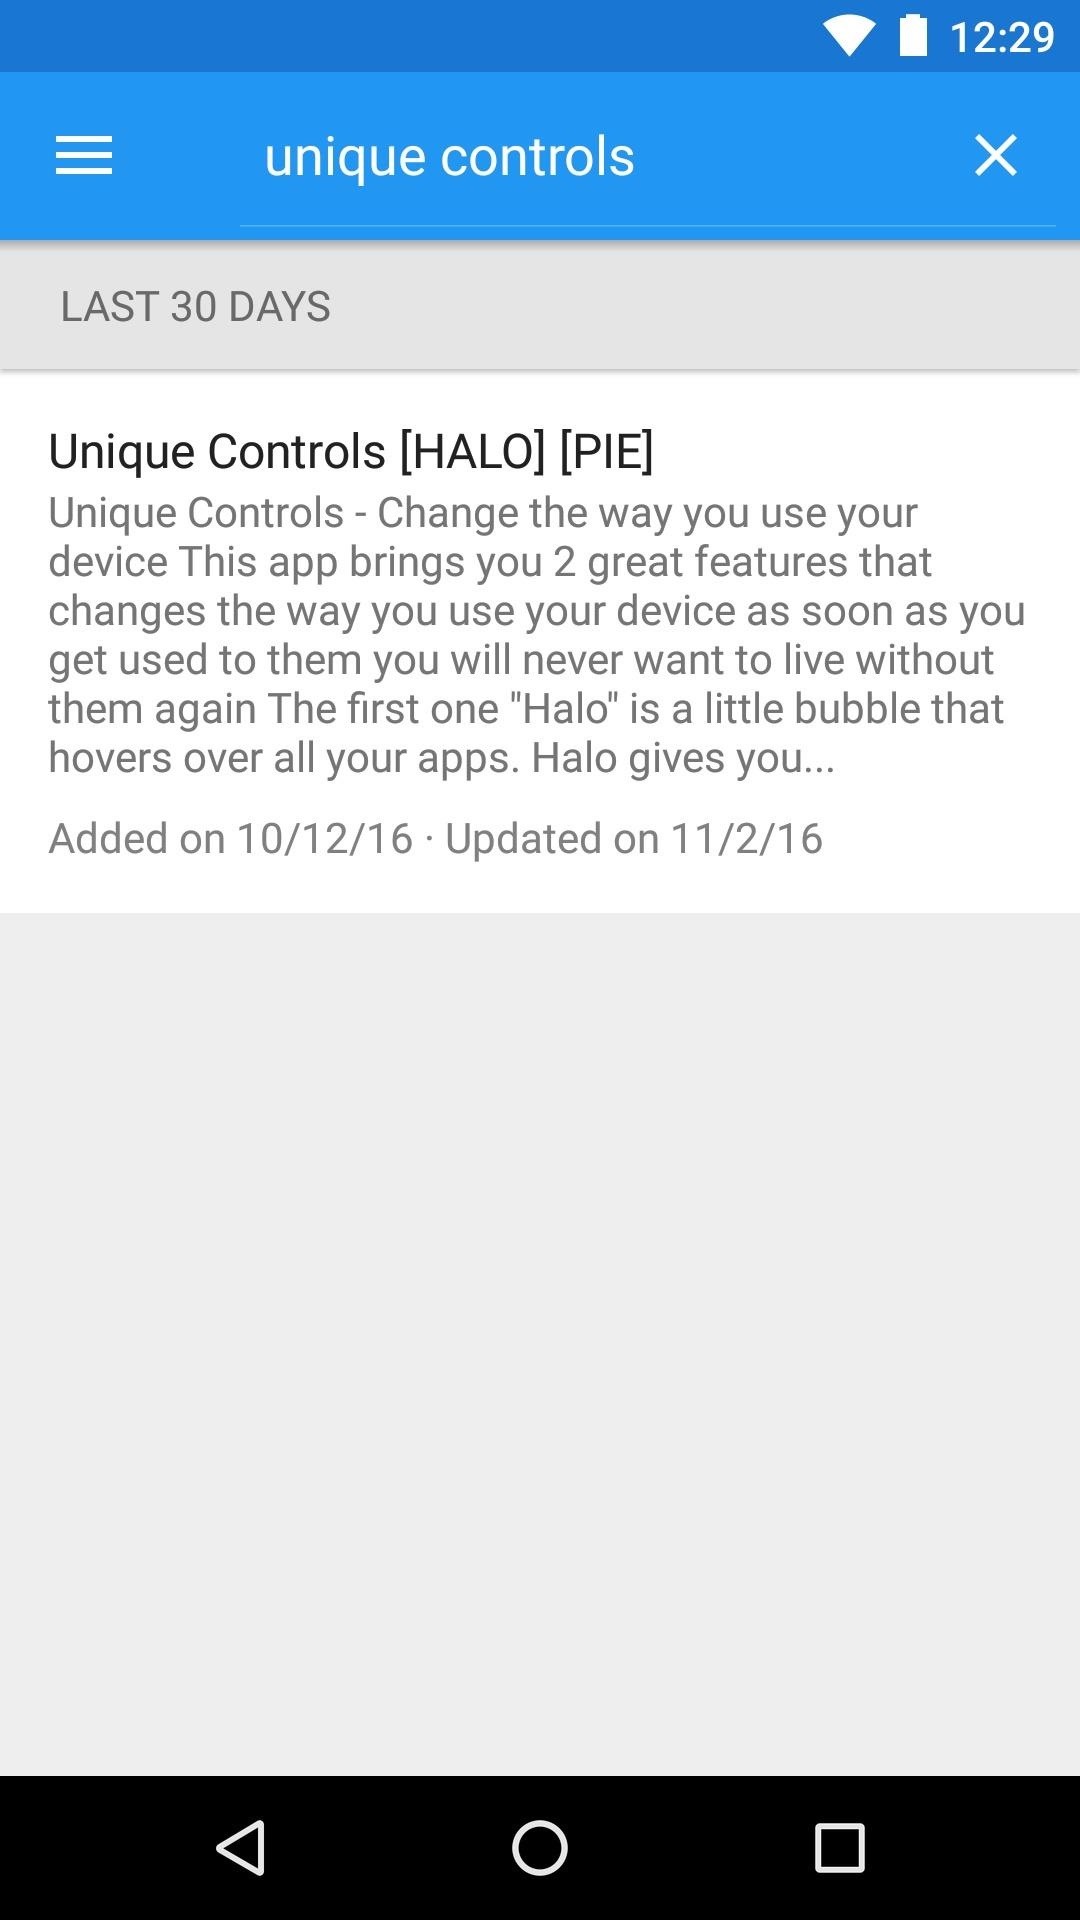
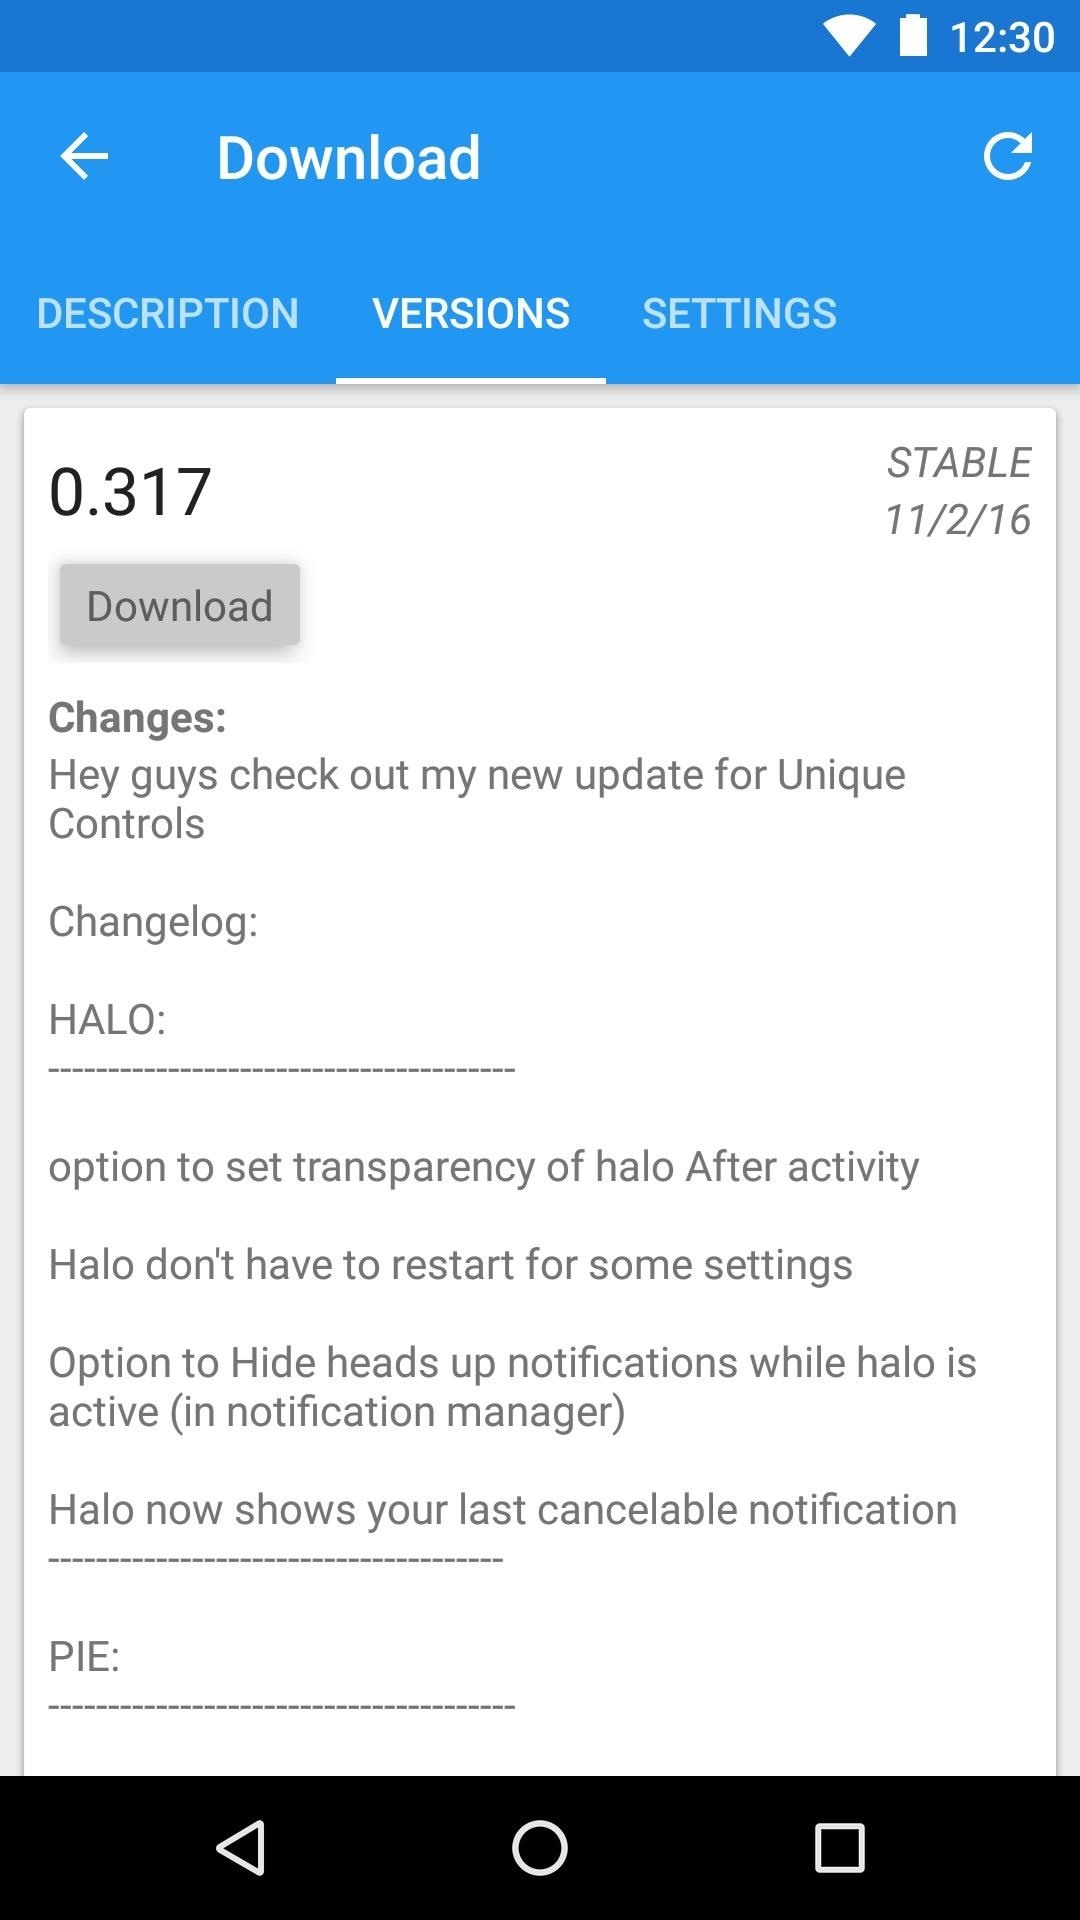
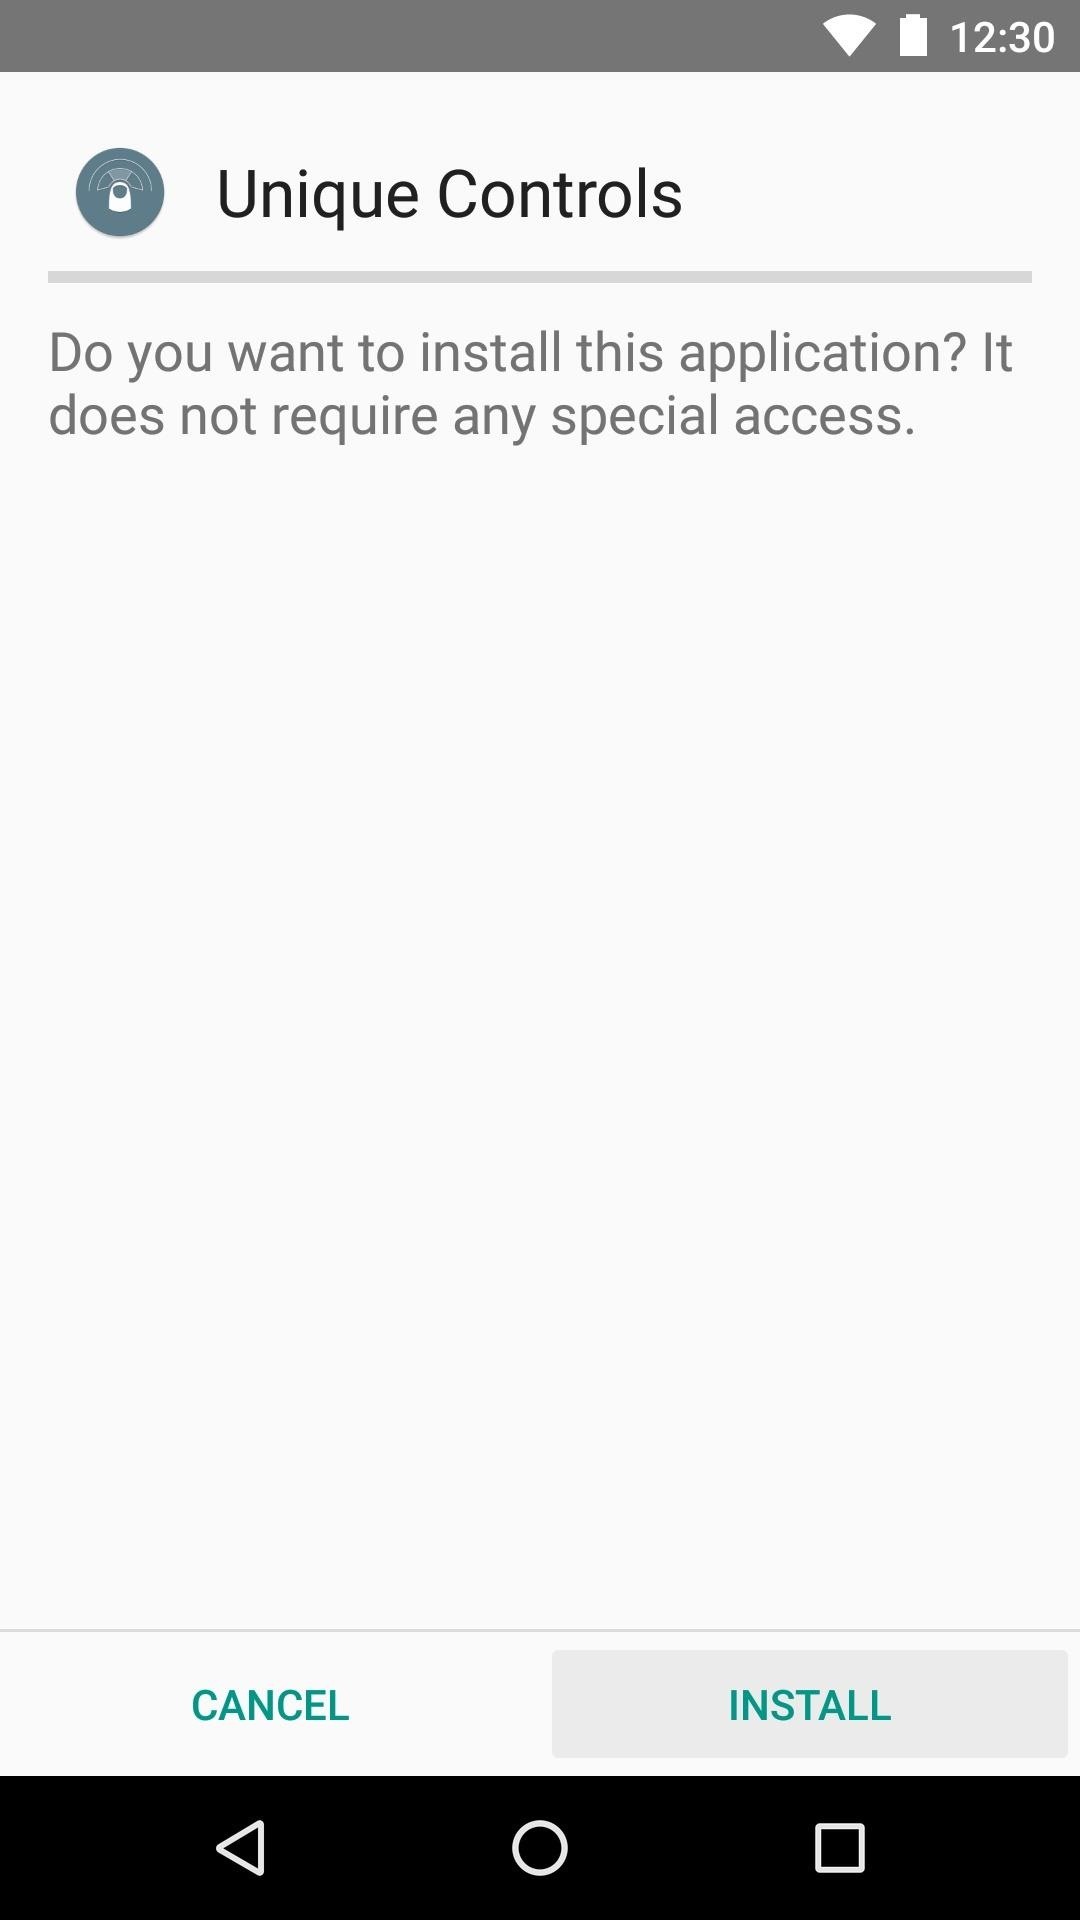
First up, head to the Download section in your Xposed Installer app and search for Unique Controls, then tap the top result. From here, swipe over to the Versions tab, then tap the "Download" button next to the most recent entry and press "Install" when prompted.
When you're done there, make sure to activate the module and reboot before moving to the next step.
Step 2: Enable Permissions
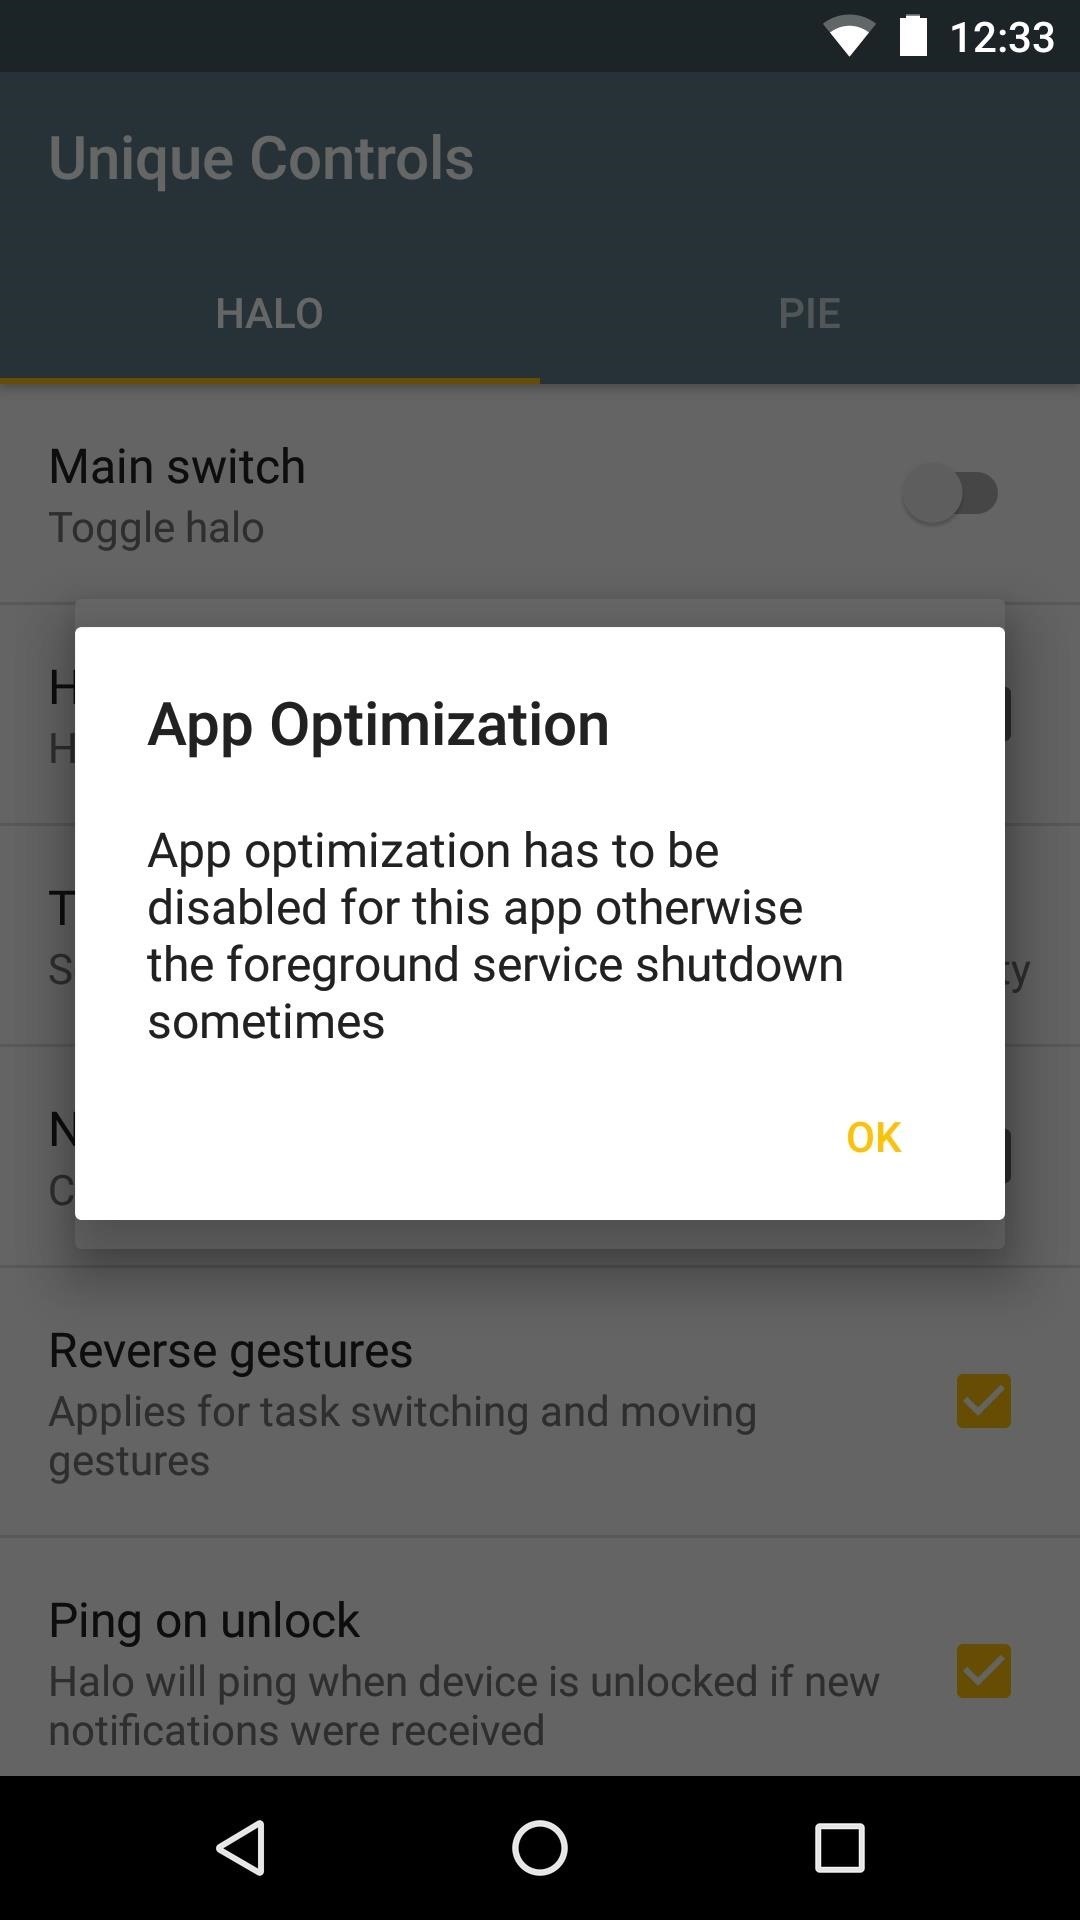
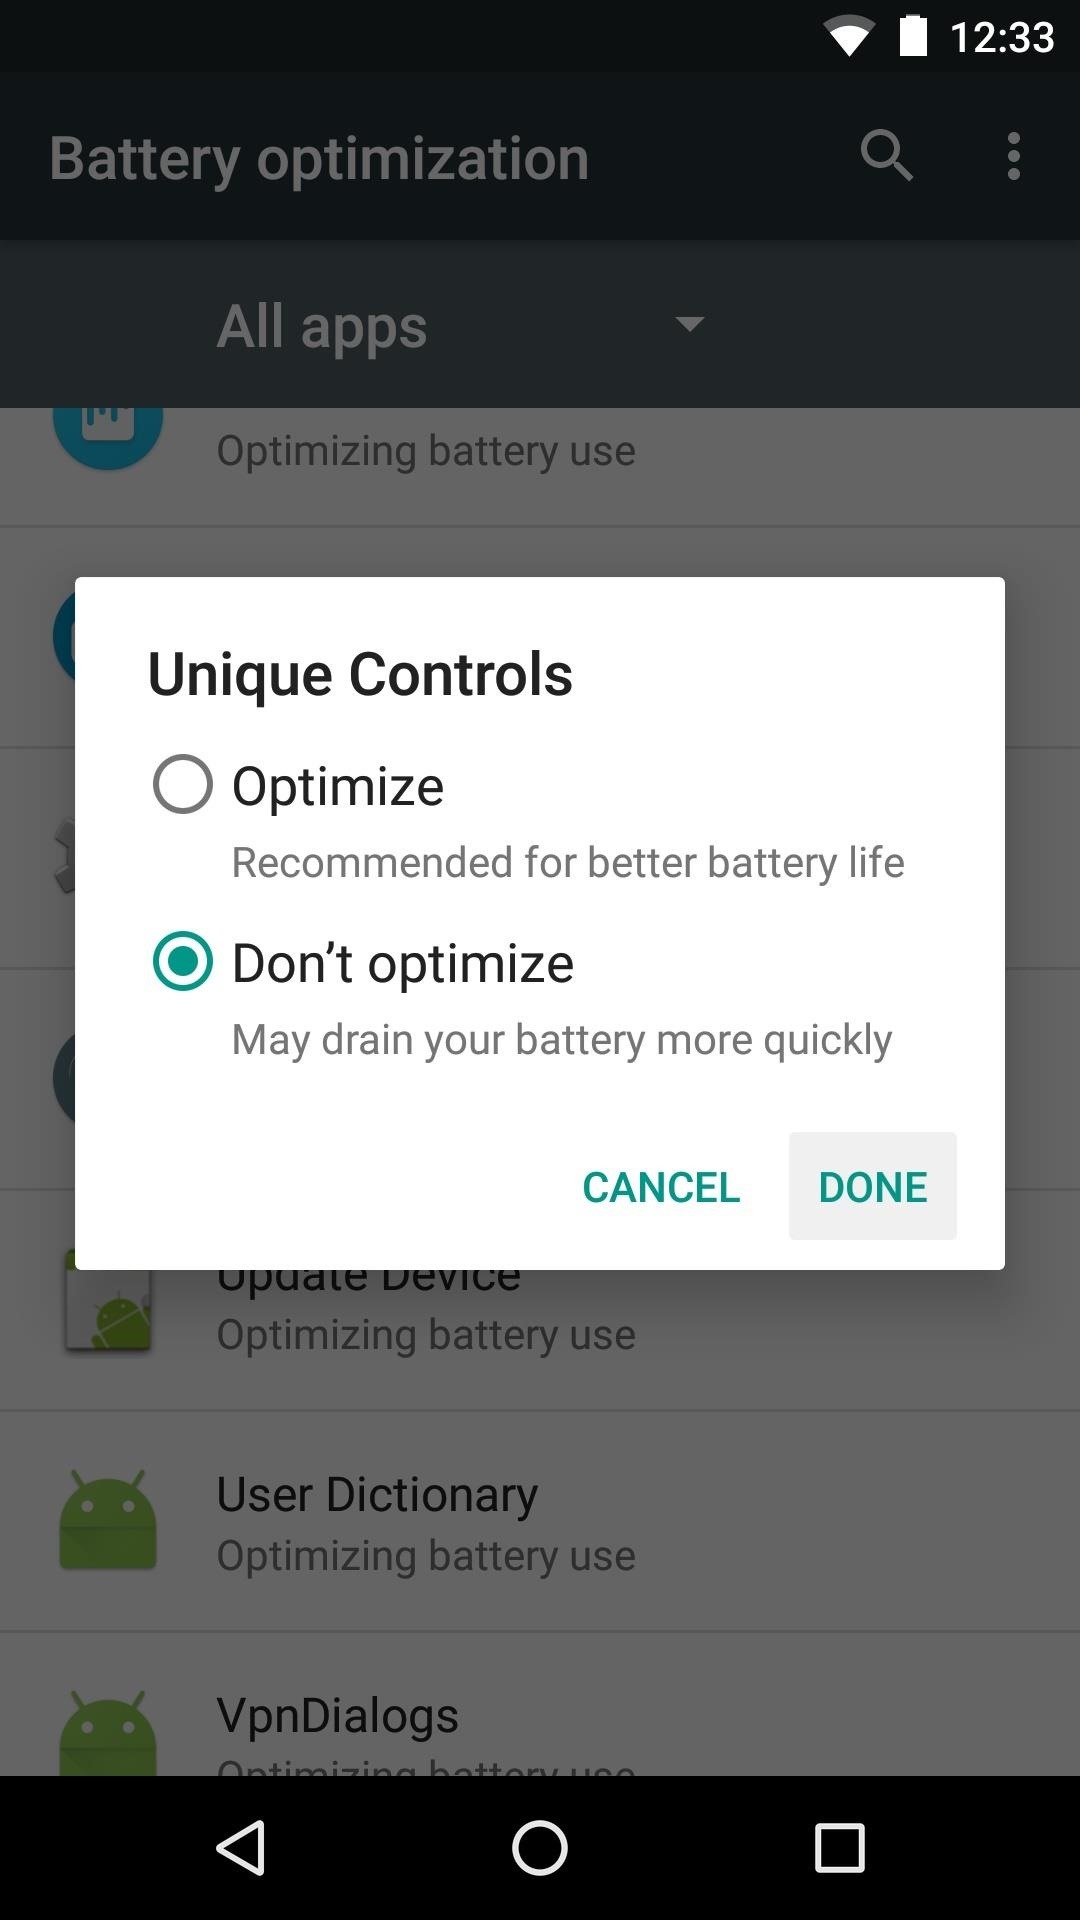
Whether you're using the non-root or Xposed app, when you get back up, go ahead and launch Unique Controls, which you'll now find in your app drawer. From here, the app will ask you to disable Android's optimization setting, so press "OK" on this popup, then find Unique Controls in the list and set it to "Don't optimize."
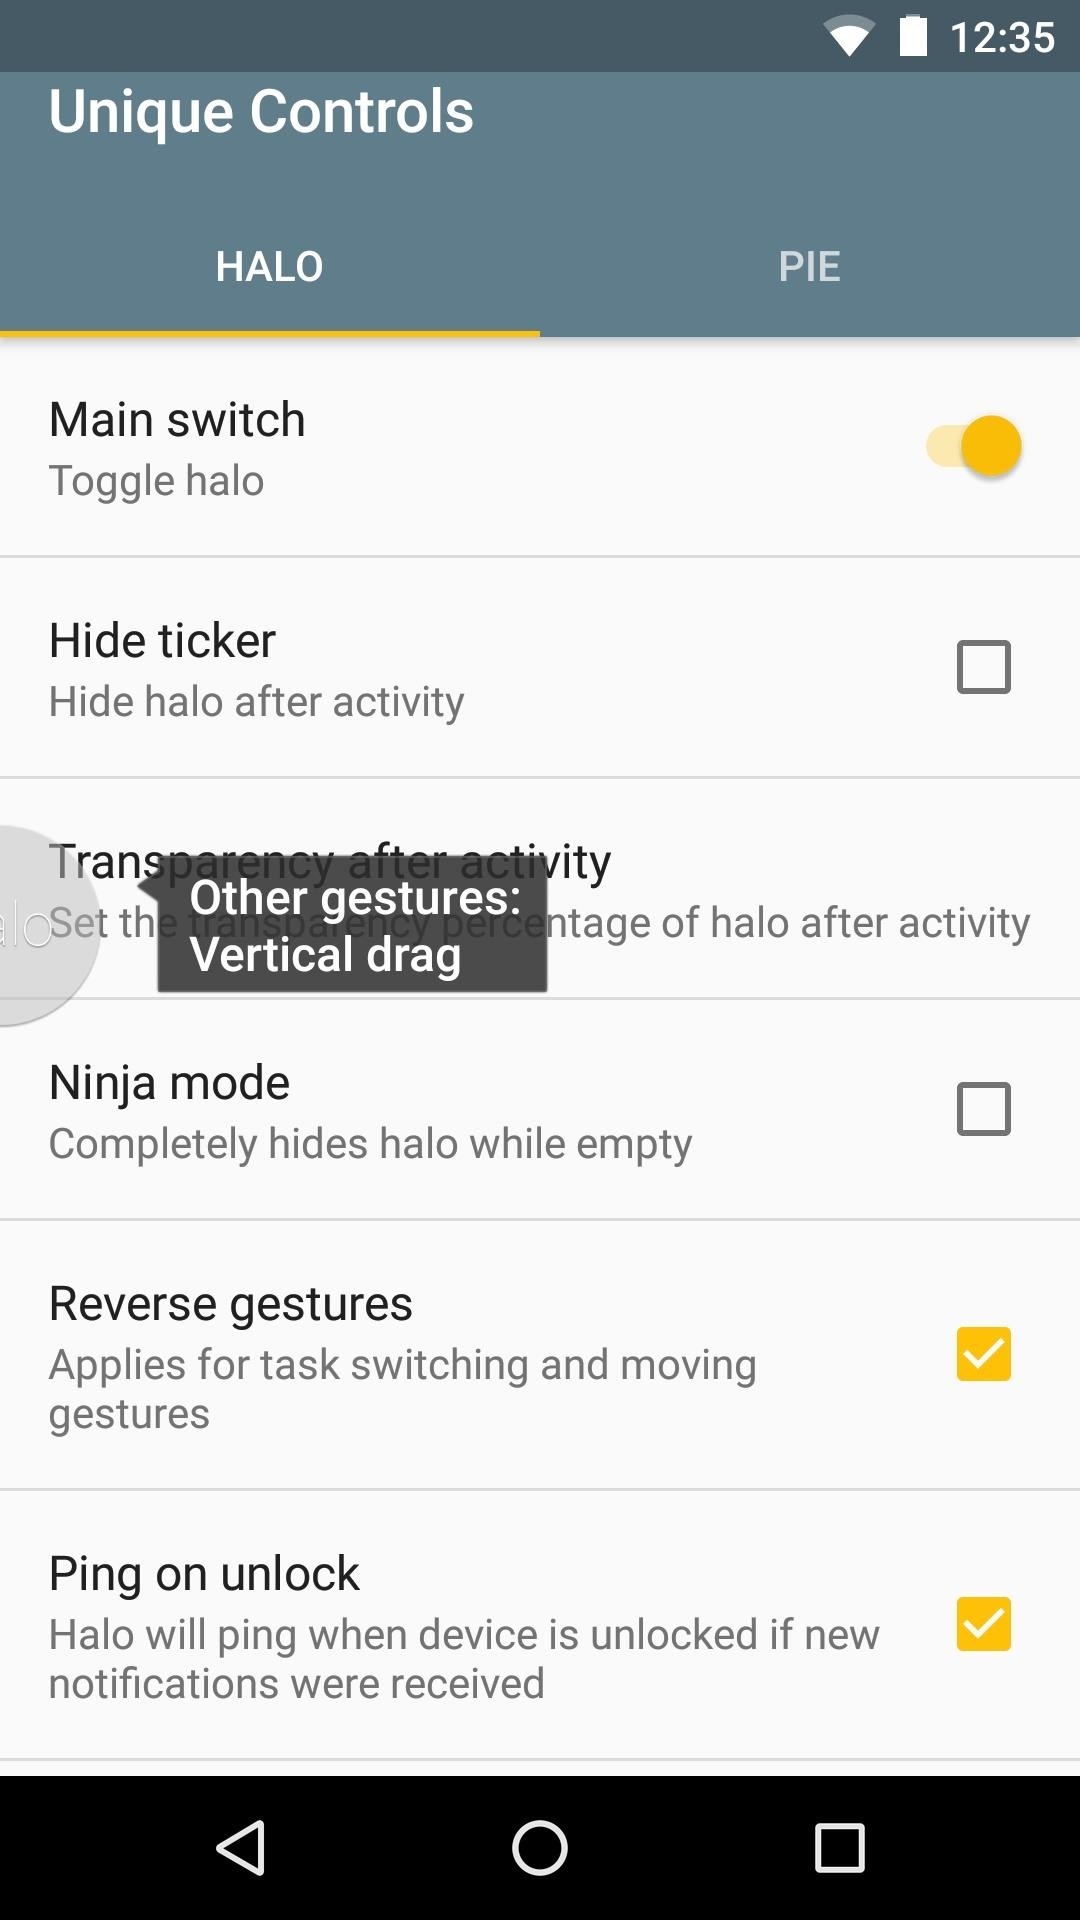
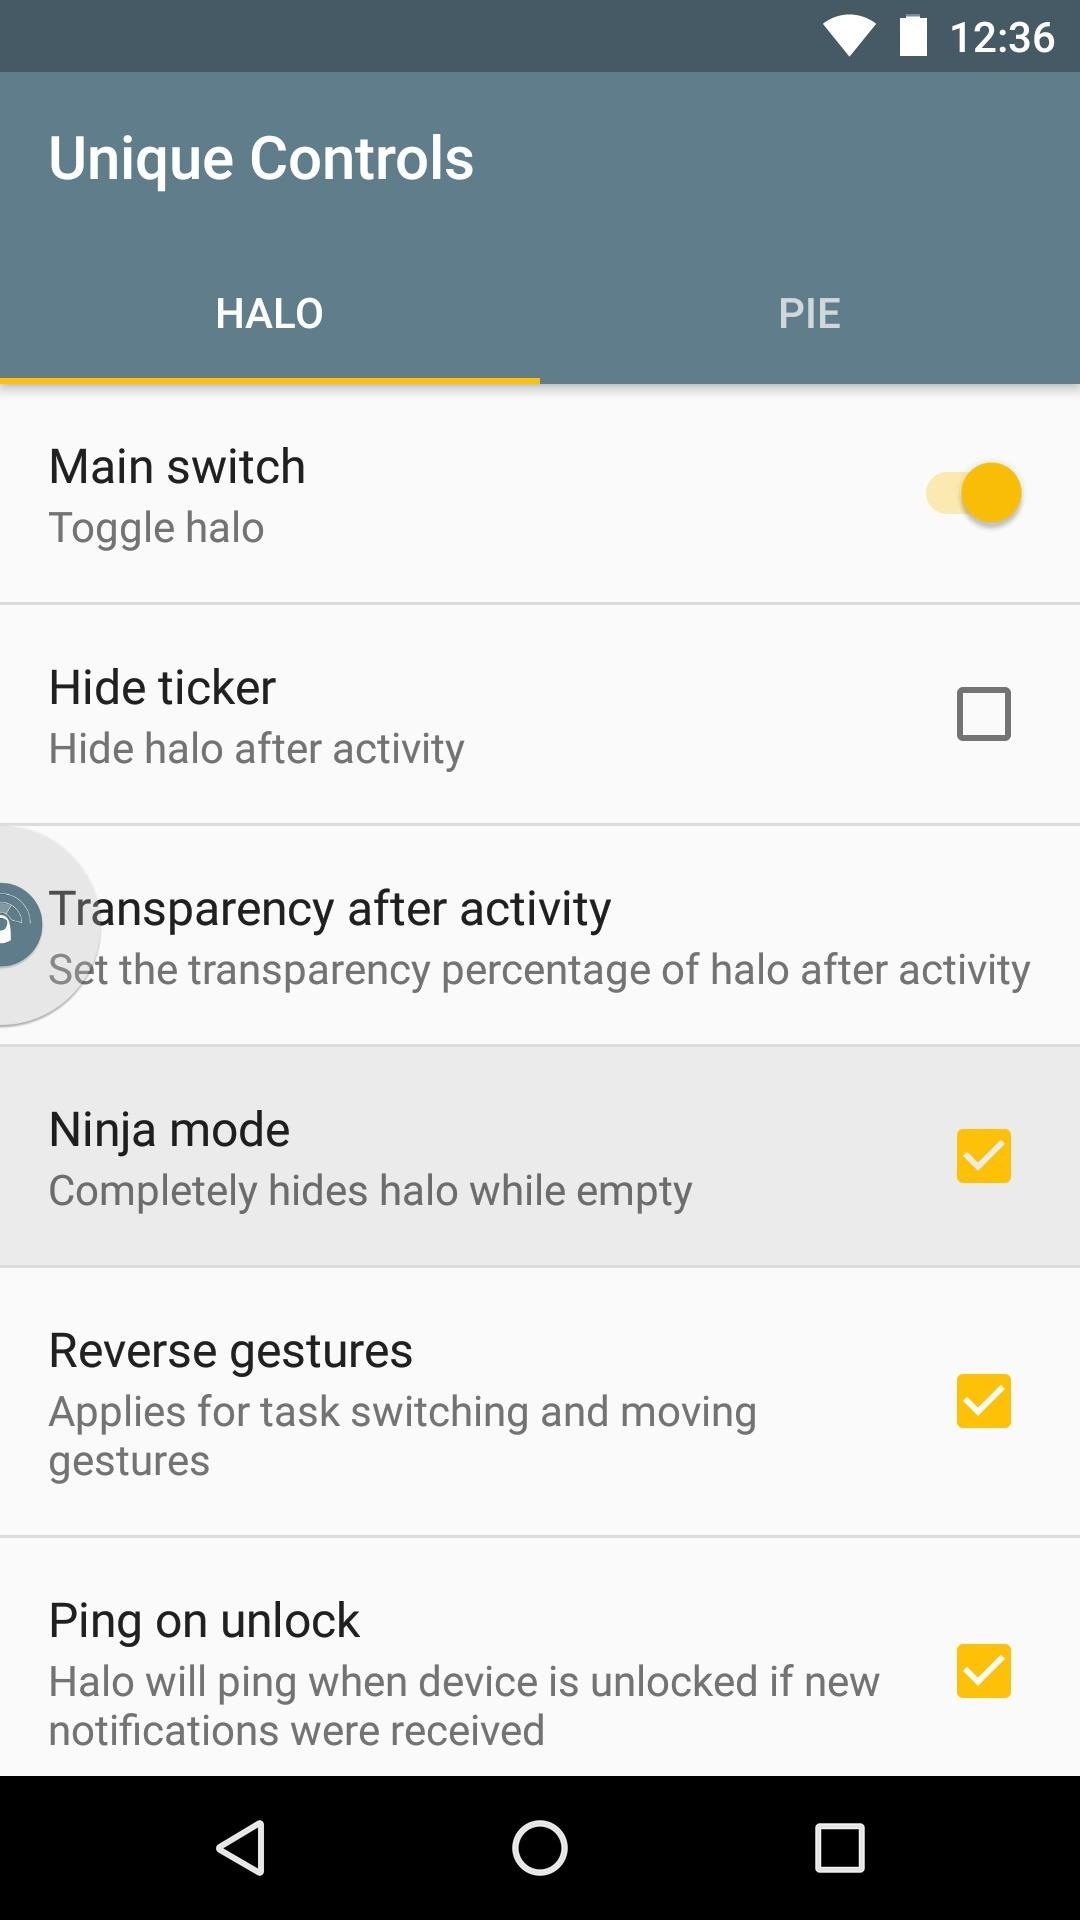
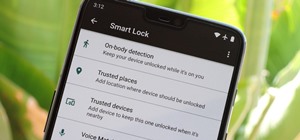
After that, head back to the app, then enable the "Main switch" in the Halo tab. This will prompt you to enable another permission, so press "OK" again, then enable the Unique Controls option on the subsequent screen.
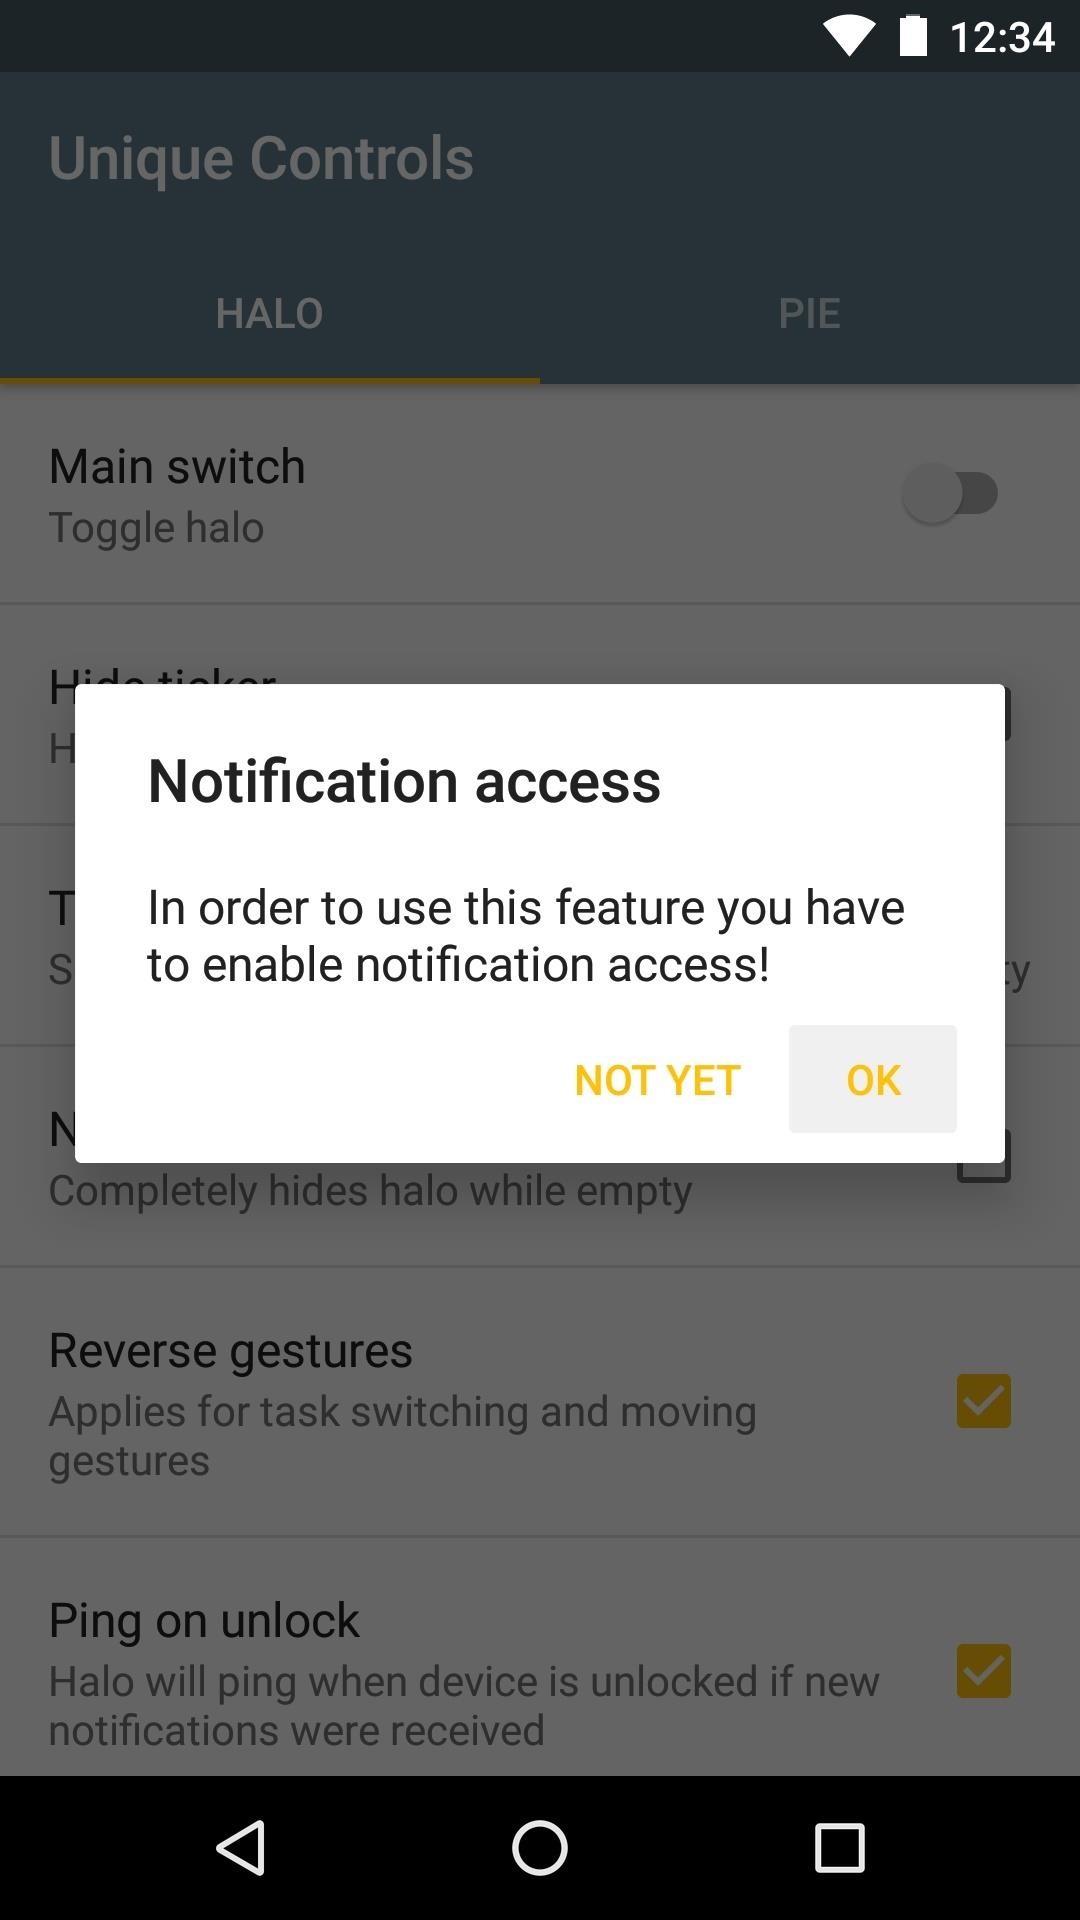
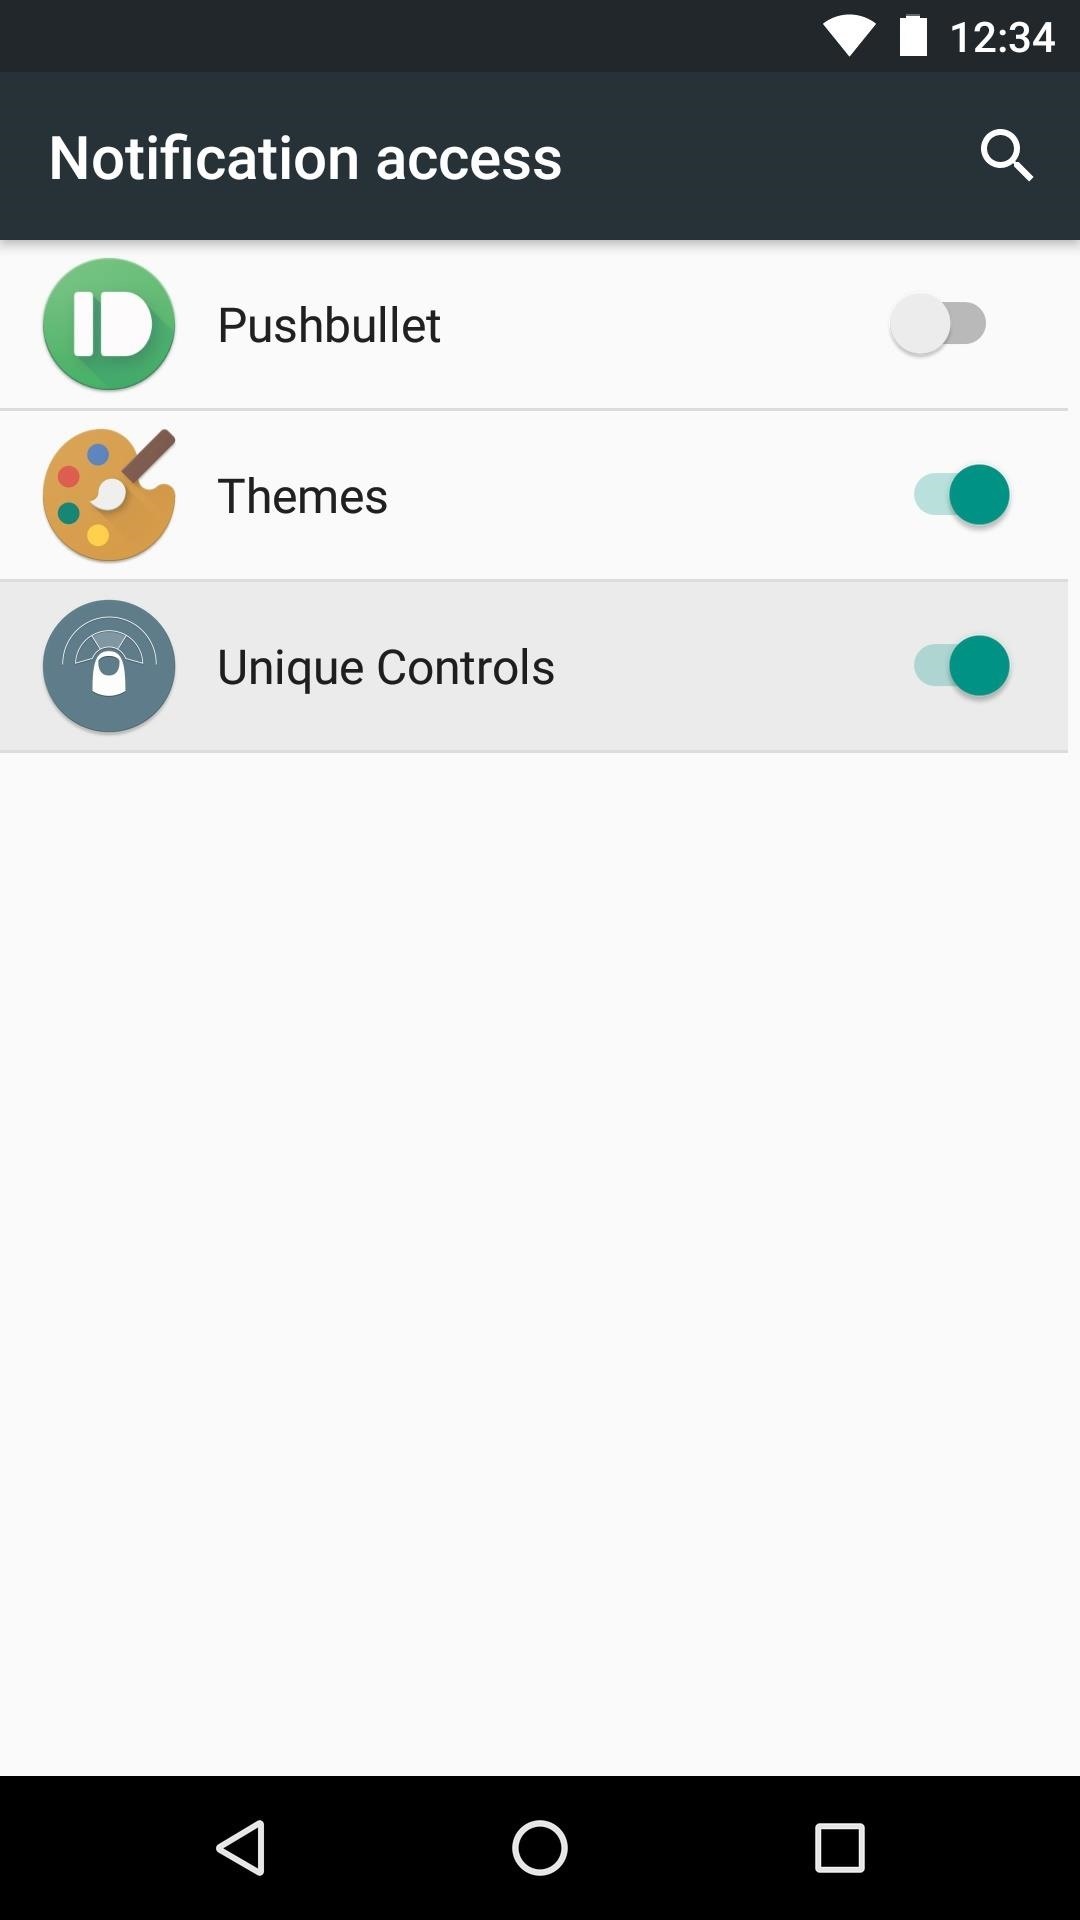
Next, head back to the app again, then you'll see that the "Main switch" toggle is still disabled. This is because the app needs yet another permission to run properly, so toggle the switch one more time, then press "OK" again and enable the Unique Controls option on the following screen.
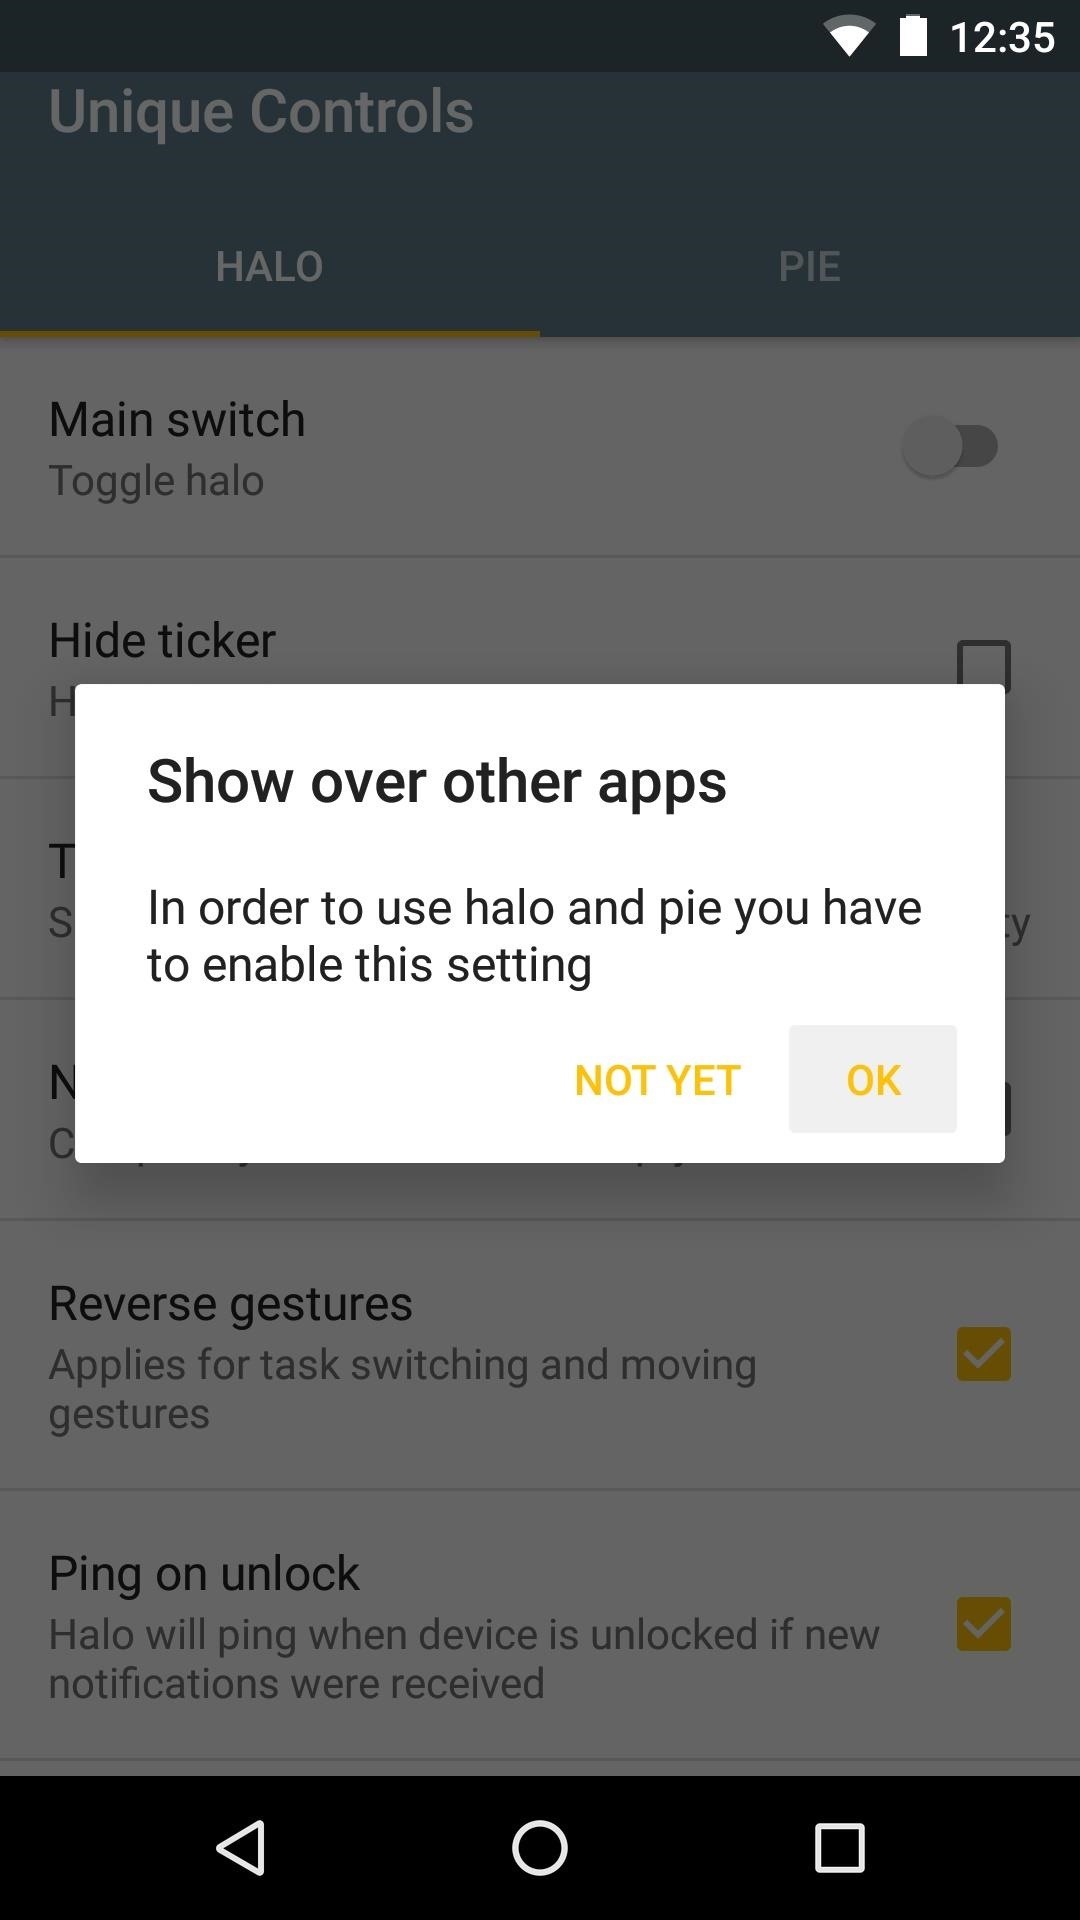
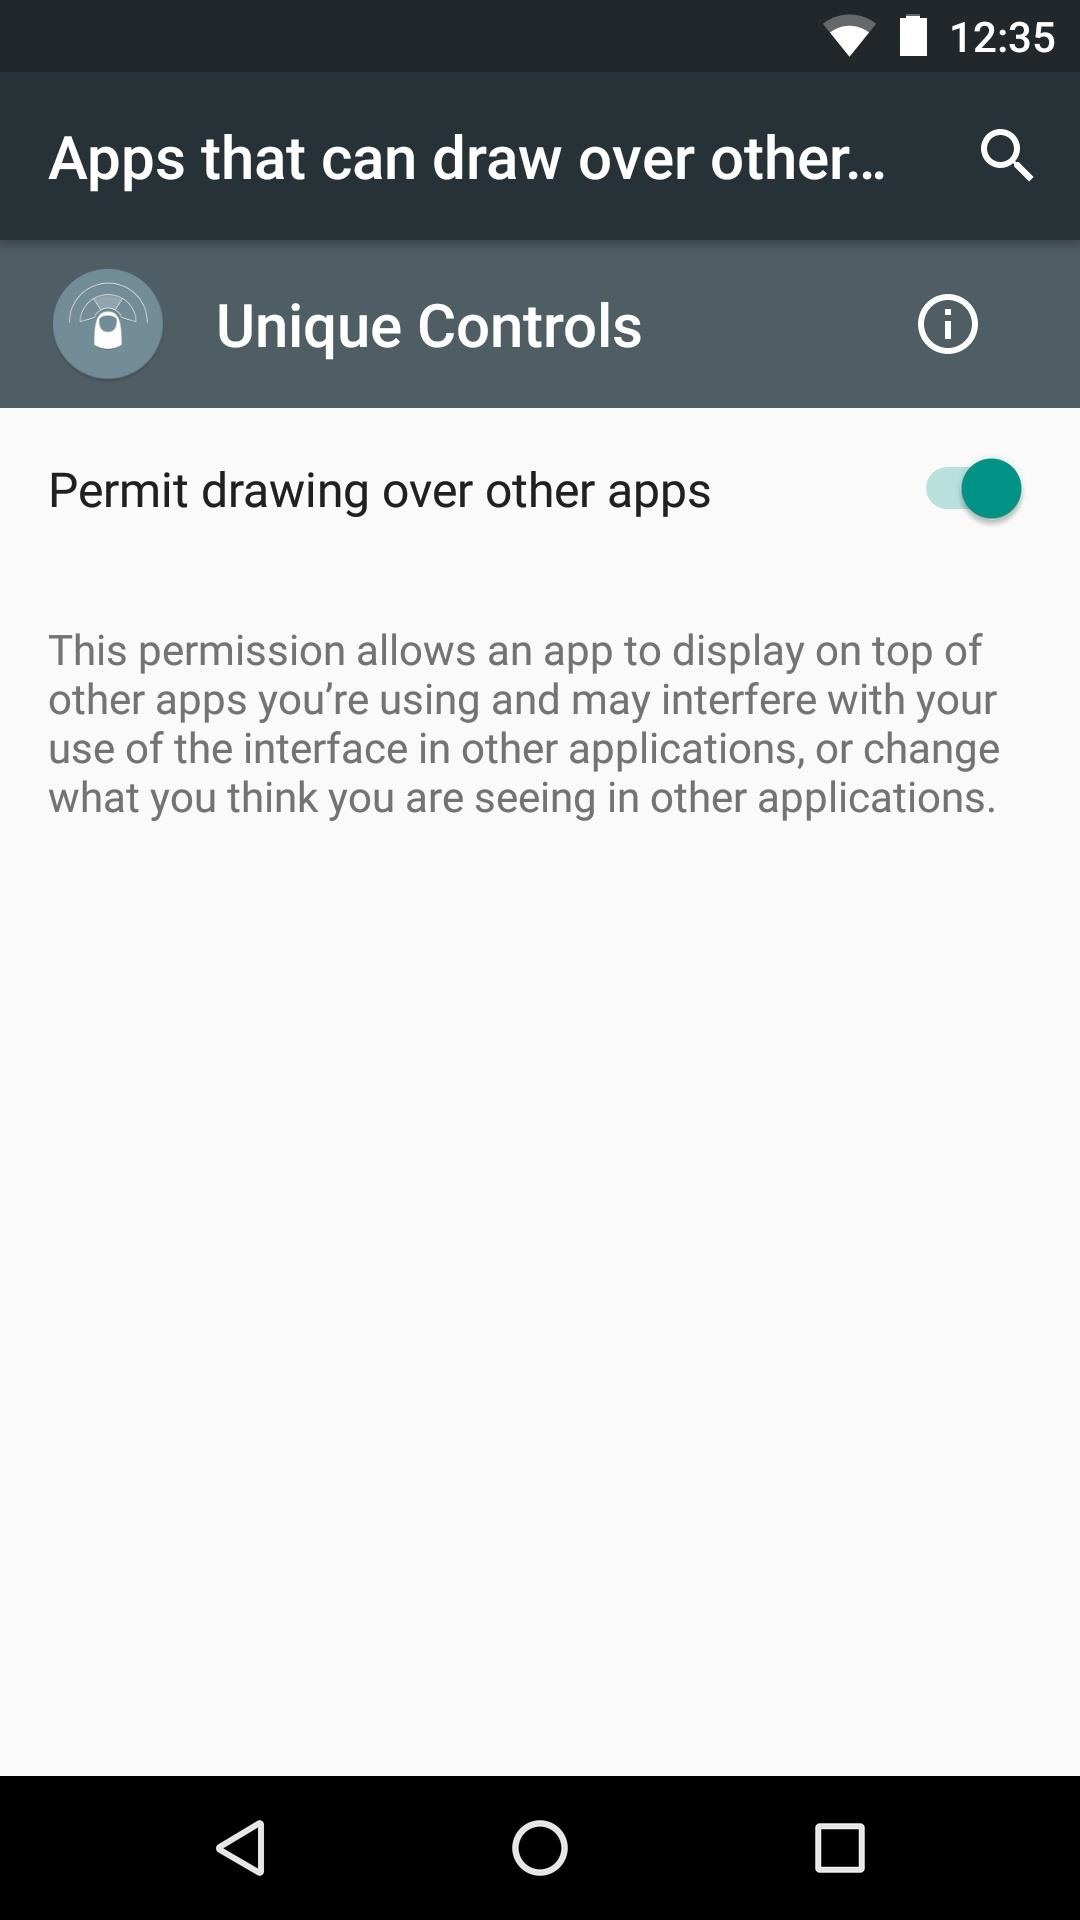
Now, head back to the app one more time. This might sound counter-intuitive, but bear with me here: Disable the "Main switch" under the Halo tab temporarily. After that, swipe over to the Pie tab, then toggle the "Main switch" there. This will prompt you to enable one more permission, so press "OK," then enable the Unique Controls option one last time. You have to do this because Android won't let you grant the last permission while Halo is active.
Step 3: Adjust Halo Options
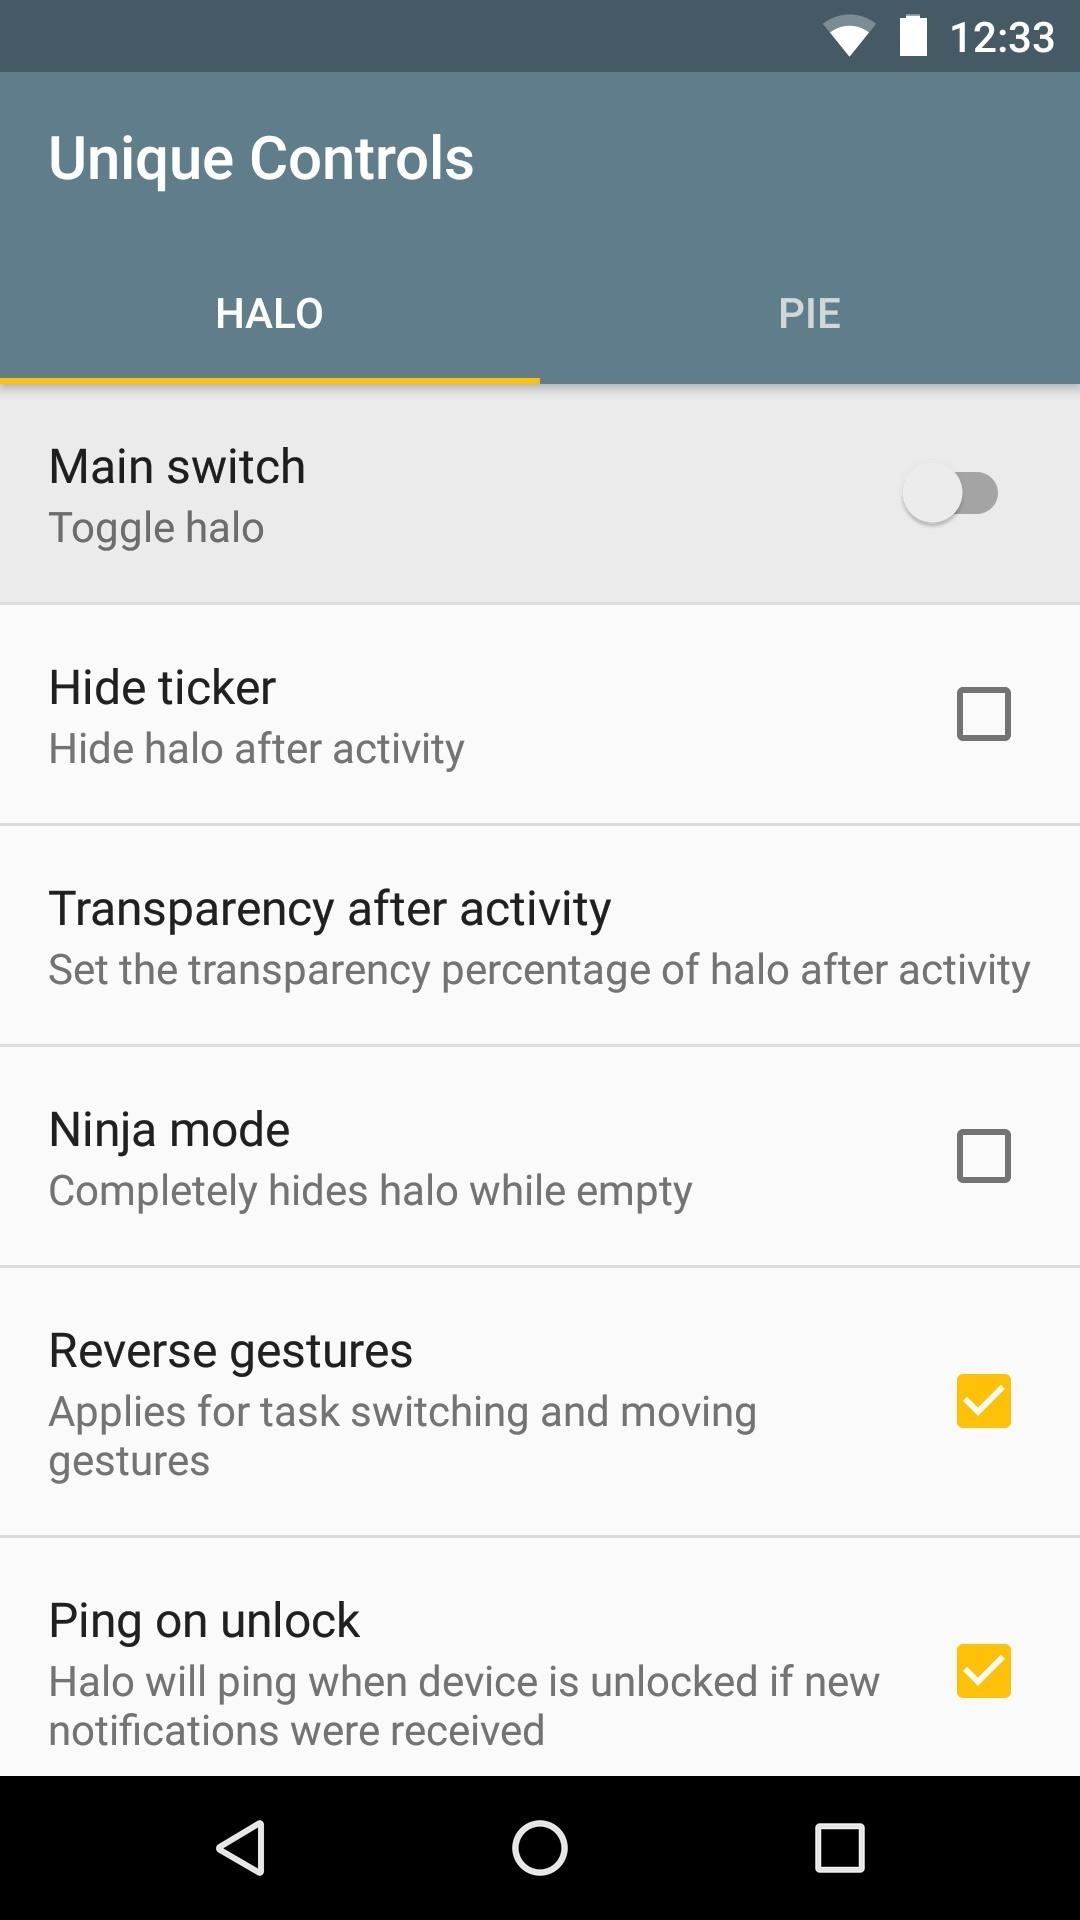
With all of the permissions enabled, you can now start to set up the actual features. First, enable the "Master switch" at the top of the Halo tab, then the Halo bubble will animate onto the screen and a caption will give you a brief description of how it all works. Aside from that, you can use the rest of the options on this page to adjust Halo's look and feel, but the default settings should be fine for most folks.
Step 4: Adjust Pie Options
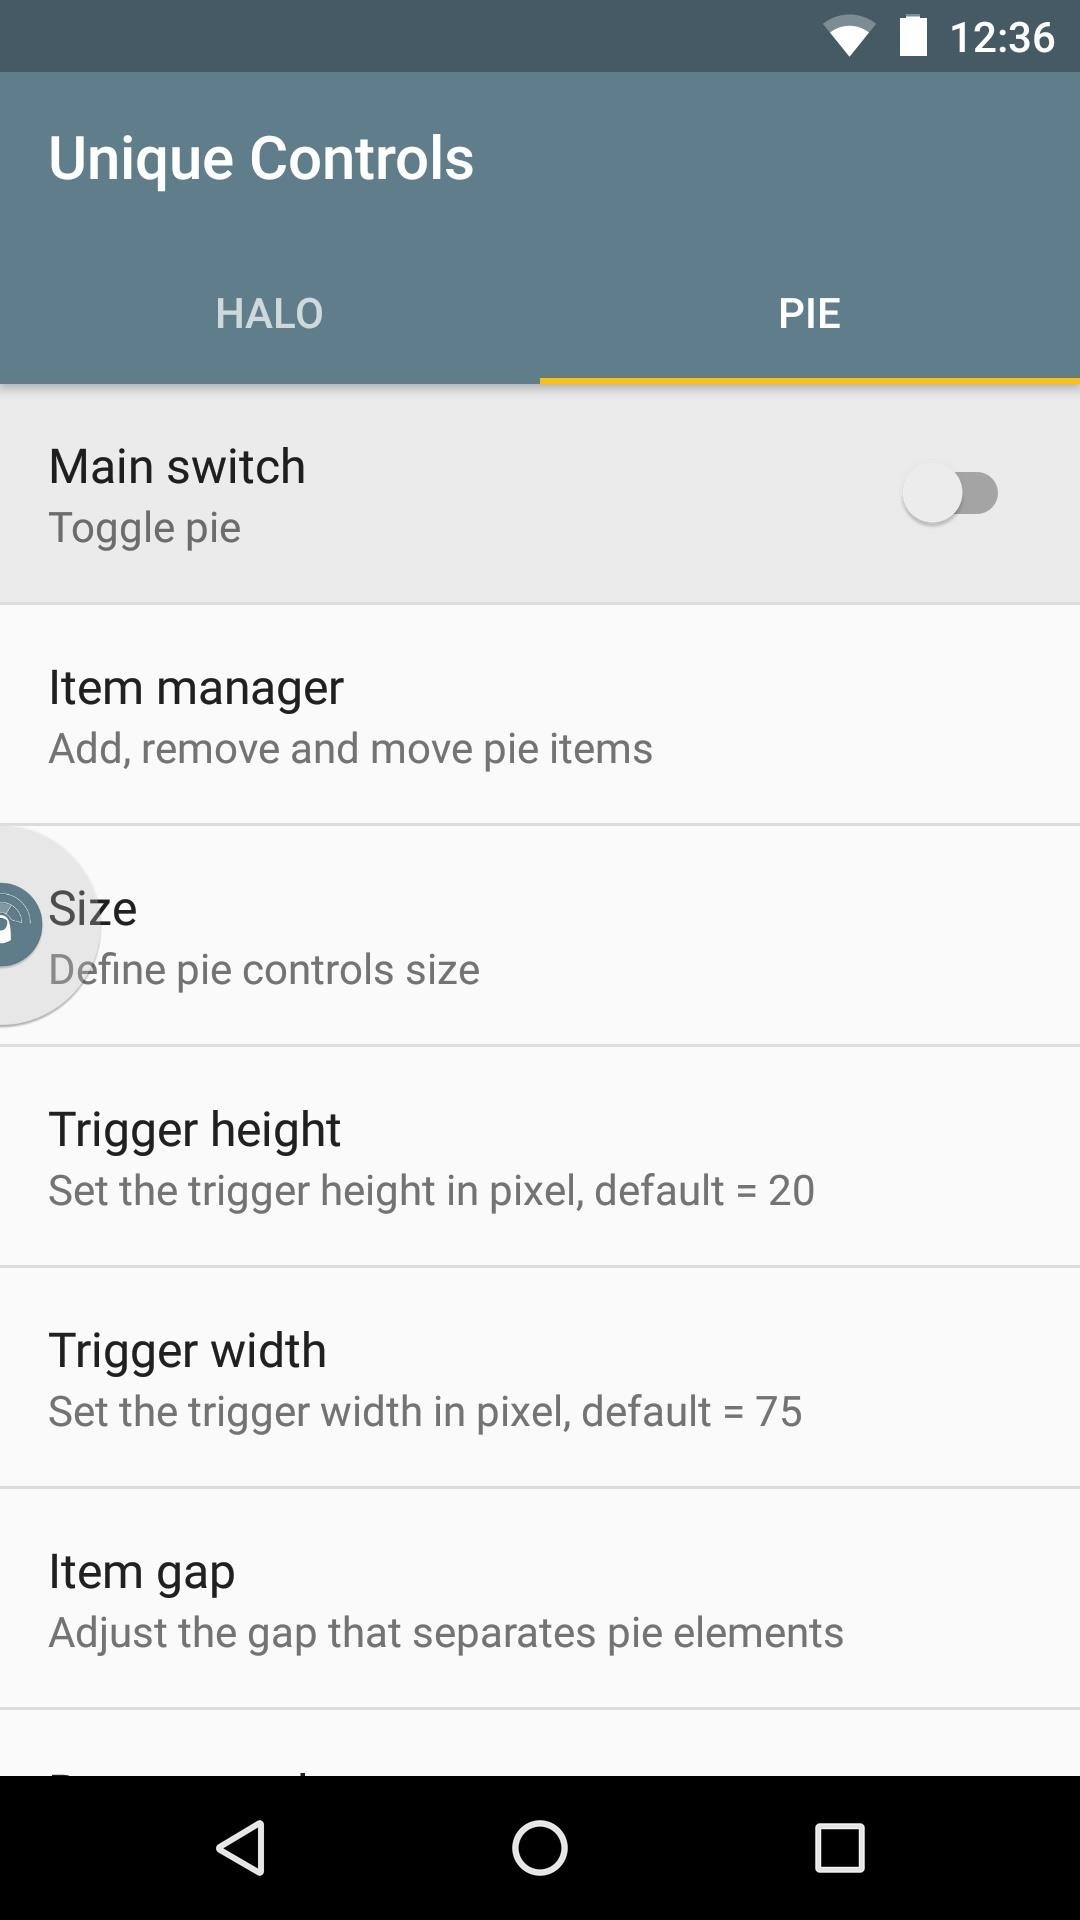
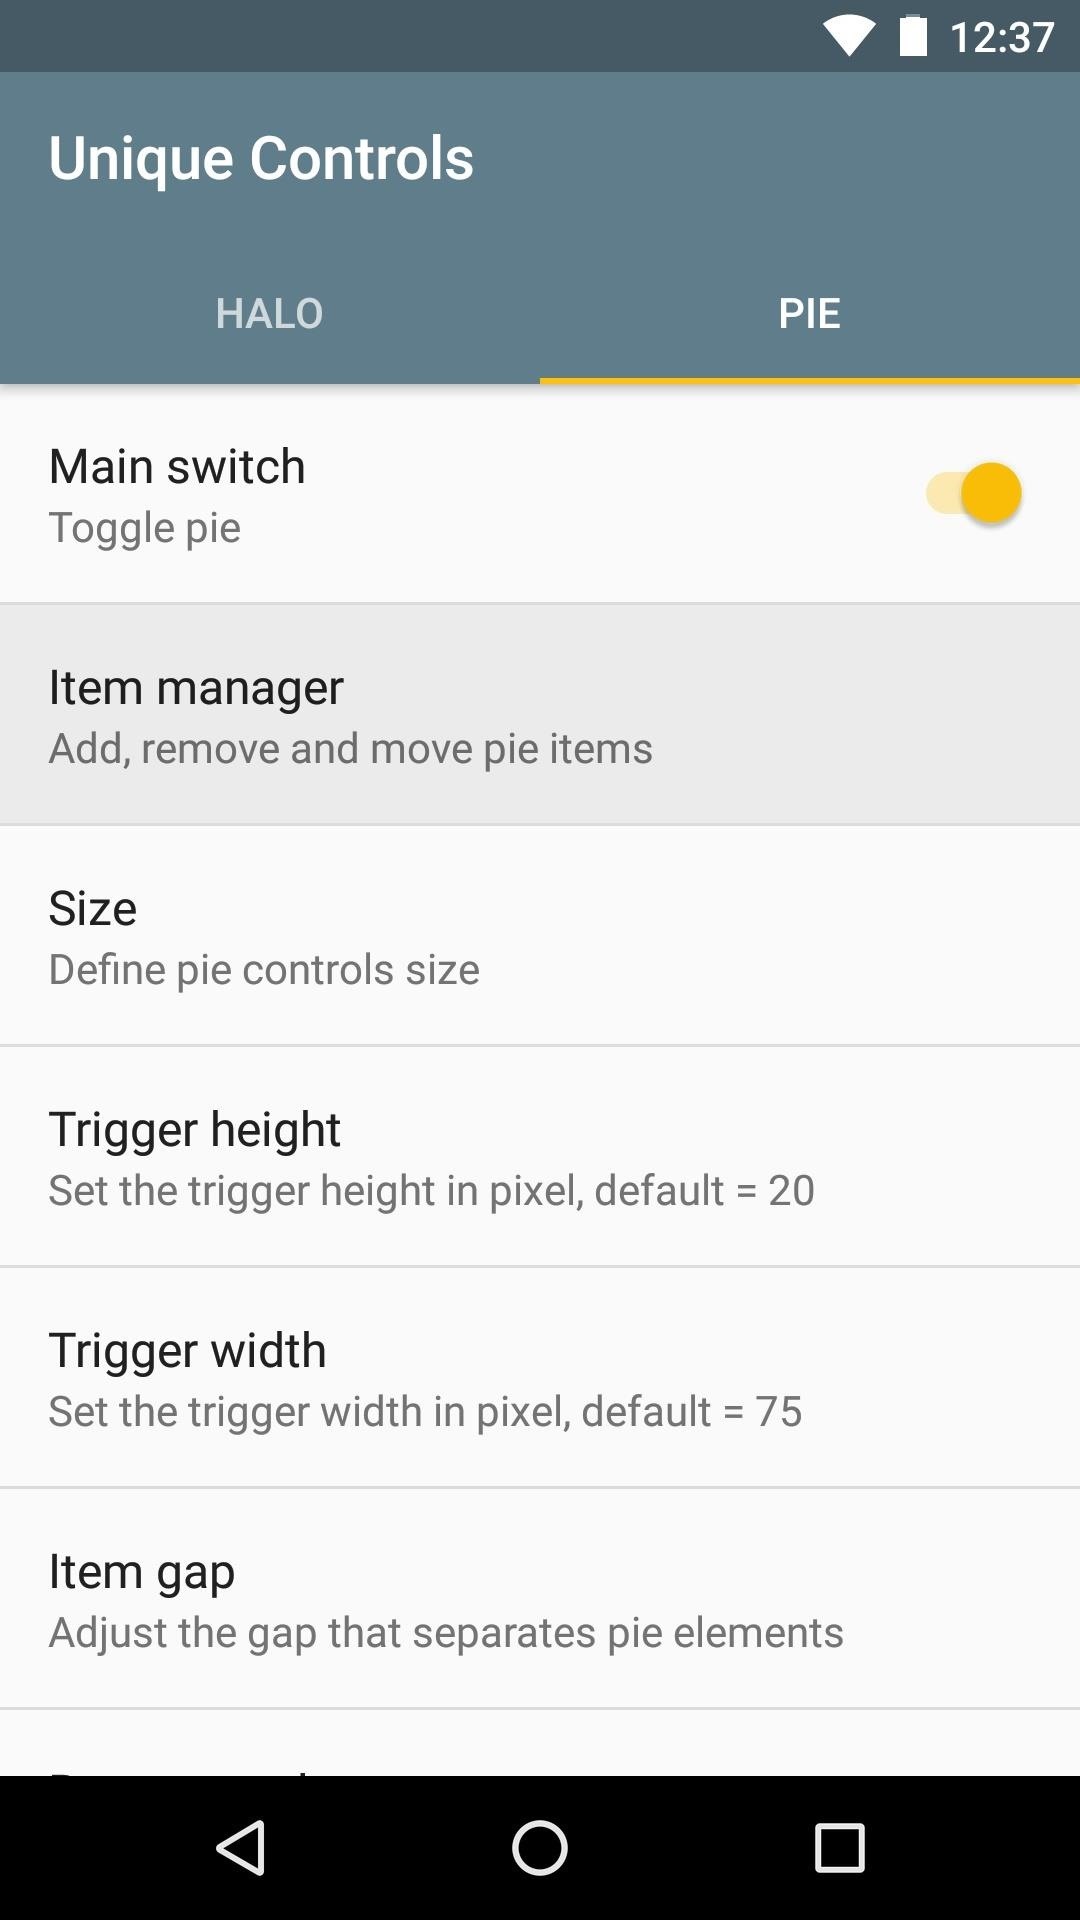
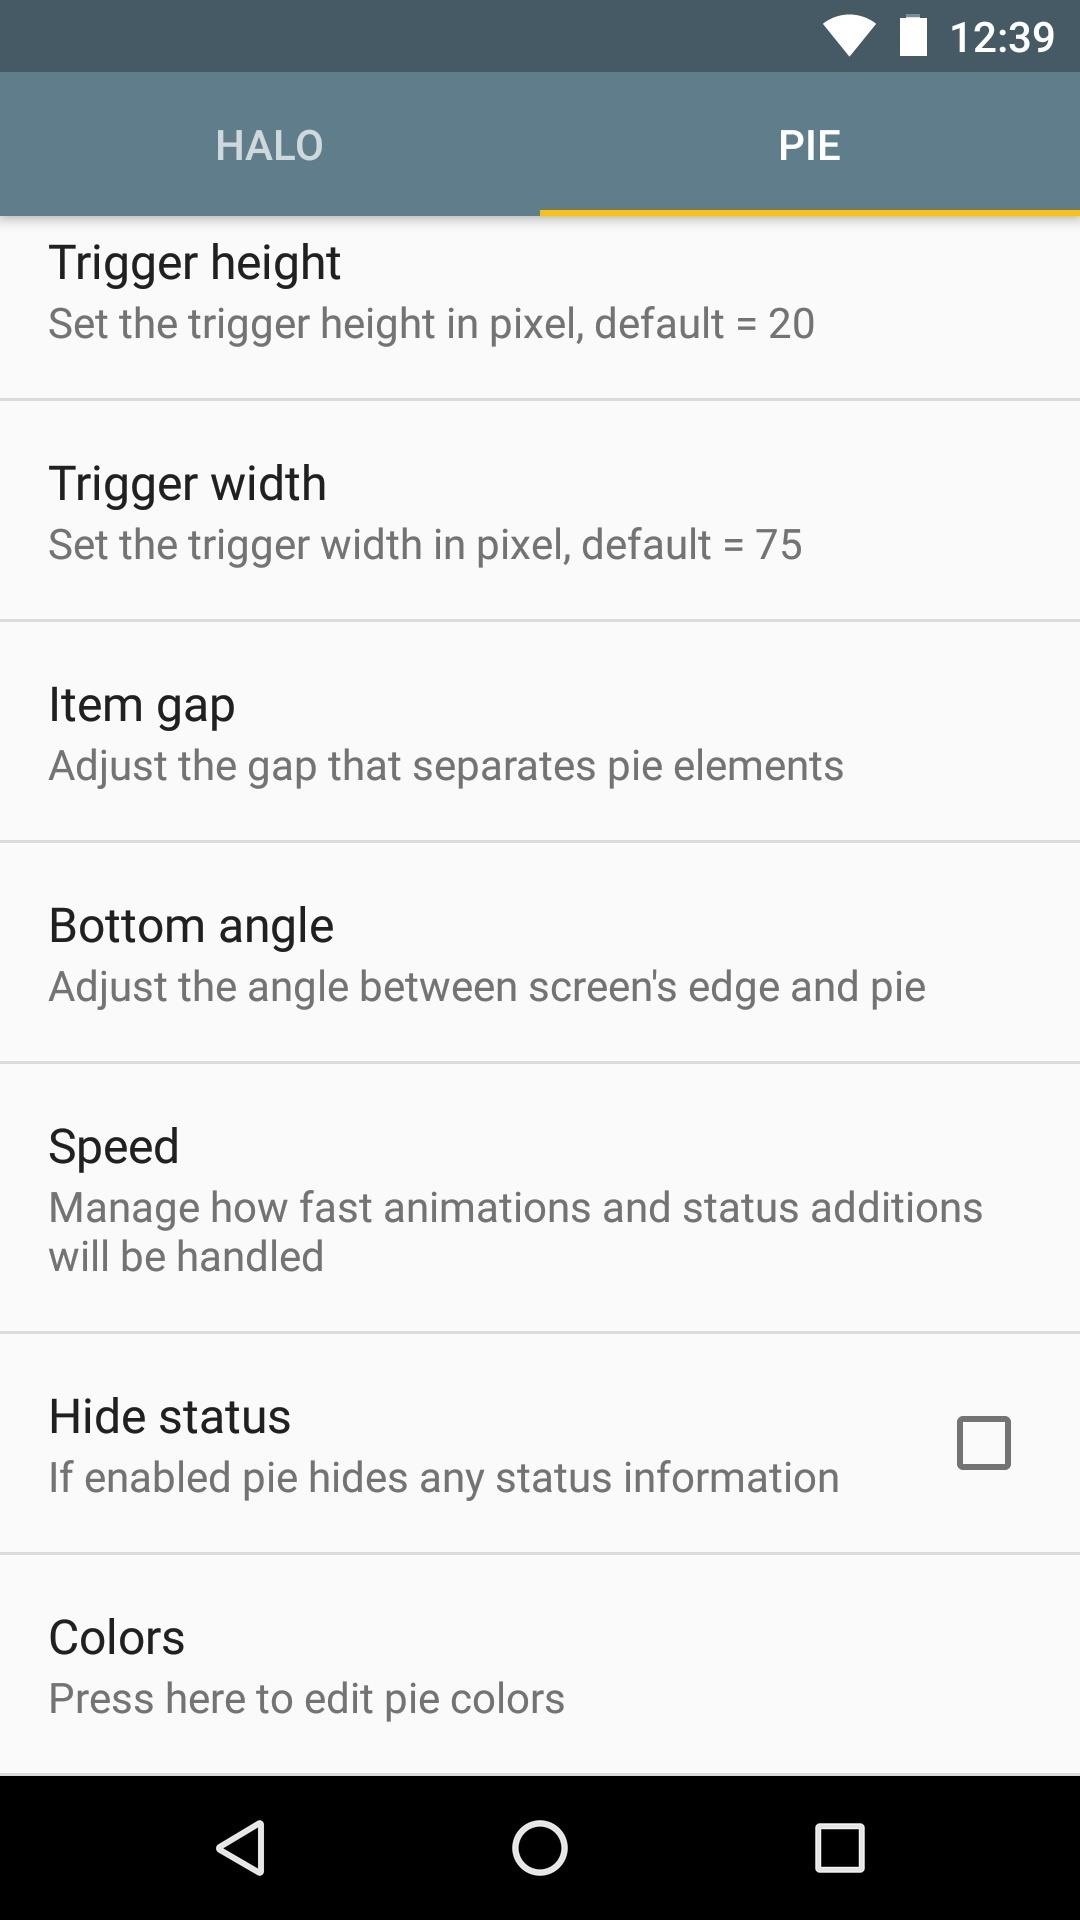
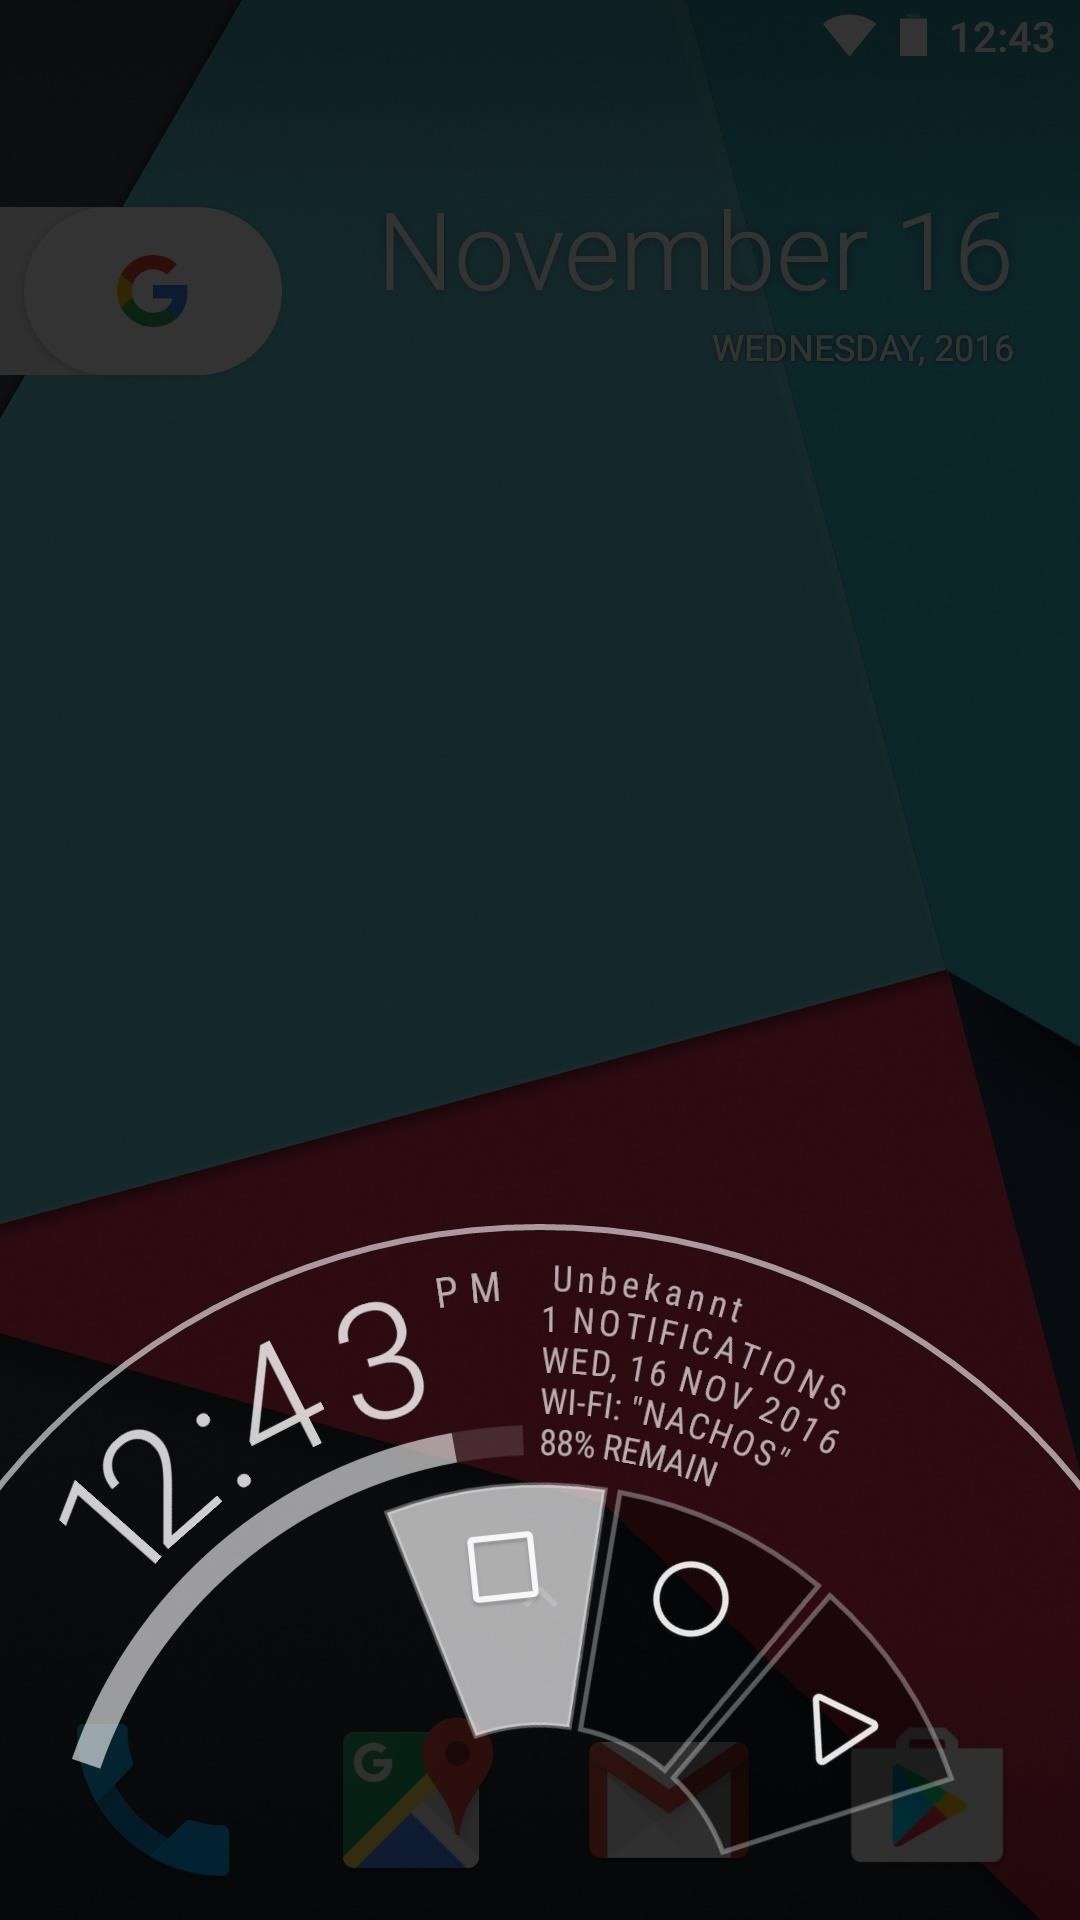
Swipe over to the Pie tab and enable the "Master switch" there, too. When you do that, a small black rectangle will briefly appear at the bottom of your screen—this is the trigger area, so take note of its location, as you'll be able to swipe inward from this spot to trigger Pie controls.
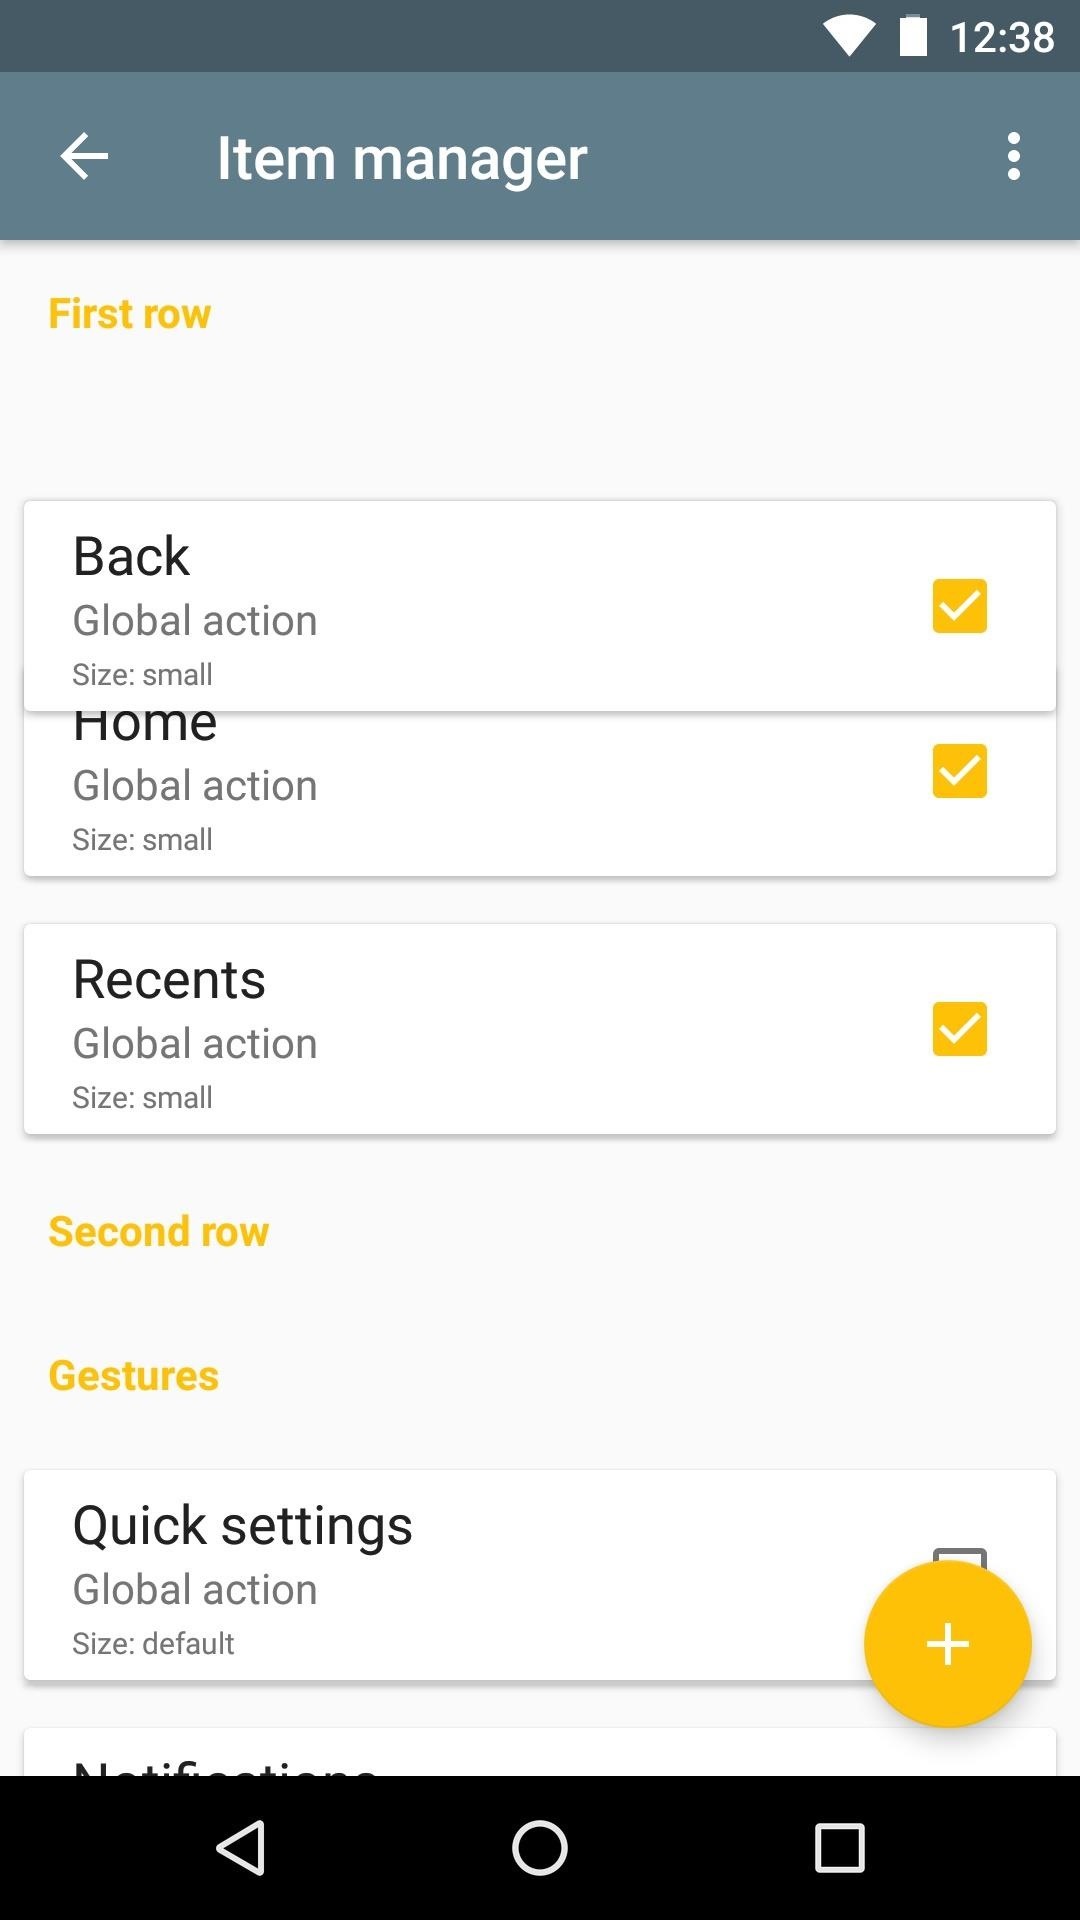
Beyond that, the "Item manager" menu lets you add and rearrange the buttons that will appear in your Pie controls. I'd suggest at least enabling the back, home, and recents options here, after which you can rearrange the items by long-pressing and dragging the entries. Beyond that, the rest of the option in the Pie tab let you tweak the interface a bit, so have a look around.
Step 5: Disable Your on-Screen Navigation Keys (Optional)
Once you've got everything set up, you may want to remove your existing on-screen navigation buttons, as Pie can replace this functionality entirely. So if you'd like to take back a bit of extra screen space, check out the following guide for some choices—particularly Option 4, as it's specifically intended for Pie controls.
Step 6: Get Floating Bubble Notifications & Gesture Buttons
At this point, you're ready to enjoy two of Paranoid Android's best features on any ROM. Pie controls can be triggered at any time by swiping in from the trigger area at the bottom of your screen—just drag your finger over one of the buttons that pop up, then let go to perform that action. Aside from that, you can hover your finger over the controls for a second to see more information, and you can drag your finger outside of the Pie controls area, then let go to open your notification panel.
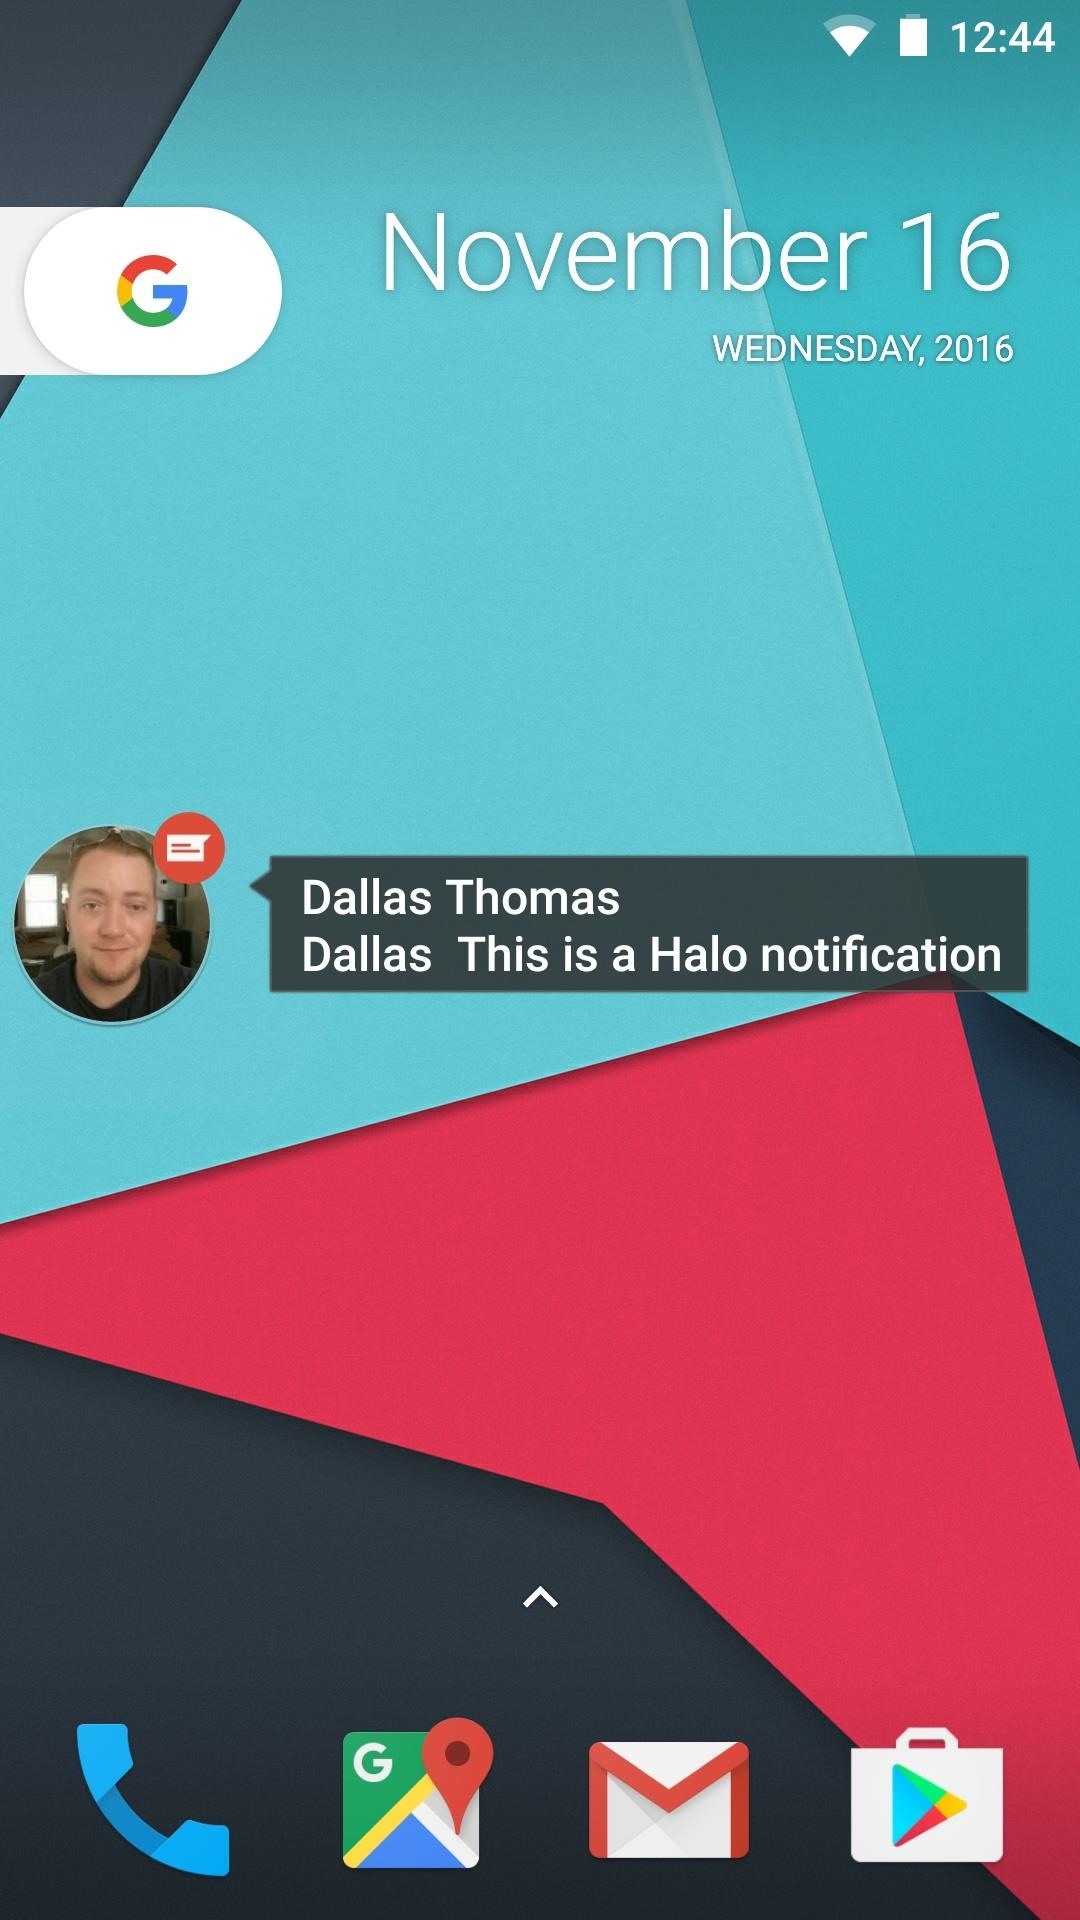
The Halo features are equally awesome. When you get a notification from any app, a small bubble will pop on screen and show you the contents of the message. Then, if you tap this bubble, the app will open in a pop-up window allowing you to quickly respond to messages without leaving the screen you're currently viewing (only if you're using the Xposed version, however).
Who needs a wand? Unlock your magical powers and transform yourself from a Muggle into a Wizard or Witch just by using your Android phone. See how:


Be the First to Comment
Share Your Thoughts