

Android's personal assistant is more than just a sassy backtalker—it's a full-on suite of all the information you could need at a given time. Google Now, as it's called, uses data from various sources to predict what you'll want to know before you even search for it, and it's an amazing experience once you've got everything set up.
- Don't Miss: 30 Unknown Google Now Commands & Easter Eggs
But the service itself has a bit of a learning curve, because it needs to be taught more about you before it gets to know your likes, dislikes, and habits. So below, I'll show you how to set it up from the very beginning, and once you've finished with this guide, you'll finally be able to get the most out of Google Now.
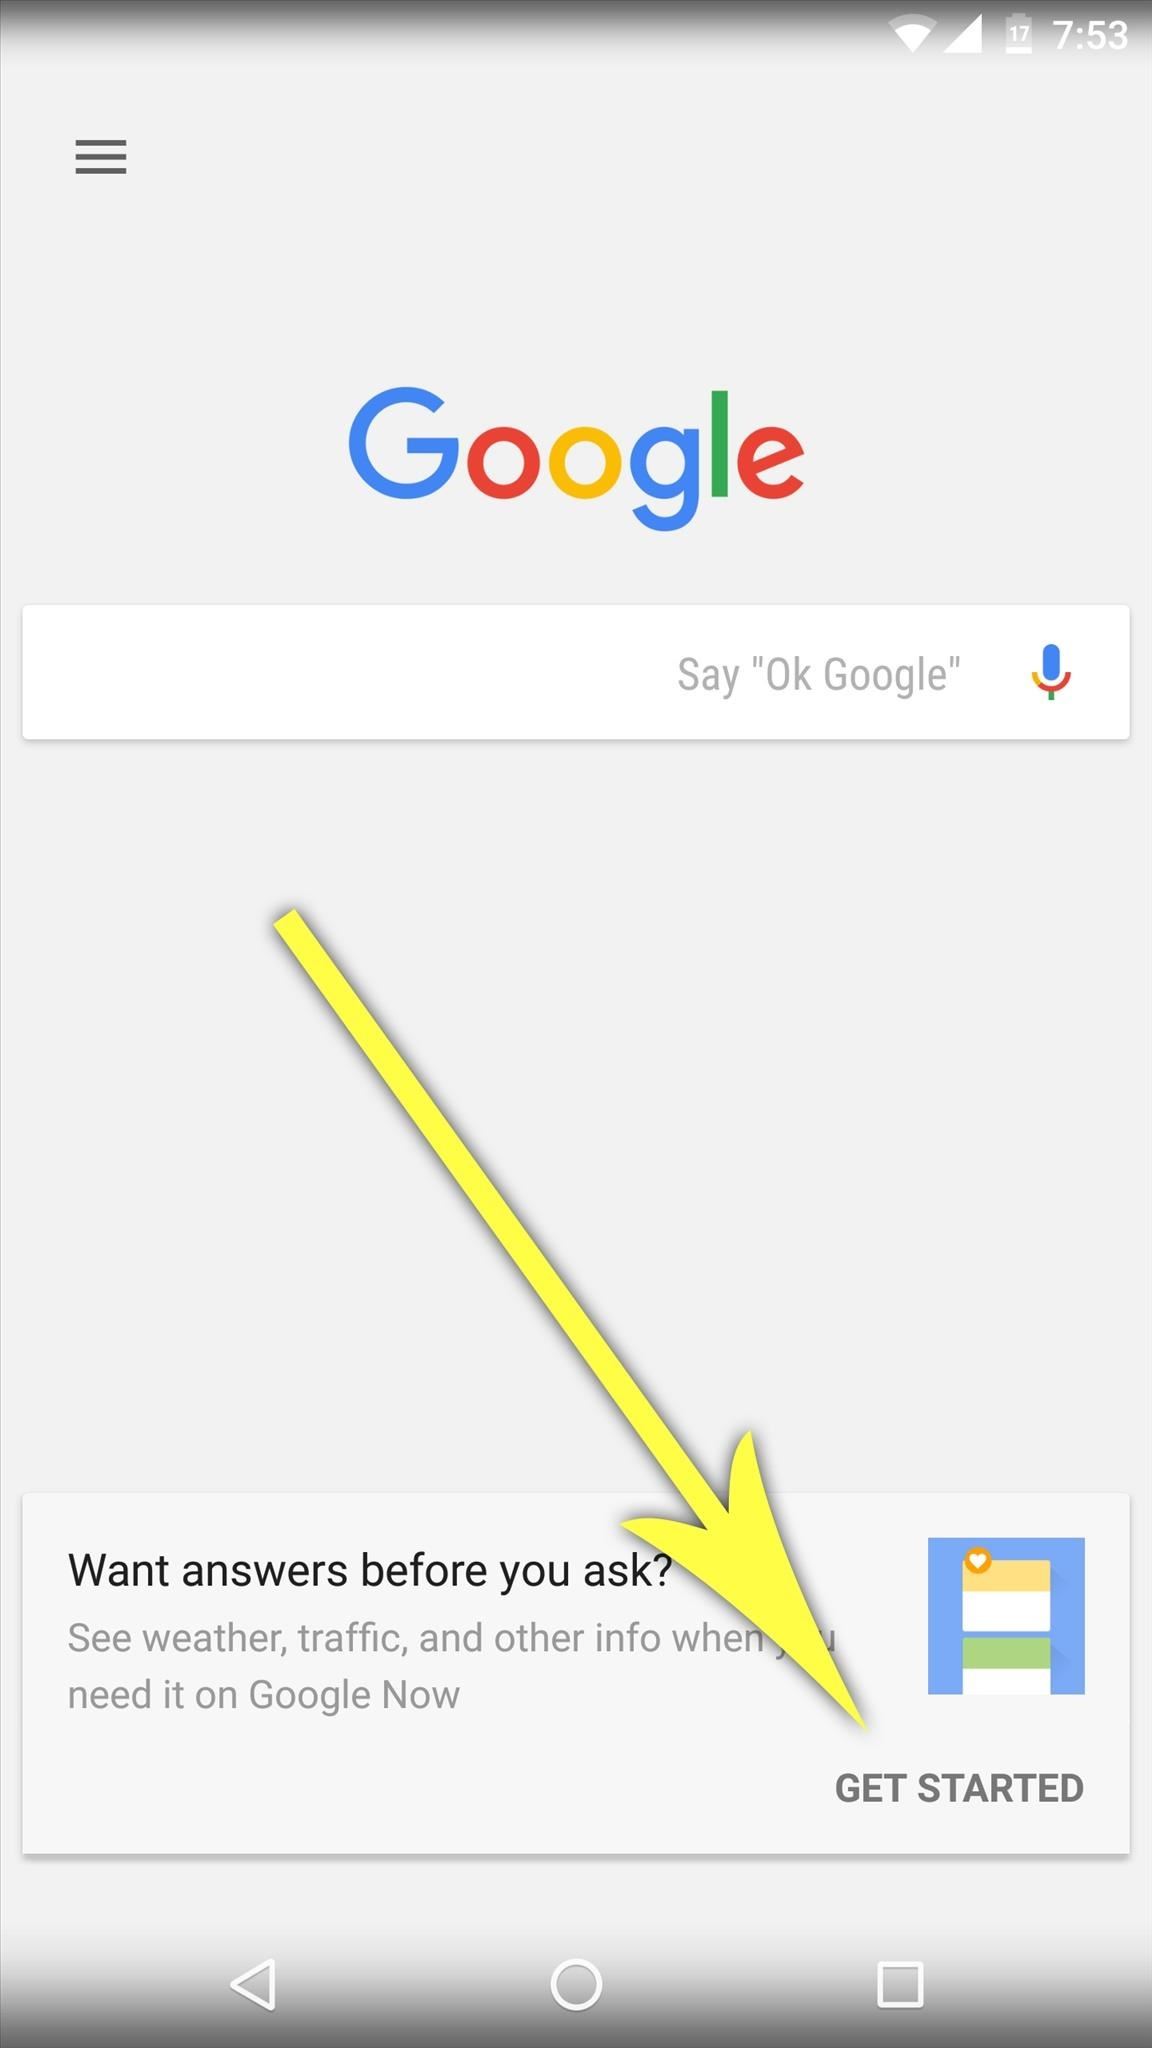
Step 1: Opt in to Google Now
If you haven't set up Google Now in the past, now is the time to start. So to begin, open your app drawer and launch the "Google" app, then tap the "Get Started" button near the bottom-right corner of your screen.
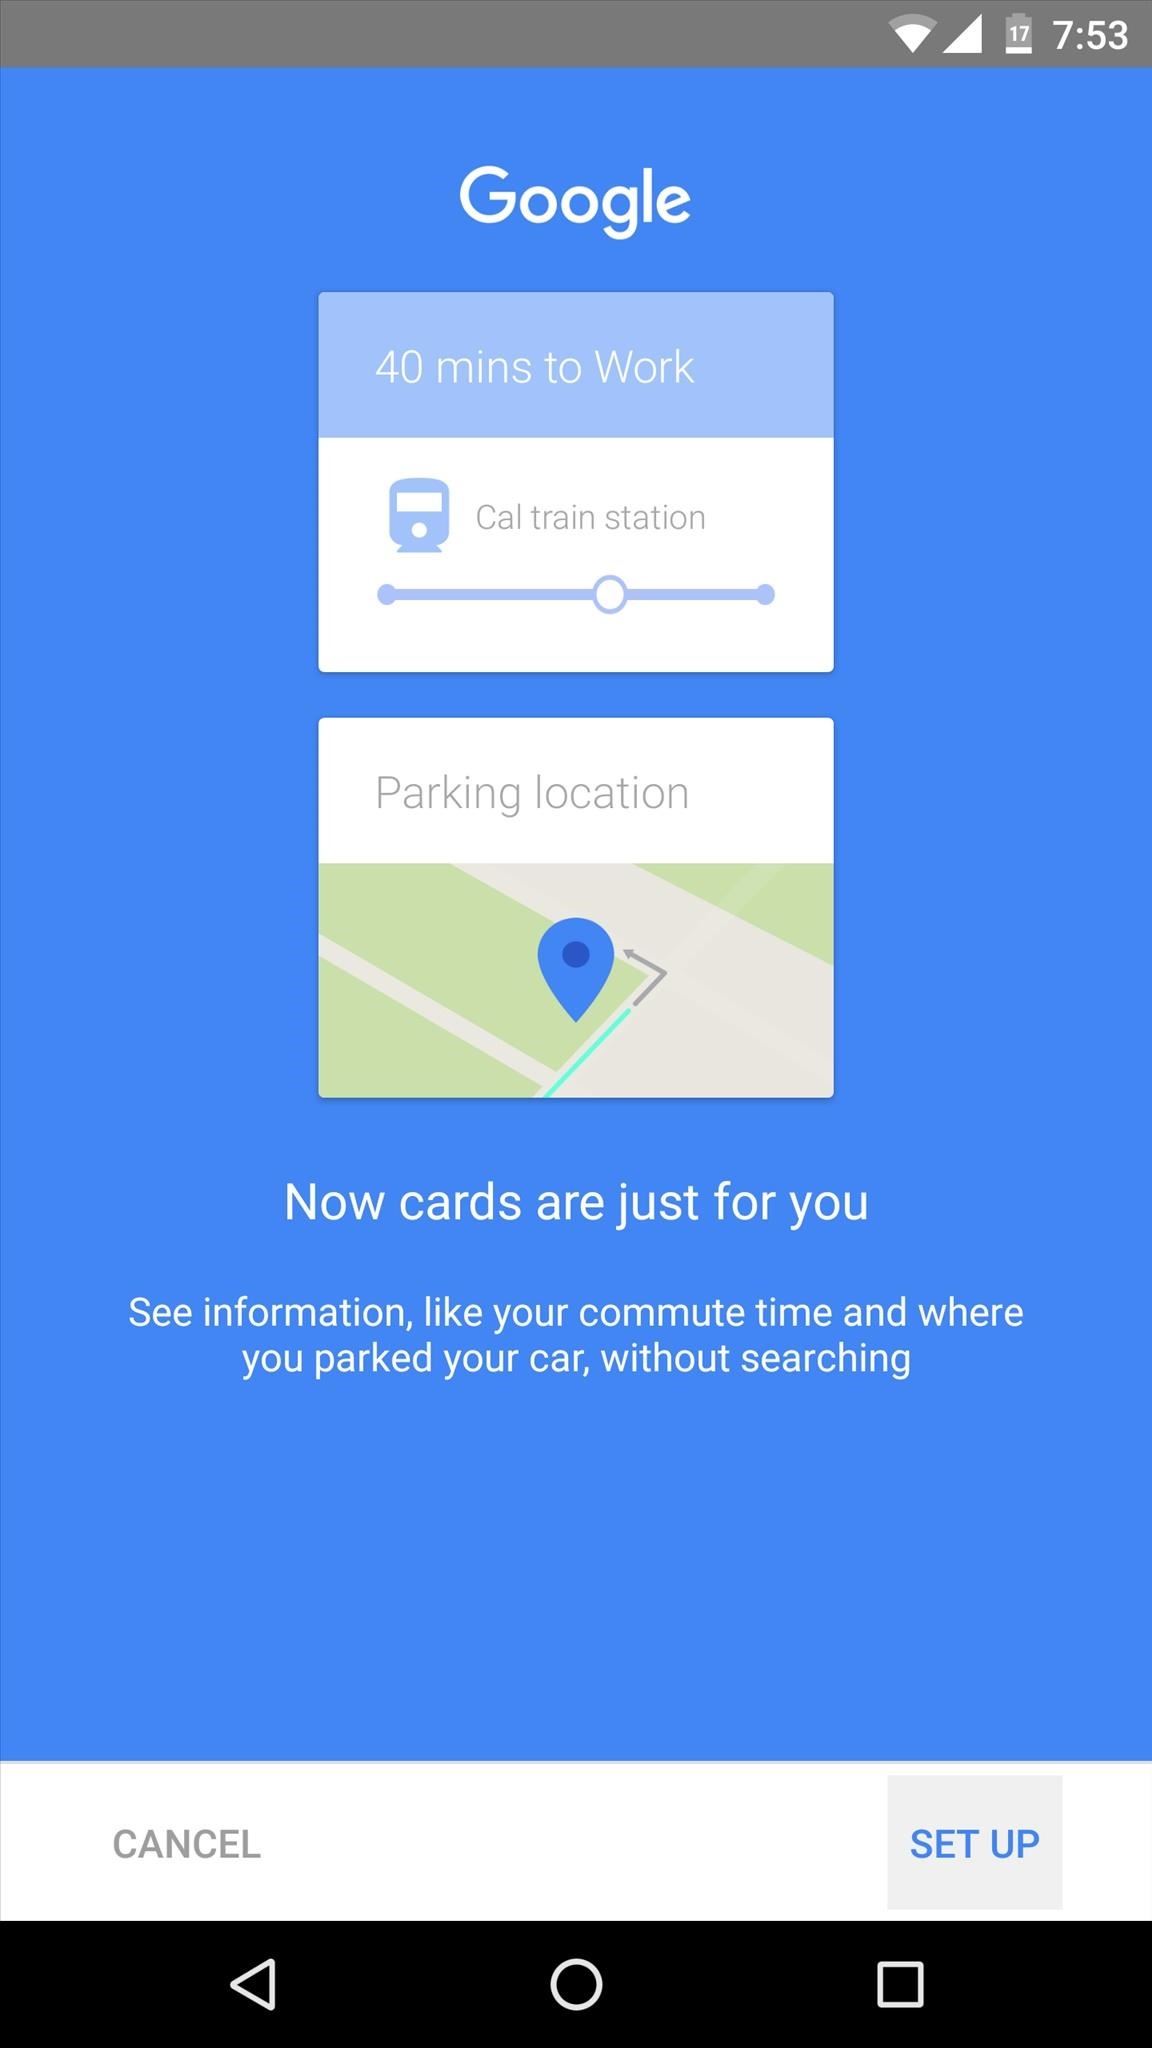
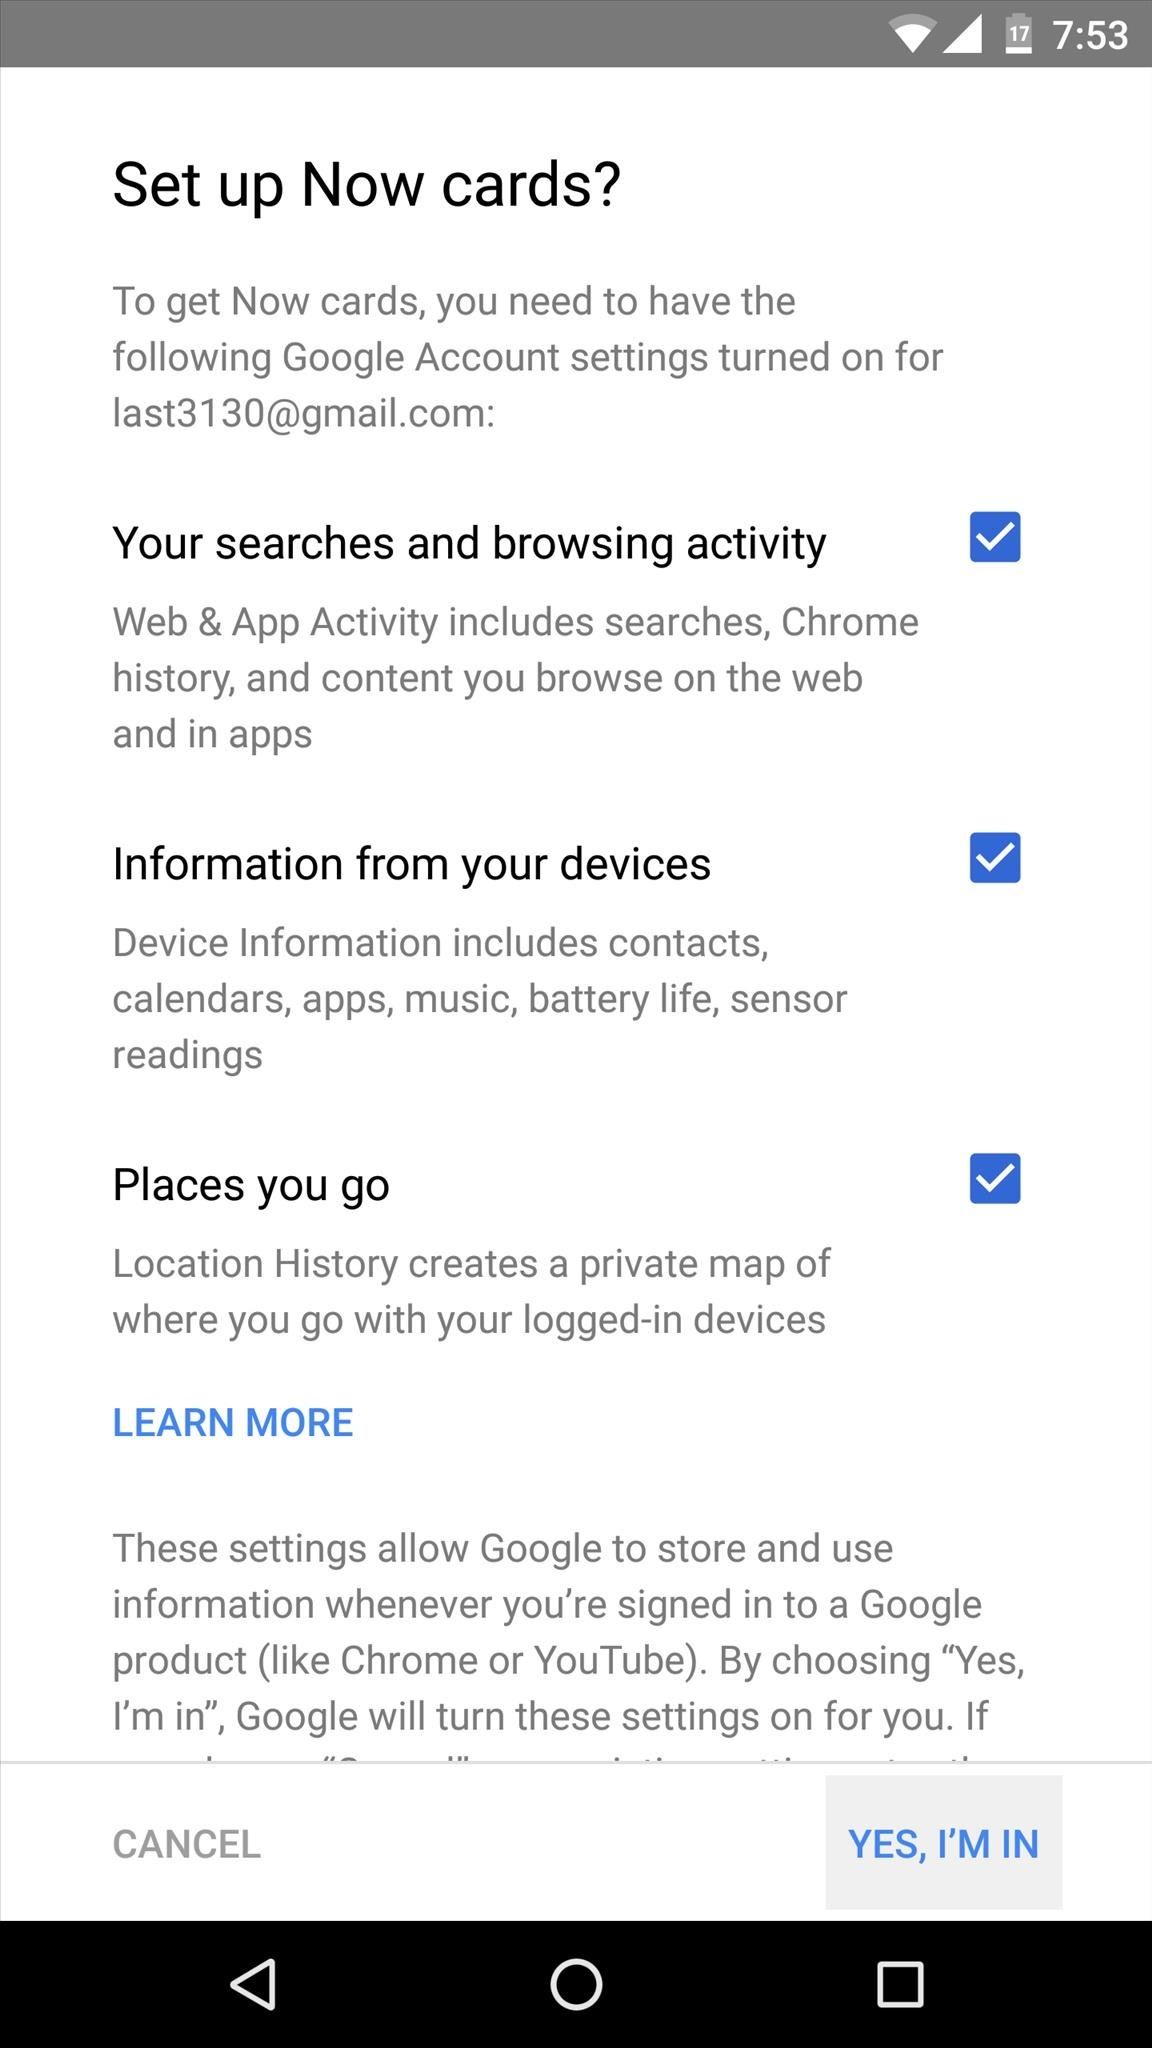
From here, press the "Set Up" button to opt into the Google Now service. Next, leave all of the options on the following screen selected exactly the way they are, then press "Yes, I'm in" to wrap things up.
Step 2: Enable Google Services
Whether you just opted in to Google Now, or you've had the service enabled for a while, the next thing you should do is ensure that all of the powerful options it has are enabled.
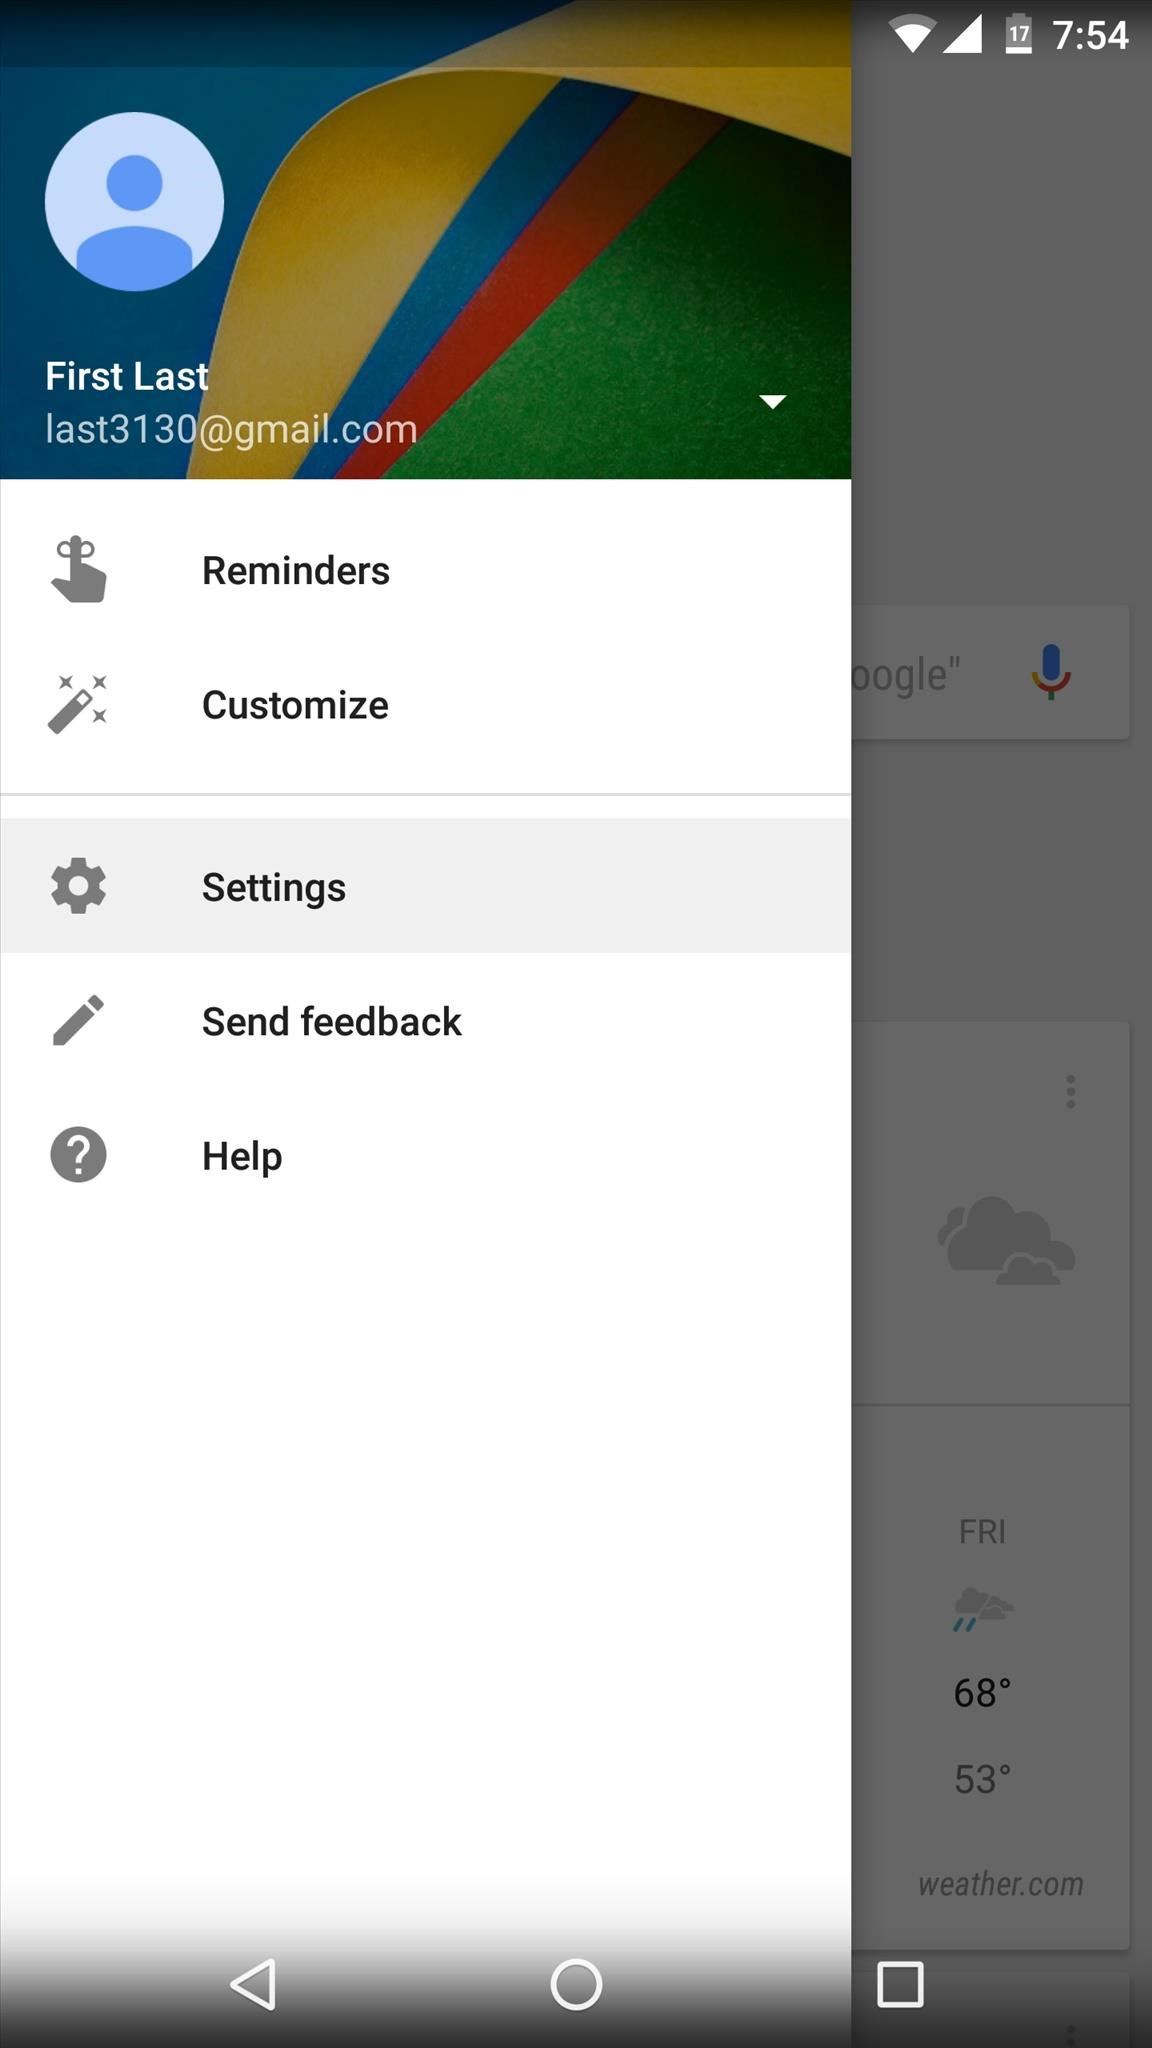
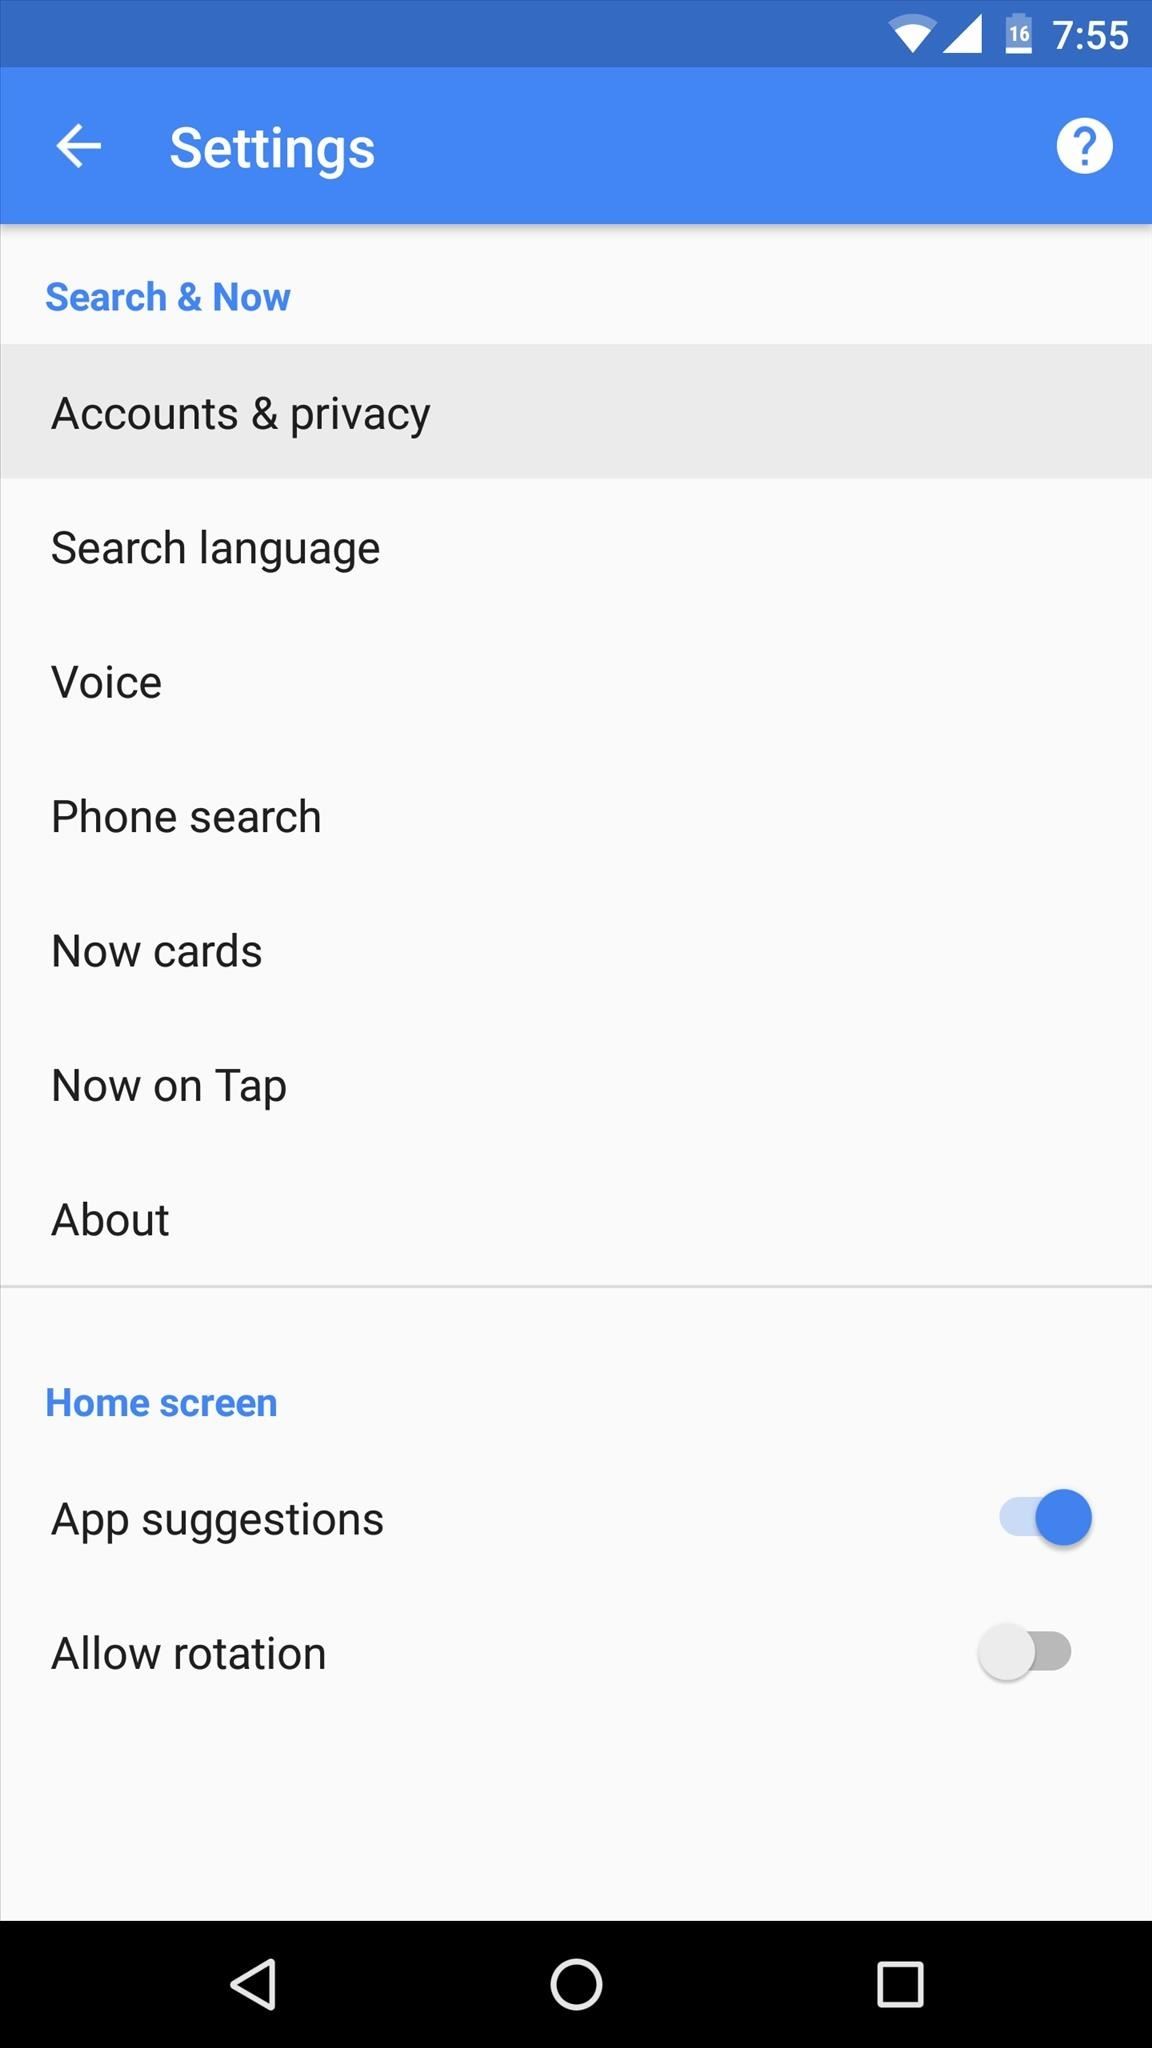
From the Google app, open the side navigation menu by swiping inward from the left edge of your screen. From there, choose the "Settings" option, then on the following screen, pick the "Accounts & privacy" entry.
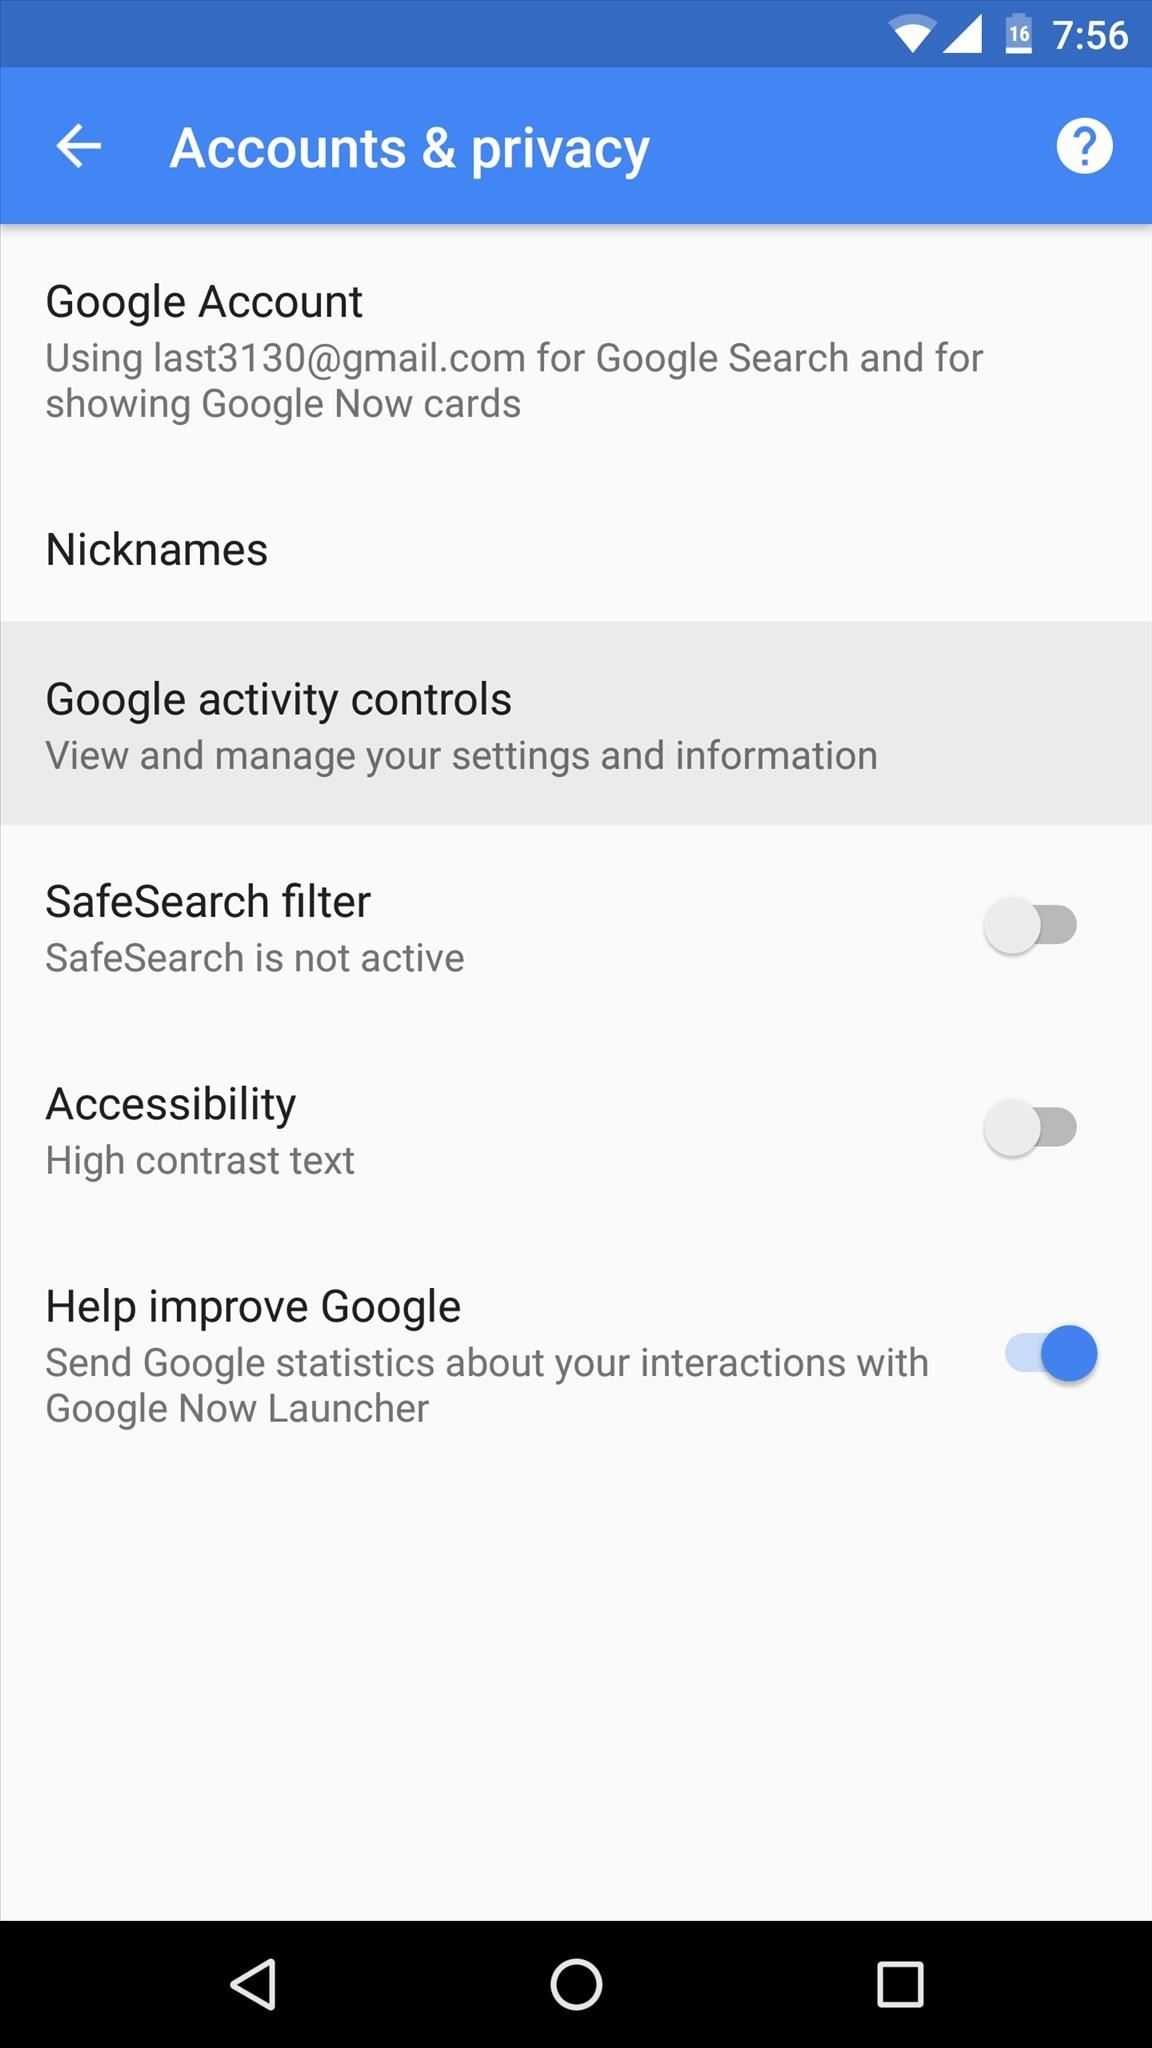
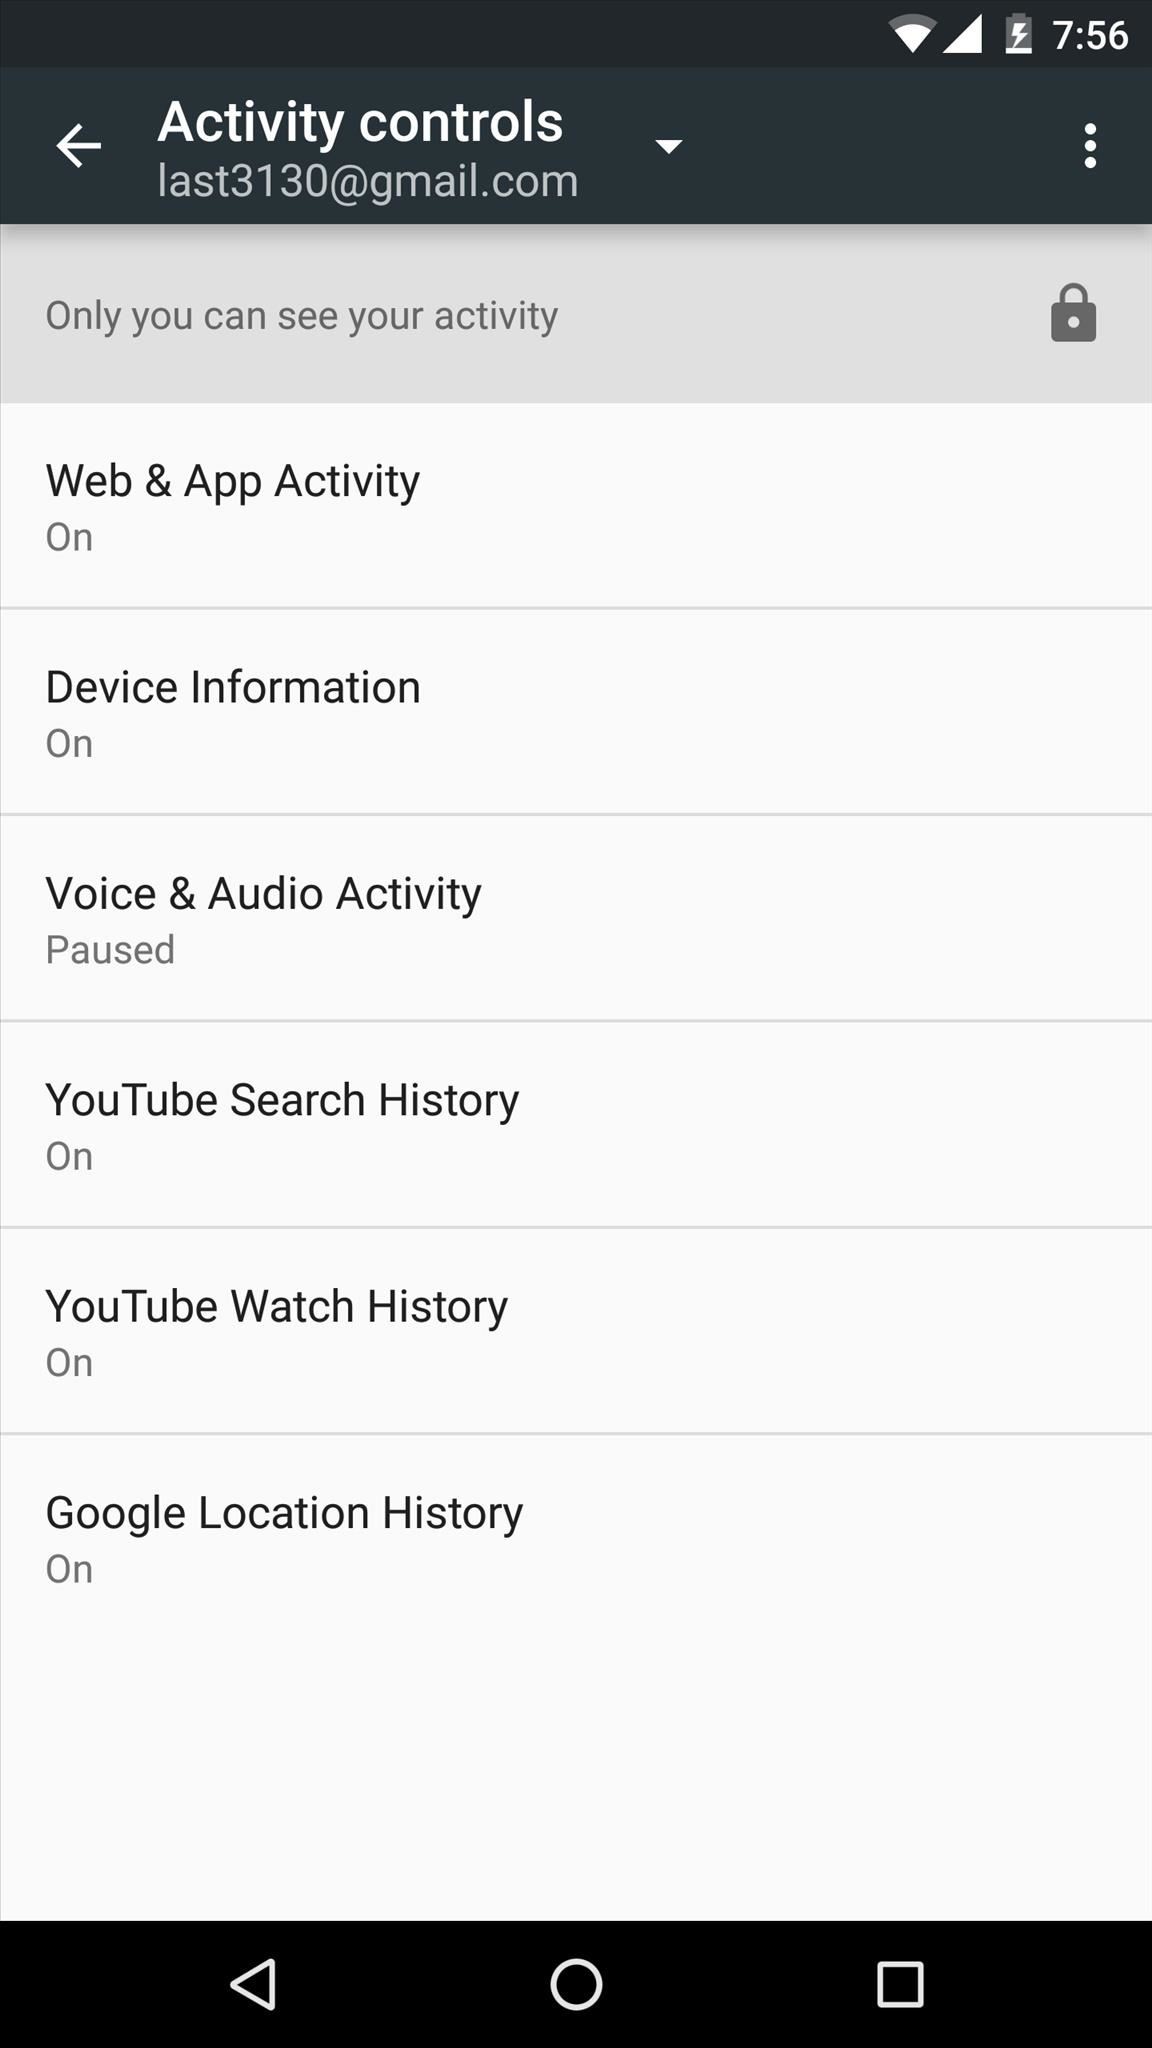
Next up, tap the "Google activity controls" option. On the following screen, you'll see a series of options for your Google account—each of these represents a bit of data that the Google Now service can glean from your day-to-day use.
To get the most out of Google Now, I'd suggest selecting each of these entries individually, then making sure the service is turned on by tapping the toggle switch at the top of the following screen.
Step 3: Tell Google Now About Things You're Interested In
From now on, Google Now will be able to use the services you just opted into to learn more about you and provide more meaningful suggestions. However, you can jump-start this process quite a bit by telling Google Now more about yourself right now.
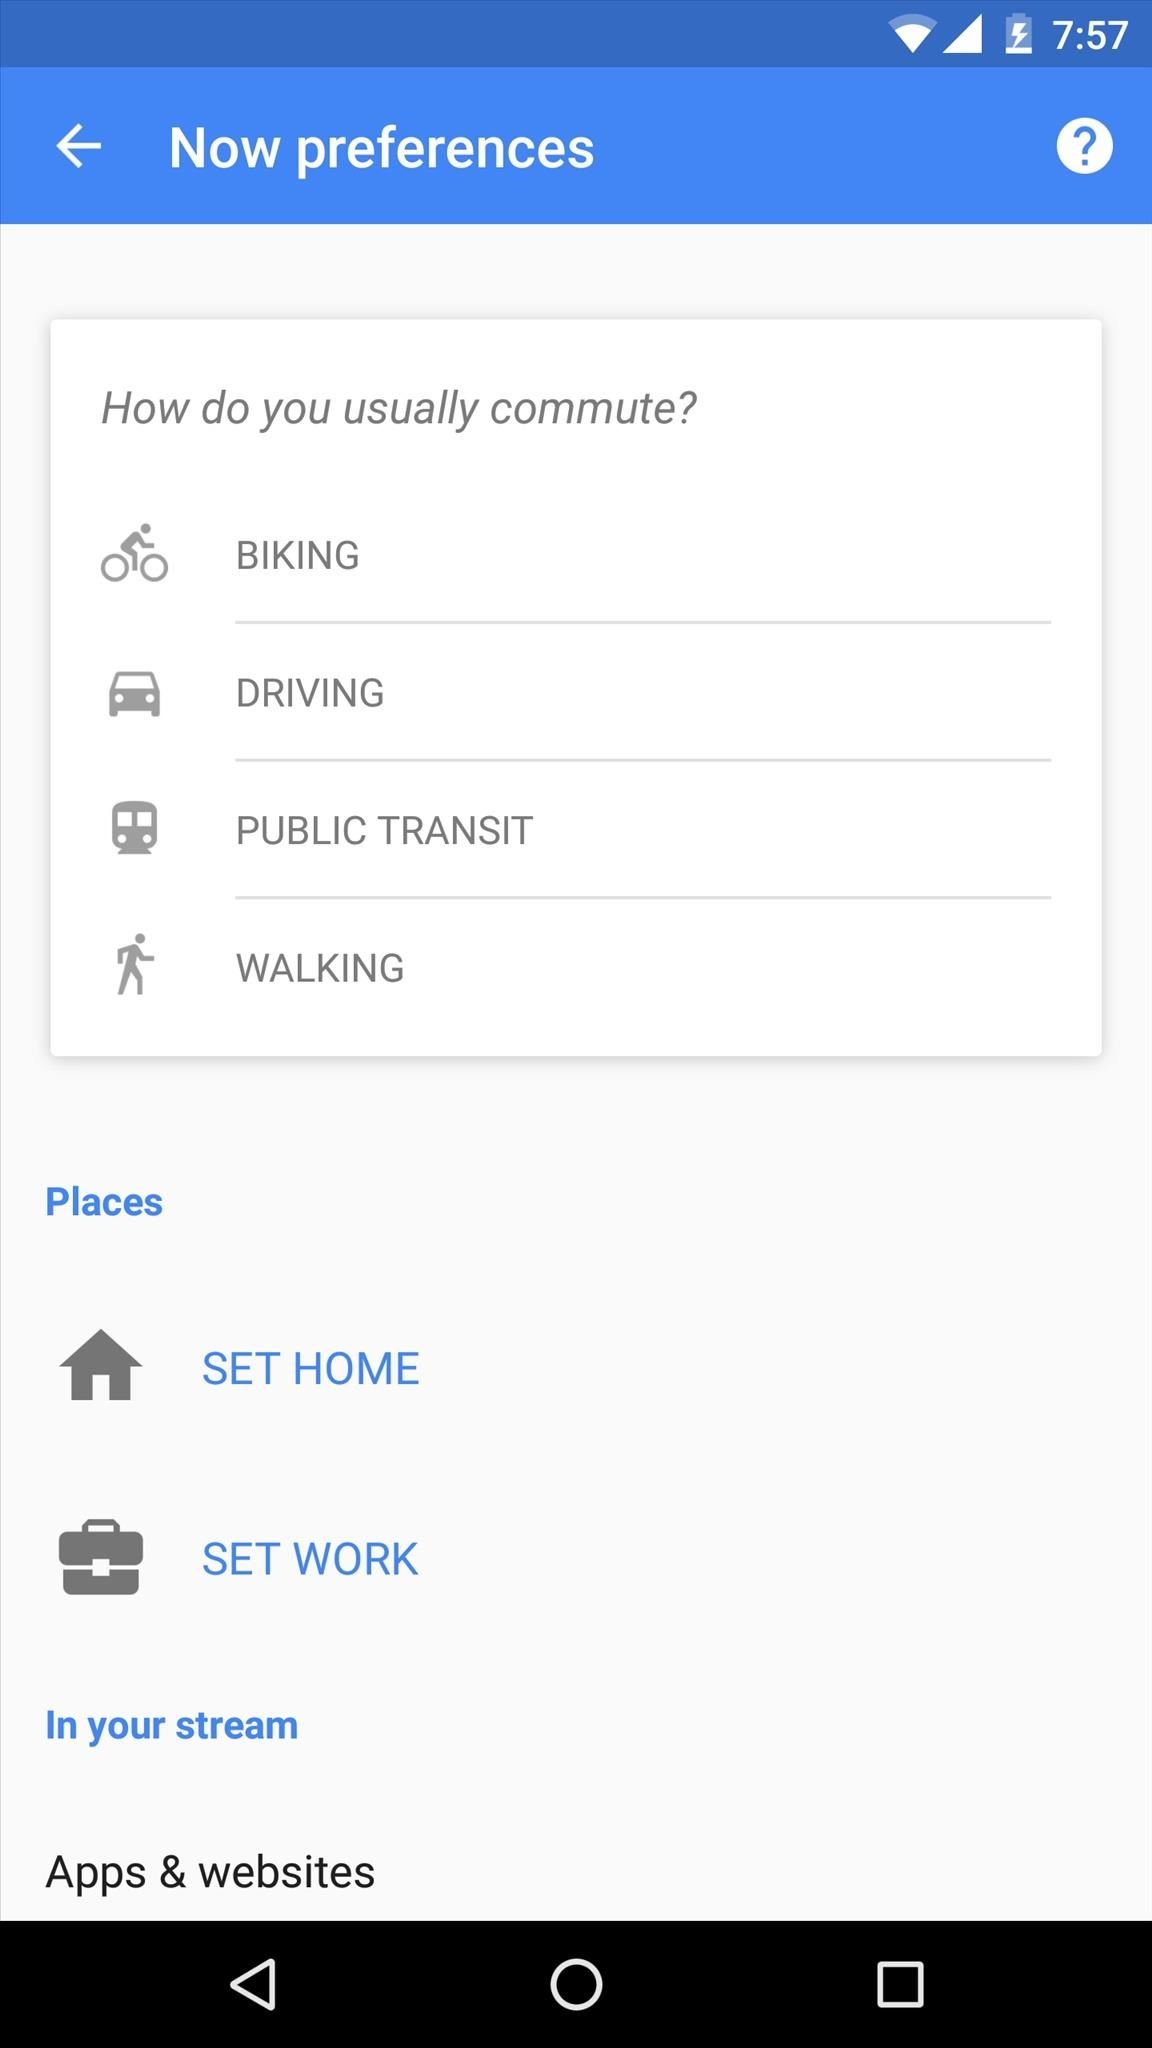
To do that, open the side navigation menu in the Google app again, then select the "Customize" option. From here, you can answer some brief questions like your main mode of transportation, and you can set Home and Work addresses so that Google Now will know where to give you directions to.

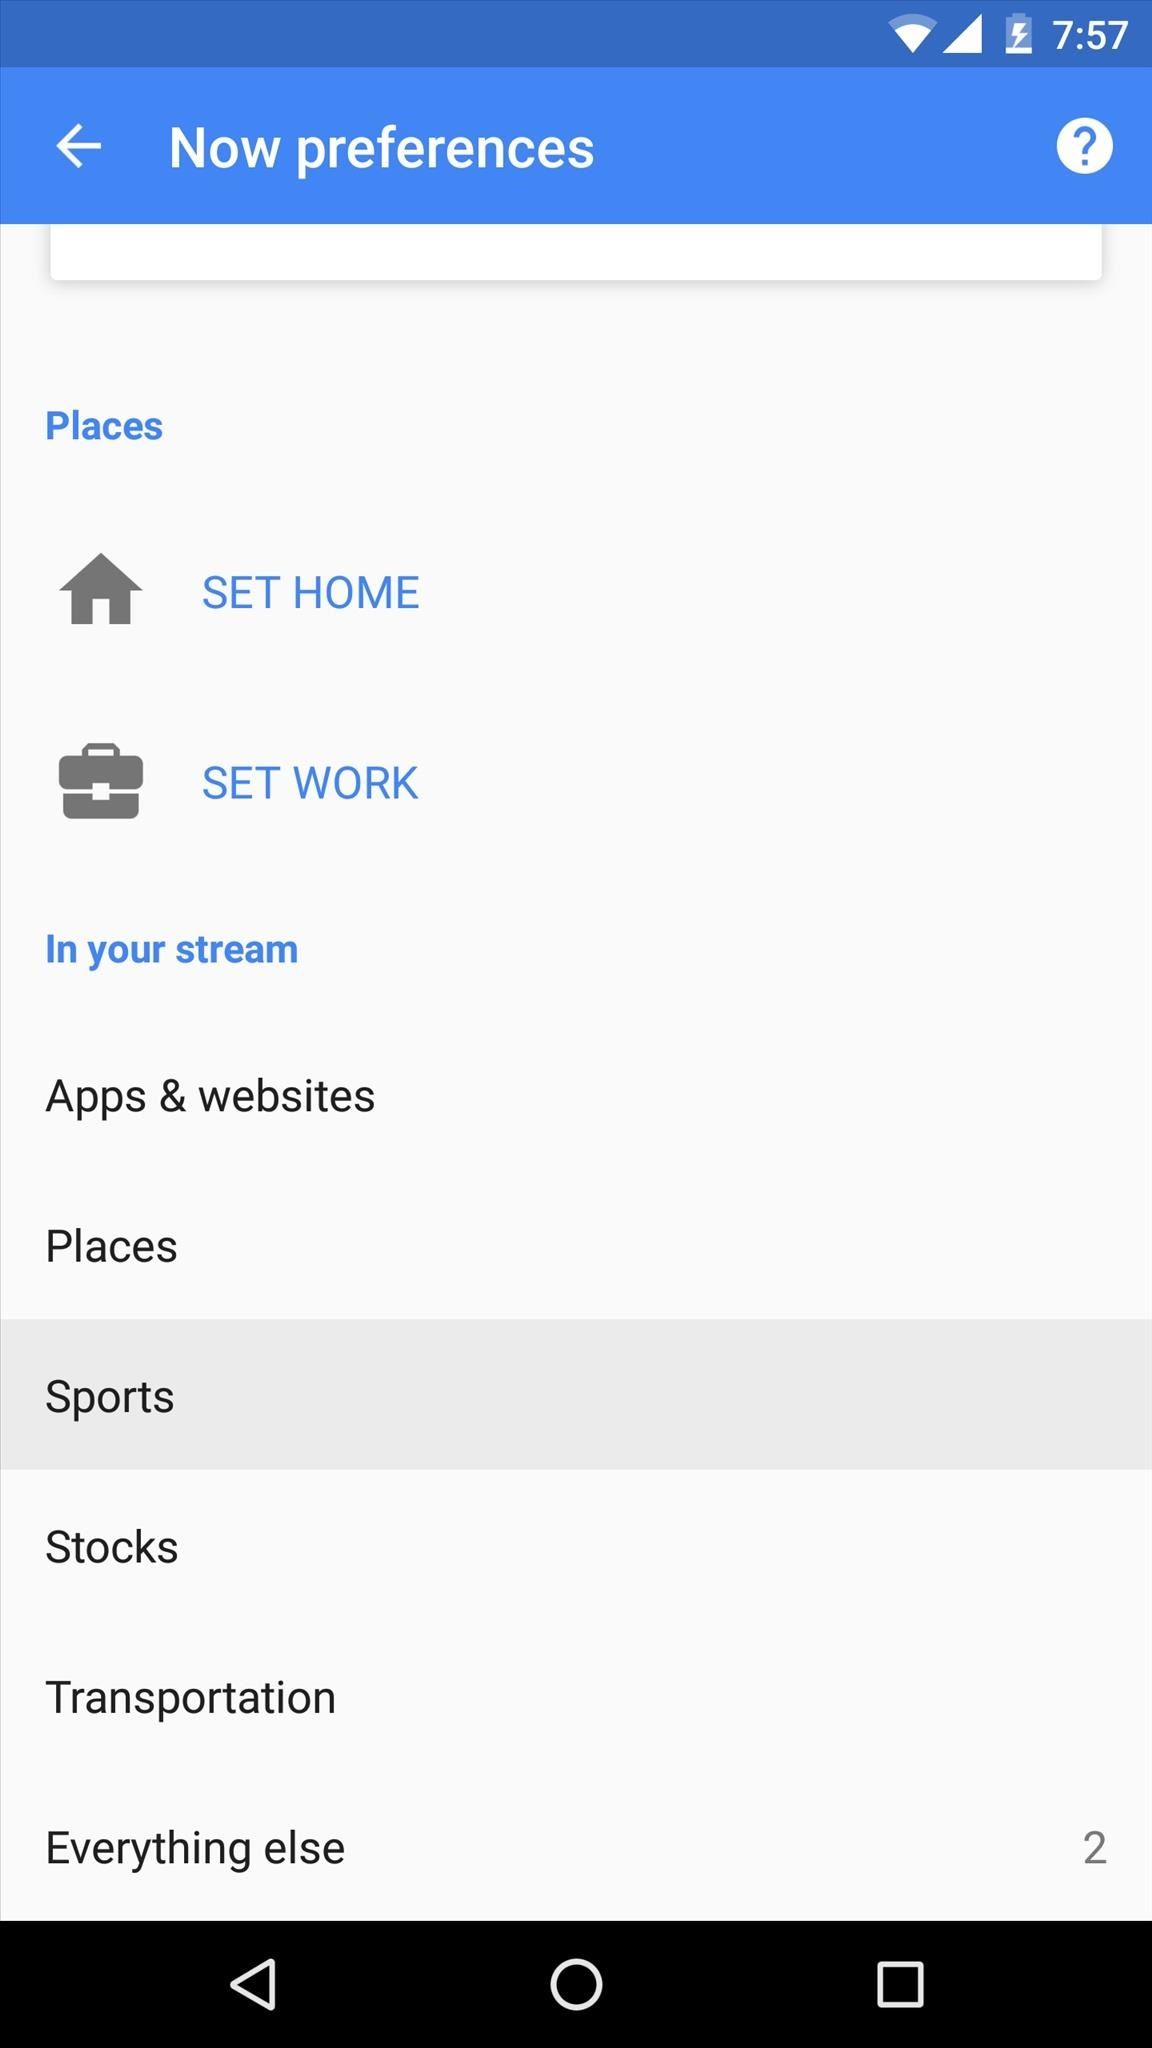
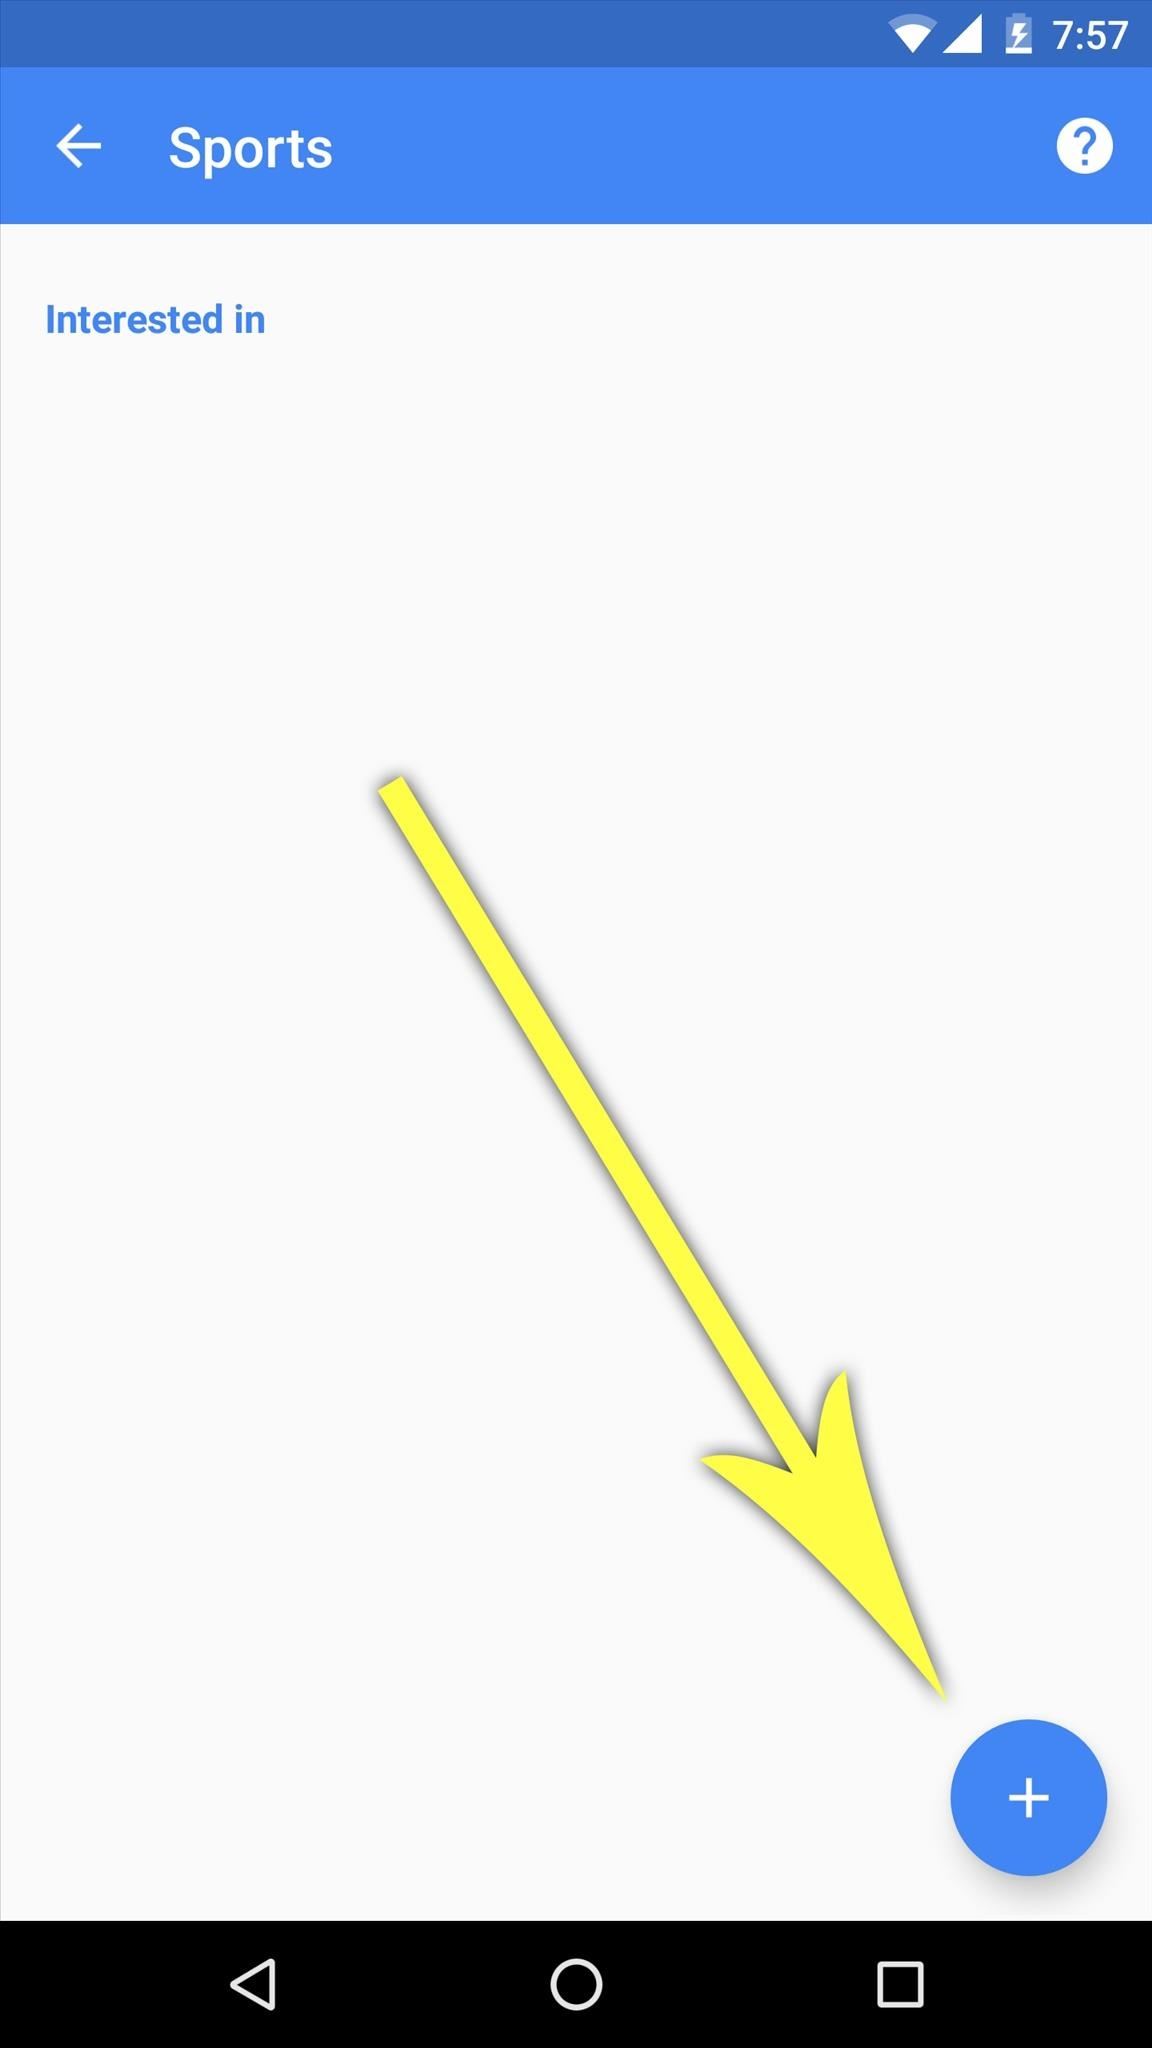
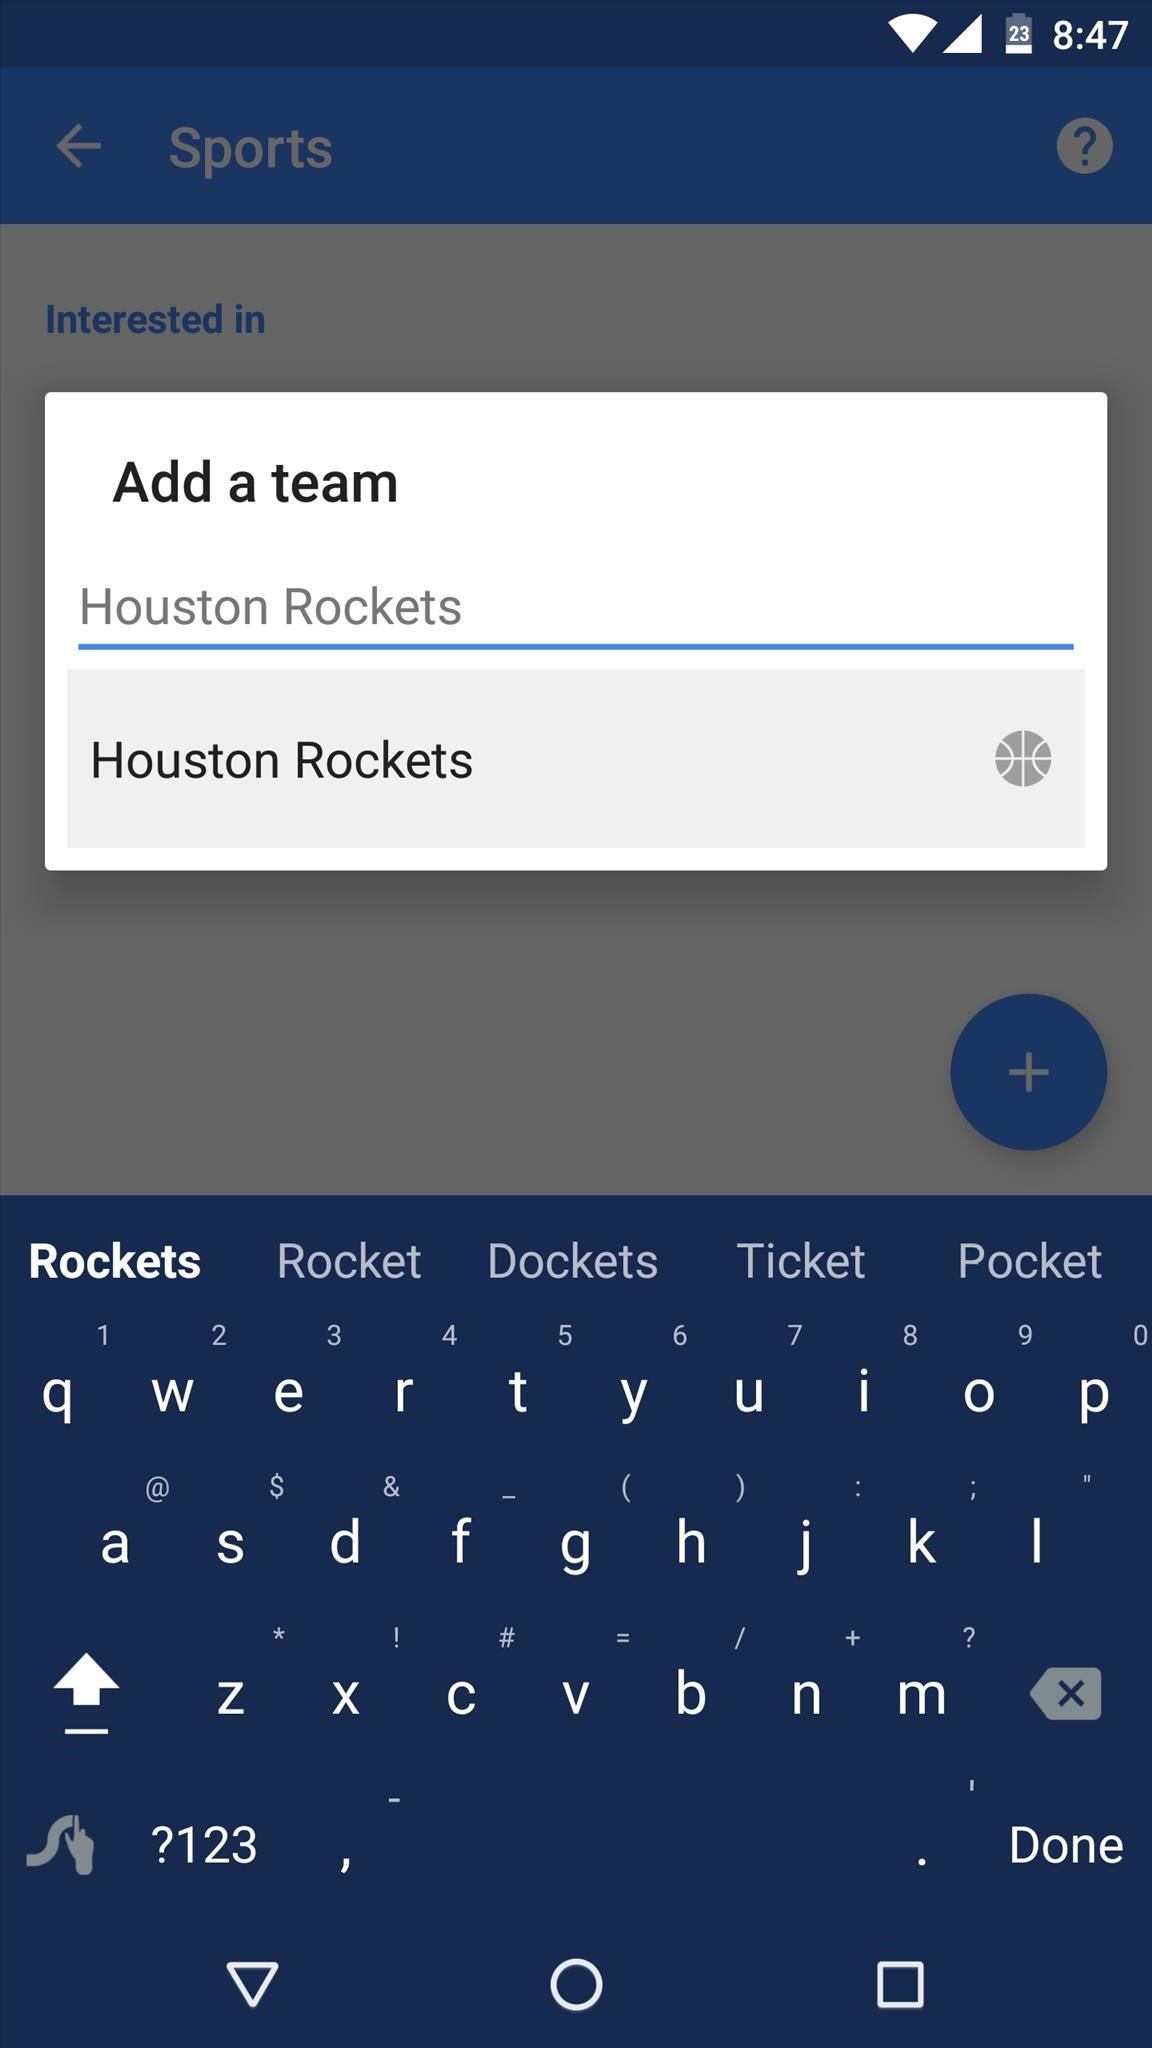
Next, scroll down a little bit further on this same menu, and you'll see several categories that might interest you. For optimal results, visit each of these categories and add any personal interests—for instance, in the "Sports" category, tap the + button in the bottom-right corner, and you'll be able to enter your favorite sports teams to receive news and updates.
Step 4: Use Gmail or Inbox to Get Even More Features
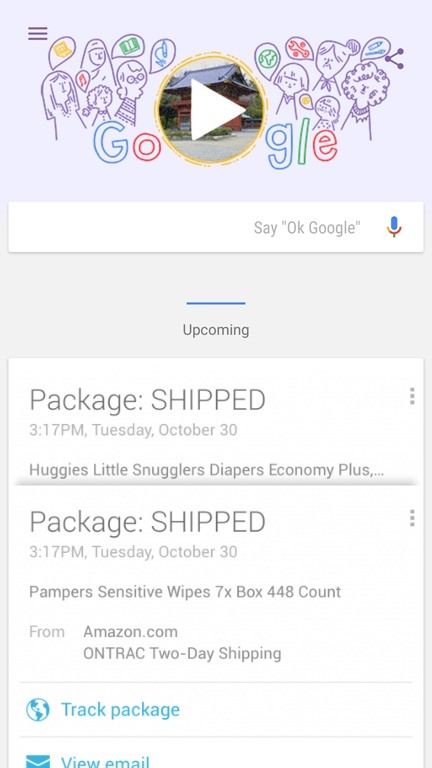
Finally, one of the biggest things you can do to get more out of Google Now is to use Google's Gmail or Inbox services as your primary email account. If you do this, things like Amazon shipment-tracking emails and flight or hotel reservations will be visible to Google Now. The end result of this is that you'll start to see boarding passes, tracking info, and check-out times directly in your Google Now feed.

With all of these options enabled, your Google Now feed should be a lot more lively. It may not happen instantaneously, but as you continue to use your Android device, you'll start to notice that Google Now just keeps on getting better at predicting what you want to see. And once you have Google Now set up, it's time to see what your can do with Google Now on Tap.
Who needs a wand? Unlock your magical powers and transform yourself from a Muggle into a Wizard or Witch just by using your Android phone. See how:


Be the First to Comment
Share Your Thoughts